Axesstel TX340G CDMA 1x Fixed Wireless Terminal, Dual-Band 800/1900MHz User Manual
Axesstel Inc CDMA 1x Fixed Wireless Terminal, Dual-Band 800/1900MHz
UserManual.wiki
>
Axesstel
>
TX340G User Manual
User Manual
Navigation menu
Upload a User Manual
Namespaces
Wiki Guide
HTML
PDF
Info
Views
User Manual
Discussion / Help
Navigation

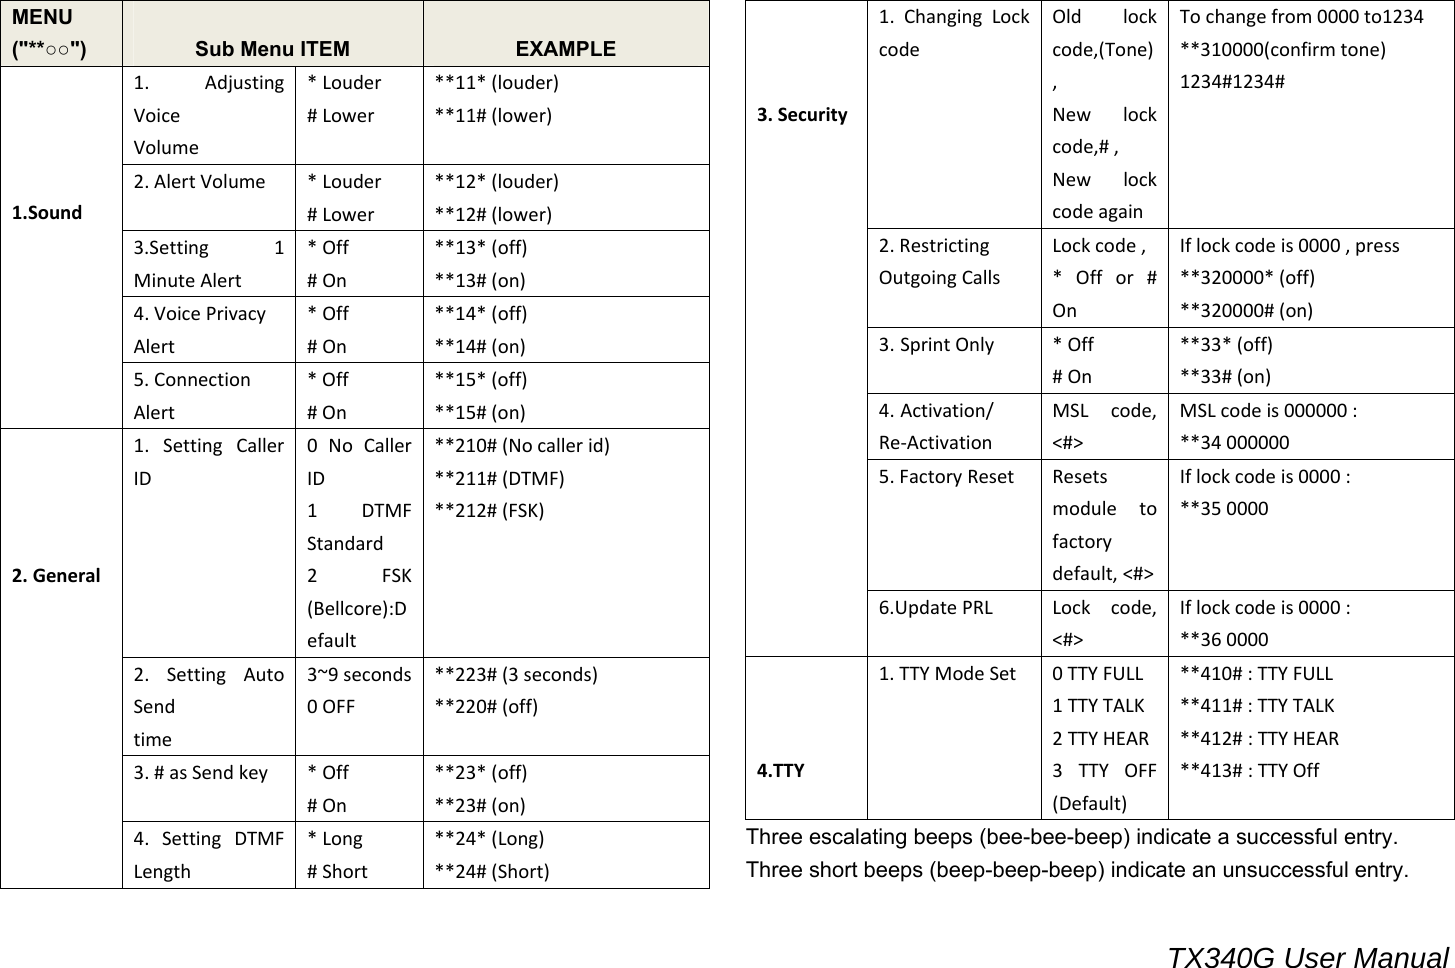

![TX340G User Manual Wall Jack Tester (PSTN Line Tester) The wall jack tester will verify if the wall phone jack is powered by existing or previous landline phone service. 1. Plug the tester into the wall jack. 2. If tester’s Green colored LED illuminates (ON), your PSTN line is still active and powered. In this case, contact your existing or previous landline phone service provider to disconnect the phone service and power. 3. If Green colored LED does not illuminate, the wall phone jack is not powered and you can safely connect your terminal to wall jack. [LED OFF – line is safe to use] IMPORTANT NOTE DO NOT CONNECT YOUR TERMINAL TO A WALL JACK IF PSTN LINE IS STILL IN SERVICE. Connecting the terminal to the live wall jack may interfere with the existing phone service and damage the terminal. NOTE: Alternately, 2-line cross adapter may be used to bypass the powered first phone line. Please see next section, using 2-line cross adapter.](https://usermanual.wiki/Axesstel/TX340G/User-Guide-1494541-Page-12.png)