Azumi S A AZUMIA5QL Mobile phone User Manual
Azumi S.A Mobile phone
Users Manual


Install new applications.
Uninstall applications.
Let’s get started
Thanks for choosing theV765M. It’s a WCDMA Digital Mobile Phone, which we’ll simply
call ‘phone’ from now on. Powered by AndroidTM, the phone supports 3G high-speed
internet access, which brings you brand new experiences.
To ensure proper phone operation and longevity, please read this guide carefully.
And don’t worry if the pictures we use to demonstrate your phone’s functions look a little
different from what you see on its screen. It’s the functions they show that matter.
This user manual is to introduce the phone’s functions. For detailed precautions,
installation descriptions, authentication information, please refer to the Quick Start Guide.
Battery Precautions

Never expose your battery in the sun, or excessive smoke or dust. Prohibited in high
humidity environments, such as bathrooms. The device is not waterproof, so rain or
moisture.
Prohibited place the battery in hot or cold places, temperatures above 50 ℃ or below
-10 ℃ environment will affect battery performance.
Never dispose of batteries in a fire as they may explode.
Battery must not be placed in the water, so as not to cause an internal short circuit, causing
the battery to heat, smoke, deformation, damage, or even explode.
Please click Dispose of batteries (such as recycling), not dispose as household waste. So
as not to cause an explosion and pollution.
The battery can only use a dedicated charger and non-continuous charging time more than
12 hours.
Keep the battery out of the reach of children a safe place to avoid any danger.
When using the charger, please observe the following precautions.
Before use, please read the instruction manual and charger surface marking.

Do not disassemble or modify the charger power cord is prohibited in the case of damage
to the charger, otherwise it will cause electric shock, fire and damage to the charger.
Charger with wet hands prohibited, if the charger come into contact with water or other
liquids, immediately cut off the power.
Non-short-circuit the charger, the charger is strictly prohibited mechanical vibration or
shaking prohibited direct sunlight, is prohibited in the bathroom where the humidity using
the charger. The device is not waterproof, so rain or moisture.
Please do not TV, radio and other appliances used near the charger.
Hold the charger when pulling the plug, pull the power cord may damage the cord.
Keep the charger in a safe place out of the reach of children to avoid danger.
SAR
SAR indicator 1.0w/kg
Installation and charging

1 Removal and installation of the battery
Removal and installation of the battery
Notes:Make sure to turn off your phone before you remove the battery and remove the
external power supply,Absolutely prohibited under the condition of the boot directly to take
out the battery,Otherwise may damage the SIM card and cell phones。
Caution risk of explosion if battery is replacerd by an incorrect type Dispose of used
batteries accrding to instructions
2 Recharge the battery
The charger plugged in,then insert the charger interface phone charger socket,
Notes:Please be careful operation,Don't force out charging interface,that this might
damage the mobile phone or charger。
-Your phone comes with the battery must be fully charged before use。

-When charging please do not remove the battery or SIM card
-If the battery run out, the phone automatically shut down。
3 SIM card installation and Removal
Pull out the left side of the mobile phone SIM card, the SIM card into the SIM card slot,
insert the SIM card, make sure the metal facing down;When you need to remove the SIM
card, with a thimble into the hole, pull out the SIM card
4 Memory card to install and remove
Memory card to install
Pull out the bottom of the SD card, make sure you insert the SD card face-down metal
Memory card to remove
With a thimble into the hole, remove the SD card connector, SD card out;
For pluggble equipment, the socket-outlet shall be installed near the equipment and shall
be easily accessible.
Getting to know your phone
Key definitions
Menu key Touch it to open a menu with items that affect the current
screen or application.
Home key Touch it to open the home screen. If you’re viewing the left
or right extended home screen, Press it to open the central
home screen.
Back key Touch it to open the previous screen you were working in.
If the onscreen keyboard is open, touc
h it to close the
keyboard.
Power key Press it to turn on/off the display.
Long press it to open a menu with options for Airplane mode,
for Silent mode, for Vibration mode, and for powering off and
for rebooting the phone.
Volumekeys Adjust the volume.
Long press it to quickly adjust the ring tone volume to
maximum or minimum.
Screen control
You can control your phone through a series of operations on the screen.
- Touch: You can touch the items on the screen to select, to open the applications or to use
the keyboard to input characters.
- Swipe or slide: Quickly move your finger across the surface of the screen, without
pausing when you first touch (so you don't drag something instead).
- Touch & hold: You can touch & hold some items to get the item’s available menu.
- Drag: You can drag some items on the screen to realize some operations.
- Switch between landscape mode and portrait mode: You can switch to the landscape
mode by rotating your phone. The landscape mode is only valid under some interfaces,
such as the text input interface, the message viewing interface, etc.
- Pinch: In some apps (such as Maps and Gallery), you can zoom in and out by placing two
fingers on the screen at once and pinching them together (to zoom out) or spreading them
apart (to zoom in).
Open and switch applications
Open and close the All Apps screen
On the home screen, touch the icon to open the All Apps screen. You can slide the All
Apps screen left or right to view more applications.
After opening the All Apps screen, touch an icon to enter the corresponding application.
Touch the Back key to return to the previous screen. Touch the Home key to return to the

home screen.
Switch to a recently used application
On the home screen, touch & hold the Homekey, opens a list of thumbnail images of apps
you've worked with recently. To open an app, touch it. To remove a thumbnail from the list,
swipe it left or right.
Home Screen
Arrange & work with apps
From All Apps, you can:
- Explore your widgets: Touch the widgets tab at the top of any All Apps screen.
- Get more apps: Touch the Play Store icon at the top of any All Apps screen.
Manage notifications
- Open notifications panel: When a new notification appears on the notification bar, you
can drag the notification bar down from the top of the screen to open notifications panel
when your phone has been in idle mode or lock the screen.
- Respond to a notification: Touch it.

- Dismiss a notification: Swipe it sideways.
- Close notifications panel: Drag the tab at the bottom of the notification panel to the top
of the screen.
Display area
The home screen can be extended to exceed the screen’s width in order to provide more
space for newly added shortcuts, widgets, etc.
On the home screen, slide your finger on the screen to extend to the left or right.
Place an app icon on a Home screen
Touch & hold the app icon, slide your finger, and lift your finger to drop the icon in place.
Delete items on the homepage
Touch & hold the app icon, slide your finger toward the top of the screen, and drop the app
over the Remove icon.
Use folders
You can combine several app icons in a folder. Drop one app icon over another on a Home
screen, and the two icons will be combined.
From any Home screen, you can
- Open a folder: Touch it. The folder opens:
- Rename a folder: Touch its name.
- Move icons around your Home screens: Touch, hold and slide.
Favorites tray
The app icons you keep in the favorites tray remain visible on every Home screen.
- Place an app icon in the Favorites tray: Touch, hold, & slide to move one of the
Favorites icons out of the tray. Then use the same technique to move another one into the
same position.
The All Apps icon in the center is permanent, you can't move it.
Change wallpaper
1. Touch & hold anywhere that’s not occupied on the home screen. A list of options
appears.
2. Select wallpaper from Gallery/ LiveWallpapers/ Wallpapers.
Switch to sleep mode

Sleep mode is a kind of power saving mode,which also helps to prevent inadvertent
operations. If your phone has been in idle mode for a while, it will automaticallyswitch to
sleep mode.
You can also press the Powerkey to turn off the screen and enable sleep mode.
Wake up your phone
After the phone switches to the sleep mode, the screen will be turned off and locked. In this
case, please awake your phone and unlock the screen if you want to use your phone.
1. Press the Powerkey to turn on the screen.
2. Drag the icon to the right tounlock the screen.
If you've set anunlockpattern or password, youneed to draw the unlock pattern or input the
password to enter the main interface. (For details, please see Systemsettings> Security>
Screenlock).
Make and answer calls
Make a call
Directly make a call
On the home screen or in the All Apps screen, touch the button to display the dialing
keypad. Touch the numeric buttons to input the telephone number and touch the
button to make the call.
Make the call from Contacts
On the home screen or in the All Apps screen, touch the icon, touch the desired
contact and touch the phone number to dial it.
Make the call from Call log
On the home screen or in the All Apps screen,touch the button, notice the three tabs at
the top of the phone, the call log tab shows recent calls. Touch the phone icon in a call
log to return it.
Make an international call
On the home screen or in the All Apps screen, touch the button to display the dialing
keypad. Touch & hold the “0” key until “+” appears on the screen, then dial the
country code or region code, city code and phone number.

Dial from Messaging
1. On the home screen or in the All Apps screen, touch the Messaging icon
2. Select and open one message or conversation.
3. Touch the icon at the top of the phone to dial.
Answer a call
Your phone will ring or vibrate (depends on the current mode and settings) upon an
incoming call.
- Slide the icon from middle to right to answer the call.
- If the earphone is inserted, press the key on the earphone to answer the call.
Reject a call
Slide the icon from middle to left to reject the call.
End a call
Touch the button to hang up the call.
Adjust the volume
In a call, you can raise or lower the volume by using the volume keys.
Turn the speaker on or off
In a call, touch the button to turn on the speaker, and touch it again to turn off speaker.
Add one call
In a call, touch the button then dial a number and touch the phone icon to add one call
and put the current caller on hold. This function requires the support of the network
operator.
Open the dialing keypad
In a call, you can touch the button to open the dialing keypad to input additional
numbers.
Contacts
You can place calls from the Phone app , the People app , or other apps or
widgets that display contact information. Wherever you see a phone number, you can
usually touch it to dial.
The contacts interface can be divided into the following tab pages:
- Caller groups: Groups of callers you have created.
- Con tacts: View the list of contacts.
- Favorites: Display the numbers you usually call.
All of your contacts are displayed alphabetically in a scrollable list. You can slide your finger
up or down to scroll quickly.
Add new contact
1. In People, touch the add contacts icon at the bottom right hand corner of the
screen.
2. Select a memory location.
3. Input all contact information. Slide up to move to the next field or touch Next.
4. Touch the icon to save your contact.
Delete contacts
1. In People, touch the Menu keyand then select Delete contact.
2. Touch the contacts you want to delete, then select OK.
Edit contact details
1. In People, touch the contact whose details you want to edit.
2. Touch the Menu key and then select Edit.
3. Edit the contact information.
Search contacts
1. In People, touch the icon.
2. Type a key word of a contact name. The phone will automatically list all matched
contacts.
Add a contact to Favorites
You can tap the contact you want to add to favorites in the contact interface, and then touch
in the upper right corner to add it to Favorites directly.
You can only add the contacts stored on the phone to the Favorites.
Create a group of contacts
By creating groups of contacts, you can manage multiple contacts and send a message to
an entire group.
1. In People, touch the tab.
2. Touch the icon at the bottom of the screen.
3. Select a memory location.
3. Enter the group’s name and type the person’s name or touch icon to select the
contacts you want to add to the group, then touch .
4. Press the Menu key then touch Edit to add members to the group.
5. Touch .
Accounts
You can synchronize contacts information to your phone from multiple GoogleTM Accounts,
Microsoft Exchange ActiveSync accounts or other kinds of accounts, depending on the
applications installed on your phone.
In People, touch the Menu key and then select Accounts.

Import/Export contacts
1. In People, touch the Menukey to select Import/export.
2. You can select your Google account, your SIM Card, Phone contact, Phone storage
and SD Card.
Share a contact
You can share a contact with someone.
1. In People, tap the contact you want to share.
2. Touch the Menukey and then touch Share.
3. Select application with which to share (Bluetooth®, Email, Gmail, MMS, SMS and SD
Card).
Messaging
In Messaging, you can send or receive text messages and multimedia messages.
On the home screen or in the All Apps screen, touch the Messaging icon to open.
Send messages
1. In Messaging, touch the icon.
2. Input your desired telephone number in Type name or number.
You can also touch the button to select contacts you want to send message from the
People and then touch OK.
3. You can touch the icon attach pictures, videos or audio file and the phone will
convert the message to a multimedia message.
4. Input some text in Typetext message. You can touch the Menu key to select:
- Addsubject: Add a message subject.
- Insertquick text: Insert a quick text.
- Insert contact: Insert contact information.
5. After that, touch the icon to send the message.
Receive messages
1. In idle mode, you will be reminded about the new messages in the notification area. Slide
down to open the notification panel to view.
2. Touch the message.
3. Directly input text to reply to the message.
4. Touch the icon at the top of the phone to directly call back. Touch & hold the text to
pop up the Messageoptions menu, you can Copy, Forward, Lock/Unlock or Delete the
message, etc.
Message thread
The messages from one contact or number will be aligned in one message thread in
chronological order. You can manage these threads in the messaging interface.

On the Messaging screen, touch the Menu key and then touchDelete all threads to delete
all threads.
Settings
In Messaging, touch the Menu keyand then touch Settings to perform relevant settings.
Email
You can receive and send Emails.
In the All Apps screen, touch the Email icon to open Email.
Set up Email account
Set up an Email account for the first time

You need to set up an Email account when you use Email for the first time.
1. Input the Email address and password.
2. Touch Next or, if you need to enter Email account settings that the wizard can’t
configure for you, touch Manual setup.
- If you touch Next, Email attempts to communicate with your Email service provider to
validate your account for sending and receiving mail, using just your Email address and
password. This is sufficient for most Email services.
- If the wizard determines that your service provider requires additional information,
you’re prompted to enter your Email account details.
3. Select POP3, IMAP or Exchange.
4. Set the relevant parameters for the receiving server according to the prompts.
5. Create a name for Emails and set the display name of sending Emails.
6. Touch Next.
Set multiple Email accounts
After you setup an Email account in the Email interface, you can also setup multiple Email

accounts.
1. Touch the Menu key > Settingsand then touch ADDACCOUNT to enter the Email
account setting interface.
2. Please refer to the settings in Set up an Email account for the first time.
Send Emails
After the setting of an Email account is completed, your phone will automatically enter the
inbox of this Email account.
1. Touch the icon in the lower left hand corner.
- Input the Email address of a recipient in the To field.
- Touch Subject to input a subject.
- Touch Compose email to input contents of the mail.
- Touch the Menu key and then touch Add Cc/Bcc to input a Cc or Bcc address.
- Touch the Menukeyand then touchAttach file. You can add photos, videos, music,
contacts, calendar or files from the SD card.
2. Touch to send.
Check Emails
1. Open Email.
2. Select the mail box you want to check.
3. Touch the Refreshicon to update new emails into the inbox.
4. Touch the emails to view them.
Tip:
When reading Emails, touch the Menukey to reply all, forward, move it or to enter the
Settings.


Gmail
You can use Gmail to read and write email from any mobile device or browser. All your
email is always up to date and available no matter where you check it from.
On the home screen or in the All Apps screen, touch the Gmail icon to open Gmail.
Set up an Gmail account for the first time
You need to set up an Gmail account when you use Gmail for the first time.
1. If you already have a Gmail account, touch Existing, then enter the Gmail address and
password.
2. Otherwise, touch New and follow the prompts to create a new Gmail account.
Send Gmails

After the setting of a Gmail account is completed, your phone will automatically enter the
inbox of this Gmail account.
1. In the inbox of the Gmail account you want to use, touch .
2. Fill in one or more recipients. You can touch the Menu key to add Cc/Bcc.
3. Enter the email subject and then compose your message.
4. If you want to attach a photo or video, Touch the Menu key > Attach picture/Attach
video.
5. Touch to send.
Replying to or forwarding email messages in Gmail
1. In the Gmail inbox, touch the email message.
2. To reply to the sender, touch . or Touch and choose whether to Reply all or
Forward.
3. If you selected Reply all, enter your reply message. If you selected Forward, specify the
message recipients.
4. Touch to send.
Network Applications
Network connection
Your phone can connect to the Internet, so you may need to pay for some data service. For
details, please consult your network service provider.
Ways of Connecting to the Internet
Your phone’s networking capabilities allow you to access the Internet via the mobile
network’s GSM/WCDMA connection and Wi-Fi.
GSM/WCDMA data connection
Different locations may have different mobile networks available. Initially, your phone is

configured to use the fastest mobile network available for data.
Yo u can also configure your phone to access a different set of networks entirely, or to
behave in special ways when roaming.
The icons on the Status bar indicate which kind of data network you’re connected to.
On the home screen, touch the Menukey and then touch System settings> More…>
Mobilenetworksto perform relevant settings.
Wi-Fi
Turn on/off Wi-Fi
1. On the home screen, touch the Menukey and then touch System settings.
2. To turn on Wi-Fi, touch OFF and slide it to the right. Touch ON and slide to the left to turn
off Wi-Fi.
Connect to Wi-Fi

1. On the home screen, touch the Menukey and then touch System settings.
2. Turn on Wi-Fi.
3. Touch Wi-Fi. Your phone will automatically search for all nearby Wi-Fi networks.
4. Select the network you would like to connect to from the list.
- If you’ve selected an open network, your phone will automatically connect to it.
- If you’ve selected a security network, you need to input the password.
Browser
You can use Browserto view web pages and to search for information on the web.
Open Browser
1. On the home screen or in the All Apps screen, touch the Browser icon.
2. Touch the URL field at the top to input a web address.
3. Enter a new address and then touch Go.

You can touch the Menukey > Bookmarks/History to select the bookmark you want to
open, and touch SAVED PAGES or HIS T ORY to open other web pages.
Browse web
After opening a web page, you could slide your finger on the screen to view other parts of
the page.
Zoom in or out
You can use two fingers to zoom in or out. Spread your fingers apart or pinch them together
to zoom in or out.
Browse options
When you’re browsing web pages, touch the Menukey to select:
You can perform more operations such as Save to bookmarks, Save for offline reading,
Share page, Find on page, Request desktop site, etc.
Settings
You can choose settings that will affect how page content is displayed and privacy and
security preferences to suit your browse style.

On the Browser screen, touch the Menukey > Settings to enter the settings interface.
Bluetooth®
Via the Bluetooth® function, you can exchange data with other Bluetooth devices that are
within a short distance. Because Bluetooth® devices communicate through radio waves;
interference might exist due to obstacles or other electronic devices.
Turn on/off Bluetooth
1. On the home screen, touch the Menukey and then touch System settings.
2. Slide the ON/OFF button next to Bluetooth® to turn it on or off.
Pairing
1. Touch Bluetooth®when it is on to automatically search for devices. Your phone will scan
for and display all Bluetooth® devices it finds.
2. Touch the ID of the desired device.

Send files via Bluetooth®
To send files via Bluetooth®, do as follows:
1. Select a file or item, such as a contact or a media file from an appropriate application or
File manager.
2. Open it, touch the Menu key and choose Share, or touch and hold it, choose then
touch the icon.
3. Search for and pair with a Bluetooth®-enabled device.
Change your phone’s Bluetooth® name
1. On the home screen, touch the Menukey and then touch System settings>Wireless &
networks.
2. If the Bluetooth® function is not turned on, turn it on.
3. Touch Bluetooth®, thenthe Menukey> Rename phone to edit the name of your device,
then touch Rename.
4. Touch the name of the phone to toggle it to Visibility timeout so that other Bluetooth®
devices can find your device.

Settings
Airplane mode
In areas where the use of mobile devices is restricted, you can activate the Airplane mode
to disable phone function but still use other functions of your phone such as calendar,
music and games. You will not be able to make/answer calls, send/receive messages in
Airplane mode.
1. On the home screen, touch the Menukey and then touch System settings>More….
2. Check the box for Airplane mode. The phone will turn off all wireless connections when
Airplane mode is enabled.
Tip:
On the home screen, you can press and hold the Powerkey, then select Airplane mode.

Device
Audio profiles
Touch the Menu key and then touch System settings > Audio profiles, you can set the
predefined profiles.
General: Touch , you can set volume for ringtones, alarms and notifications, set the
ringtone for voice calls & video calls and set the default notification ringtone, etc.
Silent: Silence all sounds (including call and notification ringtones) except the audio from
music, videos, and other media or any alarms you have set.
Meeting: Make your phone vibrate only upon incoming calls.
Outdoor: Make your phone vibrate and ring upon incoming calls.

Display
Touch System settings > Display.
Lock screen notifications: Select to show notifications on lock screen.
Wallpaper: Choose a wallpaper.
Auto-rotate screen: Set the interface to rotate automatically when you rotate the device.
Brightness: Adjust the brightness of the screen.
Font size: Set the font size.
Sleep: Choose the delay before the screen automatically turns off.
Storage
To copy files between a PC and your phone’s SD card, you should set the SD card as
USB mass storage.
1. Connect your phone to your PC with the USB cable.

2. Touch Turn on USB storage.
During this time, you can’t access the SD card from your phone, so you can’t use
applications that rely on the SD card, such as Camera, Gallery and Music.
Safely remove the SD card
Just flick down the notification panel and touch Turn off USB storage.
Check space on the SD card
1. On the home screen, touch the Menukey and then touch System settings.
2. Touch Storage.
Erase the SD card
1. On the home screen touch the Menukey and then touch System settings.
2. Touch Storage > Erase SD card.
Accounts and sync

Adding your accounts
1. Touch System settings > Accounts> Add account.
2. Touch the account type you want to add.
3. Follow the onscreen instructions to enter your account information.
Most accounts require a username and password, but the details depend on the kind of
account and the configuration of the service you're connecting to.
Depending on the kind of account, you may be asked to configure what kinds of data you
want to sync, name the account, and other details.
When you're finished, the account is added to the list in Accounts & sync. Depending how
you configured the account, email, contacts, and other information may start syncing to
your device.
Language
You can choose the language your phone displays.
On the home screen, touch the Menukey and then touch System settings > Language &

input > Language.
Voice input & output settings
On the home screen, touch the Menukey and then touch System settings > Language &
input >and look under SPEECHto configure the Android voice input feature and the
text-to-speech synthesizer, for applications that can take advantage of it.
Date & time
You can set the format of date and time.
On the home screen touch the Menukey and then touch System settings > Date & time.
About phone
You can check the phone’s status, legal information, software version, etc.
On the home screen touch the Menukey and then touch System Settings > About phone.
Experiencing Multimedia
Camera
Your phone has a camera, which can be used to take photos and record video clips.
Note:
Please respect others’ rights and abide by the local regulations and customs when taking
photos.
Take photos
1. In the All Apps screen, touch the Camera icon to open the camera.
2. Tap the icon to take photos after the view is satisfactory.
To view it, slide the screen to the left or just tap the picture in the right corner of the screen.
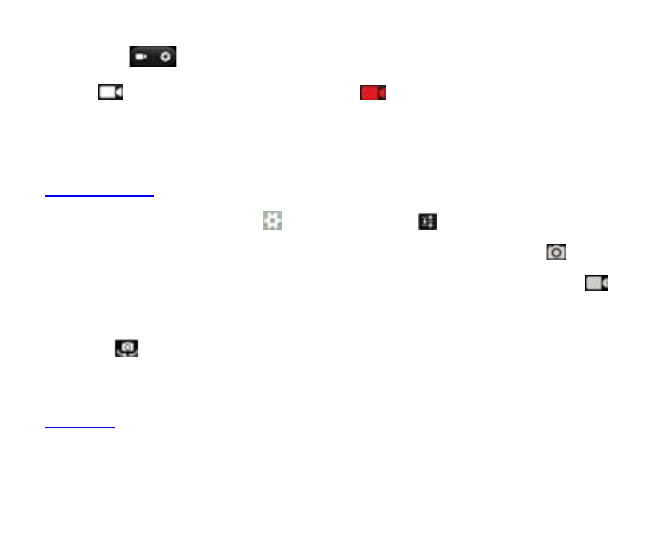
Record video clips
You can use icon to change from Camera to Camcorder or vice versa.
Tap the icon to start recording and touch the icon to end.
After a video is recorded, you can slide the screen to the left or touch the frame in the
corner to view the video.
Camera settings
On the camera screen, touch the icon, and then touch to set GPS location info,
Exposure, Color effect, Scene mode, White balance and Anti-flicker. Touch to set
Face Detection, Self timer, Continuous shot, Picture size and Preview size. Touch
to set Microphone, Audio mode, Time lapse intervaland Video quality.
Touch the icon to change to the back or front camera.
Back to top

Music Player
You can listen to music saved on the memory card with the music player.
Open the music player
First copy music files to a mounted memory card.
In the All Apps screen, touch Music to open.
Listen to music
1. Touch Artis ts / Albums / Songs / Playlists to find the music file you want to play.
2. Touch the file to start playing it.
Create playlists
In order to manage your music files conveniently, you can create some playlists.
1. Touch Songs.
2. Select the music file(s) you want to add to a playlist and touch & hold it until the shortcut
menu pops up.
3. Touch Add to playlist.

4. Touch New.
5. Input the name for a new playlist.
6. Touch Save. In this case, the music files you selected will be automatically added to the
newly created playlist.
Manage playlists
1. In Music, touch Playlists.
2. Select the playlist you want to edit or play from the list and touch & hold it until the
shortcut menu pops up.
- Play: Play the music in the playlist.
- Rename: Change the name of the playlist. You can rename self-created playlists only.
- Delete: Delete the playlist. You can delete self-created playlists only.
Add music to playlists
1. In Music, touch Songs.
2. Select the music file you want to add to playlist and touch & hold it until the shortcut
menu pops up.

3. Touch Add to playlist.
4. Select the playlist you want to add to.
Set music as phone ringtone
1. In Music, touch Songs or Playlists.
2. Select the music file and touch & hold it until the shortcut menu pops up.
3. Touch Use as phone ringtone.
Videos Player
You can watch video files saved on the SD card through the video player.
1. In the All Apps screen, touch the Gallery icon to open the list of files.
2. Select the video file you want to play, and touch icon to play.
Gallery
The Gallery categorizes your pictures and videos by storage location and stores these files
in folders. Tap a folder to view the pictures or videos inside.
Sound Recorder
You can record audio files through sound recorder.
Open the sound recorder
Before opening the sound recorder, please insert a memory card.
In the All Apps screen, touch the Sound Recorder icon to open it.
Record audio files
1. Put the microphone close to your mouth and touch to start recording.
2. Touch to stop recording.
3. Touch Save to save the recording or touch Discard not to save it.
FM radio
With the FM Radio, you can search for radio channels, listen to them, and save them on
your phone.
Note that the quality of the radio broadcast depends on the coverage of the radio station in
your area.
The wired headset that comes with your phone works as an antenna, so always connect
the headset when using the radio. When you receive an incoming call while listening to the
radio, the radio will be turned off.
To tune in, plug your headset into your phone.
In the All Apps screen, press theFM Radio icon to open it. The FM radio scans and saves
available stations automatically.
- Tap or to scan for available FM channels.
- Tap / to change the frequency by +/–0.1 MHz.
- Press the Volume Keys to adjust the volume.
- Touch to select preset list.
- Touch to switch off the radio.
- Touch to search radio channels, choose the sound from speaker and record FM.
- Touch to add to favorites/remove from favorites.
More Applications
Filemanager
In the All Apps screen, touch the File Managericon. You can view all files saved in the
phone or on the memory card.

Clock
In the All Apps screen, touch the Clock icon.
Adding an Alarm
1. Touch .
2. Touch the icon at the top of the screen.
Turning on/off an Alarm
On the Alarms screen, slide the ON/OFF button next to an alarm to turn it on or off.
Stopwatch
1. On the Clock screen, touch .
2. Touch START to start timing, press STOP to pause.
CountDown
1. On the Clock screen, touch .
2. Set the length of time to count down.

2. Touch START to begin.
3. When the timer expires, touch STOP to stop the alert.
Calculator
In the All Apps screen, touch the Calculator icon.
On the Calculator screen, slide the screen to the right or left to switch between Advanced
paneland Basic panel.
Tip:
Tap and hold the Calculator
’
s display to open a menu where you can copy what you
’
ve
entered and access other tools.
Calendar
Touch the Calendaricon in the All Apps screen.

Creating a new Event
1. On the calendar screen, touch the Menukey and then touch New event.
2. Enter the event name and location.
3. To set the duration for the event, touch FROM and TO.
4. Enter the event time zone and description.
5. If you have more than one calendar, select the calendar where you want to save the
event.
6. Select the REPETITION.
7. Set the time of the reminder in REMINDERS.
8. Touch DONE.
On the calendar screen, touch an event to view its details.
Changing your calendar view
On the calendar screen, touch the date at the top and choose Day, Week, Month, or
Agenda.
Swipe to scroll vertically or horizontally. In the Day or Week views, spread your fingers

apart or pinch them together to zoom in or out.
Displaying and synchronizing calendars
Initially, all calendars that you create or subscribe to in GoogleTM Calendar on the web are
available to synchronize and display in Calendar on your phone. You can select which
Google calendars to keep synchronized and which to show.
1. On the calendar screen, touch theMenu key and then touch Calendars to display.
2. Touch which calendars you would like to be displayed.
3. If you have more calendars you would like to synchronize and display, touch Calendars
to sync, then touch the checkbox next to the calendar(s) you would like to synchronize,
touch OK, and then you are returned to the Calendars to display screen where what you
chose is now displayed and where you can choose which to display in the calendar.
Downloads
With Downloads, you can manage logs of files you have downloaded from the web.
Touch the Downloadsicon in the All Apps screen.

Maps
You use Maps to find your current location; to view real-time traffic conditions; to get
detailed directions by foot, public transportation, bicycle, or car.
1. Touch Maps on the home screen or in the All Apps screen.
2. Touch , and then tap the Search Maps search box on the top to find the location you
need.
Navigation
You can use Google Navigation to get turn-by-turn driving directions, both spoken and
displayed on your screen.
1. On the home screen touch the Menu key and touch System settings > Location access.
2.Slide the ON/OFF button next to GPSsatellitesto turn it on or off.
3. In the All Apps screen, touch Navigation icon.
Manage applications
You can view and manage applications installed in your phone.

Install new applications
You can install applications from the Play Store or from elsewhere. When installing
applications that are not from the Play Store, make sure the software is suitable for your
phone.
Installing applications from the Play Store
1. On the home screen or in the All Apps screen, touch the Play Store icon.
2. Search for the applications you want to install.
Installing applications not in the PlayStore
1. Copy the application to the SD card and find the file from File manager.
2. Check Unknown sources.
3. Touch the file and complete the installation according to the wizard.
Uninstall applications
1. On the home screen, touch the Menukey and then select System settings > Apps.
2. Scroll the list and touch the application you want to uninstall.

FCC Statement
1. This device complies with Part 15 of the FCC Rules. Operation
is subject to the following two conditions:
(1) This device may not cause harmful interference.
(2) This device must accept any interference received, including
interference that may cause undesired operation.
2. Changes or modifications not expressly approved by the party
responsible for compliance could void the user's authority to
operate the equipment.
NOTE:
This equipment has been tested and found to comply with the
limits for a Class B digital device, pursuant to Part 15 of the FCC
Rules. These limits are designed to provide reasonable protection
against harmful interference in a residential installation.

This equipment generates uses and can radiate radio frequency
energy and, if not installed and used in accordance with the
instructions, may cause harmful interference to radio
communications. However, there is no guarantee that interference
will not occur in a particular installation. If this equipment does
cause harmful interference to radio or television reception, which
can be determined by turning the equipment off and on, the user is
encouraged to try to correct the interference by one or more of the
following measures:
Reorient or relocate the receiving antenna.
Increase the separation between the equipment and receiver.
Connect the equipment into an outlet on a circuit different from
that to which the receiver is connected.
Consult the dealer or an experienced radio/TV technician for help.

SAR Information Statement
Your wireless phone is a radio transmitter and receiver. It is
designed and manufactured not to exceed the emission limits for
exposure to radiofrequency (RF) energy set by the Federal
Communications Commission of the U.S. Government. These
limits are part of comprehensive guidelines and establish
permitted levels of RF energy for the general population. The
guidelines are based on standards that were developed by
independent scientific organizations through periodic and
thorough evaluation of scientific studies. The standards include a
substantial safety margin designed to assure the safety of all
persons, regardless of age and health. The exposure standard for
wireless mobile phones employs a unit of measurement known as
the Specific Absorption Rate, or SAR. The SAR limit set by the
FCC is 1.6 W/kg. * Tests for SAR are conducted with the phone
transmitting at its highest certified power level in all tested
frequency bands. Although the SAR is determined at the highest
certified power level, the actual SAR level of the phone while
operating can be well below the maximum value. This is because
the phone is designed to operate at multiple power levels so as to
use only the power required to reach the network. In general, the

closer you are to a wireless base station antenna, the lower the
power output. Before a phone model is available for sale to the
public, it must be tested and certified to the FCC that it does not
exceed the limit established by the government adopted
requirement for safe exposure. The tests are performed in
positions and locations (e.g., at the ear and worn on the body) as
required by the FCC for each model. The highest SAR value for
this model phone when tested for use at the ear is 0.535W/Kg and
when worn on the body, as described in this user guide, is
0.419W/Kg(Body-worn measurements differ among phone
models, depending upon available accessories and FCC
requirements). The maximum scaled SAR in hotspot mode is
0.648W/Kg. While there may be differences between the SAR
levels of various phones and at various positions, they all meet the
government requirement for safe exposure. The FCC has granted
an Equipment Authorization for this model phone with all
reported SAR levels evaluated as in compliance with the FCC
RFexposure guidelines. SAR information on this model phone is
on file with the FCC and can be found under the Display Grant
section of http://www.fcc.gov/ oet/fccid after searching on
FCC ID: QRP-AZUMIA5QLAdditional information on Specific
Absorption Rates (SAR) can be found on the Cellular

Telecommunications Industry Asso-ciation (CTIA) web-site at
http://www.wow-com.com. * In the United States and Canada, the
SAR limit for mobile phones used by the public is 1.6 watts/kg
(W/kg) averaged over one gram of tissue. The standard
incorporates a sub-stantial margin of safety to give additional
protection for the public and to account for any variations in
measurements.
Body-worn Operation
This device was tested for typical body-worn operations. To
comply with RF exposure requirements, a minimum separation
distance of 10mm must be maintained between the user’s body
and the handset, including the antenna. Third-party belt-clips,
holsters, and similar accessories used by this device should not
contain any metallic components. Body-worn accessories that do
not meet these requirements may not comply with RF exposure

requirements and should be avoided. Use only the supplied or an
approved antenna.