Azumi S A AZUMIAT7 Tablet User Manual
Azumi S.A Tablet
User manual

1
AT7 User Manual
Congratulations for buying AT-7
Thank you very much for your trust and your decision to buy an Azumi product!

2
Table of Contents
Device overview 4
Insert the SIM or USIM card 5
Charge the battery 6
Language setting 7
Power monitoring and charging the batteries 9
Screen lock 9
Connecting to the computer and data transfer 9
Description of the Program menu 11
System settings 15
1. Wireless & Networks 15
2. Sound settings 19
3. Display settings 21
4. Memory 23

3
5. Battery 24
6. Application 25
7. Accounts & sync. 25
8. Location services 26
9. Security 26
10. Language and keyboard 26
11. Back & Reset 27
12. Date and time 28
Technical data 29
FCC Information 30
4
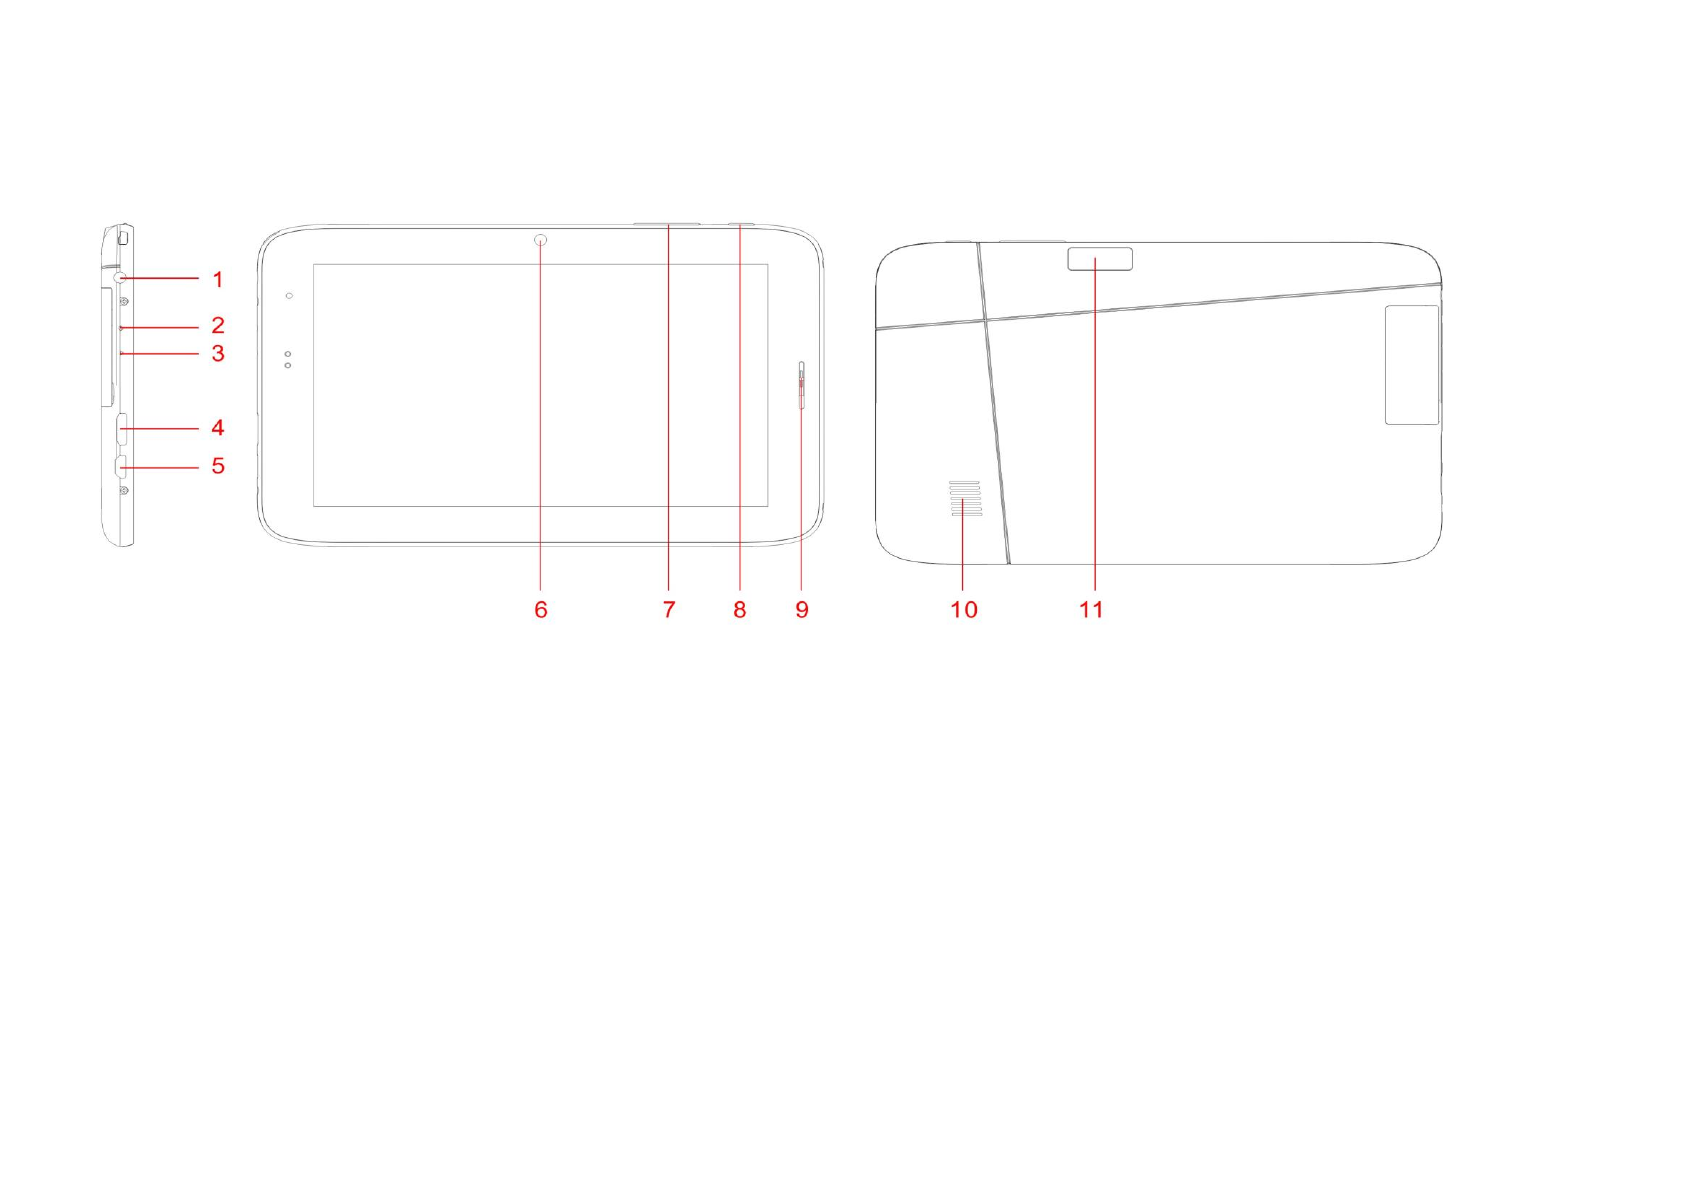
Device overview
1. Earphone
2. Microphone
3. Reset
4. HDMI
5. Micro-USB port
6. Front camera
7. Power button
8. Volume key
9. Receiver
10. Speaker
11. Rear camera
5
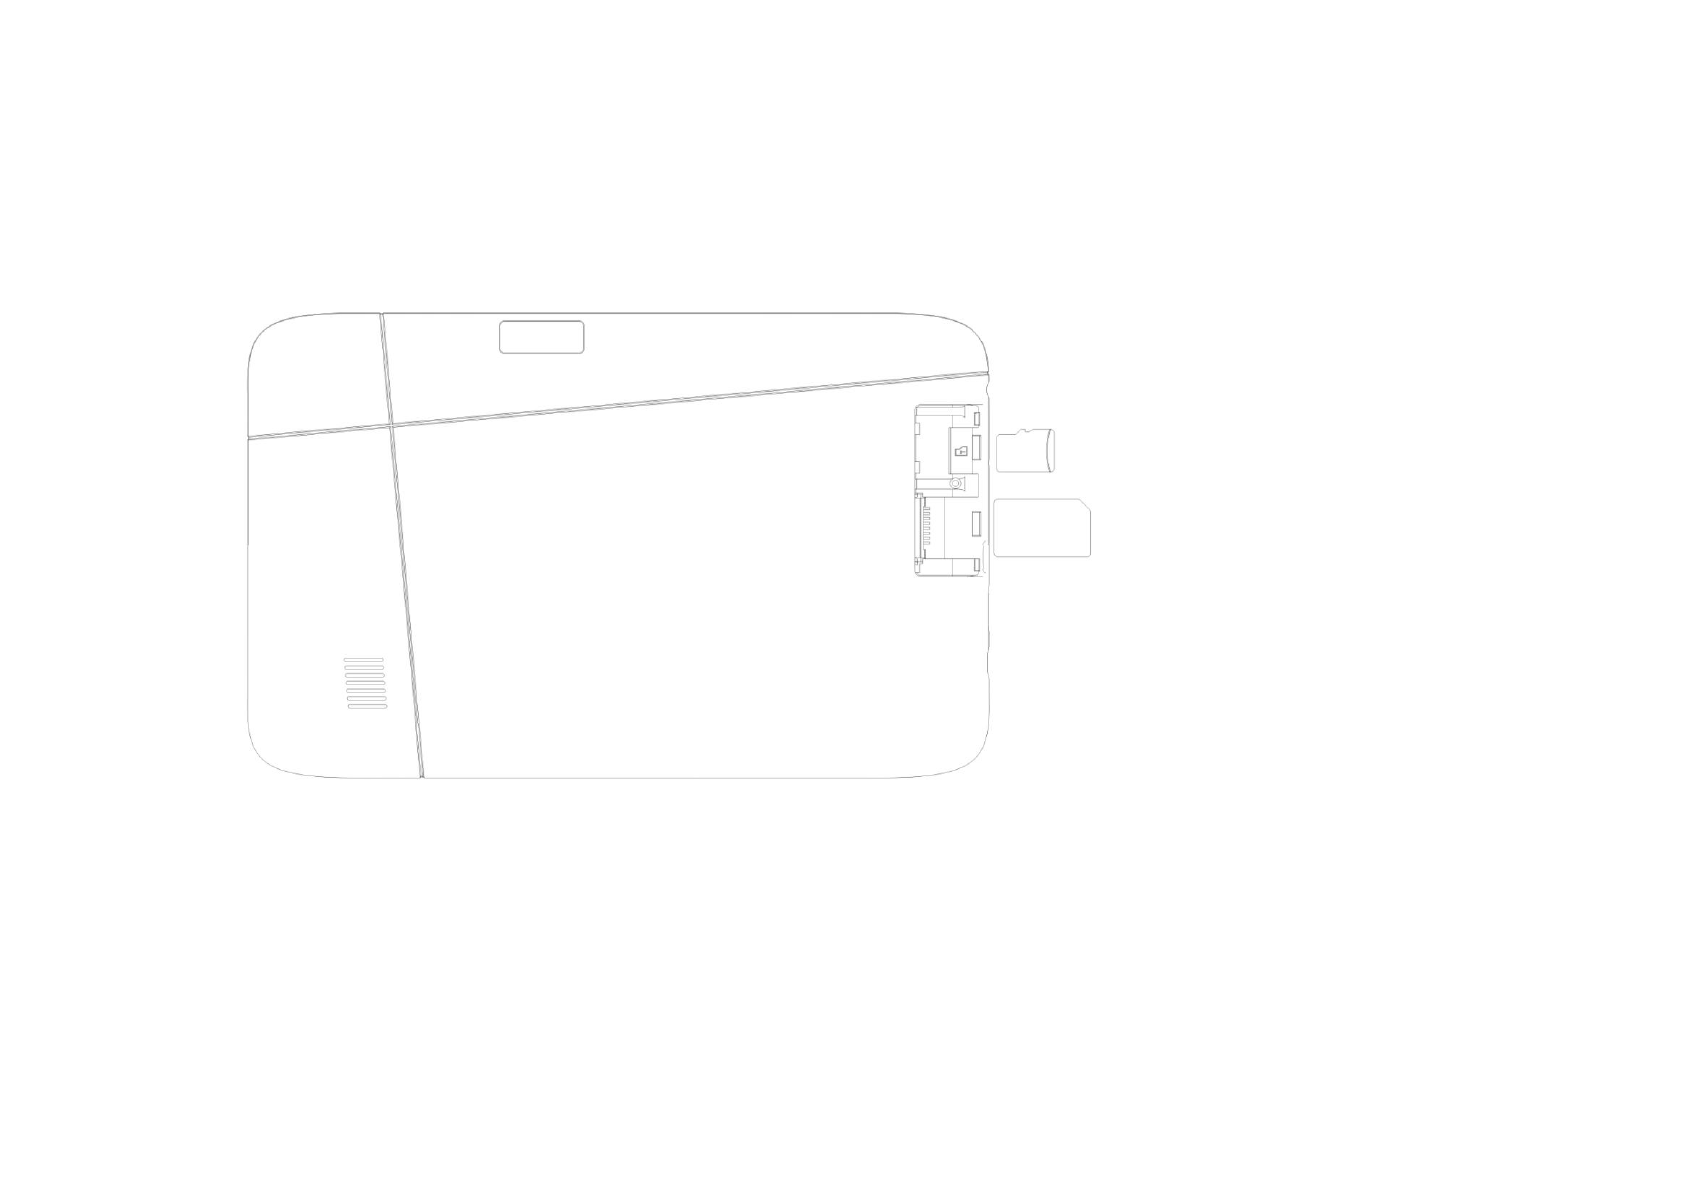
Insert the SIM or USIM card:
Insert the SIM or USIM card when you need a cellular service. Do not insert a memory card into the SIM card slot.
6
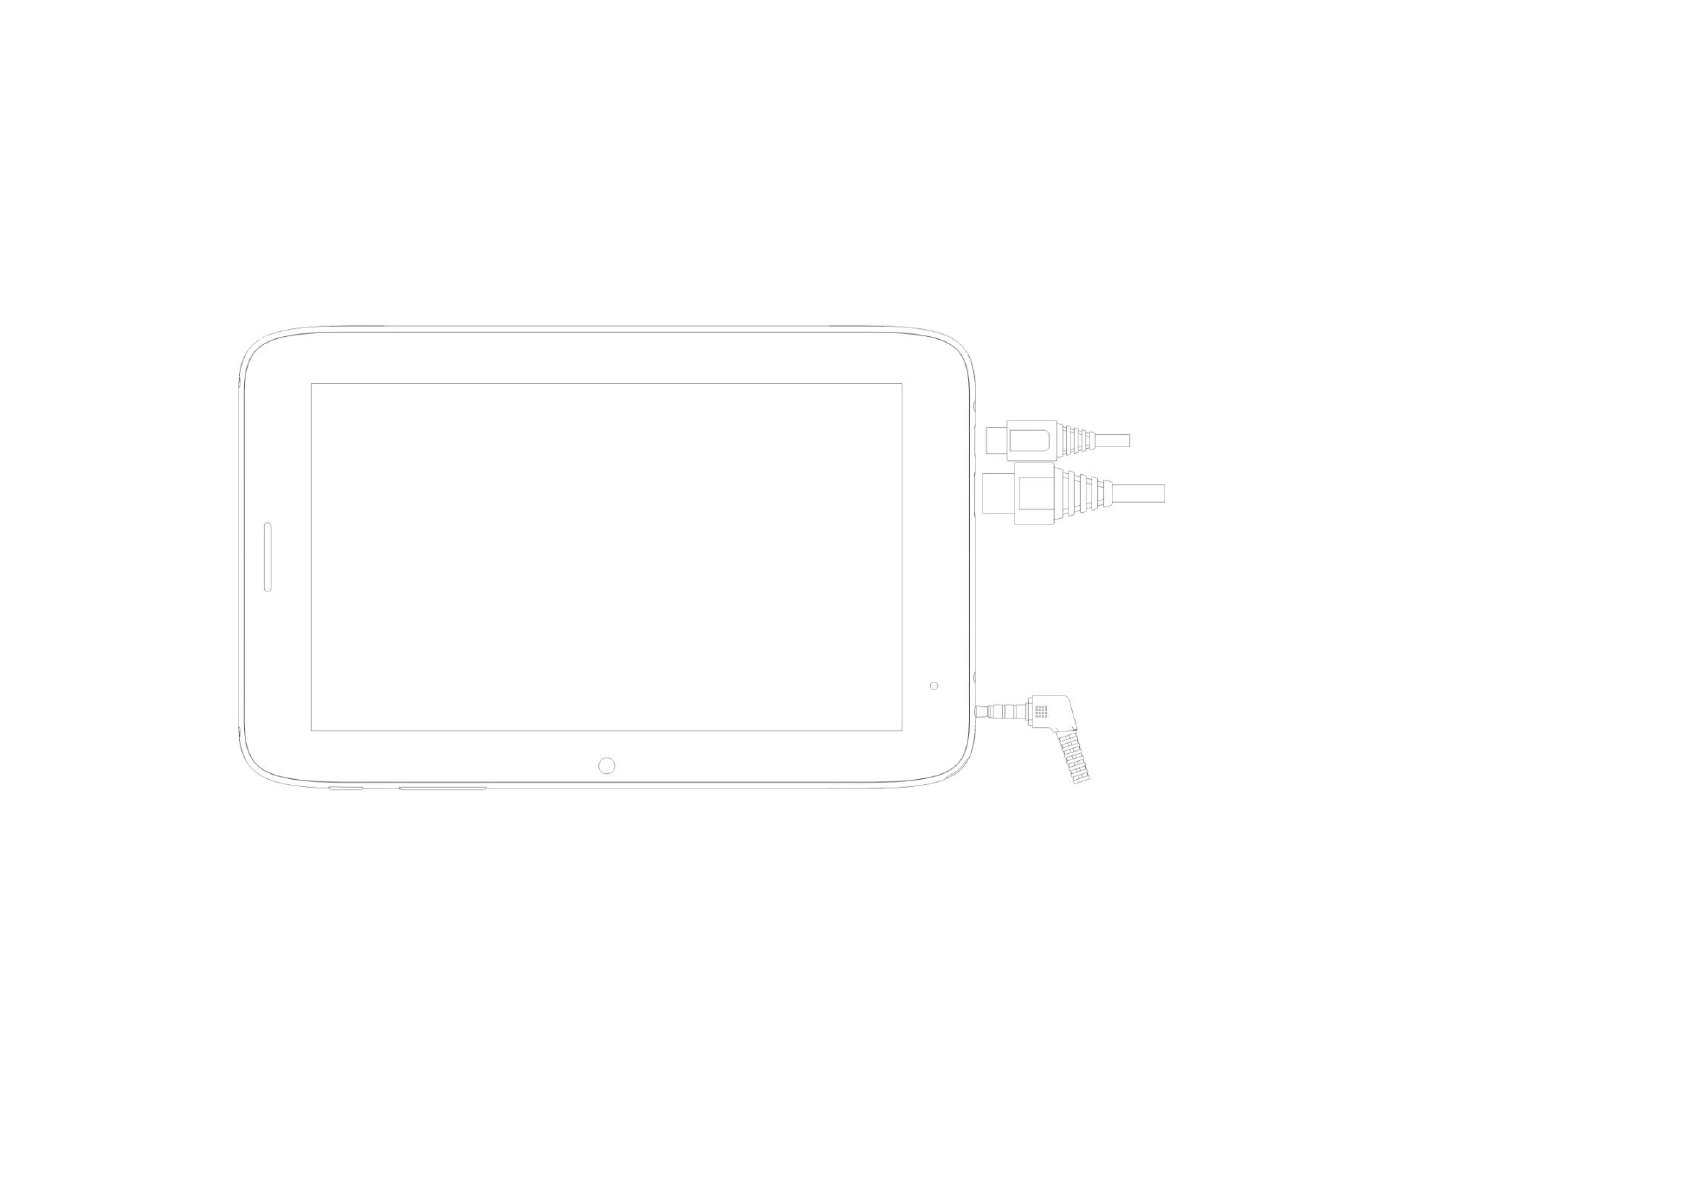
Charge the battery
Before using the device for the first time or when the battery has been unused for an extended period, you must charge the battery. You

7
can charge the battery with a travel adapter or by connecting the device to a computer with a USB cable.
Use only our approved chargers and cables. Unapproved chargers or cables may cause batteries to explode or damage your device.
When your battery is low, the device will emit a warning tone and show a low battery message. Recharge your battery to continue using
your device.
If the battery is completely discharged, you cannot turn on the device, even with the travel adapter connected. Allow a depleted battery to
charge for a while before you try to turn on the device.
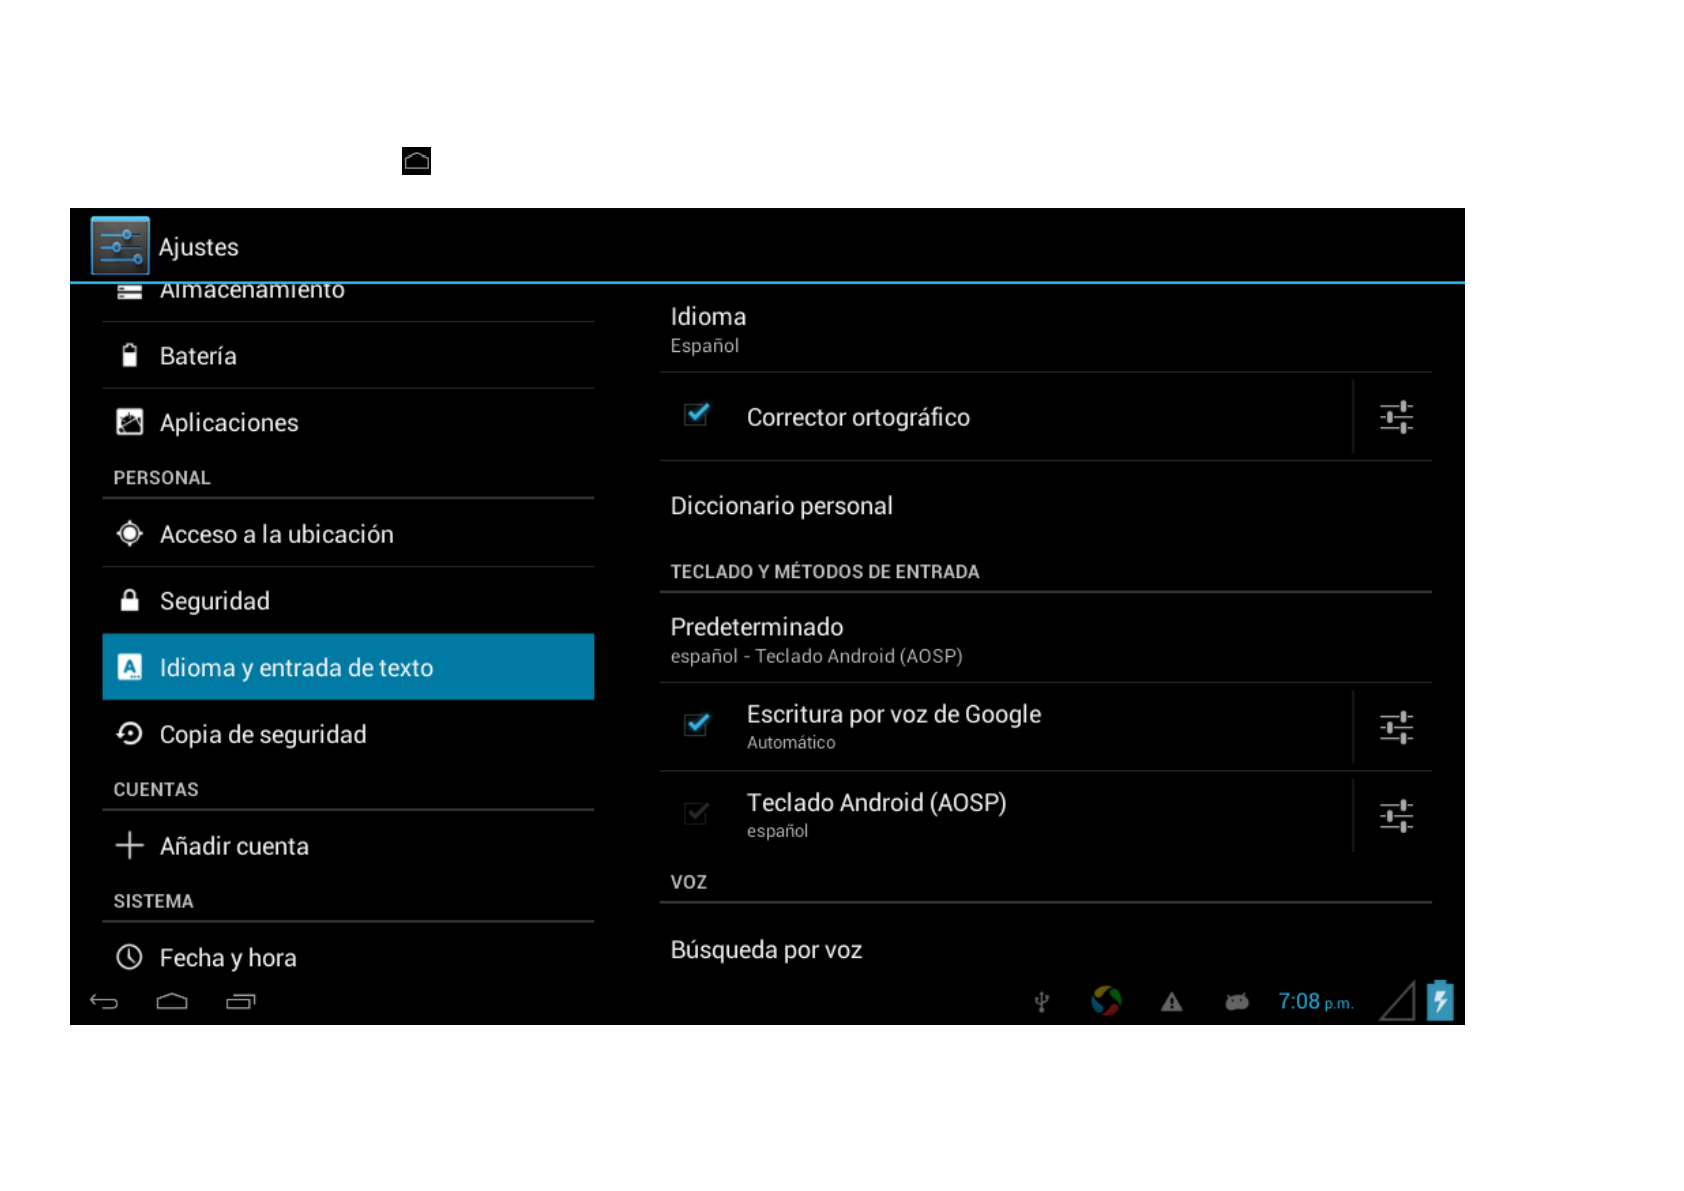
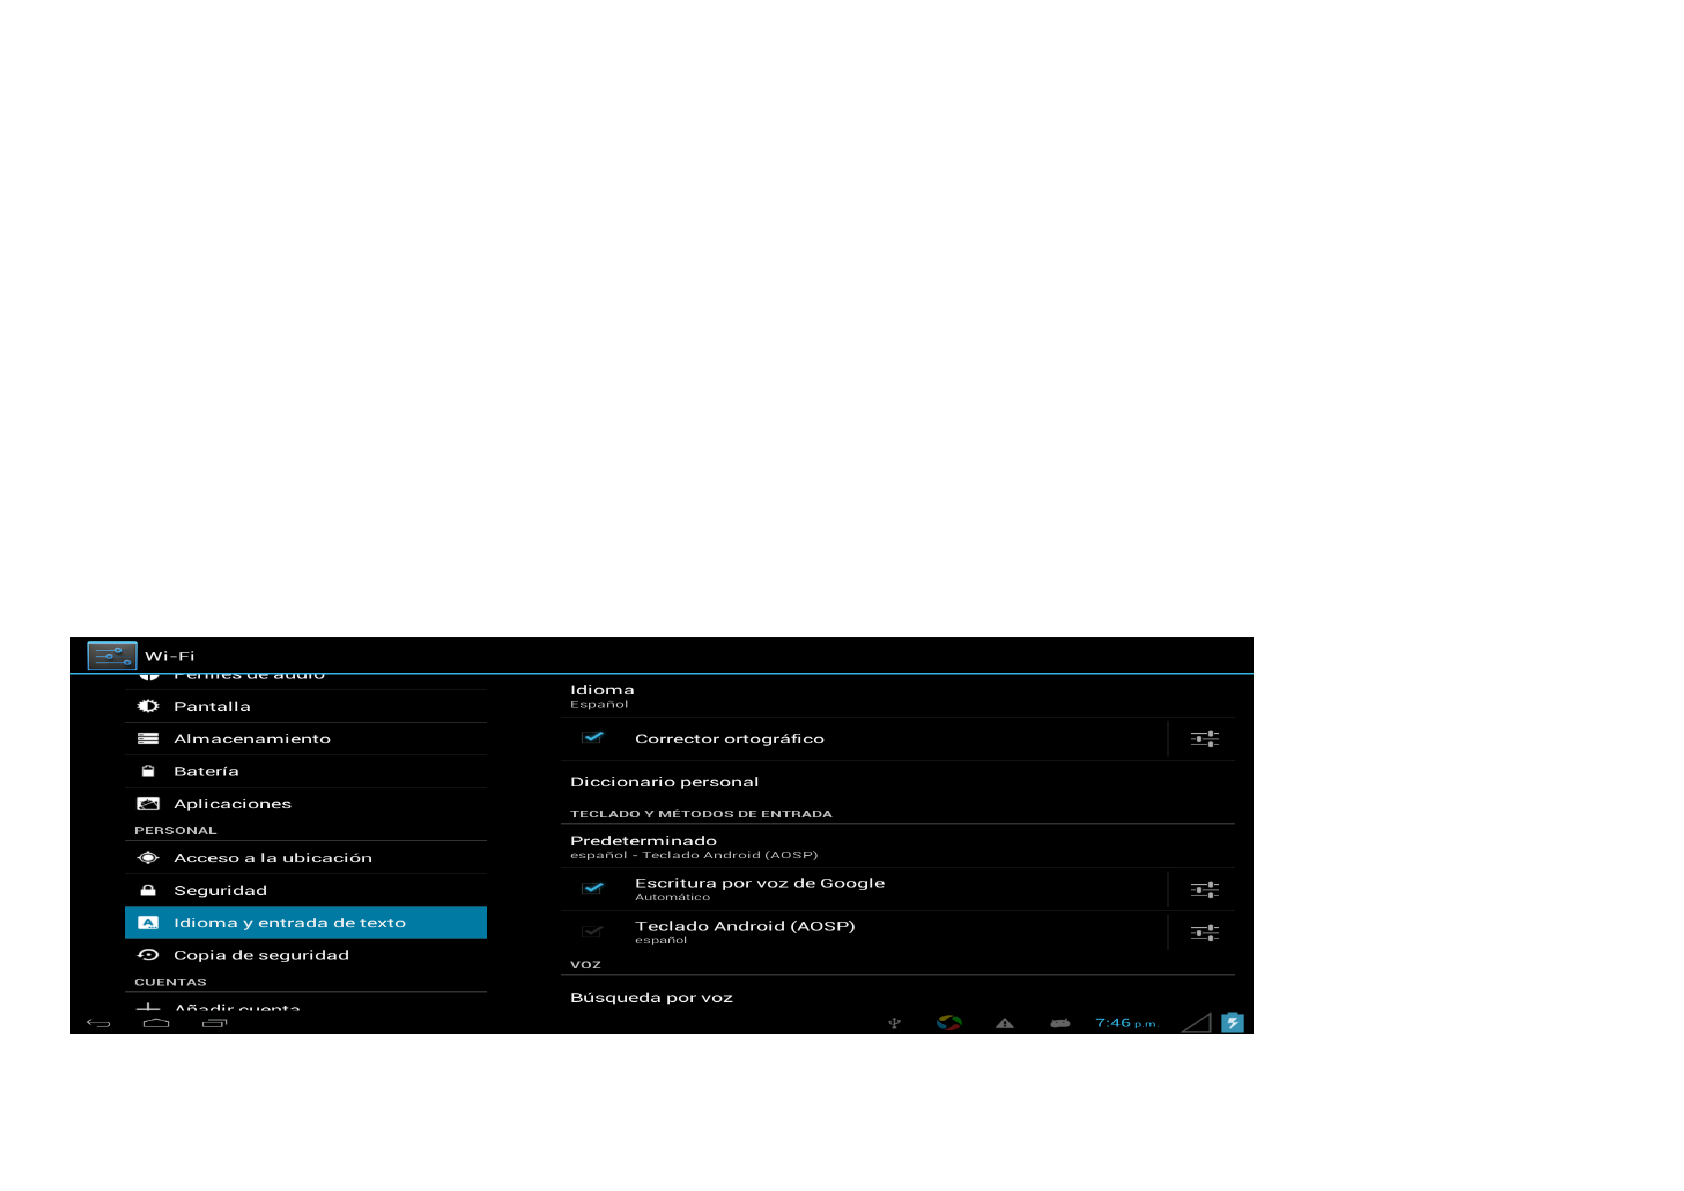
Language setting:
We select Spanish as a default language.
To change the language setting, please do the following:
- In start screen press on the right side of the screen
- Select ‘Ajustes’
- Scroll to the end of the list.
- Select ‘Idioma y entrada de texto’.
- Select ‘Idioma’.d
8
- Type your preferred language.
- Press the ‘Home’ button " "to return to the home screen.

9
Power monitoring and charging the batteries:
The battery charge symbol in on the status bar indicates the charging status of the batteries.
If the power goes down, the device shuts itself off automatically. If less power is shown, use the adapter or PC USB to charge the
device.
The charging time for the battery is approximately 5 hours.
Attention: Pleased used 5V 1.5A USB adapter for charge
Screen lock:
If the device is not used for specified time or the ‘Power’ button is pressed briefly, the screen is switched off and display lock is activated.
By pressing the ‘Power’ button briefly the screen will be reactivated. For locking the screen press the ‘Lock’ button in the specified
direction.
Connecting to the computer and data transfer:
Connect the tablet with computer by using USB cable. The computer will pop up the windows to let you install the tablet USB driver.
After you connect the device to a computer, it appears in the status display. (Press icon have "Connected as media device"
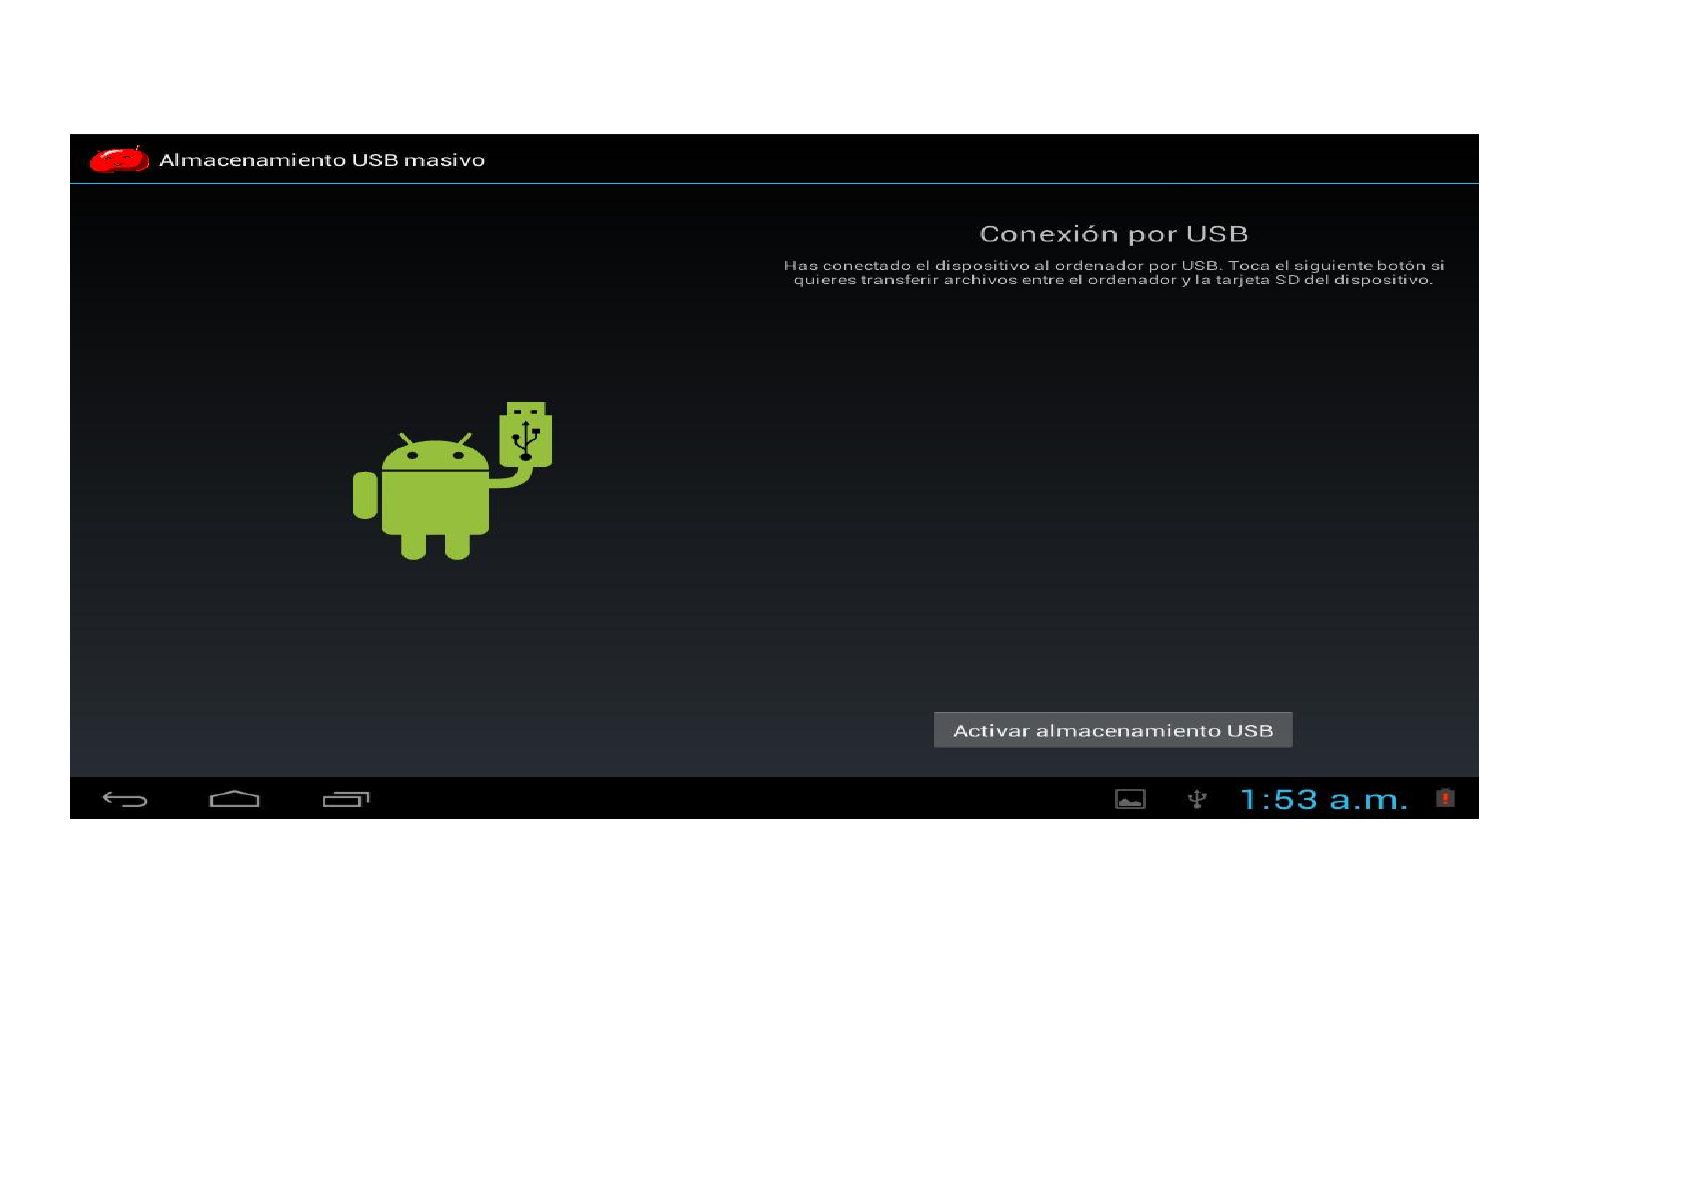
10
indication)
11
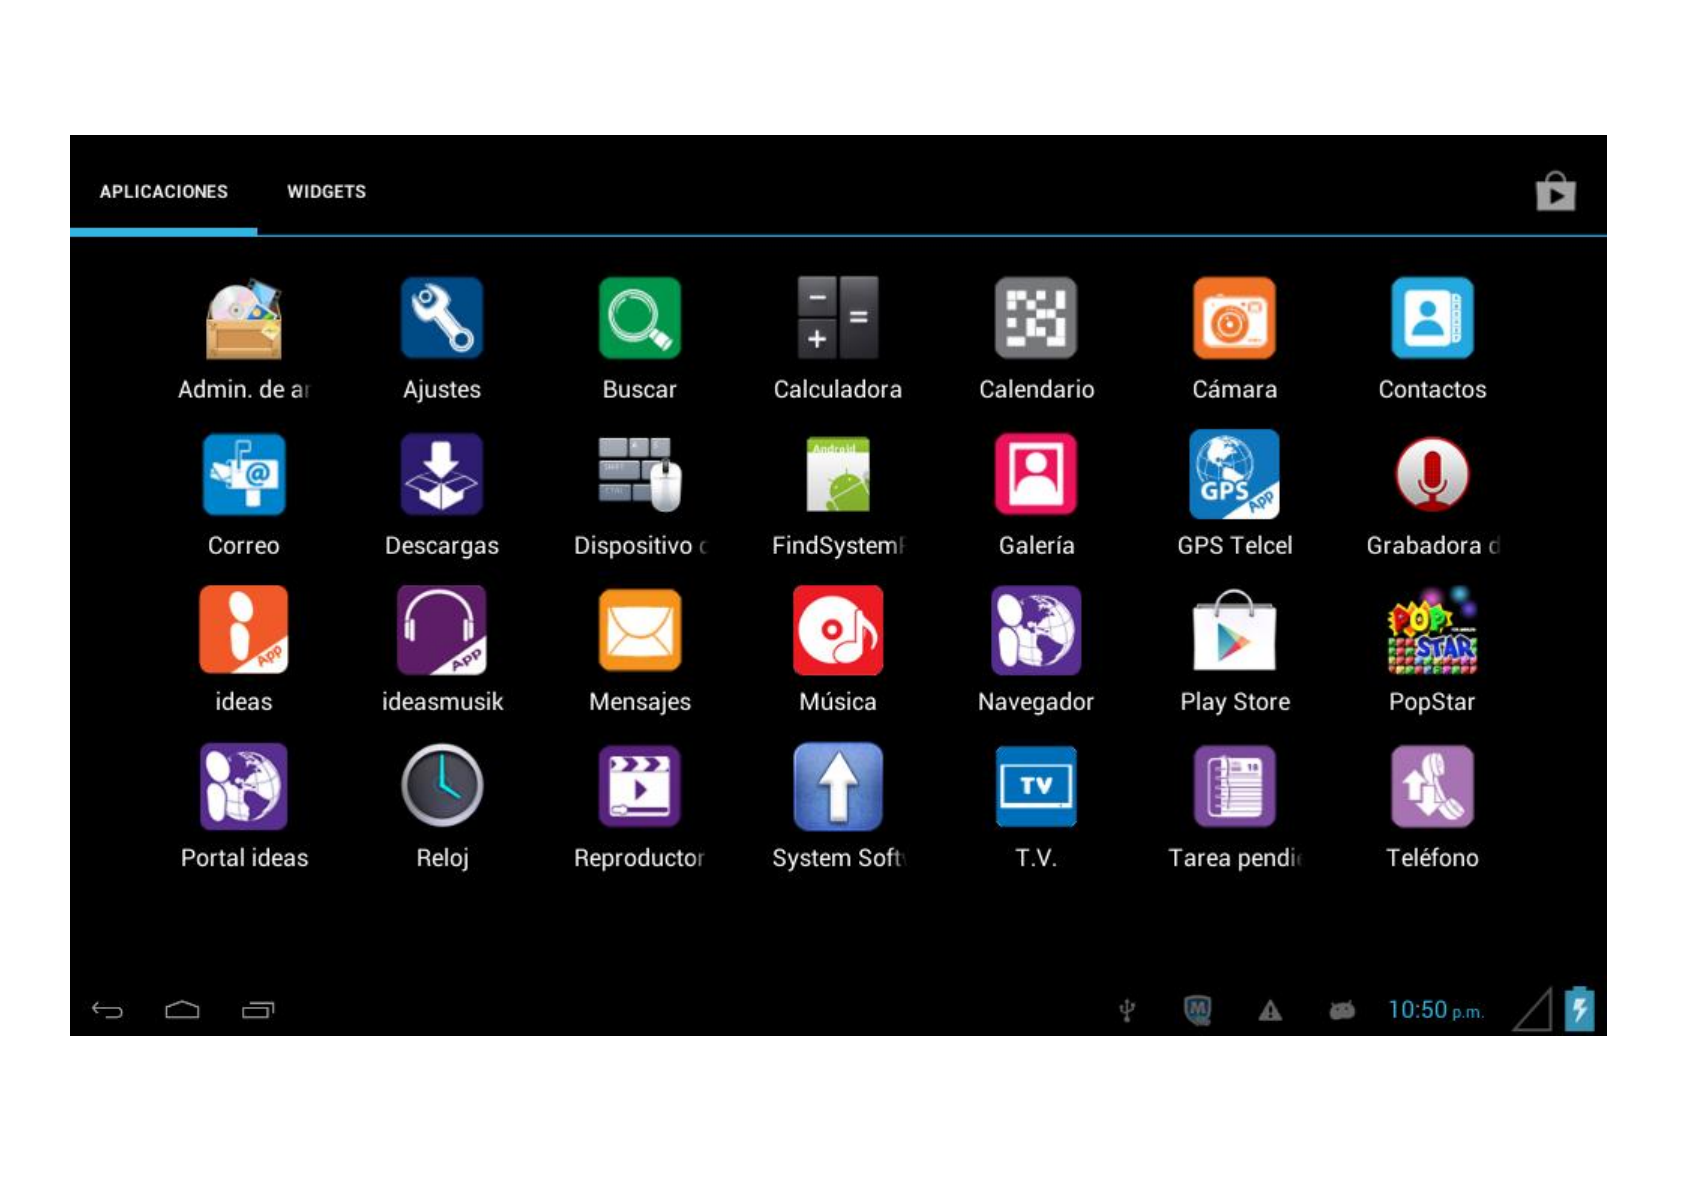
Description of the Program menu:

12
Settings:
Changing the basic settings of AT7
Internet Search
Call Log
Calculator
Calendar
Managing schedules – can be synchronized automatically with a Google account.
Camera
Contact person
E-mail:
Program for retrieving, processing and sending e-mails
Downloads:
Downloads file list

13
File Administrator:
Open the Explorer to access Micro SD TF Cards, USB sticks and other storage media. The Explorer is a practical manager for documents
and all types of data.
Gallery:
Manage and display images and videos – also enables synchronisation with Picasa web albums.
Sound Recorder:
Dictation device function
Ideas
Message:
Program for retrieving, processing and sending message
Analogy TV
Radio
System Software
Music Player
Internet browser

14
GPS
Play store:
Load Apps (programs) from the Android Market. You can download and install apps, games and other applications. Many are free.
Clock:
Time display and setting alarm functions.
Video Player:
Functions of the buttons on the user interface:
Back Button:
To go back to the previous menu / previous page
Home Button:
To go back to the start screen
Records Button:
To display recent applications using records window
Menu Button:
To open the context menu

15
/ Volume Buttons:
To increase or reduce the volume
Program Menu Button:
To display the programs and applications
WIFI / WLAN Signal Icon
Bluetooth Icon
New Mail indication:
System settings
Touch the icon for the settings to open the system settings menu:
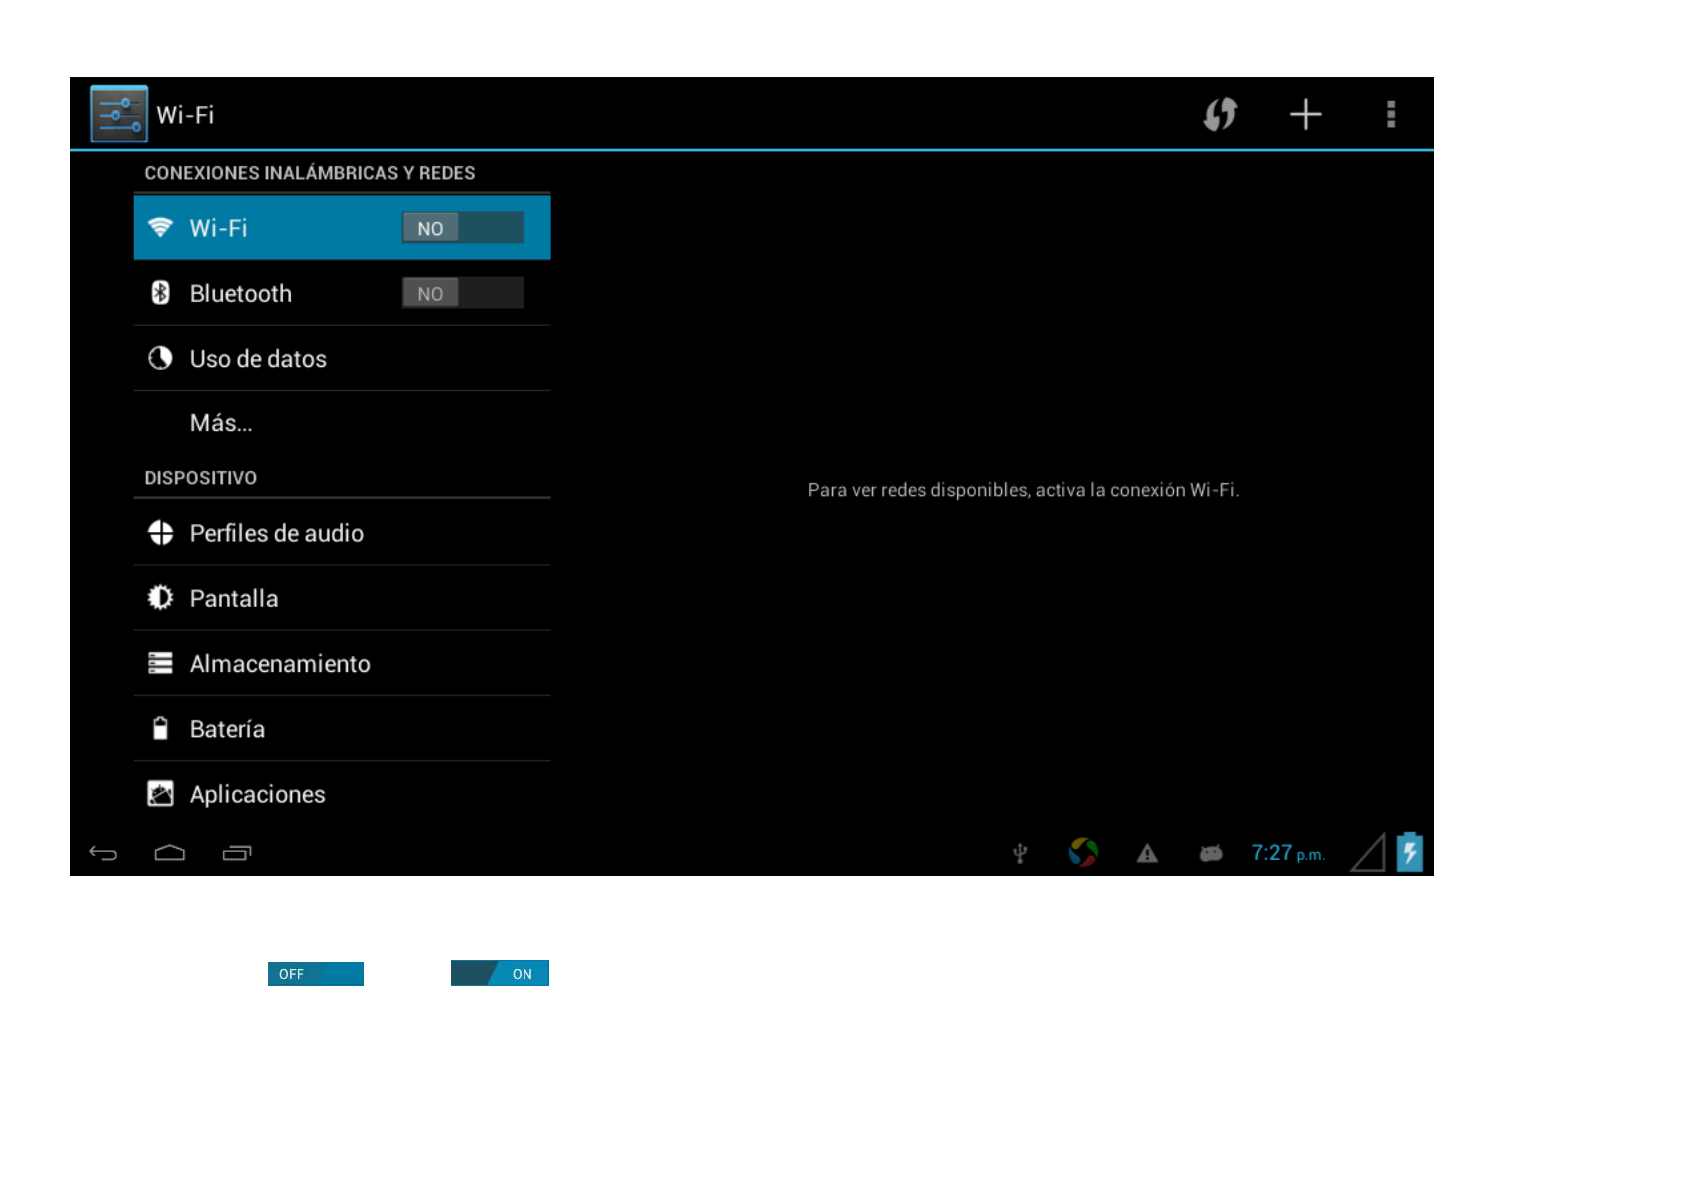
1. Wireless & Networks
16
Wi-Fi: Touch => to switch on the Wi-Fi function.
17
The device automatically searches for available Wi-Fi networks.
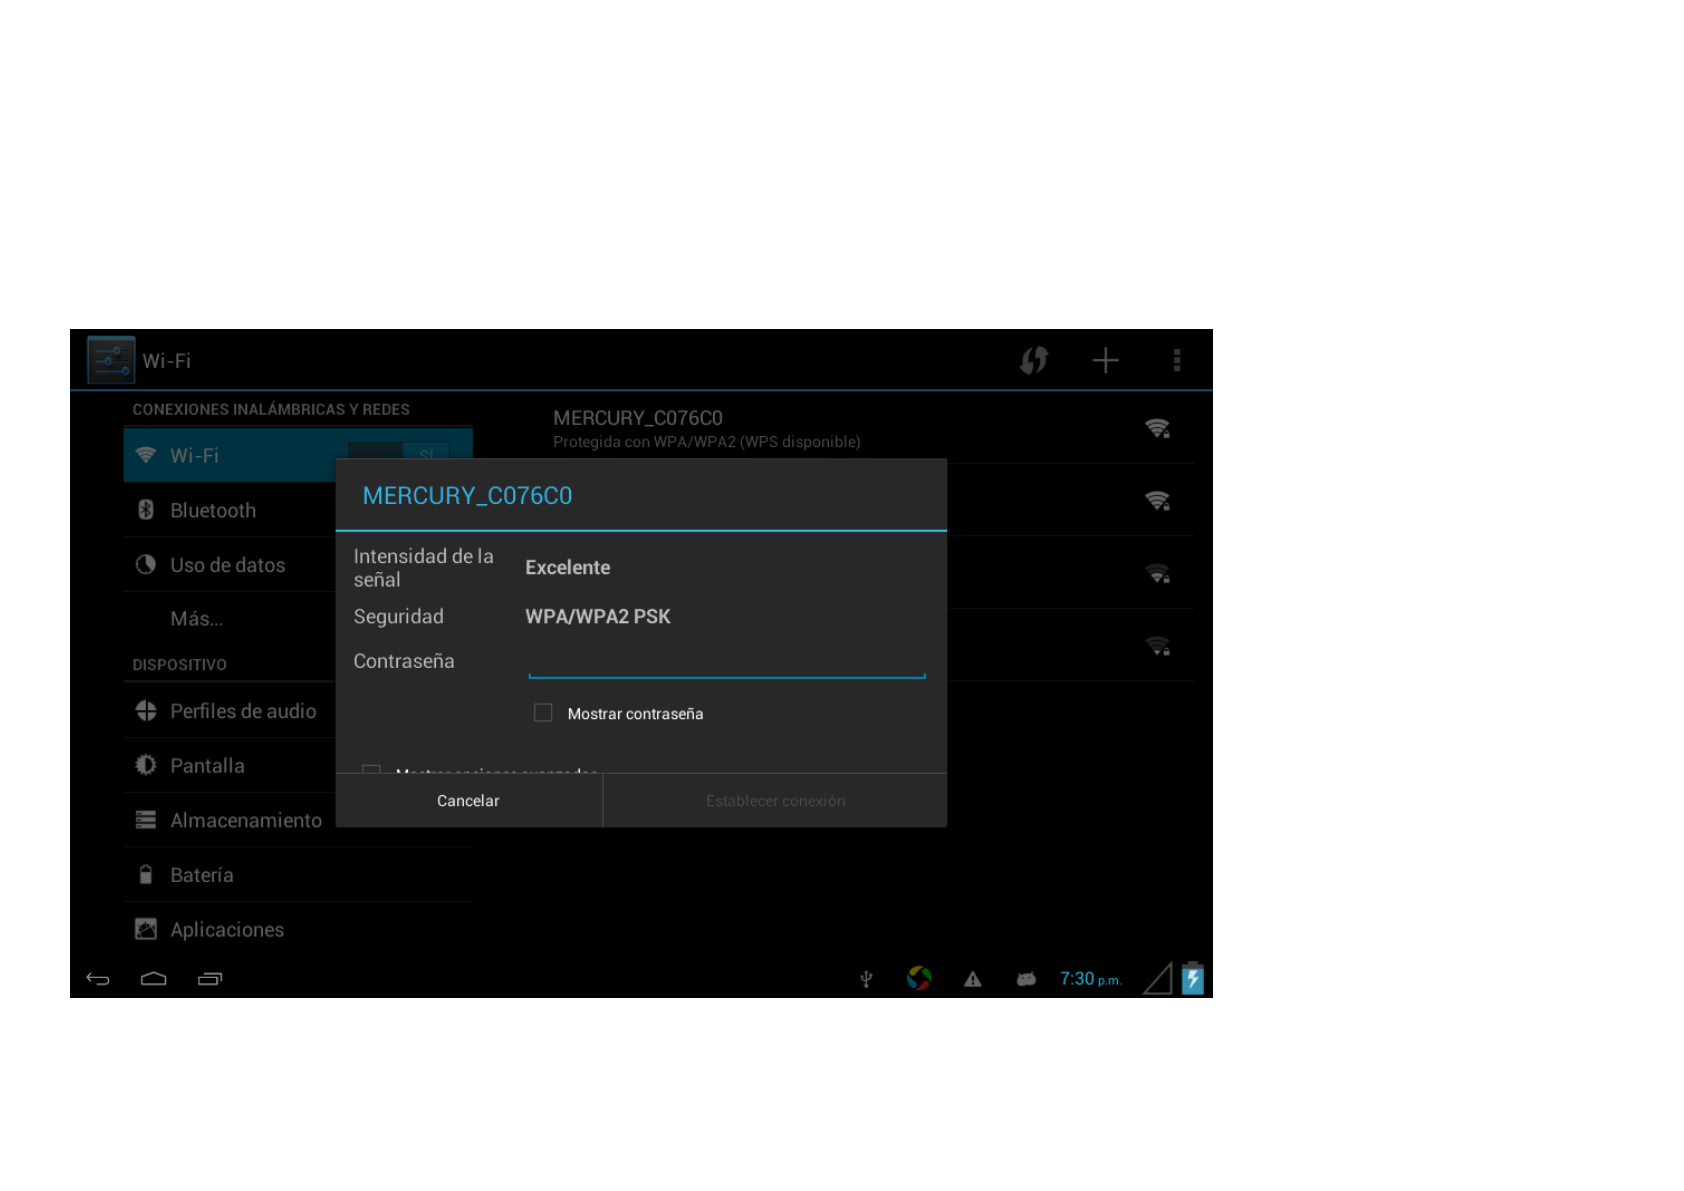
Wi-Fi Settings: Select your network here.
If needed you will be requested to enter your Wi-Fi password:
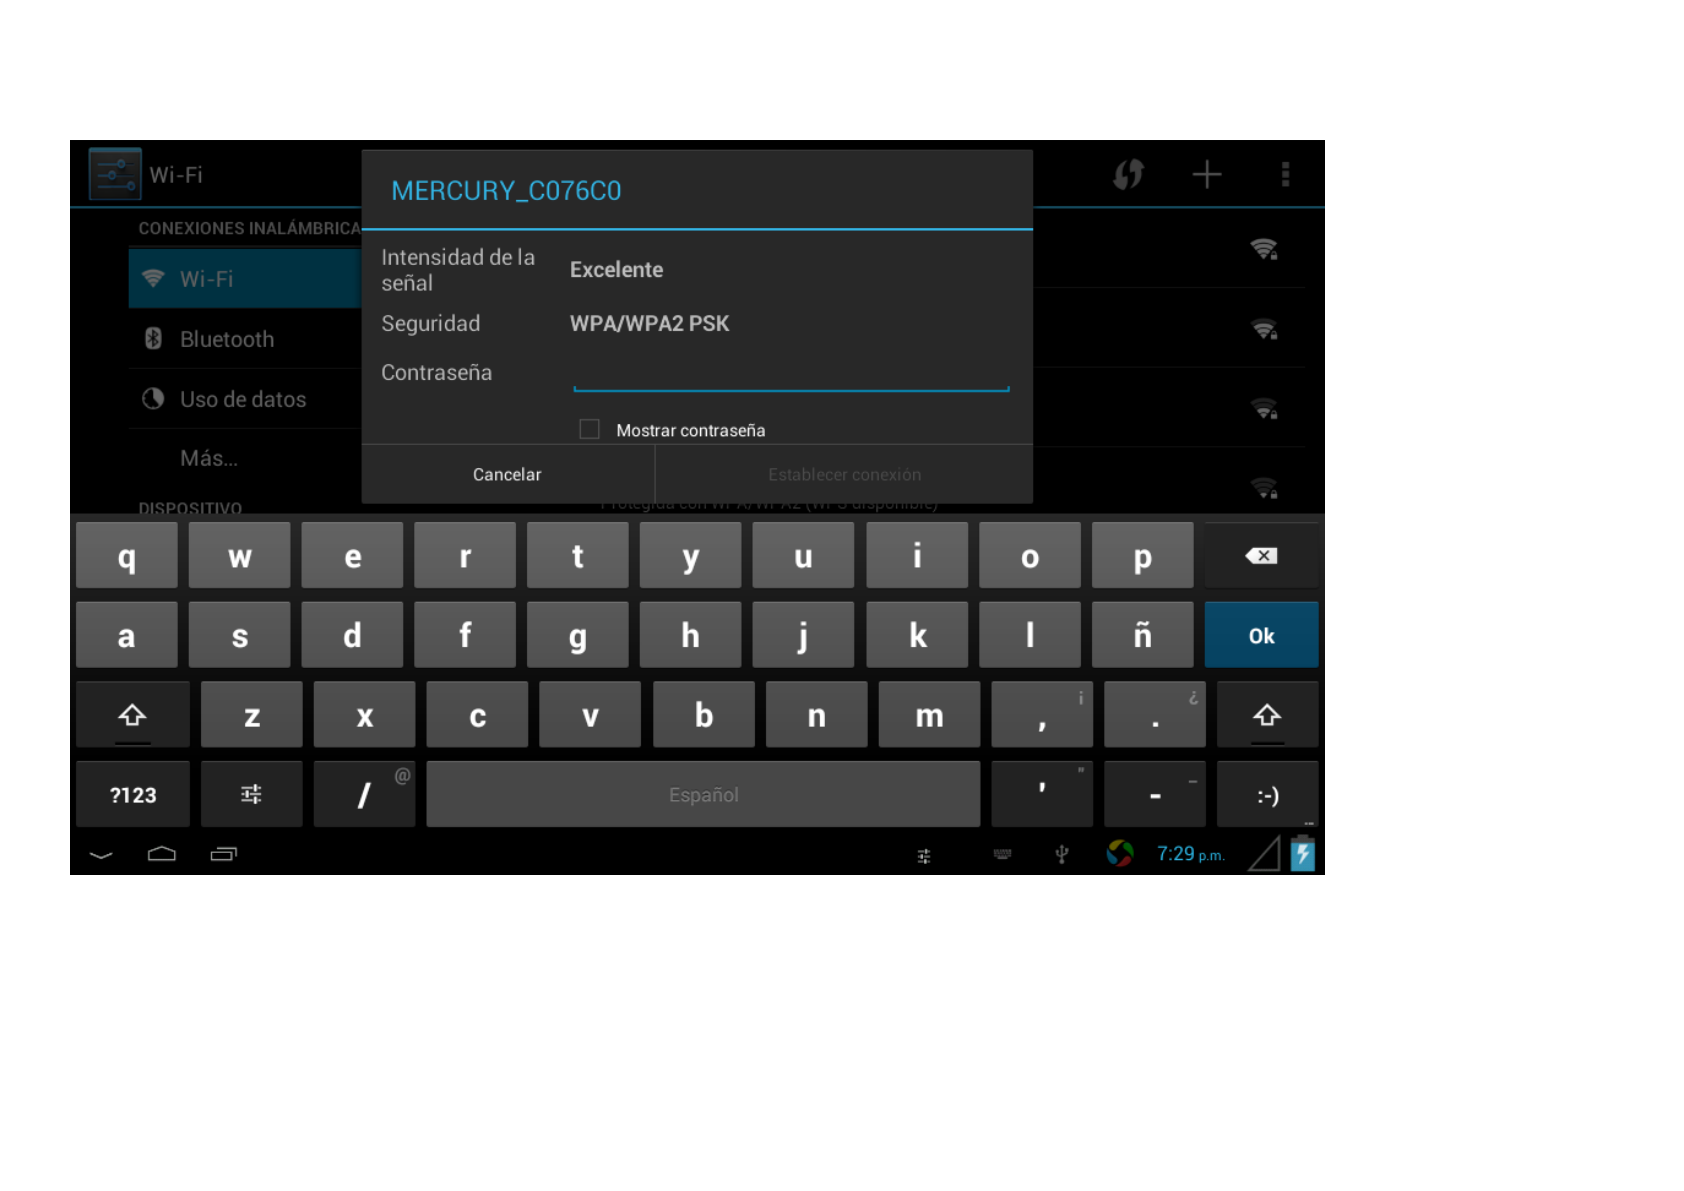
18
ADD NETWORK:
Advanced Wi-Fi settings:
Activate the Wi-Fi feature to connect to a Wi-Fi AP and access the Internet or other network devices
19
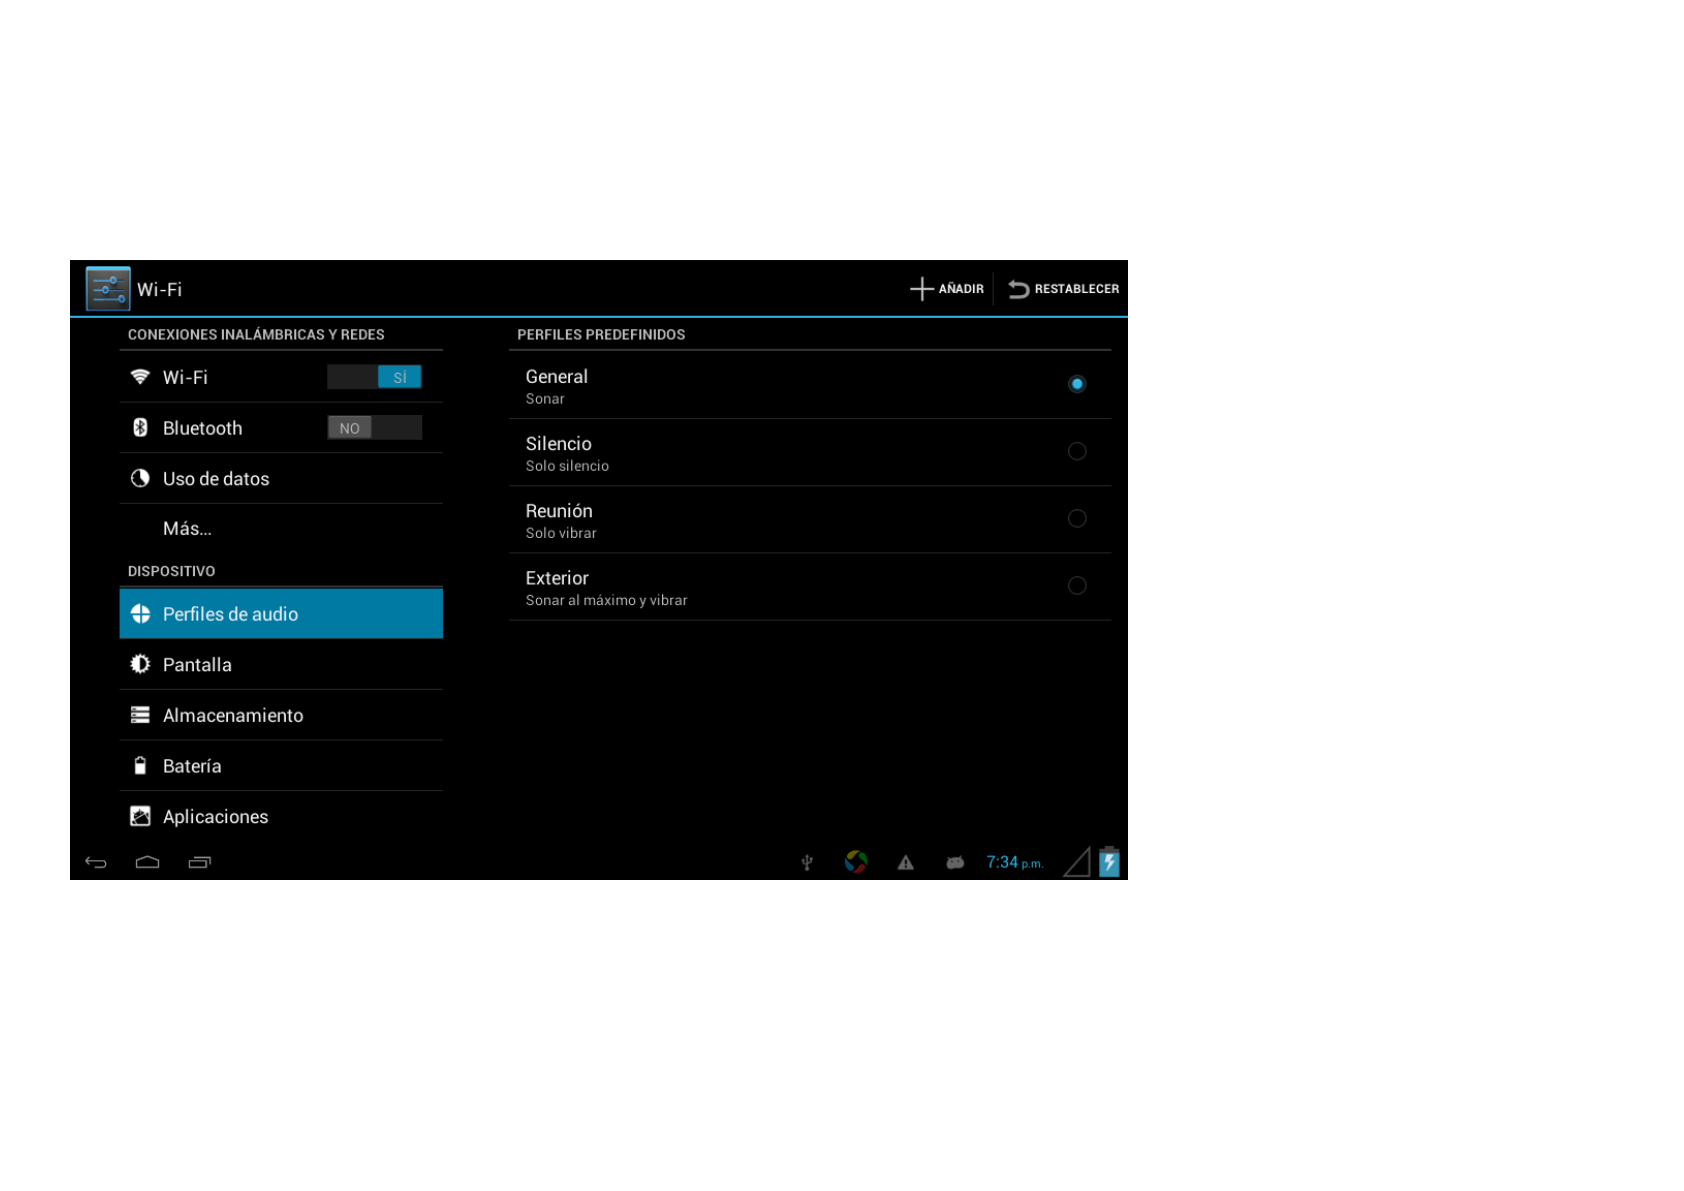
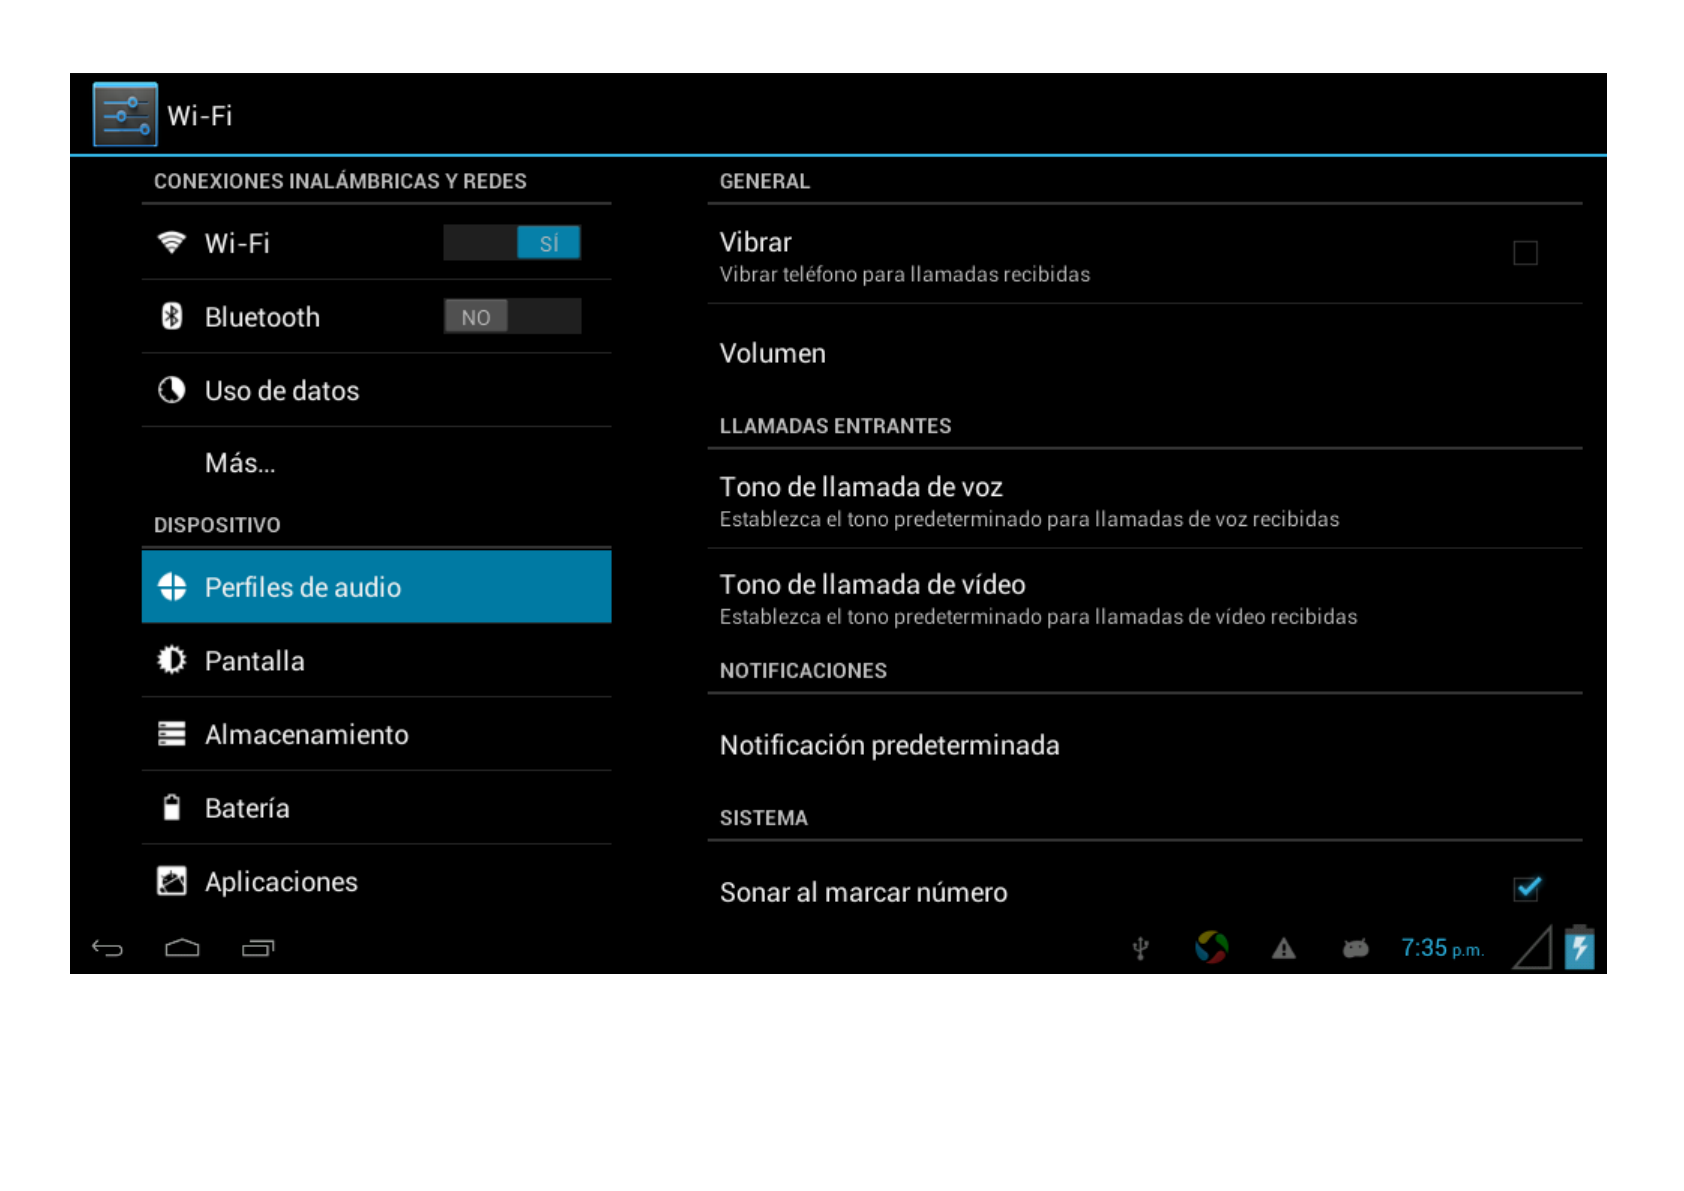
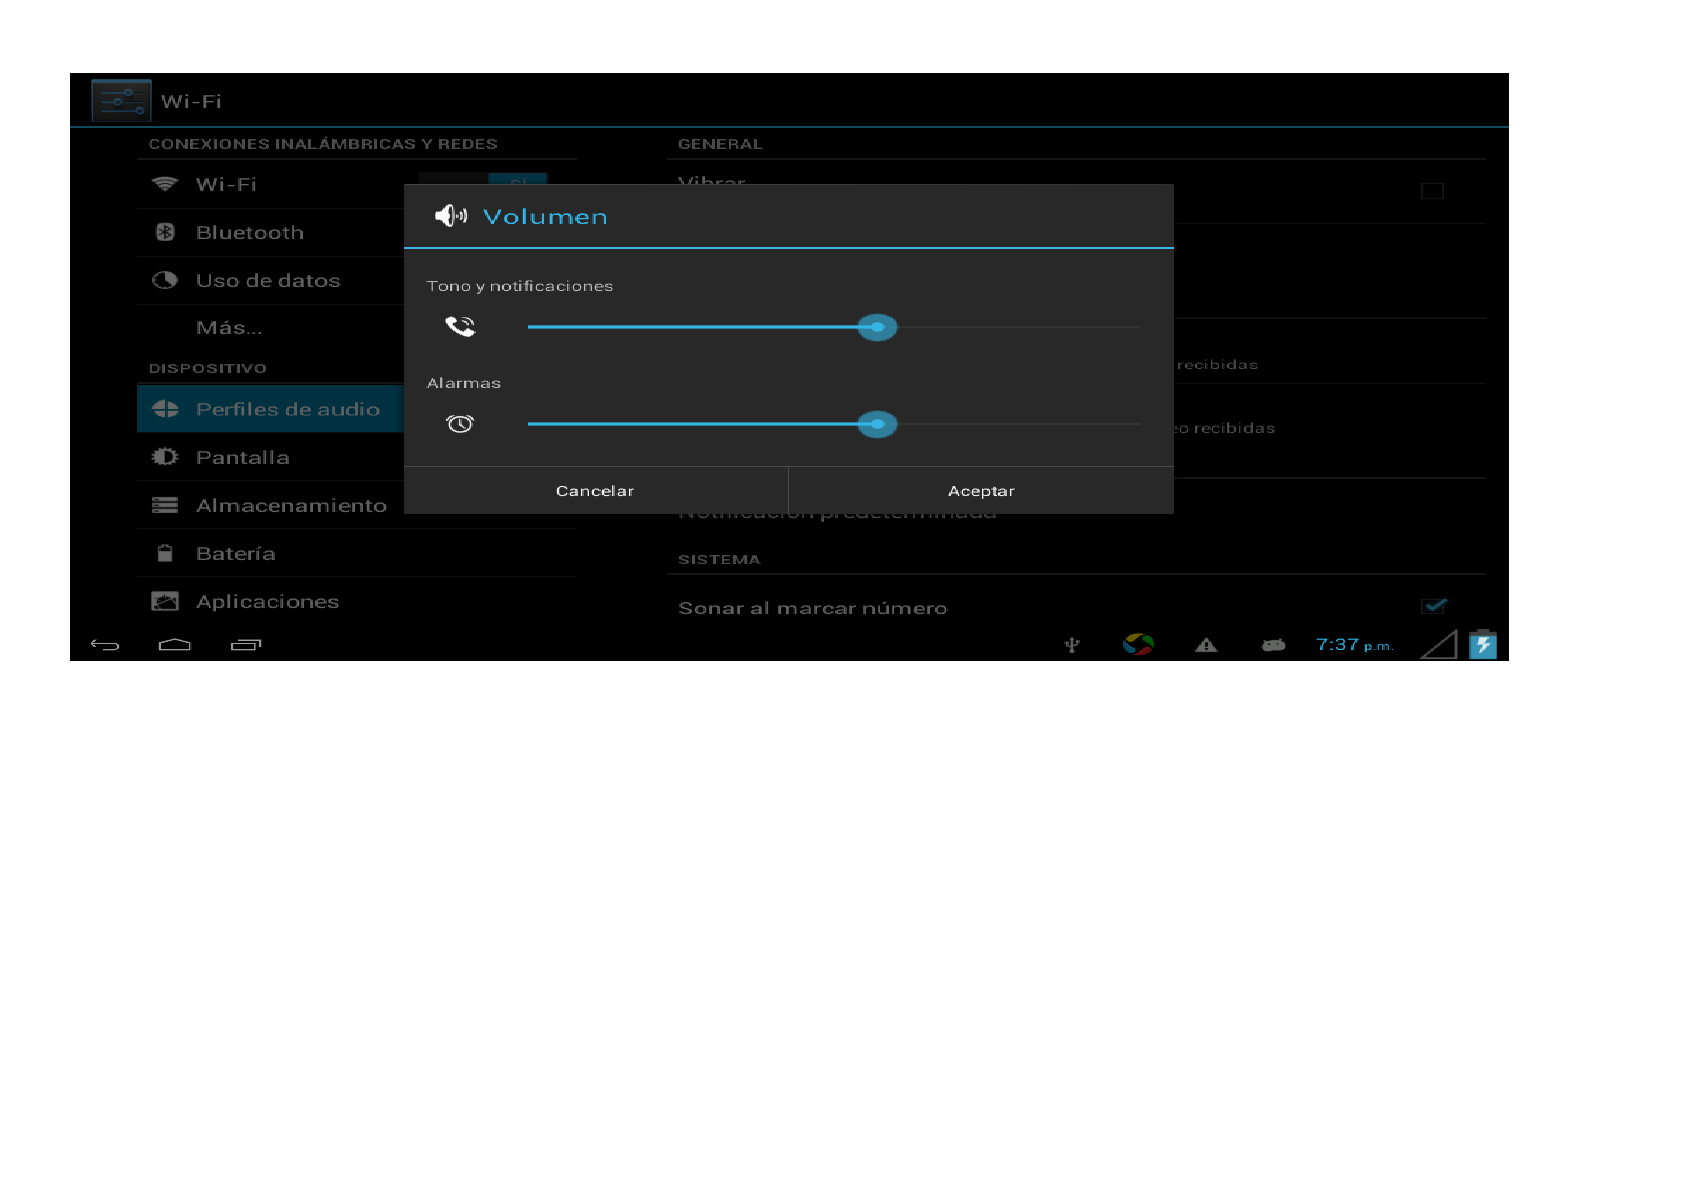
2. Sound settings
The ‘Sound’ settings contain the volume control, and selection of notification sounds, system sounds
20
21
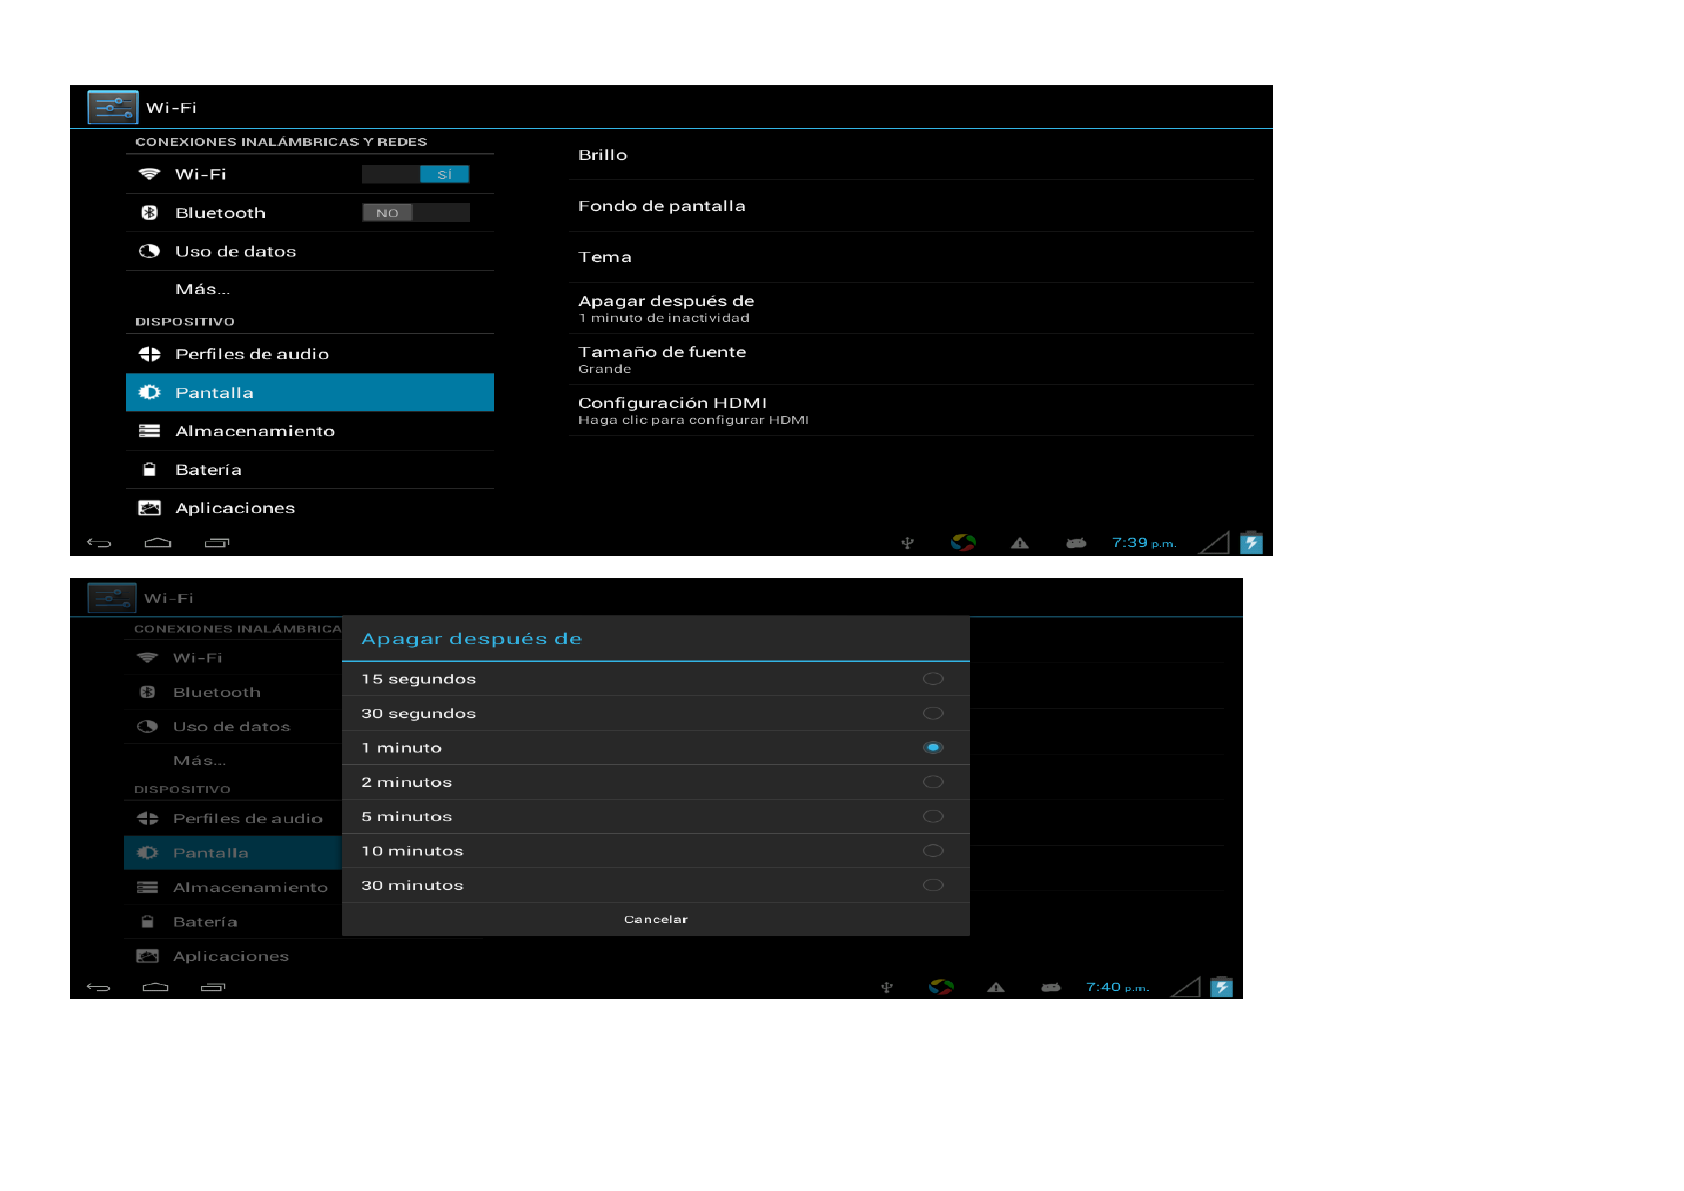
3. Display settings
Includes brightness, Wallpaper, Auto-rotate screen, sleep, Font size
Sleep time selection as 15 seconds, 30 seconds, 1 minute, 2 minutes, 10 minutes or 30 minutes are available. For example, if you select
30 seconds, the display will be switched after 30 seconds of inactivity and screen lock is activated. Press the ‘Power’ button to reactivate
the Display. Push the ‘Lock’ button up to lift the screen lock.
22
23
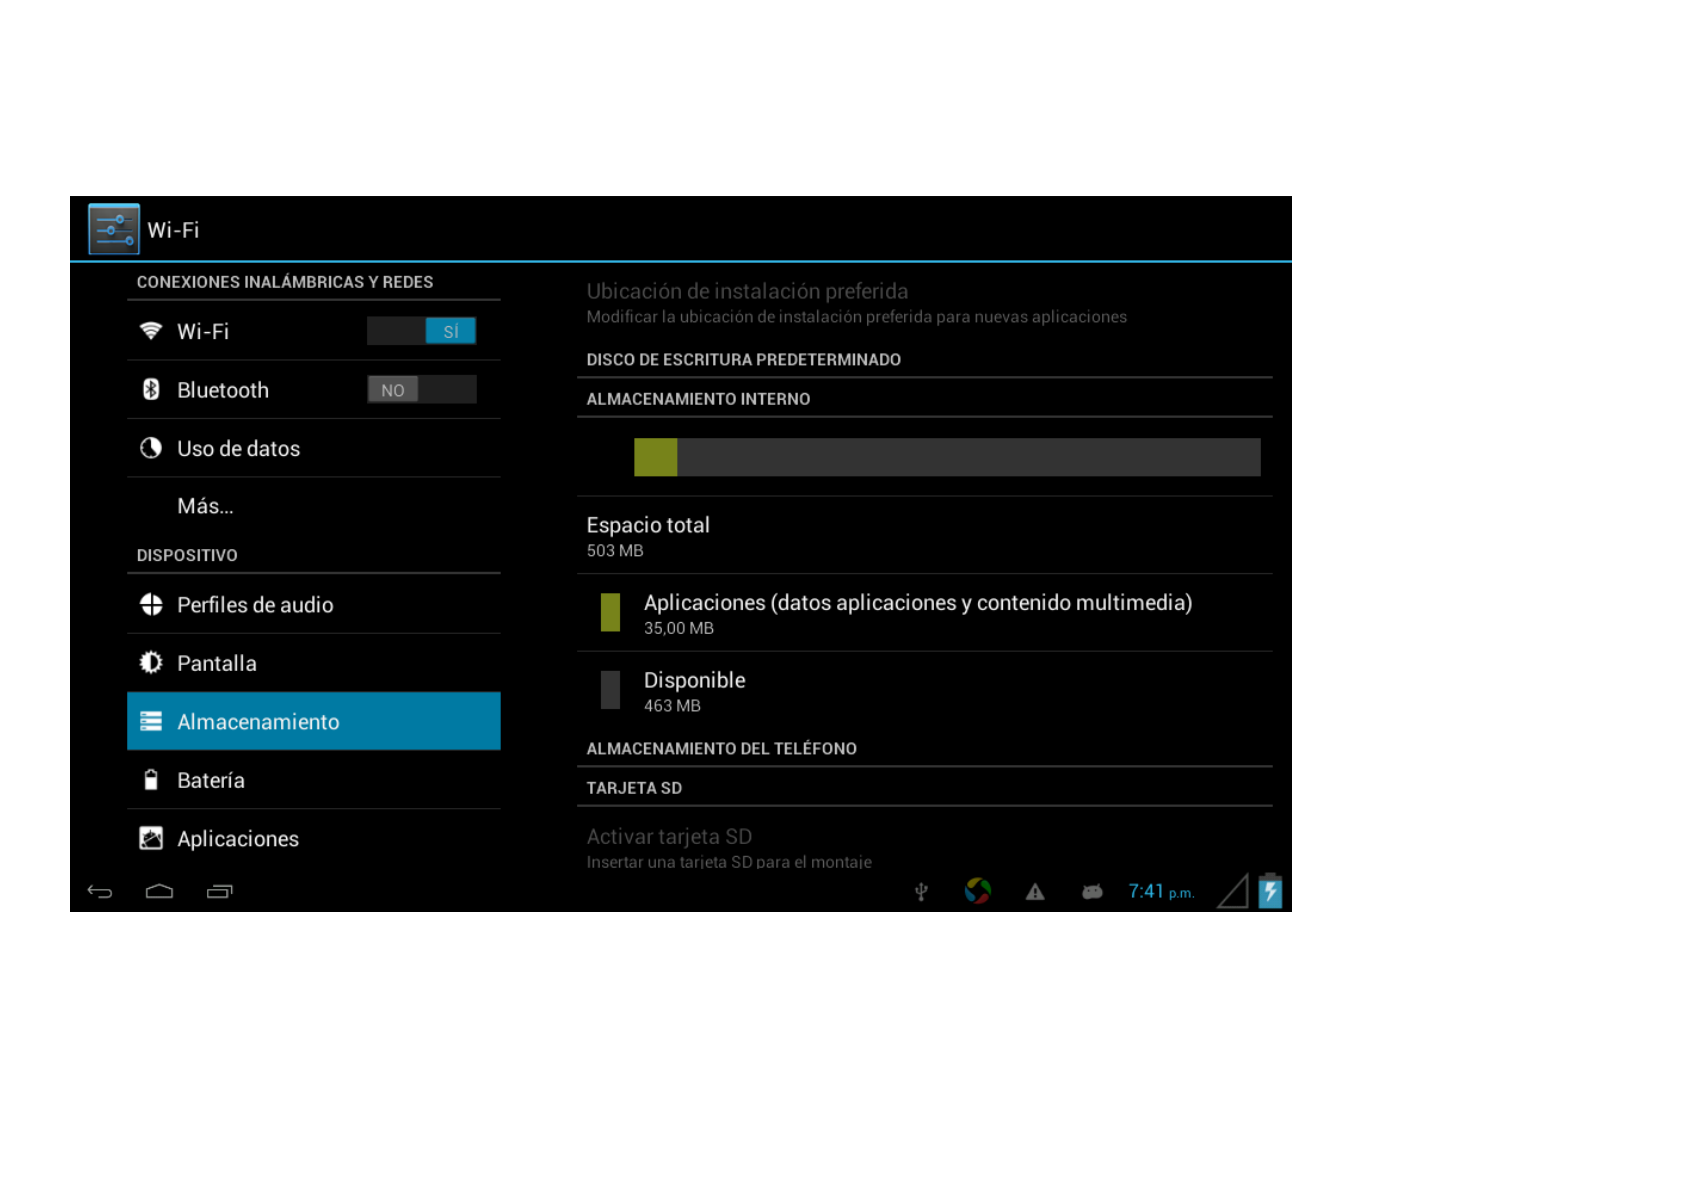
4. Memory
Here the current memory use is displayed.
24
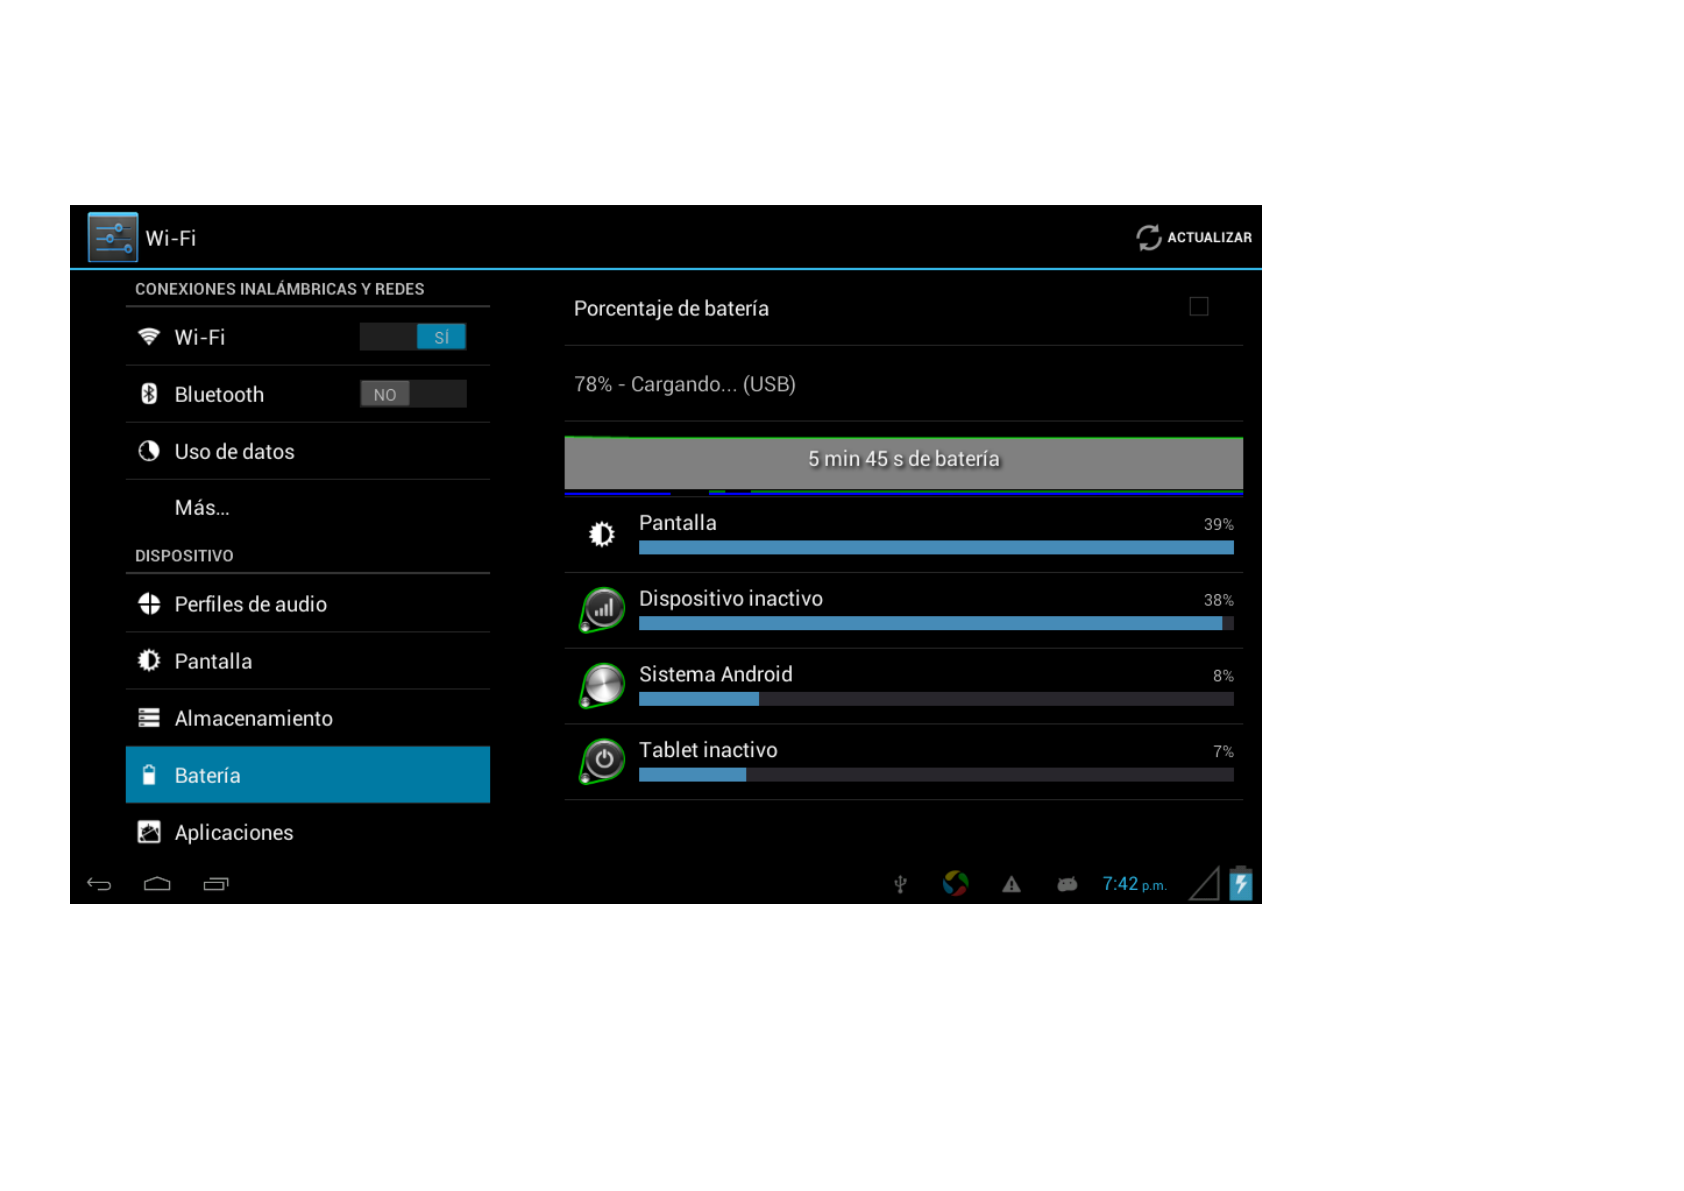
5. Battery
Here the current battery use is displayed.
25
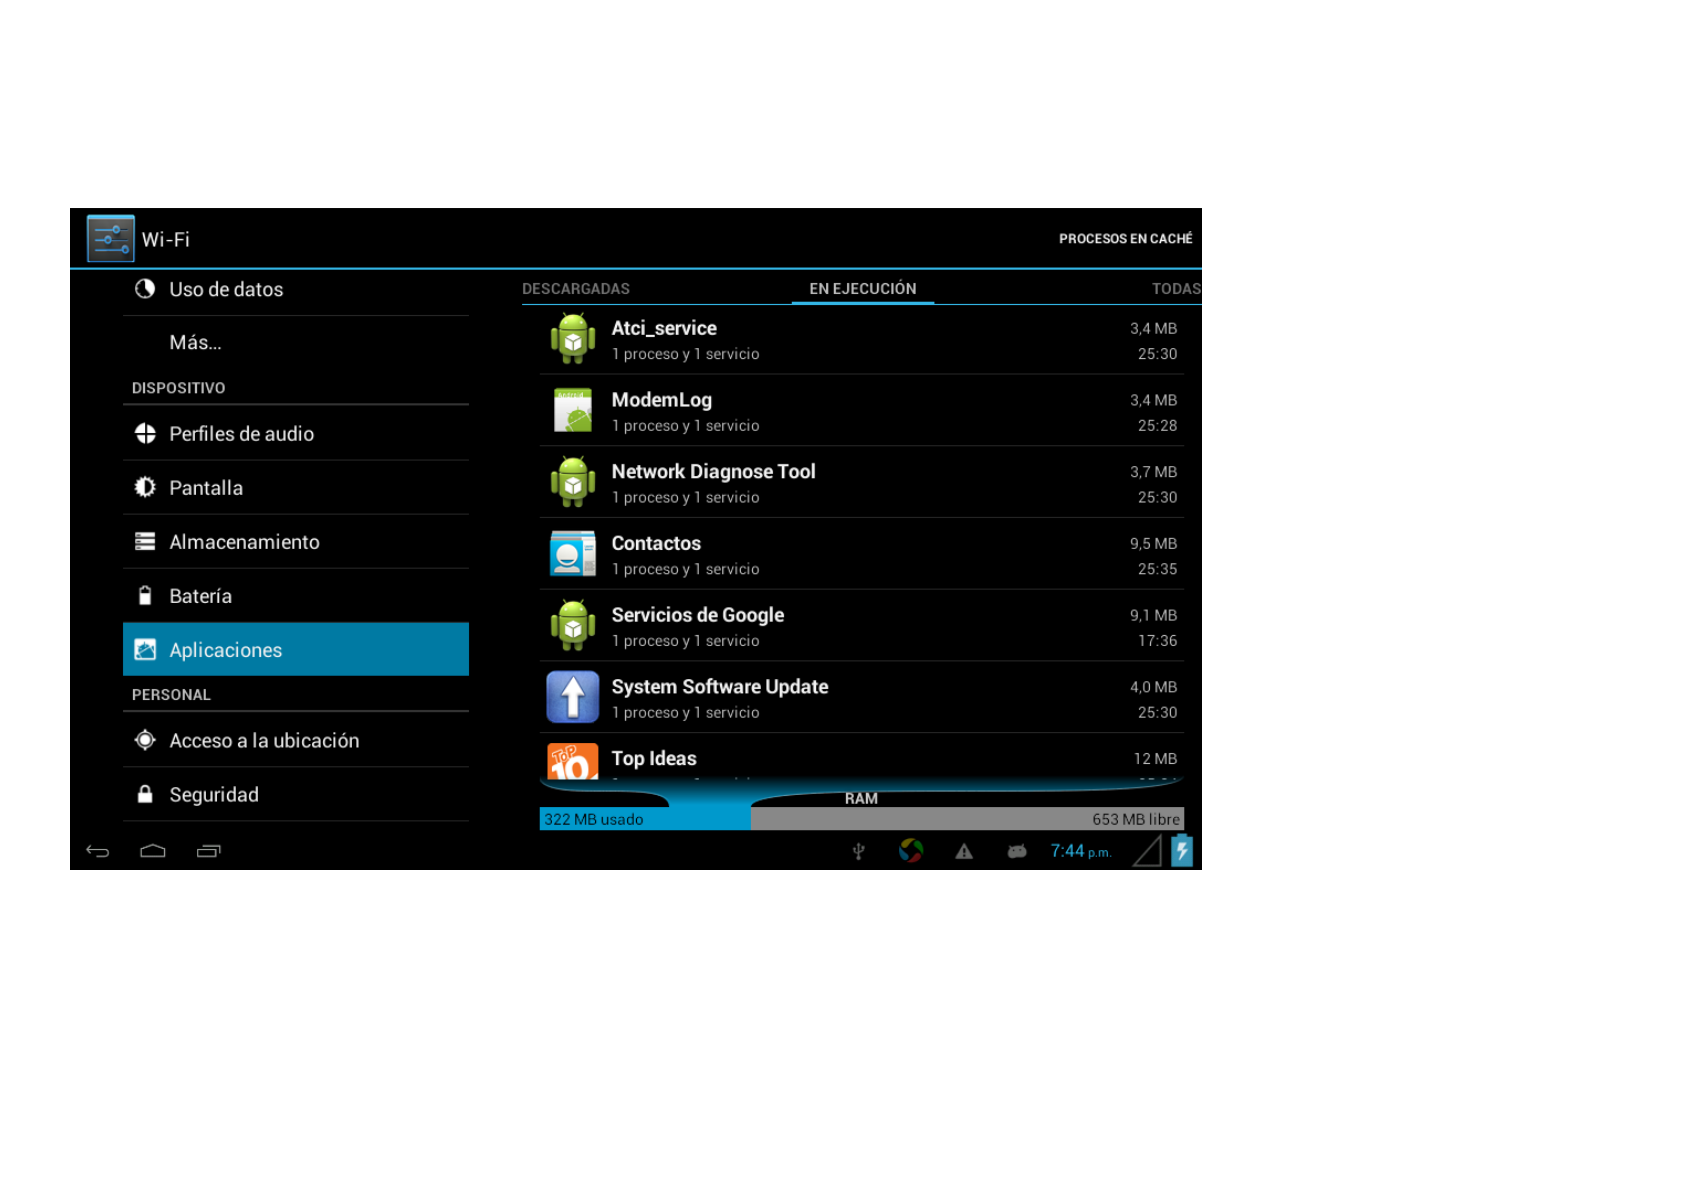
6. Application
Here you can manage your apps and define if apps from sources other than the Android Market are allowed to be installed.
7. Accounts & sync.
Account management: Management of user accounts
26
8. Location services
Here you can activate the automatic recognition of the location.
9. Security
You can also set security passwords which will prevent unauthorized access to your AT7.
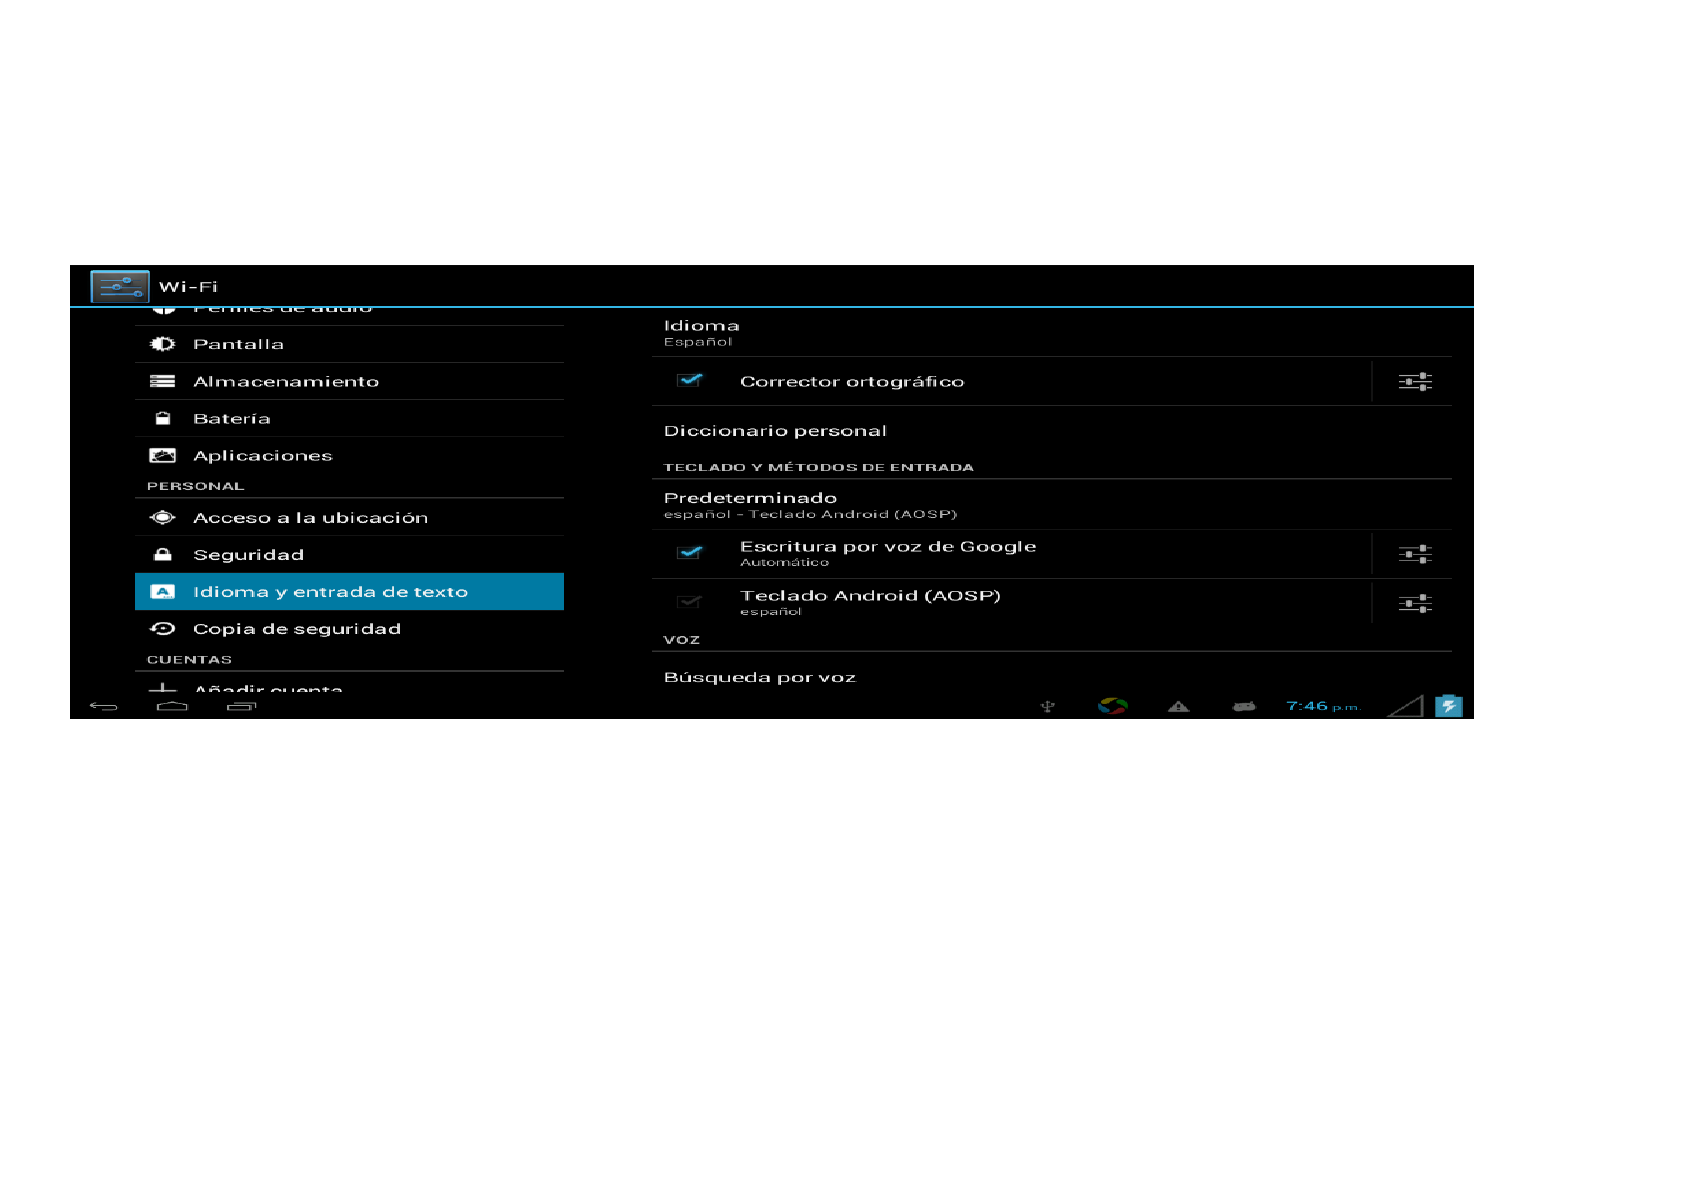
10. Language and keyboard
Set the system language and input method.
27
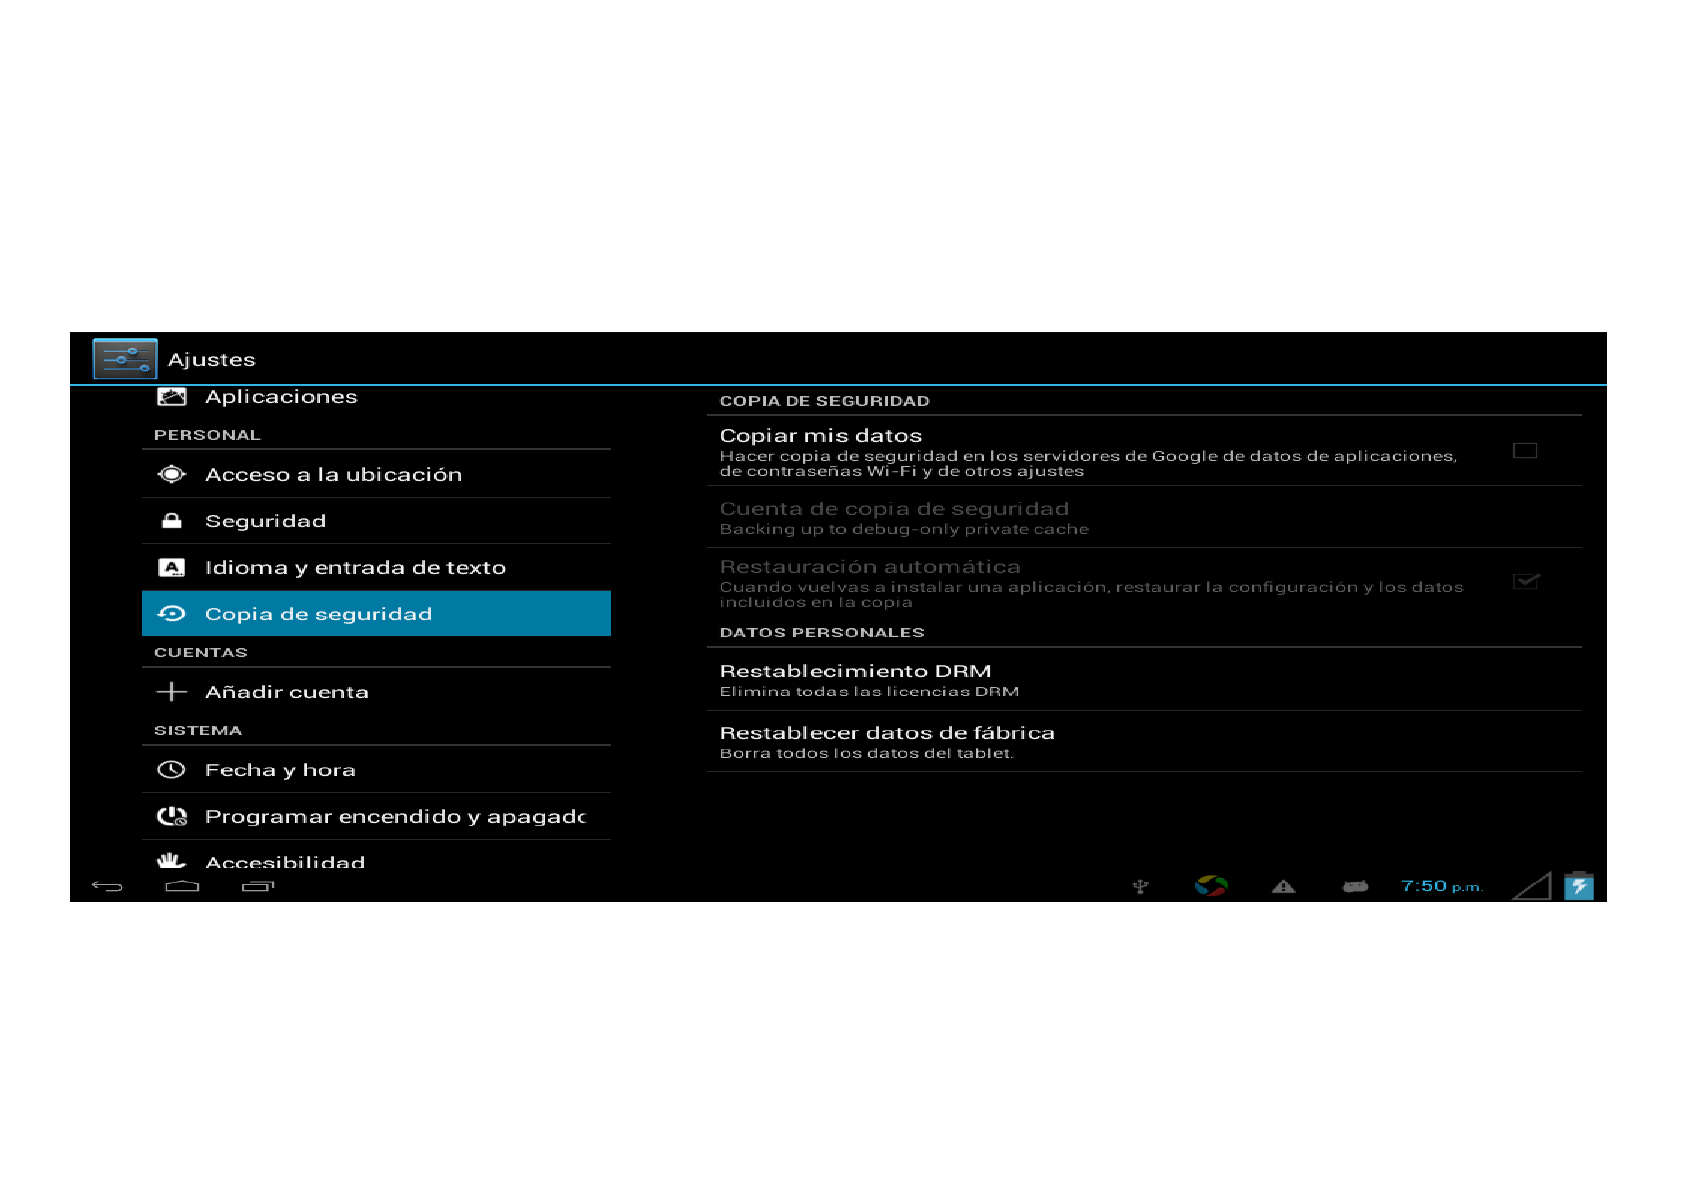
11. Back & Reset
Back up my data: Here you can define if different settings should be stored on Google servers.
Touch ‘Restablecer datos de farbrica’ to reset the device to factory settings.
All settings, self-installed apps and data stored on internal memory can be deleted.
28
12. Date and time
If your network does not support automatic setting of time, you can set the time, time zone and date manually after deactivating
automatic settings.

29
Technical Data
Dual core 3G
7 inches Tablet
SIM
Single
CPU
MT8377 dual-core 1.0 GHz
Operating System
Android 4.1
RAM
512MB DDR3
ROM
4GB EMMC
Display
4:3, 5 points capacitive touch panel
Resolution
1024*600 pixel
Camera
front 0.3MP, rear 2.0MP
Battery
2800 mAh Li-polymer
Charger (USB charger)
5V, 1.5A
G-sensor
Yes
MIC
Yes
HDMI
Yes
GPS
Yes
WIFI
802/11 b/g/n
ATV
Yes
30
FM Yes
I/O Ports
1xearphone
1xUSB(Micro 5PIN) (Charger, OTG)
1xHDMI
1x Micro SD Card-Slot
1x SIM card-Slot
FCC Information
This equipment has been tested and found to comply with the limits for a Class B digital device, pursuant to Part 15 of FCC Rules. These
limits are designed to provide reasonable protection against harmful interference in a residential installation. This equipment generates
uses and can radiate radio frequency energy and, if not installed and used in accordance with the instructions, may cause harmful
interference to radio communications. However, there is no guarantee that interference will not occur in a particular installation. If this
equipment does cause harmful interference to radio or television reception, which can be determined by turning the equipment off and on,
the user is encouraged to try to correct the interference by one or more of the following measures:
Reorient or relocate the receiving antenna.
Increase the separation between the equipment and receiver.
Connect the equipment into an outlet on a circuit difference from that to which the receiver is connected.
Consult your local Radio Shack store or an experience radio/TV technician for help.
Changes or modifications not expressly approved by Radio Shack may cause interference and void the user’s authority to operate the
equipment.
This device complies with part 15 of the FCC Rules. Operation is subject to the following two conditions: (1) This device may not cause
harmful interference, and (2) this device must accept any interference received, including interference that may cause undesired
operation.
Remark:
This device does not support voice calls next to the ear,
This device supports voice mode limited to speaker mode or headset operations only

31
This equipment complies with FCC radiation exposure limits set forth for an uncontrolled
environment. End user must follow the specific operating instructions for satisfying RF
exposure compliance. This transmitter must not be co-located or operating in conjunction with
any other antenna or transmitter.
The mobile device is designed to meet the requirements for
exposure to radio waves established by the Federal Communications
Commission (USA). These requirements set a SAR limit of 1.6 W/kg
averaged over one gram of tissue. The highest SAR value reported under
This standard during product certification for use when properly worn on the body is 1.171W/kg.
SAR Information Statement