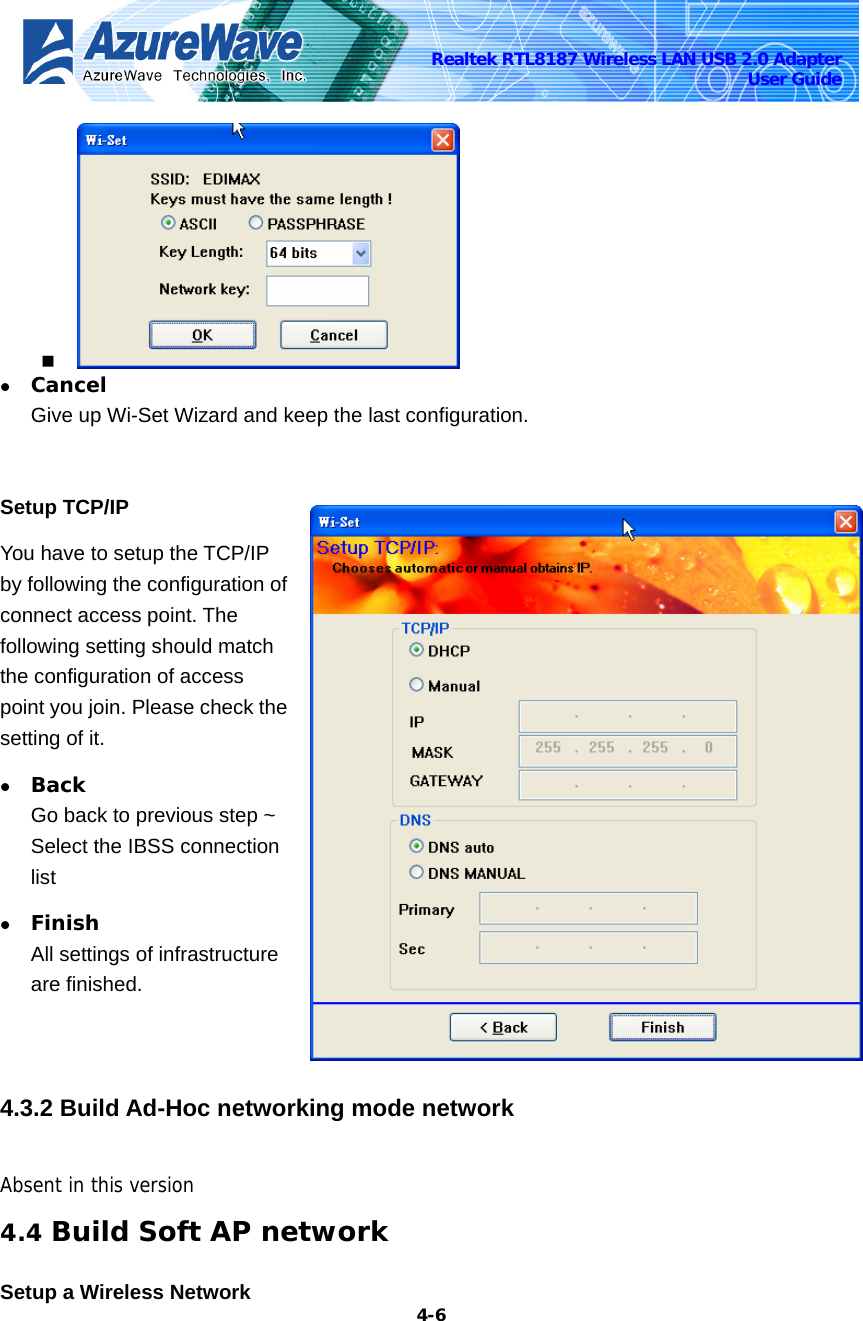
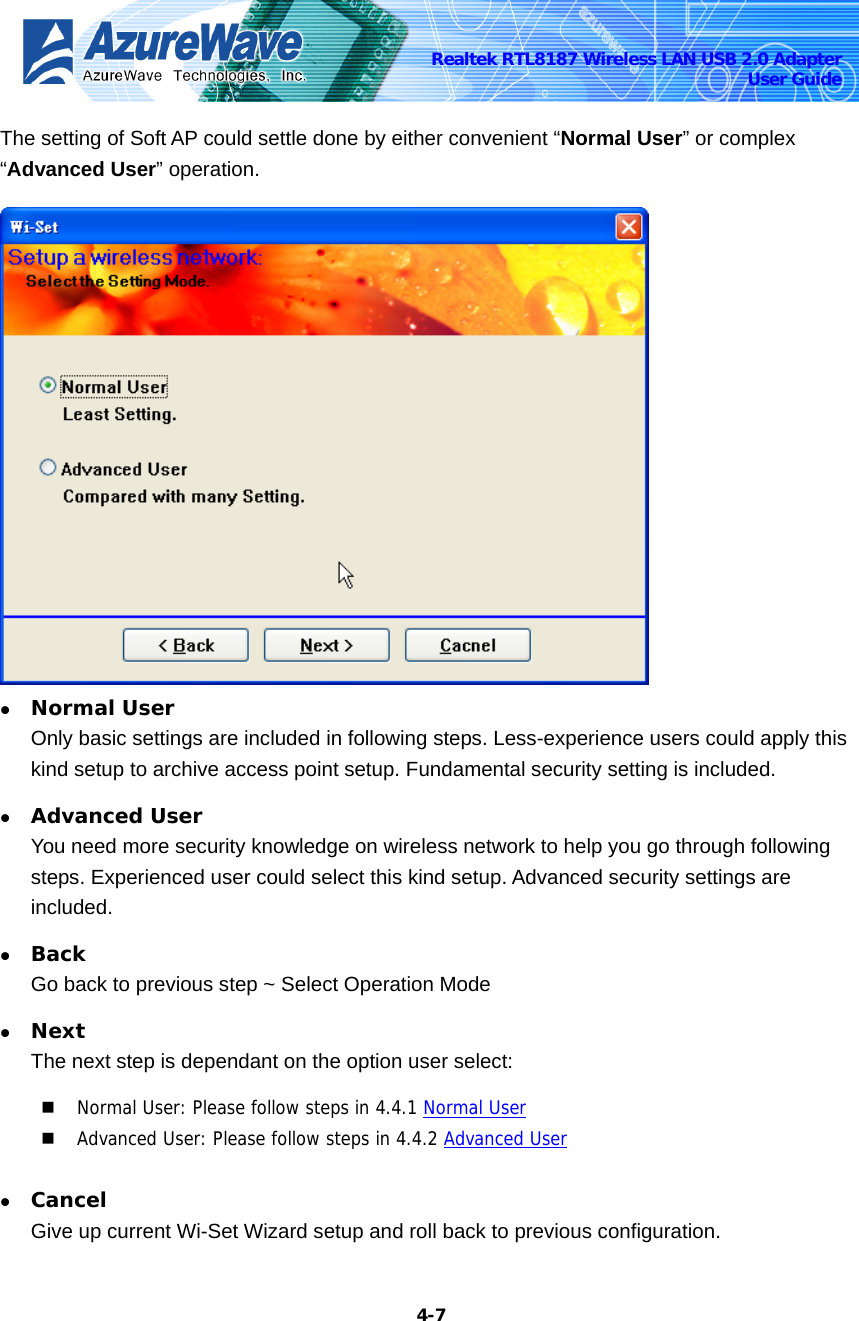
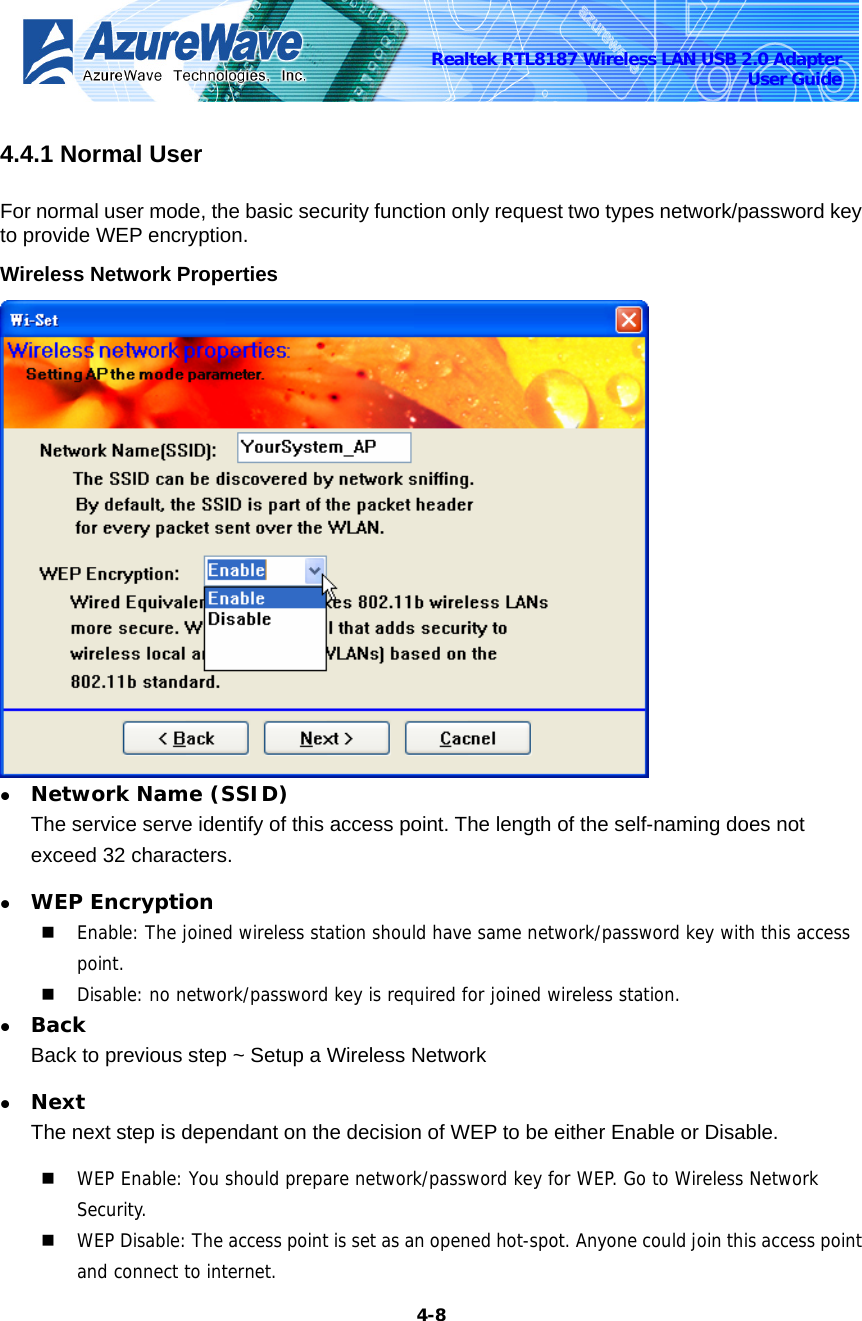
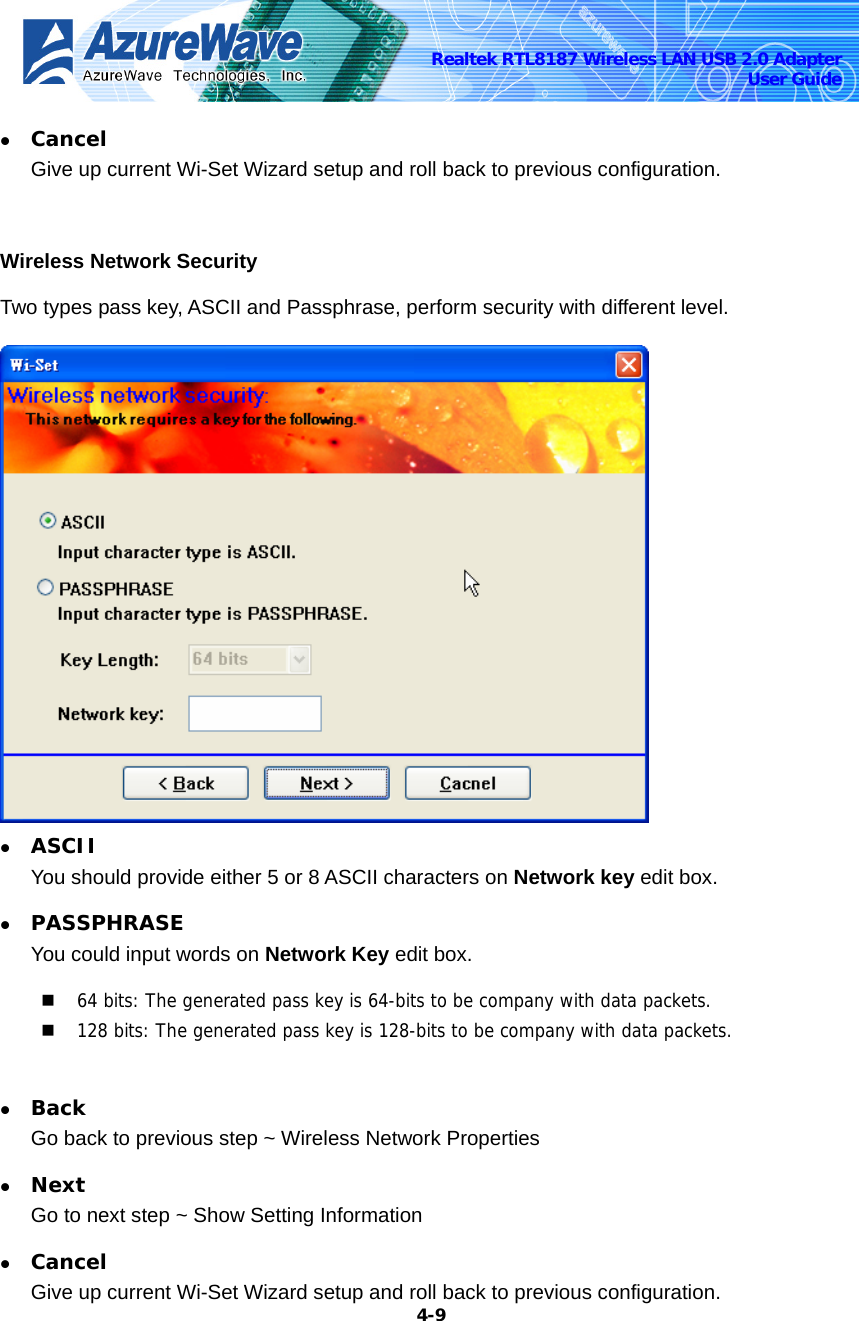
AzureWave Technologies GA800 USB interface WLAN module User Manual
AzureWave Technologies, Inc. USB interface WLAN module Users Manual
UserManual.wiki
>
AzureWave Technologies
>
GA800 User Manual
Users Manual
Navigation menu
Upload a User Manual
Namespaces
Wiki Guide
HTML
PDF
Info
Views
User Manual
Discussion / Help
Navigation


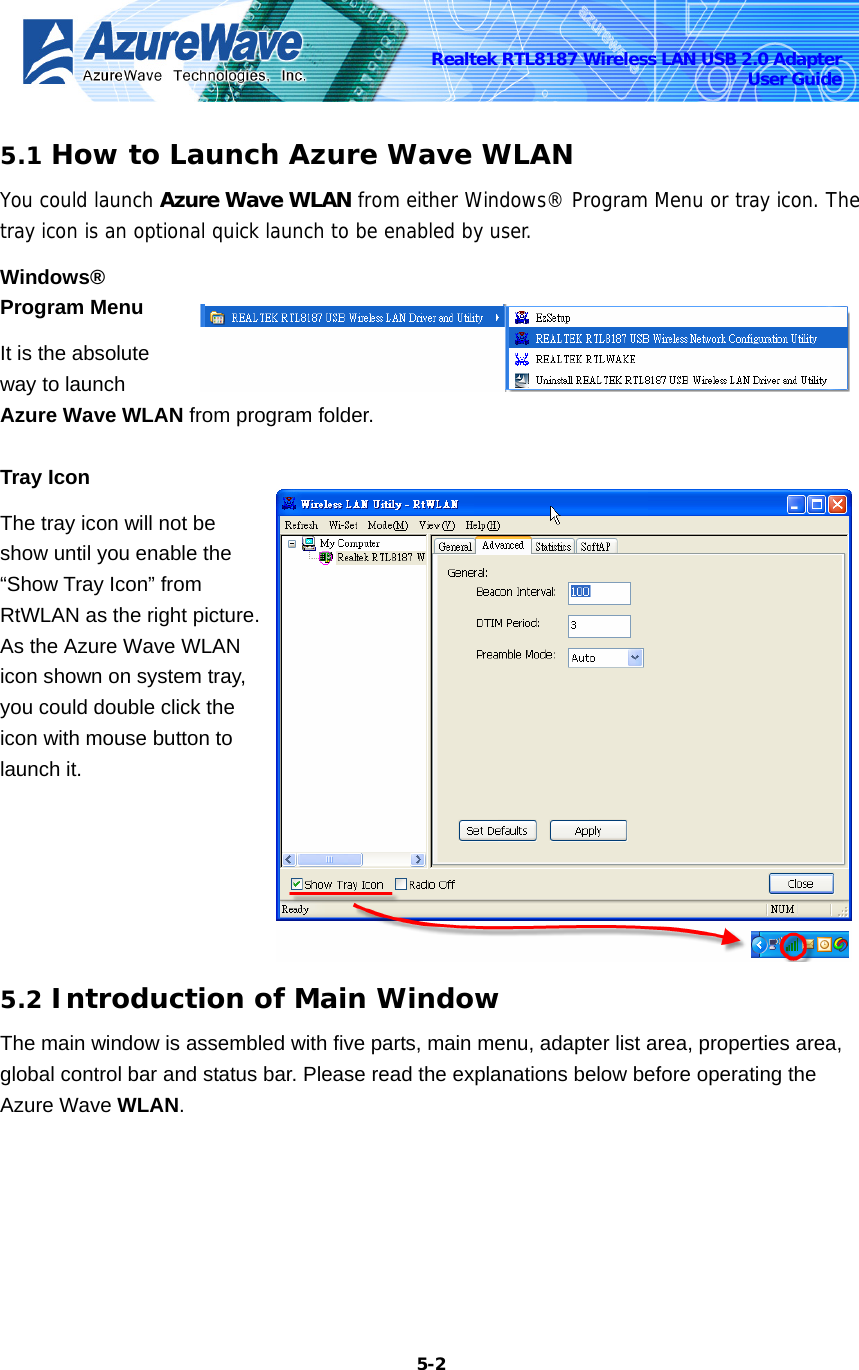
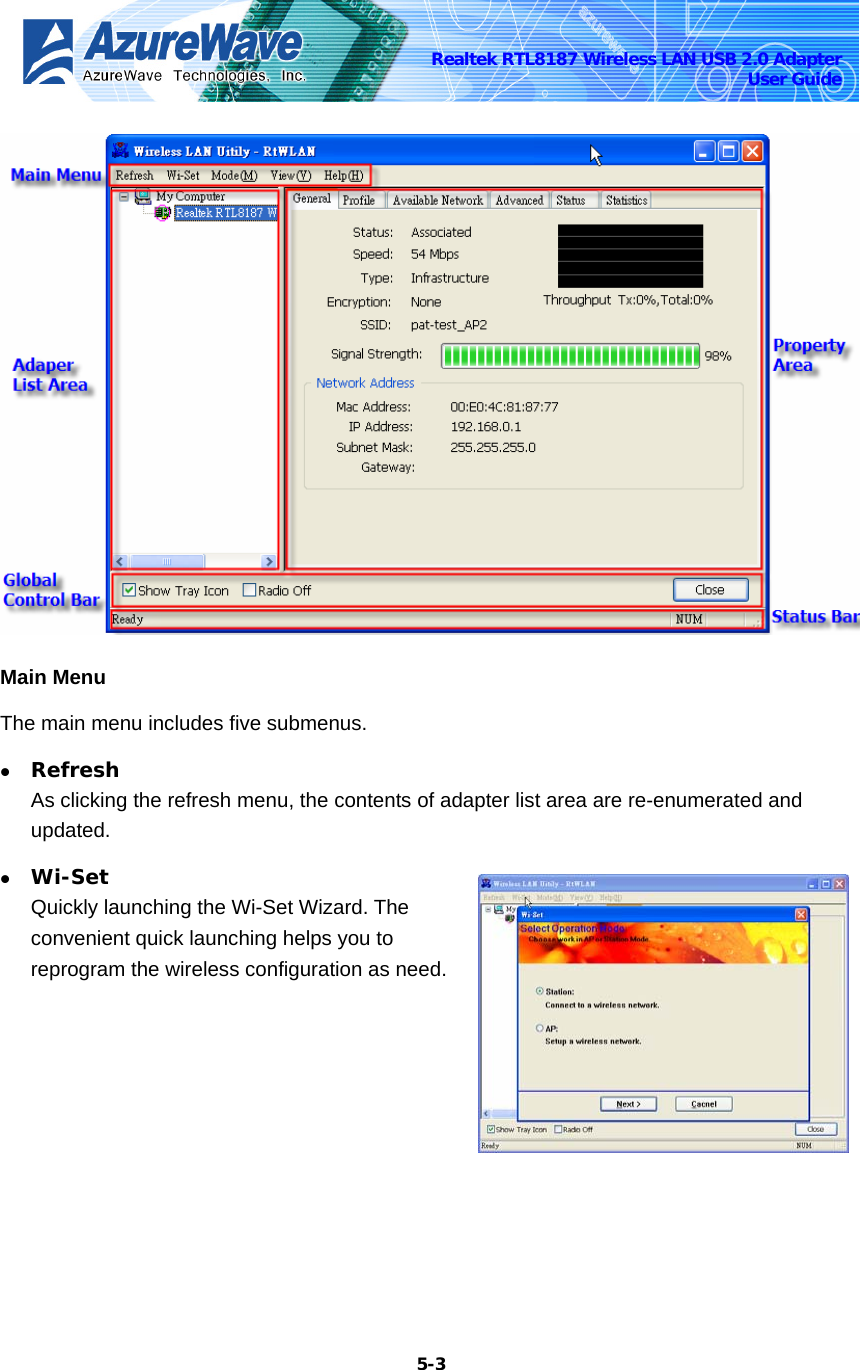
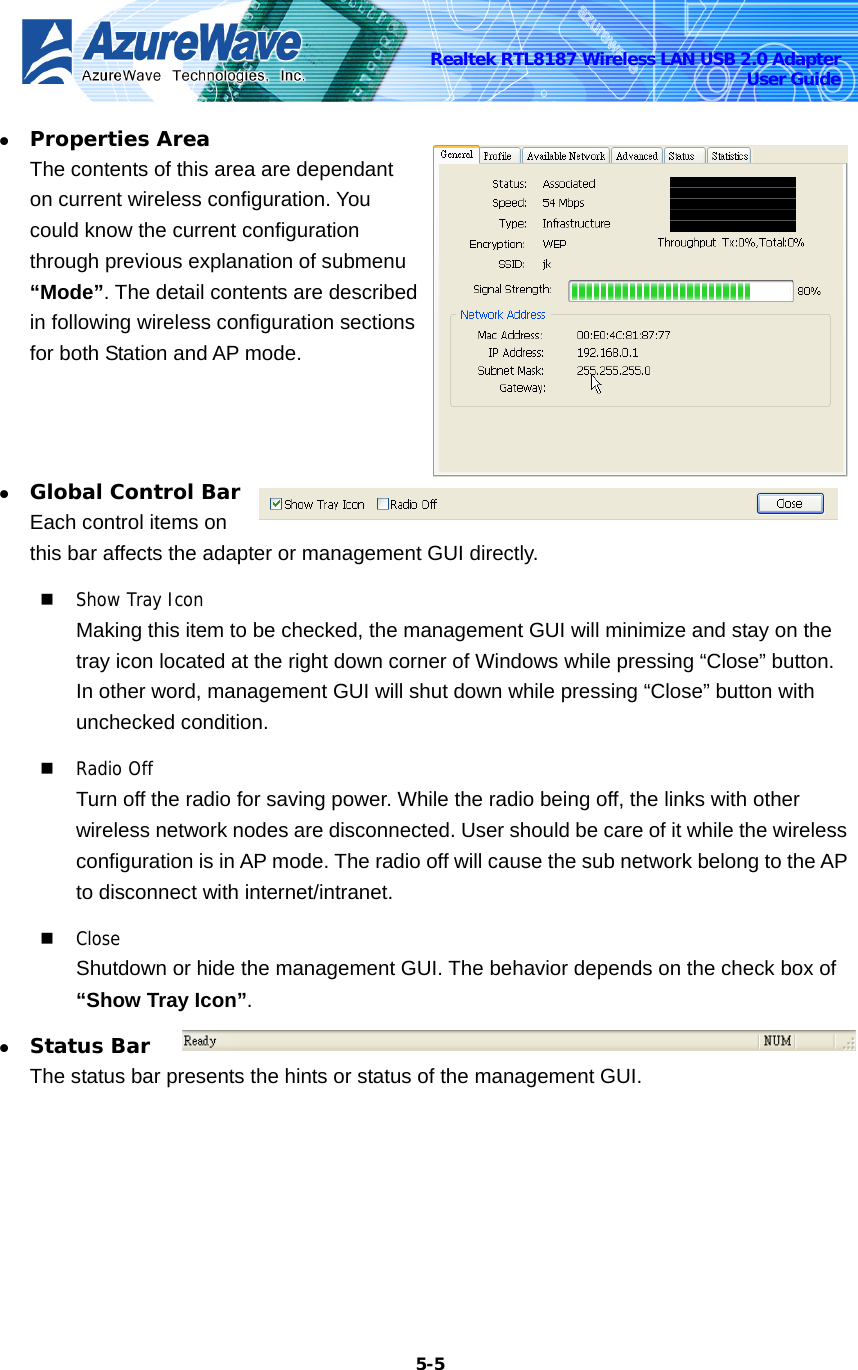
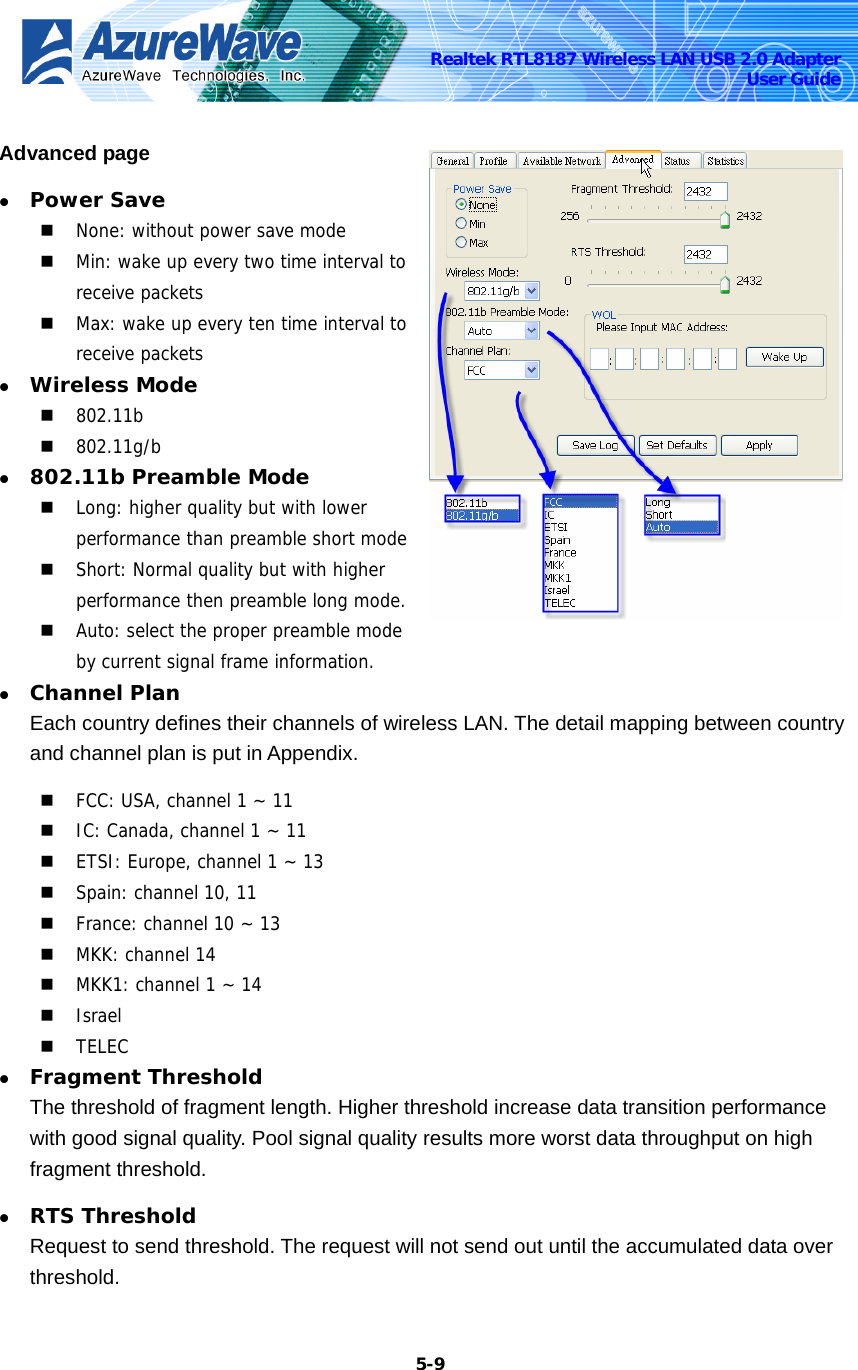
![5-4Realtek RTL8187 Wireless LAN USB 2.0 Adapter User Guide z Mode Quickly switching wireless configuration to be either [Station] or [Access Point]. The item with check mark in front is the current wireless configuration. z View Enable/disable the present of status bar. With check mark in front will make the status bar showing up. Otherwise the status bar is hidden. z Help Click the menu item “About Azure Wave WLan” to show the about dialog. The about dialog shows you the application version and license information. z Adapter List Area This area displays all connected adapters on this system for mutiple adatper installations. The easy switch helps user to change the selected adapter by one click. The contents of properties area are dependant on wireless configuration that the selected adapter was set up. For single adatper installed system, the only one adapter is always selected.](https://usermanual.wiki/AzureWave-Technologies/GA800/User-Guide-581847-Page-32.png)