AzureWave Technologies NU138 IEEE 802.11b/g/n USB Wireless Adapter User Manual AW NU138 2010 10 4 rev
AzureWave Technologies, Inc. IEEE 802.11b/g/n USB Wireless Adapter AW NU138 2010 10 4 rev
User Manual
AW-NU138
IEEE 802.11b/g/n
USB Wireless Adapter
User’s Manual
I. Introduction
i
ii
i. Overview
. Overview. Overview
. Overview
A
zurewave
AW-NU138
USB 2.0 Wireless Adapter is a highly integrated wireless local area
network (WLAN) solution to let users enjoy the digital content through the latest wireless
technology without using extra cables and cords. It provides easy-to-use, high performance, cost
effective and low power solution. Moreover, AW-NU138 enables compatible high-speed wireless
connectivity within home, business and public access wireless networks.
Compliant with the IEEE 802.11n/g/b standard, AW-NU138 uses Direct Sequence Spread Spectrum
(DSSS), Orthogonal Frequency Division Multiplexing (OFDM), BPSK, QPSK, CCK and QAM
baseband modulation technologies. When you are using AW-NU138, a high level of integration and
full implementation of the power management functions specified in the IEEE 802.11 standard can
minimize system power requirements.
The AW-NU138 802.11n/g/b Wireless USB Adapter provides up to 128-bit level of WEP security to
your wireless data transfers. It is able to run in the operating systems of Windows XP/Vista in either
Infrastructure mode or Ad-Hoc mode. Comparing to previous wireless technology, AW-NU138 got
great improvements on speed and range. AW-NU138 is able to double the data rate up to 150Mbps.
ii. Features
◎ USB 2.0 Wireless Adapter
◎ Compliant with IEEE 802.11n/g/b standard
◎ two antenna to support 1 (Transmit) x 1 (Receive) technology
◎ High speed wireless connection up to 150Mbps
(For download only, it must connect to the other two Spatial Streams Modulation Access Point)
◎ High performance and low power consumption
◎Enhanced wireless security with 128-bit WEP encryption an WPA
iii. Product Review
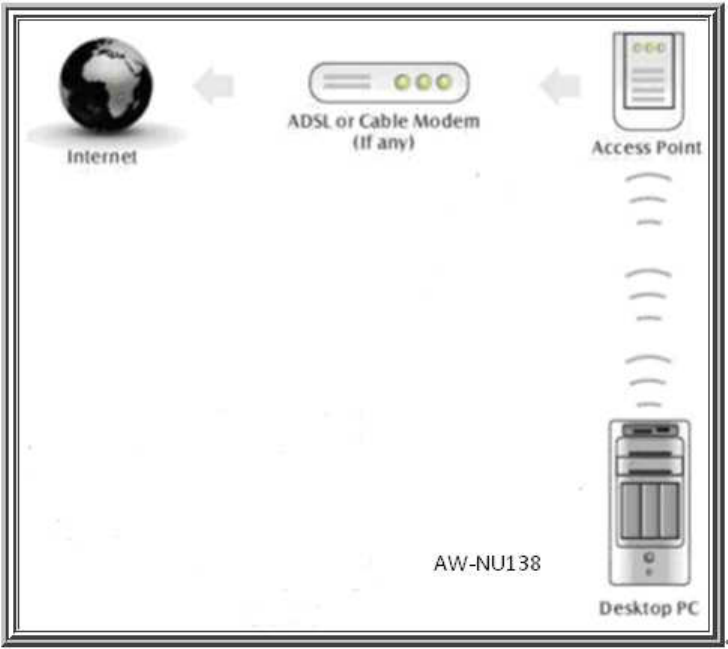
1. Connection Mode
◎Infrastructure Mode
Infrastructure mode needs an access point to establish the network, which can provide wireless accesses
within valid range for users to communicate with others or transmit data with a wired network. There are
several benefits of Infrastructure networking:
√ Roaming: a wireless LAN enabled computer can physically move from the operating range of one
access point to the other without losing connection. There is a quick association made between new
access point and wireless device as the computer traverses from the coverage of one access point to
another.
√ Range Extension: each wireless LAN enabled computer within the range of access point can
communicate with other wireless LAN enabled computers within the effective range from the access
point.
√ Wired to wireless LAN connection: the access point will establish a bridge between wireless LAN
and other wired counterparts.
Infrastructure Mode

◎Ad-hoc Mode
The difference between Ad-hoc mode and Infrastructure mode is that Ad-hoc mode does not need the
access point or router. When you use this mode, your computer will act as a server within the valid range
and connect directly to others in the same LAN workgroup.
It is recommended to choose this mode when there is no access point showed on your wireless
network.
II. Installation
i. System Requirements
Before you install AW-NU138, please make sure your system meets the following requirements.
*Desktop or Laptop or applications with USB 1.1/2.0 port
*Minimum of 64MB system memory
*Operating system: XP/Vista
*An optical drive/CD-ROM for utilities and driver installation
ii. Hardware Installation
1. Find an available USB 1.1/2.0 port on your desktop or laptop or other applications.
2. Plug AW-NU138Wireless USB adapter into USB port of desktop or laptop or other applications.
iii. Operation Range
The operating range of AW-NU138 varies from the working environment. However, this device
made improvement on speed and range, which also reduced dead spots in coverage area.
By default, this USB wireless adapter will automatically adjust the data rate. The transmission
speed may vary according to the environment. The closer the wireless stations are the better the
signal and transmission speed they will receive.
iv. Setup: Windows XP OS
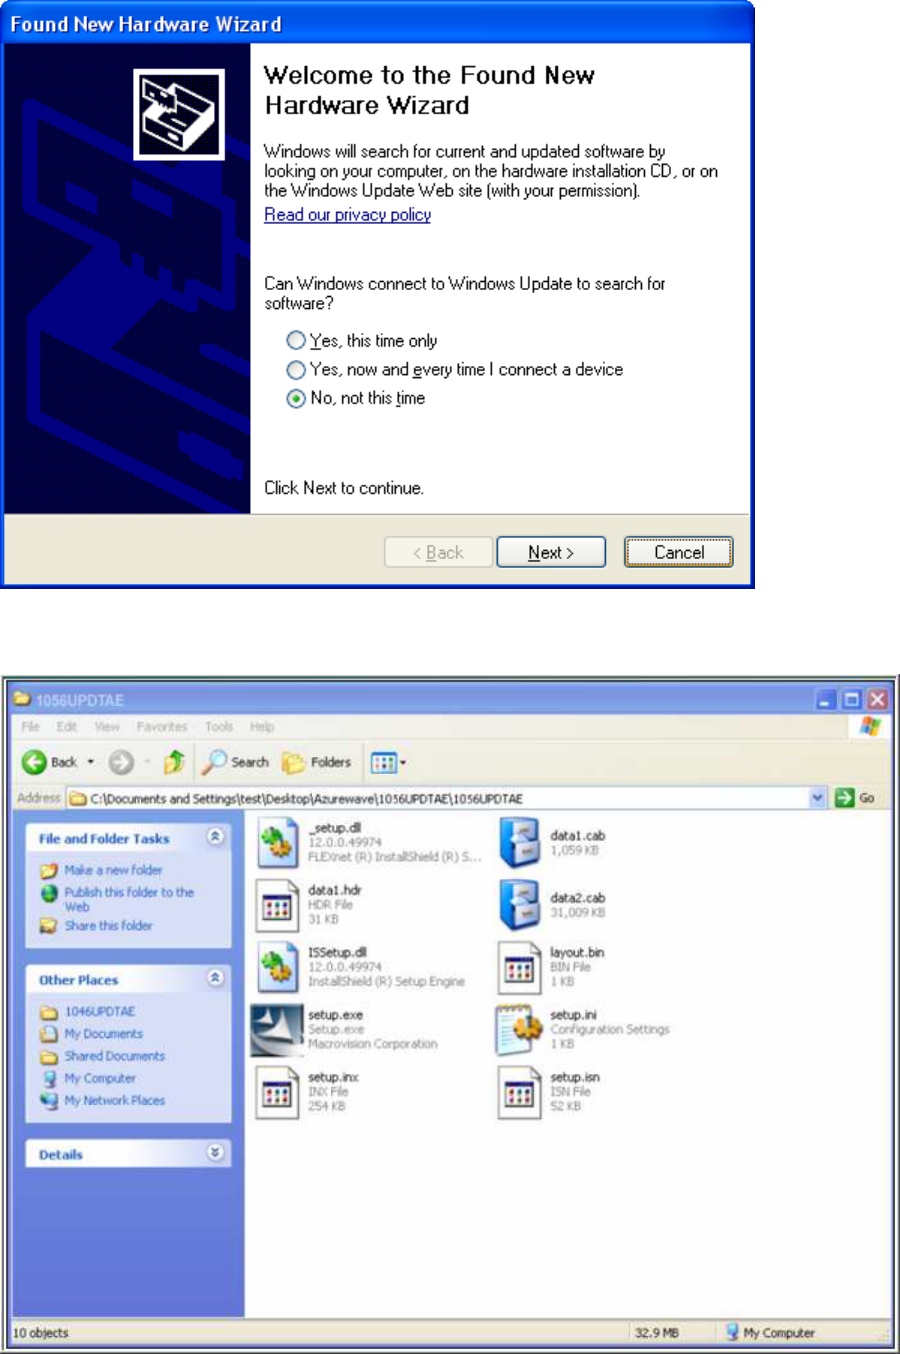
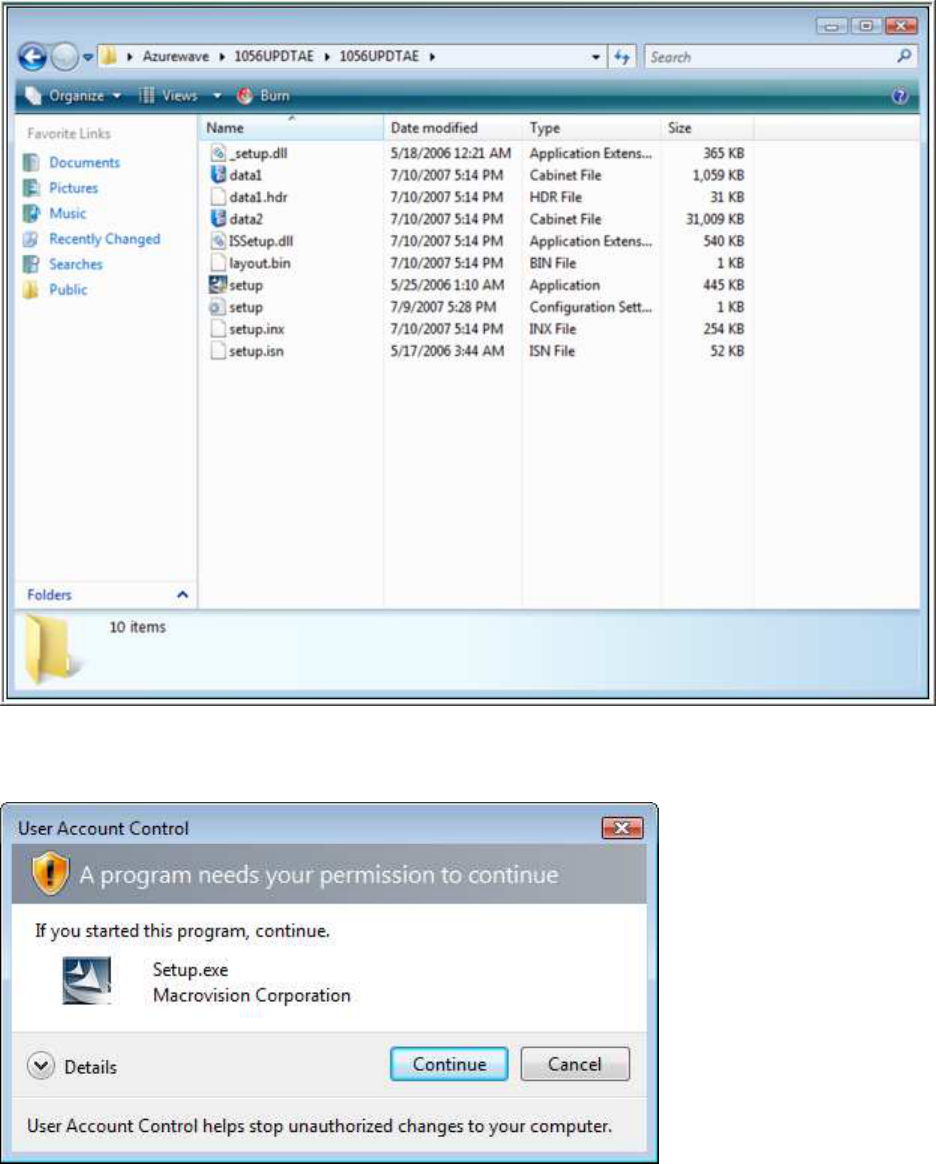
If your computer is running a Windows operating system, it will automatically detect the
AW-NU138 after the system boots up and displays a “Found New Hardware Wizard” window.
Please click [Cancel] and proceed with the following steps.
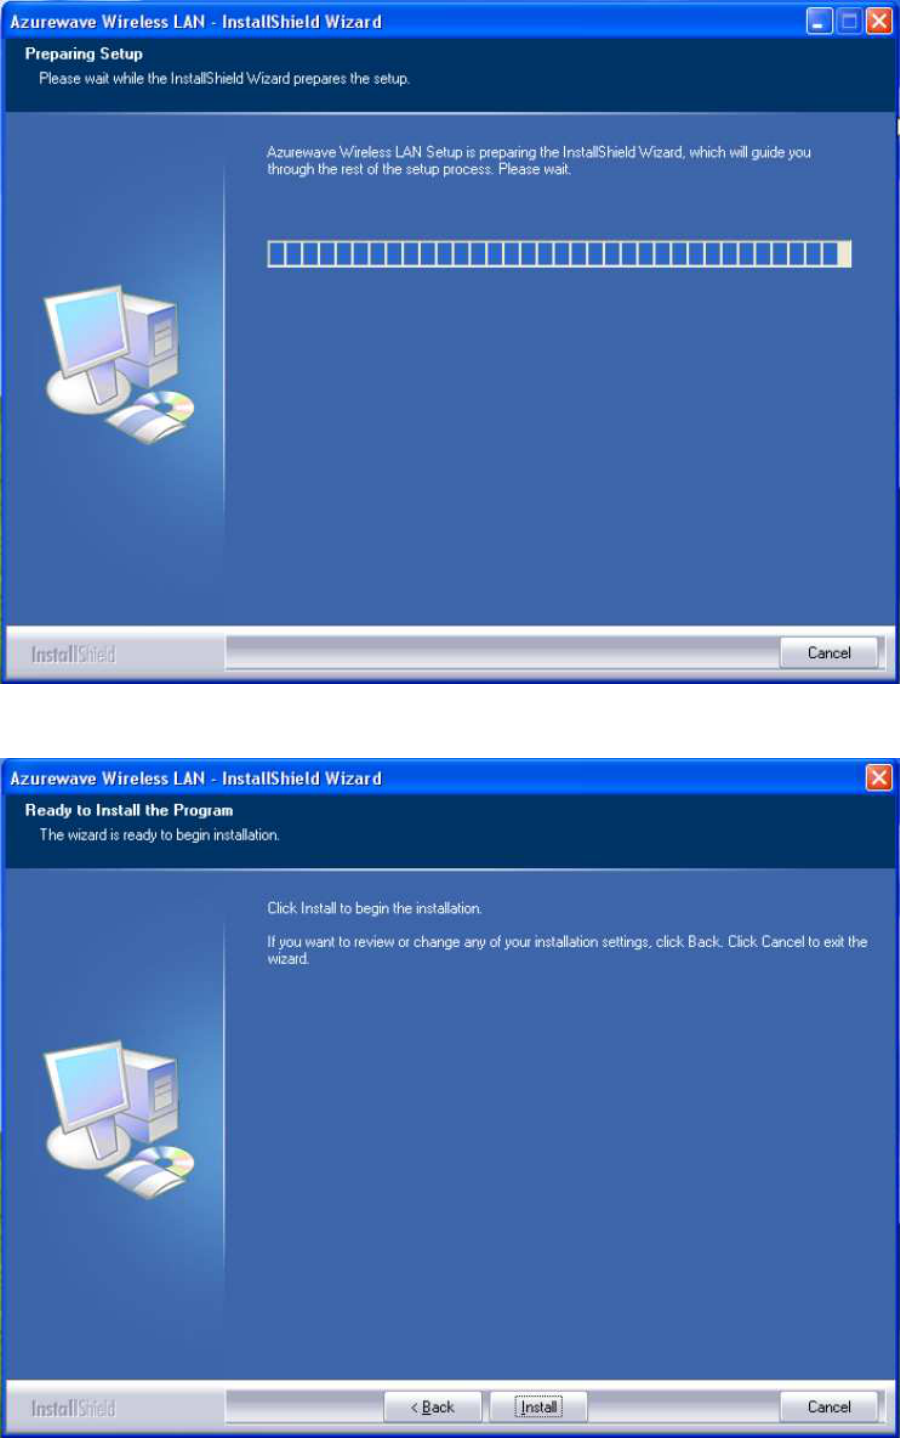
1. Find out the Driver, and launch the Setup Wizard
2. Please wait few seconds for wizard to prepare installation
3. Please select click [Install] to proceed
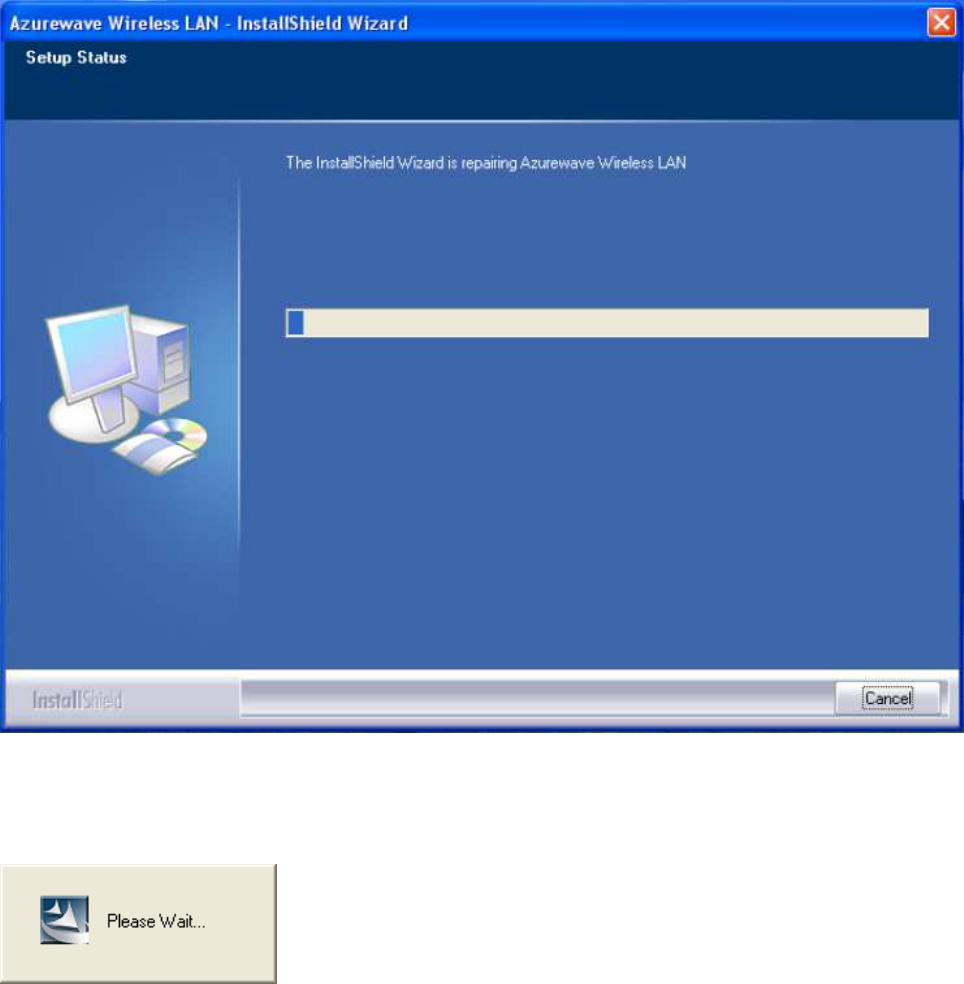
4. The Wizard is running installation
5. Please wait few seconds for Wizard to setup
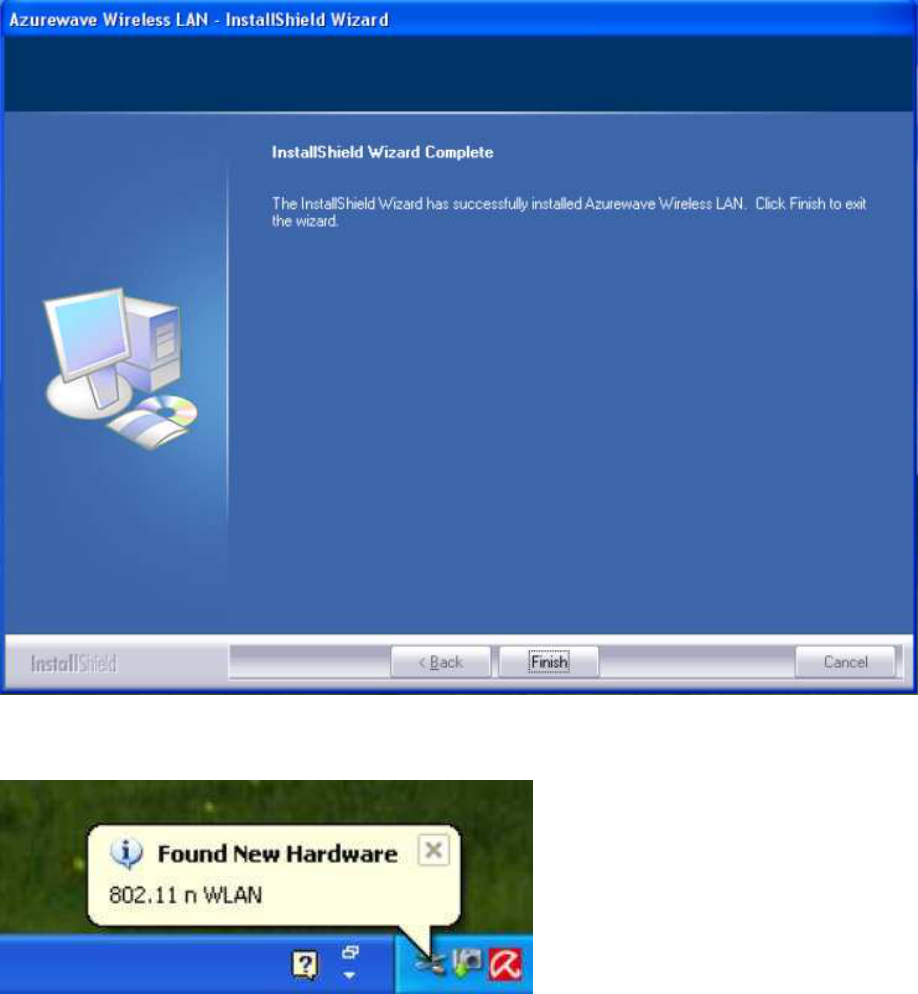
6. When it is completed, please click [Finish]
9. When the process is finished, the system will show a message of “Found New Hardware”
v. Setup: Windows Vista OS
Please follow the steps to complete installation.
1. Launch the setup driver
2. When you see the permission dialogue box, please click [Continue]
3. Now the Wizard is preparing installation
4. Please click [Install] to proceed
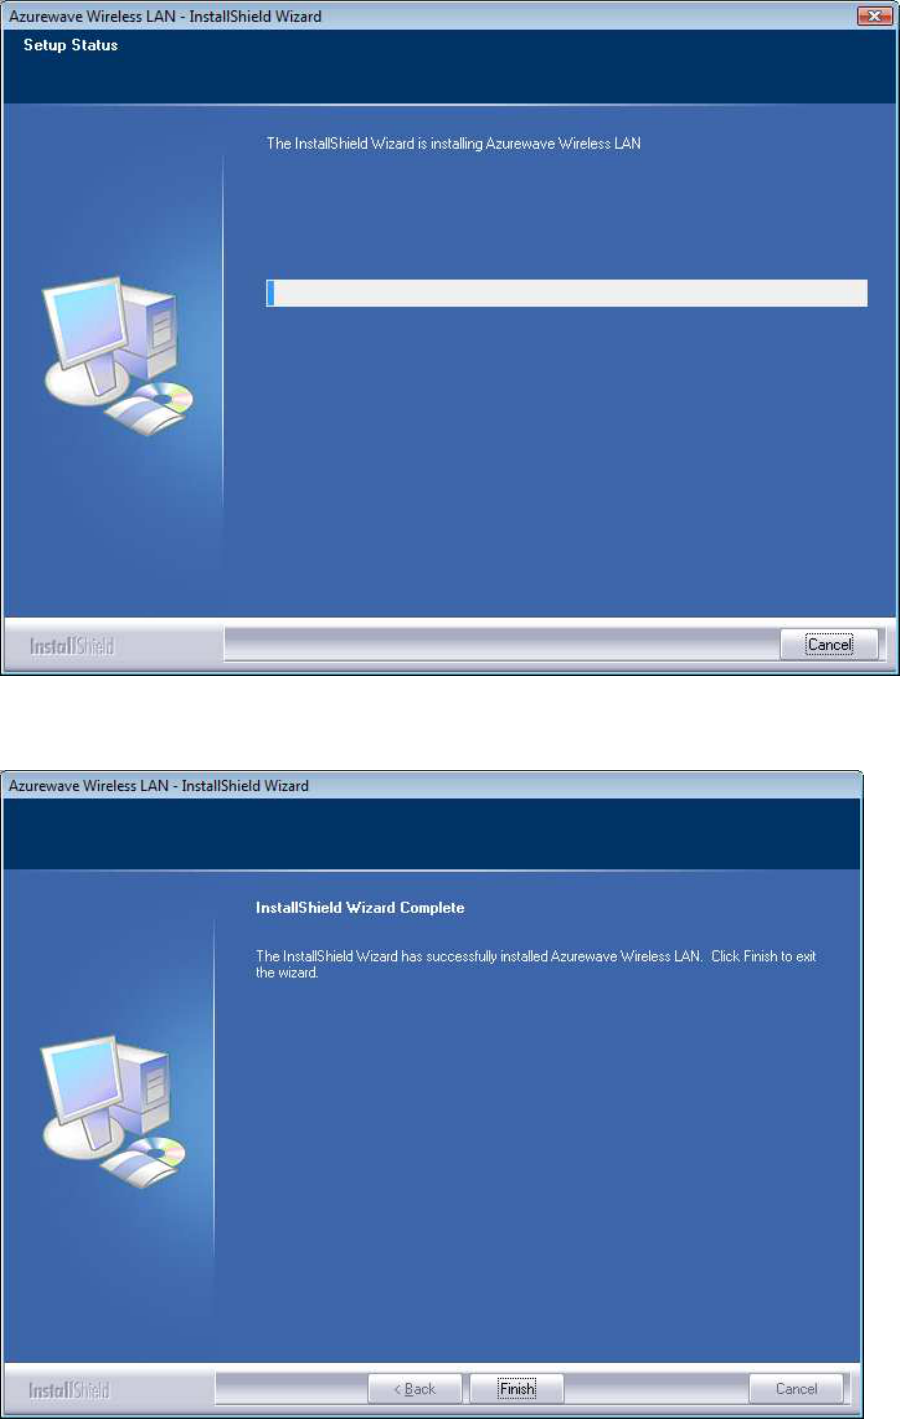
5. The system is process installation
8. When the setup is completed, please click [Finish]
III. Network Connection
i. For Windows XP OS
Please see the following steps to setup network connection for Windows XP.
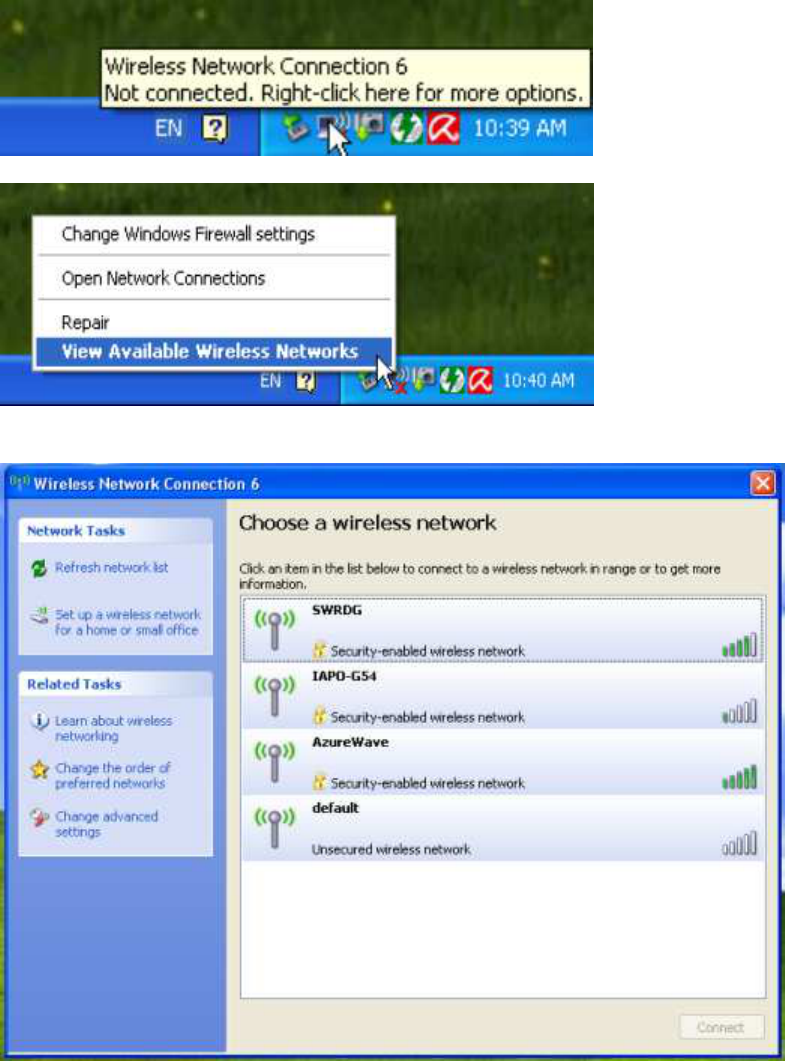
1. Find the network icon on the desktop shortcut and right-click on it. Choose “View Available
Wireless networks”
2. You will see several options, please select one and click [Connect]
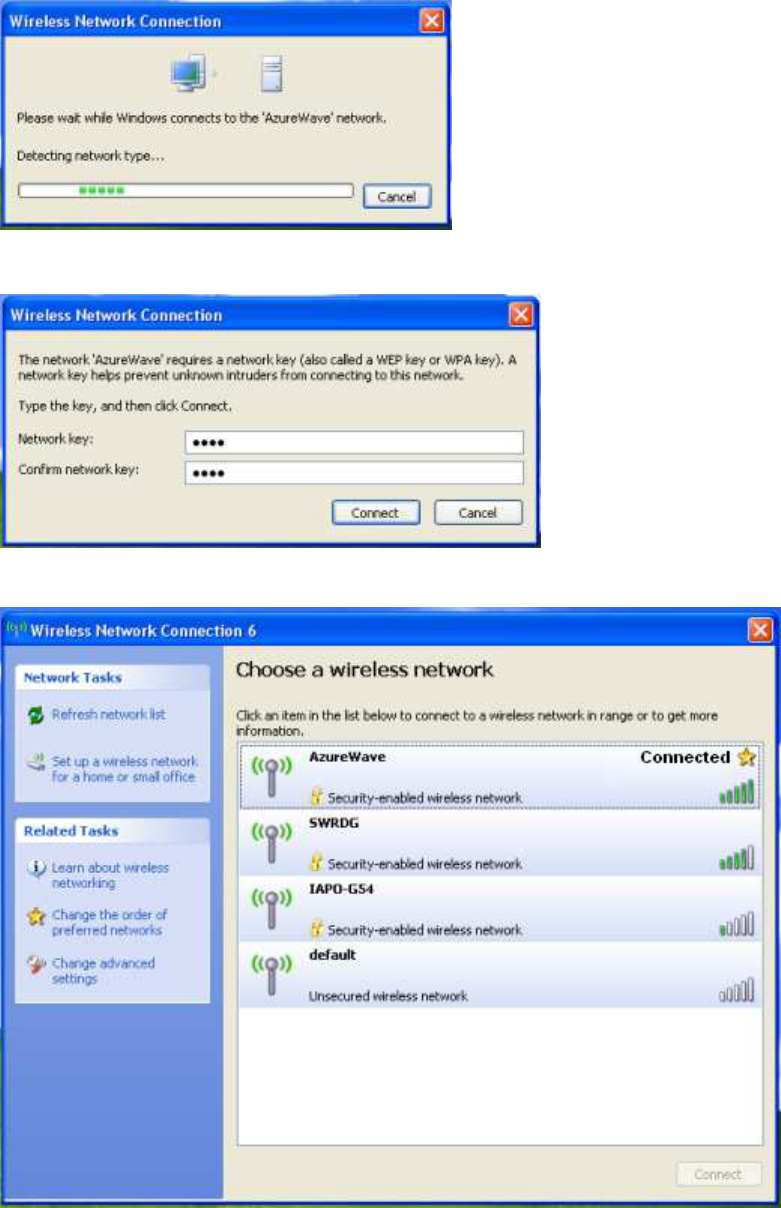
3. Please wait for few seconds to let system connecting to selected wireless network
4. You may need to type the network key when it is required
5. Now the selected wireless network is connected
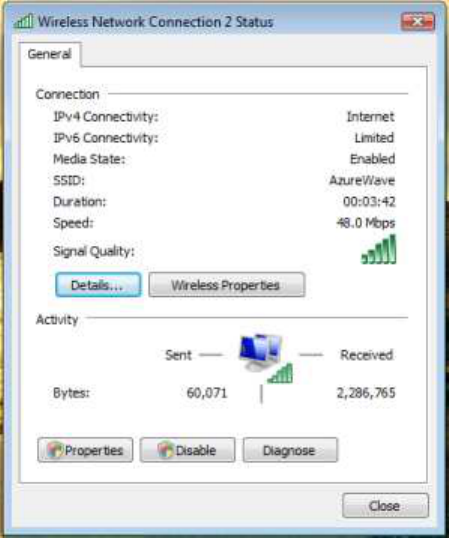
6. You can check the connection status by clicking [Status] in the pop-up dialogue
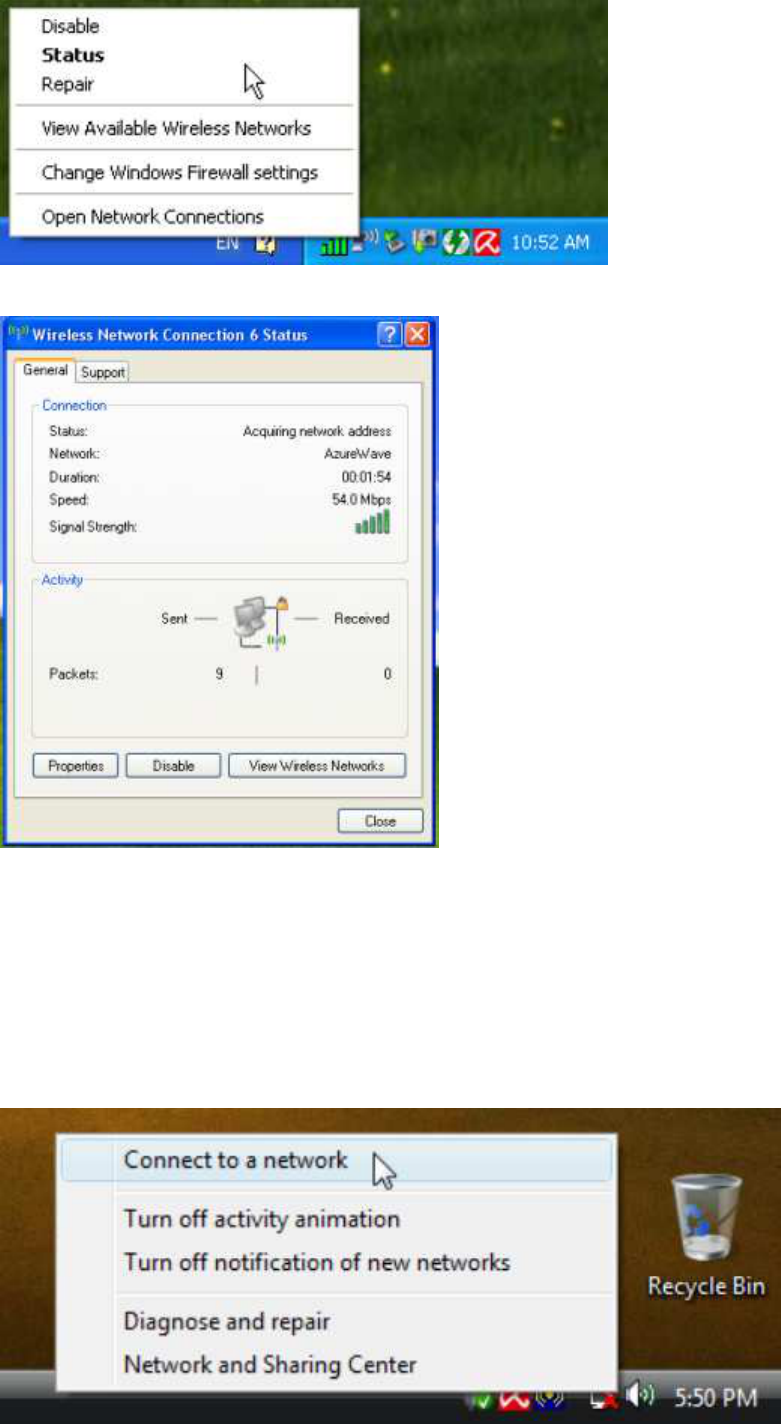
7. Here is the wireless network connection status
ii. For Windows Vista OS
Following are the instructions to setup wireless connection for Windows Vista.
1. Right-click on the network icon located on desktop shortcut. When you see the dialogue, please
click [Connect to a network]
2. Choose wireless network within your range and click [Connect]
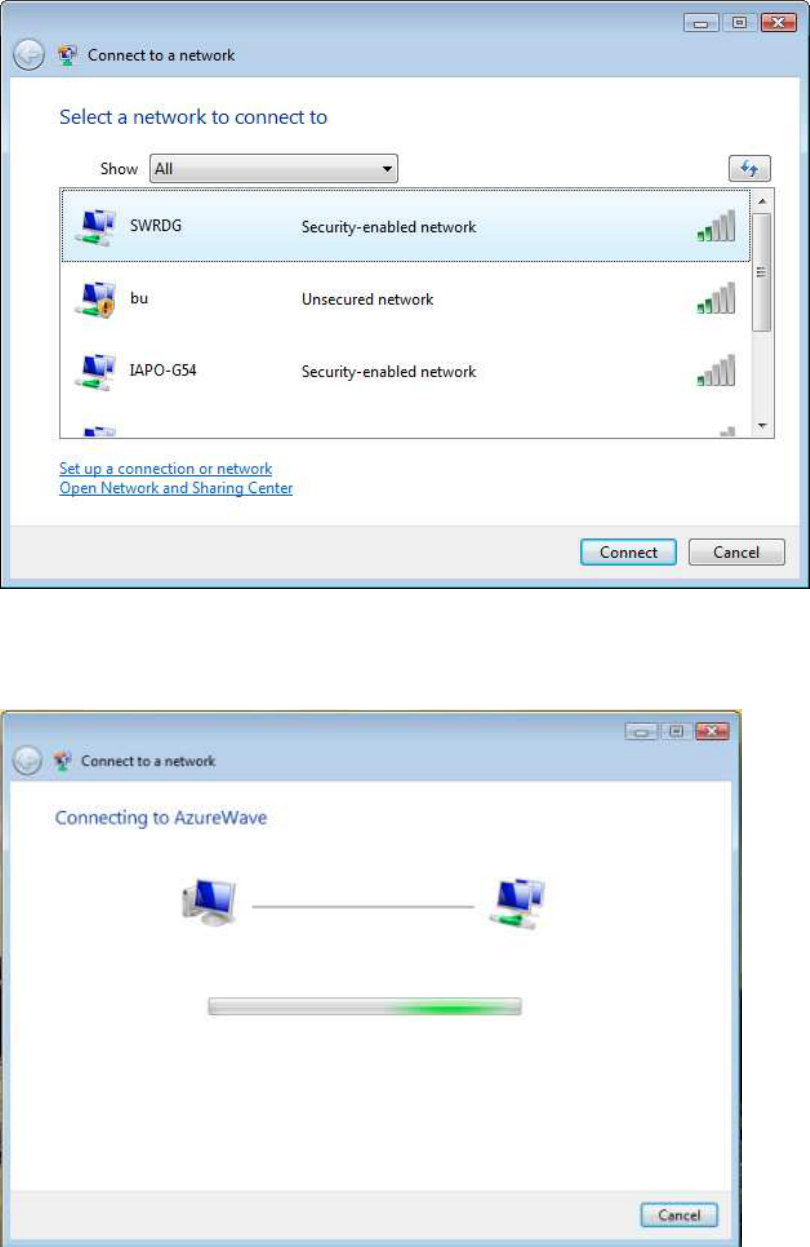
* If selected network is not secure, please choose [Connect anyway]
3. You may need to wait for few seconds when Windows connects to wireless network
4. Now the selected wireless network is connected

5. If you want to see the connection status, please right-click on the network you choose and select
[Status]
6. This is the information of network status
IV. Setup for Ad-hoc Mode
i. For Windows XP OS
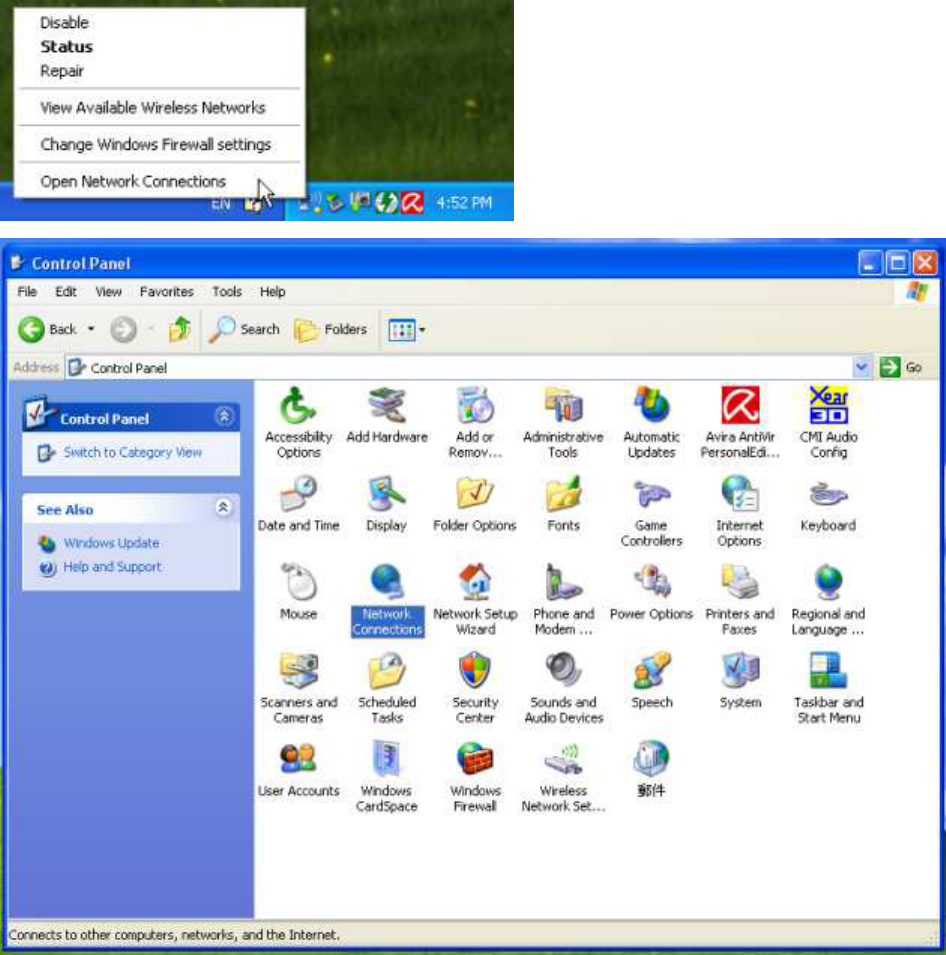
If you want to choose Ad-hoc mode, please right-click network icon on desktop shortcut and choose
“Open Network Connections”, or go to [Control Panel] and double-click “Network Connection”
icon.
When you see the “Network Connections” screen, please follow the steps below to setup Ad-hoc
mode.
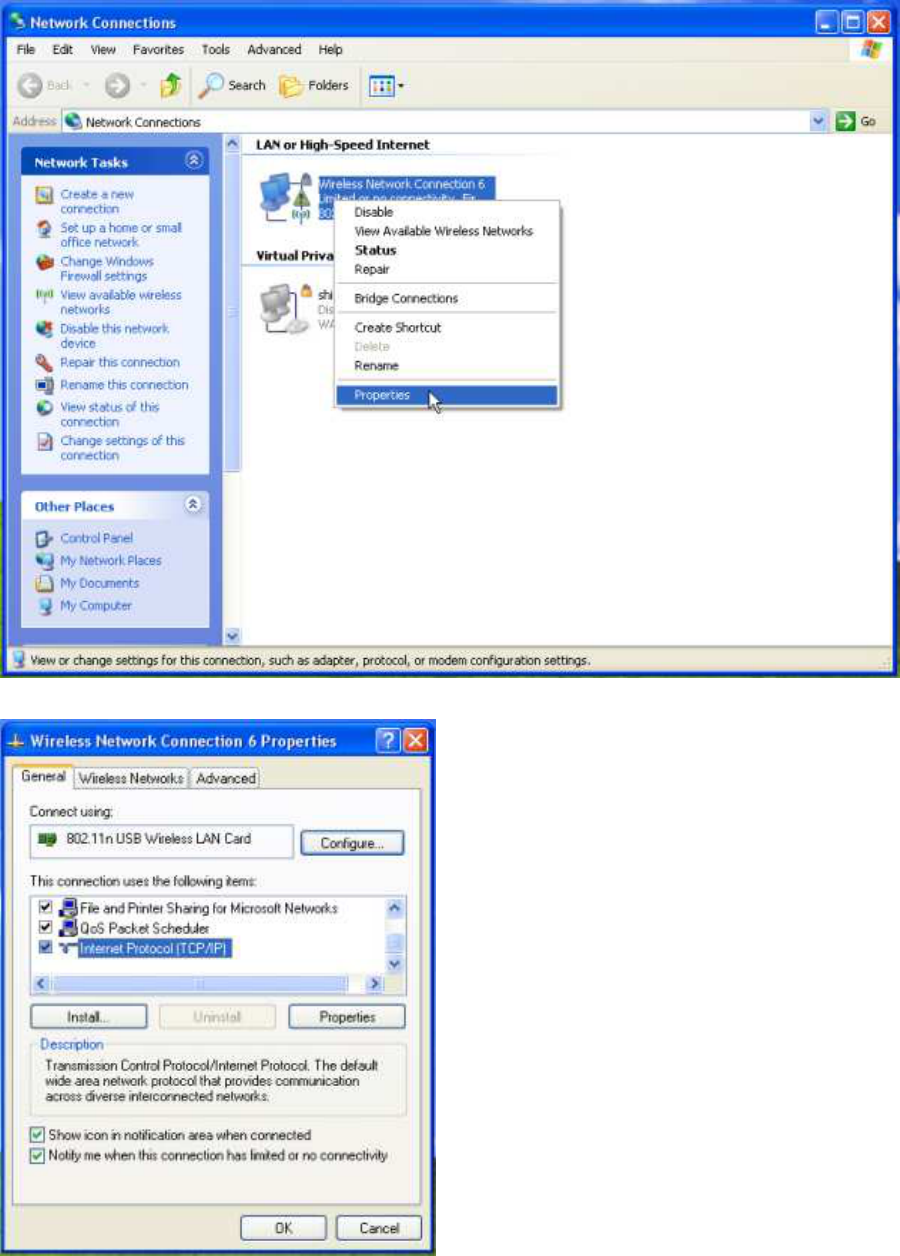
1. Double-click “Wireless Network USB Adapter” icon to enter its properties
2. Click "General” tab and double-click the “Internet Protocol (TCP/IP)” item
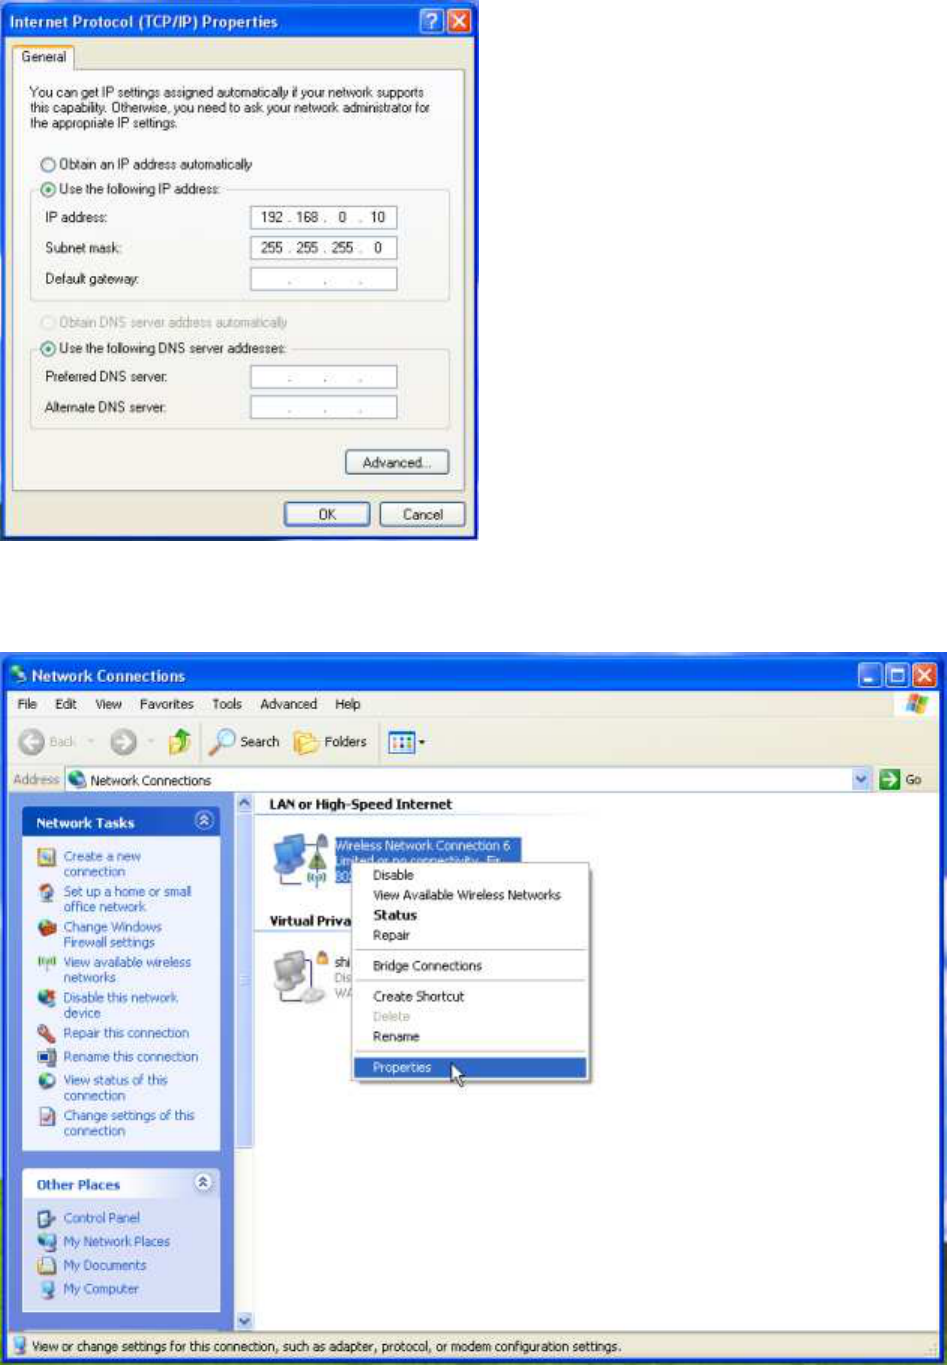
3. Choose “Use the following IP address:” and type the IP address; then click [OK]
*Note: the IP address of the other wireless card should be set with the same subnet mask
4. Right-click the “Wireless Network Connection” icon and choose “properties”
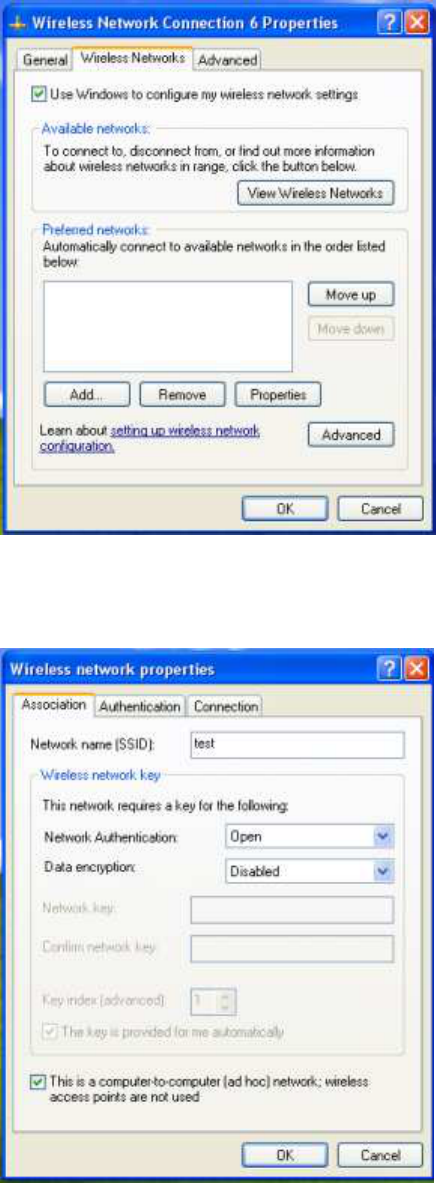
5. Select “Wireless Network” tab and choose [Add]
6. Type “Network name (SSID)” and choose “Data encryption” if you want to protect the network
security
7. When you see the dialogue showing your network is unsecured, please click [Continue Anyway]
8. Now your network is in Ad-hoc mode
ii. For Windows Vista OS
Please follow the steps to setup Ad-hoc mode for Windows Vista.
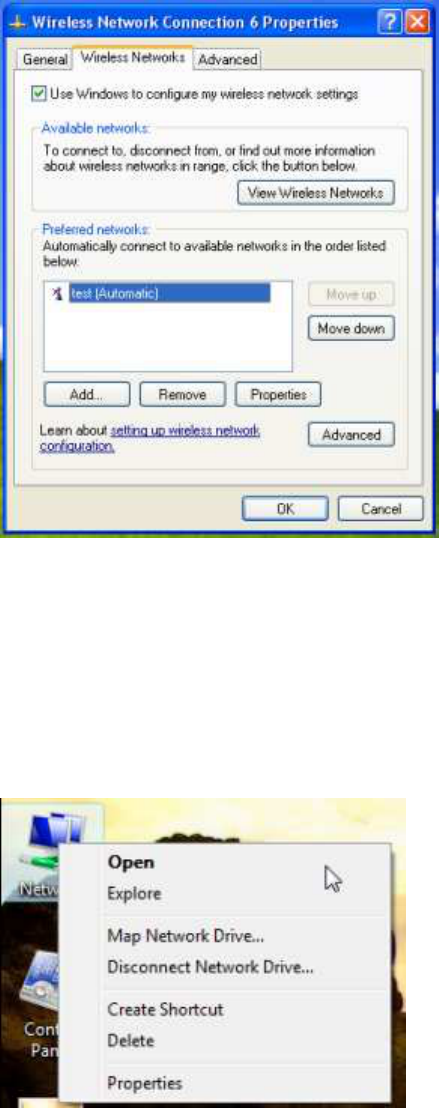
1. Right-click the Network neighbor to choose “properties,” or you can right-click network icon on
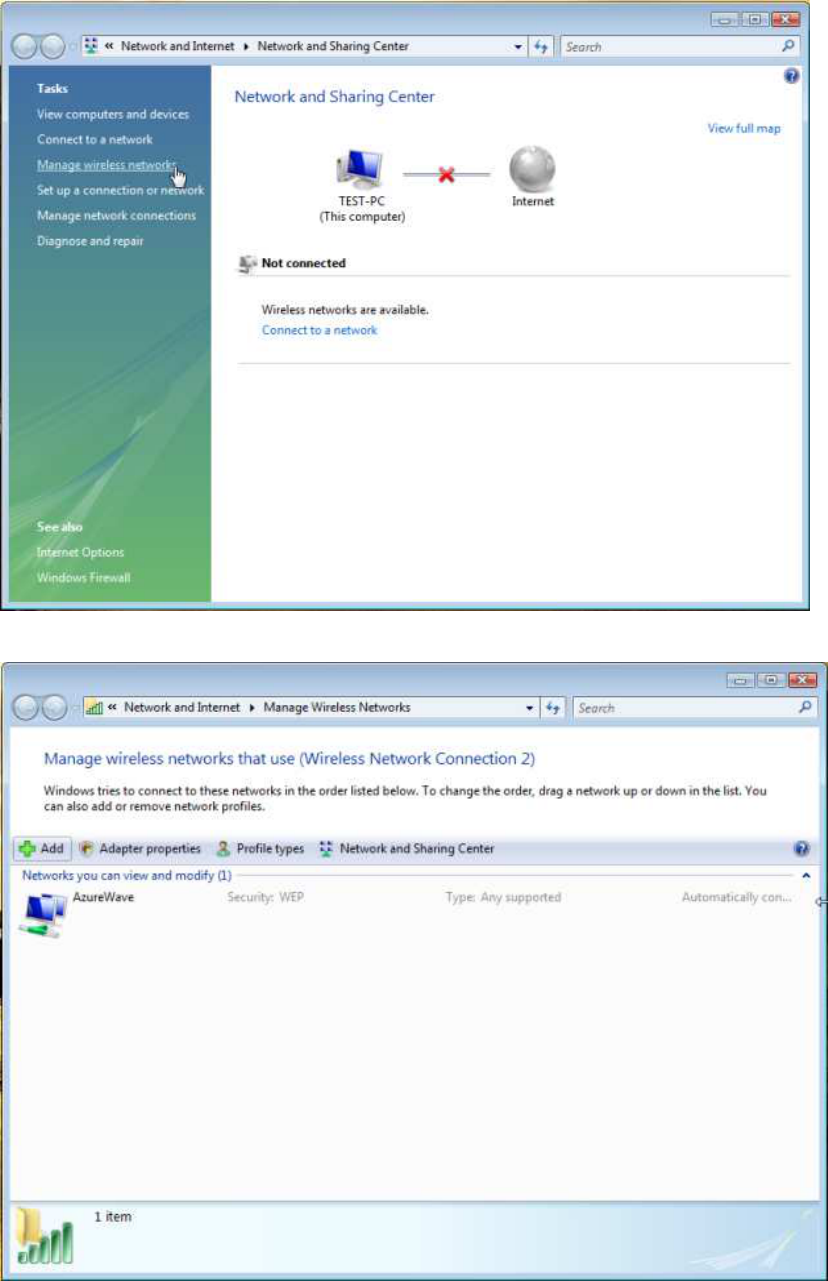
desktop shortcut and choose “Network and Sharing Center”
2. When you see the “Network and Sharing Center” windows, please select “Manage network
connection” bar
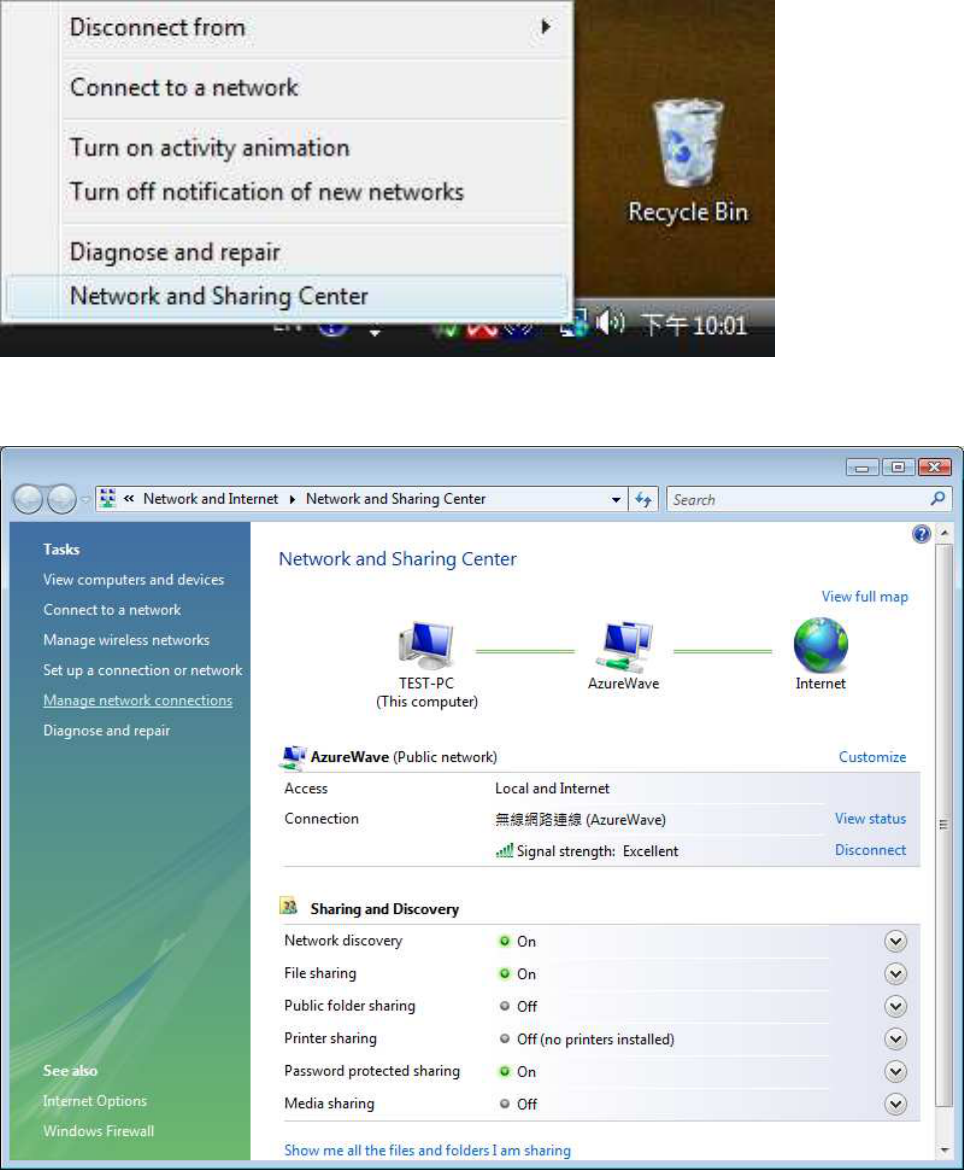
3. Right-click the connected network icon and choose “Properties”
4. When you see the warning message, please click [Continue]
5. Choose “Networking” tab and double-click the “Internet Protocol Version 4 (TCP/IPv4)” item
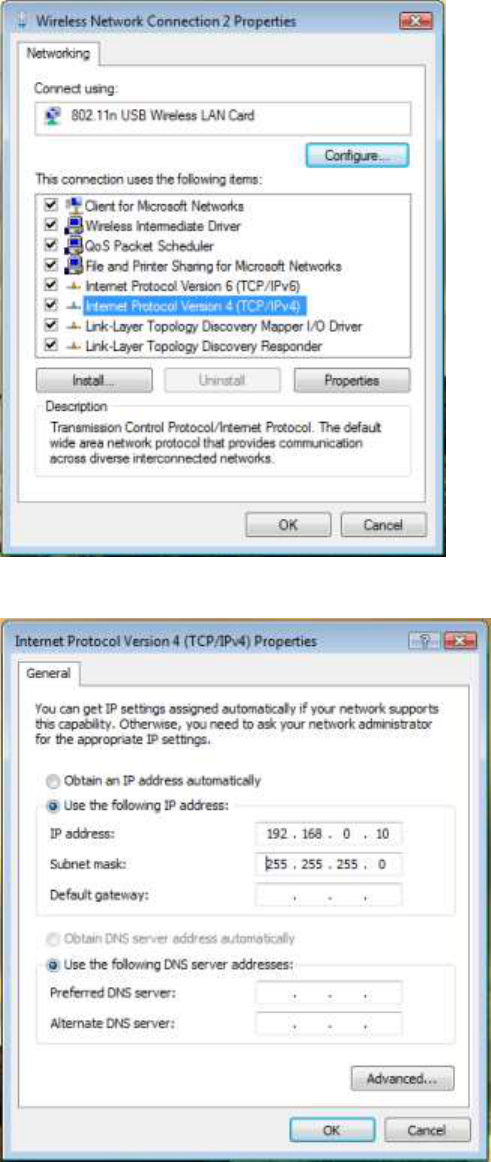
6. Choose “Use the following IP address:” and type the IP address; then click [OK]
*Note: the IP address of the other wireless card should be set with the same subnet mask
7. Choose “Manage wireless networks” bar
8. Select [Add]
9. Choose “Create ad-hoc network”
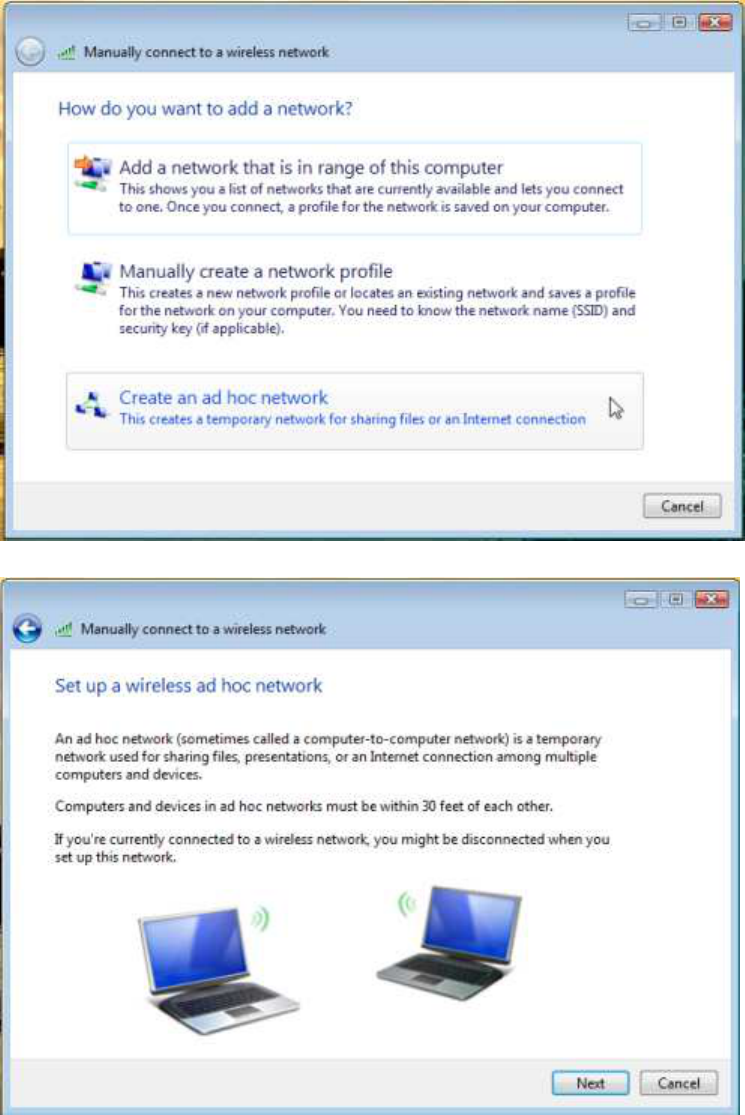
10. Please click [Next]
11. Enter “Network name” and if you want to protect the network security, please choose in
“security type”; then click [Next]
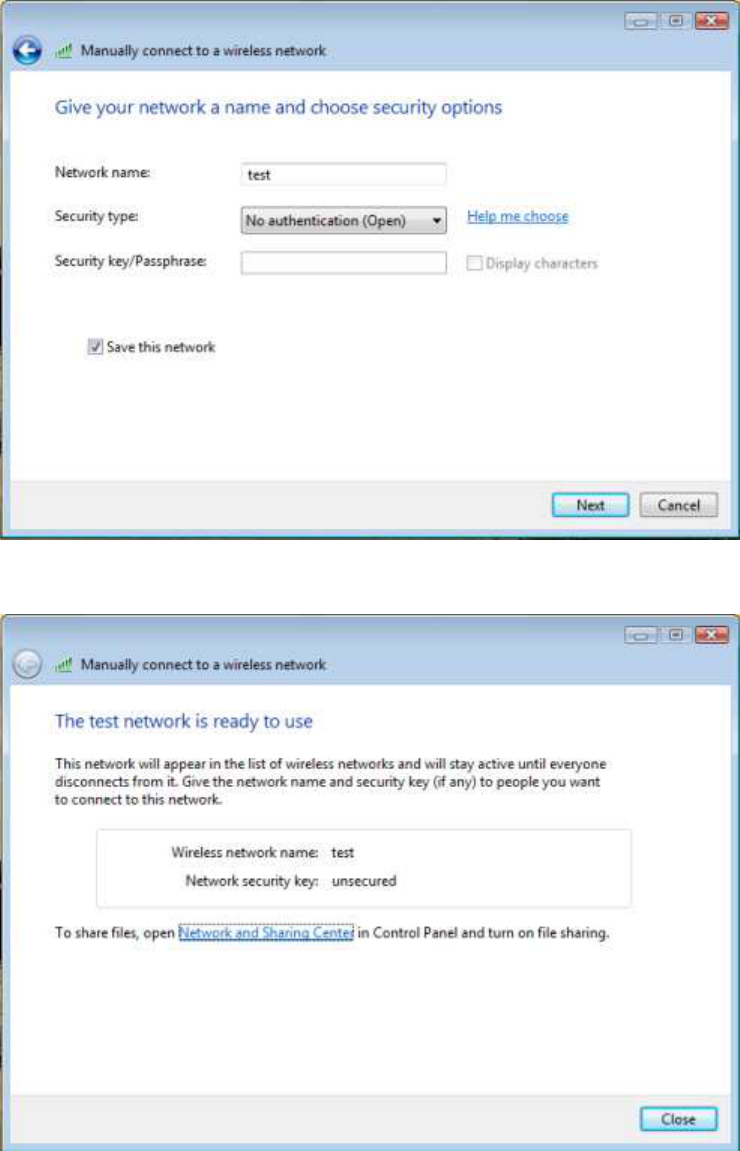
12. Now your network is in Ad-hoc mode
Federal Communication Commission Interference Statement
This equipment has been tested and found to comply with the limits for a Class B digital
device, pursuant to Part 15 of the FCC Rules. These limits are designed to provide
reasonable protection against harmful interference in a residential installation. This
equipment generates, uses and can radiate radio frequency energy and, if not installed and
used in accordance with the instructions, may cause harmful interference to radio
communications. However, there is no guarantee that interference will not occur in a
particular installation. If this equipment does cause harmful interference to radio or
television reception, which can be determined by turning the equipment off and on, the user
is encouraged to try to correct the interference by one of the following measures:
- Reorient or relocate the receiving antenna.
- Increase the separation between the equipment and receiver.
- Connect the equipment into an outlet on a circuit different from that
to which the receiver is connected.
- Consult the dealer or an experienced radio/TV technician for help.
FCC Caution: Any changes or modifications not expressly approved by the party
responsible for compliance could void the user's authority to operate this equipment.
This device complies with Part 15 of the FCC Rules. Operation is subject to the following
two conditions: (1) This device may not cause harmful interference, and (2) this device
must accept any interference received, including interference that may cause undesired
operation.
IMPORTANT NOTE:
Radiation Exposure Statement:
The product comply with the US/Canada portable RF exposure limit set forth for an
uncontrolled environment and are safe for intended operation as described in this manual.
The further RF exposure reduction can be achieved if the product can be kept as far as
possible from the user body or reduce output power if it doesn't affect the
transmission/receiving quality.
This transmitter must not be co-located or operating in conjunction with any other antenna
or transmitter.
SAR compliance has been established in typical laptop computer(s) with USB slot, and
product could be used in typical laptop computer with USB slot. Other application like
handheld PC or similar device has not been verified and may not compliance with related
RF exposure rule and such use shall be prohibited.
Industry Canada statement:
This device complies with RSS-210 of the Industry Canada Rules. Operation is subject to
the following two conditions: (1) This device may not cause harmful interference, and (2)
this device must accept any interference received, including interference that may cause
undesired operation.