AzureWave Technologies NU182H IEEE 802.11b/g/n 2x2 USB Half-Mini-Card Wireless Module User Manual
AzureWave Technologies, Inc. IEEE 802.11b/g/n 2x2 USB Half-Mini-Card Wireless Module
UserManual.wiki
>
AzureWave Technologies
>
NU182H User Manual
User Manual
Navigation menu
Upload a User Manual
Namespaces
Wiki Guide
HTML
PDF
Info
Views
User Manual
Discussion / Help
Navigation

![iv. Setup: Windows XP OS If your computer is running a Windows operating system, it will automatically detect the AW-NU182H after the system boots up and displays a “Found New Hardware Wizard” window. Please click [Cancel] and proceed with the following steps. 1. Find out the Driver, and launch the Setup Wizard](https://usermanual.wiki/AzureWave-Technologies/NU182H/User-Guide-1648699-Page-7.png)
![2. Please wait few seconds for wizard to prepare installation 3. Please select click [Install] to proceed](https://usermanual.wiki/AzureWave-Technologies/NU182H/User-Guide-1648699-Page-8.png)
![6. When it is completed, please click [Finish] 9. When the process is finished, the system will show a message of “Found New Hardware”](https://usermanual.wiki/AzureWave-Technologies/NU182H/User-Guide-1648699-Page-10.png)
![v. Setup: Windows Vista OS Please follow the steps to complete installation. 1. Launch the setup driver 2. When you see the permission dialogue box, please click [Continue]](https://usermanual.wiki/AzureWave-Technologies/NU182H/User-Guide-1648699-Page-11.png)
![3. Now the Wizard is preparing installation 4. Please click [Install] to proceed](https://usermanual.wiki/AzureWave-Technologies/NU182H/User-Guide-1648699-Page-12.png)
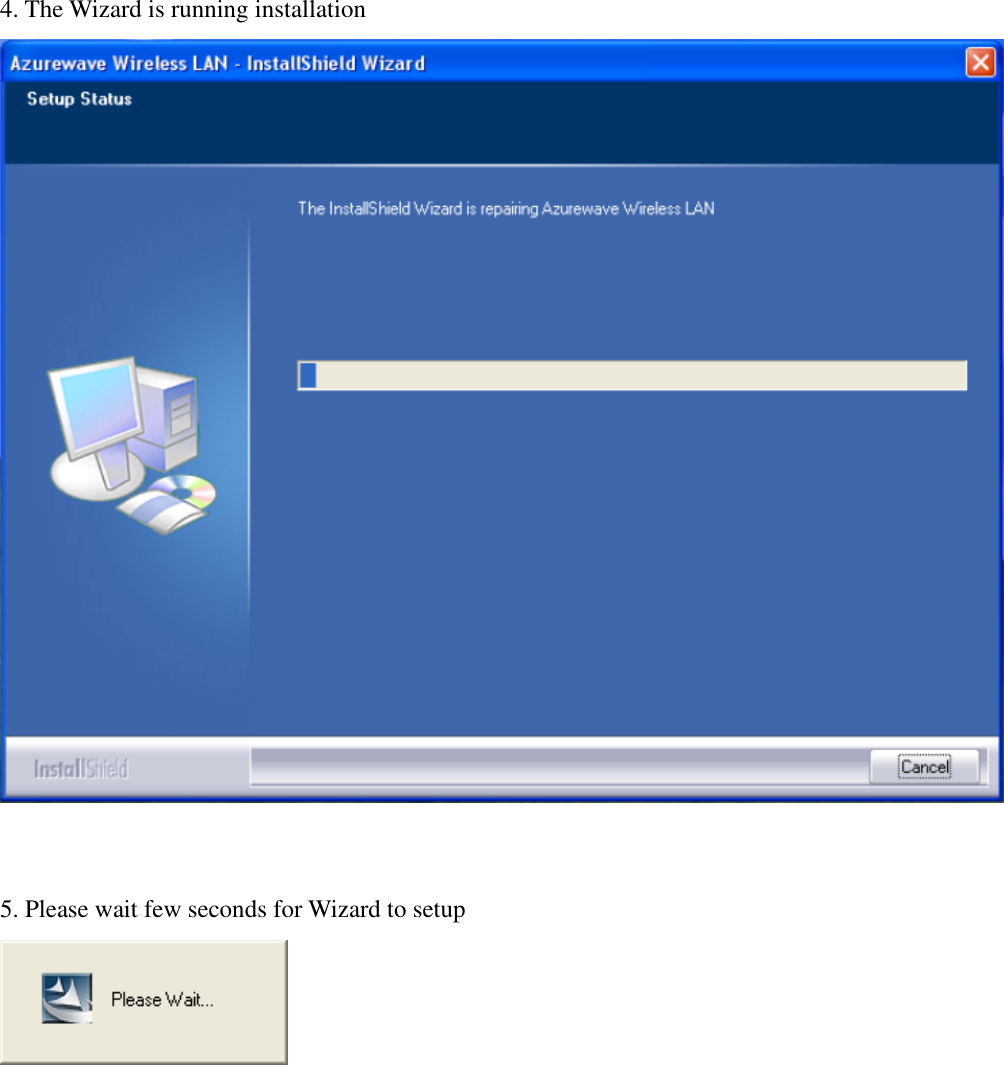
![5. The system is process installation 8. When the setup is completed, please click [Finish]](https://usermanual.wiki/AzureWave-Technologies/NU182H/User-Guide-1648699-Page-13.png)
![III. Network Connection i. For Windows XP OS Please see the following steps to setup network connection for Windows XP. 1. Find the network icon on the desktop shortcut and right-click on it. Choose “View Available Wireless networks” 2. You will see several options, please select one and click [Connect]](https://usermanual.wiki/AzureWave-Technologies/NU182H/User-Guide-1648699-Page-14.png)
![3. Please wait for few seconds to let system connecting to selected wireless network 4. You may need to type the network key when it is required 5. Now the selected wireless network is connected 6. You can check the connection status by clicking [Status] in the pop-up dialogue](https://usermanual.wiki/AzureWave-Technologies/NU182H/User-Guide-1648699-Page-15.png)
![7. Here is the wireless network connection status ii. For Windows Vista OS Following are the instructions to setup wireless connection for Windows Vista. 1. Right-click on the network icon located on desktop shortcut. When you see the dialogue, please click [Connect to a network] 2. Choose wireless network within your range and click [Connect]](https://usermanual.wiki/AzureWave-Technologies/NU182H/User-Guide-1648699-Page-16.png)
![* If selected network is not secure, please choose [Connect anyway] 3. You may need to wait for few seconds when Windows connects to wireless network 4. Now the selected wireless network is connected](https://usermanual.wiki/AzureWave-Technologies/NU182H/User-Guide-1648699-Page-17.png)
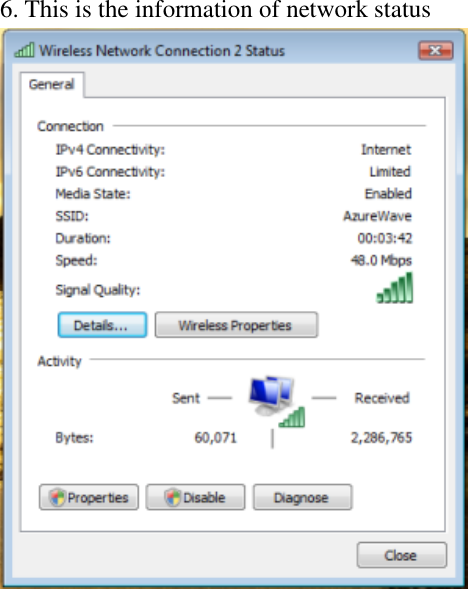
![5. If you want to see the connection status, please right-click on the network you choose and select [Status]](https://usermanual.wiki/AzureWave-Technologies/NU182H/User-Guide-1648699-Page-18.png)
![IV. Setup for Ad-hoc Mode i. For Windows XP OS If you want to choose Ad-hoc mode, please right-click network icon on desktop shortcut and choose “Open Network Connections”, or go to [Control Panel] and double-click “Network Connection” icon. When you see the “Network Connections” screen, please follow the steps below to setup Ad-hoc mode.](https://usermanual.wiki/AzureWave-Technologies/NU182H/User-Guide-1648699-Page-20.png)
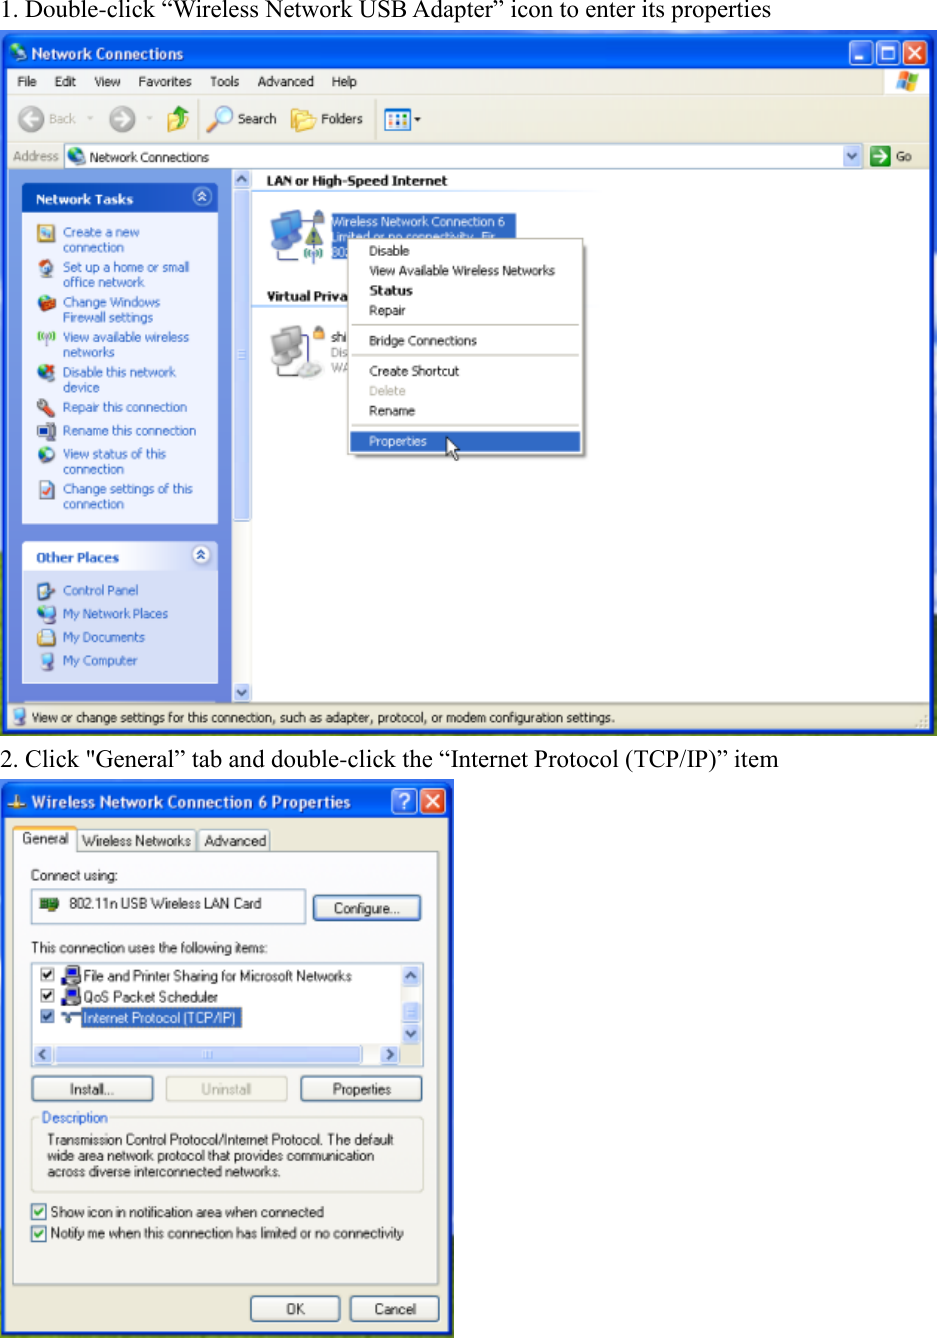
![3. Choose “Use the following IP address:” and type the IP address; then click [OK] *Note: the IP address of the other wireless card should be set with the same subnet mask 4. Right-click the “Wireless Network Connection” icon and choose “properties”](https://usermanual.wiki/AzureWave-Technologies/NU182H/User-Guide-1648699-Page-22.png)
![5. Select “Wireless Network” tab and choose [Add] 6. Type “Network name (SSID)” and choose “Data encryption” if you want to protect the network security 7. When you see the dialogue showing your network is unsecured, please click [Continue Anyway]](https://usermanual.wiki/AzureWave-Technologies/NU182H/User-Guide-1648699-Page-23.png)

![4. When you see the warning message, please click [Continue] 5. Choose “Networking” tab and double-click the “Internet Protocol Version 4 (TCP/IPv4)” item](https://usermanual.wiki/AzureWave-Technologies/NU182H/User-Guide-1648699-Page-26.png)
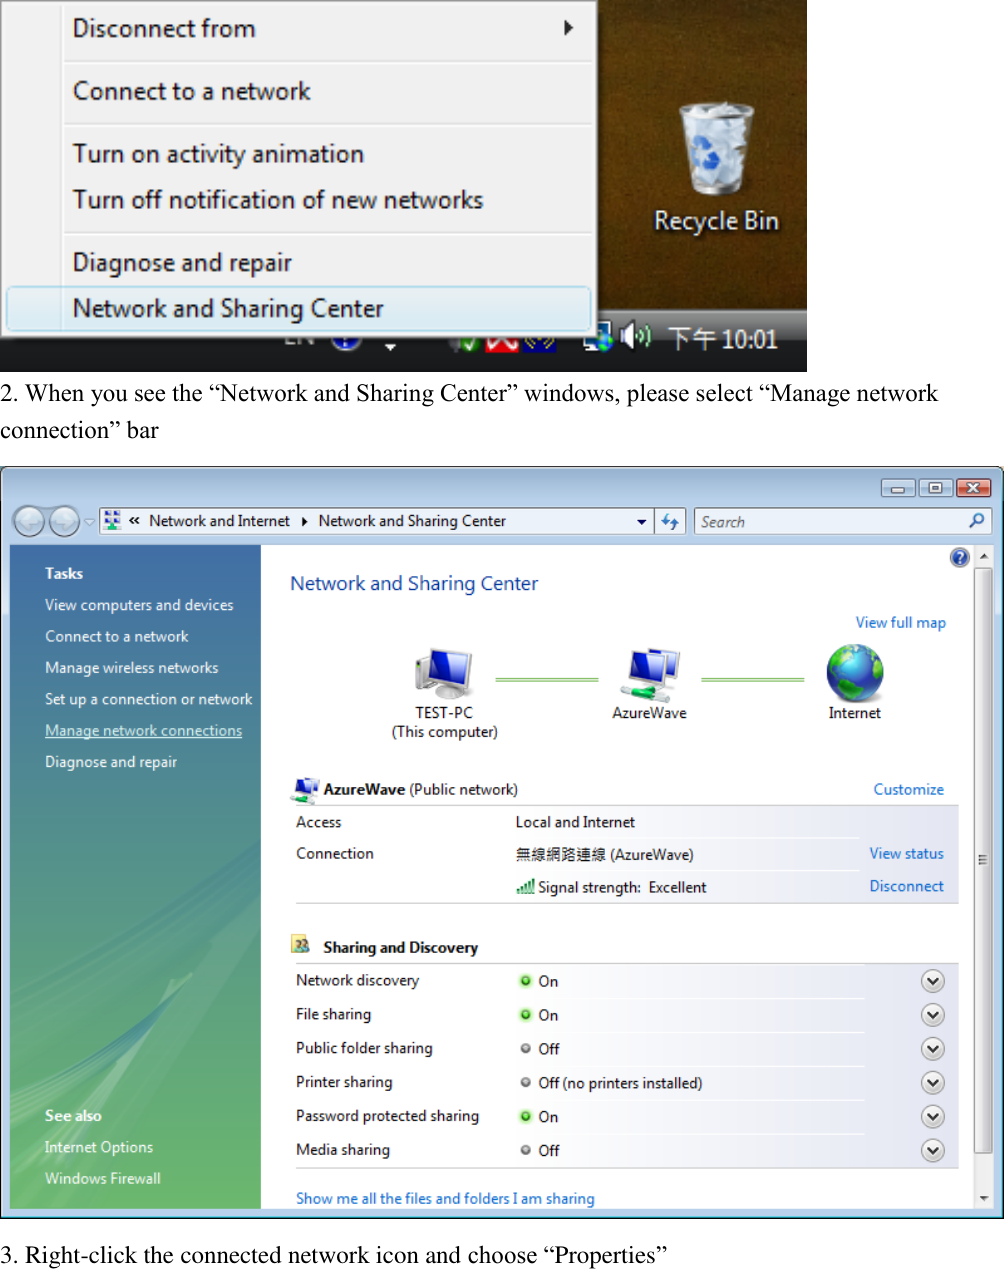
![6. Choose “Use the following IP address:” and type the IP address; then click [OK] *Note: the IP address of the other wireless card should be set with the same subnet mask 7. Choose “Manage wireless networks” bar](https://usermanual.wiki/AzureWave-Technologies/NU182H/User-Guide-1648699-Page-27.png)
![8. Select [Add] 9. Choose “Create ad-hoc network”](https://usermanual.wiki/AzureWave-Technologies/NU182H/User-Guide-1648699-Page-28.png)
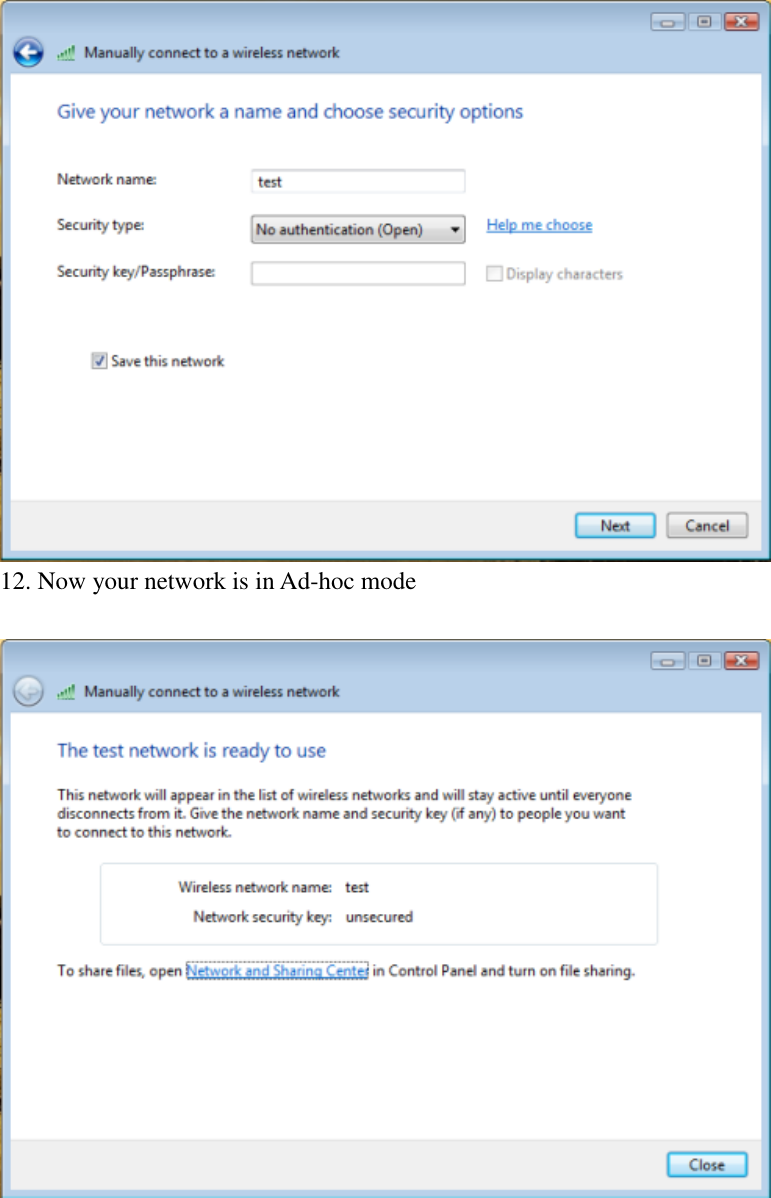
![10. Please click [Next] 11. Enter “Network name” and if you want to protect the network security, please choose in “security type”; then click [Next]](https://usermanual.wiki/AzureWave-Technologies/NU182H/User-Guide-1648699-Page-29.png)