BARCO WHE10015 Wireless HDMI Extender User Manual
AWIND Incorporated Wireless HDMI Extender
UserManual.wiki
>
BARCO
>
WHE10015 User Manual
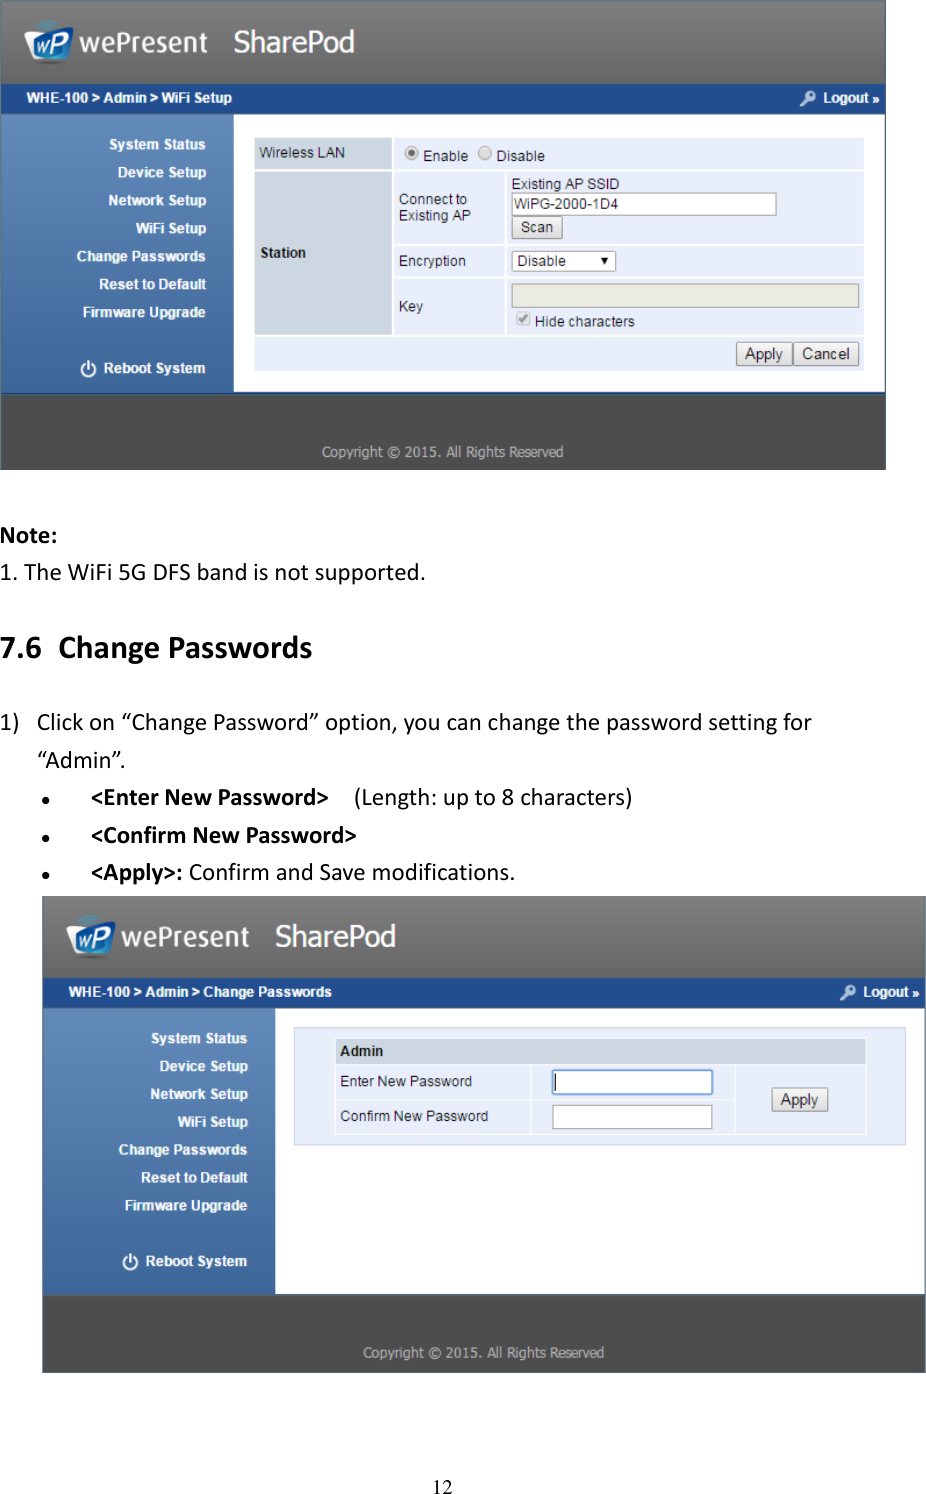
User Manual
Navigation menu
Upload a User Manual
Namespaces
Wiki Guide
HTML
PDF
Info
Views
User Manual
Discussion / Help
Navigation


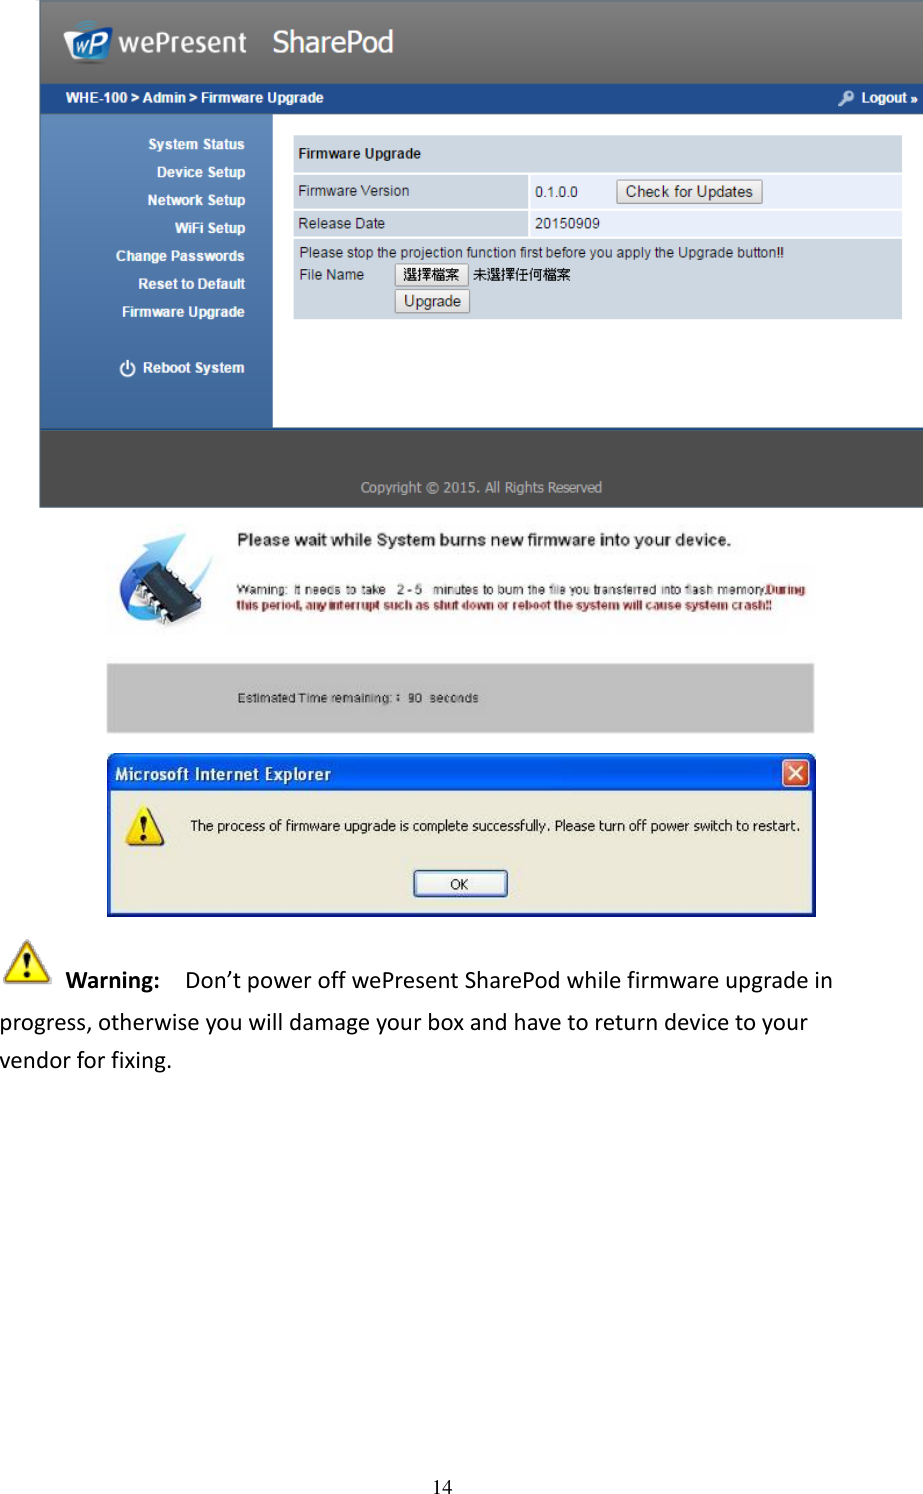
![13 7.7 Reset to Default 1) Click on “Reset to Default” option to restore factory default settings. <Apply>: Confirm and take action. *** You can also restore factory default setting from SharePod box reset button. You can find the reset button underneath the box. Please follow below procedures. 1. Press [Reset] button and Hold. 2. Turn on wePresent SharePod box. 3. Press more than 10 seconds and relief [Reset] button. 4. It will take effect to restore factory default settings. 7.8 Firmware Upgrade 1) <Firmware Version> <Release Date> You can find the firmware version and release date here. 2) <Check for Update> you can check the latest firmware on the server. 3) Firmware Upgrade 1. Firstly, you have to get latest firmware image file from your vendor. 2. Click <Browse> to specify file name you want to upgrade. 3. Click <Upgrade> to start. 4. A warning message shown and count down counter on the screen. 5. After a few minutes, a complete message shown on the screen. 6. Restart wePresent SharePod box to take effect.](https://usermanual.wiki/BARCO/WHE10015/User-Guide-2781429-Page-13.png)