BARCO WPA7511216 WIRELESS PROJECTOR ADAPTER User Manual WPA751 User s Manual
AWIND Incorporated WIRELESS PROJECTOR ADAPTER WPA751 User s Manual
BARCO >
USERS MANUAL

i
Wireless Multimedia Presentation System
User’s Manual
ii
Copyright
Information in this document is subject to change without notice. Complying with all applicable copyright laws is the
responsibility of the user. No part of this document may be reproduced or transmitted in any form or by any means,
electronic or mechanical, for any purpose, without the express written permission of the seller. If, however, your only
means of access is electronic, permission to print one copy is hereby granted. The seller provides this documentation
without warranty, term, or condition of any kind. The seller may make improvements or changes in the product(s)
and/or the program(s) described in this documentation at any time. Other product and company names herein may
be trademarks of their respective owners.
Trademarks
Windows, Windows 2000, Windows XP®, and Microsoft® are registered trademarks of Microsoft Corporation.
All other trademarks are the properties of their respective owners.
FCC Information
FCC Part 15 Declaration of Conformity (DoC)
The following equipment:
Product Name: ImageCaster WPA751
Wireless Multimedia Presentation System
Model Number: WPA 751is herewith confirmed to comply with
the requirements of FCC Part 15 rules.
The operation is subject to the following two conditions:
1. This device may not cause harmful interference, and
2. This device must accept any interference received, including interference that may cause undesired operation.
FCC ID: SQ3WPA7511216
FCC Rules and Regulations - Part 15
Warning: This device has been tested and found to comply with the limits for a Class B digital device pursuant to
Part 15 of the Federal Communications Commissions Rules and Regulations. These limits are designed to provide
reasonable protection against harmful interference when the equipment is operated in a commercial environment.
This equipment generates, uses, and can radiate radio frequency energy and, if not installed and used in accordance
with the instruction manual, may cause harmful
interference to radio communications. However, there is no guarantee that interference will not occur in a particular
installation. If this equipment does cause harmful interference to radio or television reception, which can be
determined by turning the equipment off and on, the user is encouraged to try and correct the interference by one or
more of the following measures:
Relocate your WLAN equipped laptop computer.
Increase the separation between the WLAN equipped laptop, computer and other electronics.
Connect the WLAN equipped laptop computer into an outlet on a circuit different from that of other electronics.
Consult the dealer or an experienced radio/TV technician for help.
FCC Radiation Exposure Statement
This equipment complies with FCC radiation exposure limits set forth for an uncontrolled environment. This
equipment should be installed and operated with minimum distance of 20cm between the radiator & your body.
Changes or modifications not expressly approved by the party responsible for compliance could void the
user‘s authority to operate the equipment.
This device and its antenna(s) must not be co-located or operating in conjunction with any other antenna
or transmitter.

iii
TABLE OF CONTENTS
SECTION TITLE PAGE
1 Introduction ......................................................................................................................1
1.1 System Requirement................................................................................ 2
1.2 Features and Benefits .............................................................................. 3
1.3 Package Checklists.................................................................................. 4
2 Setting Up the System ..................................................................................................... 4
2.1 Configuring the Environment.................................................................... 5
2.2 Installation .............................................................................................. 10
2.3 Setting Up the System............................................................................ 14
2.4 Setting Up the Sender ............................................................................ 18
3 Using Wireless Multimedia Presentation System........................................................... 20
3.1 Giving a Multimedia Presentation........................................................... 21
3.2 Giving a Image Presentation .................................................................. 23
4 Frequently Asked Questions .......................................................................................... 24
5 Specifications.................................................................................................................24
1 Introduction
Thanks you for using Wireless Presentation System. This is a solution bundled with wireless multimedia card
perfecting for classrooms and conference rooms or the exhibition hall, a successful presentation effectively and
efficiently uses multimedia content to illustrate and enhance what the speaker is saying. A presentation’s
effectiveness can be ruined if it can’t be seen by all or by delays as different presenters connect their laptops to the
projector.
Event schedules can be disrupted and risk losing attendees` interest. Project reviews and sales meetings look like
dance classes as participants waltz around the conference table as each one has something to present.
You need one projector or monitor and one computer to act as sender and at least one to act as a receiver, and then
broadcast MPEG-1, MPEG-2, MPEG4 video or JPEG image of the sender's laptop. Receivers can then receive the
broadcast from ImageCaster and view it on their laptops.
2
1.1 System Requirement
Wireless System requires hardware in the form of a wireless multimedia card. Here is a list of the system
requirements that must be met before installing the programs.
1.1.1 Sender / Receiver Requirement
● Intel Pentium 1GHz or faster
● Windows 2000 and XP with DirectX8.1 or later
● 256MB RAM minimum, more than 300MB hard disk free space
● CD-ROM drive
● Wireless multimedia card
1.1.2 Screen Resolution
● For the desktop image transmission mode, the following resolutions are supported: 640 x 480,
800 x 600, 1024 x 768.
3
1.2 Features and Benefits
● Wireless freedom for your presenters – no unsightly cable mess and no moving everyone around to let the next
speaker connect
● Easily and conveniently connect the ImageCaster adapter to a customer’s or eventing center’s projector without
affecting internal wireless LANs or requiring IT support.
● Pass control of the projector swiftly between all presenters PCs keeping the meeting and the sales pitch flowing
smoothly – no cabling delays.
● The wireless presentation system’s proprietary wireless networking ensures the highest possible quality in the
presentation materials.
● Broadcast feature allows each presentation to display through the projector and simultaneously on every
participant’s own PC screen.
● Participants can multitask while receiving the presentation contents to take notes, or ready additional materials for
discussion.
● One to essentially unlimited terminals within the broadcasting range
● Easy of use and install with near-zero configuration.
4
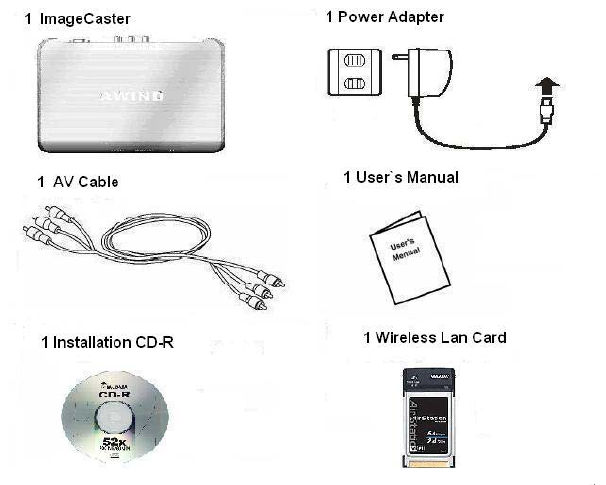
1.3 Package Checklists
Check and identify the supplied items as below operating this machine. If finding any shortage or damage, Please
contact your dealer as soon as possible.
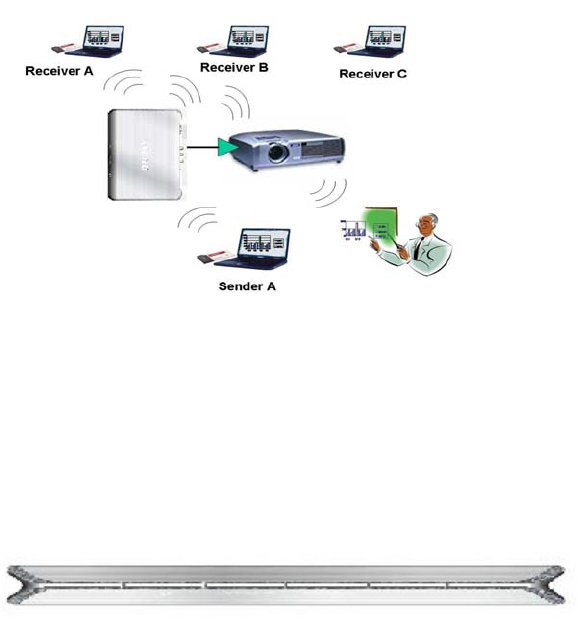
2 Setting Up the System
Wireless multimedia presentation system will have three components—one PC sender, one adapter, PC receivers.
The PC sender will broadcast, and the PC receivers can see the information in a window on their laptops. The system
is very easy to set up and all the hard choices like channel and SSID selection are made automatically.
Please check for more information on setting up and using the Wireless Multimedia Presentation System.
5
2.1 Configuring the Environment
The PresentationMaster software includes one sender and receiver focused on Microsoft Windows system. The
sender will broadcast four contents: MPEG-1/2/4 Audio/Video, Screen captured image (JPEG). The adapter will
select the available WLAN channel automatically and set the SSID with a random value. Then sender has to
implement the scanning of the dedicated channel and request the connection with the adapter. Only the first sender
that gets the connect right from the adapter can transmit the contents. All other receivers can receive the same
contents as adapter, named as Listener.
2.1.1 Hardware Configuration
This chapter explains how to connect the adapter to your projector or laptop
2.1.1.1 Front Panel
◆ Power button
Turn the power on/off. When turn on the power, adapter will do scan simultaneously.
◆ Content Button
● Master adapter
- If this is master adapter, it will do scan and show initial image on screen automatically when turn on the
power of the adapter.
- Press the button, will display the serial number of current master adapter on top right corner of screen.
- Press “Enter” button to exit the message display.
6
● Client adapters with available contents
- If this is client adapter, it will do scan and display available contents automatically when turn on the power of
the box.
- Available contents will be shown on top right corner of screen.
- Push the button, the content will be incremented by 1.
- Press “Enter” button to confirm selected content and exit the message display simultaneously.
- Not allow to select another content to play while playing previous content. If need to play another content,
user should turn off power, then turn on the power again or press Scan button on remote controller, as well
as follow above procedure to do.
● Client adapters without available contents
- If this is client adapter, it will do scan and show “NONE” on top right corner of screen automatically when turn
on the power of the box.
- User should turn off the power first, then turn on the power again or press Scan button on remote controller
to see if have any available contents shown on top right corner of screen.
- If still not, do it again or check whether there are connection problem, no contents are playing…
- If have available contents, please follow the procedure of client box with available contents to do.
● Press the button to see current message on top right corner of screen at any time. Press ‘Enter” button
to exit the message display.
◆ Resolution Button
- Press the button to display resolutions. The resolutions are shown on the top right corner of the screen
- Press the button again, the resolution will be incremented by 1.
- Press ‘Enter” button to confirm selected resolution and exit the resolution message display simultaneously.
- Press the button to see current message or select required resolution on top right corner of screen at any
time. Press ‘Enter” button to exit the resolution message display.
- Default value is the resolution of 1024 x 768
◆ Enter Button
Press the button to confirm either the content or the resolution what user selects.
◆ LEDs
● Power On/Off LED
- On when power is turned on.
- Off when power is turned off.

7
● Link/Activity LED
- Blinking when data is being received.
- On when communication with a PC has been established.
- Off when communication with a PC has not been established.
2.1.1.2 Rear Panel
◆ Power
Connect to External AC adapter 100~240Vac @50/60 Hz
◆ Master / Client Switch
Select adapter as master or client. Default setting is a master adapter.
◆ USB
Only used in debugging. No use for users.
◆ Reset Switch
Reset to default setting
◆ Audio (R & L) Output
Connect to the audio input of a projector.
◆ Composite Video Output
Connect to the composite video input of a projector.
◆ S-Video Output
Connect to the S-Video input of a projector. Suggest to use this interface to watch video.
8
◆ VGA Output
Connect to the VGA input of a projector. Video will be displayed on small screen. Screen captured image (JPEG)
will be displayed on full screen.
9
2.2 Remote Controller
◆ Power Button
Turn power On/Off.
◆ Content Button
One touch button to Content Display Message. If password enabled, users have to enter correct password before
confirm the required content to play on client box. Using Up and Down keys to select available contents.
◆ Resolution Button
One touch button to Resolution Display Message. Using Up and Down keys to select required resolution.
◆ Enter Button
Press to confirm the selected content or resolution or password and exit OSD menu simultaneously.
◆ Scan Button
Press the button to search best channel on master adapter or latest available contents on client adapter.
◆ Arrow Buttons (Left, Right, Up and Down)
Press to navigate on on-screen menu.
◆ 0~9 Numeric Buttons
Press these buttons to enter password. The digits of password are ranging from 4 digits to 8 digits. After enter
password, please press “Enter” to confirm it.

10
2.3 Installation
The PresentationMaster software disc will automatically open the installation program and will guide you through the process.
Both the sender and the receiver programs will be installed, the icons will be added to the laptop, and you can then either open the
Sender or open the Receiver program according to your needs.
Please follow the steps as below to complete all application.
2.3.1 Installing Wireless Multimedia Card
2.3.1.1 The Wireless Multimedia Card can be inserted into your computer’s PCMCIA slot when the computer
power is either turned on or off.
Caution: Do not force the Wireless Multimedia Card into the slot or
severe damage to the computer may occur.
2.3.1.2 The red LED on the Wireless Multimedia Card will light when the Wireless Multimedia Card is inserted into
the PCMCIA slot and the computer is turned on.
2.3.1.3 Insert the end of the Wireless Multimedia Card into the PCMCIA slot of your computer with the printed
label facing up, and slide it in until it is firmly seated.
2.3.2 LEDs on Wireless Multimedia Card
The two LEDs on the Wireless Multimedia Card indicate connection status and data transfer operation status, as
described below:
● Power LED
- Off when the driver of wireless multimedia card is not installed or wireless connection is disabled.
- Blinking when the driver of wireless multimedia card is installed.
● Activity LED
- Off when no data is transmitted or received.
- Blinking when the data is transmitted or received.
11
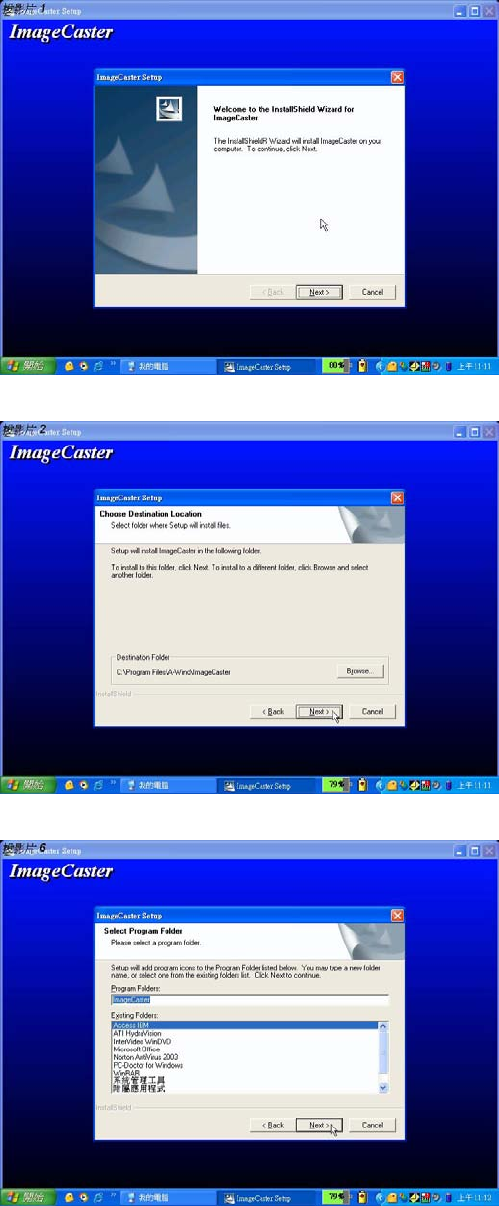
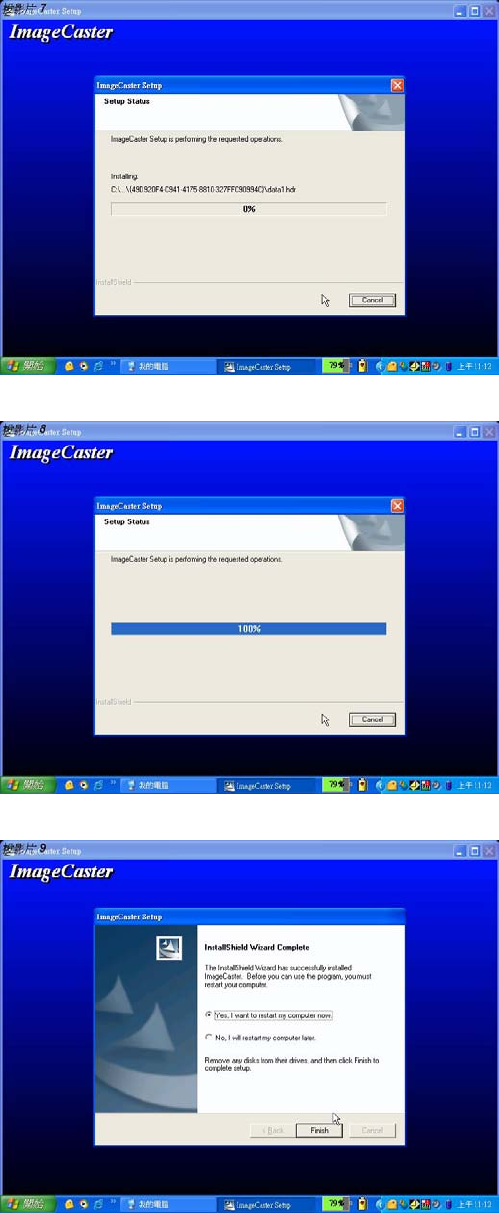
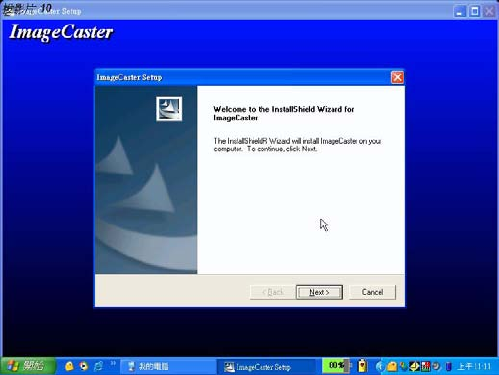
2.3.3 Installing the PresentationMaster Software
12
13

14
2.4 Setting Up the System
ImageCaster wireless multimedia system is designed to broadcast from one Sender to one master adapter and
multiple PC Receivers and multiple client adapters. The wireless broadcast can be received and viewed directly. The
PresentationMaster software is very easy to set up and all the hard choices like channel and SSID selection are made
automatically.
2.4.1 Here is how to start a PresentationMaster session.
Each desktop or notebook computer should have a WPC 293 wireless
multimedia card properly.
15
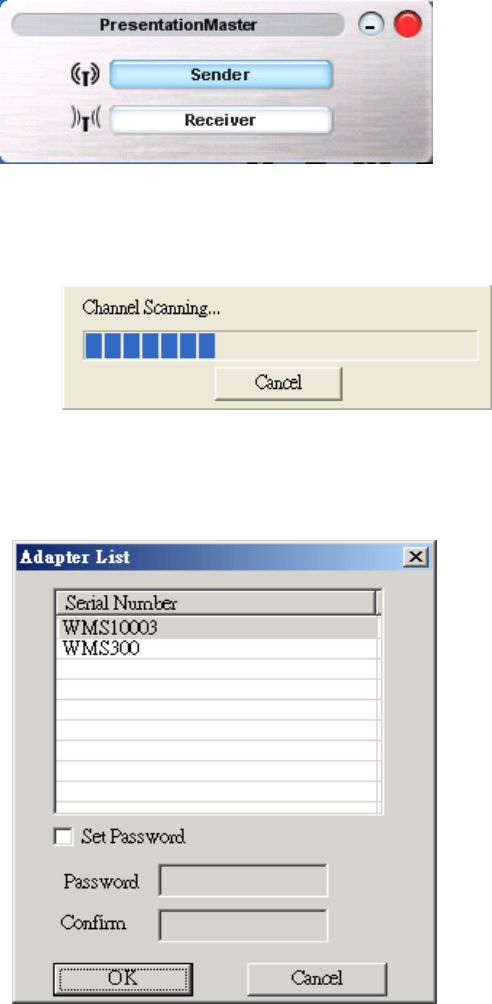
2.4.1.1 Start the PresentationMaster software. The PresentationMaster dialogue will automatically appear on the
Sender’s laptop and click Sender.
2.4.1.2 The Sender will automatically scan for available channels and select the network settings. A Rescan button
is available in the Settings dialog to perform the scan again if needed.
2.4.1.3 If the Sender finds more than one master adapters, you can choose one from the Adapter List. As a
security option, you can require a password by clicking Set Password. Type the password in the Password
box and then again to Confirm, then press OK button.
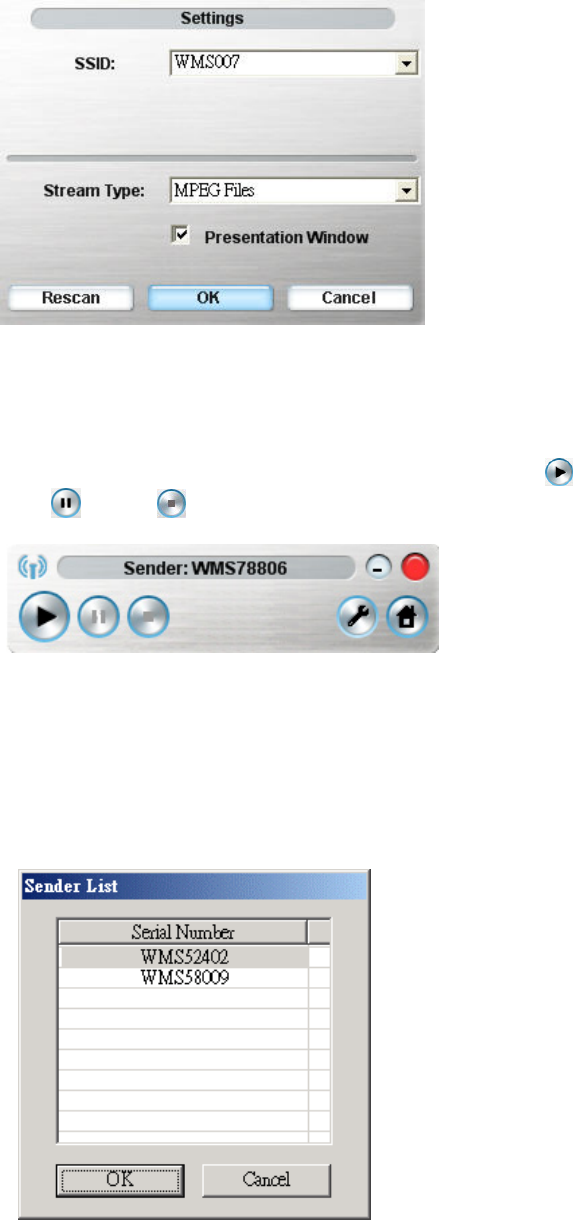
2.4.1.4 From the Settings dialog choosing two types of data that can be broadcasted. One type is MPEG-1,
MPEG-2, or MPEG-4 files and the other is a real-time image of the Sender’s laptop (called Screen
Capture).
16
2.4.1.5 Enable Presentation Window to have the MPEG content displayed on the Senders laptop. Disable this
option if it slows down the video performance.
2.4.1.6 You can now start the show from the Sender's control panel by clicking the play button . The data
transmission can be paused or halted from the Sender's control panel as well.
Note : The serial number of the connected Adapter is shown on the Sender's control panel.
2.4.1.7 The computers acted as Receiver will open the PresentationMaster software, then PresentationMaster
dialogue will automatically appear on the Receiver’s laptop. Users will click Receiver on
PresentationMaster dialogue, Sender List dialogue will appear. If there is more than one senders, the
Receiver can choose one from the Sender List.
17
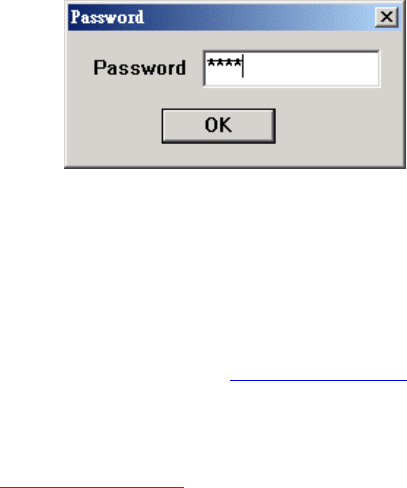
2.4.1.8 The password is required by Session Security if the Sender has enabled it. If not, you will not be
requested.
2.4.2 Here is how to start a session for the Wireless Multimedia Presentation System
2.4.2.1 Make sure that each computer in the setup has the appropriate wireless multimedia card installed.
2.4.2.2 The computer acted as Sender must open the Sender program by double-clicking the Sender button on
the dialogue of the selected computer. See Setting Up the Sender for information on how to set up your
sender computers.
2.4.2.3 Open the Receiver programs by double-clicking the Receiver button on the dialogue of the selected
computer. See Setting Up the Receiver for information on how to set up your receiver computers.
2.4.2.4 The following topics will help you get the Sender and Receiver computers properly configured.
18
2.5 Setting Up the Sender
2.5.1 PresentationMaster Dialogue
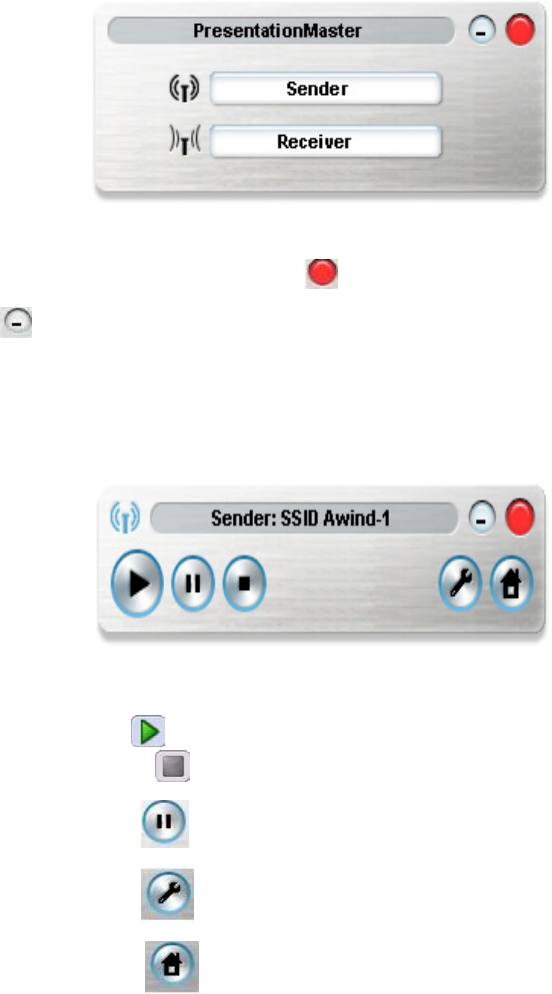
2.5.1.1 System will show PresentationMaster dialogue after installation completed. Please press the Sender
button if you act as Sender.
(Note: Presenter can be exchanged with all the meeting members by re-choosing the sender/
receiver button )
● Press Sender button entering the sender dialogue.
● Exit the PresentationMaster dialogue if press button
● Press to minimum dialogue screen
2.5.1.2 After you choose the sender button on the PresentationMaster dialogue, Sender dialogue will be shown on
the screen. There are five buttons on the sender dialogue:
● Current serial number will be showed on the sender title bar automatically.
● Click the play button on the sender dialogue to broadcast selected content. End transmission
with the stop command from the sender.
● Click the pause button on the sender: Suspend current action.
● Click the setup button on the sender: Enter the adapter setup dialogue.
● Click the Home button on the sender: Back to the sender screen.
19
● Click the Power button on the sender: Exit PresentationMaster dialogue.
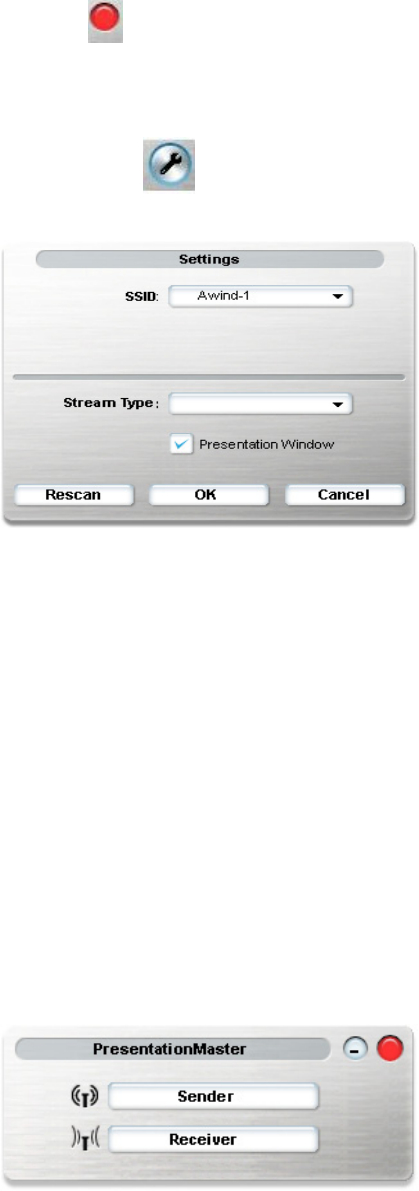
2.5.2 Settings Dialogue
2.5.2.1 After you have double-clicked the button on the sender operation dialogue, you can see the
Settings dialogue. On this dialogue, you can select the network adapter, stream type, and preview settings.
●Select Serial Number: If you access more than one master adapters, you can choose one of them to use.
●Stream Type: Choose MPEG-1, 2, 4 file to show a video, or Screen Capture to have the laptop displayed in the
sender’s or receiver's computers.
●Preview: Enable this option to have the multimedia content displayed on the senders laptop. Disable this option if it
slows down the performance.
●ReScan: Click this button and the program will search for and display the best channel to use.
2.5.2.2 After you have finished setting up the sender, click OK on the Settings dialogue.
2.5.3 Setting Up the Receiver
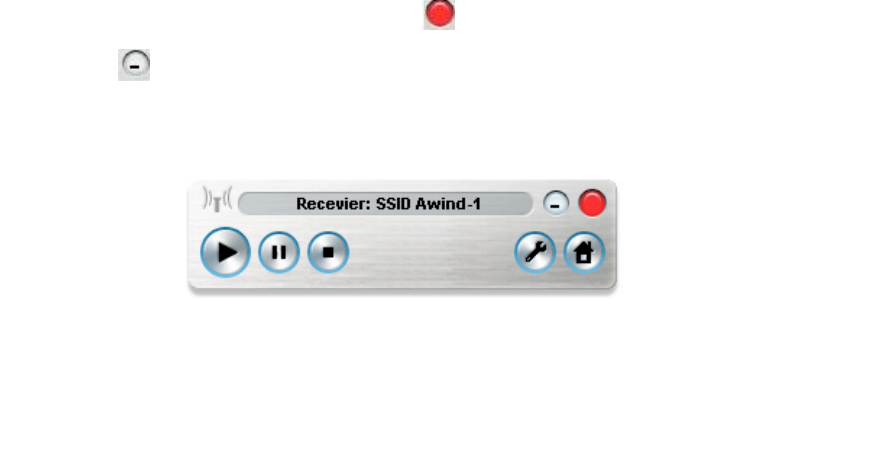
2.5.3.1 System will show PresentationMaster screen after installation completed. Please press the Receiver
button if you act as Receiver.
● Press Receiver button to enter receiver operation dialogue.
20
● Exit the PresentationMaster dialogue if press button
● Press to minimum dialogue screen
2.5.3.2 After you choose the receiver button on the PresentationMaster dialogue, receiver dialogue will be shown
on the screen. There are four buttons on the receiver dialogue:
● Current serial number will be show on the receiver title bar automatically
● Function key on the receiver control box will be the same with Sender except pause.
Note: An error message will appear if no sender is found
● Once all computers for your presentation have been set up, you can start the show.
3 Using Wireless Multimedia Presentation System
After you have set up and opened all the programs on all the computers, you are ready to experience the wonder of
wireless communications. Beginning with the main styles of presentation, video or screen capture, the possibilities
quickly become unlimited.
21
3.1 Giving a Multimedia Presentation
You can show the same JPEG or video on several computers. This could be done in a business environment,
a classroom, or at home. There's no need for everyone to crowd around a single monitor.
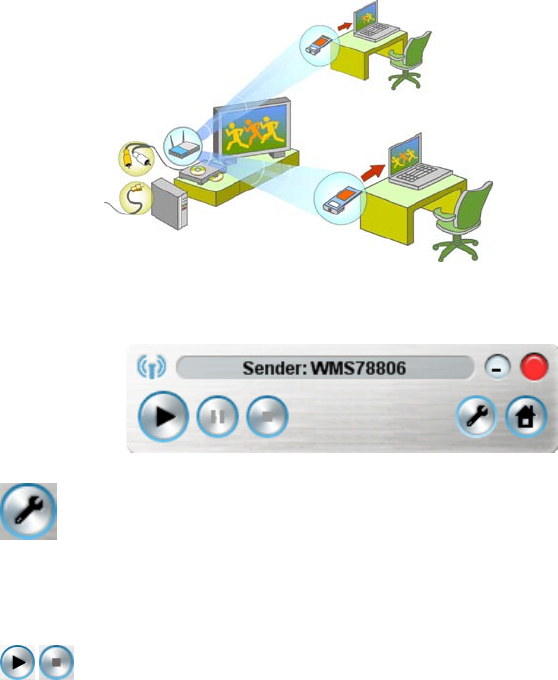
3.1.1 Operating Sender for Multimedia Presentation
● Click this button on the Sender dialogue to open the Setting dialogue. Choose MPEG File for the
Stream Type, then press OK button to exit.
● Click the Play button and an Open dialog screen will appear for choosing the MPEG file to play. Start the
broadcast by clicking the button on the Sender Computer.
● Click the start and stop buttons to control the transmission from the Sender. These buttons
will only work in the adapter has been connected.
● When the MPEG file is started, a video window will appear on each Sender and Receiver device.
22
3.1.2 Operating Receiver for Multimedia Presentation
Please note that the Sender must click the Play button before the first Receiver can start the broadcast.
● The first Receiver started has control of starting and stopping the video.
● When the video is started after receiver press Play button , a video window will appear on the laptop of each
receiver computer.
● While the video is playing, use the Maximize button to go to full-screen. To go from full-screen mode to the
standard window, right-click on the screen and choose Standard Window. Meantime, user can watch movie
and operate the OS simultaneously.
● Close the video window by clicking the Close button .
23
3.2 Giving a Image Presentation
You can let each of the receivers view the laptop of the sender. The receivers can watch the mouse move
across the screen and view any images you open on the laptop. This is a perfect way to get your point across
to your audience. Slide show or PowerPoint presentations come off really well.
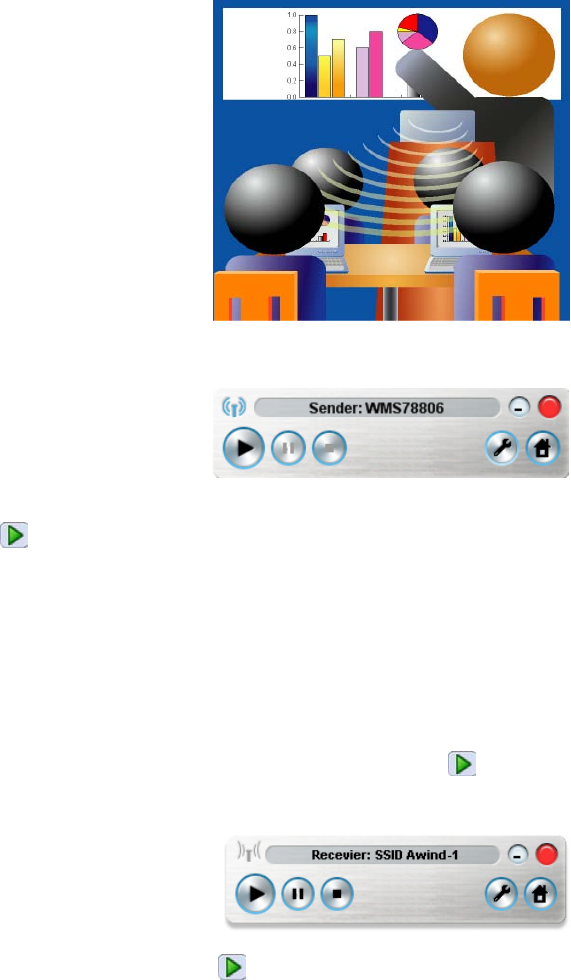
3.2.1 Operating Sender for Image Presentation
● Once you choose Screen Capture for your Stream Type, close the Settings dialog box, and click the Play button
to start the broadcast and wait for the client to begin. A window that contains the image of the Sender's lapktop
will appear on the data-receiver’s screens.
● Click the Maximize button to go to full screen. To go from full-screen mode to the standard window, right-click the
screen and choose Standard Window.
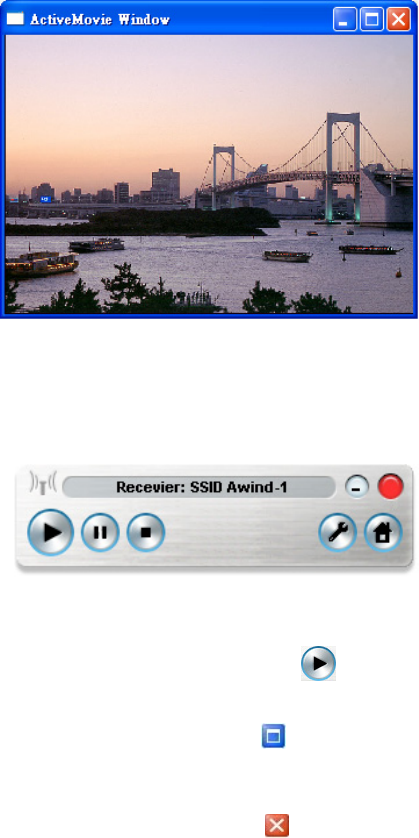
3.2.2 Operating Receiver for Image Presentation
Here are the Receiver controls and an explanation of the available buttons. Please note that the Sender must click
the Play button before the Receivers click the Play button
● After clicking the Play button , a window that contains the image of the server’s laptop will appear.
● Click the Maximize button to go to full screen. To go from full-screen mode to the standard window, right-click on
the screen and choose Standard Window. Meantime, user can watch presentation file and operate the OS
document simultaneously.
24
4 Frequently Asked Questions
Q. What is Wireless Multimedia Presentation System?
A. This is a wireless multimedia presentation system that eliminates conventional wired connection between a PC
and projector with RGB cable, allowing the users with freedom to give presentation anywhere in the meeting room,
without the limitation of cable length.
Q. What do I need to operate wireless multimedia card with my PC?
A. With your laptop PC, you will need a PCMCIA type wireless multimedia card. For a desktop PC, you will need a
PCMCIA type wireless multimedia card plus PCMCIA converting to PCI card for each client PC.
Q. Can I let wireless multimedia presentation system work with an existing WLAN?
A. No, it is not allowed multimedia presentation system to work with an existing WLAN.
Q. How many PC clients can connect to a single ImageCaster?
A. Countless client PC can connect to the adapter per session within its range. However, PresentationMaster
software allows users to take turn and present their materials by simply switching from one presenter to another.
Q. What is the range of wireless transmission?
A. With no obstructions, the wireless signals have optimal range of 100 to 130 feet. However, the layout of building,
location of furniture, and type of building materials used (such as steel frame) may affect the transmission
conditions
Q. Do I need any special software?
A. You need to install PresentationMaster software in your PC.
Q. Any software license for PresentationMaster software?
A. PresentationMaster software is a license-free software.
Q. Can I use wireless LAN cards from other vendors?
A. In general, it is a proprietary system. Thus, you can`t use standard wireless cards connection with wireless
multimedia presentation system.
5 Specifications
◆ Modes
● Peer to Peer
● One to Many
◆ Image Format
● JPEG
◆ Video formats
● MPEG1, MPEG2 and MPEG4
◆ Audio formats
● MPEG 1 Layer I, II and III (MP3)
● MPEG 2 Layer I and II
5-2
◆ Resolutions
● 640x480
● 800x600
● 1024x768
◆ Interfaces
● Rear Panel
1 x Composite video output
1 x S-Video output
1 x VGA output
1 pair of RCA connectors (L & R) for audio output
1 x SMA Connector
1 x Button (Reset to default setting)
1 x Slide Switch (Master/Client selection)
DC jack
● Front Panel
4 x Buttons (Power On/Off, Content Selection, Resolution selection and Enter)
2 x LEDs (Power On/Off indicator and Link/Activity status)
◆ Mechanical
● Dimension (L x W x H)
220mm x 155mm x 37mm
◆ Power
● External AC adapter input: 100~240Vac± 10%@50/60Hz
● Power consumption: ≦12W
◆ Environmental Conditions
● Operating temperature: 0~40℃
● Storage temperature: -10℃~60℃
● Operating humidity: ≦90%
● Storage humidity: ≦80%