BK Technologies KNGP400 UHF LAND MOBILE RADIO User Manual KNG User s Manual
RELM WIRELESS CORP. - BK RADIO UHF LAND MOBILE RADIO KNG User s Manual
Users Manual

1
RELM/BK Radio
Contents
FCC Requirements ....................................................................5
Federal Communications Commission Regulations .......................7
Compliance with RF Exposure Standards ......................................7
Industry Canada Compliance .........................................................7
RF Exposure Compliance and Control Guidelines .........................8
Radio Controls .........................................................................10
LCD Display .............................................................................11
Status Indicators ........................................................................... 11
Alphanumeric Label Options......................................................... 11
Buttons and Labels ....................................................................... 12
Battery Installation and Removal ...........................................13
Installing the Battery ..................................................................... 13
Removing the Battery ................................................................... 13
Battery Care and Maintenance ..............................................14
Antenna Installation and Removal .........................................14
Installing the Antenna ................................................................... 14
Removing the Antenna ................................................................. 14
Programmable Switch and Button Functions .......................15
Switch Options .............................................................................. 15
Buttons Options ............................................................................ 15
Menu Options................................................................................ 15
Keypad Menu Operation ............................................................... 16
Basic Radio Operation ............................................................17
Receive ......................................................................................... 17
Transmit ........................................................................................ 17
Code Guard Operation ............................................................18
Analog Squelch Control ................................................................ 18
APCO Project 25 Squelch Control ................................................ 18
Code Guard Receive .................................................................... 19
Code Guard Transmit .................................................................... 19

2KNG User’s Manual 3
RELM/BK Radio
Encryption Operation .............................................................21
Required Setup ............................................................................. 21
Operation ...................................................................................... 21
Transmit Encryption Key Selection ...............................................22
Zeroization ....................................................................................23
Over-the-Air-Rekeying (OTAR) .....................................................23
Keyset Viewing and Selecting .......................................................25
General Options.......................................................................26
Backlight (LIGT) ............................................................................26
Keypad Lock .................................................................................26
Monitor (MON) ..............................................................................27
Repeater Talkaround (TA) ............................................................. 27
Silent Mode (SLNT) ......................................................................28
Squelch Adjust (SQL) ...................................................................28
Tx Digital (TXD) .............................................................................29
Tx Power (LPW) ............................................................................29
Zone Select (ZON) ........................................................................30
Scan Operation Options .........................................................31
Channel Scan (SCAN) .................................................................. 31
Scanning Code Guarded Channels .............................................. 31
Nuisance Channel Delete .............................................................32
Transmitting with Scan On ...........................................................32
Talkback Scan ...............................................................................32
Priority Scan (PRI) ........................................................................32
Scan List Add/Delete ....................................................................36
Zone Scan (ZSCN) .......................................................................36
Zone Scan List Add/Delete .......................................................... 37
Emergency Signalling Options ..............................................37
Pacing an Emergency Call ...........................................................38
Receiving an Emergency Signal ...................................................38
Unit-to-Unit Call Options .........................................................39
Individual Call (U2U) .....................................................................39
Unit-to Unit Callback .....................................................................40
Call List Programming ...................................................................40
Encryption Options .................................................................41
Tx Secure (TXS) .......................................................................... 41
Zeroize Keys (ZER) .....................................................................42
Rekey Request (RKY) (OTAR equipped radios) .................................. 43
Pick List Options .....................................................................44
Picklist- TX CxCSS (UTON) .........................................................44
Picklist – TX NAC (UNAC) ............................................................45
Picklist – TGID (UTG) ...................................................................46
Picklist – Key (UKEY) ................................................................... 47
Picklist – Key Set (UKST) .............................................................48
Programming P25 ID Unit Call/Receive List ................................49
Programming User Selectable Transmit Tones ............................ 51
Programming User Selectable Network Access Codes ............... 52
Programming User Selectable Talkgroup IDs ...............................53
Keypad Programming .............................................................54
Programming Channel Information ...............................................54
Programming Zone Parameters.................................................... 61
Programming Global Parameters ................................................65
DeÞ nitions and Acronyms ......................................................71
Warranty ...................................................................................72
Service ......................................................................................72
Your Radio Settings ................................................................73
4KNG User’s Manual 5
RELM/BK Radio
Introduction
Congratulations on your purchase of the BK Radio KNG Portable radio
from RELM Wireless.
The KNG APCO Project 25 radio offers an array of programmable
functionality to help radio users get the most out of their portable
communications. Check with your RELM/BK Radio dealer or
communications ofÞ cer for information on the programmed functions of
your radio prior to operation.
This manual contains information concerning the operation procedures
for the BK Radio KNG Portable radio. The KNG has been designed to
meet the tough requirements of today’s communications environment.
Please take a moment to read the information in this manual so you can
get optimum performance from your new radio.
FCC Requirements
Your radio must be properly licensed by the Federal Communications
Commission prior to use. Your BK Radio dealer can assist you in meeting
these requirements. Your dealer will program each radio with your
authorized frequencies, signaling codes, etc., and will be there to meet
your communications needs as your system expands.
Safety Precautions
• Do not operate the transmitter in close
proximity to blasting caps.
• Do not operate the radio in an explosive
atmosphere (petroleum fuels, solvents, dust,
etc.) unless your radio is an intrinsically safe
model designed for such use.

6KNG User’s Manual 7
RELM/BK Radio
RF ENERGY EXPOSURE AWARENESS AND CONTROL
INFORMATION, AND OPERATIONAL INSTRUCTIONS FOR
FCC OCCUPATIONAL USE REQUIREMENTS
BEFORE USING YOUR PORTABLE 2-WAY RADIO,
READ THIS IMPORTANT RF ENERGY AWARENESS AND CONTROL
INFORMATION AND OPERATIONAL INSTRUCTIONS TO ENSURE
COMPLIANCE WITH THE FCC’S RF EXPOSURE GUIDELINES.
NOTICE: This radio is intended for use in occupational/controlled
conditions, where users have full knowledge of their exposure and
can exercise control over their exposure to meet FCC limits. This
radio device is NOT authorized for general population, consumer, or
any other use.
This 2-way radio uses electromagnetic energy in the radio frequency (RF)
spectrum to provide communications between two or more users over a
distance. It uses radio frequency (RF) energy or radio waves to send and
receive calls. RF energy is one form of electromagnetic energy; other forms
include electric power, radar, sunlight and x-rays. RF energy, however,
should not be confused with these other forms of electromagnetic energy,
which when used improperly can cause biological damage. Very high
levels of x-rays, for example, can damage tissues and genetic material.
The energy levels associated with radio waves from portable 2-way radios,
when properly used, are not great enough to cause biological damage.
Experts in science, engineering, medicine, health and industry work with
organizations to develop standards for exposure to RF energy. These
standards provide recommended levels of RF exposure for both workers
and the general public. These recommended RF exposure levels include
substantial margins of protection. All 2-way radios marketed in North
America are designed, manufactured and tested to ensure they meet
government established RF exposure levels. In addition, manufacturers
also recommend speciÞ c operating instructions to users of 2-way radios.
These instructions are important because they inform users about RF
energy exposure and provide simple procedures on how to control it.
Please refer to the following websites for more information on what RF
energy exposure is and how to control your exposure to assure compliance
with established RF exposure limits.
http://www.fcc.gov/oet/rfsafety/rf-faqs.html
http://www.osha.gov/SLTC/radiofrequencyradiation/index.html
FEDERAL COMMUNICATIONS COMMISSION REGULATIONS
The FCC rules require manufacturers to comply with the FCC RF energy
exposure limits for portable 2-way radios before they can be marketed in
the U.S. When 2-way radios are used as a consequence of employment,
the FCC requires users to be fully aware of and able to control their
exposure to meet occupational requirements. Exposure awareness can
be facilitated by the use of a product label directing users to speciÞ c user
awareness information. Your BK Radio 2-way radio has a RF exposure
product label. Also, your BK Radio owner’s and service manuals include
information and operating instructions required to control your RF exposure
and to satisfy compliance requirements.
COMPLIANCE WITH RF EXPOSURE STANDARDS
Your BK Radio 2-way radio is designed and tested to comply with a number
of national and international standards and guidelines (listed below) for
human exposure to radio frequency electromagnetic energy. This radio
complies with the IEEE and ICNIRP exposure limits for occupational/
controlled RF exposure environment at operating duty factors of up to
50% transmitting and is authorized by the FCC for occupational use only.
In terms of measuring RF energy for compliance with the FCC exposure
guidelines, your radio radiates measurable RF energy only while it
is transmitting (during talking), not when it is receiving (listening) or in
Standby Mode. Note: The approved batteries supplied with this radio are
rated for a 5-5-90 duty factor (5% talk - 5% listen - 90% standby), even
though this radio complies with the FCC occupational RF exposure limits
and may operate at duty factors of up to 50% talk.
Your BK Radio 2-way radio complies with the following RF energy exposure
standards and guidelines:
United States Federal Communications Commission, Code of •
Federal Regulations; 47 CFR §§ 1.1307, 1.1310, 2.1091 and
2.1093
American National Standards Institute (ANSI) / Institute of •
Electrical and Electronic Engineers (IEEE) C95. 1-1992
Institute of Electrical and Electronic Engineers (IEEE) C95.1-•
1999 Edition
INDUSTRY CANADA COMPLIANCE
This Class B digital apparatus complies with Canadian ICES-003. Cet
appareil numerique de la classe B est conforme à la norme NMB-003
Canada.

8KNG User’s Manual 9
RELM/BK Radio
RF EXPOSURE COMPLIANCE AND CONTROL GUIDELINES
AND OPERATION INSTRUCTIONS
To control your exposure and ensure compliance with the occupational/
controlled environment exposure limits always adhere to the following
procedures.
Guidelines:
Do not remove the RF Exposure Label from the device.•
User awareness instructions must accompany device when •
transferred to other users. Do not use this device if the operational
requirements described herein are not met.
Operating Instructions:
Transmit no more than the rated duty factor of 50% of the time. To
transmit (talk), push the Push-To-Talk (PTT) button. To receive calls,
release the PTT button. Transmitting 50% of the time, or less, is important
because this radio generates measurable RF energy exposure only when
transmitting (in terms of measuring for standards compliance).
Hold the radio in a vertical position in front of face with the •
microphone (and the other parts of the radio, including the
antenna) at least one inch (2.5 cm) away from the nose. Keeping
the radio at the proper distance is important because RF
exposures decrease with distance from the antenna. Antenna
should be kept away from eyes.
When worn on the body, always place the radio in a BK Radio •
approved clip, holder, holster, case, or body harness for this
product. Using approved body-worn accessories is important
because the use of BK Radio or other manufacturer’s non-
approved accessories may result in exposure levels which
exceed the FCC’s occupational/controlled environment RF
exposure limits.
If you are not using a body-worn accessory and are not using •
the radio in the intended use position in front of the face, then
ensure the antenna and the radio are kept at least one inch (2.5
cm) from the body when transmitting. Keeping the radio at the
proper distance is important because RF exposures decrease
with increasing distance from the antenna.
Use only BK Radio approved supplied or replacement antennas, •
batteries, and accessories. Use of non-BK Radio approved
antennas, batteries, and accessories may exceed the FCC RF
exposure guidelines.
For a list of BK Radio approved accessories visit the following website:
http://www.relm.com.
The AMBE® voice compression software included in this product is
protected by intellectual property rights including patent rights, copyrights
and trade secrets of Digital Voice Systems, Inc. The user of this software
is explicitly prohibited from attempting to decompile, reverse engineer, or
disassemble the object code, or in any other way convert the object code
into a human-readable form. This software is licensed solely for use within
this product. US Patent Nos. #6,912,495 B2, #5,870,405, #5,826,222,
#5,754,974, #5,715,365, #5,701,390, #5,649,050, #5,630,011, #5,581,656,
#5,517,511, #5,491,772, #5,247,579, #5,226,084, and #5,195,166.
CONTACT INFORMATION
For additional information on exposure requirements or other information,
visit website http://www.relm.com.
10 KNG User’s Manual 11
RELM/BK Radio
KNG
ABC DEF
GHI JKL MNO
PQRS TUV WXYZ
*
#
123
4
789
56
0
BK RADIO
15
1
2
3
4
56
7
89
11
10
12
13
14
16
SCAN
PRI
VOL
On/Off Volume
Channel Select Collar Switch
Antenna
Connector
Emergency
Button
Toggle Switches
LED Indicator
Ch 1
KNG-P150 P25
171.58500 MHz
LIGT T/A MENU LCK
TXD SCN
Programmable
Side Buttons
Push-to-Talk
Speaker
Accessory
Connector
Alphanumeric
Display
Microphone
Diamond
Button
Up Arrow
Button
Down Arrow
Button
Square
Button
Keypad
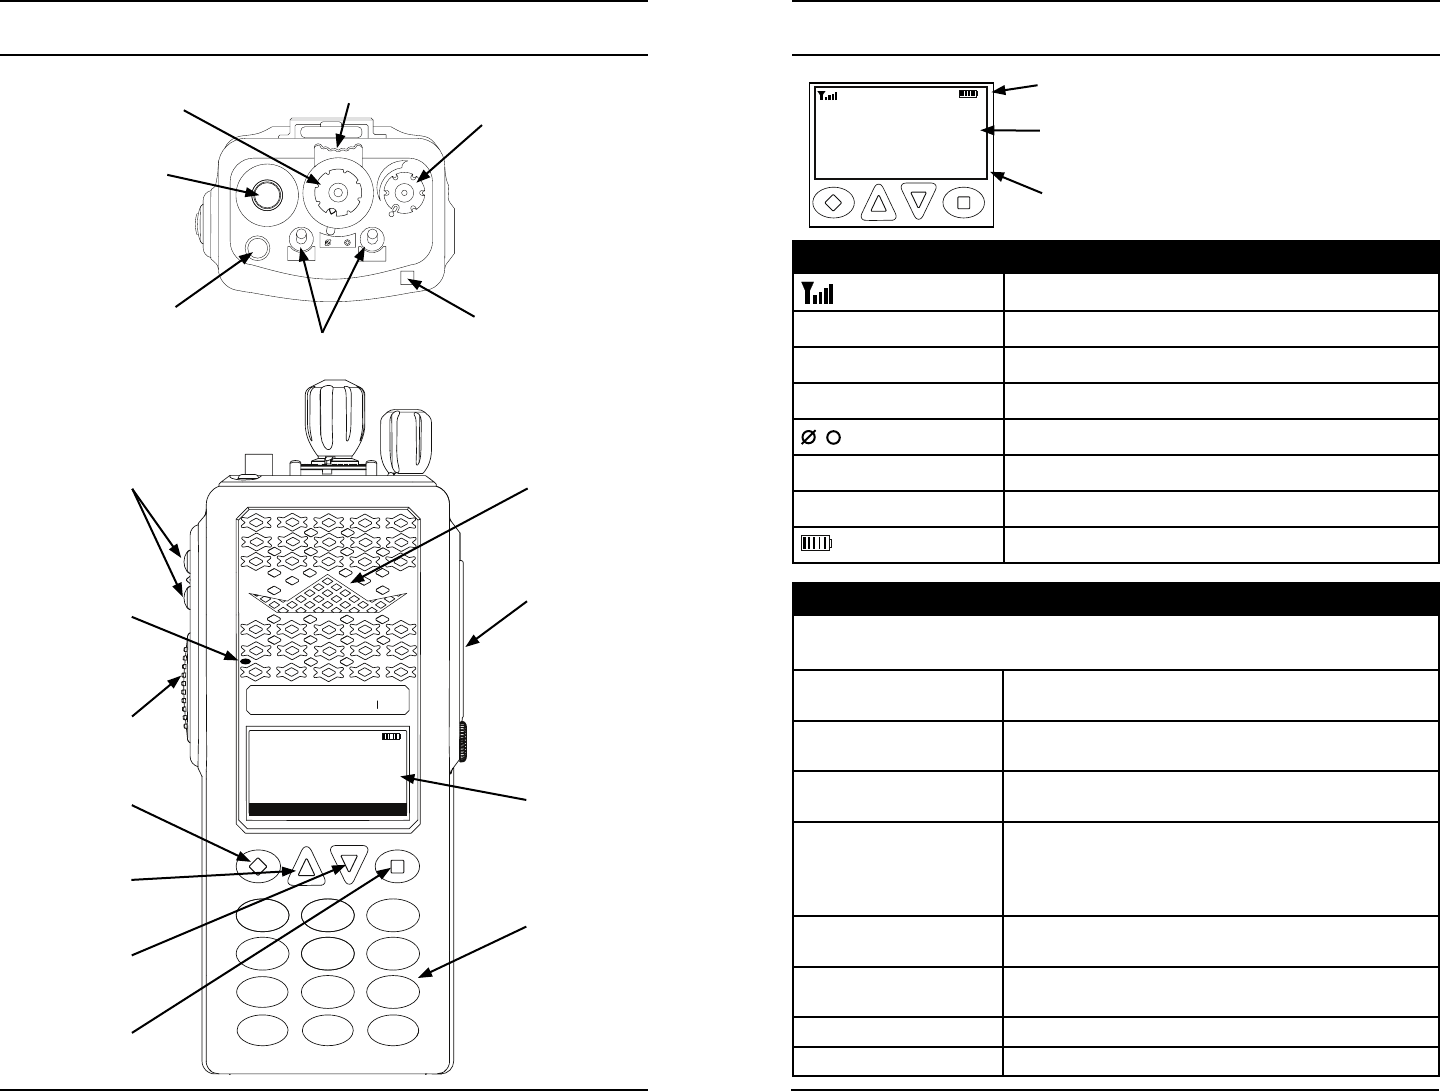
Radio Controls LCD Display
Ch 1
KNG-P150 P25
171.58500 MHz
LIGT T/A MENU LCK
RXD SCN
Status Indicators
Programmable
Alphanumeric
Labels
Programmed
Button Labels
The KNG display can be
programmed for a variety of
options and functionality.
Check with your RELM/BK
Radio dealer or communica-
tions ofÞ cer for information
on the programmed func-
tions of your radio.
Status Indicators
Receiver Signal Strength
RXD, RXA Receive Digital, Receive Analog, Hold Time Active
TXD, TXA Transmit Digital, Transmit Analog
P1, P2 Priority 1 Channel, Priority 2 Channel
, Encrypted, Clear
SCN Scan Channel, Flashing 'SCN' = Scan in Progress.
!Unit-to-Unit operation active
Battery Level Indicator
Alphanumeric Label Options
NOTE: Three channel information lines are programmable with PC Radio Editor
Software.
Channel Number Channel Number of Currently Selected Channel or
Active Scanned Channel
Channel Label Alphanumeric Label of Currently Selected Channel
or Active Scanned Channel
Frequency Operating Frequency of Currently Selected Channel
or Active Scanned Channel
Received Unit ID P25 ID of the radio transmitting the message cur-
rently being received
If the received ID is programmed in your radio's Call
List, the corresponding label will be displayed
Received Talk Group ID P25 Talk Group ID of the radio transmitting the mes-
sage currently being received
Pick List Selection NAC, TGID or Code Guard currently selected from
the programmable Pick Lists
Zone Label Label of Currently Selected Zone
Zone and Channel Currently Selected Zone and Channel Numbers
12 KNG User’s Manual 13
RELM/BK Radio
Buttons and Labels
NOTE: The Diamond, Up Arrow, Down Arrow, and Square buttons are
programmable with PC Radio Editor Software. The programmed functions are
activated by pressing the associated button. Active functions are indicated by a
highlighted background. SCN = Active, SCN = Inactive.
SCN Channel Scan
PSCN Priority Scan
ZSCN Zone Scan
MENU Open the programmed radio menu
SQL Squelch Adjust
LCK Keypad Lockout
LIGT Keypad and Display Backlight
T/A Repeater Talkaround
LPW Low Transmit Power
MON Monitor
TXD Transmit Digital
(Mixed Mode Operation)
TXS Transmit Secure
(Encrypted Models)
U2U Unit-to-Unit Call
(Digital Operation Only)
PR1 Set Priority 1 Channel
UTON User Selectable CTCSS/CDCSS Code Guard
(Analog or Mixed Mode Operation)
UNAC User Selectable NAC
(Digital or Mixed Mode Operation)
UTG User Selectable Talk Group
(Digital or Mixed Mode Operation)
ZON Channel Zone Select
SLNT Silent Mode
RKY Request OTAR Encryption Rekey
(OTAR Encrypted Models)
ZER Zeroize Encryption Keys and Password
(Encrypted Models)
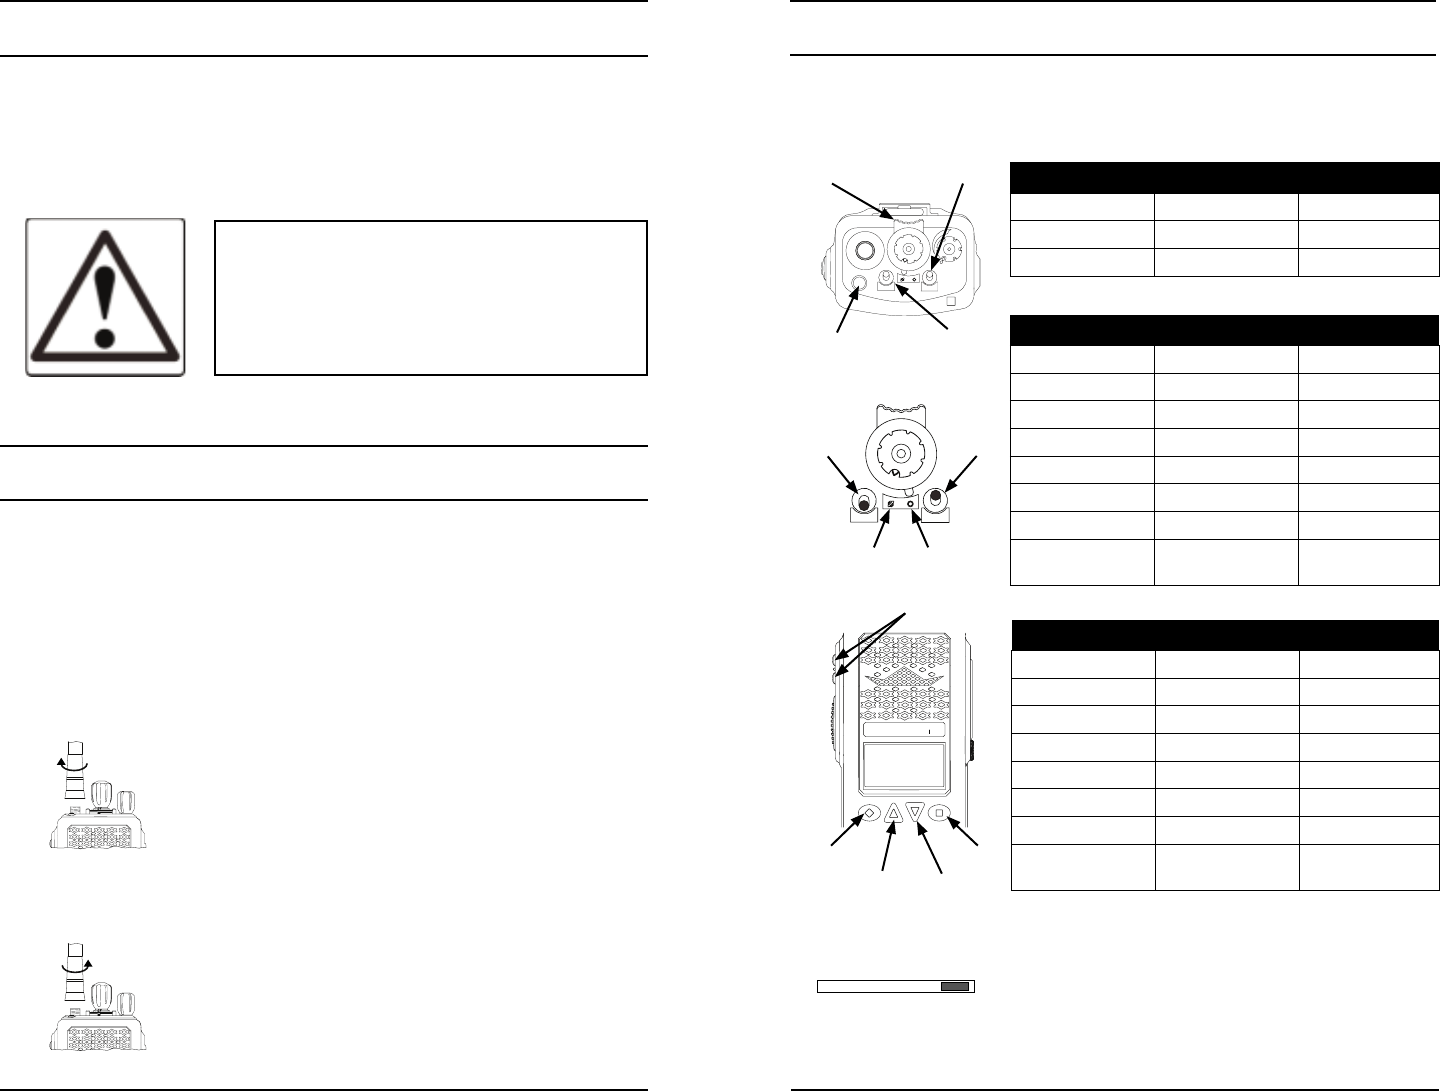
Battery Installation and Removal
NOTE: For safety reasons, rechargeable battery packs are shipped
uncharged or only partially charged. Therefore, a rechargeable battery
pack should be properly charged in an approved battery charger before
use.
Installing the Battery
1. Turn the radio off.
2. Align the tabs on the bottom of the
battery with the slots on the radio.
3. Push the top of the battery toward the
radio until release tab "clicks" into place.
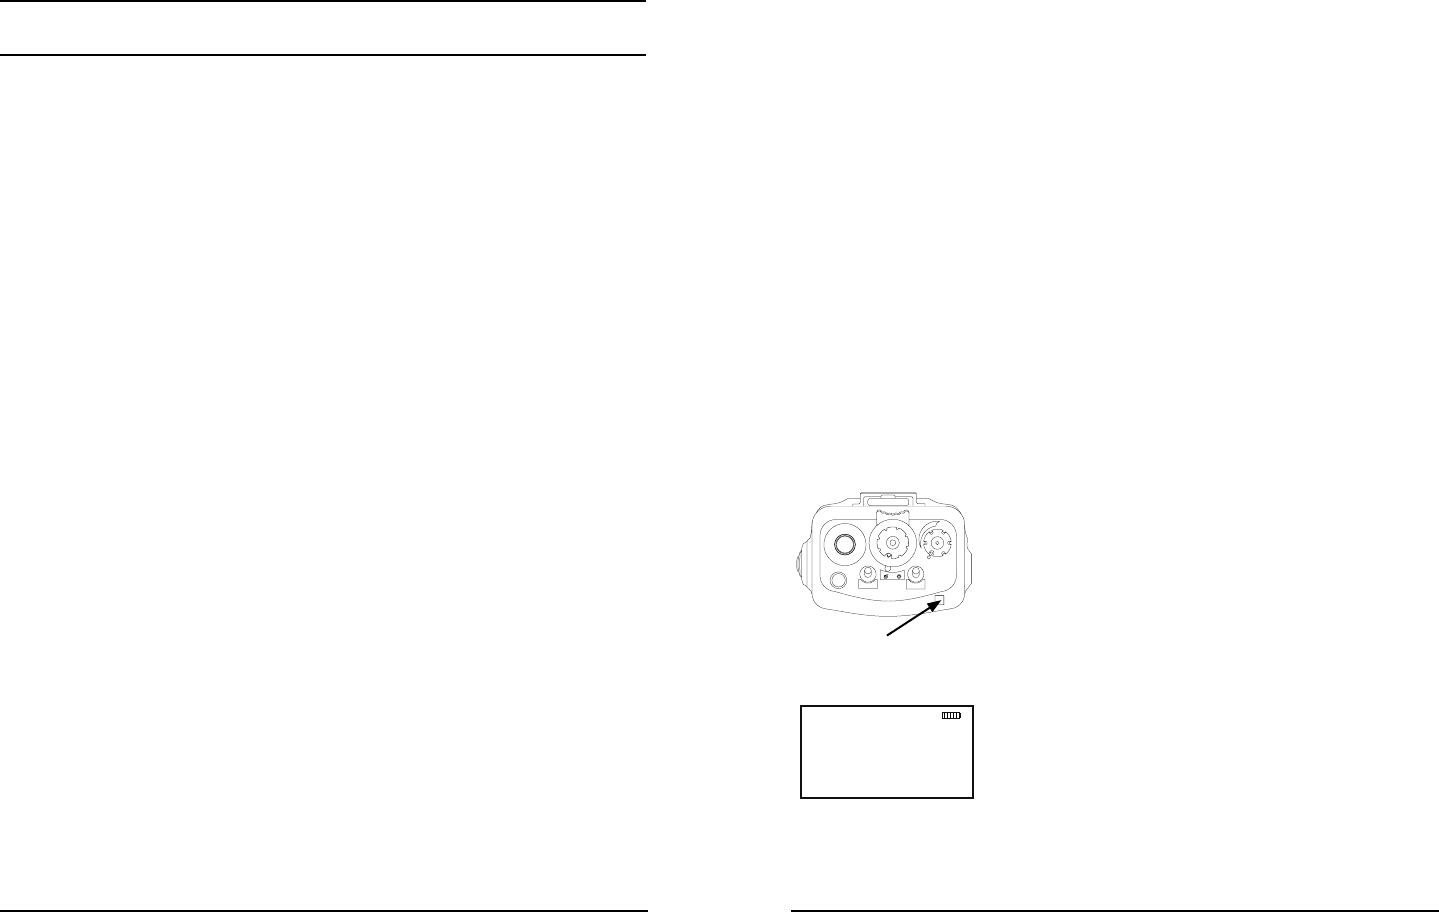
Removing the Battery
+TS ON
-
Release Tab
1. Slide the release tab toward the
bottom of the radio.
2. Pull the top of the battery out.
(Approximately 30o)
3. Pull up to remove the battery pack.
NOTE: All information programmed into the radio is maintained even
when the battery pack is removed.
14 KNG User’s Manual 15
RELM/BK Radio
Battery Care and Maintenance
BK Radio battery packs are available in a variety of capacities and types
for special applications. Rechargeable battery packs can be charged
separately or while attached to a radio.
Periodically check the contacts on the battery pack for dirt that could
prevent a good electrical contact with the charging base.
WARNING!
Do not drop a battery pack into Þ re.
An explosion may occur
Antenna Installation and Removal
NOTE: Transmitting without an antenna could result in damage to your
radio.
Use RELM/BK Radio approved antennas only. Use of non-qualiÞ ed or
mismatched antennas could result in diminished radio operation. Published
radio speciÞ cations cannot be guaranteed with non-approved antennas.
Bent, broken or damaged antennas should be replaced.
Installing the Antenna
Insert the radio's antenna connector into the
threaded connector of the antenna and turn it
clockwise until it is Þ rmly seated.
Removing the Antenna
Holding the base, turn the antenna
counterclockwise until released.
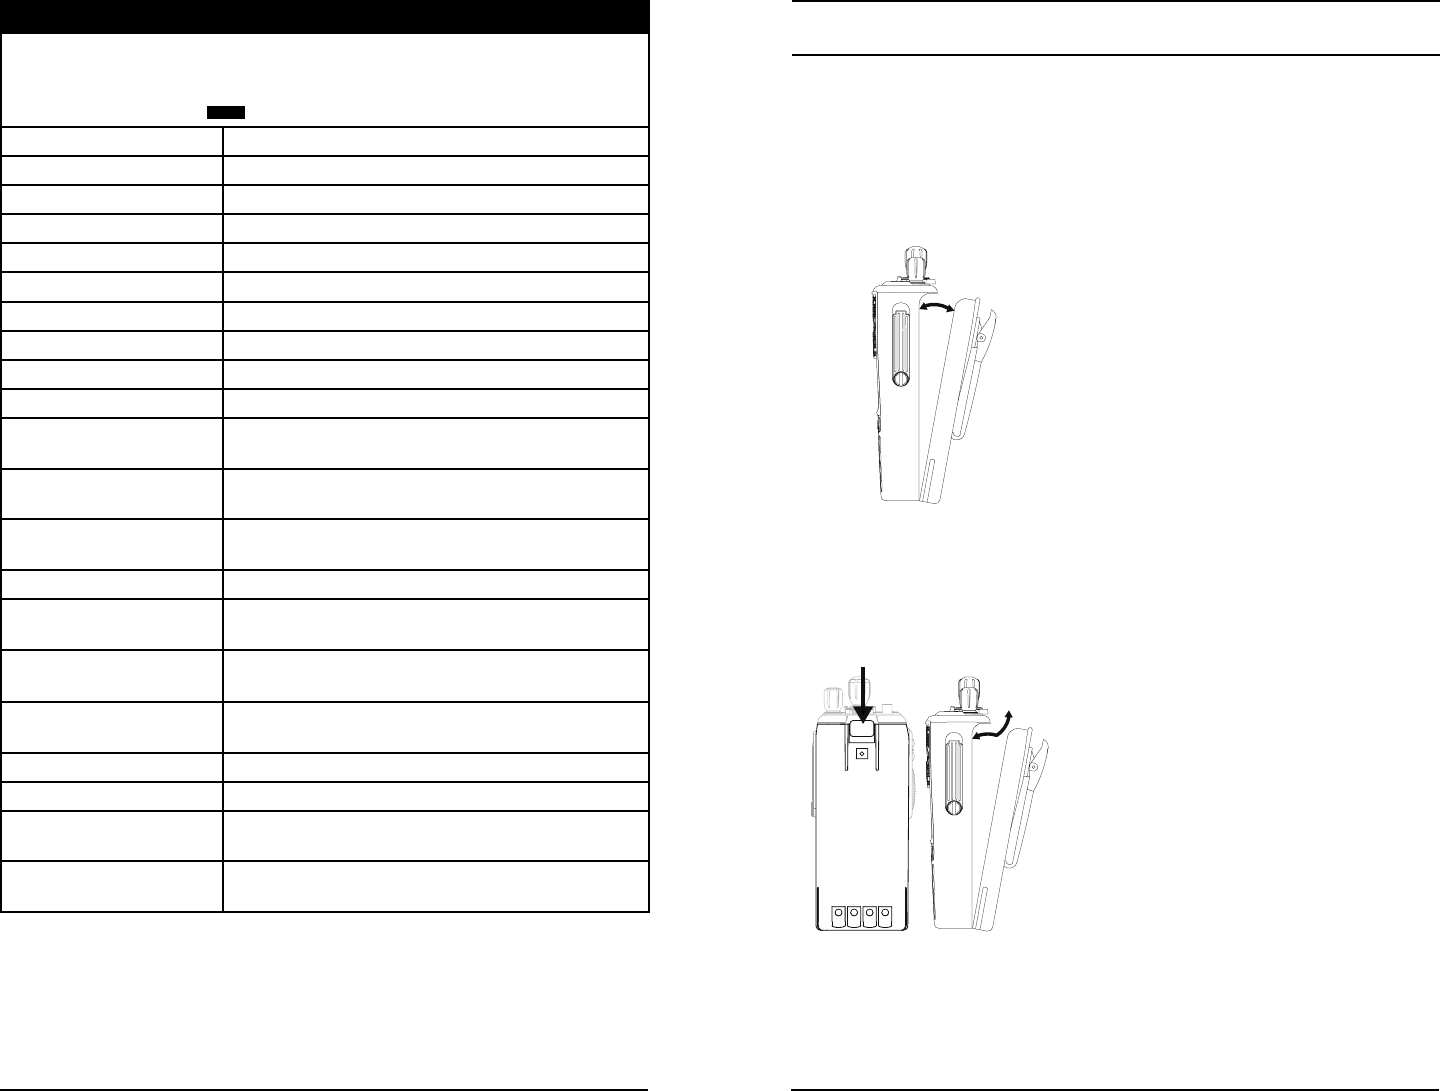
Programmable Switch and Button Functions
The KNG portable radio is equipped with seven programmable control
buttons and three programmable switches. Switch and button functions
are assigned via PC programming.
15
1
2
3
4
56
7
89
11
10
12
13
14
16
SCAN
PRI
VOL
Right Toggle
Collar Switch
Left Toggle
Orange Button
KNG
BK RADIO
Square
Diamond
Up Down
Side Buttons
Switch Options
Channel Scan Priority Scan Zone Scan
Backlight Talkaround Tx Power
Monitor Tx Digital Tx Secure
Buttons Options
Channel Scan Priority Scan Keypad Lock
Zone Scan Menu Backlight
Tx Power Monitor Tx Digital
Tx Secure Individual Call Zeroize Keys
Rekey Request Silent Mode Picklist-CxCSS
Picklist-NAC Picklist-TGID Picklist-Key
Picklist-Ket Set Zone Select Squelch Select
Repeater
Talkaround
PRI 1 Select Emergency
(Orange Only)
Menu Options
Channel Scan Priority Scan Keypad Lock
Zone Scan Backlight Tx Power
Monitor Tx Digital Tx Secure
Individual Call Zone Select Zeroize Keys
Rekey Request Silent Mode Picklist-CxCSS
Picklist-NAC Picklist-TGID Picklist-Key
Picklist-Ket Set Squelch Select PRI 1 Select
Repeater
Talkaround
15
1
2
3
4
56
7
89
11
10
12
13
14
16
SCAN
PRI
On Off
On Off
LIGT T/A MENU TXD
Functions assigned to the diamond, square or up/
down buttons will be highlighted on the display when turned on.
NOTE: Functions programmed to the toggle or collar switches should not
be programmed as menu items or button functions.
16 KNG User’s Manual 17
RELM/BK Radio
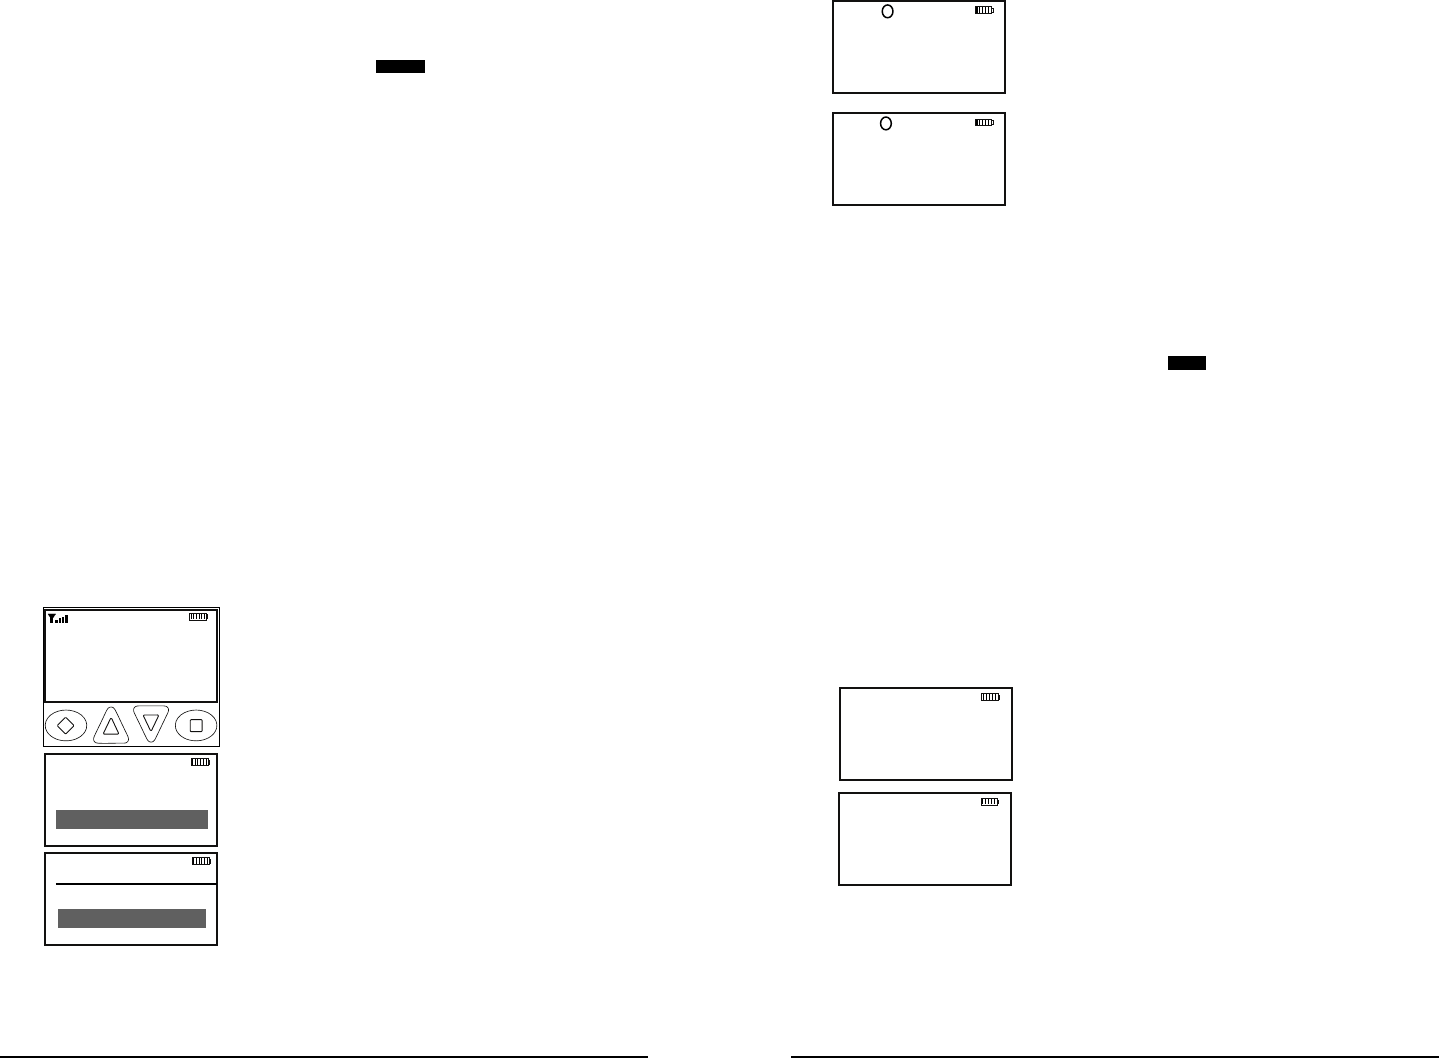
Basic Radio Operation
Receive
15
1
2
3
4
56
7
89
11
10
12
13
14
16
SCAN
PRI
VOL
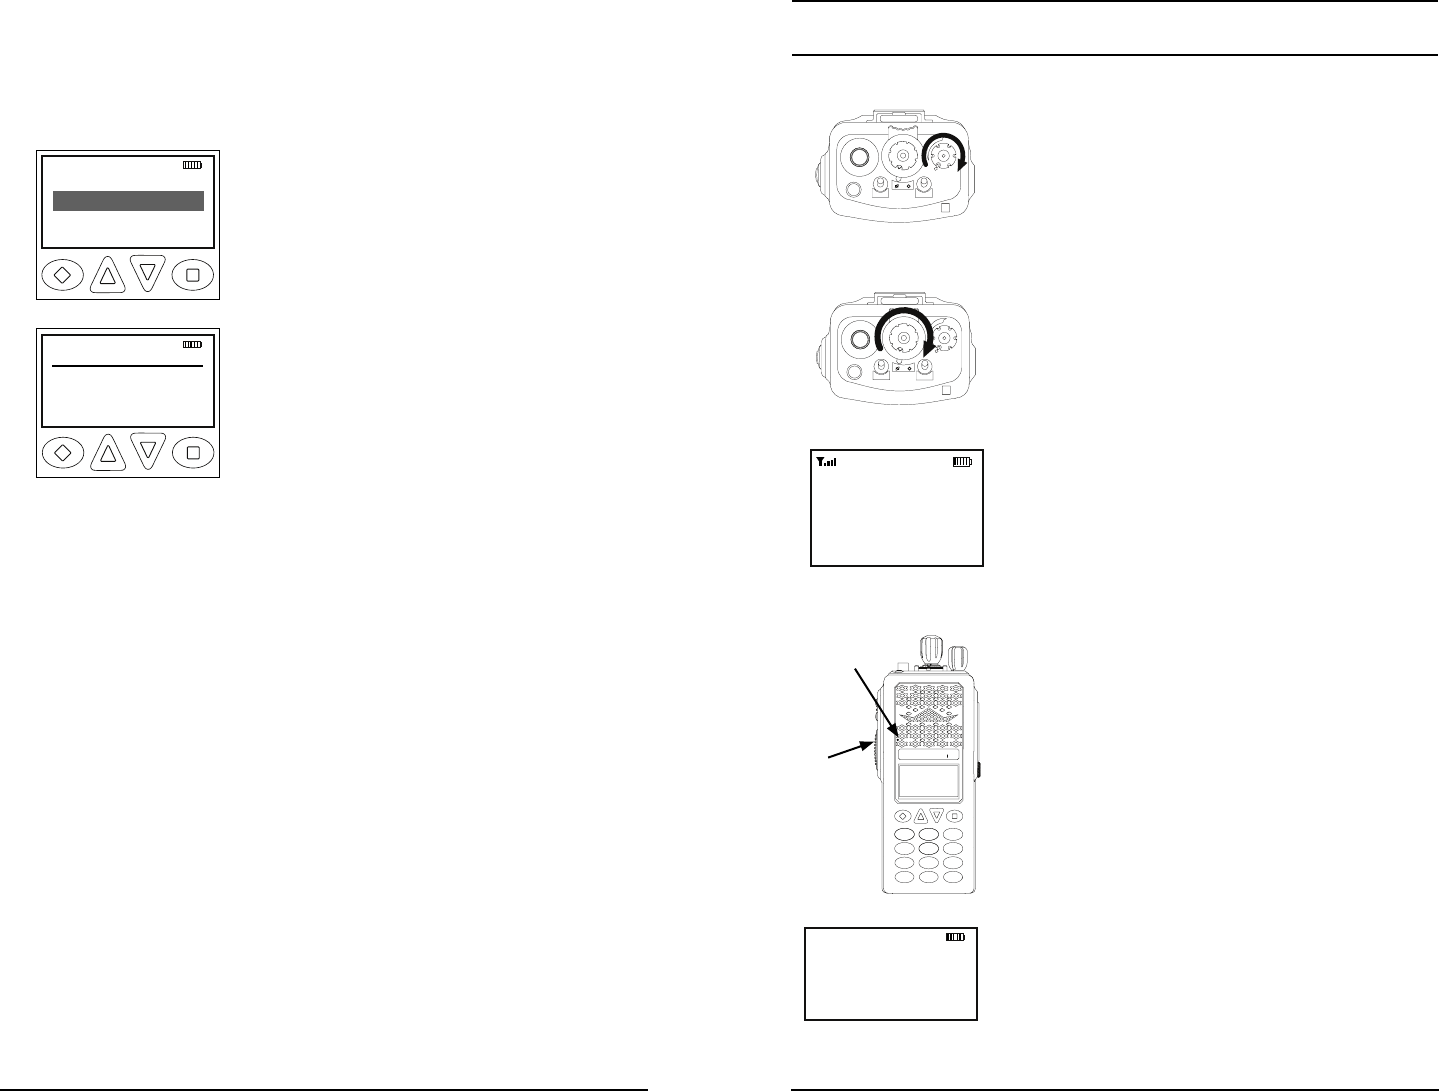
1. Turn power on by turning the Volume knob
clockwise. A beep sounds, indicating the radio is
operational. The LCD display shows the
programmed information of the currently selected
channel. Programmable channel information
options include channel number, channel label
and channel frequency.
15
1
2
3
4
56
7
89
11
10
12
13
14
16
SCAN
PRI
VOL
2. Select a channel by rotating the Channel
Selector knob.
3. Open the squelch to adjust the volume
(Open squelch can be achieved by selecting the
programmed Monitor function.)
Ch 1
KNG-P150 P25
171.58500 MHz
LIGT T/A MENU LCK
RXD
When a signal is received, the unprogrammable
top line of the display indicates the current
channel’s operating mode. RXA = analog, RXD
= digital.
Transmit
Ch 1
KNG-P150 P25
171.58500 MHz
LIGT T/A MENU LCK
TXD
KNG
ABC DEF
GHI JKL MNO
PQRS TUV WXYZ
*
#
123
4
789
56
0
BK RADIO
Microphone
PTT
1. Press the PTT (Push-To-Talk) switch. When
the radio is transmitting the indicator LED glows
red and TXD or TXA appears in the display.
2. Talk in a normal voice with the microphone one
to two inches from your mouth.
3. Release the PTT switch to stop transmitting.
If the length of your message exceeds the
programmed Time-Out Timer setting, the
transmitter automatically shuts off and a tone
sounds. To continue transmission, release the
PTT switch, then press it again and continue
talking.
If the Transmit Indicator does not glow and a tone
sounds, you are on a receive-only channel or the
channel is busy (see Busy Channel Lockout).
Select an authorized transmit channel.
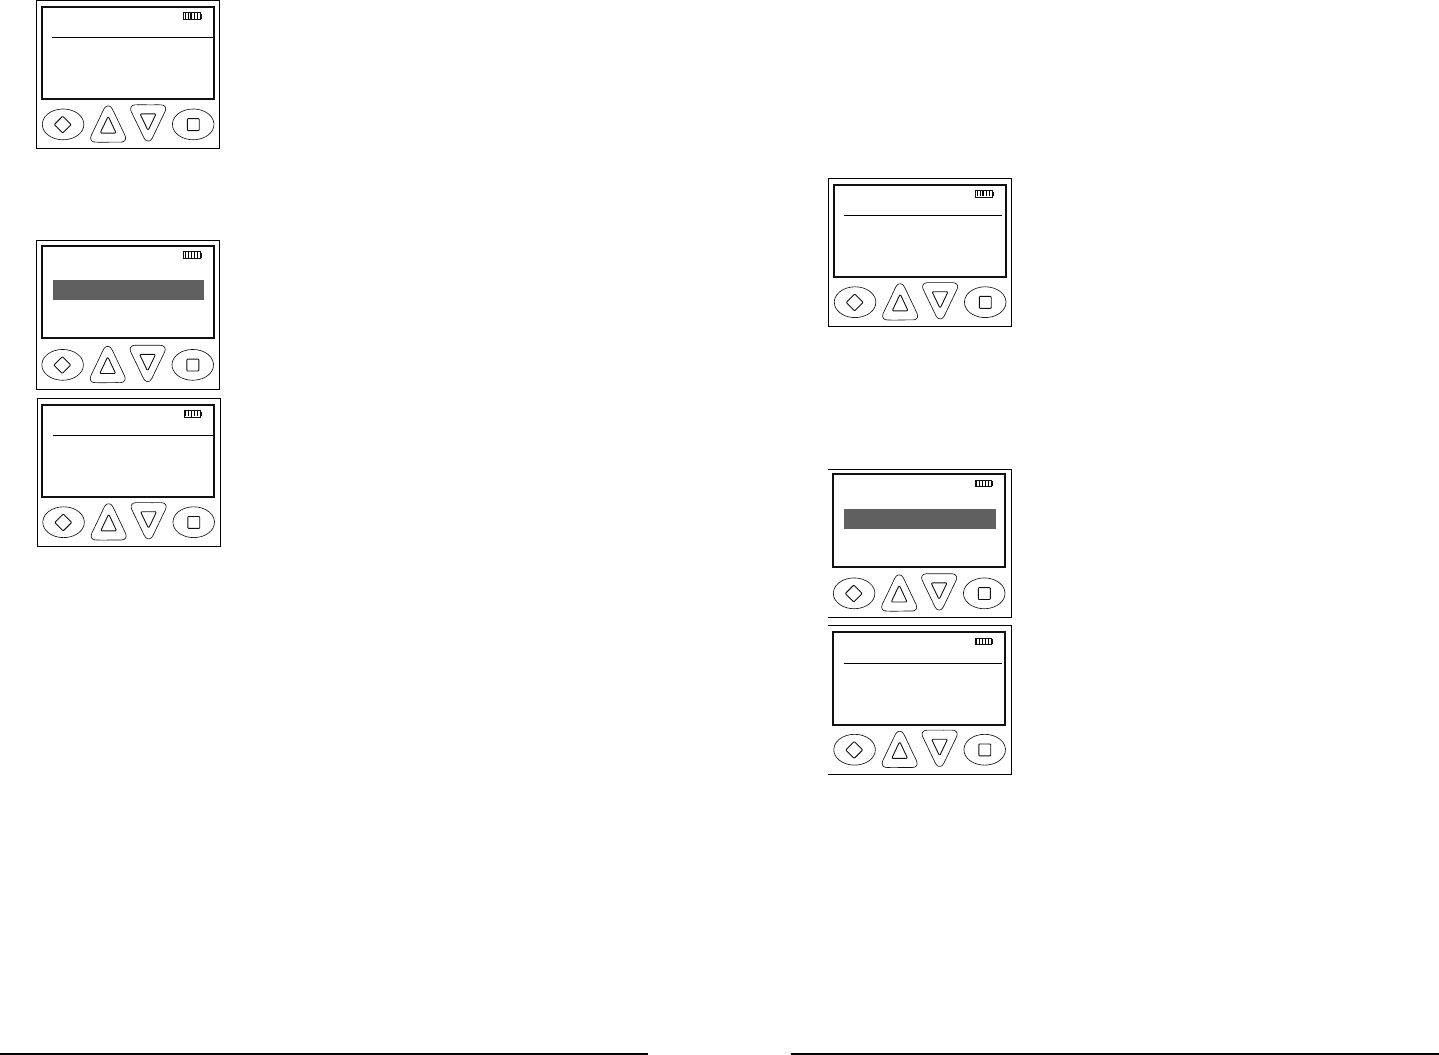
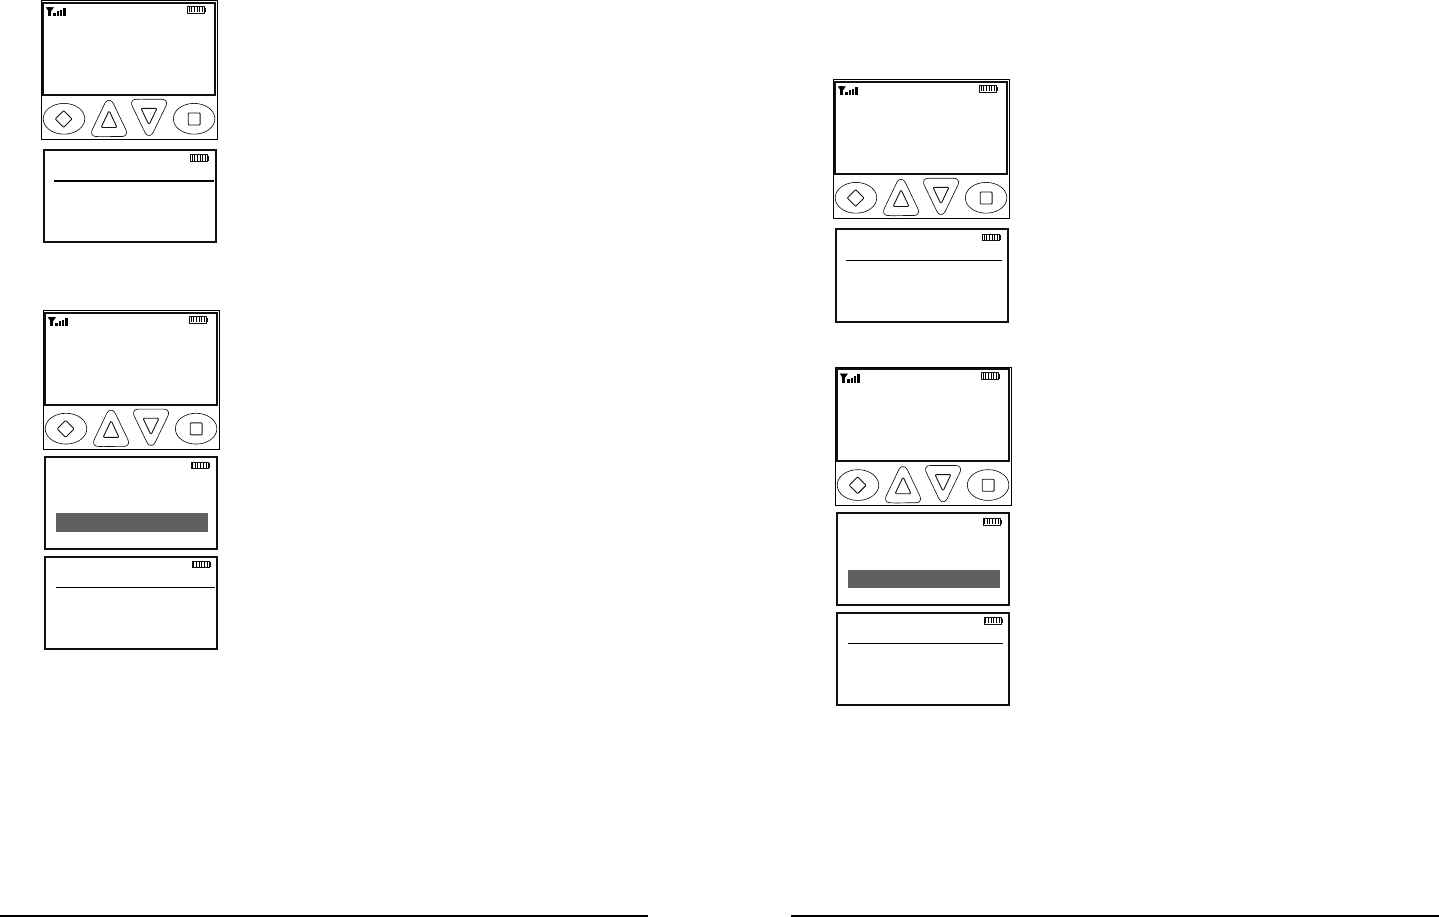
Keypad Menu Operation
One button can be programmed as 'Menu'. Items shown in the previous
table can be programmed and arranged via PC programming. These
items can then be accessed with the 'Menu' button.
To select from the menu:
Channel Scan
Tx Digital
PRI Scan
ESC ▲ ▼ ENT
TXDN
Tx Power
→High
Low
ESC ▲ ▼ ENT
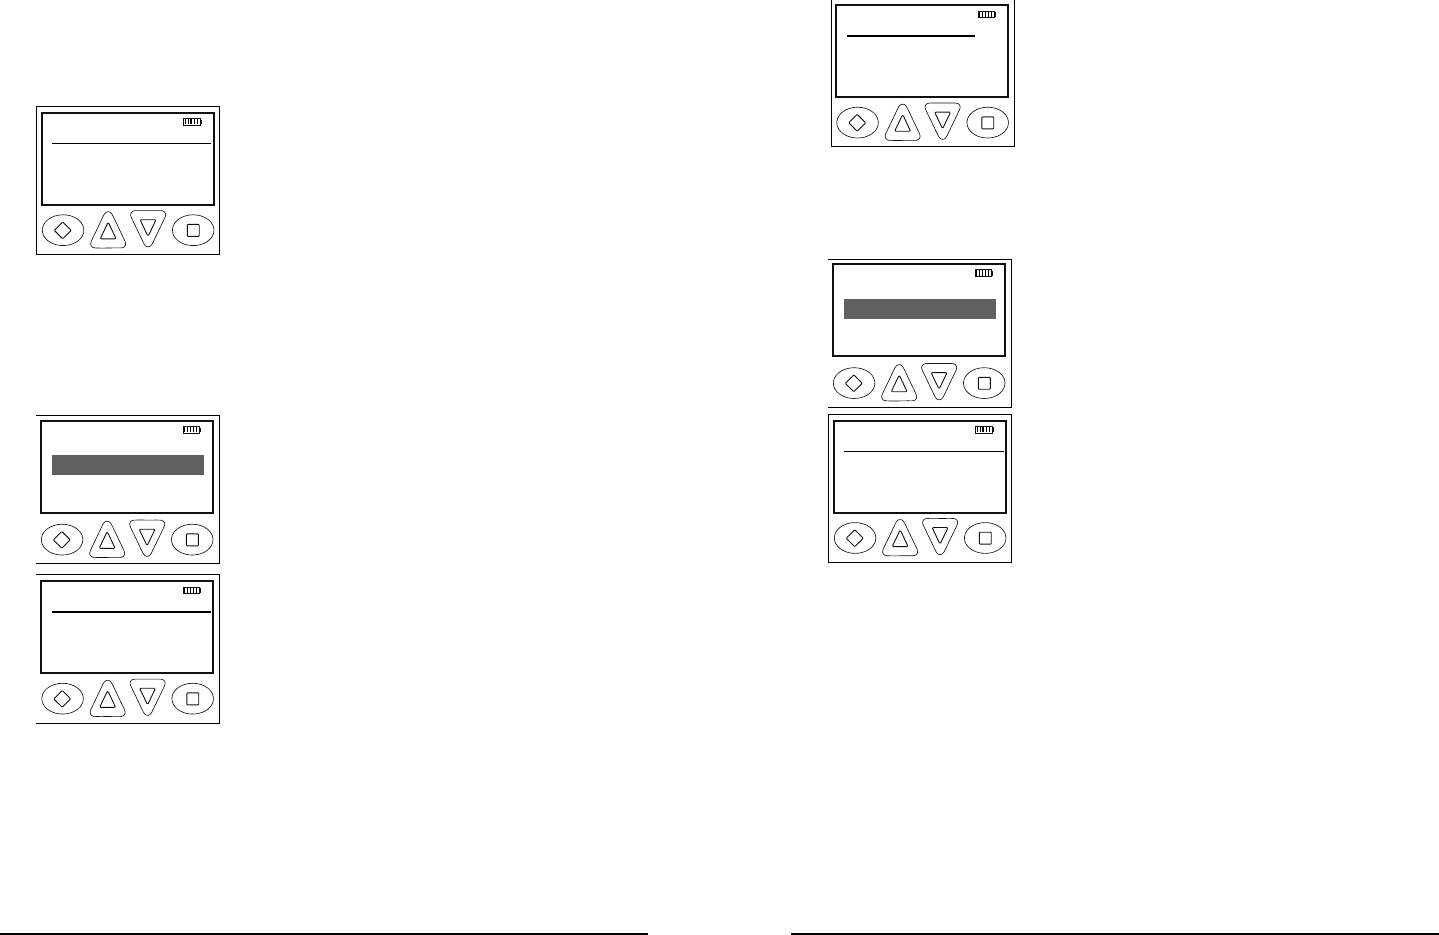
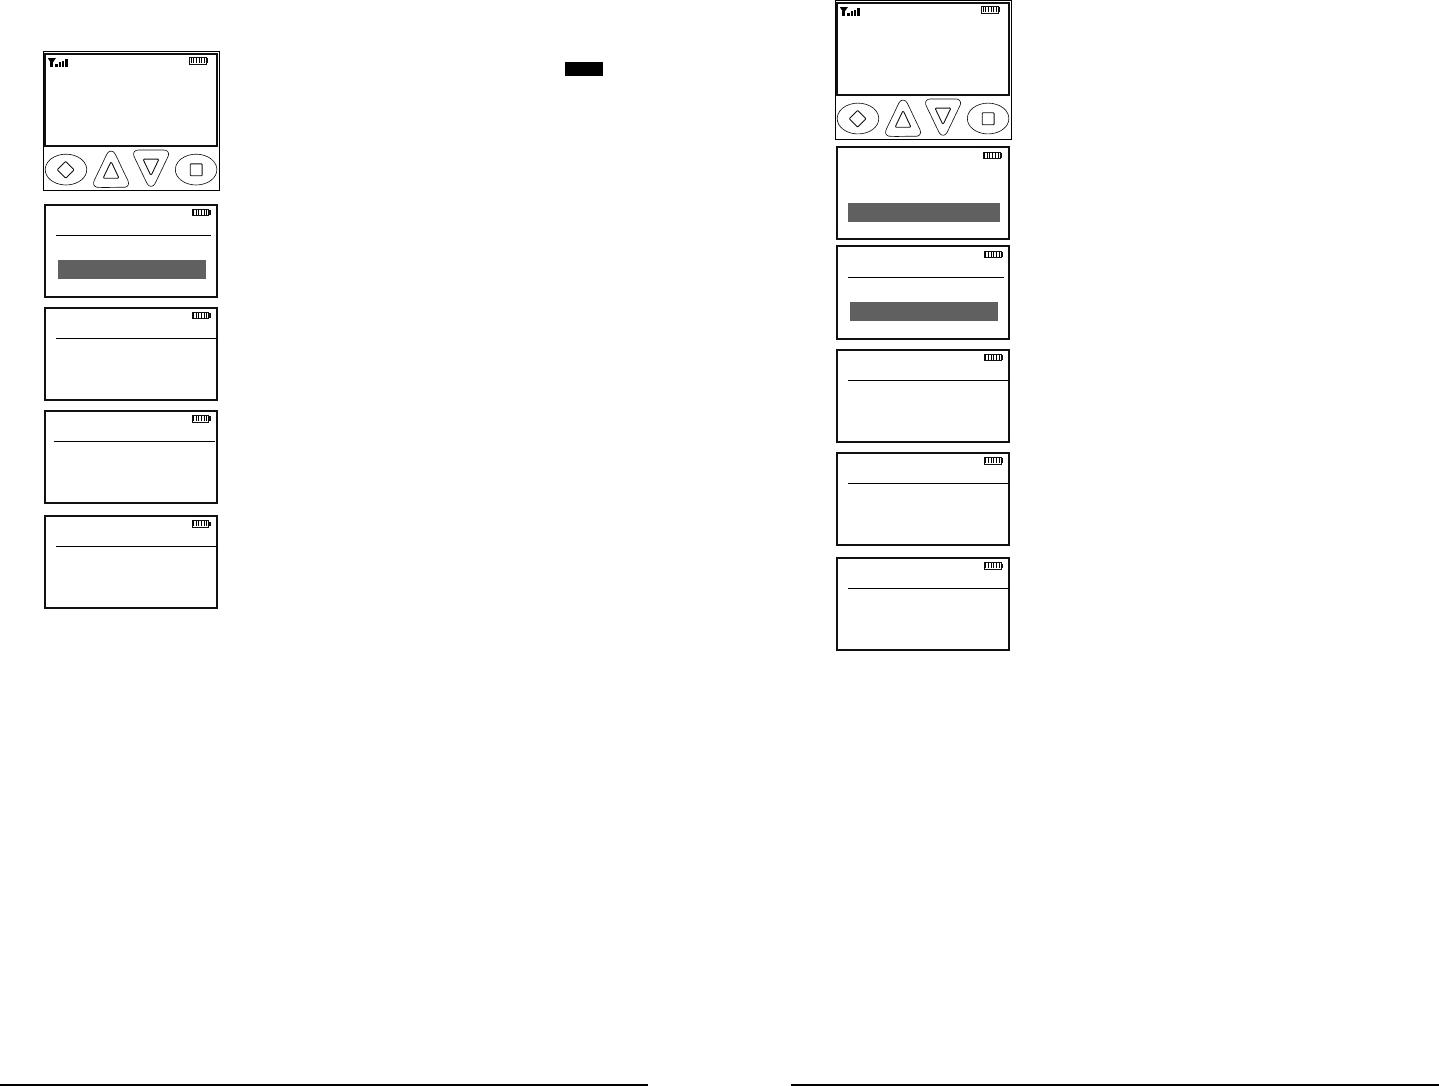
1. Press the programmed "Menu" button.
2. Scroll to the desired menu item using the
up/down buttons.
3. Press the square button marked 'ENT' to
open the selected item.
4. Use the up/down buttons to highlight the
desired operation.
5. Press the square button marked 'ENT' to
set the selection.
6. Press and hold the diamond button
marked 'ESC' to return to normal radio
operation.
18 KNG User’s Manual 19
RELM/BK Radio
NOTE: When using a channel programmed for mixed mode transmit
the signal will be transmitted in the mode selected by the TX Digital
selection. Or if programmed for Mixed Mode Talkback, the radio will
transmit in the mode of the last received channel while the “RX” icon
is displayed. (See Mixed Mode Operation.)
Code Guard Operation
Analog Squelch Control
Sub-audible signaling (CTCSS/CDCSS) is used to allow a group of
radios to be selectively called in an analog system. Programming the
receive code guard equal to zero allows for Carrier Squelch operation,
where the radio will unmute whenever a carrier is detected regardless
of the transmitted Code Guard.
APCO Project 25 Squelch Control
Network Access Codes (NACs) provide the digital equivalent of analog
sub-audible signaling (CTCSS/CDCSS) allowing a group of radios to
be selectively called within a system.
Users in the same area (using the same NAC) can be further divided
into Talk Groups, with each group having its own Talk Group ID
(TGID). Group Calls are made by designating both the users’ NAC
and TGID.
Each radio also has an individual P25 unit ID. A Unit-to-Unit call
contains the addressee’s NAC, and uses the addressee’s P25 unit ID
instead of the TGID.
When operating in Digital Mode, each channel can be programmed to
use either Normal squelch or Selective squelch.
Normal squelch is used to mimic analog operation. Signals are
only qualiÞ ed with the programmed NAC. TGIDs and P25 Unit IDs
are ignored. Each digital channel is programmed with a receive NAC
and a transmit NAC. When an incoming signal’s NAC matches the
channel’s programmed receive NAC, the radio unmutes. The default
NAC is 0659 ($293 hex).
The digital equivalent of carrier squelch is achieved by programming
the receive NAC = 3966($F7E hex). The radio will unmute when a
digital signal with any NAC is detected. The 3966 ($F7E hex) NAC is
reserved for receivers and is not allowed as a transmit NAC.
Selective squelch is used for processing Group Calls and Unit-to-
Unit Calls. TGIDs are assigned on a per-channel basis. Users can
be separated into Talk Groups with each group having its own TGID.
Then, on channels programmed for Selective squelch, the incoming
signal’s NAC and TGID must match the channels programmed
receive NAC and TGID for the radio to unmute. The default TGID
is 1.
The TGID value 65535 ($FFFF hex) is used to effect an “All Call”.
If the radio receives a signal with a matching NAC and the TGID =
65535 ($FFFF hex), it will unmute. Also, if the radio’s programmed
TGID is 65535 ($FFFF hex), it will open on any signal with a matching
NAC, ignoring the incoming TGID. A TGID = 0 means “no one”. If
the radio is programmed with the TGID = 0, it will accept incoming
group calls containing the “All Call” TGID, and correctly addressed
Unit-to-Unit calls only.
Code Guard Receive
Analog channels programmed with a receive code guard will be heard
only when the proper frequency and Code Guard value is received.
Analog and mixed mode receive channels will also unmute when the
radio is in monitor mode.
Code Guard Transmit
15
1
2
3
4
56
7
89
11
10
12
13
14
16
SCAN
PRI
VOL
Busy Channel/Transmit
Indicator
Ch 1
KNG-P150 P25
171.58500 MHz
LIGT T/A MENU LCK
TX
The frequency must be clear prior to transmitting
on a Code Guarded channel. If the LED Indicator
is yellow do not transmit. Busy Channel Lockout
can be programmed to disallow transmitting while
a channel is busy.
1. Press the PTT switch. When the transmitter is
on, the LED Indicator glows red and TX appears
in the display.
2 Talk in a normal voice with the microphone one
to two inches from your mouth.
3. Release the PTT switch to stop transmitting.
20 KNG User’s Manual 21
RELM/BK Radio
Mixed Mode Operation
The receiver and transmitter are capable of operating in analog wide-
band (25 kHz channel spacing), analog narrow-band (12.5 kHz channel
spacing) and APCO Project 25 Digital Mode.
Each channel’s Receive and Transmit Mode can be set independently as
follows:
Mode RX TX
Analog Receive qualiÞ ed analog signals only Transmit analog signals only
Digital Receive qualiÞ ed digital signals only Transmit digital signals only
Mixed Automatically receive qualiÞ ed analog
or digital signals
Transmit analog or digital
signal, depending on the status
of ‘TX Digital’ soft switch
Ch 1
KNG-P150 P25
171.58500 MHz
LIGT T/A MENU LCK
TXD
Ch 1
KNG-P150 P25
171.58500 MHz
LIGT T/A MENU LCK
TXA
Digital receptions and transmissions will be
indicated by illuminating the D annunciator in
addition to the RX or TX annunciator.
Analog receptions and transmissions will be
indicated by illuminating the A annunciator in
addition to the RX or TX annunciator.
Mixed Mode Talkback
If Mixed Mode Talkback is enabled, transmissions initiated while
hold time remains will be in the same mode as the received signal,
if the signal was received on the Ready to Transmit (RTX) channel.
Depending on programming, the RTX channel can be the main
channel, a held scan or priority channel if Talkback Scan is enabled,
or the Priority 1 channel if TX on PR1 is enabled. TX Mode on the
RTX channel must be set to MIXED.
Ch 1
KNG-P150 P25
171.58500 MHz
LIGT T/A MENU LCK
RXD
Press the PTT while the
RX indicator is shown
While hold time after a reception remains,
transmissions will be in the same mode as the
received signal, regardless of the status of the
TX Digital switch. As in Talkback Scan, the
RTX channel and receive annunciators will be
displayed for the duration of the timer.
Encryption Operation
The radio may optionally be conÞ gured for Secure communication on
channels operating in Digital Mode. No encryption is available for analog
channels.
Required Setup
Radios that have the DES/AES factory option for encryption must
have encryption keys loaded with an APCO Project 25 compatible key
Þ ll device such as the Motorola KVL 3000 Plus, using a BK Radio
keyloader cable. The radio can hold up to 32 AES and/or DES keys.
After loading keys in the radio, the KNG PC programming software
must be used to conÞ gure the radio’s key table and to assign default
transmit keys to each channel.
Radios that have the OTAR factory option support Over-the-Air
Rekeying of encryption keys (OTAR). The KNG PC programming
software must be used to enable OTAR and to mark the channel(s)
that will communicate with the Key Management Facility (KMF). In
addition, the radio must have key encryption keys (used only to encrypt
other keys) loaded with an APCO Project 25 compatible key Þ ll device
such as the Motorola KVL 3000 Plus, using a BK Radio keyloader
cable.
Operation
The receiver can be programmed to automatically detect both clear
and secure signals.
The transmitter selects clear or secure operation based on each
channel’s programming. Digital channels can be programmed to
always transmit encrypted, always transmit clear, or to select the
encryption mode with the TX Secure switch.
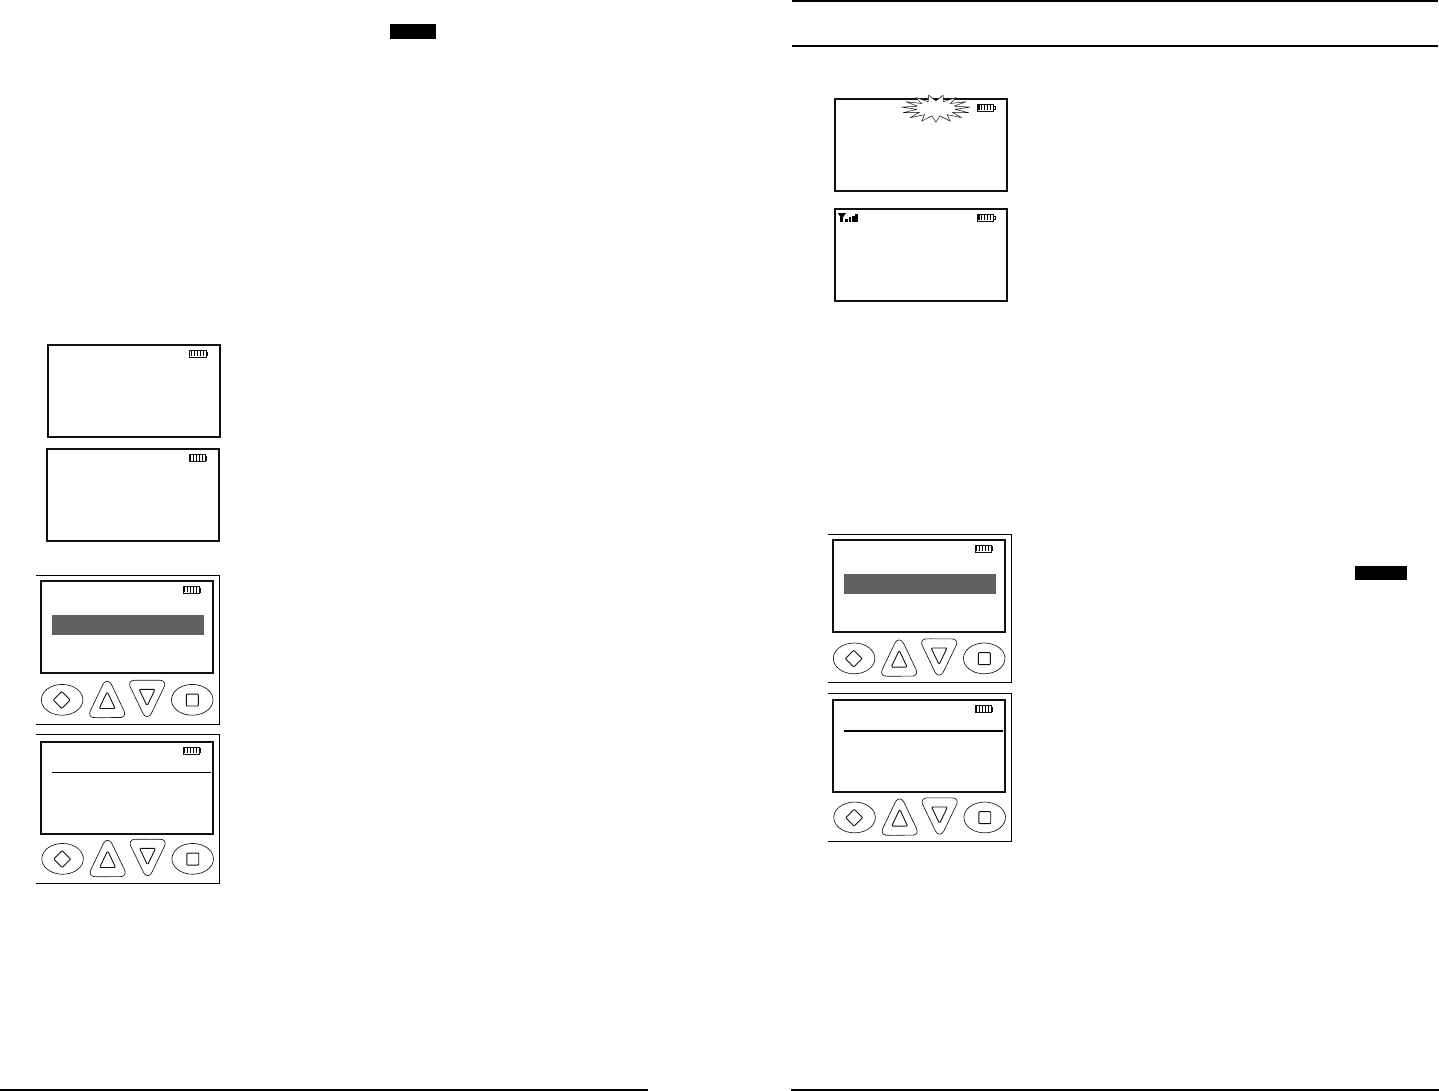
The display indicates Secure Operation as follows:
Ch 1
KNG-P150 P25
171.58500 MHz
LIGT T/A MENU LCK
TXD
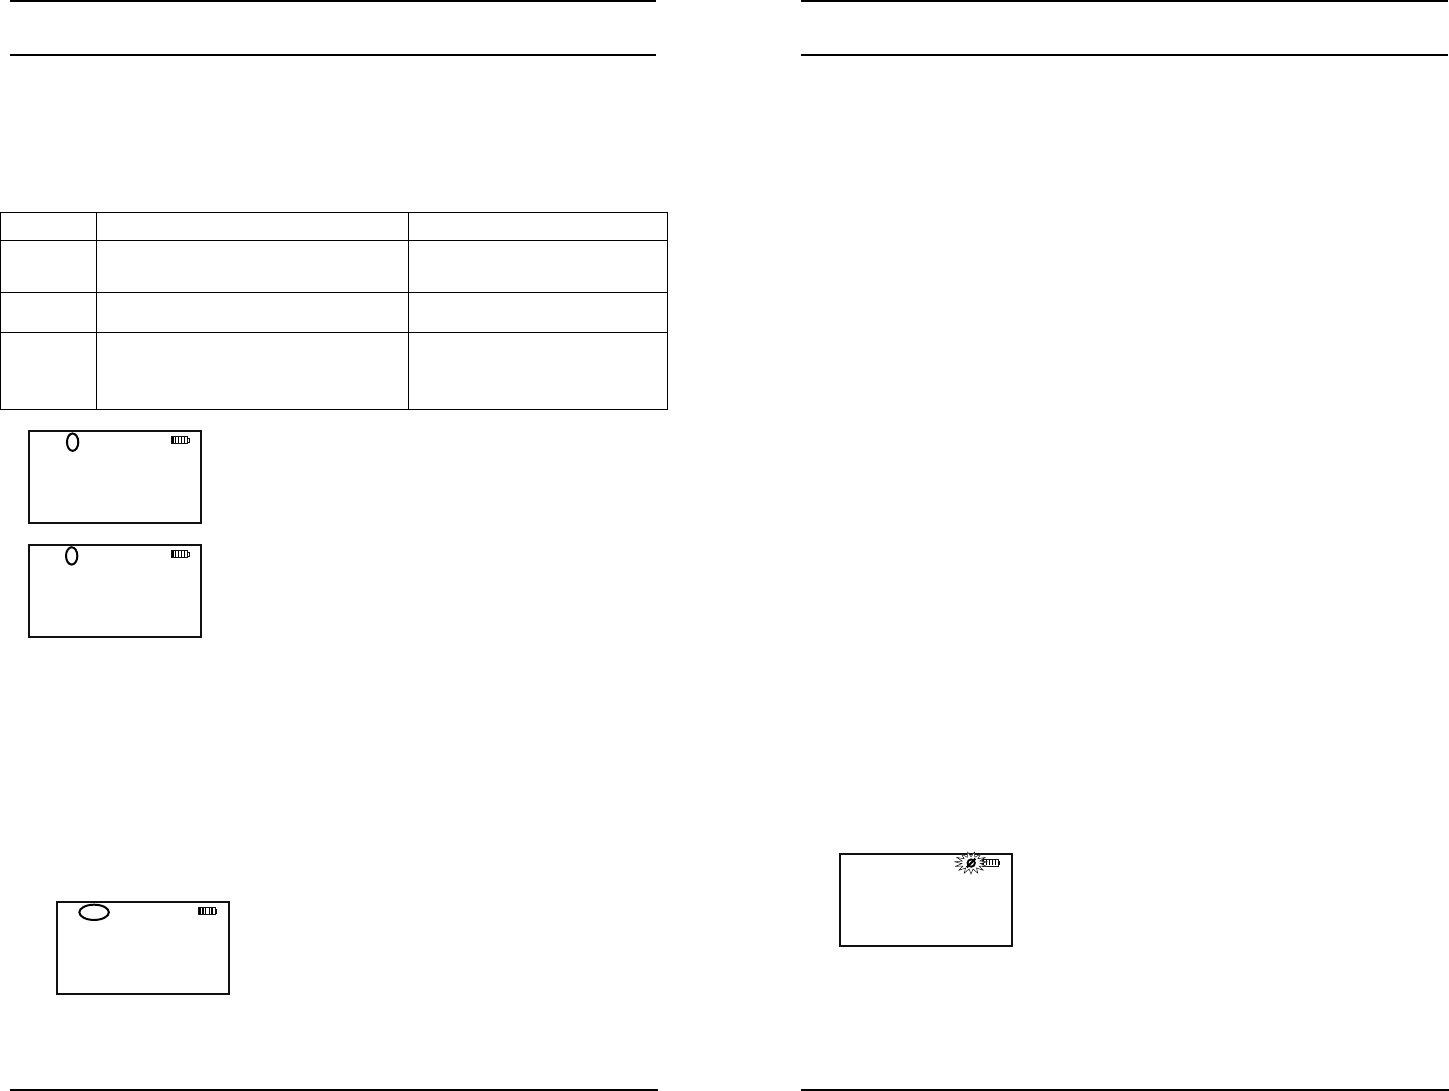
In Standby Mode, if the radio will transmit in
Secure Mode when PTT is pressed, the
encrypt icon ß ashes in the display.
When receiving or transmitting an encrypted
signal, the encrypt icon ß ashes in the display.
22 KNG User’s Manual 23
RELM/BK Radio
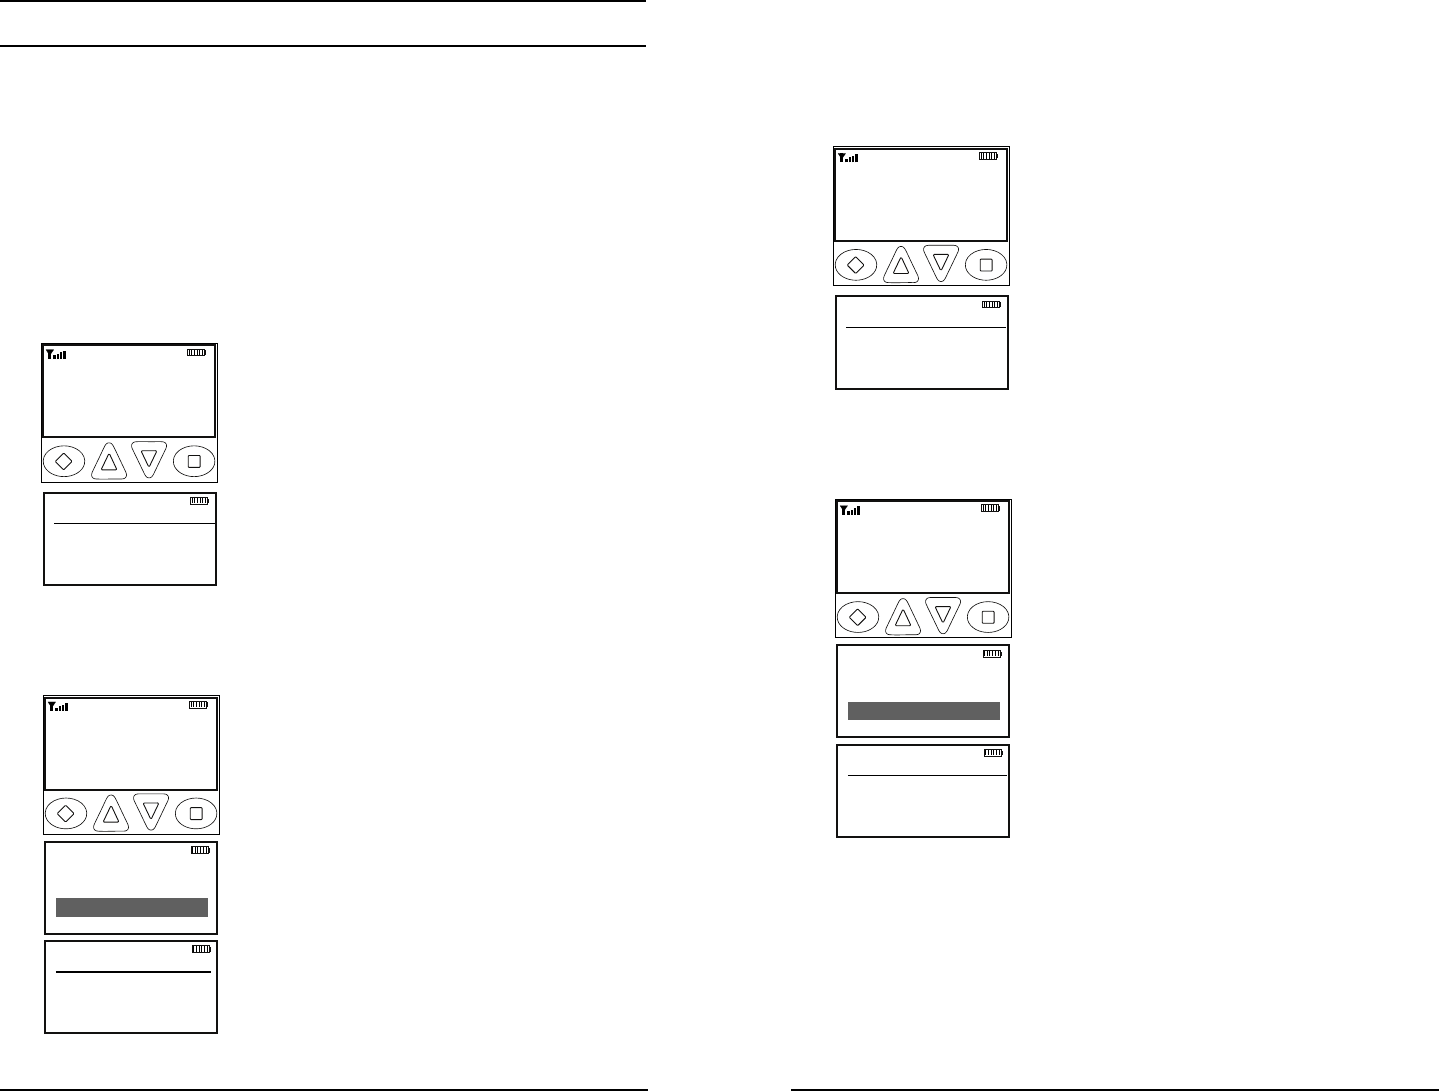
Transmit Encryption Key Selection
The radio can hold up to 32 DES or AES encryption keys. Each
channel is assigned a default key for transmit. The key can be locked
to the channel, or if programming allows, a transmit key other than the
default key can be selected from the radio’s Key Pick List. If a key
is selected from the pick list, it will be used during transmit on every
channel that allows selectable keys.
Follow the steps below to select the encryption key.
If programmed to a button:
Tx Keys
→Default
Key 1
ESC ▲ ▼ ENT
1. Press the button programmed for the Key
Pick List (UKEY).
2. Use the up/down buttons to highlight the
desired key. Or, using the keypad, press the
number of the desired key. 'Default' = Key
assigned to channel via programming.
3. Press the 'ENT' button to select the key.
4. Hold the 'ESC' button to return to normal
operation.
If programmed to the Menu button:
Channel Scan
TX Keys
PRI Scan
ESC ▲ ▼ ENT
TXD
Tx Keys
→Default
Key 1
ESC ▲ ▼ ENT
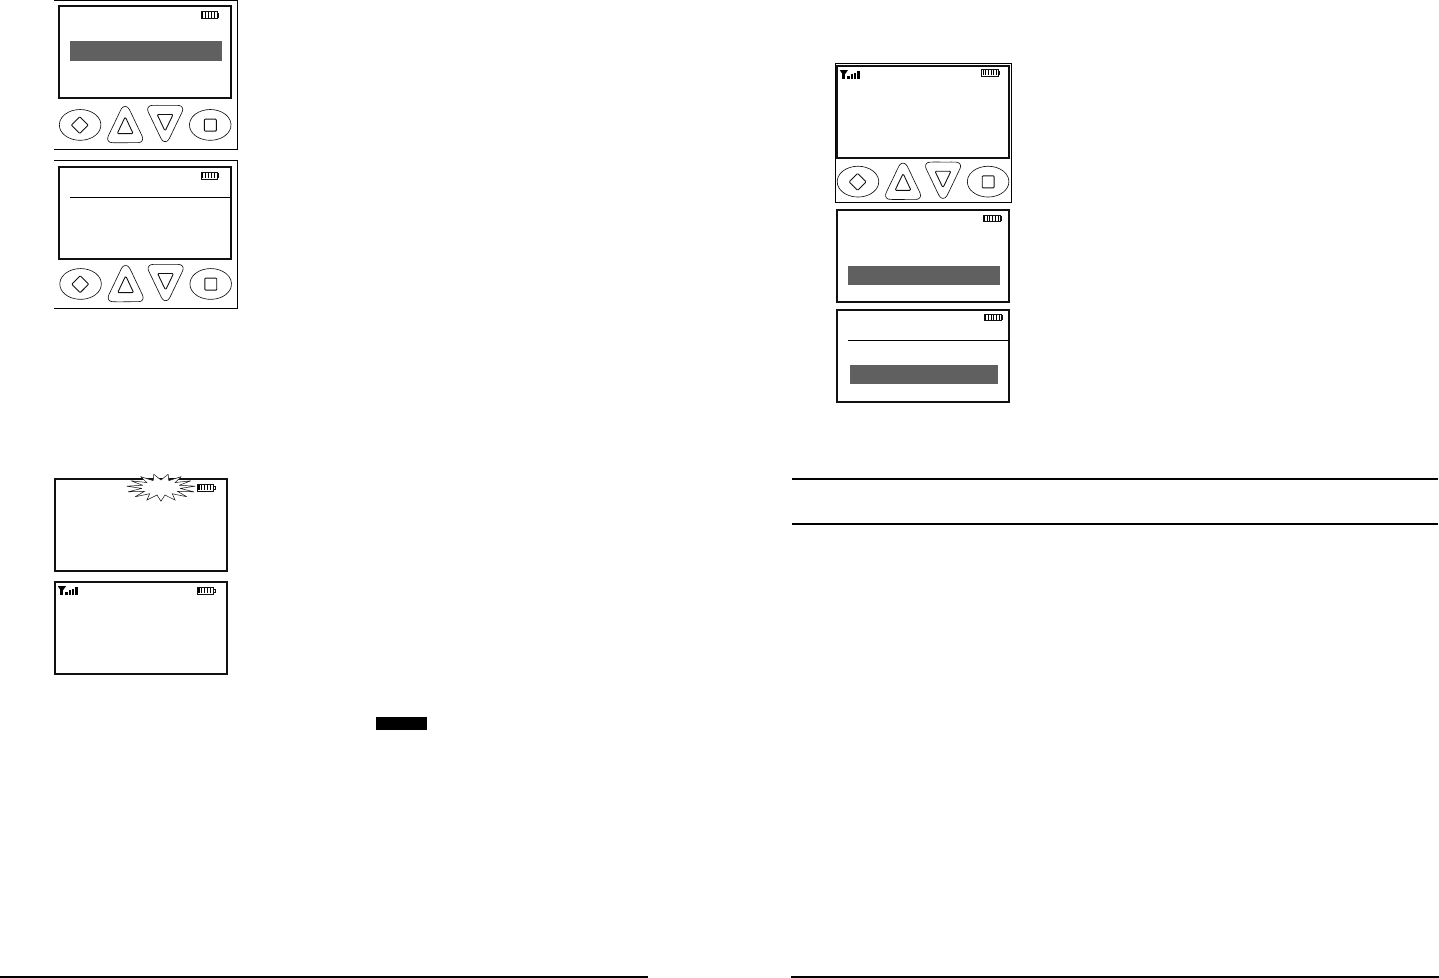
1. Press the Menu button.
2. Use the up/down buttons to highlight "Tx
Keys" selection.
3. Press the 'ENT' button to open the key
menu.
4. Use the up/down buttons to highlight the
desired key. Or, using the keypad, press the
number of the desired key. 'Default' = Key
assigned to channel via programming
5. Press the 'ENT' button to select the key.
6. Hold the 'ESC' button to return to normal
operation.
If a key is selected that has not been programmed, the radio will not
transmit but will beep and display ‘NO KEY’ when PTT is pressed.
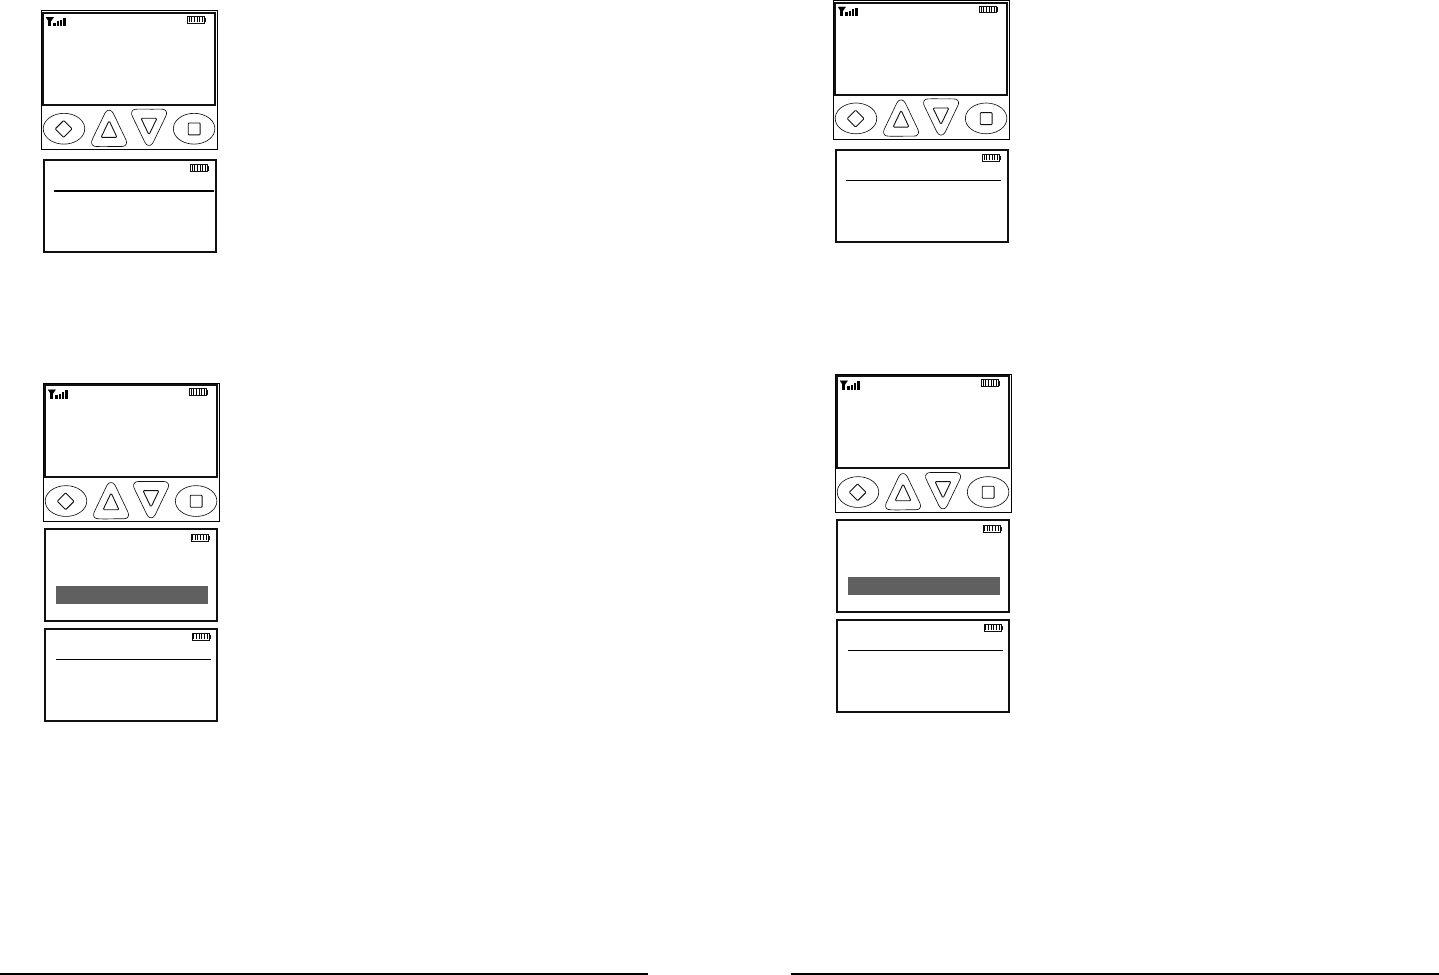
Zeroization
The radio provides a method for the user to panic-zeroize all encryption
keys. This service also sets all touchpad passwords to ‘FFFFFF’. The
zeroization service can be invoked with the steps below.
If programmed to a button:
Zeroize Keys
Zeroize Now?
ESC YES ENT
1. Press the button programmed for
Zeroizing. (ZER)
2. Press the 'YES' button to zeroize
encryption or press ESC to abort the
operation.
3. Hold the 'ESC' button to return to normal
operation.
If programmed to the Menu button:
Zeroize Keys
Zeroize Now?
ESC YES ENT
Channel Scan
Zeroize Keys
PRI Scan
ESC ▲ ▼ ENT
TXD
1. Press the Menu button.
2. Use the up/down buttons to highlight
'Zeroize Keys' selection.
3. Press the 'ENT' to open the menu.
4. Press the 'YES' button to zeroize
encryption or press 'ESC' to abort the
operation.
5. Hold the 'ESC' button to return to normal
operation.
The LCD will display "Keys Zeroized" after a successful operation.
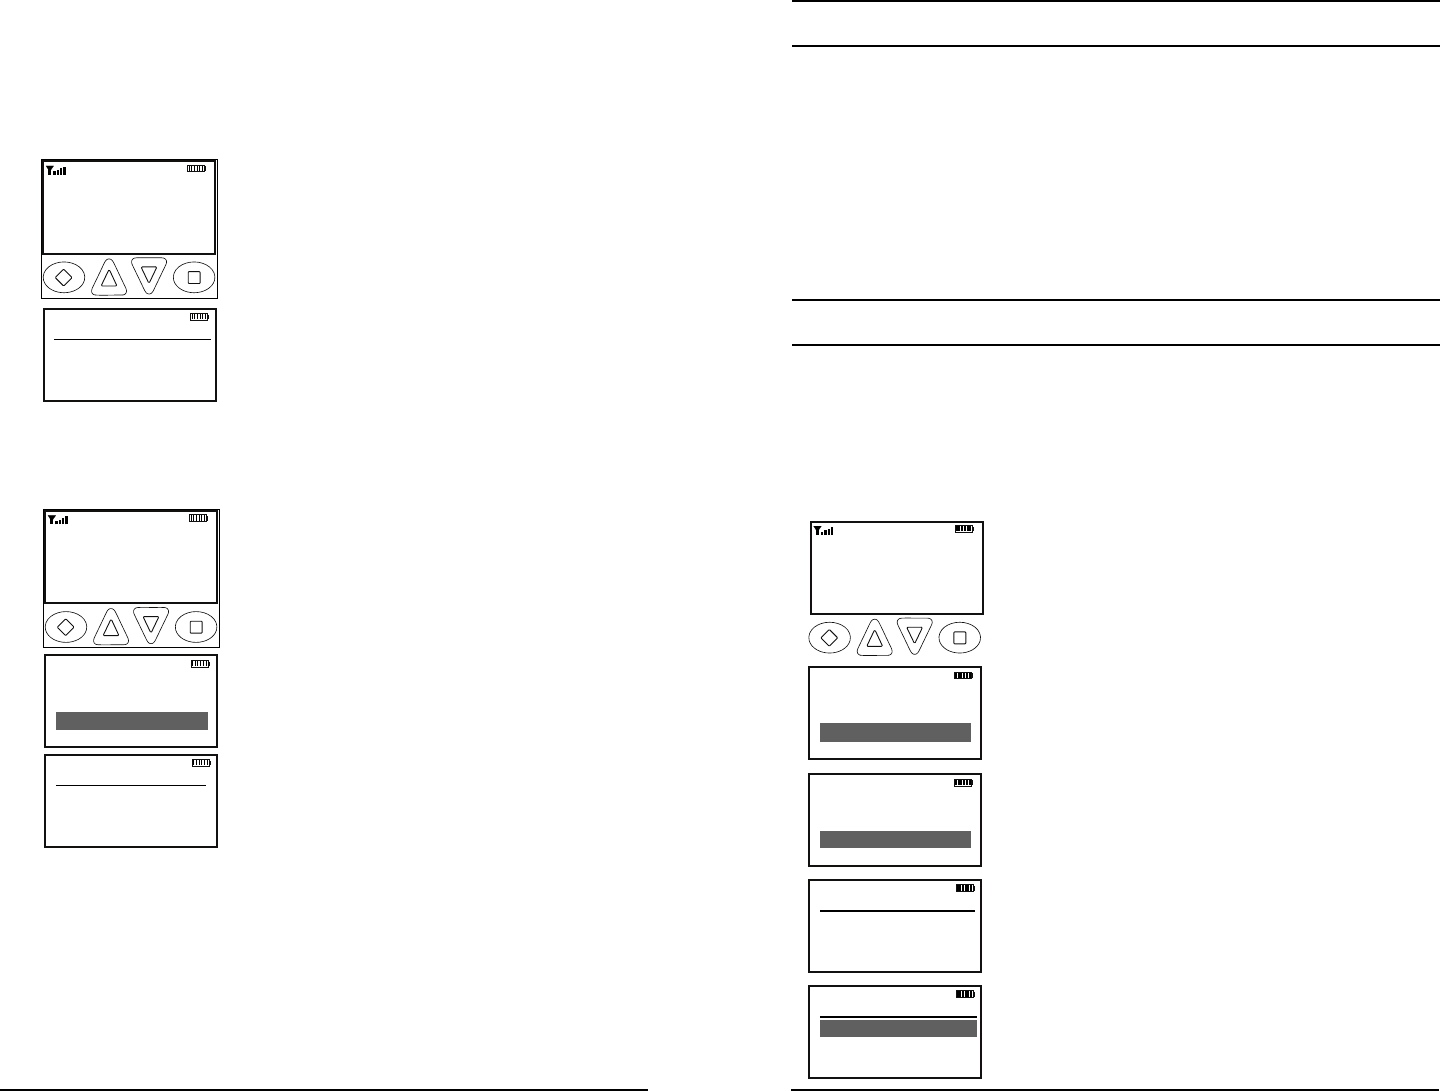
Over-the-Air-Rekeying (OTAR)
If the radio has OTAR The radio optionally provides a method for the
user to manually request a rekey from the KMF (Key Management
Facility). If manual rekeying is enabled, the rekey service can be
invoked with the following steps.
24 KNG User’s Manual 25
RELM/BK Radio
If programmed to a button:
Rekey
Rekey Now?
ESC YES ENT
1. Press the button programmed for Rekey.
(RKY)
2. Press the 'YES' button to request a key
or press ESC to abort the operation.
3. Hold the 'ESC' button to return to normal
operation.
If programmed to the Menu button:
Channel Scan
Rekey
PRI Scan
ESC ▲ ▼ ENT
TXD
Rekey
Rekey Now?
ESC YES ENT
1. Press the Menu button.
2. Use the up/down buttons to highlight
"Rekey" selection.
3. Press the 'ENT' to open the menu.
4. Press the 'YES' button to request a key
or press 'ESC' to abort the operation.
5. Hold the 'ESC' button to return to normal
operation.
If a successful rekey occurs, an ascending tone will sound, and the
display will momentarily show "REKEYED".
If the rekey attempt fails, a descending tone will sound, and the display
will momentarily show "NO_REKEY".
If the selected channel has not been marked as an OTAR channel, the
radio will boop and "NON-OTAR" will appear on the display.
Keyset Viewing and Selecting
The radio can hold up to 8 encryption keysets. Only one keyset can
be active at any time. The radio will receive messages encrypted with
any of the keys in any of the keysets, but transmit keys can only be
selected from the active keyset.
Follow the steps below to view/select the Keyset.
If programmed to a button:
Keysets
→Keyset 1
Keyset 2
ESC ▲ ▼ ENT
1. Press the button programmed for the
Keyset (UKST).
2. Use the up/down buttons to highlight the
desired keyset.
3. Press the 'ENT' button to select the
highlighted keyset.
4. Hold the 'ESC' button to return to normal
operation.
If programmed to the Menu button:
Keysets
→Keyset 1
Keyset 2
ESC ▲ ▼ ENT
Channel Scan
Keysets
PRI Scan
ESC ▲ ▼ ENT
TXD
1. Press the Menu button.
2. Use the up/down buttons to highlight the
"Keysets" selection.
3. Press the 'ENT' button to open the keyset
menu.
4. Use the up/down buttons to highlight the
desired keyset.
5. Press the 'ENT' button to select the
keyset.
6. Hold the 'ESC' button to return to normal
operation.

26 KNG User’s Manual 27
RELM/BK Radio
General Options
Backlight (LIGT)
When the Backlight function is programmed to a switch the display
and keypad will illuminate when the switch is on.
If the backlight function is programmed to a button the display and
keypad will illuminate for the programmed duration. (1-6 seconds or
ON)
Toggle switch operation
On - Slide the programmed switch toward the front of the radio.
Off - Slide the switch up toward the channel select switch.
Button Operation
On - Press the programmed button. LIGT
Off - Press the button again. LIGT
Menu Operation
Press the assigned Menu button.1.
Use the up/down buttons to select 'Backlight'.2.
Press the 'ENT' button.3.
Use the up/down buttons to select 'On' or 'Off'.4.
Press the 'ENT' button to set the selection.5.
Hold the 'ESC' button to return to normal operation.6.
Keypad Lock
The Keypad Lock function can be programmed as a radio menu
item. Enabling Keypad Lock the programmable keypad buttons.
NOTE: Programmable side buttons are not lockable.
Operation
Press the assigned Menu button.1.
Use the up/down buttons to select Lock.2.
Press the 'ENT' button.3.
Use the up/down buttons to select 'On' or 'Off'.4.
Press the 'ENT' button to set the selection.5.
Hold the 'ESC' button to return to normal operation.6.
Monitor (MON)
When MON is on, the radio will unmute. The LCD display will show
the receive indicator along with the signal strength indicator. If the
channel is not in use the signal strength indicator will show no bars
and you will hear white noise, sometimes called squelch noise.
Toggle switch operation
On - Slide the programmed switch toward the front of the radio.
Off - Slide the switch up toward the channel select switch.
Button Operation
On - Press the programmed button. MON
Off - Press the button again. MON
Menu Operation
Press the assigned Menu button.1.
Use the up/down buttons to select 'Monitor'.2.
Press the 'ENT' button.3.
Use the up/down buttons to select 'Off' or 'On'.4.
Press the 'ENT' button to set the selection.5.
Hold the 'ESC' button to return to normal operation.6.
Repeater Talkaround (TA)
When TA is turned on the radio will transmit on the programmed
receive frequency of the selected channel.
Toggle switch operation
On - Slide the programmed switch toward the front of the radio.
Off - Slide the switch up toward the channel select switch.
Button Operation
On - Press the programmed button. T/A
Off - Press the button again. T/A
Menu Operation
Press the assigned Menu button.1.
Use the up/down buttons to select 'Talk Around'.2.
Press the 'ENT' button.3.
Use the up/down buttons to select 'Repeater' or 'Direct'.4.
Press the 'ENT' button to set the selection.5.
Hold the 'ESC' button to return to normal operation.6.
28 KNG User’s Manual 29
RELM/BK Radio
Silent Mode (SLNT)
When SLNT is on, all audible indicators (button beeps etc.) are disabled.
Button Operation
On - Press the programmed button. SLNT
Off - Press the button again. SLNT
Menu Operation
Press the assigned Menu button.1.
Use the up/down buttons to select 'Silent'.2.
Press the 'ENT' button.3.
Use the up/down buttons to select 'On' or 'Off'.4.
Press the 'ENT' button to set the selection.5.
Hold the 'ESC' button to return to normal operation.6.
Squelch Adjust (SQL)
Squelch adjust can be assigned to the keypad or a radio menu item.
Button Operation
Press the programmed button.1.
Use the up/down arrows to select the desired squelch point.2.
Press 'ENT' to set the selection. 3.
Hold the 'ESC' button to return to normal operation.4.
Menu Operation
Squelch Adjust
+ -
ESC ▲ ▼ ENT
Ch 1
KNG-P150 P25
171.58500 MHz
LIGT T/A MENU LCK
RXD SCN
Talkaround
Tx Power
Squelch Set
ESC ▲ ▼ ENT
Press the Menu button.1.
Use the up/down buttons to select 2.
'Squelch Set'.
Press the 'ENT' button.3.
Use the up/down arrows to select the 4.
desires squelch point.
Press 'ENT' to set the selection. 5.
Hold the 'ESC' button to return to 6.
normal operation.
Tx Digital (TXD)
Ch 1
KNG-P150 P25
171.58500 MHz
LIGT T/A MENU LCK
TXD
Ch 1
KNG-P150 P25
171.58500 MHz
LIGT T/A MENU LCK
TXA
When the TXD is on, channels programmed
for mixed-mode transmit will transmit in digital
mode. When off, mixed-mode channels
transmit in analog mode. When transmitting
in digital mode the display shows 'D' behind
the TX indicator. In analog transmit 'A" will
follow the indicator.
Toggle switch operation
On - Slide the programmed switch toward the front of the radio.
Off - Slide the switch up toward the channel select switch.
Button Operation
On - Press the programmed button. TXD
Off - Press the button again. TXD
Menu Operation
Press the assigned Menu button.1.
Use the up/down buttons to select 'TX Digital'.2.
Press the 'ENT' button.3.
Use the up/down buttons to select 'Digital' or 'Analog'.4.
Press the 'ENT' button to set the selection.5.
Hold the 'ESC' button to return to normal operation.6.
Tx Power (LPW)
Ch 1
KNG-P150 P25
171.58500 MHz
LIGT T/A MENU LCK
TXD
Ch 1
KNG-P150 P25
171.58500 MHz
LIGT T/A MENU LCK
TXD
If Tx Power selection is enabled, transmit
power can be switched between the high
power and the pre-programmed low power
setting.
Toggle switch operation
High - Slide the programmed switch toward the front of the radio.
Low - Slide the switch up toward the channel select switch.
30 KNG User’s Manual 31
RELM/BK Radio
Button Operation
High - Press the programmed button. LPW
Low - Press the button again. LPW
Menu Operation
Press the assigned Menu button.1.
Use the up/down buttons to select 'TX Power'.2.
Press the 'ENT' button.3.
Use the up/down buttons to select High or Low.4.
Press the 'ENT' button to set the selection.5.
Hold the 'ESC' button to return to normal operation.6.
Zone Select (ZON)
Ch 1
KNG-P150 P25
Zone Label
LIGT T/A MENU SQL
TXD
KNG-P150 P25
Zn 12 : Ch 15
LIGT T/A MENU SQL
TXD
The 512 channels available in the KNG can
be divided into multiple operating zones.
Switching between zones is acomlpished via
a programmed button or menu item. Optionally,
zone labels or numbers can be displayed on
the LCD. (See Alphanumeric Label Options.)
Channel Scan
Zone Select
PRI Scan
ESC ▲ ▼ ENT
TXD
Zone Select
Zone #
ZONE LABEL
ESC ▲ ▼ ENT
Button Operation
Press the programmed button. 1. ZON
Use the up/down buttons to select the 2.
desired zone.
Press 'ENT' to set the zone.3.
Press the 'ESC' button to return to normal 4.
operation.
Menu Operation
Press the assigned Menu button.1.
Use the up/down buttons to select the 2.
desired zone.
Press 'ENT' to set the zone.3.
Hold the 'ESC' button to return to normal 4.
operation.
Scan Operation Options
Channel Scan (SCAN)
Ch 1
KNG-P150 P25
171.58500 MHz
LIGT T/A MENU LCK
Ch 1
KNG-P150 P25
171.58500 MHz
LIGT T/A MENU LCK
RXD SCN
SCN
The display indicates scan operation by
ß ashing SCAN.
Scan operates only while the radio is not
transmitting. The radio checks for signals on
channels in the preset Scan List, as well as
the channel selected by the Channel Selector
knob.
When a signal is detected, scanning stops
and the message is received. The received
channel is shown in place of the selected channel.
Once the signal ends, the radio continues to monitor the channel for
the preset scan delay time before it resumes scanning.
Toggle switch operation
On - Slide the programmed switch toward the front of the radio.
Off - Slide the switch up toward the channel select switch.
Zone Select
Channel Scan
PRI Scan
ESC ▲ ▼ ENT
TXD
Channel Scan
→Off
On
ESC ▲ ▼ ENT
Button Operation
On - Press the programmed button.SCAN
Off - Press the button again. SCAN
Menu Operation
Press the assigned Menu button.1.
Use the up/down buttons to select 2.
'Scan'.
Press the ENT button.3.
Use the up/down buttons to select 'On' 4.
of 'Off'.
Press the 'ENT' button to set the 5.
selection.
Hold the 'ESC' button to return to normal 6.
operation.
Scanning Code Guarded Channels
When a signal is detected, scanning stops while the radio checks for
the proper Channel Guard value. If the signal contains the proper
Channel Guard value, the radio receives the message. Otherwise, the
radio resumes scanning immediately.
32 KNG User’s Manual 33
RELM/BK Radio
Nuisance Channel Delete
If your radio is programmed for Nuisance Channel Delete and Channel
Scan is assigned to a top toggle switch, a Nuisance Channel can be
temporarily removed from the Scan List by sliding up and then back
down. Turn off Scan for at least Þ ve seconds or cycle radio power to
revert to programmed scan list.
Transmitting with Scan On
The radio transmits on the channel selected by the Channel Selector
knob unless Talkback Scan is enabled or “Transmit on Priority 1” is
enabled (see Priority Scan).
When the PTT switch is released, the radio continues to monitor the
selected channel for the preset scan delay time before it resumes
scanning.
Talkback Scan
Ch 1
KNG-P150 P25
171.58500 MHz
LIGT T/A MENU LCK
RXD SCN
If your radio is programmed for Talkback
Scan, press PTT while a channel is active or
while scan delay time remains, you will be
responding on the transmit frequency of the
received channel. The 'RX' indicator will be
shown in the display while scan delay time
remains.
Talkback Scan will not work if Priority Scan is on and your radio is also
programmed to transmit on the Priority 1 channel.
Priority Scan (PRI)
Priority Scan enables the radio to receive on any channel while
monitoring for a message on the designated priority channel(s). The
radio samples each priority channel at a preset rate (.25-2.0 seconds)
regardless of activity on any other channel. Priority Scan operates
only while the radio is not transmitting and can be used in combination
with scan operation.
Up to two priority channels can be on a radio wide (Global) or per-
zone basis, programmable via PC. When Global Priority channels
are enabled, zone priority selections are disabled.
If priority channels are assigned on a per-zone basis, the radio
monitors the priority channels in the currently selected zone. If priority
channels are programmed on a Global basis the radio will monitor the
assigned channels regardless of the currently selected zone.
Ch 1
KNG-P150 P25
171.58500 MHz
LIGT T/A MENU LCK
Ch 1
KNG-P150 P25
171.58500 MHz
LIGT T/A MENU LCK
P1 RXD SCN
P1 SCN
When Priority Scan is on, the display ß ashes
SCN. If a message is received on a priority
channel, the Priority Indicator appears, and
the radio receiver locks onto that channel for
the duration of the transmission, unless a
higher priority channel interrupts.
The two channels, designated as PR1 and
PR2, are periodically sampled for activity, even
if a different transmission is being monitored.
Activity on PR2 preempts activity on any of
the non-priority channels. Receptions on PR1
have priority over any other channel, including PR2.
Either priority channel can be programmed as a Þ xed channel, tied
to the Channel Selector knob, or programmed OFF. If the radio is
programmed to transmit on PR1, transmissions will occur on the Þ rst
priority channel when operating in Priority Scan Mode.
Priority Scan can be used in combination with Code Guard. If a
message is received on a priority channel, the radio receiver locks on
to the priority channel and checks to see if the proper Channel Guard
value is present. If the signal contains the proper Channel Guard value,
the radio receives the message. Otherwise, the radio will re-check the
channel every 4 seconds, until the activity on the channel ceases.
If enabled the user can use the keypad to change the priority channels.
The Priority Channel selection can be programmed to a programmed
button or as a menu item.
NOTE: To use Zone based Priority Channels set both Global Priority
Channel 1 and 2 to 'OFF'.
34 KNG User’s Manual 35
RELM/BK Radio
To select a new Priority Channel:
Pri Chans
Glob Pr1 Chan
Glob Pr1 Zone
ESC ▲ ▼ ENT
Ch 1
KNG-P150 P25
171.58500 MHz
LIGT T/A MENU PR1
RXD SCN
Glob Pr1 Chan
→Off
Main
ESC ▲ ▼ ENT
Glob Pr1 Zone
→Zone 1
Zone 2
ESC ▲ ▼ ENT
Zone 01 Pr1
→Channel 1
Channel 2
ESC ▲ ▼ ENT
Button Operation
Press the programmed button. 1. PR1
Use the up/down buttons to select the 2.
priority channel or zone you wish to edit.
'Glob PR1 Channel'
'Glob PR2 Zone'
'Zone Pr1'
'Zone Pr2'
Select the desired setting with the up/3.
down button or by the numeric keypad.
Press 'ENT' to set the selection.4.
Press 'ESC' to return to the Priority 5.
Settings menu.
Hold 'ESC' to return to normal radio 6.
operation.
Pri Chans
Glob Pr1 Chan
Glob Pr1 Zone
ESC ▲ ▼ ENT
Ch 1
KNG-P150 P25
171.58500 MHz
LIGT T/A MENU PR1
RXD SCN
Talkaround
Tx Power
Pri Channels
ESC ▲ ▼ ENT
Glob Pr1 Chan
→Off
Main
ESC ▲ ▼ ENT
Glob Pr1 Zone
→Zone 1
Zone 2
ESC ▲ ▼ ENT
Zone 01 Pr1
→Channel 1
Channel 2
ESC ▲ ▼ ENT
Menu Operation
Press the assigned Menu button.1.
Use the up/down buttons to select 'Pri 2.
Channels'.
Use the up/down buttons to select the 3.
priority channel or zone you wish to edit.
'Glob PR1 Channel'
'Glob PR2 Zone'
'Zone Pr1'
'Zone Pr2'
Select the desired setting with the up/4.
down button or by the numeric keypad.
Press 'ENT' to set the selection.5.
Press 'ESC' to return to the Priority 6.
Settings menu.
Hold 'ESC' to return to normal radio 7.
operation.
36 KNG User’s Manual 37
RELM/BK Radio
Scan List Add/Delete
A menu item can be programmed to add or remove channels from the
scan list. Channels currently in the scan list will show 'SCN' in the top
line of the display.
Zone Select
Scan List
PRI Scan
ESC ▲ ▼ ENT
TXD
Channel Scan
+Channel 01
Channel 02
ESC ▲ ▼ ENT
To edit the Scan List:
Press the assigned Menu button.1.
Use the up/down buttons to select 'Scan 2.
List' add or delete.
Press 'ENT'3.
Use the up/down buttons to select the 4.
desisred channel. Or enter the channel
number with the numeric keypad.
Use the +/- button to add or delete 5.
the channel from the Scan List.
Channels preceded by '+' are Scan List
channels
Press 'ENT'6.
Hold 'ESC' to return to normal radio operation.7.
Zone Scan (ZSCN)
Ch 1
KNG-P150 P25
171.58500 MHz
LIGT T/A MENU LCK
Ch 1
KNG-P150 P25
171.58500 MHz
LIGT T/A MENU LCK
RXDN SCAN
SCAN
When Zone Scan is turned on, the radio scans
all programmed scan channels in zones
programmed as Zone Scan zones.
Toggle switch operation
On - Slide the programmed switch toward the
front of the radio.
Off - Slide the switch up toward the channel
select switch.
Button Operation
On - Press the programmed button. ZSCN
Off - Press the button again. ZSCN
Menu Operation
Press the assigned Menu button.1.
Use the up/down buttons to select 'Zone Scan'.2.
Press the 'ENT' button.3.
Use the up/down buttons to select On or Off.4.
Press the 'ENT' button to set the selection.5.
Hold the 'ESC' button to return to normal operation..6.
Zone Scan List Add/Delete
A menu item can be programmed to add or remove Zones to the Zone
Scan List.
To add a zone to the Scan List:
Zone Scan
ZONE 1
+ZONE 2
ESC ▲ ▼ +/-
Ch 1
KNG-P150 P25
171.58500 MHz
LIGT T/A MENU LCK
RXD SCN
Talkaround
Tx Power
Zone Scn List
ESC ▲ ▼ ENT
Press the Menu button.1.
Use the up/down buttons to select 'Zone 2.
Scan List'.
Press the 'ENT' button.3.
Use the up/down buttons to select the 4.
zone to add or delete.
Press the +/- button to toggle the 5.
selection. Zones in the scan list will be
proceeded by a '+' symbol.
Hold the 'ESC' button to return to 6.
normal operation..
Emergency Signalling Options
The KNG portable radio supports P25 Emergency Operation. When
Emergency Operation is engaged the radio will transmit the P25 ID
of the radio along with the required P25 Emergency bit. Emergency
operation applies only to channels programmed for Digital or Mixed Mode
transmissions.
On channels programmed for analog transmissions, pressing PTT in
Emergency Mode will result in a normal analog transmission.
On channels programmed for Mixed Mode transmissions, pressing PTT
will result in a digital transmission, regardless of the position of the ‘TX
Digital’ switch.
All scanning and priority functions will be disabled during Emergency
operation.
Depending on the radio's PC programmable settings, emergency signal
will be sent automatically or with each Push-to-Talk.
38 KNG User’s Manual 39
RELM/BK Radio
Unit-to-Unit Call Options
Individual Call (U2U)
P25 Unit IDs allow for Unit-To-Unit calls when the radio is operating in
Digital Mode. The function must be enabled by radio programming to
allow this mode of operation.
Channels programmed for analog only operation will not be able to
transmit or receive Unit-To-Unit calls.
Button Operation
P25 ID
LIGT T/A MENU PR1
TXD SCAN
!
Unit Call
→Last Call
Call List
ESC ▲ ▼ ENT
Call List
→Call 1 Label
Call 2 Label
ESC ▲ ▼ ENT
Enter ID
ID -
ESC ▲ ▼ ENT
Press the programmed button. 'U2U'1.
Use the up/down buttons to select the 2.
desired Unit 'Call' option.
Press 'ENT' to enter Unit Call Mode.3.
Display shows phone icon and P25 ID in use.
Last Call = Use the P25 ID of the last Call.
'ENT' initiates call.
Call List = Use the programmed P25 ID List.
'ENT' brings up programmed Call List.
Use the up/down button to select the
desired ID.
Press 'ENT' to initiate the call.
Enter ID = Enter a numeric P25 ID.
'ENT' brings up 'Enter ID' menu.
Use the keypad to enter the desired ID.
Press 'ENT' to initiate the call.
4. Press the 'ESC' button to return to normal
operation.
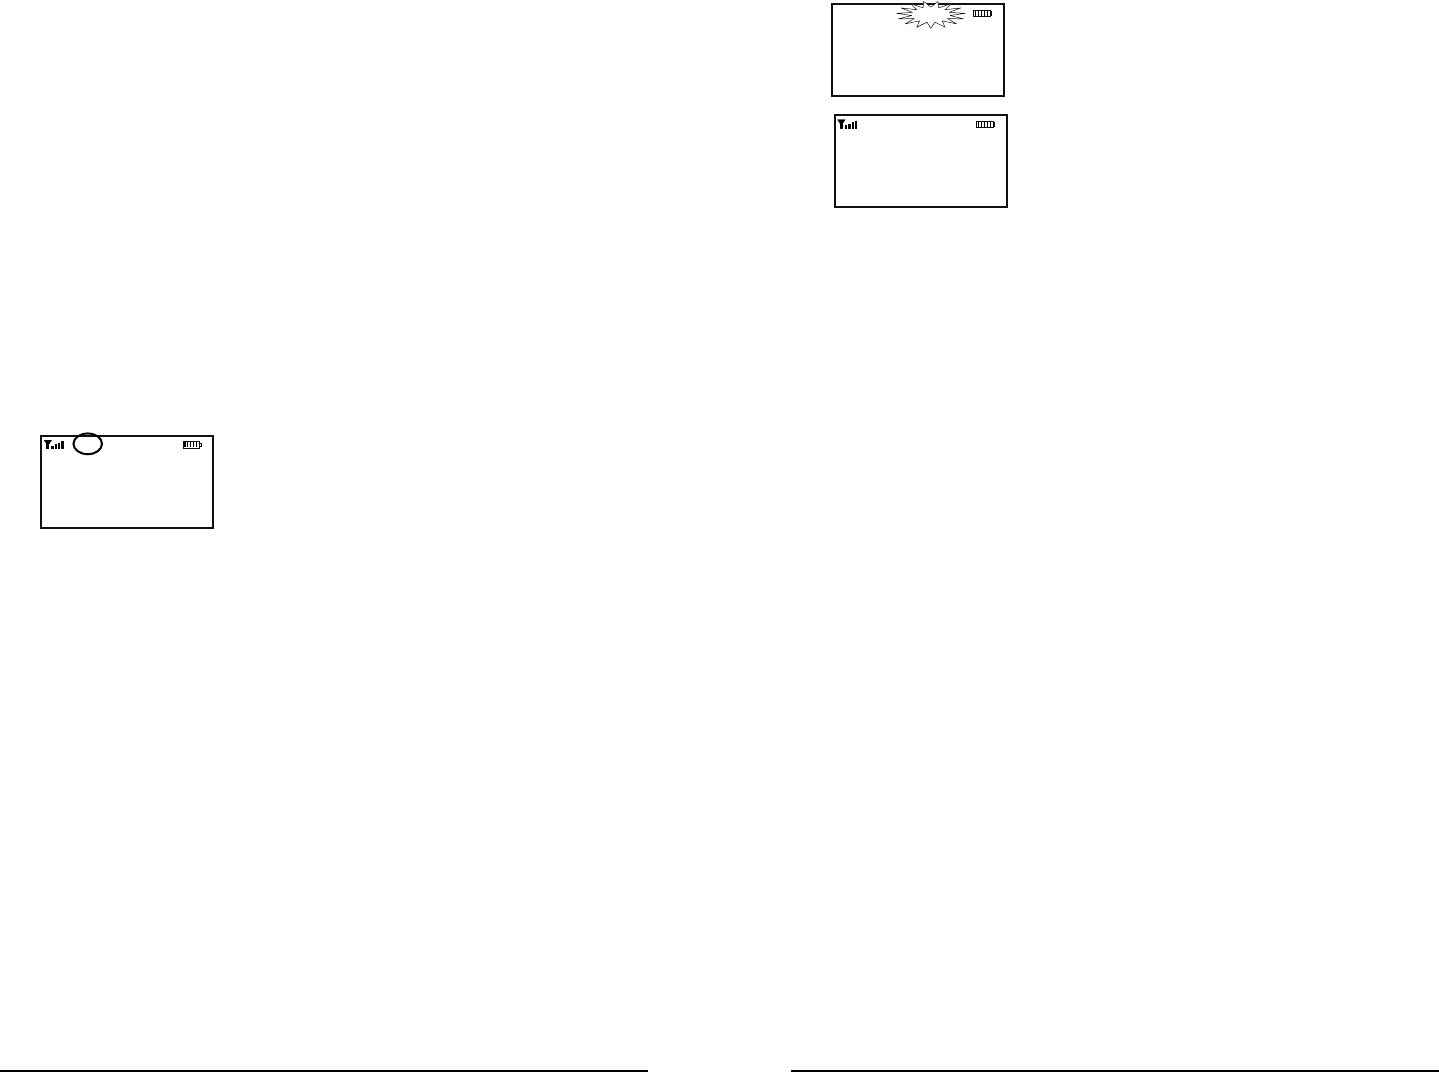
Pacing an Emergency Call
15
1
2
3
4
56
7
89
11
10
12
13
14
16
SCAN
PRI
VOL
LIGT T/A MENU PR1
TXD
EMERGENCY
KNG-P150 P25
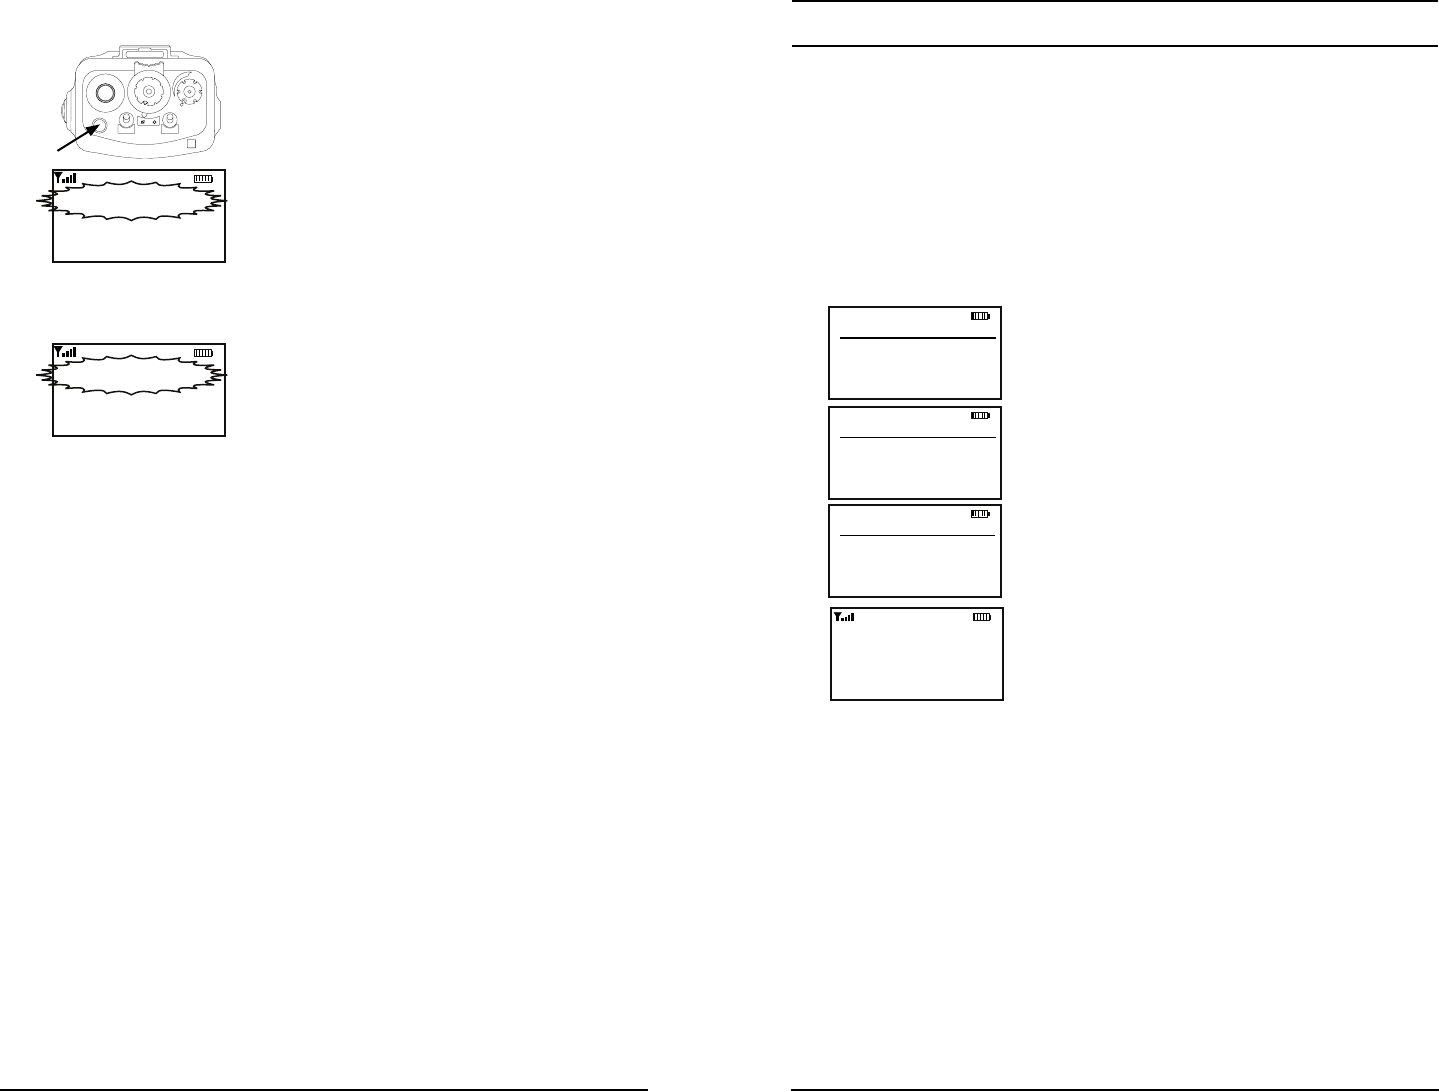
To place an emergency call, press and hold
the programmed emergency button until the
radio beeps and the display ß ashes "EMER-
GENCY".
Radio automatically sends the emergency
signal on the selected or pre-programmed
emergency channel.
Cycle power to return the radio to normal op-
eration.
Receiving an Emergency Signal
LIGT T/A MENU LCK
RXD
EMERGENCY
Unit ID 12345
To receive an emergency call, the radio's
receive mode must be programmed to Digital
or Mixed.
When receiving a qualiÞ ed emergency call,
the radio will beep. The the display will ß ash
the word ‘EMERGENCY’ and the P25 ID of
the radio sending the signal for the duration of
the reception, and during any hold time. The
RXD icon will also be lit.
40 KNG User’s Manual 41
RELM/BK Radio
Menu Operation
P25 ID
LIGT T/A MENU PR1
TXD SCAN
!
Channel Scan
Unit Call
PRI Scan
ESC ▲ ▼ ENT
Unit Call
→Last Call
Call List
ESC ▲ ▼ ENT
Call List
→Call 1 Label
Call 2 Label
ESC ▲ ▼ ENT
Enter ID
ID -
ESC ▲ ▼ ENT
Press the 'Menu' button.1.
Use the up/down buttons to select 'Unit 2.
Call'
Use the up/down buttons to select the 3.
desired Unit 'Call' option.
Press 'ENT' to enter Unit Call Mode.4.
Display shows phone icon and P25 ID in
use.
Last Call = Use the P25 ID of the last Call.
'ENT' initiates call.
Call List = Use the programmed P25 ID List.
'ENT' brings up programmed Call List.
Use the up/down button to select the
desired ID.
Press 'ENT' to initiate the call.
Enter ID = Enter a numeric P25 ID.
'ENT' brings up 'Enter ID' menu.
Use the keypad to enter the desired ID.
Press 'ENT' to initiate the call.
5. Press the 'ESC' button to return to
normal operation.
Unit-to Unit Callback
If enabled, pressing PTT during the hold time results in a Unit-to-Unit
call to the received unit ID.
Call List Programming
If enabled with the PC radio editor, the P25 Call List can edited via the
radio's keypad programming function. (See Keypad Programming)
Encryption Options
Tx Secure (TXS)
When SEC is on, encrypted channels programmed for switchable
encryption will transmit an encrypted signal.
NOTE: The SEC switch has no effect on channels programmed as
Encrypted or Clear Only channels.
Toggle switch operation
On - Slide the programmed switch toward the front of the radio.
Off - Slide the switch up toward the channel select switch.
Button Operation
On - Press the programmed button. TXS
Off - Press the button again. TXS
Menu Operation
Secure Tx
→Clear
Secure
ESC ▲ ▼ ENT
Channel Scan
TX Secure
PRI Scan
ESC ▲ ▼ ENT
TXD
Press the assigned Menu button.1.
Use the up/down buttons to select 'TX 2.
Secure'.
Press the 'ENT' button.3.
Use the up/down buttons to select 4.
Secure or Clear.
Press the 'ENT' button to set the 5.
selection.
Hold the 'ESC' button to return to 6.
normal operation.
42 KNG User’s Manual 43
RELM/BK Radio
Zeroize Keys (ZER)
The radio provides a method for the user to zeroize all encryption
keys. This service also sets all touchpad passwords to ‘FFFFFF’.
The Zeroize Keys function can be assigned to a button or the radio
menu.
To initiate the Zeroize Function:
Zeroize Keys
Zeroize Now?
ESC YES
Ch 1
KNG-P150 P25
171.58500 MHz
ZER T/A MENU LCK
RXD SCAN
Button Operation
Press the programmed button. 1. ZER
Press the 'YES' button to erase the 2.
Encryption Keys, or press 'ESC' to cancel
the operation.
Zeroize Keys
Zeroize Now?
ESC YES
Ch 1
KNG-P150 P25
171.58500 MHz
ZER T/A MENU LCK
RXD SCN
Talkaround
Tx Power
Zeroize Keys
ESC ▲ ▼ ENT
Menu Operation
Press the assigned Menu button.1.
Use the up/down buttons to select 2.
Zeroize Keys.
Press the 'ENT' button.3.
Press the 'YES' button to erase the 4.
Encryption Keys, or press 'ESC' to cancel
the operation.
Hold the 'ESC' button to return to 5.
normal operation.
Wait for the radio to start beeping and for the ‘ZERO ALL’ message to
appear on the LCD.
The radio will stop beeping and the ‘ZEROIZED’ message will appear
on the LCD after all keys are destroyed.
Rekey Request (RKY) (OTAR equipped radios)
The radio optionally provides a method for the user to manually request
a rekey from the KMF (Key Management Facility). Rekey Request can
be assigned to a button or the radio menu.
If the button is pressed while on a channel that has not been marked
as an OTAR channel, the radio will boop and ‘NON-OTAR’ will appear
on the display.
If manual rekeying request is enabled, the rekey service is invoked as
follows:
Request Key
Rekey Now?
ESC YES
Ch 1
KNG-P150 P25
171.58500 MHz
RKY T/A MENU LCK
RXD SCN
Button Operation
Select an OTAR enabled channel.1.
Press the programmed button. 2. RKY
Press the 'YES' button to Request Keys, 3.
or press 'ESC' to cancel the operation.
Request Key
Rekey Now?
ESC YES
Ch 1
KNG-P150 P25
171.58500 MHz
ZER T/A MENU LCK
RXD SCAN
Talkaround
Tx Power
Request Key
ESC ▲ ▼ ENT
Menu Operation
Select an OTAR enabled channel.1.
Press the assigned Menu button.2.
Use the up/down buttons to select 3.
'Reky'.
Press the 'ENT' button.4.
Press the 'YES' button to Request Keys, 5.
or press 'ESC' to cancel the operation.
Hold the 'ESC' button to return to 6.
normal operation.
If a successful rekey occurs, a tone will sound,
and the display will momentarily show ‘REKEYED’.
44 KNG User’s Manual 45
RELM/BK Radio
Pick List Options
The KNG provides users the ability to select and assign Pick List functions
to speciÞ c channels. Pick List options include: Transmit Code Guards,
Transmit NACs, Talk Group IDs and Encryption Keys. Pick List Options
can be assigned to a programmed button or a radio menu item.
Picklist- TX CxCSS (UTON)
Selecting a CTCSS/CDCSS tone from the Pick List will assign the tone
to the transmit function of the currently select channel. Receive tones will
not be effected.
User Tones
→Off
TONE-01
ESC ▲ ▼ ENT
Ch 1
KNG-P150 P25
171.58500 MHz
RKY T/A MENU LCK
RXD SCN
Button Operation
Turn to the channel you wish to assign 1.
the Tone to.
Press the programmed button. 2. UTON
Use the up/down buttons to select the 3.
desired tone (1-32) or select the tone using
the numeric keypad.
Press the 'ENT' button to set the 4.
selection.
Press 'ESC' to return to normal 5.
operation.
User Tones
→Off
TONE-01
ESC ▲ ▼ ENT
Ch 1
KNG-P150 P25
171.58500 MHz
ZER T/A MENU LCK
RXD SCN
Talkaround
Tx Power
User Tones
ESC ▲ ▼ ENT
Menu Operation
Press the assigned Menu button.1.
Use the up/down buttons to select 'User 2.
Tones'.
Press the 'ENT' button.3.
Use the up/down buttons to select the 4.
desired tone (1-32) or select the tone using
the numeric keypad.
Press the 'ENT' button to set the 5.
selection.
Hold the 'ESC' button to return to 6.
normal operation.
Picklist – TX NAC (UNAC)
Selecting a Network Access Code from the Pick List will assign the
NAC to the transmit function of the currently select channel. Receive
NACS will not be affected.
User NACs
→Off
TONE-01
ESC ▲ ▼ ENT
Ch 1
KNG-P150 P25
171.58500 MHz
RKY T/A MENU LCK
RXD SCAN
Button Operation
Turn to the channel you wish to assign 1.
the Tone to.
Press the programmed button. 2. UNAC
Use the up/down buttons to select the 3.
desired tone (1-32) or select the tone using
the numeric keypad.
Press the 'ENT' button to set the 4.
selection.
Press 'ESC' to return to normal 5.
operation.
User NACs
→NAC-01
NAC-02
ESC ▲ ▼ ENT
Ch 1
KNG-P150 P25
171.58500 MHz
ZER T/A MENU LCK
RXD SCAN
Talkaround
Tx Power
User NACs
ESC ▲ ▼ ENT
Menu Operation
Press the assigned Menu button.1.
Use the up/down buttons to select 'User 2.
Tones'.
Press the 'ENT' button.3.
Use the up/down buttons to select the 4.
desired NAC (1-32) or select the tone using
the numeric keypad.
Press the 'ENT' button to set the 5.
selection.
Hold the 'ESC' button to return to 6.
normal operation.
46 KNG User’s Manual 47
RELM/BK Radio
Picklist – TGID (UTG)
Selecting a Talk Group ID from the Pick List will assign the TGID to
the currently select channel. All other channels are unaffected.
User NACs
→Off
TONE-01
ESC ▲ ▼ ENT
Ch 1
KNG-P150 P25
171.58500 MHz
RKY T/A MENU LCK
RXD SCN
Button Operation
Turn to the channel you wish to assign 1.
the TGID to.
Press the programmed button. 2. UTG
Use the up/down buttons to select the 3.
desired tone (1-32) or select the tone using
the numeric keypad.
'Default' = pre-programmed TGID.
Press the 'ENT' button to set the 4.
selection.
Press 'ESC' to return to normal 5.
operation.
User TGID
→Default
TGID-01
ESC ▲ ▼ ENT
Ch 1
KNG-P150 P25
171.58500 MHz
ZER T/A MENU LCK
RXD SCN
Talkaround
Tx Power
User TGIDs
ESC ▲ ▼ ENT
Menu Operation
Press the assigned Menu button.1.
Use the up/down buttons to select 'User 2.
TGID'.
Press the 'ENT' button.3.
Use the up/down buttons to select the 4.
desired TGID (1-32) or select the tone using
the numeric keypad.
'Default' = pre-programmed TGID.
Press the 'ENT' button to set the 5.
selection.
Hold the 'ESC' button to return to 6.
normal operation.
Picklist – Key (UKEY)
Selecting an Encryption Key from the Pick List will assign the Key
to all encrypted channels that do not have 'Key Lock' programmed.
Locked key channels will continue to use the pre-programmed key.
TX Keys
→Default
Key 1
ESC ▲ ▼ ENT
Ch 1
KNG-P150 P25
171.58500 MHz
RKY T/A MENU LCK
RXD SCN
Button Operation
Turn to the channel you wish to assign 1.
the Tx Encryption Key to.
Press the programmed button. 2. UKEY
Use the up/down buttons to select the 3.
desired key (1-32) or select the tone using
the numeric keypad.
'Default' = pre-programmed key.
Press the 'ENT' button to set the 4.
selection.
Press 'ESC' to return to normal 5.
operation.
TX Keys
→Default
Key 1
ESC ▲ ▼ ENT
Ch 1
KNG-P150 P25
171.58500 MHz
ZER T/A MENU LCK
RXD SC N
Talkaround
Tx Power
Tx Keys
ESC ▲ ▼ ENT
Menu Operation
Press the assigned Menu button.1.
Use the up/down buttons to select 'Tx 2.
Keys'.
Press the 'ENT' button.3.
Use the up/down buttons to select the 4.
desired Key (1-32) or select the tone using
the numeric keypad.
'Default' = pre-programmed key.
Press the 'ENT' button to set the 5.
selection.
Hold the 'ESC' button to return to 6.
normal operation.
48 KNG User’s Manual 49
RELM/BK Radio
Keypad Programming Options
If enabled via PC programming, the radio's Picklists and Individual Call
List information can be edited using the keypad. In addition, programmed
channel, zone and some global settings can also be programmed. Check
with your RELM / B K Radio dealer or communic ations of Þ cer for information
on the programmed functions of your radio.
Programmable categories include Individual P25 ID Quick Call/Receive
List, User Tone List, User NAC List, User Talk Group ID List and Keypad
Programming of Channel, Zone and Global radio parameters.
Programming P25 ID Unit Call/Receive List
The KNG can be pre-programmed with up to 100 Project 25 IDs and labels.
If 'RX'd Unit ID' is designated as a display line, the P25 ID of the radio
sending the call will be shown when receiving a digital signal. If the P25 ID
of the received call is programmed in the Call List, the alphanumeric label
associated with the ID will be displayed. If the P25 ID is not in the Call List,
the numeric P25 ID will be displayed.
Ch 1
KNG-P150 P25
171.58500 MHz
LIGT T/A MENU LCK
RXD SCN
Keypad Prog
User Tones
Call List
ESC ▲ ▼ ENT
Enter Password
000000
ESC CLR ENT
ESC ▲ ▼ ENT
Call List
Call 1
Call 2
Talkaround
Tx Power
Prog
ESC ▲ ▼ ENT
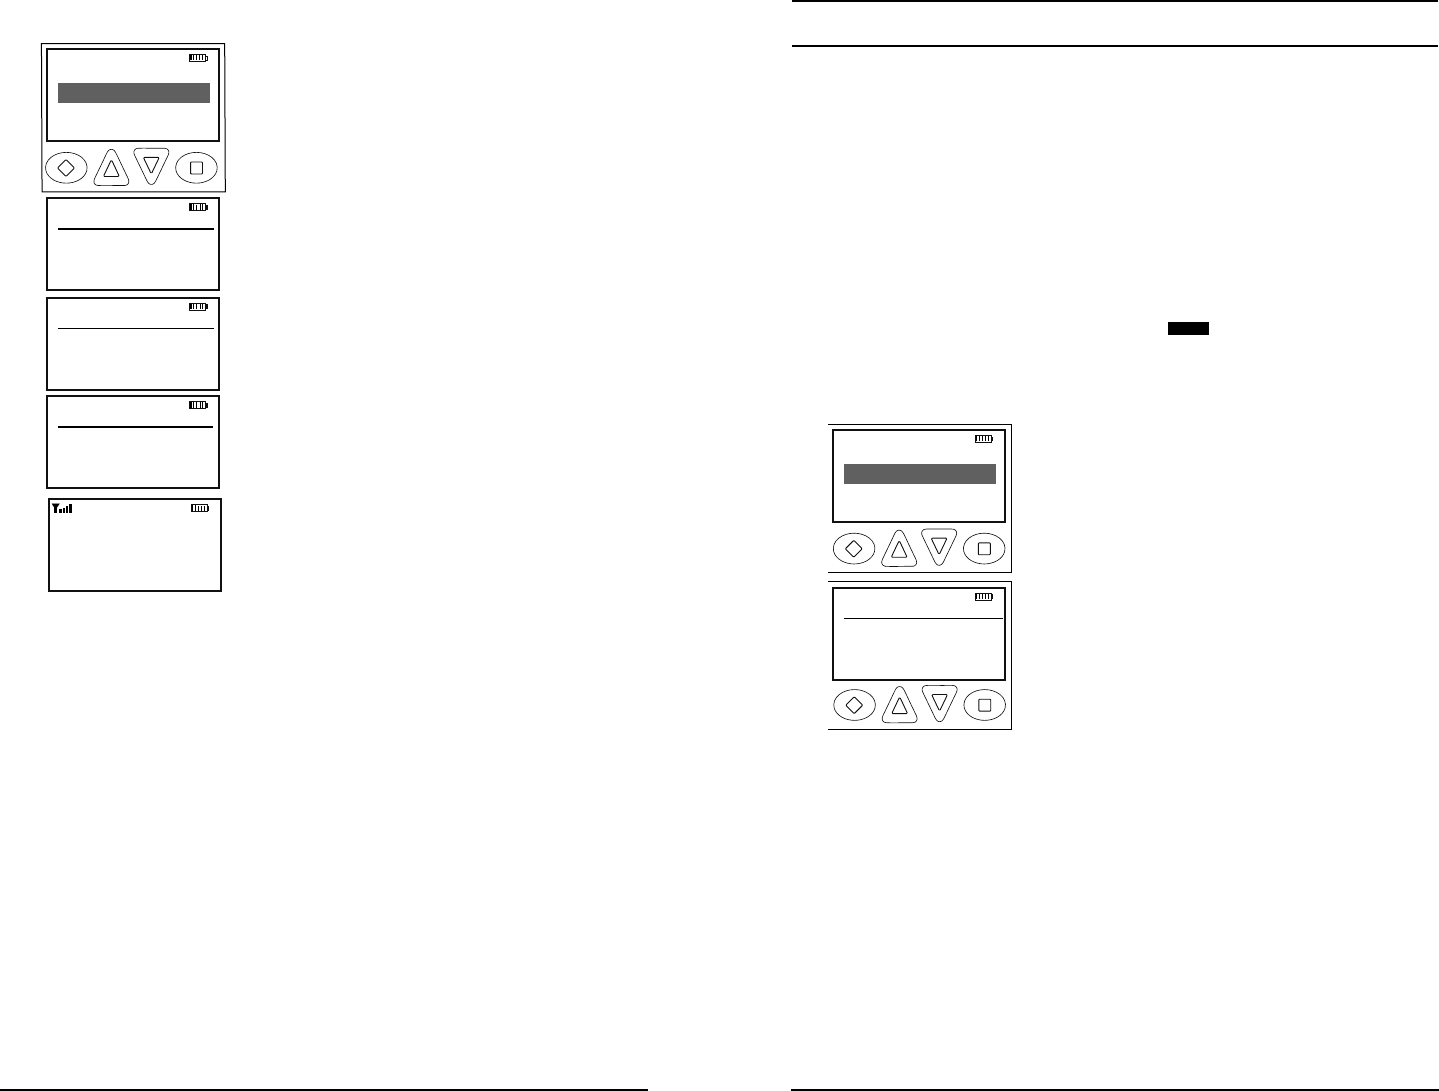
To enter P25 Call List programming:
1. Press the Menu button.
2. Use the up/down buttons to highlight Prog.
3. Press the ENT button.
4 Use the up/down buttons to highlight Call List.
5. Press ENT.
6. Use the keypad to enter the six digit
password.
7. Press ENT.
8. Use the up/down buttons to highlight the P25
ID you wish to edit.
9. Press ENT. The display shows the
alphanumeric label and P25 ID of the selected
ID.
Picklist – Key Set (UKST)
Selecting a Key Set from the Pick List will cause the radio to use
encryption keys from the selected Key Set.
Key Set
→Default
Keyset 1
ESC ▲ ▼ ENT
Ch 1
KNG-P150 P25
171.58500 MHz
RKY T/A MENU LCK
RXD SCN
Button Operation
Press the programmed button. 1. UKST
Use the up/down buttons to select the 2.
desired Key Set (1-32) or select the tone
using the numeric keypad.
'Default' = pre-programmed key set.
Press the 'ENT' button to set the 3.
selection.
Press 'ESC' to return to normal 4.
operation.
Key Set
→Default
Keyset 1
ESC ▲ ▼ ENT
Ch 1
KNG-P150 P25
171.58500 MHz
ZER T/A MENU LCK
RXD SCN
Talkaround
Tx Power
Key Set
ESC ▲ ▼ ENT
Menu Operation
Press the assigned Menu button.1.
Use the up/down buttons to select 'Key 2.
Set'.
Press the 'ENT' button.3.
Use the up/down buttons to select the 4.
desired Key (1-32) or select the tone using
the numeric keypad.
'Default' = pre-programmed key set.
Press the 'ENT' button to set the 5.
selection.
Press the 'ESC' button twice to return to 6.
normal operation.

50 KNG User’s Manual 51
RELM/BK Radio
Editing the label
ESC CLR ▼ ENT
Call 1
C a l l 1 L a b e l
1234567
ESC CLR PR1 ENT
Call 1
1234567
1. Use the down arrow button to highlight the
label.
2. Press the CLR button to clear the label.
3. Use the keypad to select the desired
character. (See Keypad Character Chart.)
4. Press the PR1 button to move to the next
character. Labels can contain up to thirteen
characters.
5. Press the ENT button to save the label.
Editing the ID Number
ESC CLR ▼ ENT
Call 1
C a l l 1 L a b e l
1234567
ESC CLR ENT
Call 1
Call 1 Label
1234567
1. Use the down arrow button to highlight the
ID.
2. Press the CLR button to clear the ID.
3. Use the keypad to select the desired ID
number. (Up to seven digits.)
4. Press the ENT button to save the ID.
Programming User Selectable Transmit Tones
The KNG can be pre-programmed with up to 32, user selectable, CTCSS
or CDCSS subaudible transmit tones. Tones are selected with the
programmed buttons. If enabled, the tones can be programmed via the
radio's keypad.
To enter Tone List programming:
Ch 1
KNG-P150 P25
171.58500 MHz
LIGT T/A MENU LCK
RXD SCN
Talkaround
Tx Power
Prog
ESC ▲ ▼ ENT
Enter Password
000000
ESC CLR ENT
Call List
User Tones
User TGIDs
ESC ▲ ▼ ENT
User Tones
TONE-01
TONE-02
ESC ▲ ▼ ENT
TONE 01
12345
ESC CLR ENT
TONE 01
0
ESC CLR ENT
1. Press the Menu button.
2. Use the up/down buttons to highlight 'Prog'.
3. Press the '' button.
4. Use the up/down buttons to highlight 'User
Tones'.
5. Press 'ENT'.
6. Use the keypad to enter the six digit
password.
7. Press 'ENT'.
8. Use the up/down buttons to highlight the
User Tone you wish to edit.
9. Press 'ENT'.
10. Press the 'CLR' button to clear the currently
programmed tone.
11. To enter CTCSS tones use the keypad to
enter the tone in Hertz. (67.0 - 255 Hz) To enter
CDCSS tones press the # key then enter the
three digit code. (000 - 999)
12. Press the 'ENT' button to set the tone.
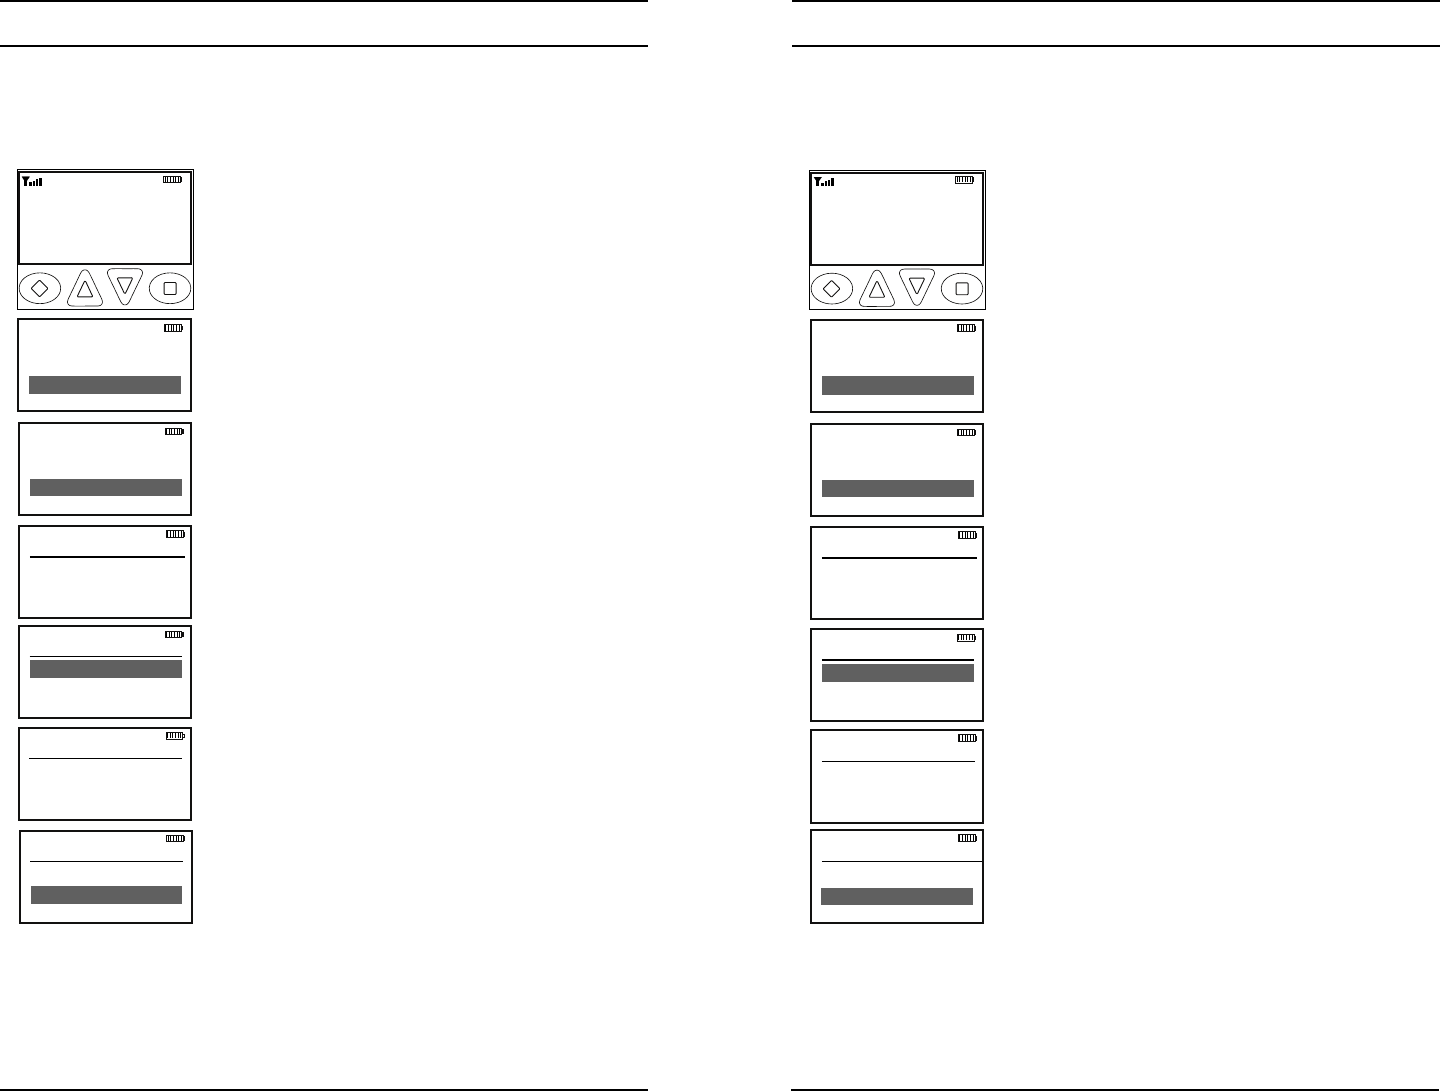
52 KNG User’s Manual 53
RELM/BK Radio
Programming User Selectable Network Access Codes
The KNG can be pre-programmed with up to 32, user selectable NACs.
NACS are selected with the programmed buttons. If enabled, the NACs
can be programmed via the radio's keypad.
To enter NAC List programming:
Enter Password
000000
ESC CLR ENT
Call List
User Tones
User NACs
ESC ▲ ▼ ENT
User NACs
NAC-01
NAC-02
ESC ▲ ▼ ENT
NAC 01
000
ESC PR1 CLR ENT
NAC 01
293
ESC PR1 CLR ENT
Ch 1
KNG-P150 P25
171.58500 MHz
LIGT T/A MENU LCK
RXD SCN
Talkaround
Tx Power
Prog
ESC ▲ ▼ ENT
1. Press the Menu button.
2. Use the up/down buttons to highlight 'Prog'.
3. Press the 'ENT' button.
4. Use the up/down buttons to highlight 'User
NACs'.
5. Press 'ENT'.
6. Use the keypad to enter the six digit
password.
7. Press 'ENT'.
8. Use the up/down buttons to highlight the
NAC you wish to edit.
9. Press the' ENT' Button.
10. Press the 'CLR' button to clear the currently
programmed NAC.
11. Use the keypad to select the Þ rst digit.
12. Press the 'NXT' button to move to the next
character. NACs are programmed as three digit
hexadecimal numbers. (000 - FFF)
13. Press the 'ENT' button to set the NAC.
Programming User Selectable Talkgroup IDs
The KNG can be pre-programmed with up to 32, user selectable TGIDs.
TDIDs are selected with the programmed buttons. If enabled, the TGIDs
can be programmed via the radio's keypad.
To enter TGID List programming:
Ch 1
KNG-P150 P25
171.58500 MHz
LIGT T/A MENU LCK
RXD SCN
Talkaround
Tx Power
Prog
ESC ▲ ▼ ENT
Enter Password
000000
ESC CLR ENT
Call List
User Tones
User TGIDs
ESC ▲ ▼ ENT
User TGIDs
TGID-01
TGID-02
ESC ▲ ▼ ENT
TGID 01
12345
ESC CLR ENT
TGID 01
0
ESC CLR ENT
1. Press the Menu button.
2. Use the up/down buttons to highlight Prog.
3. Press the ENT button.
4. Use the up/down buttons to highlight User
TGIDs.
5. Press ENT.
6. Use the keypad to enter the six digit
password.
7. Press ENT.
8. Use the up/down buttons to highlight the
TGID you wish to edit.
9. Press the ENT Button.
10. Press the 'CLR' button to clear the currently
programmed TGID.
11. Use the keypad to select the desired
Talkgroup number. (0-65355)
13. Press the 'ENT' button to set the Talkgroup.
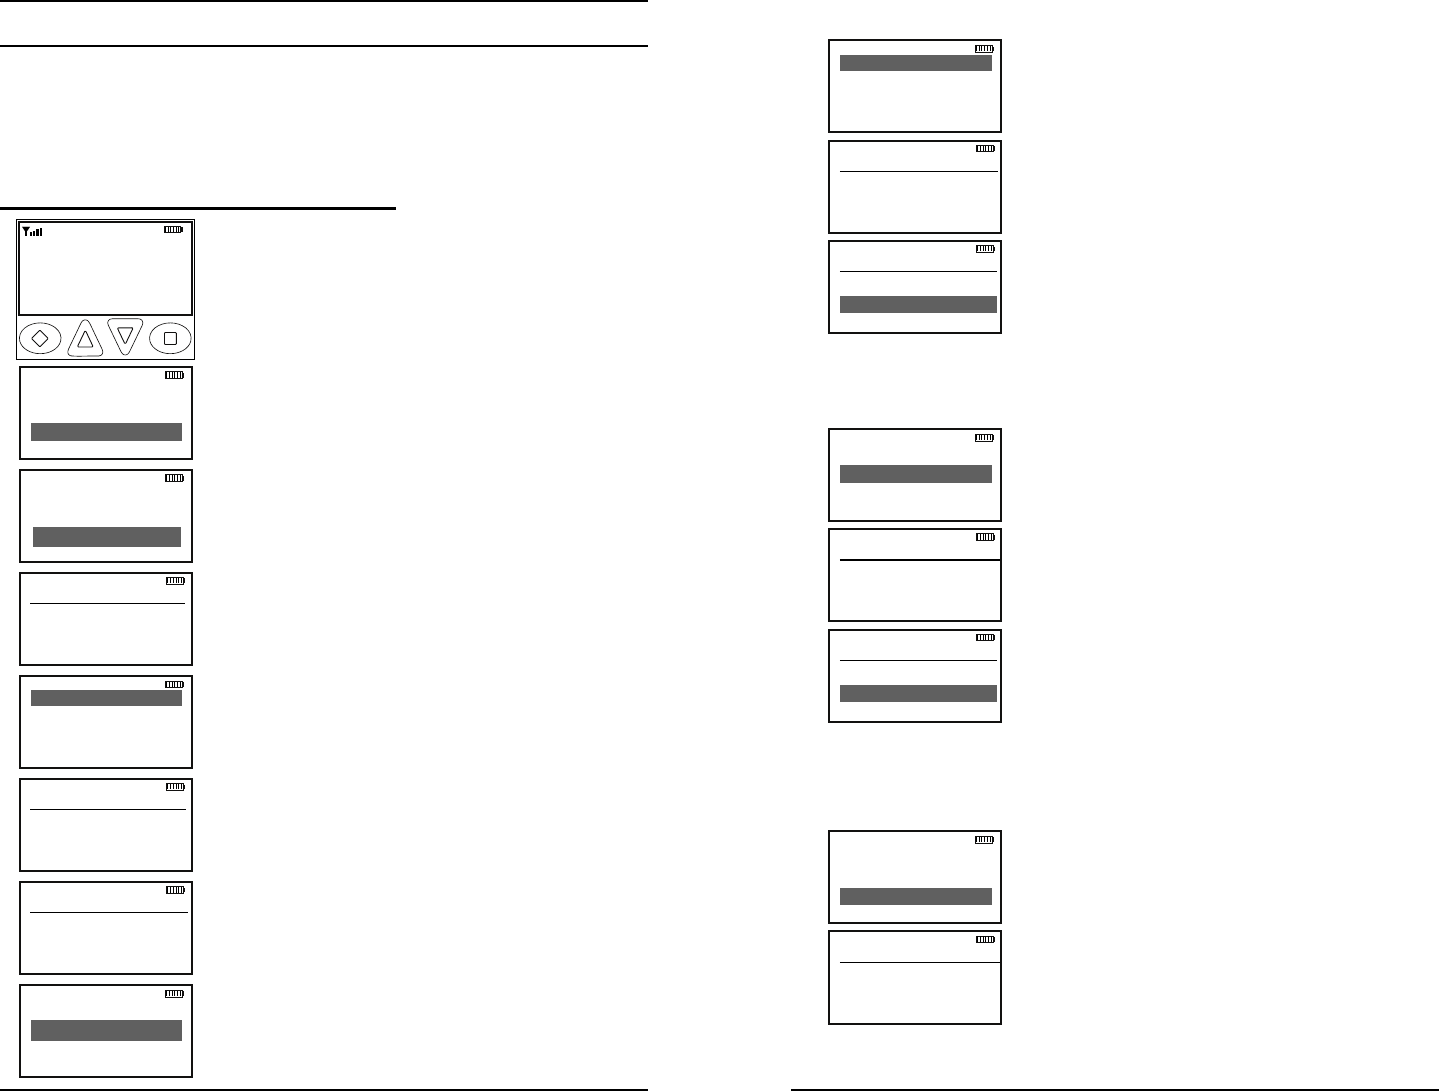
54 KNG User’s Manual 55
RELM/BK Radio
Keypad Programming
If enabled, channel, zone and global parameters can be programmed
using the radio's keypad. Individual parameters may be blocked from
programming access. Check with your RELM/BK Radio dealer or
communications ofÞ cer for information on the programmed functions of
your radio.
Programming Channel Information
Chan Label
Rx Freq
Rx Mode
ESC ▲ ▼ ENT
Enter Password
000000
ESC CLR ENT
User TGIDs
User Tones
Keypad Prog
ESC ▲ ▼ ENT
Talkaround
Tx Power
Prog
ESC ▲ ▼ ENT
Channels
Zone Params
Global Params
ESC ▲ ▼ ENT
Select Zone
Zone #
Zone Label
ESC ▲ ▼ ENT
Select Chan
Chan #
Channel Label
ESC ▲ ▼ ENT
Ch 1
KNG-P150 P25
171.58500 MHz
LIGT T/A MENU LCK
RXD SCN
To enter the Channel Programming mode:
1. Press the MENU button.
2. Use the up/down arrows to highlight 'Prog'.
3. Press 'ENT'.
4. Use the up/down arrows to highlight 'Keypad
Prog'.
5. Press 'ENT'.
6. Use the keypad to enter the six digit
password.
7. Press 'ENT'.
8. Use the up/down arrows to highlight
'Channels'
9. Press 'ENT'
8. Use the up/down arrows to select the Zone of
the desired channel.
9. Press 'ENT'.
10. Use the up/down arrows to select the
desired channel.
11. Press 'ENT'.
12. Use the up/down arrows to select the func-
tion you wish to edit.
Programmable Channel functions include: Chan-
nel Label, Receive Frequency, Receive Mode,
Receiver Code Guard, Squelch Mode, Transmit
Frequency, Transmit Mode, Bandwidth, Trans-
mit Code Guard, Transmit NAC, Talkgroup ID,
Secure Mode selection, Encryption Key Lock and
Low Power Lock.
Channel Label
Channel Label
Label
ESC PR1 CLR ENT
Chan Label
Rx Freq
Rx Mode
ESC ▲ ▼ ENT
ESC CLR ENT
Channel Label
1. With 'Chan Label' highlighted, press the
ENT button.
2. Press the 'CLR' button to clear the label.
2. Use the keypad to select the desired
character. (See Keypad Character Chart.)
3. Press the 'NXT' button to move to the next
character. Labels can contain up to thirteen
characters.
4. Press the 'ENT' button to save the label.
5. Press the 'ESC' button to return to the
Channel Programming menu.
Receive Frequency
RX Frequency
151.62500 MHz
ESC CLR ENT
Chan Label
Rx Freq
Rx Mode
ESC ▲ ▼ ENT
ESC CLR ENT
RX Frequency
000.00000 MHz
1. With 'Rx Freq' highlighted, press the 'ENT'
button.
2. Press the 'CLR' button to clear the current
frequency.
3. Use the keypad to select the desired
Receive Frequency.
4. Press the 'ENT' button to set the frequency.
5. Press the 'ESC' button to return to the
Channel Programming menu.
Receive Mode
RX Mode
→Digital
Mixed
ESC ▲ ▼ ENT
Chan Label
Rx Freq
Rx Mode
ESC ▲ ▼ ENT
1. With 'Rx Mode' highlighted, press the 'ENT'
button.
2. Use the up/down buttons to highlight the
desired Receiver Mode. (Analog, Digital or
Mixed)
3. Press the 'ENT' button to set the mode.
4. Press the 'ESC' button to return to the
Channel Programming menu.
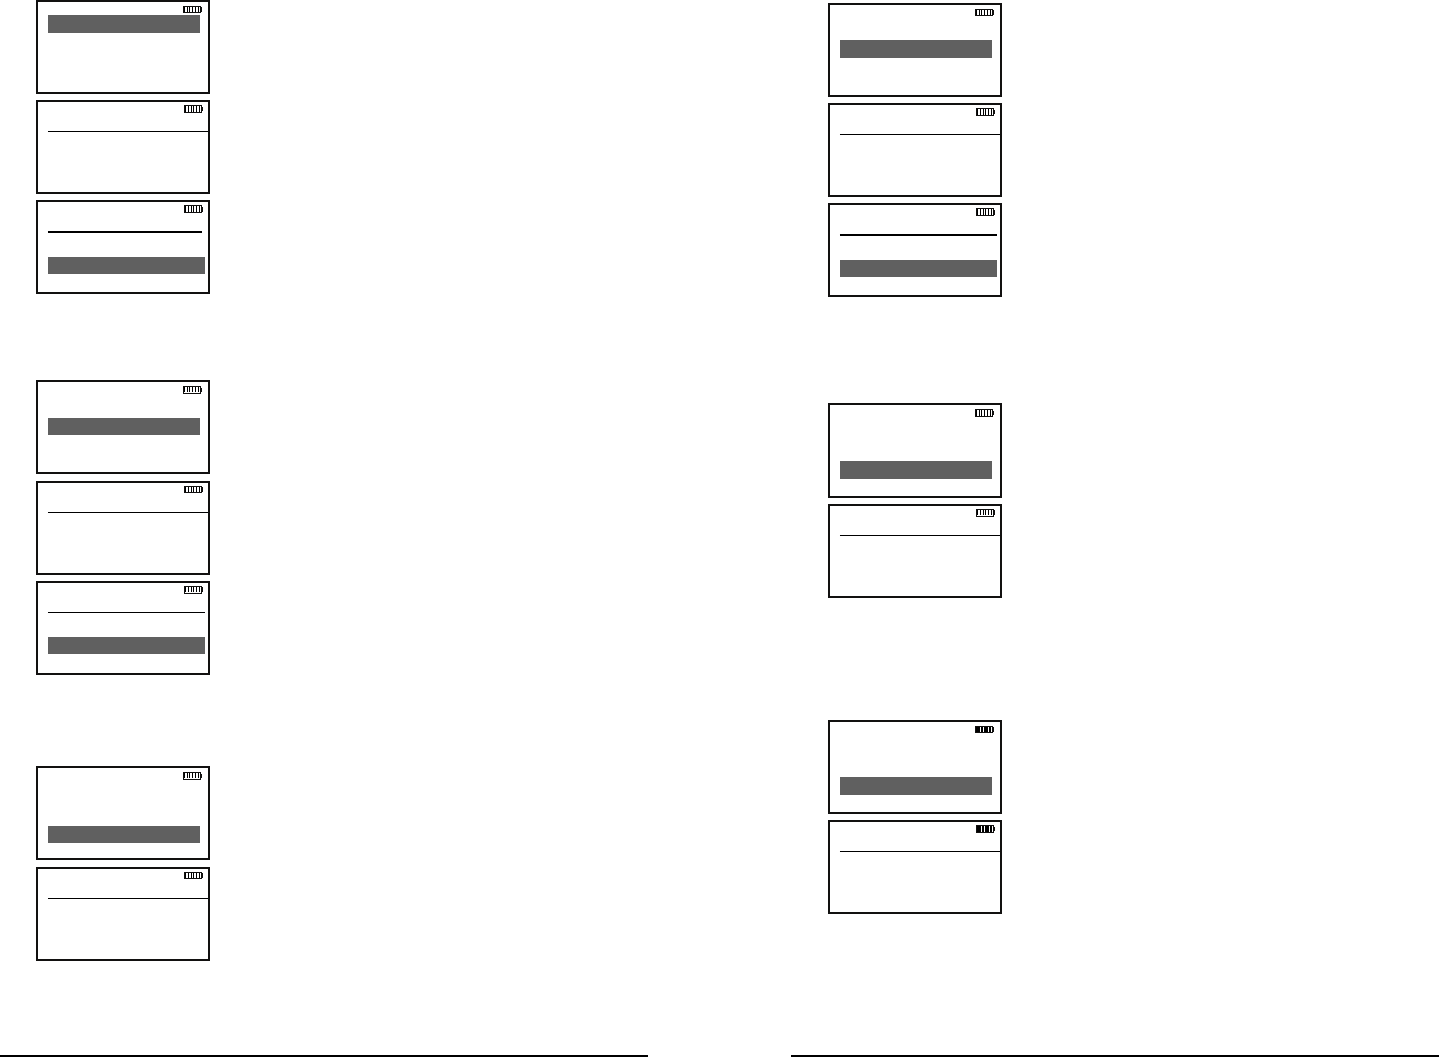
56 KNG User’s Manual 57
RELM/BK Radio
Receive Code Guard
RX Guard
000.0
ESC CLR ENT
Rx Guard
Rx NAC
Squelch Mode
ESC ▲ ▼ ENT
ESC CLR ENT
RX Guard
000.0
1. With 'Rx Guard' highlighted, press the 'ENT'
button.
2. Press the 'CLR' button to clear the
currently programmed tone.
3. To enter CTCSS tones use the keypad to
enter the tone in Hertz. (67.0 - 255 Hz) To enter
CDCSS tones press the # key then enter the
three digit code. (000 - 999)
4. Press the 'ENT' button to set the tone.
5. Press the 'ESC' button to return to the
Channel Programming menu.
Receive Network Access Code
RX NAC
000
ESC CLR ENT
Rx Guard
Rx NAC
Squelch Mode
ESC ▲ ▼ ENT
ESC CLR ENT
RX NAC
293
1. With 'Rx NAC' highlighted, press the 'ENT'
button.
2. Press the 'CLR' button to clear the
currently programmed NAC.
3. Use the keypad to select the Þ rst digit.
4. Press the PR1 button to move to the next
character. NACs are programmed as three
digit hexadecimal numbers. (000 - FFF)
5. Press the 'ENT' button to set the NAC.
6. Press the' ESC' button to return to the
Channel Programming menu.
Squelch Mode
Squelch Mode
→Normal
Selective
ESC ▲ ▼ ENT
Rx Guard
Rx NAC
Squelch Mode
ESC ▲ ▼ ENT
1. With 'Squelch Mode' highlighted, press the
'ENT' button.
2. Use the up/down arrows to select Normal
or Selective. (Selective squelch is required for
Individual Calls and use of Talkgroup IDs.)
3. Press the 'ENT' button to set the selection.
4. Press the 'ESC' button to return to the
Channel Programming menu.
Transmit Frequency
TX Frequency
151.62500 MHz
ESC CLR ENT
Squelch Mode
Tx Freq
Tx Mode
ESC ▲ ▼ ENT
ESC CLR ENT
TX Frequency
000.00000 MHz
1. With 'Tx Freq' highlighted, press the 'ENT'
button.
2. Press the 'CLR' button to clear the current
frequency.
3. Use the keypad to select the desired
Receive Frequency.
4. Press the 'ENT' button to set the frequency.
5. Press the 'ESC' button to return to the
Channel Programming menu.
Transmit Mode
TX Mode
→Digital
Mixed
ESC ▲ ▼ ENT
Squelch Mode
Tx Freq
Tx Mode
ESC ▲ ▼ ENT
1. With 'Tx Mode' highlighted, press the 'ENT'
button.
2. Use the up/down buttons to highlight the
desired Transmit Mode. (Analog, Digital or
Mixed)
3. Press the 'ENT' button to set the mode.
4. Press the 'ESC' button to return to the
Channel Programming menu.
Channel Bandwidth
Bandwidth selection applies only to Analog operation.
TX Mode
→12.5 kHz
25 kHz
ESC ▲ ▼ ENT
Tx Freq
Tx Mode
Bandwidth
ESC ▲ ▼ ENT
1. With 'Bandwidth' highlighted, press the
'ENT' button.
2. Use the up/down buttons to highlight
the desired Analog Bandwidth. (12.5 kHz =
narrowband, 25 kHz = wideband)
3. Press the 'ENT' button to set the selection.
4. Press the 'ESC' button to return to the
Channel Programming menu.
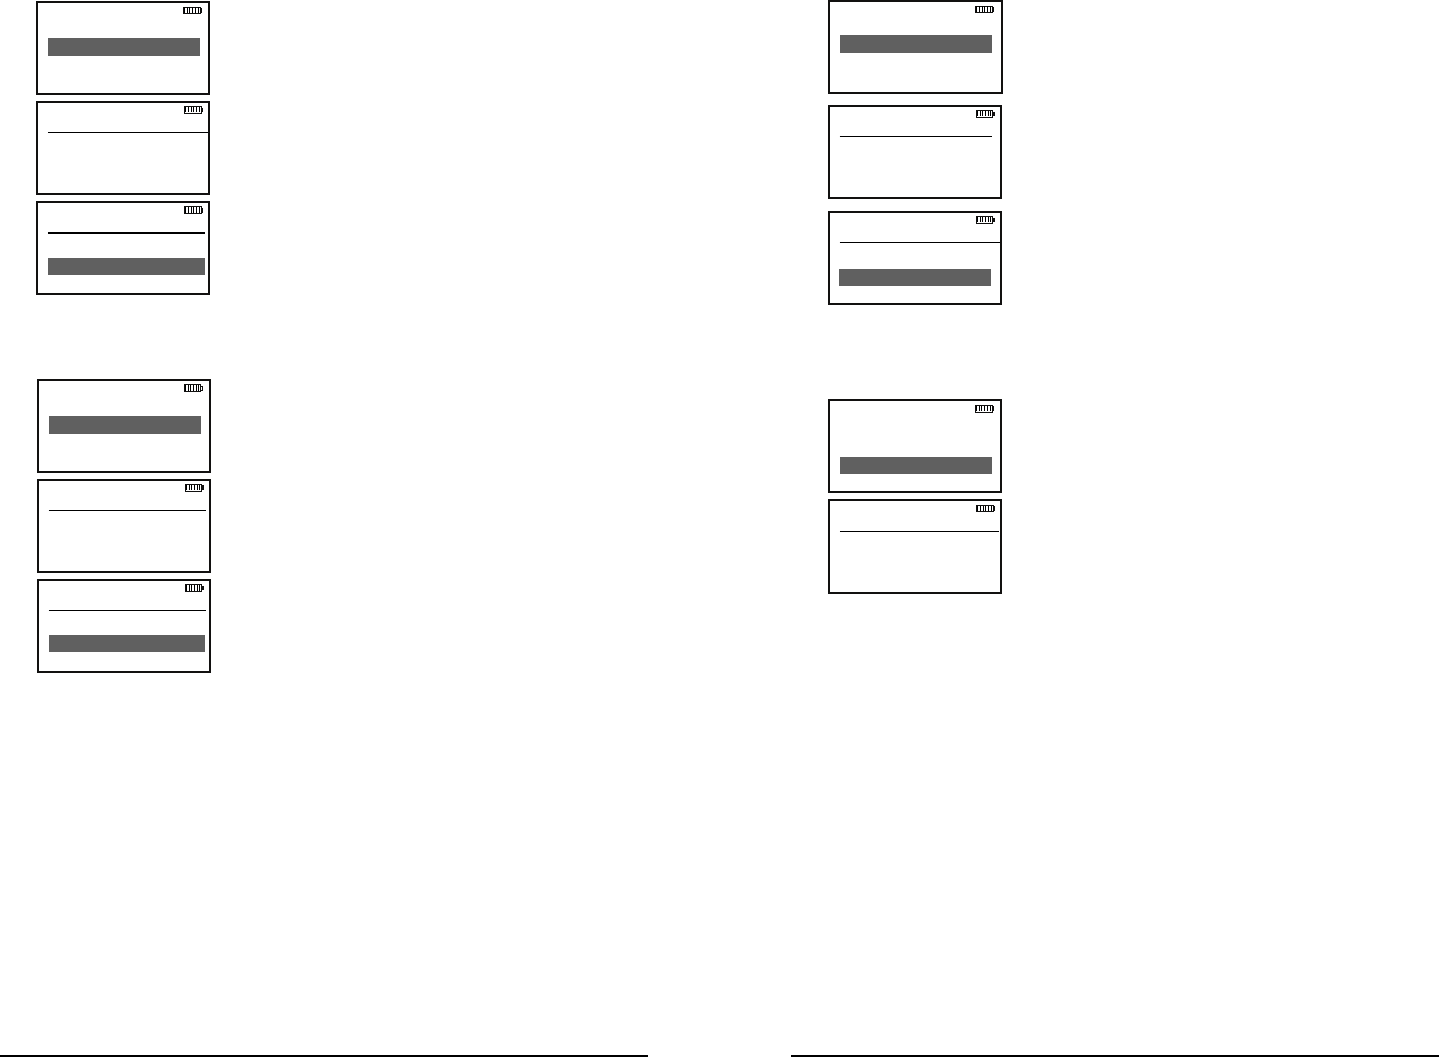
58 KNG User’s Manual 59
RELM/BK Radio
Transmit Code Guard
TX Guard
000.0
ESC CLR ENT
Bandwidth
Tx Guard
Tx NAC
ESC ▲ ▼ ENT
ESC CLR ENT
TX Guard
000.0
1. With 'Tx Guard' highlighted, press the 'ENT'
button.
2. Press the 'CLR' button to clear the
currently programmed tone.
3. To enter CTCSS tones use the keypad to
enter the tone in Hertz. (67.0 - 255 Hz) To enter
CDCSS tones press the # key then enter the
three digit code. (000 - 999)
4. Press the 'ENT' button to set the tone.
5. Press the 'ESC' button to return to the
Channel Programming menu.
Transmit Network Access Code
TX NAC
000
ESC CLR ENT
Tx Guard
Tx NAC
Squelch Mode
ESC ▲ ▼ ENT
ESC CLR ENT
TX NAC
293
1. With 'Tx NAC' highlighted, press the 'ENT'
button to edit the Guard Tone.
2. Press the 'CLR' button to clear the
currently programmed NAC. (The NAC returns
to the Project 25 default NAC of 293)
3. Use the keypad to select the Þ rst digit.
4. Press the PR1 button to move to the next
character. NACs are programmed as three
digit hexadecimal numbers. (000 - FFF)
5. Press the 'ENT' button to set the NAC.
6. Press the 'ESC' button to return to the
Channel Programming menu.
Talkgroup ID
Tx NAC
TGID
Secure Mode
ESC ▲ ▼ ENT
TGID
12345
ESC CLR ENT
TGID 01
0
ESC CLR ENT
1. With 'TGID' highlighted, press the 'ENT'
button.
2. Press the 'CLR' button to clear the
currently programmed TGID.
3. Use the keypad to select the desired
Talkgroup number. (0-65355)
4. Press the 'ENT' button to set the Talkgroup.
5. Press the 'ESC' button to return to the
Channel Programming menu.
Encryption Secure Mode (Encrypted models)
Secure Mode
→Clear
Secure
ESC ▲ ▼ ENT
Tx NAC
TGID
Secure Mode
ESC ▲ ▼ ENT
1. With 'Secure Mode' highlighted, press the
'ENT' button.
2. Use the up/down buttons to highlight the
desired Encryption Selection.
Clear = channel always transmits unencrypted.
Secure = channel always transmits encrypted.
Selectable = encryption selected via
programmed switch or button
3. Press the 'ENT' button to set the mode.
4. Press the 'ESC' button to return to the
Channel Programming menu.

60 KNG User’s Manual 61
RELM/BK Radio
Encryption Key (Encrypted models)
Encryption keys must loaded with a compatible key Þ ll device. The
radio can hold up to 32 AES and/or DES keys. (See Encryption
Operation)
Secure Mode
Key
Key Lock
ESC ▲ ▼ ENT
Encryption Key
01
ESC CLR ENT
TGID 01
01
ESC CLR ENT
1. With 'Key' highlighted, press the 'ENT'
button.
2. Press the 'CLR' button to clear the
currently selected encryption key.
3. Use the keypad to select the desired
Encryption Key number. (01-32)
4. Press the 'ENT' button to set the
Encryption Key.
5. Press the 'ESC' button to return to the
Channel Programming menu.
Encryption Key Lock (Encrypted models)
Encryption Keys can be locked to a channel or selected via a
programmed button.
Key Lock
→Off
On
ESC ▲ ▼ ENT
Secure Mode
Key
Key Lock
ESC ▲ ▼ ENT
1. With 'Key Lock' highlighted, press the 'ENT'
button.
2. Use the up/down buttons to highlight the
desired setting. Off = Selectable Key, On =
Locked Key.
3. Press the 'ENT' button to set the selection.
4. Press the 'ESC' button to return to the
Channel Programming menu.
Low Power Lock
Low Pow Lock
→Off
On
ESC ▲ ▼ ENT
Key
Key Lock
Low Pow Lock
ESC ▲ ▼ ENT
Channels with Low Power Lock enabled ignore
the Hi/Lo power switch and operate in Low
Power only.
1. With 'Low Pow Lock' highlighted, press the
'ENT' button.
2. Use the up/down buttons to highlight the
desired setting. Off = Selectable Power, On =
Low Power Only.
3. Press the 'ENT' button to set the selection.
4. Press the 'ESC' button to return to the
Channel Programming menu.
Programming Zone Parameters
Zone Label
Pri 1 Chan
Tx on Pri 1
ESC ▲ ▼ ENT
Enter Password
000000
ESC CLR ENT
Ch 1
KNG-P150 P25
171.58500 MHz
LIGT T/A MENU LCK
RXD SCAN
User TGIDs
User Tones
Keypad Prog
ESC ▲ ▼ ENT
Talkaround
Tx Power
Prog
ESC ▲ ▼ ENT
Channels
Zone Params
Global Params
ESC ▲ ▼ ENT
Select Zone
Zone #
Zone Label
ESC ▲ ▼ ENT
To enter the Zone Programming mode:
1. Press the MENU button.
2. Use the up/down arrows to highlight 'Prog'.
3. Press 'ENT'.
4. Use the up/down arrows to highlight 'Keypad
Prog'.
5. Press 'ENT'.
6. Use the keypad to enter the six digit
password.
7. Press 'ENT'.
8. Use the up/down arrows to highlight 'Zone
Params'
9. Press 'ENT'.
8. Use the up/down arrows to select the desired
Zone.
9. Press 'ENT'.
10. Use the up/down arrows to select the func-
tion you wish to edit.
Programmable Zone functions include: Zone
Label, Priority 1 Channel, Transmit on Priority 1
Channel, Priority 2 Channel, Automatic-Number-
IdentiÞ cation (ANI) settings and Allow/Disallow
Cloning.
62 KNG User’s Manual 63
RELM/BK Radio
Zone Label
Zone Label
Label
ESC PR1 CLR ENT
Zone Label
Pri 1 Chan
Tx in Pri 1
ESC ▲ ▼ ENT
ESC PR1 CLR ENT
Zone Label
1. With 'Zone Label' highlighted, press the
ENT button.
2. Press the 'CLR' button to clear the label.
2. Use the keypad to select the desired
character. (See Keypad Character Chart.)
3. Press the 'NXT' button to move to the next
character. Labels can contain up to thirteen
characters.
4. Press the 'ENT' button to save the label.
5. Press the 'ESC' button to return to the
Zone Programming menu.
Priority 1 Channel
Pri 1 Channel
→Main
Channel 1
ESC ▲ ▼ ENT
Zone Label
Pri 1 Chan
Tx on Pri 1
ESC ▲ ▼ ENT
1. With 'Pri 1 Chan' highlighted, press the
ENT button.
2. Use the up/down buttons to highlight the
desired Priority Channel.
Off = No Zone Priority Channel.
Main = Priority 1 Channel follows channel
select knob.
Channel Label = Assign as Priority 1 Channel.
4. Press the 'ENT' button to set the selection.
5. Press the 'ESC' button to return to the
Zone Programming menu.
Transmit on Priority 1 Channel
If enabled, the radio transmits on the Priority 1 Channel when PRI is
turned on.
Tx on Pri 1
→Off
On
ESC ▲ ▼ ENT
Zone Label
Pri 1 Chan
Tx on Pri 1
ESC ▲ ▼ ENT
1. With 'Tx on Pri 1' highlighted, press the
'ENT' button.
2. Use the up/down buttons to highlight the
desired setting.
3. Press the 'ENT' button to set the selection.
4. Press the 'ESC' button to return to the
Zone Programming menu.
Priority 2 Channel
Pri 2 Channel
→Main
Channel 1
ESC ▲ ▼ ENT
Tx on Pri 1
Pri 2 Chan
ANI Mode
ESC ▲ ▼ ENT
1. With 'Pri 2 Chan' highlighted, press the
'ENT' button.
2. Use the up/down buttons to highlight the
desired Priority Channel.
Off = No Zone Priority Channel.
Main = Priority 2 Channel follows channel
select knob.
Channel Label = Assign as Priority 2 Channel.
4. Press the 'ENT' button to set the selection.
5. Press the 'ESC' button to return to the
Zone Programming menu.
Automatic Number IdentiÞ cation (ANI) Mode
ANI/DTMF Mode
→Off
DTMF Only
ESC ▲ ▼ ENT
Tx on Pri 1
Pri 2 Chan
ANI Mode
ESC ▲ ▼ ENT
1. With 'ANI Mode' highlighted, press the
'ENT' button.
2. Use the up/down buttons to highlight the
desired setting.
Off = No ANI operation.
DTMF Only = Transmit DTMF Tones with
keypad.
ANI Only = Send DTMF ANI on PTT.
BOTH = Keypad Tones and manual ANI.
3. Press the 'ENT' button to set the selection.
4. Press the 'ESC' button to return to the
Zone Programming menu.
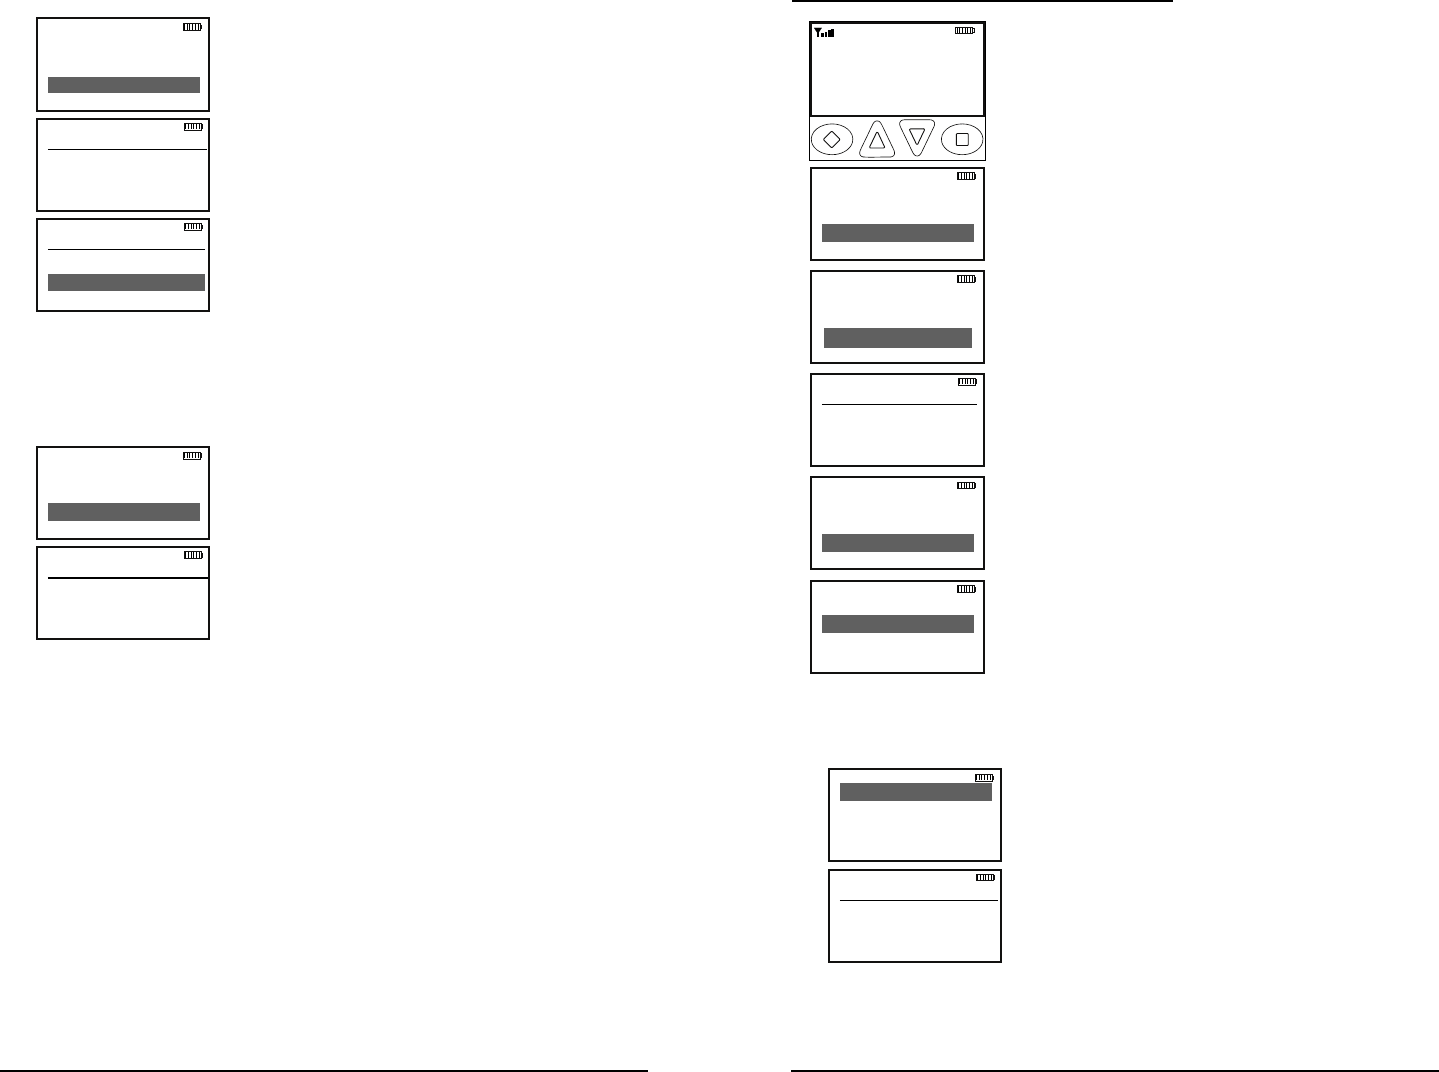
64 KNG User’s Manual 65
RELM/BK Radio
Automatic Number IdentiÞ cation (ANI) ID
ANI ID
1234567
ESC CLR ENT
Pri 2 Chan
ANI Mode
ANI ID
ESC ▲ ▼ ENT
ESC CLR ENT
ANI ID
789
1. With 'ANI ID' highlighted, press the ENT
button.
2. Press the 'CLR' button to clear the ID.
3. Use the keypad to select the desired
numeric ID. (Up to seven digits.)
4. Press the 'ENT' button to save the ID.
5. Press the 'ESC' button to return to the
Zone Programming menu.
Disable Zone Cloning
If enabled, the Zone will not accept incoming clone from another radio.
Disable Clone
→Off
On
ESC ▲ ▼ ENT
ANI Mode
ANI ID
Disable Clone
ESC ▲ ▼ ENT
1. With 'Disable Clone' highlighted, press the
'ENT' button.
2. Use the up/down buttons to highlight the
desired setting.
3. Press the 'ENT' button to set the selection.
4. Press the 'ESC' button to return to the
Zone Programming menu.
Programming Global Parameters
Pri 1 Chan
Pri 1 Zone
Tx on Pri 1
ESC ▲ ▼ ENT
Enter Password
000000
ESC CLR ENT
Ch 1
KNG-P150 P25
171.58500 MHz
LIGT T/A MENU LCK
RXD SCAN
User TGIDs
User Tones
Keypad Prog
ESC ▲ ▼ ENT
Talkaround
Tx Power
Prog
ESC ▲ ▼ ENT
Channels
Zone Params
Global Params
ESC ▲ ▼ ENT
To enter the Global Programming mode:
1. Press the MENU button.
2. Use the up/down arrows to highlight 'Prog'.
3. Press 'ENT'.
4. Use the up/down arrows to highlight 'Keypad
Prog'.
5. Press 'ENT'.
6. Use the keypad to enter the six digit
password.
7. Press 'ENT'.
8. Use the up/down arrows to highlight 'Global
Params'
9. Press 'ENT'.
10. Use the up/down arrows to select the
function you wish to edit.
Programmable Global functions include: Priority
1 Channel, Priority 1 Zone, Transmit on Priority
1 Channel, Priority 2 Channel, Priority 2 Zone,
Scan Hold Time, Busy Channel Mode, Transmit
Time-out-Timer, Backlight Mode, Backlight
Duration, Battery Saver, and Radio Password.
Global Priority 1 Channel
Pri 1 Channel
Off
→Main
ESC ▲ ▼ ENT
Pri 1 Chan
Pri 1 Zone
Tx on Pri 1
ESC ▲ ▼ ENT
1. With 'Pri 1 Chan' highlighted, press the
ENT button.
2. Use the up/down buttons to highlight the
desired Priority Channel.
Off = No Global Priority Channel.
Main = Global Priority 1 Channel follows
channel select knob.
Channel Label = Assign as Priority 1 Channel.
4. Press the 'ENT' button to set the selection.
5. Press the 'ESC' button to return to the
Global Programming menu.
66 KNG User’s Manual 67
RELM/BK Radio
Global Priority 1 Zone
Pri 1 Zone
ZONE 1
→ZONE 2
ESC ▲ ▼ ENT
Pri 1 Chan
Pri 1 Zone
Tx on Pri 1
ESC ▲ ▼ ENT
1. With 'Pri 1 Zone' highlighted, press the'ENT'
button.
2. Use the up/down buttons to highlight the
Zone of desired Global Priority Channel.
3. Press the 'ENT' button to set the selection.
4. Press the 'ESC' button to return to the
Global Programming menu
Tx on Global Priority 1 Channel
If enabled, the radio transmits on the Global Priority 1 Channel when
PRI is turned on.
Tx on Pri 1
→Off
On
ESC ▲ ▼ ENT
Pri 1 Chan
Pri 1 Zone
Tx on Pri 1
ESC ▲ ▼ ENT
1. With 'Tx on Pri 1' highlighted, press the
'ENT' button.
2. Use the up/down buttons to highlight the
desired setting.
3. Press the 'ENT' button to set the selection.
4. Press the 'ESC' button to return to the
Global Programming menu.
Global Priority 2 Channel
Pri 2 Chan
→Off
Main
ESC ▲ ▼ ENT
Pri 1 Zone
Tx on Pri 1
Pri 2 Chan
ESC ▲ ▼ ENT
1. With 'Pri 2 Chan' highlighted, press the
'ENT' button.
2. Use the up/down buttons to highlight the
desired Priority Channel.
Off = No Global Priority Channel.
Main = Global Priority 2 Channel follows
channel select knob.
Channel Label = Assign as Priority 2 Channel.
4. Press the 'ENT' button to set the selection.
5. Press the 'ESC' button to return to the
Global Programming menu.
Global Priority 2 Zone
Pri 2 Zone
ZONE 1
→ZONE 2
ESC ▲ ▼ ENT
Pri 2 Chan
Pri 2 Zone
Scn Hold Time
ESC ▲ ▼ ENT
1. With 'Pri 2 Zone' highlighted, press the
'ENT' button.
2. Use the up/down buttons to highlight the
Zone of desired Global Priority Channel.
3. Press the 'ENT' button to set the selection.
4. Press the 'ESC' button to return to the
Global Programming menu
Scan Hold Time
Scan Hold Time is also used as the Hold Time for programmed
talkback functions.
Set Hold Time
0.0 Seconds
ESC ▲ ▼ ENT
Pri 2 Zone
Scn Hold Time
Busy Ch Mode
ESC ▲ ▼ ENT
1. With 'Scn Hold Time' highlighted, press the
'ENT' button.
2. Use the up/down buttons to select the
desired Hold Time.(0.0 - 7.5)
3. Press the 'ENT' button to set the selection.
4. Press the 'ESC' button to return to the
Global Programming menu
Busy Channel Mode
Busy Ch Mode
Off
→Indicate
ESC ▲ ▼ ENT
Scn Hold Time
Busy Ch Mode
TX TOT
ESC ▲ ▼ ENT
1. With 'Busy Ch Mode' highlighted, press the
'ENT' button.
2. Use the up/down buttons to highlight the
desired Busy Channel Operation.
Off = No Busy Channel indication.
Indicate = Indicator LED glows yellow when
the selected frequency is in use.
Lockout = Prevents transmitting when selected
frequency is in use.
Override = Lets the user override the Lockout
function and transmit while frequency is busy.
4. Press the 'ENT' button to set the selection.
5. Press the 'ESC' button to return to the
Global Programming menu.
68 KNG User’s Manual 69
RELM/BK Radio
TX Time Out Timer
The TX Time Out Timer Limits the length of transmissions to the
programmed time.
Tx Timeout
255 Seconds
ESC ▲ ▼ ENT
Busy Ch Mode
TX TOT
Bklight Mode
ESC ▲ ▼ ENT
1. With 'TX TOT' highlighted, press the 'ENT'
button.
2. Use the up/down buttons to select the
desired transmission time Limit. (0 - 225
seconds. Zero seconds = No Time Out Time.)
3. Press the 'ENT' button to set the selection.
4. Press the 'ESC' button to return to the
Global Programming menu.
Backlight Mode
Bklight Mode
Off
→Keypress
ESC ▲ ▼ ENT
TX TOT
Bklight Mode
Bklight Dur
ESC ▲ ▼ ENT
1. With 'Bklight Mode' highlighted, press the
'ENT' button.
2. Use the up/down buttons to highlight the
desired Backlight setting.
Off = No Backlight.
Keypress = Display and keypad light whenever
the keypad is used.
Display Chan = Display and keypad light
whenever displayed information changes
Both = Display and keypad light whenever
displayed information changes or the keypad
is used.
3. Press the 'ENT' button to set the selection.
4. Press the 'ESC' button to return to the
Global Programming menu.
Backlight Duration
Backlight Dur
Off
→1 Sec
ESC ▲ ▼ ENT
TX TOT
Bklight Mode
Bklight Dur
ESC ▲ ▼ ENT
1. With 'Bklight Dur' highlighted, press the
'ENT' button.
2. Use the up/down buttons to select the
desired Backlight Time Limit. (1 - 6 seconds,
Off or Always On)
3. Press the 'ENT' button to set the selection.
4. Press the 'ESC' button to return to the
Global Programming menu.
Battery Saver
It is recommended that Battery Saver be used for normal radio
operation.
Battery Saver
Off
→On
ESC ▲ ▼ ENT
Bklight Mode
Bklight Dur
Battery Saver
ESC ▲ ▼ ENT
1. With 'Battery Saver' highlighted, press the
ENT button.
2. Use the up/down buttons to select 'On' or
'Off'.
3. Press the 'ENT' button to set the selection.
4. Press the 'ESC' button to return to the
Global Programming menu.
Password
Password
123456
ESC CLR ENT
Bklight Dur
Battery Saver
ANI ID
ESC ▲ ▼ ENT
ESC CLR ENT
Password
1. With 'Password' highlighted, press the
'ENT' button.
2. Press the 'CLR' button to clear the current
Password.
3. Use the keypad to select a desired six digit
numeric Password.
4. Press the 'ENT' button to set the new
Password.
5. Press the 'ESC' button to return to the
Global Programming menu.
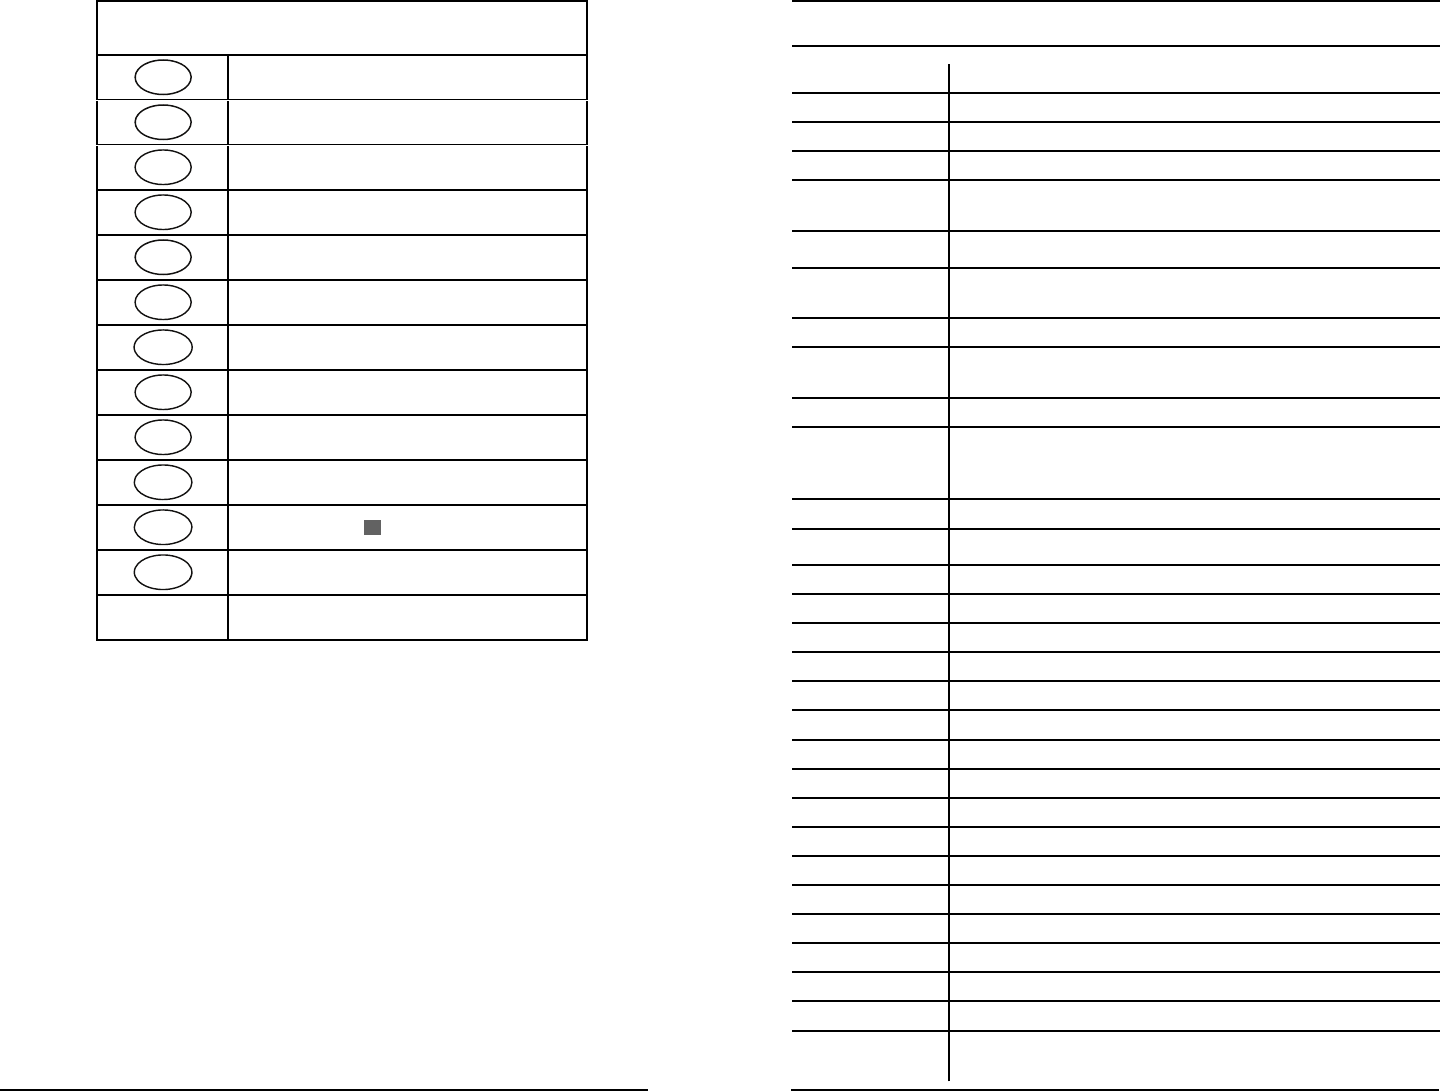
70 KNG User’s Manual 71
RELM/BK Radio
Keypad Programming Charachters
11
ABC
2A, B, C, a, b, c, 2
DEF
3D, E, F, d, e, f, 3
GHI
4G, H, I, g, h, i, 4
JKL
5J, K, L, j, k, l, 5
MNO
6M, N, O, m, n, o, 6
PQRS
7P, Q, R, S, p, q, r, s, 7
TUV
8T, U, V, t, u, v, 8
WXYZ
9W, X, Y, Z, w, x, y, z, 9
00, Blank Space
*
-, *, $, /, +, %, :, , <, >
#
Nothing
DeÞ nitions and Acronyms
AES APCO Project 25 Advanced Encryption Standard
ANI Automatic Numeric IdentiÞ cation
CG Code Guard
CLR Clear
Code Guard A sub-audible tone, a code (analog) or a Network Access
Code (digital) for selective calling and receiving
DES APCO Project 25 Encryption Standard
Detent The click/hesitation you feel as you turn a knob from one
position to another.
DTMF Dual Tone Multiple Frequency
DTMF Tones Tones that sound like those used by a standard push-
button telephone.
ENT Enter
Individual
Personality
The information programmed with a PC on both a global
and by-channel basis that tells the radio exactly how to
operate
LCD Liquid Crystal Display
Mixed Mode Allows Analog & Digital operation on same channel.
NAC Network Access Code for digital channel.
PR Priority Channel
PRI Priority
PTT Push To Talk
RTA Repeater Talk Around
RTX Channel Ready to Transmit Channel
RX Receive
SCN Scan
SQ Squelch
Squelch A control that eliminates background noise.
Talkback Programmed response to a call.
TGID Talk Group ID
TOT Time-Out Timer
Time-Out Timer Limits the duration of calls.
Talk Group ID P25 Talk Group IdentiÞ cation
Cloning The process of copying data from one radio, called
“master,” to other radios, called “slaves” or “clones.”
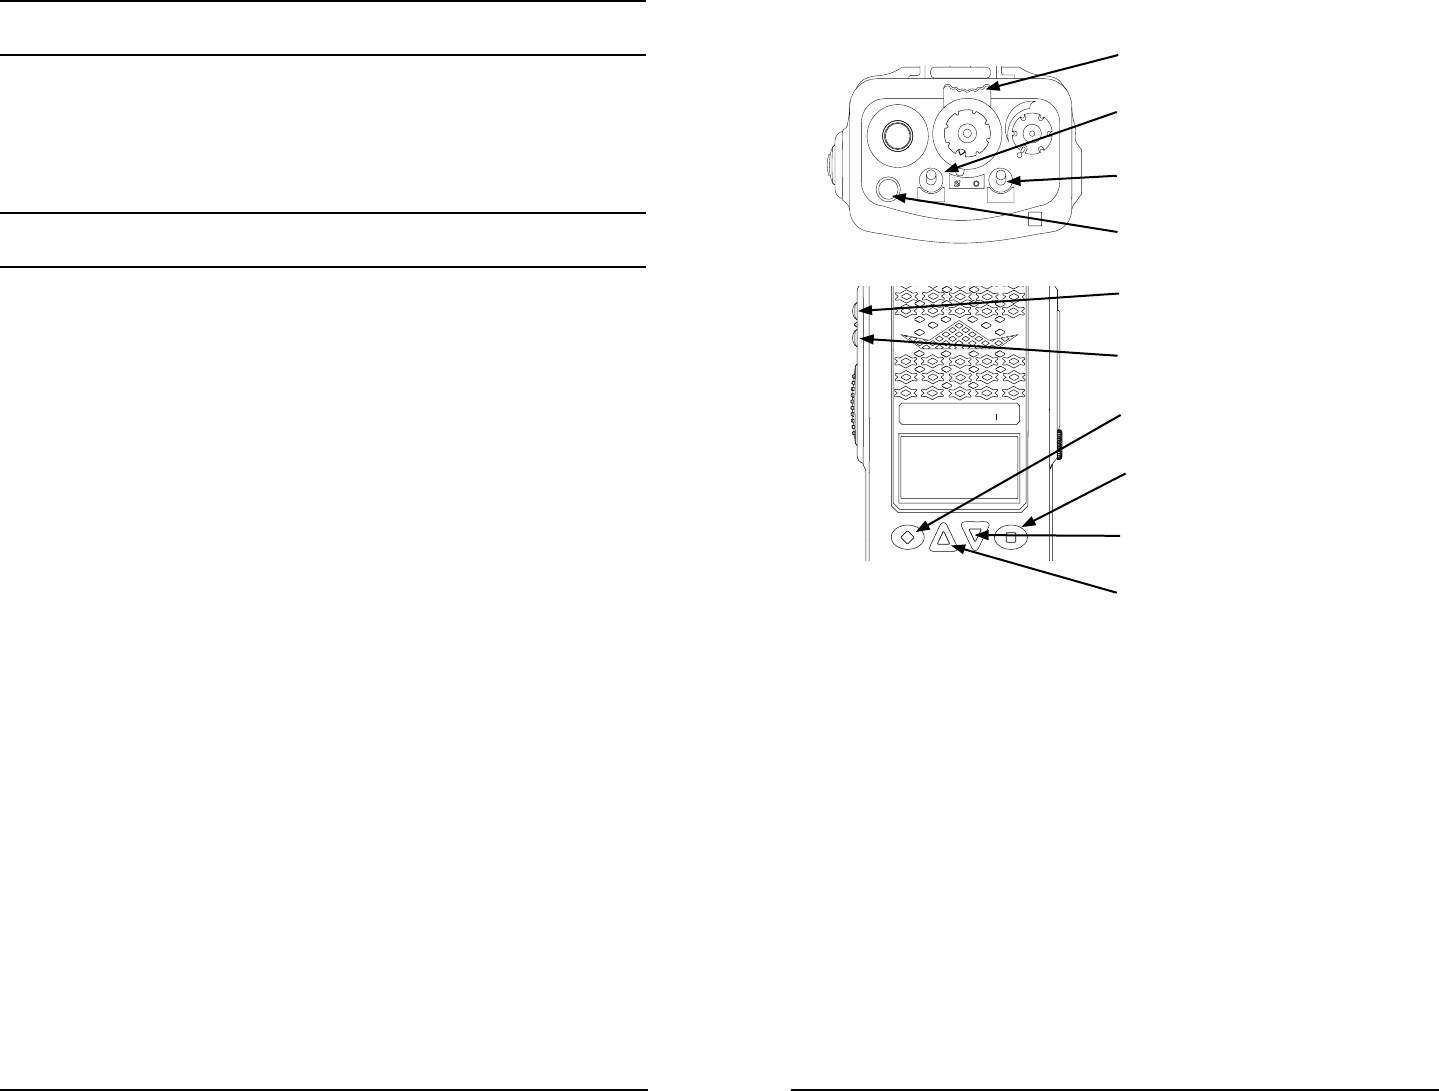
72 KNG User’s Manual 73
RELM/BK Radio
Warranty
The KNG portable radio is covered by a two-year warranty. Extended
warranties may be available. For information about your warranty contact
RELM/BK Radio at (800) 648-0947. Email; sales@relm.com
Service
If you need service, contact your BK Radio dealer. If you Þ nd it impractical
to have service provided by your dealer, contact the RLM/BK Radio
Technical Service Department at (800) 422-6281.
Repairs may be sent to the address below.
RELM Wireless Corporation
Attention: Customer Service
7100 Technology Drive
West Melbourne, FL 32904
Your Radio Settings
15
1
2
3
4
56
7
89
11
10
12
13
14
16
SCAN
PRI
VOL
KNG
BK RADIO
Collar Switch __________
Left Toggle __________
Right Toggle __________
Orange Button ____________
Top Side ______________
Bottom Side ___________
Diamond _____________
Up Arrow ______________
Down Arrow ____________
Square _______________
Menu Settings
_____________
_____________
_____________
_____________
_____________
_____________
_____________
_____________
_____________
_____________
_____________
_____________
_____________
_____________
_____________
_____________
_____________
_____________

74 KNG User’s Manual 75
RELM/BK Radio

76 KNG User’s Manual