User manual
Life Pro
User Manual

WELCOME
Congratulations on your new phone purchase!
This guide will help you to quickly come up to speed on the
important features of your phone. Keep in mind your phone
has….
A Fast Processor
Featuring the MTK6589T Quad-core 1.5 GHz
Processor that
delivers great performance for speedy application and web
page
loading, fast multitasking, and smooth video playback.
Intelligent Camera
Capture the moment with the
13 MP rear camera with BSI 2
sensor & 5 MP front camera with BSI sensor
.
A host of camera
features including different colour effects, exposure settings and
much more to provide a great imagery experience.
Note: Screen images and icons are simulated for the purpose of this guide. Actual
displays may vary. Instructions in this guide may change depending on the software
version on your device.
1
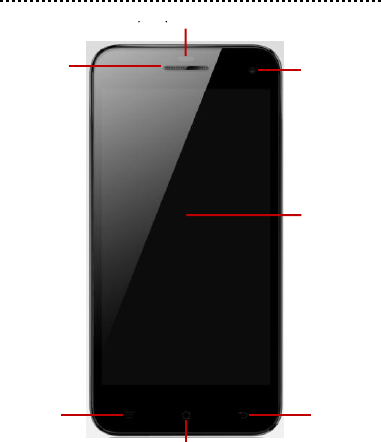
YOUR PHONE – FRONT VIEW
2
Front Camera
Receiver
Sensor
Back key
Menu key
Home key
Home screen
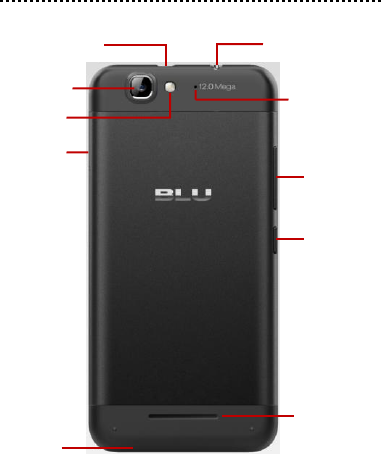
YOUR PHONE – BACK VIEW
3
USB/Power port
3.5 mm Audio Jack
Rear facing
Camera
Second Mic (for
reduce the noise)
Flash
SIM card slot
Volume Key
Power Key
Speaker
First Mic
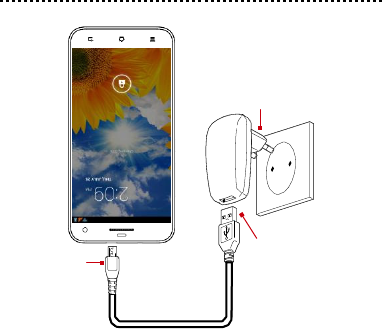
CHARGE THE BA
TTERY
Plug into wall.
Connect this
end to phone’s
USB port.
Connect this
end to plug.
Tip:
Be sure to charge your phone’s battery for 4 hours after
inserting it in the phone for the first time.
4

INSERT SIM CARD
Please insert the Micro SIM card following the below steps:
Step 1: Plugin the SIM Card remover to the SIM card fixing seat
and open the SIM card slot.
Step 2: Put the Micro SIM card on the seat.
Step 3: Put the seat into the SIM card slot.
Tip:
This mobile doesn’t support external MicroSD card.
5
SIM Card remover
SIM Card fixing seat
Micro SIM card
SIM Card fixing seat
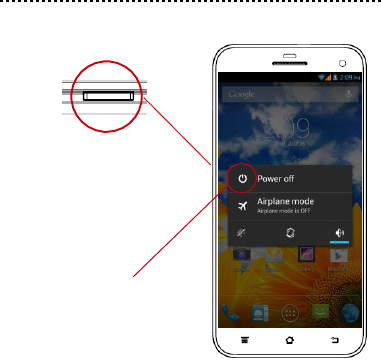
TURN THE PHONE ON & OFF
Hold down the power button
to turn the phone on.
Hold down the power
button, then touch
Power off
to turn the
phone off.
6
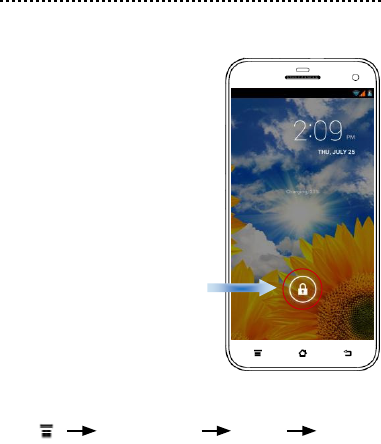
DIM, LOCK & W
AKE THE PHONE
When the power is on and you want to dim the screen, press
the
power button.
When the screen is dimmed
and you want to wake the
phone, press the
power
button and then
drag the
lock to the right.
TIP:
For additional protection, easily set a security lock.
Press
System settings
Security
Screen lock.
7
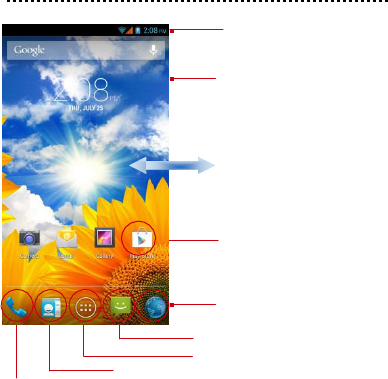
HOME SCREEN
Phone status bar and
notifications
T
ouch and hold an empty
spot to
change the
wallpaper
.
Slide left or right to see
more panels.
T
ouch an app to open it.
T
ouch to browse
the web.
T
ouch to open Messages App.
T
ouch to open the
App tray.
T
ouch to open the
Contacts
App.
T
ouch to open the
Phone
App.
T
ip:
T
o move any icon, touch and hold the icon, then drag it to
a new location.
8
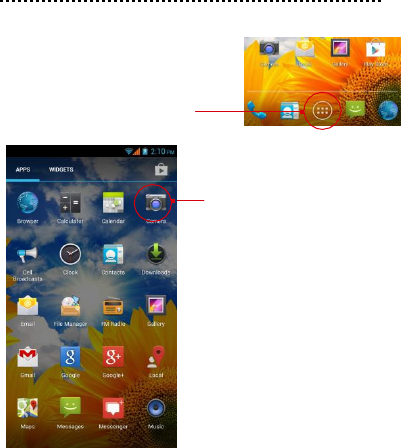
APPS
1.
T
ouch to open the App tray.
2. T
ouch an app to open it.
9

ST
A
TUS BAR
The Status bar shows your phone’s status and notifications.
(Notifications are described on the next page.)
Notification icons
Status icons
Icon
Description
Mobile network strength
Missed call
Wi-Fi
connection
Battery strength/charge
Bluetooth is activated
TIP:
For complete list of icons, see User Guide.
10
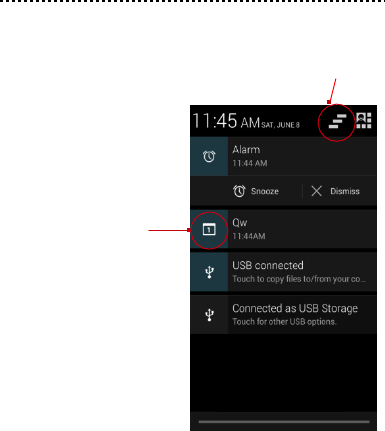
NOTIFICATION P
ANEL
The Notification panel is your center for new events—like new
e-mail, voicemail, updates, and more.
T
ouch to clear notifications.
Drag down to display
notifications.
T
ouch a notification
to respond.
11

MAKE & ANSWER A CALL
1.
From the Home screen, touch
2.
Dial a number using the dial pad.
3.
T
ouch
to make call.
TIP:
Y
ou can use the
Call Log,
Contacts
tabs to
quickly make
a call.
Answer a call
Drag to the right to
answer a call.
12
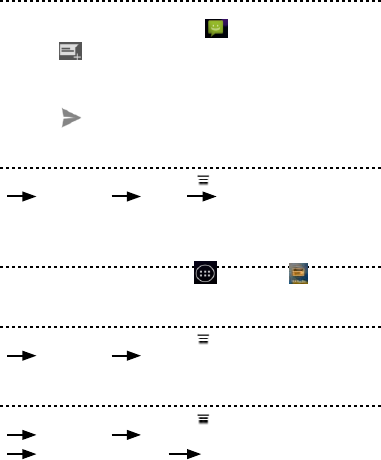
SEND A TEXT
1.
From the Home screen, touch
.
2.
T
ouch
.
3.
T
ouch the
To
field, then enter a recipient.
4.
T
ouch the
Type
message
field, then enter a message.
5.
T
ouch
to send the message
.
SET A RINGTONE
1.
From the Home screen, press then touch System settings
Audio profiles General Voice call ringtone.
2.
T
ouch a ringtone to hear it, then touch
OK
to select it.
FM
1.
From the Home screen, touch
, then touch
GPS
1.
From the Home screen, press then touch System settings
Location services GPS satellites
Hotspot
1.
From the Home screen, press then touch System settings
More… Tethering & portable hotspot
Set the SSID &Password Save
13
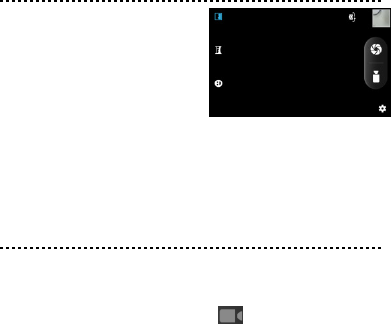
T
AKE A PICTURE
1.
Launch the camera by
pressing the camera icon on
the home screen.
2.
In the Camera app, tap the
screen to focus on a specific
area.
3.
Tap camera button on the screen to take a picture.
SHOOT A VIDEO
1.
Launch the camera by pressing the camera icon on
the home screen.
2.
In the Camera app, select
V
ideo
.
3.
Tap
video button on the screen
to begin filming, and tap
again to stop filming.
14
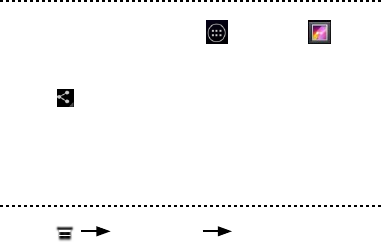
SHARE A PHOTO
1.
From the Home screen, touch
, then touch
.
2.
T
ouch an album to open it, then touch the picture you want
to share.
3.
Touch
.
4.
Select a medium
for sending the photo (such as Gmail to
mail the photo, or Messages to send the photo via
messaging).
CONNECT TO WLAN
1.
Press
System settings
Wi-Fi
2.
T
o turn on Wi-Fi
.
3.
T
ouch a network to connect to it.
15
Notice
The information contained herein is subject to change without notice. All
statements, information and recommendations contained herein do not constitute
a
warranty of any kind, either expressed or implied. Please review this product
guide
thoroughly; with particular attention paid to any safety sections, to be sure
that you
use your phone safely.
Please Note:
1
Socket location while charging: The socket-outlet shall be installed near the
equipment and shall be easily accessible.
2
Warnings related to Battery
i
Please use specified battery to avoid any risk of explosion.
ii
Please dispose lifeless battery under proper guidance.
16

FCC Regulations:
This mobile phone complies with part 15 of the FCC Rules. Operation is
subject to the following two conditions: (1) This device may not cause
harmful interference, and (2) this device must accept any interference
received, including interference that may cause undesired operation.
This mobile phone has been tested and found to comply with the limits for a
Class B digital device, pursuant to Part 15 of the FCC Rules. These limits
are designed to provide reasonable protection against harmful interference
in a residential installation. This equipment generates, uses and can
radiated radio frequency energy and, if not installed and used in accordance
with the instructions, may cause harmful interference to radio
communications. However, there is no guarantee that interference will not
occur in a particular installation If this equipment does cause harmful
interference to radio or television reception, which can be determined by
turning the equipment off and on, the user is encouraged to try to correct the
interference by one or more of the following measures:
-Reorient or relocate the receiving antenna.
-Increase the separation between the equipment and receiver.
-Connect the equipment into an outlet on a circuit different from that to which
the receiver is connected.
-Consult the dealer or an experienced radio/TV technician for help.
FCC Note:
Changes or modifications not expressly approved by the party responsible
for compliance could void the user‘s authority to operate the equipment.
17

RF Exposure Information (SAR)
This phone is designed and manufactured not to exceed the emission limits
for exposure to radio frequency (RF) energy set by the Federal
Communications Commission of the United States.
During SAR testing, this device was set to transmit at its highest certified
power level in all tested frequency bands, and placed in positions that
simulate RF exposure in usage against the head with no separation, and
near the body with the separation of 10 mm. Although the SAR is determined
at the highest certified power level, the actual SAR level of the device while
operating can be well below the maximum value. This is because the
phone is designed to operate at multiple power levels so as to use only the
power required to reach the network. In general, the closer you are to a
wireless base station antenna, the lower the power output.
The exposure standard for wireless devices employing a unit of
measurement is known as the Specific Absorption Rate, or SAR. The SAR
limit set by the FCC is 1.6W/kg.
This device is complied with SAR for general population /uncontrolled
exposure limits in ANSI/IEEE C95.1-1992 and had been tested in
accordance with the measurement methods and procedures specified in
IEEE1528. This device has been tested and meets the FCC RF exposure
guidelines when tested with the device directly contacted to the body.
The FCC has granted an Equipment Authorization for this model phone with
all reported SAR levels evaluated as in compliance with the FCC RF
exposure guidelines. SAR information on this model phone is on file with
the FCC and can be found under the Display Grant section of
www.fcc.gov/oet/ea/fccid after searching on FCC ID: YHLBLULIFEPRO
For this device, the highest reported SAR value for usage against the head
is 1.04 W/kg, for usage near the body is 0.99 W/kg.
18
While there may be differences between the SAR levels of various phones
and at various positions, they all meet the government requirements.
SAR compliance for body-worn operation is based on a separation distance
of 10 mm between the unit and the human body. Carry this device at least 10
mm away from your body to ensure RF exposure level compliant or lower to
the reported level. To support body-worn operation, choose the belt clips or
holsters, which do not contain metallic components, to maintain a separation
of 10 mm between this device and your body.
RF exposure compliance with any body-worn accessory, which contains
metal, was not tested and certified, and use such body-worn accessory
should be avoided.
19