BTC Korea Co 151M LCD Monitor User Manual 320636
BTC Korea Co Ltd LCD Monitor 320636
User Manual
This equipment has been designed for the normal use. It is certified to comply with Electron Wave Suitable Registration. The user this
equipment in everywhere including residential areas.
151M
USER GUIDE
Notice
This equipment is one of first class quality. The LCD panel is composed of more than 2 Million pixels and may
have some faulty pixels. LCD panels with a maximum of 10 faulty pixels are classified as products of good
quality. This standard is accepted by other manufacturers of LCD panels. An LCD panel without any faulty
pixels is too expensive for the average customer. Our ”A” class panels have the least 5 faulty pixels. We
guarantee that our panels will provide the user with high quality performance. Therefore, no product exchanges
or refunds will be made in regards to this matter.
Please observe all following rules for installation, usage, and services so as to not defeat the safeguards
incorporated into this monitor.
Safety precautions are divided into Warning and Attention.
Warning : Please ensure that no water leaks or gets onto or into the LCD monitor. Accidental exposure to water may cause fire or electrical
damage. If case occurs, please turn off and unplug the monitor. If there is smoke or abnormal noises, please contact the store or customer service
center.
Attention ; Breaking the basic rules can cause injury can cause injury to yourself or damage to the equipment.
Save the manual near to future users after you read it.
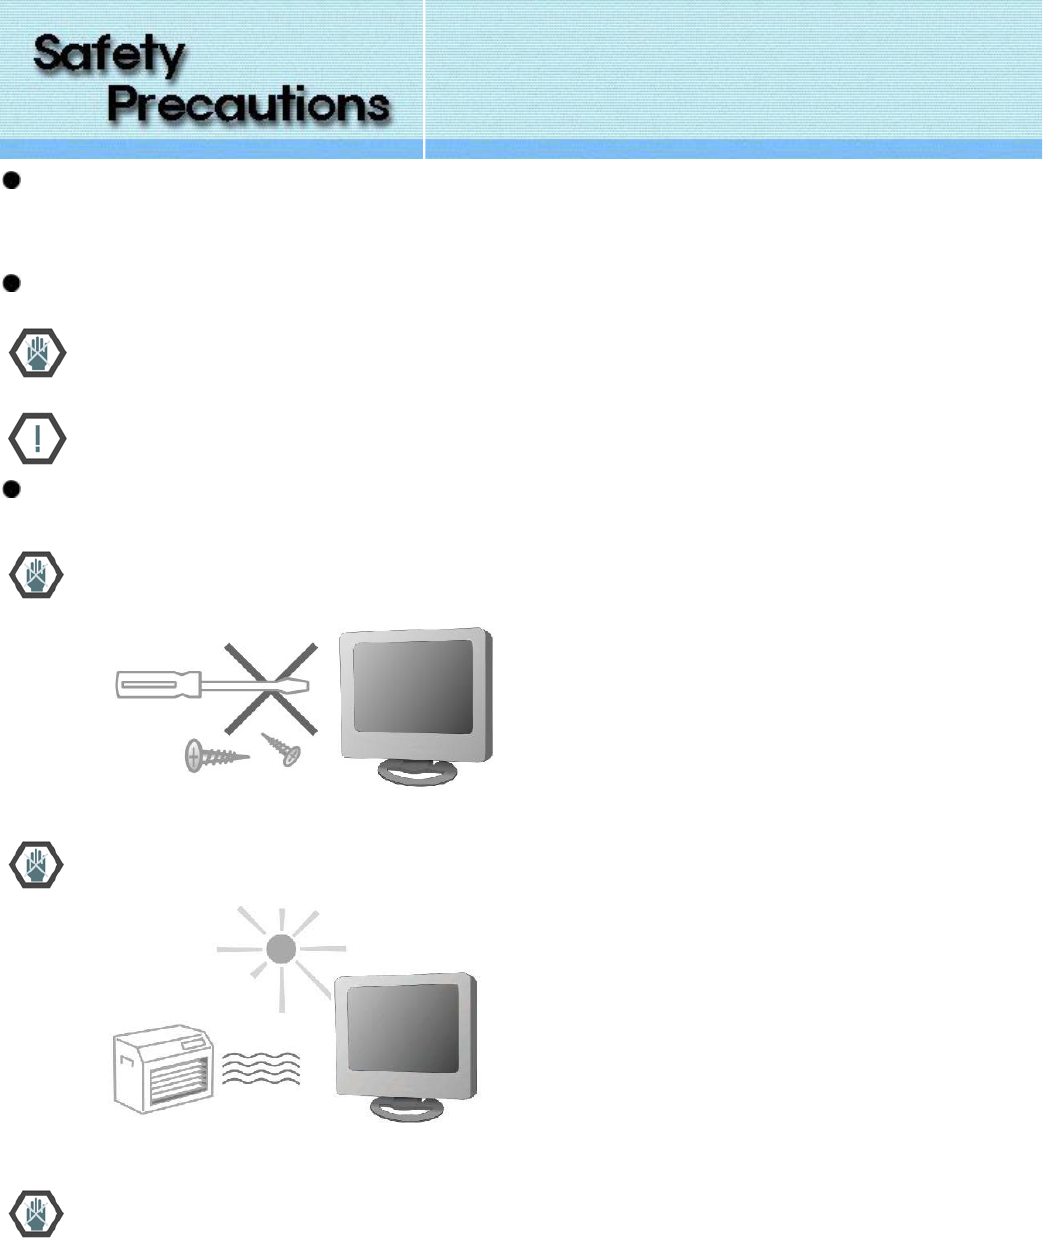
Do not open the monitor. Contact your dealer if the monitor is not operating properly.
Do not place the monitor in direct sunlight or close to any heat source. -Product malfunction or fire hazard may
occur.
Do not drop metal objects like coins or hairpins into the monitor. -Electrical shock or fire hazard may result.
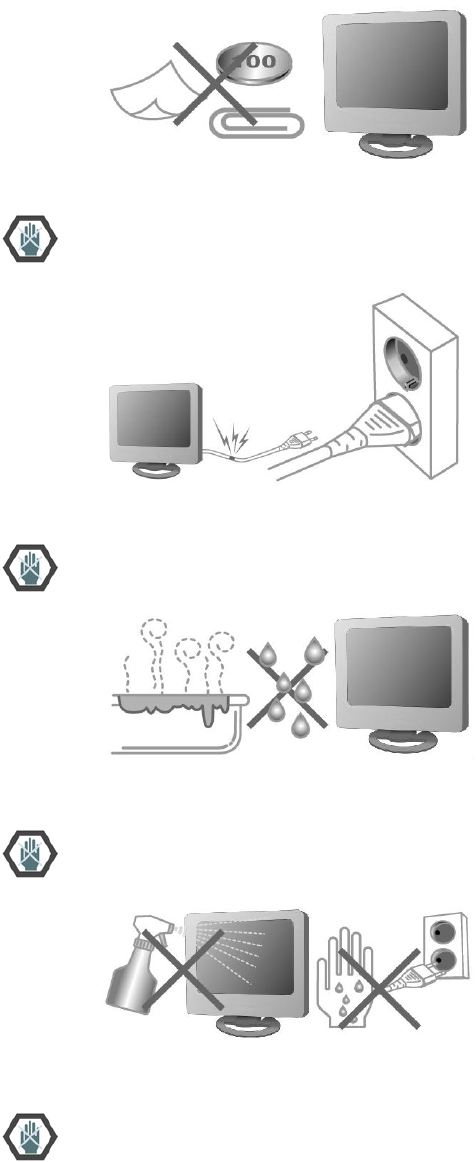
Provide a secure connection to the power supply and do not use damaged power cords or plugs. -Electrical shock or
fire hazard may result.
Do not place the monitor in exposed places or near water.
Do not clean the monitor with water or touch it with wet hands. -Electrical shock or fire hazard may result.
During lightening storms, unplug the monitor from the wall outlet and do not touch it. -Electrical shock or fire
hazard may result

N
ot using the monitor for hours, unplug the monitor from the wall outlet. - Dust may cause heat, fire, shock or short
circuit
In case of any smoke or abnormal noise, immediately stop use of product and pull the power cord from the wall outlet.
Then call your local dealer or service representative for assistance. -Any subsequent use may result in fire or electric
shock.
Install the monitor at the specified position from the wall to be well ventilated. - A rise in temperature of monitor
may cause fire.
Install the monitor in stable place. - An unstable monitor may crash or fall. Personal injury, damage, or malfunction
may result.
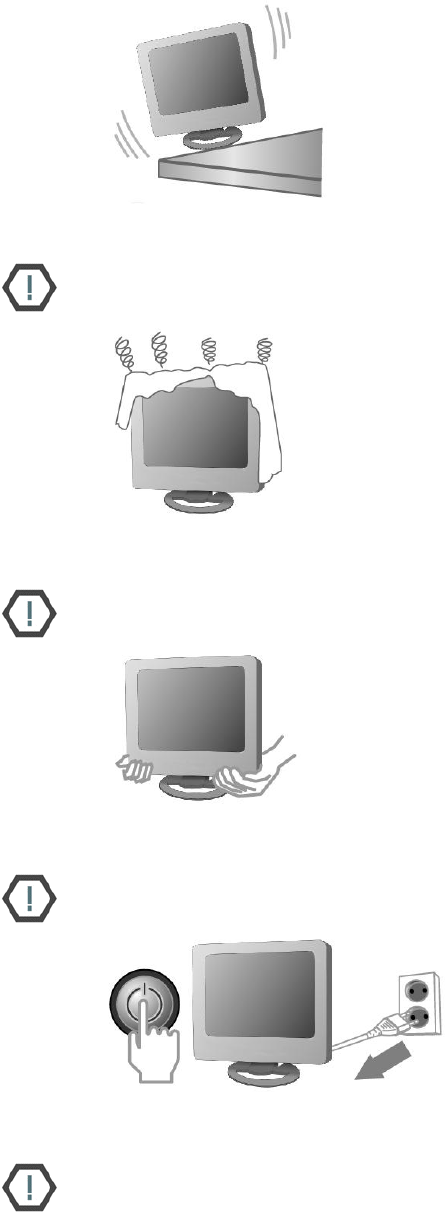
Do not block ventilation openings with any curtain or tablecloths. - The increase of inside temperature may cause
fire
DO not drop the unit or make any scratch on the panel when you move the product. -Any scratch on the panel or
drop of the product may cause functional failure.
When moving the monitor, turn it off and disconnect all cables and the plug. - Product damage, electric shock, or
fire hazard may result.
When disconnecting from the wall outlet, grab the plug. - Grabbing the cord may result in heat generation or fire
hazard.

Keep your eyes 20 inch away from the screen and 0~15° down in relation to the screen. - Viewing at too close a
p
osition and wrong posture can weaken your eyes.
Do not press hard with your finger or scratch with sharp object on the surface of the LCD. -Any damage on the
surface of the LCD may cause functional failure.
When you clean the monitor and the surface of LCD, be sure to pull the plug from wall outlet. Use soft cloth instead
of using damp duster.
Do not use any chemicals such as industrial polisher, abrasive solution, wax, benzene, alcohol, or clearing
detergents. - Chemical cleaners may fade, dissolve, or crack the monitor surface.
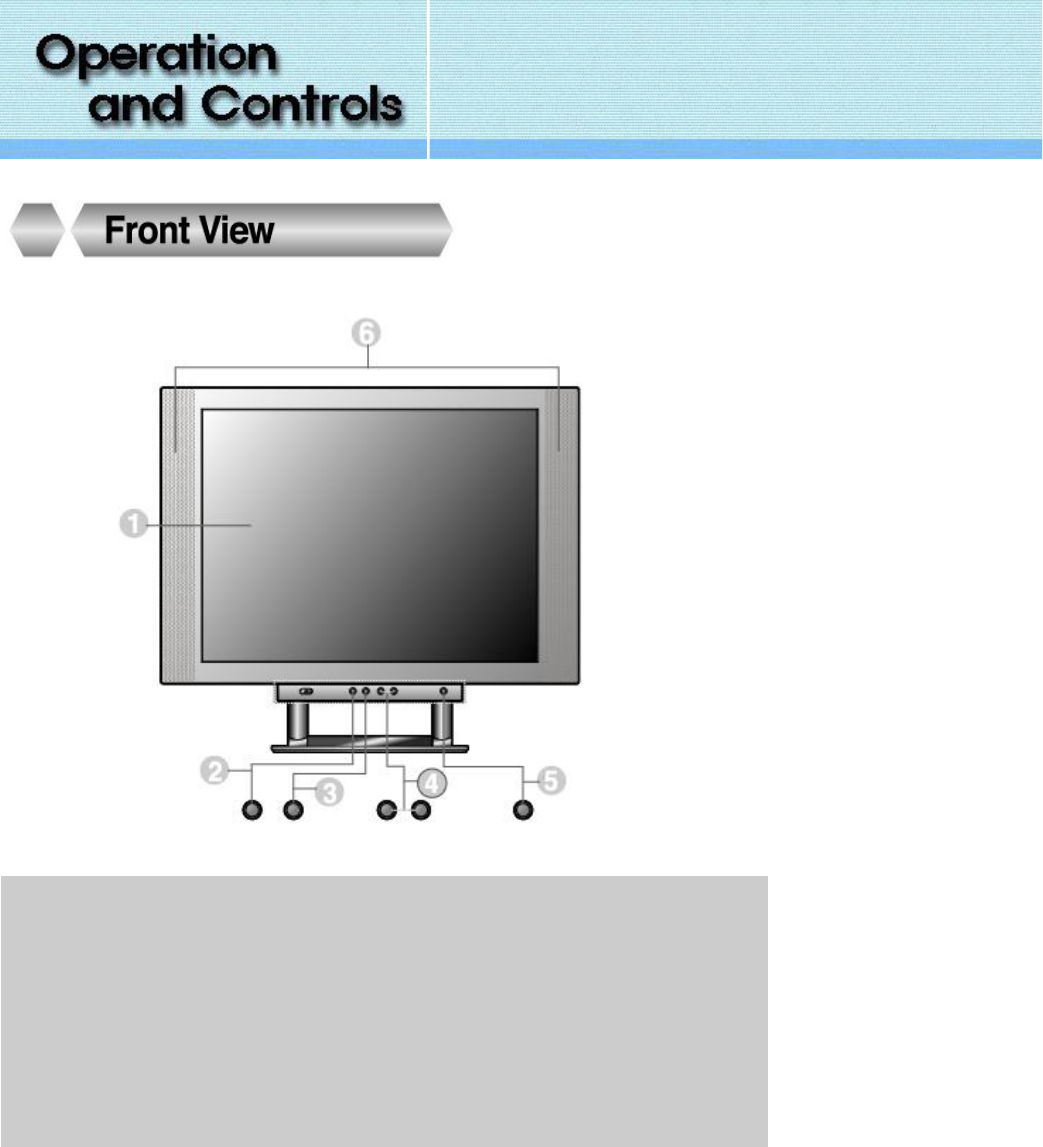
1. LCD Panel
2. Menu Button : Use this button to open the OSD and activate a highlighted menu items.
3. Select Buttons : Use this button to activate a highlighted menu item.
Allows the monitor to self-adjust to the incoming video signal.
4. Adjust Buttons : These buttons allow you to highlight and adjust items in the OSD.
Increases or decreases the level of speaker volume.
5. Power Button :Turns ON/OFF the monitor.
6. Built-in Speaker
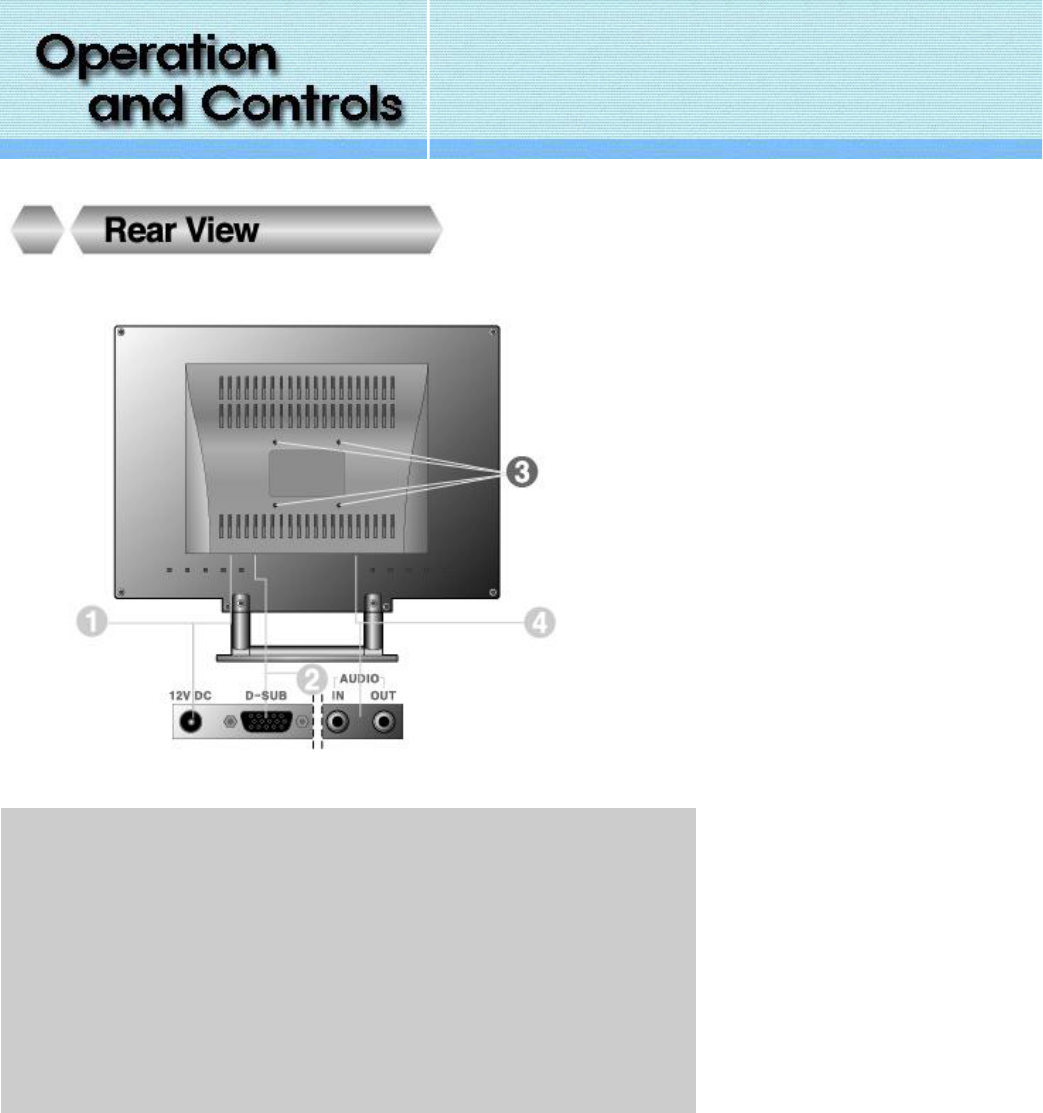
1. Power In Terminal
: Connect the DC Adaptor to the power terminal on the back of the monitor.
2. D-SUB Terminal
: Connect the monitor D-SUB connector and the PC using the D-SUB signal cable.
3. VESA HOLE for fixing on the wall.
: Supports VESA mounting standard for use with various VESA mounting devices.
4. AUDIO IN & OUT Terminal
: AUDIO IN : Connect the audio output of the PC.
AUDIO OUT : Connect the stereo speaker system to Audio output.
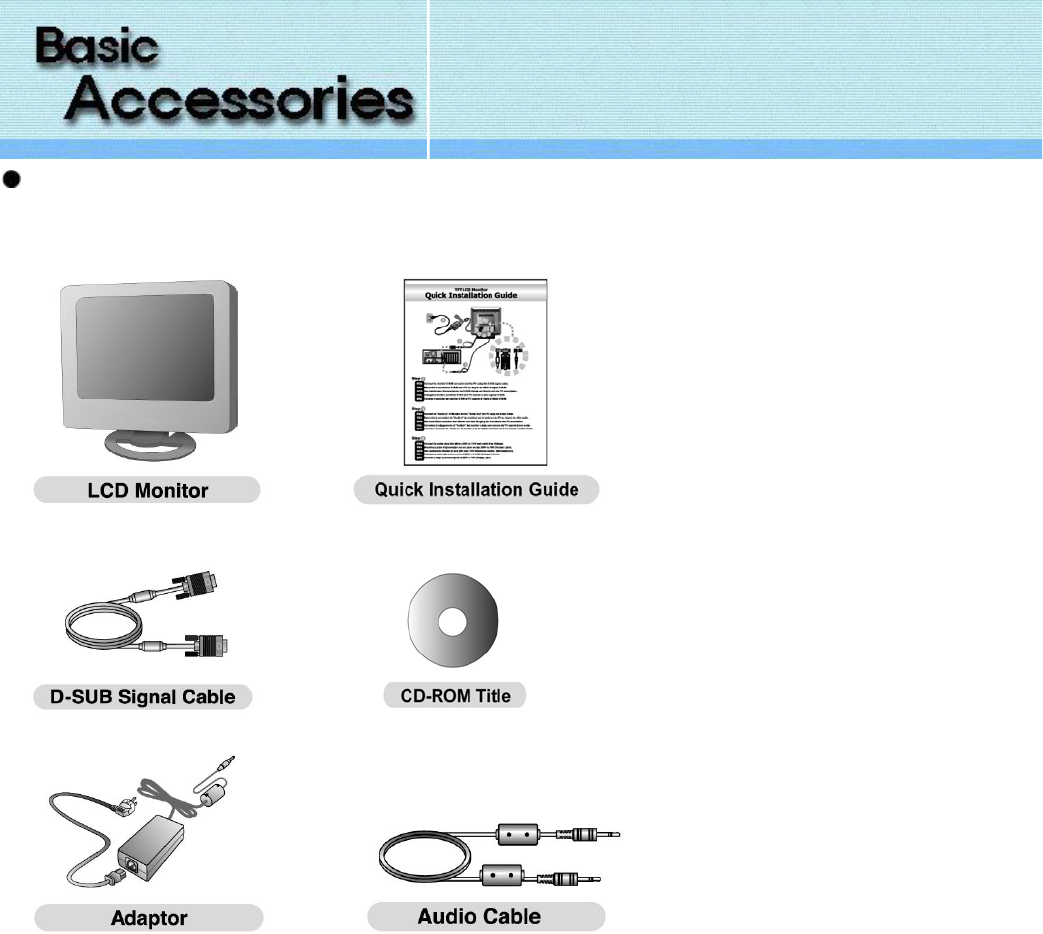
Please make sure the following items are included with your monitor.
If any items are missing, contact your dealer.
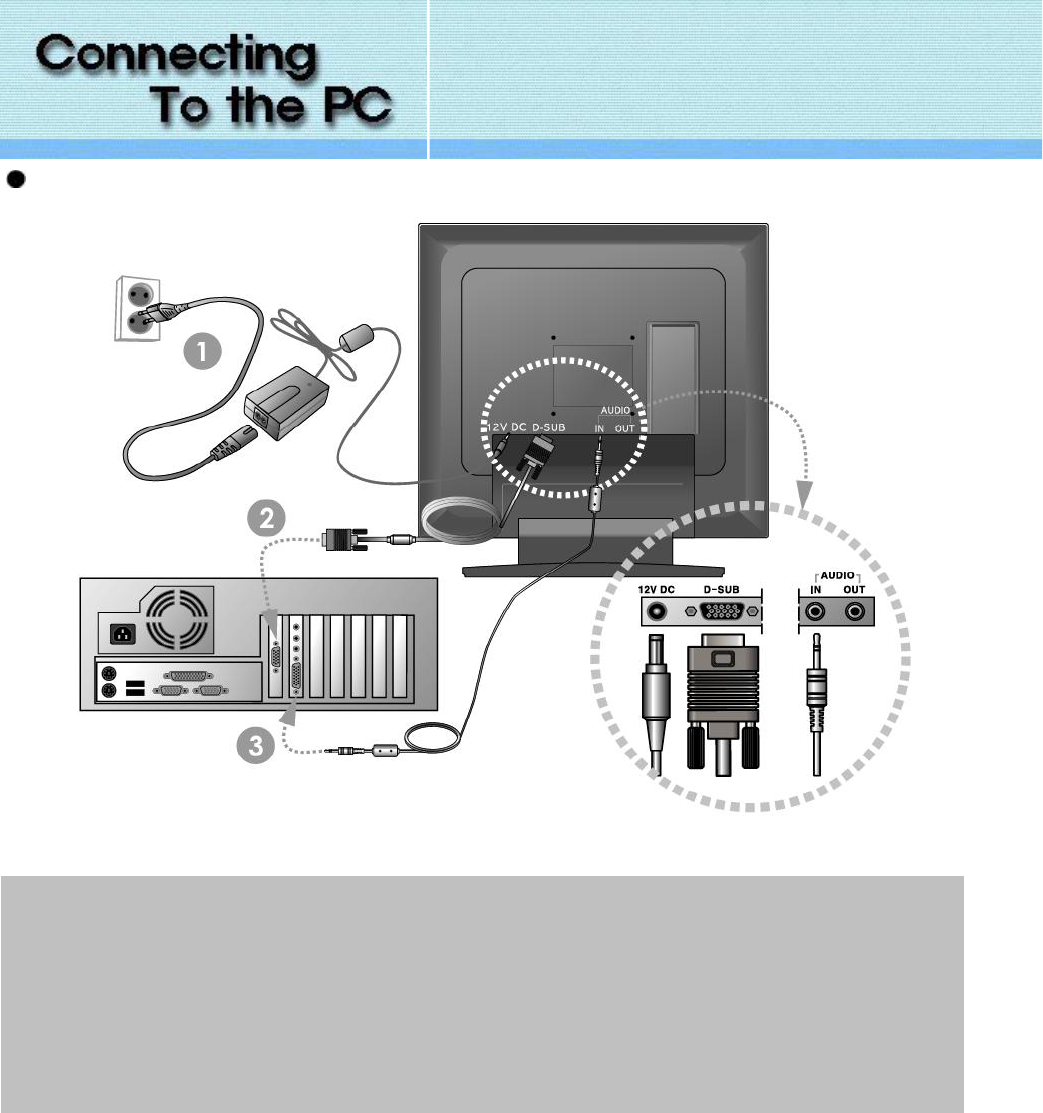
Attention : Power off your Monitor before making any connections.
1. Power Connection : Connect the DC Adaptor to the power terminal on the back of the monitor.
2. Connection of PC : Connect the signal cable(D-SUB cable) to the monitor output socket of the computer and the other end
to D-SUB on the back of the monitor.
3. AUDIO IN : Connect an audio cable to AUDIO IN on the back of the Monitor and the other end to AUDIO OUT terminal
of the sound card on your computer.
AUDIO OUT : Connect an audio cable to the AUDIO OUT of the back of the Monitor and the other end to to the external
speakers.
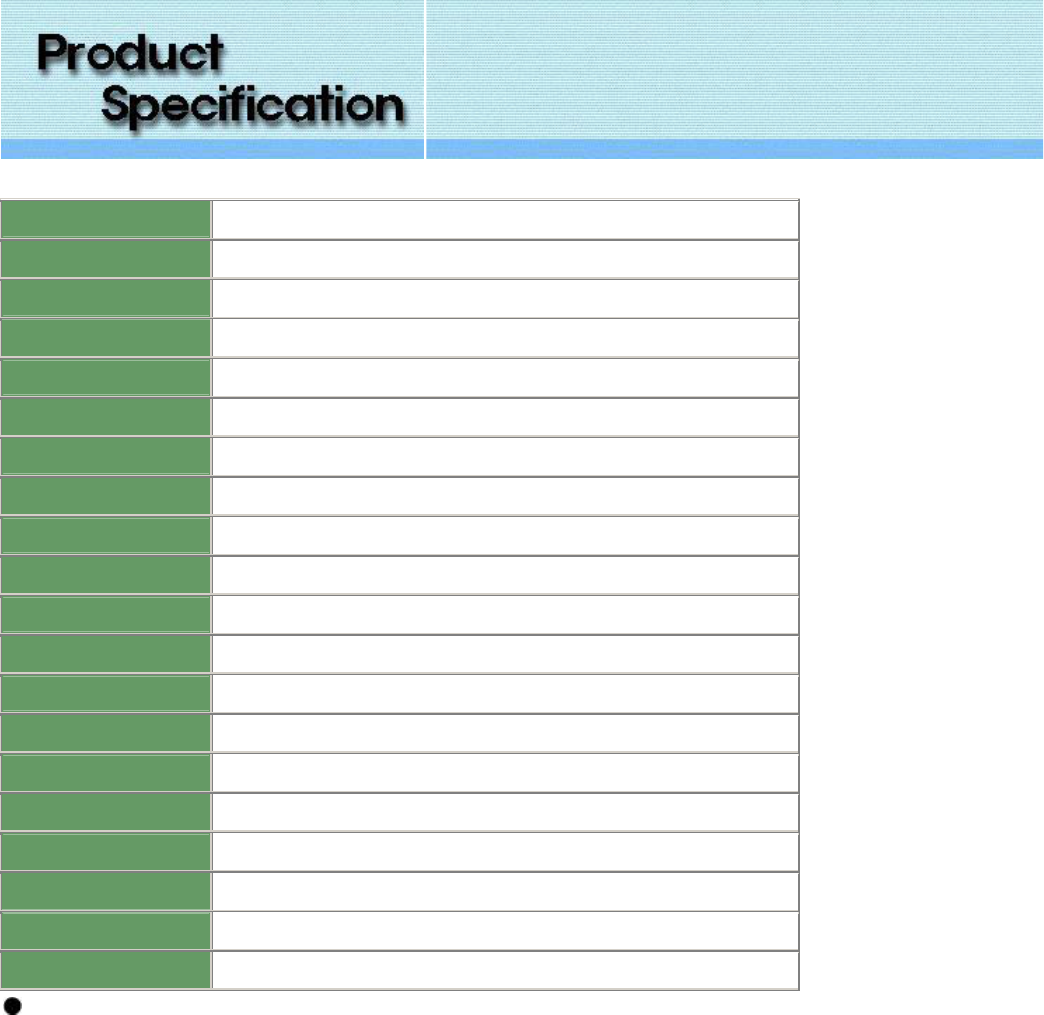
1. Product's Display Specification
Monitor Type TFT LCD Flat Panel
Resolution / Color 1024 x 768 (XGA)
Display Colors 16.7M Max. : True Color
Pixel Type RGB stripe arrangement
Pixel pitch 0.3mm(H) x 0.3 mm(V)
Viewable Screen Size 15.1 "
Viewing Angles(H/V) 130/110
Video Input Analog / R.G.B., 0.7 Vp-p
Contrast Ratio 400 :1
Brightness 250 cd/m²
AC/DC Adapter? Adapter 100~240V, 50/60 Hz , DC 12V / 3.33A
Plug & Play Level VESA DDC 1/2B Compatible
Built-in Speakers 2W * 2 Stereo Type
I/O Connector DC Power in, VGA 15-pin D-sub , Audio in, Audio out
Power Requirements DC 12V, 3.3A
Power Management VESA DPMS Standard
Power Consumption 30W Saving Mode : MAX 1W
Weight 4.0 kg (Net)
Dimensions (WxLxH) 399 x 162 x 384 mm
Agency Approval FCC, CE, MIC, VCCI
This specification of the product might be changed without any notice.
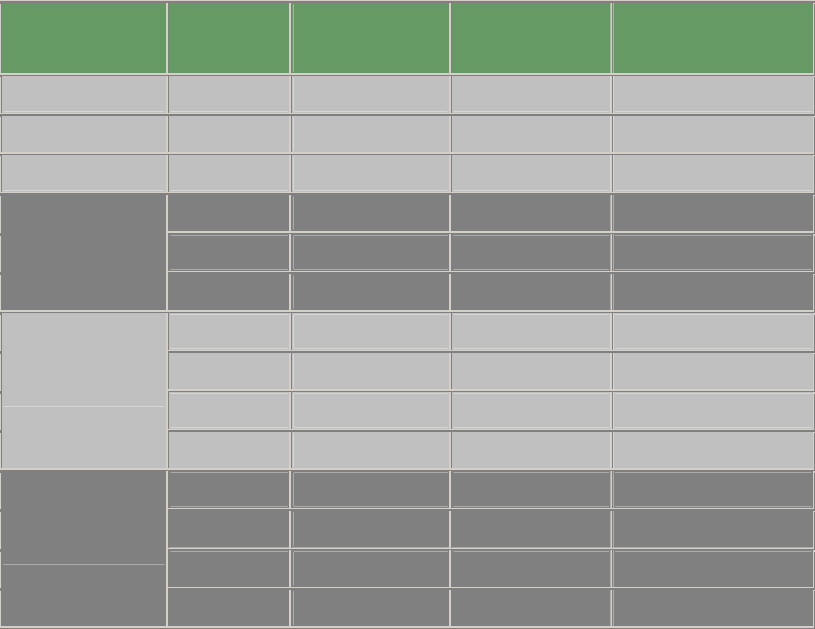
2. Product's Display Specification
RESOLUTION REFRESH
RATE
HORIZONTAL
FREQUENCY
PIXEL
FREQUENCY STANDARD TYPE
640 X 350 70 Hz 31.5 KHz 25.175 MHz VESA Standard
640 X 400 70 Hz 31.5 KHz 25.175 MHz VESA Standard
720 X 350 70 Hz 31.5 KHz 28.35 MHz VESA Standard
60 Hz 31.5 KHz 25.175 MHz Indurstry Standard
72 Hz 37.9 KHz 31.500 MHz VESA Standard
640 X480
75 Hz 37.5 KHz 31.500 MHz VESA Standard
56 Hz 35.1 KHz 36.600 MHz VESA Guidelines
60 Hz 37.9 KHz 40.000 MHz VESA Guidelines
72 Hz 48.1 KHz 50.000 MHz VESA Standard
800 X 600
75 Hz 46.9 KHz 49.500 MHz VESA Standard
43 Hz 35.5 KHz 44.900 MHz Indurstry Standard
60 Hz 48.4 KHz 65.000 MHz VESA Guidelines
70 Hz 56.5 KHz 75.000 MHz VESA Standard
1024 X 768
75 Hz 60.0 KHz 78.750 MHz VESA Standard
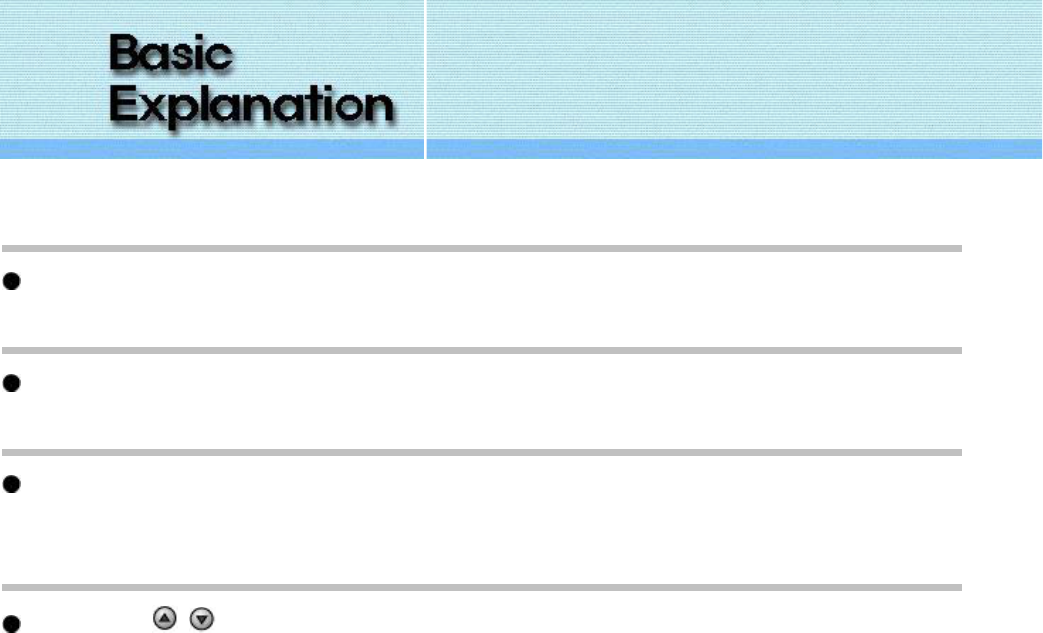
The front part of panel of this model consists of following function buttons. Description for each of function button is
shown below.
Power Button
Turns ON/OFF the monitor.
Menu Button
Use this button to open the OSD and activate a highlighted menu items.
SELECT Button
1. Use this button to activate a highlighted menu item.
2. Allows the monitor to self-adjust to the incoming video signal.
Adjust Buttons( , )
1. These buttons allow you to highlight and adjust items in the OSD.
2. Increases or decreases the level of speaker volume.
1. OSD Adjustment
- Set OSD value with the instructions described below.
2. Frequently used function
1) Monitor Self-Adjust
- Self-Adjust to the incoming video signal.
Press the "SELECT" Button. (SELECT -> YES -> Self-Adjust)
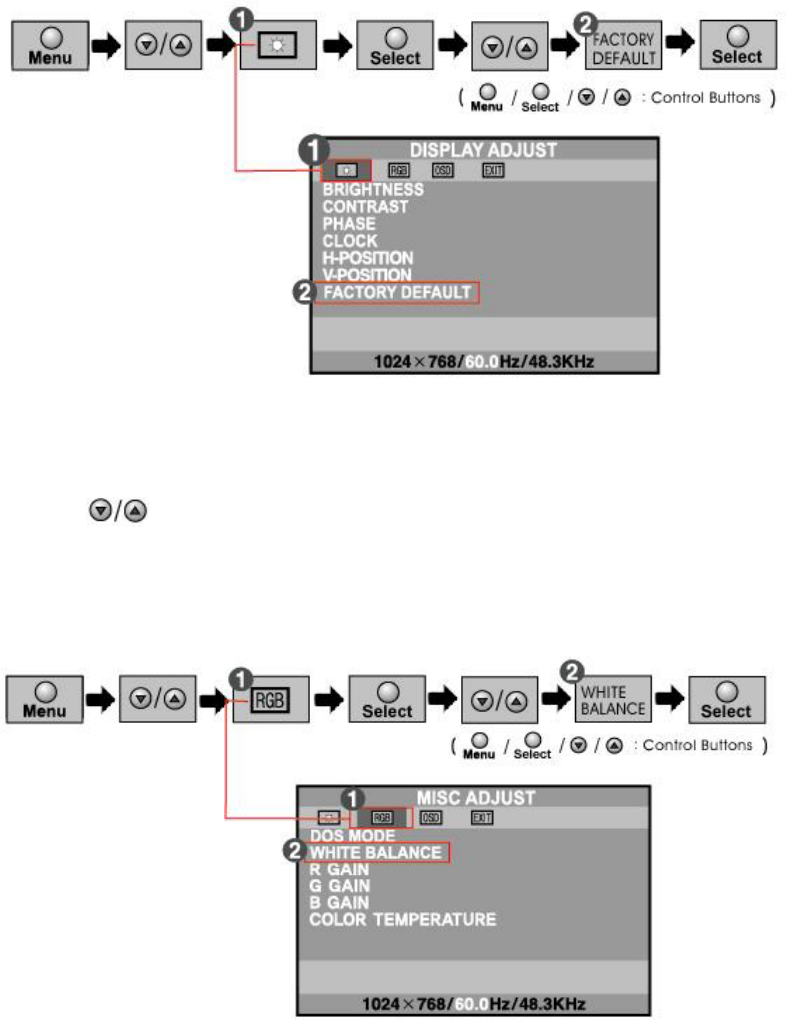
2) Reset Factory Default
- Screen parameters are replaced with the factory default values.
3) Adjust Speaker Volume
- Increases or decreases the level of speaker volume.
Press the buttons.
4) White Balance
- Select this menu to use automatic color balance function.
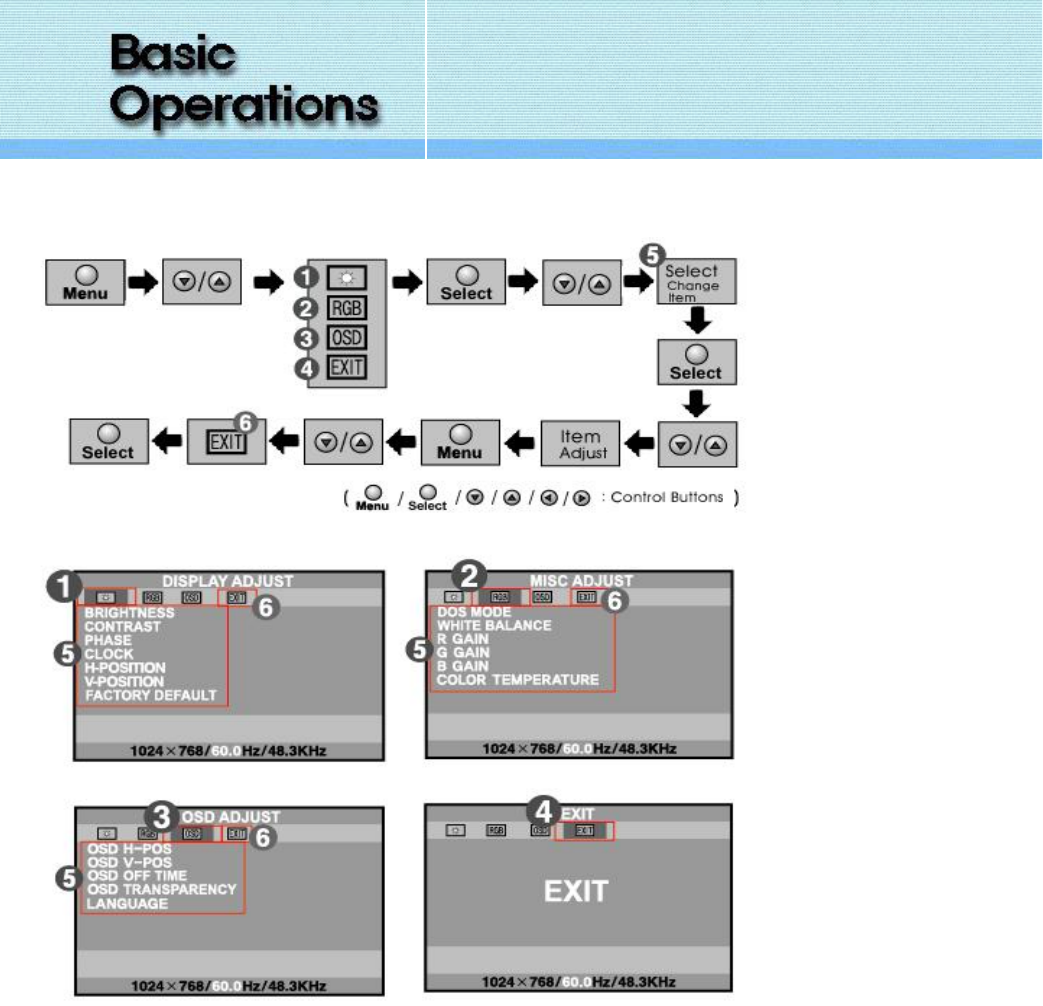
1. OSD for Each Adjustment Items
1) DISPLAY ADJUST
BRIGHTNESS : Adjust to brighten or darken the picture.
CONTRAST : The contrast control determines the white level of the picture.
PHASE : Fine tuning of the screen even though it is not easily distinguishable with naked eyes.
CLOCK : Adjust the horizontal-size(size of horizontal screen)of the entire screen.
H-POSITION : Move the entire screen to the left or right.
V-POSITION : Move the entire screen to the below or upper.
FACTORY DEFAULT : Screen parameters are replaced with the factory default values.
2) MISC ADJUST
DOS MODE : Use this menu to select either 640X400 or 720X400 of Dos mode.
WHITE BALANCE : Select this menu to use automatic color balance function.
R GAIN : The user can adjust the Red Settings.
G GAIN : The user can adjust the Green Settings.
B GAIN : The user can adjust the Blue Settings.
COLOR TEMPERATURE : Use this menu to adjust color temperature.
3) OSD ADJUST
OSD H-POS : You can change the horizontal position where the OSD menu appears on your monitor
OSD V-POS : You can change the vertical position where the OSD menu appears on your monitor
OSD OFF TIME : The OSD will automatically turn off if no adjustments are made for a certain time period.
OSD TRANSPARENCY : Changes the transparent(or opaque) status of the background of the OSD.
LANGUAGE : OSD language and appearance can be changed.
4) EXIT : Use this menu to exit from OSD menu screen.
In case of trouble, check these before calling the service center.
What you see... Suggested Actions
Screen is black and powe
r
indicator is off
Ensure that the power cord is firmly connected and the Monitor is on.
Screen is black and power
indicator is blinks.
Ensure that the signal cable is firmly connected to the PC.
Ensure that the PC are turned on.
Screen position and size is
incorrect.
Press the AUTO Button.
Image is not stable and may
appear to vibrate.
Check that the display resolution and frequency from your PC is an available mode for your
Monitor.
On your computer check : Control Panel -> Display -> Settings.
The image is too light or too
dark.
Adjust the Brightness and Contrast.
Horizontal noise on the image. Adjust the AUTO.
Adjust the PHASE.
Picture OK, No Sound. Check the Volume.
Make sure that MUTE is not on and the volume level.
Vertical bars or stripes on the
image.
Adjust the AUTO.
Adjust the CLOCK.
Dot pitch
The image on a monitor is composed of red, green and blue dots. The closer the dots, the higher the resolution. The
distance between two dots of the same color is called the 'Dot Pitch'.
Horizontal Frequency
The time to scan one line connecting the right edge to the left edge of the screen horizontally is called Horizontal Cycle.
The inverse number of the Horizontal Cycle is called Horizontal Frequency.
Vertical Frequency
The screen must be redrawn several times per second in order to create and display an image for the user. The frequency of
this repetition per second is called Vertical Frequency or Refresh Rate.
Resolution
The number of horizontal and vertical dots used to compose the screen image is called 'resolution'.
Plug and Play
This is a function that provides the best quality screen for the user by allowing the computer and the monitor to exchange
information automatically.
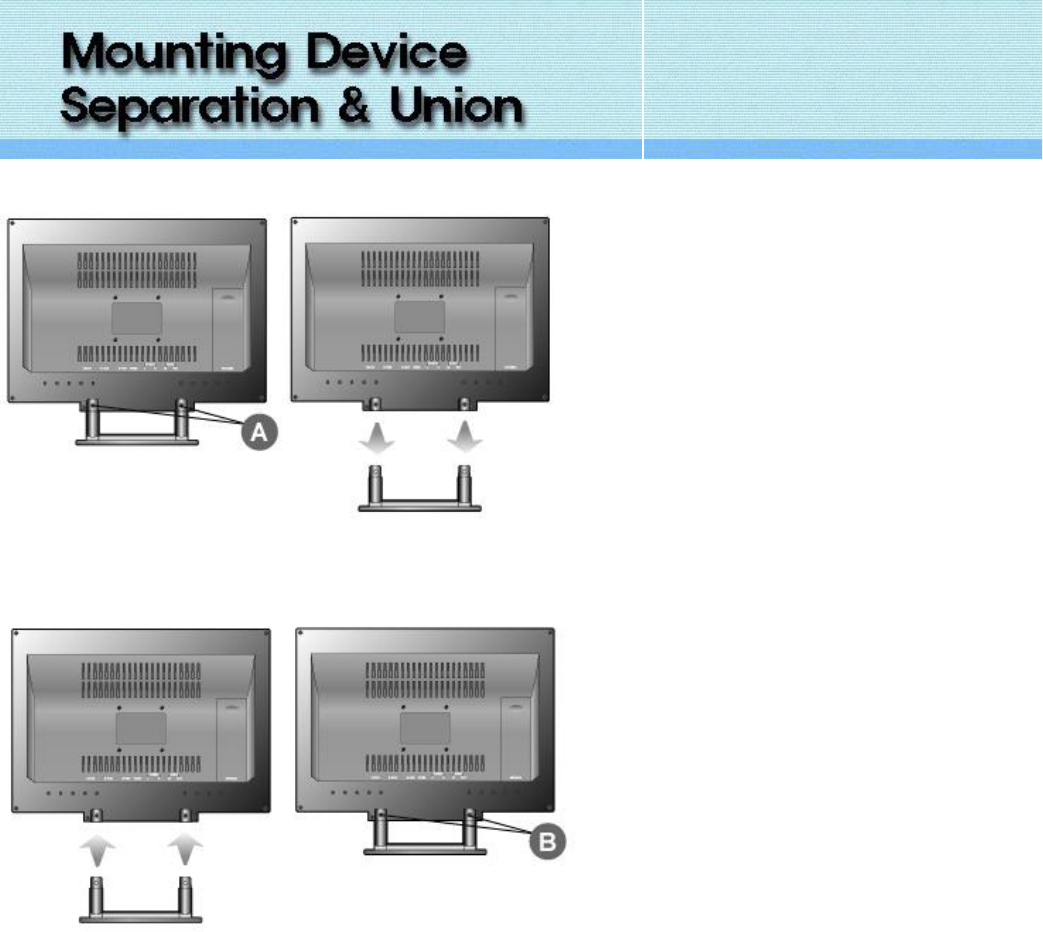
1. Separation
1. Turn off your monitor and unplug its power cord.
2. Lay the Monitor face-down ward on a flat surface
with a cushion beneath it to protect the screen.
3. Remove the screws( A ) and then remove the
Stand from the monitor.
2. Union
1. Align the stand with the holes( B ) in the Rear
Cover and secure it with the screws.