BTC Korea Co 151T LCD Monitor With TV Tuner User Manual 336411
BTC Korea Co Ltd LCD Monitor With TV Tuner 336411
UserManual.wiki
>
BTC Korea Co
>
151T User Manual
User Manual
Navigation menu
Upload a User Manual
Namespaces
Wiki Guide
HTML
PDF
Info
Views
User Manual
Discussion / Help
Navigation

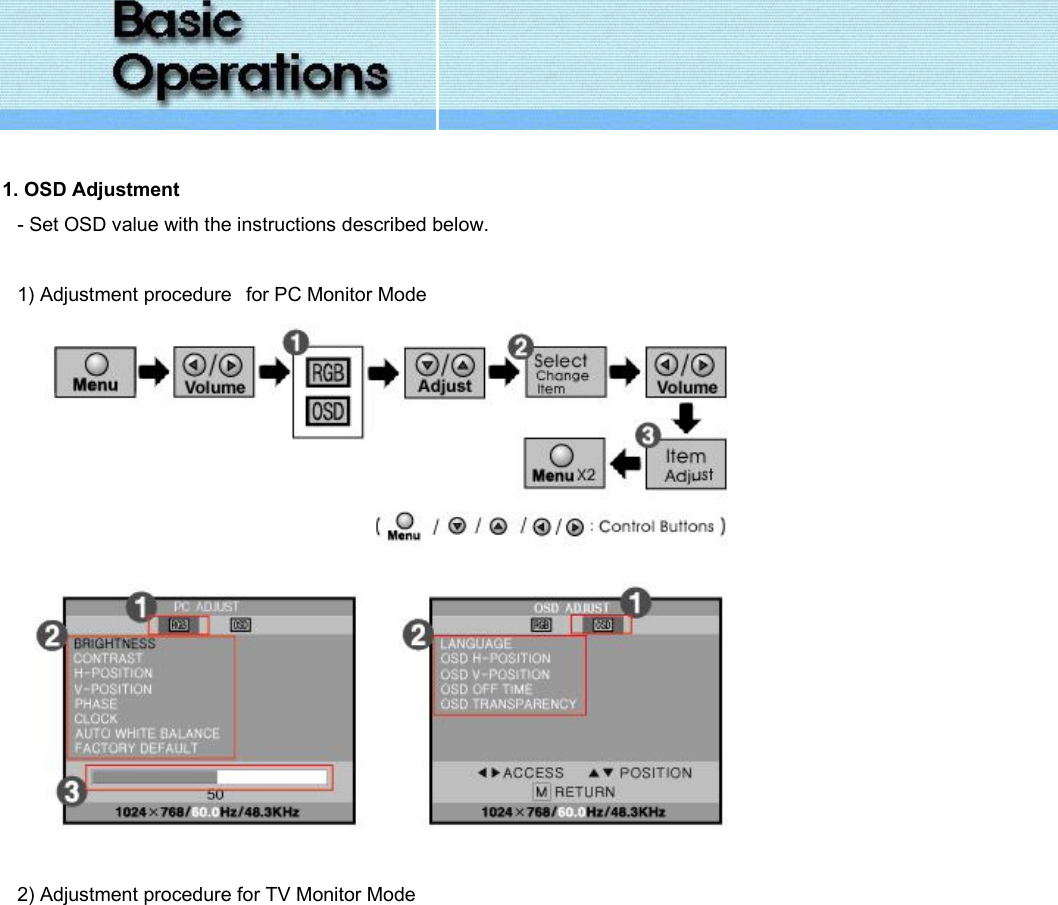
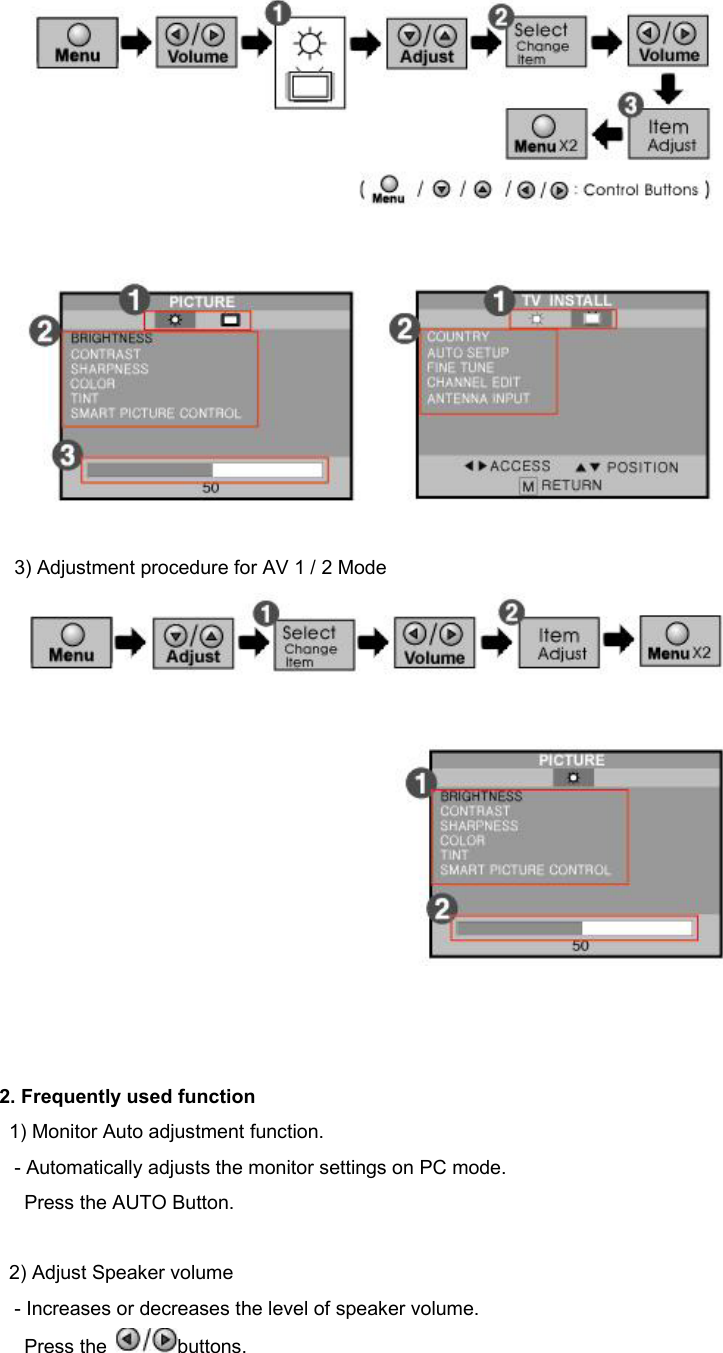
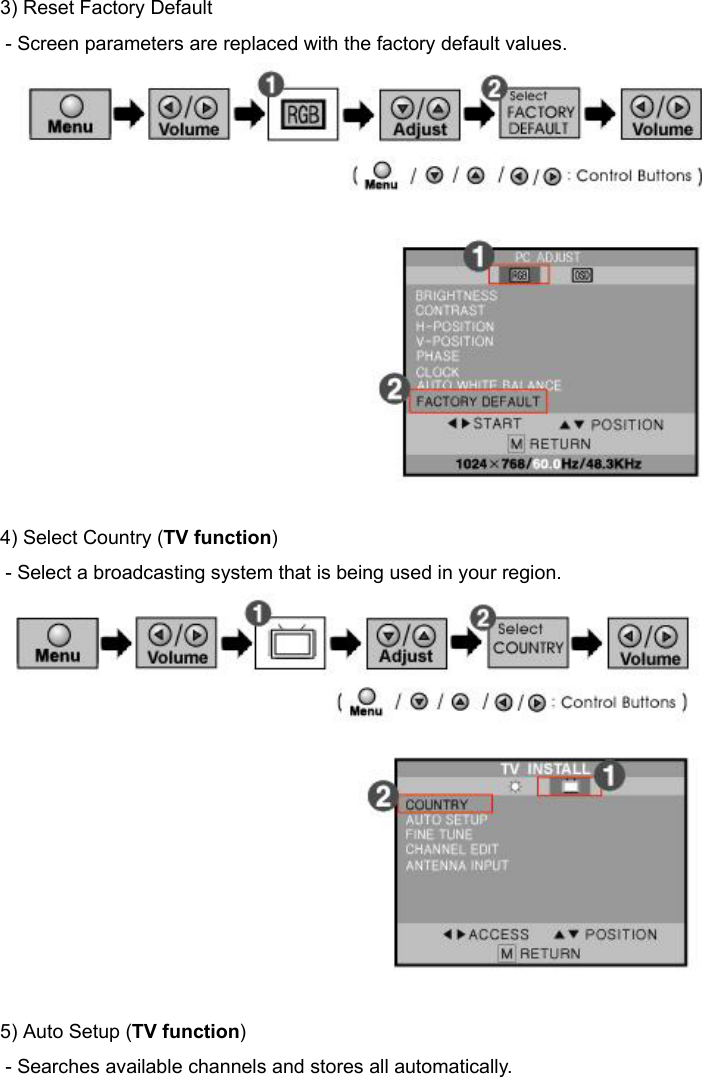
![1. Menus when using PC Mode 1) PC ADJUST Brightness : Adjust to brighten or darken the picture. Contrast : The contrast control determines the white level of the picture. H-Position : Move the entire screen to the left or right. V-Position : Move the entire screen to the below or upper. PHASE : Fine tuning of the screen even though it is not easily distinguishable with naked eyes. CLOCK : Adjust the horizontal-size(size of horizontal screen)of the entire screen. Auto White Balance : Select this menu to use automatic color balance function. Factory Default : Screen parameters are replaced with the factory default values. 2) OSD ADJUST Language : OSD language and appearance can be changed. OSD H-Position : You can change the horizontal position where the OSD menu appears on your monitor OSD V-Position : You can change the vertical position where the OSD menu appears on your monitor OSD Off Time : The OSD will automatically turn off if no adjustments are made for a certain time period. OSD Transparency : Changes the transparent(or opaque) status of the background of the OSD. 2. Menus when using TV Mode 1) PICTURE Brightness : Adjust to brighten or darken the picture. Contrast : The contrast control determines the white level of the picture. Sharpness : Adjust the sharpen or soften the picture. Color : Adjust to increase or decrease color intensity.. Tint : Change the tone of the color. Smart Picture Control : Changes the picture setting that is defined for [NORMAL], [ DYNAMIC], [ CINEMA] or [ USER] each.](https://usermanual.wiki/BTC-Korea-Co/151T/User-Guide-336411-Page-27.png)
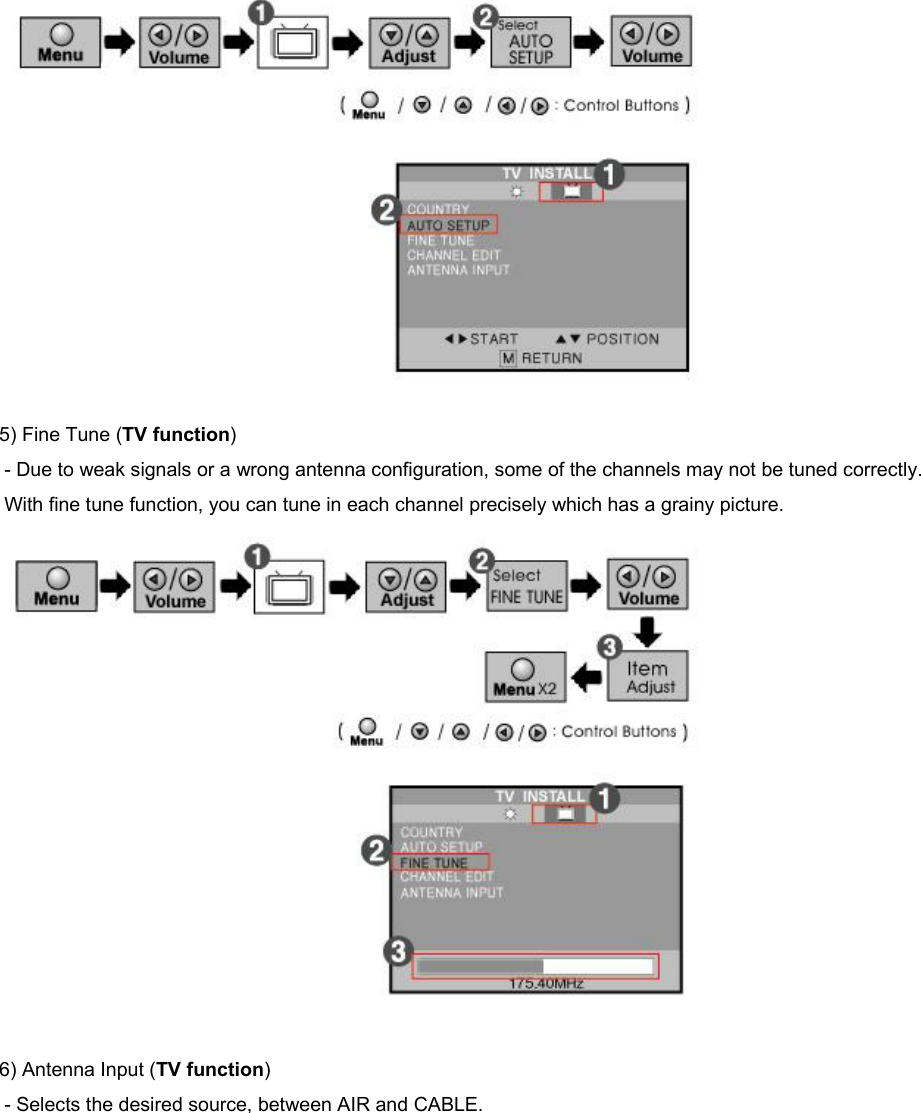
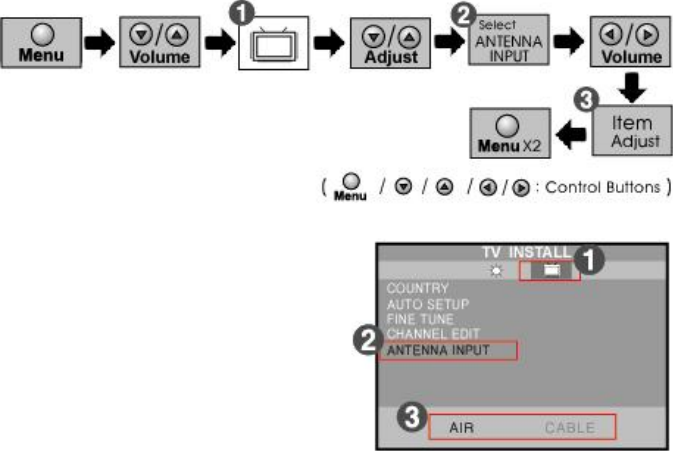
![2) TV INSTALL Country : Select a broadcasting system that is being used in your region. Auto Setup : Searches available channels and stores all automatically. Fine Tune : Due to weak signals or a wrong antenna configuration, some of the channels may not be tuned correctly. With fine tune function, you can tune in each channel precisely which has a grainy picture. Channel Edit : Channel Edit function helps edit those channels. Antenna Input : Select the desired source, between AIR and CABLE.. 3. Menus when using AV 1(Composite) / AV 2 (S-VHS) Mode 1) PICTURE Brightness : Adjust to brighten or darken the picture. Contrast : The contrast control determines the white level of the picture. Sharpness : Adjust the sharpen or soften the picture. Color : Adjust to increase or decrease color intensity.. Tint : Change the tone of the color. Smart Picture Control : Changes the picture setting that is defined for [NORMAL], [ DYNAMIC], [ CINEMA] or [ USER] each.](https://usermanual.wiki/BTC-Korea-Co/151T/User-Guide-336411-Page-28.png)