BUFFALO 000000021 MiniStation Air User Manual HDW PDU3 Reference Guide
BUFFALO INC. MiniStation Air HDW PDU3 Reference Guide
UserManual.wiki
>
BUFFALO
>
000000021 User Manual
user manual
Navigation menu
Upload a User Manual
Namespaces
Wiki Guide
HTML
PDF
Info
Views
User Manual
Discussion / Help
Navigation
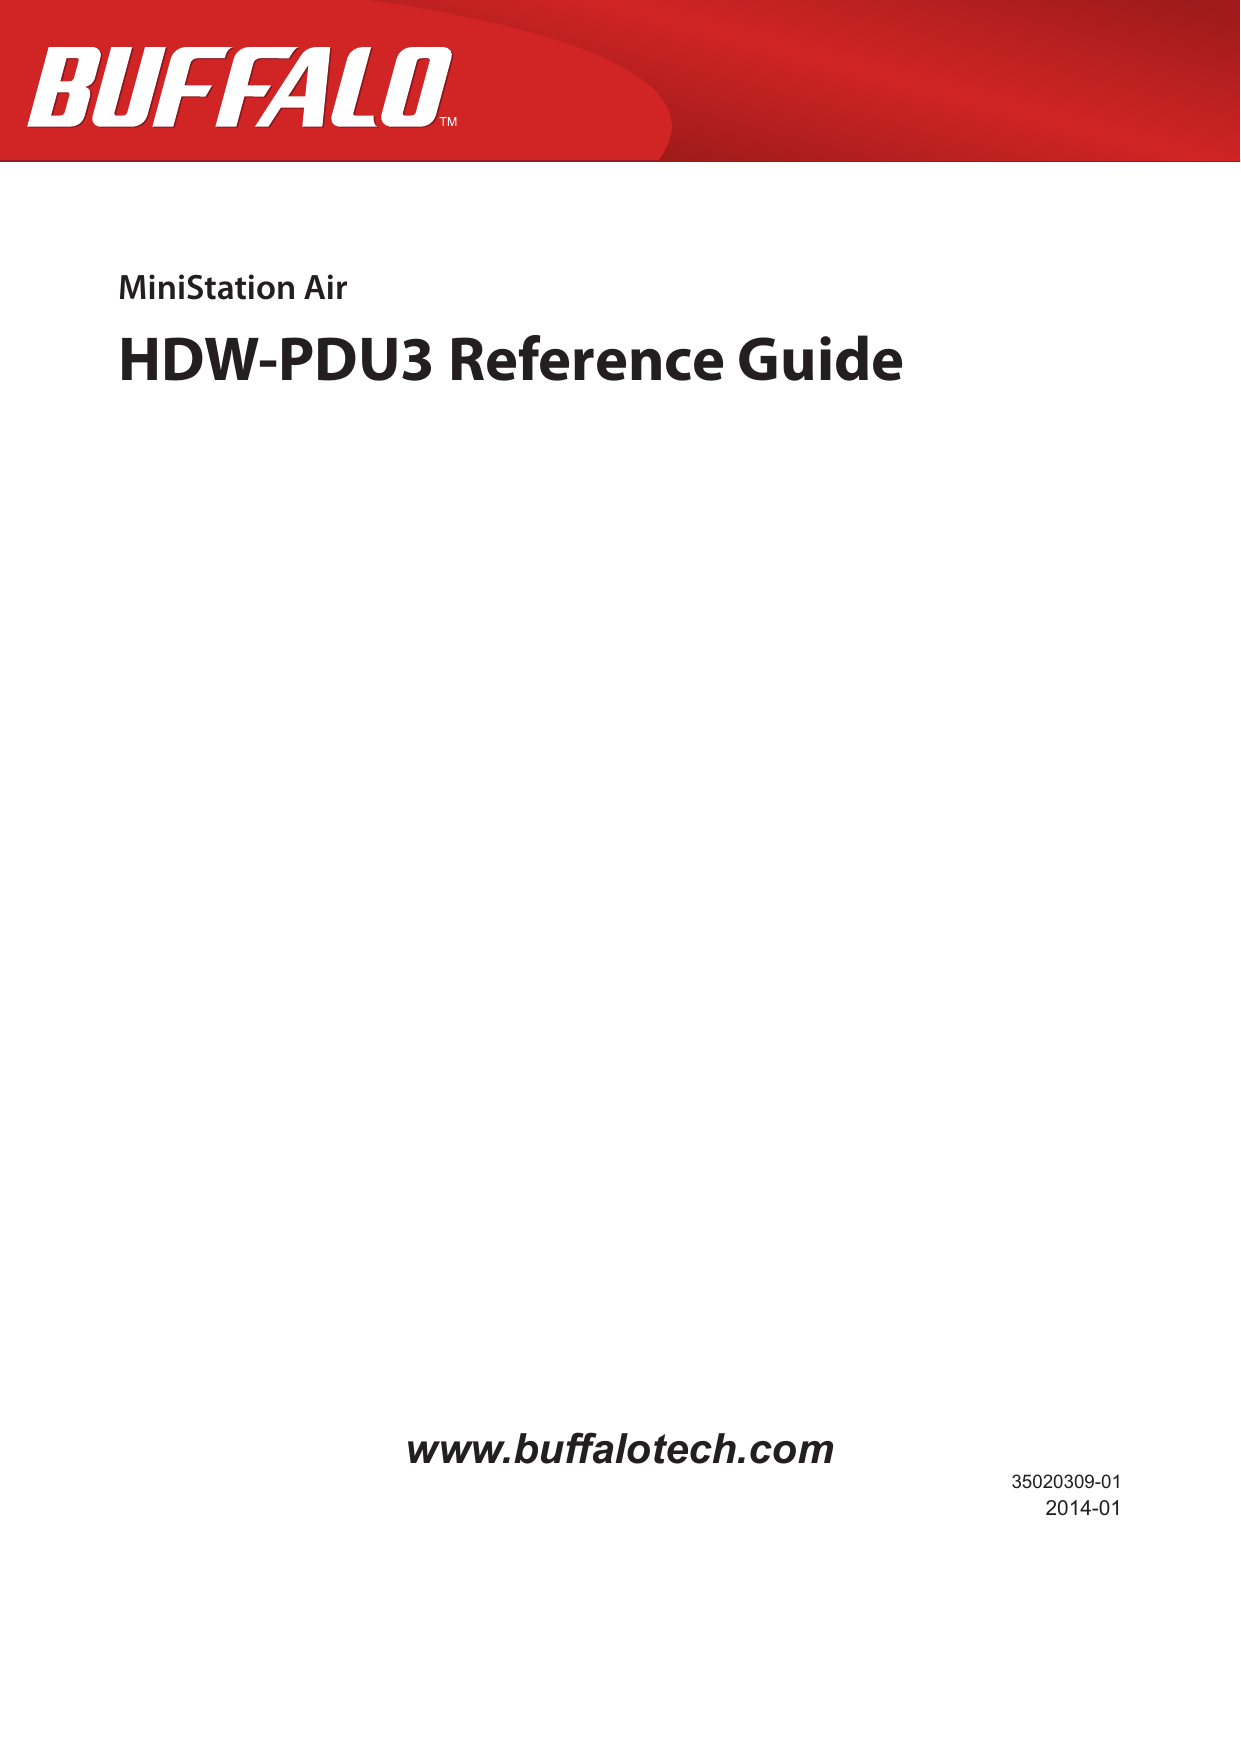
![8Chapter 3 - FormattingWhat is Formatting?Formatting is an operation that enables a hard drive to be used on your computer.This unit is formatted with FAT32 by default, and so it can be used without any additional formatting procedure. However, due to the restrictions of the FAT32 format, this unit cannot save files that are 4 GB or larger in size.For Windows usersReformatting with NTFS is recommended for most Windows users. This will let you save files that are 4 GB or larger. However, Macs will not be able to write to the dive if it is formatted with NTFS.For Mac usersKeeping the default FAT32 format partition is recommended for Mac users. If the MiniStation Air is reformatted with HFS+, files on it will no longer be accessible from your iPhone, iPad, iPod touch, Android phones, or other portable device. If you have already reformatted the MiniStation Air with a different partition, use the procedure in this manual to reformat it with FAT32.Formatting NotesNever unplug, reset, or turn off the computer during the formatting process. This could result in damage to the drive or other problems. Proper operation cannot be guaranteed if the format process is interrupted.Formatting will erase all data on the hard drive. Before formatting, back up any data.The user is responsible for any data lost due to formatting of the hard drive.Don’t format the wrong drive! Check the drive letter and partition name carefully. If you format the wrong drive, all data on it will be lost.Formatting with NTFS (Windows)If you use a Windows computer primarily, you may reformat the MiniStation Air with NTFS. This will allow files larger than 4 GB to be saved. Note: Most Mac computers cannot save data to an NTFS drive.1 Use the supplied USB data cable to connect this unit to your computer.2 Select [Start] - [Computer (My Computer)].](https://usermanual.wiki/BUFFALO/000000021/User-Guide-2213060-Page-8.png)
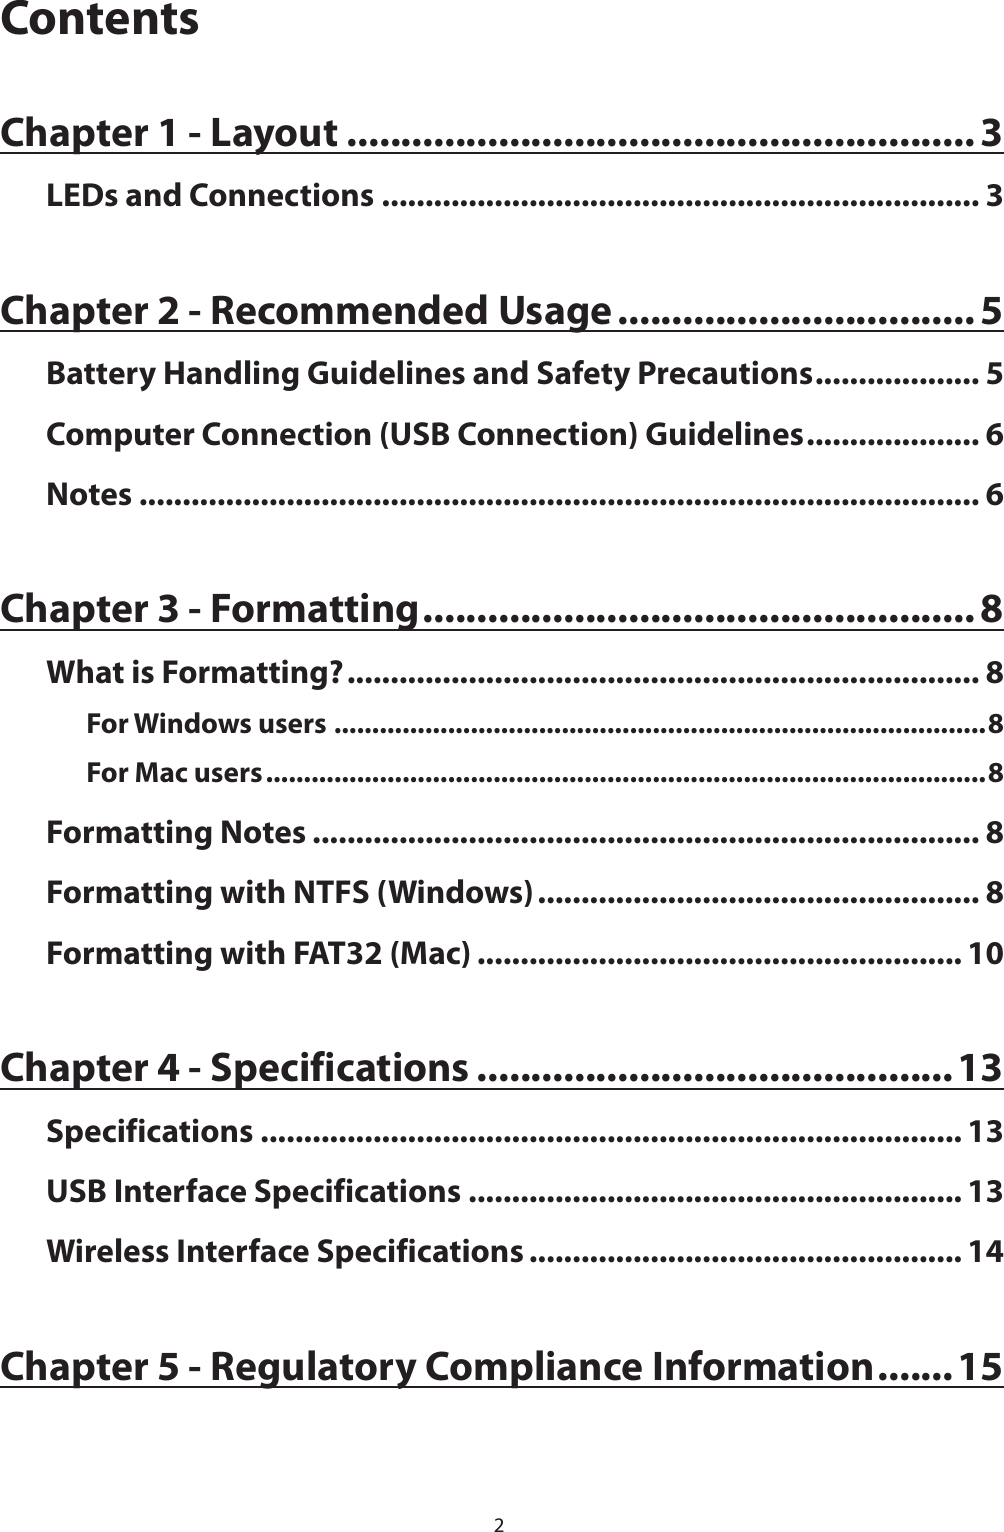
![93 Right-click the icon for this MiniStation Air and select [Format] from the right-click menu.4 • Select [NTFS] for the file system.• Insert a checkmark for [Quick Format].• Click [Start].5 Click [OK].](https://usermanual.wiki/BUFFALO/000000021/User-Guide-2213060-Page-9.png)
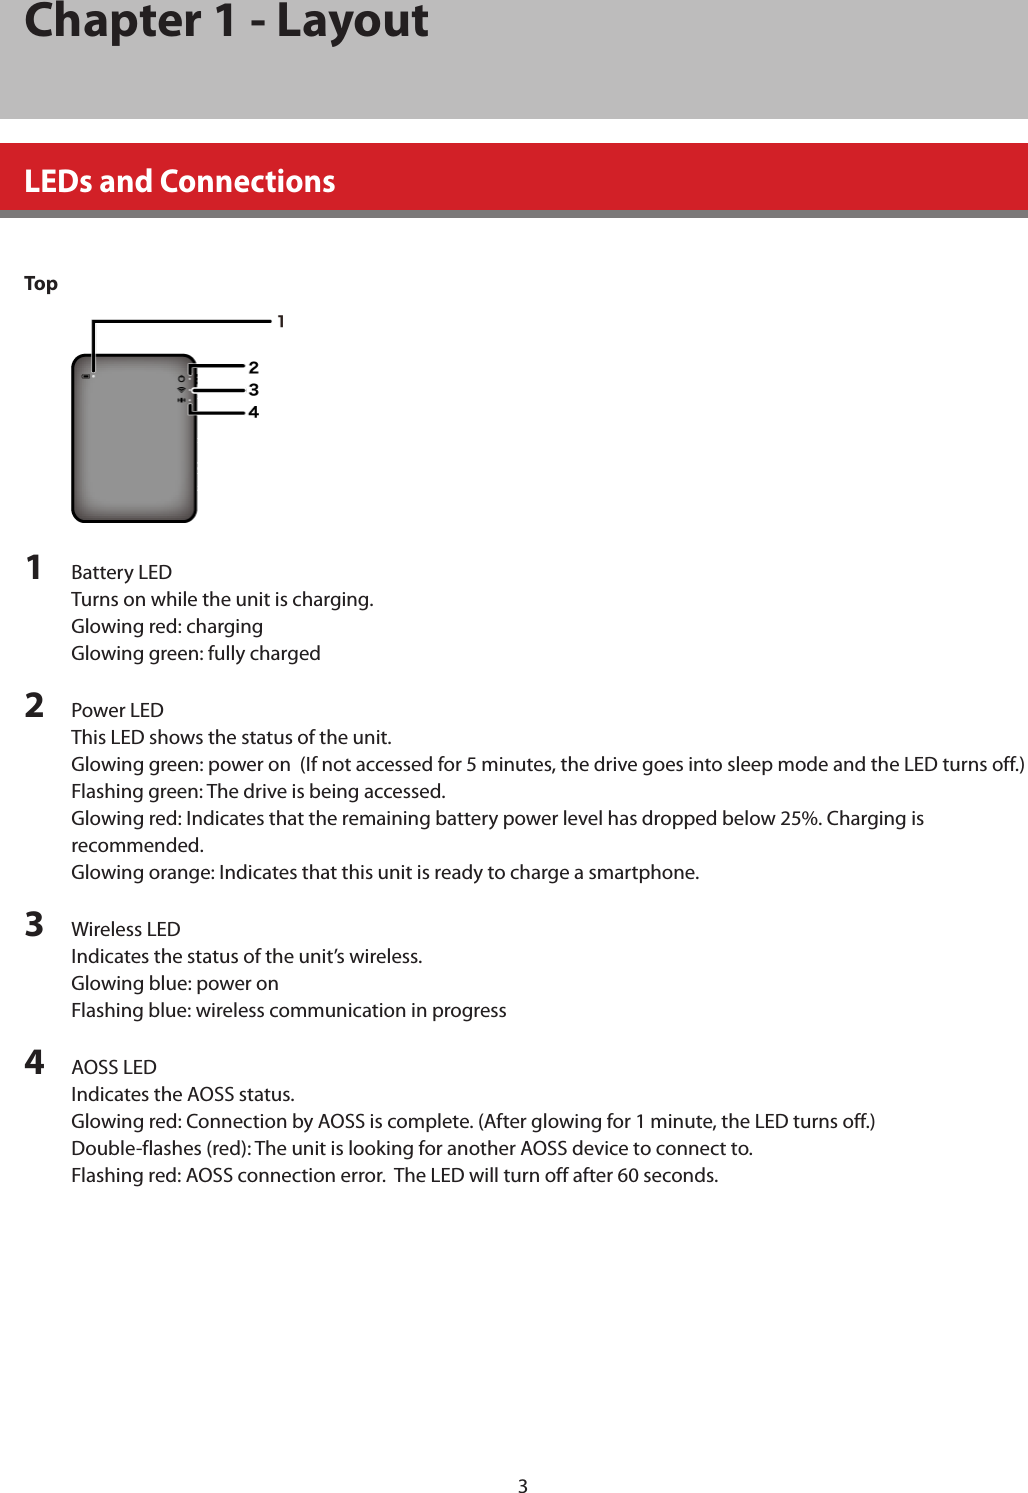
![106 Click [OK].This completes the formatting process.Formatting with FAT32 (Mac)FAT32 formatting is recommended if the MiniStation Air will be used with non-Windows computers such as Macs. After formatting with FAT32, only files of 4 GB or smaller can be saved to the drive. This is the default format on the drive. If the drive has been reformatted with NTFS and you want to use it with a Mac, follow the procedure below to reformat it with FAT32 from your Mac. Note: HFS+ is not recommended for this drive because it is not compatible with iOS and Android devices. If you accidentally reformatted the drive with HFS+, use the procedure below to restore it to FAT32 from your Mac.1 Use the supplied USB data cable to connect this unit to your Mac.2 Click to select the Finder.3 Select [Go] - [Utilities].4 Double-click [Disk Utility].5 • Click the disk to be formatted.• Confirm that you are about to format the right drive!](https://usermanual.wiki/BUFFALO/000000021/User-Guide-2213060-Page-10.png)
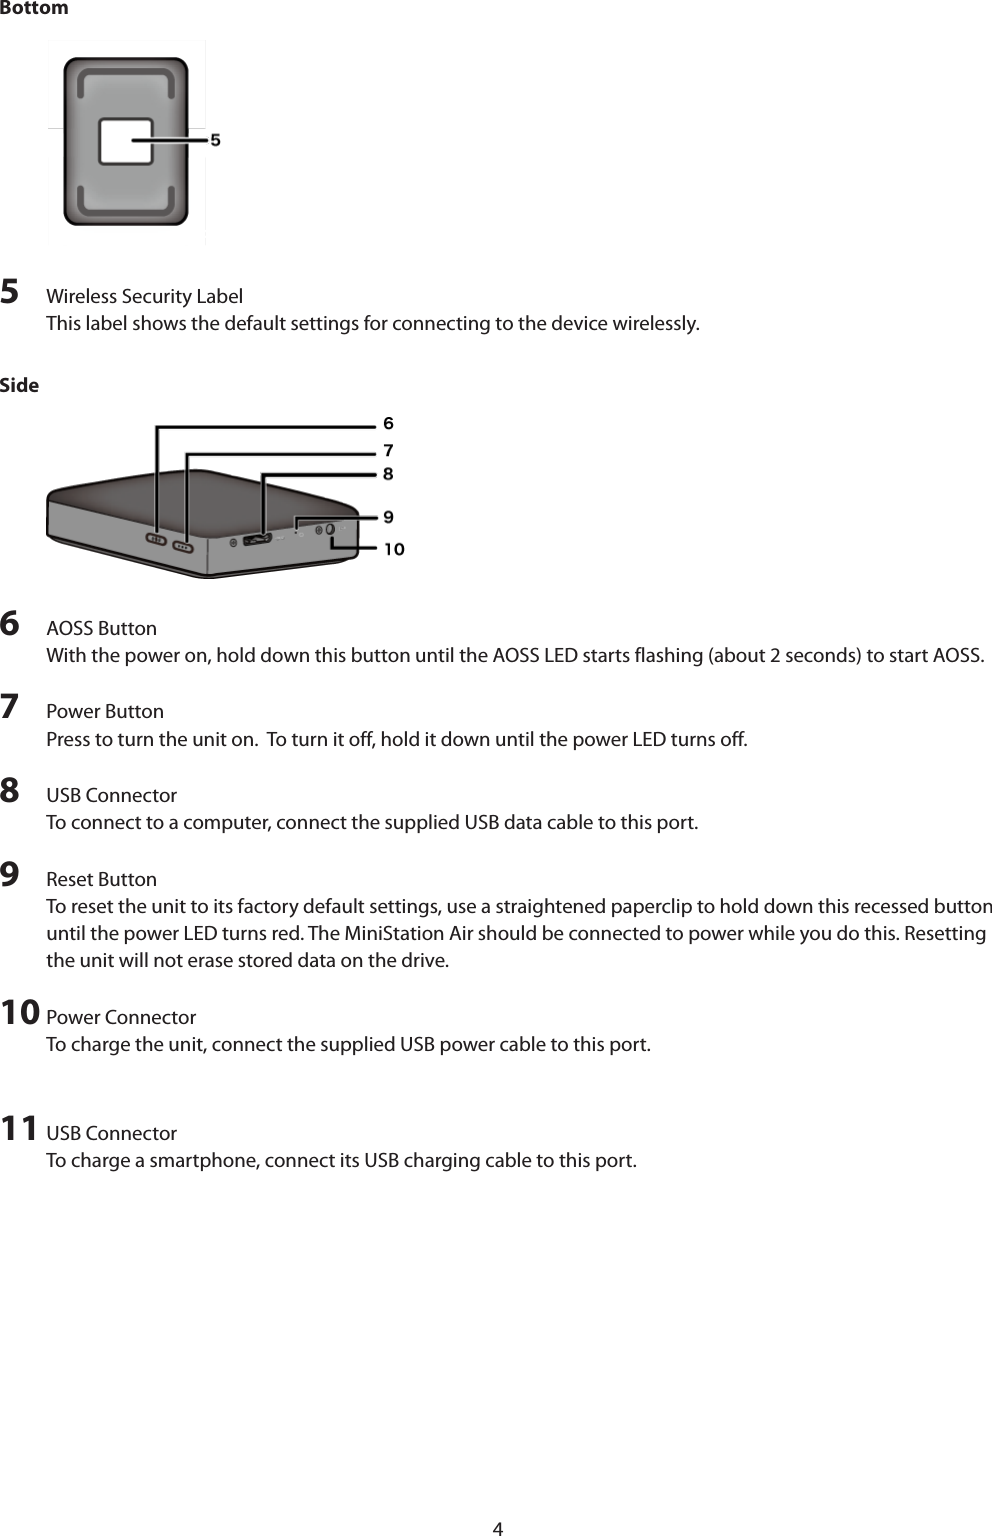
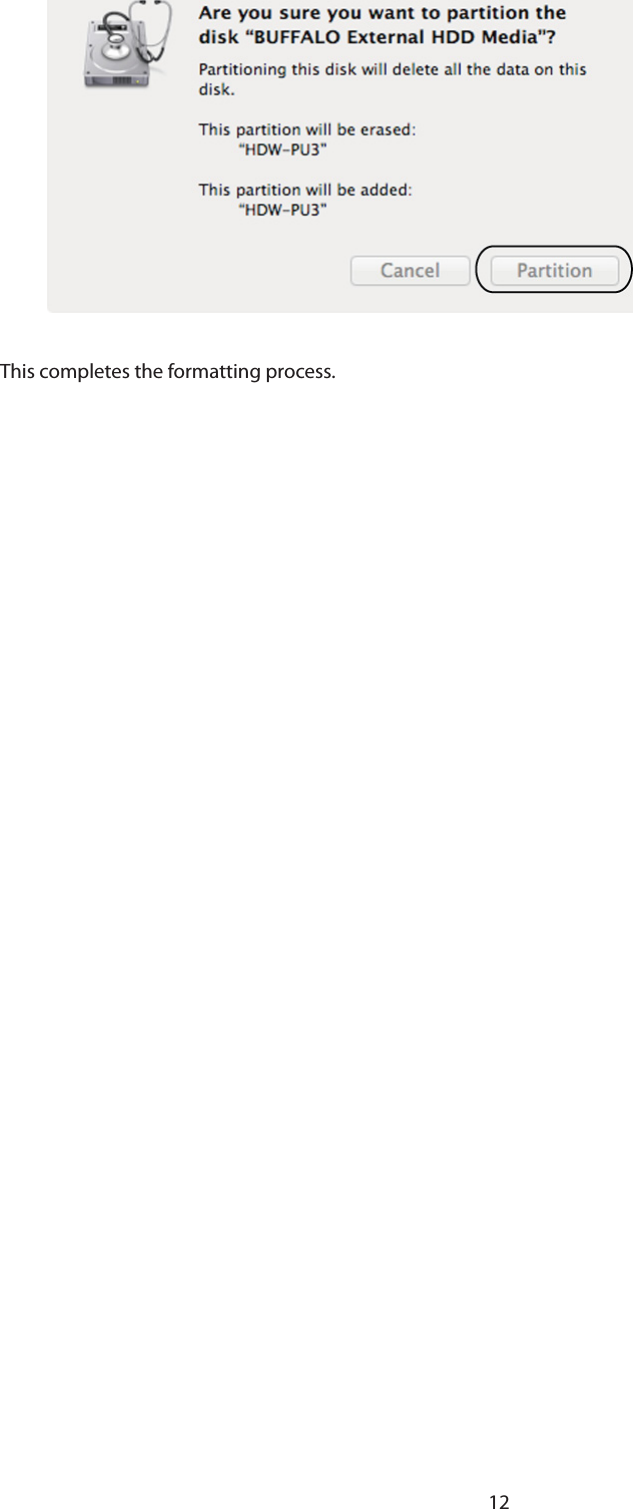
![116 • Click [Partition].• Select [1 Partition].• Select [MS-DOS (FAT)] for the formatting type.• Click [Apply].7 Click [Partition].](https://usermanual.wiki/BUFFALO/000000021/User-Guide-2213060-Page-11.png)
![16(2) ce dispositif doit accepter tout brouillage reçu, y compris un brouillage susceptible de provoquer un fonctionnement indésirable.Important Note - IC Radiation Exposure Statement:Note Importante - IC Déclaration d’exposition aux radiations:This equipment complies with IC radiation exposure limits set forth for an uncontrolled environment. End-users must follow the specific operating instructions for satisfying RF exposure compliance. This equipment should be installed and operated with minimum distance 0.5 cm between the radiator and your body.Under Industry Canada regulations, this radio transmitter may only operate using an antenna of a type and maximum (or lesser) gain approved for the transmitter by Industry Canada. To reduce potential radio interference to other users, the antenna type and its gain should be so chosen that the equivalent isotropically radiated power (e.i.r.p.) is not more than that necessary for successful communication.Cet équipement est conforme aux limites d’exposition aux rayonnements IC établies pour un environnement non contrôlé. Cet équipement doit être installé et utilisé avec un minimum de 0.5 cm de distance entre la source de rayonnement et votre corps.Conformément à la réglementation d’Industrie Canada, le présent émetteur radio peutfonctionner avec une antenne d’un type et d’un gain maximal (ou inférieur) approuvé pourl’émetteur par Industrie Canada. Dans le but de réduire les risques de brouillage radioélectriqueà l’intention des autres utilisateurs, il faut choisir le type d’antenne et son gain de sorte que lapuissance isotrope rayonnée équivalente (p.i.r.e.) ne dépasse pas l’intensité nécessaire àl’établissement d’une communication satisfaisante.EuropeEU Declaration of ConformityČesky [Czech]Buffalo Inc. tímto prohlašuje, že tento HDW-PDU3 je ve shodě se základními požadavky a dalšími příslušnými ustanoveními směrnice 1999/5/ES.Dansk [Danish]Undertegnede Buffalo Inc. erklærer herved, at følgende udstyr HDW-PDU3 overholder de væsentlige krav og øvrige relevante krav i direktiv 1999/5/EF.Deutsch [German]Hiermit erklärt Buffalo Inc. dass sich das Gerät HDW-PDU3 in Übereinstimmung mit den grundlegenden Anforderungen und den übrigen einschlägigen Bestimmungen der Richtlinie 1999/5/EG befindet.Eesti [Estonian]Käesolevaga kinnitab Buffalo Inc. seadme HDW-PDU3 vastavust direktiivi 1999/5/EÜ põhinõuetele ja nimetatud direktiivist tulenevatele teistele asjakohastele sätetele.English Buffalo Inc. hereby declares that this HDW-PDU3 is in compliance with the essential requirements and other relevant provisions of Directive 1999/5/EC. The declaration of conformity may be consulted at www.buffalo-technology.com/declaration-of-conformity.Unless there is no exceptional instruction in the documents of the product, users should not use other accessories](https://usermanual.wiki/BUFFALO/000000021/User-Guide-2213060-Page-16.png)
![17(such as cables) than those included in the package.Español [Spanish]Por medio de la presente Buffalo Inc. declara que el HDW-PDU3 cumple con los requisitos esenciales y cualesquiera otras disposiciones aplicables o exigibles de la Directiva 1999/5/CE.Ελληνική [Greek]ΜΕ ΤΗΝ ΠΑΡΟΥΣΑ Buffalo Inc. ΔΗΛΩΝΕΙ ΟΤΙ HDW-PDU3 ΣΥΜΜΟΡΦΩΝΕΤΑΙ ΠΡΟΣ ΤΙΣ ΟΥΣΙΩΔΕΙΣ ΑΠΑΙΤΗΣΕΙΣ ΚΑΙ ΤΙΣ ΛΟΙΠΕΣ ΣΧΕΤΙΚΕΣ ΔΙΑΤΑΞΕΙΣ ΤΗΣ ΟΔΗΓΙΑΣ 1999/5/ΕΚ.Français [French]Par la présente Buffalo Inc. déclare que l’appareil HDW-PDU3 est conforme aux exigences essentielles et aux autres dispositions pertinentes de la directive 1999/5/CE.Italiano [Italian]Con la presente Buffalo Inc. dichiara che questo HDW-PDU3 è conforme ai requisiti essenziali ed alle altre disposizioni pertinenti stabilite dalla direttiva 1999/5/CE.Latviski [Latvian]Ar šo Buffalo Inc. deklarē, ka HDW-PDU3 atbilst Direktīvas 1999/5/EK būtiskajām prasībām un citiem ar to saistītajiem noteikumiem.Lietuvių [Lithuanian]Šiuo Buffalo Inc. deklaruoja, kad šis HDW-PDU3 atitinka esminius reikalavimus ir kitas 1999/5/EB Direktyvos nuostatas.Nederlands [Dutch]Hierbij verklaart Buffalo Inc. dat het toestel HDW-PDU3 in overeenstemming is met de essentiële eisen en de andere relevante bepalingen van richtlijn 1999/5/EG.Malti[ Maltese]Hawnhekk, Buffalo Inc. , jiddikjara li dan HDW-PDU3 jikkonforma mal-ħtiġijiet essenzjali u ma provvedimenti oħrajn relevanti li hemm fid-Dirrettiva 1999/5/EC.Magyar [Hungarian]Alulírott, Buffalo Inc. nyilatkozom, hogy a HDW-PDU3 megfelel a vonatkozó alapvetõ követelményeknek és az 1999/5/EC irányelv egyéb elõírásainak.Polski [Polish]Niniejszym Buffalo Inc. oświadcza, że HDW-PDU3 jest zgodny z zasadniczymi wymogami oraz pozostałymi stosownymi postanowieniami Dyrektywy 1999/5/EC.Português [Portuguese]Buffalo Inc. declara que este HDW-PDU3 está conforme com os requisitos essenciais e outras disposições da Directiva 1999/5/CE.Slovensko [Slovenian]Buffalo Inc. izjavlja, da je ta HDW-PDU3 v skladu z bistvenimi zahtevami in ostalimi relevantnimi določili direktive](https://usermanual.wiki/BUFFALO/000000021/User-Guide-2213060-Page-17.png)
![181999/5/ES.Slovensky [Slovak]Buffalo Inc. týmto vyhlasuje, že HDW-PDU3 spĺňa základné požiadavky a všetky príslušné ustanovenia Smernice 1999/5/ES.Suomi [Finnish]Buffalo Inc. vakuuttaa täten että HDW-PDU3 tyyppinen laite on direktiivin 1999/5/EY oleellisten vaatimusten ja sitä koskevien direktiivin muiden ehtojen mukainen.Svensk [Swedish]Härmed intygar Buffalo Inc. att denna HDW-PDU3 står I överensstämmelse med de väsentliga egenskapskrav och övriga relevanta bestämmelser som framgår av direktiv 1999/5/EG.AC adapterJP, US Asian Power Devices Inc. WA-10K05FUEU Asian Power Devices Inc. WA-10K05R, APD3-EU, APD3-UK Others根據 NCC低功率電波輻射性電機管制辦法:第十二條:經型式認證合格之低功率射頻電機,非經許可,公司、商號或使用者均不得擅自變更頻率、加大功率或變更原設計之特性及功能。第十四條:低功率射頻電機之使用不得影響飛航安全及干擾合法通信;經發現有干擾現象時,應立即停用,並改善至無干擾時方得繼續使用。前項合法通信,指依電信法規定作業之無線電通信。低功率射頻電機須忍受合法通信或工業、科學及醫療用電波輻射性電機設備之干擾。KC Warning해당 무선설비는 전파혼신 가능성이 있으므로 인명안전과 관련된 서비스는 할 수 없음기종별 사 용 자 안 내 문B급 기기(가정용 정보통신기기)이 기기는 가정용(B급) 전자파적합기기로서 주로 가정에서 사용하는 것을 목적으로 하며, 모든지역에서 사용할 수 있습니다.UAE TRA](https://usermanual.wiki/BUFFALO/000000021/User-Guide-2213060-Page-18.png)