BUFFALO 04610108-0 DC-HSDPA Portable WiFi Router User Manual GP03
BUFFALO INC. DC-HSDPA Portable WiFi Router GP03
BUFFALO >
Contents
- 1. FDI-04610108-0_User Manual_Rev1
- 2. FDI-04610108-0_User Manual_GP03
FDI-04610108-0_User Manual_Rev1
![123 Wireless Connection to the GP033Wireless Connection to a Personal ComputerThis section describes the procedures for connecting this product wirelessly to a personal computer running Windows, using AOSS/WPS (push-button type) as an example. Setting methods vary according to the version of Windows that is running. Note Refer to the Reference Guide for details on other connecting methods. See page 58 in this manual on reference method.For Windows 7/VistaFollow the procedure below to connect to this device using AOSS/WPS (push-button type) on a personal computer running Windows 7 or Vista.Note In setting AOSS/WPS (push-button type), the personal computer and this device establish a 1-to-1 relationship. For that reason, you cannot connect another device with AOSS/WPS (push-button type) while it is being set. To connect multiple devices to one GP03 unit, connect an-other device after completing the AOSS/WPS (push-button type) connection.1 Select [Start] - [(All) Programs] - [BUFFALO] - [AirStation Utility] - [Client Manager V].](https://usermanual.wiki/BUFFALO/04610108-0.FDI-04610108-0-User-Manual-Rev1/User-Guide-1591177-Page-13.png)
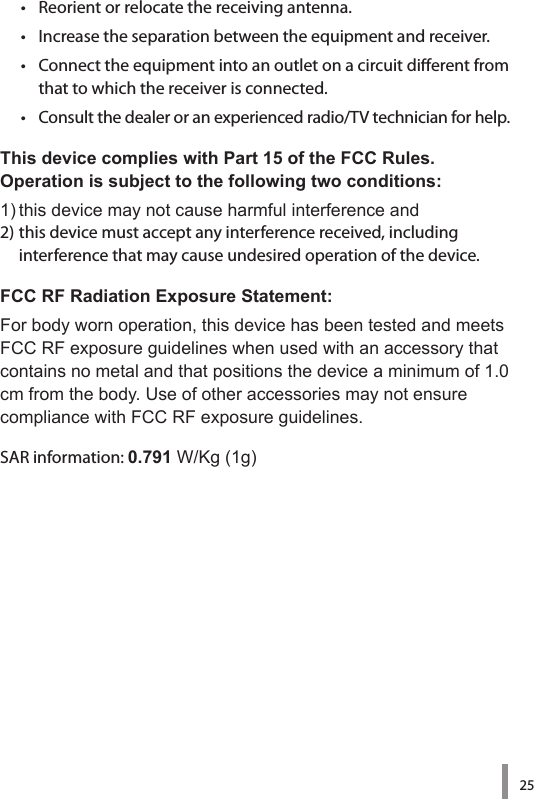
![132 When the screen below is displayed, click [Create connection destination].3 When the ”User Account Control” screen is displayed, click [Yes] or [Continue].](https://usermanual.wiki/BUFFALO/04610108-0.FDI-04610108-0-User-Manual-Rev1/User-Guide-1591177-Page-14.png)
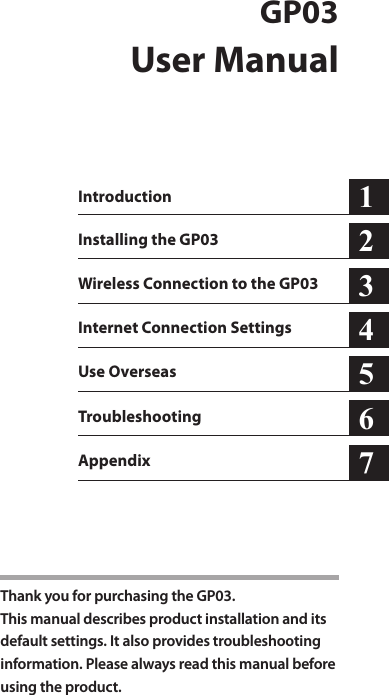
![167 Wait for the connection to complete.8 When ”Connection with AOSS completed” or ”Connection with WPS push-button type completed” is displayed, check the name of the connection destination, and click [Save and close].※ The product image in the screen is an example. Note The connection destination name can be freely set.](https://usermanual.wiki/BUFFALO/04610108-0.FDI-04610108-0-User-Manual-Rev1/User-Guide-1591177-Page-17.png)
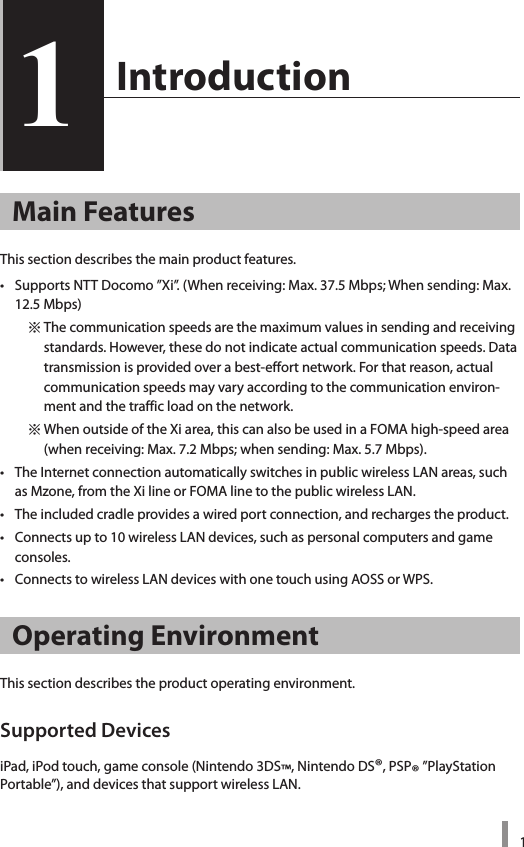
![179 When ”Wireless connection destination creation completed” is displayed, click [Close].10 If a screen ”Set Network Location” is displayed, click the location that matches the environment where the devices will be used. (In the example here, click ”Home Network”.)](https://usermanual.wiki/BUFFALO/04610108-0.FDI-04610108-0-User-Manual-Rev1/User-Guide-1591177-Page-18.png)
![1811 If the ”User Account Control” screen is displayed, click [Yes] or [Continue].12 If the screen below is displayed, click [Close].This completes connecting to this product. Note If connecting to this device fails, the AOSS/DIAG LED will continuously flash in blue for approximately 30 minutes, and a screen like the one below is displayed. In such case, click ”Start creating wireless connection from the beginning” and implement the procedures again from step 4 (Page14).※ Sample screen.](https://usermanual.wiki/BUFFALO/04610108-0.FDI-04610108-0-User-Manual-Rev1/User-Guide-1591177-Page-19.png)