BUFFALO 09101577-0 Air Station (High Power Wireless Router) User Manual WHR HP G54 Manual indd
BUFFALO INC. Air Station (High Power Wireless Router) WHR HP G54 Manual indd
BUFFALO >
Contents
- 1. Manual 1
- 2. Manual 2
- 3. Manual 3
- 4. Manual 4
- 5. Manual 5
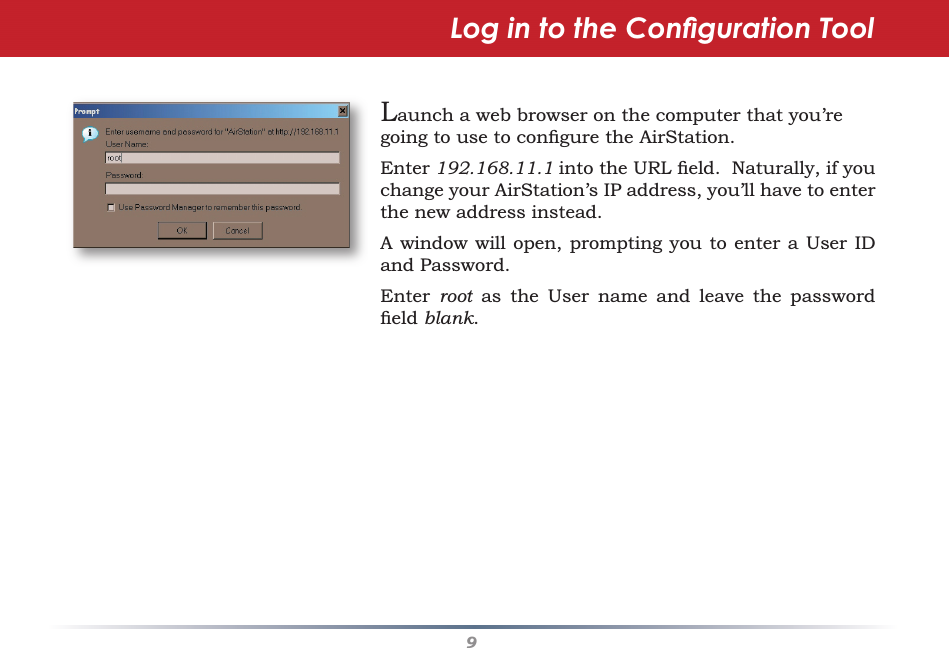
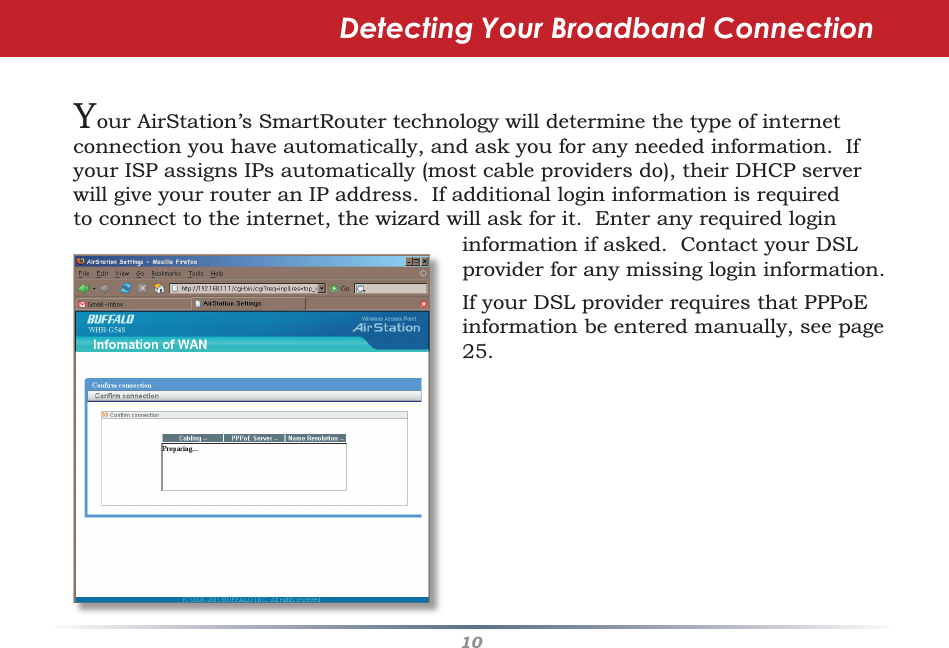
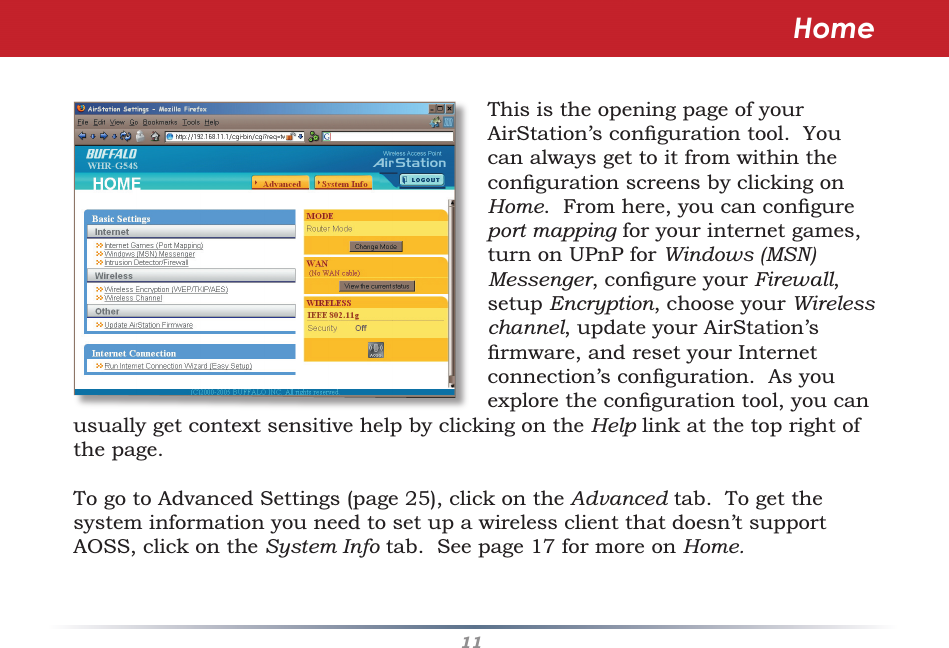
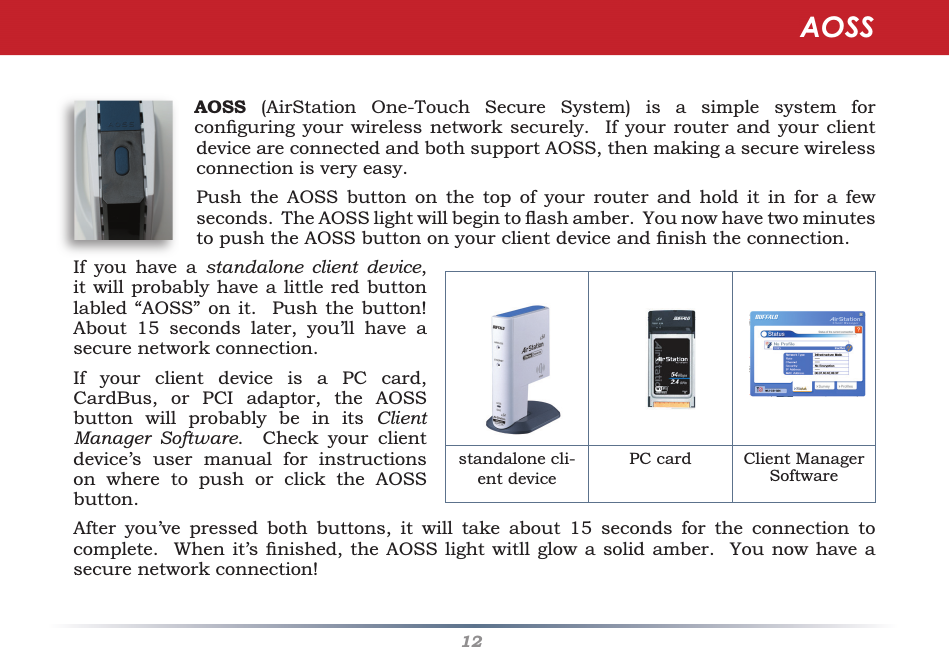
Manual 1