Badger Meter 2006B Orion Water Transmitter User Manual Pit ORION Transmitter
Badger Meter Inc Orion Water Transmitter Pit ORION Transmitter
Exhibit D Users Manual per 2 1033 b3
Installation
Data
BadgerMeter, Inc.
®
ORI-I-36
P/N 62014-042 Rev.6
11-06
Pit ORION
Pit ORION®
IDENTIFICATION
Badger Meter Pit ORION Transmitters are available configuration for
easy adaptation to the complete Badger® Recordall® Disc, Turbo,
Compound Series, Fire Service, and Mag meter lines. The single pit
design offers a factory prewired ORION module to either of Badger
Meter's encoders, including the Recordall Transmitter Register (RTR®)
or the Absolute Digital Encoder (ADE®).
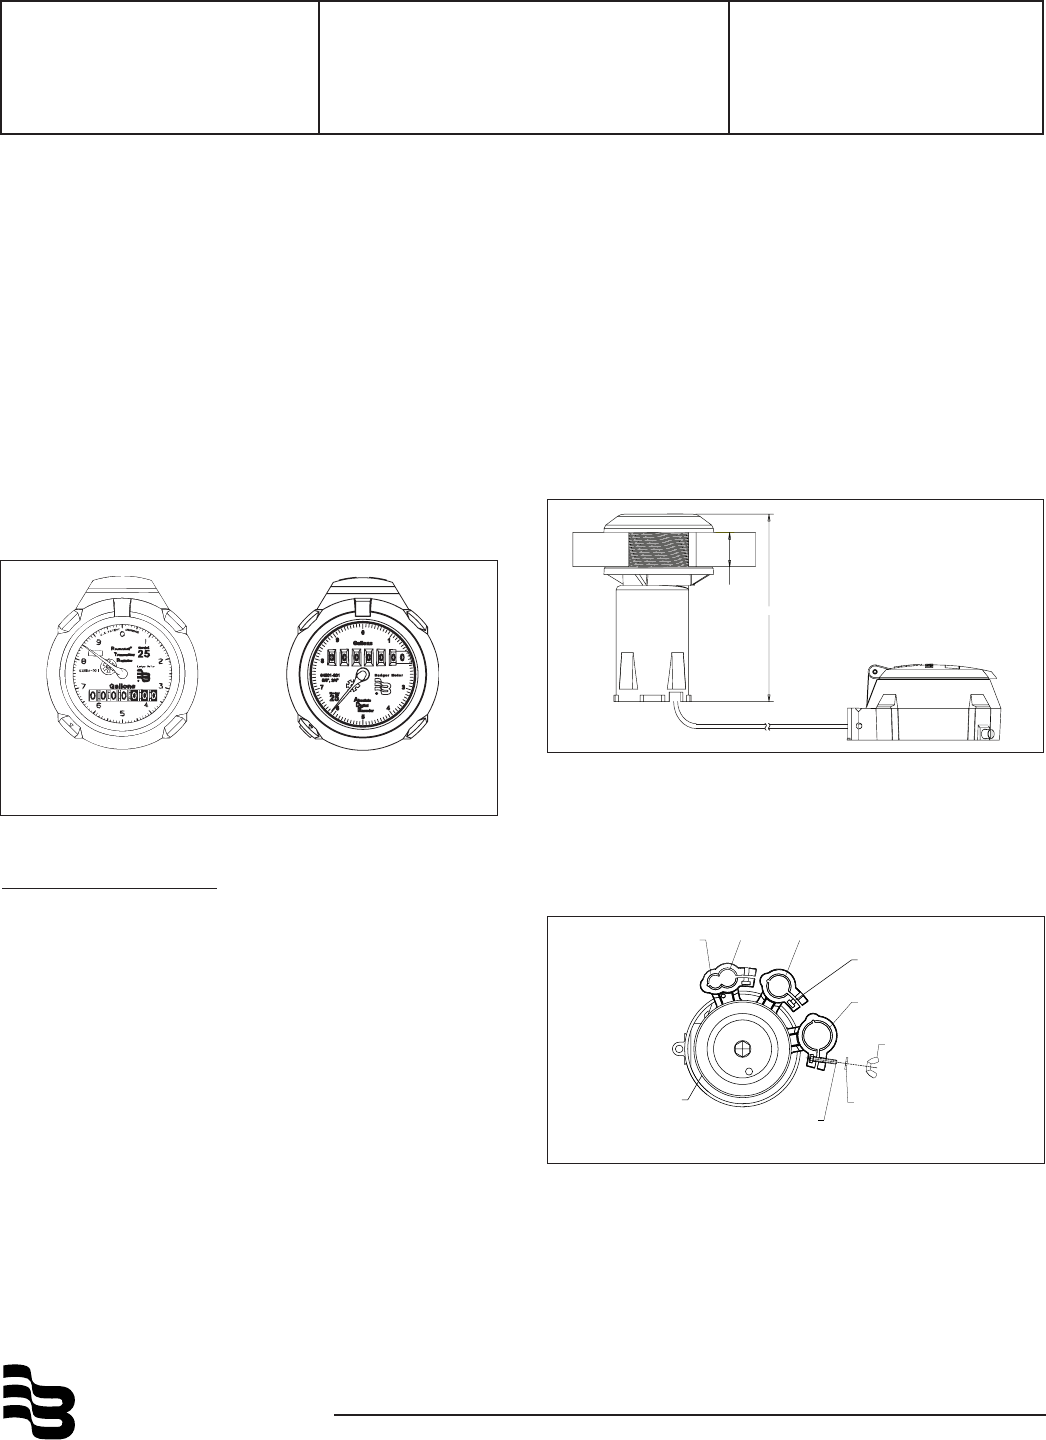
Each Pit ORION transmitter can be identified using the unique eight-
digit serial number located on a tag attached to the wire harness. At
the end of the serial number a letter ‘M’ or ‘N’ appears. This alpha
character represents whether the transmitter is for Metal (M) or
Nonmetal (N) pit lid applications. Each Badger Meter encoder is clearly
identified on the face of the register with an assembly number, unit of
measure and meter model (see figure 1). It is essential that the correct
transmitter is used for the correct pit lid application. Failure to do so
will result in a violation of FCC regulations.
Figure 2 Identification - Pit ORION Transmitter
ORION Pit Installation Kits
Through Lid Installation Kit 64394-001
Below Lid with Knuckles 64394-003
Vault Installation Kit 64394-008
Armorcast Installation Kit 64394-009
INSTALLATION
UNPACKING
Carefully remove the prewired pit ORION transmitter and encoder
from the shipping carton and inspect the assembly for damage. Retain
the contents of the installation kit for use in mounting the pit transmitter
in the field. Prior to installing any pit ORION transmitter, it is important
to determine whether it should be installed in a pit with a metal or
nonmetal lid. To determine the type of pit ORION transmitter, look at
the serial number tag attached to the wire harness. At the end of the
serial number, either a ‘M’ for metal or an ‘N’ for nonmetal will designate
the proper lid application for the transmitter.
After determining the proper application, the ORION pit transmitter can
be installed either through or beneath the lid. An installation kit is
provided with each transmitter for mounting through or beneath a pit
lid. Note that the ORION transmitter should not be mounted through
the lid in applications where vehicle traffic and exposure to snow plow
blades and other objects may damage the ORION transmitter.
PIT ORION INSTALLATION
The Pit ORION Transmitter (see Figure 2) is shipped prewired to the
Badger Meter encoder for single pit configurations. Due to the factory
prewired shipment, there is no splicing required and only the mounting
of the register with tightening of the Torx seal screw is necessary.
Excess wire should be coiled up inside the pit and cable tied to avoid
any damage.
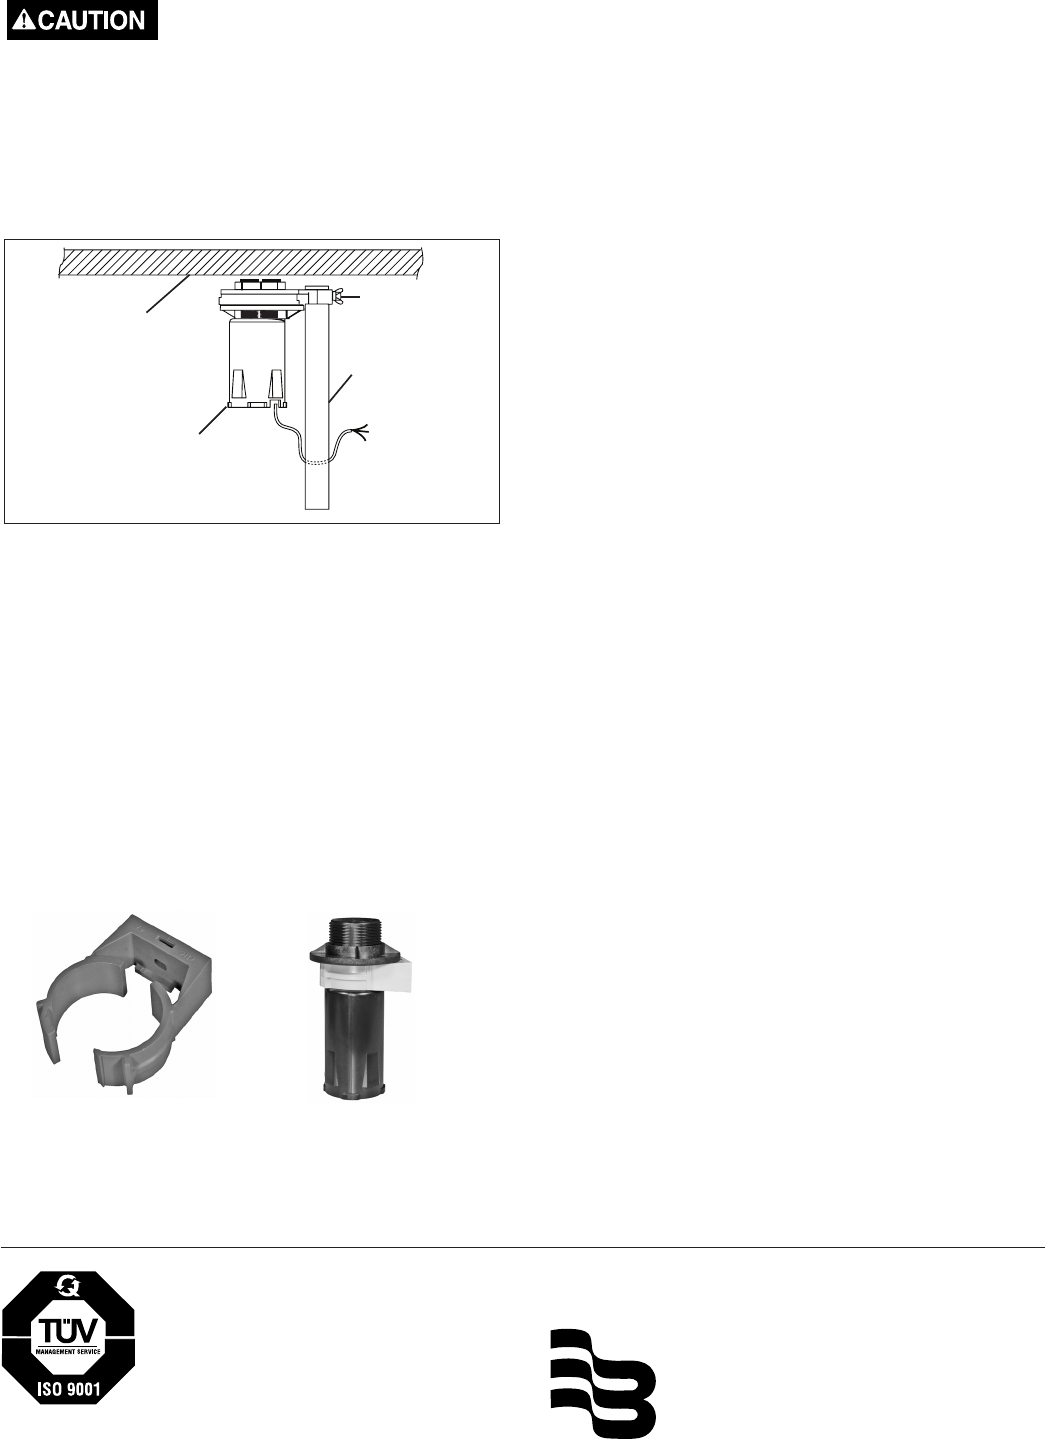
3/8 REBAR 1/2 REBAR 5/8 REBAR
HEX HEAD BOLT CAN BE PLACED
IN ANY SLOT DEPENDING ON
TYPE OF SUPPORT USED
1/2 SCHEDULE 40
PVC PIPE
#6-32 WING NUT
P/N 63517-001
#6 WASHER
P/N 55262-007
#8-32 X 3/4
HEX HEAD BOLT
P/N 55030-031
SUPPORT BRACKET
P/N 63516-001
Figure 3 Identification - Pit Mounting Bracket - Top View
ORION Pit transmitters can be mounted through or below the pit lid.
See figures 2 and 4 for details. For below the lid installations, a special
mounting bracket (figure 3) is available. This mounting bracket is
designed for use with 3/8", 1/2" and 5/8" rebar or 1/2" schedule 40
PVC pipe.
Recordall Transmitter
Register (RTR®)
Figure 1
Absolute Digital
Encoder (ADE™)
MAX LID
THICKNESS
.95
5.13
®
Due to continuous research, product improvements and enhancements,
Badger Meter reserves the right to change product or system specifications
without notice, except to the extent an outstanding contractual obligation
exists.
Copyright © Badger Meter, Inc. 2006. All rights reserved.
Please see our website at
www.badgermeter.com
for specific contacts. BadgerMeter, Inc.
P.O. Box 245036, Milwaukee, WI 53224-9536
(800) 876-3837 / Fax: (888) 371-5982
www.badgermeter.com
ORION®, Recordall®, RTR®, and ADE®, are registered trademarks of Badger Meter,
Inc. TORX® is a registered trademark of Camcar, Division of Textron, Inc.
Deep Vault Installation
When installation of the ORION Pit Transmitter occurs in a deep vault,
Badger offers a kit that can be used to mount the transmitter to the side
of the vault. To install, mount the ‘C’ clamp on the side of the vault. Select
a location close to the top of the vault that will not be damaged when
access to the meter is required. Place the tape, supplied in the
installation kit, around the transmitter approximately ½” from the top
of the transmitter. Thread the locking ring on the transmitter until it
makes contact with the tape. Insert the transmitter into the ‘C’ clamp.
Close the ‘C’ clamp and lock it in place so that it closes over the tape
and securely holds the transmitter.
NOTE:
ORION Radio Transmitters perform best with a clear line of
sight. Performance varies by installation and lid construction.
Figure 4 Identification - Pit ORION Beneath Lid Installation
Armorcast Installation
ORION Pit Transmitters can also be installed in composite and plastic
lids like Armorcast. An installation kit for installing an ORION Pit
Transmitter to the lid is available. To install an ORION transmitter to
a composite or plastic lid, thread the locking ring onto the top of the
ORION Transmitter. Slide the transmitter into the mounting bracket.
Thread the locking ring so that the transmitter is held firmly in place.
Badger Encoder Register Installation
Install an RTR® or ADE® on the water meter and secure it using either
the Torx® screw or standard seal screw provided.
TESTING
RTR Transmitter
Once the Pit ORION Transmitter is securely installed and the RTR is
mounted on the water meter, the ORION system is ready for operation.
Run water through the meter to increment the RTR 1/10th of the test
circle. Upon receiving the first digital signal from the RTR, the transmitter
counts the signal and begins its radio frequency transmissions. No
specific testing of the wiring or programming of the transmitter is
required. Reading each pit transmitter immediately after installation
verifies proper operation and reading performance. ORION reading
equipment only can be used to read installed ORION Transmitters.
ADE Transmitter
Once the ADE is assembled to the meter and the ORION transmitter
is installed, the transmitter is ready for operation. The user can either
let the transmitter automatically turn itself on by rolling the ADE number
wheels to all zeros or by turning on the transmitter with the handheld
or mobile reading equipment. Since the ADE transmitter updates its
reading from the ADE once an hour, it may take up to one hour after
the ADE number wheel stack rolls to all zeros for the transmitter to begin
broadcasting. In either case, no specific testing or programming of the
transmitter is required. Reading each pit transmitter after it has been
installed verifies proper installation and reading performance.
LICENSE REQUIREMENTS
This device complies with Part 15 of the FCC Rules. Operation of this
device is subject to the following two conditions: (1) This device may
not cause harmful interference, and (2) this device must accept any
interference received, including interference that may cause undes-
ired operation. Any changes made by the user not approved by Badger
Meter can void the user's authority to operate the equipment. No
license is required by the utility to operate an ORION meter reading
system.
Figure 6
C Clamp around Transmitter
Figure 5
C Clamp
METER PIT LID
ORION
TRANSMITTER
CLAMP
1/2 SCHEDULE
40 PVC PIPE
To install, drive rebar or stake into the ground prior to attaching Pit
ORION Transmitter to avoid damage. Once in the ground, secure
the mounting bracket on the appropriate rebar or pipe using the
enclosed washer, wing nut and hex head bolt provided with the
bracket. Insert the Pit ORION Transmitter through the bracket and
thread the locking nut to secure the ORION transmitter (see Figure
4). For best results mount the Pit Transmitter approximately
1-2" below the underside of the lid.