Badger Meter REPEAT2SI Orion Serial Repeater User Manual Exhibit D Users Manual per 2 1033 b3
Badger Meter Inc Orion Serial Repeater Exhibit D Users Manual per 2 1033 b3
Exhibit D Users Manual per 2 1033 b3
Installation &
Programming
Manual for Installer
BadgerMeter, Inc.
Badger® ORION®
Automated Meter
Reading System
Repeater Programmer
Software
ORI-IOM-53
P/N XXXXX-XXX
10-07
IMPORTANT: This manual contains important warnings
and information. READ AND KEEP FOR REFERENCE.
Preliminary
Preliminary

WELCOME
Badger® ORION®
REPEATER PROGRAMMER
Welcome to the Badger ORION Repeater Programmer (RP) software. The RP software
allows you to easily define a set of transmitters that a ORION Repeater must repeat. The
software also provides you with the means to verify that the Repeater is hearing all of the
needed transmitters, and that the Repeater is being heard at the receive destination.
The RP software runs on a PC under Windows® 2000 Professional or Windows XP. It
provides you a simple way to work with your Badger ORION Repeater:
• You can easily load the list of transmitter serial numbers into the Repeater.
• You can change the list of transmitters in a Repeater that is currently working by
adding a new transmitter serial number, removing one that is no longer needed, or
changing an incorrect serial number.
• You can clear out the list of transmitter serial numbers if you wish to remove a
Repeater from service.
• You can verify that the transmitters that are to be repeated are within range and
are being received.
• You can verify that the repeated transmissions are being received at the target
location.
REPEATER INSTALLATION
PRODUCT UNPACKING AND INSPECTION
Upon receipt of the product, perform the following unpacking and inspection
procedures:
Note: If damage to the shipping container is evident
upon receipt, request the carrier to be present
when the product is unpacked.
Carefully open the shipping package, follow any instructions that may be marked
on the exterior. Remove all cushioning material surrounding the product and
carefully lift the product from the package.
2
Preliminary

Retain the package and all packing material for possible use in reshipment or
storage.
Visually inspect the product and applicable accessories for any physical damage
such as scratches, loose or broken parts, or any other sign of damage that may
have occurred during shipment.
Note: If damage is found, request an inspection by the
carrier’s agent within 48 hours of delivery and file
a claim with the carrier. A claim for equipment
damage in transit is the sole responsibility of the
purchaser.
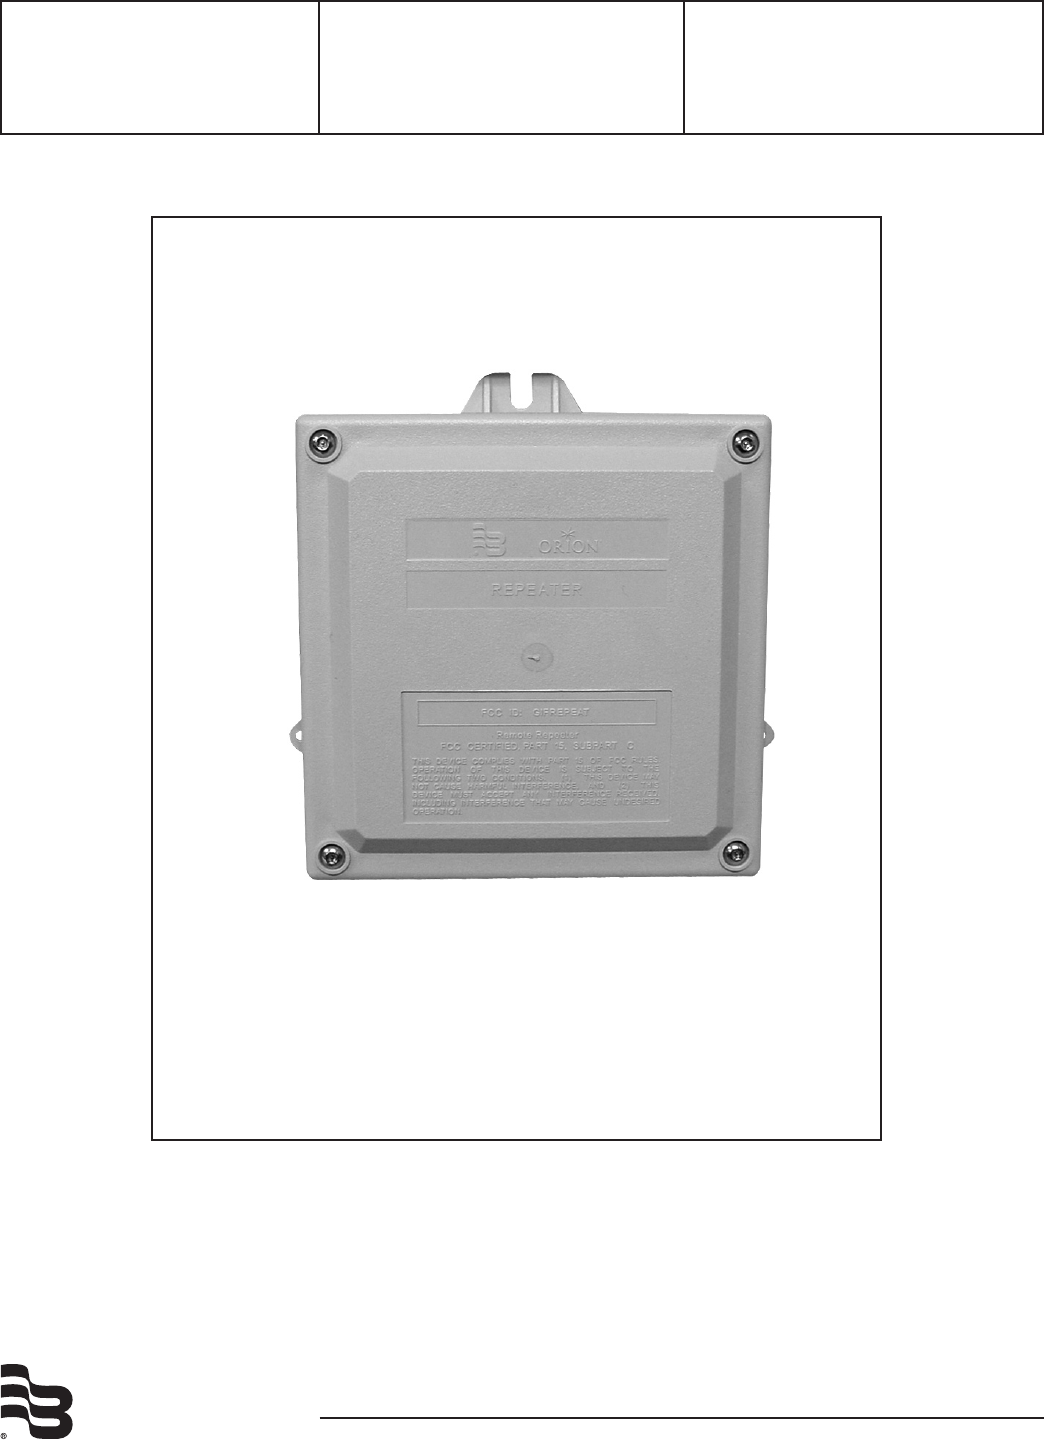
BADGER® ORION® REPEATER
The Badger ORION Repeater is a transmitter/receiver that can be used in
conjunction with any water or gas Badger ORION transmitter to increase the
performance for fixed network applications. Packaged in a remote enclosure,
the Badger ORION Repeater can be located in any indoor or non-submersed
outdoor application and programmed to repeat up to twelve Badger ORION
transmitter signals within receiving range of the Badger ORION Repeater.
Once programmed, the Badger ORION Repeater will cycle through the list of
transmitters in its memory. One transmitter reading is broadcast every four to
five seconds.
The Badger ORION Repeater is constructed of a plastic remote enclosure with a
‘D’ sized lithium battery that provides 15 years of power for each Badger ORION
Repeater. The Badger ORION Repeater is shipped from the factory in an off
mode and is not transmitting.
LOCATING THE UNIT
A Badger ORION Repeater can be programmed with up to eight Badger ORION
water and/or gas transmitter serial numbers. Once programmed, the Repeater
will listen for and repeat the standard consumption messages for those
transmitters, which are located within range of the Repeater.
The ideal Badger ORION Repeater location is somewhere that has a clear “line-
of-sight” to the Badger ORION gas or water transmitter. However, this is rarely
possible. The line-of-sight may be hindered by obstructions such as trees and
vegetation, buildings and other structures, vehicles or uneven terrain.
3
Preliminary
Note that the change of season, increasing vegetation, building construction, and
remolding can all contribute to changing the signal reception over time.
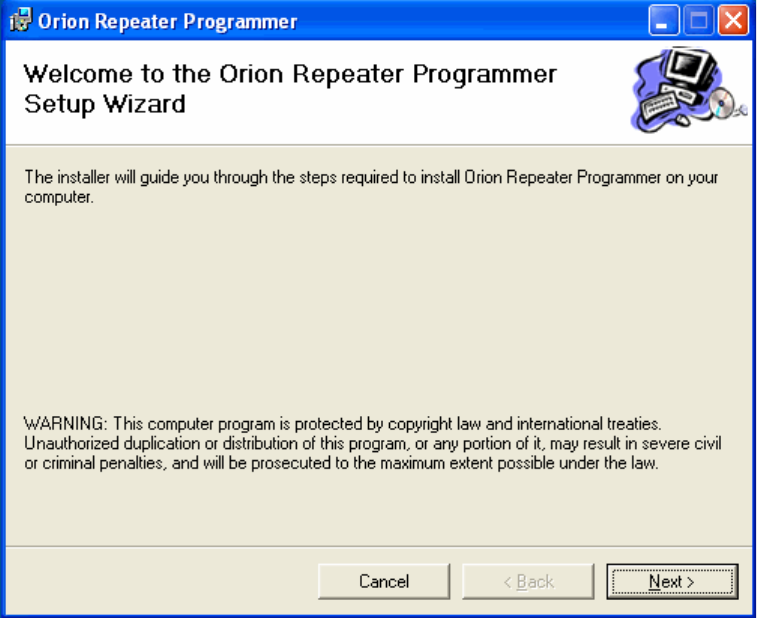
INSTALLING THE SOFTWARE
From your installation CD, double-click on Setup. You’ll see this screen.
Click the Next button and you’ll see this screen.
4
Preliminary
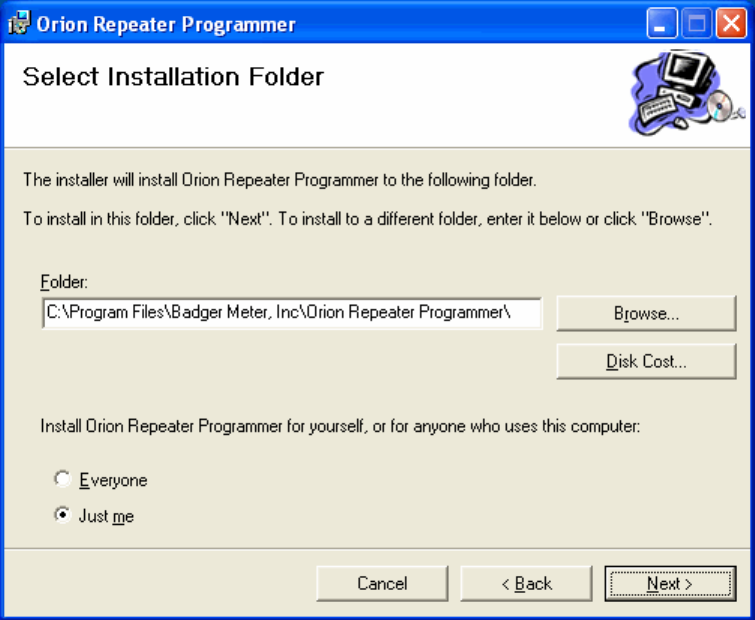
There is no need to change any of the parameters on this screen for most cases. Just click
the Next button to see the next screen.
5
Preliminary
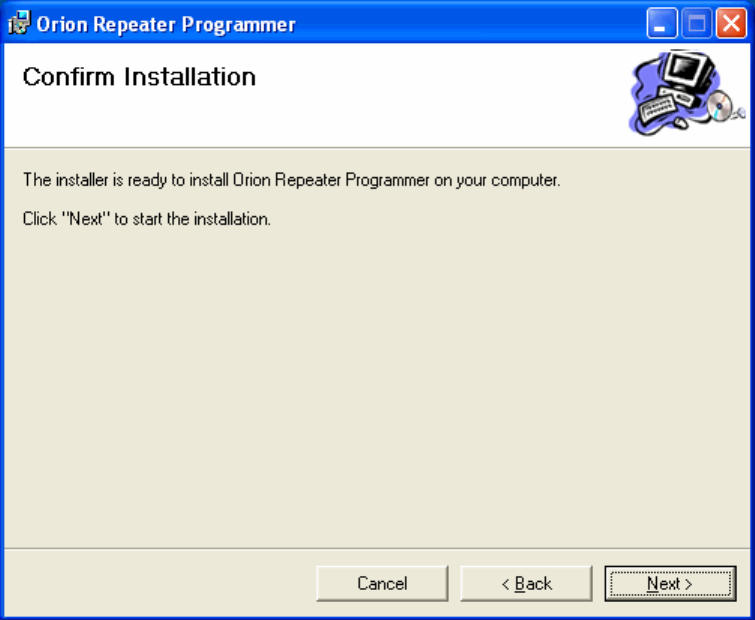
Click the Next button to confirm and begin the installation of the software. When the
installation is complete (it may take 30 seconds to a minute or more depending on your
computer), you’ll see this screen.
6
Preliminary
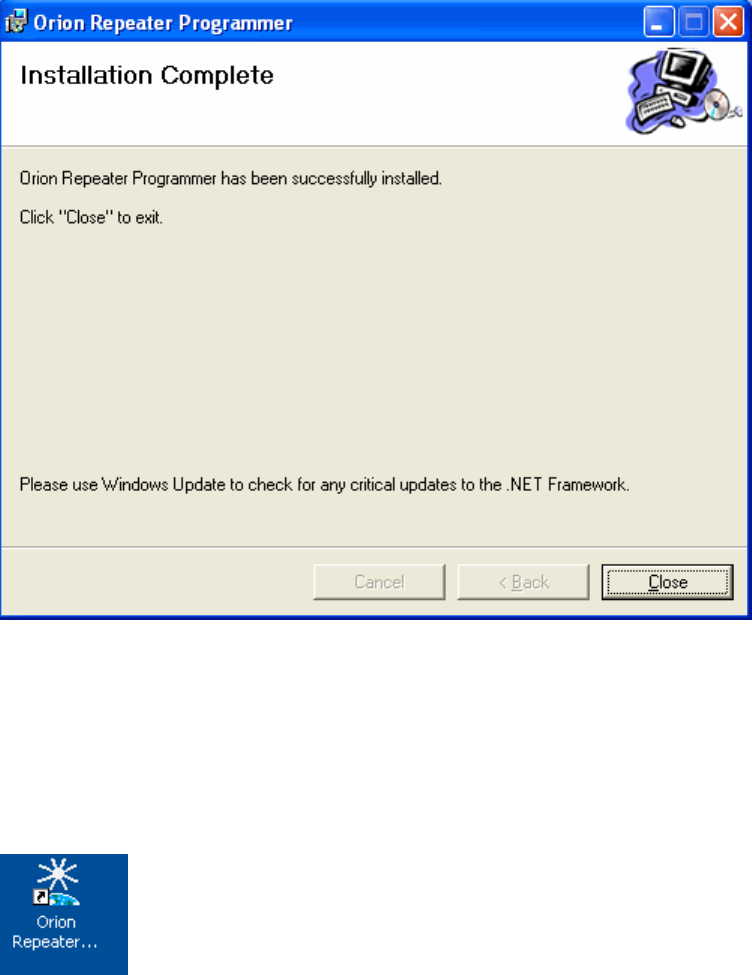
Click the Close button. The installation is complete.
STARTUP
On your Windows desktop, you will see the RP software icon.
Double clicking on the icon will bring up the RP Splash screen, which shows the version
of the software and asks for your initials.
7
Preliminary
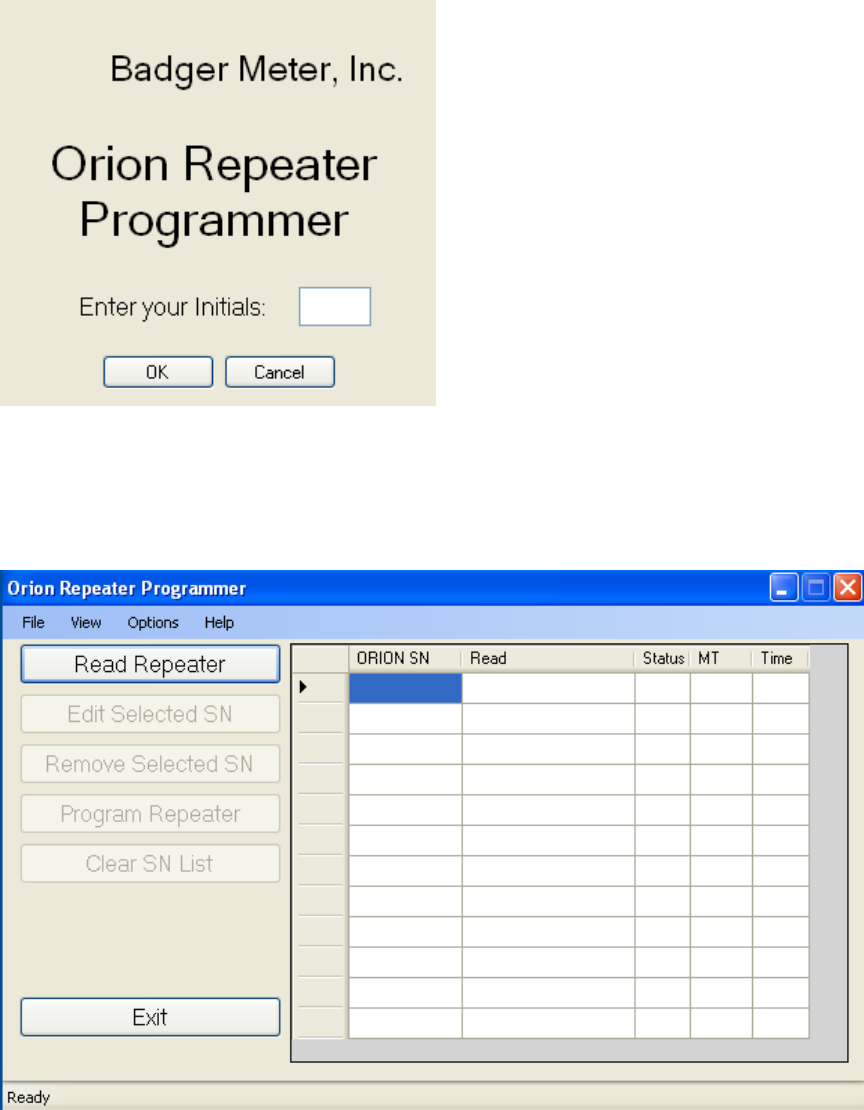
If you wish to use the RP software, enter your initials and click the OK button. If you do
not wish to use the RP software, click the Cancel button.
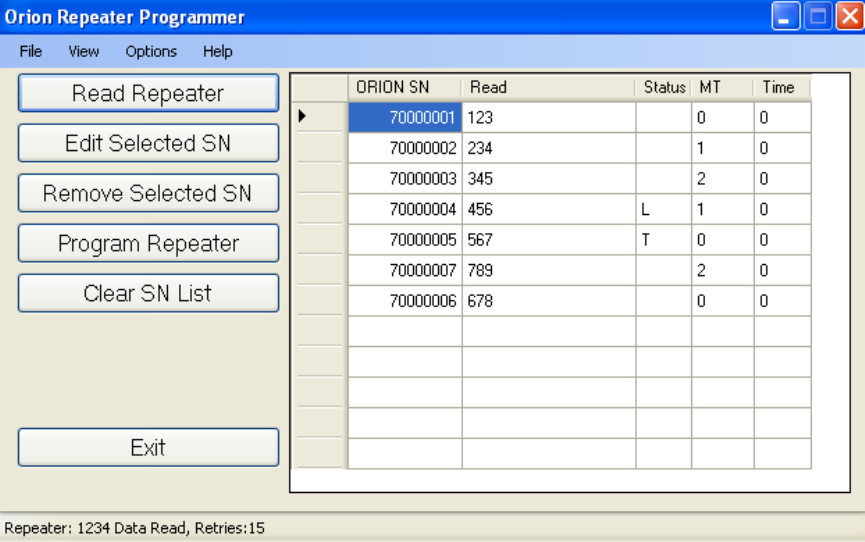
If you click the OK button, you’ll see the main menu of the RP software.
The buttons on the main menu perform these functions.
• Read Repeater – Fetches the list of Badger® ORION® serial numbers currently
stored in the Repeater and displays them on the list. Clicking this button is the
first step in programming or updating the Repeater.
8
Preliminary
• Edit Selected Serial Number – By choosing one serial number in the list and
clicking this button, you can change or correct one of the transmitter serial
numbers in the list.
• Remove Selected Serial Number – By choosing one serial number in the list and
clicking this button, you will remove that serial number from the list.
• Program Repeater – Clicking this button sends the displayed list to the Repeater.
The Repeater will replace its list of transmitter serial numbers with this one.
• Clear SN List – Clicking this button will remove all of the serial numbers from
the list. This function is handy when removing a Repeater from a service
location.
• Listen – Clicking this button will cause the Repeater to forward every Badger®
ORION® transmission it receives to the RP software for 30 seconds. As each
transmission is received from the Repeater, the RP software will display it in a
separate window, allowing you to view all of the transmitters that are within range
of the Repeater. This function is very handy in determining a mounting location
for the Repeater.
• Transmit – Clicking this button will open a window that asks to choose a specific
serial number from the list, as well as a delay time in seconds. Once you choose
that serial number and the delay time, the RP software will direct the Repeater to
continuously send the reading from that transmitter via RF for 30 seconds after
waiting the number of seconds as specified in the delay time. This function is
very handy in determining if the Repeater’s transmissions from the current
location will be received at the target location for reception. The delay time
allows you time to get to the location and set up your receiving device.
• Exit – Clicking this program ends the RP software and exits to Windows.
SETTINGS
Before you click the Read Repeater button, you must insure that the communications
cable from the PC running the RP software is connected to the Repeater. The cable is a
straight-through serial cable with a male DB9 connector on one end and a female DB9
connector on the other end. You can use the same cable that connects the Badger®
ORION® Receiver to the Badger ORION Laptop.
In most cases, the DB9 serial port on the PC is COM1. If you are using a different COM
port, be sure to choose the correct COM port for the Repeater from the list by clicking on
the down arrow button.
To set the individual settings for your PC, go to the drop down menus at the top of the
screen and choose Options / Settings. You’ll see this screen.
9
Preliminary
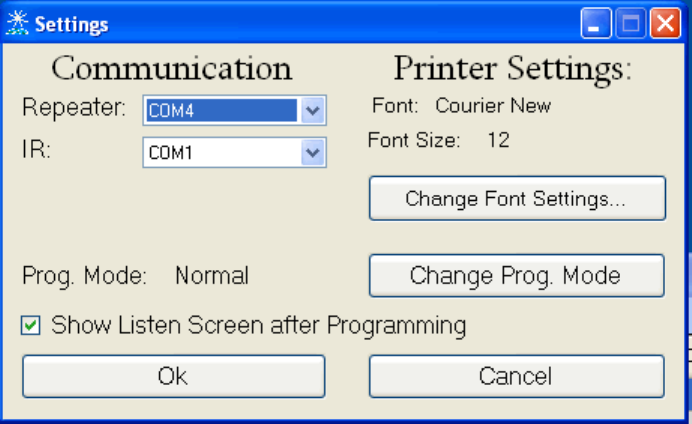
You can choose the ports for both the IR head and the Repeater cable by clicking on the
down arrow and choosing the port. You can also choose the receiving mode for the
Repeater by clicking on the Change Prog. Mode button. Choosing Narrow Band will
focus the Repeater on the Narrow Band Badger® ORION® transmitters. Choosing
Frequency Hopping will focus the Repeater on the newer Orion transmitters using the
Frequency Hopping Spread Spectrum technology, as well as the narrow band
transmitters. Finally, you can choose the Font for the screens. If you wish to keep these
settings, click the OK button. If you wish to discard the changes you made to this screen,
click the CANCEL button.
If you decide to change the font, you’ll see this screen.
10
Preliminary
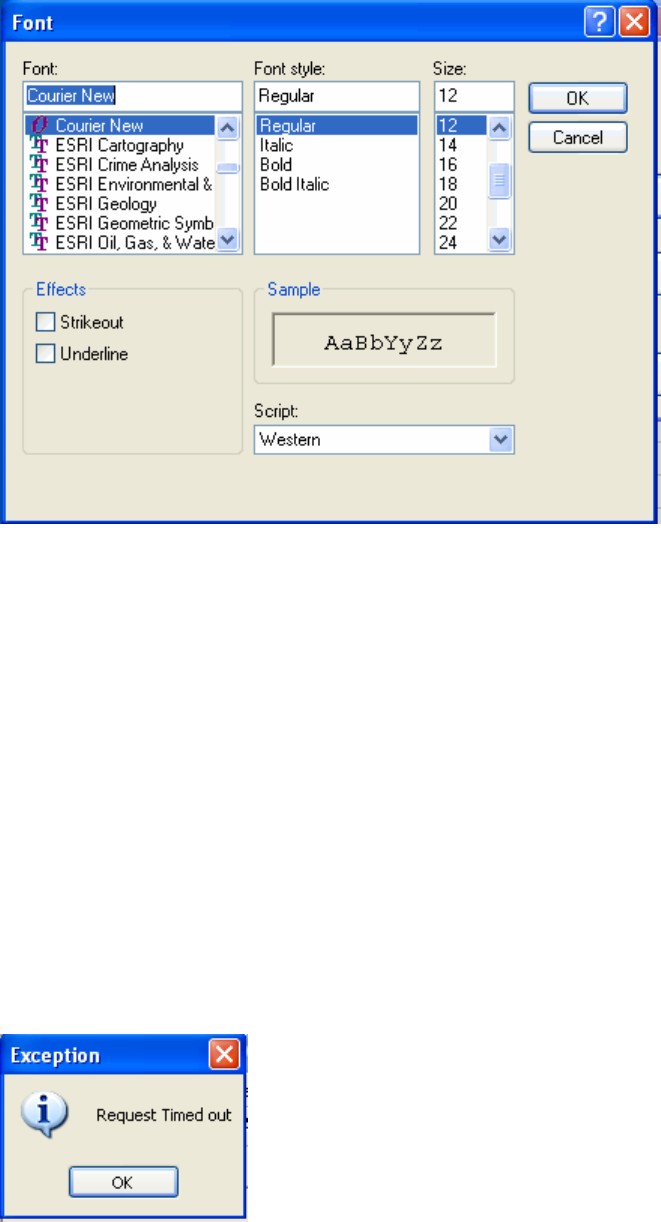
Choose the font, the style, and the size and click OK. If you wish to discard your
changes, click Cancel.
READ REPEATER
The Read Repeater button is the first function you perform when using the RP software.
It initiates communication with the Repeater itself, fetches the list of Badger® ORION®
transmitters in the Repeater memory, and displays them in a list on the right side of the
screen.
Once the COM Port is set and the cable connects the PC to the Repeater, click the Read
Repeater button. The PC will communicate with the Repeater, fetch the list of
transmitters from the Repeater, and display them on the list.
If any communications errors occur, you’ll see a message like this.
11
Preliminary
Check the cable and the COM port setting. Once you’ve made sure that all is correct,
you can click the Read Repeater button again. If the problem persists, please refer to the
last section of this manual: Troubleshooting the Badger® ORION® Repeater.
THE TRANSMITTER INFORMATION ON THE READ
SCREEN
Besides the serial number of the transmitter being repeated, you will also see this
information.
• Transmitter serial number being repeated
• The last reading received from the transmitter
• The status received from the transmitter (L denotes a Leak Status, T denotes a
Tamper status, blank denotes a normal status)
• The MT (Meter Type) received from the transmitter:
o 0 – denotes a water meter using an RTR®
o 1 – denotes a water meter using an ADE®
o 2 – denotes a gas meter
o 3, 4 – unused
o 5 – denotes a water meter where the source of the message is a Repeater
o 6 – denotes a gas meter where the source of the message is a Repeater
o 7 – denotes a Water Meter Monitor programming tool
• The number of times the Repeater missed a meter reading from this transmitter
(note that the Repeater listens for transmissions once per hour).
12
Preliminary

ADDING A SERIAL NUMBER TO THE LIST
To add a serial number to the Repeater, connect the PC to the Repeater and click on the
Read Repeater button. When the list of serial numbers from the Repeater is displayed,
click on an open spot on the list and click on the Edit Selected SN button. You’ll see this
screen.
If you wish, you can enter the serial number of the transmitter by typing it in on the
computer’s keyboard. Also, if you click on the Keypad button, a numeric keypad will be
displayed that you can use to enter the serial number. Finally, if you wish to read the
serial number from the transmitter via the IR head, connect the head to the computer and
click on the IR button.
Once the serial number is entered, click the OK button. The screen will show the main
menu with the serial number added to the list. The rest of the data for the transmitter will
be blank.
13
Preliminary
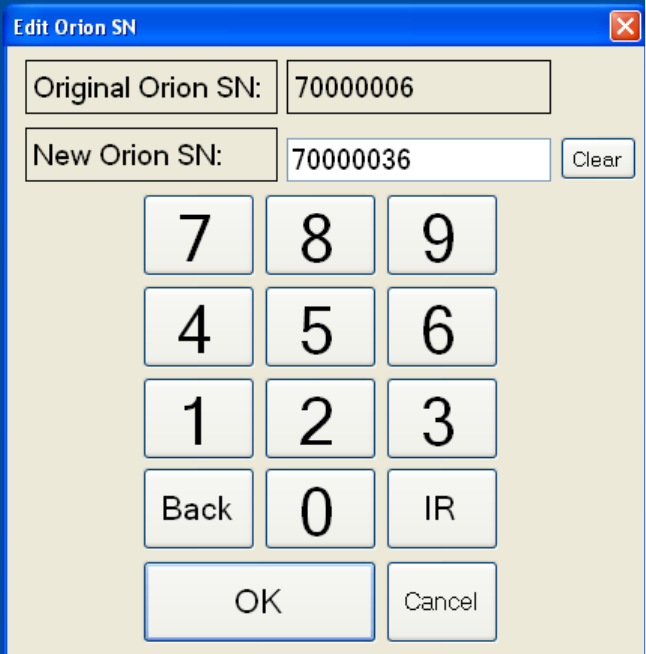
CHANGING A SERIAL NUMBER ON THE LIST
To change one of the serial numbers on the list, click on the serial number and then click
the Edit Selected SN Button. You’ll see this screen.
You can change the serial number by using the keyboard, the on-screen keypad, or by
reading the serial number using the IR head. Once the serial number is corrected, click
on the OK button. The screen will show the main menu with the corrected serial number.
REMOVING A SERIAL NUMBER FROM THE LIST
To remove one of the serial numbers on the list, click on the serial number and then click
the Remove Selected SN Button. The screen will show the main menu with the serial
number removed from the list. If there were other serial numbers below it, they will be
moved up the list so that there are no open slots in the list.
14
Preliminary
CLEARING ALL THE SERIAL NUMBERS FROM
THE LIST
If you wish to clear all serial numbers from the list, click on the Clear SN List button.
The screen will show the main menu with no serial numbers on the list.
UPDATING THE REPEATER WITH THE
DISPLAYED LIST
Once the list is updated to show the serial numbers you want the Repeater to repeat,
connect the communications cable to the Repeater and PC and click on the Program
Repeater button. The RP Software will send the displayed list to the Repeater.
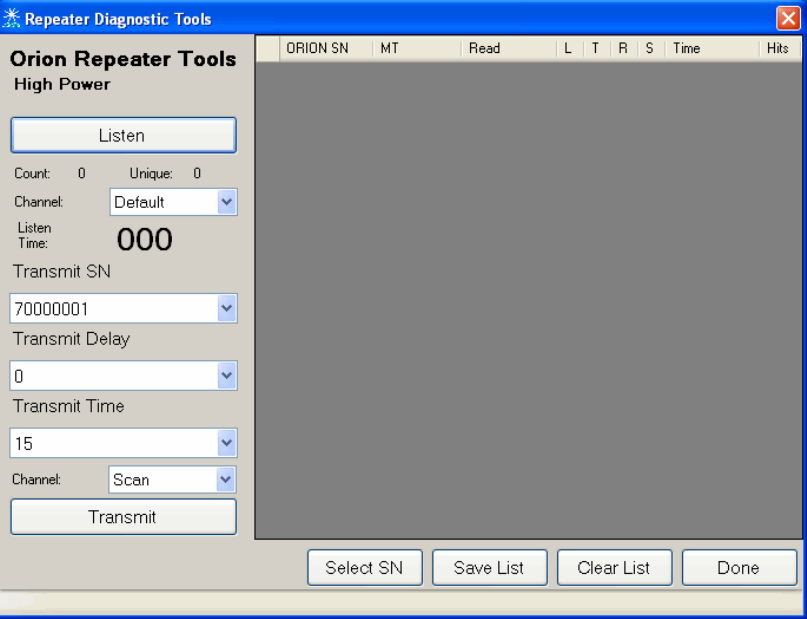
USING THE REPEATER TO LISTEN TO ALL
TRANSMITTERS IN RANGE
If you wish to see a list of the transmitters that the Repeater is receiving, connect the
Repeater to the PC via the cable and click on the Listen button. You’ll see this screen.
15
Preliminary
When you click on the Listen button, every time the Repeater receives a Badger®
ORION® transmission it will forward the reading, and the RP Software will display it on
the list. The most recent transmission will be shown at the top of the list. This will
continue for 30 seconds.
This function is helpful in determining a good place to mount the Repeater. If you are
interested in verifying that the Repeater can hear the selected transmitters, place the
Repeater in the location and perform the Listen function. If those transmitters are all
shown on the list, you can then mount the Repeater permanently in the selected location.
CHECKING THE RECEPTION AT THE
DESTINATION POINT
In choosing a location for the Repeater, you must also verify that the Repeater’s signal
reaches the area where you intend to receive the meter readings. To test this, the
Repeater has a Constant Transmit function. When activated, the Repeater will, after a
specified wait time, transmit the meter reading for one transmitter over and over again for
30 seconds.
First, choose the transmitter serial number you would like to be repeated by clicking on
the down arrow of the Transmitter SN field and choosing the number. Next choose the
amount of time for the Repeater to wait before transmitting by clicking the down arrow
of the Transmit Delay field and choosing the time in seconds. Then choose the amount
of Transmit Time you’d like in the same manner. When you are ready to perform the
Constant Transmit function, click on the Transmit button.
The Repeater will begin counting down the number of seconds as chosen in the Transmit
Delay field. Once the countdown is completed, the Repeater will transmit the meter
reading for the chosen serial number over and over again for the amount of time chosen
by the Transmit Time field. This allows you verify that the repeated signal is reaching
the area you’d like.
PROGRAMMING THE BADGER® ORION®
REPEATER
A Badger ORION Repeater must be programmed in the field in order to activate the
device. Once the Badger ORION transmitter is installed, a Badger ORION Repeater can
be installed within range of the transmitter to increase the performance.
Badger ORION Repeaters can be easily programmed in the field using either the Badger
ORION Mobile Reading Laptop or Badger® handheld data collector.
16
Preliminary
TROUBLESHOOTING THE BADGER® ORION®
REPEATER
During the normal course of operations, the Repeater Programmer Software may run into
problems. While errors do not occur normally, errors can happen in any software
product. This section gives you guidelines on how to respond to the times when the RP
Software reports a problem.
Using Technical Support
For Badger Meter Technical Support, call 1-800-456-5023. When you call the 800
technical support number, a Support Specialist will answer. Explain the situation that has
occurred, the state that the RP Software in, and go over the steps you performed just
before the error occurred. If possible, give this information to the Support Specialist:
• The screen that was active when the error occurred
• The steps being performed on the screen
• Any entries that were made to the screen
• The message in the error window, including any error code and explanation
that is shown
• The current state of the RP Software
Your Support Specialist may ask you to fax notes or other information to Badger Meter
to assist in the investigation.
What To Report To Technical Support
It is important that you report all occurrences of error windows to the Technical Support
Hotline. It allows Badger Meter to improve its products and improve your system at the
same time. In some cases, the error may have already been solved, and the Support
Specialist can send you a software upgrade to correct the problem. In other cases, the
Support Specialist can direct you to perform a function in a certain way so that the error
does not occur.
In some cases, the Support Specialist will direct you to perform some steps if the problem
happens again. This is very valuable information that will speed the investigation of the
problem. If the problem does happen again, please follow those steps and call the
Hotline. The Support Specialist will gather the information for that particular problem,
and direct you if further action is needed.
17
Preliminary
18
Faxing the Technical Support Group
The Badger Meter Technical Support Group can also be reached by fax at 1-888-371-
5982. This may be a convenient way to follow up with your support specialist on
particular steps. The number is available 24 hours per day, 7 days per week.
E-Mailing the Technical Support Group
The Badger Meter Technical Support Group is also available via electronic mail through
the Internet. To send questions or comments to the Technical Support group, address
your e-mail to TechSupport@BadgerMeter.com. The Technical Support Group can
respond to your comments or questions via phone, fax, or e-mail. Just let us know in
your message the type of response you would prefer.
Preliminary

Due to continuous research, product improvements and enhancements, Badger
Meter reserves the right to change product or system specifications without notice,
except to the extent an outstanding contractual obligation exists.
Copyright © Badger Meter, Inc. 2007. All rights reserved.
Please see our website at
www.badgermeter.com
for specific contacts. BadgerMeter,Inc.
P.O. Box 245036, Milwaukee, WI 53224-9536
(800) 876-3837 / Fax: (888) 371-5982
www.badgermeter.com
ORION® , RTR®, ADE®, and Badger® are registered trademarks of Badger Meter, Inc.
Radix® is a registered trademark of Radix International Corporation, USA.
Preliminary