Badger Meter RFEPM RF Electronic Preset Meter User Manual Exhibit D Users Manual per 2 1033 b3
Badger Meter Inc RF Electronic Preset Meter Exhibit D Users Manual per 2 1033 b3
Exhibit D Users Manual per 2 1033 b3
Instruction
Manual
BadgerMeter,Inc.
®
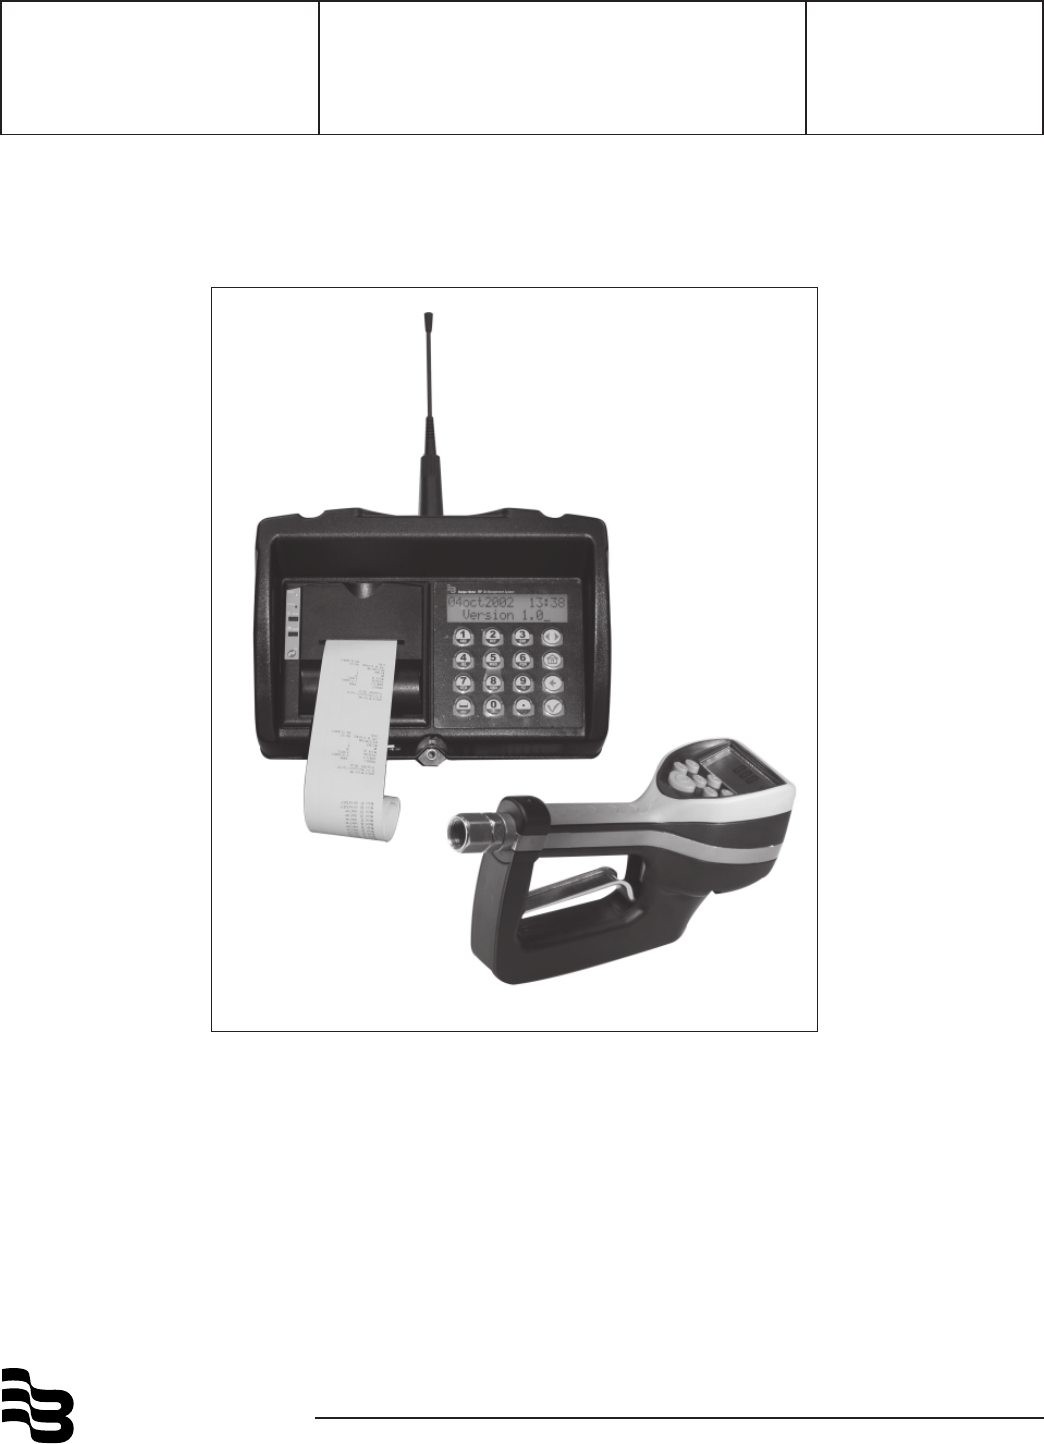
Model RF-OMS Radio Frequency Oil
Management System
IOM-087-01
11-02
Page 1 of 37
RF Oil Management System
INSTRUCTION MANUAL
November 2002
Version 1.0
Page 2 of 37
1. General Description
1.1 Technical Data
CPU: Texas Instrument, MSP430, 8-bit, Serial
Flash, 48k bytes of In-system
Programmable Flash
Programming: With Adapter
Interfaces: 1 x serial, printer
9600/n/8, code line LF/CF
RF Communications: 2-way 902-928MHz Frequency Hopping
Spread Spectrum Per FCC Part 15.247
Part 15.109
Operating Temperature: -10°C to +60°C
NOTE: ANY CHANGES MADE BY THE USER NOT APPROVED BY
BADGER METER MAY VOID THE USER’S AUTHORITY
UNDER FCC REGULATIONS TO OPERATE THE EQUIPMENT.
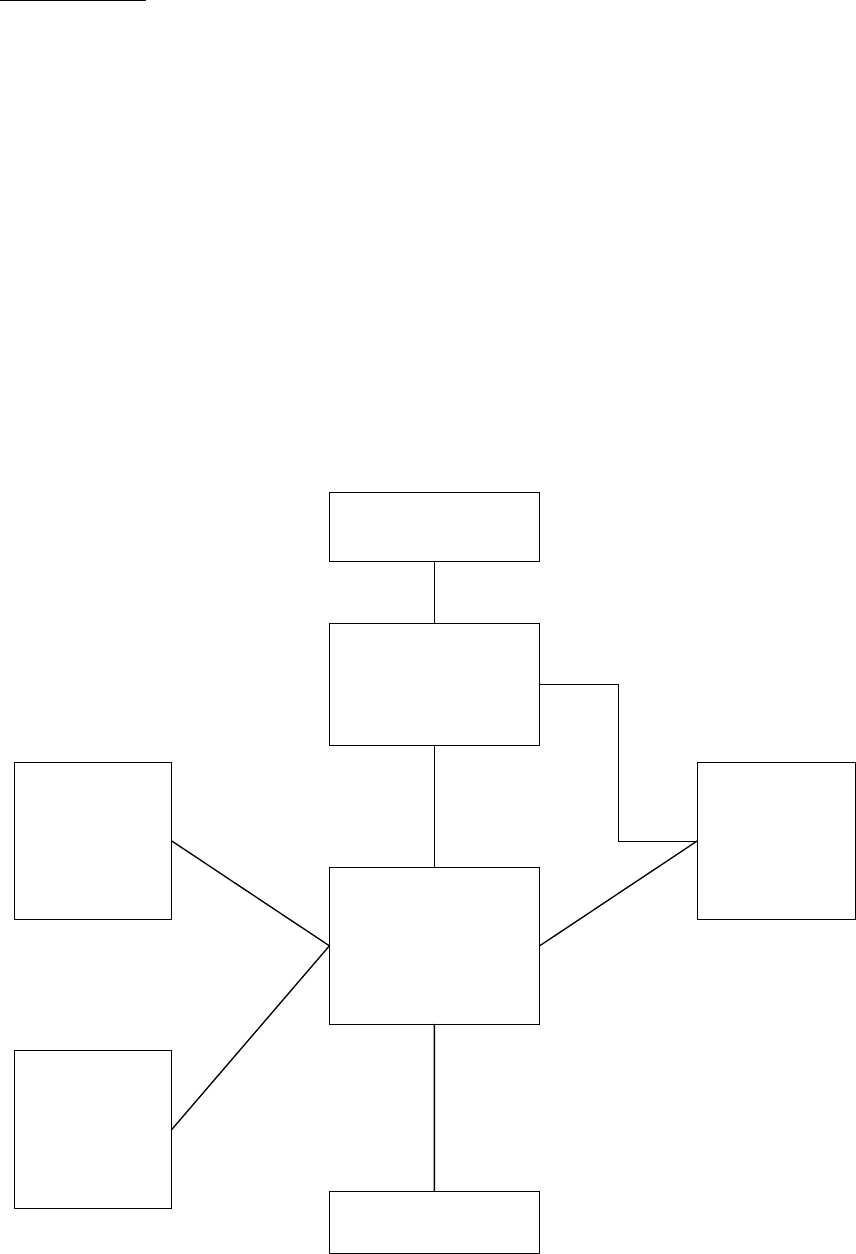
POWER BOARD
MOTHER BOARD
LCD
DISPLAY
KEYBOARD
Transformer
FT190
PRINTER
RF MODULE
Page 3 of 37
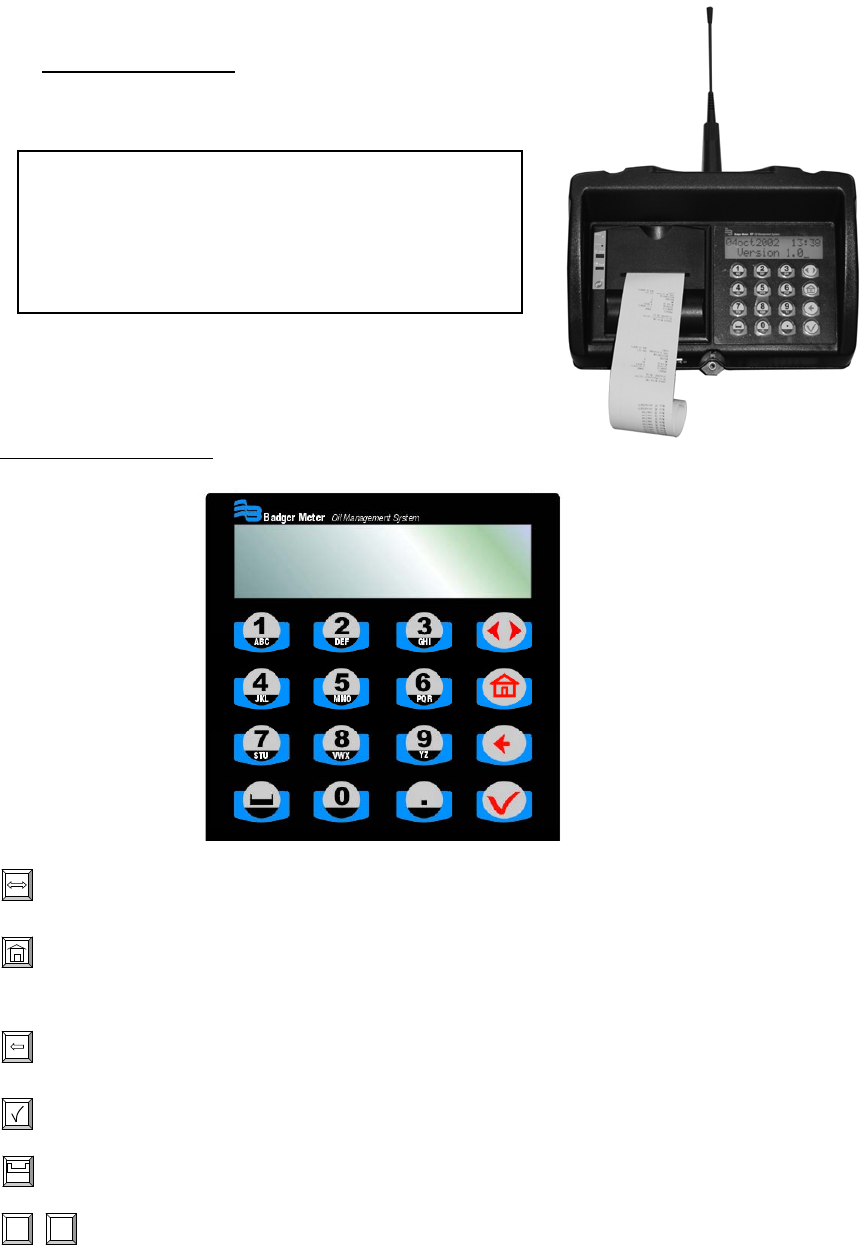
1.2 Keypad Description
Keyboard Description
FCC ID: GIF-RFKEYPAD
FCC CERTIFIED, PART 15, SUBPART C
This device complies with Part 15 of the FCC Rules. Operation is
subject to the following two conditions: (1) this device may not
cause harmful interference, and (2) this device must accept any
interference received, including interference that may cause
undesired o
p
eration.
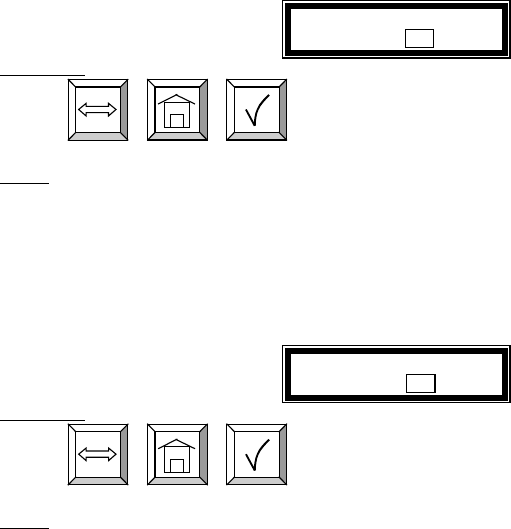
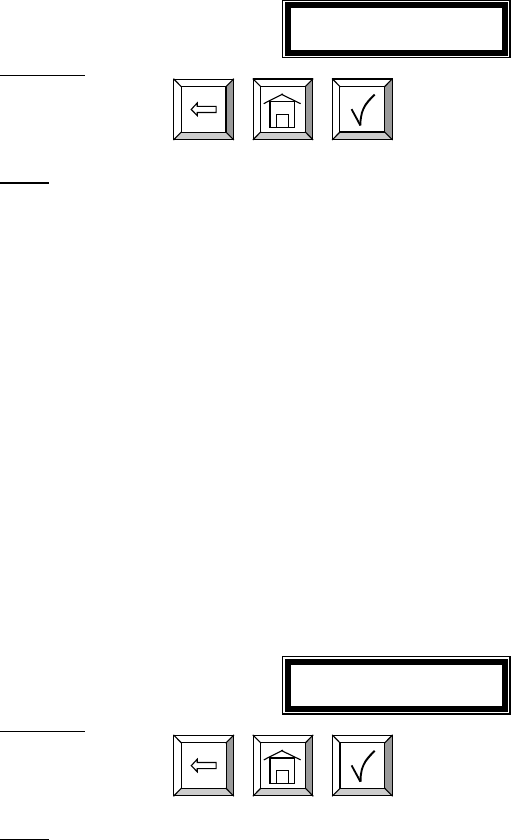
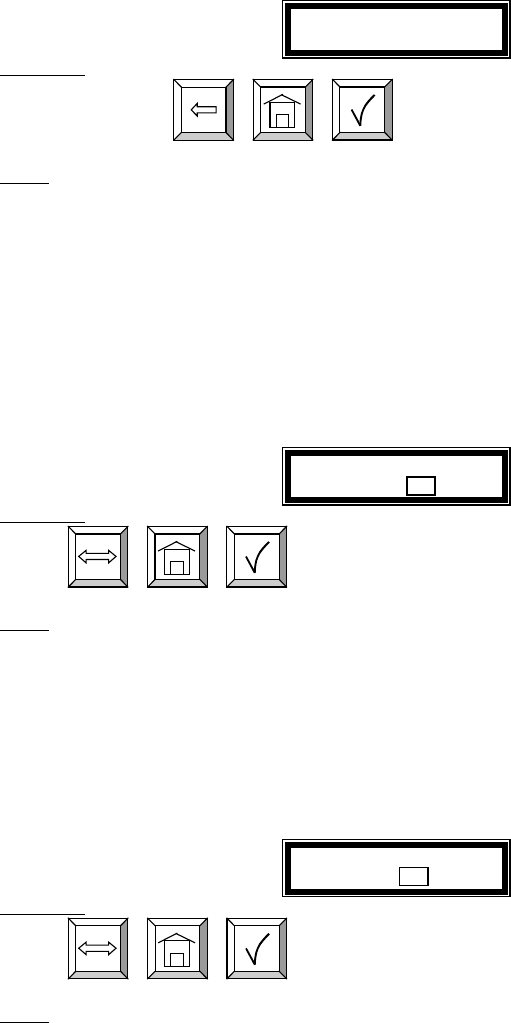
Scroll Key: Used to select option on display
Home Key: Pressing this key will return display to the PIN Number
and Time/Date screens
Backspace Key: Used to backspace when entering data
Enter Key: Used to enter data and move to next screens
Space Key: Used to enter a space character when entering data
1
ABC
-
9
YZ
Alphanumeric Keys: Used to enter data on display. Hold down key
until the desired character is on display. Then release the key.
Page 4 of 37
Programming and Use
2.1 Default Screens:
• The Personal Identification Number (PIN) number is 4 numeric digits
• 1 supervisor account
• Maximum 50 operators account
• The supervisor account has access to the management process
(initialization, configuration, communication and report)
• The operator account only has access to the dispense order process
17mar2002 22:32
Version 1.0
There is no active key: Active keys are the keys that will produce a result for a
given screen.
This screen is displayed for user information
It is displayed during 1 seconds every 5 seconds. The 4 other seconds are
reserved Enter Pin No. Screen.
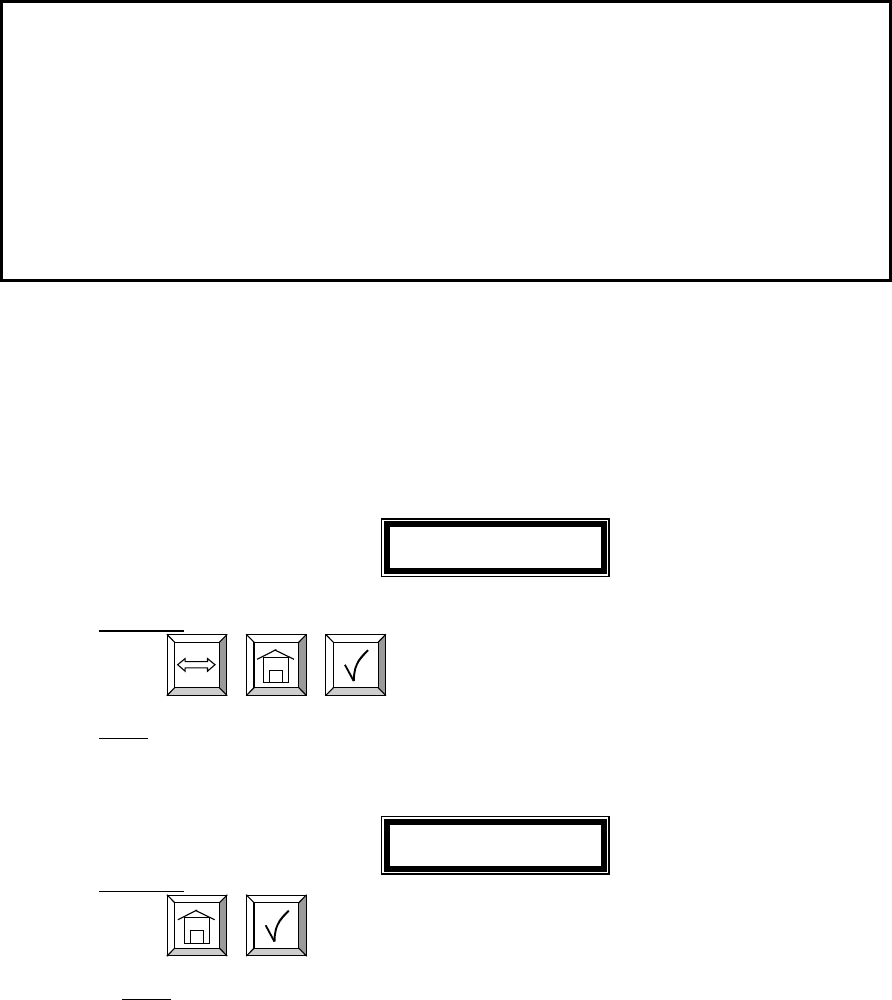
Enter Pin No.
****
Active keys:
Numeric keys,
,
2.2 Supervisor
Enter Supervisor PIN Number
4 Numeric digits: default is 0000 at initial power-up
Page 5 of 37
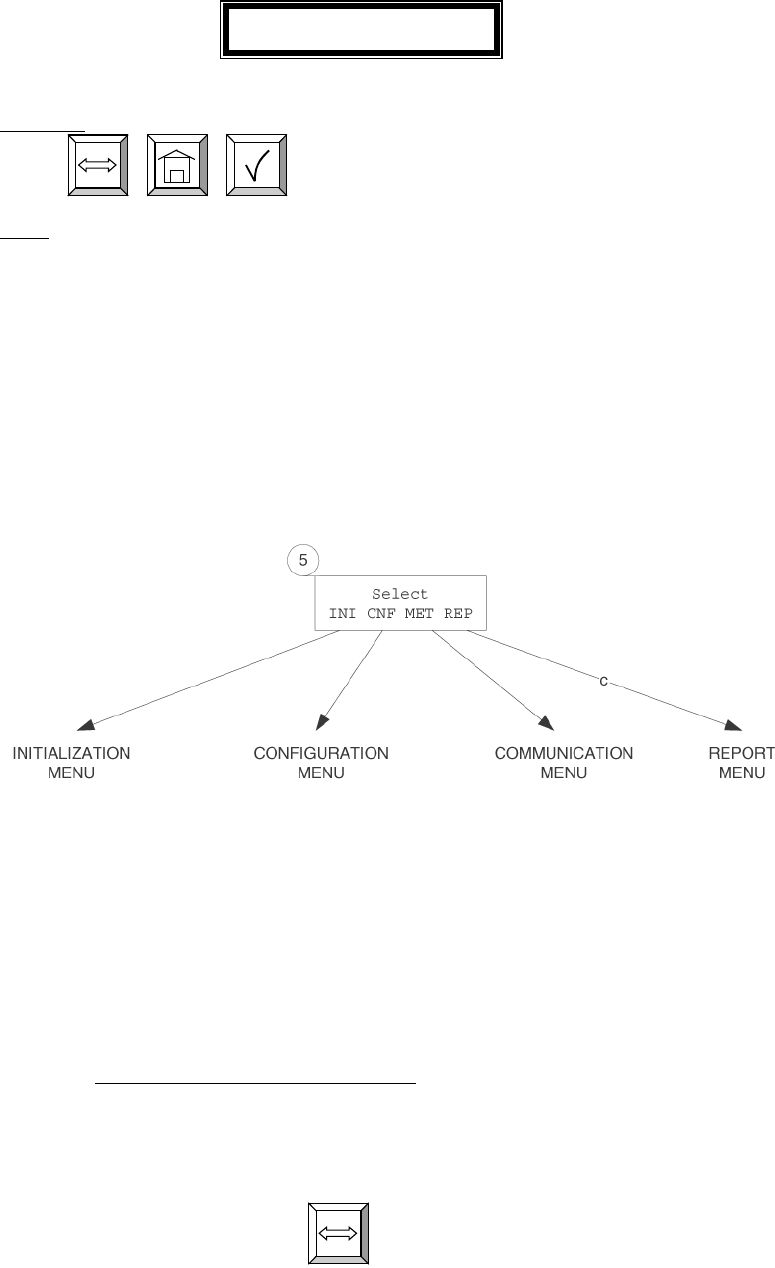
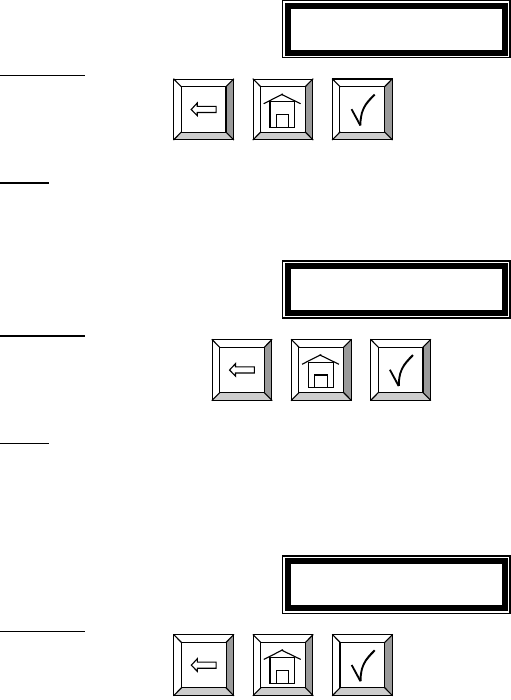
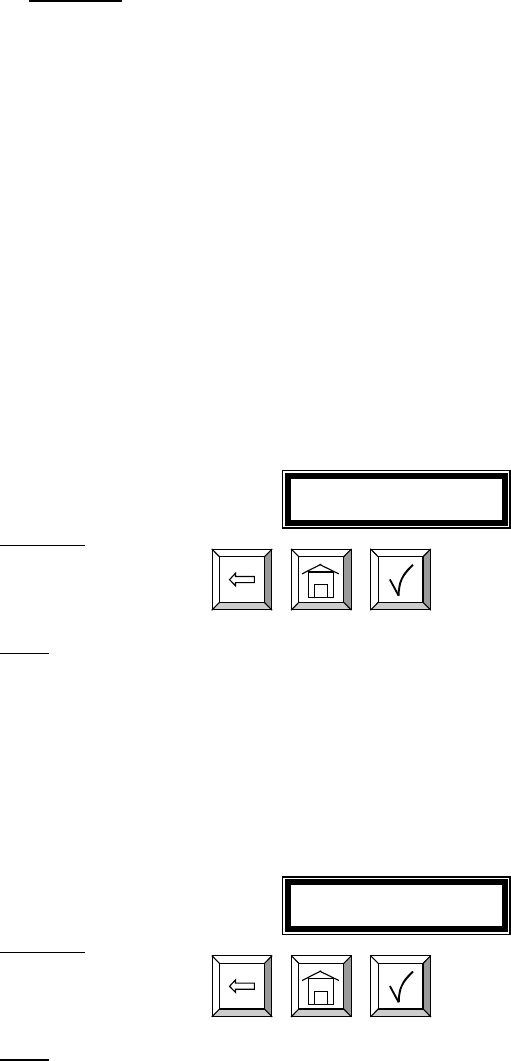
Management Menu: The management menu displays after entering the
supervisor PIN Number
Select
INI CNF MET REP
Active keys:
,
,
Action:
• Choose which option you need
Screens in INI are accessed only when the Dispense Order list is empty. If the
supervisor wants to change one of these parameters whereas the list is not
empty, a screen message will be displayed. The supervisor must clear all
transaction records through the CNF menu prior to entering the INI
(initialization) menu.
For screens with multiple choices, the selection is in inverse video. (i.e. The
selection is green on black.)
The scroll key is used to select an answer (Example Yes – No). The selection
is in inverse video, it is validated with the ENTER key.
To go to the desired menu, move the scroll key to your choice and press the
ENTER key
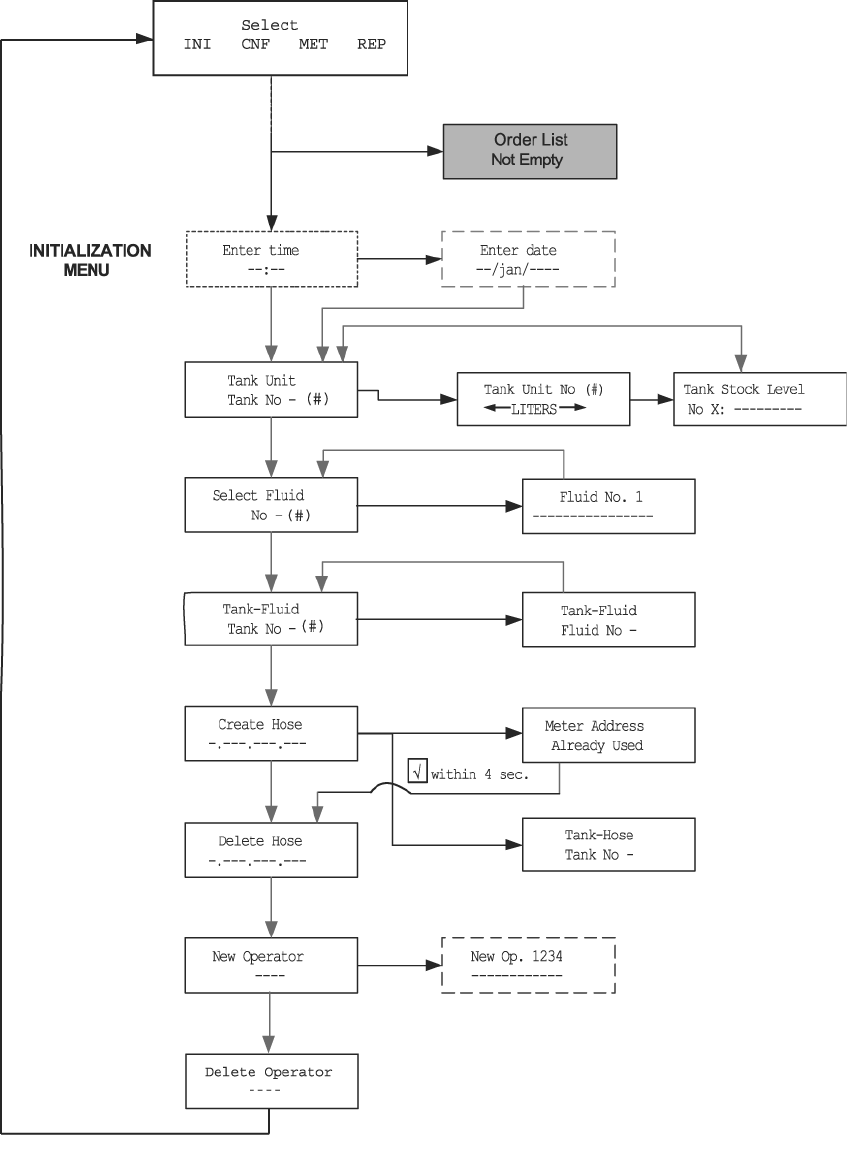
2.2.1 Initialization Menu Screens (INI)
• System date and time are initially blank
• System time is in military standard
• System date is in format DD/MMM/YYYY (in English)
• To change month
Page 6 of 37
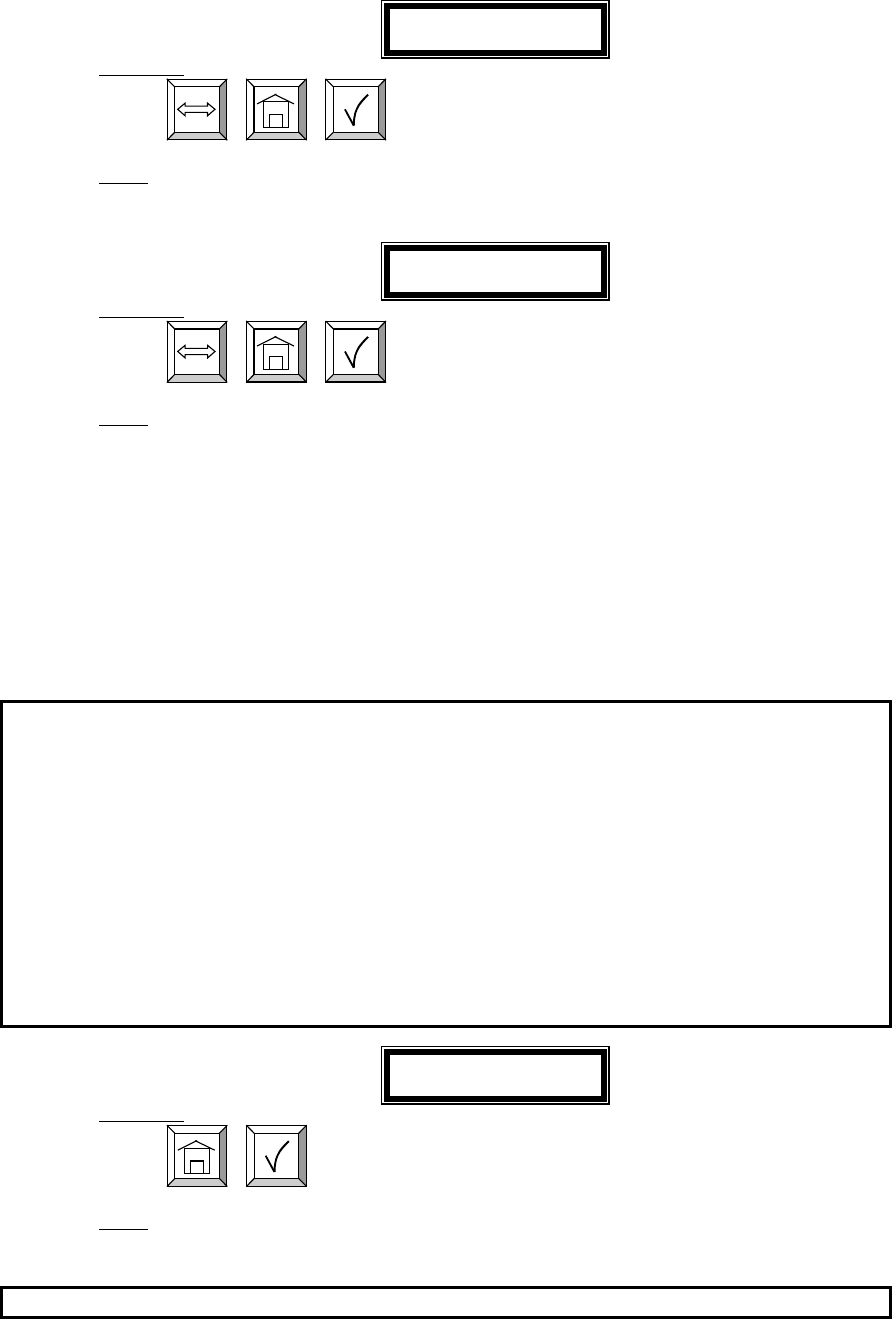
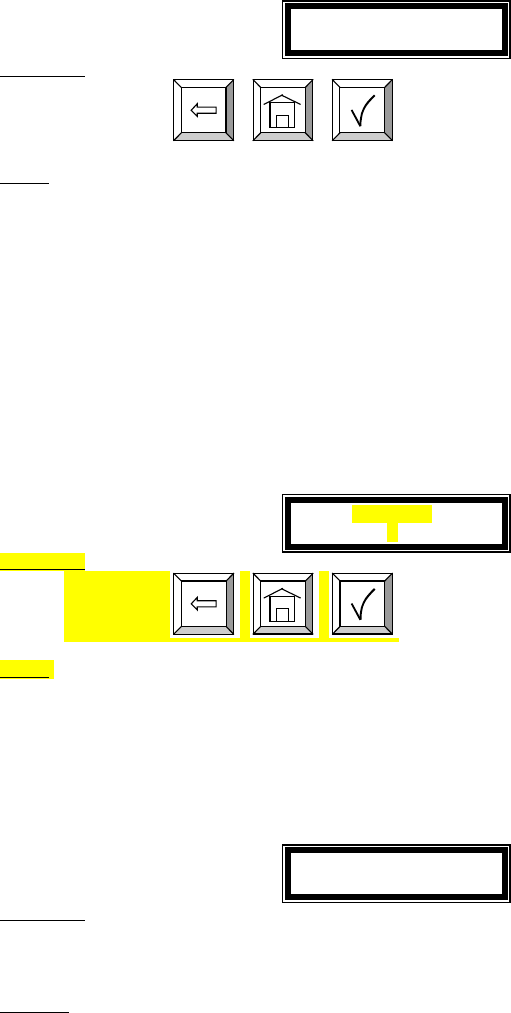
Enter Time:
Enter Time
--:--
Active keys:
Numeric keys,
,
,
Action:
• Enter key with no entry Æ Jumps to TANK UNIT screen
• If the time/date are already entered into the system, press enter with no date to move to the
next screens.
Enter time by using the numeric keys to set a 24-hour military time of day.
Press
when finished to move to the next initialization screen.
• Enter Date:
Enter Date
--/jan/----
Active keys:
Numeric keys,
,
,
,
Action: Date is changed and tank unit screen is displayed.
Alphanumeric keys are validated only for some of the display menus. In
these menus to enter a letter just hold the related key and the letters scroll.
Then release the key when the letter you want is displayed.
Enter date by first entering the two digit day of the month. The cursor will
automatically jump to the month. Use
to select month, then enter
a four-digit year.
After date is set, press
to move to the next initialization screen.
Page 7 of 37
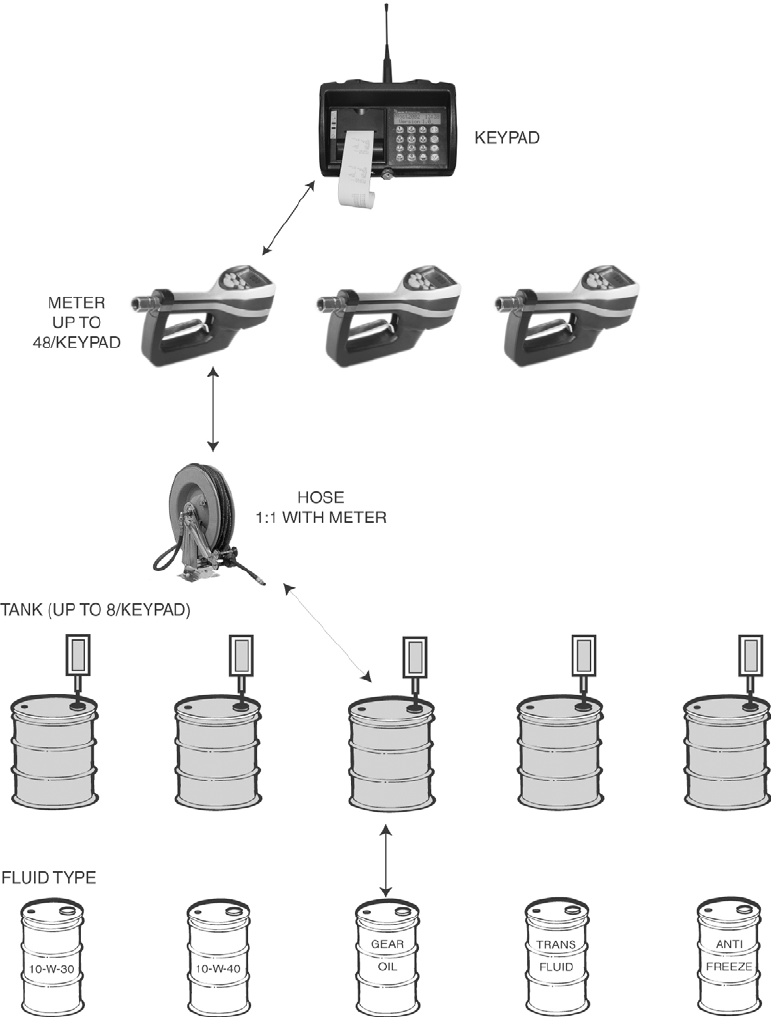
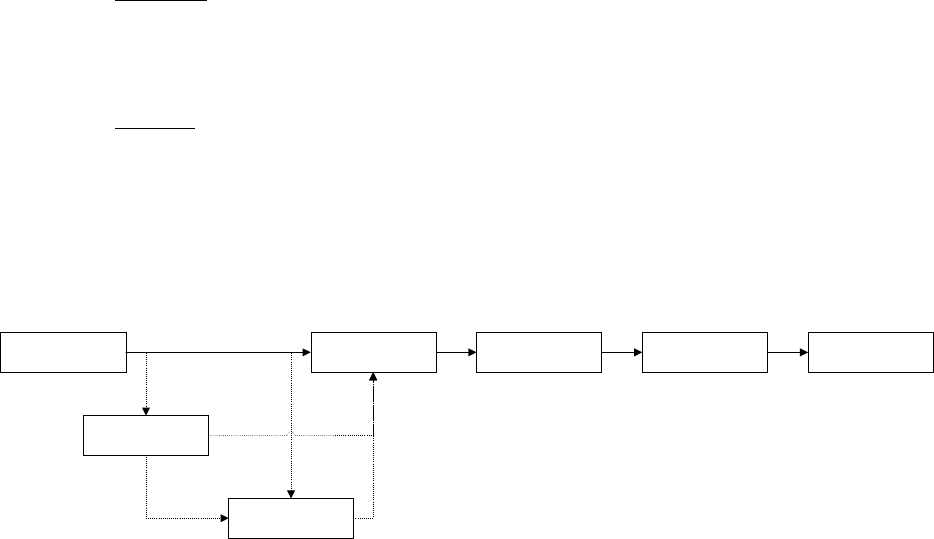
PICTORAL DIAGRAM OF RF – OMS LOGICAL SET-UP
Steps:
1. Identify and Name Fluid Types
2. Identify and Name Fluid Tanks
3. Associate Fluid Type to Tank Number
4. Identify and Name Hose Reel
5. Identify and Name Meter
6. Associate Tank to Hose
7. Associate Meter to Keypad
(NOTE: Hose and Meter are synonymous.)
Page 8 of 37
Tank Initialization:
The tank screens are used to set up the tanks in the system. Each tank is
assigned a number and a starting quantity level in the desired unit of
measure. The following is the process for installing a tank:
• Maximum 8 Tanks
• The tank id ranges from 1 to 8
• By default, the unit type is liters
• Unit type can be quarts, liters, pints or gallons
• The tank quantity setting is updated after each dispense from the
associated tank.
• The quantity setting is Format 5.3 digits (99999.999)
• The tank quantity will be printed out to the nearest whole number
after each dispense on the ticket.
• The Supervisor may update the quantity setting at any time by
entering these screens to change levels
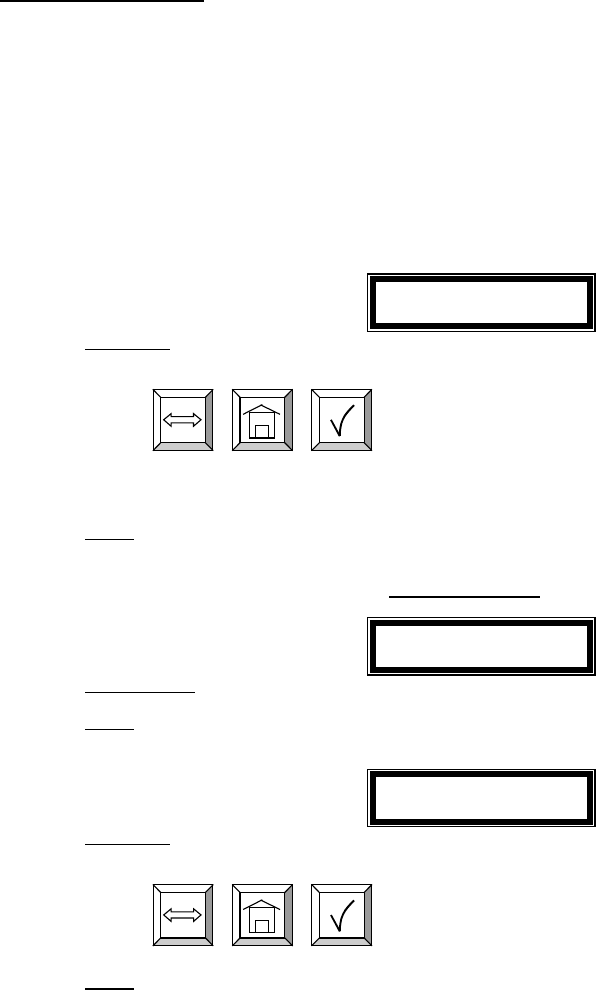
Tank Unit
Tank No -
Active keys:
Numeric keys,
,
,
Action:
• Enter key with no entry jumps to Fluids Screens
Enter a numeric value from 1 to 8 and press
Tank Unit
LITERS
Active keys:
Numeric keys,
,
,
,
Use
to select between LITERS, QUARTS, PINTS, GALLONS
and REMOVE.
Press
to move to the next screen.
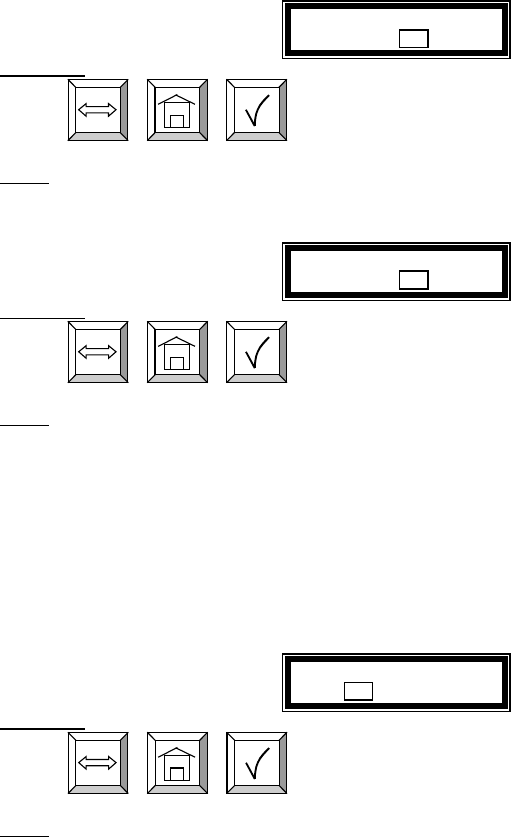
Tank Stock Level
No X: ---------
Page 9 of 37
Active keys
Numeric keys,
,
,
Use the numeric keys to enter a stock level from 00000.000 to 99999.999.
Press
to move to next screen.
Fluid Initialization:
This screen is used to set initial stock level or when ever supplier delivers
AFP. The fluid screens allow the supervisor to set the fluid names used in
the system. The parameters are:
• Maximum 8 Fluid types
• The fluid type id ranges from 1 to 8
• The fluid type name is a 16 alphanumeric string
• Initially, the fluid type name is blank
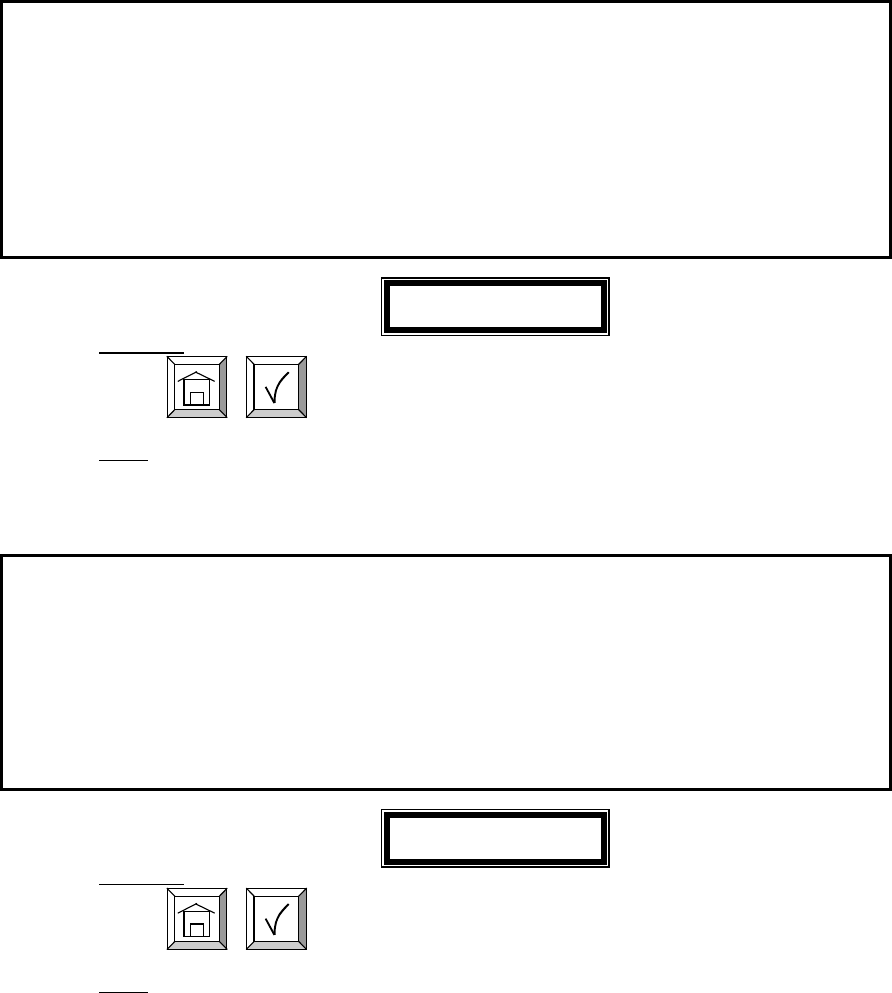
Select Fluid
No -
Active keys:
Numeric keys,
,
,
Action:
• Enter key with no entry Æ moves to Tank/Fluid relationship screen
Fluid No. 1
----------------
Active keys:
Alphanumeric keys,
,
,
Page 10 of 37
Tank-Fluid Relationship Screens:
The relationship between tank id and fluid type id will be 1:1 (one tank
assigned to one fluid type id). For example, the supervisor may associate
tank #1 with fluid #1 or tank #1 with fluid #2. Each tank must be
associated with one and only one fluid type.
Tank-Fluid
Tank No -
Active keys:
Numeric keys,
,
,
Action:
• Enter key with no entry Æ moves to Create Hose screens
Tank-Fluid
Fluid No -
Active keys:
Numeric keys,
,
,
The user must enter a valid number for a fluid in the system. Pressing
enter after a valid fluid number will bring the Tank-Fluid Tank No screen.
Page 11 of 37
Creating and Deleting RF Meters: (Meter and Hose are synonymous)
This set of screens allows the Supervisor to create or delete RF Meters
from the system.
• The RF Meter number can be found on the RF Meter under the
battery pack
• The RF Meter address format is 10 decimal digits (-.---.---.---)
• The RF Meters can be created and deleted
• Maximum 48 RF Meters
• A given keypad can exchange data only with RF Meters whose
address is in this list.
• All RF Meters addresses and ids are unique
• The relationship between tank and RF Meter will be 1:n (one tank
assigned to n RF Meters). Since there will be a relationship
between tank and fluid type, the RF Meter will be assigned to one
fluid type.
• Initially the RF Meter address list is empty
Create Hose
-.---.---.---
Active keys:
Numeric keys,
,
,
Action:
• After validate RF Meter address is entered the tank-hose screen is displayed
• Enter key with no entry Æ moves to Delete Hose screen
• If RF Meter address already used Hose Address Already Used Screen is displayed
Hose Address
Already Used
Active keys:
There is no active key.
This screen is displayed if another RF Meter already uses the last three number of the RF Meter.
If this screen displays check RF Meters in system to make some duplicate RF Meters do not exist, then
check to see if this RF Meter has already been created in the system.
It is displayed for 3 seconds and it comes back to create hose screen.
No Action
The relationship between tank and RF Meter will be 1:n (one tank
assigned to n meters). Since there will be a relationship between tank and
fluid type, the RF Meter will be assigned to one fluid type. Assign the RF
Meter to the tank in which it is connected.
Tank-Hose
Tank No -
Page 12 of 37
Active keys:
Numeric keys,
,
,
Action: Create hose screen is displayed
The supervisor has the option to delete a hose/RF Meter through
this screen. This is necessary when there is a change to the
system; whereby, a RF Meter needs replacement for any reason.
The supervisor should delete from the keypad the removed RF
Meter prior to creating the new RF Meter. This will put the new
RF Meter in the same logical position with the keypad and the
dispense order process will remain the same.
Delete Hose
-.---.---.---
Active keys:
Numeric keys,
,
,
Action:
• If a RF Meter is deleted, the Delete Hose screen is displayed
• Enter key with no entry Æ Create Operator screen is displayed
Page 13 of 37
Creating and Deleting Operators:
• Only valid Operator PIN can dispense AFP’s
• Maximum 50 operators may be created
• The operator id format is 4 numeric digits
• The operator name format is 16 alphanumeric digits
• Initially, the operator list is empty
New operator
----
Active keys:
Numeric keys,
,
,
Action:
• If a new operator has been created, the Operator name screen is displayed
• Enter key with no entry Æ Delete Operator screen is displayed
Operator XXXX
----------------
Active keys:
Alphanumeric keys,
,
,
Action: The New operator screen is displayed
Delete an operator by entering the four-digit id number for the operator to
be deleted.
Delete operator
----
Active keys:
Numeric keys,
,
,
Page 14 of 37
Initialization Menu: Flow Chart
aThe parameter changes will affect all data in memory (example: if we
change the quantity unit from liters to gallons, the general quantity will be
simply switched from liters to gallons (no conversion from the previous
quantity unit to the new quantity unit)
aNo pending dispense order
Page 15 of 37
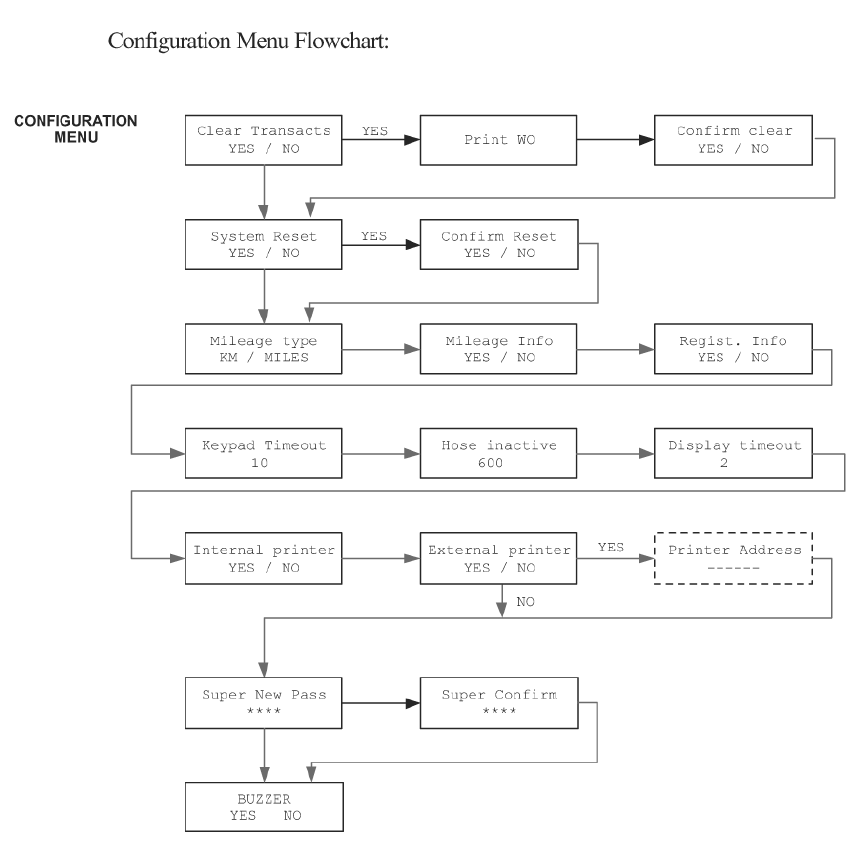
Configuration Menu:
The Configuration Menu allows the supervisor to set-up all parameters for
the Keypad. The Supervisor is the only user with access to these screens.
Clearing Transactions from Keypad Memory:
• Removes all transactions (Dispense Order) previously recorded in
memory
• After an erase memory, it will not be possible to print them out further
Clear Transacts
YES / NO
Active keys:
The selection is in reverse video
,
,
Use the scroll key to select between YES/NO.
Action:
• If yes, the keypad automatically prints all transactions stored in the system if an external printer
is attached to the keypad. If no printer is attached the user will be asked to confirm the clear.
• If no, keypad will display the System Reset screen.
Print WO
No Active keys:
Action:
• Displayed during the printing
Confirm Clear
YES / NO
Active keys:
The selection is in reverse video
,
,
Action: The keypad will automatically return to the Clear Transacts screen on YES or NO confirmation
Page 16 of 37
System Reset:
Allows the user to reset all the configuration parameters to default values:
System Reset
YES / NO
Active keys:
,
,
Action:
• If yes, the keypad asks the user to confirm
• If no, the keypad displays the mileage type screen
Confirm Reset
YES / NO
Active keys:
,
,
Action: The keypad returns to the System Reset screen
Mileage Type:
Allows the user to select how mileage is stored in the keypad
• KM/MILES
• The mileage type by default is KM.
• The mileage type is set for all RF Meters in the keypad
Mileage Type
KM / MILES
Active keys:
,
,
Action:
• Press enter key to move to Mileage Info screen
Page 17 of 37
Mileage and Registration Information Option:
Allows the supervisor to select the storage of vehicle mileage and
registration information for each dispense order.
• YES/NO to the option of entering the vehicle mileage information for
each dispense order
• Mileage information by default is NO
Mileage Info
YES / NO
Active keys:
,
,
Action: Use the scroll key to select YES/NO, press enter key to move to the Registration option screen
• YES/NO to the option of entering the vehicle registration information
for each dispense order
• Registration information by default is NO
Regist. Info
YES / NO
Active keys:
,
,
Action: Use the scroll key to select YES/NO, press enter key to move to the keypad timeout screen
Page 18 of 37
Keypad Timeout Option:
• Timeout parameter corresponding to the time it takes to validate after
all dispense order data has been entered. If the enter button is not
pressed within the time allocated, the keypad display goes back to the
initial menu, and the input data is erased.
• The keypad timeout is between 0 to 255 seconds (0 no timeout) and
the default for this feature is 10 seconds
Keypad Timeout
10-
Active keys:
Numeric keys,
,
,
Action:
• Press Enter key to move to Hose Inactive Timeout Option
Hose Inactive Timeout Option:
• Essentially, this is the time the user has to top-off the dispense and
completing the automatic batch.
• Timeout parameter corresponding to the time that a RF Meter could
stay inactive after an RF batch has been dispensed.
• If the user has not pressed reset on the RF Meter within the timeout
period, the RF Meter will transmit the dispense order quantity to the
keypad and lockout the RF Meter.
• Meter inactive timeout is sent to the RF meter. It’s the meter (ER) that
is responsible of tracking this timer.
• The meter inactive timeout is set for all RF Meters.
• The meter inactive timeout is between 0 to 65534 seconds (0 = no
timeout) and the default value is 10 minutes.
Hose Inactive
600
Active keys:
Numeric keys,
,
,
Action:
• Press Enter key to move to Display Timeout Option
Page 19 of 37
Display Timeout Option: (Not a parameter to change in configuration)
• Timeout parameter corresponding to the time for displaying an
information on the keypad LCD before it is refreshed with new
information
• The display timeout is set at 2 seconds
Display Timeout
2--
Active keys:
Numeric keys,
,
,
Action:
• Press Enter key to move to Internal Printer Option
Internal Printer Option:
• YES / NO. Parameter indicating the existence of an internal printer
(CUSTOM FT190).
• The integrated printer value is set by default NO (a The keypad will
not detect the existence of a printer)
Internal printer
YES / NO
Active keys:
,
,
Action:
• Press Enter key to move to External Printer Option
External Printer Option:
• YES / NO. Parameter indicating the existence of an external printer
(EPSON LX300).
• The external printer value is set by default NO
External Printer
YES / NO
Active keys:
,
,
Action:
• Press Enter key to move to Supervisor Password Option
•

Page 20 of 37
Supervisor Password Option:
The default supervisor password for protecting the modification of the
supervisor id is 0000.
It is recommended the Supervisor change this password during the initial
set-up of the system.
Maximum 1 Supervisor login
Super new pass
****
Active keys:
Numeric keys,
,
,
Action:
• Use numeric keys to enter the new password then press enter.
• Enter key with no entry Æ No change to password and displays buzzer option.
Super Confirm
----
Active keys:
Numeric keys,
,
,
Action: reenter new password to confirm.
Buzzer Option:
This screen provides the user with the option to have a beep on
every key entry. The default is YES.
Buzzer
YES / NO
Active keys:
,
,
Action: Select YES or NO by using the scroll key, then press Enter. The keypad will display the Supervisor
Menu.
Page 21 of 37
Page 22 of 37
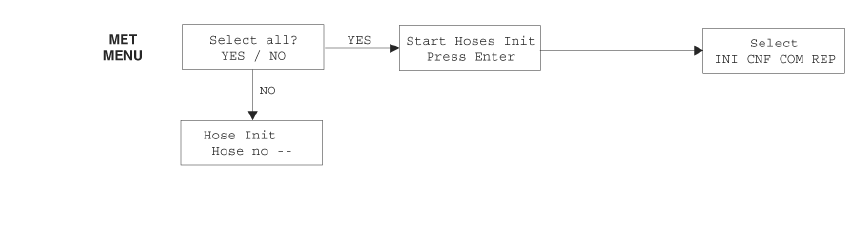
2.2.2 MET Menu:
• Only the supervisor has access to this process.
• The supervisor may delete a dispense order keypad que for a single
hose or all hoses in the system.
• If the supervisor selects all RF Meters, all dispense orders in the que
will be deleted and all meters may be programmed for a dispense
order.
• The communication test could be done only with the RF Meters
entered in the initialization menu
Init all Hose
YES / NO
Active keys:
,
,
Action:
• If YES Æ Start (Hoses Init) is displayed
• If NO Æ User is prompted for a hose number for communications test
Start Hoses Init
Press enter
Page 23 of 37
RF Communications Menu Flowchart:
Page 24 of 37
2.2.3 Report Menu Screens:
The supervisor has the opportunity to print out a variety of reports, if there
is an external printer connected to the keypad.
INI: Prints all parameters associated with the system initialization
CNF: Prints all parameters selected for the configuration of the keypad
MET: Prints the status of all hoses/meters
REP: Prints the dispense order history
The external printer has to be activated and connected.
aWhen the keypad is printing out a report or a receipt, the keypad
keyboard will be locked for all new data entry (i.e. the operator will not be
able to enter a new Dispense Order List while the keypad is printing).
aIf the keypad detects an error on the integrated printer or the external
printer (not connected, out of paper or off line), the keypad keyboard will
be locked for all new data entry and an error will displayed on the keypad
LCD. The user should check the printers for off-line or out of paper
conditions.
aIf an error is detected while printing, the keypad will not purge the
memory (especially in the case of the Dispense Order List report)
aAfter printing out the Dispense Order List report, the Dispense Order
list memory is erased automatically
The dispense order receipt is automatically (after a user prompt message)
printed out after the RF reception of the dispense order result
Select Report
INI CNF MET WO
Active keys:
,
,
Action:
• Use the scroll key to select report option
• Enter key with no entry Æ keypad returns to Supervisor Menu screen

Page 25 of 37
Initialization Report:
DD/MMM/YYYY INITIALIZATION REPORT HH:MI
TNK PRODUCT LEVEL UNT
=== ================ ===== ======
1 Fluid 1 name 99999 LITERS
2 Fluid 2 name 99999 LITERS
(…) (…) (…) (…)
7 Fluid 7 name 99999 LITERS
8 Fluid 8 name 99999 LITERS
ID ADDR TNK
=== ================ ===
123 124456 1
234 561444 2
(…) (…) (…)
ID PIN NAME
=== ==== ================
1 1234 John SMITH
2 1235 Paul GREEN
3 1236 Mike BROWN
(…) (…) (…)
ID PRODUCT
=== ================
1 Fluid 1 name
2 Fluid 2 name
(…) (…)
7 Fluid 7 name
8 Fluid 8 name
DD/MMM/YYYY Date of the printout
HH:MI Time of the printout
TNK Tank No
PRODUCT Fluid type name
QTY Quantity dispensed
UNT Unit
ADDR Meter RF address
ID RF Meter Id (Last 3 address characters)
TNK Tank No
PIN User pin number
NAME User name
Page 26 of 37
Configuration Report:
DD/MMM/YYYY CONFIGURATION REPORT HH:MI
Mileage Type KM
Registration Info NO
Mileage Info NO
Internal printer Yes
External printer Yes
Address printer
Buzzer Yes
Approved PTB NO
Supervisor pass 1234
Hose Inactive 600
Keypad Timeout 10
Display Timeout 2
On-Off sequence 999999
Select Report
INI CNF COM WO
Active keys:
,
,
Action:
• Use scroll key to move to CNF and press Enter key
• Enter key with no entry Æ Supervisor Menu screen is displayed
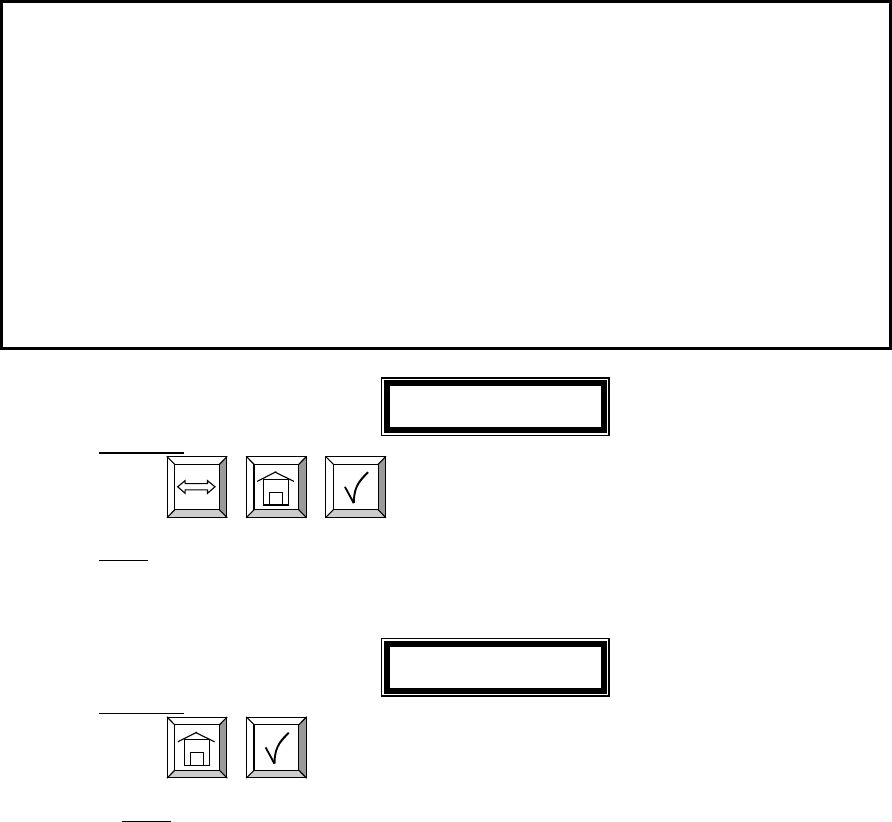
Start
CNF Report
Active keys:
,
Action: After Report is completed the Select Report screen is displayed
Page 27 of 37
Communications Report:
DD
/MMM/YYYY COMMUNICATION REPORT HH:MI
ADDR ID STA
====== ==== ===
0.000.000.101 1 inactive
0.000.000.137 2 inactive
0.000.000.111 3 inactive
0.000.000.126 4 inactive
0.000.000.127 5 inactive
0.000.000.109 6 inactive
0.000.000.100 7 inactive
0.000.000.135 8 inactive
DD/MMM/YYYY Date of the printout
HH:MI Time of the printout
ADDR Meter RF address
ID RF Meter Id (Last 3 address characters)
STA Status of the RF link:
•
OK Î RF link is established
•
KO Î RF link not established
•
? Î RF link doubtful
Select Report
INI CNF COM WO
Active keys:
,
,
Action:
• Use scroll to move to COM and press Enter
• Enter key with no entry Æ Supervisor Menu screen is displayed
Start
COM report
Active keys:
,
Action: After printing Select Report Menu is displayed
Page 28 of 37
Dispense Order Reports
Select Report
INI CNF COM WO
Active keys:
,
,
Action:
• Scroll to WO and press Enter key
• Enter key with no entry Æ Supervisor Menu screen is displayed
Select REP
USR PRO HOS TNK
Active keys:
,
,
Action: Scroll to report to print and press the Enter key
There are four reports that may be printed associated with Dispense Orders:
• USR: Print dispense orders by Operator
• PRO: Print dispense orders by Fluid Type
• HOS: Print dispense orders by Hose/Meter
• TNK: Print dispense orders by Tank
User Report (USR):
DD/MMM/YYYY STATISTICAL REPORT BY USER HH:MI
USER PRODUCT QTY
================ ================ =====
JOHN SMITH FLUID TYPE 1 99999
FLUID TYPE 2 99999
FLUID TYPE 3 99999
FLUID TYPE 4 99999
PAUL GREEN FLUID TYPE 5 99999
FLUID TYPE 6 99999
FLUID TYPE 7 99999
FLUID TYPE 8 99999
(…)
Start
Report
Active keys:
,
Action: After printing the Select Report Screen is displayed
Product Report (PRO):
DD/MMM/YYYY STATISTICAL REPORT BY PRODUCT HH:MI
Page 29 of 37
PRODUCT USER QTY
================ ================ =====
FLUID TYPE 1 JOHN SMITH 99999
PAUL GREEN 99999
FLUID TYPE 2 JOHN SMITH 99999
PAUL GREEN 99999
FLUID TYPE 3 JOHN SMITH 99999
PAUL GREEN 99999
(…)
Start
Report
Active keys:
,
Action: After printing the Select Report Screen is displayed
Hose/Meter Report (HOS):
DD
/MMM/YYYY STATISTICAL REPORT BY RF METER HH:MI
ADDR ID USER QTY
====== === ================ =====
123456 456 JOHN SMITH 99999
PAUL GREEN 99999
234561 561 JOHN SMITH 99999
PAUL GREEN 99999
(…)
Start
Report
Active keys:
,
Action: After printing the Select Report Screen is displayed
Page 30 of 37
Tank Report (TNK):
DD/MMM/YYYY STATISTICAL REPORT TANK LEVEL HH:MI
TNK PRODUCT LEVEL UNT
=== ================ ===== =======
1 5W30 OIL 123 LITERS
2 GEAR OIL 1111 LITERS
3 ATF 111 11111 GALLONS
4 HYDRAULIC FLUID 232 QUARTS
5 10W40 OIL 3466 PINTS
6 WASHER FLUID 1 LITERS
7 5W40 OIL 2344 LITERS
8
BEER 43234 PINTS
Start
Report
Active keys:
,
Action: After printing the Select Report Screen is displayed
Report Menu Flowchart
Select Report
INI CNF COM WO
Start
INI Report
Start
CNF Report
Select REP
USR PRO HOS TNK
Start
COM Report
Start
Report
REPORT
MENU
Page 31 of 37
2.3 Operator:
The Operator only has access to the dispense order menus. At the main
menu, enter one of the four-digit operator pin numbers.
• The pin number is 4 numeric characters
• Maximum 50 operators account
• The supervisor account has access to the management process
• The operator account has only access to the dispense order process
Dispense Order Process:
After a valid Operator pin number is entered, the following screens form the
dispense order process:
Job No: Enter the job or work order number: This may be alphanumeric
and up to 16 digits.
Enter Job No.
----------------
Active keys:
Alphanumeric keys,
,
,
Action:
• Enter the 16-digit alphanumeric work order number and press Enter to move to next screen
The next two screens are only displayed if the settings for Registration and
Mileage are set to YES in the Configuration Menu.
Registration Number: Enter the Registration or License Plate number of
the vehicle.
Enter Reg. No.
------------
Active keys:
Alphanumeric keys,
,
,
Action: Enter the 10-digit Alphanumeric Registration number and press Enter to move to next screen
Page 32 of 37
Mileage: Enter the current mileage on the vehicle.
Enter Mileage
--------
Active keys:
Numeric keys,
,
,
Action: Enter the numeric current mileage of vehicle and press Enter to move to the next screen
Hose: Enter a valid Hose/Meter number for the dispense.
• This number will be from 1-48, and only valid Hose numbers will be
accepted.
• If an undefined hose number is entered, the display will remain on this
screen.
• If there is an on going dispense already in process with the Hose, a
new dispense order for that Hose will not be accepted.
Enter Hose
--
Active keys:
Numeric keys,
,
,
Action: Enter a Hose number that has been previously created through the initialization menu and press enter
Product: The keypad will automatically display the Fluid Type associated
with the Hose previously selected. There is no data entry for this
screen.
Product
(Fluid Type)
Active keys:
There is no active key.
This screen is displayed for user information
It is display during 3 seconds and it goes to quantity
No Action

Page 33 of 37
Quantity: Enter the quantity to be dispensed through the Hose.
• Quantity may be from 0.0-99.9 and 100-999.
• There may be only one digit after the decimal point.
• Dispensed quantities from 100-999 will be in count down mode.
• A quantity of 0.0 will put the RF Meter in a free-dispense mode, the
RF Meter will not latch and the user may display fluid as long as the
trigger is manually held in the open position. The user must press
RESET on the RF Meter to exit this dispense and communicate the
dispense order to the Keypad.
Enter Quantity
----
Active keys:
Numeric keys,
,
,
Action: Select the quantity to be dispensed and press Enter
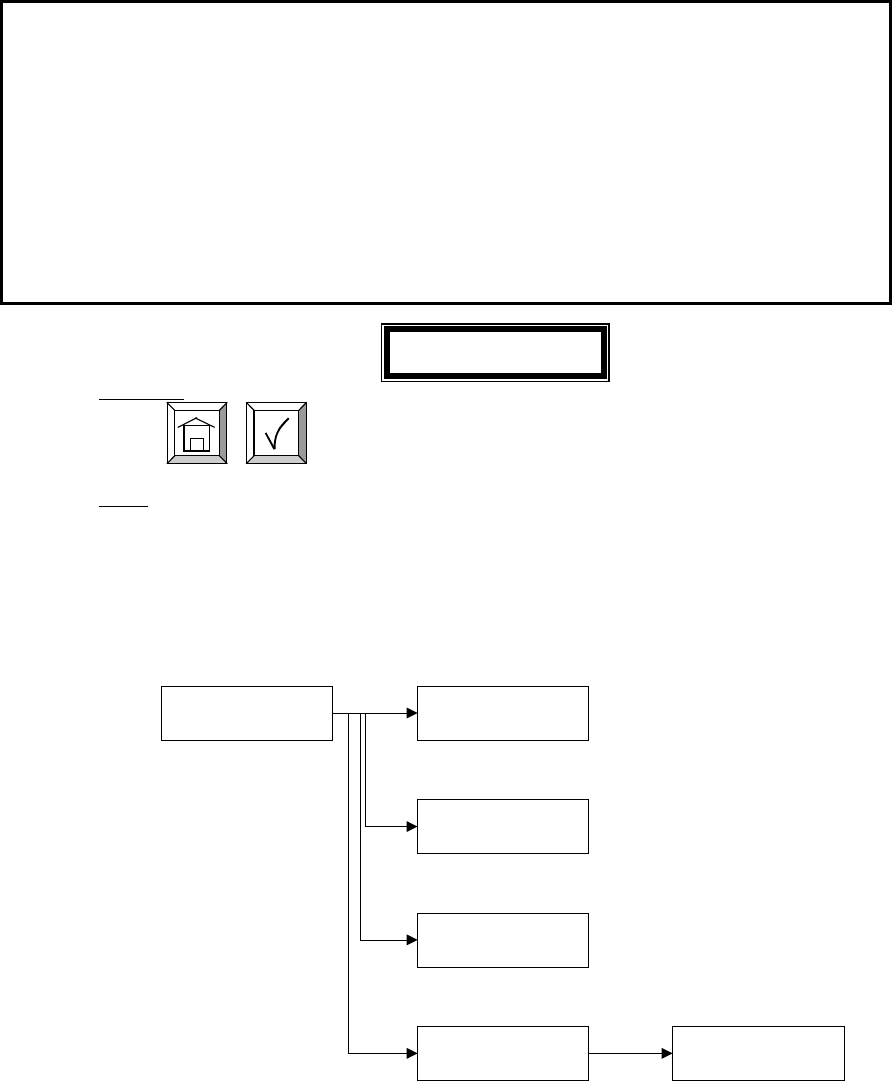
Dispense Confirmation: Press Enter to confirm a dispense is desired.
Press enter for
Dispense
Active keys:
,
Action: Press the Enter Key to confirm the dispense. Press HOME to cancel order and return to the
main screen.

Page 34 of 37
Dispense Order Transaction Ticket: A ticket receipt is printed for every dispense
after the completion of the dispense by the
RF Meter.
TRANSACTION TICKET
DD/MMM/YYYY HH:MI
PRODUCT FLUID TYPE 1
QUANTITY 2.1 LTS
OPERATOR N SMITH JOH
RF METER ID 12
WO 1234567890123456
MILEAGE -
REGISTRATION -
TYPE PRE-SET/MANUAL/OUT OF SEQUENCE
LEVEL 999999 LTS
ERROR1 1 (COMMUNICATION ERROR)
ERROR2 3 (LOW BATTERIES)
ERROR3 5 (COUNT ERROR)
• The Ticket is printed on the integrated printed if it is installed.
• A printer must be installed to retrieve dispense order records.
• Product: Fluid dispensed
• Quantity: Exact quantity of fluid dispensed by the Hose
• Operator: Operator who dispensed the fluid
• RF Meter ID: Hose number
• WO: Work Order number
• Mileage: Mileage of vehicle, only printed if configured to YES
• Registration: Registration or License number, only printed if
configured to YES
• Type: The type of dispense:
• Pre-set: Normal Dispense Process
• Manual: Fluid dispensed while RF Meter was in a manual
mode of operation. This is a degraded mode of operation.
• Out of Sequence: Normal Dispense Process, but data not
communicated from the Hose to the Keypad immediately
after the dispense. Out of Sequence quantity is only
communicated through the Supervisor Menu in COM
mode. This is a degraded mode of operation.
• Level: The remaining amount of fluid in the tank used for the
dispense
• Error1…3: Error Message for the dispense:
• Communication Error: Difficulty in communications
• Low Batteries: Change the batteries on the RF Meter/hose
• Count Error: RF Meter had a count error, NOT AN
APPROVED DISPENSE. (For PTB System ONLY)
Page 35 of 37
Dispense Order Flow Chart:
Operator:
The operator is a user that has only access to the dispense order process.
After entering a dispense order, the operator activates the preset RF Meter
for a fluid dispense.
Receipt:
On integrate printer if connected or on external printer if connected. If
both are connected, the integrated one will be used. If none are connected,
no receipt will be printed.
The dispense order process follows an operator PIN Number
Press enter for
dispense
Enter quantity
----
Product
(Fluid type)
Enter Job No.
----------------
Enter Hose
--
Enter mileage
----------------
Enter Reg. No.
----------------
IF Validate
DISPENSE
ORDER MENU
Registration and mileage are active only if they are select in the
management process.
®
Due to continuous research, product improvements and enhancements,
Badger Meter reserves the right to change product or system specifications
without notice, except to the extent an outstanding bid obligation exists.
BadgerMeter,Inc.
P.O. Box 245036, Milwaukee, WI 53224-9536
Telephone: (414) 355-0400 / (877) 243-1010
Fax: (414) 355-7499 / (866) 613-9305
www.badgermeter.com
Copyright © Badger Meter, Inc. 2002. All rights reserved.
Please see our website at
www.badgermeter.com
for specific contacts.
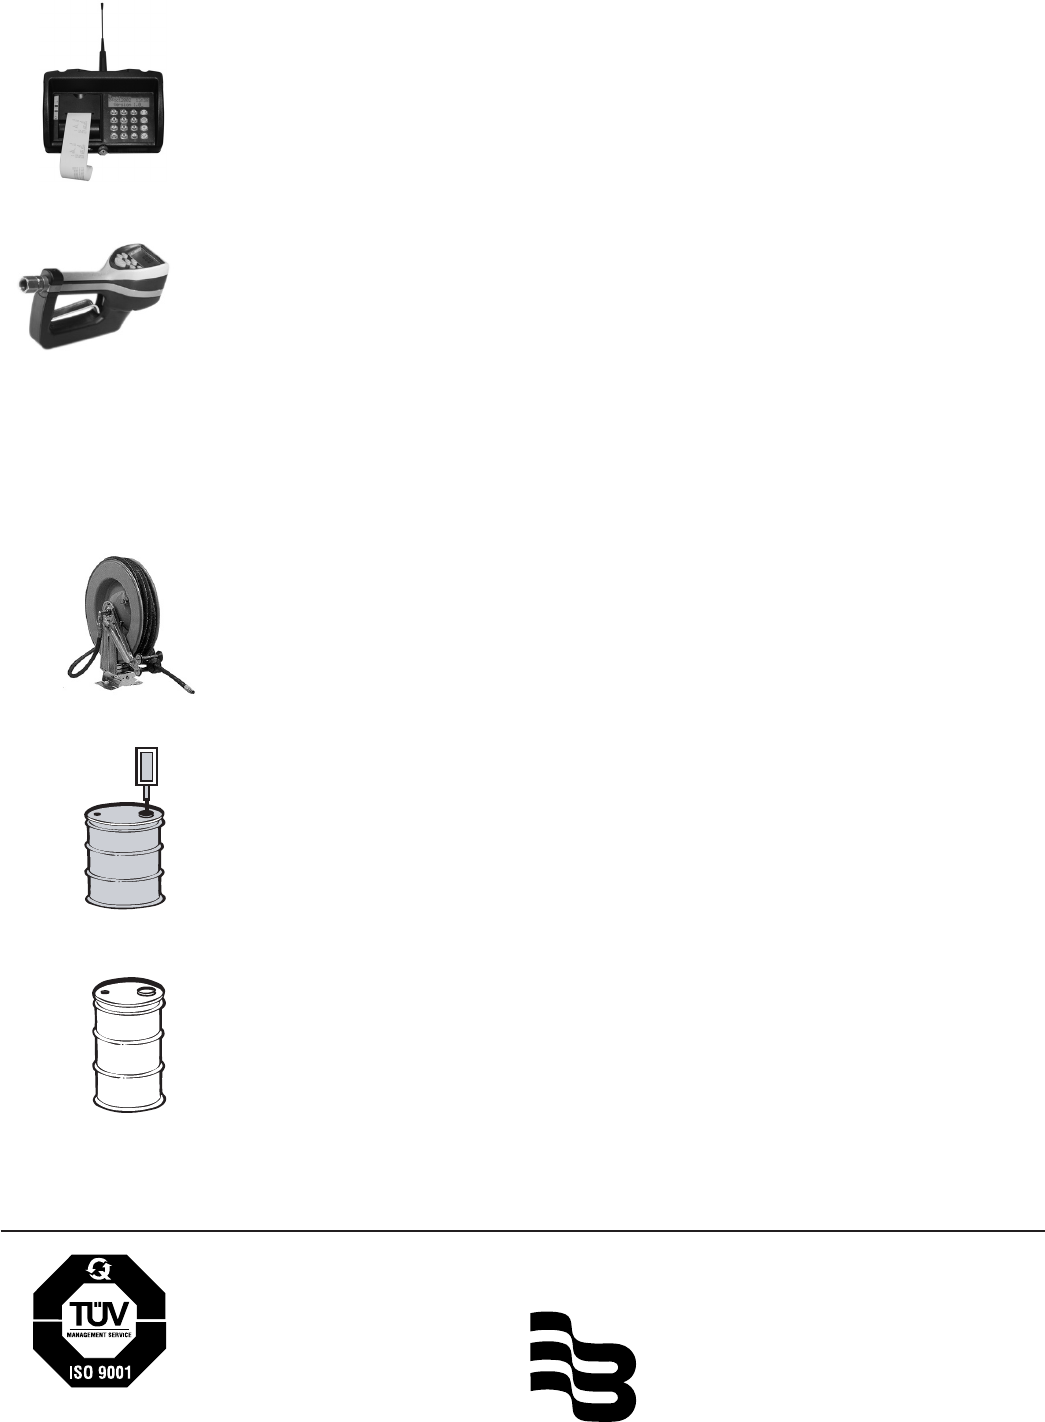
Keypad
(1 per system)
Meter # (2 Digits) ____ ____
(Up to 48 meters/keypad)
Unique Meter Serial # ____ - ____ ____ ____ - ____ ____ ____
(10 Digits)
Hose # ____ ____ ____ ____ ____ ____
Tank # (1 Digit) ____
(Up to 8/keypad)
1:Hose
Fluid Type (16 Digits) ____ ____ ____ ____ ____ ____ ____ ___
_
Description
1:Tank
(Up to 8/keypad)
____ ____ ____ ____ ____ ____ ____ ___
_