Baicells Technologies CN6671 LTE Indoor CPE User Manual BaiCells CN6671 CPE
Baicells Technologies Co., Ltd. LTE Indoor CPE BaiCells CN6671 CPE
Contents
- 1. User Manual
- 2. Users Manual
User Manual

All rights reserved © BaiCells Technologies Co., Ltd.
BaiCells CN6671 CPE User Manual
V1.0
1
About This Document
This document is a user guide for CN6671 CPE.
Copyright Notice
BaiCells copyrights this specification. No part of this specification may be reproduced in
any form or means, without the prior written consent of BaiCells.
Disclaimer
This specification is preliminary and is subject to change at any time without notice.
BaiCells assumes no responsibility for any errors contained herein. For more information,
please consult our technical engineers.
Revision Record
Date
Version
Description
30 Jun, 2016
V1.0
Initial released.
Contact Us
BaiCells Technologies Co., Ltd.North America
Address: 555 Republic Drive, Suite 200 Plano, TX 75074
E-mail: support_na@baicells.com
Phone: +1-972-800-1157
Website: http://www.baicells.com/

Contents
1. Hardware Specification .................................................................................................... 2
Appearance ............................................................................................................... 2 1.1
Specifications ............................................................................................................ 5 1.2
1.2.1 Basic Description ............................................................................................... 5
1.2.2 RF Specifications ............................................................................................... 5
1.2.3 Environment Specifications .............................................................................. 6
2. Operation Steps .............................................................................................................. 7
3. Configuration Guide ....................................................................................................... 8
Log In .......................................................................................................................... 8 3.1
Network Settings ........................................................................................................ 9 3.2
WiFi Settings ............................................................................................................. 12 3.3
Security Settings ....................................................................................................... 13 3.4
VPN Settings ............................................................................................................. 14
3.5
VoIP Settings ............................................................................................................ 15 3.6
System Settings ........................................................................................................ 16 3.7
4. Trouble Shooting .......................................................................................................... 17
Device cannot Access to CPE through WiFi .............................................................. 17 4.1
CPE cannot connect to internet ............................................................................... 17 4.2
5. Regulatory Compliance ................................................................................................ 19
Shipping List ................................................................................................ 21 Appendix A

Contents of Figure
Figure 1-1 Front View of CN6671 .................................................................................... 2
Figure 1-2 Back View of CN6671 ................................................................................. 3
Figure 1-3 Side View of CN6671 .................................................................................. 4
Figure 3-1 CPE Web Client Login Page ....................................................................... 8
Figure 3-2 Home Page of Web Client .......................................................................... 9
Figure 3-3 LET Settings.............................................................................................. 10
Figure 3-4 LET Status ................................................................................................ 10
Figure 3-5 APN Management ..................................................................................... 11
Figure 3-6 LAN Settings ............................................................................................. 12
Figure 3-7 WLAN Settings .......................................................................................... 13
Figure 3-8 Security Settings ....................................................................................... 14
Figure 3-9 VPN Settings ............................................................................................. 15
Figure 3-10 VoIP Settings .......................................................................................... 15
Figure 3-11 System Settings ...................................................................................... 16

Contents of Table
Table 1-1 LED Indicators of Front View ........................................................................ 2
Table 1-2 LED Indicators of Back View ........................................................................ 4
Table 1-3 Interfaces and Buttons of Back View ........................................................... 4
Table 1-4 Interfaces and Buttons of Side View ............................................................ 4
2
1. Hardware Specification
Appearance 1.1
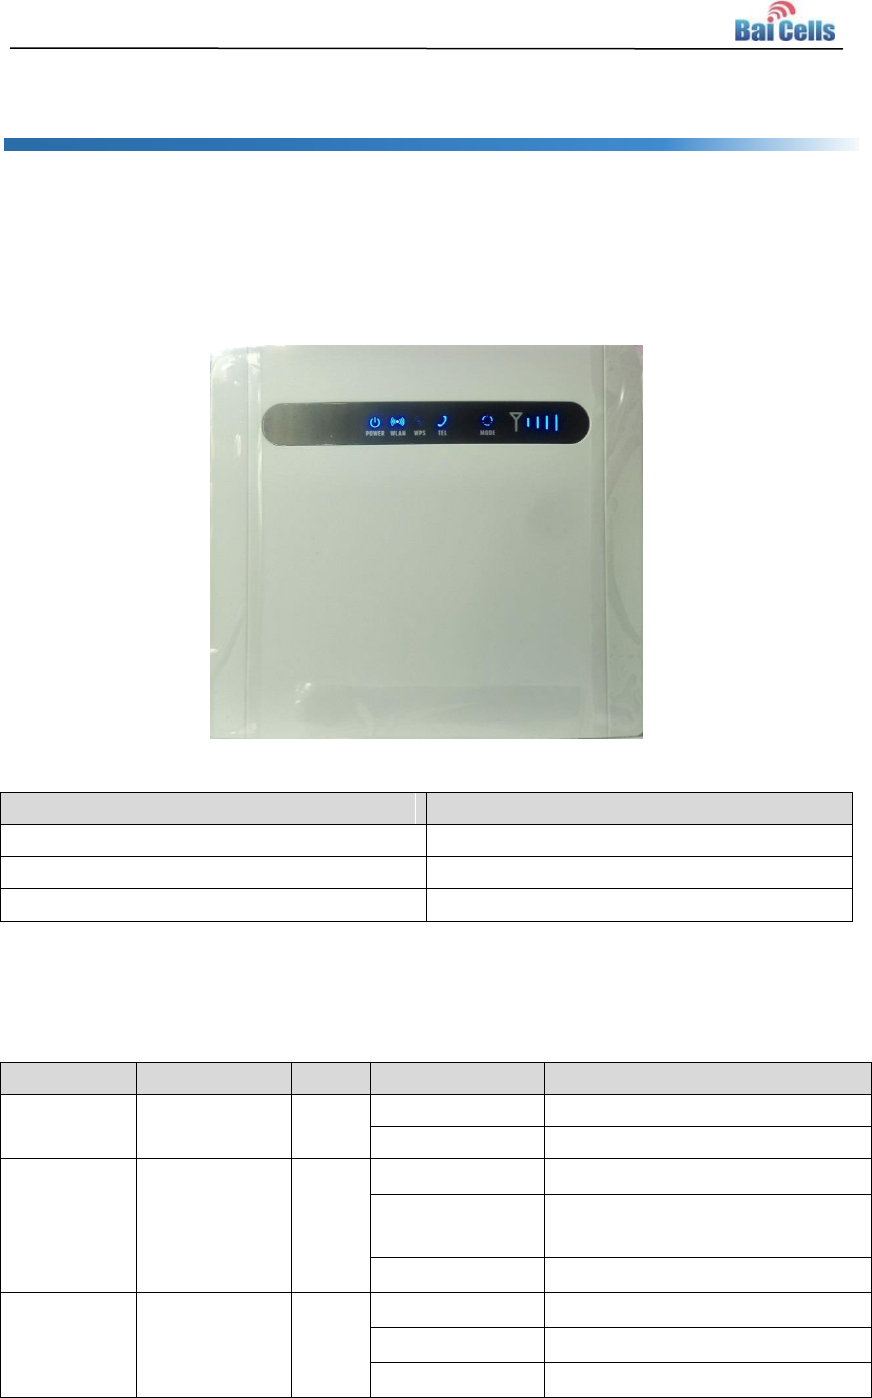
The front view of CN6671 is shown in Figure 1-1.
Figure 1-1 Front View of CN6671
Index
Description
Dimension
167(H)*187(W)*44(T)mm
Weight
310g
Color
White
The LED indicators of front view are described in Table 1-1.
Table 1-1 LED Indicators of Front View
LTE Name
Description
Color
LED Behavior
Status Indicator
PWR
Power
Indicator
blue
OFF
No Power Supply
Steady On
Power On
WLAN
WLAN
Indicator
blue
OFF
WLAN function disable
Blanking
Data transmission through
WLAN
Steady On
WLAN function enable
WPS
WiFi
Protected
Setup
blue
OFF
WPS disable
Blanking
WiFi terminal being accessing
Steady On
WPS Enable
3
Tel1 ~ Tel2
Voice
telephone
interface
indicator
blue
OFF
Not establish a connection with
the voice server
Blanking(1/sec)
Registering with the voice server
Blanking(2/sec)
Connection has been
established
Steady On
Be connected with voice server
MODE
Mode
Indication
blue
OFF
No access in LTE network
Blanking
LTE scan, connecting
Steady On
In LTE network
LTE Signal
4 LTEs,
Indicate
connection
state and
signal
strength
blue
All OFF
No Connected
One by one
signal bar
display, four
bars
Displays the current wireless
network signal strength, the
stronger the signal, the more
bars on
In addition, two special status indicators (Firmware upgrading and reset process) is
described as follows:
Status
Indicator Status Description
Firmware upgrade
WPS + WLAN two lights flash simultaneously
Reset process
Except 5 signal strength indicator, the other indicator are all
on
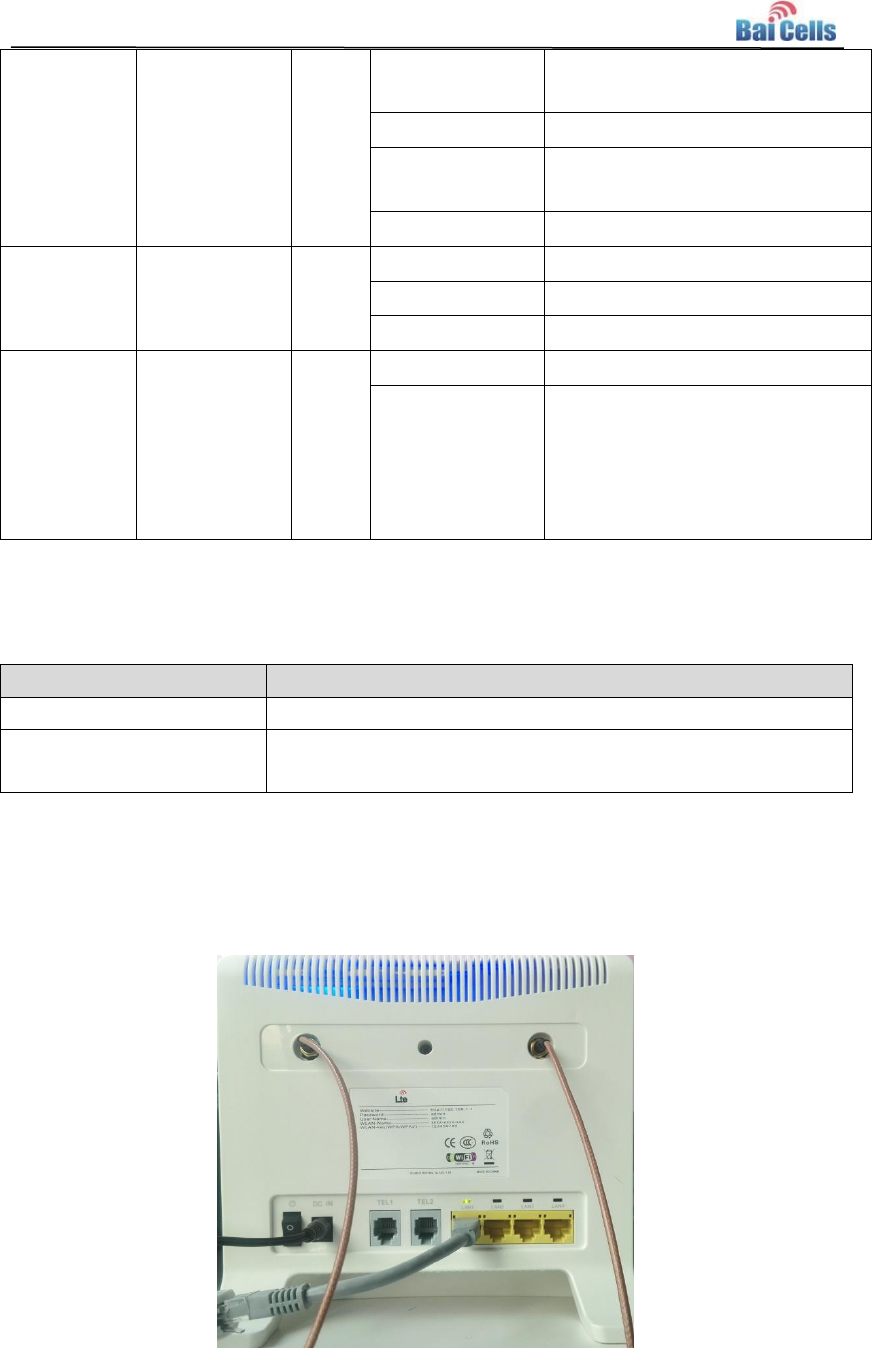
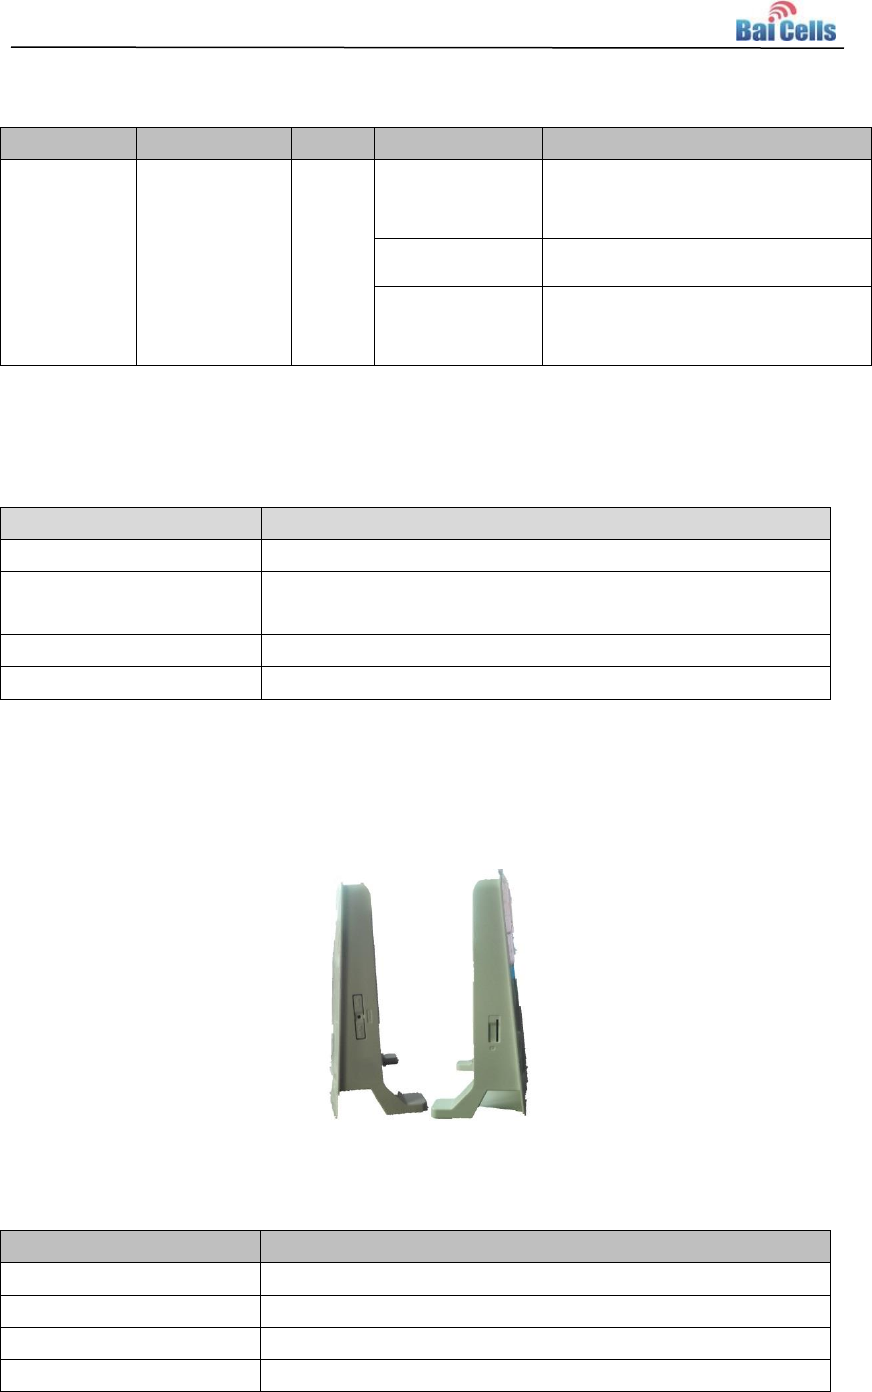
The back view of CN6671 is shown in Figure 1-2.
Figure 1-2 Back View of CN6671
4
The LED indicators of back view are described in Table 1-2.
Table 1-2 LED Indicators of Back View
LTE Name
Description
Color
LED Behavior
Status Indicator
LAN1 ~
LAN4
Eth Indication
Green
OFF
Ethernet connection is not
established
Steady On
Ethernet connection is normal
Blanking
Ethernet interface data being
transmitted
The interfaces and buttons of back view are described in Table 1-3.
Table 1-3 Interfaces and Buttons of Back View
Name
Description
ETH RJ45
4 LAN Ports
POTS-RJ11
2 RJ11 interface, phone / fax / POS, providing VoIP
functions under conditions of software support
Power
Power port is the linked power adapter which is parceled.
Power Switch
Power Switch
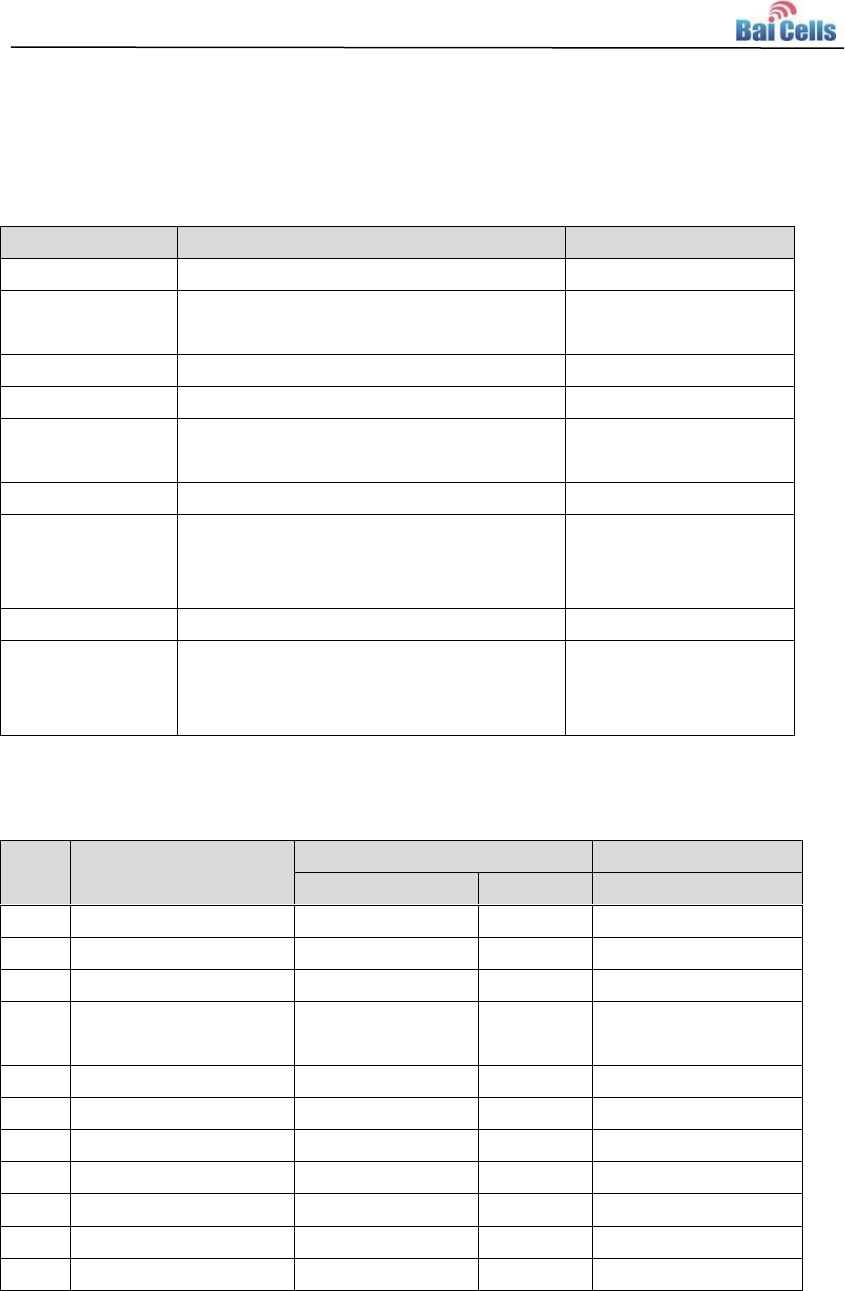
The side view of CN6671 is shown in Figure 1-3.
Figure 1-3 Side View of CN6671
The interfaces and buttons of side view are described in Table 1-4.
Table 1-4 Interfaces and Buttons of Side View
Name
Description
Restore Button
Long press over 10s to restore the factory settings
WPS
WiFi Protected Setup
WiFi
Turn on or off WiFi Function
USIM Slot
Support 1.8V/3.0V USIM
5
Specifications 1.2
1.2.1 Basic Description
Specification
Description
Comment
LTE Standard
3GPP Release 9
None
Ethernet LAN
Port
4 RJ-45 port 10/100 auto-sensing,
auto-MDX
LAN * 4
USIM
Support 1.8V/3.3V 2FF USIM
None
Tel Port
2 FXS RJ11 Ports
None
LED Indicators
POWER / WLAN / WPS / TEL / MODE /
Signal Strength / LAN Indicator * 4
None
Power Switch
Switch
None
Reset/Restore
Button
Tact Button
Long press over 10s
to restore the factory
settings
WPS
WiFi Protected Setup
None
Power Supply
Input: Universal range 100V~240V AC,
50Hz
Output: 12V DC 1A
None
1.2.2 RF Specifications
No.
Feature
Capability
Comments
Value
Unit
1
LTE Mode
TDD LTE
2
Channel Bandwidth
5/10/15/20
MHz
3
Max Output Power
17
dBm
25℃
4
Transmit Power
Dynamic Range
63
dB
5
LTE Standard
3GPP R9
6
Frequency
3650 ~ 3700
MHz
B43
7
Antenna Gain
5
dBi
8
WiFi Frequency
2400 ~ 2483.5
MHz
9
WiFi Channel BW
20/40
MHz
10
WiFi Antenna Type
2*2
MIMO
Built-in antenna
11
WiFi Antenna Gain
2
dBi
6
1.2.3 Environment Specifications
No.
Feature
Capability
Value
Unit
1
Operating Temperature
-10 ~ 45
℃
2
Storage Temperature
-20 ~ 60
℃
3
Operating Humidity
0 ~ 95
%
7
2. Operation Steps
Attention:
Make sure the CPE is turned off before you insert or remove the SIM card. Otherwise, the
CPE and SIM card may be damaged.
1. Insert SIM card into USIM slot.
Note:
If you want to remove the SIM card, please tightly press the SIM card, the SIM card will pop up.
2. Insert power adaptor and turn on it. The power indicator getting steady on indicate
that the power supply is normal. Otherwise, you need to check whether the power
adaptor is normal.
3. Wait for 1 minute, if MODE and SIGNAL STRENGTH indicators flash simultaneously,
it indicates that SIM card did not connect or is invalid. You need to buy new SIM card
or contact vendor.
4. MODE indicator flashing indicates that the device is searching and registering to LTE
network. If the device connect to LTE network normally, MODE indicator is steady on.
SIGNAL STRENGHTH indicator indicate the strength of LTE signal. If the device
cannot connect to LTE network, MODE indicator flash ceaselessly.
5. WLAN indicator indicates whether WiFi function is enabled.
If WiFi is enabled, mobile phone and laptop can connect to network by WiFi.
SSID is “Airtouch-8783”. For the first time, no WiFi password is required.
6. PC and laptop can connect to internet through LAN port.
8
3. Configuration Guide
Log In 3.1
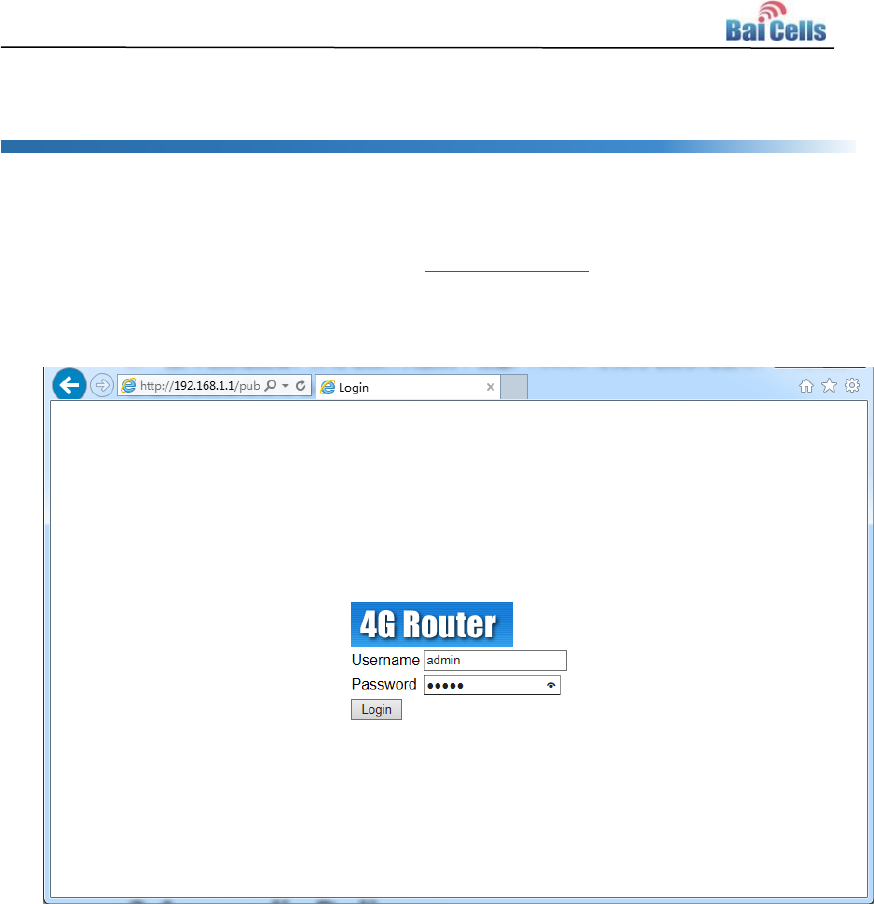
1. In the browser’s address column, type in http://192.168.1.1, click “Enter” to open web
client login page, as shown in Figure 3-1
Figure 3-1 CPE Web Client Login Page
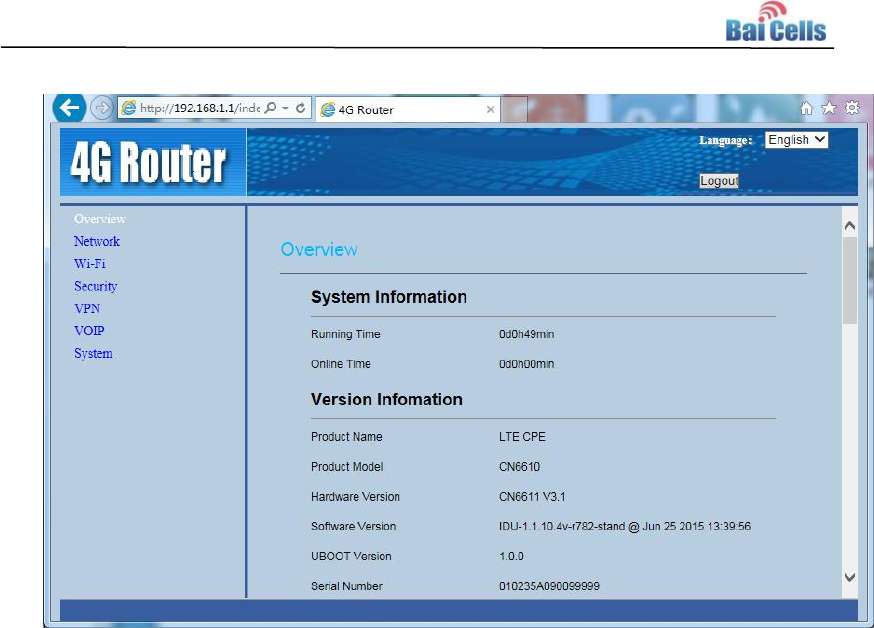
2. Input user name “admin”, password “admin”, and click “Login”. The homepage of
web client is given in Figure 3-2. The home page displays basic information of
CPE.
10
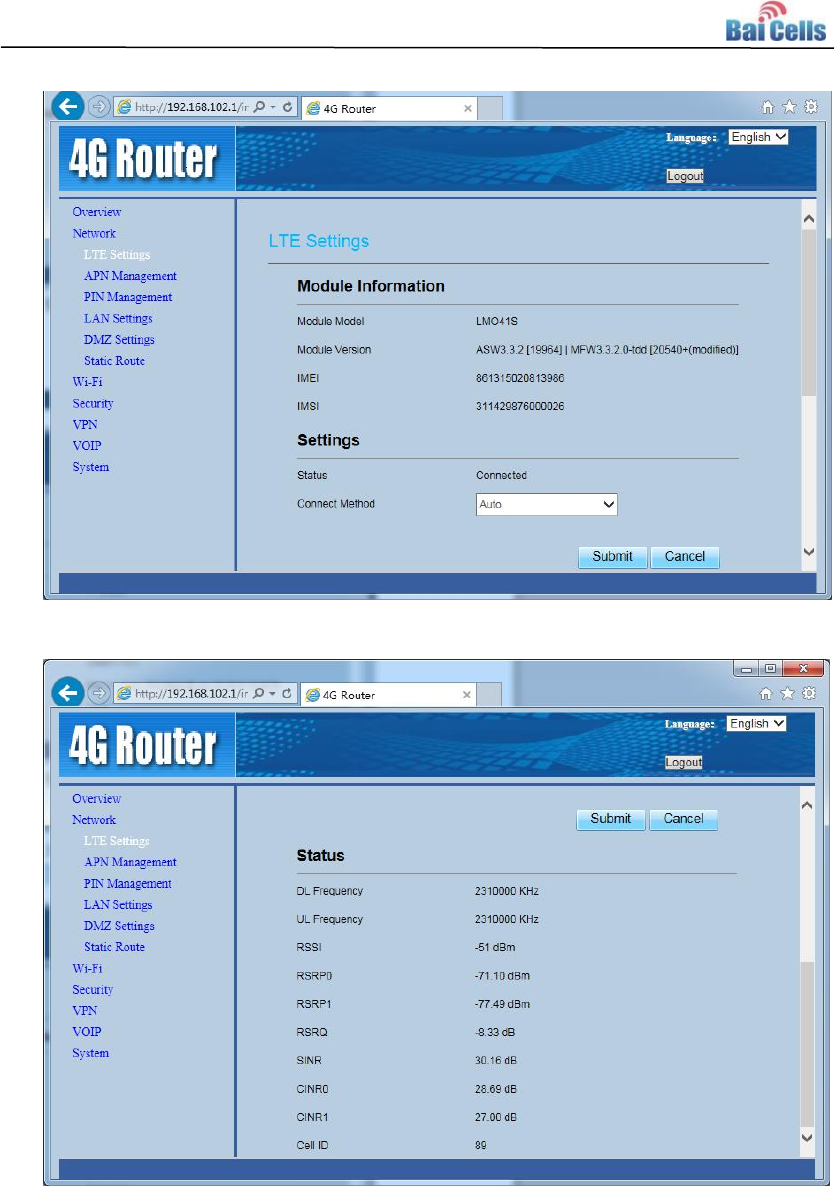
Figure 3-3 LET Settings
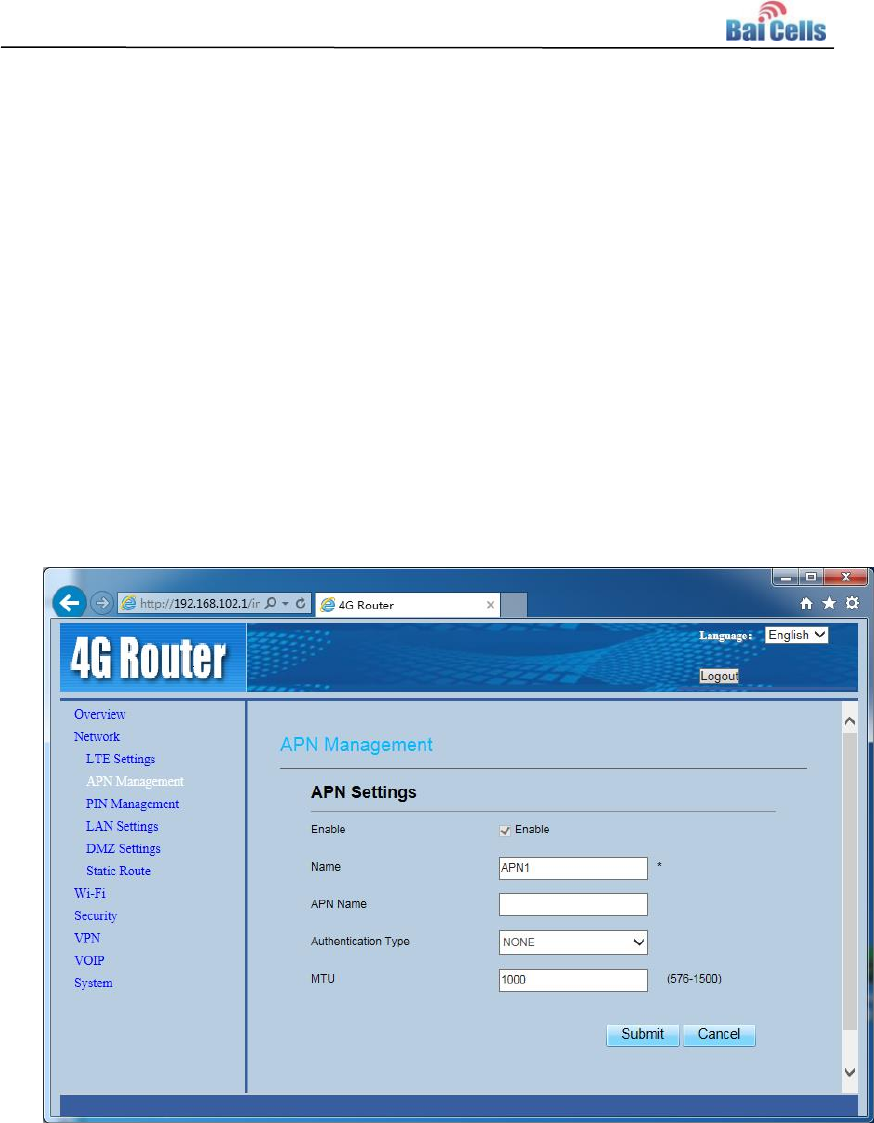
Figure 3-4 LET Status
In general, “LTE Settings” leaves the default setting.
In “Module Information” area, if IMSI field is empty, you need to check whether
SIM card has inserted or damaged.
“Settings” area displays the connection type and connection status, the value of
“Status” is unconnected, connecting, and connected. “Connect Method”
choose “Auto” mode.
11
“Status” displays the current connection status:
UL Frequency /DL Frequency: Frequency point of cell which connect or search.
If the field is empty, it indicate that searching LTE network is failed.
RSRP0/RSRP1: Indicate the RSRP of current channel. If the value is greater
than -110dBm, it indicates that the LTE signal is within the service scope of base
station, if the value is greater than -95dBm, it indicates LTE signal well.
SINR: Indicate the SINR of current channel, if the value is greater than 25dB, it
indicates channel quality well.
Cell ID: Indicate cell ID of connection.
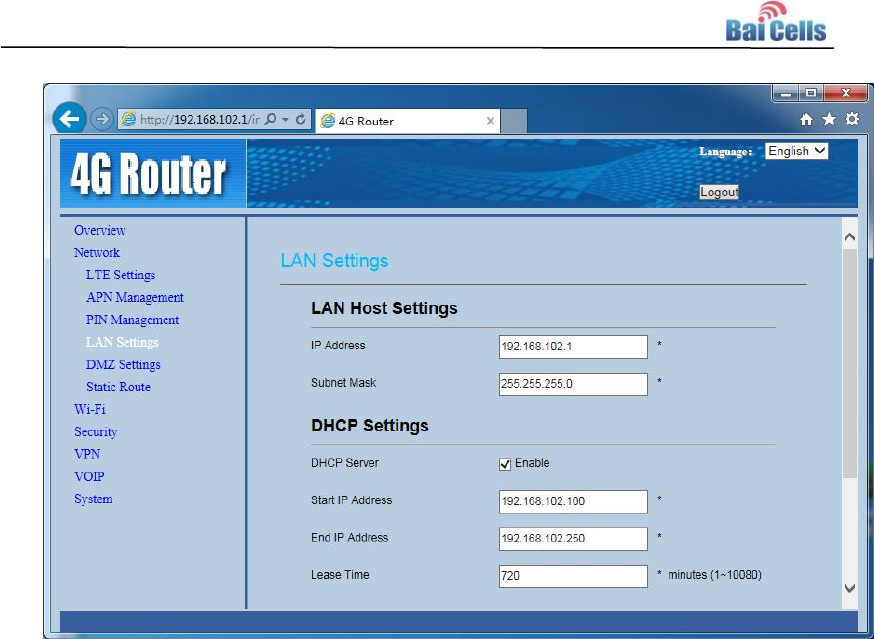
2. In the left navigation bar, choose “Network>APN Management”, as shown in
Figure 3-5.
In general, the “APN Management” leaves the default value.
Figure 3-5 APN Management
3. In the left navigation bar, choose “Network>LAN Settings”, as shown in Figure
3-6.
12
Figure 3-6 LAN Settings
In LAN Host Settings area, note that IP address of LAN port and Subnet Mask
avoid conflict with the local gateway.
In DHCP Settings area, distribute dynamic IP address for local WiFi and LAN
host. The IP address segment is the same segment with LAN Host Settings.
WiFi Settings 3.3
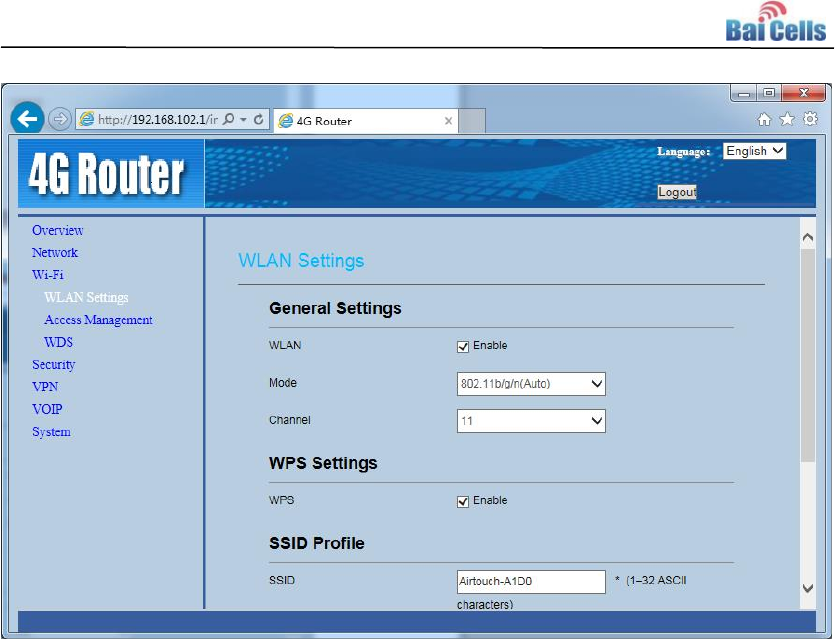
In the left navigation bar, choose “WiFi”. WiFi settings includes WLAN general settings,
WPS settings, SSID profile, WLAN encryption type, password setting, access
management and WDS settings, as shown in Figure 3-7.

17
4. Trouble Shooting
Device cannot Access to CPE through WiFi 4.1
1. Check whether WiFi function is enabled.
Observe WLAN indicator is steady on or flashing. If WLAN indicator is OFF, you need
to enter into “WiFi Settings” to enable WiFi function. Refer to 3.3WiFi Settings.
2. SSID and password is incorrect.
In web client, enter into “WiFi Settings”, reset SSID and password.
3. If web client cannot login, you need to reset CPE.
Long press reset button over 10s to restore the factory settings.
CPE cannot connect to internet 4.2
Without SIM card or SIM card damaged
1. Check whether SIM card have inserted into USIM slot.
2. Log in web client, check whether there is the hint “PIN LOCKED”. If “PIN
LOCKED”, you need to unlock SIM card as follows.
a) Enter into PIN Management, try to type in: 1234.
b) If 1234 is incorrect, try three times, enter into PIN code input page, type in:
12345678.
c) Reset PIN code and set PIN Verification is Disable.
d) If PIN code is incorrect, you need to contact SIM card vendor.
3. Log in web client, choose “LTE Settings”, check the value of IMSI. If it is empty
and SIM card is normal, you need to reboot CPE, wait for 1minute, log in web
client again, check the value of IMSI. If it is also empty, change SIM card.
Without LTE signal or LTE network access privilege
1. Check the status of CPE indicator.
If MODE indicator is flashing continuous, it indicates that CPE is searching
network, wait for 5 minutes.
2. If CPE still cannot connect to internet. Log in web client, enter into “LTE
Settings”, if IMSI is invalid (did not consist with user agreement), you need to
change SIM card or contact SIM card vendor.

18
3. Lon in web client, choose “Network>LTE Settings”. If the value of Connect
Method is Manual, reset it to Auto, and reboot CPE.
4. If CPE still cannot connect to internet. Lon in web client, choose “Network>LTE
Settings”. Check whether the value of status is Unconnected in Settings area,
it indicates that LTE network is abnormal, you need to contact vendor. If the
value of status is Connecting for a long time, it indicates that CPE is not within
scope of LTE network, you need to move CPE to next to a window.
5. If CPE still cannot connect to internet, it indicates that CPE is not in service
network, you need to contact vendor.

19
5. Regulatory Compliance
FCC Compliance
This device complies with part 15 of the FCC Rules. Operation is subject to the
following two conditions: (1) This device may not cause harmful interference, and (2)
this device must accept any interference received, including interference that may
cause undesired operation.
Any Changes or modifications not expressly approved by the party responsible for
compliance could void the user's authority to operate the equipment.
This equipment has been tested and found to comply with the limits for a Class B
digital device, pursuant to part 15 of the FCC Rules. These limits are designed to
provide reasonable protection against harmful interference in a residential installation.
This equipment generates uses and can radiate radio frequency energy and, if not
installed and used in accordance with the instructions, may cause harmful
interference to radio communications. However, there is no guarantee that
interference will not occur in a particular installation. If this equipment does cause
harmful interference to radio or television reception, which can be determined by
turning the equipment off and on, the user is encouraged to try to correct the
interference by one or more of the following measures:
Reorient or relocate the receiving antenna.
Increase the separation between the equipment and receiver.
Connect the equipment into an outlet on a circuit different from that to which the
receiver is connected.
Consult the dealer or an experienced radio/TV technician for help.
Warning
This equipment complies with FCC radiation exposure limits set forth for an
uncontrolled environment. This equipment should be installed and operated with
minimum distance 20 cm between the radiator & your body.

20
IC Compliance
This device complies with Industry Canada licence-exempt RSS standard(s).
Operation is subject to the following two conditions: (1) This device may not cause
interference, and (2) This device must accept any interference, including
interference that may cause undesired operation of the device.
Le présent appareil est conforme aux CNR d'Industrie Canada applicables aux
appareils radio exempts de licence. L'exploitation est autorisée aux deux
conditions suivantes:
(1) l'appareil ne doit pas produire de brouillage, et
(2) l'utilisateur de l'appareil doit accepter tout brouillage radioélectrique subi,
même si le brouillage est susceptible d'en compromettre le fonctionnement.
The antenna(s) used for this transmitter must be installed to provide a
separation distance of at least 20 cm from all persons and must not be
collocated or operating in conjunction with any other antenna or transmitter,
End-Users must be provided with transmitter operation conditions for satisfying
RF exposure compliance.
21
Shipping List Appendix A
Item
Quantity
Assembled product
1
12V/1A adapter
1
User Manual
1
