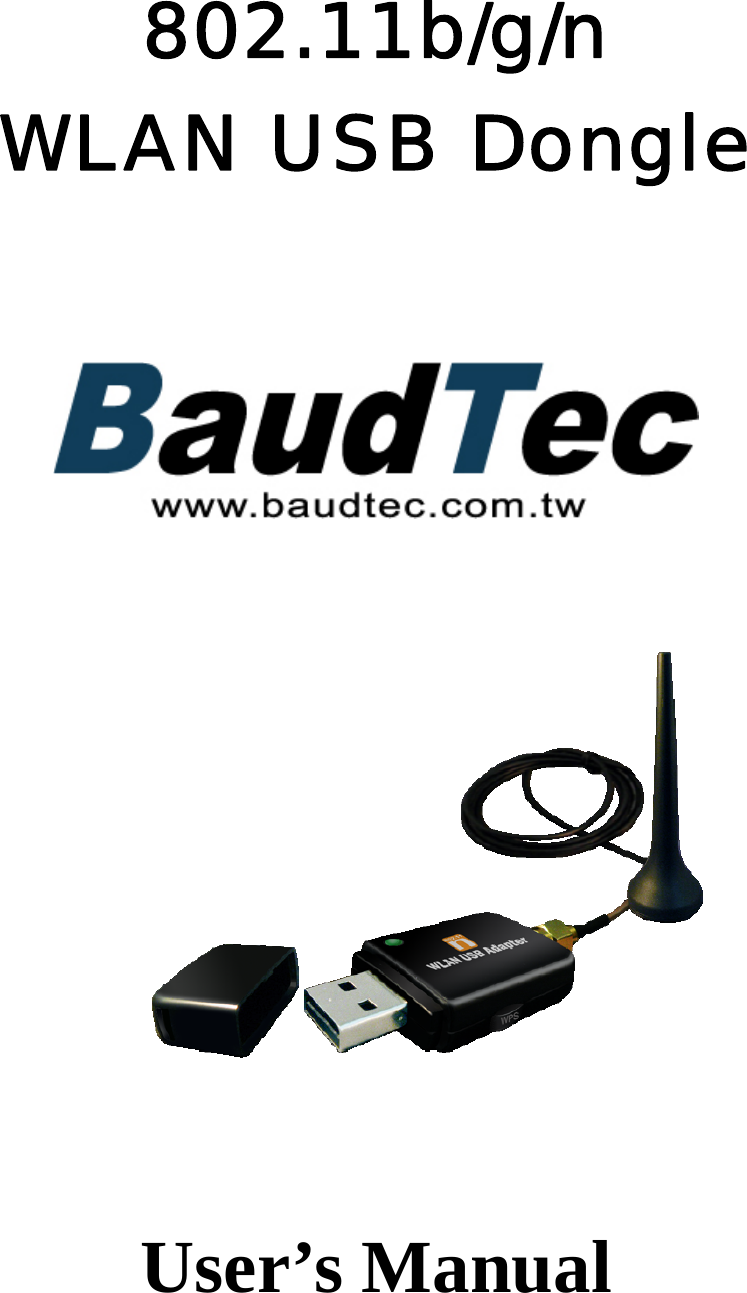
BaudTec RE150U-DT 802.11b/g/n WLAN USB DONGLE User Manual
BaudTec Corporation 802.11b/g/n WLAN USB DONGLE Users Manual
UserManual.wiki
>
BaudTec
>
RE150U DT User Manual
Users Manual
Navigation menu
Upload a User Manual
Namespaces
Wiki Guide
HTML
PDF
Info
Views
User Manual
Discussion / Help
Navigation
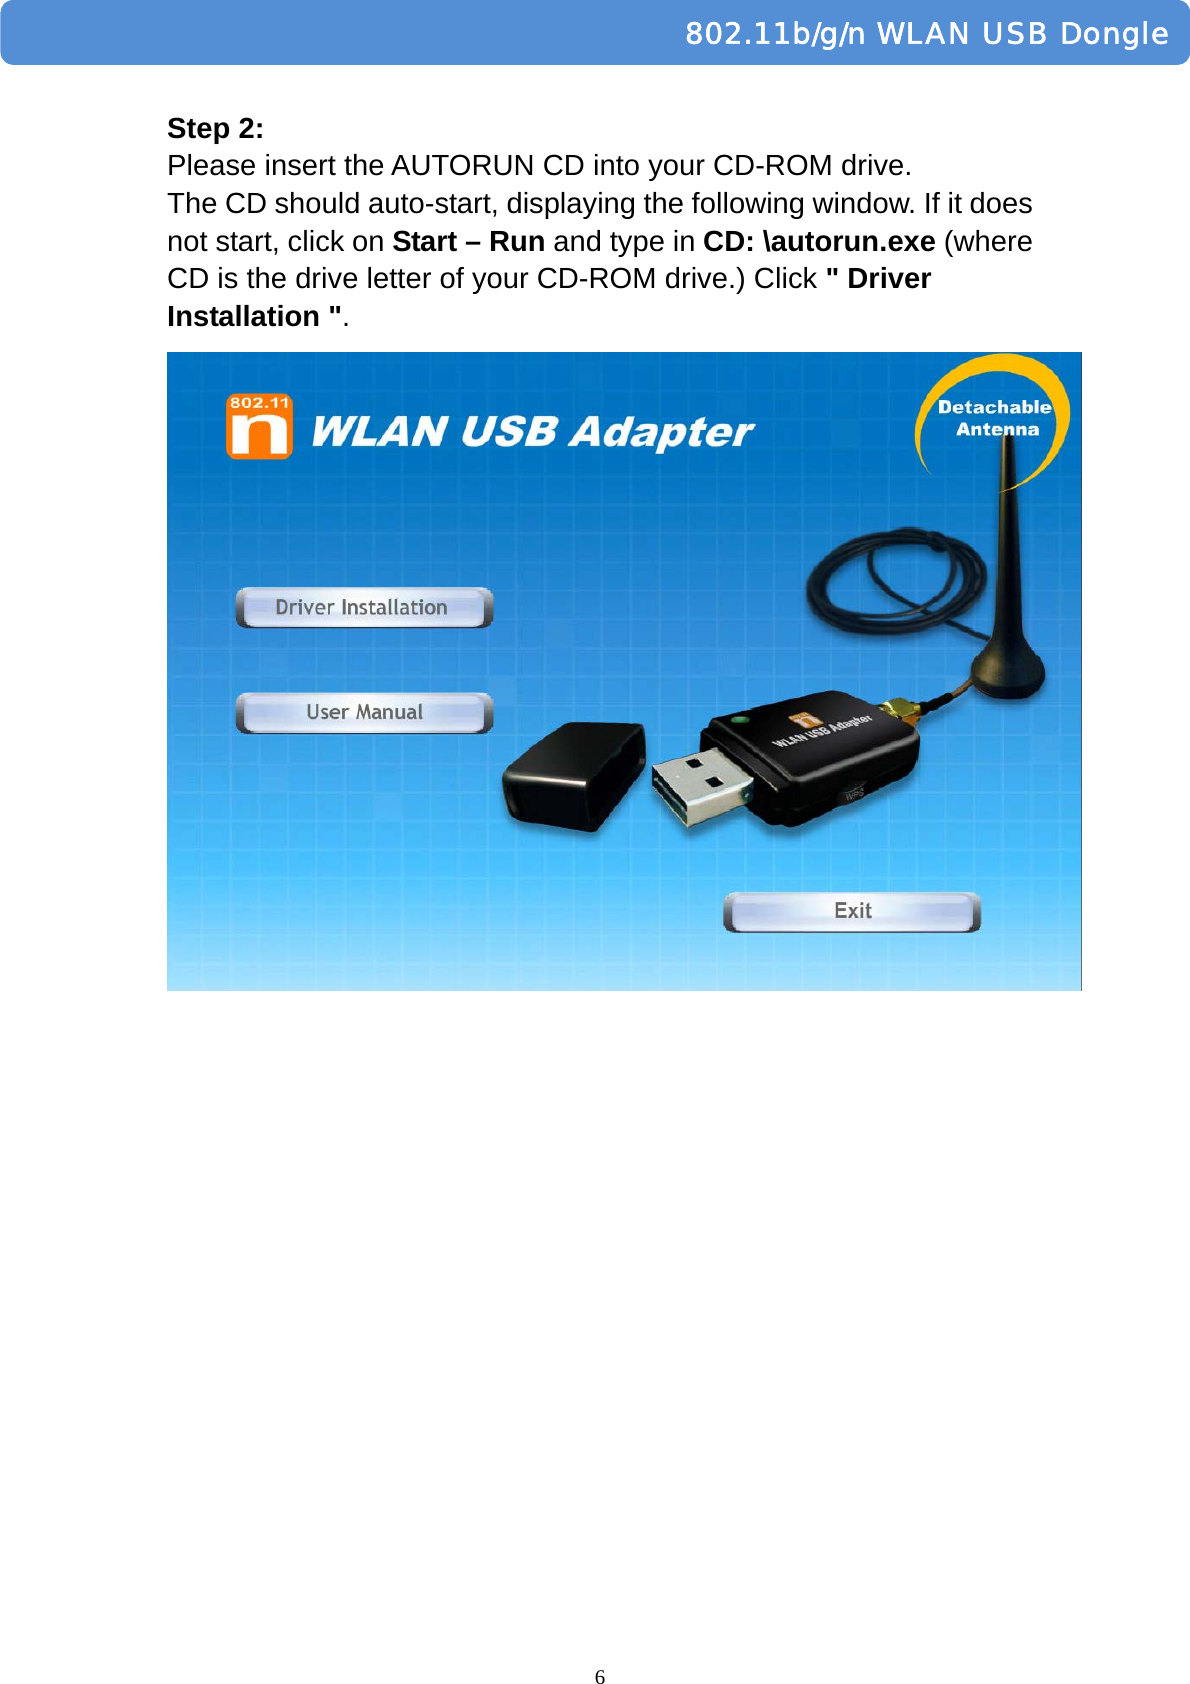
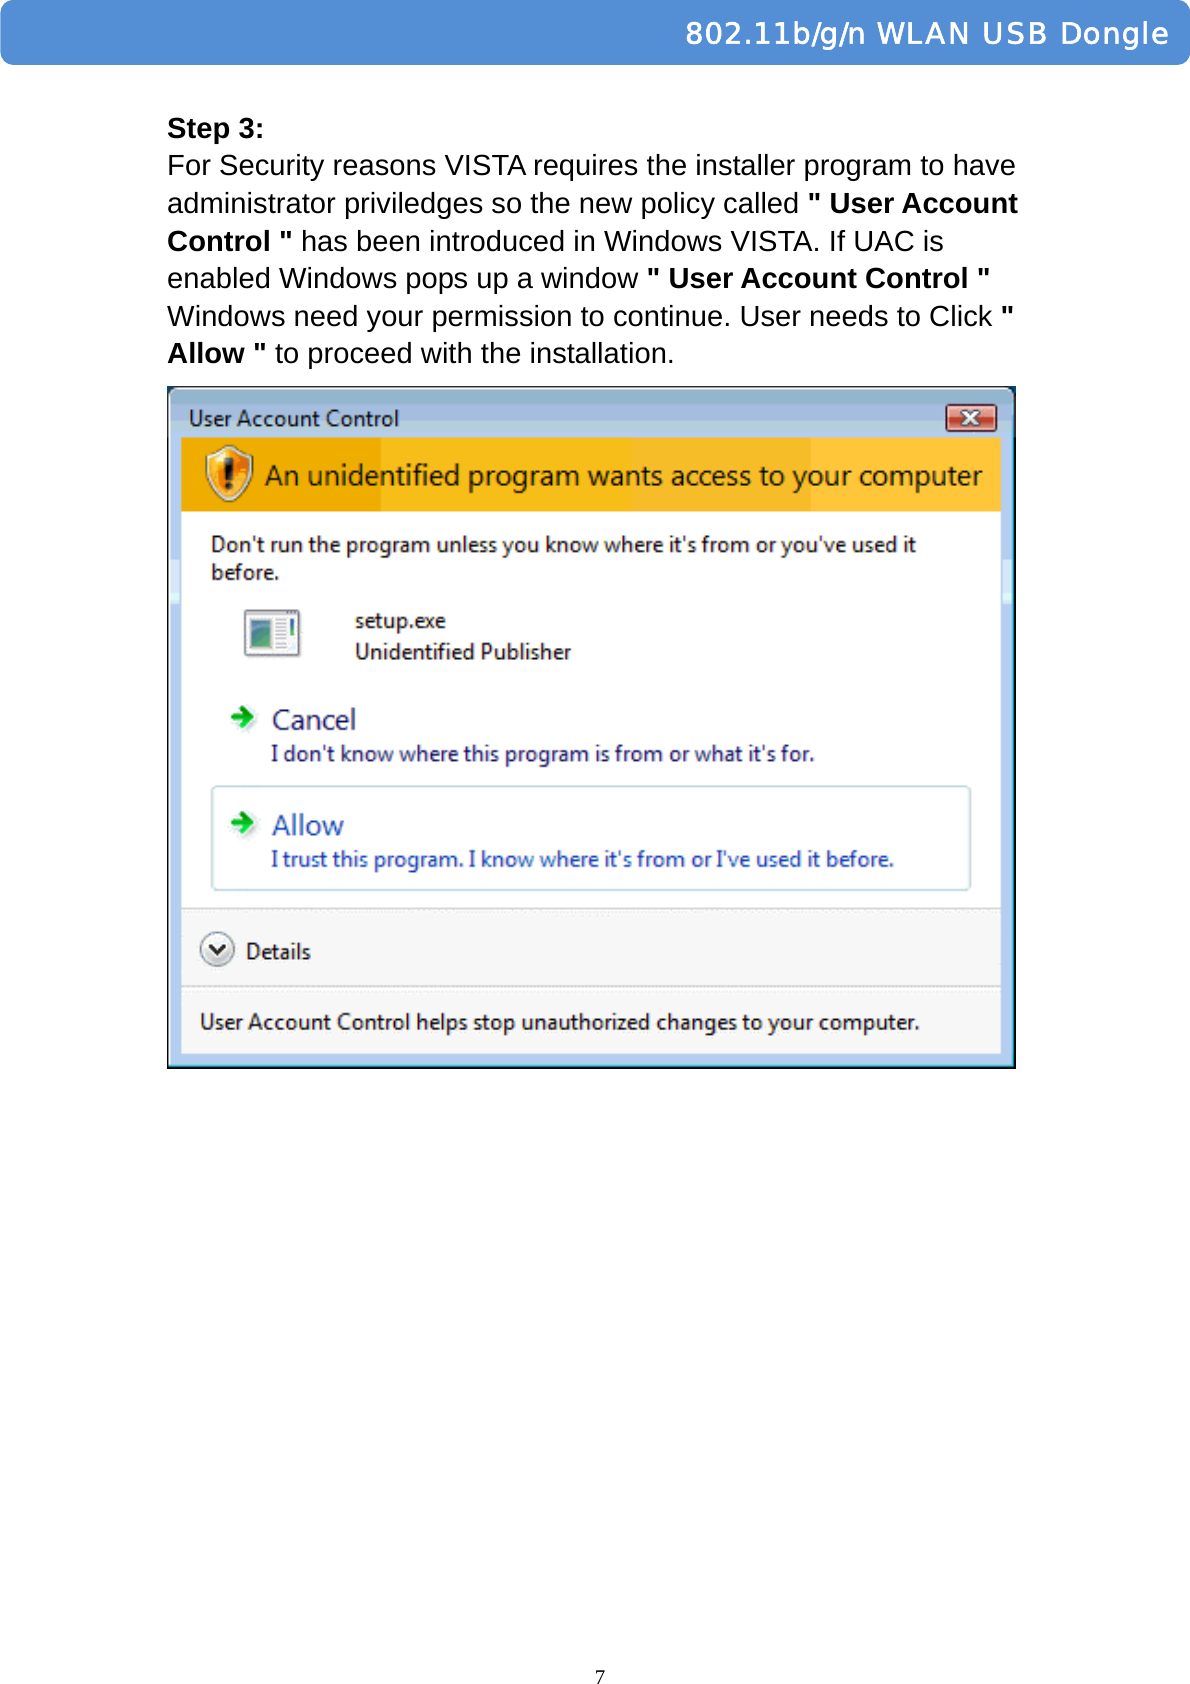
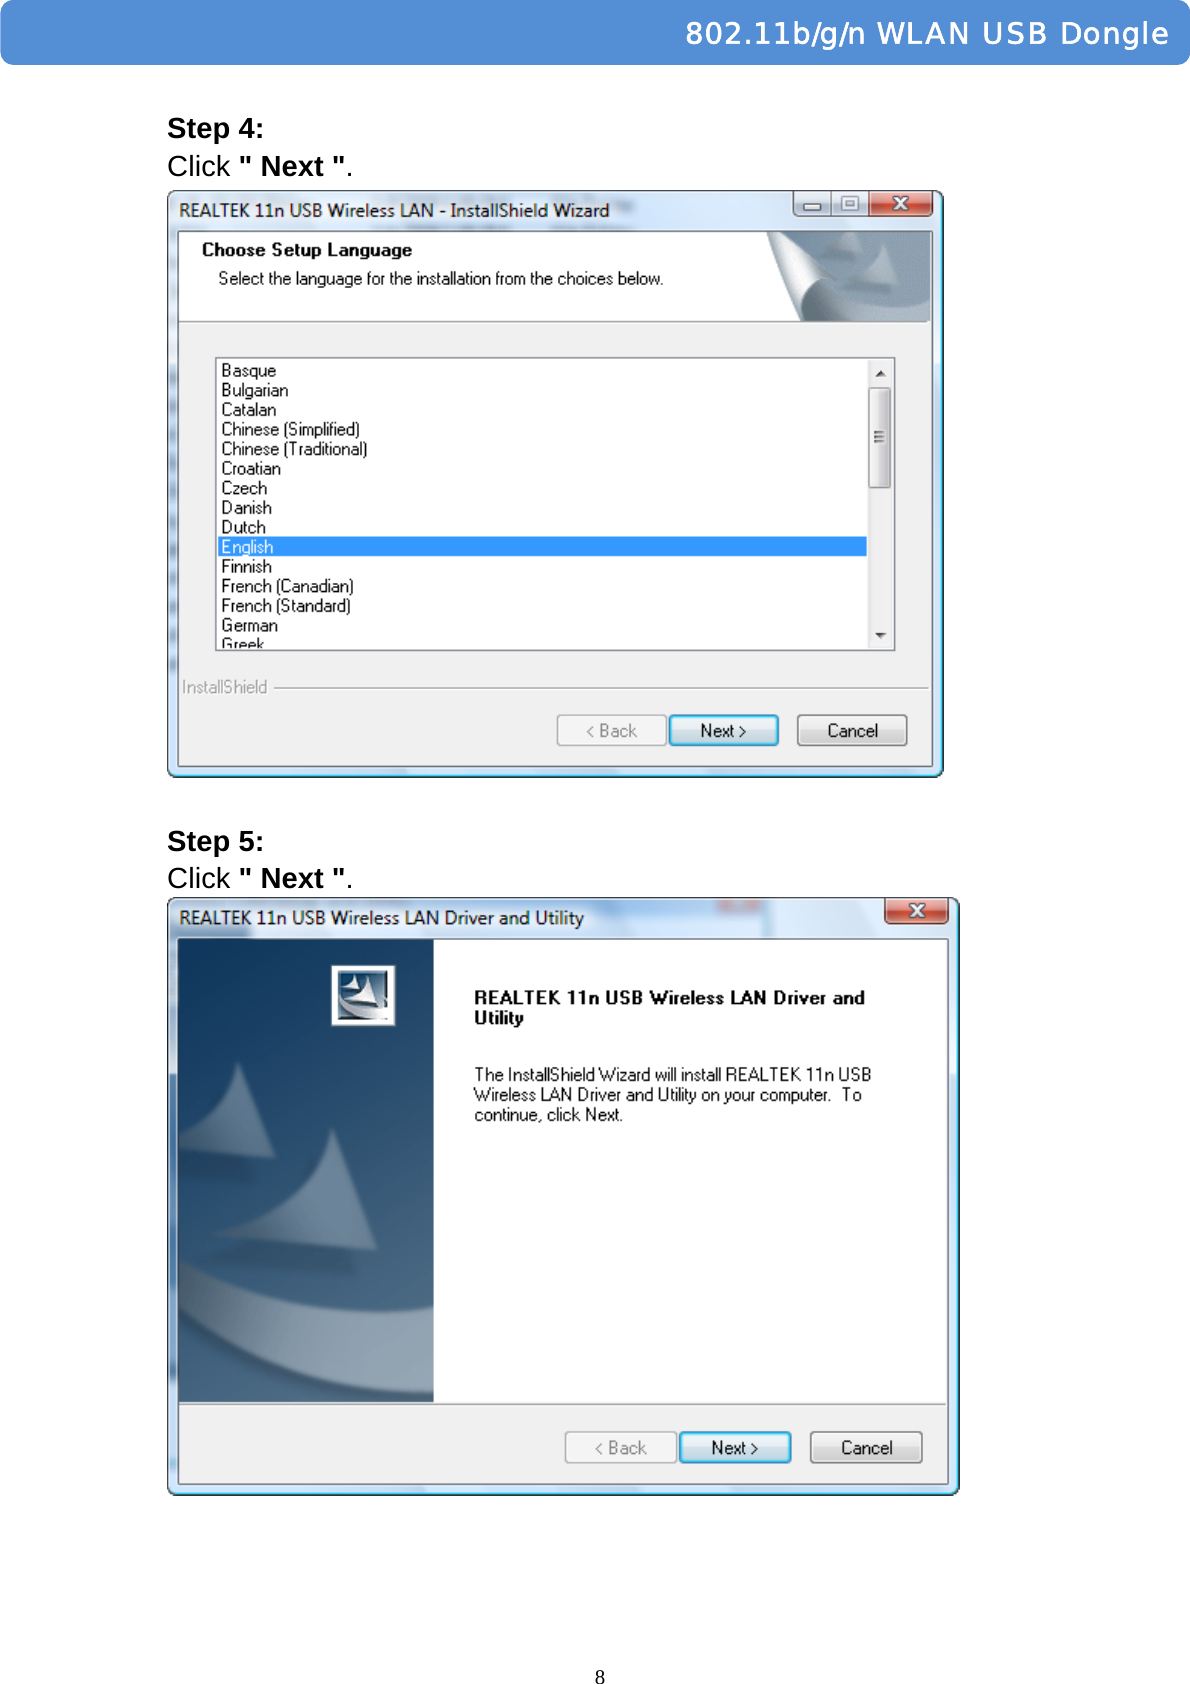
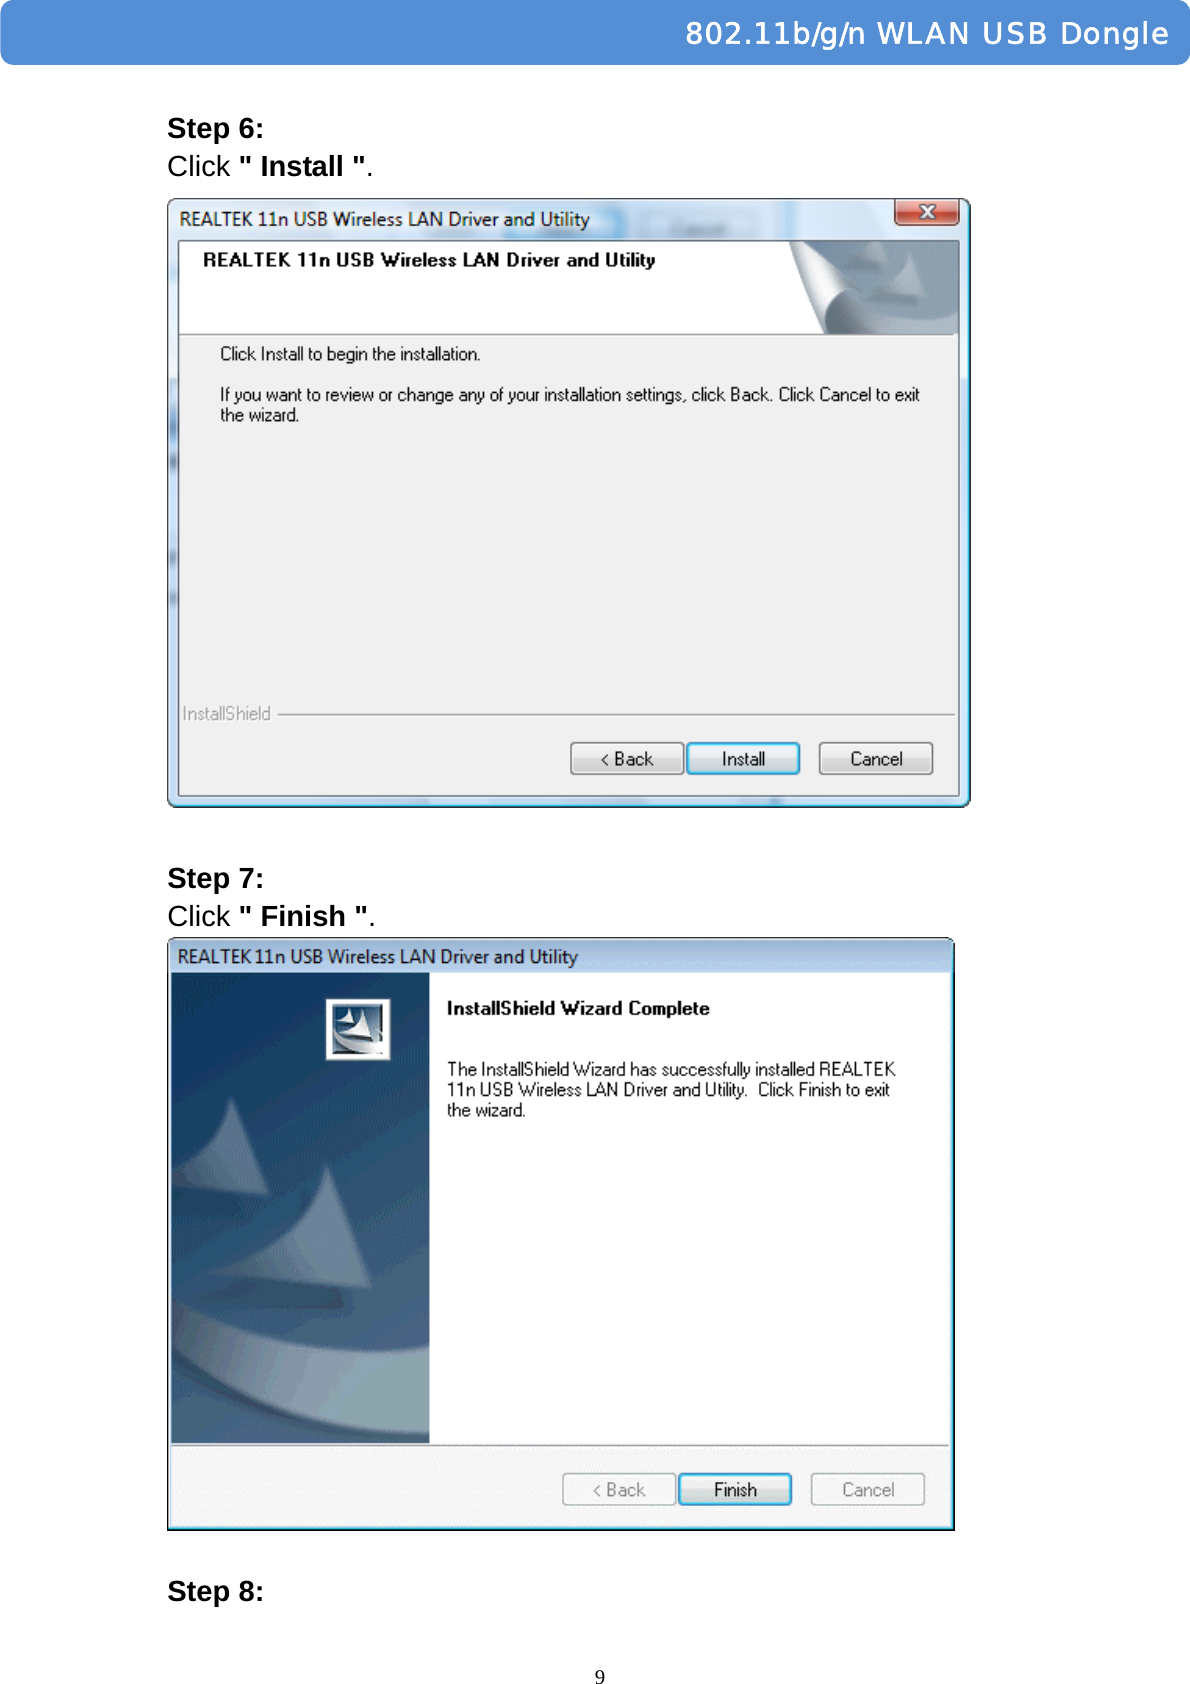
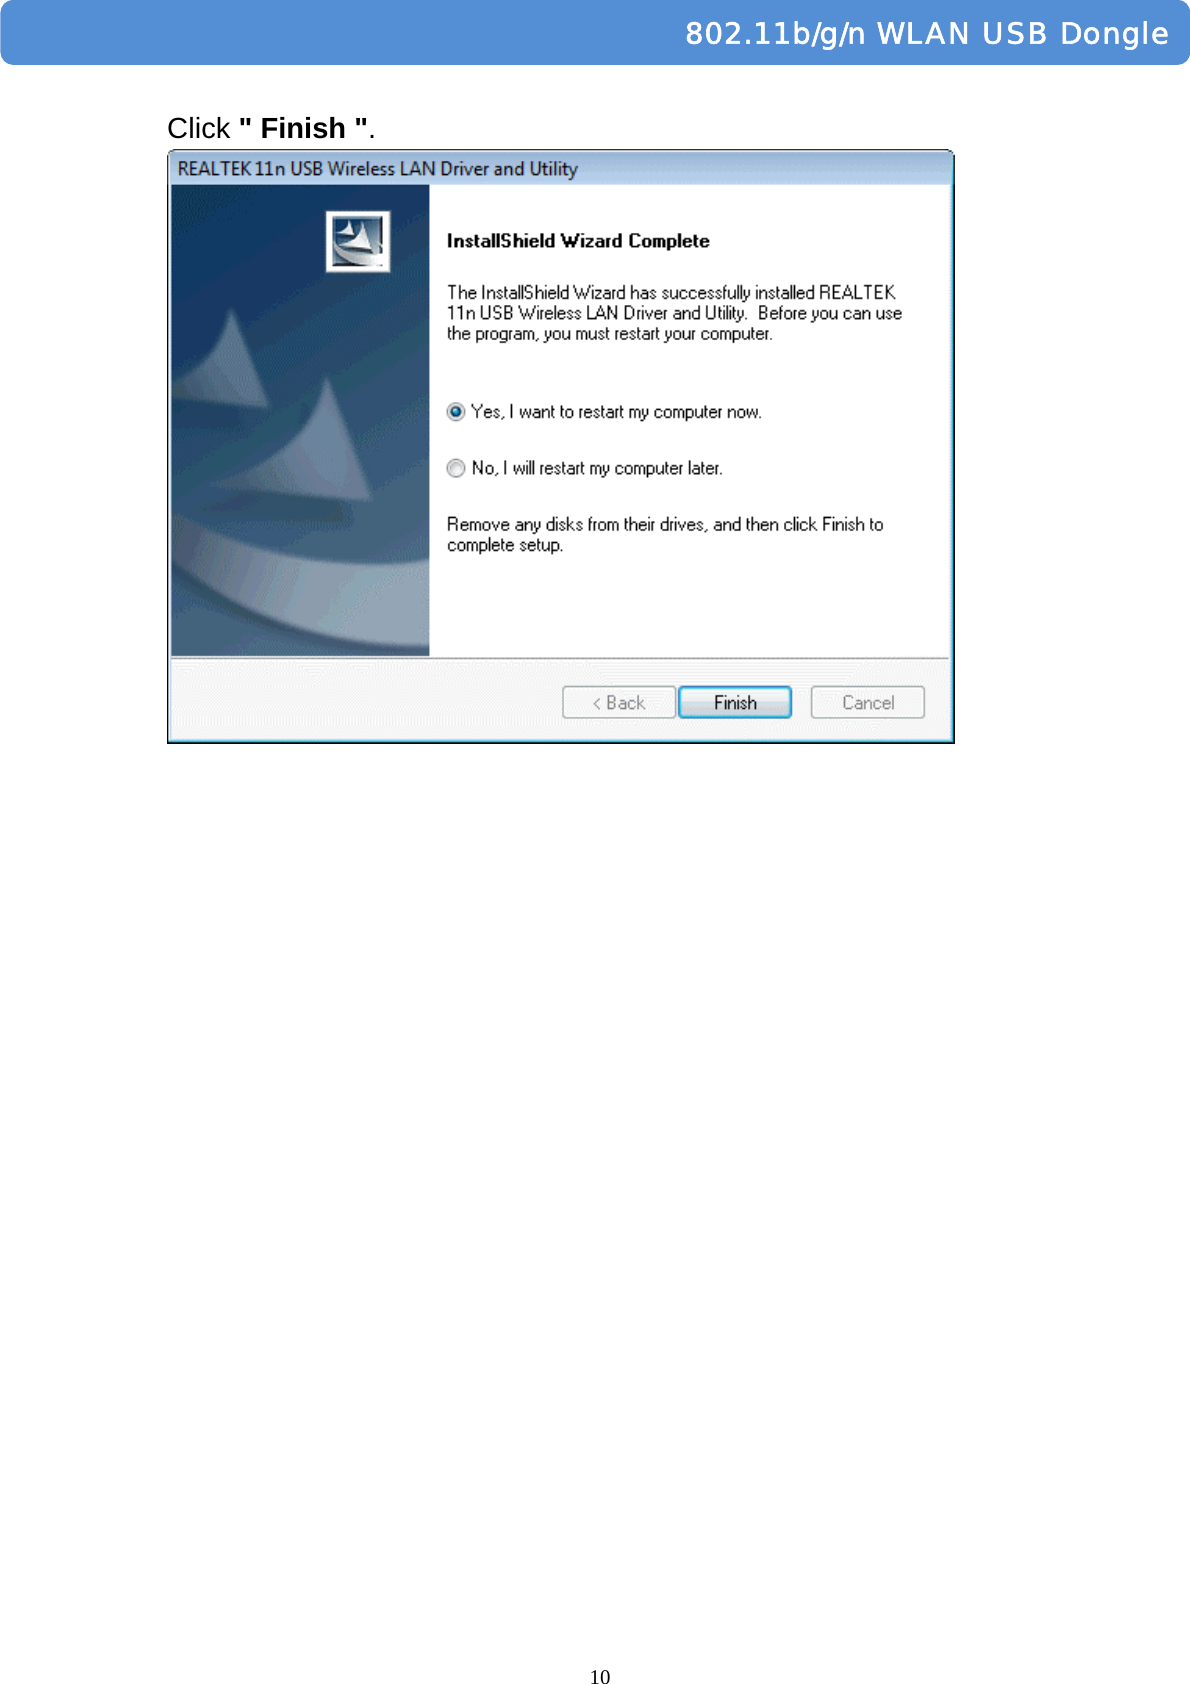
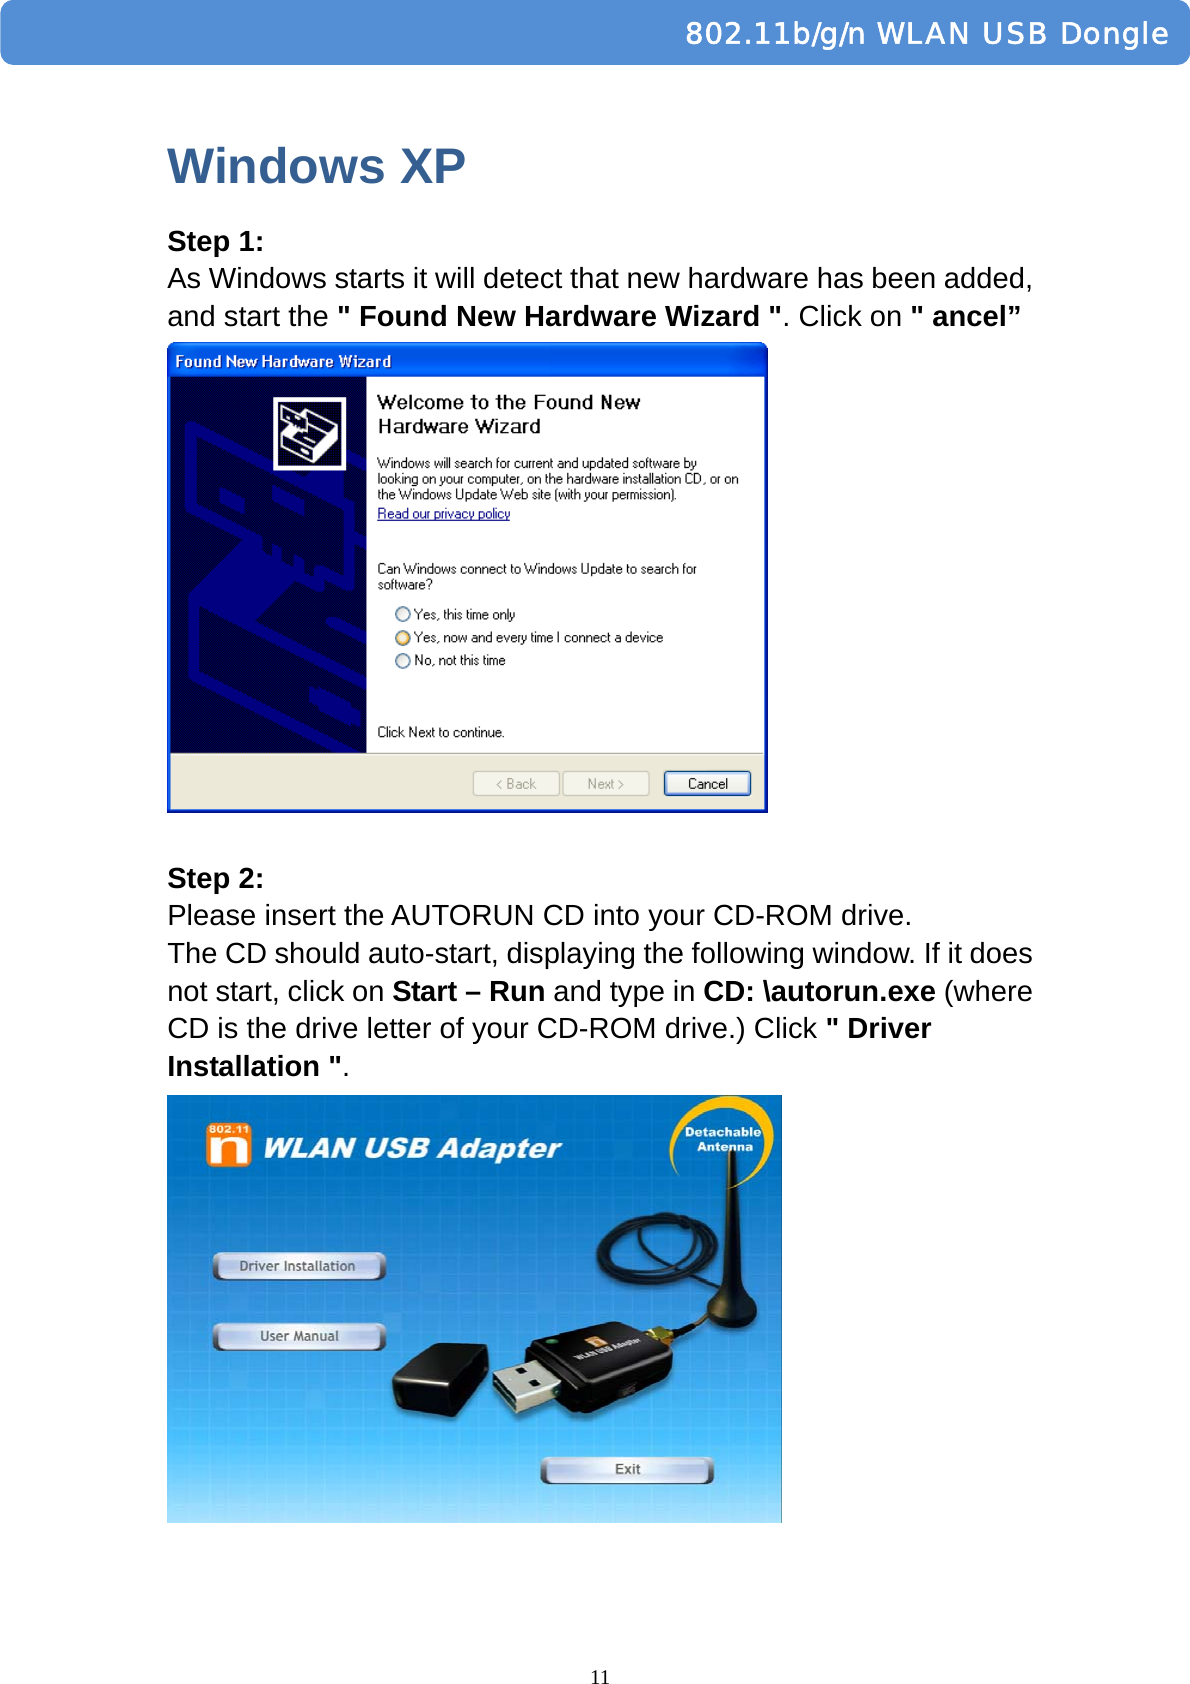
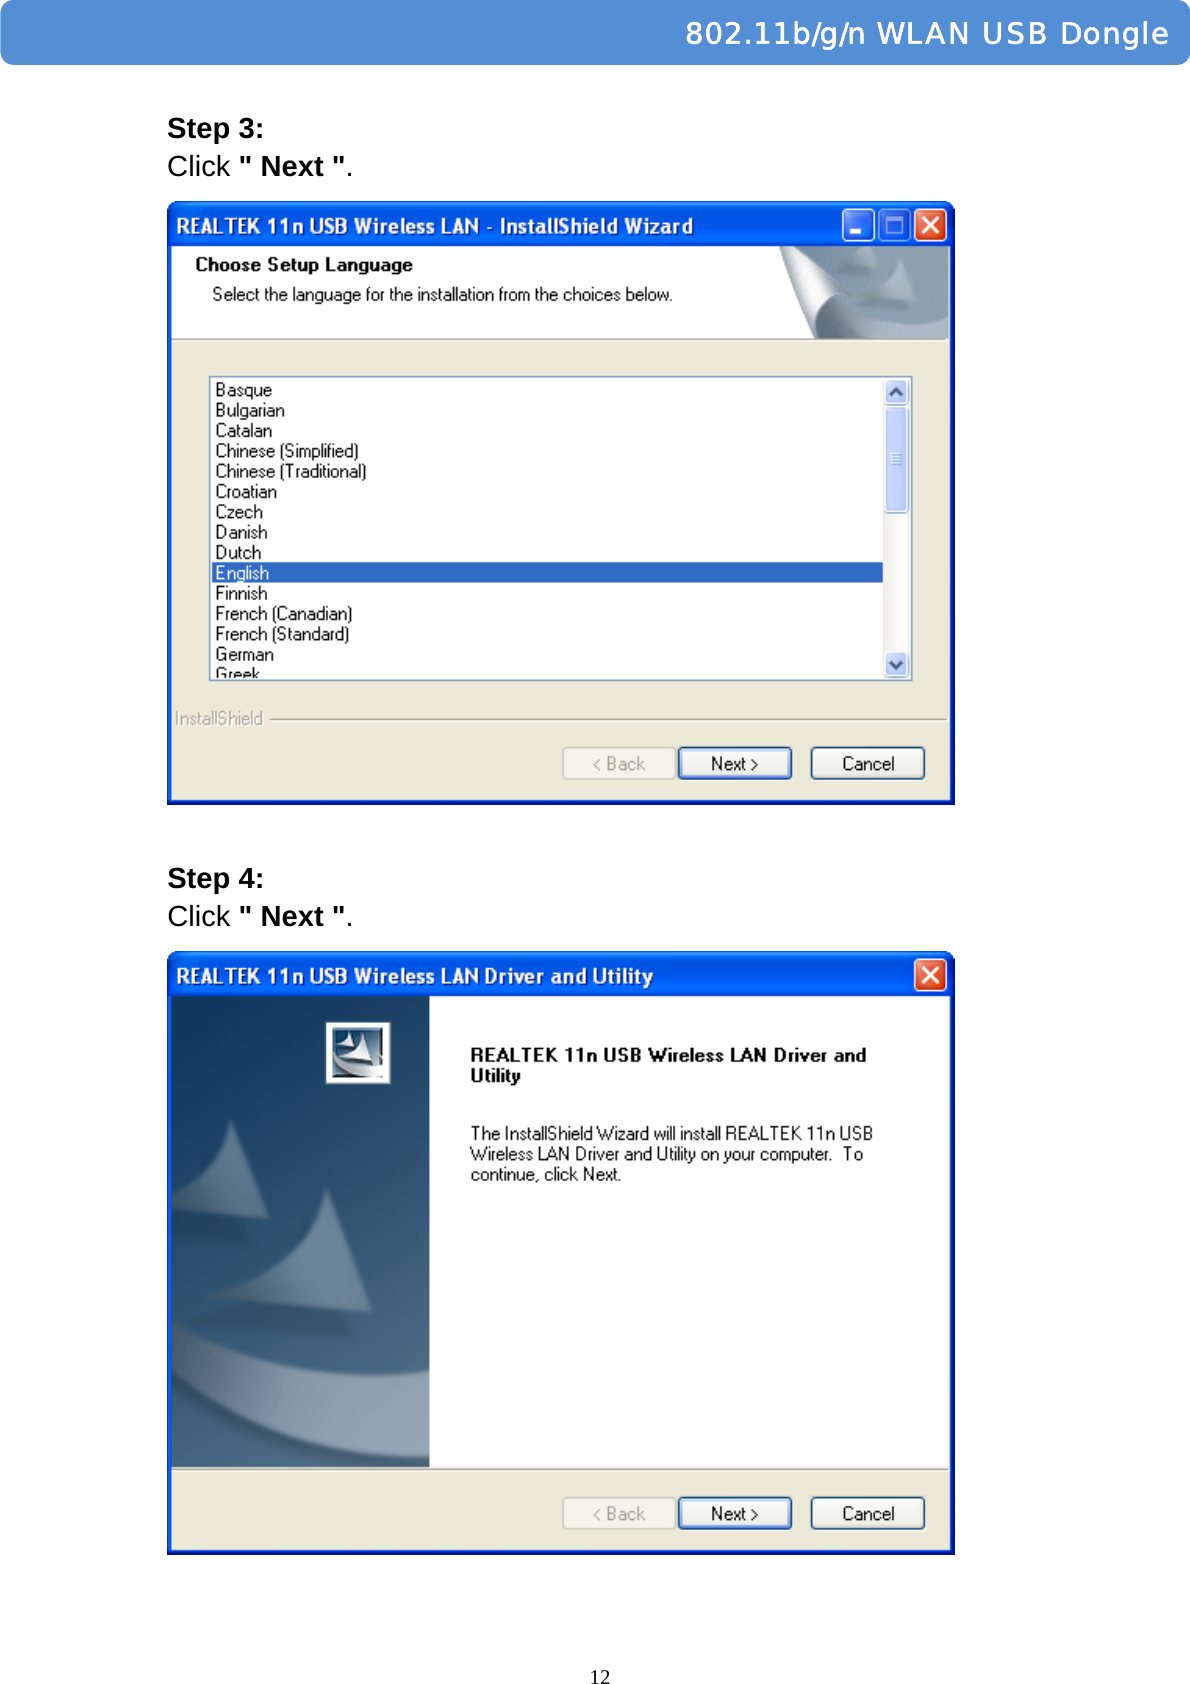
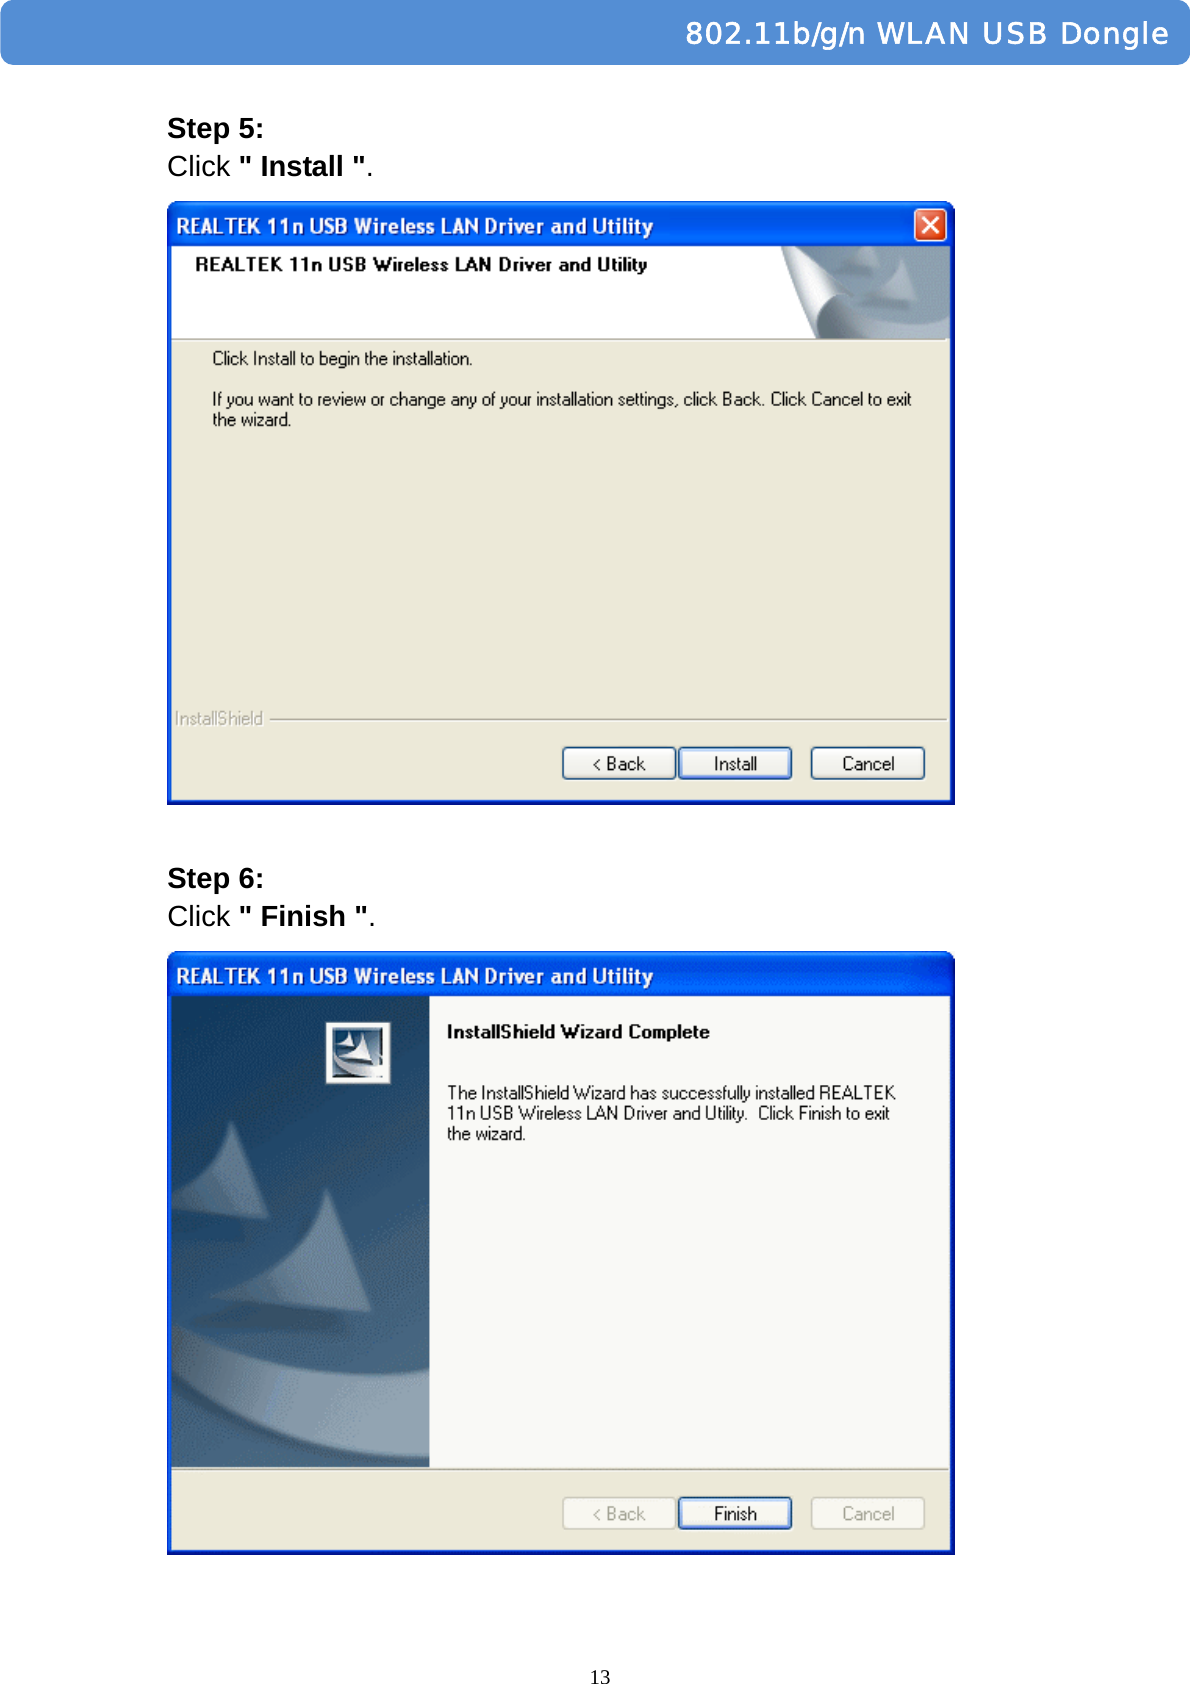


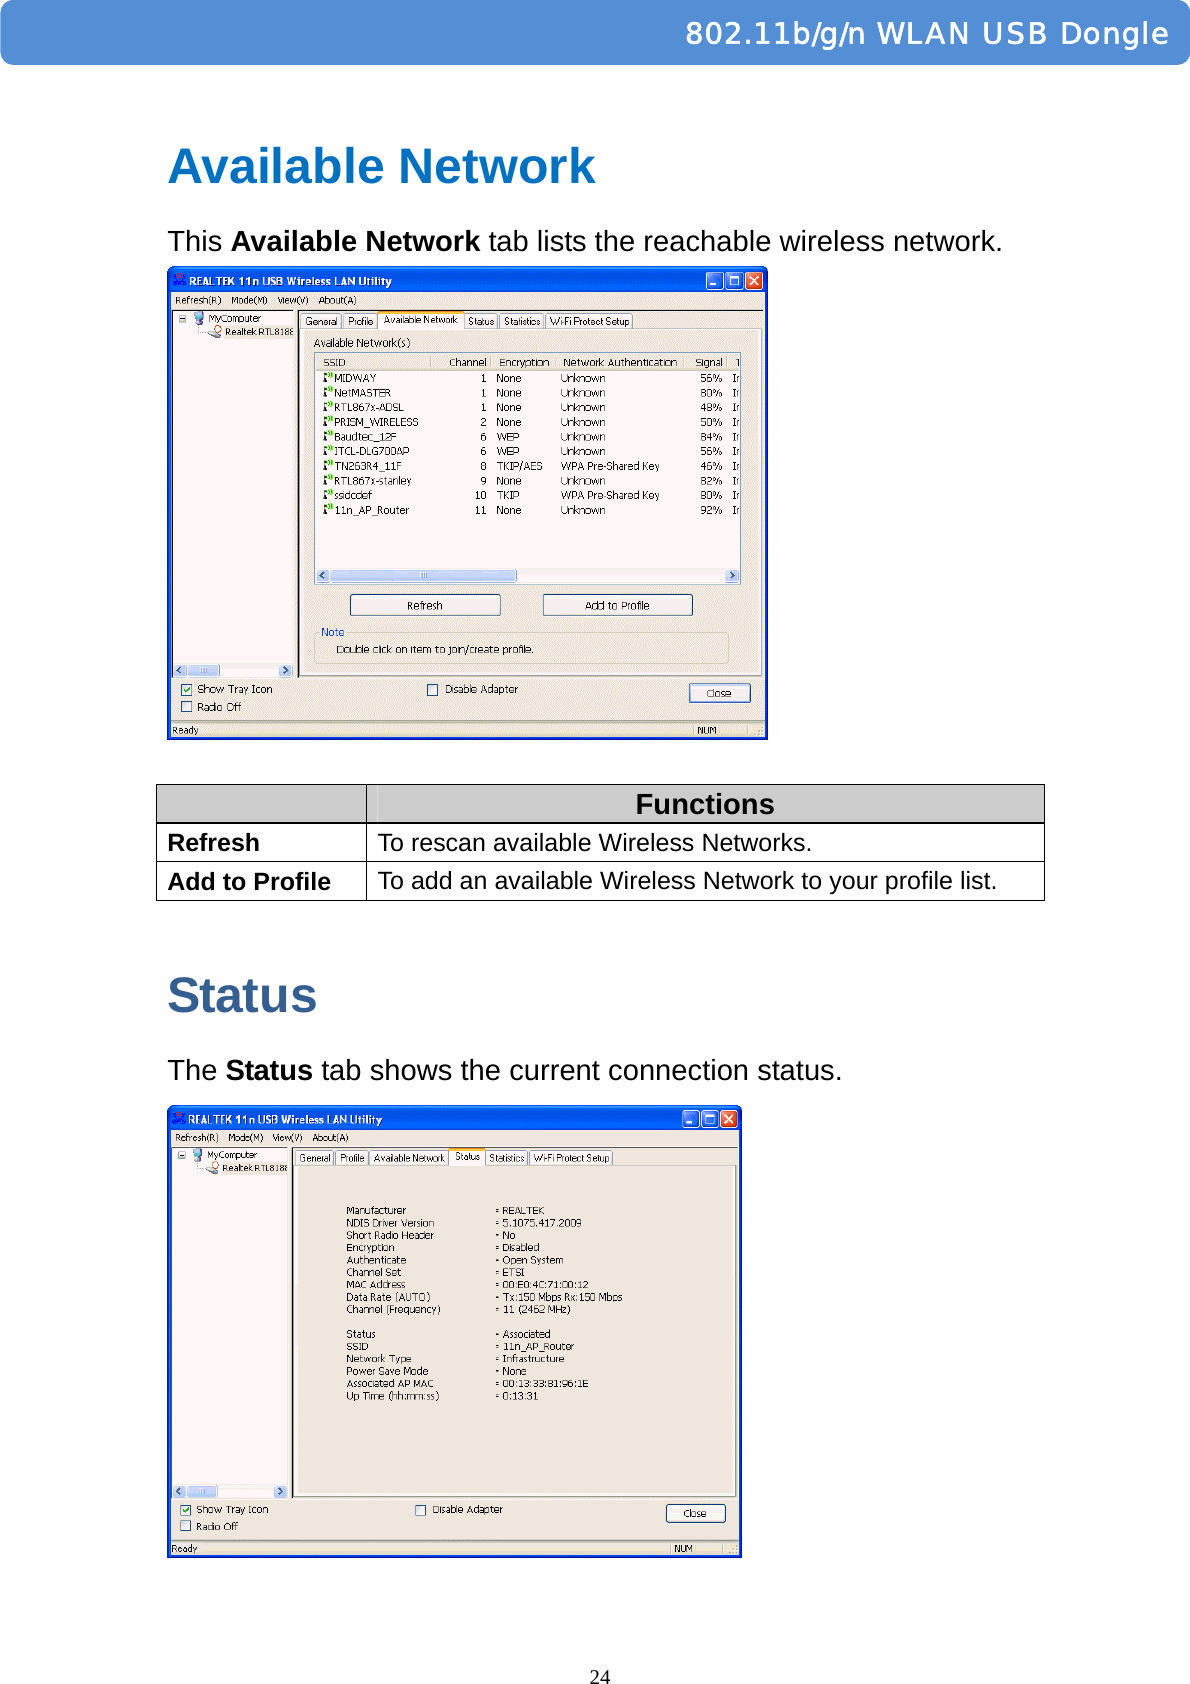
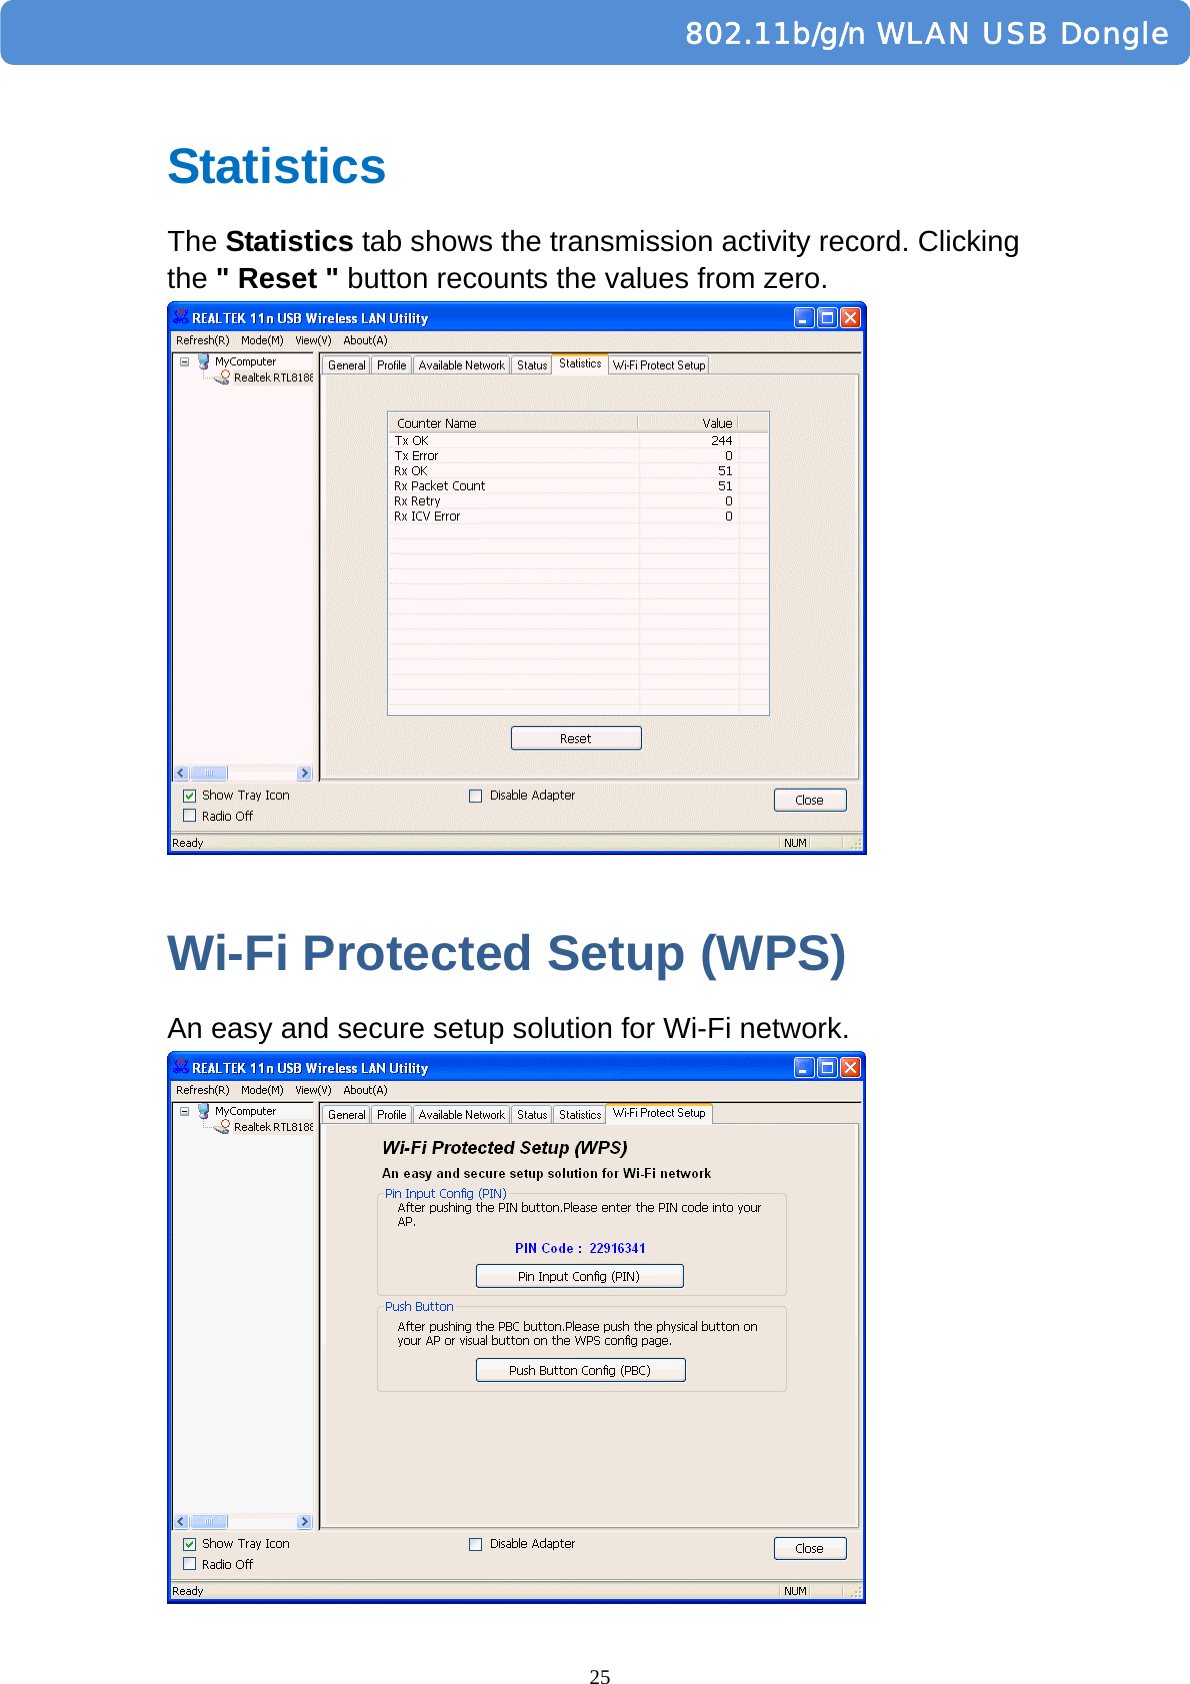
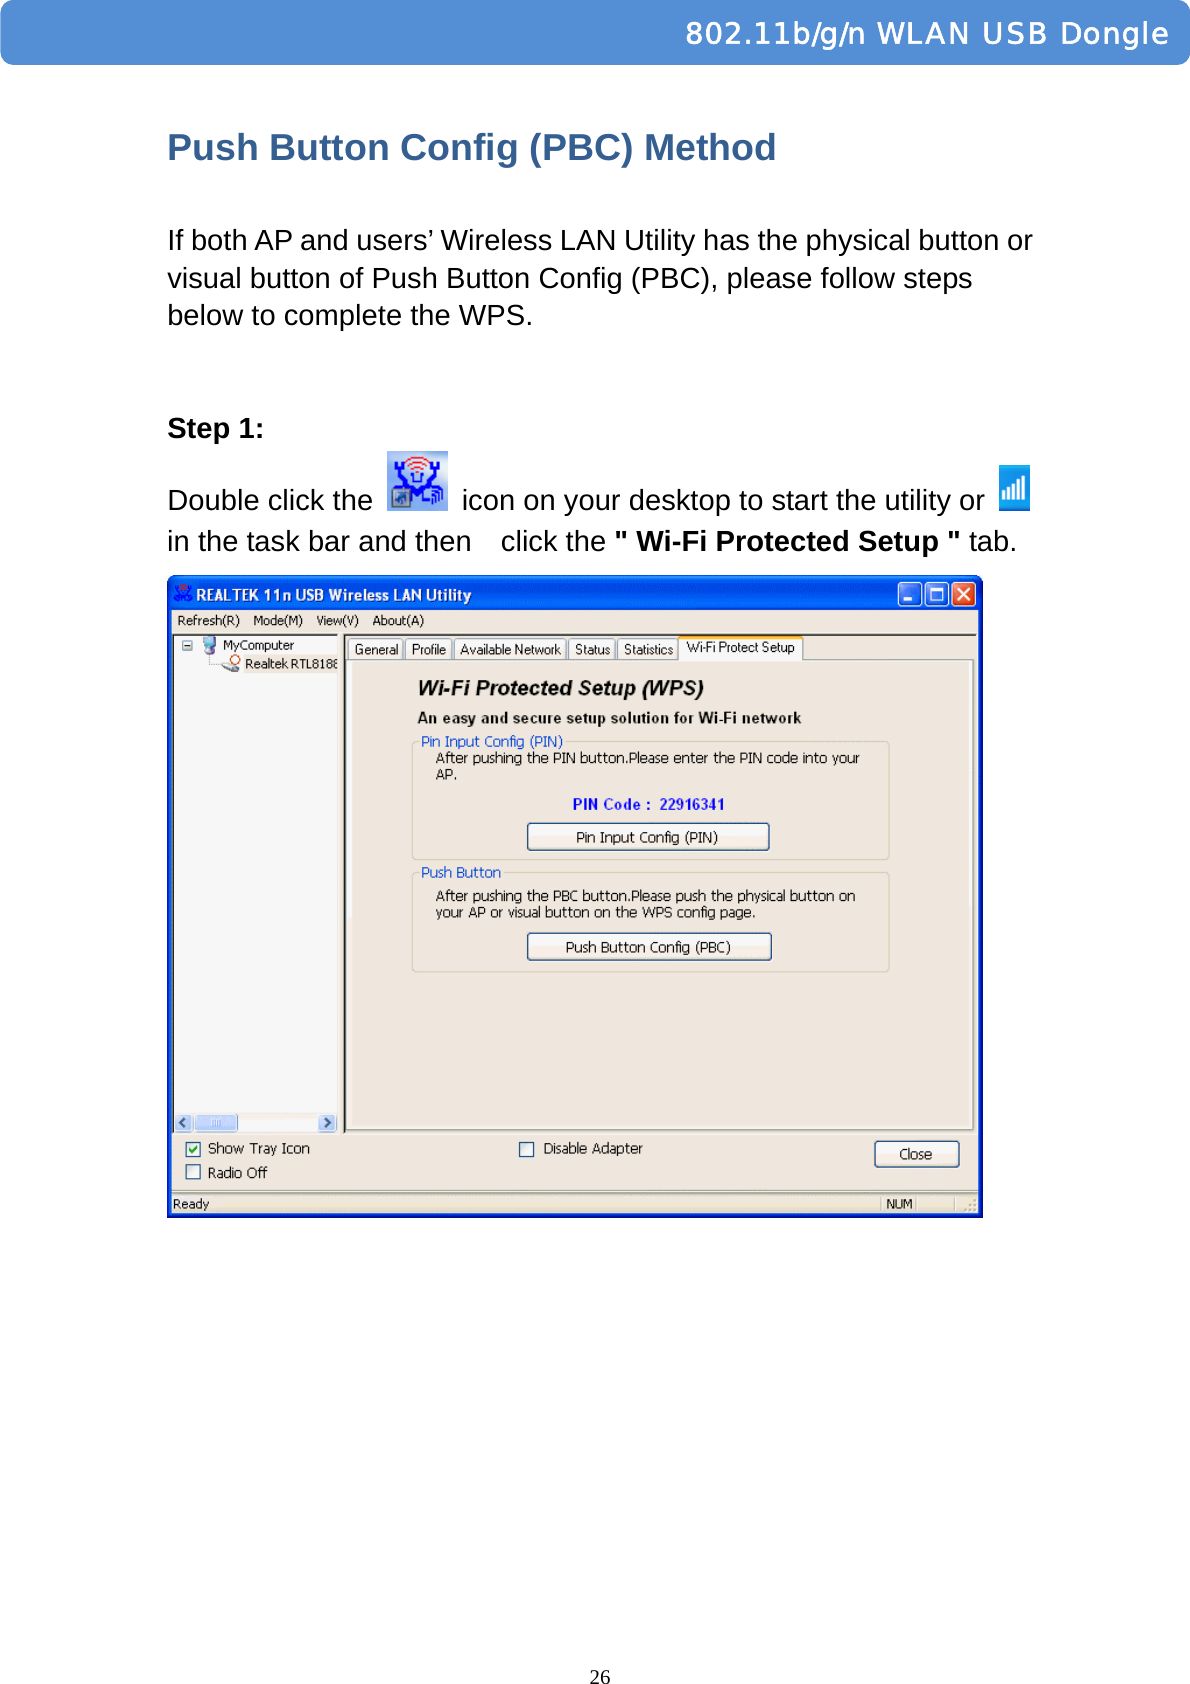
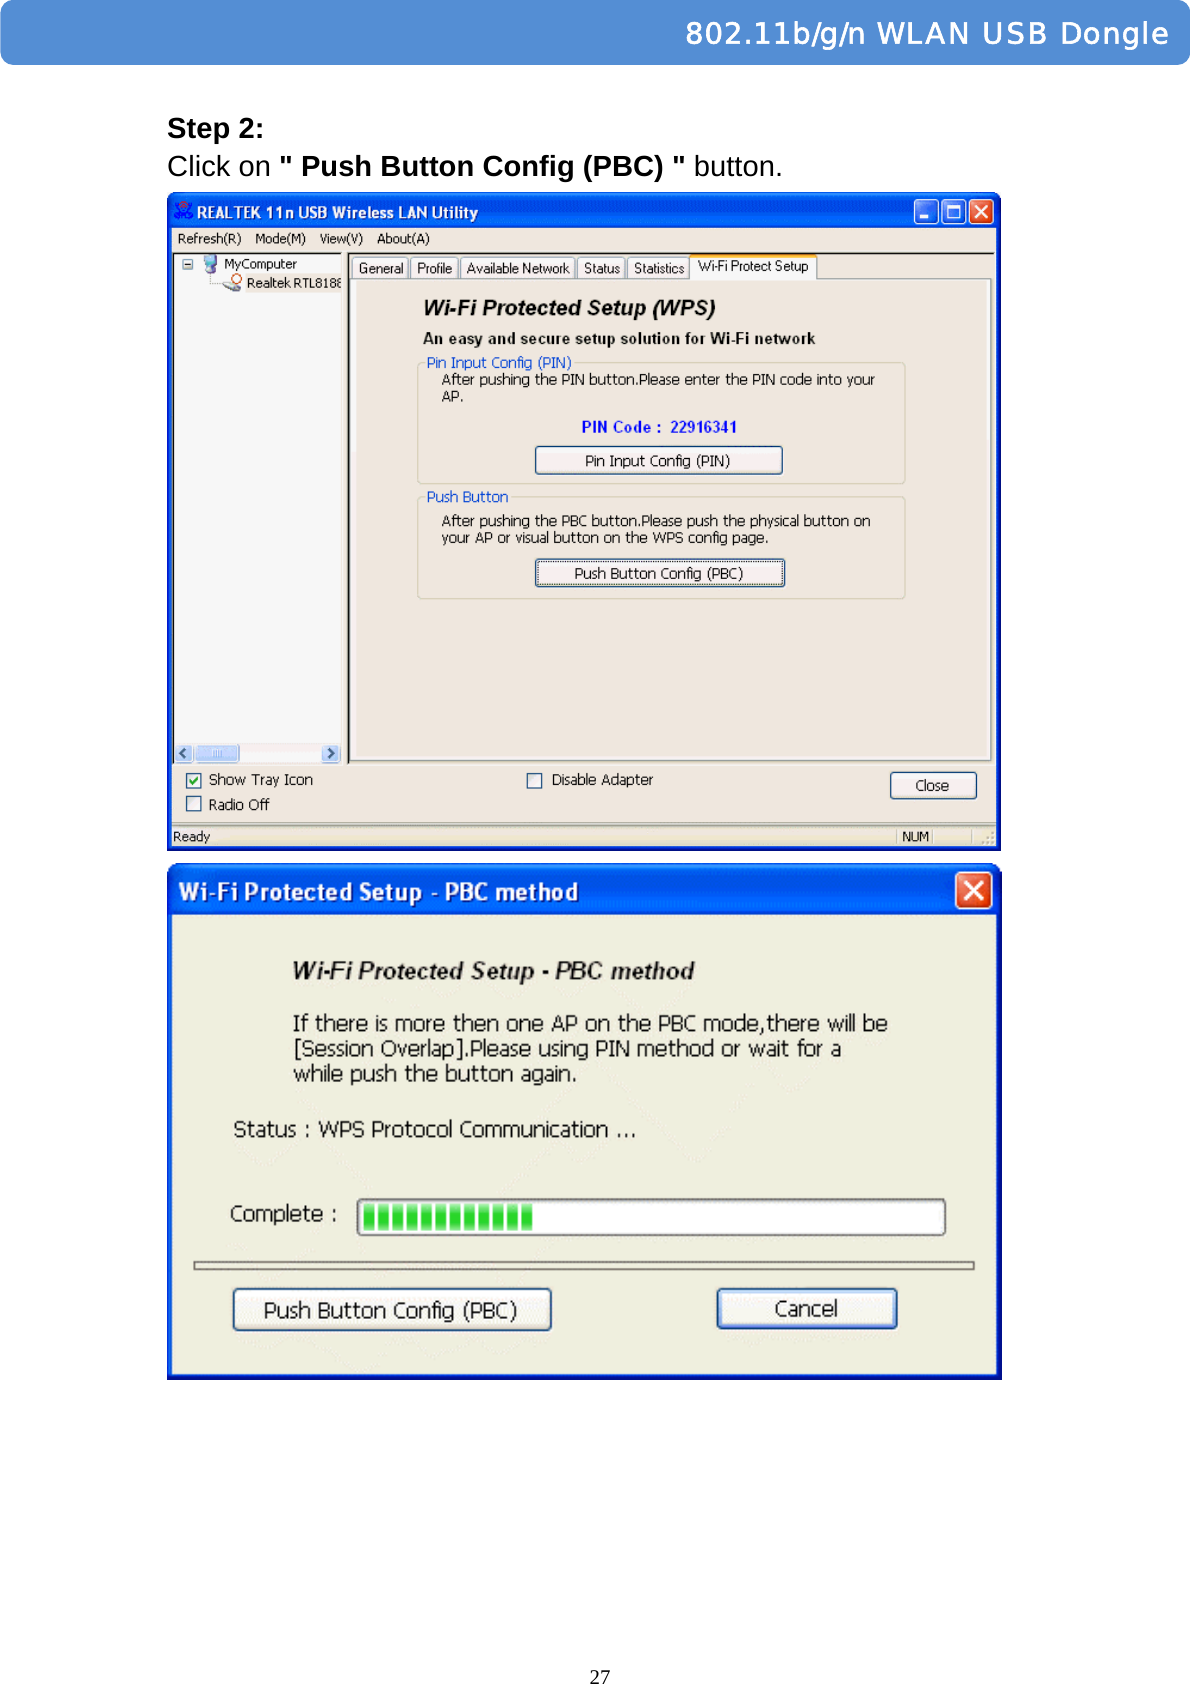

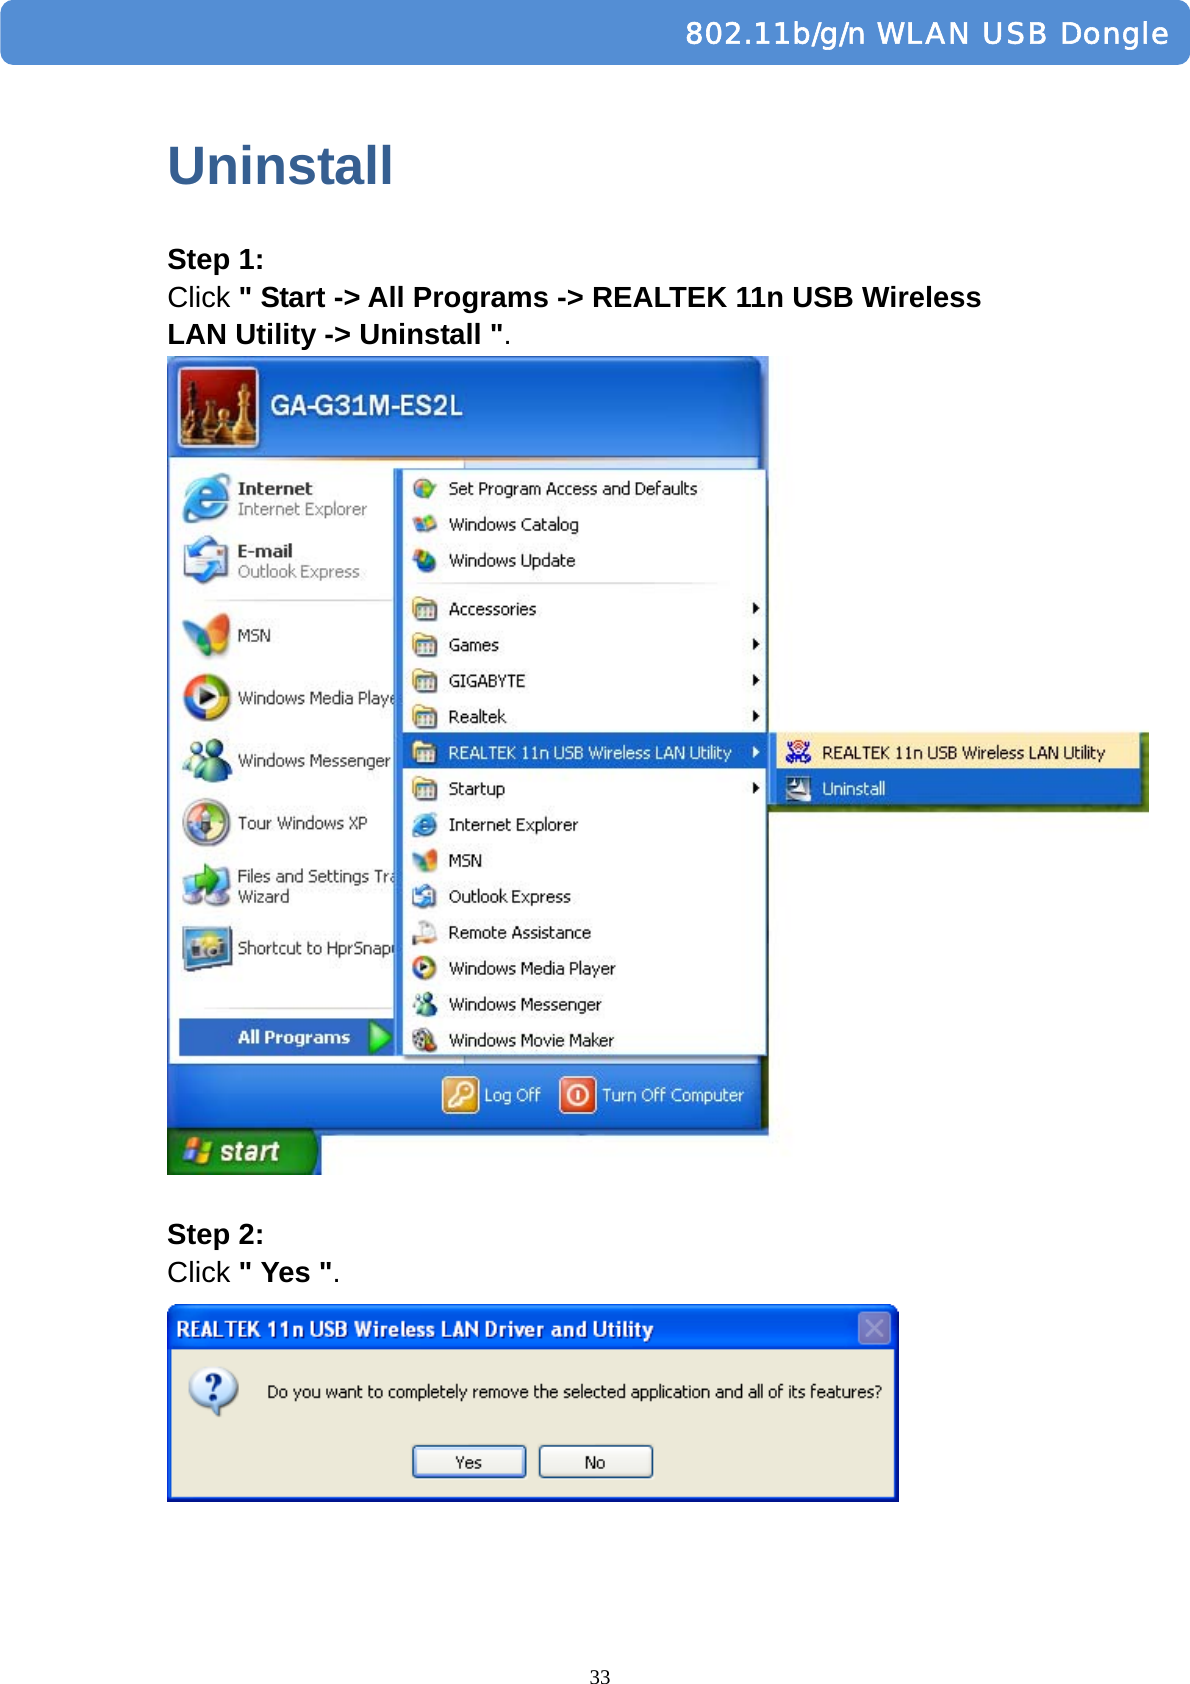
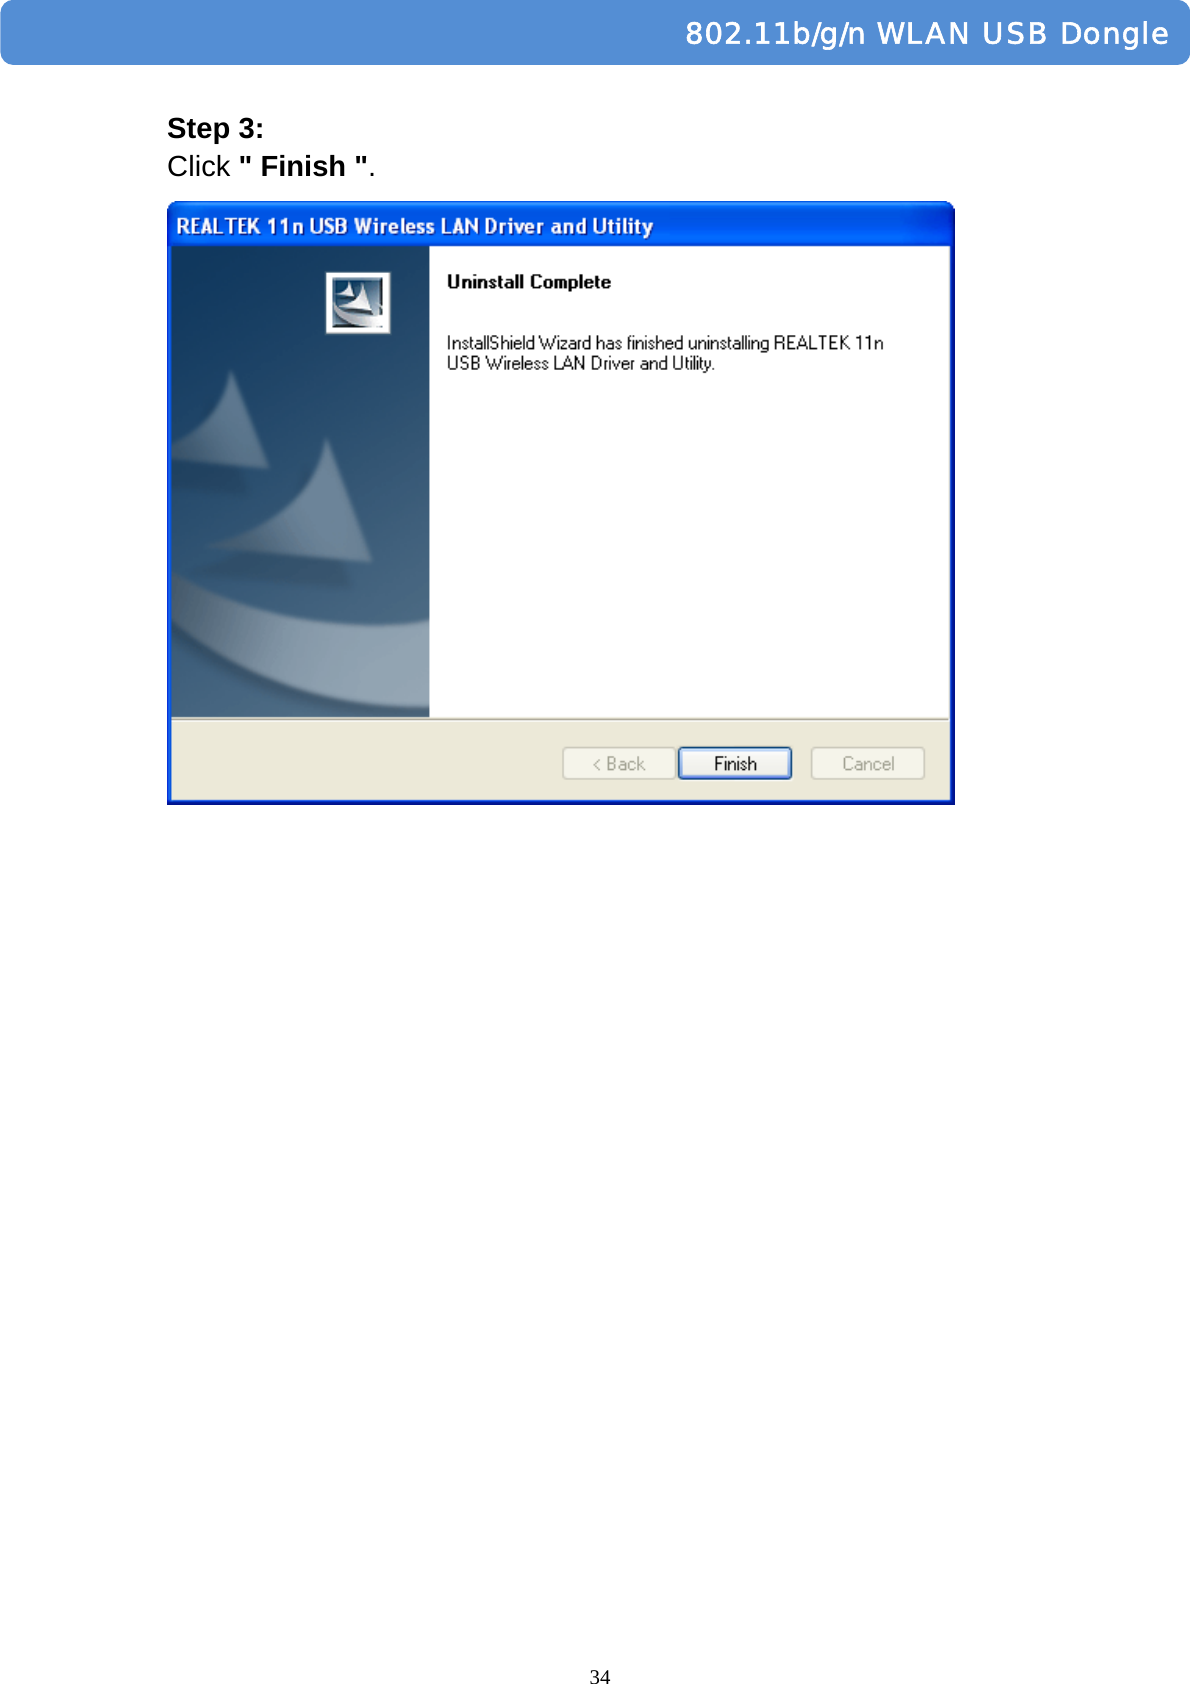
![35 802.11b/g/n WLAN USB DongleTroubleshooting Session Overlap If there is more then one AP on the PBC mode, there will be [Session Overlap].Please using PIN method or wait for a while push the button again. TimeOut!! If you see the message below while doing WPS!! Please retry again! NO REALTEK 11n USB Wireless LAN If you see the message below, please plug in the REALTEK 11n USB Wireless LAN to the USB port of PC.](https://usermanual.wiki/BaudTec/RE150U-DT/User-Guide-1166161-Page-35.png)