Beautiful Enterprise AW1TRANSMITTER Wireless Audio Transmitter User Manual
Beautiful Enterprise Co., Ltd. Wireless Audio Transmitter
User Manual
Safety Information
Model No. : AW1
Wireless Audio USB Kit
FCC
This device complies with Part 15 of the FCC Rules
Operation that is subject to following two conditions:
(1) This device may not cause harmful interference and,
(2) This device must accept any interference received,
including interference that may cause undesired
operation.
Warning: Changes or modifications to this unit not
expressly approved by the party responsible for
compliance could void the user authority to operate the
equipment.
Instruction Book Draft
Introduction
Packing
Information for Users on Disposal of Old
Equipment
[European Union]
This symbol indicates that the electrical
and electronic equipment should not be
disposed as general household waste at
its end-of-life. Instead, the product should
be handed over to the applicable
collection point for the recycling in
accordance with your national legislation.
By disposing of this product correctly, you will help to
conserve natural resources and will help prevent
potential negative effects on the environment and
human health that could otherwise be caused by
inappropriate waste handling of this product. For more
information about collection point and recycling of
this product, please contact your local municipal
office, your household waste disposal service or the
shop where you purchased the product.
Penalties may be applicable for incorrect disposal of
this waste, in accordance with national legislation.
Attention:
This symbol is
only valid in the
European Union.
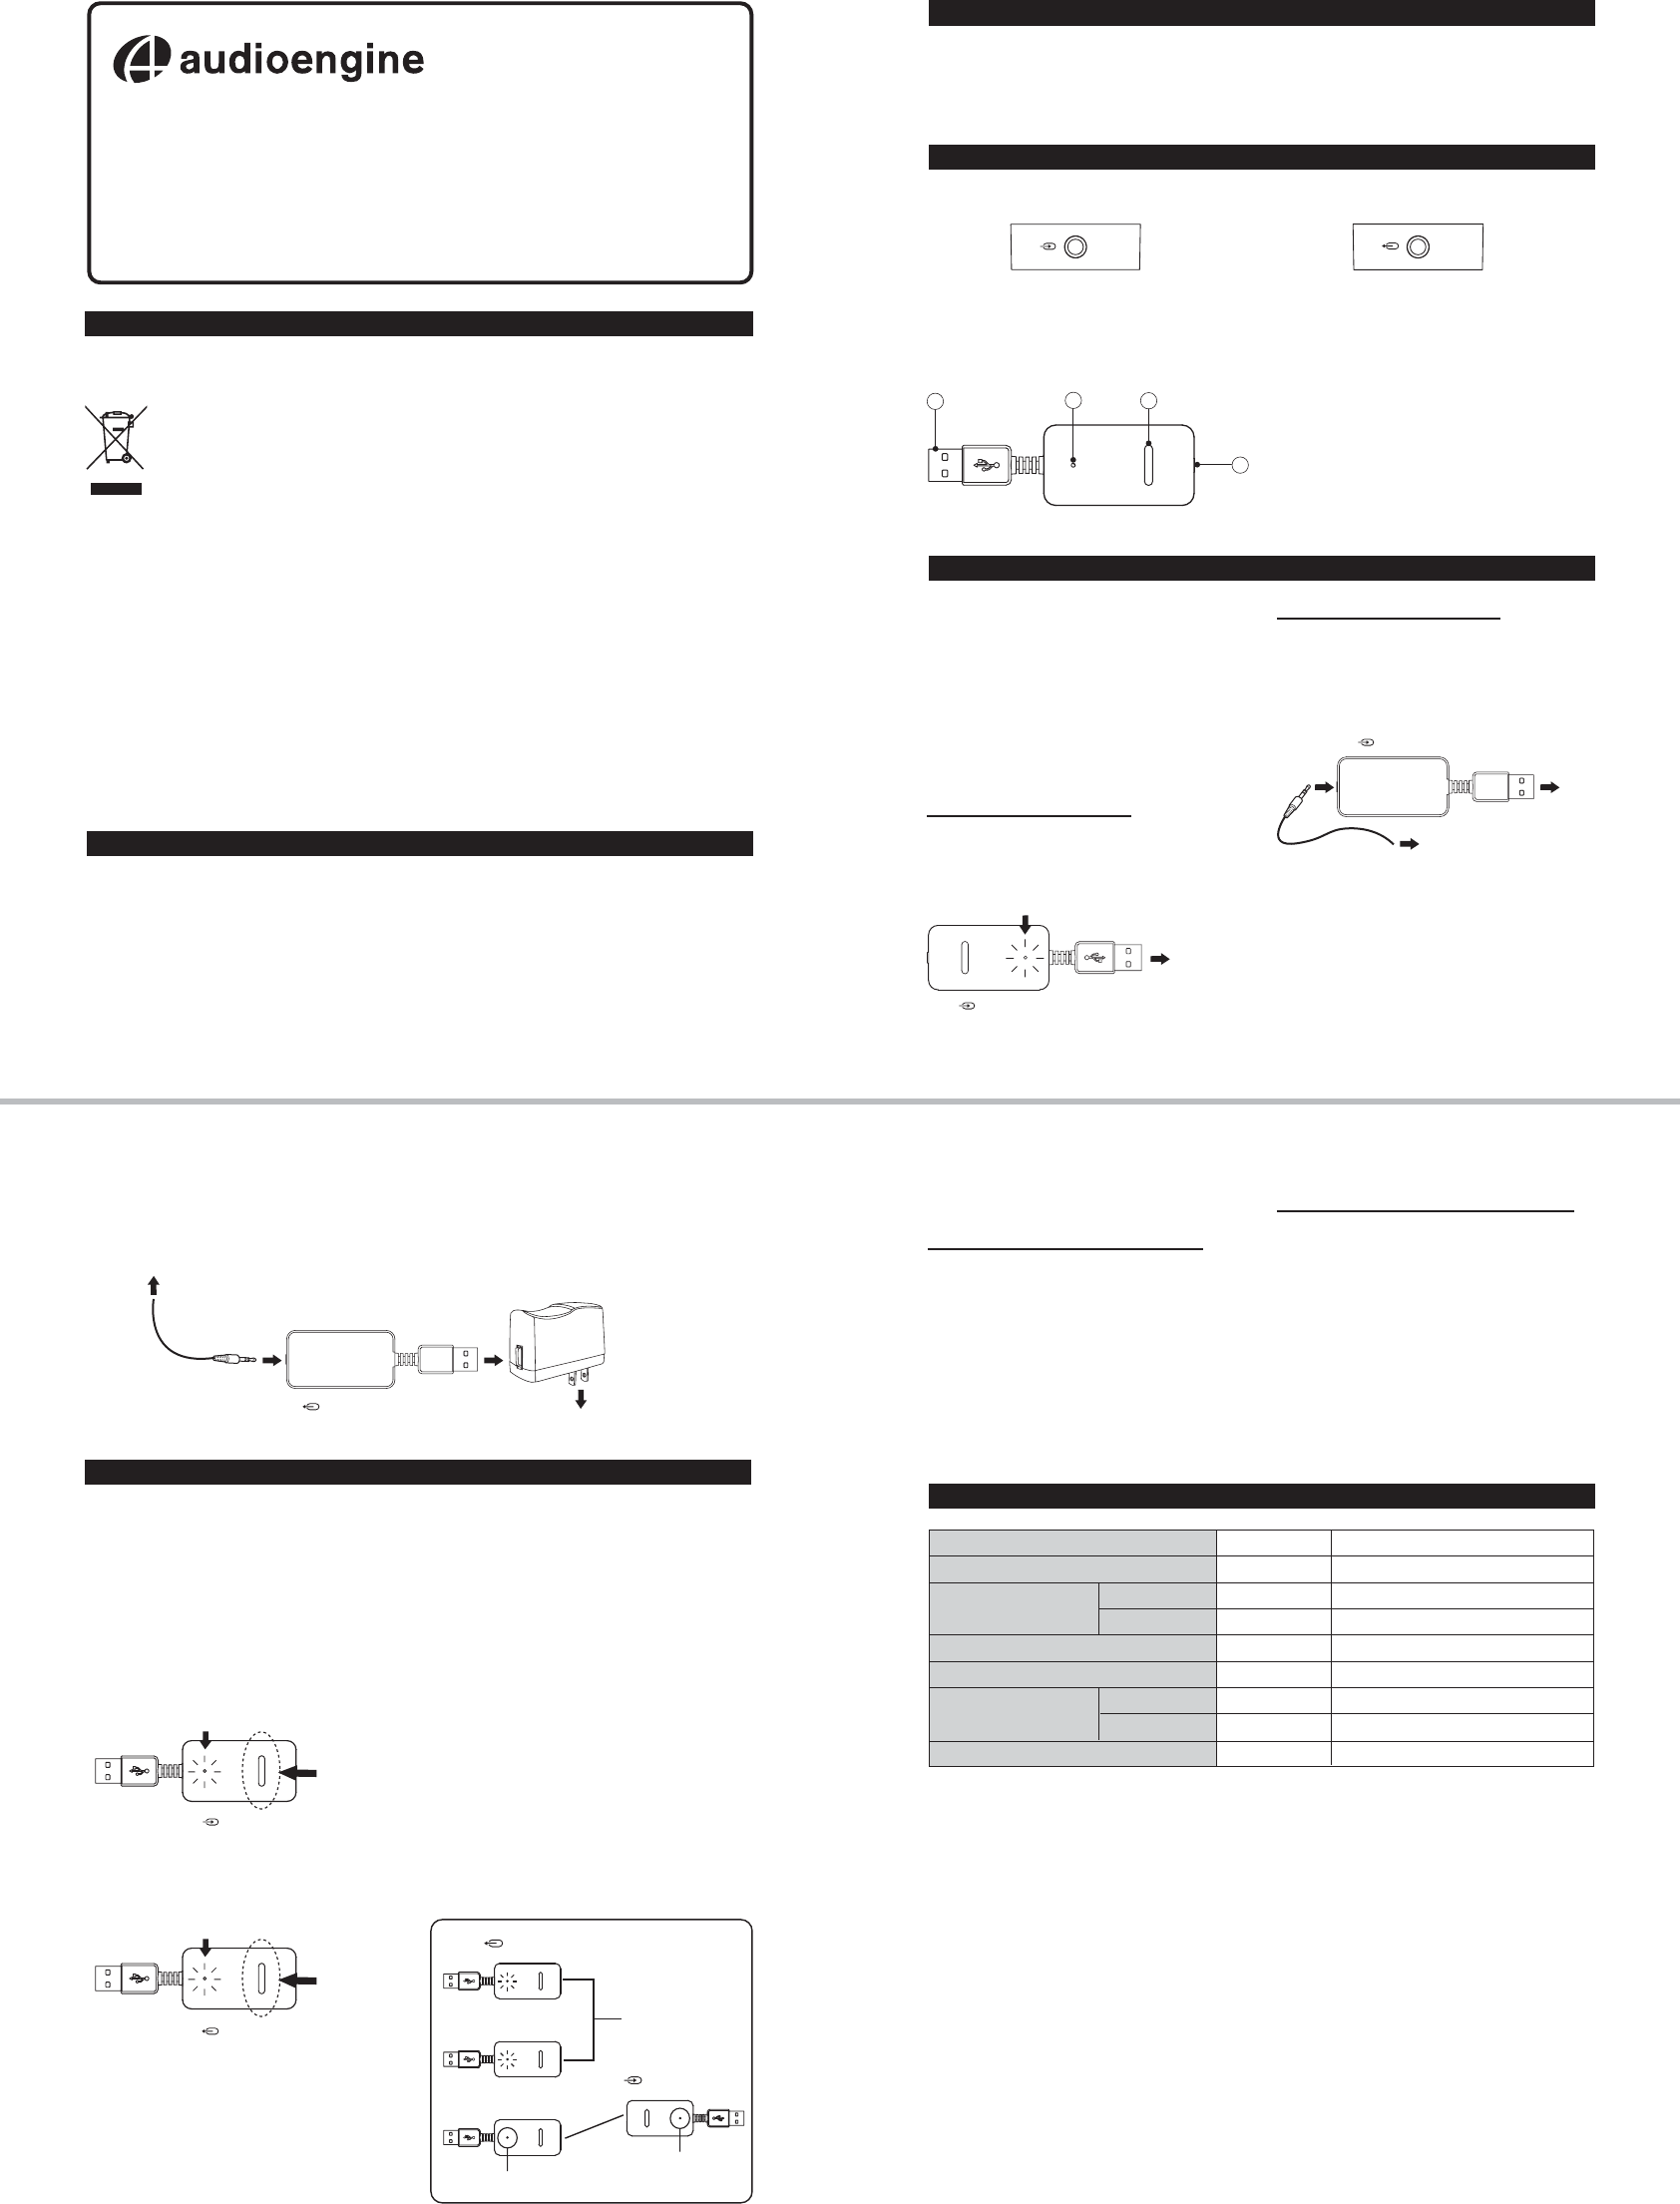
Technical Specifications
Connection
Using the Wireless Audio USB Kit
Functional Overview
The appearance of Sender and Receiver are the same except the audio jack symbol marked on the bottom.
The symbol with an arrow "going in" represents that
audio is transmitted from an audio player (such as
computer, MP3 player, iPod, etc.) to the Sender.
The symbol with an arrow "going out" represents that
audio is transmitted from the Receiver to a speaker
system.
1. USB Plug
2. LED Indicator
3. Connect Button
4. Audio Jack
123
4
Receiver (Bottom View)Sender (Bottom View)
Caution:
Turn off your audio player and speaker system that you
want to connect to before connection.
Do not connect the Sender to any audio system through
the USB plug. Use the supplied stereo cable only.
Connect the switching power adapter only after all
other connections are completed.
[Connecting the Sender]
A. Listening from your computer
1. Connect the USB plug of Sender to your computer.
The LED indicator blinks at a lower rate on the Sender.
Caution: Keep far away from any obvious radio frequency
interference sources when using the wireless Audio
USB kit.
[Establishing Communication
between the Sender and Receiver]
1. Hold the CONNECT button on the Sender for 5
seconds.
The LED indicator blinks at a faster rate on the Sender.
2. Hold the CONNECT button on the Receiver for 1
second.
The LED indicator blinks at a faster rate on the Receiver.
Note:
During the period of "pair mode", the LED indicators
blink at a faster rate on the Sender and Receiver.
When an active link is established bewteen the Sender
and Receiver, the LED indicators are solid on.
The maximum operation distance between the Sender
and Receiver can be up to 30m (No obstacle).
Supplied
switching Power
Adapter
Receiver
Receiver
Receiver
2. Connect the USB plug of Receiver to the supplied
switching power adapter.
3. Plug the switching power adapter into a AC power
outlet.
The LED indicator blinks at a lower rate on the Receiver.
[Other Countries outside the European Union]
If you wish to dispose of this product, please do so in
accordance with applicable national legislation or
other rules in your country for the treatment of old
electrical and electronic equipment.
Examine the contents of the box for your Wireless Audio USB Kit. The box should contain:
A Sender
A Receiver
Two 3.5mm stereo cables
A switching power adapter
A user manual
Press this
button for
5 seconds
Blinking LED
Thank you for purchasing an AW1 Wireless Audio USB
Kit from Audioengine. Your AW1 uses a proprietary
2.4GHz wireless communication system that enables
you to securely establish connection between your
personal computer and speaker system, through
which you can enjoy listening to music files stored
remotely.
Compact in size and easy to setup, the system also
allows connectivity with up to eight receivers, which you
can share and listen to music from different locations.
B. Listening from your audio player
1. Connect the USB plug of Sender to a computer.
2. Connect the other end of Sender to your audio
player with the supplied stereo cable.
The LED indicator blinks at a lower rate on the Sender.
[Connecting the Receiver]
1. Connect the audio output jack of Receiver to your
speaker system with the supplied cable.
Blinking LED
To computer
Sender
Sender
Sender
Sender
To speaker system
To AC power outlet
Supplied cable
Blinking LED
Press this
button for
1 second
Item
Output level
Frequency Reapones
(1 kHz = 0 dB)
THD
Signal - Noise Ratio
Channel Separation
Effective Distance
Condition
mV
dB
dB
%
dB
dB
dB
m
Specifications
550
0
0
0.1
85
60
60
>30
100 Hz
10 kHz
L > R
R > L
. 1 . . 2 .
. 3 . . 4 .
To audio player
Supplied cable
To
computer
[Listening to the System]
A. If the sound source is from your computer,
Caution: The system cannot play music files at your
computer if an audio player is connected to the Sender.
1. Launch "Windows Media Player" or another media
player program.
2. Select your favorite music to play.
3. Adjust volume on either your computer or speaker
system.
B. If the sound source is from your audio player,
1. Turn on your audio player.
2. Select the desired music and press "Play" button.
3. Adjust volume on either your audio player or
speaker system.
[Breaking up the Link]
1. After you finish using the system, unplug the Sender
and Receiver. The pair is disconnected.
[When Connecting to More Receivers]
The system allows you to connect up to Eight Receivers
at the same time but only one active link can be
established at once.
1. Make sure communications are established between
the Sender and all Receivers from which the audio
can be transmitted.
Note: At least there is one active link established
with one Receiver, remaining other Receivers inactive.
The LED indicators blink at a lower rate on inactive
Receivers.
2. If the active link is not established with the desired
Receiver, hold the CONNECT button on the Sender to
connect with another Receiver. Each time an active
link is established, the LED indicators on the Sender
and Receiver are solid on.
3. Repeat step 2 until the active link is established with
the desired Receiver.
Inactive
Solid
Active link
Solid