Beautiful Enterprise SFQ04ROM Sound Kick Audio System User Manual cover
Beautiful Enterprise Co., Ltd. Sound Kick Audio System cover
UserManual.wiki
>
Beautiful Enterprise
>
SFQ04ROM User Manual
User Manual
Navigation menu
Upload a User Manual
Namespaces
Wiki Guide
HTML
PDF
Info
Views
User Manual
Discussion / Help
Navigation
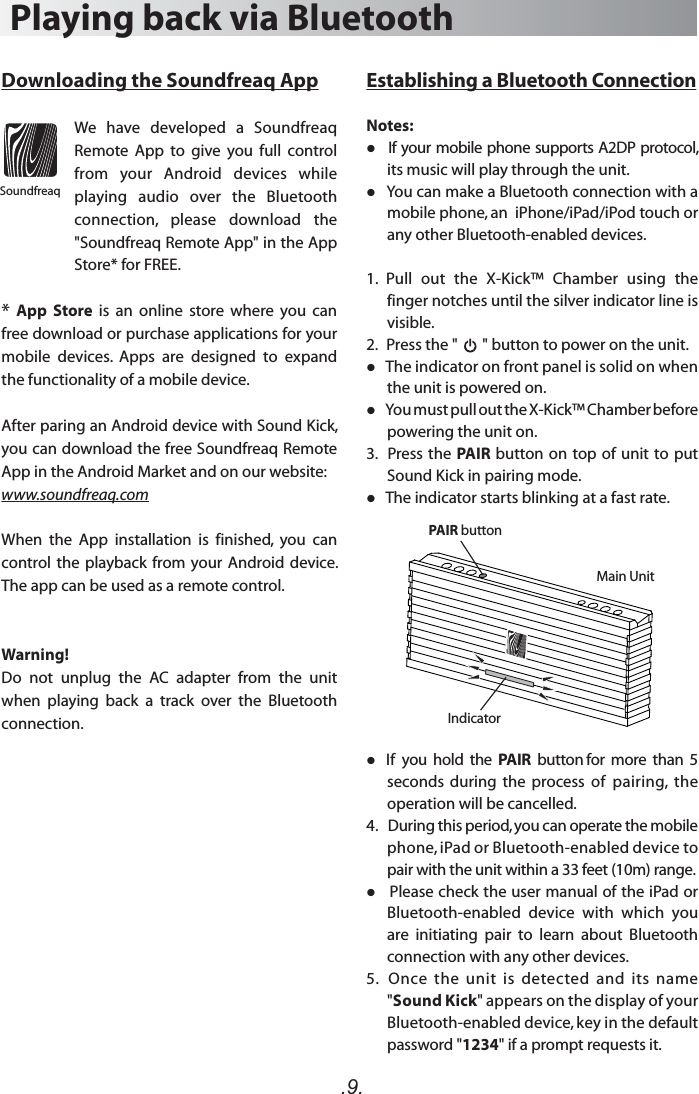
![.3.15 cm(5- 15/16")10 cm(3- 15/16")15 cm(5-15/16")15 cm(5-15/16")15 cm(5-15/16")Front View:Side View:Front side Back sideQDID: B020153 CAUTION - Proper Installation Install the system in a place which is level, dry and neither too hot nor too cold. The appropriate temperature is between 5 oC and 35 oC. Install the system in a location with adequate ventilation to prevent internal heat from building up inside the unit. Leave sufficient distance between the system and TV. Keep the system away from TV to avoid interference with TV.CAUTION - Proper VentilationTo avoid risk of electric shock and fire, and to prevent damage, locate the apparatus as follows:Front: No obstructions and open spacing.Sides / Top / Back: No obstructions should be placed in the areas shown by the dimensions below.Bottom: Place on the level surface. Maintain an adequate air path for ventilation by placing on a stand with a height of 10 cm (3-15/16") or more.Information for Users on Disposal of Old Equipment[European Union]This symbol indicates that the electrical and electronic equipment should not be disposed as general household waste at its end-of-life. Instead, the product should be handed over to the applicable collection point for the recycling in accordance with your national legislation.By disposing of this product correctly, you will help to conserve natural resources and will help prevent potential negative effects on the environment and human health that could otherwise be caused by inappropriate waste handling of this product. For more information about collection point and recycling of this product, please contact your local municipal office, your household waste disposal service or the shop where you purchased the product.Penalties may be applicable for incorrect disposal of this waste, in accordance with national legislation.[Other Countries outside the European Union]If you wish to dispose of this product, please do so in accordance with applicable national legislation or other rules in your country for the treatment of old electrical and electronic equipment.Attention:This symbol is only valid in the European Union.](https://usermanual.wiki/Beautiful-Enterprise/SFQ04ROM/User-Guide-1819177-Page-4.png)