Behavior Tech Computer KB8190 Keyboard User Manual 8190 Manual Version 1 0 1
Behavior Tech Computer Corporation Keyboard 8190 Manual Version 1 0 1
users manual

8190
Smart Office Keyboard
Manual
Version 1.0
封面內頁

The information in this document is subject to change without notice and does not represent a commitment
on the part of the vendor.
No warranty of representation, either expressed or implied, is made with respect to the quality, accuracy or
fitness for any particular purpose of this document. The manufacturer reserves the right to make changes to
the content of this document and/or the products associated with it at any time without obligation to notify
any person or organisation of such changes.
In no event will the manufacturer be liable for direct, indirect, special, incidental or consequential damages
arising out of the use or inability to use this product or documentation, even if advised of the possibility of
such damages.
Copyright © 2001. All rights reserved
IBM, PC/AT and PS/2 are registered trademarks of International Business Machines Corporation.
Microsoft, Windows, and Windows NT are registered trademarks of Microsoft Corporation in the United
States of America and/or other countries.
All other trademarks are trademarks of their respective holders.

Table of Contents
1Introduction ...................................................................................... 1
What's in this package...................................................................... 1
2System Requirements........................................................................ 2
3Hardware Installation........................................................................ 4
4Software Installation.......................................................................... 6
4.1 Minimun Installation .................................................................. 6
4.2 Typically Installation .................................................................. 6
4.3 About Smart Office Keyboard Driver ........................................ 6
4.2 Setting Configure Button:.......................................................... 8
5Standard Hot Keys & Adding Office Keys.........................................10
5.1 Office Application Keys Block:..................................................10
5.2 Internet Keys Block:..................................................................10
5.3 Application Keys Block:............................................................10
5.4 Multimedia Keys Block:.............................................................11
5.5 Enhance Function Keys Block: ..................................................11
5.6 Clipboard Keys Block: ..............................................................12
6 Troubleshooting ..................................................................................14

1
1Introduction
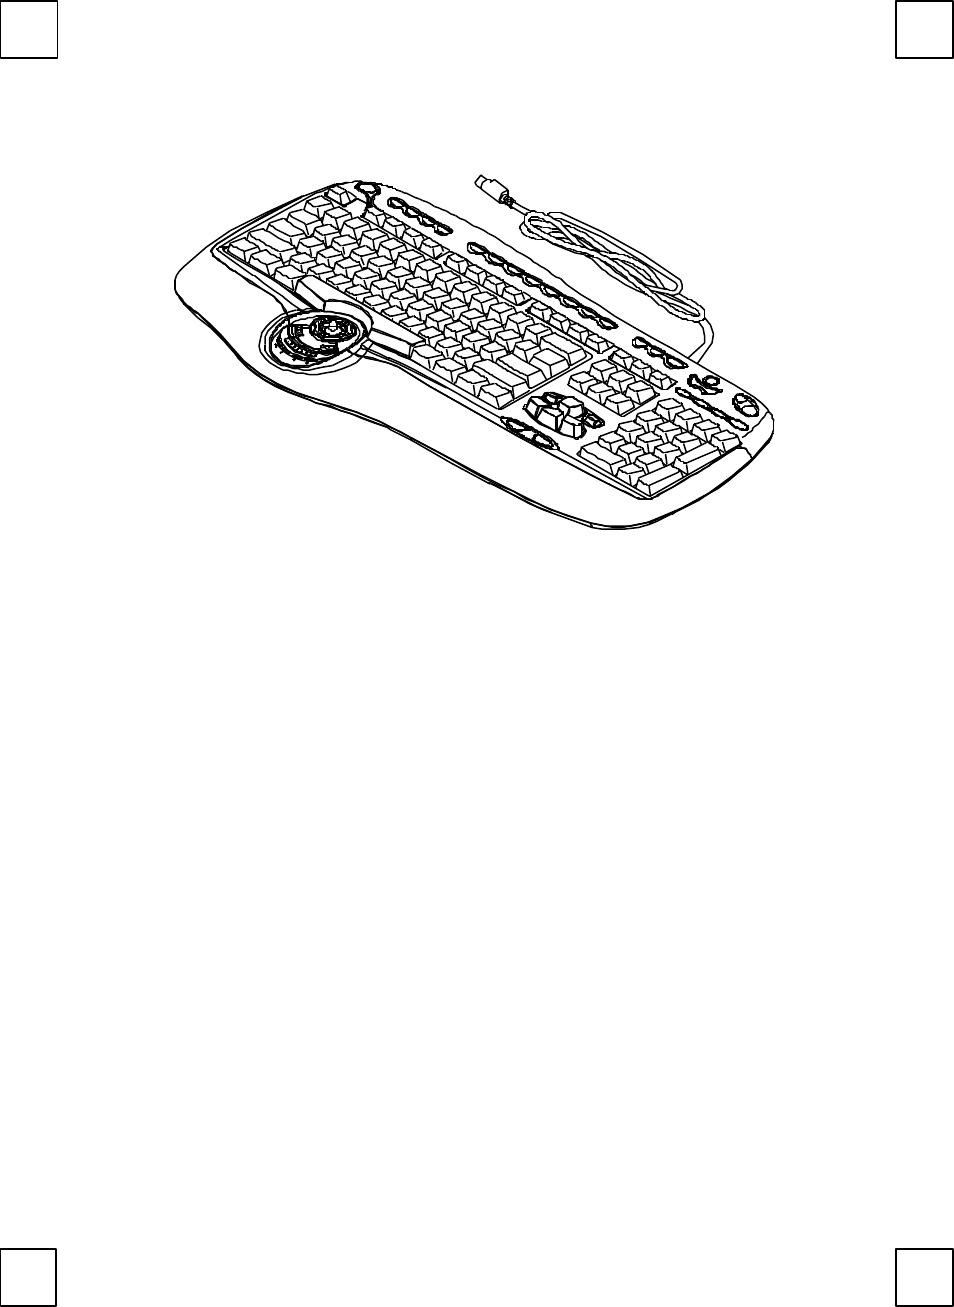
Congratulations on your purchase of this Smart Office Keyboard! This
unique keyboard brings you to a totally free and comfortable field. It
contains health concept of minimal mouse movement and the
ergonomics design. Smart Office Keyboard makes the work you do all
the time take less time.
The whole keyboard is divided into 6 blocks except the normal keyboard
function block. The 6 blocks are Office Application Keys, Enhance
Function Keys, Internet Keys, Application Keys, Multimedia Keys and
Clipboard Keys. These keys make your keyboard more powerful than
ever. The applications and functions you use everyday are included in
these; just by a touch can access to your applications immediately. It
helps a lot in your daily usage.
The most creative design of this Smart Office Keyboard is to combines
the mouse function within a keyboard. Use the scroll wheel on the
keyboard helps you save up hands movement between keyboard and
mouse and this save your time. We want to make your typing time more
fast, comfortable and joyful.
This Smart Office Keyboard is compatible with Windows® 95, Windows®
98, Winodws® 2000, Windows NT® 4.0, Windows® ME and Windows® XP.
In order to enjoy the full potentiality of the Smart Office Keyboard, please
read this manual carefully.
What's in this package
w A Smart Office Keyboard
w A driver disc
w A “Quick Installation Guide”
2
2 System Requirements
w Microsoft Windows 95, Windows 98, Windows NT 4.0,
Windows ME, Windows 2000 or Windows XP operating system
w Microsoft Internet Explorer 5.0 or later version (for the Internet keys)
w CD-ROM or DVD drive
w Microsoft Office 97 or later version
w The system supporting ACPI or APM II (for power management
buttons)
w ATX mother board and ATX power supply (for power management
buttons)
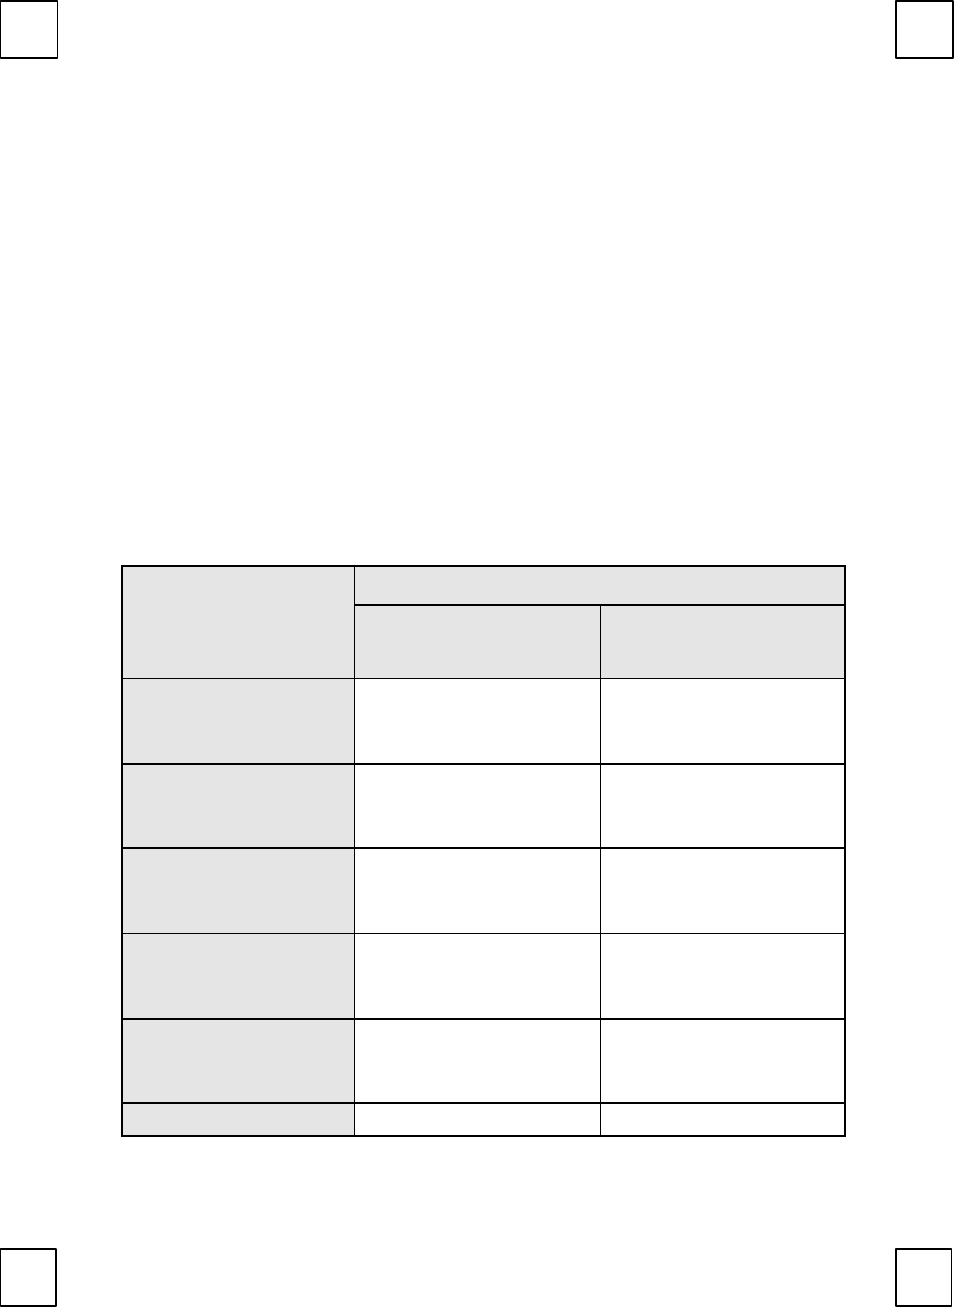
Please refer to table below for the other system requirements for the
features.
Operating System
Function Description Windows 95 /
Windows 98 /
Windows NT 4.0
Windows 2000 /
Windows ME /
Windows XP
Keyboard
Functionality Available immediately
after hardware
installation
Available immediately
after hardware
installation
Keyboard Extra
Office Application
Keys
Requires keyboard
driver installation (see
driver disc for details)
Requires keyboard
driver installation (see
driver disc for details)
Keyboard Extra
Enhance Function
Keys
Available immediately
after hardware
installation
Available immediately
after hardware
installation
Keyboard Extra
Internet Keys Requires keyboard
driver installation (see
driver disc for details)
Available immediately
after hardware
installation
Keyboard Extra
Multimedia Buttons Requires keyboard
driver installation (see
driver disc for details)
Available immediately
after hardware
installation
Keyboard Extra Available immediately Available immediately
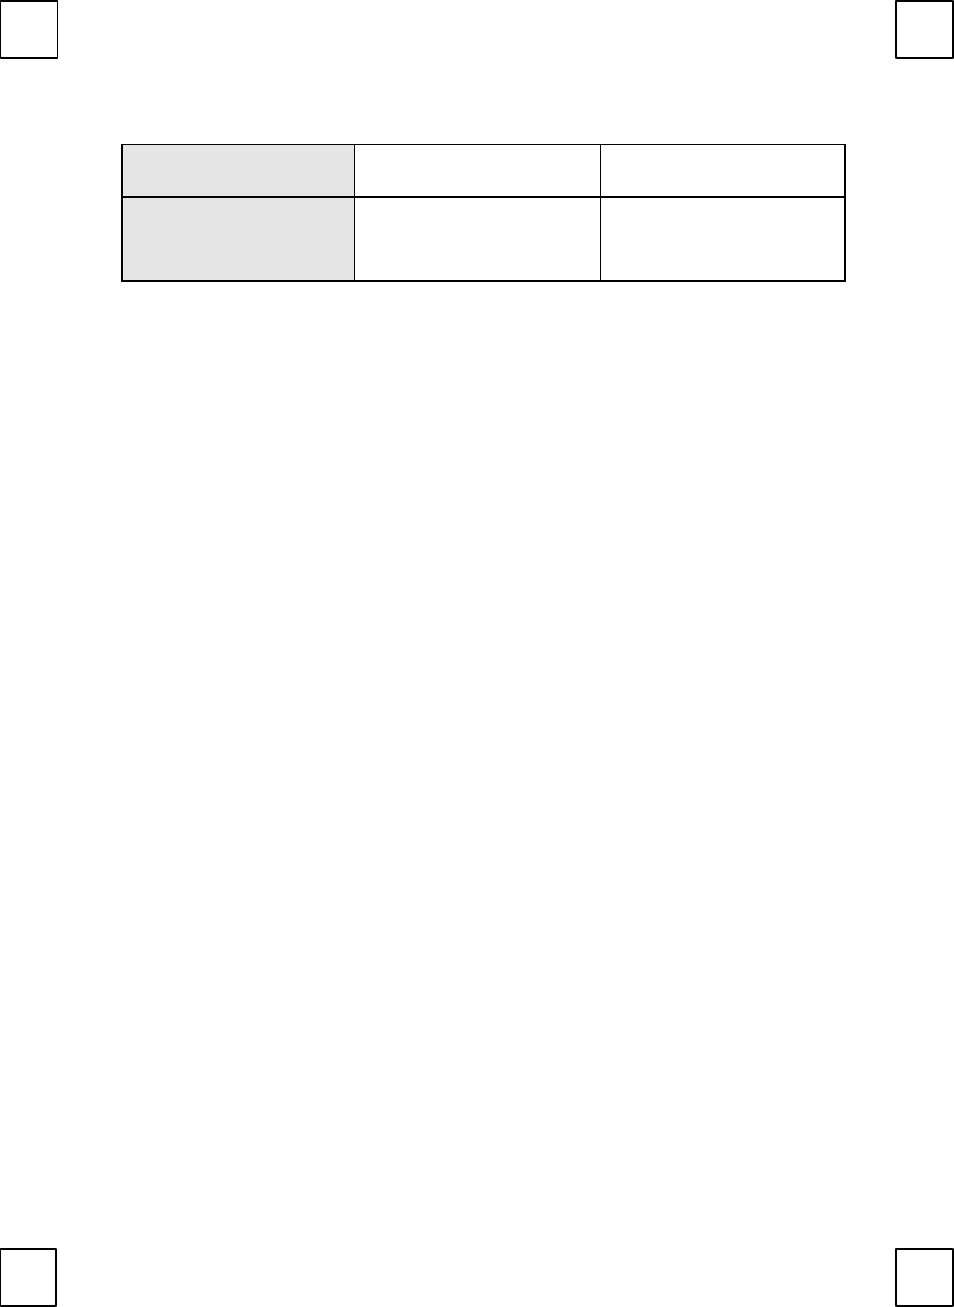
3
ACPI Buttons after hardware
installation after hardware
installation
Keyboard Extra
Chipboard Keys Requires keyboard
driver installation (see
driver disc for details)
Requires keyboard
driver installation (see
driver disc for details)
4
3 Hardware Installation
Mechanical specification
Physical characteristics
Length :477 mm
Width :238 mm
Height :39 mm
Weight :1.3 kg (unpacking)
Electrical specifications
Power consumption
Supply Voltage :5V
Working Current :50 mA
Switch Activation :Membrane
Step 1: Make sure your PC is switched off.
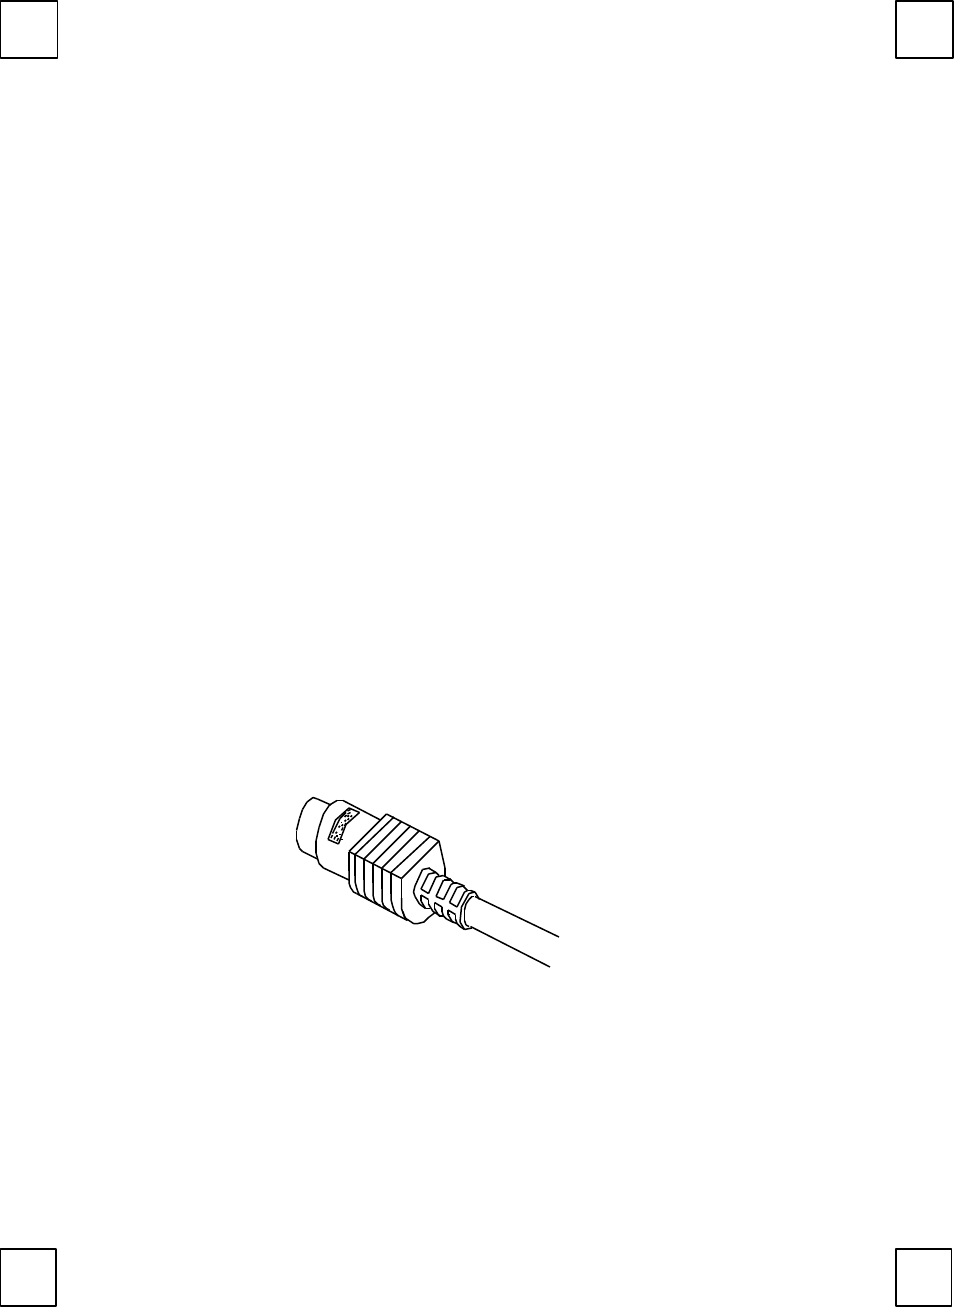
Step 2: Plug the keyboard connector into the keyboard port of your PC.
Keyboard Connector
Step 3: Start your PC, your computer will auto-detect your keyboard.
5

6
4 Software Installation
After finishing the hardware installation as described in this manual and
starting up your PC, you should be able to immediately take advantage
of this Smart Office Keyboard within its main keyboard function.
In order to take the great potentiality of the Smart Office Keyboard,
Please install its driver disc.
Step 1: Check if there is any keyboard driver existed. If yes, please
remove it before installing.
Step 2: Insert the driver disc in your computer CD-ROM drive.
Step 3: Select driver for “Minimum Installation” or “ Typical Installation”
according to your operating system.
Step 4: Follow the on screen instructions to finish the installation
procedure.
Step 5: After installation, restart your computer to enable the Smart Office
Keyboard software.
4.1 Minimun Installation
For Windows 2000, Windows ME and Windows XP, please select
minimum installation.
w The software driver shares minimum Windows operating system
resources and hard disk space.
w The software driver supports 5 shortcut keys. They are
4.2 Typically Installation
For all version of Windows!
w The software driver shared some Windows operating system
resources and hard disk space.
w The software driver supports 12 shortcut keys.
4.3 About Smart Office Keyboard Driver
If right-clicking on the KeyMaestro icon on the taskbar, a menu will
pop up with the following functions.
w Configure Button:

7
Shows the 3D image keyboard. Click on the configure button
item to bring up a dialog box, you can easily change the
default of a hot key.
8
w Enable Taskbar Icon:
Clicks this function to show or hide the keyMaestro icon on
windows task bar.
w Close:
Clicks this option to disabled all hot key functions. By right-
clicking on the keymasetro icon and select \Configure
button\ Launch to enable hot key function again.
w About:
Selects this command to see the information of this
KeyMaestro driver, including the version number and web site
which you can update the driver.
w Exit:
Clicks this option to close Smart Office Keyboard. If you want
to reload it, please click the start button and select program to
find keymaestro icon and launch it.
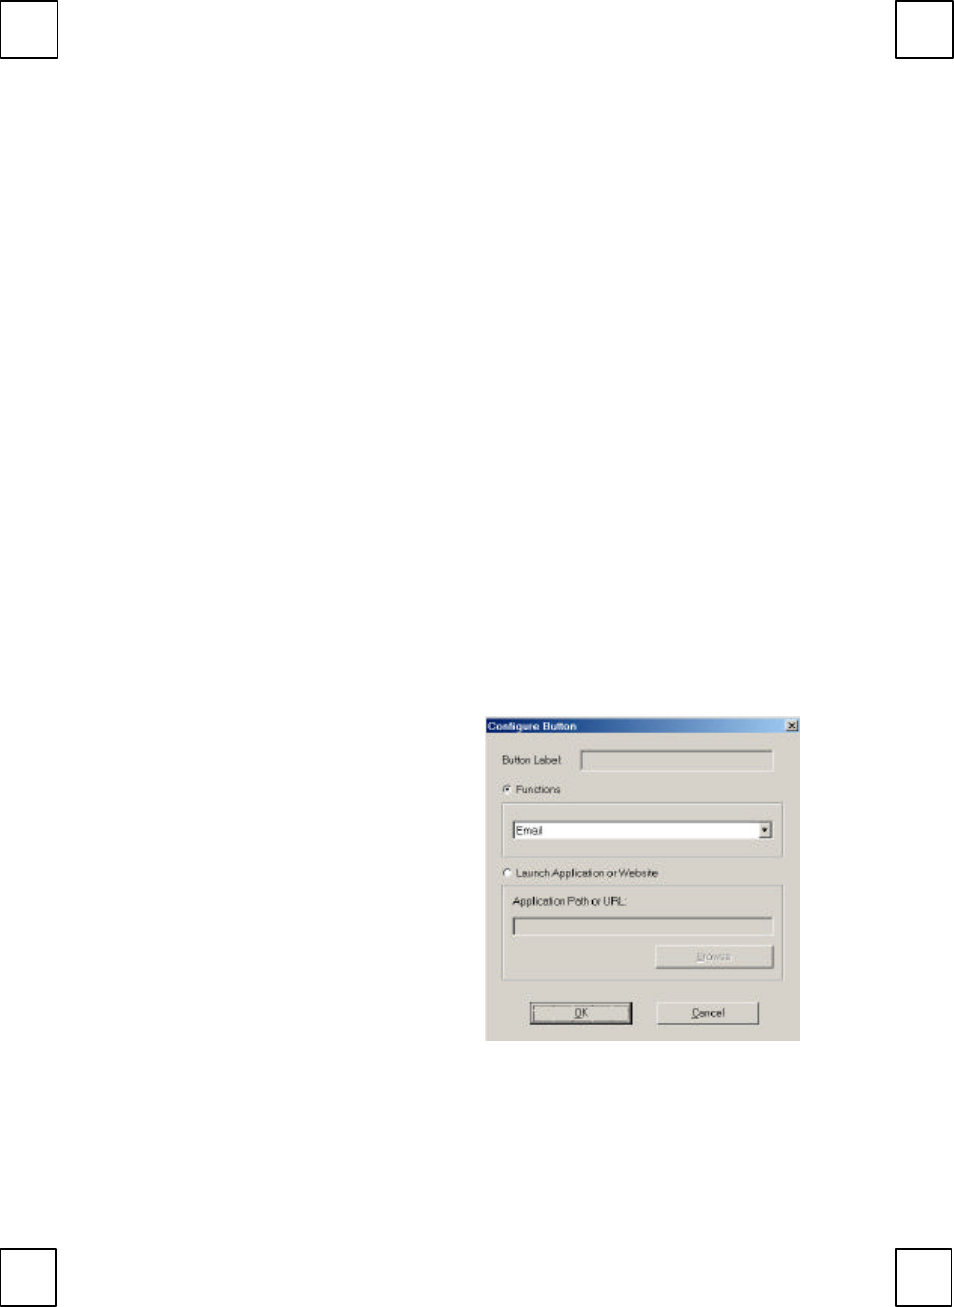
4.2 Setting Configure Button:
Clicks on the configure button item to bring up a dialog box as
follow:
w Functions:
A list of pre-programmed
functions can be
selected for your own
selection.
w Launch Application or
Web Site:
Selects an application or
Web address of your
own favorite. In the text
box, type in the path or
name of your
application execution file.

9
If the keyboard is not working properly, see Troubleshooting for tips on
how to solve your problems.
10
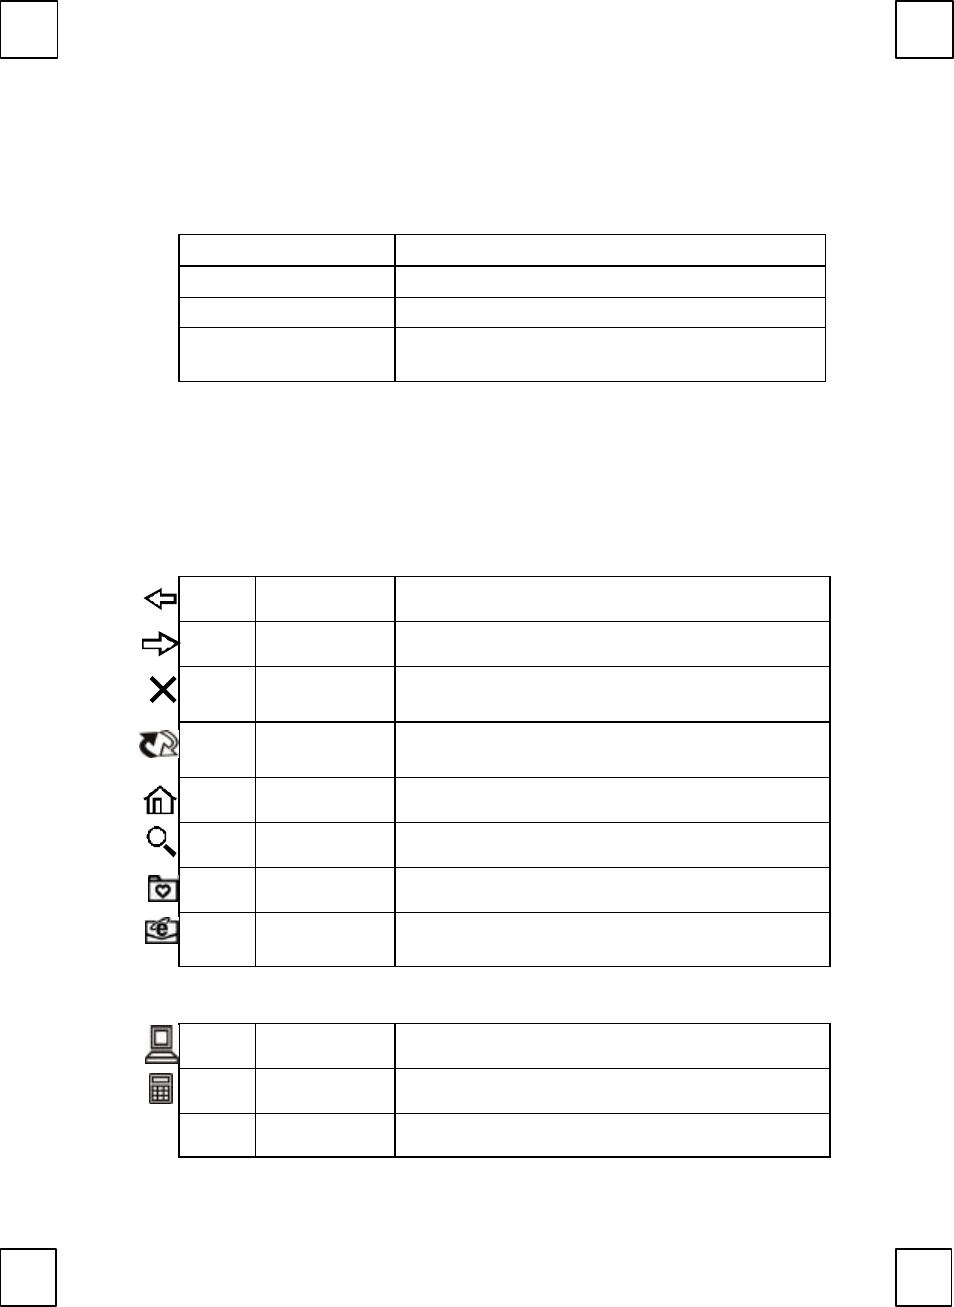
5Standard Hot Keys & Adding Office Keys
5.1 Office Application Keys Block:
Word Opens Microsoft Word.
Excel Opens Microsoft Excel.
Power Point Opens Microsoft Power Point.
Calendar
Opens Calendar function of Microsoft
Outlook.
F Note: Without driver, user can make shortcut setting to have these functions. For
example, right-clicking on the Word icon to select Properties. Type in “D” to come up
with “ Ctrl+Alt+D” for Word shortcut function.
“Ctrl+Alt+D” for Word. “Ctrl+Alt+E” for Excel.
“Ctrl+Alt+P” for PowerPoint. “Ctrl+Alt+O” for Outlook.
5.2 Internet Keys Block:
Back Returns to the last page you viewed.
Forward Views the next page you viewed before.
Stop
If a page you are trying to view is taking too
long to open, click this button to stop.
Refresh
Refreshes the current Web page in order to
make sure you have the latest Web page.
WWW Opens the default internet browser.
Search Opens the internet search menu.
My Favorite Opens the Internet My Favorite folder.
E-mail
Opens the default program you use for
mail.
5.3 Application Keys Block:
My Computer Opens “my computer” window.
Calculator Starts Microsoft calculator.
Log Log Off Opens the log off windows dialog box.
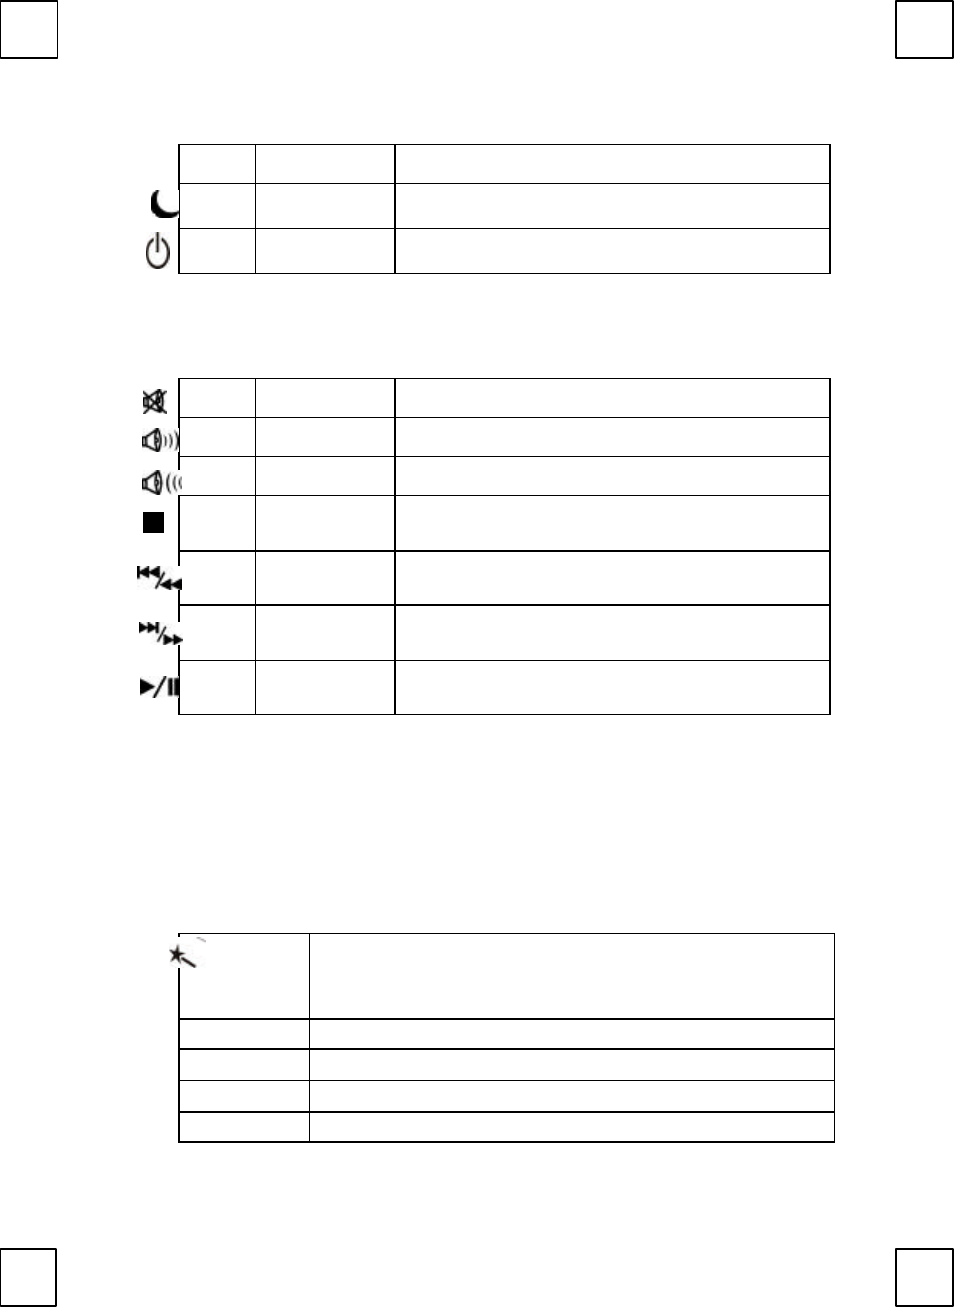
11
Off
Sleep Places the computer in Sleep Mode.
Power Turns the computer off.
F Note: If “Log Off” key function cannot work properly, see Chapter 6 Troubleshooting
for more information.
5.4 Multimedia Keys Block:
Mute Mutes the sound.
Volume up Adjusts the volume up.
Volume down
Adjusts the volume down.
Stop
Stops the audio and resets the tracks to the first
track in the sequence.
Previous/
Fast Backward Advances to the previous audio track.
Next /
Fast Forward Advances to the next audio track.
Play/Pause
Begins audio tracks, pause will temporarily
stop the track from playing.
5.5 Enhance Function Keys Block:
Enhance function keys block consists of 15 keys and functions in
two ways:
w As a part of the main keyboard: F1~F12, Print Screen, Scroll
Lock, Pause/Break.
w As 15 embedded office keys and functions.
Embedded Office Functions are as fellow:
Office
Wizard
A toggle key for embedded office keys. When Office
Wizard key is pressed, the embedded office function
keys are activated.
F1: Help Opens the Help file for the activate window.
F2: New Creates a new, blank file in program.
F3: Open Opens or finds a file in program..
F4: Save Saves the active file with current file name, location
12
and file format.
F5: Replace
Searches for and replaces the specified text and
formatting.
F6: Bold Bolds or unbolds the text and numbers you marked.
F7: Spell Starts the spelling check program in the active
document.
F8: Bullets
Adds bullets to or removed bullets from selected
paragraphs.
F9: Reply Replies to the e-mail in Microsoft Outlook or Outlook
Express.
F10: Forward
Forwards the e-mail in Microsoft Outlook or Outlook
Express.
F11: Send Send the e-mail in Microsoft Outlook or Outlook
Express.
F12:
Task pane
Shows or hides the office task pane previous
displayed. (For Office XP only)
Print Screen:
Print Prints the file in the active window.
Scroll Lock:
Undo
Reverses the last command or deletes the last entry
you typed or action.
Pause: Redo
Reverses the action of the Undo command.
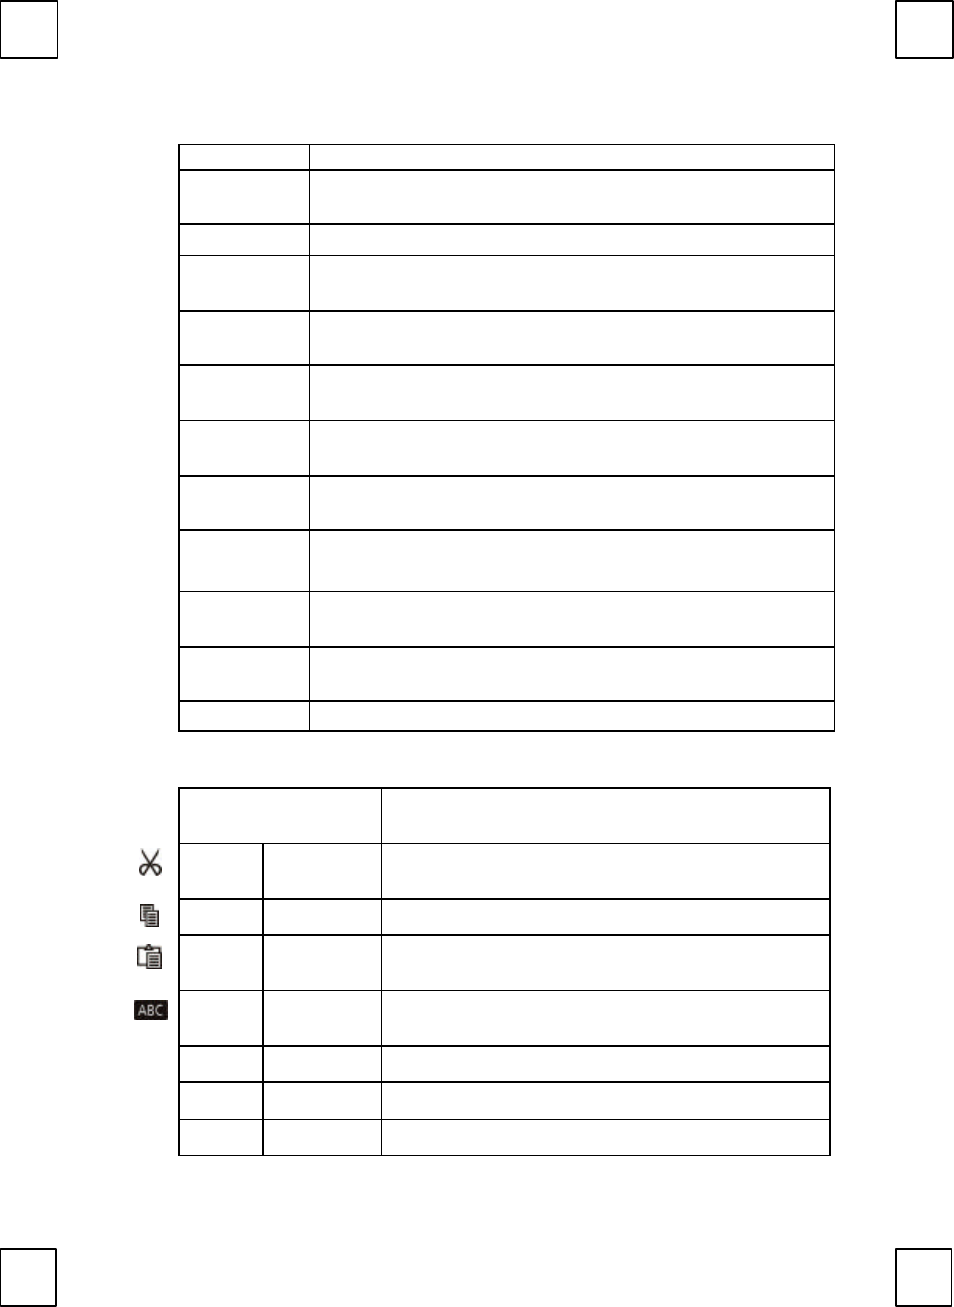
5.6 Clipboard Keys Block:
Scroll Wheel
Works as mouse scrolling function but in 4D
direction-Up, down, right and left.
Cut
Removes the selection from the active
document.
Copy Copies the selection to the Chipboard.
Paste
Paste the previously cut or copied items from
the Chipboard.
Mark
Use roller keys and mark key to selected and
mark item.
Back Back Returns to the last page you viewed.
Forward
Forward Views the next page you viewed before.
APP.
Application
Switches the focus to the previous opened

13
Switch
windows when you press the key and
choose the right one as the active window.
Close Close Closes the active Windows Application.

14
6 Troubleshooting
If you are experiencing problems with your keyboard please check the
following:
1. Keyboard cannot work properly
If the keyboard cannot work properly while plug in System and
power on, you can unplug keyboard and plug in again to fix the
problem.
2. The Smart Office Keyboard Software can not work properly:
The Hot key function cannot work after installation the Smart Office
keyboard software. Please make sure if there is another keyboard
hot key driver installed. Remove all keyboard hot key driver first and
re-install Smart Office Keyboard Software to solve the problem.
3. Add/Remove Smart Office Keyboard Software or Re-Install:
After installed the Smart Office Keyboard software, the Smart Office
Keyboard Icon will display on the system tray. If you want to re-install
the software for some reasons, you must delete the Smart Office
Keyboard driver from your operation system first. Right-click the
mouse button on Smart Office Keyboard Icon and choose EXIT.
After this step, open the Start menu and select Remove to delete
Smart Office Keyboard drivers. This will remove it completely after
you have finished the above procedures. To reinstall, see chapter 4
software installation.
F Note: If you want to upgrade or you Smart Office Keyboard software does not work
properly, you can re-install it to fix this problem.
4. Can not properly Install other software application:
If you want to install another software application but can’t install
properly, you have to remove the Smart Office Keyboard driver
from your system memory by right-click on the Smart Office
Keyboard icon and then choosing EXIT, then start installing the
desired software application. After completed the new software
installation, restart your system, the Smart Office Keyboard Icon will
display in tray again.

15
5. The repeating rate of previous & next key of multimedia function
cannot match CD-ROM driver speed:
If you hold on those buttons, the CD player will continuous search
previous or next tracks until you release this key. If your CD-ROM
driver speed is too slow, it will continue-search-tracks-function.
Recommend you to change a better performance CD-ROM driver.
6. CD or Video Player can not be launched:
Make sure CD or Video software and hardware for these functions
are properly installed in your system.
7. Can not play VCD title or MPEG file:
Make sure if your have installed Windows Media Player version 7
properly. Otherwise please down load the Windows Media Player
version 7 from Microsoft Web site.
8. Cannot use The Microsoft Windows default short cut keys function:
The Smart Office Keyboard driver took over some Windows OS
default short cut keys function resource. The following 5
combination keys cannot be use again.
“CTRL+ALT+E”, “CTRL+ALT+P”, “CTRL+ALT+O”, “CTRL+ALT+D”,
“CTRL+ALT+C”.
9. Word, Excel, Power Point, Calendar cannot do action, but can see
the onscreen display:
Please make sure installed the Office Applications completely. If
Office Applications are not fully installed, press those keys can only
see the onscreen display.
10. Sleep key con not work properly:
If you have problems using the sleep button, make sure that the
power management in your PC has been enabled both in the BIOS
and in Windows. For more information on your PC’s BIOS settings,
refer to your PC’s manual. For more information on how to enable
the power management features in Windows, refer to your
Windows manual.
11. The “Log Off“ key can not work:

16
w For Windows 95, Windows 98, Windows ME, Windows XP
If press the Log Off key and can not see the Log Off dialog box
or just can open the “Start button Menu”, Please press the
“ESC” key to ignore all actions and press the Log Off key again,
the Target Log Off function will do action.
w For Windows 2000
The Log Off key function must be enabled because the Log Off
function is default in Windows 2000. The way to enable the Log
Off function, open the Start Menuà SettingsàTaskbar & Start
Menu. Choose the Taskbar & Start Menu Properties, select Start
Menu Settings in Advanced window, choose the “Display
Logoff” item and click OK to complete enable the Log Off
function.
w For Windows NT 4.0
The Log Off Key is basically no function in Windows NT 4.0. You
can still use this function by clicking the Start Manu to have Shut
Down Windows.
12. The “TASK PANE key” can not do action:
The TASK PANE key just can support “OFFICE XP Application”.

FCC GUIDELINES
This equipment has been tested and found to comply with the limits for a Class B digital device, pursuant to
Part 15 of the FCC Rules. These limits are designed to provide reasonable protection against harmful
interference in a residential installation. This equipment generates, uses and can radiate radio frequency
energy and, if not installed and used in accordance with the instructions may cause harmful interference to
radio communications. However, there is no guarantee that interference will not occur in a particular
installation. If this equipment does cause harmful interference to radio or television reception, which can be
determined by turning the equipment off and on, the user is encouraged to try to correct the interference by
one or more of the following measures:
s Reorient or relocate the receiving antenna
s Increase the separation between the equipment and receiver
s Connect the equipment into an outlet on a circuit different from that to which the receiver is
connected.
s Consult the dealer or an experienced radio/TV technician for help.
The Class B digital apparatus meets all requirements of the Canadian Interference-Causing Equipment
Regulation.
Cet appareil numerique de la class B respecte toutes les exigences du Règlement sur le materiel brouilleur du
Canada.
Caution:
Any changes or modifications not expressly approved by the party responsible for compliance could
void the user's authority to operate this equipment. Shielded interface cable, if any, must be used in
order to comply with emission limits.
封底內頁

8190
Version 1.0
October 2001
http://www.btc.com.tw Printed in China
封底