Behavior Tech Computer MSM955C Wireless Optical Mouse User Manual
Behavior Tech Computer Corporation Wireless Optical Mouse Users Manual
Users Manual
M
M9
95
55
5C
C
O
Op
pt
ti
ic
ca
al
l
M
Mo
ou
us
se
e
Q
Qu
ui
ic
ck
k
I
In
ns
st
ta
al
ll
la
at
ti
io
on
n
G
Gu
ui
id
de
e
Congratulations on purchasing this exciting Typhoon Optical Wireless Mouse. This multi-function
optical office mouse is with great features, wheel for quick scrolling and optical sensor for
preventing mechanical interference caused by dust. Designed with human-oriented
characteristics make you feel more comfortable and efficient while surfing on the website or using
applications.
System Requirements
1. Available PS/2 or USB port.
2. Operating system:
USB Model Windows® 98SE, Windows® ME, Windows® 2000 or Windows® XP
operating system
Combo Model Microsoft® Windows® 95, Windows® 98SE, Windows® ME, Windows®
2000 or Windows® XP operating system
Hardware Installation
Connect the mouse onto Your PC System
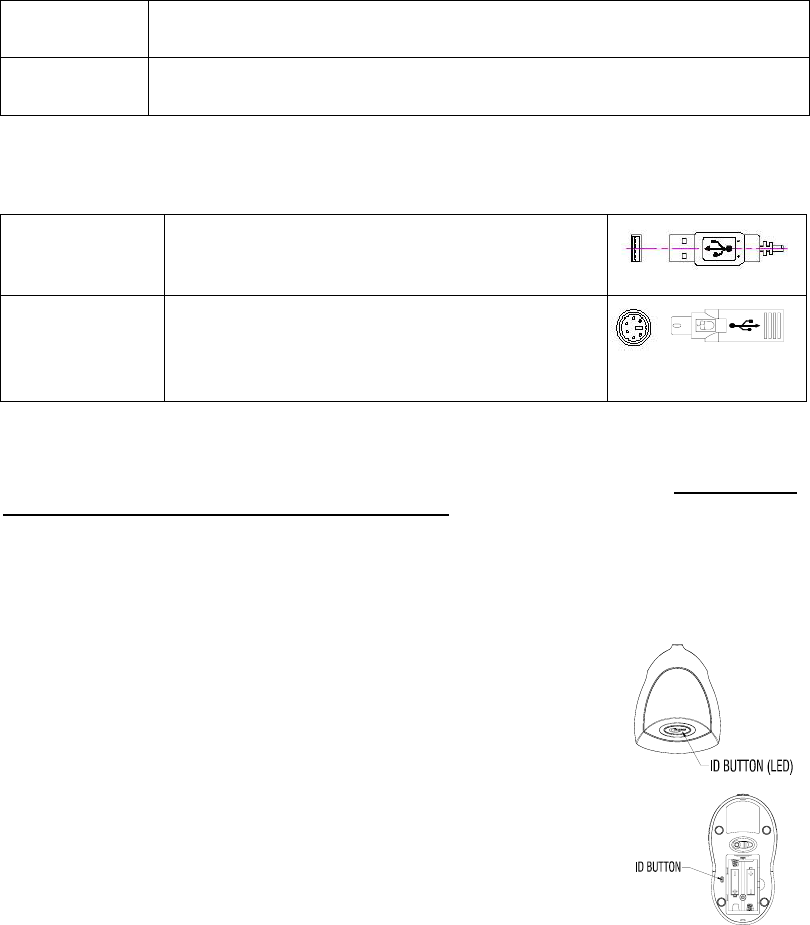
USB Model Just directly plug the USB connector into the USB
port on PC.
Combo Model
(USB Model + USB
to PS/2 adapter)
For PS/2 port system, please use the “Combo
Adapter” (USB to PS/2 adapter). This adapter
helps you a lot on solving the USB to PS/2 port
issue.
ID Setting
This wireless optical mouse contains 256 sets ID. The ID-recognition function helps to
protect against interference from other RF products in the same environment. Remember to
reset ID when other RF products affect your mouse.
The ID button (with Typhoon Logo) locates on the top of the receiver with a LED under
to show the connecting condition.
The mouse should be able to work after you first install it. If it can’t work, please follow
the steps below to process ID setting of this mouse.
1. Firstly, press the ID button on the top of the receiver once.
The LED under the receiver ID button will flash.
2. Then press the ID button on the bottom of the mouse once.
Once the ID is set, the LED under the receiver ID button will
remain steadily lit.
Note: The whole procedure should be completed within 25 seconds.
USB Mouse connector
Combo connector
(USB to PS/2 adaptor)
ID Button of Mouse
ID Button on Receiver
Battery Low Indication
When the mouse battery is low, the RED LED indication under mouse scroll wheel will light up
when the mouse is moved. Please change batteries immediately when the RED LED indication
lights up to ensure the good use of this mouse. After you change the batteries, the RED LED
indication will disappear.
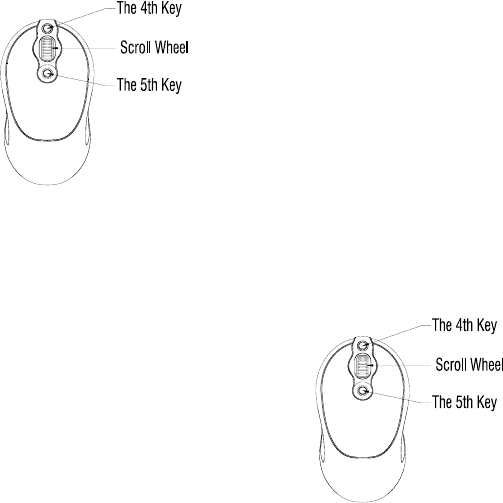
Mouse Buttons
Besides normal mouse left and right key, this mouse also provides a scroll wheel, the 4th and 5th
key for other features.
Scroll Wheel: Page up
Page Down Scroll page up or down.
The 4th Key: Back Return to the last page you viewed.
The 5th Key: Forward View the next page you viewed
before.
Sleep Mode
When the signal between the receiver and mouse suspends over 8 minutes, the mouse would fall
into sleep mode. To wake up the mouse, just simply click on any key of it.
Important Information
1. This optical mouse uses light to sense movement. It cannot work on a glass, translucent,
dark color, or reflective surface.
2. Use the mouse only on a clean, flat, non-slippery, and opaque surface in order to ensure
smooth and accurate cursor action.
Scroll Wheel on Mouse
(With a RED LED beneath)
F
Fe
ed
de
er
ra
al
l
C
Co
om
mm
mu
un
ni
ic
ca
at
ti
io
on
n
C
Co
om
mm
mi
is
ss
si
io
on
n
I
In
nt
te
er
rf
fe
er
re
en
nc
ce
e
S
St
ta
at
te
em
me
en
nt
t
This equipment has been tested and found to comply with the limits for a Class B digital
device, pursuant to Part 15 of the FCC Rules. These limits are designed to provide
reasonable protection against harmful interference in a residential installation. This
equipment generates, uses and can radiate radio frequency energy and, if not installed
and used in accordance with the instructions, may cause harmful interference to radio
communications. However, there is no guarantee that interference will not occur in a
particular installation. If this equipment does cause harmful interference to radio or
television reception, which can be determined by turning the equipment off and on, the
user is encouraged to try to correct the interference by one of the following measures:
- Reorient or relocate the receiving antenna.
- Increase the separation between the equipment and receiver.
- Connect the equipment into an outlet on a circuit different from that
to which the receiver is connected.
- Consult the dealer or an experienced radio/TV technician for help.
FCC Caution: Any changes or modifications not expressly approved by the party
responsible for compliance could void the user's authority to operate this equipment.
This device complies with Part 15 of the FCC Rules. Operation is subject to the following
two conditions: (1) This device may not cause harmful interference, and (2) this device
must accept any interference received, including interference that may cause undesired
operation.