Behavior Tech Computer MSM971U Wireless Mouse User Manual M971U QG
Behavior Tech Computer Corporation Wireless Mouse M971U QG
Users Manual
M
M9
97
71
1U
U
W
Wi
ir
re
el
le
es
ss
s
O
Op
pt
ti
ic
ca
al
l
M
Mo
ou
us
se
e
Q
Qu
ui
ic
ck
k
I
In
ns
st
ta
al
ll
la
at
ti
io
on
n
G
Gu
ui
id
de
e
Congratulations on your purchasing this exciting wireless radio frequency optical mouse. This
multi-function optical mouse is with great features, the wheel for quick scrolling and two side
buttons for extra functions (if with 5 keys). Beside, this optical mouse uses optical sensor instead of
mouse ball. The precise sensor detects motion on hundreds of surfaces, including wood, plastic, or
even your pants leg, and prevents you from the interference caused by dust. All those human-
oriented characteristics make you feel more comfortable and efficient while surfing on the website
or using applications. After the KeyMaestro Mouse Driver installed, you will have seven extra
functions to select for buttons- Quick Jump, Double Click, Window Zoom, Switch AP, Auto Panning,
Back and Forward. Moreover, the Quick Jump button is bonded with most often-used functions,
Mouse Control Panel, Control Panel, Horizontal Scroll Bar, Vertical Scroll Bar, Minimize All
Windows, Size Grip, Windows Explorer, Recall the Last Active Window and Exit. Please install the
KeyMaestro Mouse Driver to find more great functions!
System Requirements
¾ Microsoft® Windows® NT 4.0, Windows® 95, Windows® 98, Windows® ME, Windows®
2000 or Windows® XP operating system
Hardware Installation
Connect the Receiver to Your PC System
1. Connect the receiver to your PC by plugging in the receiver connector into USB port on your
PC.
2. Take the mouse and make sure the batteries on the back are installed correctly. (Follow the
polarity signs in the battery compartment.)
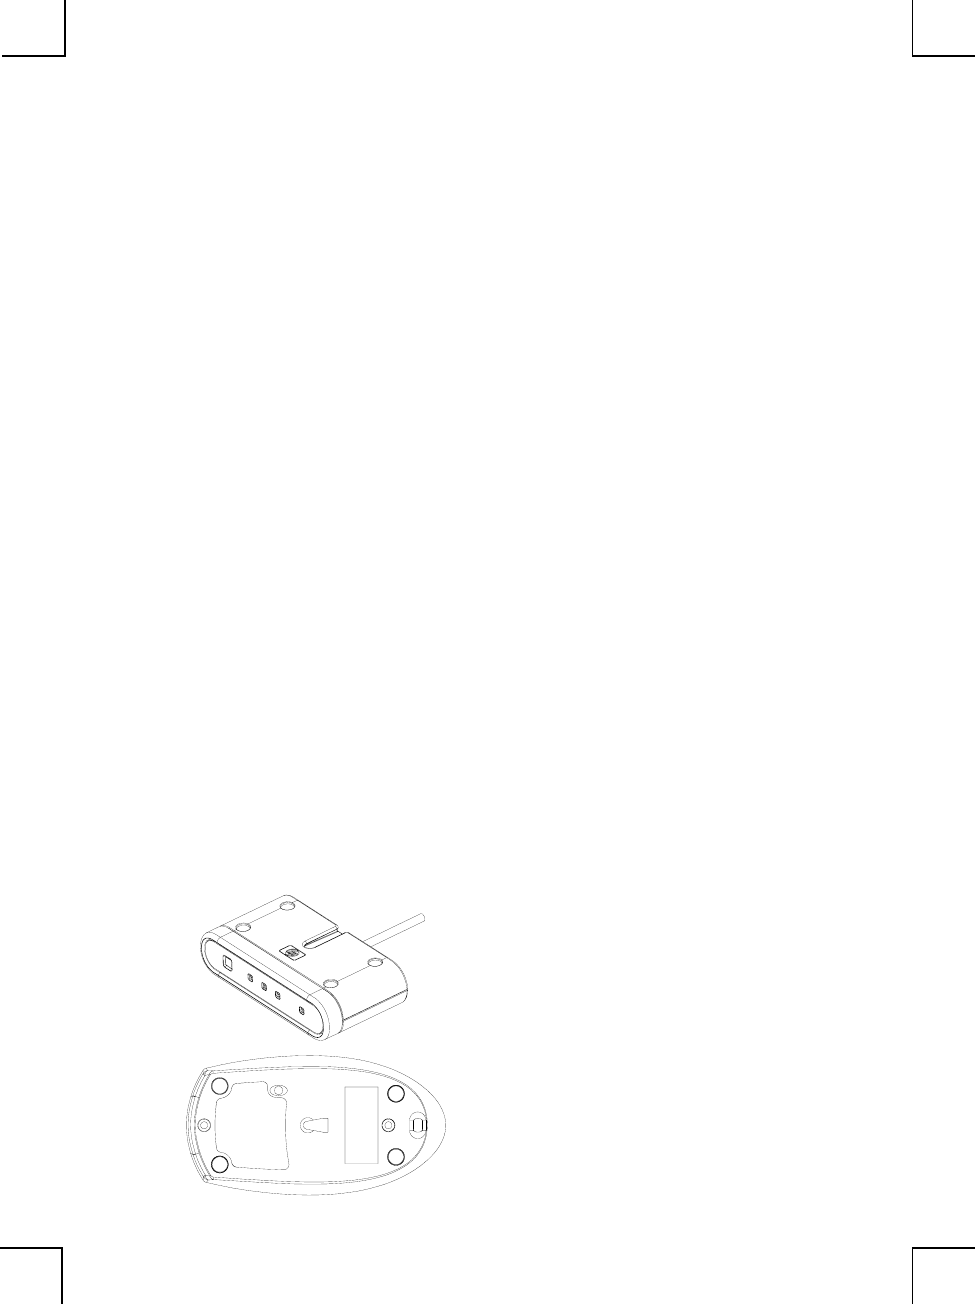
ID Setting
This wireless optical mouse contains 255 sets ID. This ID-recognition function helps to protect
against interference from other RF keyboards in the same environment. Remember to set the ID
when you replace the batteries.
1. Your PC must be on for the ID setting.
2. Press the ID button on the side of the receiver once.
3. Press the ID button on the bottom of the mouse once.
Front view of Receiver
The button view of Mouse
Software Installation
1. Insert the disk labelled “KeyMaestro Input Device Driver” into your disk drive.
2. Open File Explorer to find “Setup.exe” from the disk.
3. Double-click the “Setup.exe”.
4. Then follow the instruction on the screen to install the driver. The default install path is set
to c:\MMaestro. You have the option to change the install path during set-up.
5. Set up will indicate when installation has successfully completed. The driver is loaded
when you see the driver icon in the system tray (lower right corner of the screen). The
operating system needs to restart.
Battery Low Alarm
When battery is running out of power, computer will display a battery low icon on the
upper-right corner of your screen and flash 10 seconds per minute to indicate low
batteries in the unit. Please change the batteries. After changing the batteries,
remember to set ID settings.
FCC GUIDELINES
This equipment has been tested and found to comply with the limits for a Class B digital device, pursuant to Part 15 of the FCC
Rules. These limits are designed to provide reasonable protection against harmful interference in a residential installation.
This equipment generates, uses and can radiate radio frequency energy and, if not installed and used in accordance with the
instructions may cause harmful interference to radio communications. However, there is no guarantee that interference will
not occur in a particular installation. If this equipment does cause harmful interference to radio or television reception, which
can be determined by turning the equipment off and on, the user is encouraged to try to correct the interference by one or
more of the following measures:
Reorient or relocate the receiving antenna
Increase the separation between the equipment and receiver
Connect the equipment into an outlet on a circuit different from that to which the receiver is connected.
Consult the dealer or an experienced radio/TV technician for help.
Use only shielded cables to connect I/O devices to this equipment.
This device complies with Part 15 of the FCC Rules. Operation is subject to the following two conditions: (1) This device may
not cause harmful interference. (2) This device must accept any interference received, including interference that may cause
undesired operation.
This equipment is intended for use in the following countries EU 15 countries:
Austria, Belgium, Denmark, Finland, France, Germany, Ireland, Italy, Luxembourg, Netherlands, Spain, Sweden, United
Kingdom, Portugal, Greece. And other non-EU countries: Switzerland, Norway, and Iceland.
低功率電波輻射性電機管理辦法:
第十㆕條:經型式認證合格之低功率射頻電機,非經許可,公司、商號或使用者均不得擅自變更頻率、加大功率或變更原設
計之特性及功能。
第十七條:低功率射頻電機之使用不得影響飛航安全及干擾合法通信;經發現有干擾現象時,英立即停用,並改善至無干擾
時方得繼續使用。
前項合法通信,指依電信法規定作業之無線電信。
低功率射頻電機需忍受合法通信或工業、科學及醫療用電波輻射性電機設備之干擾。
Information to User:
) Any changes or modifications not expressly approved by the party responsible for compliance could void the user’s
authority to operate this equipment. Shielded interface cable, if any, must be used in order to comply with emission
limits.
IBM AT and PS/2 are registered trademarks of International Business Machines Corporation.
Microsoft and Windows are registered trademarks of Microsoft Corporation in the United States and/or other countries.
All other trademarks are trademarks of their respective holders.
3100505190 v1.1 June 2003 Printed in China.