Behavior Tech Computer RX9039ARF3 Wireless USB dongle User Manual Quick Installation Guide
Behavior Tech Computer Corporation Wireless USB dongle Quick Installation Guide
User manual
Wireless Keyboard & USB dongle /9039ARF III / BTC / EMPREX
Quick Installation Guide
Hardware Installation
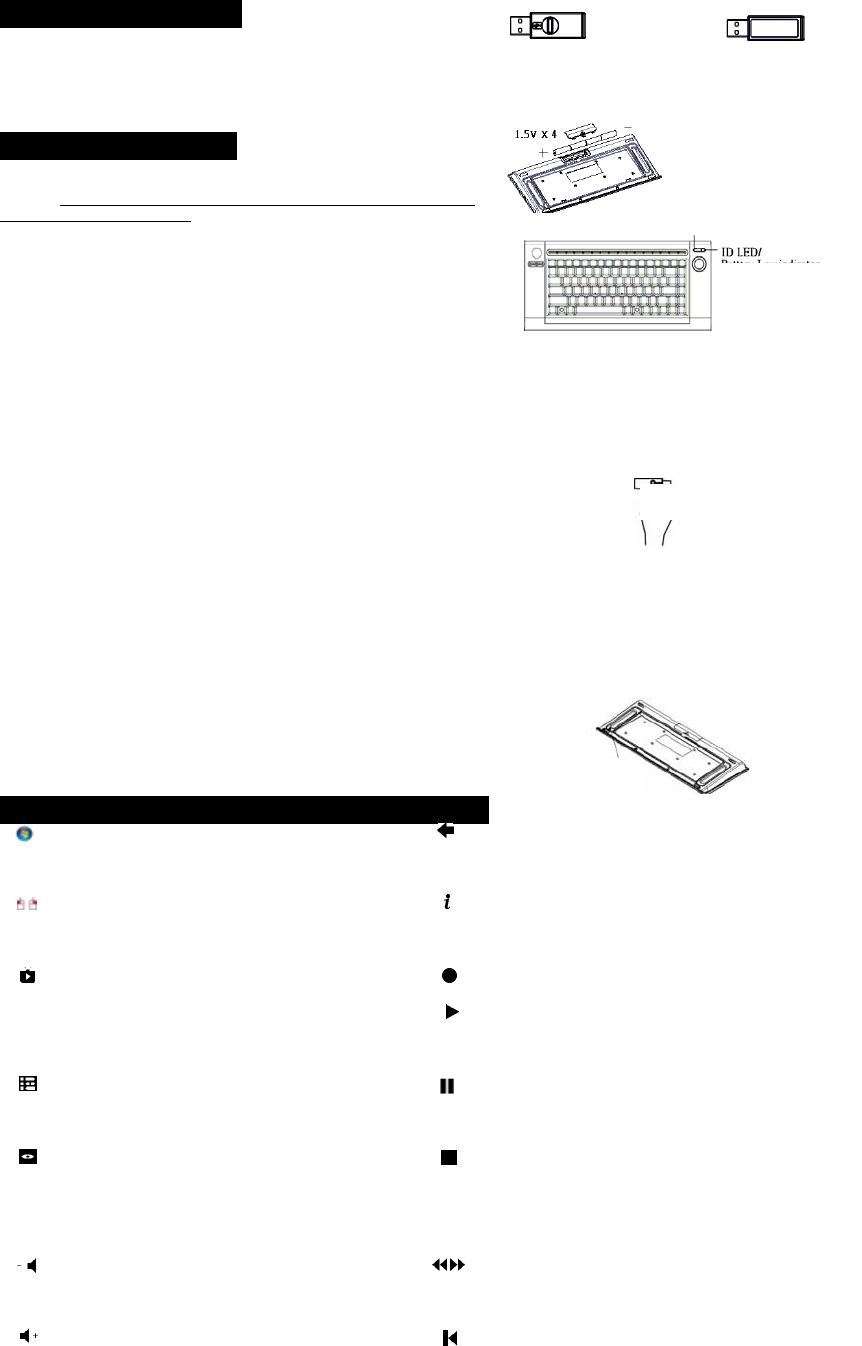
1. Plug the dongle receiver connector into your available USB port on PC.
2. Make sure the batteries of the keyboard are installed correctly. Please follow
the polarity signs in the battery compartment.
Note:
After you plug the receiver USB connector into your PC USB port, please
hold the keyboard close to the receiver within 1m and press any key to pair
ID.
ID Pairing Procedure
If it can’t work, please follow the steps below to process the ID pairing procedures.
The ID-recognition function helps to protect against interference from other RF
products. Remember to follow the steps below to change ID when other RF
products affect your keyboard kit.
ID pairing/connect button location:
- Receiver ID pairing/connect button→ on the top of the
dongle receiver
- Keyboard ID pairing/connect button→ on the bottom of the
keyboard
ID pairing procedures:
1. Press and hold the ID pairing/connect button on the top of the dongle
receiver about 5 seconds until the receiver LED flashes. The receiver LED will
flash 60 seconds to wait for keyboard pairing information. (If you release the
button within 5 seconds, the ID doesn’t make any changes.)
2. Hold the keyboard close to the dongle receiver within 1M.
3. Press and hold the keyboard ID pairing/connect button on the bottom of the
keyboard about 5 seconds until the keyboard LED flashes. (If you release the
button within 5 seconds, the ID pairing will fail.)
4. The receiver LED indicator flashes rapidly as its ID paired with this keyboard.
Then you could press any key to check if the keyboard works or not.
Note:
- The whole ID pairing procedure shall be completed within
60 seconds.
- Make sure your PC is on and running when doing the
pairing procedure.
- You don’t have to pair ID again after changing batteries. If it
can’t work, please follow the steps above to pair ID.
- The keyboard can operate freely up to a radius of about
10m from the receiver.
- The keyboard battery life is up to 4.5 months.
Front View of Back View of
Power Button
ID LED/
Batter
y
Low
ID Button
ID pairing/connect button on the top of the
ID Button
Keyboard Hotkey Functions (from left to right)
ID pairing/connect button on the bottom of the keyboard
1. MCE Start
Button
To quickly launch Media Center 9. Back Go to the previous screen.
2. Mouse
Painter
Built-in mouse painter and Left/Right click. 10. More Show information about the selected
item.
11. Record Record the TV Show to disk.
3. Live TV Switch to Live TV to bring up Live TV on
your computer screen or on a television
connected to your Media Center PC.
12. Play Play the selected song, album, play
list, recorded TV Show, or video.
4. Guide Go to the electronic programming guide. 13. Pause Pause the currently playing media.
Press pause again to resume.
5. DVD
Menu
Display the DVD menu 14. Stop Stop the currently playing media.
Press play to start the track again from
the beginning.
6. Volume - Adjust the volume 15. Rew/Fwd
Rewind/ Speed up the currently playing
media.
7. Volume+ Adjust the volume 16. Replay Rewind the position pointer and

Wireless Keyboard & USB dongle /9039ARF III / BTC / EMPREX
(Previous) Increment
8. Mute Mute the sound without stopping play back 17. Skip (Next)Skip ahead an increment.
Power Key
1. Power Button 2. ID LED /Battery low indicator
Depending on your system power management setting, this button can be used to shut the PC
down or put the PC into standby (sleep) mode or wakes it up from standby
Battery Low Alarm
When the keyboard batteries are low, the RED LED indicator, which is on the upper right of the keyboard, will blink when you press keyboard
buttons. Please change batteries immediately when the RED LED indicator lights up to ensure the good use of this keyboard. After you change
the batteries, the RED LED indicator will disappear.
System Requirement
Microsoft® Windows 7™ (Home Premium or above), Windows Vista™ (Ultimate/Home Premium) or Windows® XP Media Center Edition 2005
or later.
CD-ROM drive (for CD and Video operation) Standard sound card (for CD and Video operation)

Wireless Keyboard & USB dongle /9039ARF III / BTC / EMPREX
FCC GUIDELINES
This equipment has been tested and found to comply with the limits for a Class B digital device, pursuant to Part 15 of the FCC Rules.
These limits are designed to provide reasonable protection against harmful interference in a residential installation. This equipment
generates, uses and can radiate radio frequency energy and, if not installed and used in accordance with the instructions may cause
harmful interference to radio communications. However, there is no guarantee that interference will not occur in a particular installation.
If this equipment does cause harmful interference to radio or television reception, which can be determined by turning the equipment off
and on, the user is encouraged to try to correct the interference by one or more of the following measures:
Reorient or relocate the receiving antenna.
Increase the separation between the equipment and receiver.
Connect the equipment into an outlet on a circuit different from that to which the receiver is connected.
Consult the dealer or an experienced radio/TV technician for help.
FCC Warning: This device complies with Part 15 of the FCC Rules. Operation is subject to the following two conditions: (1) this device
may not cause harmful interference, (2) this device must accept any interference received, including interference that may cause
undesired operation.
FCC Caution: Any changes or modifications not expressly approved by the party responsible for compliance could void the user's
authority to operate this equipment.
IMPORTANT NOTE:
FCC Radiation Exposure Statement:
This equipment complies with FCC radiation exposure limits set forth for an uncontrolled environment. End users must follow the
specific operating instructions for satisfying RF exposure compliance.
This transmitter must not be co-located or operating in conjunction with any other antenna or transmitter.
You are cautioned that changes or modifications not expressly approved by the party responsible for compliance could void your
authority to operate the equipment.