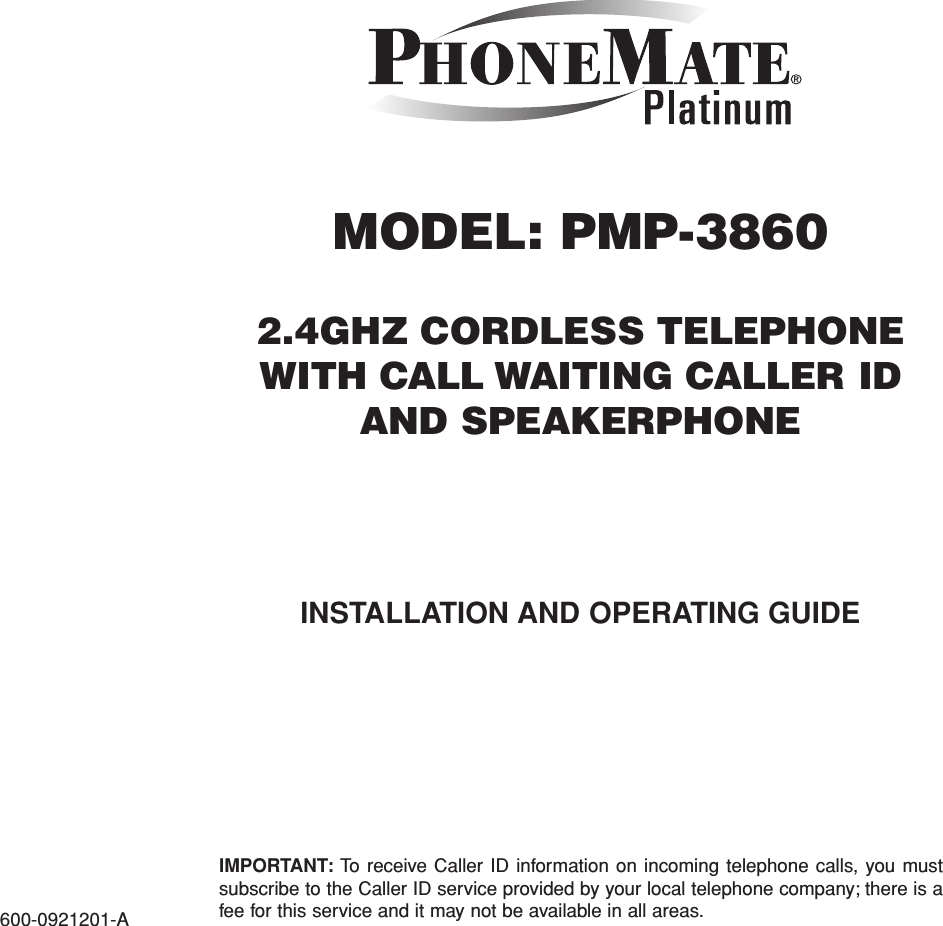
Belco Co PMP-3860 2.4 GHz 50 Channel Analog Cordless Phone with CID User Manual IBM 3455 op manual

Belco International Co Ltd 2.4 GHz 50 Channel Analog Cordless Phone with CID IBM 3455 op manual

User Manual

MODEL: PMP-38602.4GHZ CORDLESS TELEPHONEWITH CALL WAITING CALLER IDAND SPEAKERPHONEIMPORTANT: To receive Caller ID information on incoming telephone calls, you mustsubscribe to the Caller ID service provided by your local telephone company; there is afee for this service and it may not be available in all areas.600-0921201-AINSTALLATION AND OPERATING GUIDE
This symbol is to alert you to important operating or servicing instructions that may appear inthe user's manual. Always follow basic safety precautions when using this product to reduce therisk of injury, fire, or electrical shock.When using this product, basic safety precautions should always be followed to reduce the risk of fire, electric shockand injury to persons, including the following:1. Read and understand all instructions.2. Follow all warnings and instructions marked on the product.3. Use only with class 2 power source DC 9V 300mA.4. Unplug this product from the wall outlet before cleaning. Do not use liquid cleaners or aerosol cleaners. Use a damp clothfor cleaning.5. Do not use this product near water; for example, near a bathtub, wash bowl, kitchen sink or laundry tub, in a wet basementor near a swimming pool.6. Do not place this product on an unstable cart, stand, or table. The product may fall, causing serious damage to the product.7. Slots and openings in the cabinet back or bottom are provided for ventilation. To protect it from overheating, these openingsmust not be blocked or covered. The openings should never be blocked by placing the product on the bed, sofa, rug, or othersimilar surface. This product should never be placed near or over a radiator or heat register.This product should not be placedin an enclosed environment unless proper ventilation is provided.8. Do not allow anything to rest on the power cord. Do not locate this product where the cord will be abused by animals orpersons walking on it.9. Do not overload wall outlets and extension cords as this can result in risk of fire or electrical shock.10. Never push objects of any kind into this product through cabinet slots as they may touch dangerous voltage points or shortout parts that could result in a risk of fire or electrical shock. Never spill liquid of any kind on the product.11. To reduce the risk of electrical shock, do not disassemble this product. Instead take it to a qualified service person whenservice or repair work is required. Opening or removing covers may expose you to dangerous voltages or other risks. Incorrectre-assembly can cause electrical shock when the appliance is subsequently used.12. Unplug all cords and refer servicing to qualified service personnel under the following conditions:A. When the power supply cord or plug is damaged or frayed.B. If liquid has been spilled into the product.C. If the product has been exposed to rain or water.D. If the product does not operate normally by following the operating instructions. Adjust only those controls covered inthe operating instructions. Improper adjustment of other controls may result in damage and require work by a qualifiedtechnician to restore the product to normal operation.13. Avoid using a telephone (other than a cordless type) during an electrical storm. There may be a remote risk of electric shockfrom lightning.14. Do not use a telephone to report a gas leak in the vicinity of the leak.IF YOUR PRODUCT UTILIZES BATTERIES, THE FOLLOWING ADDITIONAL PRECAUTIONS SHOULD BE OBSERVED:1. Use only the type and size of batteries specified in the users manual.2. Do not dispose of batteries in a fire. The cells may explode. Check with local codes for possible special disposal instructions.3. Do not open or mutilate the batteries. Released electrolyte is corrosive and may cause damage to the eyes or skin. It may betoxic if swallowed.4. Exercise care in handling batteries in order not to short the battery with conducting materials such as rings, bracelets andkeys. The battery or conductor may overheat and cause burns.5. Do not attempt to recharge the batteries with or identified for use with this product. The batteries may leak corrosiveelectrolyte or explode.6. Do not attempt to rejuvenate the batteries provided with or identified for use with this product by heating them. Suddenrelease of the battery electrolyte may occur causing burns or irritation to eyes or skin.7. When replacing batteries, all batteries should be replaced at the same time. Mixing fresh and discharged batteries couldincrease internal cell pressure and rupture the discharged batteries.8. When inserting the batteries into this product, the proper polarity or direction must be observed. Reverse insertion of batteriescan cause charging, which may result in leakage or explosion.9. Remove the batteries from this product if the product will not be used for a long period of time (several months or more) sinceduring this time the batteries could leak, damaging the product.10. Discard "dead" batteries as soon as possible since they are more likely to leak in a product.11. Do not store this product, or the batteries provided with or for identified use with this product, in high temperature areas.12. If your product uses a rechargeable battery, charge the battery(ies) only in accordance with the instructions and limitationspecified in the User Manual.SAVE THESE INSTRUCTIONSIMPORTANT SAFETY INSTRUCTIONS2Important Safety Instructions ...................2FCC Regulations ....................................3-4Battery Cautionary Instructions ...............5PMP-3860 Parts Checklist .........................6Location of Controls and Features......7-12Handset .................................................7-8Base ...................................................9-11LCD Display ...........................................12Choosing a Location ...............................13Telephone Setup .................................14-16Connecting the Base ..............................14Wall Mounting .........................................15Tone/Pulse Switch .................................16Handset Ringer Volume ..........................16Base Ringer Volume ...............................16Battery Installation ..................................17Battery Duration .....................................17When the Battery Needs Charging .........17When to Purchase a New Battery Pack ..17Headset and Data Jack ............................18The Data Jack ........................................18The Headset Jack ...................................18Belt-Clip .................................................18Basic Operation ..................................19-21Making Calls ...........................................19Receiving Calls .......................................20Redialing ................................................21Additional Options .................................21Basic Displays .........................................22Settings ...............................................23-28Handset Settings ....................................23Changing the Language .........................24Turning the First Ring On or Off ..............24Setting the Time and Date ......................25Setting the Area Code .......................25-26Adjusting the Contrast ............................26Deleting Message Waiting Indication ......27Turning Auto Answer On or Off ...............27Disabling the Ring for Private Calls .........28Disabling the Ring for Unavailable Calls .28Speed Dialing ......................................29-34Storing Phone Numbers in the Handset .29Letter Table .............................................30Storing Phone Numbers in the Base .......30Viewing the Handset Phone Book ..........31Making Calls from the HandsetPhone Book ............................................31Making Speed Dial Calls fromthe Base .................................................32Deleting a Number Stored in theHandset ..................................................32Deleting a Number Stored in theBase .......................................................33Editing a Number Stored in theHandset ..................................................33Priority (VIP) Calls ..................................34Blocked (REJ) Calls ................................34Caller ID ...............................................35-39When You Receive a Call ........................35Viewing the Caller ID List .......................35Caller ID Displays ...................................36Caller ID with Call Waiting Service ..........37Storing Caller ID Records .......................37Deleting Caller ID Records .....................38Returning Caller ID Calls ........................39Message Waiting ......................................40New Call Light ........................................40Other Features ....................................41-42Using the Intercom/Handset Finder (PAGE) ........................................41Call Transfer/3-way Calling ................41-42Out-of-Range Warning ..........................42Channel Changing ..................................42Care and Maintenance ............................43Troubleshooting ......................................44Warranty ..............................................45-46Glossary  ...................................................47Wall Mount Template ................................49Battery Order Form .................................50PMP-3860 TABLE OF CONTENTS1
6. Programming/testing emergency numbers:When programming emergency numbers and/or making test calls to emergencynumbersA. Remain on the line and briefly explain to the dispatcher the reason for the callbefore hanging up.B. Perform such activities in the off-peak hours, such as early morning or late evening.INTERFERENCE INFORMATION: PART 15 OF FCC RULESSome telephone equipment generates and uses radio frequency energy which if notproperly  installed, may cause interference to radio and television reception.This unit has been tested and found to comply with the limits for a Class B computingdevice in accordance with the specifications in Part 15 of the FCC rules. Thesespecifications are designed to provide reasonable protection against such interference ina residential installation. However, there is no guarantee that interference will not occur ina particular installation.If this equipment does cause interference to radio or television reception, when it’s in use,the user is encouraged to try to correct the interference by one or more of the followingmeasures:A. Where it can be done safely, reorient the radio or TV receiving antenna.B. To the extent possible, relocate the television, radio, or other receiver with respectto the telephone equipment.C. If your telephone product runs on AC power, plug your product into an AC outletthat’s not on the same circuit as the one used by the radio or television.4FCC REGULATIONS CONTINUEDWarning: Modifying or tampering with the telephone's internal components can cause amalfunction and might invalidate the telephone's warranty and void your FCCauthorization to operate it. If the trouble is harming the telephone lines, the telephonecompany might ask you to disconnect the telephone until you have resolved the problem.As it complies with Part 68 of the FCC rules and the technical requirements for connectionto telephone networks published by ACTA, your unit has been registered with the FCC.The FCC requires us to provide you with the following information:1. Connection and use with the nationwide telephone network:The FCC requires that you connect to a nationwide telephone network through amodular telephone outlet which is TIA/EIA-IS-968 compliant. It is USOC jack typeRJ11C.This equipment may not be used on coin service provided by the telephone company.Connection to party lines is subject to state tariffs. Check with your local telephonecompany.2. Notification to the telephone company:FCC rules require that upon request you provide the following information to the phonecompany.A. The line (telephone number) to which you will connect the telephone equipment,andB. The Registration Number and Ringer Equivalence Number (REN). These numbersare found on the back or bottom of your telephone equipment.The REN is useful to determine the quantity of devices you may connect to yourtelephone line and still have all of those devices ring when your telephone number iscalled. In most, but not all areas, the sum all RENs should be 5 or less. To determinethe number of devices permitted in your area, contact your local telephone company.3. Repair instructions:If it is determined that your telephone equipment is malfunctioning, the FCC requiresthat it not be used and be unplugged from the modular outlet until the problem hasbeen corrected. Repairs to this telephone equipment can be made only by the manu-facturer or its authorized agents, or by others who may be authorized by the FCC.Unauthorized repairs void registration and warranty.4. Rights of the telephone company:If your product is causing harm to the telephone network, the telephone company maytemporarily discontinue your service. If possible, they will notify you in advance. Butif advance notice isn’t practical, you will be notified as soon as possible. You will begiven the opportunity to correct the problem, and you will be informed of your right tofile a complaint with the FCC. Your telephone company may make changes in its facil-ities, equipment, operations or procedures that could affect the proper functioning ofyour telephone equipment. If such changes are planned, you will be notified inadvance.5. This product is compatible with inductively coupled hearing aids.Note: This applies only if this product is equipped with a corded or cordless handset.3FCC REGULATIONS
PMP-3860 PARTS CHECKLIST67. Short line cord forwall installation CID RedialTalkFlash MuteSaveMEMMenuEditDelete9:45  10/11   38    3AM RPTJOHN SMITH  555-555-1212#NEWFlashRedialVolume#0*986532741PQRSGHITUVJKLWXYZMNOABCDEFIn UsePage/ICMMEMHoldSpeakerChargeRingerOff  Low  Hi1. Handset 2. Base4. AC power adapter8. Quick start card6. 7-foot line cord for desk useQUICK START GUIDEPMP-38601. Connect the telephone line cord to the "LINE"jack and to a telephone outlet.2. Connect the AC power adapter to the 9V DCjack and to an AC outlet.Note: Use only the supplied AC power adapter.Do not use anyother AC power adapter.Connect the AC power adapter to acontinuous power supply. Place the phone close to the ACoutlet so that you can plug in the AC power adapter easily.SETTING UP THE BASELINE               DATA9VDC IN!1. Slide open the batter y compartment door on the bottomof thehandset.2. Plug the batter y connector into the 2-pin connector in thebattery compartment, and then insert the battery.3. Close the batter y compartment door and place thehandset on the base unit cradle. You will hear a toneand the CHARGE LED on the base will illuminate.4. IMPORTANT:Charge the battery pack for at least 8hours before using the handset the first time.INSTALL THE BATTERYWith the handset:1. Pick up the handset from the base and press T.2. Wait until you hear a dial tone, and then dial the number you wish to dial.3. When you are finished talking, press the Tkey or place the unit backinto the base to end the call.With the speakerphone:1. Press Speaker.2. Wait until you hear a dial tone, and then dial the number you wish to dial.3. When you are finished talking, press the Speaker key.MAKING CALLS9. Belt-Clip3. 10-numbermemory card10. Ni-MH battery packBATTERIES: CAUTIONTo reduce the risk of fire or injury to persons, read and follow these instructions:•For the cordless handset, use only 3.6V 600mAh Nickel-Metal Hydride (Ni-MH),cordless telephone battery pack, PM-38BAT (included).•  Do not dispose of the batteries in a fire. The cells may explode. Check with local codesfor possible special disposal instructions.•Do not open or mutilate the batteries. Released electrolyte is corrosive and may causedamage to the eyes or skin. It may be toxic if swallowed.•Exercise care in handling batteries in order not to short the battery with conductingmaterials such as rings, bracelets, and keys. The battery or conductor may overheatand cause burns.•Do not attempt to rejuvenate the batteries identified for use with this product byheating them. Sudden release of the battery electrolyte may occur causing burns orirritation to eyes or skin.•When inserting batteries into this product, the proper polarity or direction must beobserved. Reverse insertion of batteries can cause charging, and that may result inleakage or explosion.•Remove the batteries from this product if the product will not be used for a long periodof time (several months or more) since during this time the battery could leak in theproduct.•Do not store this product, or the batteries identified for use with this product, in hightemperature areas. Batteries that are stored in a freezer or refrigerator for the purposeof extending shelf life should be protected from condensation during storage anddefrosting.Batteries should be stabilized at room temperature prior to use after cold storage.5BATTERY CAUTIONARY INSTRUCTIONSThe EPA certified RBRC®Battery Recycling Seal on the nickel-metalhydride(Ni-MH) battery indicates TT Systems LLC is voluntarily participating in anindustry program to collect and recycle these batteries at the end of theiruseful life, when taken out of service in the United States or Canada. TheRBRC®program provides a convenient alternative to placing used Ni-MHbatteries into the trash or the municipal waste stream, which may be illegal inyour area. Please call 1-800-8-BATTERY for information on Ni-MH batteryrecycling and disposal bans/restrictions in your area. TT Systems LLC’sinvolvement in this program is part of our commitment to preserving ourenvironment and conserving our natural resources.
HandsetTalk TThe Tkey is used to access the telephone line or end a call on the handset.Caller ID Key CThe Ckey is used to review Caller ID information stored in memory.Redial Key R/DELETEWhen the phone is idle or off-hook, press Rto redial the last number dialed.When viewing or editing menus and logs, the R/DELETE key is used to erasedigits and single or multiple entries from the phone book and Caller ID directories.R/DELETE is also used to insert a four second pause into a number stored inthe phone book.Channel Key The CH key, if pressed when the line is off-hook, will scan up to 50 channels andselect the clearest one to provide the best possible reception.Option Key /ICMThe Option key is used to change the 7/10/11 digit dialing mode during caller IDcallback. It can also initiate an intercom connection between the handset and base.Mute Key L/MENUThe L/MENU key is used to temporarily mute the handset microphone. Thiskey is also used to access the programmable functions of your phone.Up/Down Key ▲▼The ▲▼key lets you scroll through menus and logs, and adjust the handsetvolume.Dial PadNumeric keys are used in the conventional manner for dialing on the handset.Flash Key F/EDITThe F/EDIT key is used to access telephone company services, like callwaiting. It is also used to create and edit phone book entries.Memory Key l/SAVEUse l/SAVE to program, save, and retrieve the numbers in the handsetspeed dial directory. The l/SAVE key is also used to save handset settings.Temporary Tone/View Left key <If the base is set to pulse dialing, pressing <causes subsequent digits to bedialed out using tone until the line is put back on hook. Also used to view the leftpart of the display and move the cursor left when editing.View Right Key >Used to view the right part of the display and move the cursor right when editing.Headset JackAllows using a headset (not included) for hands-free convenience.Ringer Switch (Off/Low/Hi)Adjust the switch to select the handset ringer volume – choose OFF, LOW, or HI.LOCATION OF CONTROLS AND FEATURES8LOCATION OF CONTROLS AND FEATURESCID RedialTalkFlash MuteSaveMEMMenuEditDelete9:45  10/11   38    3AM RPTJOHN SMITH  555-555-1212#NEWHeadset Jack3-Line LCDDisplayRedial/Delete KeyMicrophoneMemory KeyDial PadCaller ID KeyNew Call LightView Right KeyRinger SwitchTalk KeyTemporary Tone/View Left KeyFlash KeyChannel KeyOption/ICM KeyMute KeyUp/Down Key7
Dial PadNumeric keys are used in the conventional manner for speakerphone dialing.Hold KeyThe Hold key is used to place a speakerphone call on hold.Flash Key The Flash key is used to access telephone company services, like call waiting.MEM Key The MEM key is used to program, save, and retrieve the numbers in the basespeed dial locations.Volume Up/Down Keys ▲▼The ▲▼keys let you adjust the speakerphone volume.Redial KeyWhen the phone is idle or off-hook, press Redial to redial the last numberdialed.Ringer Switch (Hi/Low/Off)Adjust the switch to select the handset ringer volume – choose OFF, LOW, orHI.Page/IntercomUsed to initiate a handset page. Also used to initiate an intercom connectionbetween the base and the handset.Charge LEDOn (red) when the handset is on the cradle being charged.In Use LEDOn (red) when the handset is in use. Flashes when the phone is ringing.Charging ContactsUsed to recharge battery and reset the security code in the handset.FlashRedialVolume#0*986532741PQRSGHITUVJKLWXYZMNOABCDEFIn UsePage/ICMMEMHoldSpeakerChargeRingerOff  Low  HiLOCATION OF CONTROLS AND FEATURES10BaseLOCATION OF CONTROLS AND FEATURESPage/IntercomButtonIn Use LEDDial PadFlash KeySpeakerKeyMicrophoneSpeakerLEDRinger SwitchAntennaMEM KeyCharge LEDSpeakerHold KeyVolumeUp/Down Keys Redial KeySpeaker KeyThe Speaker key is used to access the telephone line or end a call using thespeakerphone.Speaker LEDOn (red) when the speakerphone is in use. Flashes slowly when the phone isringing.9
LCDDisplayName Character Field Displays caller’s name and operational menus.Number FieldThe number field will display numbers when dialing, viewing Caller ID, and whenviewing the phone book.Date/Time DisplayShows the date and time of Caller ID calls or current date & time when idle.NEW IconWhen in idle mode, the NEW call icon will flash slowly when a new Caller ID callhas been received. The number of new caller ID calls is listed next to the icon.Call/Entry NumberWhen in any of the menus, a number is listed here, next to the #sign. Thisnumber indicates the place in the list, such as the 38th caller ID call or the 7thsetting in the menu.RPT CounterWhen viewing caller ID entries, the RPT icon indicates that the same Caller IDnumber has called more than one time since Caller ID memory has last beenreviewed. Next to the RPT icon is a counter that indicates how many times thatcaller has called since the last review.Total Call CounterThe Total Call Counter will show the total number of Caller ID messagesreceived, the total number of phone numbers stored in the phone book, etc.,depending on the menu.9:45  10/11   38    3AM RPTJOHN SMITH555-555-1212#NEW12LOCATION OF CONTROLS AND FEATURESName Character FieldDate/TimeDisplay New Iconor EntryNumberRPT orTotal CallCounterNumber FieldData JackUsed for connecting a computer or fax machine.Tone/Pulse SwitchUsed to set the dialing method for tone or pulse dialing.Base Bottom ViewLOCATION OF CONTROLS AND FEATURESBase Back View11Data JackTone/Pulse Switch
Connecting the Base1. Connect the telephone line cord to the "LINE" jack and to a telephone outlet.2. Connect the AC power adapter to the 9V DC jack and to an AC outlet.Note: Use only the supplied AC power adapter. Do not use any other ACpower adapter. Connect the AC power adapter to a continuous powersupply. Place the phone close to the AC outlet so that you can plug inthe AC power adapter easily.Tip: If your telephone outlet is not modular, contact your telephone company forassistance.14TELEPHONE SETUPDo the following:•Choose the best location•Connect the phone•Choose the dialing modeWhere you place the phone affects the reception quality of the handset:•Away from another cordless telephone•Place the base near an AC electrical outlet and near telephone line jack•Place the base away from metal walls and metal file cabinets•Raise the base unit’s antenna making sure it points towards the ceilingCAUTION: The cordless telephone operates at a frequency that may causeinterference to nearby TVs and VCRs; the base phone should notbe placed near, or on top of a TV or VCR. If interference is experi-enced, moving the cordless telephone farther away from the TV orVCR will often reduce or eliminate the interference.Note: While the 2.4GHz frequency is inherently clearer, we suggest thatyou do not use this phone within 20 feet of a working microwave.The microwave produces frequencies in this range which maycause interference. This interference is normal for all 2.4GHzphones and should not be considered a product defect.CHOOSING A LOCATIONAway from noise sources such as awindow by a street with heavy trafficAway from VCRs and TV sets andother electronic equipmentAway from heat sources, such asradiators, air ducts, and sunlightAway from a microwave ovenAway from excessivemoisture, extremely lowtemperatures, dust,mechanical vibration, orshockAway from apersonal computerNear a centrallocation and on alevel surface13
Tone/Pulse Switch1. Choose the correct dialing mode.2. Select the dialing mode Tone (T) orPulse (P) by setting the switch at theback of the base unit.Note: Changes to the switch positionduring a call do not take effectuntil the call has ended.Tip: If you are unsure of the proper dialing mode, make a trial call with the dialmode setting to T. If the call connects, leave the switch as is (Tone mode),otherwise, set to P. Handset Ringer VolumeAdjust the handset ringer volume using the RINGERswitch on the right side of the handset. Selectbetween Hi ringer, Low ringer, and ringer Off.Base Ringer VolumeAdjust the base ringer volume using theRINGER switch on the right side of the base,near the rear of the phone. Select between Hiringer, Low ringer, and ringer Off.16TELEPHONE SETUPTone/PulseSwitchWall MountingThe PMP-3860 telephone may be installed onto two screws (not included)fastened into the wall. When installing screws into plasterboard walls, use wallanchors (not included) to ensure that the screws remain secure. Insert thescrews into the wall leaving 3/16" of each screw extending out from the wall.See the wall mount template on page 49 to properly space the screws in thewall for mounting. The PMP-3860 is not compatible with mounting on astandard telephone wall plate.Wall Mounting Instructions:1. Remove the handset from thebase.2. Turn the base over so the under-side of the base faces you.3. Adjust the base to the wall mountposition.4. Plug the supplied 7-foot telephonecord into the LINE jack on thetelephone.5. Connect the telephone line cordto the wall jack.6. Insert the AC adapter into the 9VDC jack on the top of the base.7. Run the cables down through thecable channel to allow for flushwall mounting.8. Slip the telephone base onto the wall, lining up the wall mounting holes overthe screws. Slide the telephone base down so it is firmly in place.9. Return the handset to the telephone base.10.Plug the other end of the AC adapter into the AC outlet.15TELEPHONE SETUPRingerOff  Low   HIRingerOff  Low  Hi
The Data JackThe jack located on the side of thetelephone labeled "DATA" is aconvenience jack. It is useful forconnecting a fax machine or modem whenthere is no telephone jack available forthat device.The Headset Jack The headset jack is located on the side of thehandset and is a standard 2.5mm plug. Simplyplug the headset (not included) into the jack andthe headset will be active.Note: When the headset is plugged into thetelephone, the microphone and earpieceon the handset are not active.Belt-ClipBe sure to remove the belt-clip filler cap prior to installing thebelt-clip. Install the belt-clip as shown.To remove the belt-clip, squeeze the release at the top of theclip where it attaches to the phone, and gently pull the clip upand out of the handset.TalkCIDRedial12ABC3DEF45JKL6MNOGHI78TUV9WXYZPQRS8:02  12/25  #38    3AM RPTJOHN SMITH555-555-1212DeleteData JackHeadset Jack18HEADSET AND DATA JACKBelt-clipTo install the 3.6V 600mAh cordless handset battery pack:1. Slide open the battery compartment door on the back ofthehandset.2. Plug the battery connector into the 2-pin connector inthe battery compartment, and then insert the battery.3. Close the battery compartment door.4. Place the handset on the base unit cradle.5. Once you have installed the battery pack and placedthe handset on the base you will hear a tone indicatingthehandset has connected with the base and willsuccessfully charge.6. IMPORTANT: Charge the battery pack for at least 12hours before using the handset the first time.7. The CHARGE LED on the base illuminates when thehandset is properly making contact with the chargeterminals.Battery DurationA fully charged battery lasts for approximately:•5 hours when you use the handset continuously (talktime).•5 days when the handset is not in use (standby).When the Battery Needs Charging•The display will show "LOW BATTERY.”When to Purchase a New Battery PackIf the battery lasts only a few minutes even after a full charge, the usable life ofthe battery has expired and needs to be replaced. Replacement batteries canbe purchase directly from https://www.ttsystems.com/ShoppingCart/shoponline2.asp, or you can contact TT Systems LLC customer support centerat 1-800-592-1336 for information about how to order a new battery.17BATTERY INSTALLATION8:02  12/25    0     39NEW TOTALAMLOW BATTERY
Receiving CallsWith the handset:When you hear the phone ring:1. If the handset is in the base, lift the handset from thebase. The handset will turn on. There is no need topush the Tkey if the unit is on the base when thecall comes in. This auto-answer feature can beprogrammed off (see handset settings page 23).2. If the handset is off the base the display, you will needto press Tto answer the call. The display will showthe Caller ID information after the first ring.3. When you are finished, push Tor place the handsetback on the base.With the speakerphone:When you hear the phone ring:1. Press .2. When you are finished talking, press thekey.SpeakerSpeaker20BASIC OPERATION         00   04   MIN SECTALK                 0     21NEW TOTALRINGCID RedialTalkFlash MuteSaveMEMMenuEditDelete9:45  10/11   38    3AM RPTJOHN SMITH  555-555-1212#NEWSpeakerFlash RedialVolume#0*986532741PQRSGHITUVJKLWXYZMNOABC DEFIn UsePage/ICM MEM MuteMaking CallsWith the handset:1. Pick up the handset from the base and press T.2. Wait until you hear a dial tone, and then dial thenumber you wish to dial.3. When you are finished talking, press the Tkey orplace the unit back into the base to end the call.Note: The IN USE light on the base will illuminate whenthe line is active.With the speakerphone:1. Press   . The Speaker LED will light.2. Wait until you hear a dial tone, and thendial the number you wish to dial.3. When you are finished talking, press thekey to end the call.SpeakerSpeakerBASIC OPERATIONCID RedialTalkFlash MuteSaveMEMMenuEditDelete9:45  10/11   38    3AM RPTJOHN SMITH  555-555-1212#NEW         00   04   MIN SECTALK19SpeakerFlash RedialVolume#0*986532741PQRSGHITUVJKLWXYZMNOABC DEFIn UsePage/ICM MEM Mute
22Handset Idle Volume ControlLine RingingHandset Off-hookSpeakerphone Off-hookLine MutedCall TimerNew CALLER ID ReceivedThree-way call         00   04   MIN SEC3-WAY CALL9:11  12/25    3     39NEW TOTALAMNEW CALL:03         01   23   MIN SEC     555-1212         03   49   MIN SEC     555-1212MUTE10:02  10/11   0     11NEW TOTALAMSPK         00   04   MIN SECTALK                 0     21NEW TOTALRING         05   19   MIN SEC     555-1212VOL :MID10:02  10/11   0     11NEW TOTALAMBASIC DISPLAYSRedialingWith the handset:1. Press T.2. Wait until you hear a dial tone, and then press Rto redial the last number dialed using the handset (upto 32 digits).Note: You can also press R/DELETE first todisplay the number and then press Tto dial thenumber displayed.With the speakerphone:1. Press .2. Press /Redial to redial the last numberdialed from the speakerphone (up to 32digits).Additional OptionsSpeakerBASIC OPERATION21To: Do This:Adjust the volume of the  Press the volume ▲▼during a call until the desired other party volume level is reached.Switch to temporary tone Press the *key after the phone is in use. The phone dialing will remain in tone dialing mode for the duration of the call.Receive a call waiting call Press Fto go to the new caller.Press Fagain to go back to the original caller.Mute a call on the handset Press the Lkey.Press Lto continue speaking to the caller.Place a speakerphone call Press /Hold on the base to place the call on hold.on hold Press /Hold again to continue speaking to the caller.CID RedialTalkFlash MuteSaveMEMMenuEditDelete         00   04   MIN SECTALKSpeakerFlash RedialVolume#0*986532741PQRSGHITUVJKLWXYZMNOABC DEFIn UsePage/ICM MEM Mute
Changing the Language1. Press and hold the L/MENU key.2. Press F/EDIT to change the setting.“ENGLISH”will begin flashing.3. Use the ▲▼key to toggle between ENGLISH,ESPANOL, and FRANCAIS.4. When the setting you desire is displayed, pressl/SAVE to save the setting. A double beep willsound to confirm the setting has been saved.5. Continue with programming or press L/MENU toreturn to the idle screen.Turning the First Ring On or OffYou can turn off the first ring of the phone so that it doesnot ring until caller ID information has been displayed.1. Press and hold the L/MENU key.2. Press 2to go to the first ring programming option.3. Press F/EDIT to change the setting. “On”willbegin flashing.4. Use the ▲▼key to toggle between On and Off.5. When the setting you desire is displayed, pressl/SAVE to save the setting. A double beep willsound to confirm the setting has been saved.6. Continue with programming or press L/MENU toreturn to the idle screen.SETTINGS24Talk123ABCDEF456GHI JKLMNO789PQRS TUVMenuMEMFlashWXYZ*0#8:02  12/25    0     39NEW TOTALAMCID RedialDeleteEditMuteSaveOption/ICM Volume                #1     9TOTALENGLISHHandset SettingsYou can change the setting on the handset in the options menu. Press and holdthe L/MENU key until “ENGLISH”is displayed to access the menu.There are nine settings in the options menu which can be changed. You canscroll through the menu in the listed order by pressing the ▲key. Settings canalso be reached directly by pressing the listed number on the keypad.To edit most settings, press the F/EDIT key, use the ▲▼key to togglebetween the setting options, and then press l/SAVE to save changes.You can continue programming options by using the dial pad keys or the ▲▼key to go to a new setting. Press L/MENU to exit the options menu.Note: The ringer options do not affect the base ringer in any way. The baseringer will ring normally unless the base ringer switch is set to “Off.”Key Function1Language: Change the language that appears on the display. Choosebetween English, French, and Spanish.2First Ring On/Off: Turn the first ring of the phone off so that it does notring until caller ID information has been displayed. Particularly usefulwhen using the priority and blocked call features or the private andunavailable ring settings.3Time Set: Change the time and date.4Area Code: Allows the programming of a home area code where 7-digitdialing is used for ease of callback and other features.5Contrast: Provided to adjust the display background lighter or darker.6MSG Waiting Delete: Clears any current message waiting indication.7Auto Answer On/Off: Turns on and off the feature which makes thephone automatically go off-hook when the handset is picked up from thebase while the phone is ringing.8Private Ring On/Off: Turns on and off the ring for all calls where thecaller has blocked their caller ID. Please note that the phone will ringonce even when set to “Off”unless First Ring is also programmed “Off.”9Unavailable Ring On/Off: Turns on and off the ring for all calls wherecaller ID information is unavailable. Please note that the phone will ringonce even when set to “Off”unless First Ring is also programmed “Off.”SETTINGS23Talk123ABCDEF456GHI JKLMNO789PQRS TUVMenuMEMFlashWXYZ*0#8:02  12/25    0     39NEW TOTALAMCID RedialDeleteEditMuteSaveOption/ICM Volume                #2     9TOTALFIRST RINGOn
1. Press and hold the L/MENU key.2. Press 4to go to the area code programmingoption.3. Press F/EDIT to change the setting. “---”willbegin flashing.4. Use the dial pad to enter the three digit area code thatyour phone number begins with.5. When the setting you desire is displayed, pressl/SAVE to save the setting. A double beep willsound to confirm the setting has been saved.6. Continue with programming or press L/MENU toreturn to the idle screen.Adjusting the ContrastThe contrast is optimized for viewing and will probably not need to be changedfrom the default setting. It will adjust the display background lighter or darker.1. Press and hold the L/MENU key.2. Press 5to go to the contrast programming option.3. Press F/EDIT to change the setting. “2”willbegin flashing.4. Use the ▲▼key to toggle between the three levels ofcontrast.5. When the setting you desire is displayed, pressl/SAVE to save the setting. A double beep willsound to confirm the setting has been saved.6. Continue with programming or press L/MENU toreturn to the idle screen.SETTINGS26                #4     9TOTALAREA CODE---Talk123ABCDEF456GHI JKLMNO789PQRS TUVMenuMEMFlashWXYZ*0#8:02  12/25    0     39NEW TOTALAMCID RedialDeleteEditMuteSaveOption/ICM VolumeSetting the Time and Date1. Press and hold the L/MENU key to enter themenu.2. Press 3to go to the time set programming option.3. Press F/EDIT to change the setting. The monthwill begin flashing.4. Use the dial pad to enter the month in two-digitformat. The date will begin flashing.5. Use the dial pad to enter the date in two-digit format.The hour will begin flashing.6. Use the dial pad to enter the hour in two-digit format.The minutes will begin flashing.7. Use the dial pad to enter the minutes in two-digitformat. AM and PM begin flashing.8. Use the dial pad to choose between AM and PM,where 1is AM and 2is PM.9. When the final setting is programmed, the time anddate are automatically saved. A double beep willsound and you are returned to the options menu.10.Continue with programming or press L/MENU toreturn to the idle screen.Setting the Area CodeArea code programming is used for caller ID callback purposes. It allows peoplewho dial only 7 digits for local numbers to avoid extra work when dialing fromcaller ID memories. DO NOT use the area code programming if you arerequired to dial 10 digits (555-555-1212) to call a local number.SETTINGS258:02  12/25  #3     9TOTALTIME SET                #1     9TOTALENGLISHTalk123ABCDEF456GHI JKLMNO789PQRS TUVMenuMEMFlashWXYZ*0#8:02  12/25    0     39NEW TOTALAMCID RedialDeleteEditMuteSaveOption/ICM Volume                #5     9TOTALCONTRAST2Talk123ABCDEF456GHI JKLMNO789PQRS TUVMenuMEMFlashWXYZ*0#8:02  12/25    0     39NEW TOTALAMCID RedialDeleteEditMuteSaveOption/ICM Volume
Disabling the Ring for Private CallsTurns on and off the ring for all calls where the caller hasblocked their caller ID.1. Press and hold the L/MENU key.2. Press 8to go to the private ring programmingoption.3. Press F/EDIT to change the setting.4. Use the ▲▼key to toggle between On and Off.5. When the setting you desire is displayed, pressl/SAVE to save the setting. A double beep willsound to confirm the setting has been saved.6. Continue with programming or press L/MENU toreturn to the idle screen.Note: The phone will ring once when “Off”unless First Ring is also set to “Off.”Disabling the Ring for Unavailable CallsTurns on and off the ring for all calls where caller ID information is unavailable.1. Press and hold the L/MENU key.2. Press 9to go to the unavailable ring programmingoption.3. Press F/EDIT to change the setting. “On”willbegin flashing.4. Use the ▲▼key to toggle between On and Off.5. When the setting you desire is displayed, pressl/SAVE to save the setting. A double beep willsound to confirm the setting has been saved.6. Continue with programming or press L/MENU toreturn to the idle screen.Note: The phone will ring once when “Off”unless First Ring is also set to “Off.”SETTINGS28                #8      9TOTALPRIVATE RNGOFFTalk123ABCDEF456GHI JKLMNO789PQRS TUVMenuMEMFlashWXYZ*0#8:02  12/25    0     39NEW TOTALAMCID RedialDeleteEditMuteSaveOption/ICM VolumeDeleting Message Waiting IndicationClears any current message waiting indication. Seepage 40 for more information about message waiting.1. Press and hold the L/MENU key to enter themenu.2. Press 6to go to the message waiting programmingoption.3. Press F/EDIT to reset the message waiting indi-cation. “DELETE”will begin flashing.4. Press l/SAVE to delete the indication. A doublebeep will sound to confirm.5. Continue with programming or press L/MENU toreturn to the idle screen.Turning Auto Answer On or OffTurn on and off the auto answer feature. When on, thephone will automatically answer an incoming call if thehandset is in the base.1. Press and hold the L/MENU key.2. Press 7to go to the auto answer programmingoption.3. Press F/EDIT to change the setting.4. Use the ▲▼key to toggle between On and Off.5. When the setting you desire is displayed, pressl/SAVE to save the setting. A double beep willsound to confirm the setting has been saved.6. Continue with programming or press L/MENU toreturn to the idle screen.SETTINGS27                #6      9TOTALMSG WAITINGdELEtETalk123ABCDEF456GHI JKLMNO789PQRS TUVMenuMEMFlashWXYZ*0#8:02  12/25    0     39NEW TOTALAMCID RedialDeleteEditMuteSaveOption/ICM Volume                #7      9TOTALAUTO ANSWEROnTalk123ABCDEF456GHI JKLMNO789PQRS TUVMenuMEMFlashWXYZ*0#8:02  12/25    0     39NEW TOTALAMCID RedialDeleteEditMuteSaveOption/ICM Volume                #9      9TOTALUNAVAIL RNGOnTalk123ABCDEF456GHI JKLMNO789PQRS TUVMenuMEMFlashWXYZ*0#8:02  12/25    0     39NEW TOTALAMCID RedialDeleteEditMuteSaveOption/ICM Volume
Letter TableStoring Phone Numbers in the BaseYou can store 10 phone numbers into the basetwo-touch speed dial.1. Press /MEM. The handset will beep.2. Dial the number you wish to store.3. Press /MEM.4. Press the key on the dial pad into whichyou want to store the number (0-9). Aconfirmation beep should sound to showthe number has been stored.SPEED DIALING301st 2nd 3rd 4th 5th 6th 7th 8thKey Press Press Press Press Press Press Press Press1Space & ’()*.12ABC2ABC23DEF3DEF34GHI4GHI45JKL5JKL56MNO6MNO67PQRS7PQR8TUV8TUV89WXY Z P W X Y000000000SpeakerFlash RedialVolume#0*986532741PQRSGHITUVJKLWXYZMNOABC DEFIn UsePage/ICM MEM MuteStoring Phone Numbers in the HandsetThe PMP-3860 will store up to 20 speed dial numbers in the handset phonebook, in the order that they are programmed. No duplicate numbers can bestored.1. With the handset in the idle state, press l.2. Press F/EDIT to create a new phone book entry.3. Enter the name you wish to store using the dial pad toenter the letters (up to 15 letters). See the followingletter table  for how to program the letters using thenumber pad. To add a space between words, push1.Example: For JOHN SMITH dial this sequence:4. Press ▼, and dial the number you wish to store (up to16 digits). Press Rto insert a dialing pause intothe number.5. Press l/SAVE when finished to store thenumber to memory.Note: If there are no memory locations left in the speed dial directory the PMP-3860 will display "MEMORY FULL."  To continue with memoryprogramming, you must delete or edit existing speed dial numbers.Note: If you mis-type entering the phone number, you can move through thenumber and edit it by pressing and holding the <>. To delete aflashing character, press the R/DELETE key; to delete a flashingnumber, press and hold the R/DELETE key.SPEED DIALING29Talk123ABCDEF456GHI JKLMNO789PQRS TUVMenuMEMFlashWXYZ*0#8:02  12/25    0     39NEW TOTALAMCID RedialDeleteEditMuteSaveOption/ICM Volume8:02  12/25          15TOTALPHONE BOOKAM8:02  12/25          15TOTALAMJOHN SMITH18885_8:02  12/25          15TOTALAMJOHN S_______5  666  44  66     1     7777 6 444 8 44J    O    H   N  space    S   M   I   T  H
Making Speed Dial Calls from the Base1. Press  . Wait until you hear a dialtone.2. Press   /MEM.3. Press the number on the base dial pad inwhich the number you wish to dial isstored (0-9). The number will be dialed.Deleting a Number Stored in the Handset1. Press l.2. Locate the number you wish to delete using ▲▼.3. Press R/DELETE.4. Press R/DELETE to delete the phone bookmemory. The display will briefly show “ERASED”andreturn to the previous phone book entry.5. When you are finished press l.SpeakerSPEED DIALING328:02  12/25          15TOTALPHONE BOOKAM                #5     15TOTALJOHN SMITH888-555-1212                #5    15TOTAL  5555551212ERASE ITEM?Talk123ABCDEF456GHI JKLMNO789PQRS TUVMenuMEMFlashWXYZ*0#8:02  12/25    0     39NEW TOTALAMCID RedialDeleteEditMuteSaveOption/ICM VolumeSpeakerFlash RedialVolume#0*986532741PQRSGHITUVJKLWXYZMNOABC DEFIn UsePage/ICM MEM MuteViewing the Handset Phone Book1. Press lto enter the phone book.2. Press ▲▼to locate the number you wish to view.3. If the name or number is more than 11 characters,press the >and <button to view the rest of thedisplay (as indicated by the arrows in the top line ofthe display).4. Press lto exit the phone book, or let the phonebook time out.Making Calls from the Handset Phone Book1. To make a call from the phone book, press l.2. Locate the number you wish to dial using ▲▼.3. Push T. The display will show the directory name,and begin dialing the number.4. When you are finished with your call, press T, orplace the handset back on the base.Note: Be sure to check that the line is not in use by another extension.SPEED DIALING31Talk123ABCDEF456GHI JKLMNO789PQRS TUVMenuMEMFlashWXYZ*0#8:02  12/25    0     39NEW TOTALAMCID RedialDeleteEditMuteSaveOption/ICM Volume         00   03   MIN SECJOHN SMITH        188858:02  12/25          15TOTALPHONE BOOKAM                #5     15TOTALJOHN SMITH888-555-12128:02  12/25          15TOTALPHONE BOOKAM                #5     15TOTALJOHN SMITH51212PPP456                #5     15TOTALJOHN SMITH 1555555121Talk123ABCDEF456GHI JKLMNO789PQRS TUVMenuMEMFlashWXYZ*0#8:02  12/25    0     39NEW TOTALAMCID RedialDeleteEditMuteSaveOption/ICM Volume
Priority (VIP) CallsYou can assign stored numbers as priority calls. When an incoming call ismatched to a stored number designated as “VIP,”the phone will generate aspecial ringer sound after the first ring (caller ID information must be receivedfirst).To mark a phone book entry as priority:1. Press l.2. Press ▲or ▼to go the desired entry.3. Press the L/MENU button once. The LCD willshow the “VIP”icon.4. Press lto exit the phone book.Blocked (REJ) CallsIf you do not want to have the phone ring when a specific number calls, you canstore that number in the phone book and assigned it as blocked. When anincoming call is matched to a stored number designated as “REJ,”the phone willnot ring after the first ring (caller ID information must be received first).To mark a phone book entry as blocked:1. Press l.2. Press ▲or ▼to go the entry to be blocked.3. Press the L/MENU button twice. The LCD willshow the “REJ”icon.4. Press lto exit the phone book.SPEED DIALING348:02  12/25  AMJOHN SMITH888-555-12128:02  12/25  AMJOHN SMITH888-555-1212Deleting a Number Stored in the Base1. Press   /MEM. The handset will beep.2. Press Redial. The handset will beep.3. Press   /MEM. The handset will beep.4. Press the dial pad location  (0-9) with thenumber that you wish to delete. The basewill give a confirmation tone that thenumber has been deleted.Editing a Number Stored in the Handset1. Press l.2. Locate the number you wish to edit using ▲▼.3. Press F/EDIT. Move the cursor to the sectionyou wish to edit using the ▲, ▼, <, and >keys.When moving through the number field, it will benecessary to press and hold the <and >keysfor more than one second until the cursor moves,since just pressing them enters a * or # into thedialing sequence. Any dial pad key pressed will beinserted before the cursor.4. You can delete the character or number the cursor isresting on. To delete a character, press theR/DELETE key. To delete a number, press andhold the R/DELETE key for more than onesecond until the number is deleted, since if theRkey is just pressed, it inserts a pause in thedialing sequence.5. When you are finished, press l/SAVE to storethe edited entry.SPEED DIALINGTalk123ABCDEF456GHI JKLMNO789PQRS TUVMenuMEMFlashWXYZ*0#8:02  12/25    0     39NEW TOTALAMCID RedialDeleteEditMuteSaveOption/ICM Volume8:02  12/25          15TOTALPHONE BOOKAM                #5     15TOTALJOHN SMITH888-555-1212SpeakerFlash RedialVolume#0*986532741PQRSGHITUVJKLWXYZMNOABC DEFIn UsePage/ICM MEM Mute33
Caller ID DisplaysDisplay shows name and number, time and date of thecall.Display shows number-only service."UNAVAILABLE" will be displayed when Caller IDinformation is not available. This call was made from atelephone company that does not offer Caller ID services(including international calls)."PRIVATE" will be shown when a call is received from ablocked number. For privacy reasons, some states allowcallers the option to prevent their telephone data frombeing displayed on the other party's Caller ID display.Display shows when the Caller ID information wasreceived incorrectly or only part of the data was received.Note: When an error is received, none of the data fromthis call is saved in memory.Display shows when a voice mail message has beenreceived and is stored by message waiting serviceprovided by the phone company.Display shows when the incoming call is a priority call.This is displayed when Cis pressed and there is noCaller ID data stored.9:07  12/25    0     0NEW TOTALAMNO CALLS8:02  12/25  AMJOHN SMITH888-555-12128:02  12/25    0     39NEW TOTALAMMSG WAITINGMSG9:07  12/25    2     8NEW TOTALAMERROR10:34  12/25  #40    AMPRIVATE------------11:33  12/25  #20    AMUNAVAILABLE------------9:12  12/25  #28    1AM RPT888-555-12129:45  10/11   38    3AM RPTJOHN SMITH555-555-1212#NEWCALLER ID36Caller ID allows the caller's name and phone number to be shown on thedisplay before you answer the call. In order to use this feature you must firstsubscribe to Caller ID service with your telephone company.When You Receive a Call1. When the telephone rings, the caller's name andphone number appears on the display.2. The new Caller ID record includes the name and number of the caller andthe time and date the record is received. The New Call light will flash toindicate that you have a new Caller ID call stored in memory.Note: When the Caller ID information is received, it is stored in memory sothat this information can be recalled for later use. Up to 40 Caller IDcalls can be stored.Viewing the Caller ID ListThis phone automatically stores the last 40 calls received. If a call is receivedfrom the same number more than once since the records were last viewed, nonew entry is made, but the repeat call icon (“RPT”) and the number of repeatcalls is displayed.1. With the handset idle press C.2. Any unviewed (new) calls will be displayed first. Themost recent call will be displayed. The information onthe call will be displayed with the name, number, date,and time that the call was received.3. If the name or number is more than 11 characters,press the >and <button to view the rest of thedisplay.4. To scroll to the next call, press ▲or ▼. The ▲will gothrough the calls from the last call received to the first.The ▼will allow you to view the calls from the first callreceived to the last.5. Press Cto finish.CALLER ID359:45  10/11   38    3AM RPTJOHN SMITH555-555-1212#NEW9:45  10/11   38    3AM RPTJOHN SMITH555-555-1212#NEWTalk123ABCDEF456GHI JKLMNO789PQRS TUVMenuMEMFlashWXYZ*0#8:02  12/25    0     39NEW TOTALAMCID RedialDeleteEditMuteSaveOption/ICM Volume
Deleting Caller ID RecordsWhen viewing the Caller ID information you can delete a single call record or allthe call records.To Delete a Single Record1. Press C.2. Use ▲▼to scroll to the call record you wish todelete.3. Press R/DELETE.4. To delete the record press R/DELETE.5. Press Cto exit the Caller ID log.To Delete All Records1. Press C.2. Press and hold R/DELETE. The display willshow “ERASE ALL?”3. To delete all the Caller ID records pressR/DELETE.Talk123ABCDEF456GHI JKLMNO789PQRS TUVMenuMEMFlashWXYZ*0#8:02  12/25    0     39NEW TOTALAMCID RedialDeleteEditMuteSaveOption/ICM VolumeTalk123ABCDEF456GHI JKLMNO789PQRS TUVMenuMEMFlashWXYZ*0#8:02  12/25    0     39NEW TOTALAMCID RedialDeleteEditMuteSaveOption/ICM VolumeCALLER ID3810:00  12/25   #6      555-1212ERASE ITEM?AM10:00  12/25   #6      ERASEDAM10:05  12/25   #5      555-1212ERASE ALL?AM10:05  12/25   #5      555-1212ERASE ALLAM9:45  10/11   38    3AM RPTJOHN SMITH555-555-1212#NEW9:45  10/11   38    3AM RPTJOHN SMITH555-555-1212#NEWCaller ID with Call Waiting ServiceIn order to use the "Call Waiting Caller ID" service you must subscribe to atelephone company that offers Caller ID service combined with "call waiting"service.When a new call comes in while you are talking, you will hear a notificationbeep from the handset and the volume is momentarily muted. The new caller'sname and phone number, if available, appears on thedisplay. Once flash has been pressed, an “L2”in thelower right hand corner indicates the call waiting callerso you can keep track of who you are talking to.1. When you receive a "call waiting" call and you want to connect the call, pressF. The active call will be placed on hold and the new call will be active.2. Press Fto alternate between calls.3. Press Tto end the call or place the handset back on the base.Storing Caller ID Records1. Press C.2. Use ▲▼to scroll to the call record you wish to storeinto the phone book.3. Press l/SAVE.4. The entry will be stored exactly as shown with a “1”inserted in front of the number. If you wish to edit thenewly stored number, edit it in the phone book (page33, “Editing a Stored Number”).5. Press Cto exit the Caller ID log.Note: Since a “1”is inserted in front of the number when numbers are storedinto the phone book, if you must dial a 10-digit number for local calls,you must edit the number to exclude that digit to dial out correctly.CALLER ID37JOHN SMITH555-555-1212         02   13      L2MIN SEC9:16  12/25   #10AMSAVED9:45  10/11   38    3AM RPTJOHN SMITH555-555-1212#NEWTalk123ABCDEF456GHI JKLMNO789PQRS TUVMenuMEMFlashWXYZ*0#8:02  12/25    0     39NEW TOTALAMCID RedialDeleteEditMuteSaveOption/ICM Volume
If you subscribe to voice mail from the telephonecompany and if there are voice messages thathave been left in your voice mailbox, the displaywill show "MSG WAITING”(see note below).Note: This function requires voice mail subscription from the local telephonecompany. Furthermore, the local phone company must provide a type ofvoice mail signaling called "FSK”(Frequency Shift Key)  Not alltelephone companies have the visual message waiting feature available.Please contact your local telephone company to check if this is availablein your area.Tip: If you wish to delete the "Message Waiting" message, delete it as described inthe handset settings section “Deleting the Message Waiting Indication” (seepage 27). New Call LightWhen you receive a Caller ID message, voice mail message, or when the phoneis ringing, the New Call light will flash accordingly.•For Caller ID, the New Call light will flashto indicate that you have a new Caller IDcall stored in memory.•When you have a voice message waitingthe New Call light will also flash.40MESSAGE WAITING8:02  12/25    0     39NEW TOTALAMMSG WAITINGMSGNew Call LightReturning Caller ID CallsYou can return calls by using the Caller ID callback feature.1. Press C.2. Use the ▲▼to scroll to the call record you wish tocall back.3. If the number displayed is not correct (needing 7, 10,11 digits), use the /Option key to toggle the numberto display the correct number of digits to be dialed.4. Press Tto dial out the displayed number.5. Press Cto cancel dialing.6. To end the call, press T, or place the handset backin the base.CALLER ID39Talk123ABCDEF456GHI JKLMNO789PQRS TUVMenuMEMFlashWXYZ*0#8:02  12/25    0     39NEW TOTALAMCID RedialDeleteEditMuteSaveOption/ICM Volume9:45  10/11   38    3AM RPTJOHN SMITH555-555-1212#NEW9:45  10/11   38    3AM RPTJOHN SMITH555-555-1212#NEW8:02  12/25  #38    3AM RPTJOHN SMITH     555-12128:02  12/25  #38    3AM RPTJOHN SMITH15555551212Press /OptionPress /Option
Transfer from the base to the handset:If the handset is in the base cradle when the speakerphone call is made, youcan simply transfer the call to the handset by lifting the handset from base. Thespeakerphone If the handset is not in the base:1. After a call has connected using the base, press Tonthe handset, the conversation becomes active on both thehandset and the base.2. You may continue a 3-way call between the person on the line, the handset,and the speakerphone, or you can transfer the call by pressing  .3. Continue your conversation on the handset.4. To end the call, press T, or place the handset back into the base.Out-of-Range WarningIf you venture too far from the base, the handset will beep and the display willshow “OUT RANGE.”Reverse your direction to re-establish connection withthe base or the call will be dropped. When the base detects that the handsethas been out of range for 20 continuous seconds it will release the engagedline. If you try to access the line when the handset is out of range of the base,the display will show “TRY AGAIN.”Channel ChangingIf you are experiencing interference during a telephone call, press the CHkey. The PMP-3860 will scan up to 50 channels and select the clearest one toprovide the best possible reception. If the current channel is the clearest avail-able channel, it will keep you on that channel.SpeakerOTHER FEATURES42Using the Intercom/Handset Finder (PAGE)From the handset:1. Press /Option/Int on the left side of the handset. If thephone is in range, the phone will beep for up to 20seconds.2. Press the  /Page/ICM on the base, which enables thebase to intercom with the handset.3. Press either intercom key to end the intercom connection.From the base:1. Press /Page/ICM on the base. If the phone is inrange, the phone will beep for up to 20 seconds.2. Press the /Option/Int on the left side of the handset, which enables thehandset to intercom with the base. Press any other key on the handset tostop the handset page/find feature.3. Press either intercom key to end the intercom connection.Note: If a call is received while the unit is in the intercom mode, the intercomconnection is automatically disconnected.Call Transfer/Three-way CallingThe PMP-3860 is designed for easy communication between the handset andbase speakerphone. You can transfer a call from one to the other, or you canhave a three-way call between the handset, base, and a caller.Transfer from the handset to the base:1. After a call has connected using the handset, press on the base. The conversation becomes active on boththe speakerphone and the handset.2. You may continue a 3-way call between the person on the line, the handset,and the speakerphone, or you can transfer the call by pressing Tor placingthe handset back in the base.3. Continue your conversation on the base.4. To end the call, press  .SpeakerSpeakerOTHER FEATURES41INTCOMINTCOM         00   04   MIN SEC3-WAY CALL         00   04   MIN SEC3-WAY CALL
No dial tone/phone will not dial out.•Check that the AC power adapter is plugged into a working AC power outlet.•Check all telephone cord connections or try another wall jack.•Do a basic reset of the phone: Disconnect the phone from the wall andremove the battery. Leave for 30 minutes and then re-install as instructed bythe manual.Can’t hear the ring signal.•Check the ringer volume controls; at the lowest level the ring may not beheard.While on a call, you hear another call on the line or experience radiofrequency interference.•Switch channels to a clear channel.•Check the wiring for bad connections.•Do not use this phone within 20 feet of a working microwave. The microwaveproduces frequencies in this range which may cause interference. Thisinterference is normal for all 2.4GHz phones and should not be considered aproduct defect.The caller’s name and/or phone number does not appear on the display.•Make sure you have subscribed to Caller ID service from your localtelephone company and that service has been activated.•Caller ID service may not work when the phone is connected to a PrivateBranch Exchange (PBX).•The caller has requested that their phone number be suppressed from CallerID service, or caller ID service is not available in their area. "Private" or"Unavailable" will appear on the display.•You answered the call before Caller ID data was displayed, which usuallyoccurs after the first ring.New Call/Message Waiting Indicator doesn’t work properly.•Make sure you have subscribed to voice mail compatible with "FSK" typesignaling (check with your local phone company). Verify that both the “On”and “Off”signals are activated. If your voice mail product from the localphone company does not support "FSK" signaling, you may use this featureas a New Call Indicator only.Can't receive or make phone calls.•Check if the phone is set to the correct type of service, either Tone or Pulse.TROUBLESHOOTING44Your PMP-3860 telephone has been designed to give years of trouble-freeservice. It is a sensitive electronic instrument. To assure its longevity, pleaseread the following maintenance instructions.1. Keep the PMP-3860 away from heat as high temperatures can shorten thelife of the electrical components and distort or melt its plastic parts.2. The PMP-3860 should be kept free of dust and moisture. If it gets wet, wipeit dry immediately. Liquids can contain minerals that can corrode electroniccircuits.3. Handle your PMP-3860 gently and carefully. Dropping it can cause seriousdamage to circuitry, or the plastic case, which may result in malfunction.4. Do not use any type of chemical or any abrasive powder to clean thecabinet. Use only mild detergents on a soft, damp cloth to clean the PMP-3860 telephone.5. The PMP-3860 has built-in surge protection circuits that meet or exceedFCC requirements. However, an incident such as a lightning strike at or nearthe telephone lines, could cause serious damage.6. If the PMP-3860 is installed in an area with frequent or severe electricalstorms, it is suggested that the telephone be disconnected during thesestorms or that additional surge suppression equipment be added to theinstallation.7. In the case of trouble with the telephone, do not attempt to repair thetelephone yourself. It is the responsibility of users requiring service to reportthe need for service to our Service Department. They will make thenecessary arrangements for repair or replacement.8. If you should have any questions about the operation of your PMP-3860telephone, please call our Service Department at 1-800-592-1336. Or youmay contact TT Systems LLC for technical assistance via our Internet Website: www.ttsystems.com or e-mail: tech@ttsystems.com.9. Please register your product online atwww.ttsystems.com/CustomerSupport/RegOnline.aspCARE AND MAINTENANCE43
•Some states do not allow limitations on how long an implied warranty lasts and/or donot allow the exclusions or limitations of incidental or consequential damages, so theabove limitations or exclusions may not apply to you.•TT Systems shall not be liable for any special or consequential damages or for loss orexpense directly or indirectly arising from use of the products or in inability to use themeither separately or in combination with other equipment or product accessories or fromany other cause.•TT Systems reserves the right to make changes in the design of the PMP-3860 and tomake additions or improvements to the PMP-3860 without incurring any obligation tomodify any PMP-3860 previously sold.WARRANTY46TT Systems One Year Limited Warranty within the United States1. What does the limited warranty cover?TT Systems LLC warrants that the PMP-3860 sold by TT Systems within the continentallimits of the United States, Hawaii and Alaska are free from defects in materials andworkmanship under normal use for one year. This warranty is only applicable to the orig-inal purchaser of the PMP-3860, when accompanied by a sales receipt stating the dateof the purchase and the name of the company from which it was purchased. Thiswarranty is in lieu of and excludes all other warranties, expressed or implied, includingany implied warranty of merchantability or fitness, and of any other obligation on the partof TT Systems.2. What will TT Systems do when I send in my unit?At our discretion, repair or replace the PMP-3860.3. How do I send my unit, in or out of warranty?•Properly pack your unit. Include any cables and accessories that were originallyprovided with the product. We recommend using the original carton and packingmaterials.•Include in the package a copy of the sales receipt or other evidence of date of originalpurchase (if the unit was purchased within the last year).•Print your name, address and phone number, along with a description of the problem,and include this in the package.•Include payment for any service or repair not covered by the warranty, as determinedby TT Systems. Contact a customer service representative at 1-800-592-1336 ortech@ttsystems.com to find out what payment is necessary.•Ship the unit via UPS insured or equivalent to:TT Systems LLC4 Executive PlazaYonkers NY  10701•If you have not received your returned unit within 3-4 weeks, you may call 1-914-968-2100 regarding the status of your return.4. What doesn’t the warranty cover?•Damage from misuse, neglect, or acts of nature (lightning, floods, power surges, etc).•Products that may have been repaired or altered by persons not expressly approved byTT Systems.•Products purchased outside the USA.•Products purchased more than 12 months from the current date.•Products which are not accompanied by a valid proof of purchase.5. The legal information:•There is no informal dispute settlement mechanism available.•This warranty gives you specific legal rights, and you may also have other rights, whichvary from state to state.WARRANTY45
NOTES4847GLOSSARY
50TT SYSTEMS LLC7 Odell PlazaYonkers, NY 10701To order a replacement battery pack for thePMP-3860 cordless telephone, please mailthis order form to the licensee for thisproduct.Please enclose a check or money ordermade out to TT SYSTEM LLC for therespective amount. Shipping and handlingis included in the price.Please ship order to:Name:______________________________Company:___________________________Address:_______________________________________________________________City:____________State:____Zip:________PM-38BAT Battery Packs are $14.95 each TT SYSTEMS LLC7 Odell PlazaYonkers, NY 10701(This is your mailing label)From:To:_________________________________________________________________________________________________________________________________________________________________________________________________ORDER FORMPlace this template on the wall. The location of the screws isindicated by the centers of the crossed lines.Fasten the screws leaving 3/16”of the screw extending from thewall.Remove This Page to Mark Wall49WALL MOUNT TEMPLATEExpansion Anchor #6 or #8 Pan Head Self Tapping Screw Screws needed forwall mounting:2 3/4”

Navigation menu