Belkin F5D8053E Wireless N USB Adapter User Manual
Belkin International, Inc. Wireless N USB Adapter
UserManual.wiki
>
Belkin
>
F5D8053E User Manual
User Manual
Navigation menu
Upload a User Manual
Namespaces
Wiki Guide
HTML
PDF
Info
Views
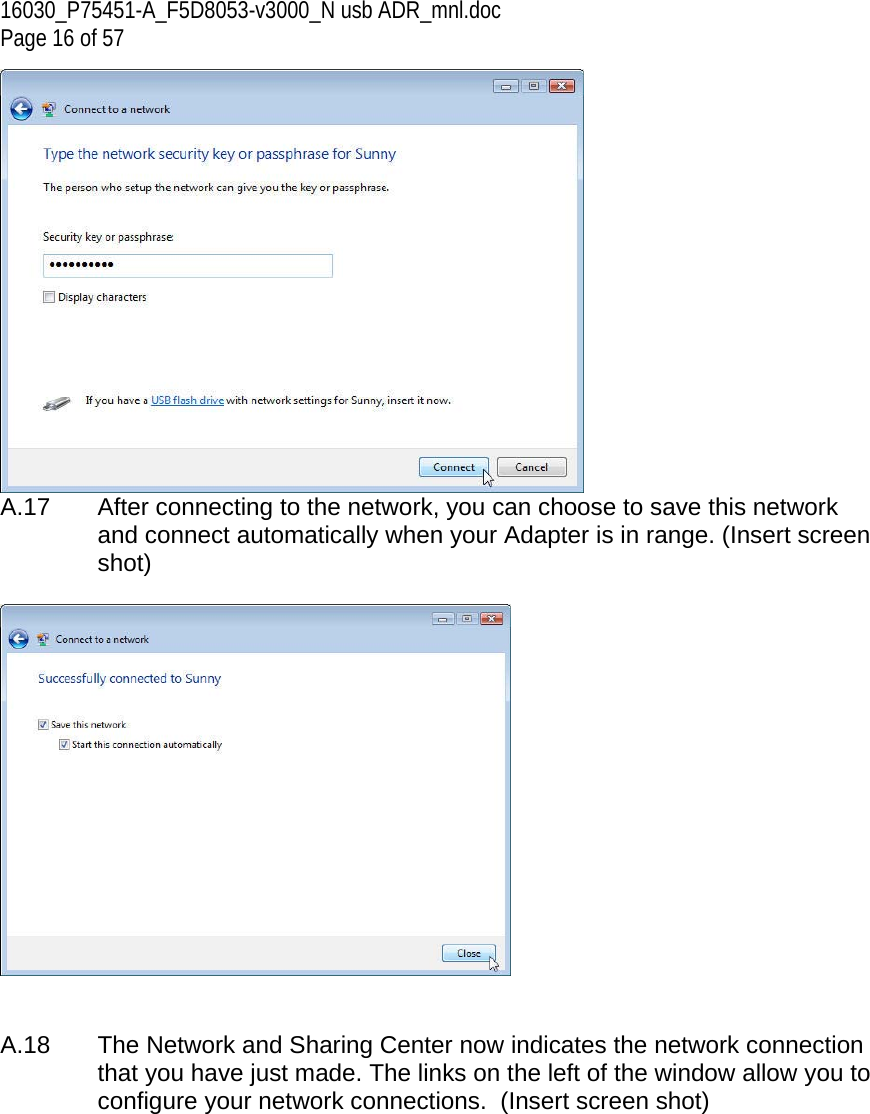
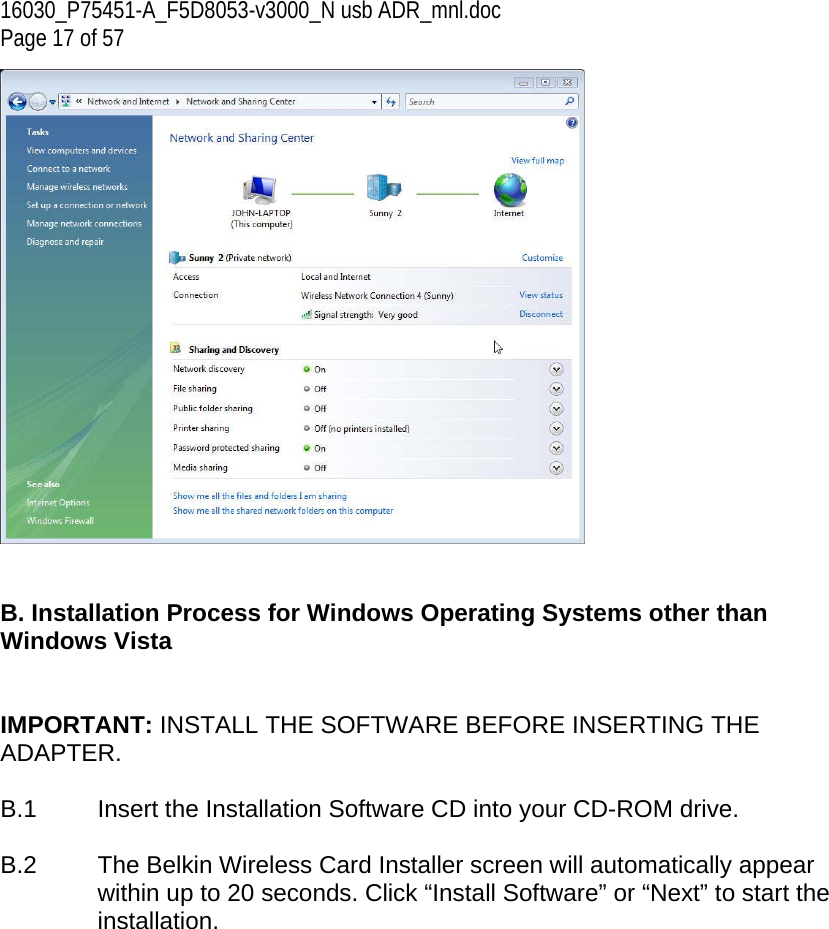
User Manual
Discussion / Help
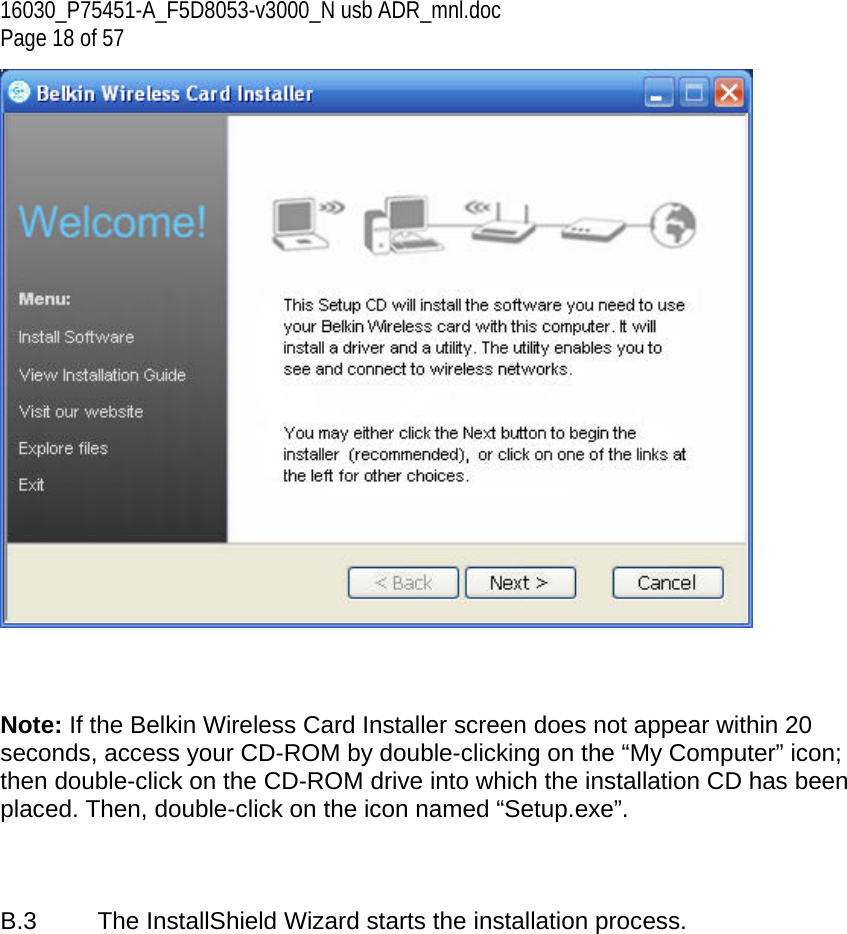
Navigation

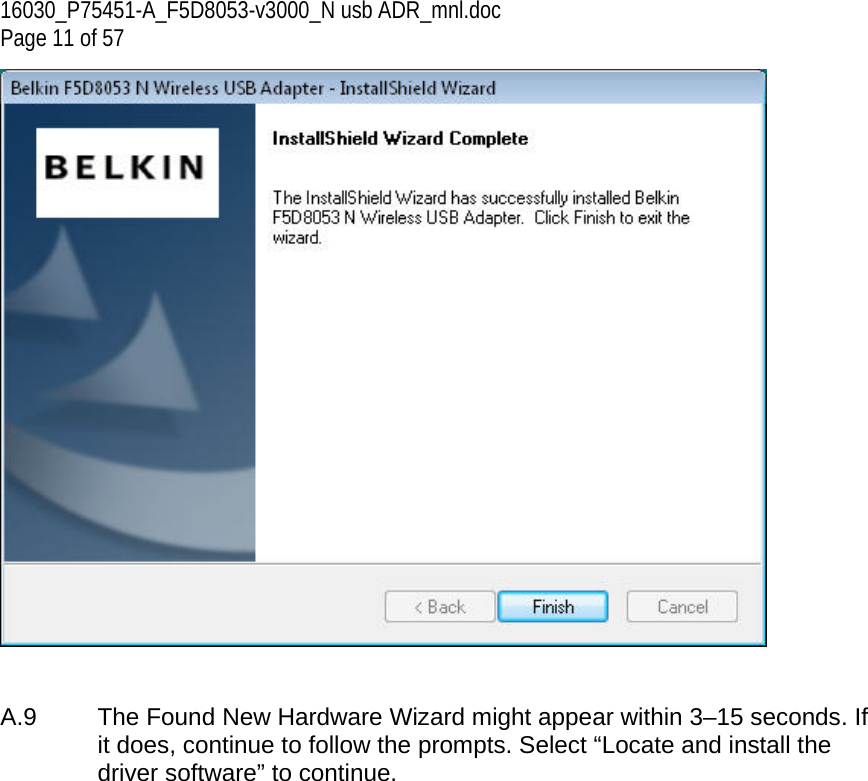
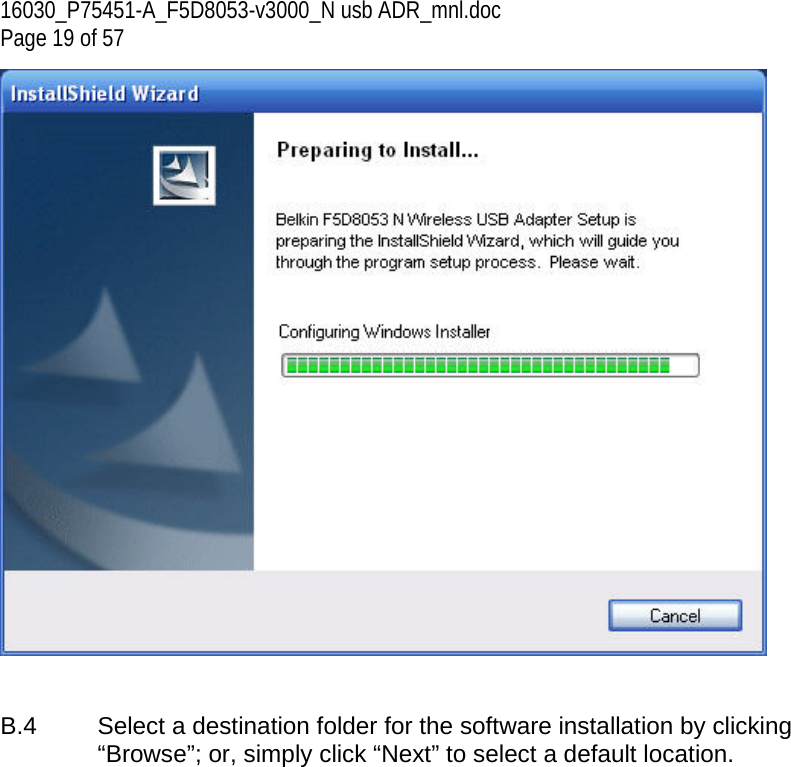
![16030_P75451-A_F5D8053-v3000_N usb ADR_mnl.doc Page 7 of 57 ***NOTE: For information on updated drivers, please visit the Belkin website at www.belkin.com/support . IMPORTANT: INSTALL THE SOFTWARE BEFORE INSERTING THE ADAPTER. A.1 Insert the Installation Software CD into your CD-ROM drive. A.2 Click “Next” to begin the installation process. [Insert screen shot] Note: If the Belkin Wireless Card Installer screen does not appear within 20 seconds, access your CD-ROM by double-clicking on the “My Computer” icon; then double-click on the CD-ROM drive into which the installation CD has been placed. If the Installer does not start automatically, double-click on the icon named “Setup.exe”. A.3 The InstallShield Wizard starts the installation process.](https://usermanual.wiki/Belkin/F5D8053E/User-Guide-1054958-Page-7.png)
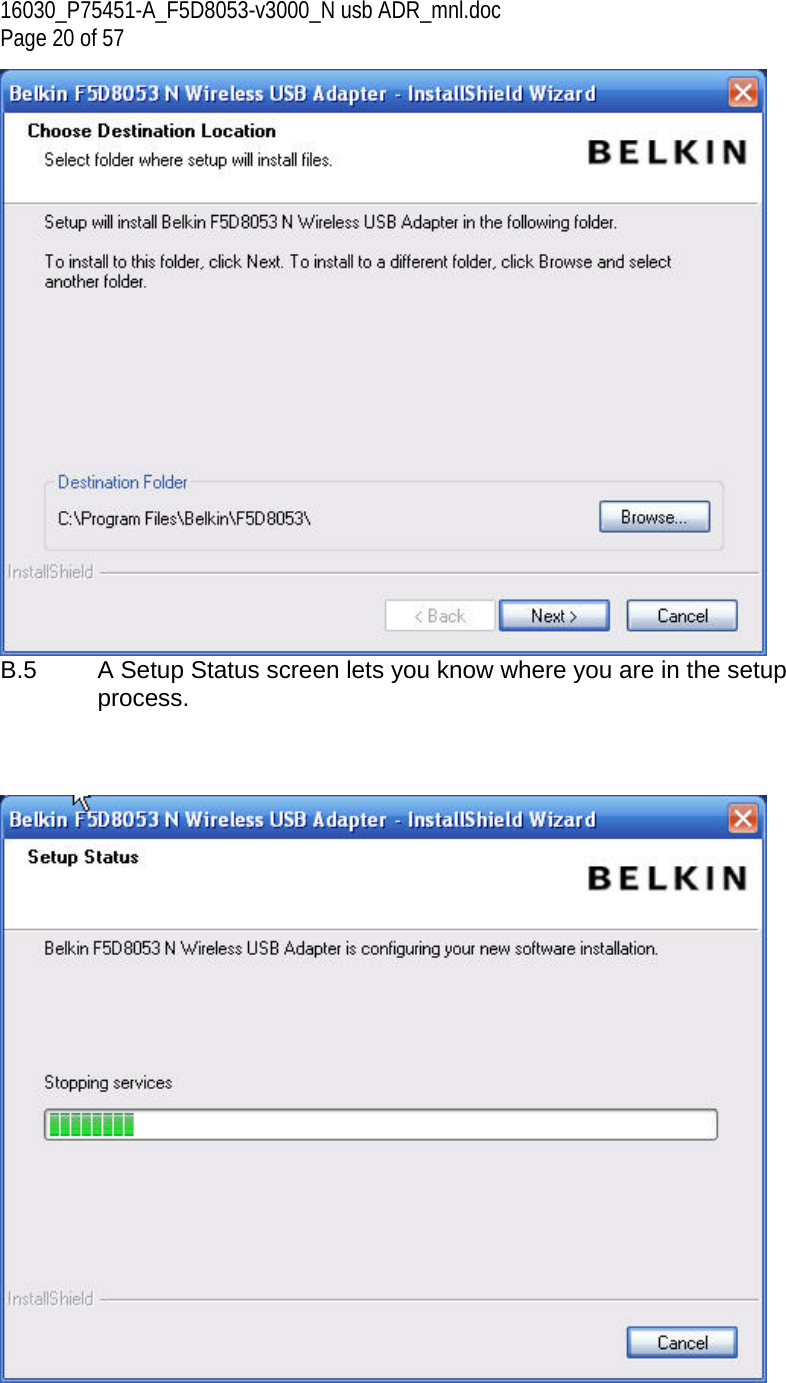
![16030_P75451-A_F5D8053-v3000_N usb ADR_mnl.doc Page 8 of 57 A.4 Select a destination folder for the software installation by clicking “Browse”; or, simply click “Next” to select a default location. [insert 8011_Install_2.tif – to be updated 8/1]](https://usermanual.wiki/Belkin/F5D8053E/User-Guide-1054958-Page-8.png)
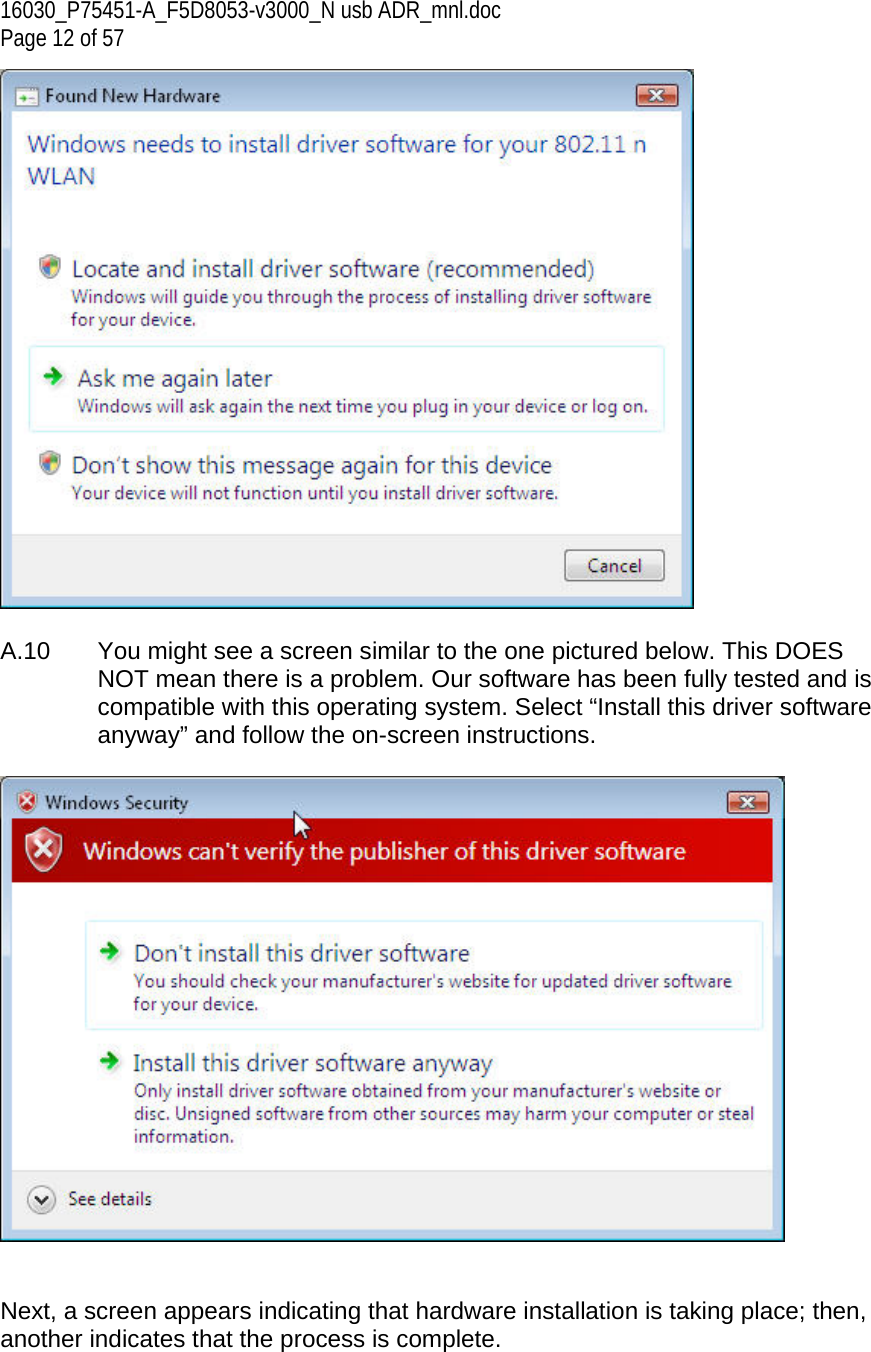
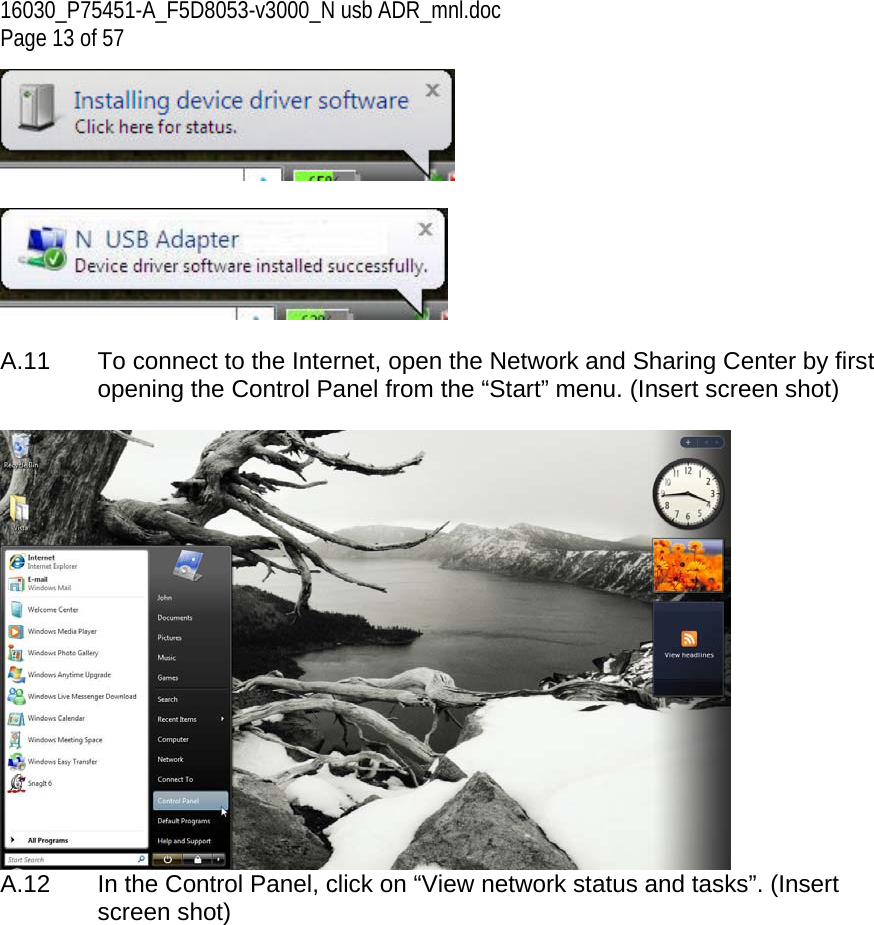
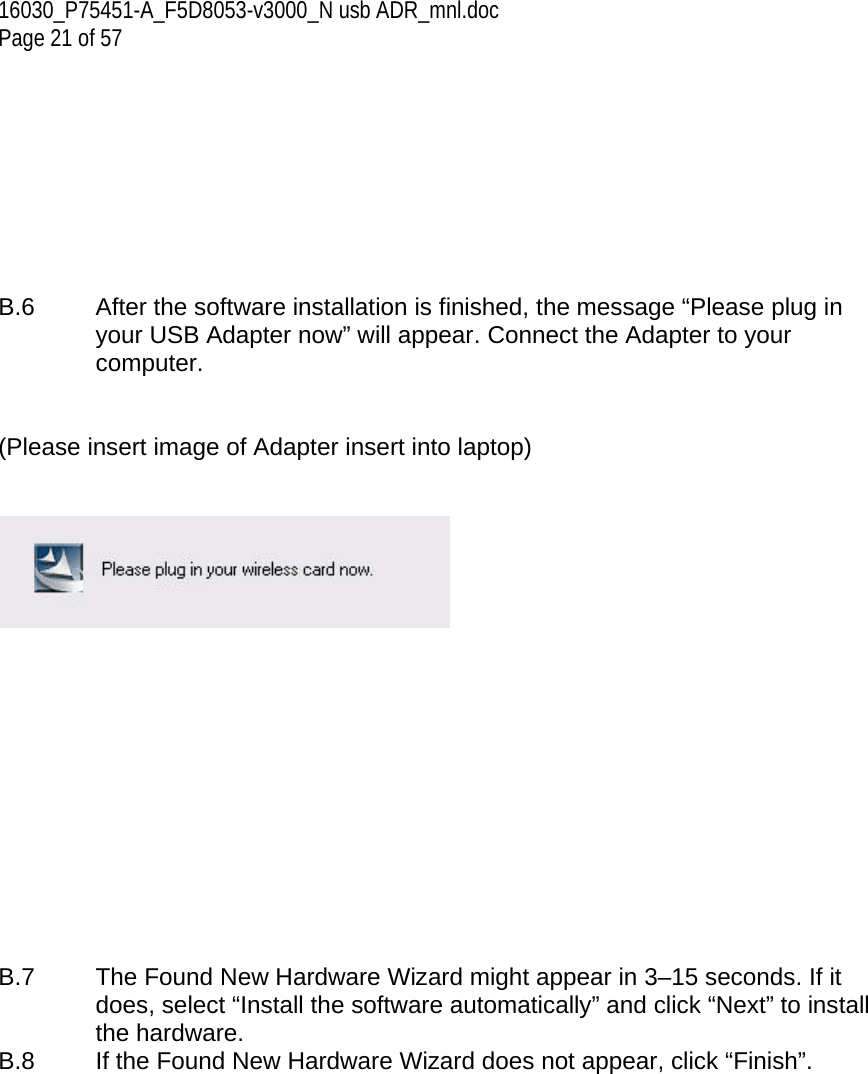
![16030_P75451-A_F5D8053-v3000_N usb ADR_mnl.doc Page 9 of 57 A.5 A Setup Status screen will let you know where you are in the setup process. [insert 8011_Install_3.tif] A.6 A window may appear a second time showing the message, “Windows can’t verify the publisher of this driver software”. This DOES NOT indicate a problem. Our software has been fully tested and is compatible with this operating system. (Insert screen shot)](https://usermanual.wiki/Belkin/F5D8053E/User-Guide-1054958-Page-9.png)

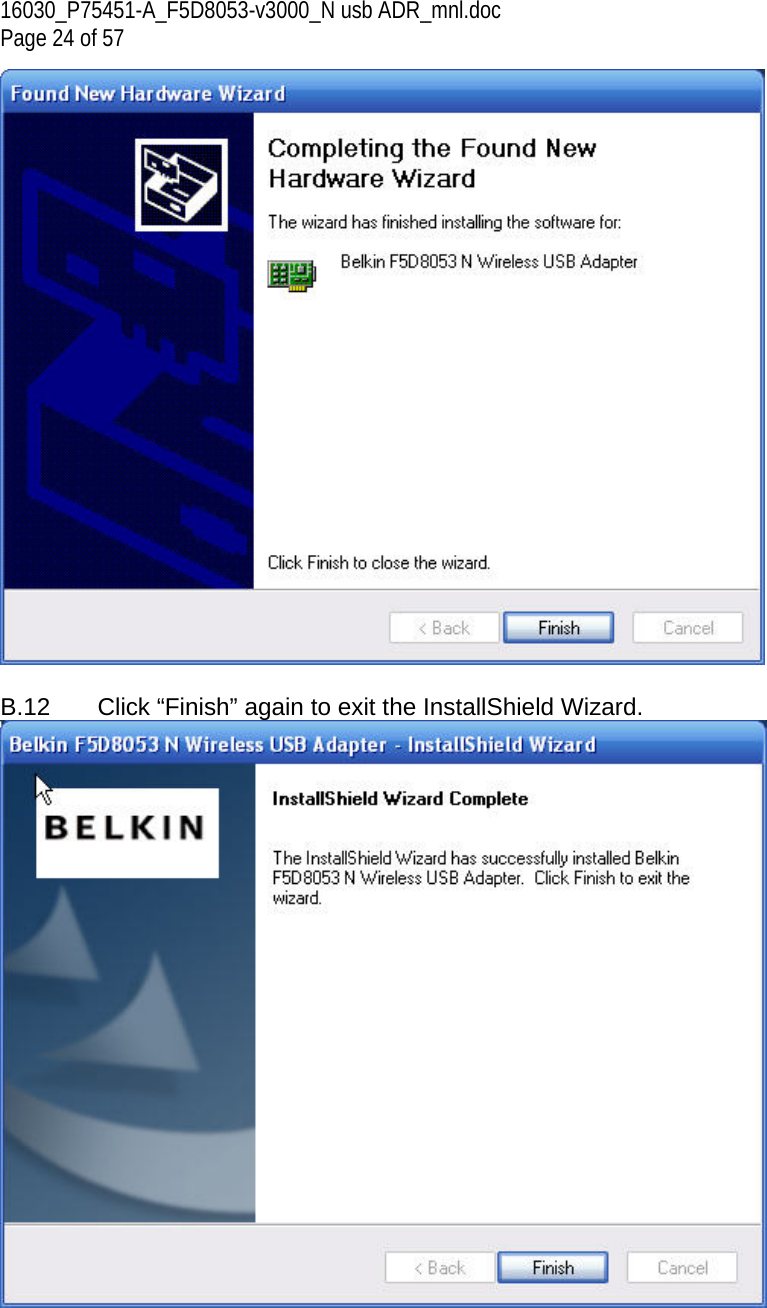
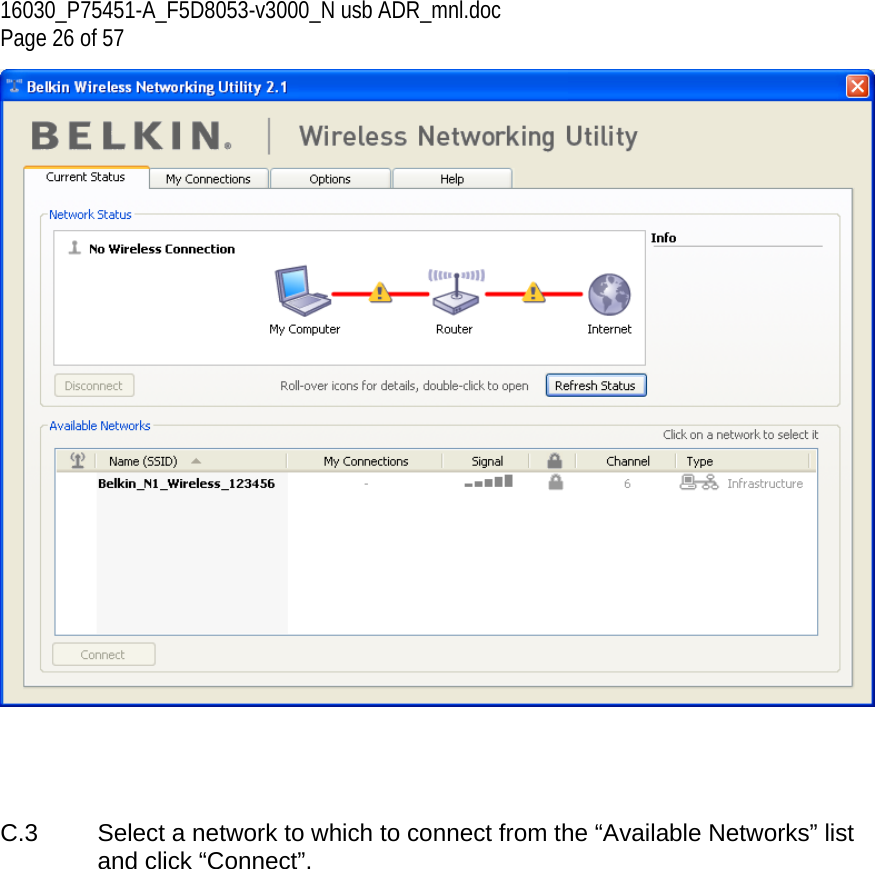
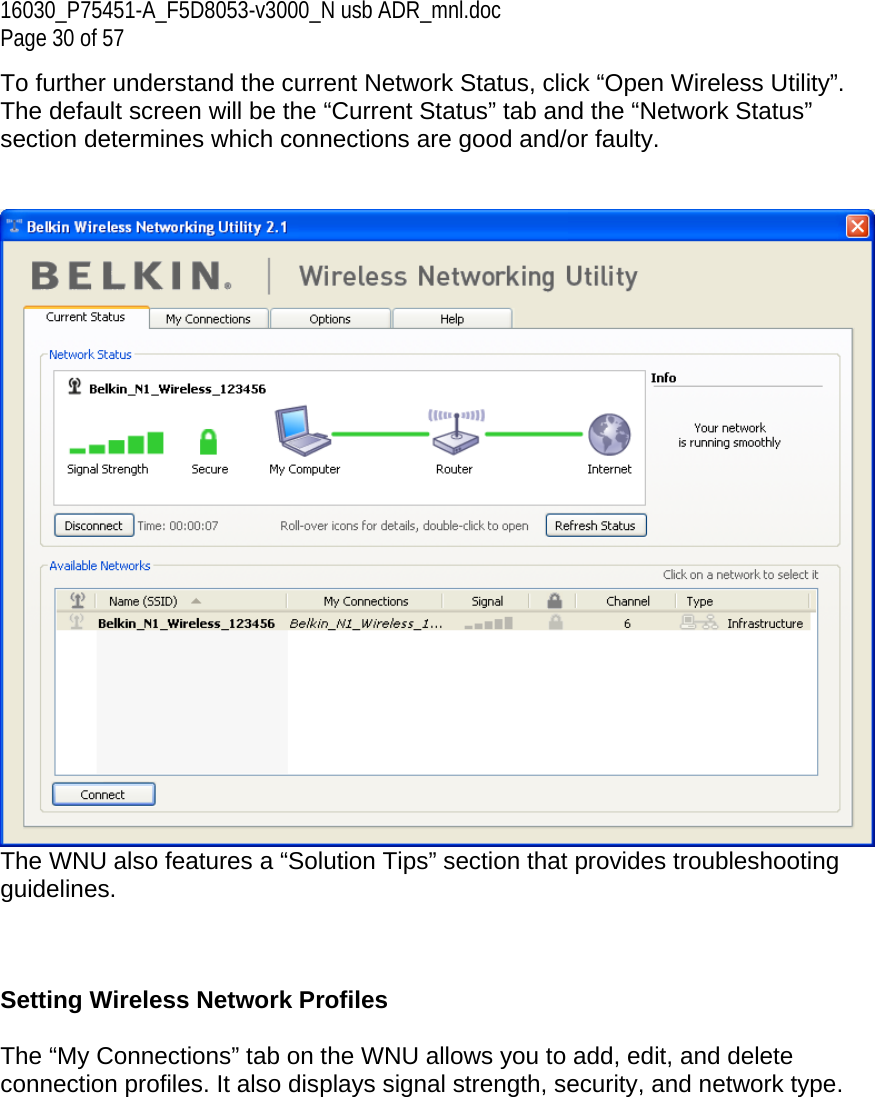
![16030_P75451-A_F5D8053-v3000_N usb ADR_mnl.doc Page 25 of 57 B.13 Depending on which operating system you are using, you might be required to reboot your computer for the changes to take effect. Save your data and close all other applications. Then, reboot. C. Configuration Using the Belkin Wireless Networking Utility C.1 After restarting your computer, double-click the Belkin Wireless Networking Utility icon on the desktop screen. [KEEP THE ICON] Note: The Belkin Wireless Networking Utility icon can also be found on the system tray. C.2 The Belkin Wireless Networking Utility screen will appear.](https://usermanual.wiki/Belkin/F5D8053E/User-Guide-1054958-Page-25.png)
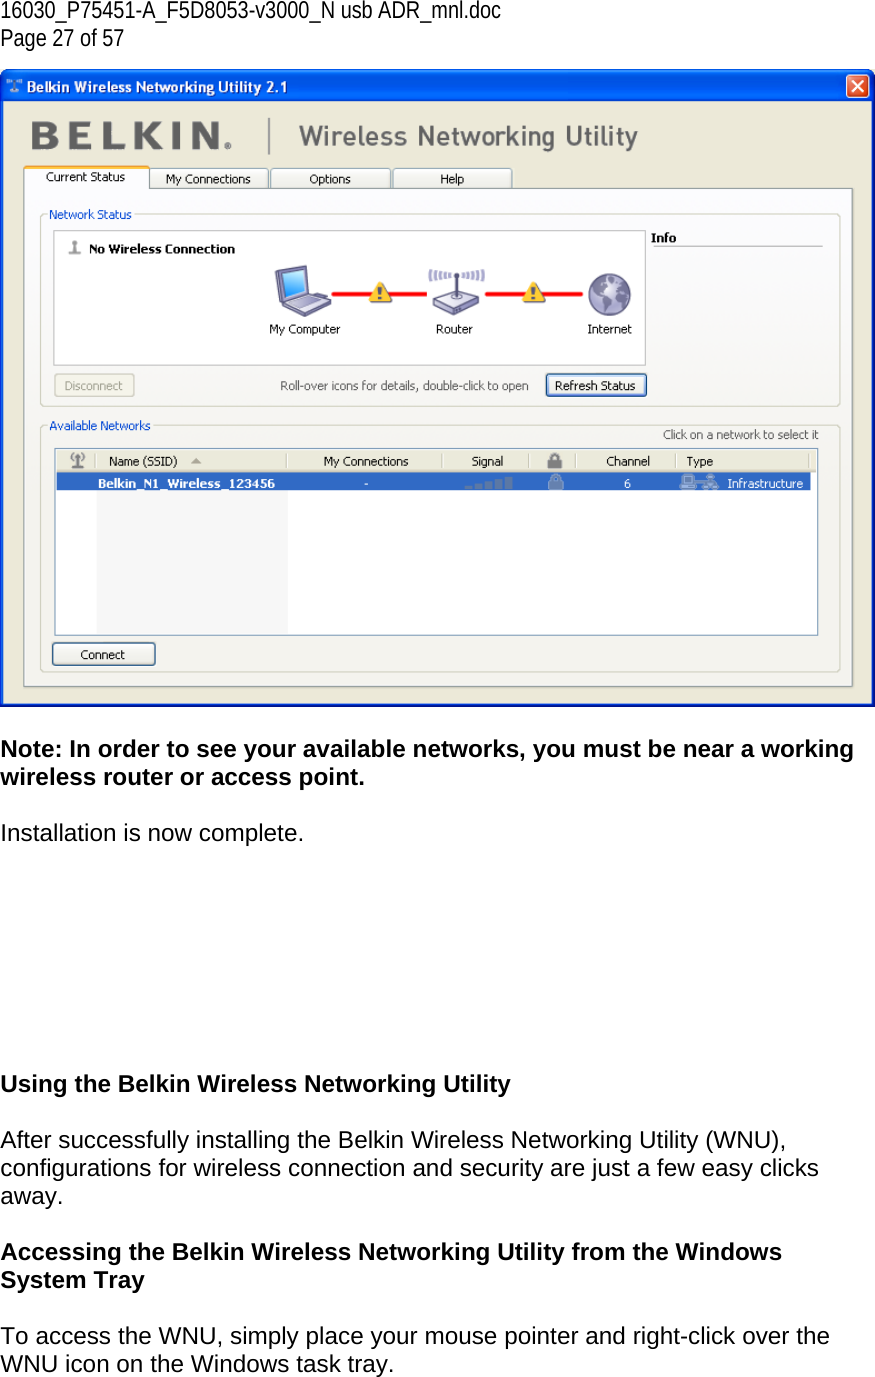
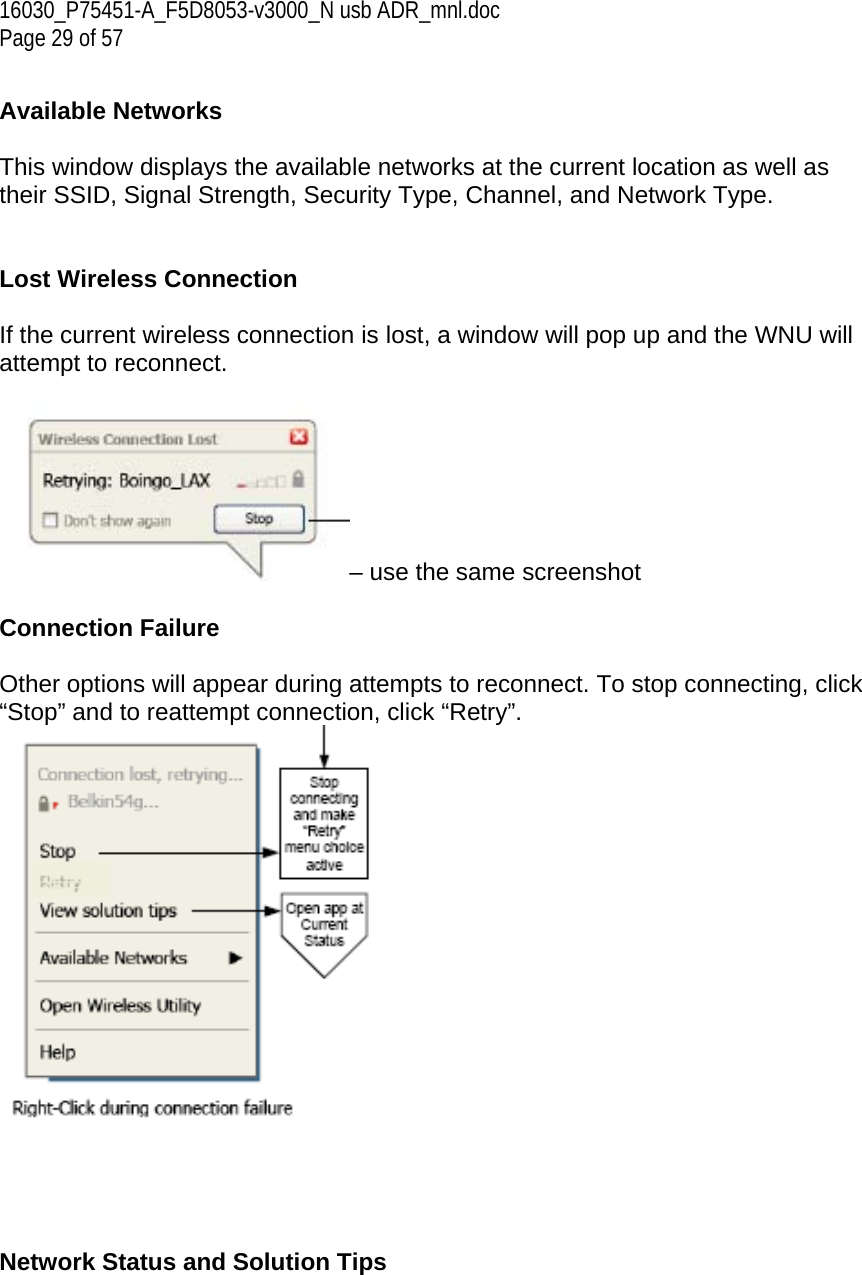
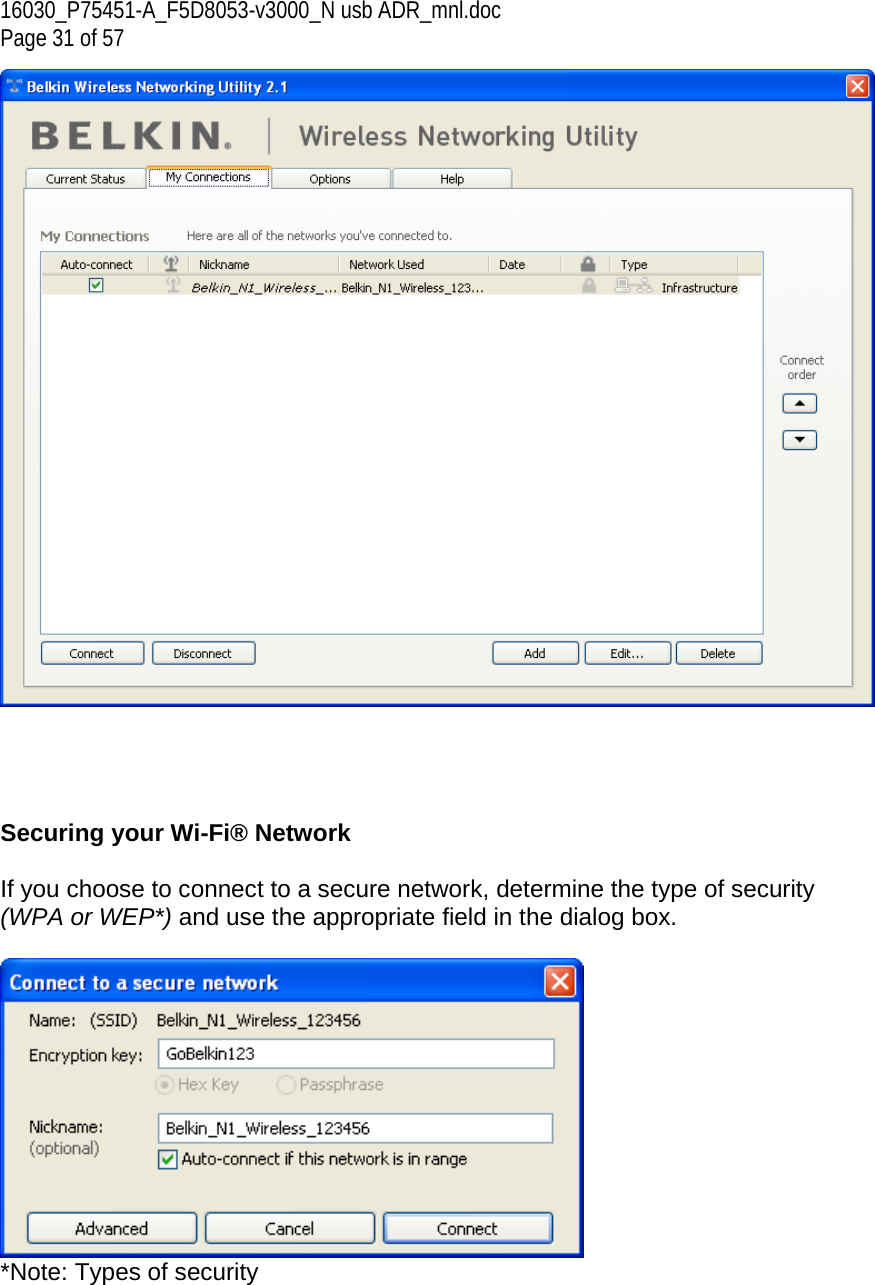
![16030_P75451-A_F5D8053-v3000_N usb ADR_mnl.doc Page 28 of 57 [KEEP] [KEEP] If the icon is not present, click on “Start > Programs > Belkin > N1 Wireless USB Network Adapter > Belkin Wireless Networking Utility”. [insert 8011_WNU_Current_Status_Connected.tif] – use the same screenshot The WNU’s default screen is the “Current Status” tab. The “Current Status” tab displays the current Network Status and Available Networks. Network Status This window displays the connectivity status of the current network. It even displays connectivity between the computer and router, and router and Internet. In the event of a connectivity problem, this window can be used to determine the problem’s source (e.g. computer, router, or Internet/modem).](https://usermanual.wiki/Belkin/F5D8053E/User-Guide-1054958-Page-28.png)
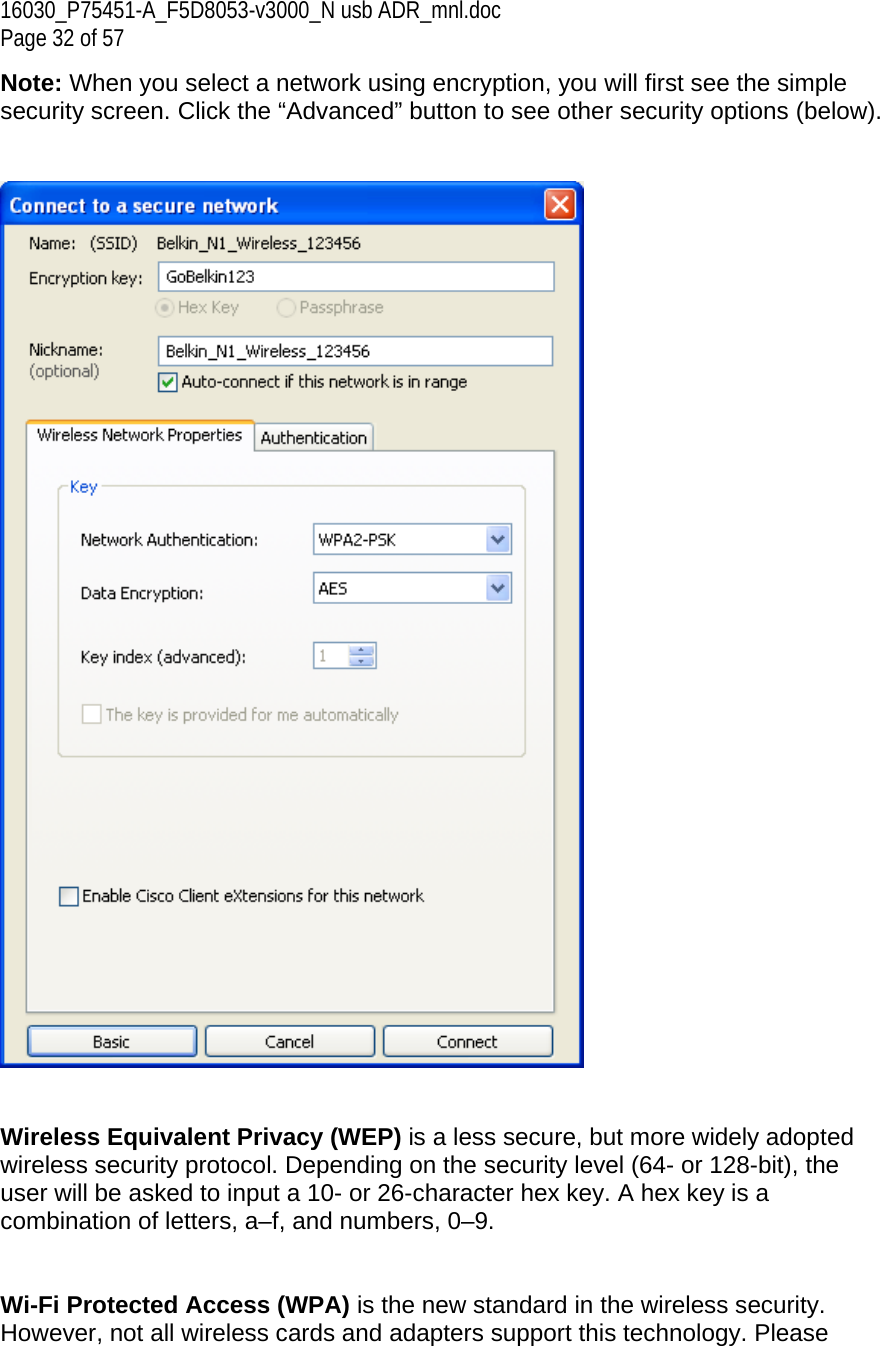
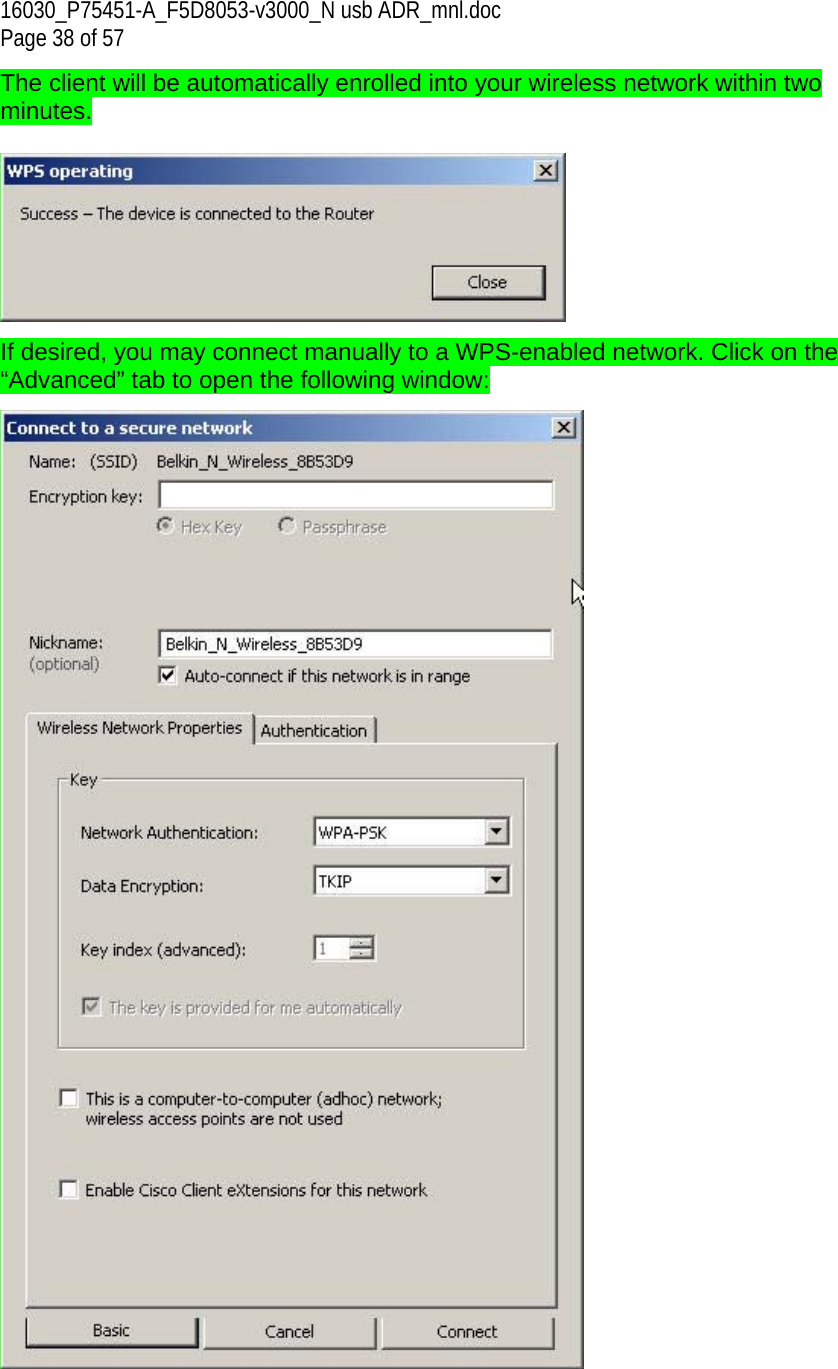
![16030_P75451-A_F5D8053-v3000_N usb ADR_mnl.doc Page 40 of 57 64-Bit WEP Encryption 1. Select “WEP” from the “Data Encryption” drop-down menu. 2. After selecting your WEP encryption mode, you can enter your key by typing in the hex key manually. A hex (hexadecimal) key is a combination of numbers and letters from A–F and 0–9. For 64-bit WEP, you must enter 10 hex keys. For instance: AF 0F 4B C3 D4 = 64-bit WEP key [insert UCUI-Connect2aSecureNetwork-Adv.tif] [Add AF0F4BC3D4 to the Encryption key box] – use the same screenshot](https://usermanual.wiki/Belkin/F5D8053E/User-Guide-1054958-Page-40.png)
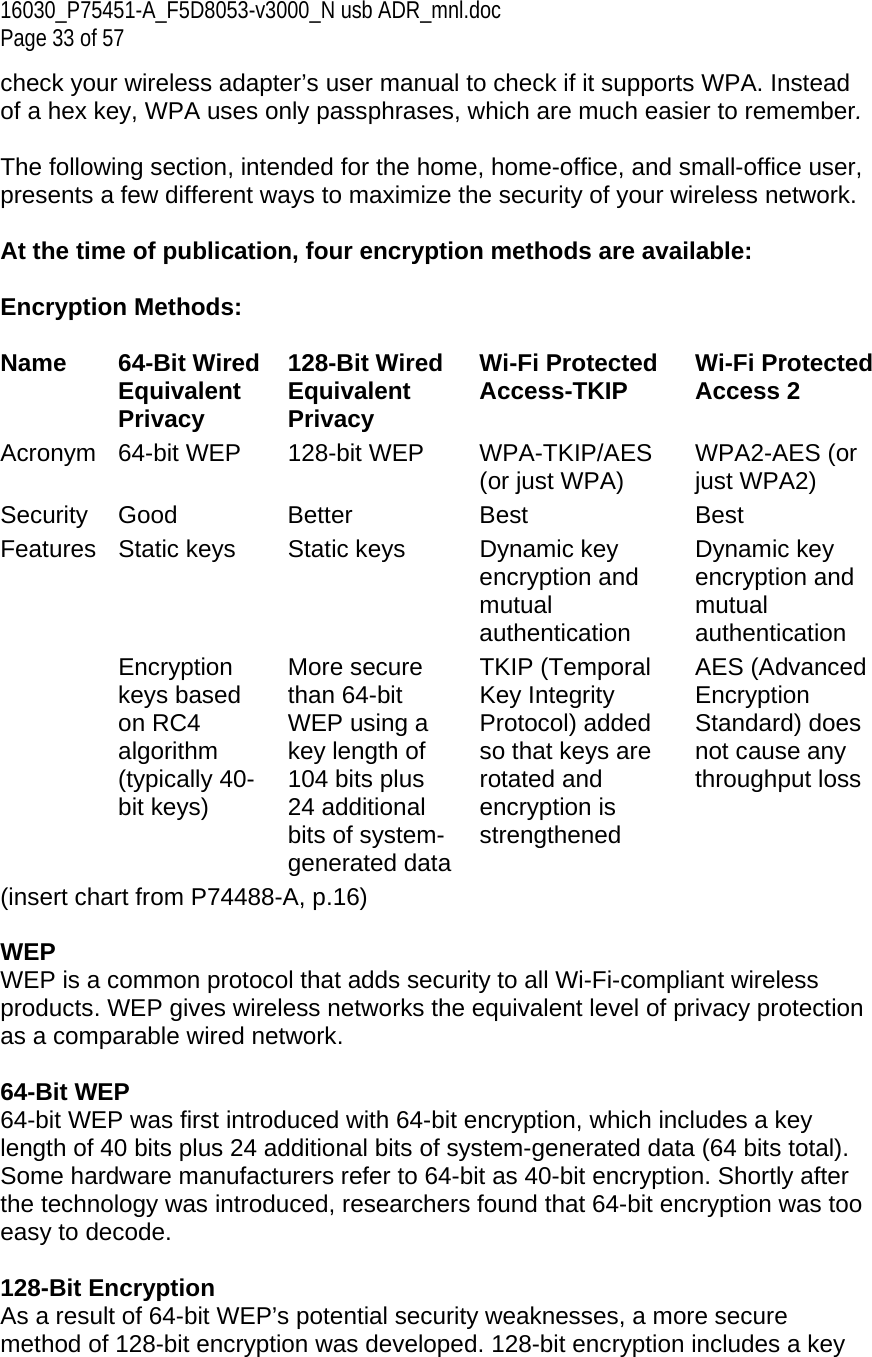
![16030_P75451-A_F5D8053-v3000_N usb ADR_mnl.doc Page 41 of 57 3. Click “Save” to finish. Encryption in the wireless router (or access point) is now set. Each of your computers on your wireless network will now must be configured with the same security settings. WARNING: If you are using a wireless client to turn on the security settings in your wireless router (or access point), you will temporarily lose your wireless connection until you activate security on your wireless client. Please record the key prior to applying changes in the wireless router (or access point). If you don’t remember the hex key, your client will be locked out of the wireless router (or access point). 128-Bit WEP Encryption 1. Select “WEP” from the drop-down menu. 2. After selecting your WEP encryption mode, you can enter your key by typing in the hex key manually. A hex (hexadecimal) key is a combination of numbers and letters from A–F and 0–9. For 128-bit WEP, you must enter 26 hex keys. For instance: C3 03 0F AF 0F 4B B2 C3 D4 4B C3 D4 E7 = 128-bit WEP key [insert UCUI-EditInfo-Adv.tif] [Change encryption key to C3 03 0F AF 0F 4B B2 C3 D4 4B C3 D4 E7]](https://usermanual.wiki/Belkin/F5D8053E/User-Guide-1054958-Page-41.png)
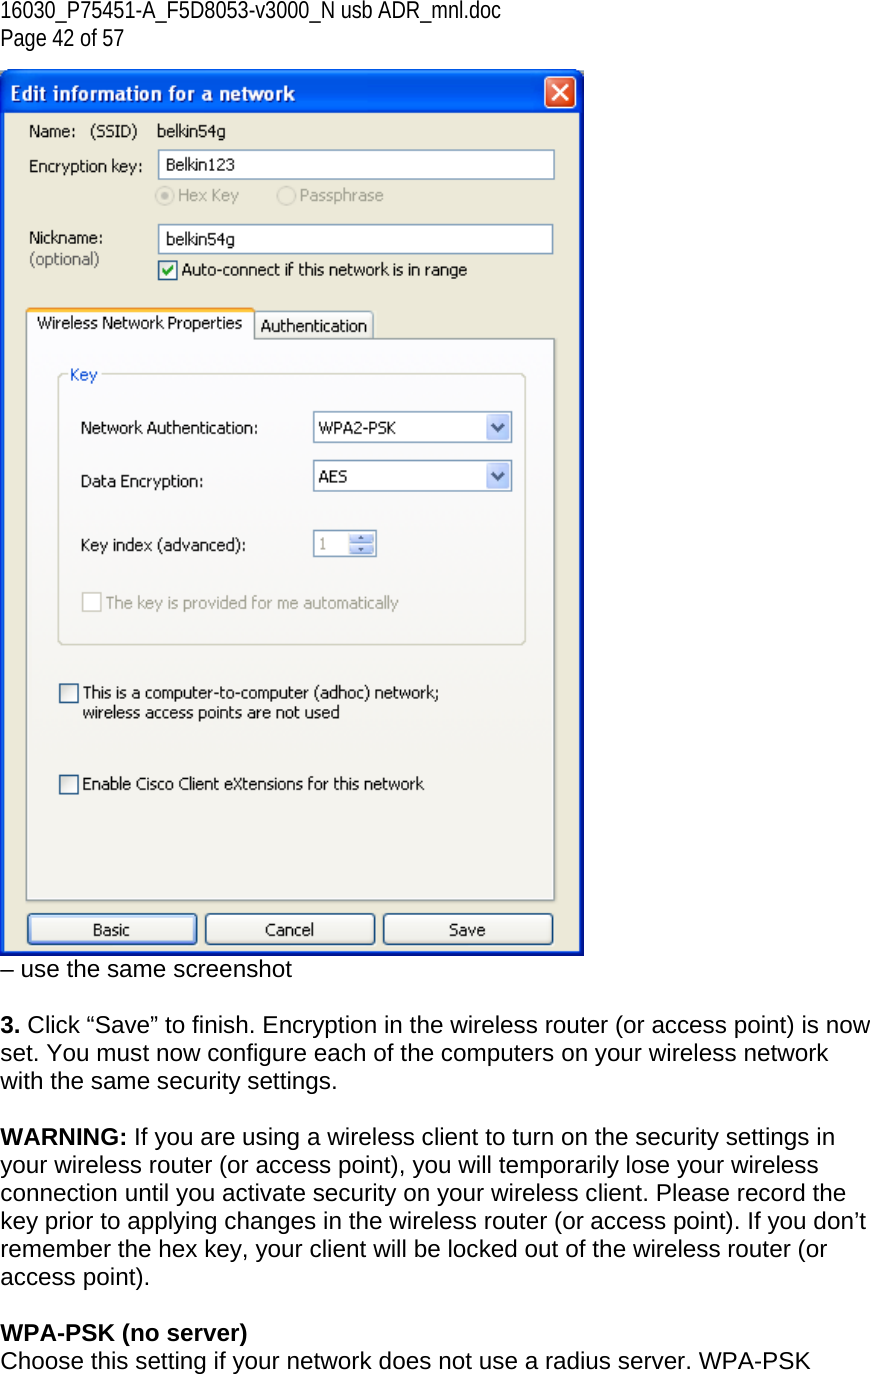
![16030_P75451-A_F5D8053-v3000_N usb ADR_mnl.doc Page 43 of 57 (no server) is typically used in home and small office networking. 1. From the “Network Authentication” drop-down menu, select “WPA-PSK (no server)”. 2. Enter your network key. This can be from eight to 63 characters and can be letters, numbers, or symbols. This same key must be used on all of the clients (network cards) that you want to include in your wireless network. [insert UCUI-EditInfo-Adv.tif– use the same screenshot] 3. Click “Save” to finish. You must now set all clients (network cards) to match these settings.](https://usermanual.wiki/Belkin/F5D8053E/User-Guide-1054958-Page-43.png)
![16030_P75451-A_F5D8053-v3000_N usb ADR_mnl.doc Page 44 of 57 Wireless Networking Utility Options [insert 9010-8.tifKEEP– use the same screenshot] The “Options” tab on the WNU provides the user the ability to customize his or her WNU settings. Wireless Networking Utility Help The WNU “Help” tab provides users with access to online and telephone support, one-click check for upgrades to updated versions of software, and advanced diagnostic tools. [insert 8011_Help.tif– use the same screenshot]](https://usermanual.wiki/Belkin/F5D8053E/User-Guide-1054958-Page-44.png)
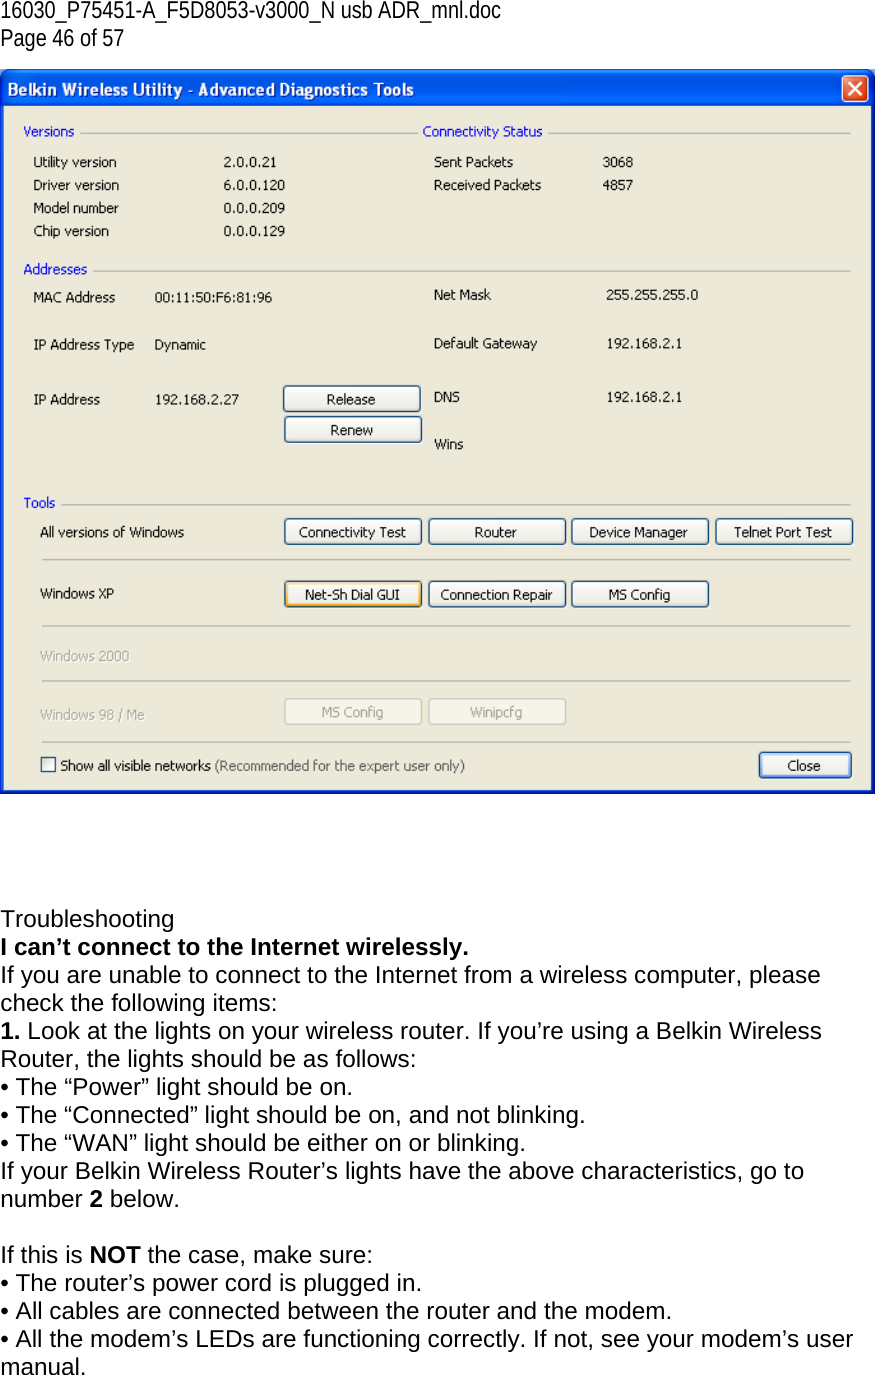
![16030_P75451-A_F5D8053-v3000_N usb ADR_mnl.doc Page 45 of 57 Advanced Diagnostic Tools The “Advanced Diagnostic Tools” section is the central control panel for all the settings of the hardware and software components of the wireless network. It provides an array of tests and connectivity services to ensure optimal network performance. [insert 8011_WNU_Help_Diagnostic.tif– use the same screenshot]](https://usermanual.wiki/Belkin/F5D8053E/User-Guide-1054958-Page-45.png)
![16030_P75451-A_F5D8053-v3000_N usb ADR_mnl.doc Page 47 of 57 • Reboot the router. • Reboot the modem. If you continue to have issues, please contact Belkin Technical Support. If you are not using a Belkin Wireless Router, consult that router manufacturer’s user guide. 2. Open your wireless utility software by clicking on the icon in the system tray at the bottom right-hand corner of the screen. The tray icon should look like this (the icon may be red or green): [Keep the same icon] 3. The window that opens should have a list of “Available Networks”. Available networks are wireless networks to which you can connect. If you are using a Belkin 802.11g (G Plus) Router, or Belkin 802.11g (54g) Router, “Belkin54g” is the default name. If you are using a Belkin 802.11b Router, the default name should be “WLAN”. If you are NOT using a Belkin Router, please consult your router manufacturer’s user manual for the default name. The name of your wireless network appears in “Available Networks”. If the correct network name is listed in the “Available Networks” list, please follow the steps below to connect wirelessly: 1. Click on the correct network name in the “Available Networks” list. 2. If the network has security (encryption) enabled, you must enter the network key. Click “Connect”. For more information regarding security, see the page entitled: “Securing your Wi-Fi Network” on page xx of this User Manual. 3. Within a few seconds, the tray icon in the lower right-hand corner of your screen should turn green, indicating a successful connection to the network. If you are still unable to access the Internet after connecting to the wireless network, please contact Belkin Technical Support. The name of your wireless network DOES NOT appear in the list](https://usermanual.wiki/Belkin/F5D8053E/User-Guide-1054958-Page-47.png)

![16030_P75451-A_F5D8053-v3000_N usb ADR_mnl.doc Page 54 of 57 Technical Support You can find technical support information at www.belkin.com or www.belkin.com/networking. If you want to contact technical support by phone, please call: US: 877-736-5771 800-223-5546 ext. 2263 310-898-1100 ext. 2263 UK: 0845 607 77 87 Australia: 1800 235 546 New Zealand: 0800 235 546 Singapore: 65 64857620 Europe: www.belkin.com/support Information FCC Statement DECLARATION OF CONFORMITY WITH FCC RULES FOR ELECTROMAGNETIC COMPATIBILITY We, Belkin International, Inc., of 501 West Walnut Street, Compton, CA 90220, declare under our sole responsibility that the product, F5D8053, to which this declaration relates, complies with Part 15 of the FCC Rules. Operation is subject to the following two conditions: (1) this device may not cause harmful interference, and (2) this device must accept any interference received, including interference that may cause undesired operation. IMPORTANT NOTE: Radiation Exposure Statement This EUT is compliance with SAR for general population/uncontrolled exposure limits in ANSI/IEEE C95.1-1999 / IC RSS-102 and had been tested in accordance with the measurement methods and procedures specified in OET Bulletin 65 Supplement C / IEEE 1528. Co-location/channel setting This device and its antenna(s) must not be co-located or operating in conjunction with any other antenna or transmitter. Country Code selection feature to be disabled for products marketed to the US/CANADA. Federal Communications Commission Notice This equipment has been tested and found to comply with the limits for a Class B digital device, pursuant to Part 15 of the FCC Rules. These limits are designed to provide reasonable protection against harmful interference in a residential installation. This Class [B] digital apparatus complies with Canadian ICES-003. Cet appareil numerique de la classe [B] est conforme a la norme NMB-003 du Canada.](https://usermanual.wiki/Belkin/F5D8053E/User-Guide-1054958-Page-54.png)