Belkin F5D8231-4 N1 Wireless Router User Manual Table of Contents
Belkin International, Inc. N1 Wireless Router Table of Contents
UserManual.wiki
>
Belkin
>
F5D8231-4 User Manual
>
Manual 1
Contents
1.
Manual 1
2.
Manual 2
Manual 1
Navigation menu
Upload a User Manual
Namespaces
Wiki Guide
HTML
PDF
Info
Views
User Manual
Discussion / Help
Navigation

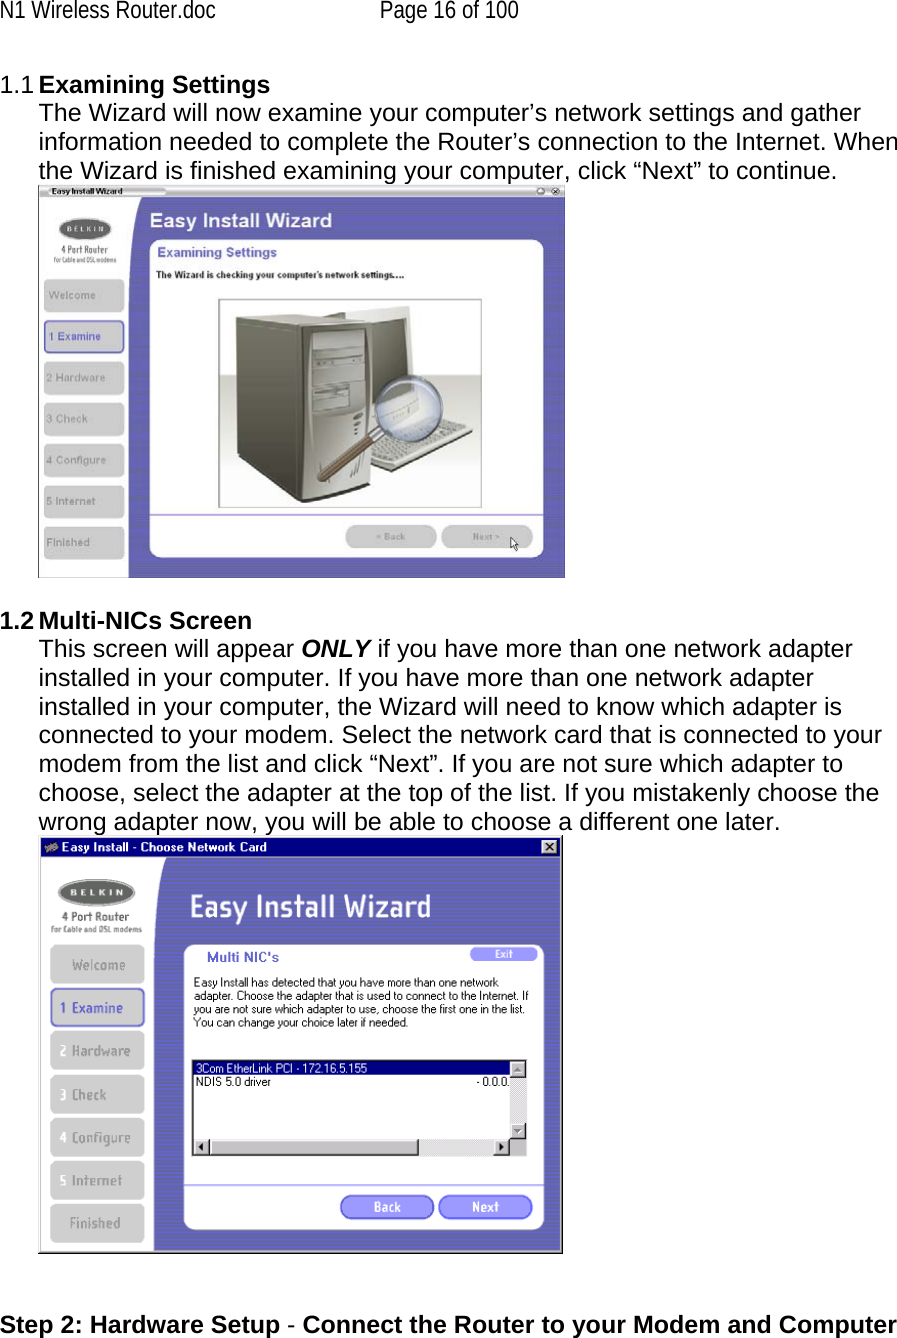
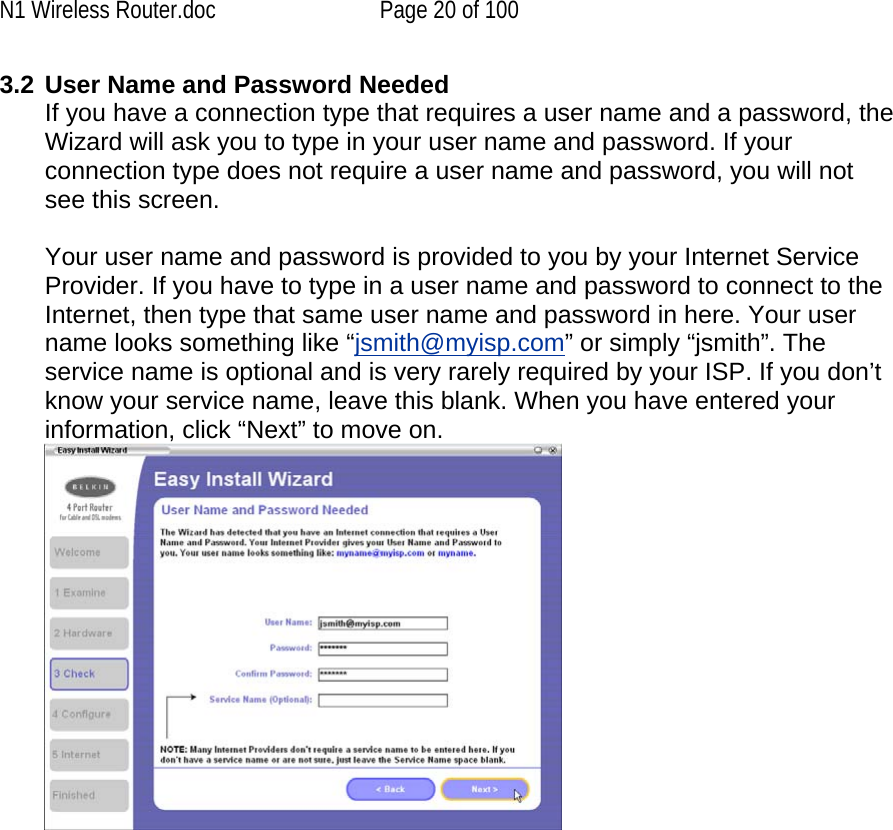
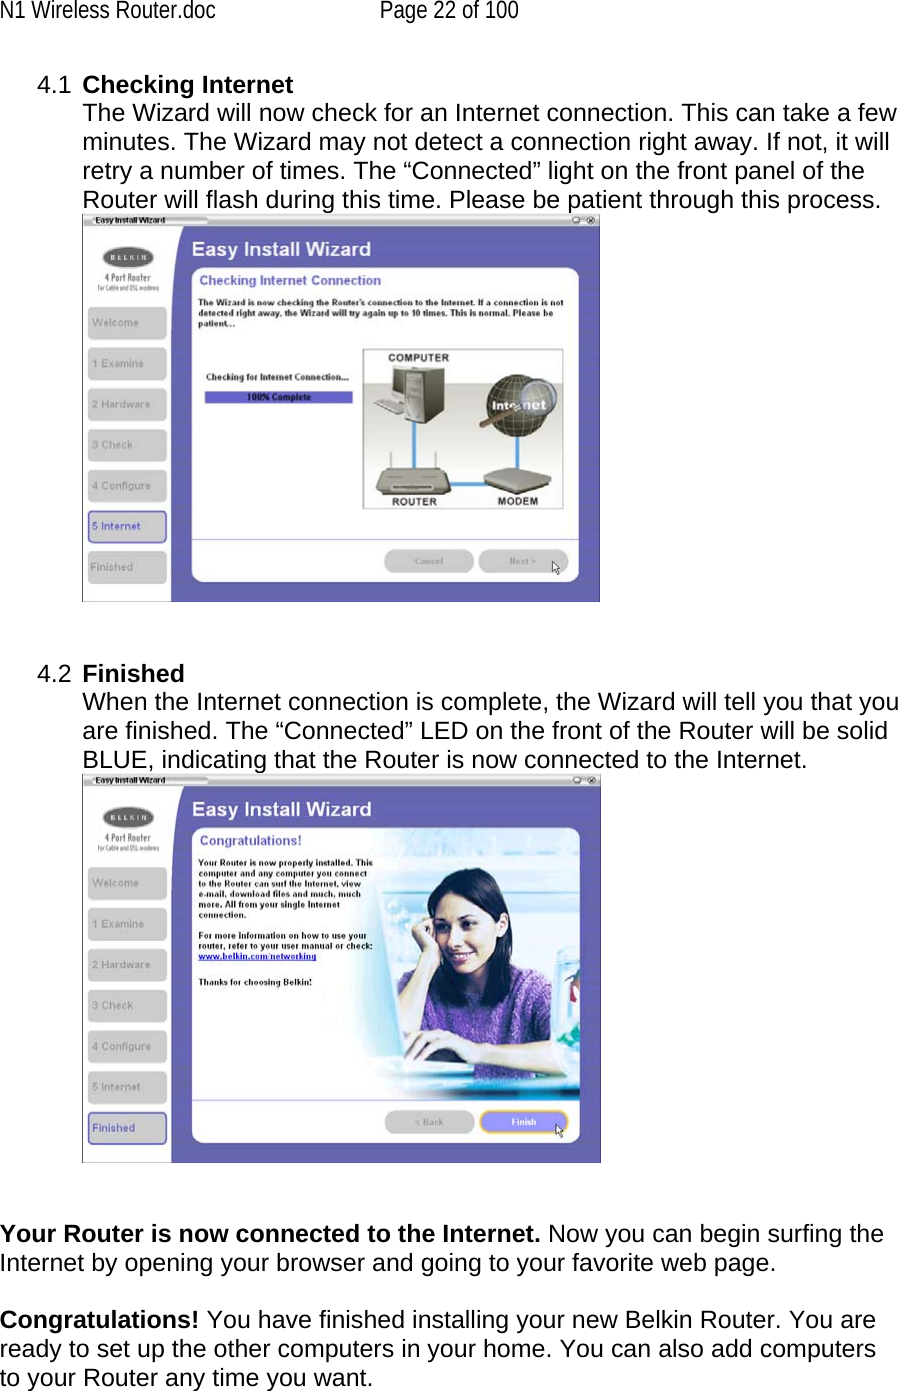
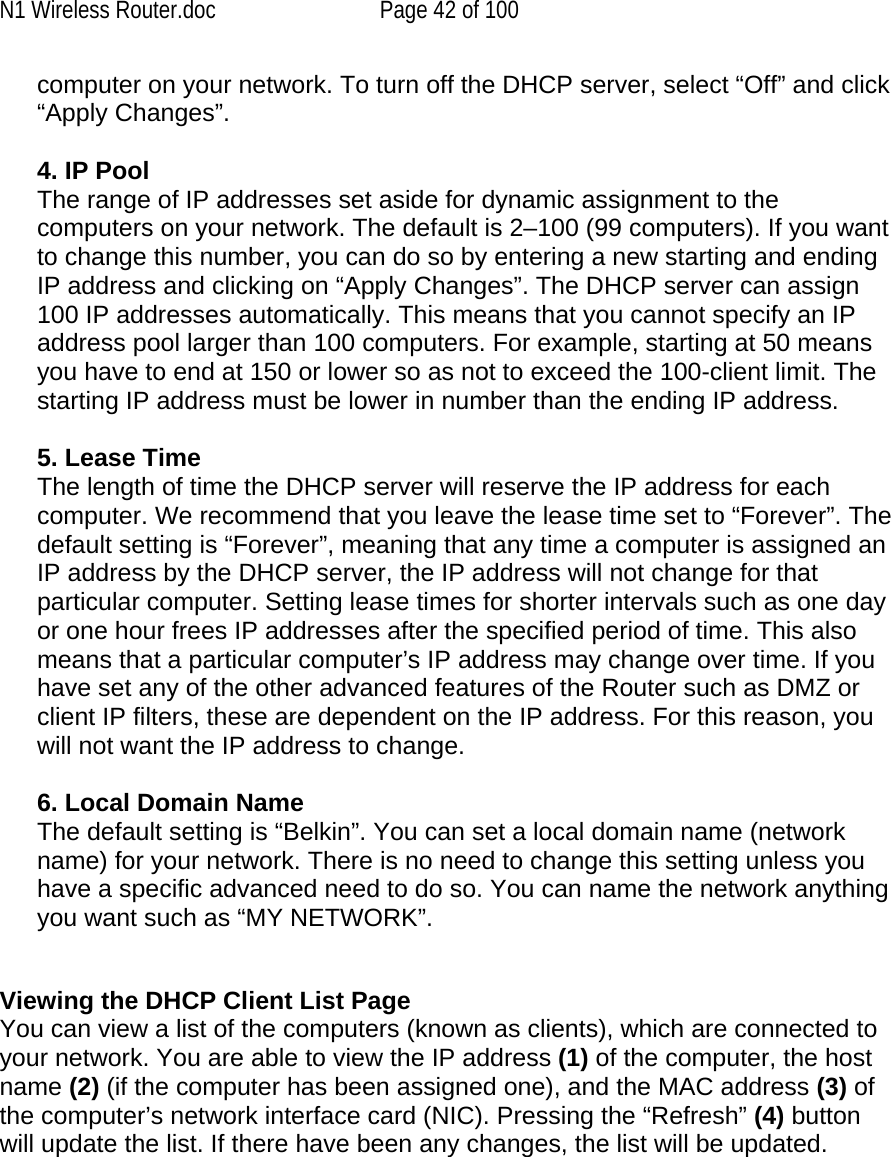
![The Easy Install Wizard takes the guesswork out of setting up your Router. This automatic software determines your network settings for you and sets up the Router for connection to your Internet Service Provider (ISP). In a matter of minutes, your Router will be up and running on the Internet. Note: Easy Install Wizard software is compatible with Windows 98SE, Me, 2000, XP, and Mac OS X. If you are using another operating system, the Router can be set up using the Alternate Setup Method described in this User Manual (see page xx) [VERIFY PAGE NUMBER]. Integrated N1 Wireless Access Point G Plus MIMO is an exciting new wireless technology that achieves data rates up to 150/300Mbps. Actual throughput is typically lower than the connected data rate and will vary depending on your networking environment. MAC Address Filtering For added security, you can set up a list of MAC addresses (unique client identifiers) that are allowed access to your network. Every computer has its own MAC address. Simply enter these MAC addresses into a list using the Web-Based Advanced User Interface and you can control access to your network. Knowing your Router Package Contents • Belkin N1 Wireless Router • Quick Installation Guide • Belkin Easy Install Wizard Software CD • Belkin RJ45 Ethernet Networking Cable • Power Supply • User Manual System Requirements • Broadband Internet connection such as a cable or DSL modem with RJ45 (Ethernet) connection • At least one computer with an installed network interface adapter • TCP/IP networking protocol installed on each computer • RJ45 Ethernet networking cable • Internet browser N1 Wireless Router.doc Page 9 of 100](https://usermanual.wiki/Belkin/F5D8231-4.Manual-1/User-Guide-655755-Page-9.png)
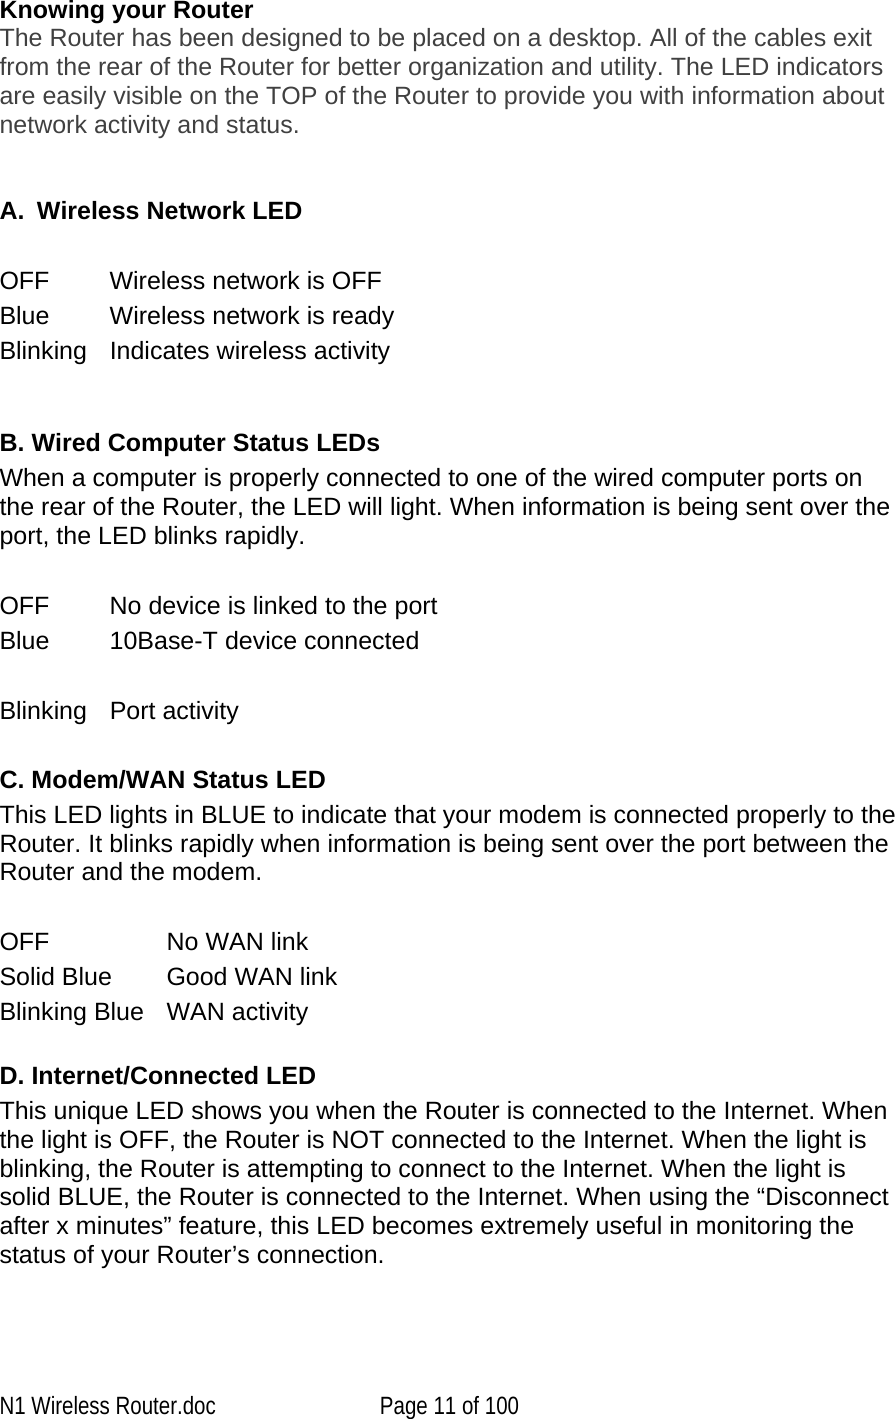
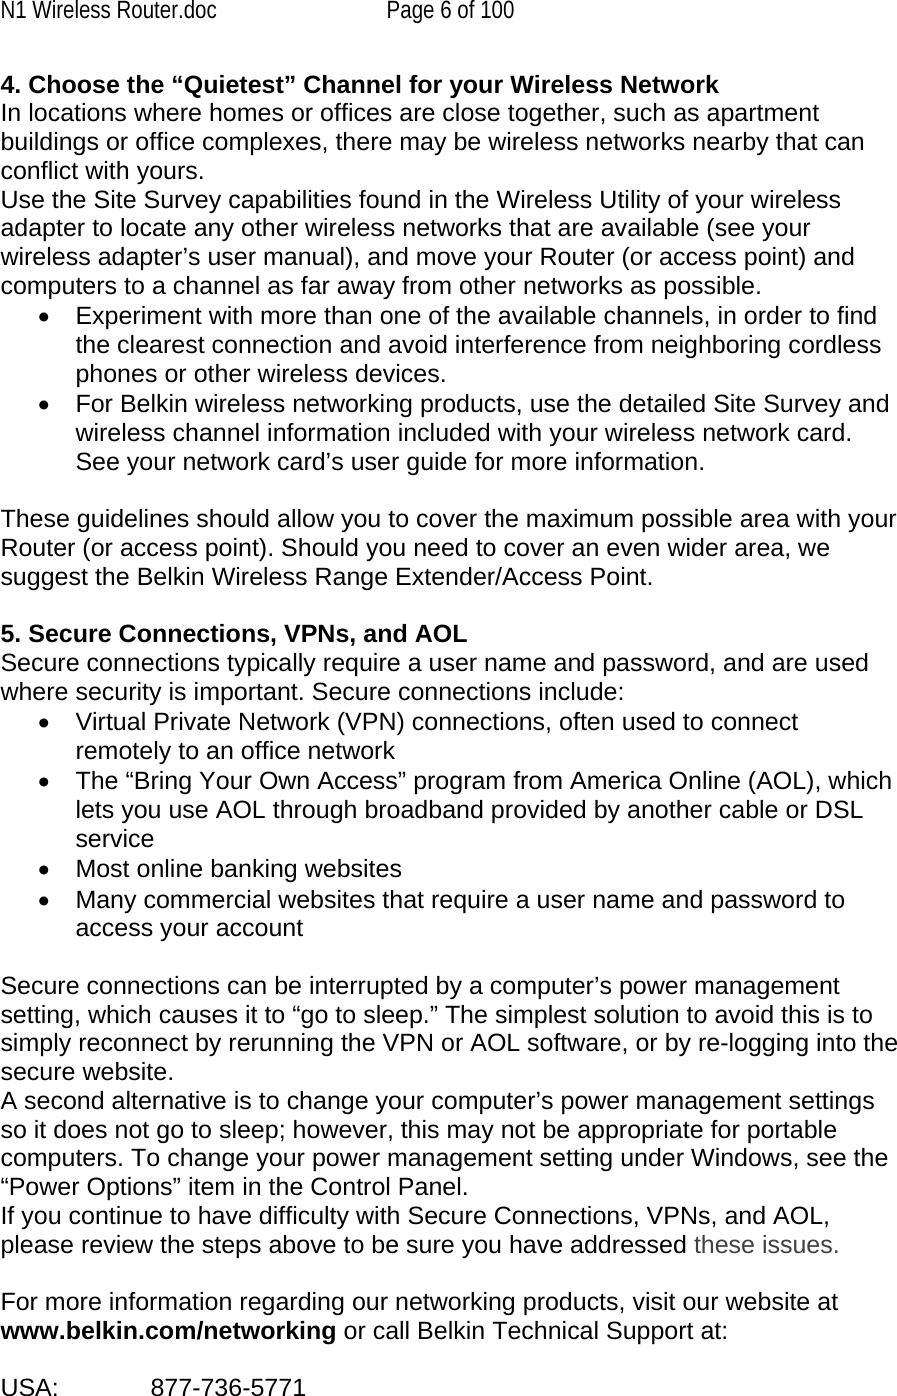
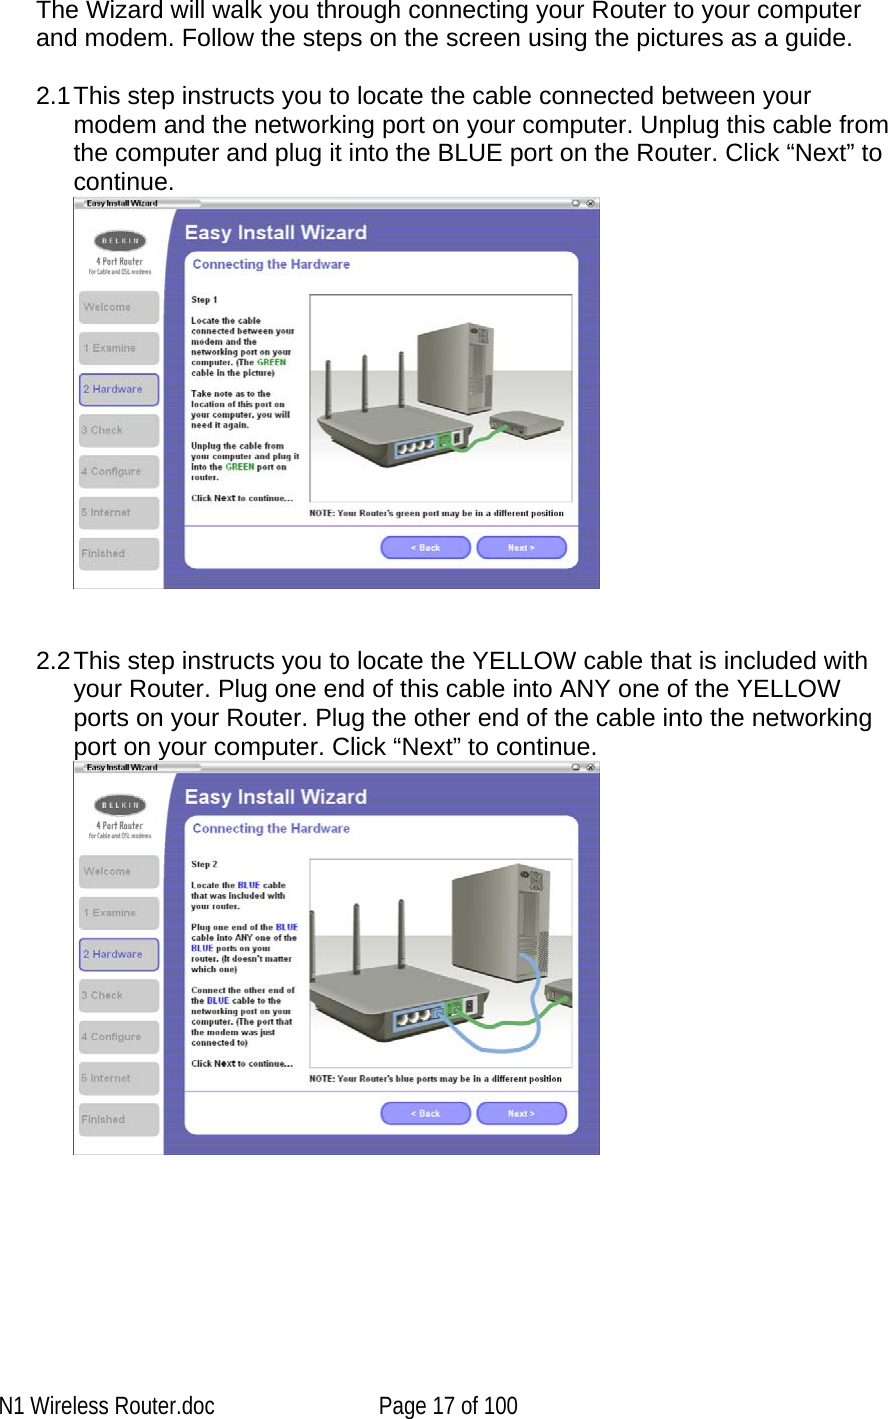
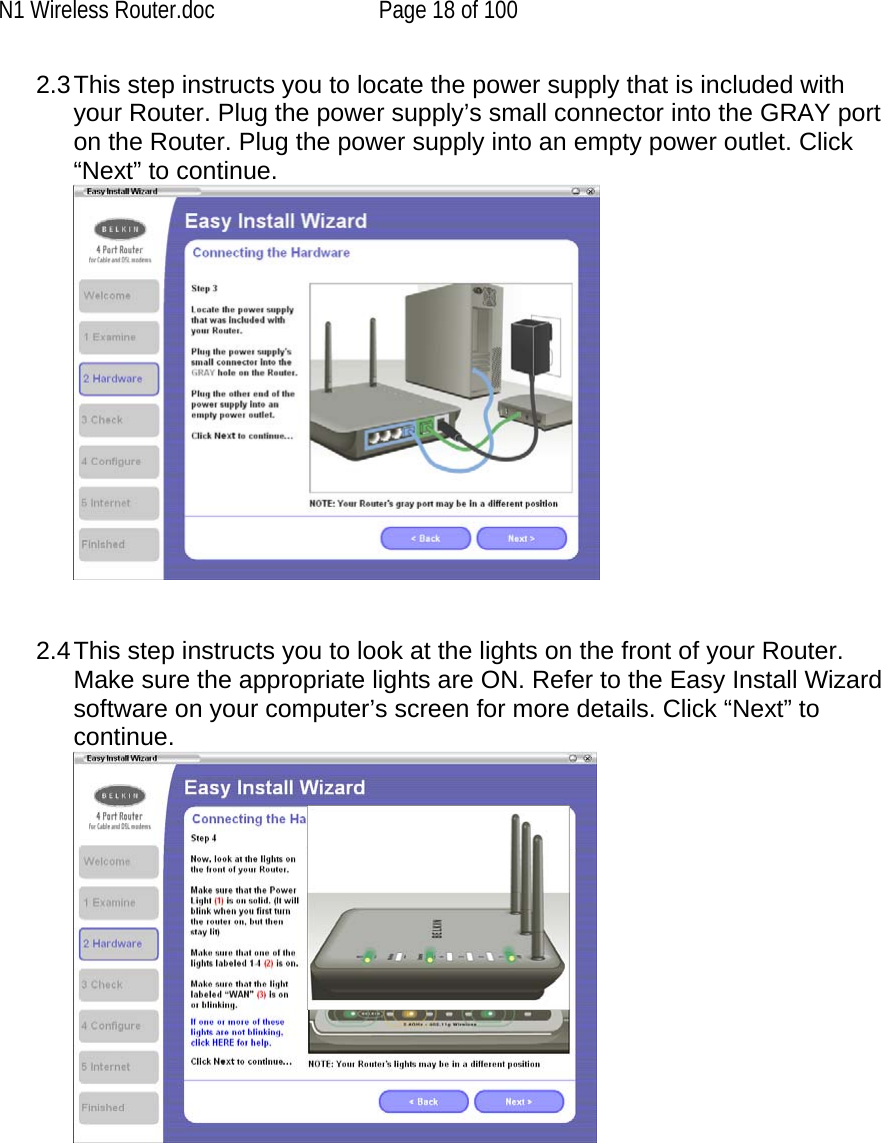
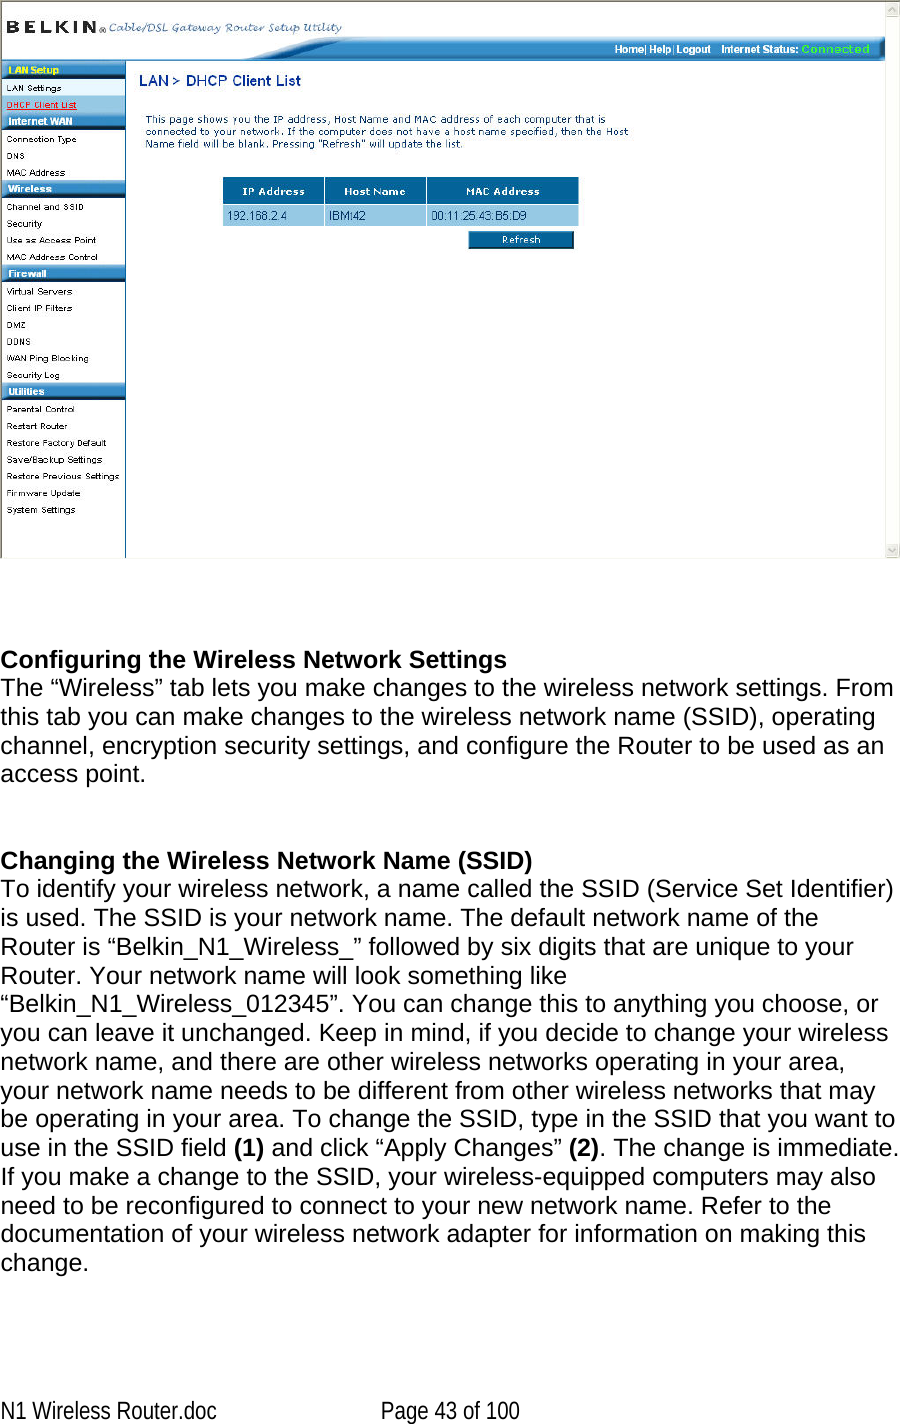
![N1 Wireless Router.doc Page 12 of 100 OFF Router is not connected to the Internet Blinking Blue Router is attempting to connect to the InternetSolid Blue Router is connected to the Internet E. Power/Router LED When you apply power to the Router or restart it, a short period of time elapses while the Router boots up. During this time, the “Power/Router” LED blinks. When the Router has completely booted up, the “Power/Router” LED becomes a SOLID light, indicating the Router is ready for use. OFF Router is OFF Blinking Blue Router is booting upSolid Blue Router is ready --------------------------------------------------------------------------------------------- [insert rear panel line art with F to I line up to the ports] F. Power Jack – Black Connect the included 12V/0.5A DC power supply to this jack. G. Connections to Computers (Wired Computer Ports) – Gary Connect your wired (non-wireless) computers to these ports. These ports are RJ45, 10/100 auto-negotiation, auto-uplinking ports for standard UTP category 5 or 6 Ethernet cable. The ports are labeled 1 through 4. These ports correspond to the numbered LEDs on the front of the Router. H. Connection to Modem (Modem Port) – Yellow This port is for connection to your cable or DSL modem. Use the cable that was provided with the modem to connect the modem to this port. Use of a cable other than the cable supplied with the cable modem may not work properly. I. Reset Button The “Reset” button is used in rare cases when the Router may function improperly. Resetting the Router will restore the Router’s normal operation while maintaining the programmed settings. You can also restore the factory default settings by using the “Reset” button. Use the restore option in instances where you may have forgotten your custom password. a. Resetting the Router Push and release the “Reset” button. The lights on the Router will momentarily flash. The “Power/Ready” light will begin to blink. When the “Power/Ready” light becomes solid again, the reset is complete.](https://usermanual.wiki/Belkin/F5D8231-4.Manual-1/User-Guide-655755-Page-12.png)
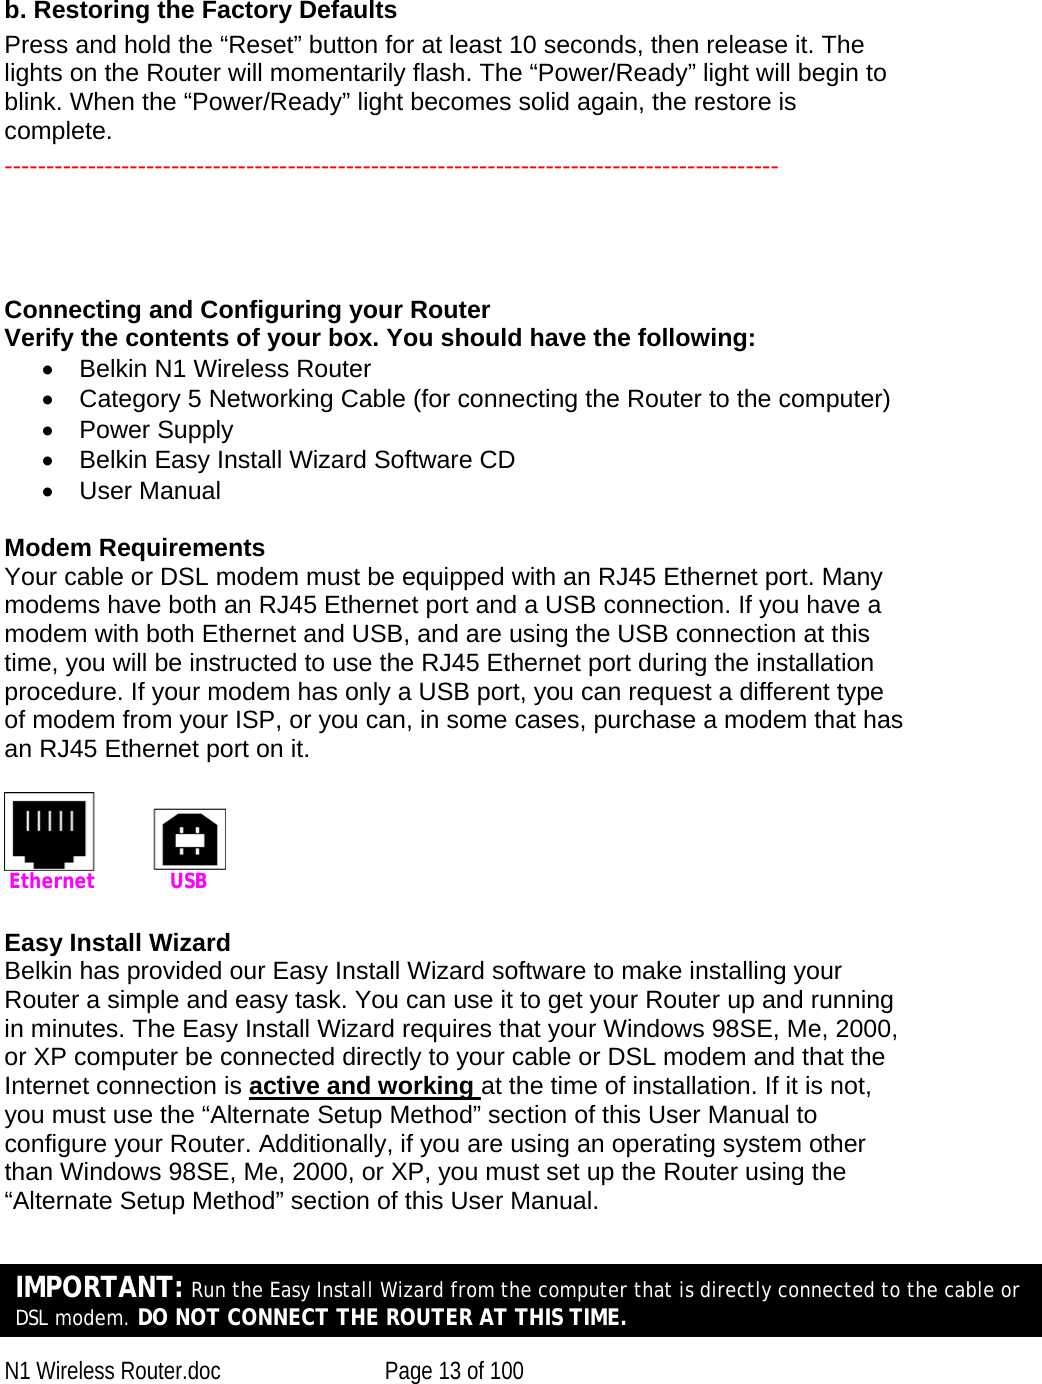
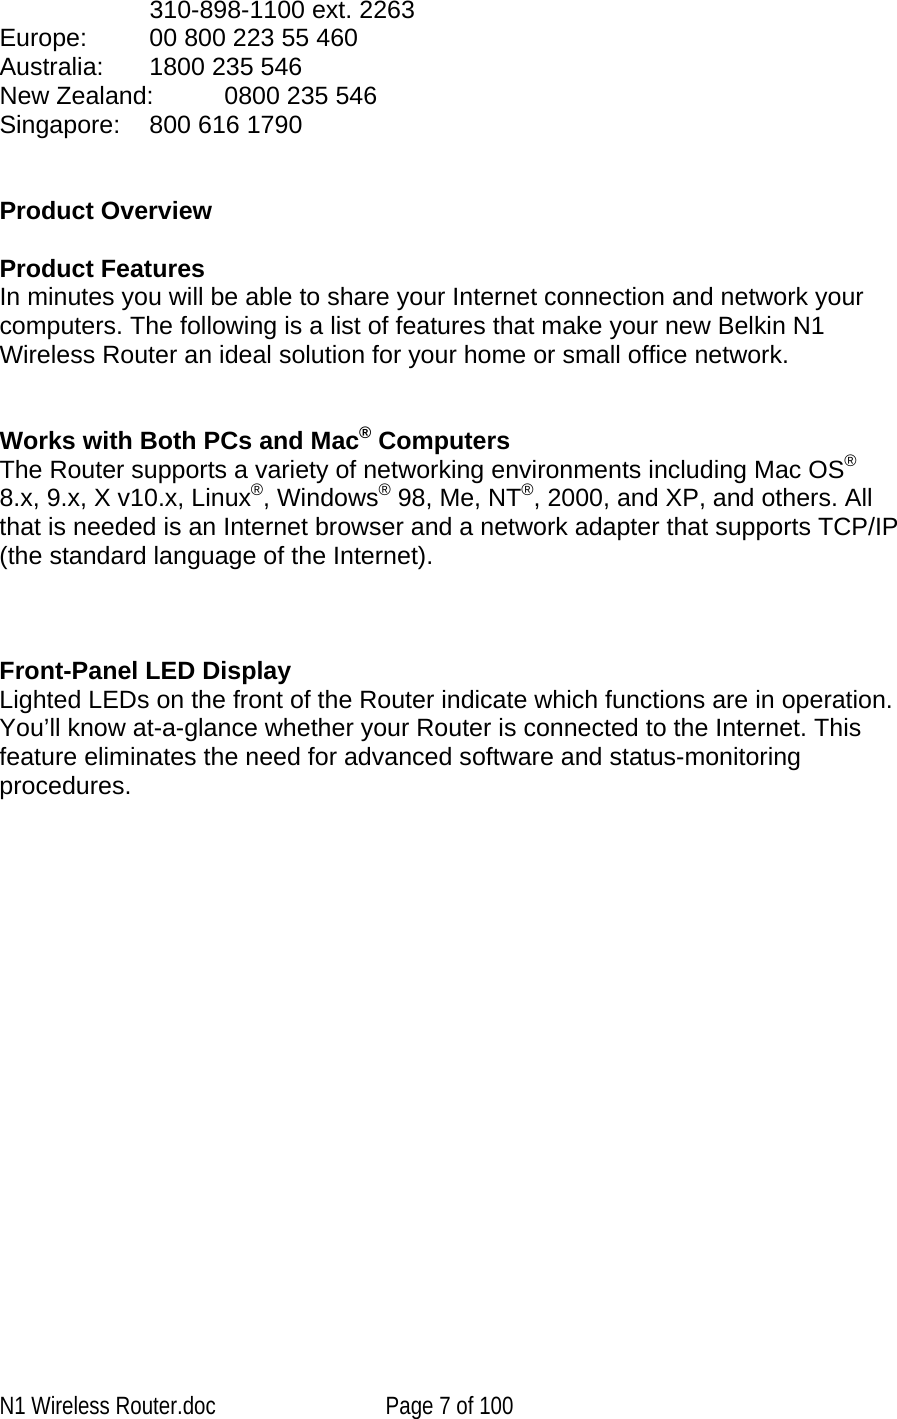
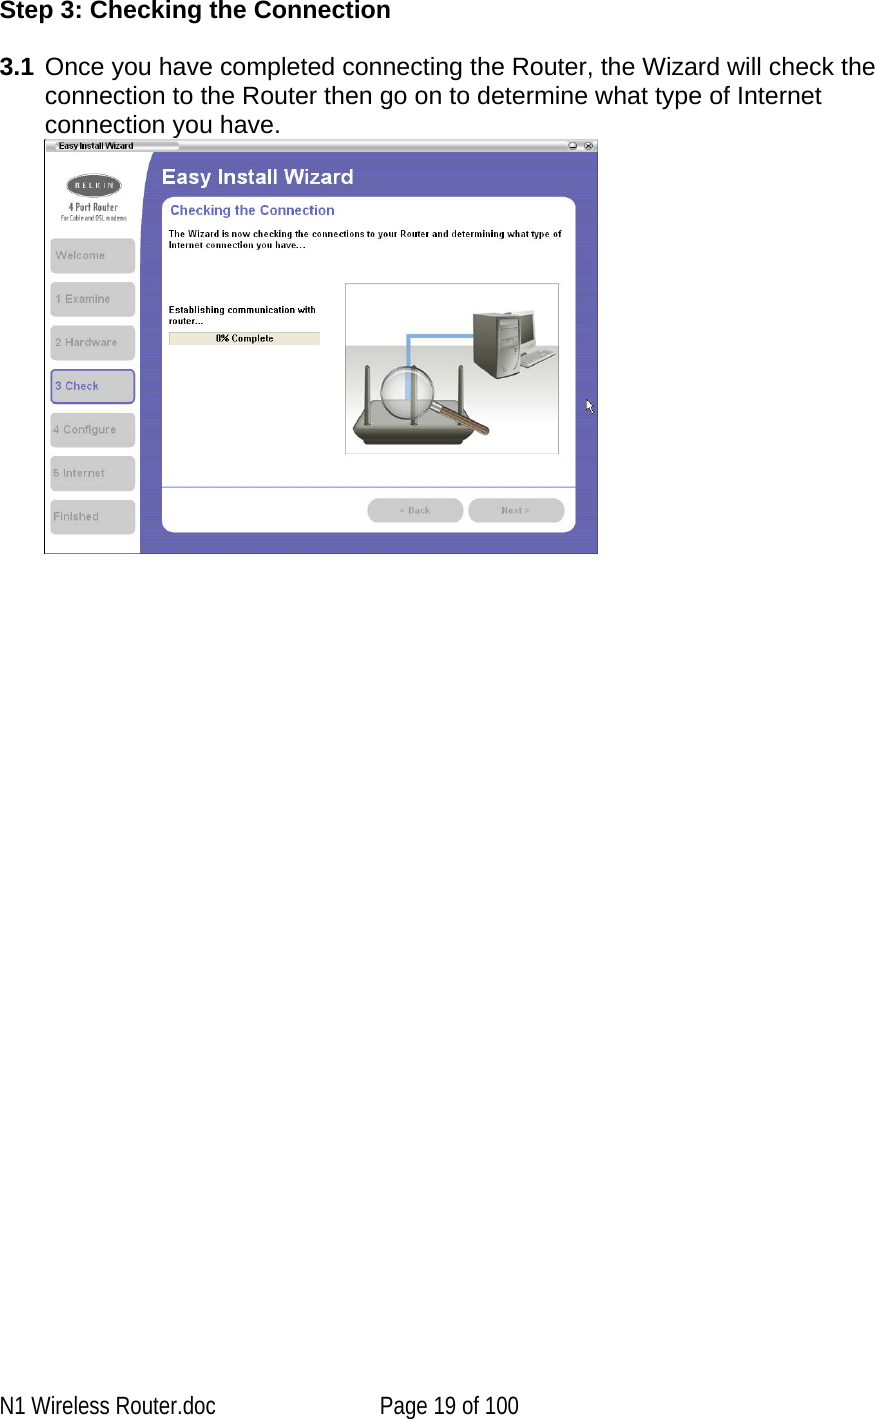
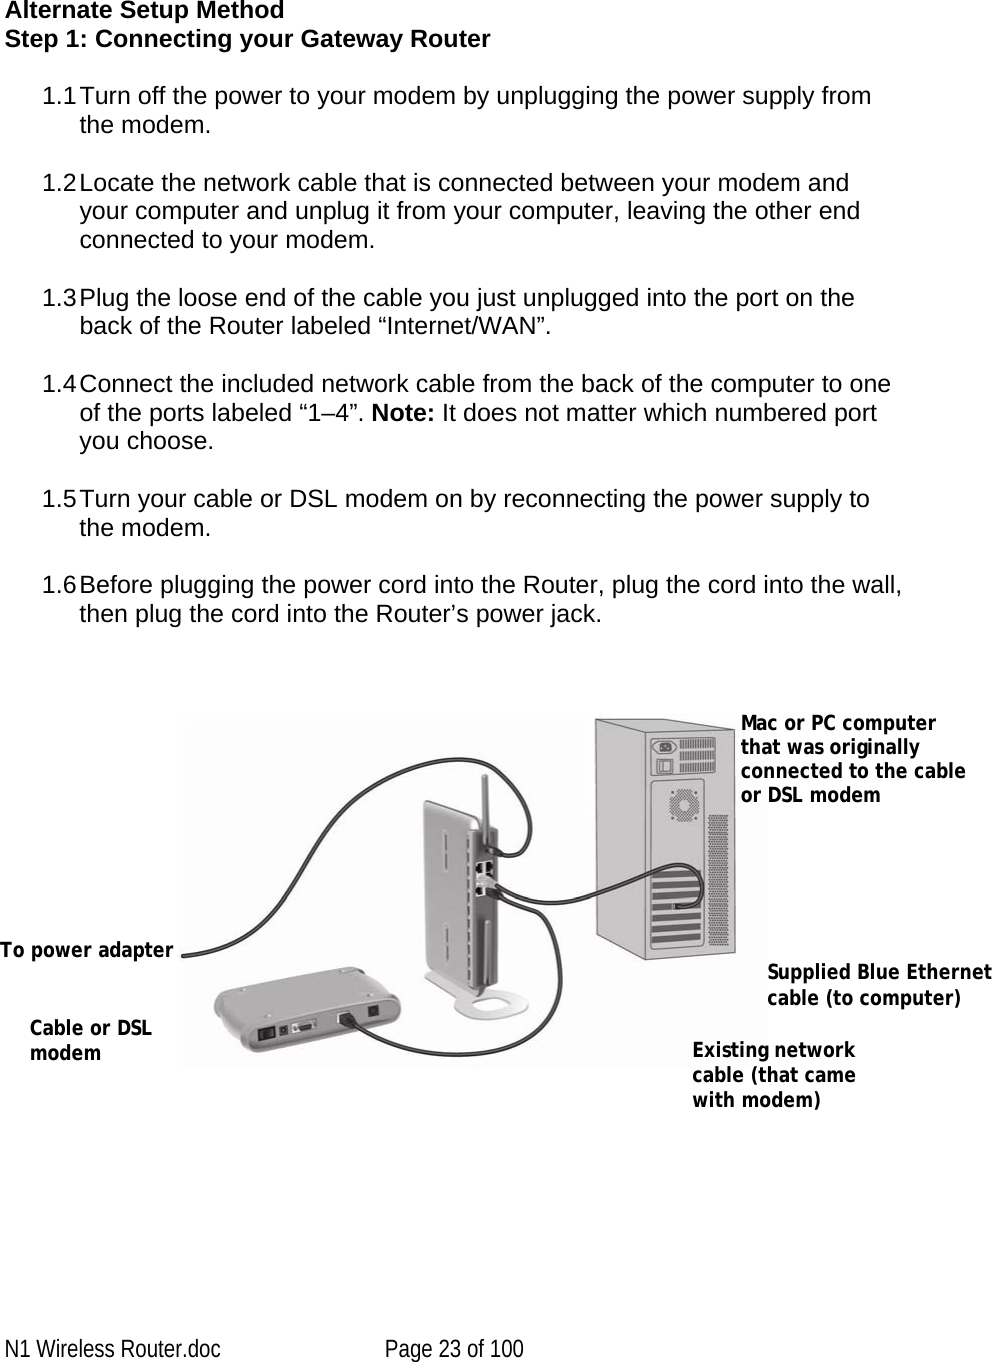
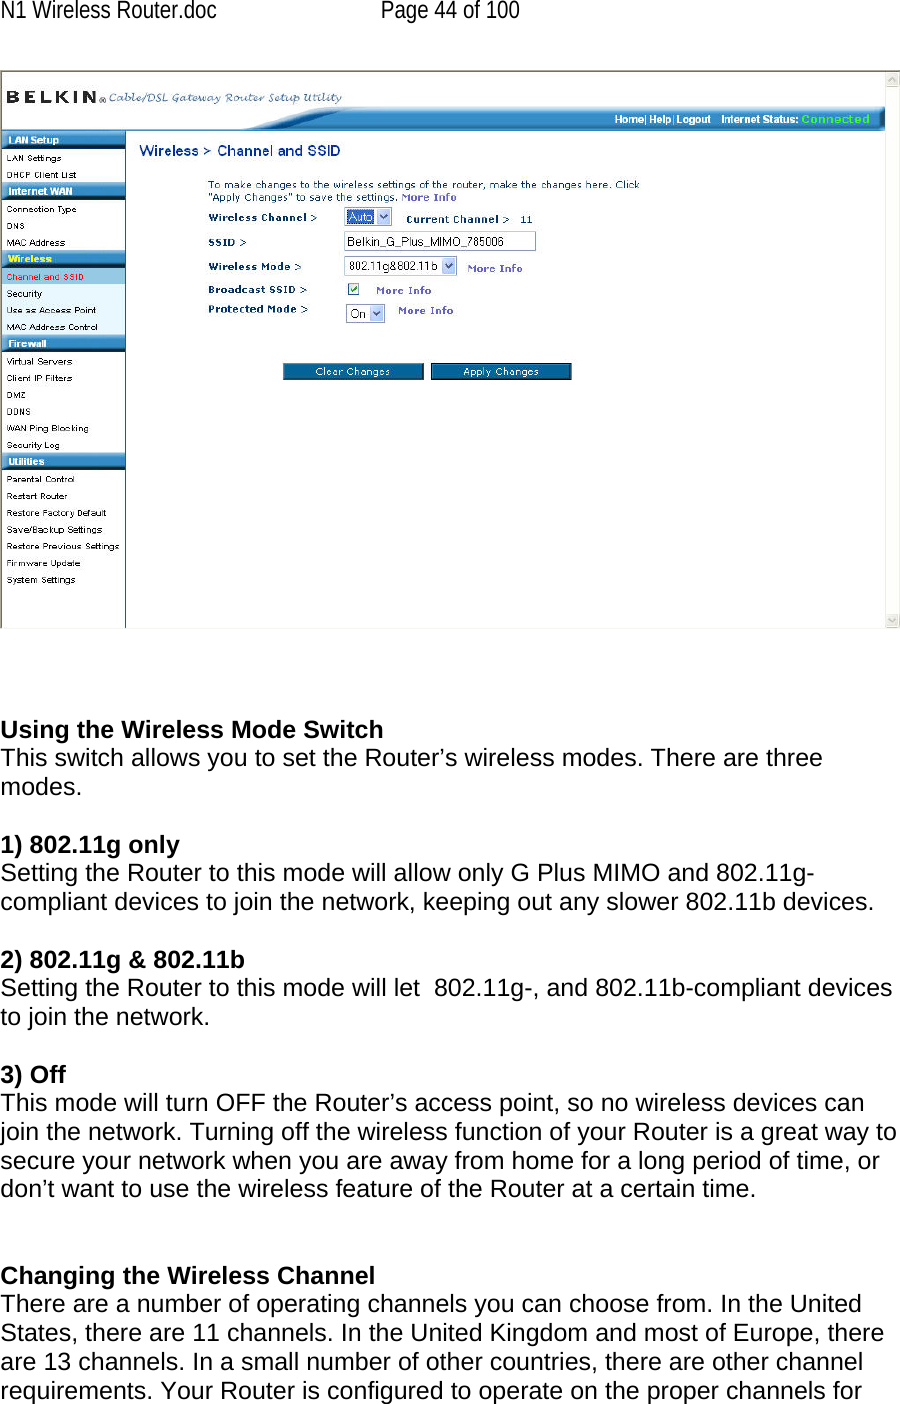
![N1 Wireless Router.doc Page 14 of 100 Step 1 Run the Easy Install Wizard Software 1. Shut down any programs that are running on your computer at this time. 2. Make sure you have the following items at the computer that is now directly connected to the cable or DSL modem. DO NOT CONNECT THE ROUTER AT THIS TIME. • The Easy Install Wizard CD-ROM • The Router • The Router Power Supply • Category 5 Networking Cable • This User Manual 3. Turn off any firewall or Internet-connection-sharing software on your computer. Windows User: Insert the Easy Install Wizard software CD into your CD-ROM drive. The Network Setup Utility screen will automatically appear on your screen within 15 seconds. Click on “Run the Easy Install Wizard” to begin. <Insert: 0-Flash.tif>[use current image] Select your region from the drop-down box shown on the screen. <Insert: 1-SelectRegion.tif>[use current image] Note for Windows Users: If the Easy Install Wizard does not start up automatically, select your CD-ROM drive from “My Computer” and double-click on the file named “Start” to start the Network Setup Utility. Mac OS Users: Insert the Easy Install Wizard software CD into your CD-ROM drive. Click on the CD icon; a folder will pop up. To begin, click on “start.osx” if you have Mac OS X. 4. Follow the Easy Install Wizard to complete the installation. Welcome Screen After you insert the CD into your CD-ROM drive, the Wizard’s welcome screen will appear. Make sure you have not connected the Router at this point. If you have connected your Router, please reconnect your computer directly to the modem. Click “Next” when you are ready to move on.](https://usermanual.wiki/Belkin/F5D8231-4.Manual-1/User-Guide-655755-Page-14.png)

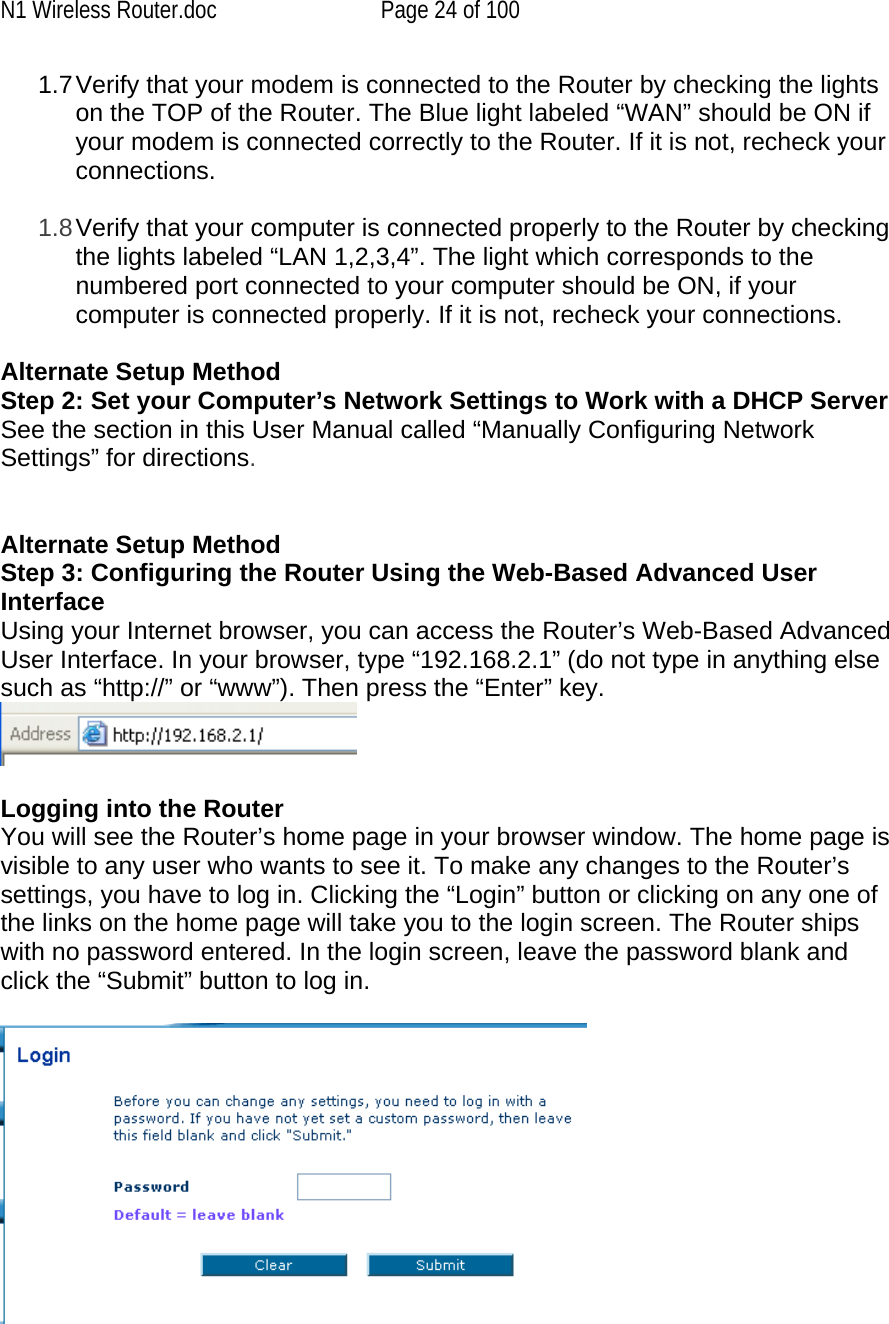
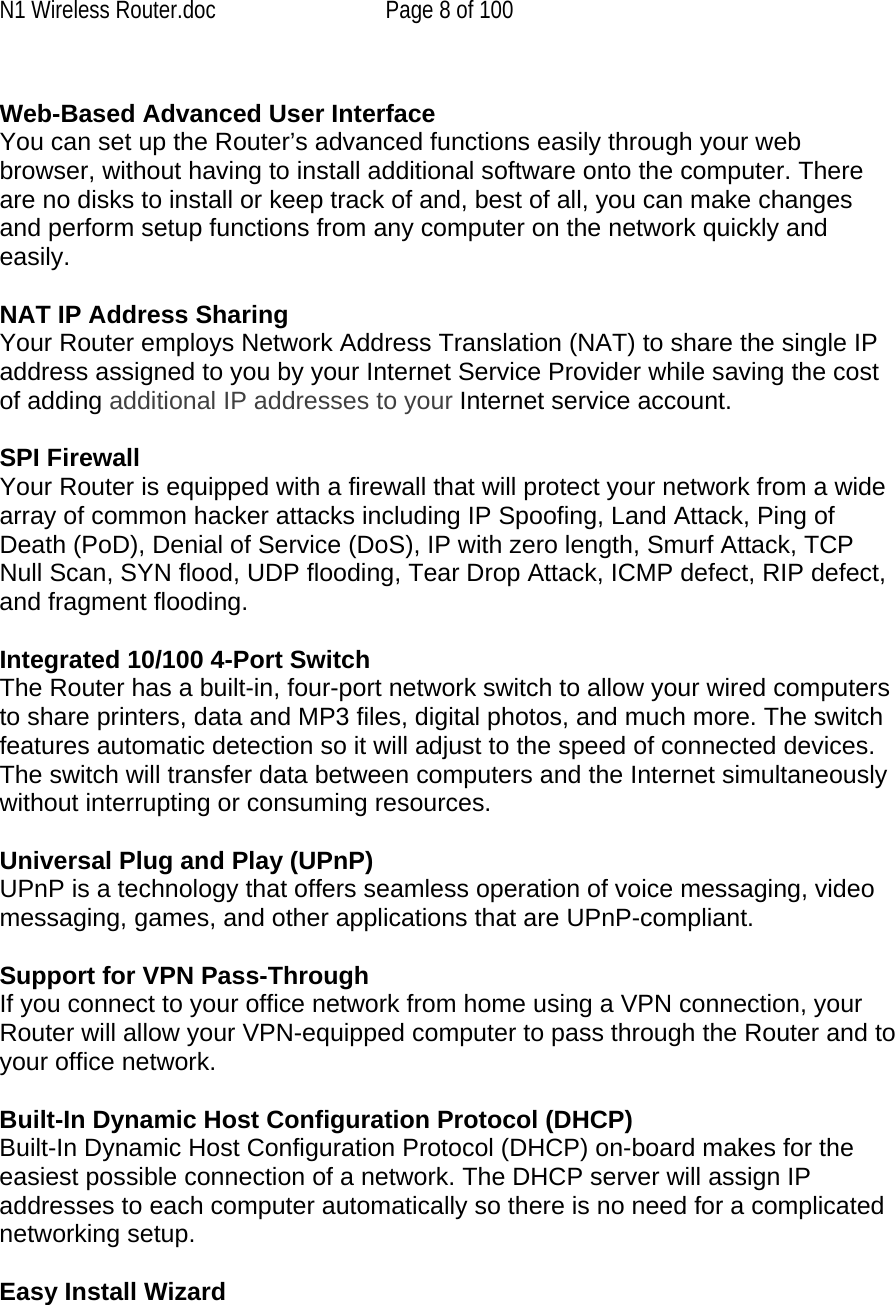
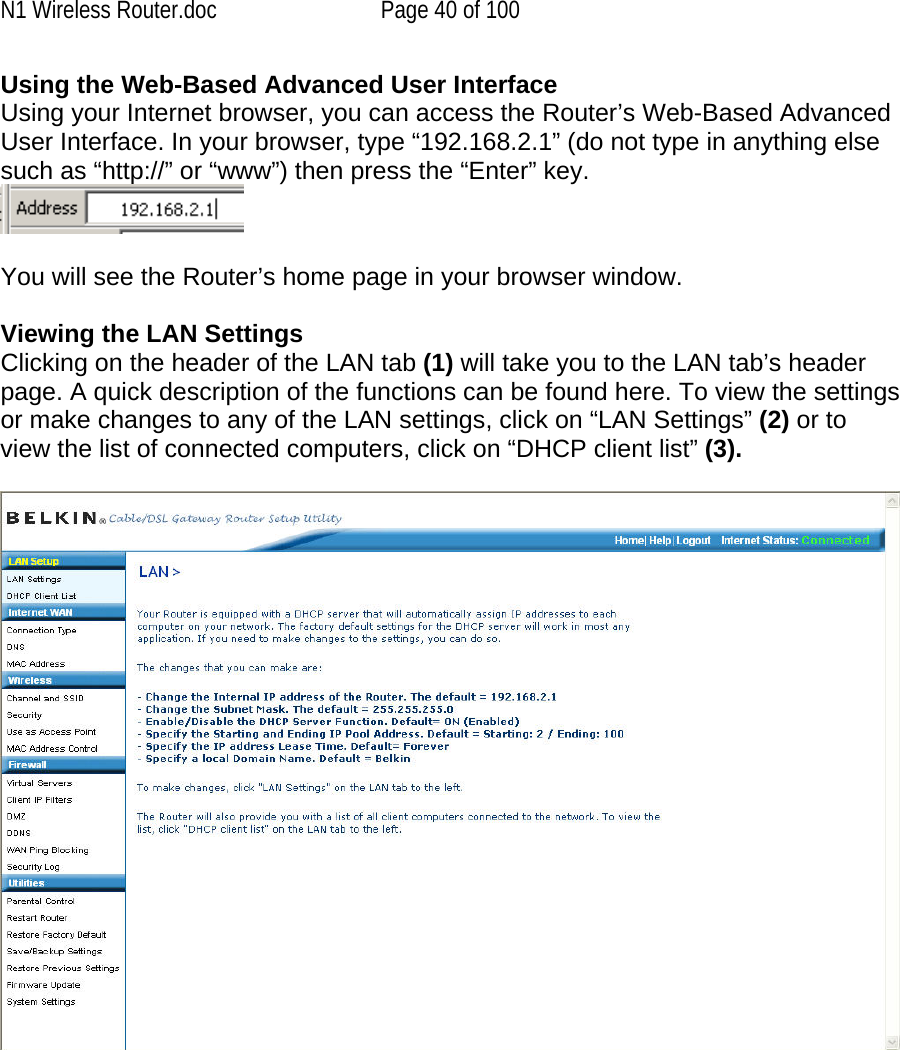
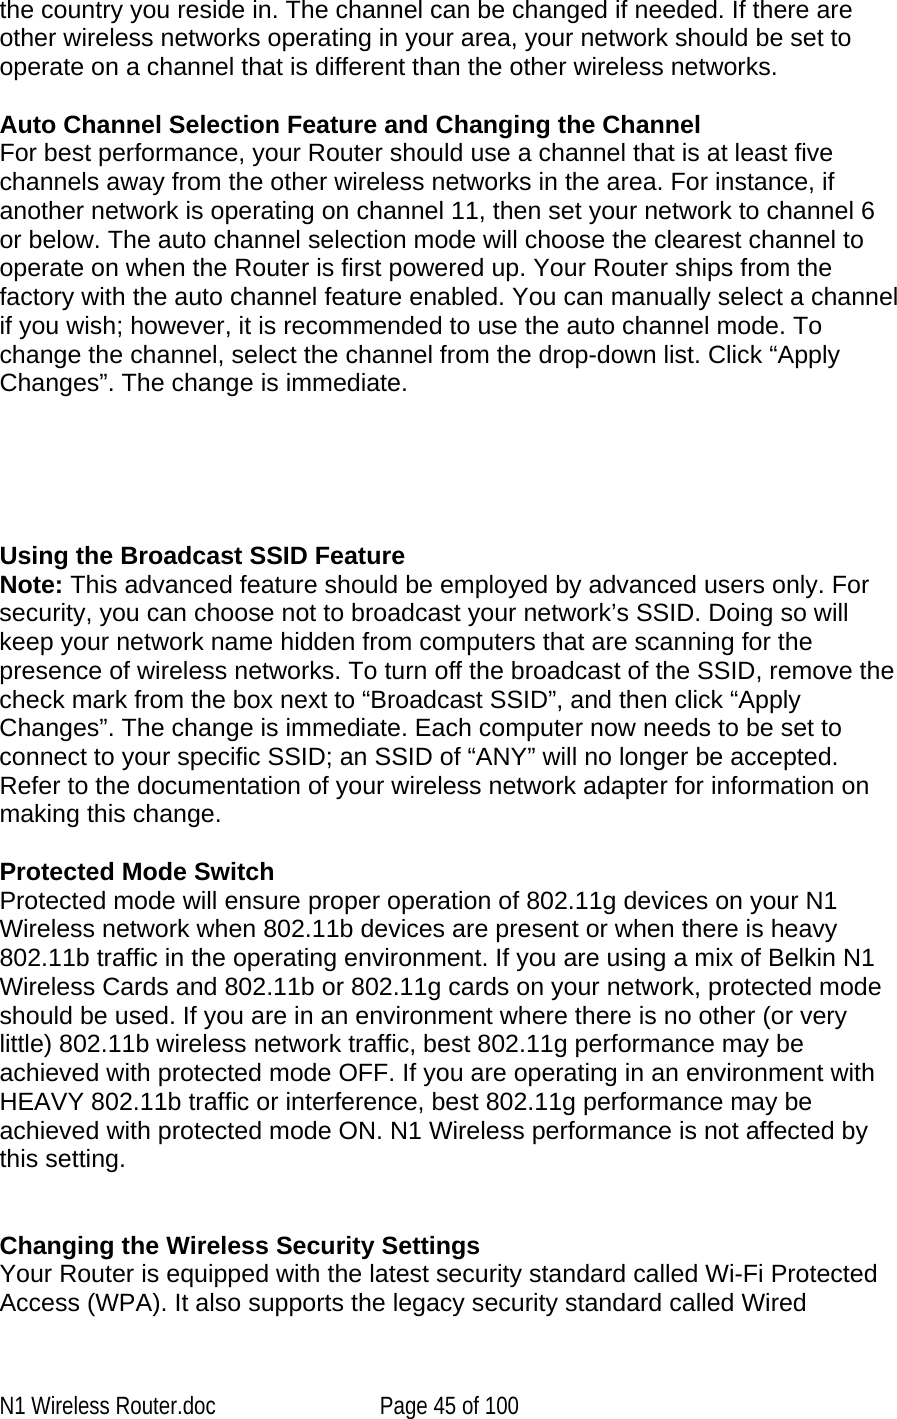
![Logging out of the Router One computer at a time can log into the Router for the purposes of making changes to the settings of the Router. Once a user has logged in to make changes, there are two ways that the computer can be logged out. Clicking the “Logout” button will log the computer out. The second method is automatic. The login will time out after a specified period of time. The default login time-out is 10 minutes. This can be changed from one to 99 minutes. For more information, see the section in this manual titled “Changing the Login Time-Out Setting”. Understanding the Web-Based Advanced User Interface The home page is the first page you will see when you access the Advanced User Interface (UI). The home page shows you a quick view of the Router’s status and settings. All advanced setup pages can be reached from this page. (2) (5) (3) (4) (9) (8) (10) (1) (6) (7) [replace with 8231-Status.jpg] 1. Quick-Navigation Links You can go directly to any of the Router’s advanced UI pages by clicking directly on these links. The links are divided into logical categories and grouped by tabs to make finding a particular setting easier to find. Clicking on the purple header of each tab will show you a short description of the tab’s function. N1 Wireless Router.doc Page 25 of 100](https://usermanual.wiki/Belkin/F5D8231-4.Manual-1/User-Guide-655755-Page-25.png)


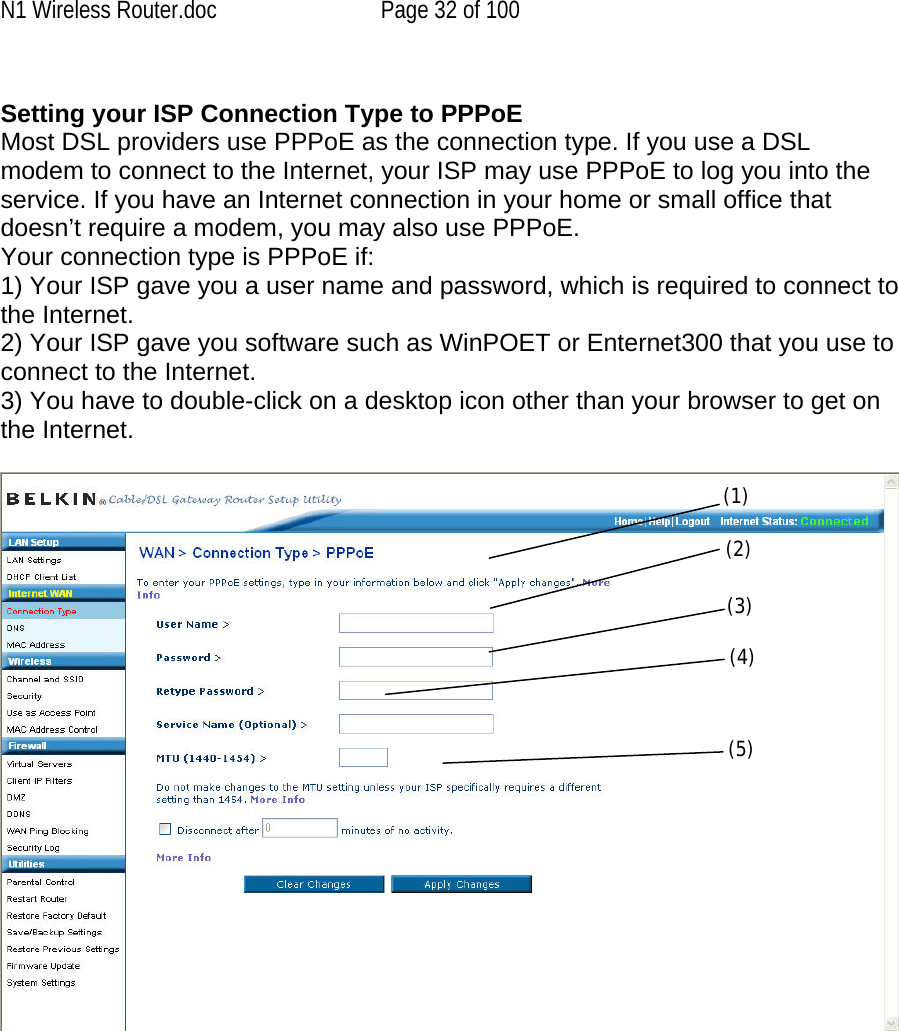
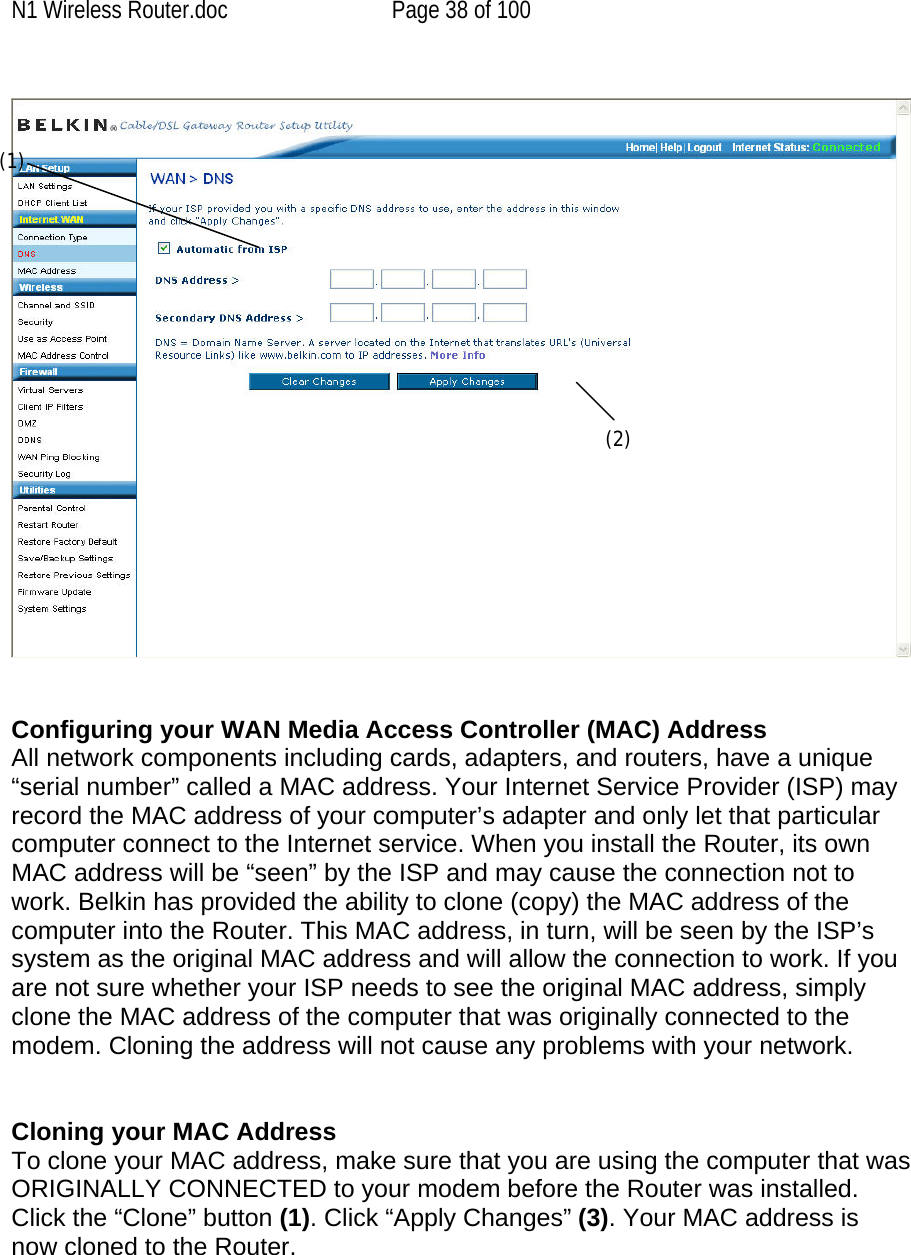
![N1 Wireless Router.doc Page 34 of 100 Setting your Internet Service Provider (ISP) Connection Type to Point-to-Point Tunneling Protocol (PPTP) [European Countries Only]. Some ISPs require a connection using PPTP protocol, a type of connection most common in European countries. This sets up a direct connection to the ISP’s system. Type in the information provided by your ISP in the space provided. When you have finished, click “Apply Changes” (9). After you apply the changes, the Internet Status indicator will read “connection OK” if your Router is set up properly. (1) (2) (3) (4) (5) (6) (7) (8) (9) 1. PPTP Account Provided by your ISP. Enter your PPTP account name here. 2. PPTP Password Type in your password and retype it into the “Retype Password” box to confirm it. 3. Host Name Provided by your ISP. Enter your host name here.](https://usermanual.wiki/Belkin/F5D8231-4.Manual-1/User-Guide-655755-Page-34.png)
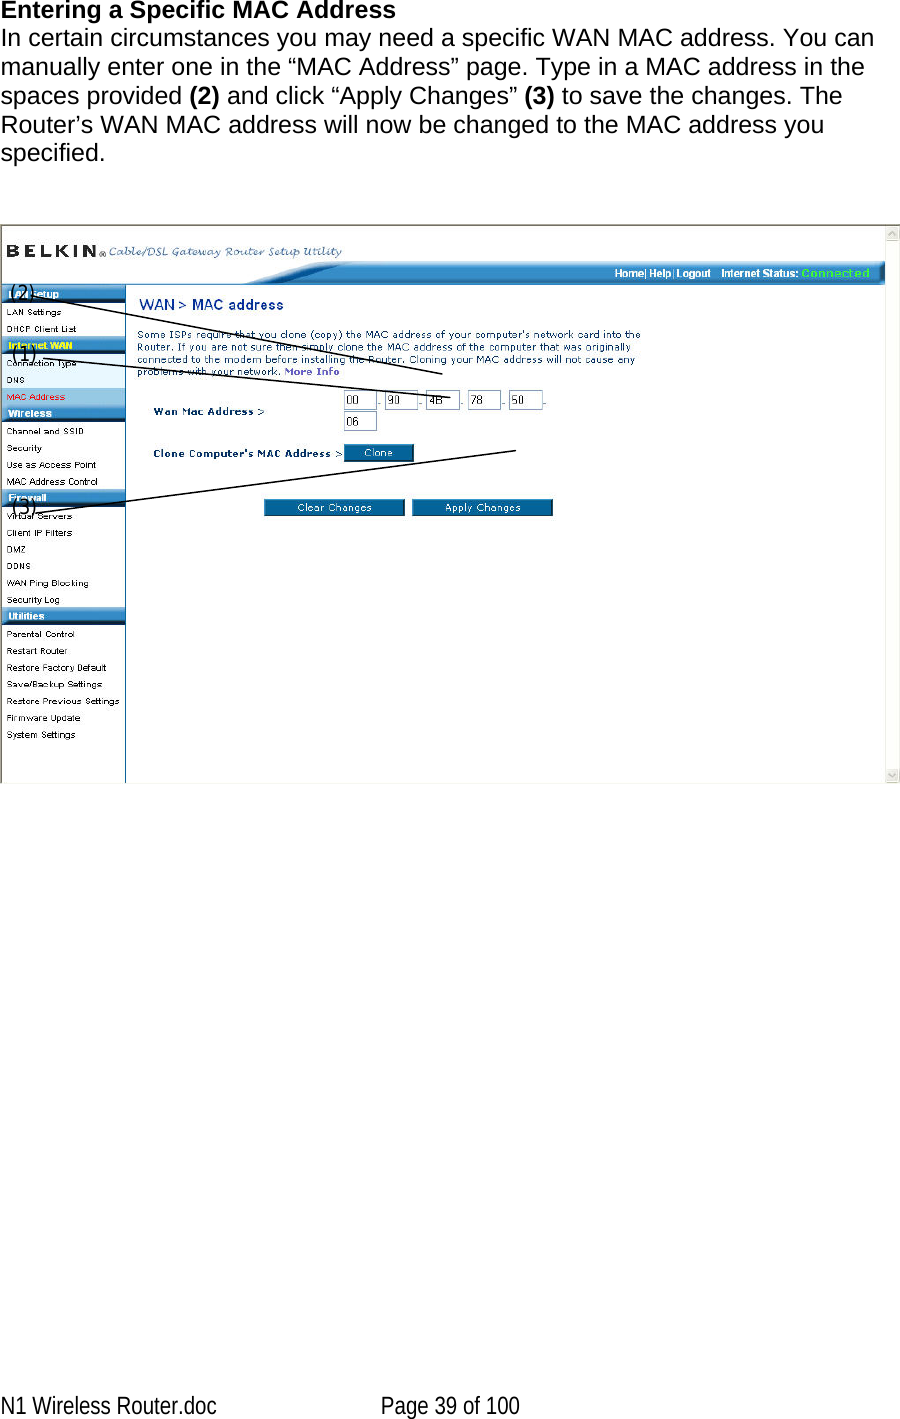
![N1 Wireless Router.doc Page 36 of 100 Setting your Connection Type if You Are a Telstra® BigPond User [Australia Only] Your user name and password are provided to you by Telstra BigPond. Enter this information below. Choosing your state from the drop-down menu (6) will automatically fill in your login server IP address. If your login server address is different than one provided here, you may manually enter the login server IP address by placing a check in the box next to “User decide login server manually” (4) and type in the address next to “Login Server” (5). When you have entered all of your information, click “Apply Changes” (7). After you apply the changes, the Internet Status indicator will read “connection OK” if your Router is set up properly. (1) (2) (3) (4) (5) (6) (7) 1. Select your State Select your state from the drop-down menu (6). The “Login Server” box will automatically be filled in with an IP address. If for some reason this address does not match the address that Telstra has given, you can manually enter the login server address. See “User decide login server manually” (4). 2. User Name Provided by your ISP. Type in your user name here.](https://usermanual.wiki/Belkin/F5D8231-4.Manual-1/User-Guide-655755-Page-36.png)
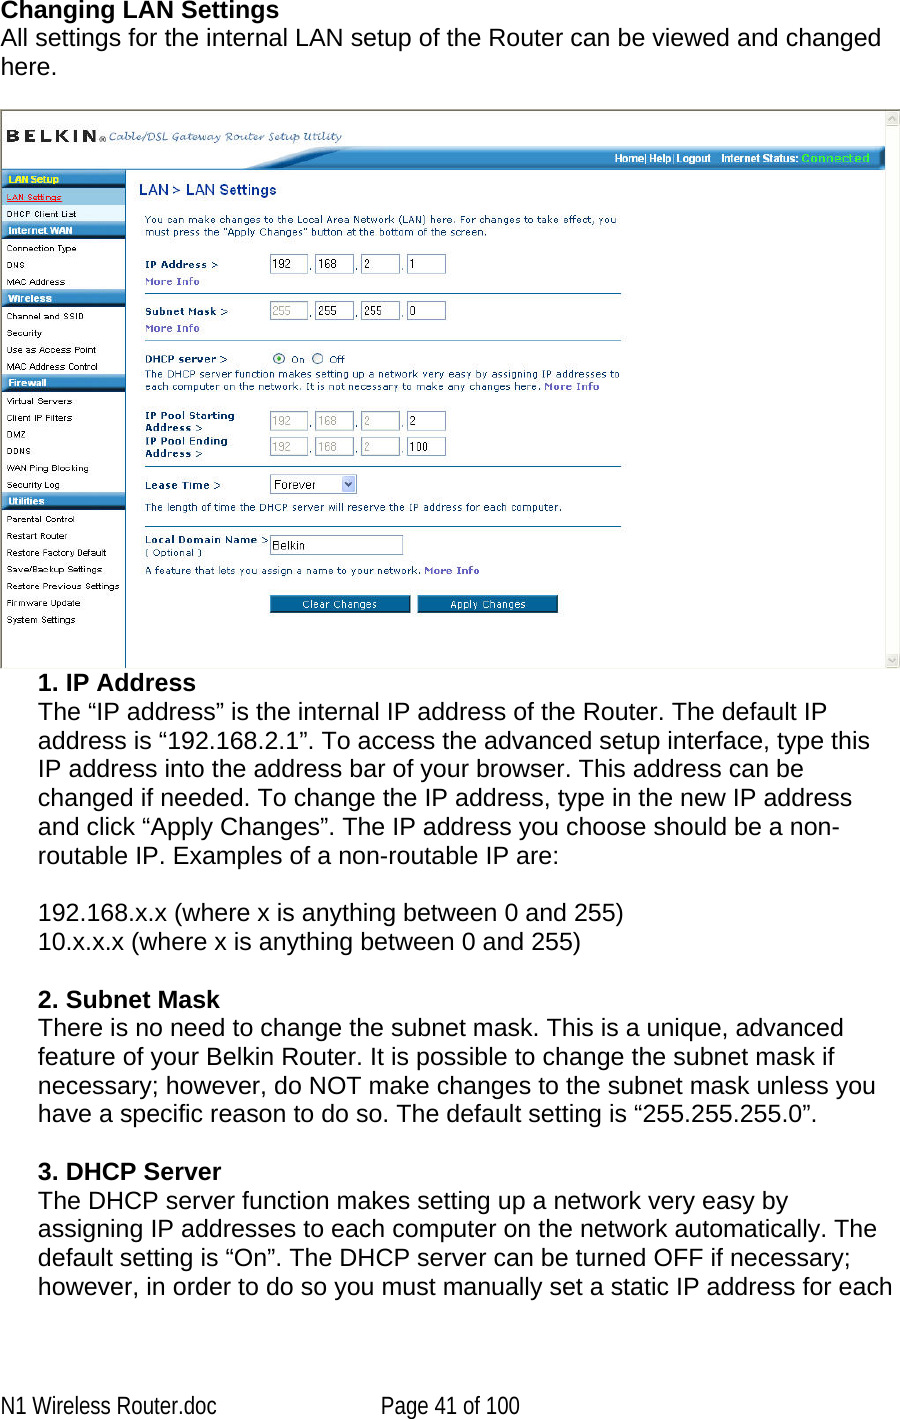

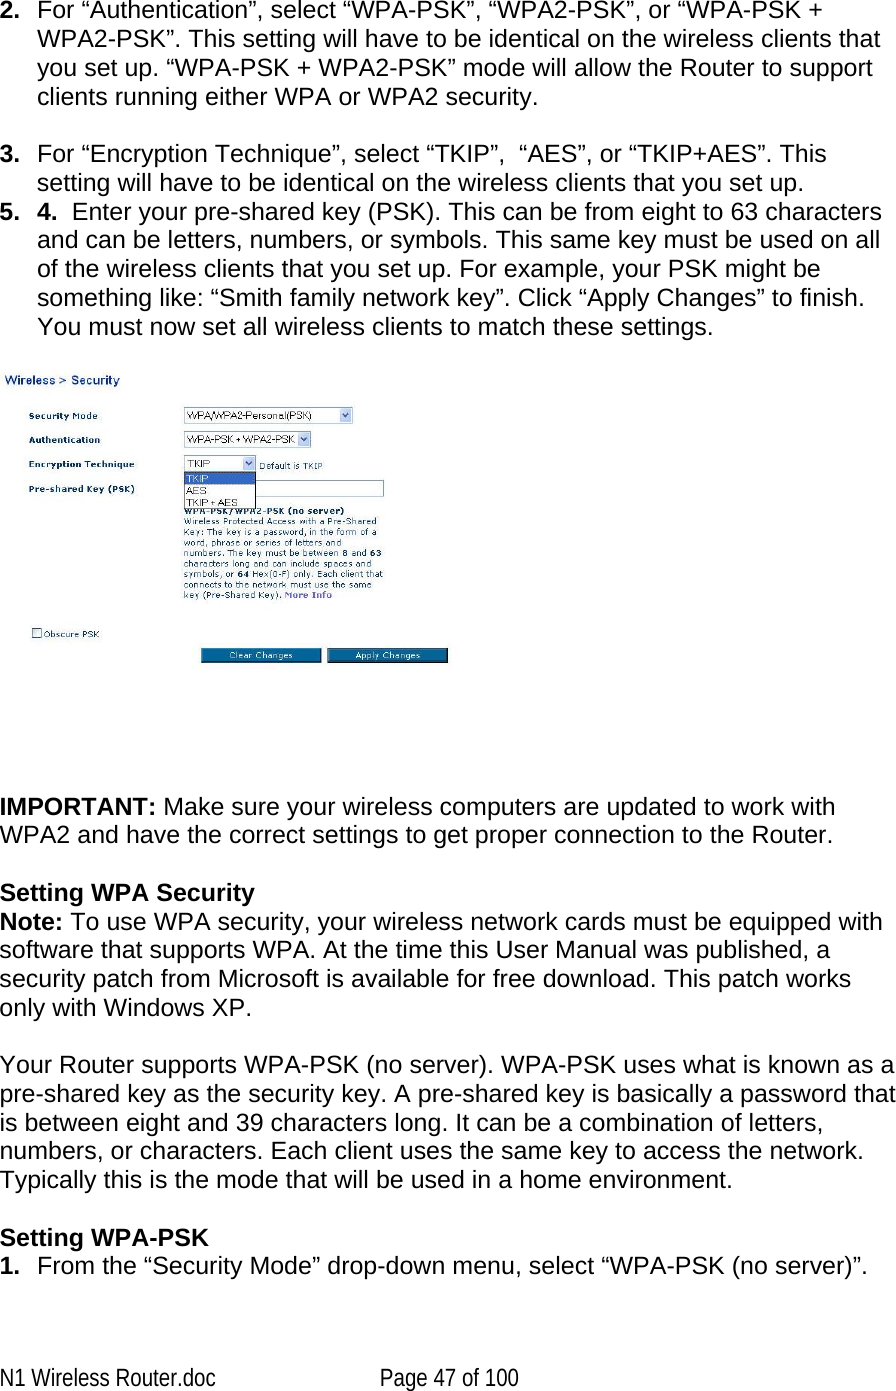
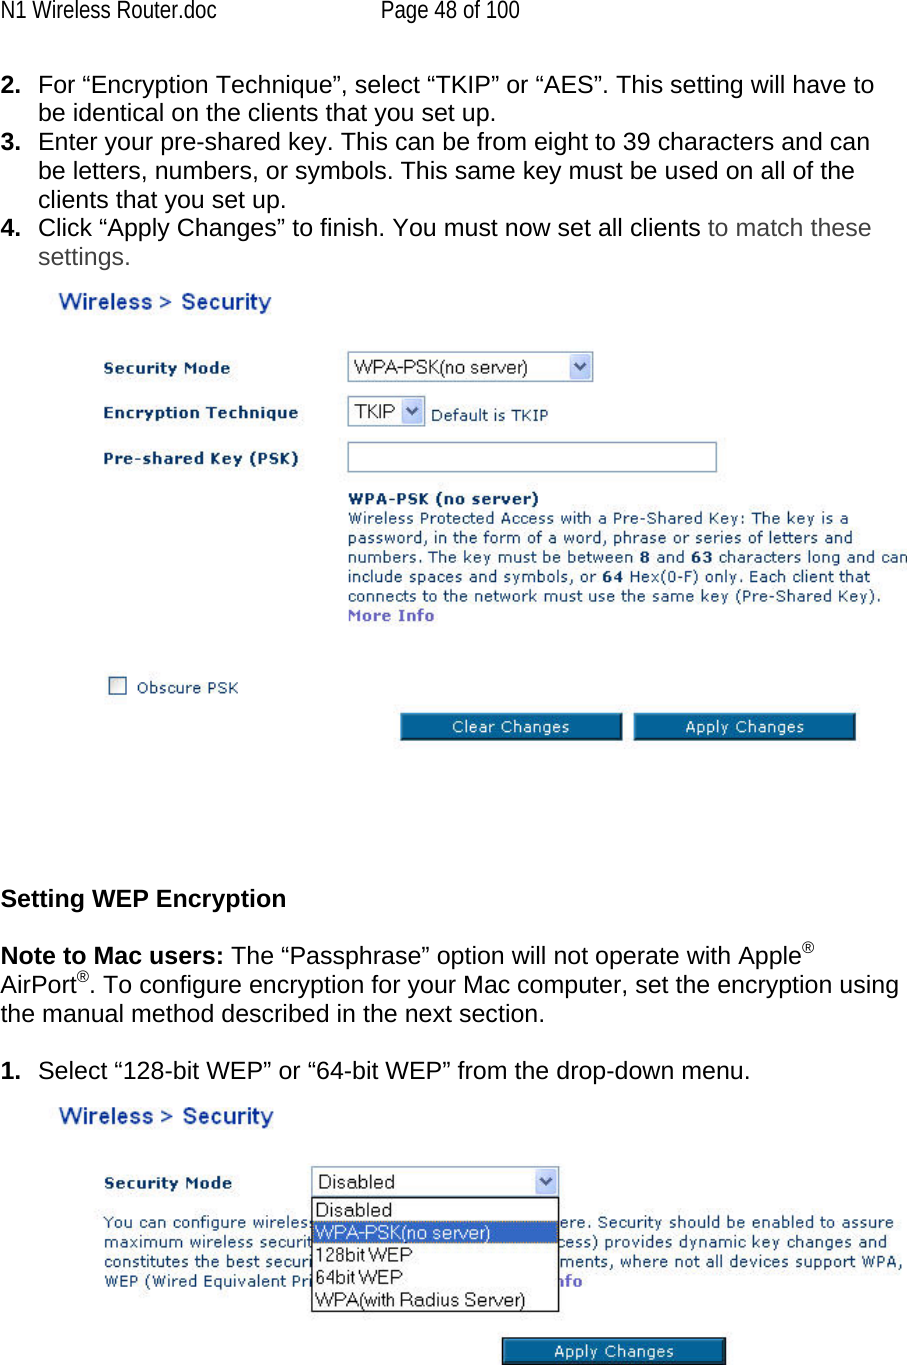
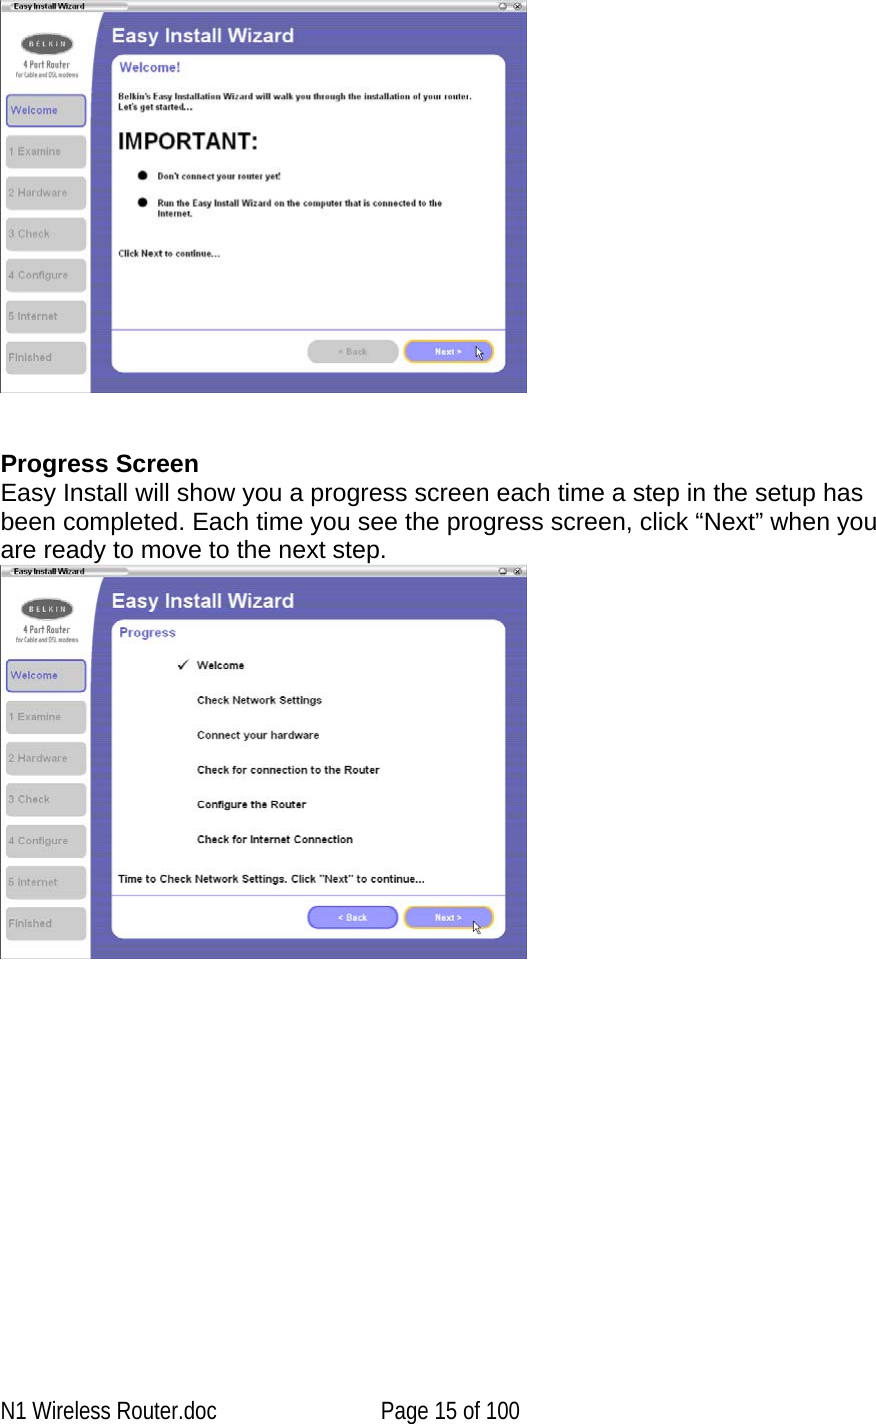
![[replace with 8231_Wireless_Security_Mode.jpg] 2. After selecting your WEP encryption mode, you can enter you WEP key manually by typing in the hex WEP key manually, or you can type a passphrase in the “PassPhrase” field and click “Generate” to create a WEP key from the passphrase. Click “Apply Changes” to finish. You must now set all of your clients to match these settings. 3. Encryption in the Router is now set. Each of your computers on your wireless network will now need to be configured with the same passphrase. Refer to the documentation of your wireless network adapter for information on making this change. Using a Hexadecimal Key A hexadecimal key is a mixture of numbers and letters from A–F and 0–9. 64-bit keys are 10 digits long and can be divided into five two-digit numbers. 128-bit keys are 26 digits long and can be divided into 13 two-digit numbers. For instance: AF 0F 4B C3 D4 = 64-bit key C3 03 0F AF 0F 4B B2 C3 D4 4B C3 D4 E7 = 128-bit key In the boxes below, make up your key by writing in two characters between A–F and 0–9. You will use this key to program the encryption settings on your Router and your wireless computers. N1 Wireless Router.doc Page 49 of 100](https://usermanual.wiki/Belkin/F5D8231-4.Manual-1/User-Guide-655755-Page-49.png)