Belkin F5D9000B Wireless G Plus MIMO Desktop Card User Manual Belkin
Belkin International, Inc. Wireless G Plus MIMO Desktop Card Belkin
UserManual.wiki
>
Belkin
>
F5D9000B User Manual
Manual
Navigation menu
Upload a User Manual
Namespaces
Wiki Guide
HTML
PDF
Info
Views
User Manual
Discussion / Help
Navigation
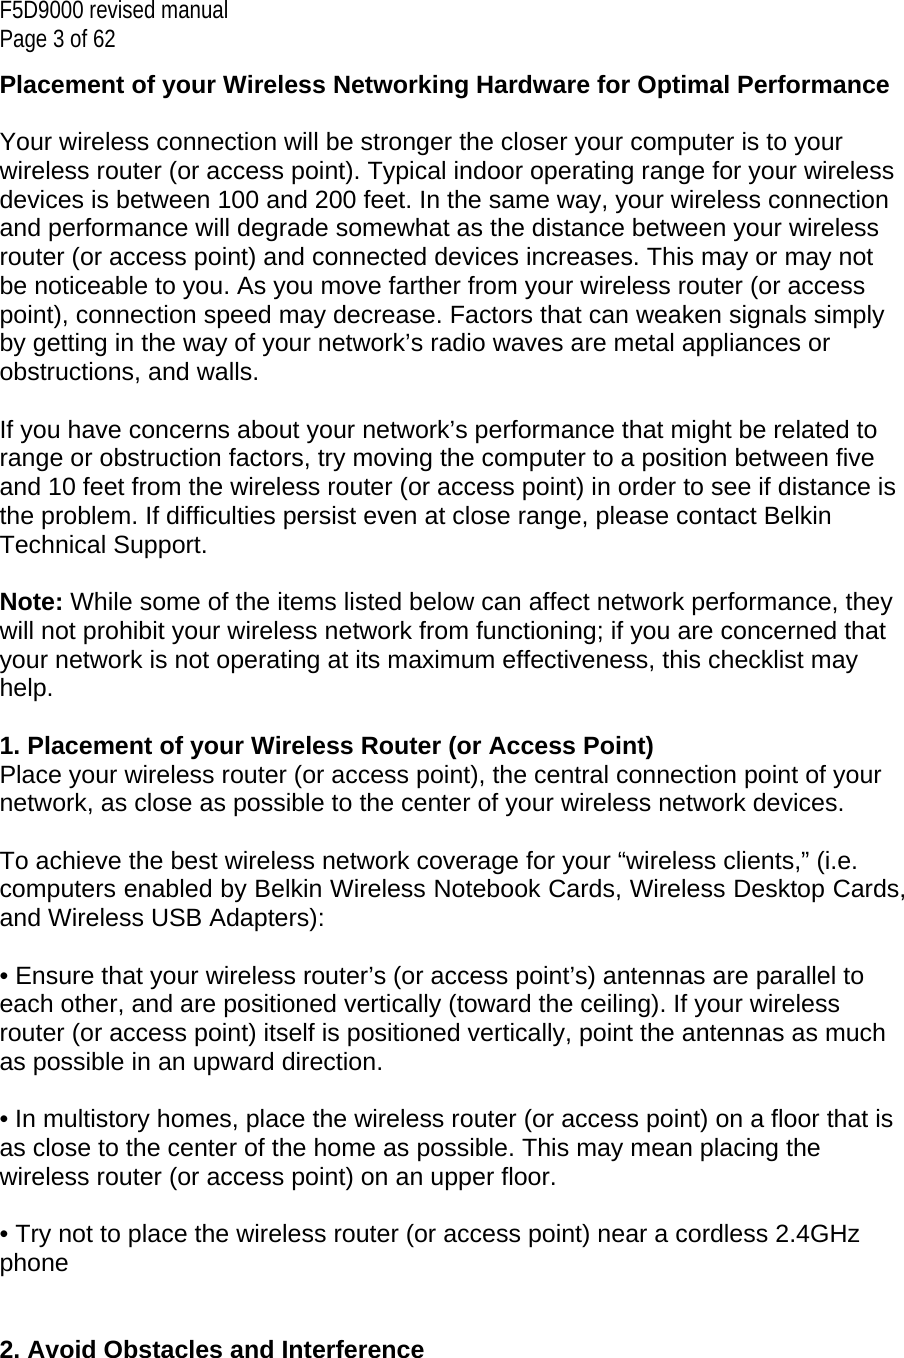
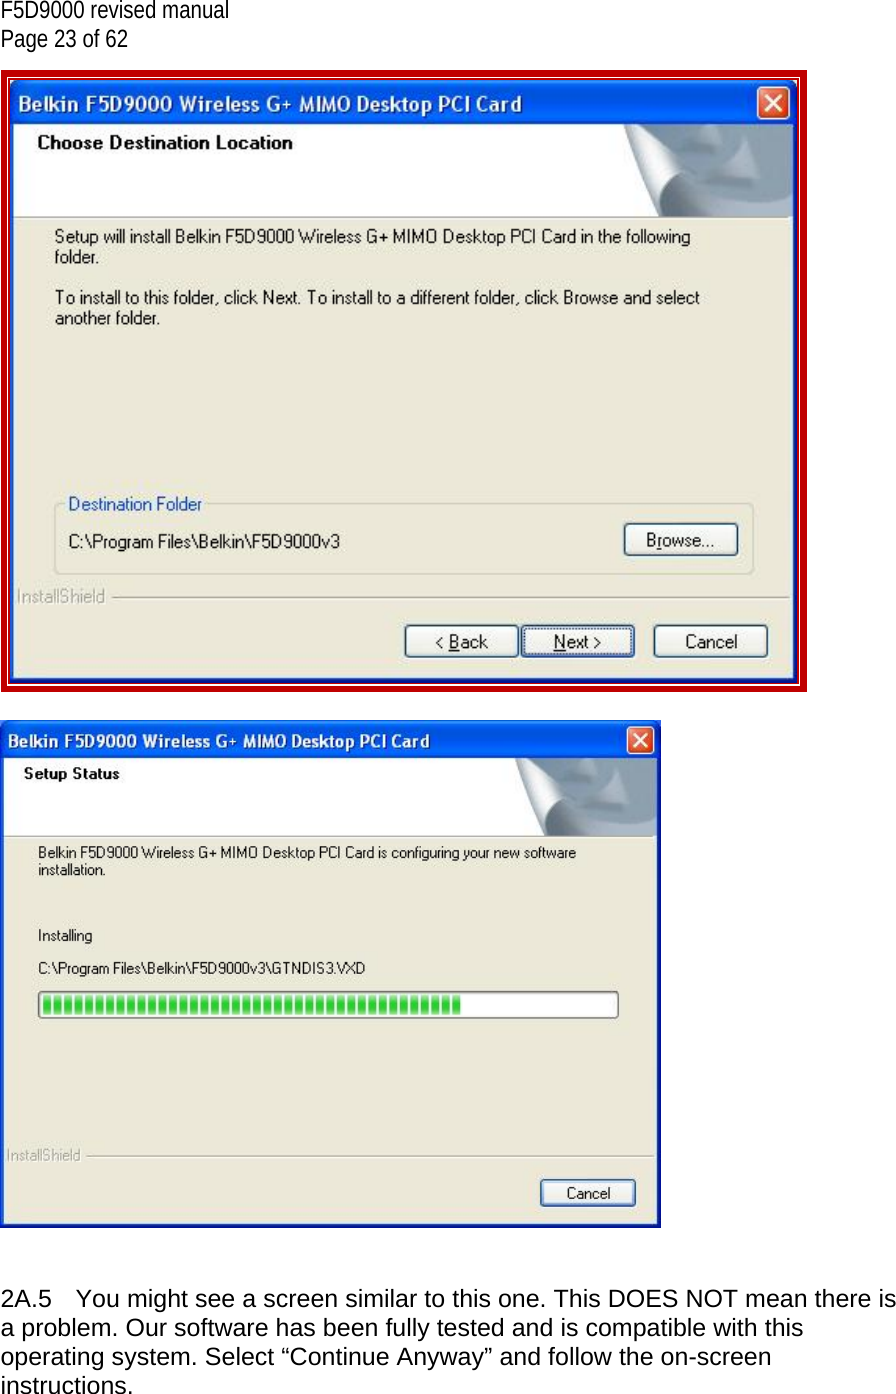
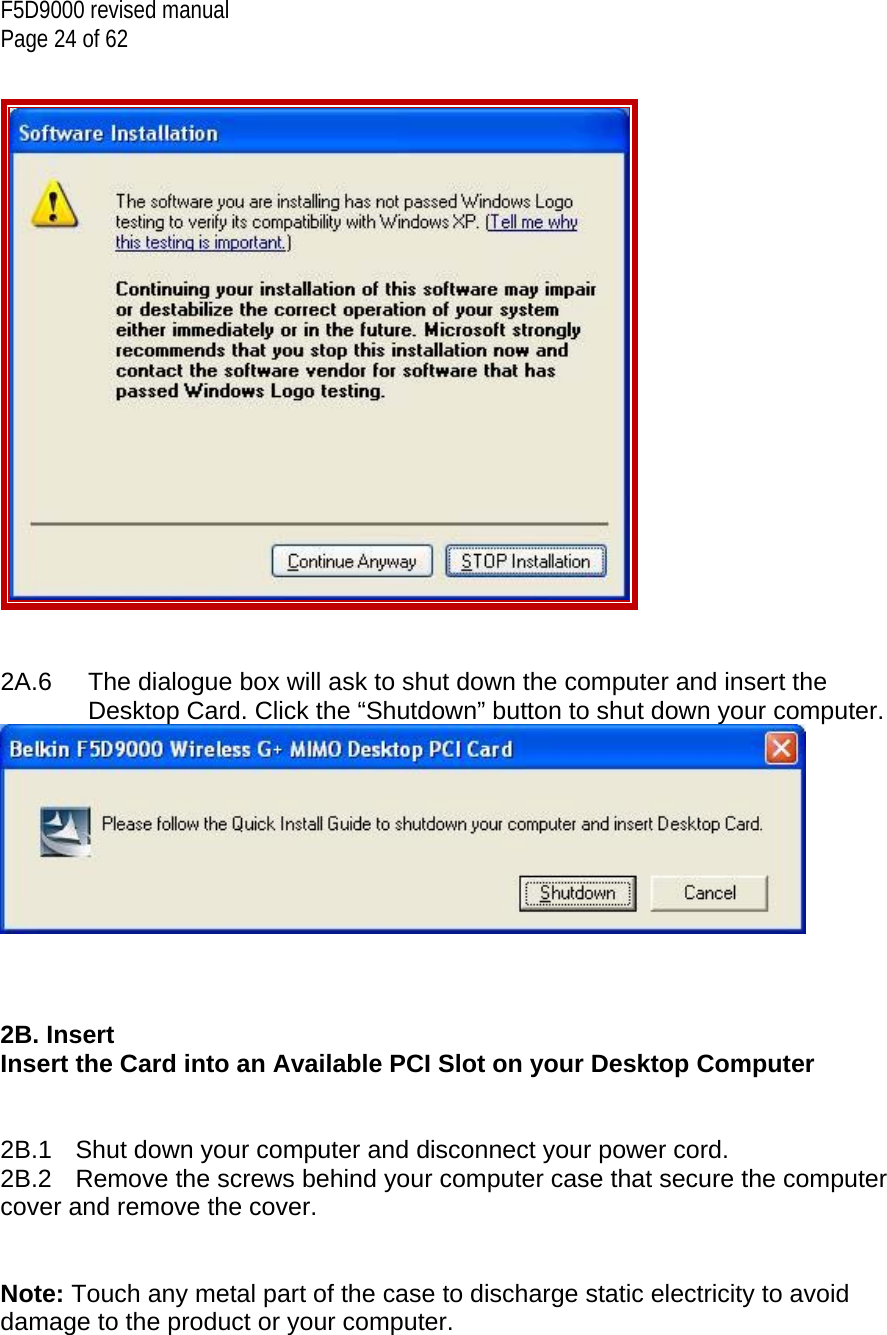
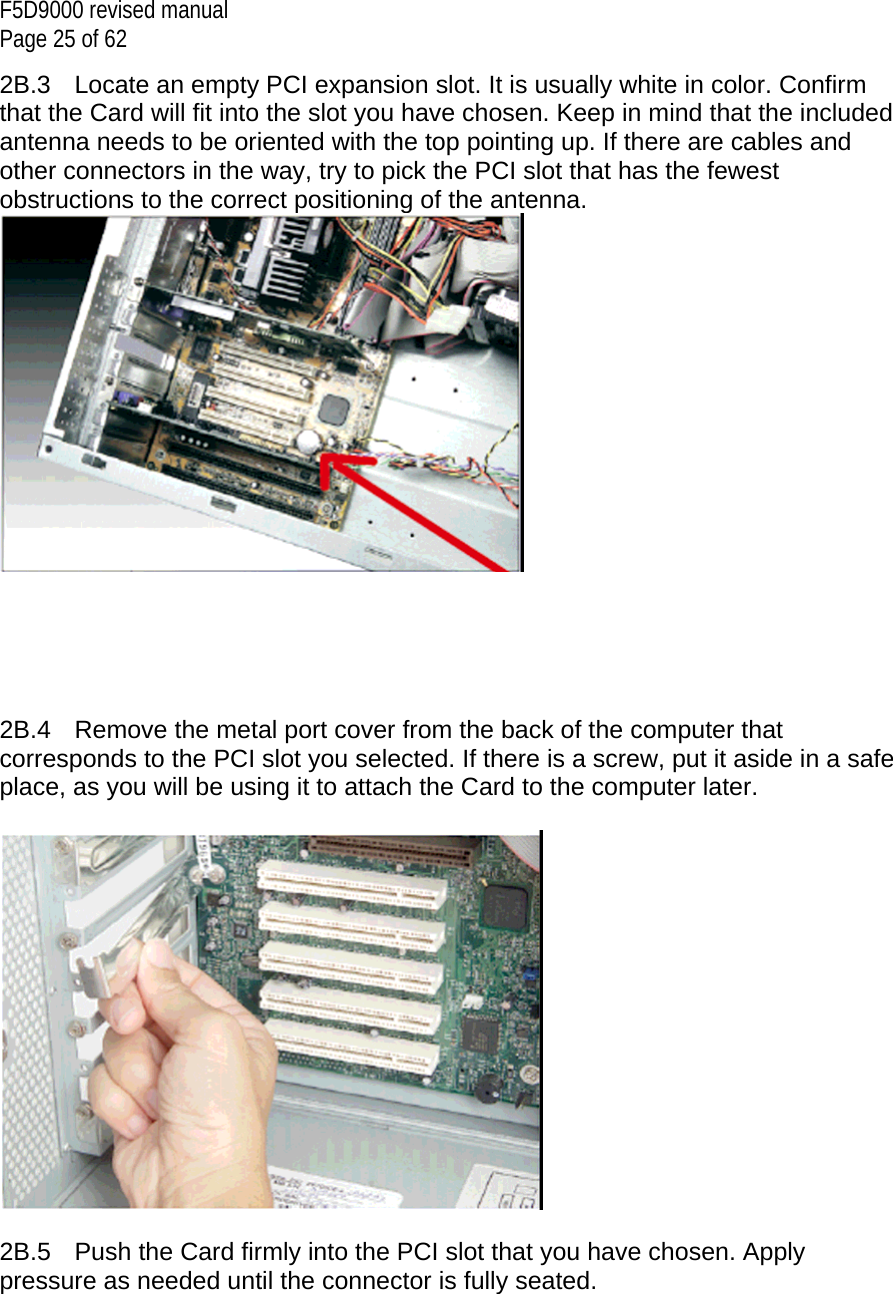
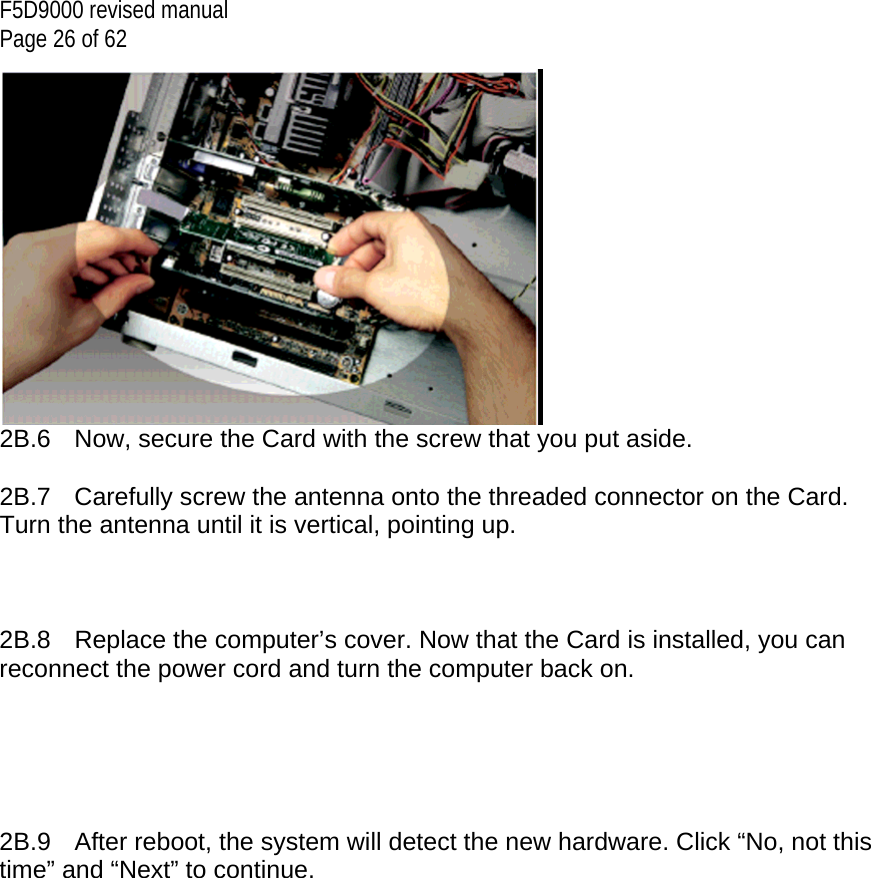
![F5D9000 revised manual Page 7 of 62 Continuous Rx: 360±10mA @ 802.11b/g Standby: 200±10mA @ 3.3VDC (max.) Operating Temperature: 0 ~ 65°C Storage Temperature: -20~85°C Humidity: Operating Humidity: 10% to 85% Non-Condensing Storage Humidity: 5% to 90% Non-Condensing Typical Operating Range: Up to 1,000 ft. (304.8m)* *Wireless performance may vary depending on the networking environment. [insert F5D9000-23.jpg] (Designer we need a new image) (a) Link/Activity LED Lights up when the Card links to a wireless network and flashes when the Card is active (b) Card Connector Fits securely into your computer’s PCI slot (d) Two Antennas System Requirements - PC-compatible desktop computer with one available PCI slot and CD-ROM drive - Windows® 2000, XP, or Vista™ - Mac OS® X v10.3.x or v10.4.x Package Contents - Wireless G Plus MIMO Desktop Card - Two Dipole 2 dBi Antennas - Quick Installation Guide](https://usermanual.wiki/Belkin/F5D9000B/User-Guide-827275-Page-7.png)
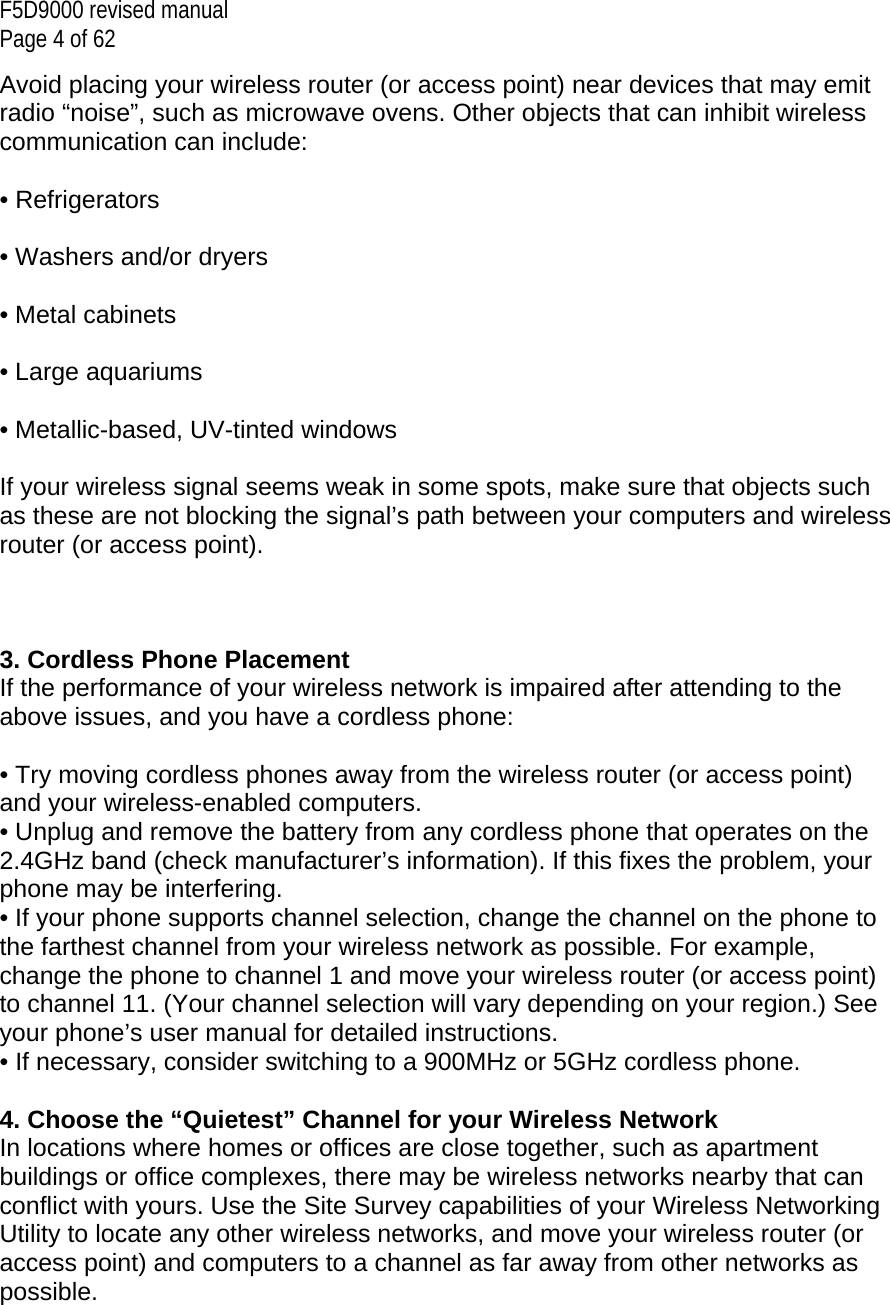
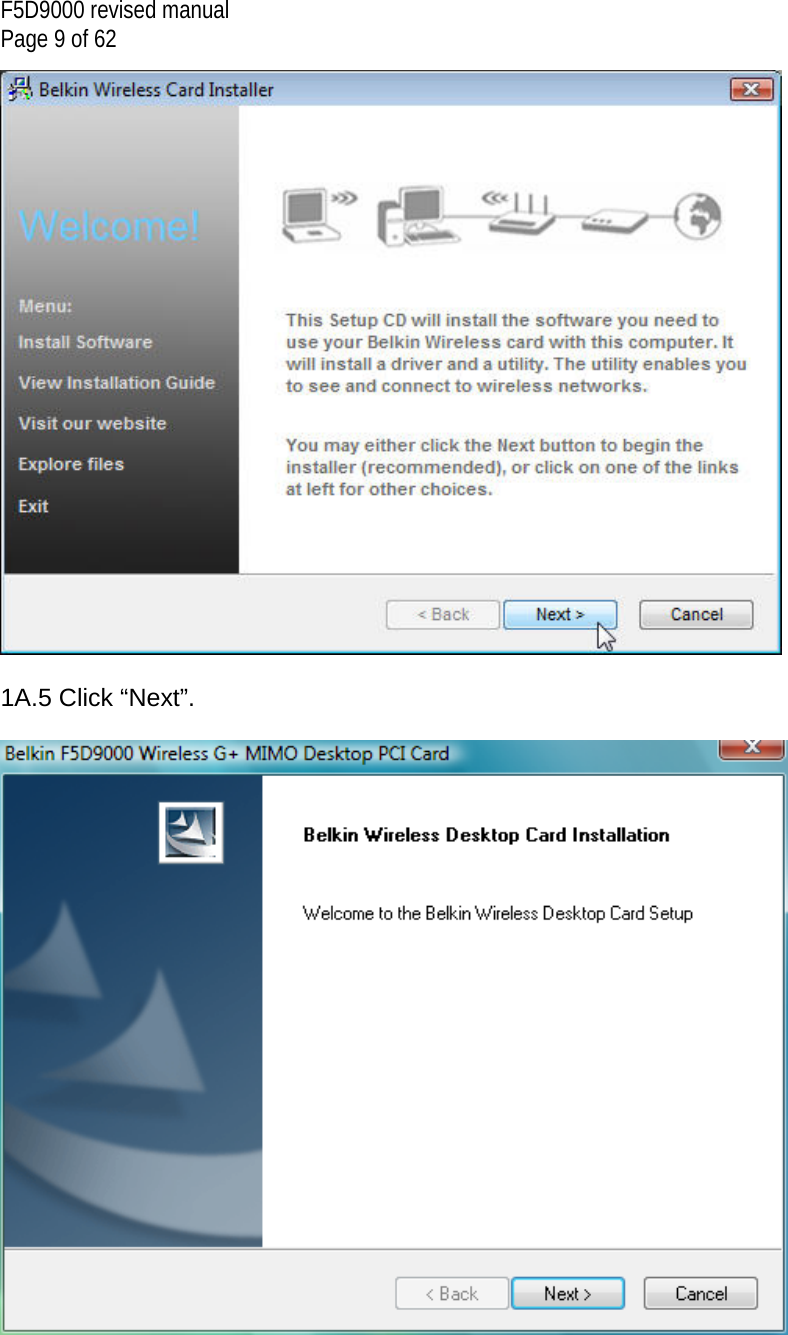
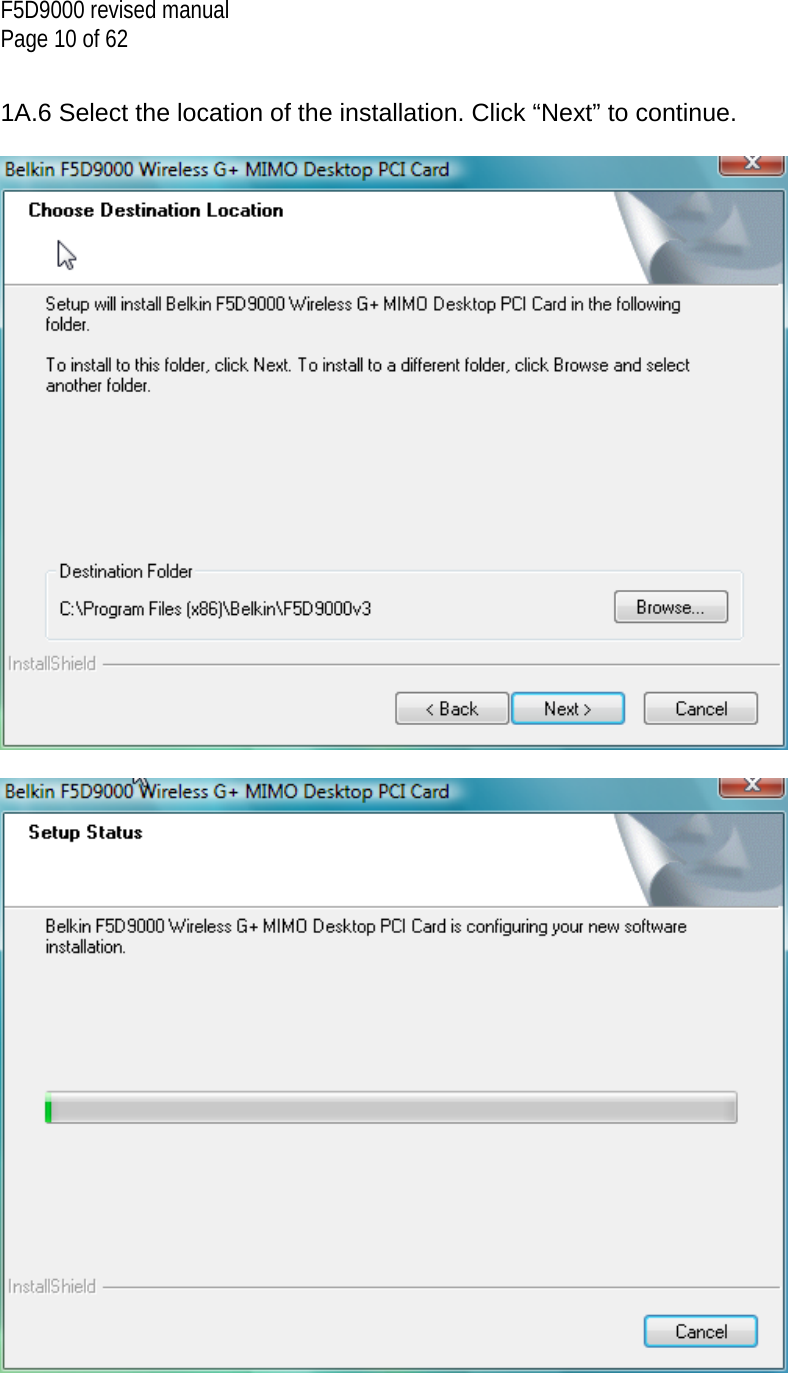
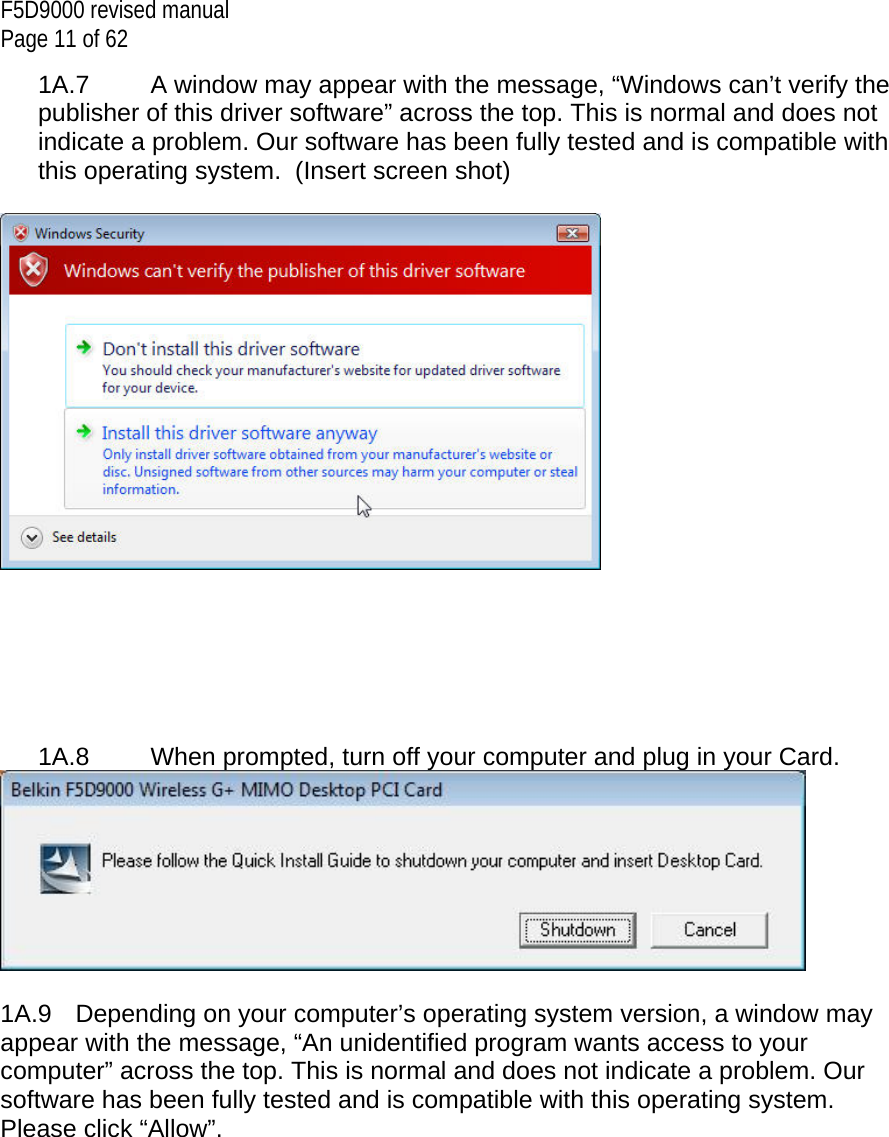
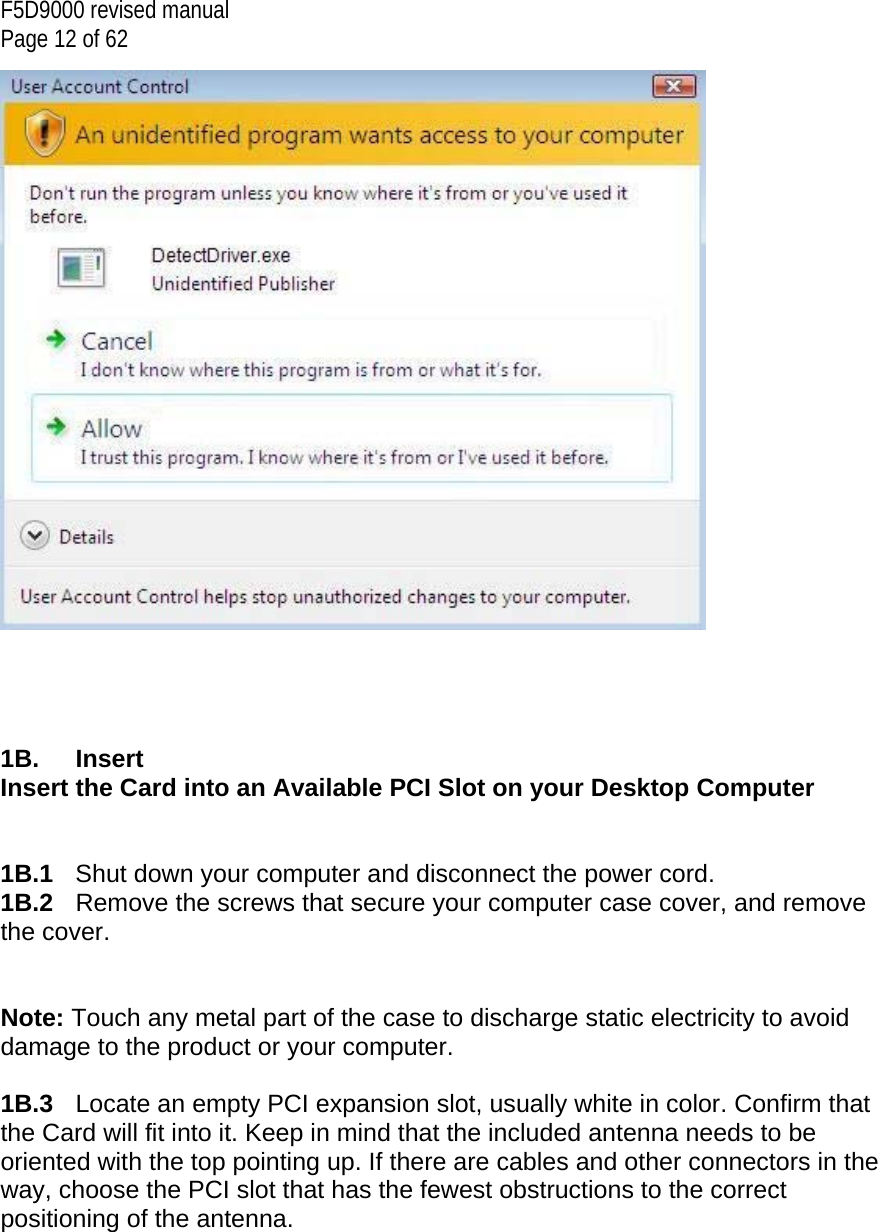
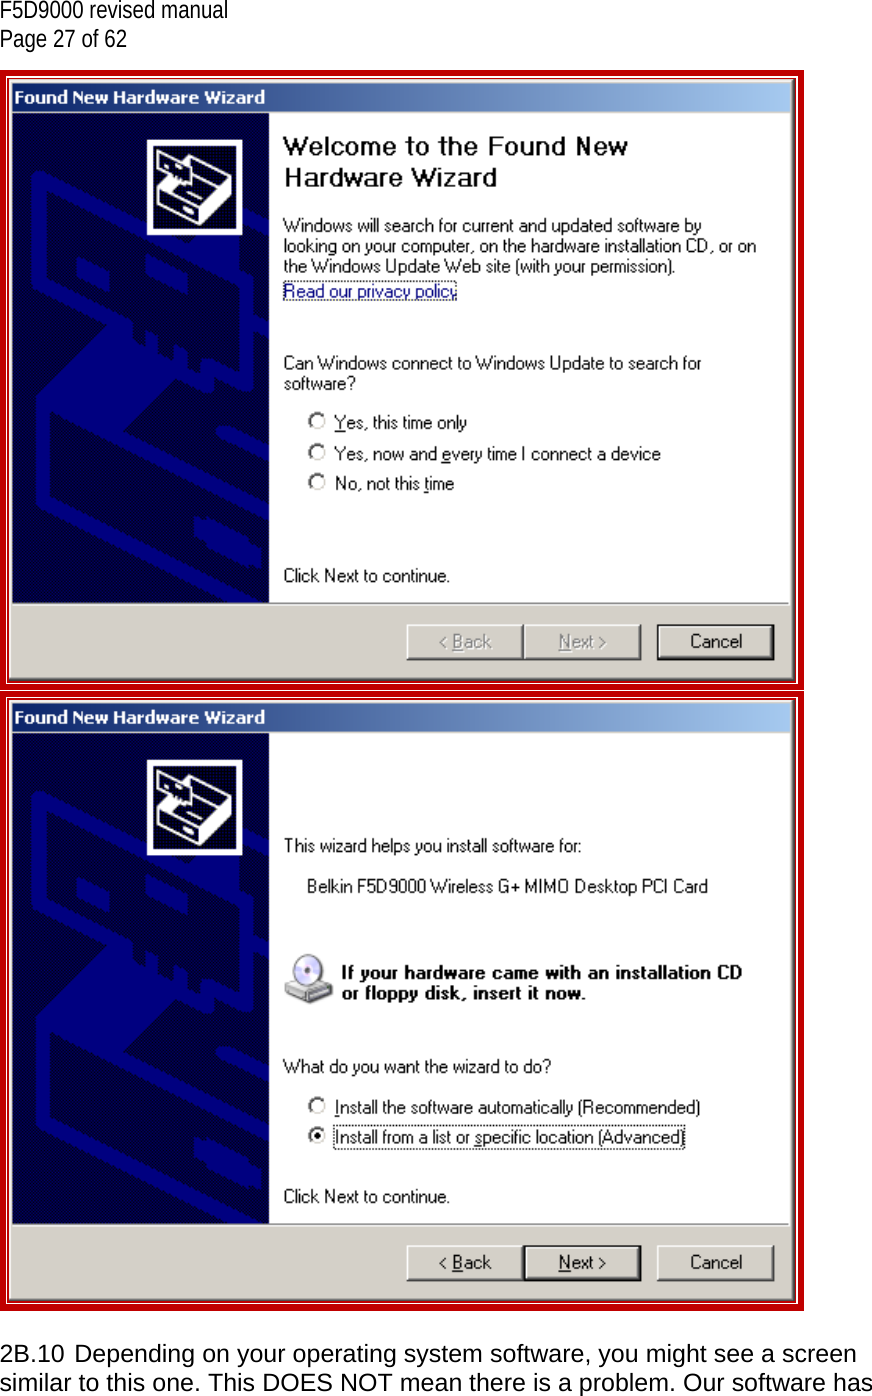
![F5D9000 revised manual Page 8 of 62 - Installation Software CD containing User Manual - Installing and Setting up the Card For users of Windows Vista, refer to the following installation steps: 1A Install IMPORTANT: INSTALL THE SOFTWARE BEFORE INSERTING THE CARD. 1A.1 Insert the Installation Software CD into your CD-ROM drive. 1A.2 Select the “Run Installer.exe” option. [***Insert screen shot***] 1A.3 You may see a window titled, “A program needs your permission to continue”. Click “Continue”. 1A.4 Click “Next” to begin the installation process. [Insert screen shot]](https://usermanual.wiki/Belkin/F5D9000B/User-Guide-827275-Page-8.png)

![F5D9000 revised manual Page 21 of 62 Note: If the Belkin Wireless Networking Utility screen does not appear within 20 seconds, access your CD-ROM by double-clicking on the “My Computer” icon; then, double-click on the CD-ROM drive into which the installation CD has been placed. Double-click on the folder named “Files”, then double-click on the icon named “setup.exe”. 2A.3 The InstallShield Wizard will now start. Click “Next” to continue. [insert 9010-1.tif]](https://usermanual.wiki/Belkin/F5D9000B/User-Guide-827275-Page-21.png)

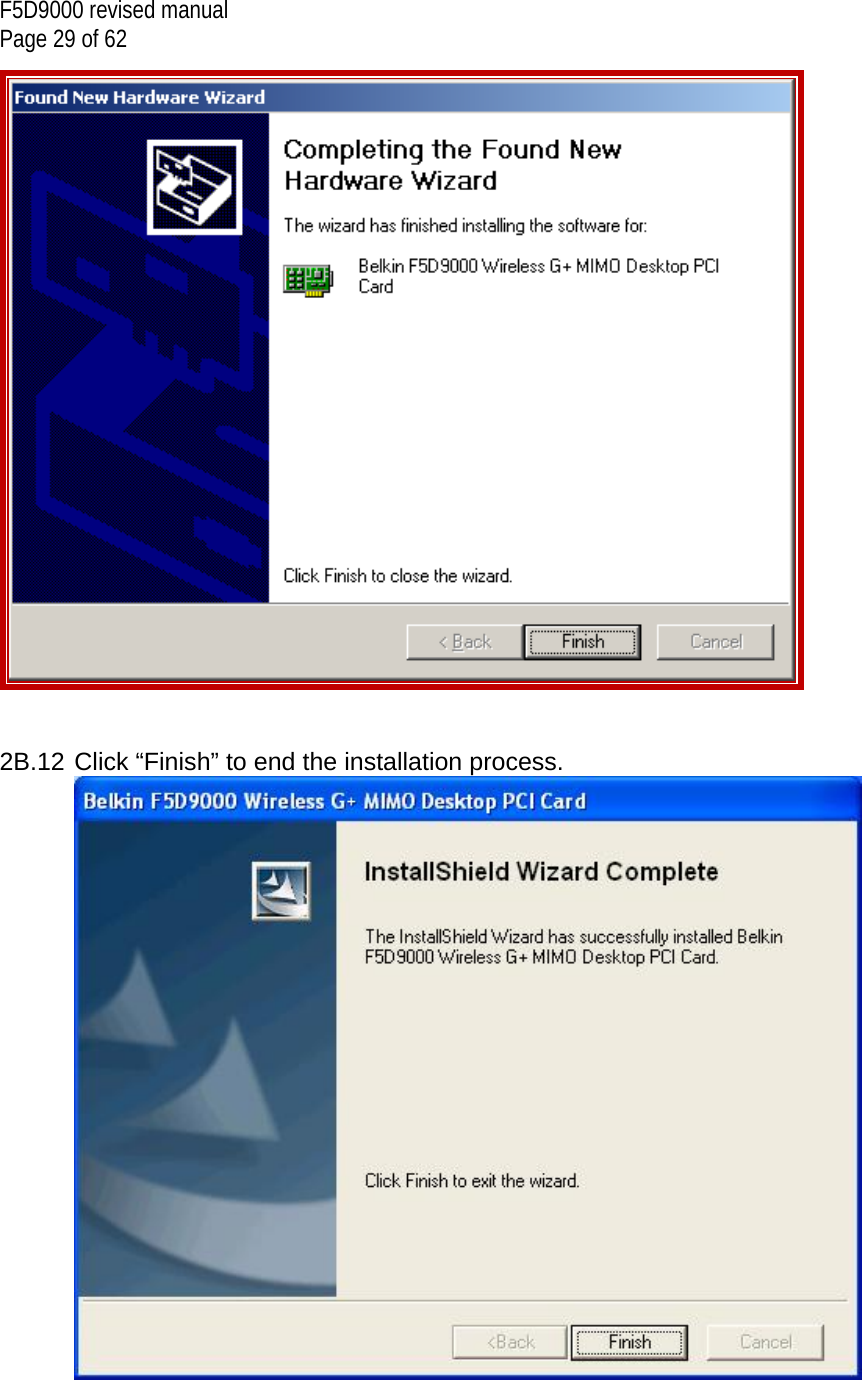
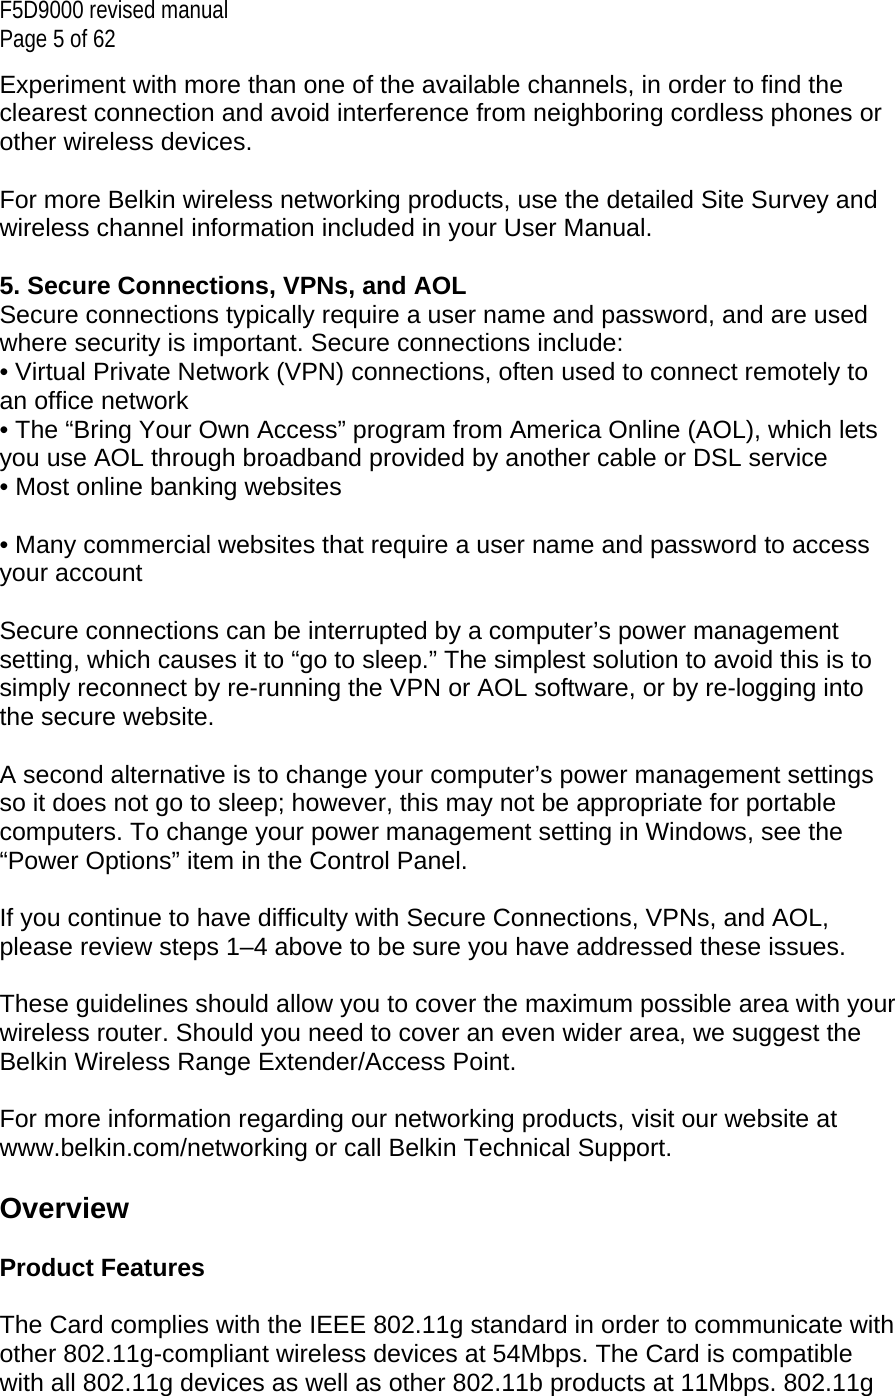
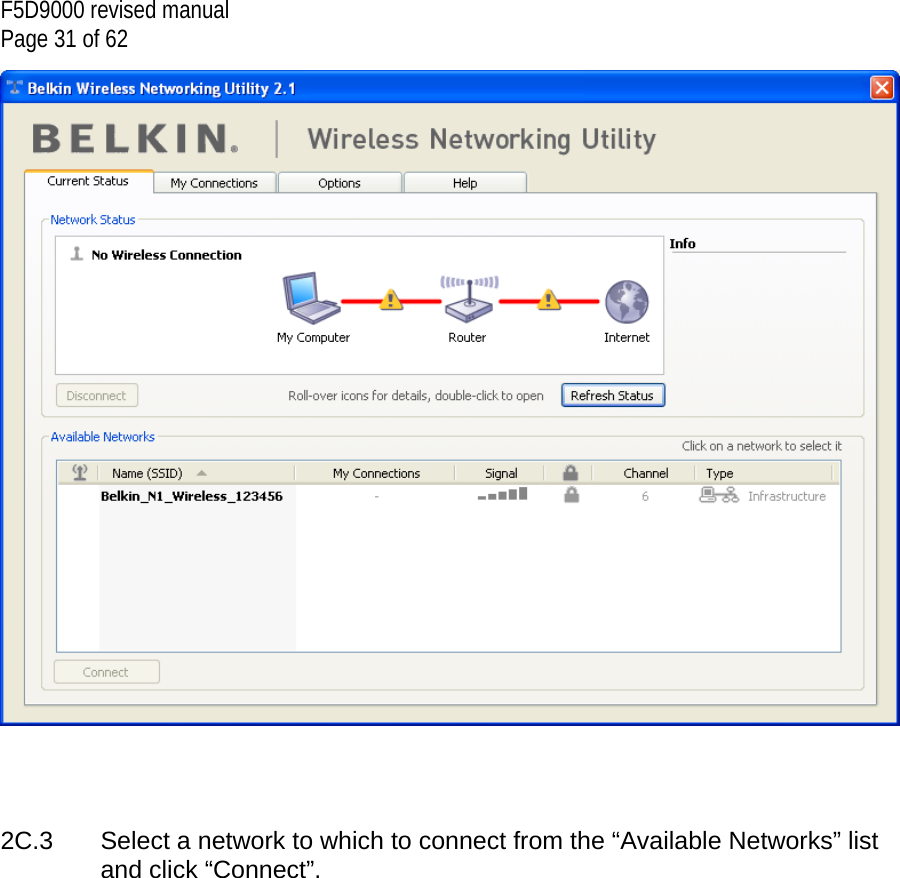
![F5D9000 revised manual Page 30 of 62 2C. Configure Connect to a Network Using the Belkin Wireless Networking Utility 2C.1 After restarting your computer, double-click the Belkin Wireless Networking Utility icon on the desktop screen. [KEEP THE ICON] Note: The Belkin Wireless Networking Utility icon can also be found on the system tray. [KEEP] 2C.2 The Belkin Wireless Networking Utility screen will appear. [insert 8013_WNU_Current_Status.tif]](https://usermanual.wiki/Belkin/F5D9000B/User-Guide-827275-Page-30.png)
![F5D9000 revised manual Page 32 of 62 Note: In order to see your available networks, you must be near a working wireless router or access point. Installation is now complete. Using the Belkin Wireless Networking Utility After successfully installing the Belkin Wireless Networking Utility (WNU), configurations for wireless connection and security are just a few easy clicks away. Accessing the Belkin Wireless Networking Utility from the Windows System Tray To access the WNU, simply place your mouse pointer and right-click over the WNU icon on the Windows task tray. [KEEP] [KEEP]](https://usermanual.wiki/Belkin/F5D9000B/User-Guide-827275-Page-32.png)
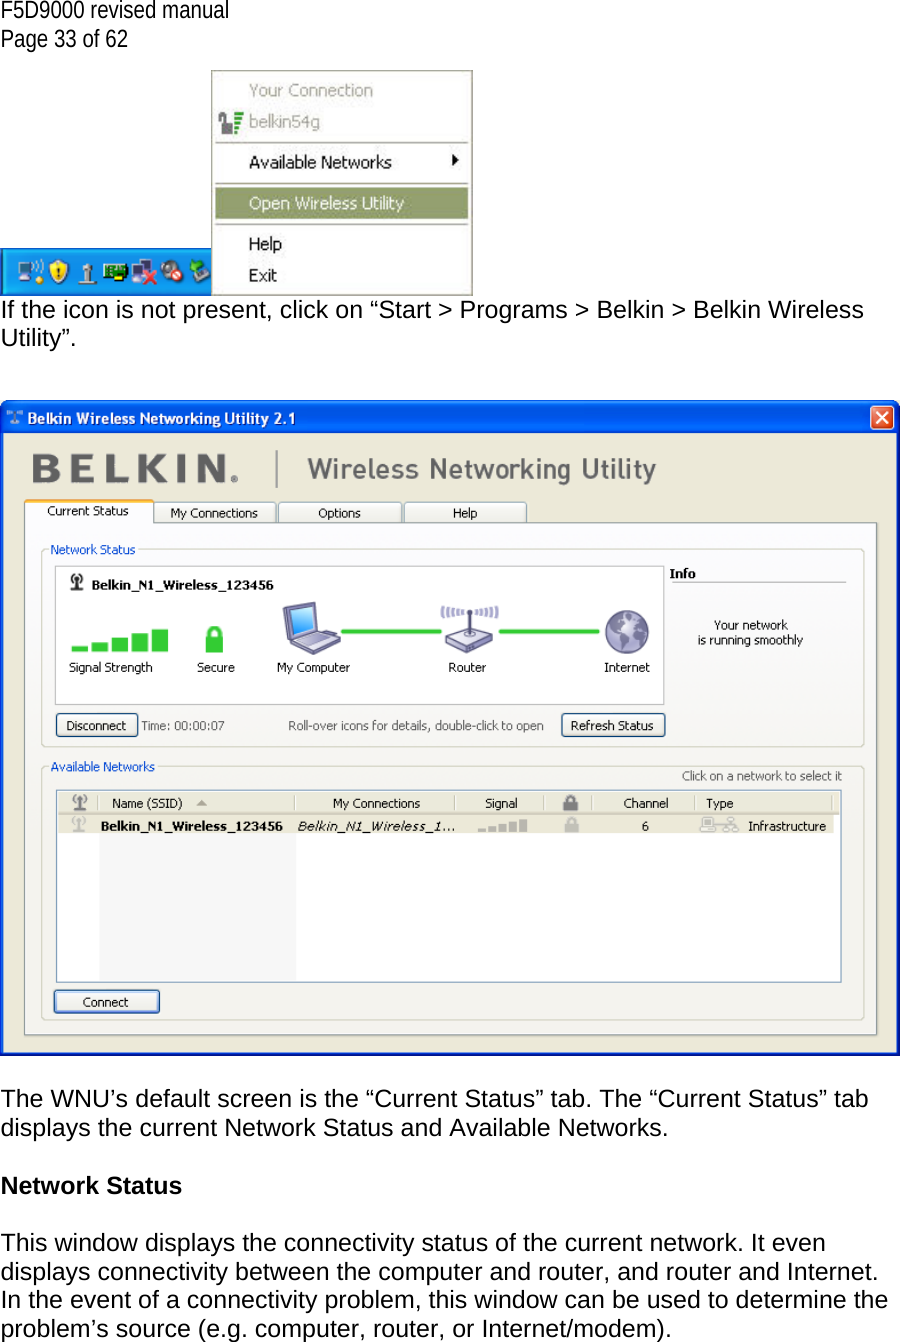
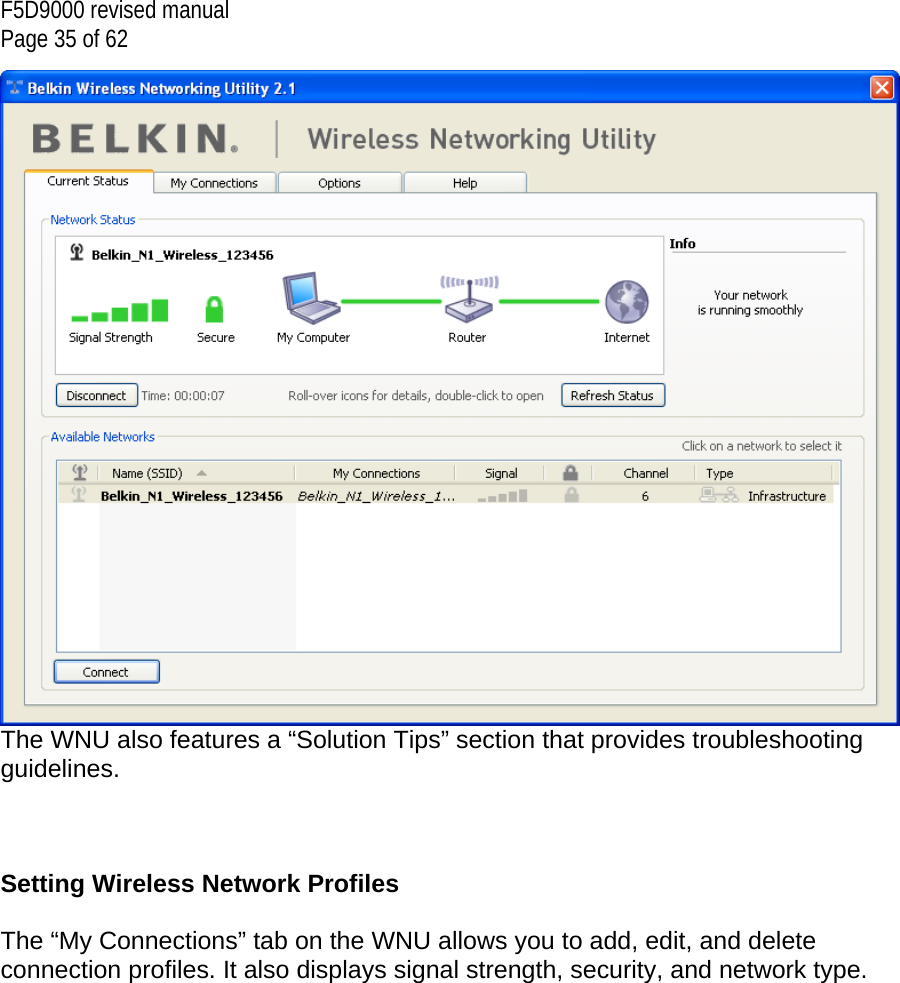
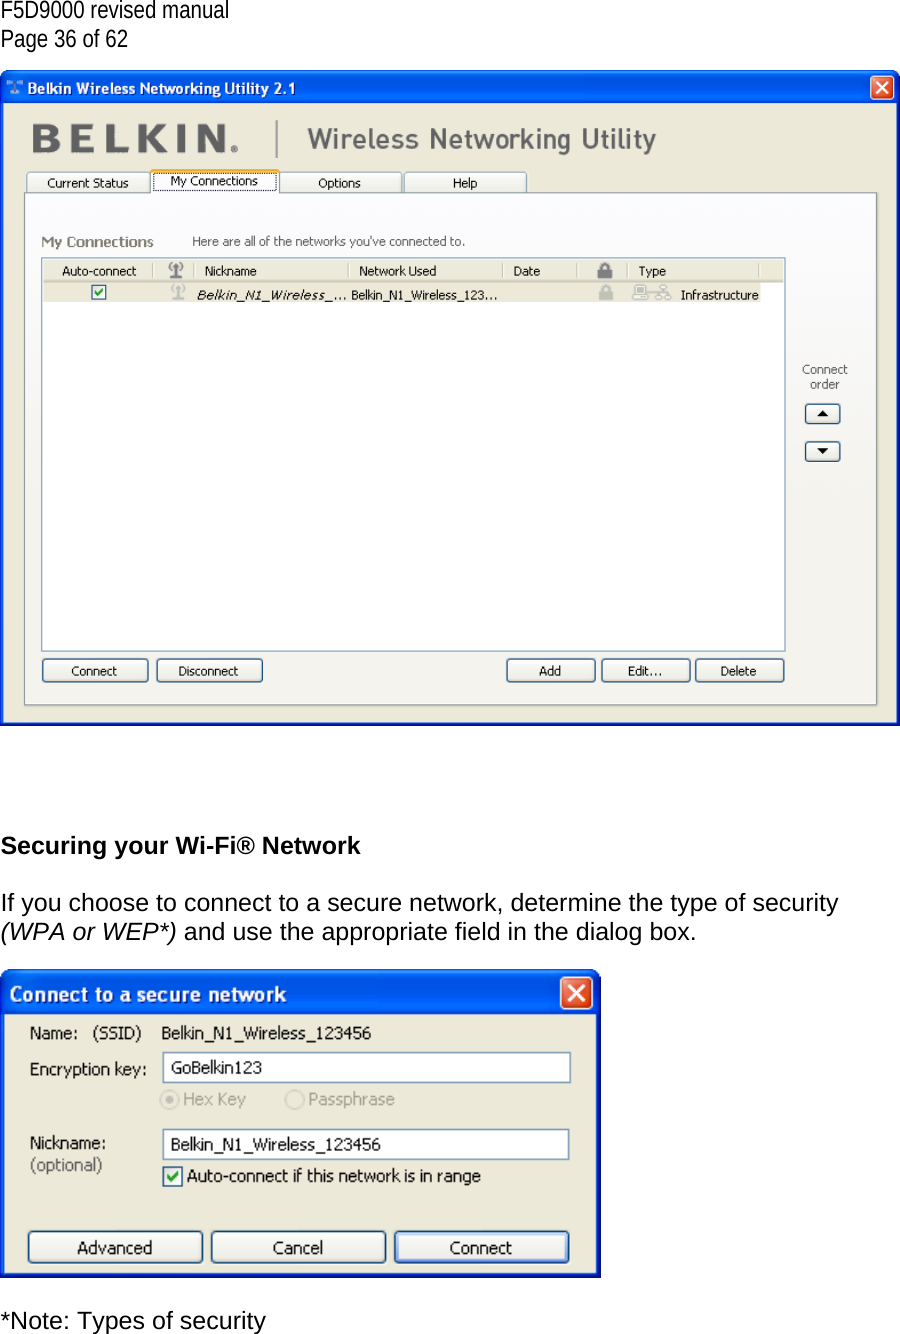
![F5D9000 revised manual Page 34 of 62 Available Networks This window displays the available networks at the current location as well as their SSID, Signal Strength, Security Type, Channel, and Network Type. Lost Wireless Connection If the current wireless connection is lost, a window will pop up and the WNU will attempt to reconnect. Connection Failure Other options will appear during attempts to reconnect. To stop connecting, click “Stop” and to reattempt connection, click “Retry”. Network Status and Solution Tips To further understand the current Network Status, click “Open Wireless Utility”. The default screen will be the “Current Status” tab and the “Network Status” section determines which connections are good and/or faulty. [insert 8013_WNU_Current_Status_Connected.tif, pls circle the “Info” box and message]](https://usermanual.wiki/Belkin/F5D9000B/User-Guide-827275-Page-34.png)
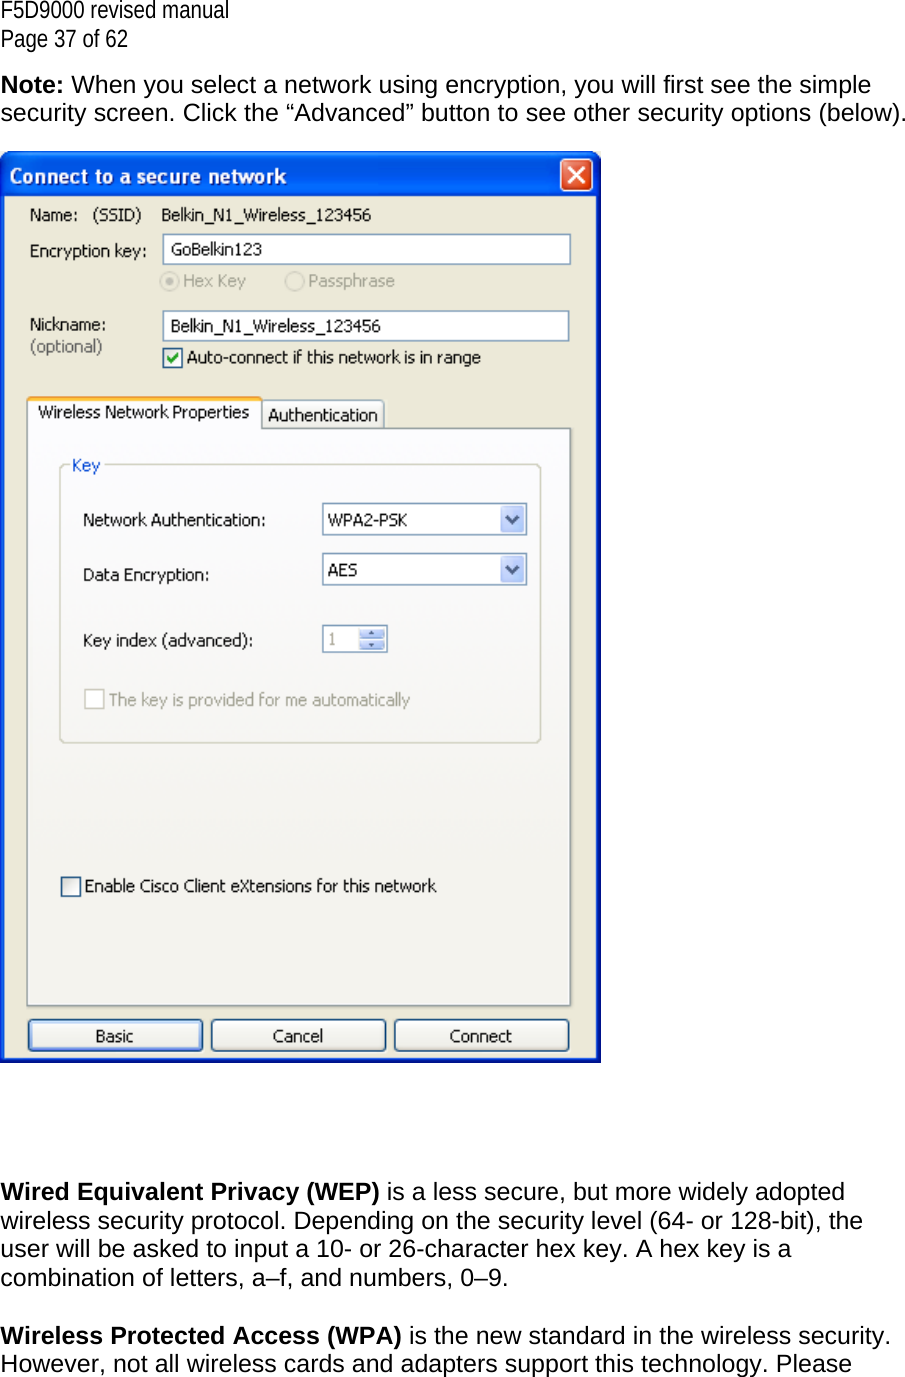
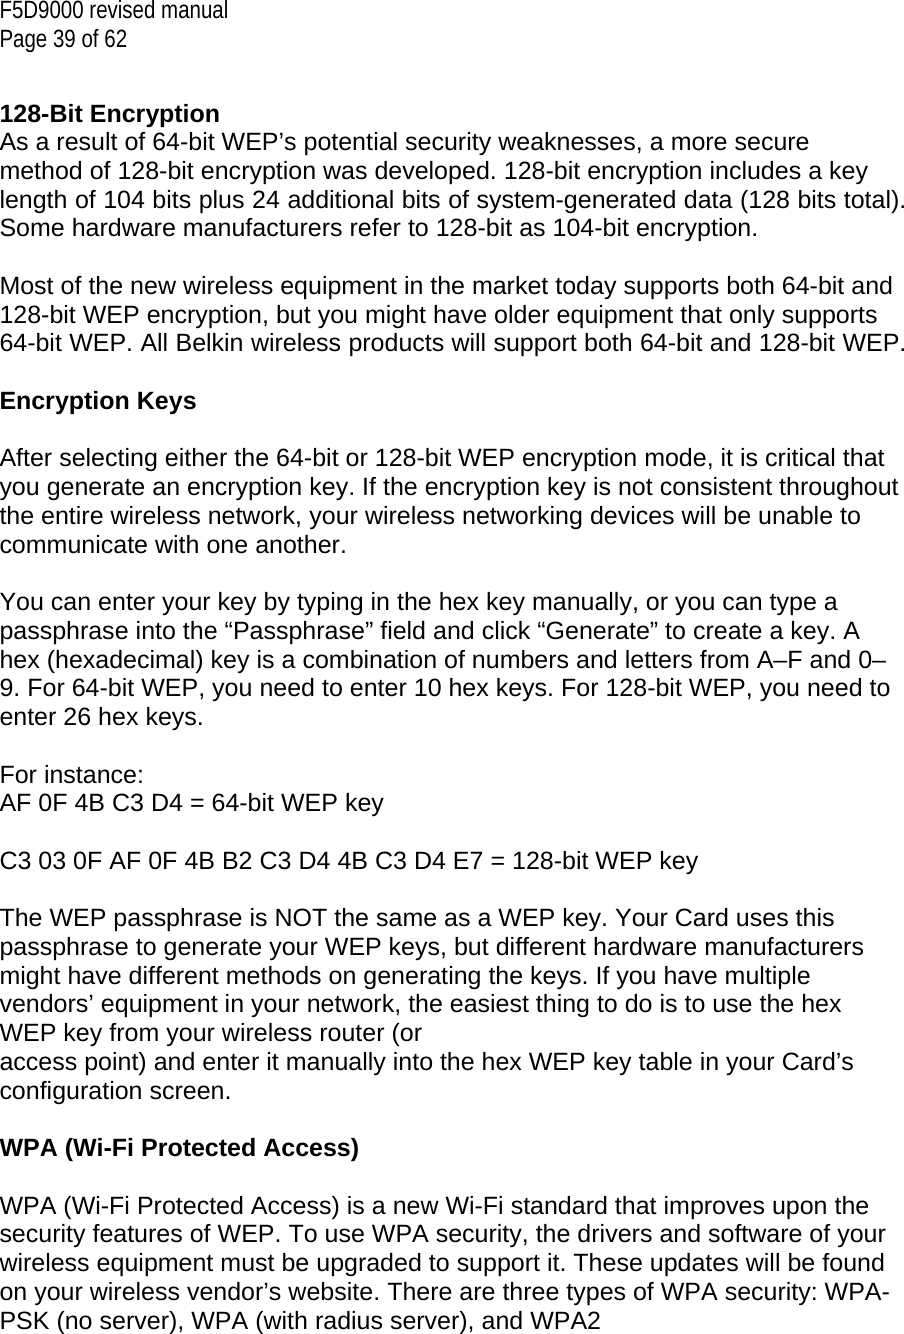
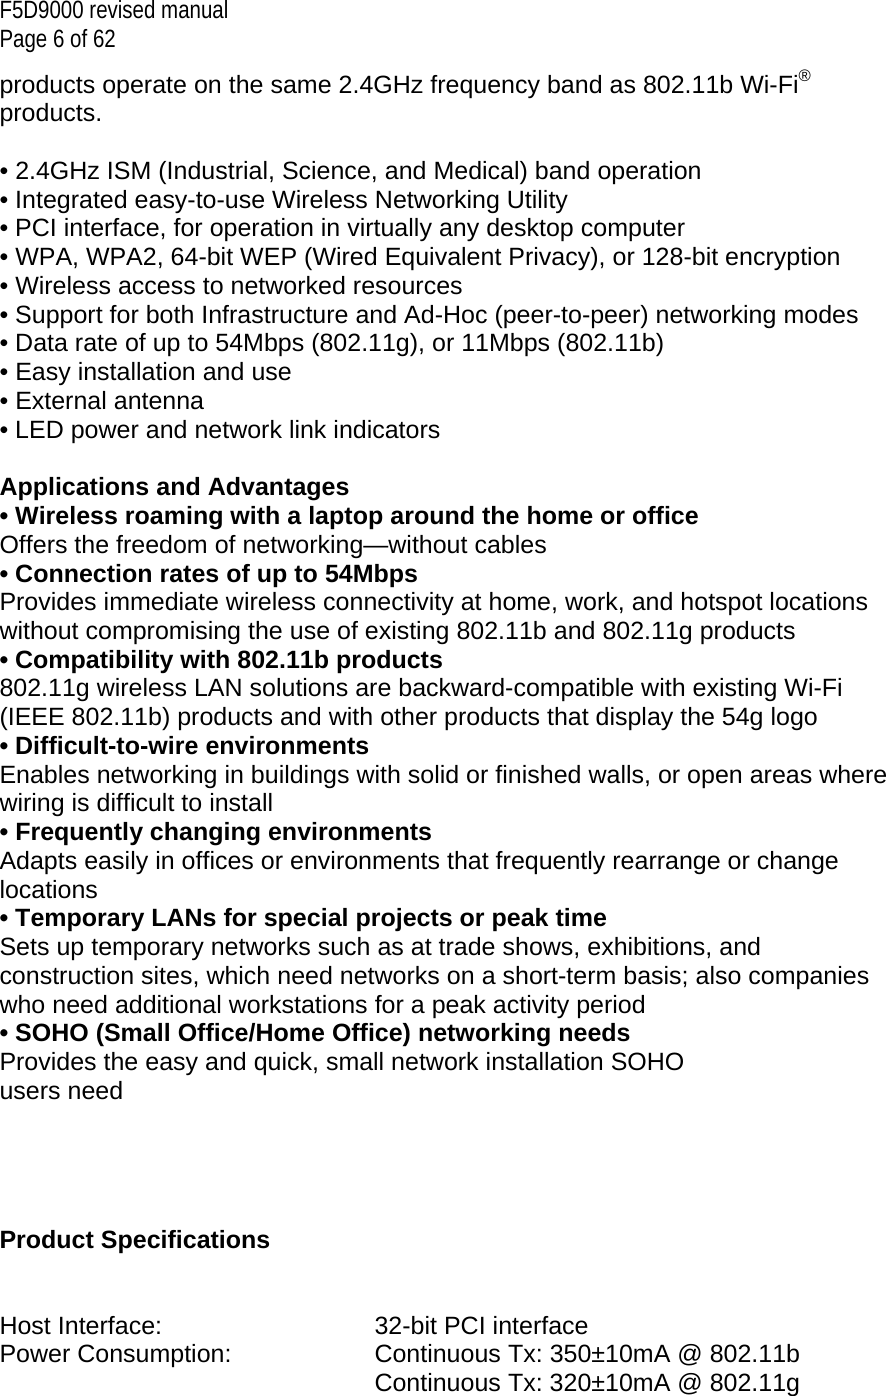
![F5D9000 revised manual Page 41 of 62 To enable security, you will first need to determine which standard is used by the router or access point. (See your wireless router’s or access point’s manual for directions on how to access the security settings.) [insert F5D9000-18.jpg] To access the security settings on your Card, click the “My Connections” tab and point to the connection for which you want to change security settings. Click “Edit” to change settings. WEP Setup 64-Bit WEP Encryption 1. Select “WEP” from the drop-down menu. 2. After selecting your WEP encryption mode, you can enter your key by typing in the hex key manually, or you can type in a passphrase in the “Passphrase” field and click “Generate” to create a key. A hex (hexadecimal) key is a combination of numbers and letters from A–F and 0–9. For 64-bit WEP, you need to enter 10 hex keys. For instance: AF 0F 4B C3 D4 = 64-bit WEP key [insert F5D9000-15.jpg]](https://usermanual.wiki/Belkin/F5D9000B/User-Guide-827275-Page-41.png)
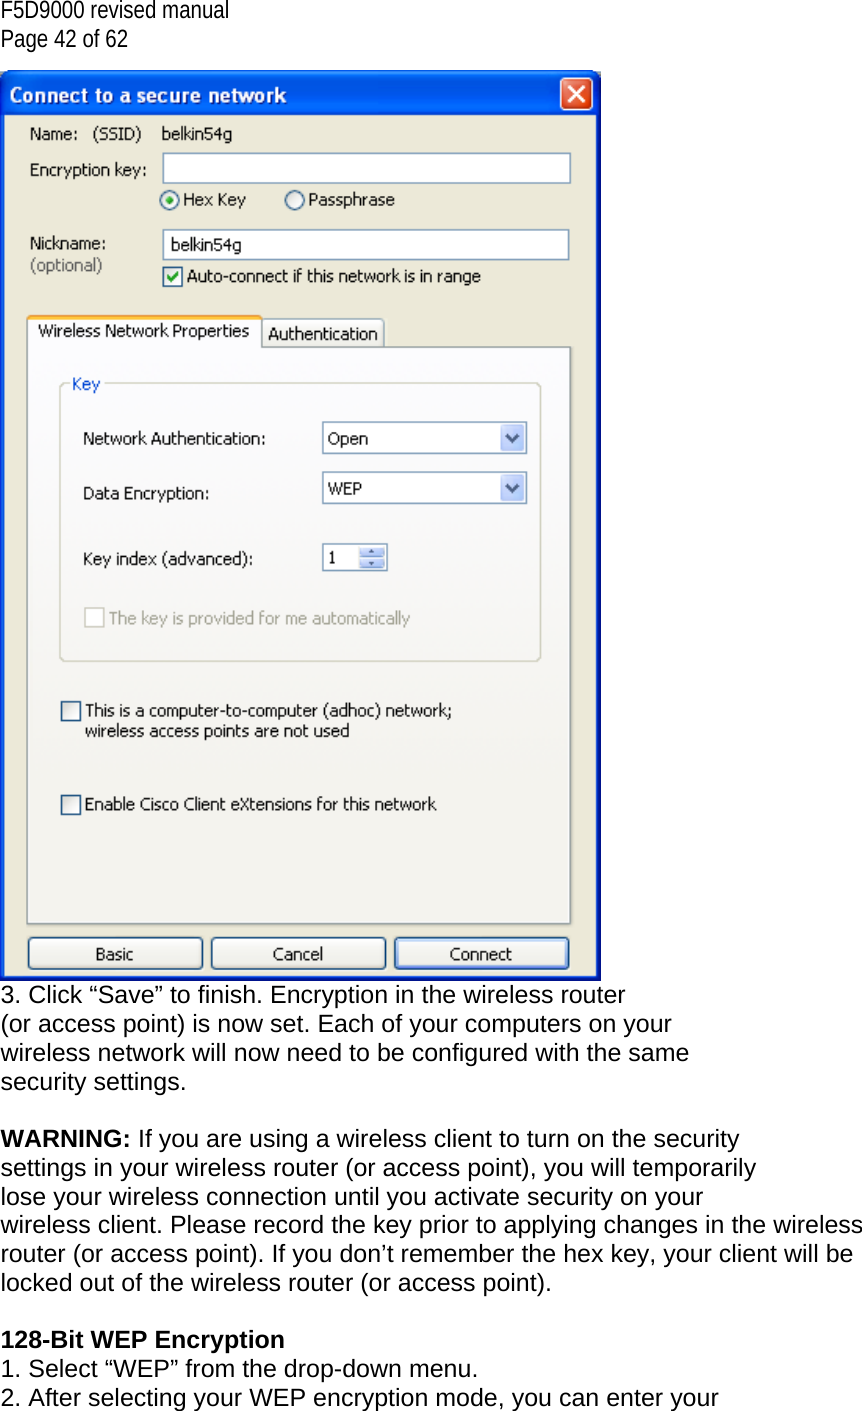
![F5D9000 revised manual Page 43 of 62 key manually by typing in the hex key manually, or you can type in a passphrase in the “Passphrase” field and click “Generate” to create a key. A hex (hexadecimal) key is a combination of numbers and letters from A–F and 0–9. For 128-bit WEP, you need to enter 26 hex keys. For instance: C3 03 0F AF 0F 4B B2 C3 D4 4B C3 D4 E7 = 128-bit WEP key [insert F5D9000-16.jpg] 3. Click “Save” to finish. Encryption in the wireless router (or access point) is now set. Each of the computers on your wireless network will now need to be configured with the same security settings.](https://usermanual.wiki/Belkin/F5D9000B/User-Guide-827275-Page-43.png)
![F5D9000 revised manual Page 44 of 62 WARNING: If you are using a wireless client to turn on the security settings in your wireless router (or access point), you will temporarily lose your wireless connection until you activate security on your wireless client. Please record the key prior to applying changes in the wireless router (or access point). If you don’t remember the hex key, your client will be locked out of the wireless router (or access point). WPA-PSK (no server) Choose this setting if your network does not use a radius server. WPA-PSK (no server) is typically used in home and small office networking. 1. From the “Network Authentication” drop-down menu, select “WPA-PSK (no server)”. 2. Enter your network key. This can be from eight to 63 characters and can be letters, numbers, or symbols. This same key must be used on all of the clients (network cards) that you want to include in your network. [insert F5D9000-17.jpg]](https://usermanual.wiki/Belkin/F5D9000B/User-Guide-827275-Page-44.png)
![F5D9000 revised manual Page 45 of 62 3. Click “Save” to finish. You must now set all clients (network cards) to match these settings. Wireless Networking Utility Options [insert F5D9000-19.jpg]](https://usermanual.wiki/Belkin/F5D9000B/User-Guide-827275-Page-45.png)
![F5D9000 revised manual Page 46 of 62 The “Options” tab on the WNU provides the user the ability to customize his or her WNU settings. Wireless Networking Utility Help The WNU “Help” tab provides users with access to online and telephone support, as well as advanced diagnostic tools. [insert F5D9000-20.jpg]](https://usermanual.wiki/Belkin/F5D9000B/User-Guide-827275-Page-46.png)
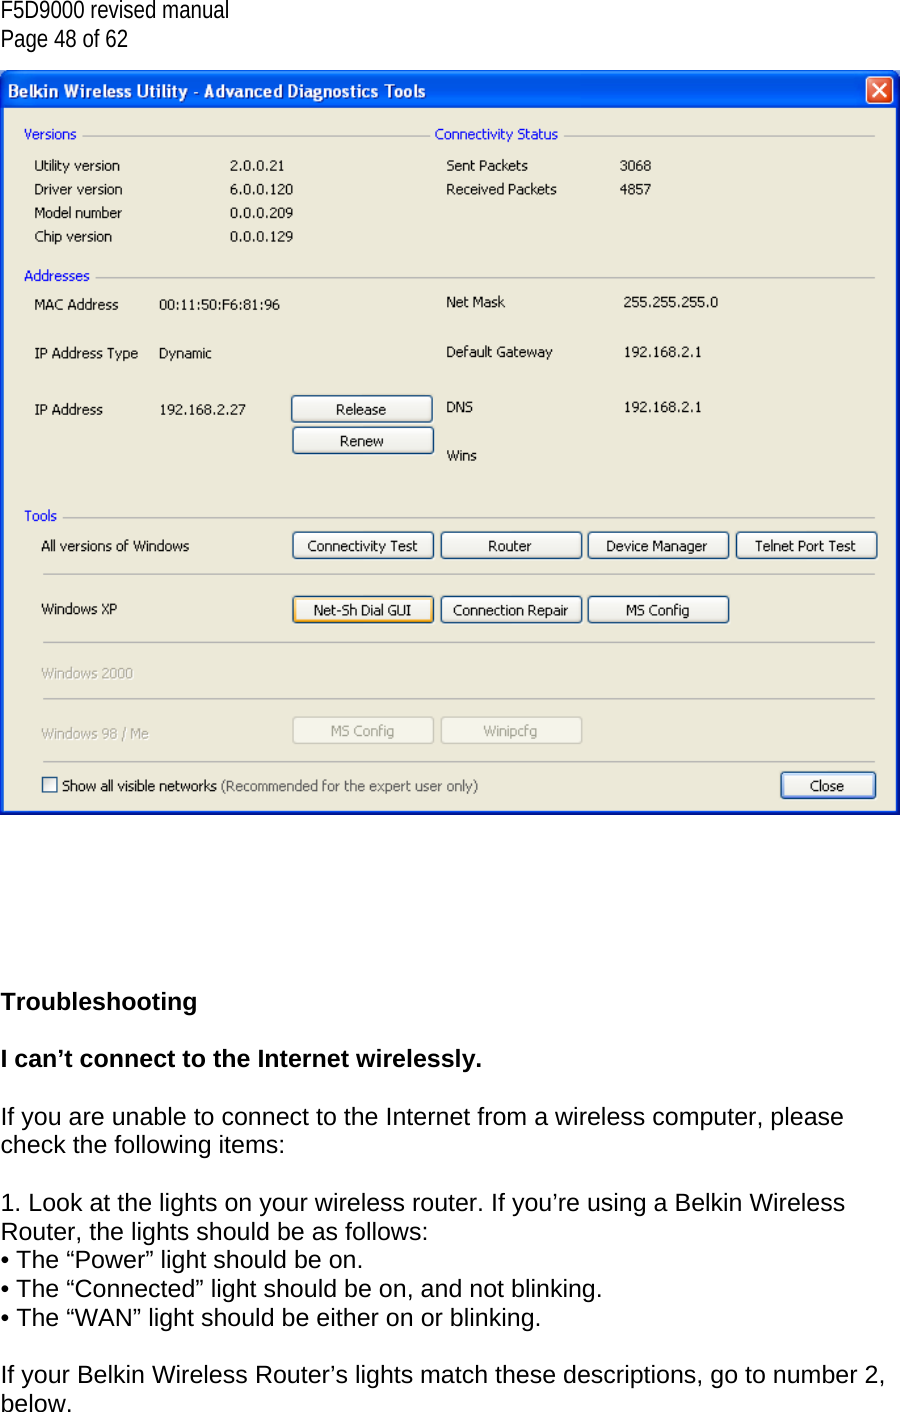
![F5D9000 revised manual Page 47 of 62 Advanced Diagnostic Tools The “Advanced Diagnostic Tools” section is the central control panel for all the settings of the hardware and software components of the wireless network. It provides an array of tests and connectivity services to ensure optimal network performance. [insert F5D9000-21.jpg]](https://usermanual.wiki/Belkin/F5D9000B/User-Guide-827275-Page-47.png)

![F5D9000 revised manual Page 59 of 62 This device may not be used for setting up outdoor radio links in France and in some areas the RF output power may be limited to 10 mW EIRP in the frequency range of 2454–2483.5MHz. For detailed information, the end user should contact the national spectrum authority in France. 0560 Česky [Czech] [Jméno výrobce] tímto prohlašuje, že tento [typ zařízení] je ve shodě se základními požadavky a dalšími příslušnými ustanoveními směrnice 1999/5/ES. Dansk [Danish] Undertegnede [fabrikantens navn] erklærer herved, at følgende udstyr [udstyrets typebetegnelse] overholder de væsentlige krav og øvrige relevante krav i direktiv 1999/5/EF. Deutsch [German] Hiermit erklärt [Name des Herstellers], dass sich das Gerät [Gerätetyp] in Übereinstimmung mit den grundlegenden Anforderungen und den übrigen einschlägigen Bestimmungen der Richtlinie 1999/5/EG befindet. Eesti [Estonian] Käesolevaga kinnitab [tootja nimi = name of manufacturer] seadme [seadme tüüp = type of equipment] vastavust direktiivi 1999/5/EÜ põhinõuetele ja nimetatud direktiivist tulenevatele teistele asjakohastele sätetele. English Hereby, [name of manufacturer], declares that this [type of equipment] is in compliance with the essential requirements and other relevant provisions of Directive 1999/5/EC. Español [Spanish] Por medio de la presente [nombre del fabricante] declara que el [clase de equipo] cumple con los requisitos esenciales y cualesquiera otras disposiciones aplicables o exigibles de la Directiva 1999/5/CE. Ελληνική [Greek] ΜΕ ΤΗΝ ΠΑΡΟΥΣΑ [name of manufacturer] ΔΗΛΩΝΕΙ ΟΤΙ [type of equipment] ΣΥΜΜΟΡΦΩΝΕΤΑΙ ΠΡΟΣ ΤΙΣ ΟΥΣΙΩΔΕΙΣ ΑΠΑΙΤΗΣΕΙΣ ΚΑΙ ΤΙΣ ΛΟΙΠΕΣ ΣΧΕΤΙΚΕΣ ΔΙΑΤΑΞΕΙΣ ΤΗΣ ΟΔΗΓΙΑΣ 1999/5/ΕΚ. Français [French] Par la présente [nom du fabricant] déclare que l'appareil [type d'appareil] est conforme aux exigences essentielles et aux autres dispositions pertinentes de la directive 1999/5/CE. Italiano [Italian] Con la presente [nome del costruttore] dichiara che questo [tipo di apparecchio] è conforme ai requisiti essenziali ed alle altre disposizioni pertinenti stabilite dalla direttiva 1999/5/CE. Latviski [Latvian] Ar šo [name of manufacturer / izgatavotāja nosaukums] deklarē, ka [type of equipment / iekārtas tips] atbilst Direktīvas 1999/5/EK būtiskajām prasībām un citiem ar to saistītajiem noteikumiem. Lietuvių [Lithuanian] Šiuo [manufacturer name] deklaruoja, kad šis [equipment type] atitinka esminius reikalavimus ir kitas 1999/5/EB Direktyvos nuostatas. Nederlands [Dutch] Hierbij verklaart [naam van de fabrikant] dat het toestel [type van toestel] in overeenstemming is met de essentiële eisen en de andere relevante bepalingen van richtlijn 1999/5/EG. Malti [Maltese] Hawnhekk, [isem tal-manifattur], jiddikjara li dan [il-mudel tal-prodott] jikkonforma mal-ħtiġijiet essenzjali u ma provvedimenti oħrajn relevanti li hemm fid-Dirrettiva 1999/5/EC. Magyar [Hungarian] Alulírott, [gyártó neve] nyilatkozom, hogy a [... típus] megfelel a vonatkozó alapvetõ követelményeknek és az 1999/5/EC irányelv egyéb elõírásainak. Polski [Polish] Niniejszym [nazwa producenta] oświadcza, że [nazwa wyrobu] jest zgodny z zasadniczymi wymogami oraz pozostałymi stosownymi postanowieniami Dyrektywy 1999/5/EC.](https://usermanual.wiki/Belkin/F5D9000B/User-Guide-827275-Page-59.png)
![F5D9000 revised manual Page 60 of 62 Português [Portuguese] [Nome do fabricante] declara que este [tipo de equipamento] está conforme com os requisitos essenciais e outras disposições da Directiva 1999/5/CE. Slovensko [Slovenian] [Ime proizvajalca] izjavlja, da je ta [tip opreme] v skladu z bistvenimi zahtevami in ostalimi relevantnimi določili direktive 1999/5/ES. Slovensky [Slovak] [Meno výrobcu] týmto vyhlasuje, že [typ zariadenia] spĺňa základné požiadavky a všetky príslušné ustanovenia Smernice 1999/5/ES. Suomi [Finnish] [Valmistaja = manufacturer] vakuuttaa täten että [type of equipment = laitteen tyyppimerkintä] tyyppinen laite on direktiivin 1999/5/EY oleellisten vaatimusten ja sitä koskevien direktiivin muiden ehtojen mukainen. Svenska [Swedish] Härmed intygar [företag] att denna [utrustningstyp] står I överensstämmelse med de väsentliga egenskapskrav och övriga relevanta bestämmelser som framgår av direktiv 1999/5/EG. Belkin International, Inc., Limited Lifetime Product Warranty What this warranty covers. Belkin International, Inc. (“Belkin”) warrants to the original purchaser of this Belkin product that the product shall be free of defects in design, assembly, material, or workmanship. What the period of coverage is. Belkin warrants the Belkin product for the lifetime of the product. What will we do to correct problems? Product Warranty. Belkin will repair or replace, at its option, any defective product free of charge (except for shipping charges for the product). What is not covered by this warranty? All above warranties are null and void if the Belkin product is not provided to Belkin for inspection upon Belkin’s request at the sole expense of the purchaser, or if Belkin determines that the Belkin product has been improperly installed, altered in any way, or tampered with. The Belkin Product Warranty does not protect against acts of God such as flood, lightning, earthquake, war, vandalism, theft, normal-use wear and tear, erosion, depletion, obsolescence, abuse, damage due to low voltage disturbances (i.e. brownouts or sags), non-authorized program, or system equipment modification or alteration. How to get service. To get service for your Belkin product you must take the following steps: 1. Contact Belkin International, Inc., at 501 W. Walnut St., Compton CA 90220, Attn: Customer Service, or call (800)-223-5546, within 15 days of the Occurrence. Be prepared to provide the following information:](https://usermanual.wiki/Belkin/F5D9000B/User-Guide-827275-Page-60.png)