Belkin F5L049V1 Home Base User Manual
Belkin International, Inc. Home Base
UserManual.wiki
>
Belkin
>
F5L049V1 User Manual
User Manual
Navigation menu
Upload a User Manual
Namespaces
Wiki Guide
HTML
PDF
Info
Views
User Manual
Discussion / Help
Navigation
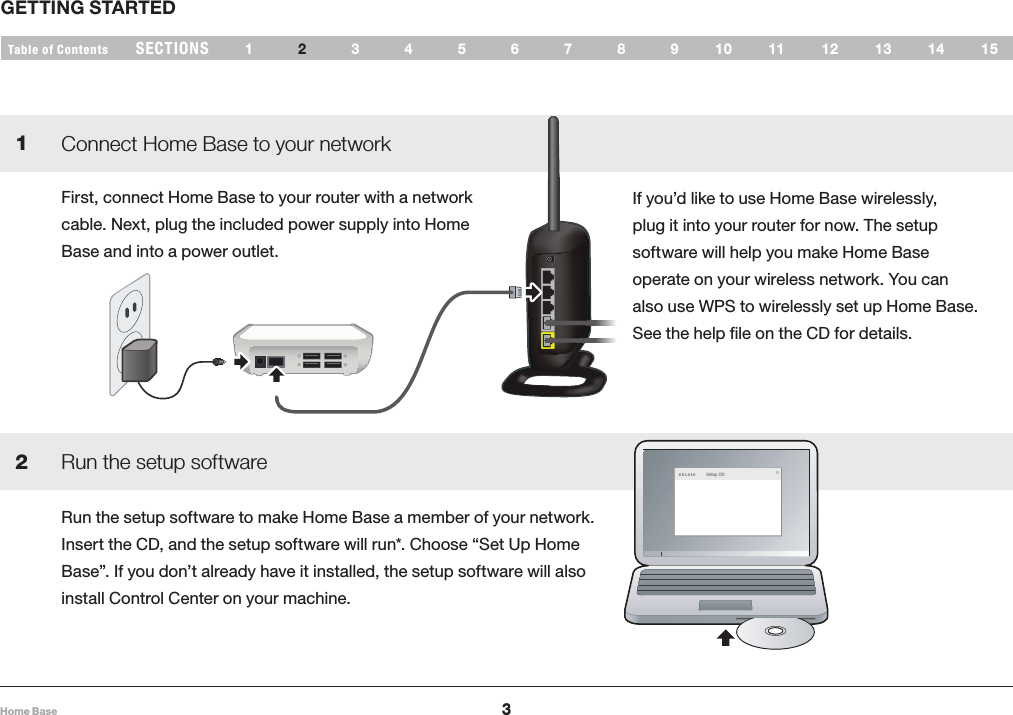
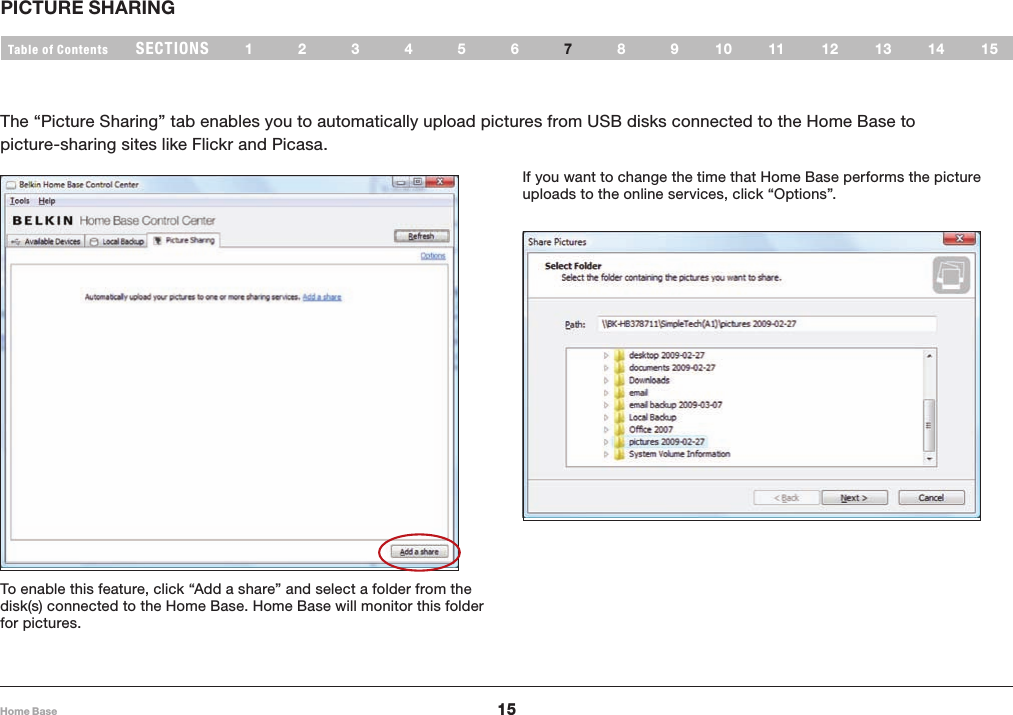
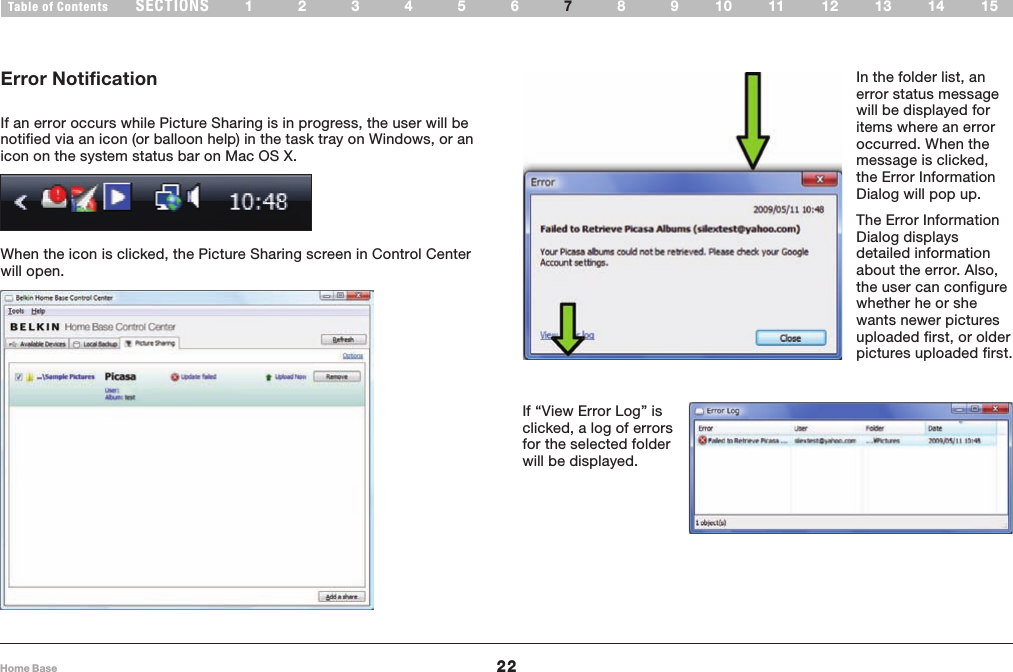

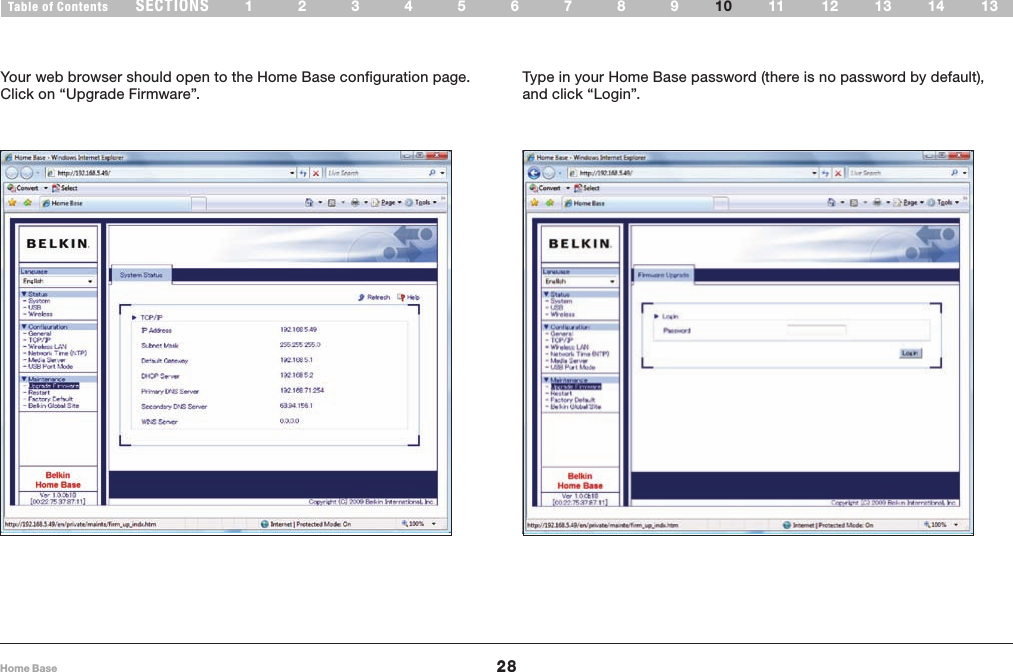
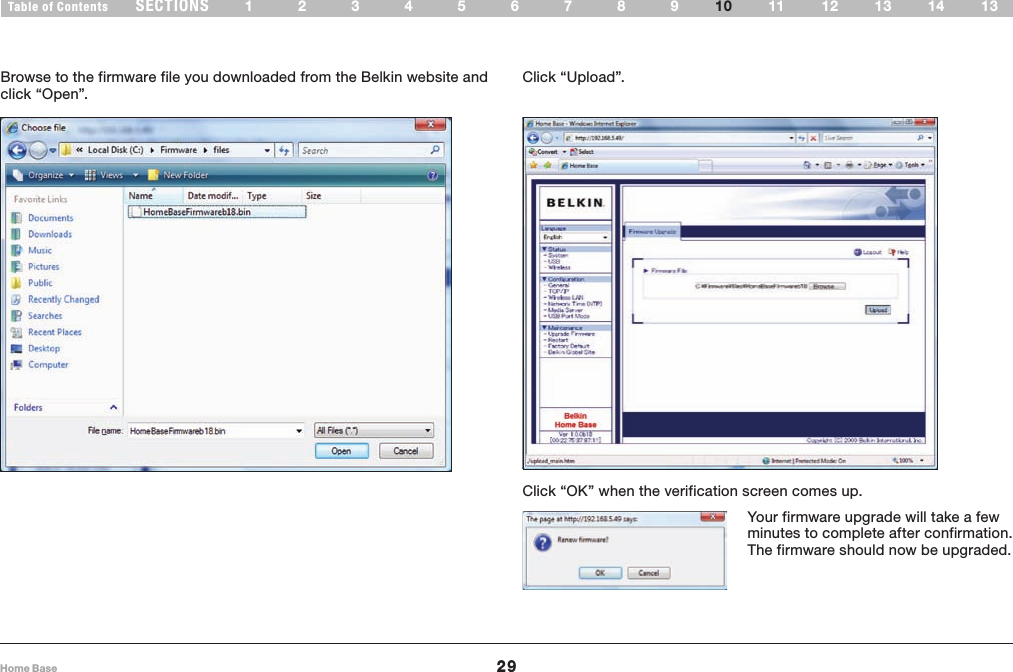
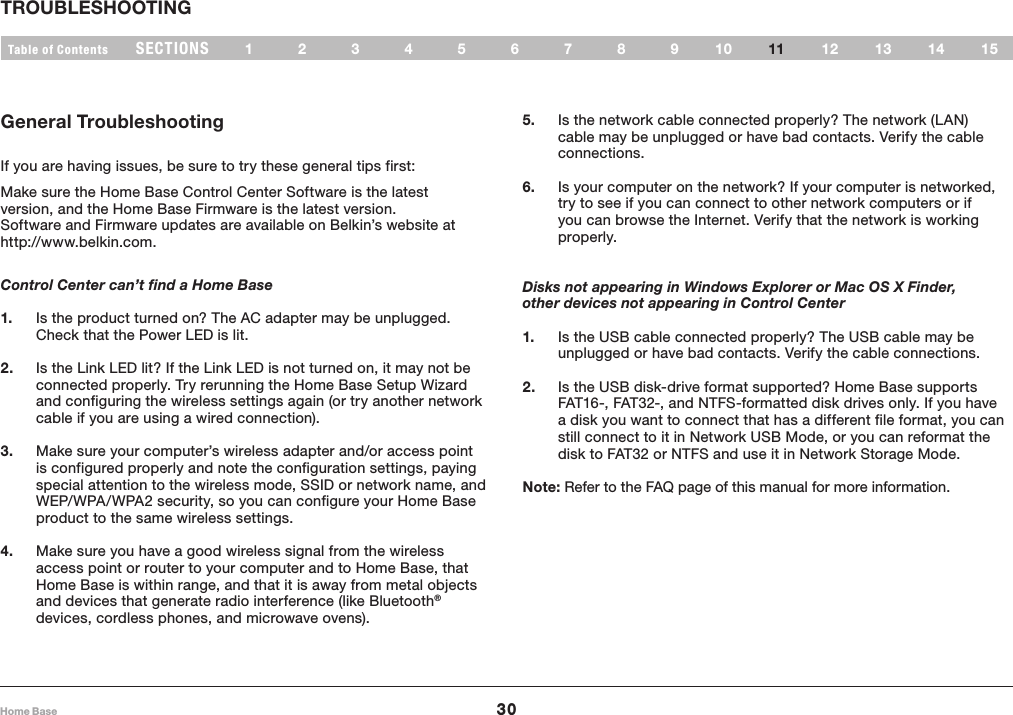
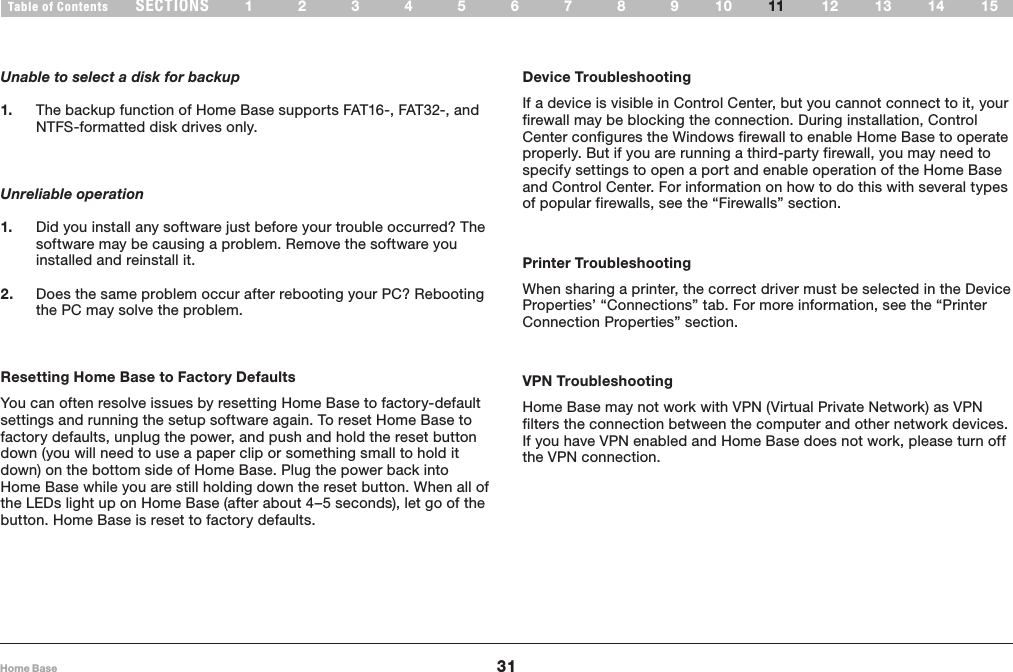
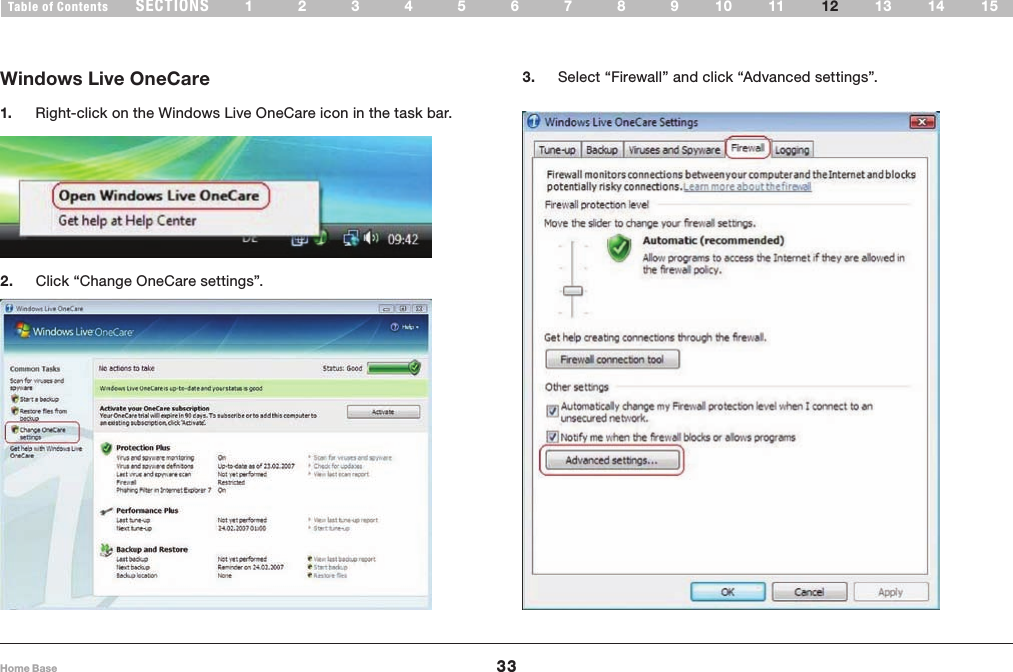
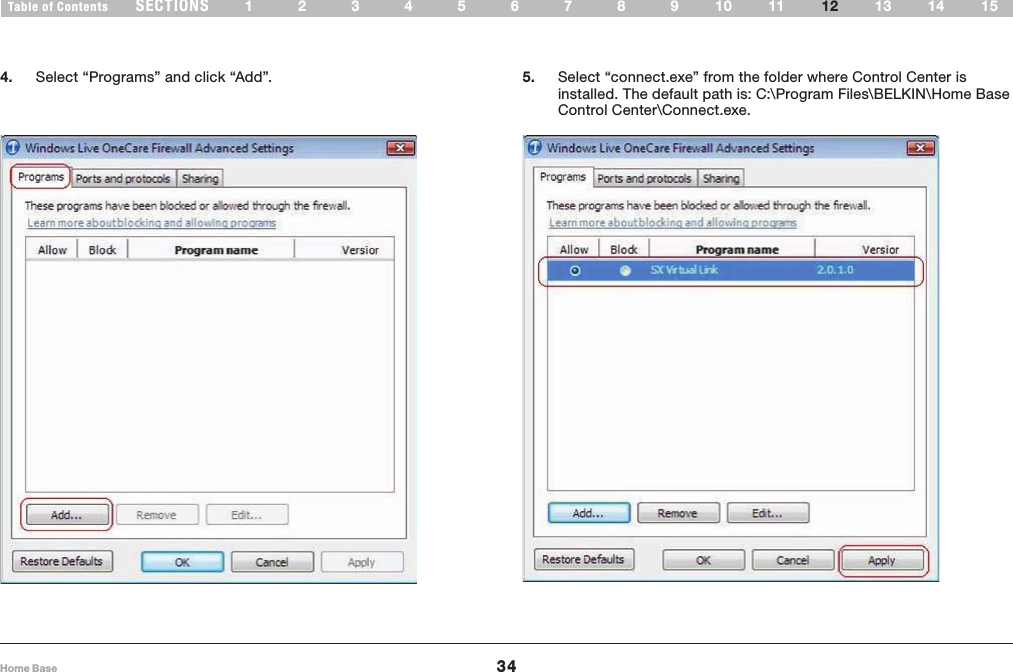
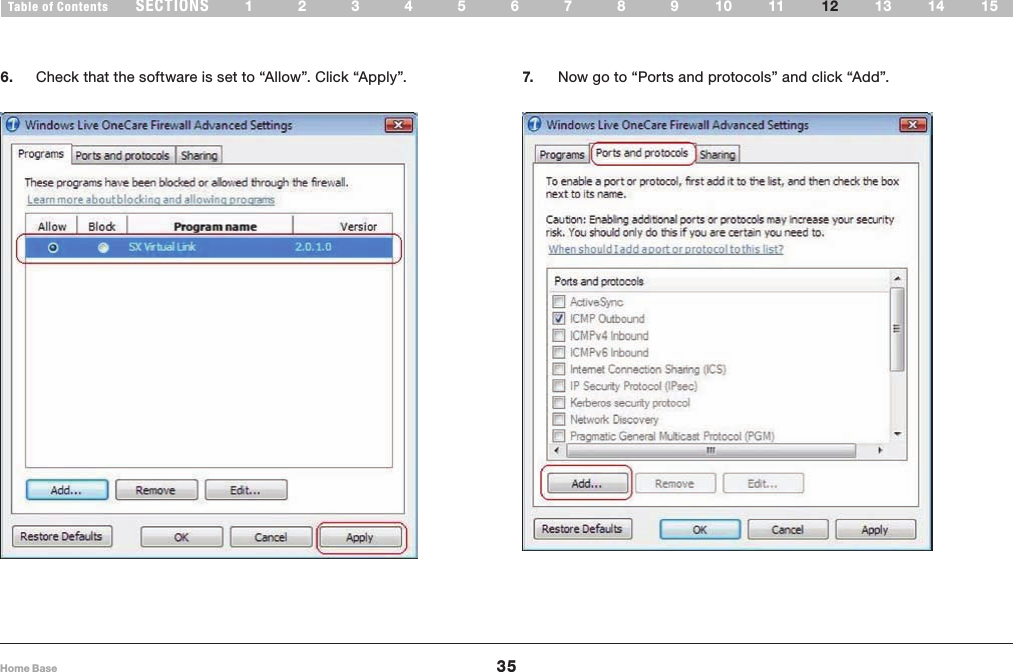
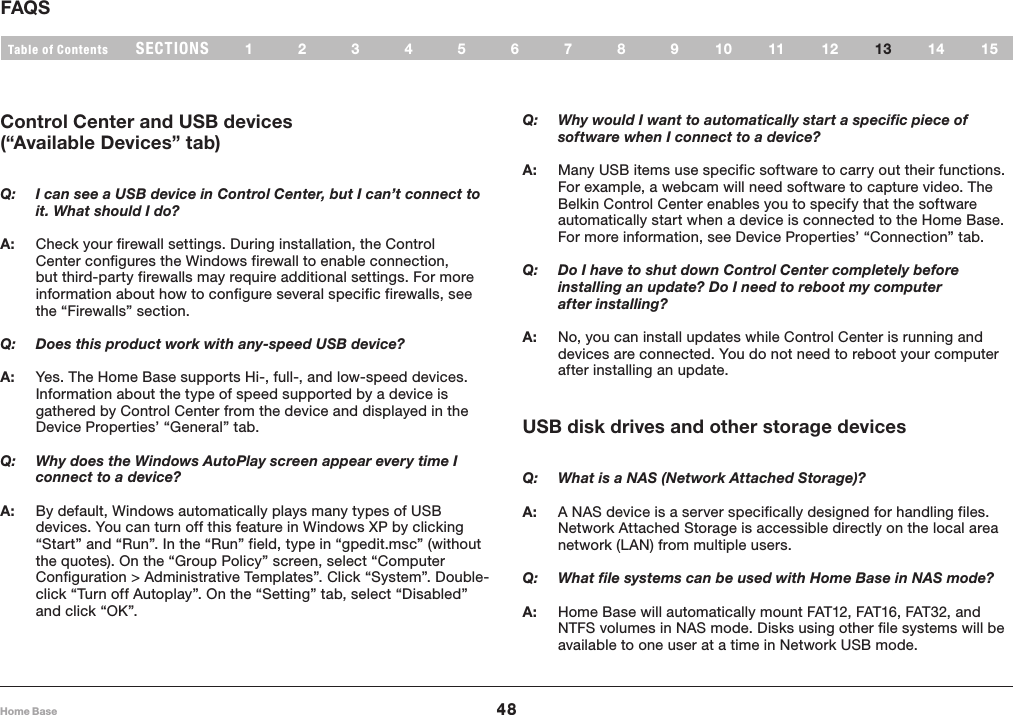
![36Home BaseSECTIONSTable of Contents 123456789 1510 13 141211FIREWALLS8. Add a new exception, one for outgoing data. Name Home Base (Out) TCP or UDP TCP Port Range 19540 to 19540 For Connections Outbound [remote ports] Scope Internet 9. Add another new exception, one for incoming data. Name Home Base (In) TCP or UDP UDP Port Range 19540 to 19540 For Connections Inbound [local ports] Scope Internet 10. Check the new exceptions you just created. Make sure that both exceptions are enabled.11. Finish the configuration. You must reboot your computer for the changes to take effect.](https://usermanual.wiki/Belkin/F5L049V1/User-Guide-1139379-Page-38.png)