Belkin F6D4050V1 Enhanced Wireless USB Adapter User Manual
Belkin International, Inc. Enhanced Wireless USB Adapter
UserManual.wiki
>
Belkin
>
F6D4050V1 User Manual
manual
Navigation menu
Upload a User Manual
Namespaces
Wiki Guide
HTML
PDF
Info
Views
User Manual
Discussion / Help
Navigation
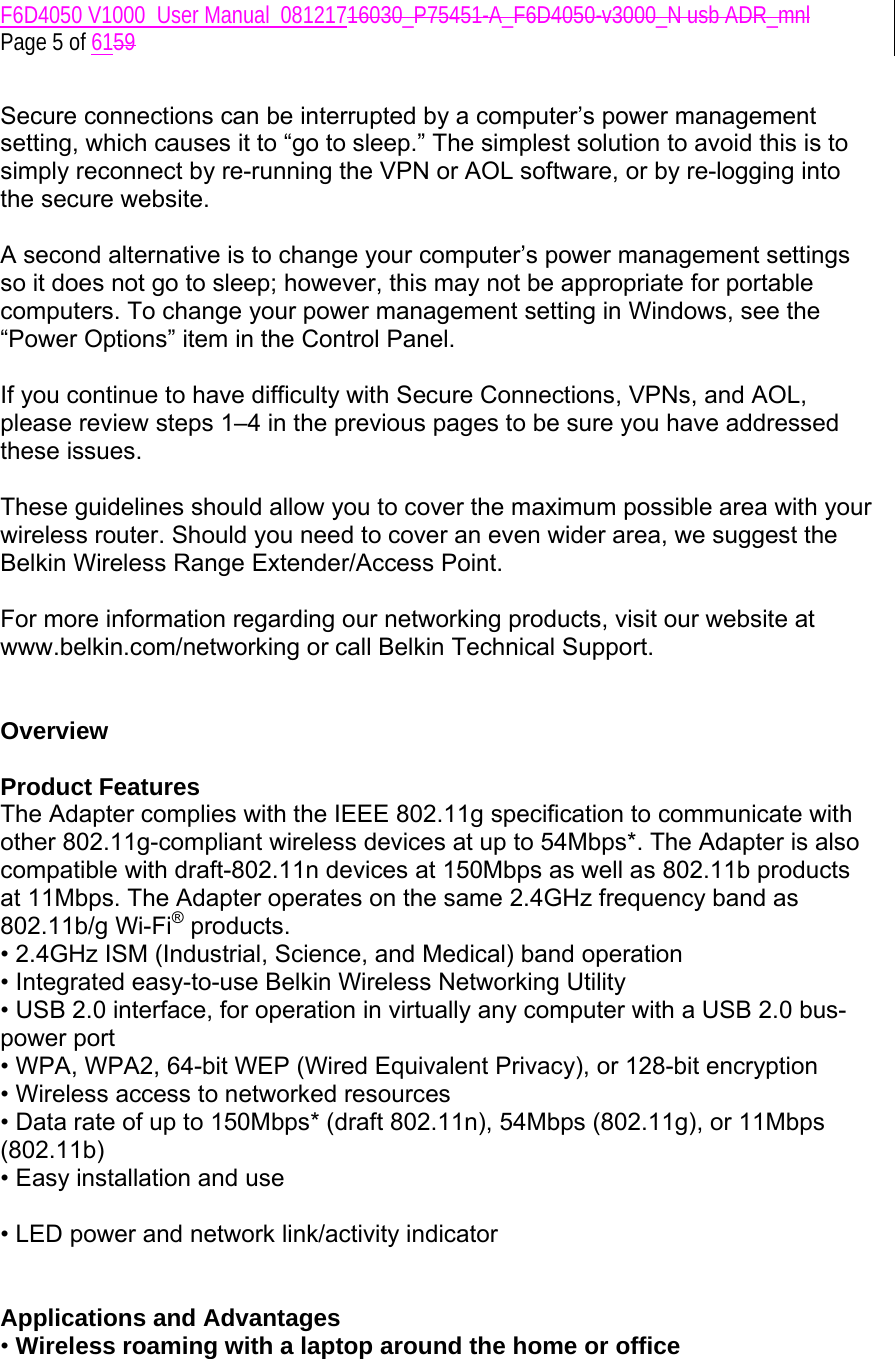
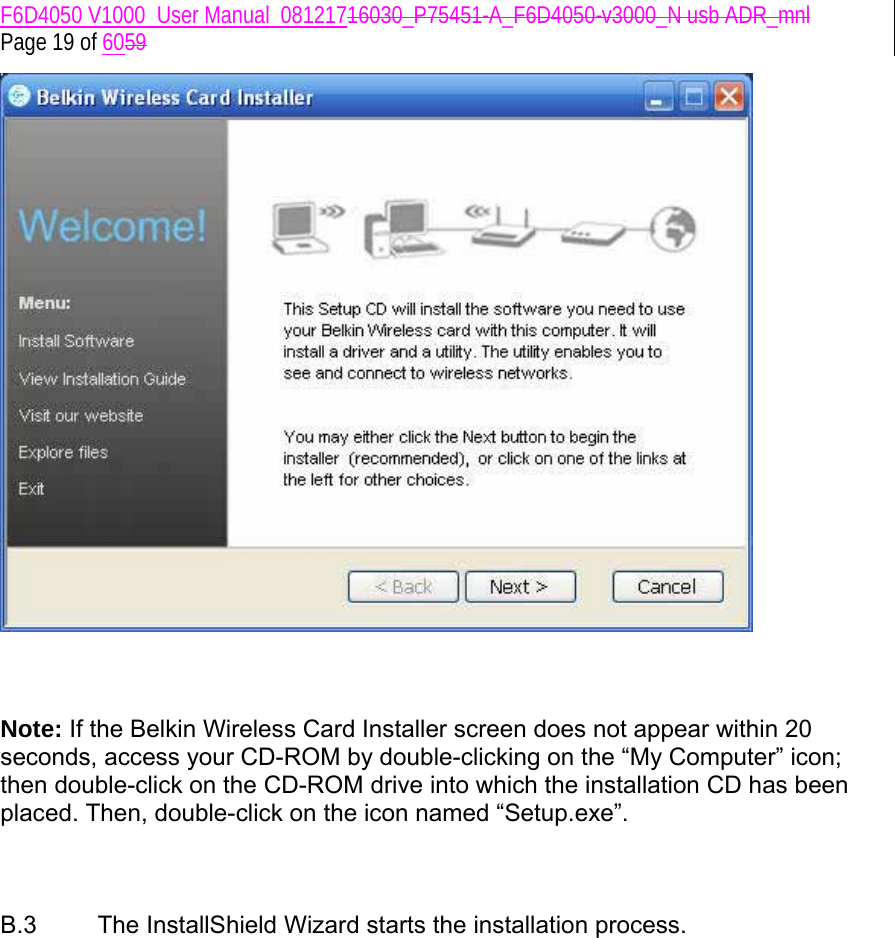
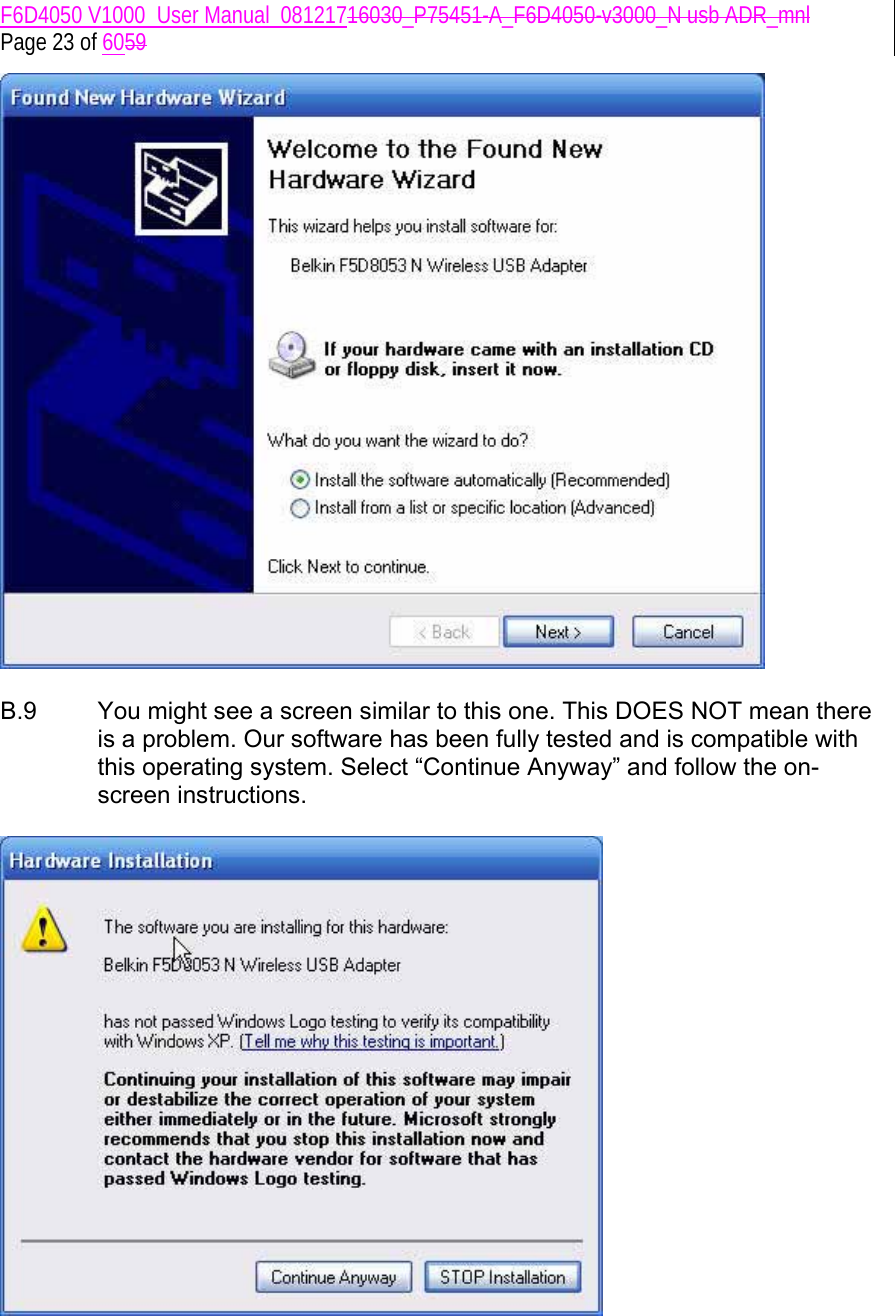
![F6D4050 V1000_User Manual_08121716030_P75451-A_F6D4050-v3000_N usb ADR_mnl Page 7 of 6159 • Windows® 2000, XP with SP2, or Vista™*** Package Contents • Enhanced Wireless USB Adapter • Quick Installation Guide • CD with Installation Software and User Manual Installing and Setting up the Adapter A. Installation Process for Windows Vista ***NOTE: For information on updated drivers, please visit the Belkin website at www.belkin.com/support . IMPORTANT: INSTALL THE SOFTWARE BEFORE INSERTING THE ADAPTER. A.1 Insert the Installation Software CD into your CD-ROM drive. A.2 Click “Next” to begin the installation process. [Insert screen shot] Note: If the Belkin Wireless Card Installer screen does not appear within 20 seconds, access your CD-ROM by double-clicking on the “My Computer” icon; then double-click on the CD-ROM drive into which the installation CD has been](https://usermanual.wiki/Belkin/F6D4050V1/User-Guide-1063472-Page-7.png)
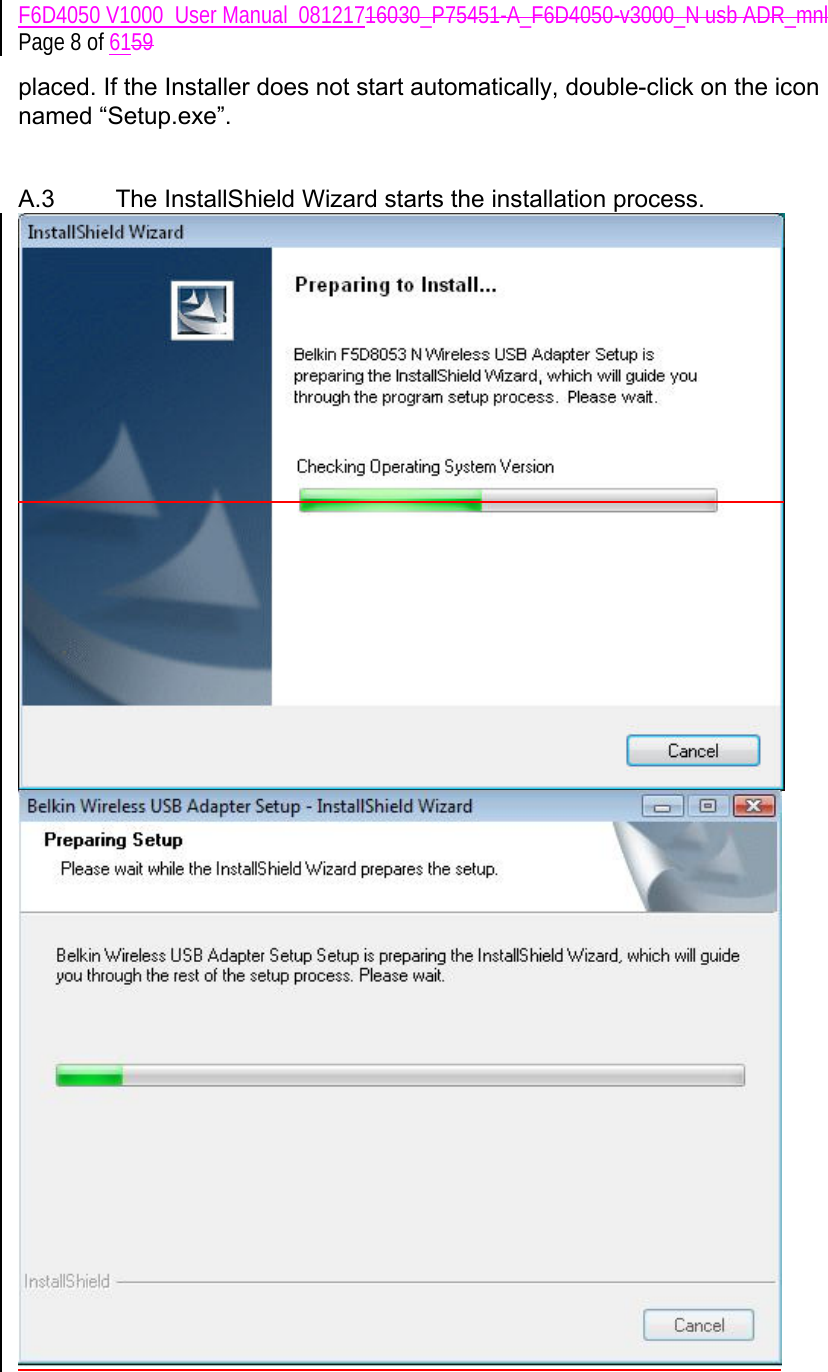
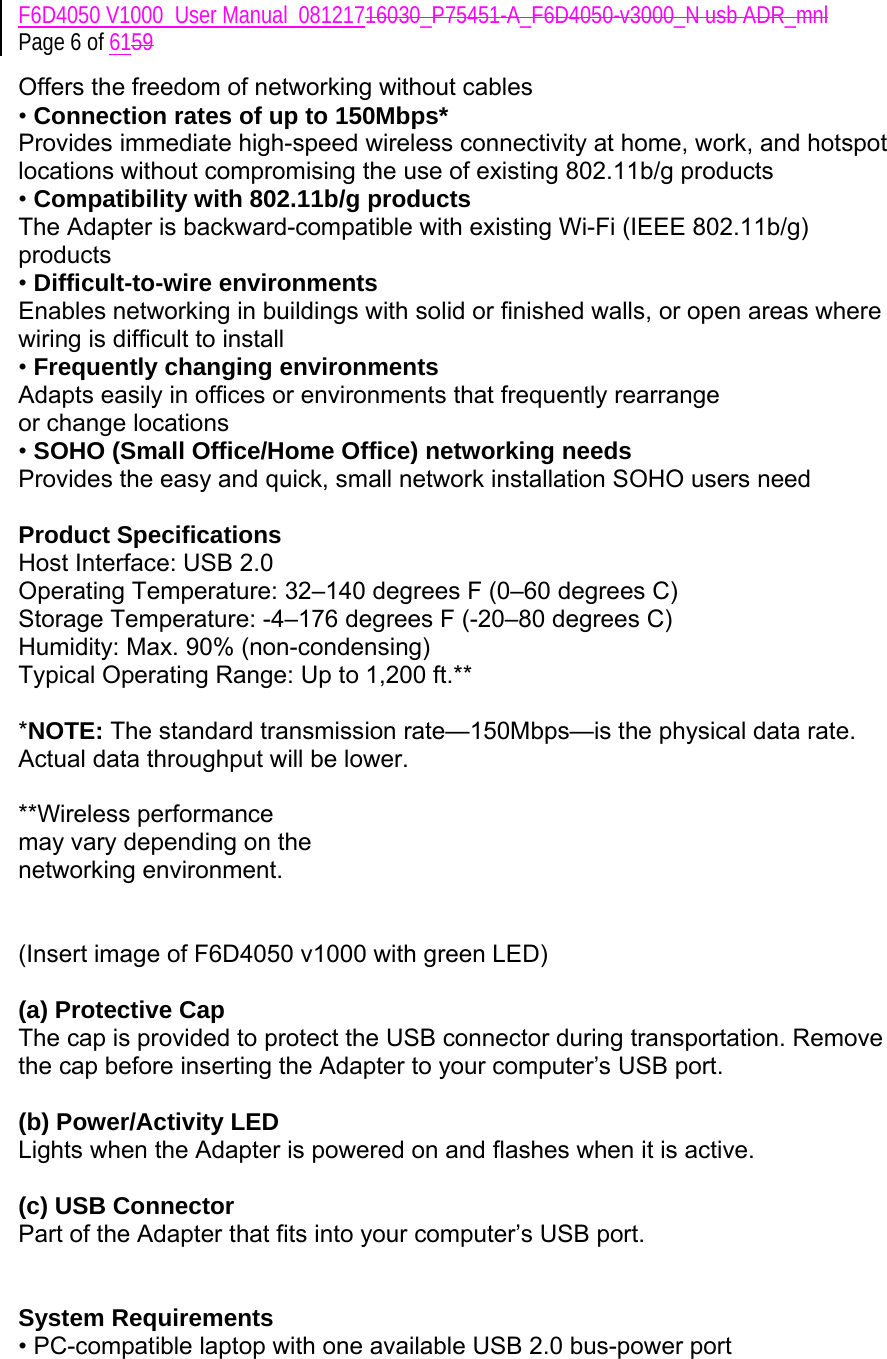
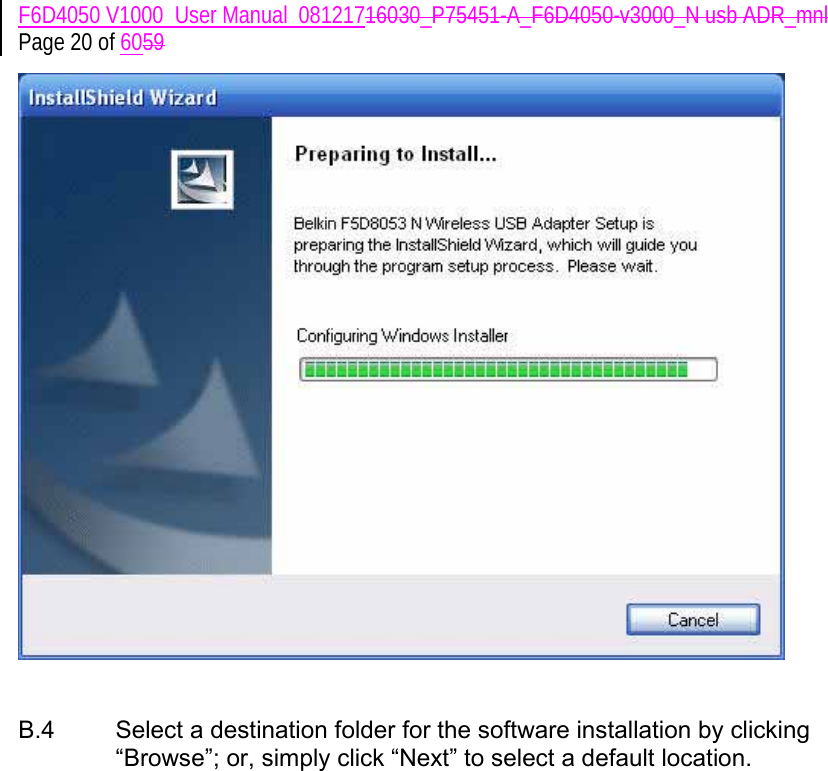
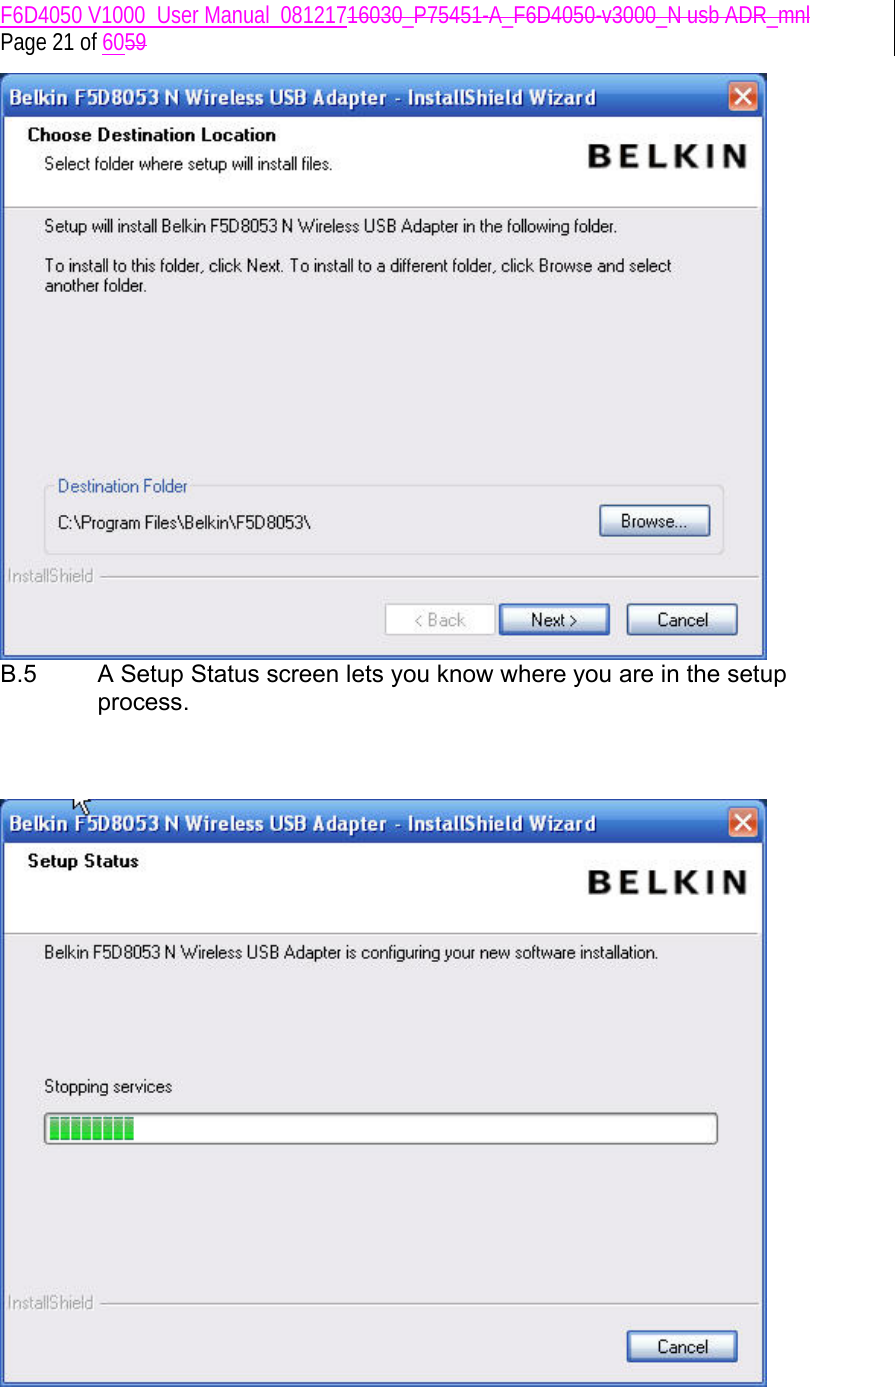
![F6D4050 V1000_User Manual_08121716030_P75451-A_F6D4050-v3000_N usb ADR_mnl Page 9 of 6159 A.4 Select a destination folder for the software installation by clicking “Browse”; or, simply click “Next” to select a default location. [insert 8011_Install_2.tif – to be updated 8/1] A.5 A Setup Status screen will let you know where you are in the setup process. [insert 8011_Install_3.tif]](https://usermanual.wiki/Belkin/F6D4050V1/User-Guide-1063472-Page-9.png)
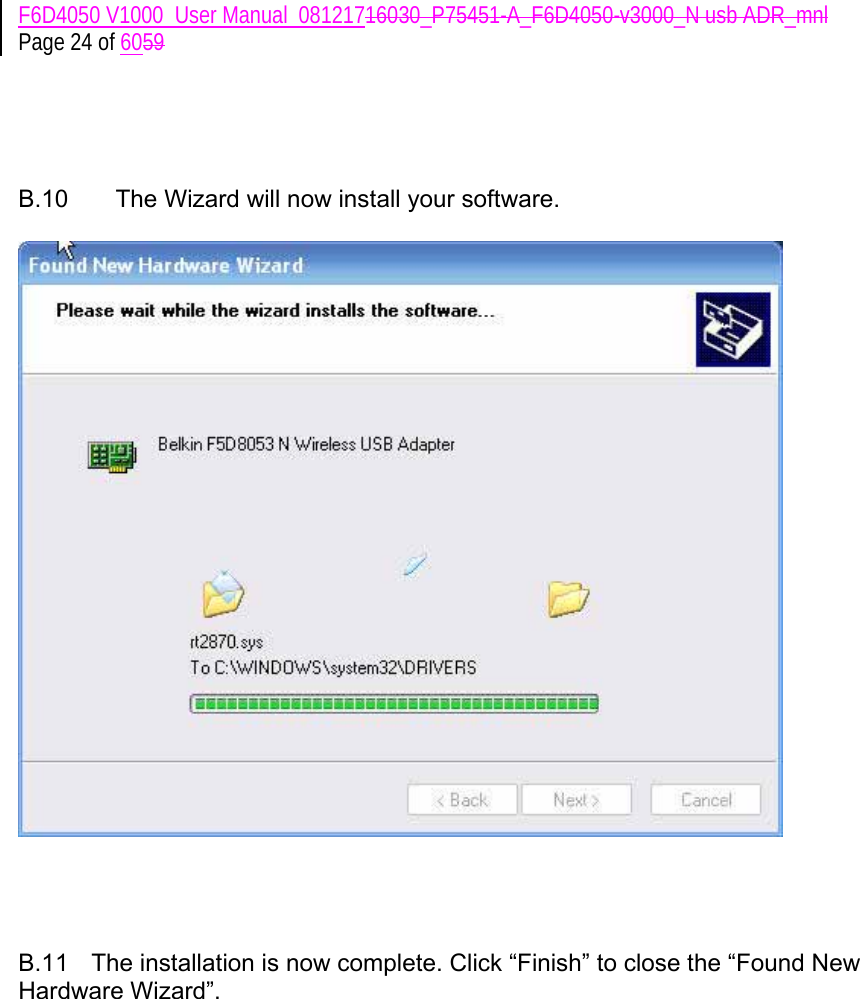
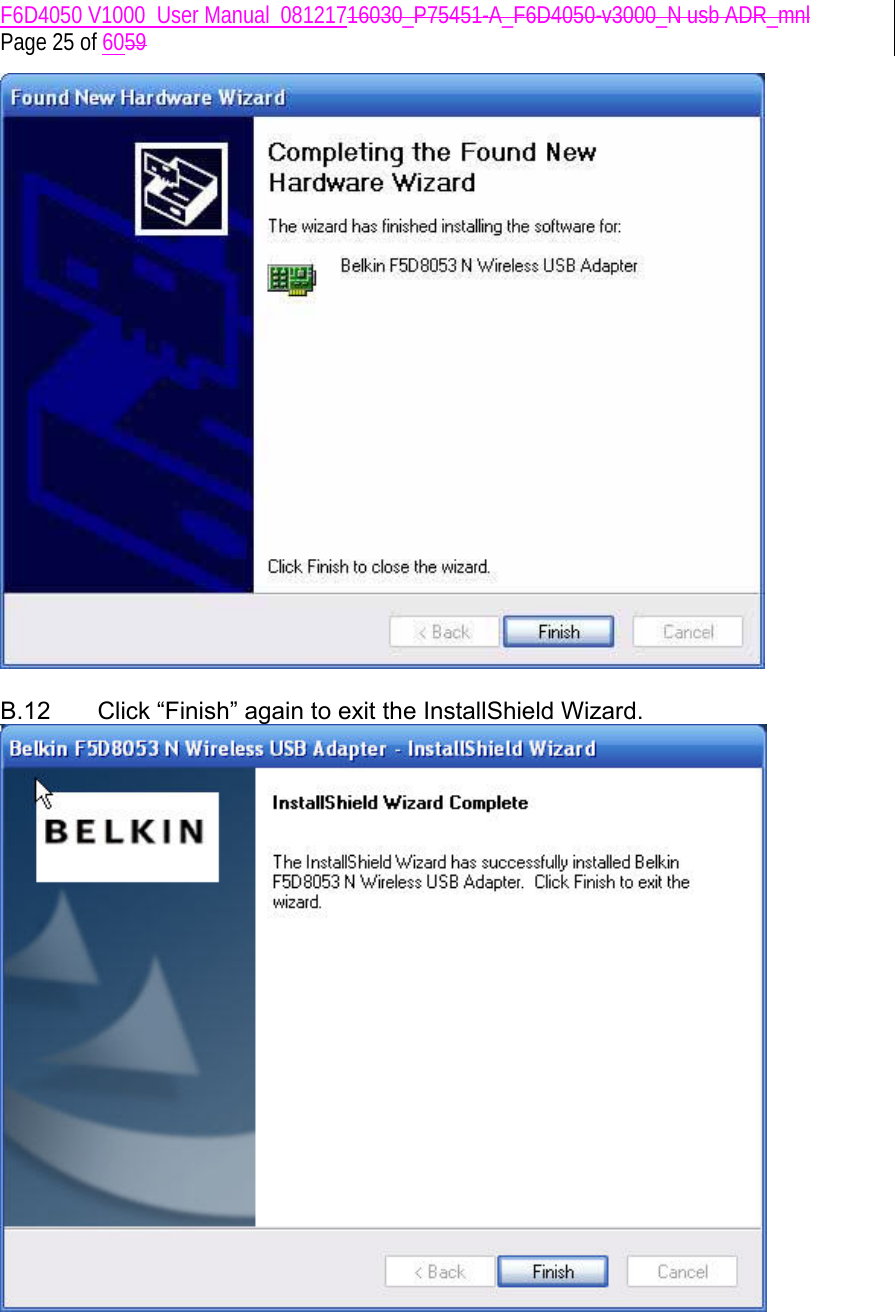
![F6D4050 V1000_User Manual_08121716030_P75451-A_F6D4050-v3000_N usb ADR_mnl Page 26 of 6059 B.13 Depending on which operating system you are using, you might be required to reboot your computer for the changes to take effect. Save your data and close all other applications. Then, reboot. C. Configuration Using the Belkin Wireless Networking Utility C.1 After restarting your computer, double-click the Belkin Wireless Networking Utility icon on the desktop screen. [KEEP THE ICON] Note: The Belkin Wireless Networking Utility icon can also be found on the system tray. C.2 The Belkin Wireless Networking Utility screen will appear.](https://usermanual.wiki/Belkin/F6D4050V1/User-Guide-1063472-Page-26.png)
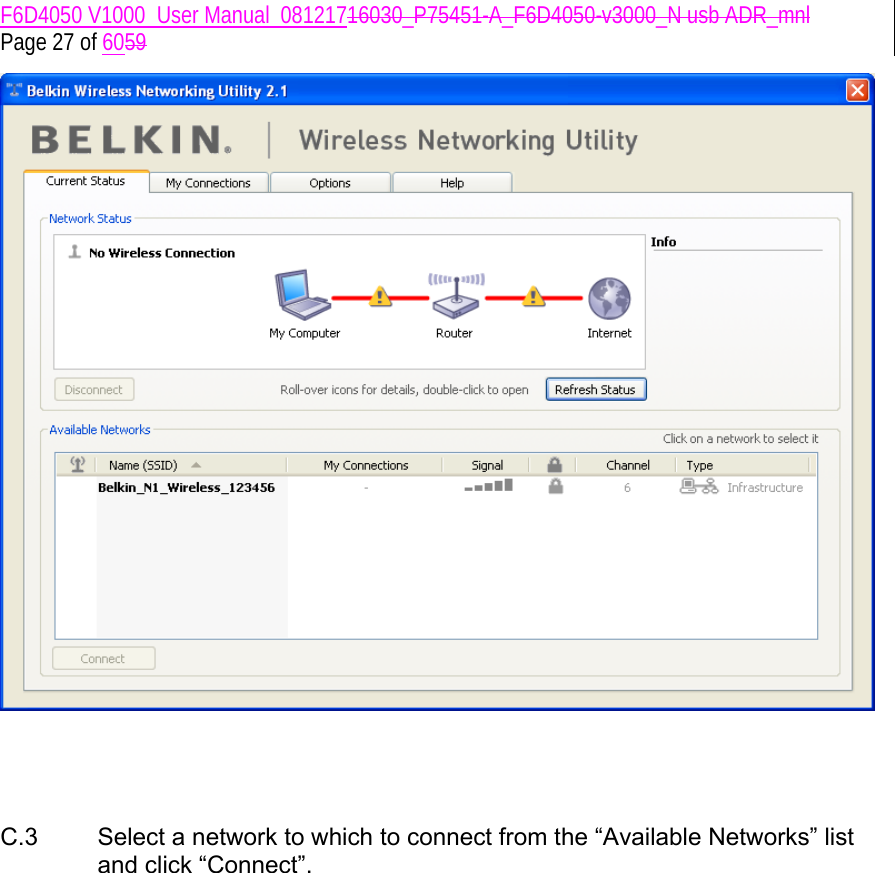
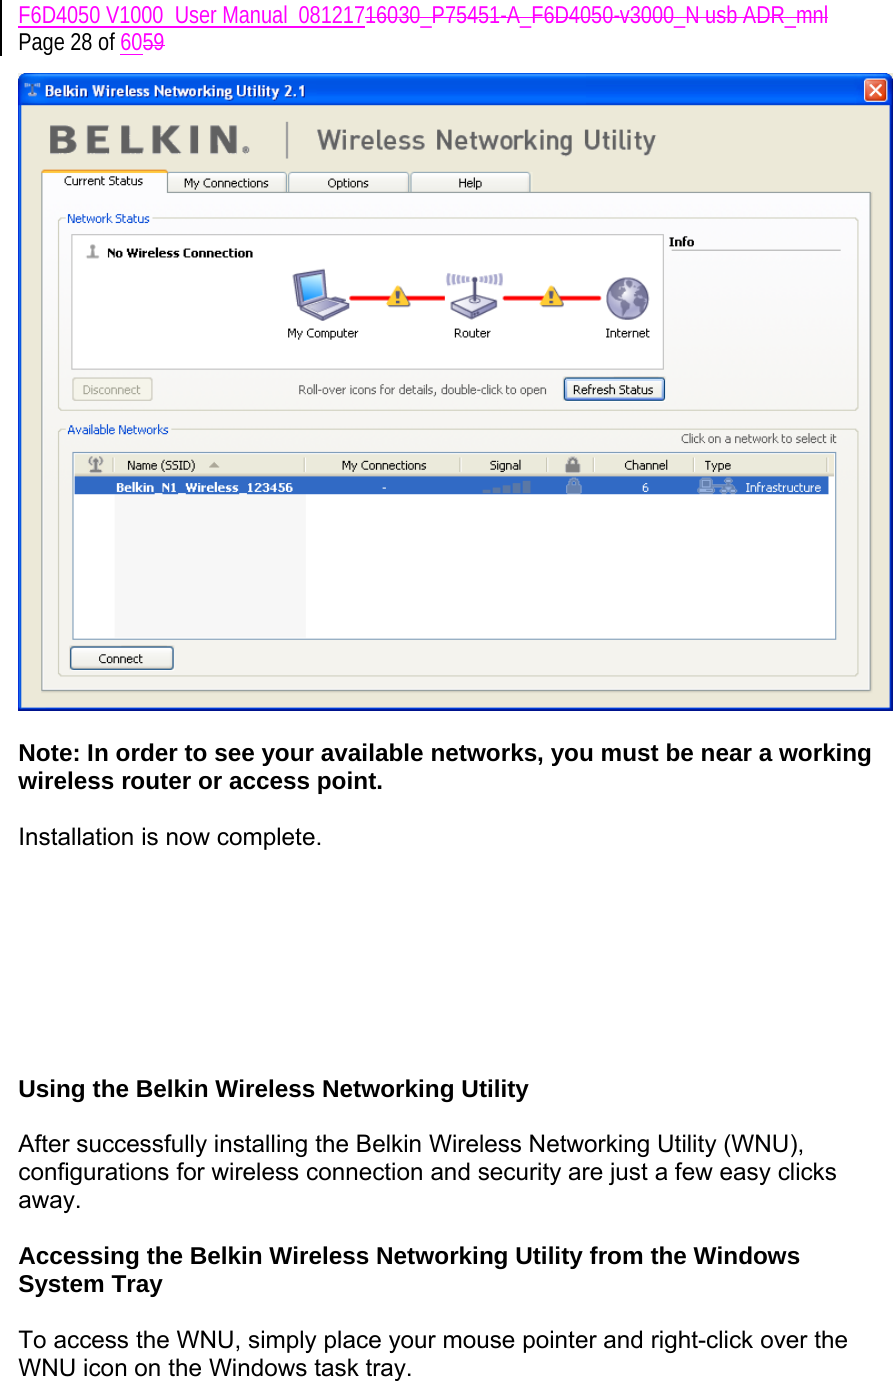
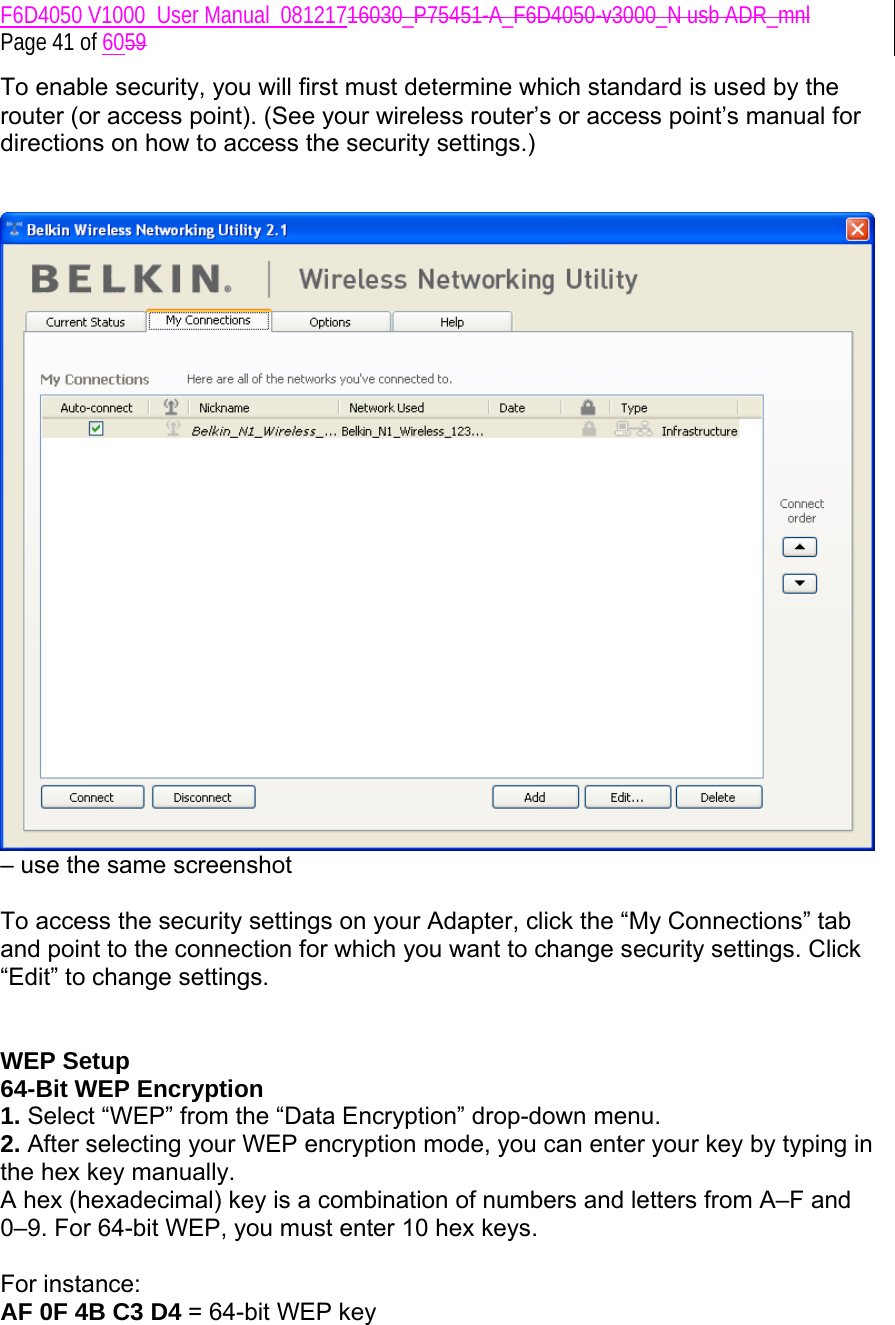
![F6D4050 V1000_User Manual_08121716030_P75451-A_F6D4050-v3000_N usb ADR_mnl Page 29 of 6059 [KEEP] [KEEP] If the icon is not present, click on “Start > Programs > Belkin > N1 Wireless USB Network Adapter > Belkin Wireless Networking Utility”. [insert 8011_WNU_Current_Status_Connected.tif] – use the same screenshot The WNU’s default screen is the “Current Status” tab. The “Current Status” tab displays the current Network Status and Available Networks. Network Status This window displays the connectivity status of the current network. It even displays connectivity between the computer and router, and router and Internet. In the event of a connectivity problem, this window can be used to determine the problem’s source (e.g. computer, router, or Internet/modem).](https://usermanual.wiki/Belkin/F6D4050V1/User-Guide-1063472-Page-29.png)
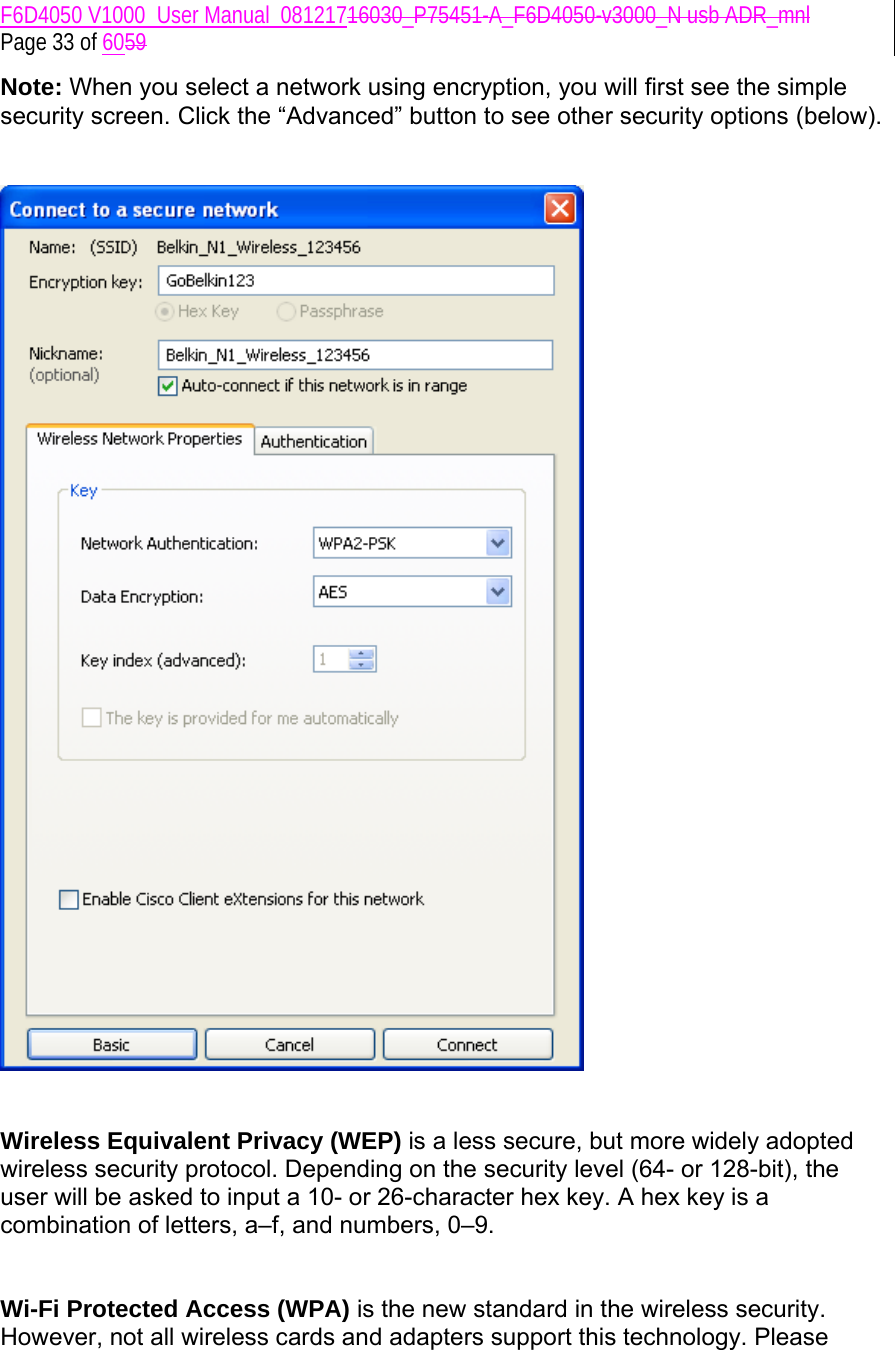
![F6D4050 V1000_User Manual_08121716030_P75451-A_F6D4050-v3000_N usb ADR_mnl Page 42 of 6059 [insert UCUI-Connect2aSecureNetwork-Adv.tif] [Add AF0F4BC3D4 to the Encryption key box] – use the same screenshot 3. Click “Save” to finish. Encryption in the wireless router (or access point) is now set. Each of your computers on your wireless network will now must be configured with the same security settings. WARNING: If you are using a wireless client to turn on the security settings in your wireless router (or access point), you will temporarily lose your wireless connection until you activate security on your wireless client. Please record the key prior to applying changes in the wireless router (or access point). If you don’t remember the hex key, your client will be locked out of the wireless router (or access point).](https://usermanual.wiki/Belkin/F6D4050V1/User-Guide-1063472-Page-42.png)
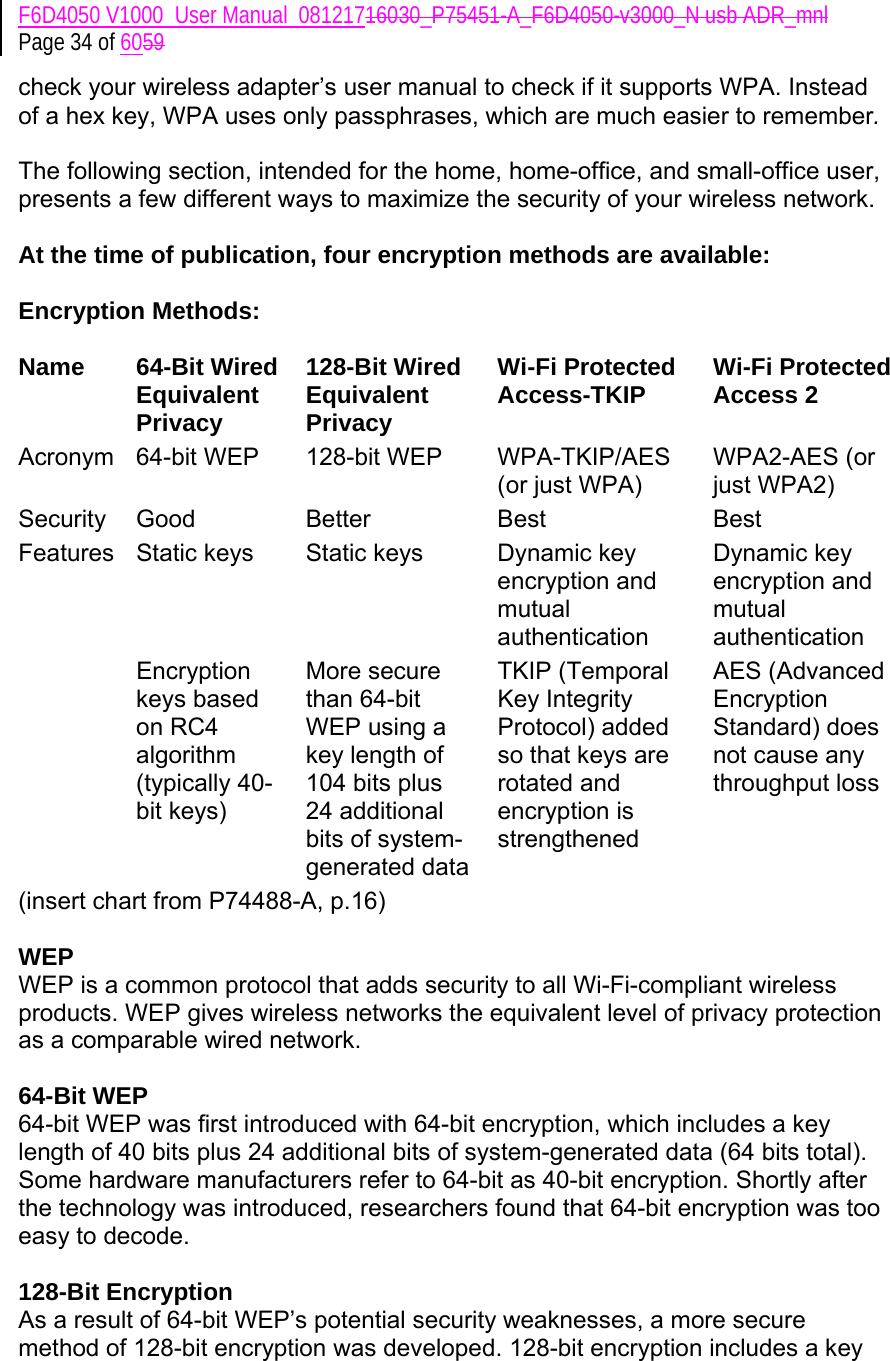
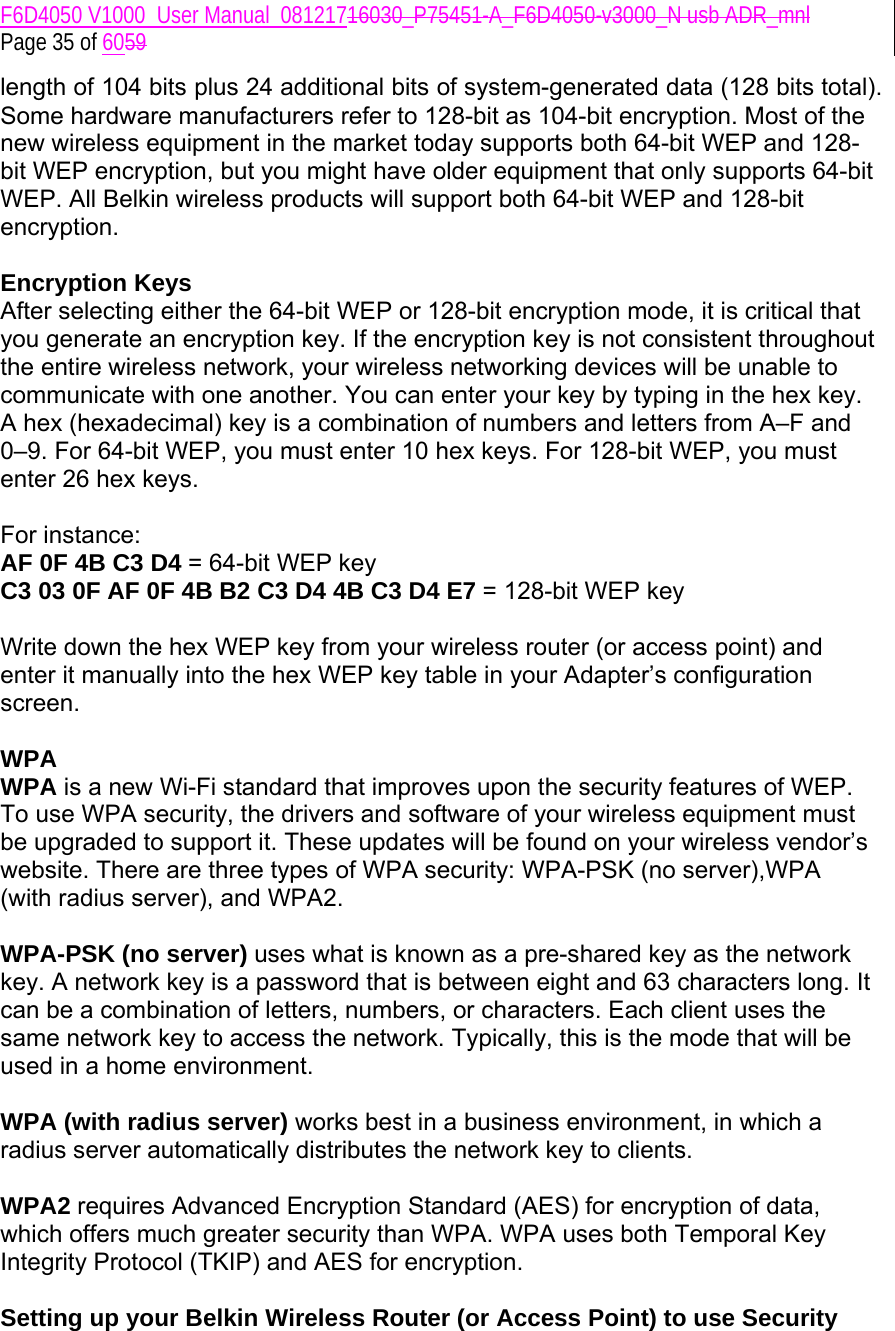
![F6D4050 V1000_User Manual_08121716030_P75451-A_F6D4050-v3000_N usb ADR_mnl Page 43 of 6059 128-Bit WEP Encryption 1. Select “WEP” from the drop-down menu. 2. After selecting your WEP encryption mode, you can enter your key by typing in the hex key manually. A hex (hexadecimal) key is a combination of numbers and letters from A–F and 0–9. For 128-bit WEP, you must enter 26 hex keys. For instance: C3 03 0F AF 0F 4B B2 C3 D4 4B C3 D4 E7 = 128-bit WEP key [insert UCUI-EditInfo-Adv.tif] [Change encryption key to C3 03 0F AF 0F 4B B2 C3 D4 4B C3 D4 E7] – use the same screenshot](https://usermanual.wiki/Belkin/F6D4050V1/User-Guide-1063472-Page-43.png)
![F6D4050 V1000_User Manual_08121716030_P75451-A_F6D4050-v3000_N usb ADR_mnl Page 44 of 6059 3. Click “Save” to finish. Encryption in the wireless router (or access point) is now set. You must now configure each of the computers on your wireless network with the same security settings. WARNING: If you are using a wireless client to turn on the security settings in your wireless router (or access point), you will temporarily lose your wireless connection until you activate security on your wireless client. Please record the key prior to applying changes in the wireless router (or access point). If you don’t remember the hex key, your client will be locked out of the wireless router (or access point). WPA-PSK (no server) Choose this setting if your network does not use a radius server. WPA-PSK (no server) is typically used in home and small office networking. 1. From the “Network Authentication” drop-down menu, select “WPA-PSK (no server)”. 2. Enter your network key. This can be from eight to 63 characters and can be letters, numbers, or symbols. This same key must be used on all of the clients (network cards) that you want to include in your wireless network. [insert UCUI-EditInfo-Adv.tif– use the same screenshot]](https://usermanual.wiki/Belkin/F6D4050V1/User-Guide-1063472-Page-44.png)
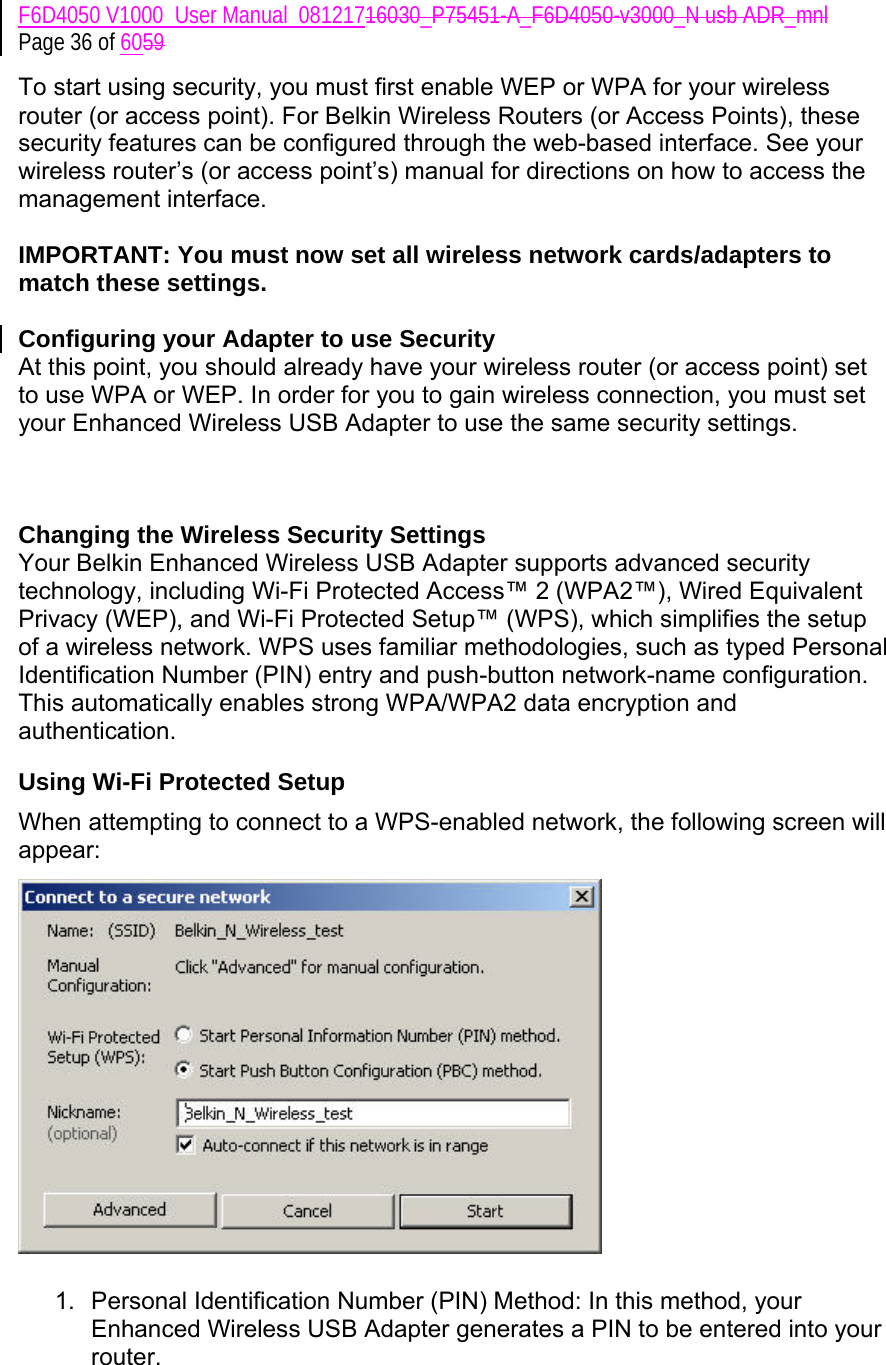
![F6D4050 V1000_User Manual_08121716030_P75451-A_F6D4050-v3000_N usb ADR_mnl Page 45 of 6059 3. Click “Save” to finish. You must now set all clients (network cards) to match these settings. Wireless Networking Utility Options [insert 9010-8.tifKEEP– use the same screenshot]](https://usermanual.wiki/Belkin/F6D4050V1/User-Guide-1063472-Page-45.png)
![F6D4050 V1000_User Manual_08121716030_P75451-A_F6D4050-v3000_N usb ADR_mnl Page 46 of 6059 The “Options” tab on the WNU provides the user the ability to customize his or her WNU settings. Wireless Networking Utility Help The WNU “Help” tab provides users with access to online and telephone support, one-click check for upgrades to updated versions of software, and advanced diagnostic tools. [insert 8011_Help.tif– use the same screenshot]](https://usermanual.wiki/Belkin/F6D4050V1/User-Guide-1063472-Page-46.png)
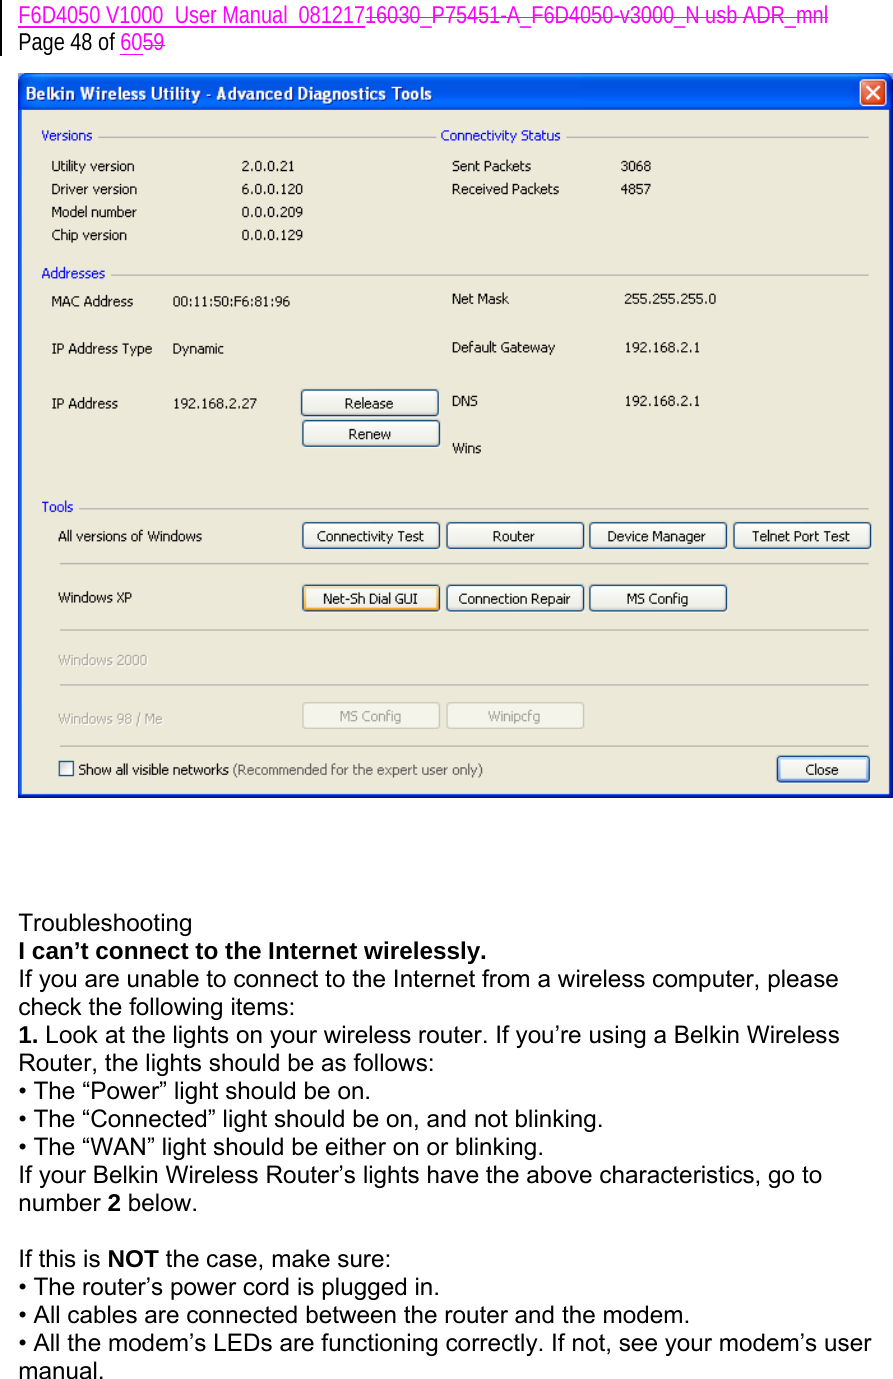
![F6D4050 V1000_User Manual_08121716030_P75451-A_F6D4050-v3000_N usb ADR_mnl Page 47 of 6059 Advanced Diagnostic Tools The “Advanced Diagnostic Tools” section is the central control panel for all the settings of the hardware and software components of the wireless network. It provides an array of tests and connectivity services to ensure optimal network performance. [insert 8011_WNU_Help_Diagnostic.tif– use the same screenshot]](https://usermanual.wiki/Belkin/F6D4050V1/User-Guide-1063472-Page-47.png)
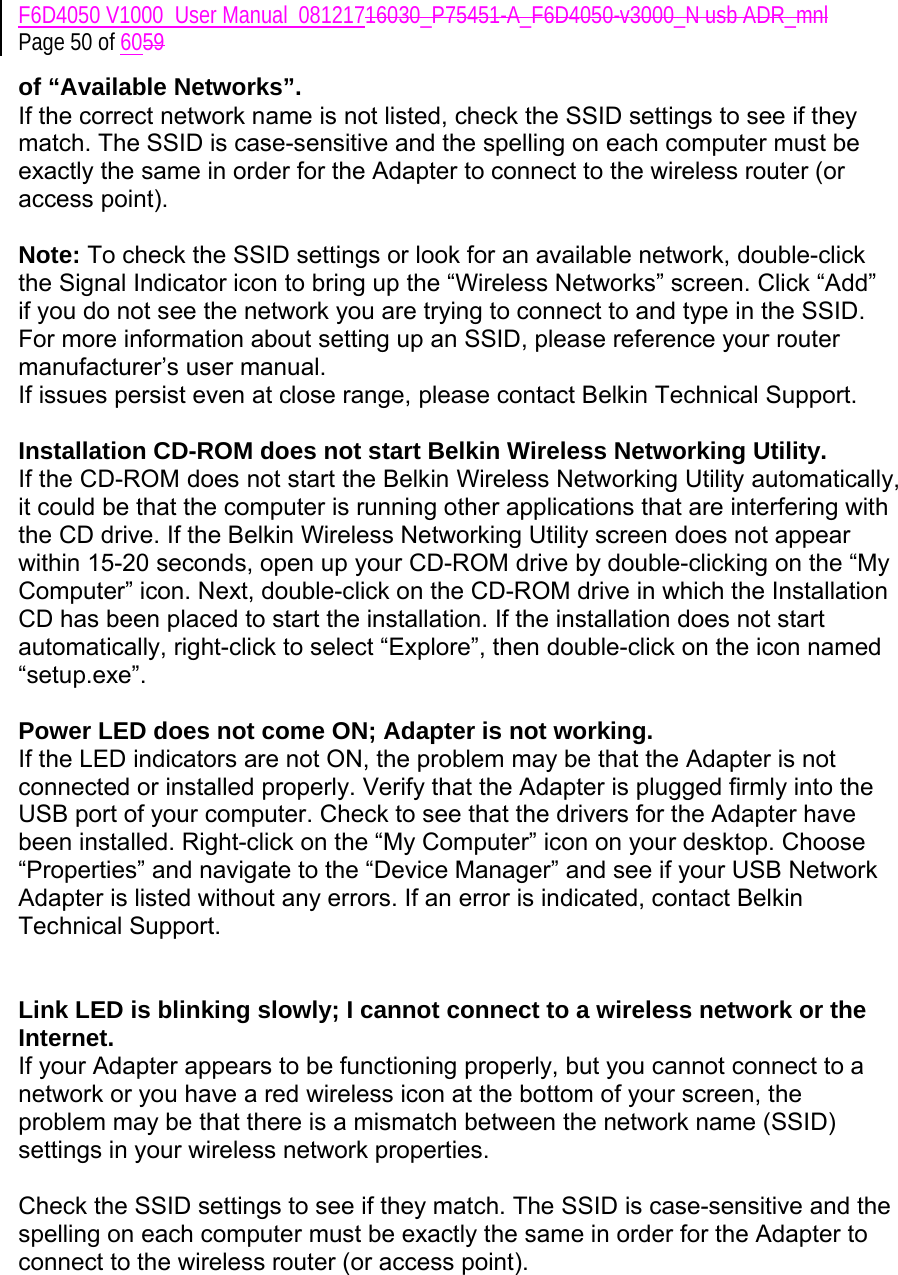
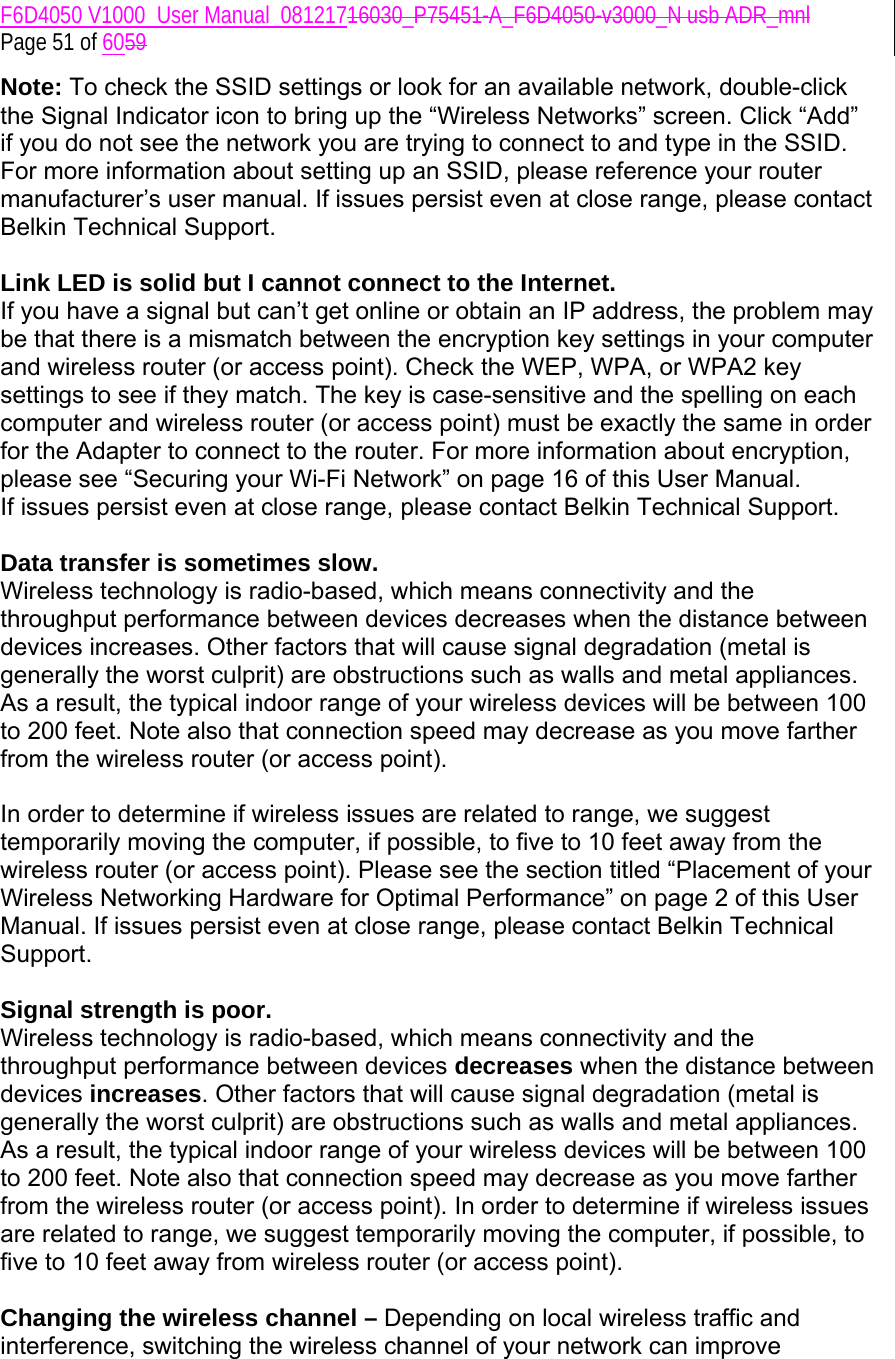
![F6D4050 V1000_User Manual_08121716030_P75451-A_F6D4050-v3000_N usb ADR_mnl Page 49 of 6059 • Reboot the router. • Reboot the modem. If you continue to have issues, please contact Belkin Technical Support. If you are not using a Belkin Wireless Router, consult that router manufacturer’s user guide. 2. Open your wireless utility software by clicking on the icon in the system tray at the bottom right-hand corner of the screen. The tray icon should look like this (the icon may be red or green): [Keep the same icon] 3. The window that opens should have a list of “Available Networks”. Available networks are wireless networks to which you can connect. If you are using a Belkin 802.11g (G Plus) Router, or Belkin 802.11g (54g) Router, “Belkin54g” is the default name. If you are using a Belkin 802.11b Router, the default name should be “WLAN”. If you are NOT using a Belkin Router, please consult your router manufacturer’s user manual for the default name. The name of your wireless network appears in “Available Networks”. If the correct network name is listed in the “Available Networks” list, please follow the steps below to connect wirelessly: 1. Click on the correct network name in the “Available Networks” list. 2. If the network has security (encryption) enabled, you must enter the network key. Click “Connect”. For more information regarding security, see the page entitled: “Securing your Wi-Fi Network” on page xx of this User Manual. 3. Within a few seconds, the tray icon in the lower right-hand corner of your screen should turn green, indicating a successful connection to the network. If you are still unable to access the Internet after connecting to the wireless network, please contact Belkin Technical Support. The name of your wireless network DOES NOT appear in the list](https://usermanual.wiki/Belkin/F6D4050V1/User-Guide-1063472-Page-49.png)

![Česky [Czech] [BELKIN] tímto prohlašuje, že tento [Enhanced Wireless USB Adapter] je ve shodě se základními požadavky a dalšími příslušnými ustanoveními směrnice 1999/5/ES. Dansk [Danish] Undertegnede [BELKIN] erklærer herved, at følgende udstyr [Enhanced Wireless USB Adapter] overholder de væsentlige krav og øvrige relevante krav i direktiv 1999/5/EF. Deutsch [German] Hiermit erklärt [BELKIN], dass sich das Gerät [Enhanced Wireless USB Adapter] in Übereinstimmung mit den grundlegenden Anforderungen und den übrigen einschlägigen Bestimmungen der Richtlinie 1999/5/EG befindet. Eesti [Estonian] Käesolevaga kinnitab [BELKIN] seadme [Enhanced Wireless USB Adapter] vastavust direktiivi 1999/5/EÜ põhinõuetele ja nimetatud direktiivist tulenevatele teistele asjakohastele sätetele. English Hereby, [BELKIN], declares that this [Enhanced Wireless USB Adapter] is in compliance with the essential requirements and other relevant provisions of Directive 1999/5/EC. Español [Spanish] Por medio de la presente [BELKIN] declara que el [Enhanced Wireless USB Adapter] cumple con los requisitos esenciales y cualesquiera otras disposiciones aplicables o exigibles de la Directiva 1999/5/CE. Ελληνική [Greek] ΜΕ ΤΗΝ ΠΑΡΟΥΣΑ [BELKIN] ∆ΗΛΩΝΕΙ ΟΤΙ [Enhanced Wireless USB Adapter] ΣΥΜΜΟΡΦΩΝΕΤΑΙ ΠΡΟΣ ΤΙΣ ΟΥΣΙΩ∆ΕΙΣ ΑΠΑΙΤΗΣΕΙΣ ΚΑΙ ΤΙΣ ΛΟΙΠΕΣ ΣΧΕΤΙΚΕΣ ∆ΙΑΤΑΞΕΙΣ ΤΗΣ Ο∆ΗΓΙΑΣ 1999/5/ΕΚ. Français [French] Par la présente [BELKIN] déclare que l'appareil [Enhanced Wireless USB Adapter] est conforme aux exigences essentielles et aux autres dispositions pertinentes de la directive 1999/5/CE. Italiano [Italian] Con la presente [BELKIN] dichiara che questo [Enhanced Wireless USB Adapter] è conforme ai requisiti essenziali ed alle altre disposizioni pertinenti stabilite dalla direttiva 1999/5/CE. Latviski [Latvian] Ar šo [BELKIN] deklarē, ka [Enhanced Wireless USB Adapter] atbilst Direktīvas 1999/5/EK būtiskajām prasībām un citiem ar to saistītajiem noteikumiem. Lietuvių [Lithuanian] Šiuo [BELKIN] deklaruoja, kad šis [Enhanced Wireless USB Adapter] atitinka esminius reikalavimus ir kitas 1999/5/EB Direktyvos nuostatas. Nederlands [Dutch] Hierbij verklaart [BELKIN] dat het toestel [Enhanced Wireless USB Adapter] in overeenstemming is met de essentiële eisen en de andere relevante bepalingen van richtlijn 1999/5/EG. Malti [Maltese] Hawnhekk, [BELKIN], jiddikjara li dan [Enhanced Wireless USB Adapter] jikkonforma mal-ħtiġijiet essenzjali u ma provvedimenti oħrajn relevanti li hemm fid-Dirrettiva 1999/5/EC. Magyar [Hungarian] Alulírott, [BELKIN] nyilatkozom, hogy a [Enhanced Wireless USB Adapter] megfelel a vonatkozó alapvetõ követelményeknek és az 1999/5/EC irányelv egyéb elõírásainak. Polski [Polish] Niniejszym [BELKIN] oświadcza, że [Enhanced Wireless USB Adapter] jest zgodny z zasadniczymi wymogami oraz pozostałymi stosownymi postanowieniami Dyrektywy 1999/5/EC.Português [Portuguese] [BELKIN] declara que este [Enhanced Wireless USB Adapter] está conforme com os requisitos essenciais e outras disposições da Directiva 1999/5/CE.](https://usermanual.wiki/Belkin/F6D4050V1/User-Guide-1063472-Page-62.png)
![Slovensko [Slovenian] [BELKIN] izjavlja, da je ta [Enhanced Wireless USB Adapter] v skladu z bistvenimi zahtevami in ostalimi relevantnimi določili direktive 1999/5/ES. Slovensky [Slovak] [BELKIN] týmto vyhlasuje, že [Enhanced Wireless USB Adapter] spĺňa základné požiadavky a všetky príslušné ustanovenia Smernice 1999/5/ES. Suomi [Finnish] [BELKIN] vakuuttaa täten että [Enhanced Wireless USB Adapter] tyyppinen laite on direktiivin 1999/5/EY oleellisten vaatimusten ja sitä koskevien direktiivin muiden ehtojen mukainen. Svenska [Swedish] Härmed intygar [BELKIN] att denna [Enhanced Wireless USB Adapter] står I överensstämmelse med de väsentliga egenskapskrav och övriga relevanta bestämmelser som framgår av direktiv 1999/5/EG.](https://usermanual.wiki/Belkin/F6D4050V1/User-Guide-1063472-Page-63.png)