Belkin F7C001 Conserve Gateway Connect User Manual MAN F7C001 8820 00692 Conserve Gateway indd
Belkin International, Inc. Conserve Gateway Connect MAN F7C001 8820 00692 Conserve Gateway indd
Belkin >
User Manual

Company Information
Belkin Tech Support
U.S.
http://www.belkin.com/support
For more information and to learn about other
Belkin Conserve energy management products,
please go to belkin.com/conserve
8820-00692
F7C001
© 2010 Belkin International, Inc. All rights reserved. All trade names are registered trademarks of respective
manufacturers listed. Safari is a trademark of Apple Inc., registered in the U.S. and other countries. Internet
Explorer is either a registered trademark or trademark of Microsoft Corporation in the United States and/or other
countries. Belkin International, Inc. reserves the right to make any modification to this manual or the information
contained herein at any time without notice.
Conserve Gateway™
Your Connection
to Saving Energy
User Guide

01

Introduction 03
Installation and Setup 05
Getting Connected 09
Settings 19
Troubleshooting 23
Information 29
TABLE OF CONTENTS
02

03
Making progress
every day
Making a better world doesn’t happen all at once; it’s about making
progress. Your Conserve energy management system can help you make
progress on your energy goals every day.
03
04
Welcome to Conserve
Welcome to your Conserve energy management system. Here you can
track your energy use, estimate your bill, get answers to your energy
questions, and set goals to help you save energy and money.
Your Conserve System
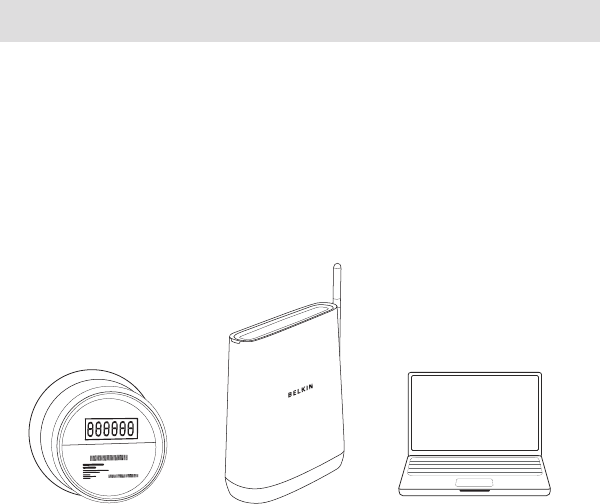
Your Conserve energy management system is made up of three key parts.
INTRODUCTION
Smart Meter
Located on the
outside of your home
Conserve Gateway
Professionally installed
by your utility company
Computer Interface
Accessible from home
or remotely

05
What was
just installed
in my home?
Your utility company sent a representative to your house to professionally
install your Conserve Gateway, the nerve center for your Conserve
system. The following pages describe what was installed.
05
06
Introducing Your Conserve Gateway
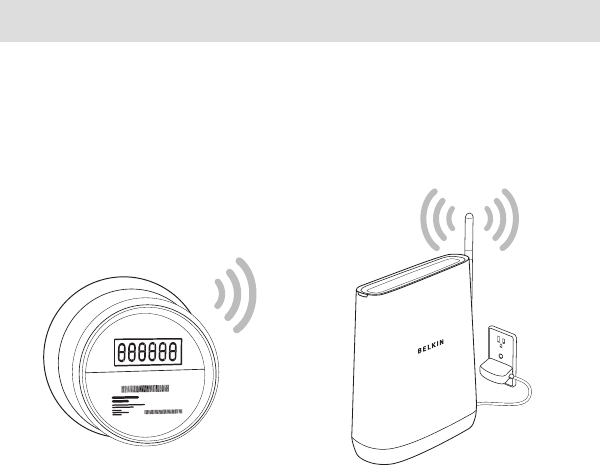
Your Conserve Gateway was professionally installed in your home and
set up to link wirelessly to your smart meter.
INSTALLATION AND SETUP
Smart Meter Conserve Gateway

07
INSTALLATION AND SETUP
Here’s what the installer did to set up
your Conserve Gateway:
. Found the optimal location for the Conserve Gateway in your home.
Your Conserve Gateway requires a strong wireless signal to link to your
smart meter and other connected devices. Please avoid moving the
Conserve Gateway. If you experience connection problems, see the
Troubleshooting section at the back of this guide.
. Connected your Conserve Gateway to an appropriate power source.
Your Conserve Gateway needs to be powered on at all times and cannot
be connected to an outlet controlled by a switch.
. Established a secure wireless connection to your smart meter.
Your Conserve Gateway transmits information about your energy use
from the smart meter to your personalized Conserve interface to help
you understand your bill and set energy goals.

08
INSTALLATION AND SETUP
The installer may have also:
. Paired the Conserve Gateway to other devices in your home,
if applicable.
Additional devices, including in-home displays, smart thermostats, and
load controllers may have been connected to enhance your Conserve
system. Refer to any additional information your utility company may
have provided.
. Linked the Conserve Gateway to your existing home router,
if applicable.
Connecting your Conserve Gateway to the Internet enables additional
functionality, such as remote access.

09
How do I get
connected?
Now that your Conserve Gateway has been installed, how do you make
it work for you? Getting connected is easy. Just follow one of the four
connection options on the following pages. From there you can access
the Conserve system from your home computer, or enable remote
access to manage your energy use from anywhere.
09
10
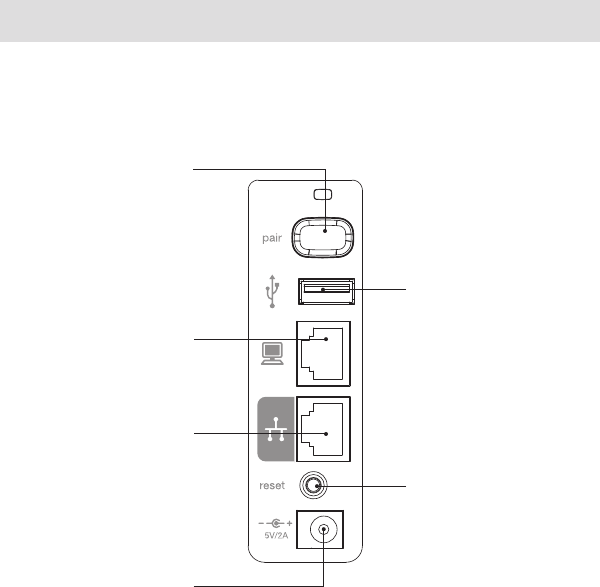
The Back of Your Conserve Gateway
GETTING CONNECTED
Pair Button
May be used to link the Conserve
Gateway to compatible devices.
Refer to instructions included
with the device you wish to pair.
Note: This feature may not be
enabled by your utility provider.
Computer Port
For connecting the Conserve
Gateway to your home computer.
Network Port
For connecting the Conserve
Gateway to the Internet.
Note: You must have an
existing Internet connection and
compatible wired or wireless
router with available Ethernet
ports to use this functionality.
Power Jack
Connects the Conserve Gateway
to the included power supply.
Note: Only use the included
power supply (power rating
5V/2A) with the
Conserve Gateway.
USB Port
Used with compatible USB
devices.
Reset Button
Use to restart your Conserve
Gateway in the rare case that
it functions incorrectly. Existing
settings will be preserved
during restart.
Back
11
GETTING CONNECTED
Simple Connection
You can access the Conserve interface at home from your computer. You
don’t need to be connected to the Internet to do this, but connecting to
the Internet will enable additional functionality, such as remote access.
Choose the connection option that’s right for you.
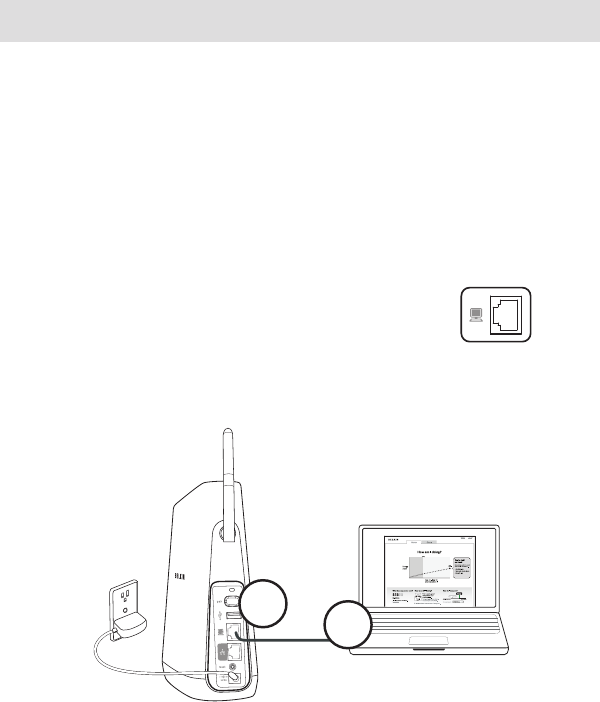
Connecting without Internet:
Linking your Conserve Gateway to your home computer:
Step 1: Plug an Ethernet cable into the Computer Port
on the back panel of the Conserve Gateway.
Step 2: Plug the other end of the Ethernet cable into an Ethernet port
on your home computer.
Step
2
Step
1
12
GETTING CONNECTED
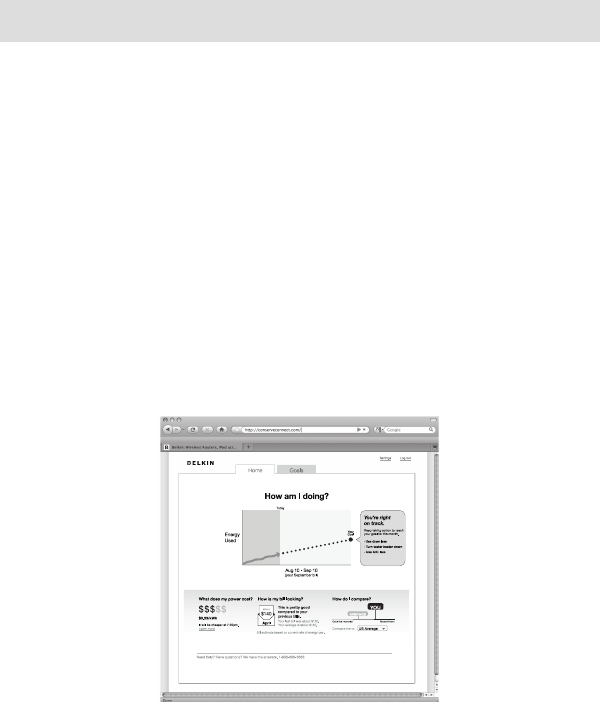
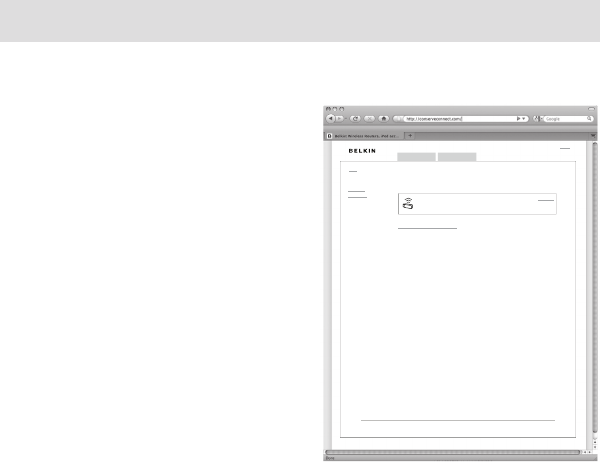
Accessing the Conserve interface:
Step 1: Open up a browser window on your computer (for example,
Internet Explorer® or Safari®).
Step 2: Type the following address into the address bar:
http://www.ConserveAdvisor.com
This will open up the Conserve interface that allows you to manage your
energy use.
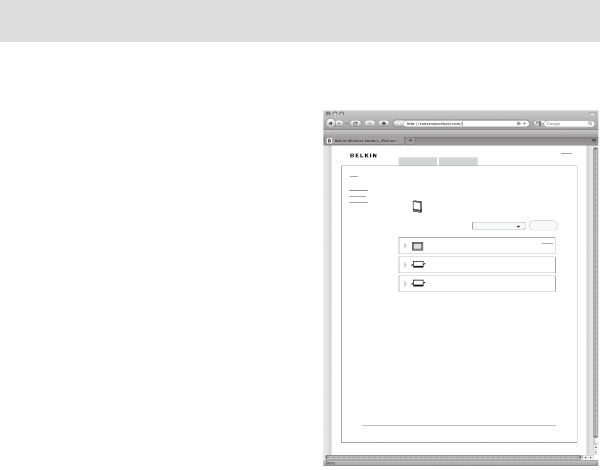
Step 3: If this is your fi rst time accessing the Conserve interface, create
an account by entering the required information.
Then log in to access your personalized energy management system.
13
GETTING CONNECTED
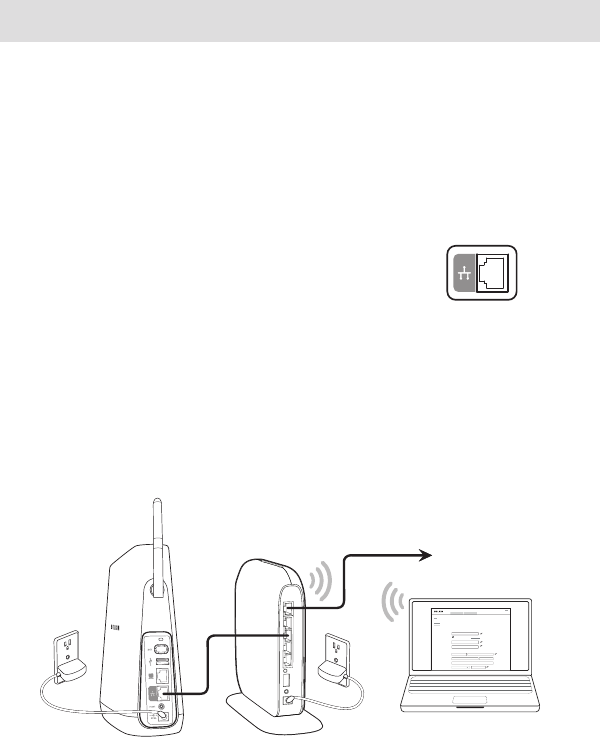
Connecting through wired Internet:
If you have broadband Internet access and a compatible router, linking
your Conserve Gateway to the Internet will enable additional functionality,
such as remote access.
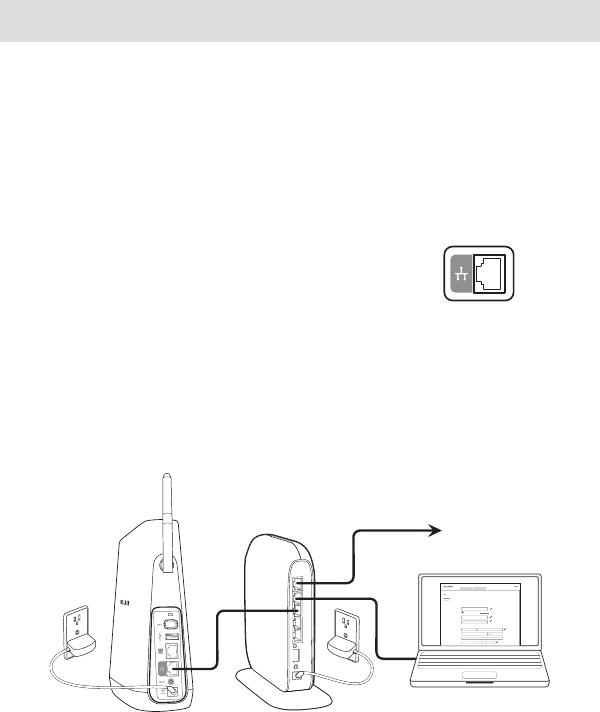
Linking your Conserve Gateway to your home network using an
Ethernet cable
Step 1: Plug an Ethernet cable into the Network Port
on the back of the Conserve Gateway.
Step 2: Plug the other end of the Ethernet cable into your
home network router.
Note: The Conserve Gateway is not a network router. Your home
computer should be connected directly to your home router. Do not
connect your home computer to the Computer Port on the Conserve
Gateway if you are also plugged into the Network Port.
Your Account I nformation
to modem
14
GETTING CONNECTED
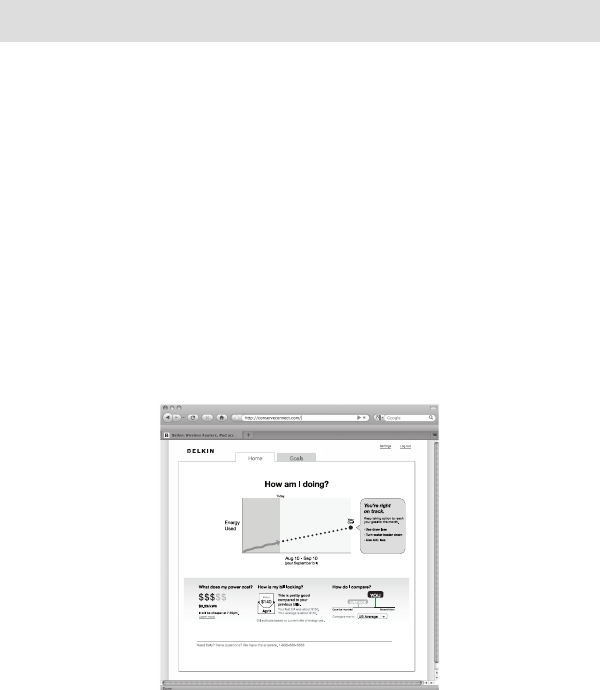
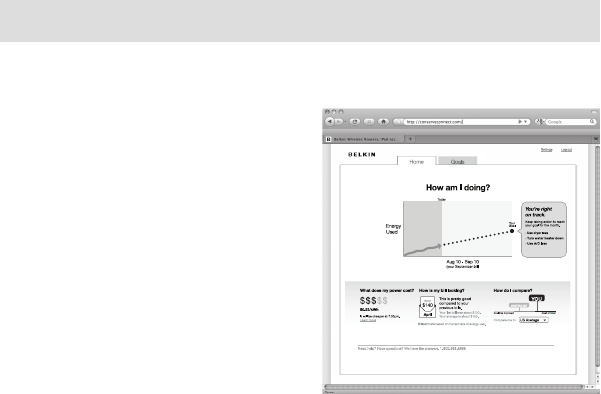
Accessing the Conserve interface:
Step 1: Open up a browser window on your computer (for example,
Internet Explorer or Safari).
Step 2: Type the following address into the address bar:
http://www.ConserveAdvisor.com
This will open up the Conserve interface that allows you to manage your
energy use.
Step 3: If this is your fi rst time accessing the Conserve interface, create
an account by entering the required information.
Then log in to access your personalized energy management system.
15
GETTING CONNECTED
Connecting through wireless Internet:
If you have wireless Internet access and a compatible wireless router,
linking your Conserve Gateway to the Internet will enable additional
functionality, such as remote access.
Connecting though wireless Internet using an
Ethernet cable
Step 1: Plug an Ethernet cable into the Network Port
on the back of the Conserve Gateway.
Step 2: Plug the other end of the Ethernet cable into your wireless router.
Note: The Conserve Gateway is not a network router. Your home
computer should be connected directly to your wireless router. Do not
connect your home computer to the Computer Port on the Conserve
Gateway if you are also plugged into the Network Port.
Your Account I nformation
to modem
16
GETTING CONNECTED
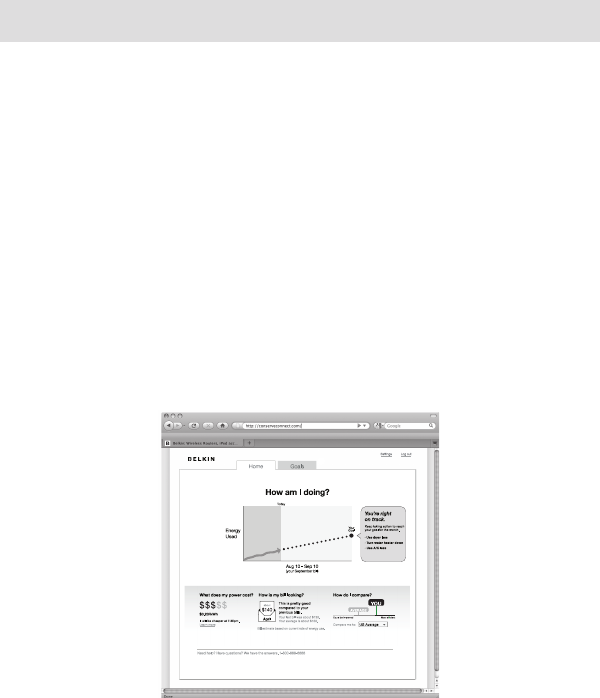
Accessing the Conserve interface:
Step 1: Open up a browser window
on your computer (for example,
Internet Explorer or Safari).
Step 2: Type the following address
into the address bar:
http://www.ConserveAdvisor.com
This will open up the Conserve
interface that allows you to manage
your energy use.
Step 3: If this is your fi rst time
accessing the Conserve interface,
create an account by entering the
required information.
Then log in to access your
personalized energy
management system.
17
GETTING CONNECTED
Accessing Conserve Away from Home
Note: Before establishing remote access to the Conserve interface, you
must create a local account at home and link the Conserve Gateway to
your home Internet (see sections “Connecting through wired Internet” or
“Connecting through
wireless Internet”).
Step 1: Connect to the Internet and open up a browser window on your
computer (for example, Internet Explorer or Safari).
Step 2: Type the following address into the address bar:
http://www.ConserveAdvisor.com
This will open up the Conserve interface that allows you to manage your
energy use.

18
GETTING CONNECTED
Step 3: If this is your first time accessing the Conserve interface
remotely, create an account by entering the required information.
Note: This may require changing the username you created during initial
setup if another remote-enabled account already exists for that username.
If so, please make note of your new username.
Then log in to access your personalized energy management system.

How do I customize
my settings?
Your Conserve energy management system is designed to allow you to
customize your experience. The following pages will help you change
account and network settings and connect any additional devices to the
Conserve system.
19
20
SETTINGS
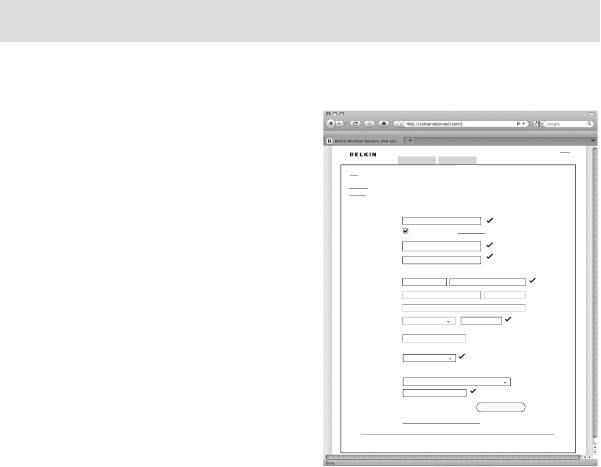
Changing Your Account Settings
To change your password or other
account information:
Step 1: Select “Settings”
Step 2: Select “Account”
Your current account information will
be listed.
Step 3: Update the form with new
data, if applicable, and click on the
“Save Changes” button.
G
oals
Home
Log out Setti ngs
home : se tting s
Need help? Have quest ions? We hav e the answe rs. 1 -800-2 23-55 46
Network
System
Account
Your Account Information
Required fi elds are highlighted.
S
av e
C
ha n ge
s
City
Street
steve@aol.com
• • • • • • •
• • • • • • •
Apt
Steve Power
CA 90049
555-555-5555
PHON E
Del ete acco unt and a ll p ersa onal inf orma tion
What is the name of your fi rst pet?
SECU RITY QUE STIO N
max
HOW MANY P EOPLE LIVE IN YO UR HOM E?
4 people
Ena ble remo te a ccess (What is this ?)
21
SETTINGS
Changing Your Network Settings
If you have broadband Internet
access and a compatible router,
linking your Conserve Gateway
to the Internet enables additional
functionality, such as remote access.
To change your network settings,
follow the steps below.
Step 1: Select “Settings”
Step 2: Select “Network”
Your current network connection will
be listed. If you do not have a network
connection, follow the on-screen
instructions to set one up.
G
oals
Home
Log out
Need help? Have quest ions? We hav e the answe rs. 1 -800-2 23-55 46
Setti ngs
home : se tting s
Network
System
Account
Need to ch ange your u ser I D or p asswo rd?
Wireless Adapter
Con nected to Ho meNet work23
Disco nnec t
Your Network Connection
22
SETTINGS
Managing Your Connected Devices
Check the connection status of
devices linked to your Conserve
Gateway, connect new devices, and
change device names.
Step 1: Select “Settings”
Step 2: Select “System”
Your current linked devices will
be listed. Follow the on-screen
instructions to add a new device
or click on an existing device for
more information.
G
oals
Home
Log o ut
Need help? Have quest ions? We hav e the answe rs. 1- 800-2 23-554 6
Setti ngs
home : set tings
Network
System
Account
Need to add a new device? Device Type
Air Conditioner
Connect ed
Car Charger
Connect ed
System Status
Con serve Connect
Net work O n
Con serve Advisor
Connect ed
Ad d
Remov e

What if I’m
having trouble?
If you need help with the Conserve Gateway, follow the troubleshooting
tips on the following pages.
23

24
TROUBLESHOOTING
One of my devices lost connection.
If your smart meter, in-home display, load controller, or other in-home
device loses connection with the Conserve Gateway, it could be
experiencing interference. Wireless connectivity typically improves when
devices are located closer together. Obstructions such as walls, furniture,
and metal appliances can also affect the wireless connection.
•Trymovingconnecteddevicesascloseaspossibletothe
Conserve Gateway.
•Trymovingcomputermonitors,electronics,andotherobjectsaway
from the Conserve Gateway.
25
TROUBLESHOOTING
I’m having difficulty connecting to the Internet.
To enable Internet functionality, you must have an existing Internet
connection and compatible wired or wireless router.
If you used an Ethernet cable to link your Conserve Gateway to your home
router, consider the following tips:
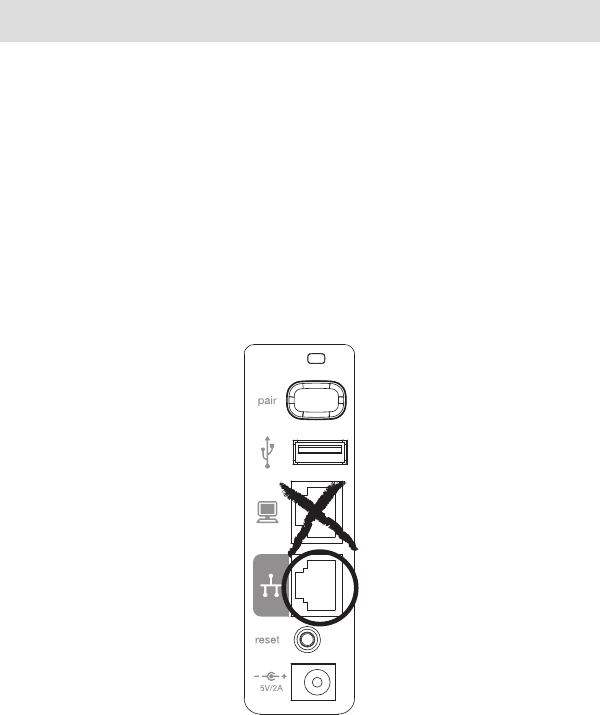
•EnsuretheEthernetcableispluggedsecurelyintotheNetworkPort
(not the Computer Port) on the back panel of the Conserve Gateway.
•EnsuretheEthernetcableispluggedsecurelyintothecorrect
port on your home router. Refer to your router’s instructions for
additional information.

26
TROUBLESHOOTING
I can’t connect devices.
Make sure that the devices you are trying to connect are compatible for
use with the Conserve Gateway. If so, follow the instructions listed on
page 22. Refer to the instructions provided by the device manufacturer to
determine the correct pairing procedure with the Conserve Gateway.
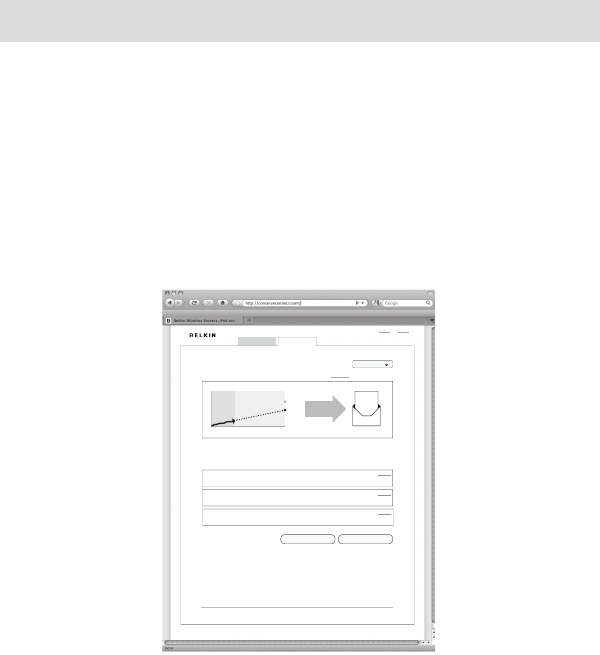
I forgot my password.
To reset your password, access the Conserve interface login screen. Click
on the link “Forgot your password” and follow the on-screen instructions.
27
TROUBLESHOOTING
I’m having diffi culty setting goals and actions.
The Conserve interface provides tips and guidance to help you meet
your energy goals. To set your goal, click on the “Goals” tab. Click on the
“Customize” link and follow the on-screen instructions.
You can set Actions that will help you reach your energy-saving goals.
The Conserve interface offers some suggestions (click on the “Get a
Suggestion” button ), or you can create your own.
Home
G
oals
Log out Settings
Need help? Have quest ions? We hav e the answe rs. 1 -800-2 23-55 46
C
rea te a n ac ti o
n
Ge t a su gg es ti o
n
Your Actions
You’v e com mitted to t hese e nergy- saving actio ns to help you re ach y our go al.
Remove
Remove
Re pla ce wa ter h eat er
New Energy Star water heat ers ar e twic e as effi c ient
Us e d ryer more ef fi c ie ntly
Foll ow our tips to re duce d ryer usage up to 30%
to save
abo ut
$28
Oct
This Month’s Goal: Save 5%
Your April 10 - May 1 0 goa l to u se 5% less energy than the s tate a verag e. Cus tom ize.
your
goal
stat e
aver age
Yo u’re r ight
on tra ck.
This month
Show:
Re duc e car charg er use
Impr ove yo ur mil eage to red uce yo ur en ergy b ill.
Remove
28
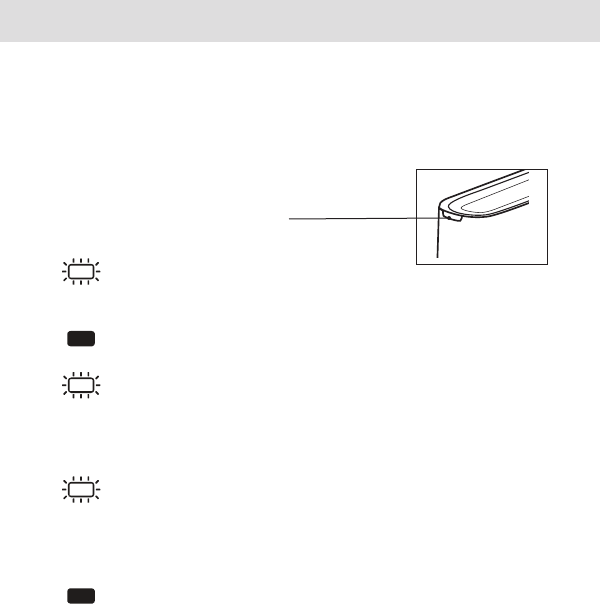
What do the lights indicate?
The Conserve Gateway has a single indicator
located on the front of the unit. The indicator
will notify you if everything is ok or if there is a
problem with one of your connections.
Front Panel Indicator
Blinking Green
The Conserve Gateway is
starting up or in pairing mode.
Solid Green
Normal operation.
Blinking Amber
There is a home network
connection error. Access the
Conserve interface and follow
the on-screen instructions.
Blinking Red
There is a Smart Meter
connection error. Access the
Conserve interface and follow
the on-screen instructions.
Solid Red
There is a Smart Meter and
home network connection error.
Access the Conserve interface
and follow the on-screen
instructions.
TROUBLESHOOTING

How does my
warranty work?
Belkin International, Inc.,
Limited 1-Year Product Warranty
29

30
INFORMATION
What this warranty covers.
Belkin International, Inc. (“Belkin”) warrants to the original purchaser of this Belkin product that
the product shall be free of defects in design, assembly, material,
or workmanship.
What the period of coverage is.
Belkin warrants the Belkin product for one year.
What will we do to correct problems?
Product Warranty.
Belkin will repair or replace, at its option, any defective product free of charge (except for
shipping charges for the product). Belkin reserves the right to discontinue any of its products
without notice, and disclaims any limited warranty to repair or replace any such discontinued
products. In the event that Belkin is unable to repair or replace the product (for example,
because it has been discontinued), Belkin will offer either a refund or a credit toward the
purchase of another product from Belkin.com in an amount equal to the purchase price of the
product as evidenced on the original purchase receipt as discounted by its natural use.
What is not covered by this warranty?
All above warranties are null and void if the Belkin product is not provided to Belkin for
inspection upon Belkin’s request at the sole expense of the purchaser, or if Belkin determines
that the Belkin product has been improperly installed, altered in any way, or tampered with.
The Belkin Product Warranty does not protect against acts of God such as flood, lightning,
earthquake, war, vandalism, theft, normal-use wear and tear, erosion, depletion, obsolescence,
abuse, damage due to low voltage disturbances (i.e. brownouts or sags), non-authorized
program, or system equipment modification or alteration.

31
INFORMATION
How to get service.
To get service for your Belkin product you must take the following steps:
1. Contact Belkin International, Inc., at 12045 E. Waterfront Drive, Playa Vista, CA 90094,
Attn: Customer Service, or call (866)-239-5731, within 15 days of the Occurrence.
Be prepared to provide the following information:
a. The part number of the Belkin product.
b. When the product was first installed.
c. Proof of installation.
2. Your Belkin Customer Service Representative will then instruct you on how to forward
your receipt and Belkin product and how to proceed with your claim.
Belkin reserves the right to review the damaged Belkin product. All costs of shipping the Belkin
product to Belkin for inspection shall be borne solely by the purchaser. If Belkin determines, in
its sole discretion, that it is impractical to ship the damaged equipment to Belkin, Belkin may
designate, in its sole discretion, an equipment repair facility to inspect and estimate the cost
to repair such equipment. The cost, if any, of shipping the equipment to and from such repair
facility and of such estimate shall be borne solely by the purchaser. Damaged equipment must
remain available for inspection until the claim is finalized. Whenever claims are settled, Belkin
reserves the right to be subrogated under any existing insurance policies the purchaser
may have.

32
INFORMATION
How state law relates to the warranty.
THIS WARRANTY CONTAINS THE SOLE WARRANTY OF BELKIN. THERE ARE NO OTHER
WARRANTIES, EXPRESSED OR, EXCEPT AS REQUIRED BY LAW, IMPLIED, INCLUDING THE
IMPLIED WARRANTY OR CONDITION OF QUALITY, MERCHANTABILITY OR FITNESS FOR
A PARTICULAR PURPOSE, AND SUCH IMPLIED WARRANTIES, IF ANY, ARE LIMITED IN
DURATION TO THE TERM OF THIS WARRANTY.
Some states do not allow limitations on how long an implied warranty lasts, so the above
limitations may not apply to you.
IN NO EVENT SHALL BELKIN BE LIABLE FOR INCIDENTAL, SPECIAL, DIRECT, INDIRECT,
CONSEQUENTIAL OR MULTIPLE DAMAGES SUCH AS, BUT NOT LIMITED TO, LOST
BUSINESS OR PROFITS ARISING OUT OF THE SALE OR USE OF ANY BELKIN PRODUCT,
EVEN IF ADVISED OF THE POSSIBILITY OF SUCH DAMAGES.
This warranty gives you specific legal rights, and you may also have other rights, which may
vary from state to state. Some states do not allow the exclusion or limitation of incidental,
consequential, or other damages, so the above limitations may not apply to you.

33
INFORMATION
FCC Statement
DECLARATION OF CONFORMITY WITH FCC RULES FOR ELECTROMAGNETIC
COMPATIBILITY
We, Belkin International, Inc., of 12045 E. Waterfront Drive, Playa Vista, CA 90094, declare
under our sole responsibility that the device, F7C001, complies with Part 15 of the FCC Rules.
Operationissubjecttothefollowingtwoconditions:(1)thisdevicemaynotcauseharmful
interference, and (2) this device must accept any interference received, including interference
that may cause undesired operation.
Caution: Exposure to Radio Frequency Radiation.
The device shall be used in such a manner that the potential for human contact during normal
operation is minimized.
This equipment complies with FCC radiation exposure limits set forth for an uncontrolled
environment. This equipment should be installed and operated with a minimum distance of
20cm between the radiator and your body.

34
INFORMATION
Federal Communications Commission Notice
This equipment has been tested and found to comply with the limits for a Class B digital
device, pursuant to Part 15 of the FCC Rules. These limits are designed to provide reasonable
protection against harmful interference in a residential installation. This equipment generates,
uses, and can radiate radio frequency energy, and if not installed and used in accordance with
the instructions, may cause harmful interference to radio communications. However, there is
no guarantee that interference will not occur in a particular installation. If this equipment does
cause harmful interference to radio or television reception, which can be determined by turning
the equipment off and on, the user is encouraged to try and correct the interference by one or
more of the following measures:
•Reorientorrelocatethereceivingantenna.
•Increasethedistancebetweentheequipmentandthereceiver.
•Connecttheequipmenttoanoutletonacircuitdifferentfromthattowhichthereceiveris
connected.
•Consultthedealeroranexperiencedradio/TVtechnicianforhelp.
FCC Caution: Any changes or modifications not expressly approved by the party responsible
for compliance could void the user’s authority to operate this equipment. This device and its
antenna(s)mustnotbeco-locatedoroperatinginconjunctionwithanyotherantenna
or transmitter.