Belkin F8T009 Bluetooth Class 2 Adapter User Manual QIG Bluetooth USB Adapter 80 81 90 91
Belkin International, Inc. Bluetooth Class 2 Adapter QIG Bluetooth USB Adapter 80 81 90 91
Belkin >
Users Manual
BluetoothTM USB Adapter
Connect your peripherals and computing devices
without cables
Quick Installation Guide
Introduction
PC System Requirements
• PC-compatible computer, CPU speed of 200MHz or above
• Memory: 64MB or above, 128MB recommended
• One available USB port, USB 1.1 standard
• Windows® 98 SE, Me, 2000, and XP
Product Contents
• Bluetooth USB Adapter
• CD-ROM for installation software and documentation
• Quick Installation Guide
1
Step 1: Software Setup
Software Setup for Windows 98 SE, Me, 2000, and XP
To install the software for the USB Adapter, follow the instructions below:
Note: The installation process for Windows XP may look slightly different from Windows
98 SE, Me, and 2000.
Note: Do not insert the USB Adapter into the USB port prior to software
installation.
1. Insert the software installation CD-ROM
into the PC’s CD-ROM drive.
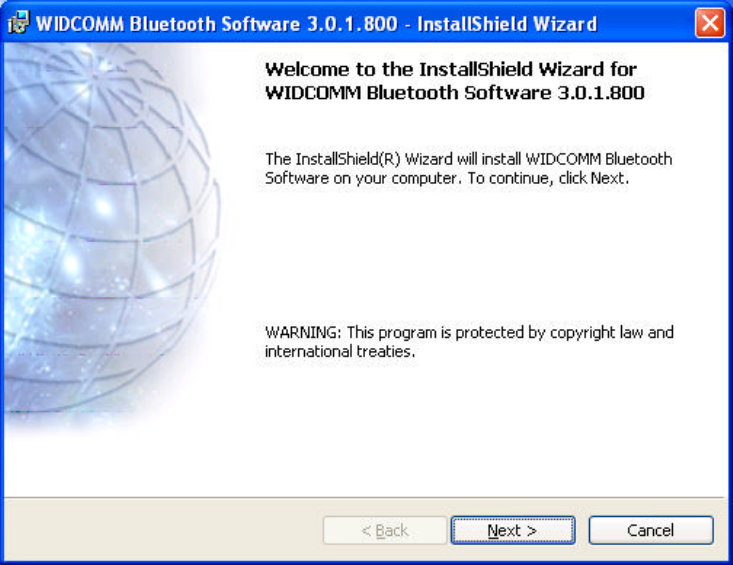
2. The “Software InstallShield Wizard”
window appears. Click on “Next” to
begin the installation process.
2
Step 1: Software Setup
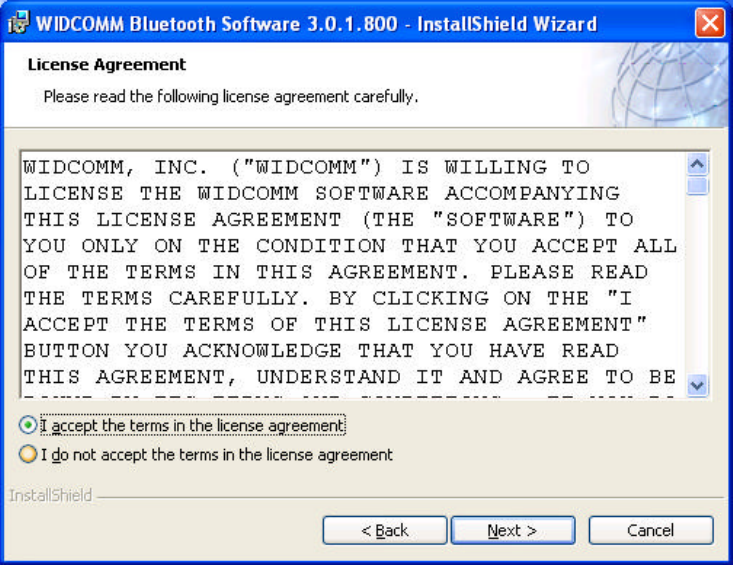
3. Choose “I accept the terms in the
license agreement” to accept the
license agreement. Click on “Next”
to continue.
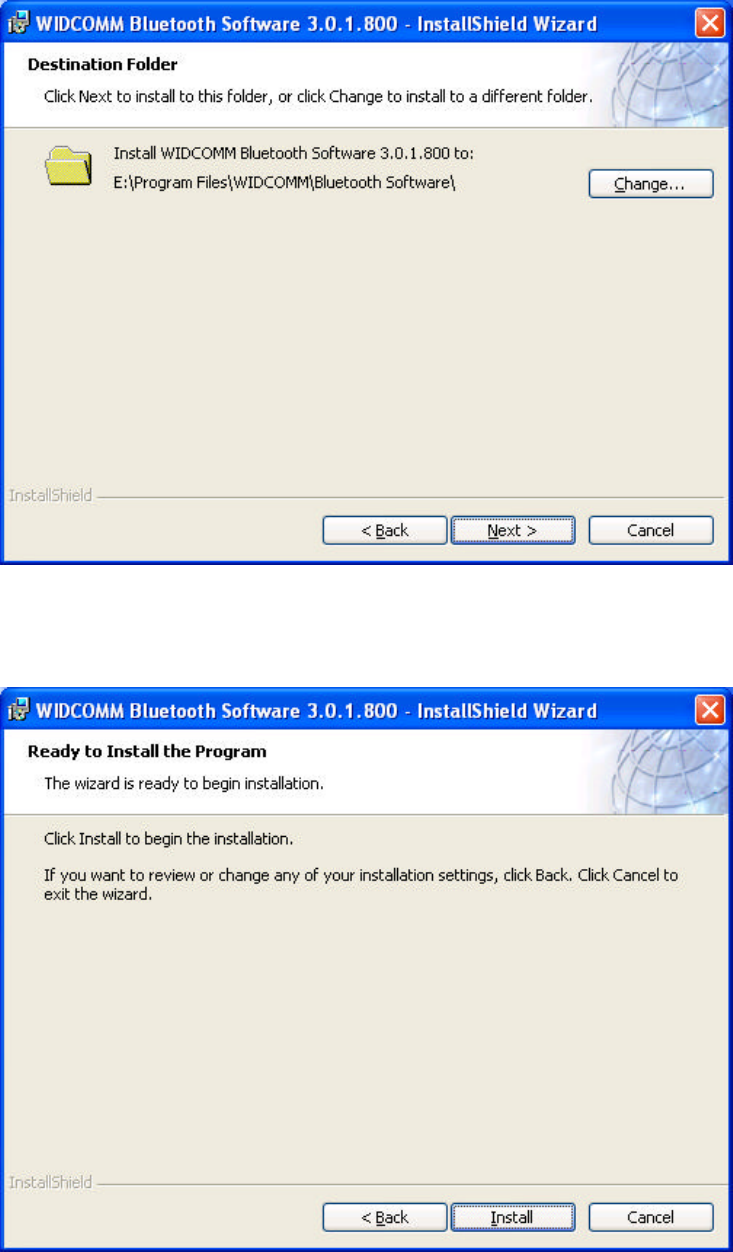
4. Specify the location where the
software files will be installed on your
hard drive. It is recommended that
you install the software in the default
directory “C:\Program Files\WIDCOMM\
Bluetooth Software\”. Click on “Next”
to continue.
3
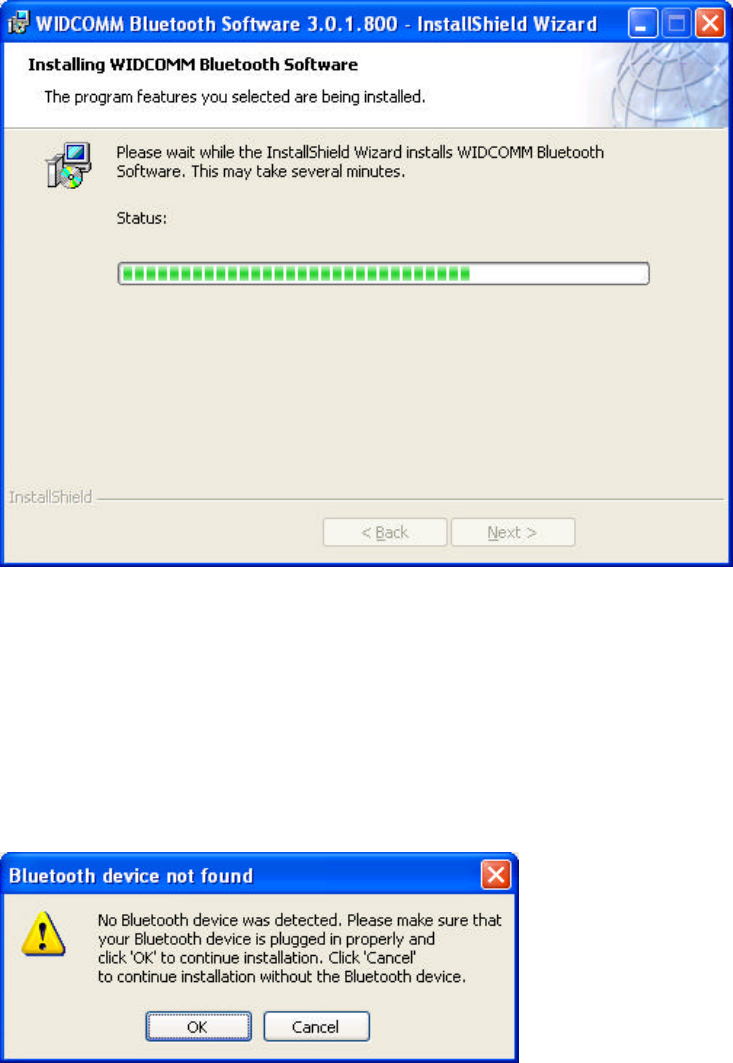
5. Confirm that the device software
is ready to be installed and click
on “Install”.
6. The InstallShield Wizard will begin to
install the Bluetooth Software.
This may take several minutes.
4
Step 1: Software Setup
7. During the installation process you may be prompted to insert your USB Adapter.
If your USB Adapter is not plugged into your computer at this time, you may insert
it into an available USB 1.1-compliant port on your desktop or notebook computer,
then click “OK” to continue. Click on “Cancel” to continue installation without the
Bluetooth device inserted. Refer to the “Hardware Installation” section of this User
Manual for instructions for installing the hardware.
Note: If at any time during the installation process you receive a “Driver Signature
Notice”, click “OK” to continue the installation process.
5
Step 1: Software Setup
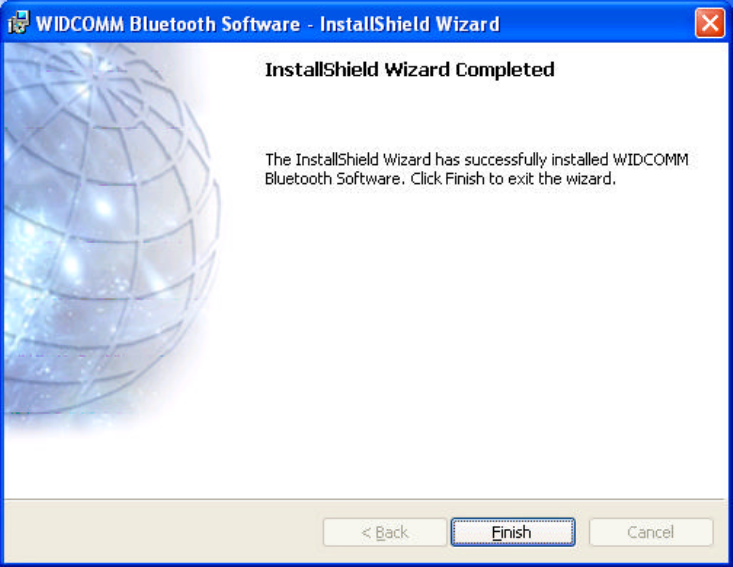
8. Confirm the completion of the software installation; click “Finish” and restart the
system if prompted to do so.
6
Step 1: Software Setup
Hardware Setup for Windows 98 SE, Me, 2000, and XP
Follow these instructions to install your USB Adapter on your PC.
Note: Your USB Adapter is sensitive to static electricity, which can damage its delicate
electrical components. To protect your device, always touch the metal chassis of your
computer before handing the USB Adapter. This will ground any potential electrostatic
discharge. Avoid touching the metal connector when handling the USB Adapter. Dry
weather conditions or walking across carpeted floors may cause you to acquire an
electrostatic charge.
1. Connect the USB Adapter directly to an
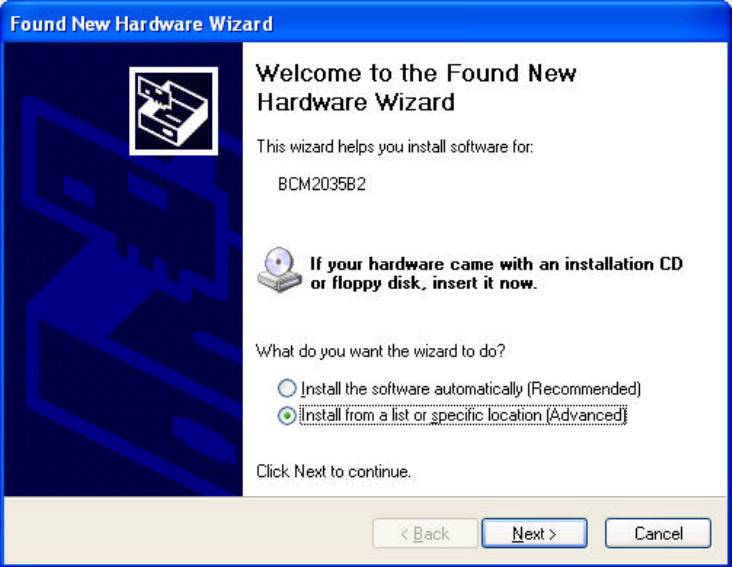
available USB A-type connector on your
desktop or notebook computer. Your system
should register a new USB device found.
2. Choose “Install from a list or specific location”;
then click “Next”.
Step 2: Hardware Setup
7
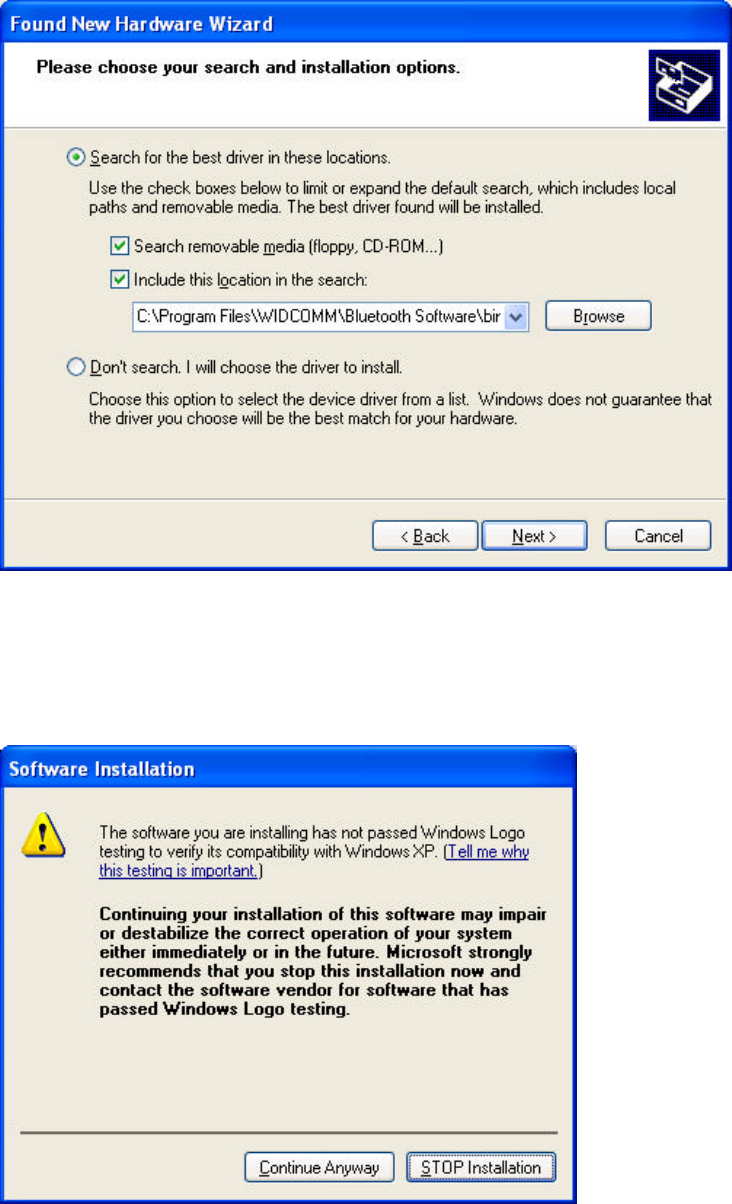
3. Browse for the location of the device
driver “:\Program Files\WIDCOMM\
Bluetooth\Software\bin\” then
click “Next”.
4. If you receive the following “Hardware
installation notice”, click on “Continue
Anyway” to continue with the
installation process.
8
Step 2: Hardware Setup
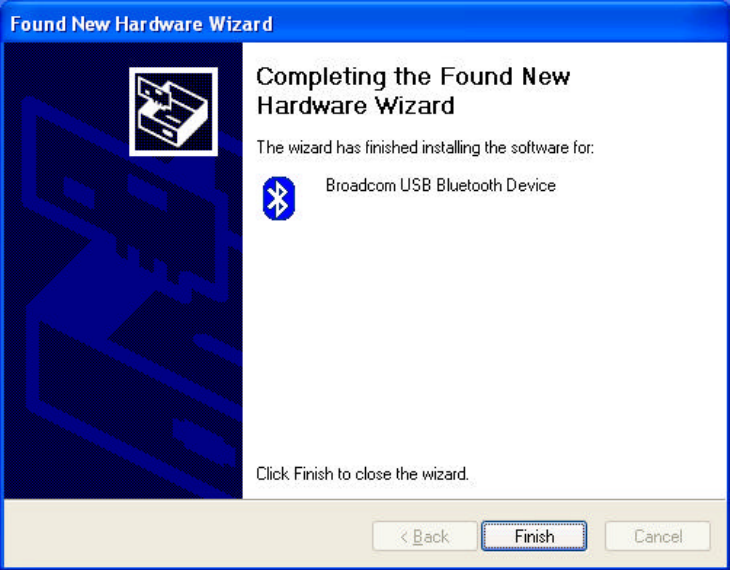
5. A window will appear that confirms the completion of the hardware installation;
click on “Finish” to complete the installation process.
Step 2: Hardware Setup
9
Uninstalling the Software for Windows 98 SE, Me, 2000, and XP
Follow these instructions to uninstall your USB Adapter on your PC.
1. Insert the CD-ROM included with your USB Adapter.
2. This “InstallShield Wizard” should automatically load. If it does not load, explore
the CD and run the “Setup.exe” file.
3. The “InstallShield” window should now appear. Click “Next” to continue with the
uninstall process.
10
Federal Communication Commission Interference Statement
This equipment has been tested and found to comply with the limits for a Class B digital device, pursuant to
Part 15 of the FCC Rules. These limits are designed to provide reasonable protection against harmful
interference in a residential installation.
This equipment generates, uses and can radiate radio frequency energy and, if not installed and used in
accordance with the instructions, may cause harmful interference to radio communications. However, there is
no guarantee that interference will not occur in a particular installation. If this equipment does cause harmful
interference to radio or television reception, which can be determined by turning the equipment off and on, the
user is encouraged to try to correct the interference by one of the following measures:
. Reorient or relocate the receiving antenna.
. Increase the separation between the equipment and receiver.
. Connect the equipment into an outlet on a circuit different from that to which the receiver is connected.
.Consult the dealer or an experienced radio/TV technician for help.
FCC Caution :To assure continued compliance, any changes or modifications not expressly approved by the party
responsible for compliance could void the user's authority to operate this equipment. (Example - use only shielded
interface cables when connecting to computer or peripheral devices).
This device complies with Part 15 of the FCC Rules. Operation is subject to the following two conditions:
(1) This device may not cause harmful interference, and (2) This device must accept any interference received,
including interference that may cause undesired operation.