Beyond Broand Network WTVB Wireless TV Box User Manual 3 2 4GHz Wireless TV Box Manual
Beyond Broadband Network, Inc. Wireless TV Box 3 2 4GHz Wireless TV Box Manual
User Manual
2
2.
.4
4G
GH
Hz
z
W
Wi
ir
re
el
le
es
ss
s
T
TV
V
B
Bo
ox
x
User Manual
1
1. Packaging
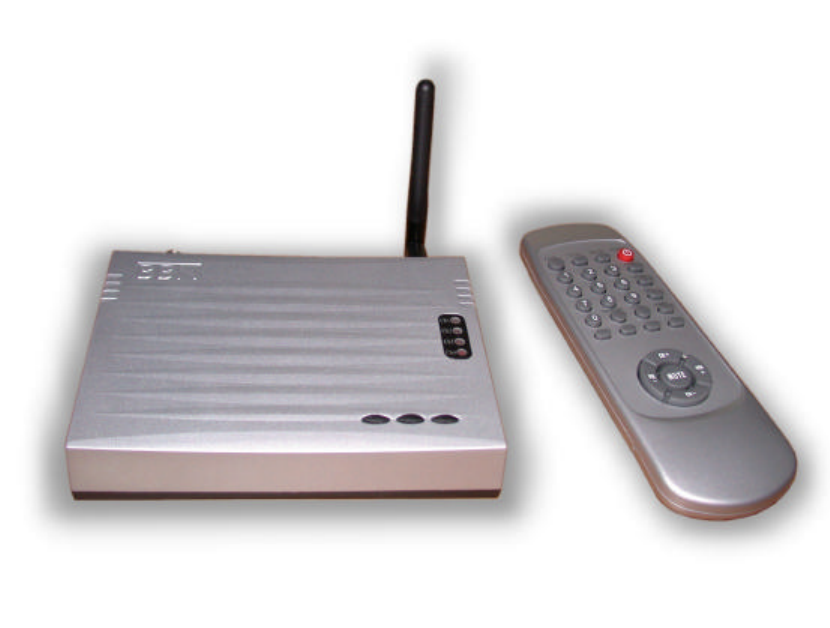
1.1 Transmitter × 1 and Receiver × 1
1.2 2.4GHz Omni-directional Antenna × 1
1.3 Remote Controller × 1 (Supplied with two AAA Batteries)
1.4 Two-way RF Splitter × 1
1.5 DC9V Adaptor × 2 (for Transmitter and Receiver)
1.6 CATV Cable (1M) × 1
1.7 RCA A/V Cable (1.5M) × 1
1.8 Screw Mount × 3
1.9 User Manual × 1
2. Features
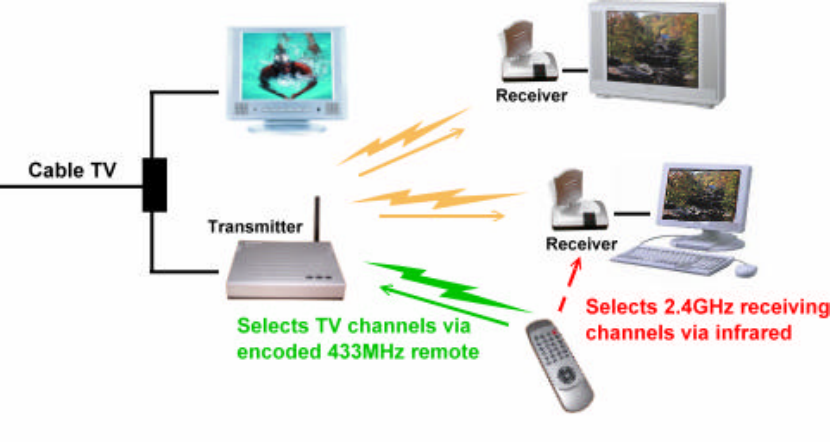
2.1 Watch cable TV on additional CRT or LCD monitor in separate
rooms via 2.4GHz wireless transmission.
Note: Monitor should be equipped with RCA input.
2.2 Transmits CATV signals via the Transmitter or signals from other video
equipment such as VCR, DVD, VCD, satellite receiver, and video camera by
wireless.
2.3 Transmitting range is about 30~40 meters indoors (estimated).
2.4 Built-in 433MHz and IR remote give commands over the transmitter and the
receiver separately.
2.5 Encoded 433MHz remote avoids interference caused by other 433MHz
products.
2.6 Memory function enables the devices to remain on last used channel.

2
3. Specifications
3.1 Transmitter
Frequency 2400~2483MHz
Transmitting Power 0dBm(FCC)/10dBm(CE)
No. of Channels 4 (2410, 2430, 2450, 2470)
Video In/Out Cable, Air TV, Composite
Video System NTSC/PAL/SECAM
Remote Control 433MHz
Power Consumption DC9V, 500mA
Operating Temperature -10℃ ~ 50℃
Weight 260g
Dimensions (W×H×D) 152 × 125 × 35 (mm)
3.2 Receiver
Frequency 2400~2483MHz
No. of Channels 4 (2410, 2430, 2450, 2470)
Video Out Composite
Remote Control Infrared
Video Output Level 1 Vp-p
Power Consumption DC9V, 500mA
Operating Temperature -10℃ ~ 50℃
Weight 140g
Dimensions (W×H×D) 117 × 85 × 42 (mm)
3.3 Approvals
FCC/CE
3
VCR/VCD/DVD in
4. Installation
4.1 Transmitter
Please note that this device is mainly for home use. It is better not to place it
under sunlight. Please keep it away from heat, humid, dusty, or greasy
environment.
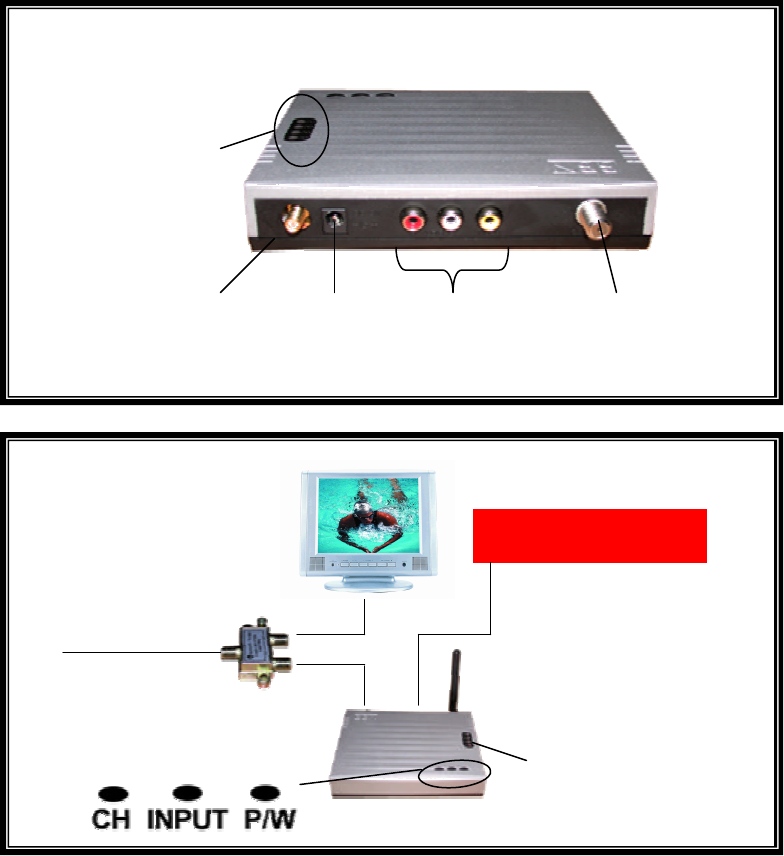
4.1.1 Find the CATV signal source. Generally, it is fixed on walls of the house
or under roof.
4.1.2 Get CATV cable. If there is only one TV, just connect the CATV signal
source with the transmitter. Otherwise, connect it with the attached
2-way RF splitter input. Then connect one splitter output with the
transmitter and the other splitter output with the TV via CATV cable.
4.1.3 Connect a VCR/VCD/DVD player with the transmitter via RCA A/V cable.
Make sure that the colors (yellow, white, and red) match. You may
CATV cable in
LED light shows
channel of 2.4GHz
transmission
Diagram 2:
Diagram 1:
A/V cable
SMA connector
(connected with the
attached 2.4GHz antenna)
DC9V
A/V in
RF connector
(connected with
CATV cable)
LED light shows
channel of 2.4GHz
transmission

4
press “INPUT” or use the remote (see instructions in Section 5: Remote
Controller) to switch mode (TV or A/V).
4.1.4 Power the transmitter with the attached DC9V adaptor. Please make sure
that the DC jack is plugged in before power on.
4.1.5 Press “P/W” or use the remote. Check if the transmitter is turned on.
The LED light shall light up after power on.
4.1.5 Press “CH” or use the remote to select a channel of transmission. Later
in setting up the receiver, make sure the channel shall be same as the
transmitter.
4.1.6 In order to get the best transmission quality, place the transmitter in a
favorable place. Adjust antenna direction till the picture gets clear and
steady. Generally, make the antenna stand straight.
4.2 Receiver
Please note that this device is mainly for home use. It is better not to place it
under sunlight. Please keep it away from heat, humid, dusty, or greasy
environment.
4.2.1 Turn on the TV and then switch to A/V mode.
4.2.2 Connect the receiver with the TV A/V Input via RCA A/V cable. Please
make sure that the colors (yellow, white, and red) match.
4.2.3 Power the receiver with the attached DC9V adaptor. Please make sure
Tact switch for 2.4GHz
receiving channels
DC9V Adaptor
Display shows channel
of transmission
A/V cable connects the
receiver with the TV (A/V in)
Directional
antenna (front)
House Monitoring
Baby Monitoring
Wireless Camera
(option)
Wireless Camera
(Option)
Wireless TV
Transmitter
5
Options to buy: Wireless Camera (regular, covert, and etc.)
When there are multiple transmitters working at your place, just use
the remote to switch
receiving channels. No need to move and may
be able to see pictures sent from other transmitters such as wireless
camera. Please refer to the local distributors for optional wireless
products.
that the DC jack is plugged in before power on.
4.2.4 Make sure that the digit-display (red light) lights up after power on.
4.2.5 Switch channel of transmission via tact switch or remote (see instructions
in Section 5: Remote Controller) to same as the transmitter.
4.2.6 The receiver shall start to receive pictures from the transmitter now.
Please adjust antenna direction till the picture gets clear and steady.
Generally, it is better to make the antenna (front) face the transmitter.
5. Remote Controller
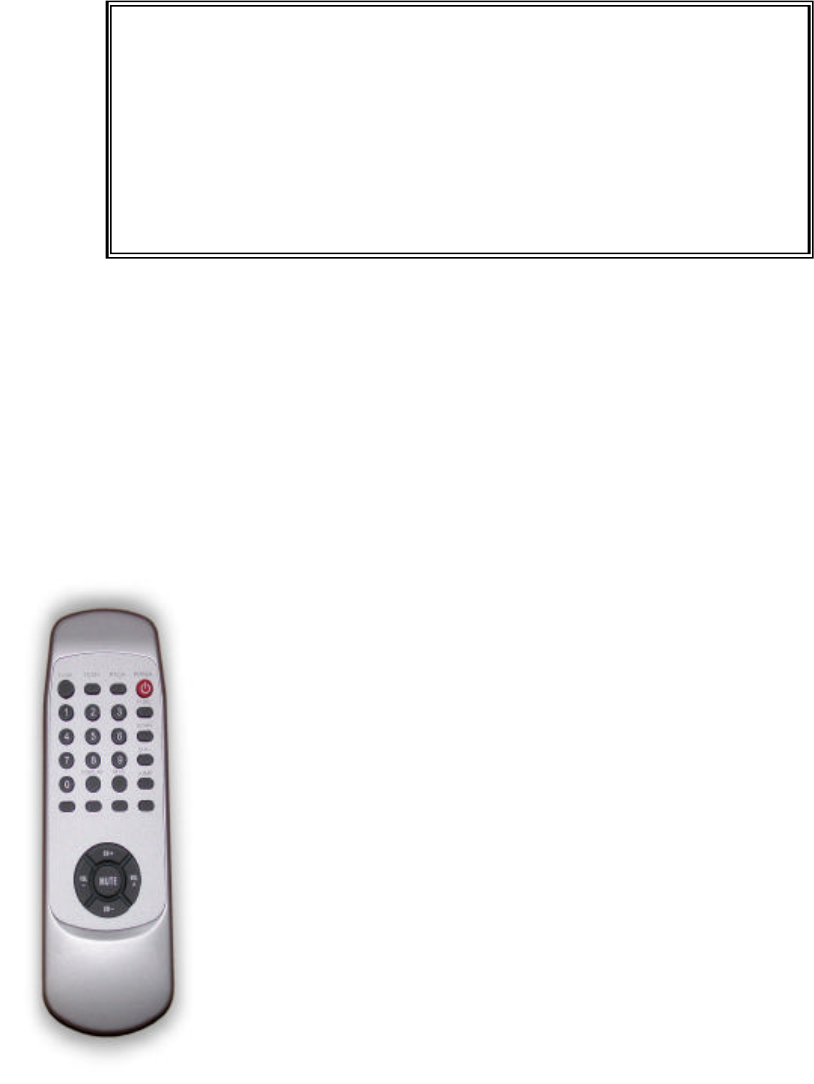
5.1 Using the Remote Controller
*FUNC: Please refer to Section 6.3 for further details.
Power Power On/Off the transmitter
TX. CH Switch 2.4GHz transmitting channels of Tx
RX. CH Switch 2.4GHz receiving channels of Rx
TV/AV Switches TV and Video input on transmitter
FUNC* Sets up an new encoded address of the remote
SCAN Automatically scans all TV channels
CH + − Adds or deletes TV channels
CH+/CH- Switches TV channels in sequence
VOL+/VOL-
Turns up or down the output volume
MUTE Silent
DISPALY Shows OSD status
JUMP Turns back to the previous TV channel
MTS Bilingual system
0~9 Selects a TV channel directly by pressing
number keys

6
5.2 Installing the Batteries
The remote uses 2 AAA alkaline batteries for power. We recommend using
high-quality batteries.
5.2.1 Remove the battery compartment door by pressing the tab allowing to
door to be removed.
5.2.2 Install 2 AAA alkaline batteries (included) into the battery compartment.
Be certain to follow the + and − symbols in the compartment. Installing
the batteries incorrectly will prevent the unit from operating.
5.2.3 Put the battery compartment door back on.
Battery Safety Precautions:
1. Do not burn, disassemble, mutilate, or puncture. Like other batteries of
this type, toxic materials could be released which can cause injury.
2. To reduce the risk of fire or personal injury, please use quality batteries.
3. Keep batteries out of the reach of children.
6. Trouble Shooting
Please read this user manual carefully before using the Wireless CATV Box. If
you still have difficulties using this product, please consult the following syndrome,
which will give your guide to solve most common problems. Otherwise, please
refer to the local distributors for problems.
6.1 No picture or sound
• Check if the DC adaptors are well and connected correctly.
• Check if all the cables (including A/V and CATV cables) are well and
connected correctly.
• Check if the transmitter is turned on by remote or tact switch.
• Check if the transmitter is out of range. If so, the transmitter or the receiver
needs to be relocated.
6.2 Interference in picture or sound
• Check if there is any interference radio frequency source near your place such
as microwave oven and cordless phone.
• Check if there is any other 2.4GHz wireless product working near your place
such as WLAN, Bluetooth wireless products. If so, switch to a new
transmission channel.
7
6.3 Signal loss (no response) in remote control
• Check if the batteries are well and installed correctly.
• Check if the encoded address of the transmitter and the remote is matched.
• Check if there is interference with the remote.
To set up the encoded address of the remote, please follow the instructions
below.
To provide the best technologies products to customers, we reserve the
right to change the specifications without prior notice.
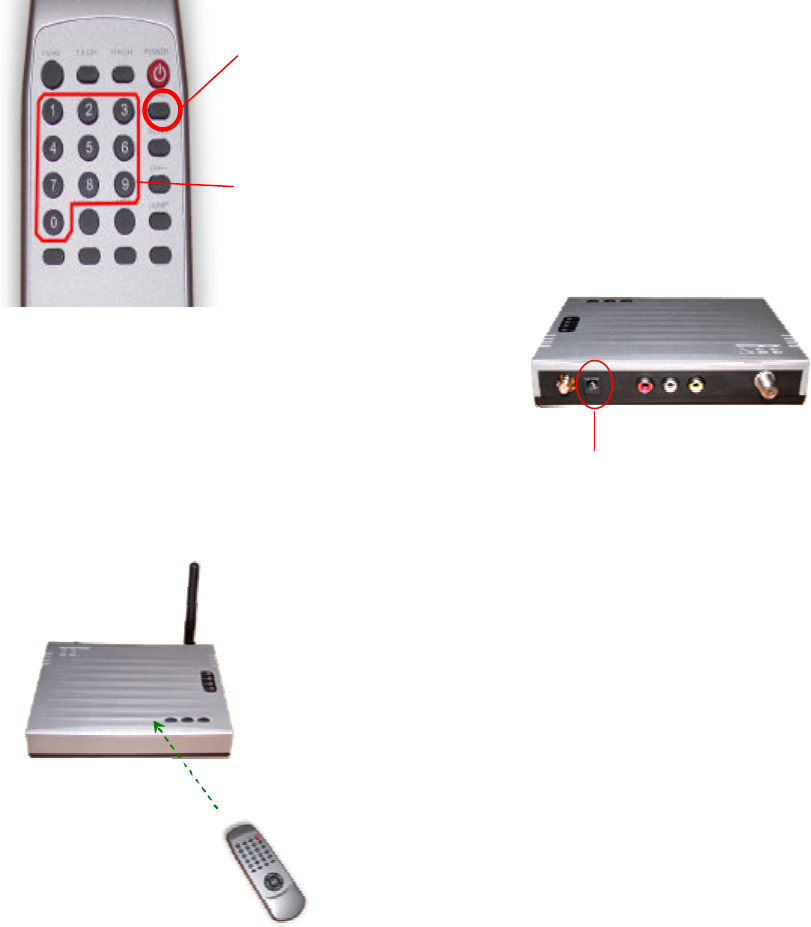
Step 1: Press and hold
FUNC button. Do
not release it.
Step 2: Select and press
a number key (0~9) to
store a new encoded
address.
Step 3: Restart the transmitter.
(Disconnect and then
reconnect the power cord.)
Step 4: Press any button on the
remote to give commands right
after Step 3 is completed (within 5
seconds).
8
User Information
This device complies with part 15 of FCC Rules. Operation is subject to the following
two conditions:
(1) This device may not cause harmful interference, and
(2) This device must accept any interference received, including interference
that may cause undesired operation.
The FCC require the user to be notified that any changes or modification made to this
device that are not expressly approved by BEYOND BROADBAND NETWORKS,
INC.may avoid the user’s authority to operate the equipment.
To comply with FCC RF exposure requirement, this device and its antenna must no be
co-located or operating in conjunction with any other antenna or transmitter.