Bissell 8920 User Manual DEEP CLEANER PROHEAT 2X Manuals And Guides L0520756
BISSELL Power Steamer Manual L0520756 BISSELL Power Steamer Owner's Manual, BISSELL Power Steamer installation guides
User Manual: Bissell 8920 8920 BISSELL DEEP CLEANER PROHEAT 2X - Manuals and Guides View the owners manual for your BISSELL DEEP CLEANER PROHEAT 2X #8920. Home:Vacuums & Floor Care Parts:Bissell Parts:Bissell DEEP CLEANER PROHEAT 2X Manual
Open the PDF directly: View PDF ![]() .
.
Page Count: 24

8920, 9200, 9300, 9400 SERIES
3
6-17
17-18
19-20
21
22-23
24
J
We'regladyoupurchaseda BISSELLProHeat2Xheatedformuladeepcleaner.
Everythingweknowaboutfloorcarewentintothedesignandconstructionof
thiscomplete,high-techhomecleaningsystem.
YourProHeat2Xiswellmade.andwebackitwitha limitedone-yearwarranty.
Wealsostandbehindit witha knowledgeable,dedicatedConsumerServices
department,so,shouldyoueverhavea problem,you'llreceivefast,
considerateassistance.
Mygreat-grandfathernventedthefloorsweeperin1876.Today,BISSELLisa
globalleaderinthedesign,manufacture,andserviceof highqualityhomecare
productslikeyourProHeat2X.
Thanksagain,fromall of usat BISSELL.
MarkJ.Bissell
PresidentandChiefExecutiveOfficer
0
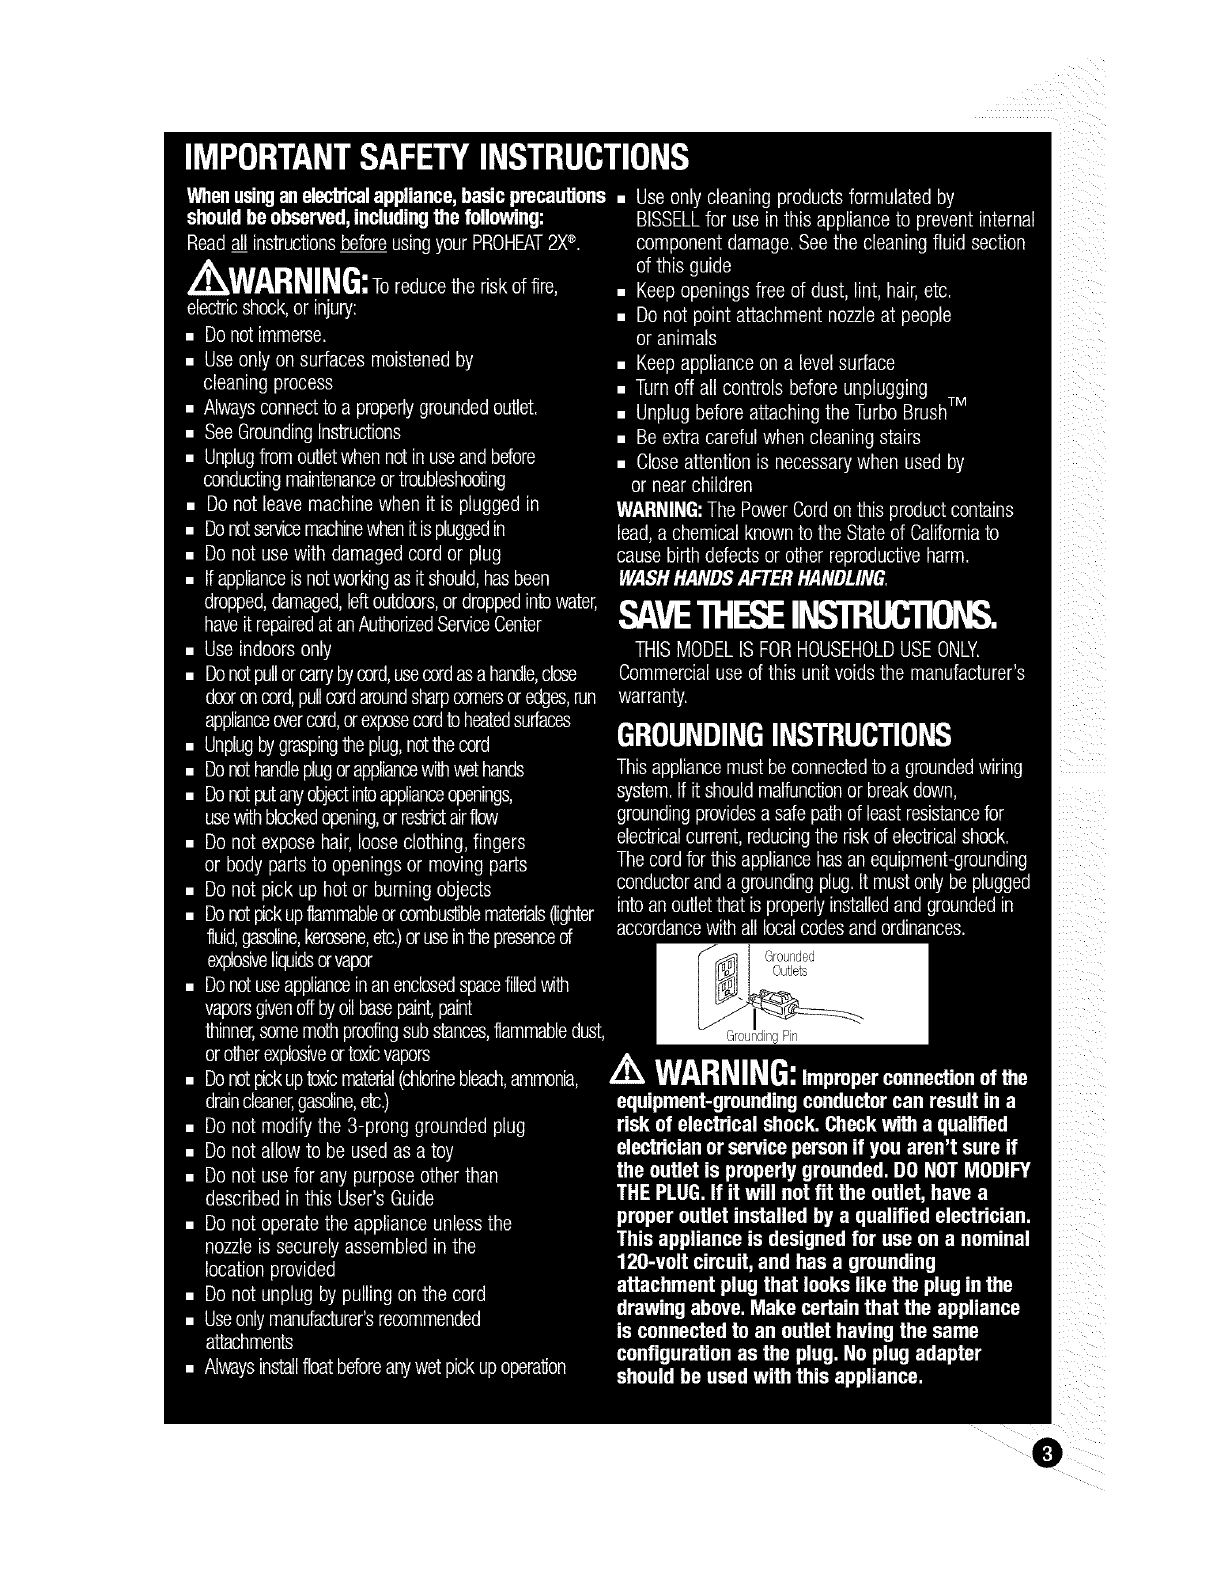
SprayTrigger
PowerSwitch
ExtraLOrg
Sower C}ra Hose
UpperHandle
TankCarry.....
nanale
Handle
DetentPedal
WaterTank
Lower
Base
Sweep
EasyTo" Brushes
RemoveNozzle
Optional Accessories:
Theseitems are availablefor purchase with your model.To order reDlacemen_sarts or additional tools or formulas, pleaserefer to page 22-23.
B"Tough_Bin Brush 4, _pnolsteBTool 6" Wide StairToo TurboBrushTM
J
BareFloorAttachment
08sraylngCreviceToo ScotchgaraEro_ec_ol ToolBag
aDDIIcaTor
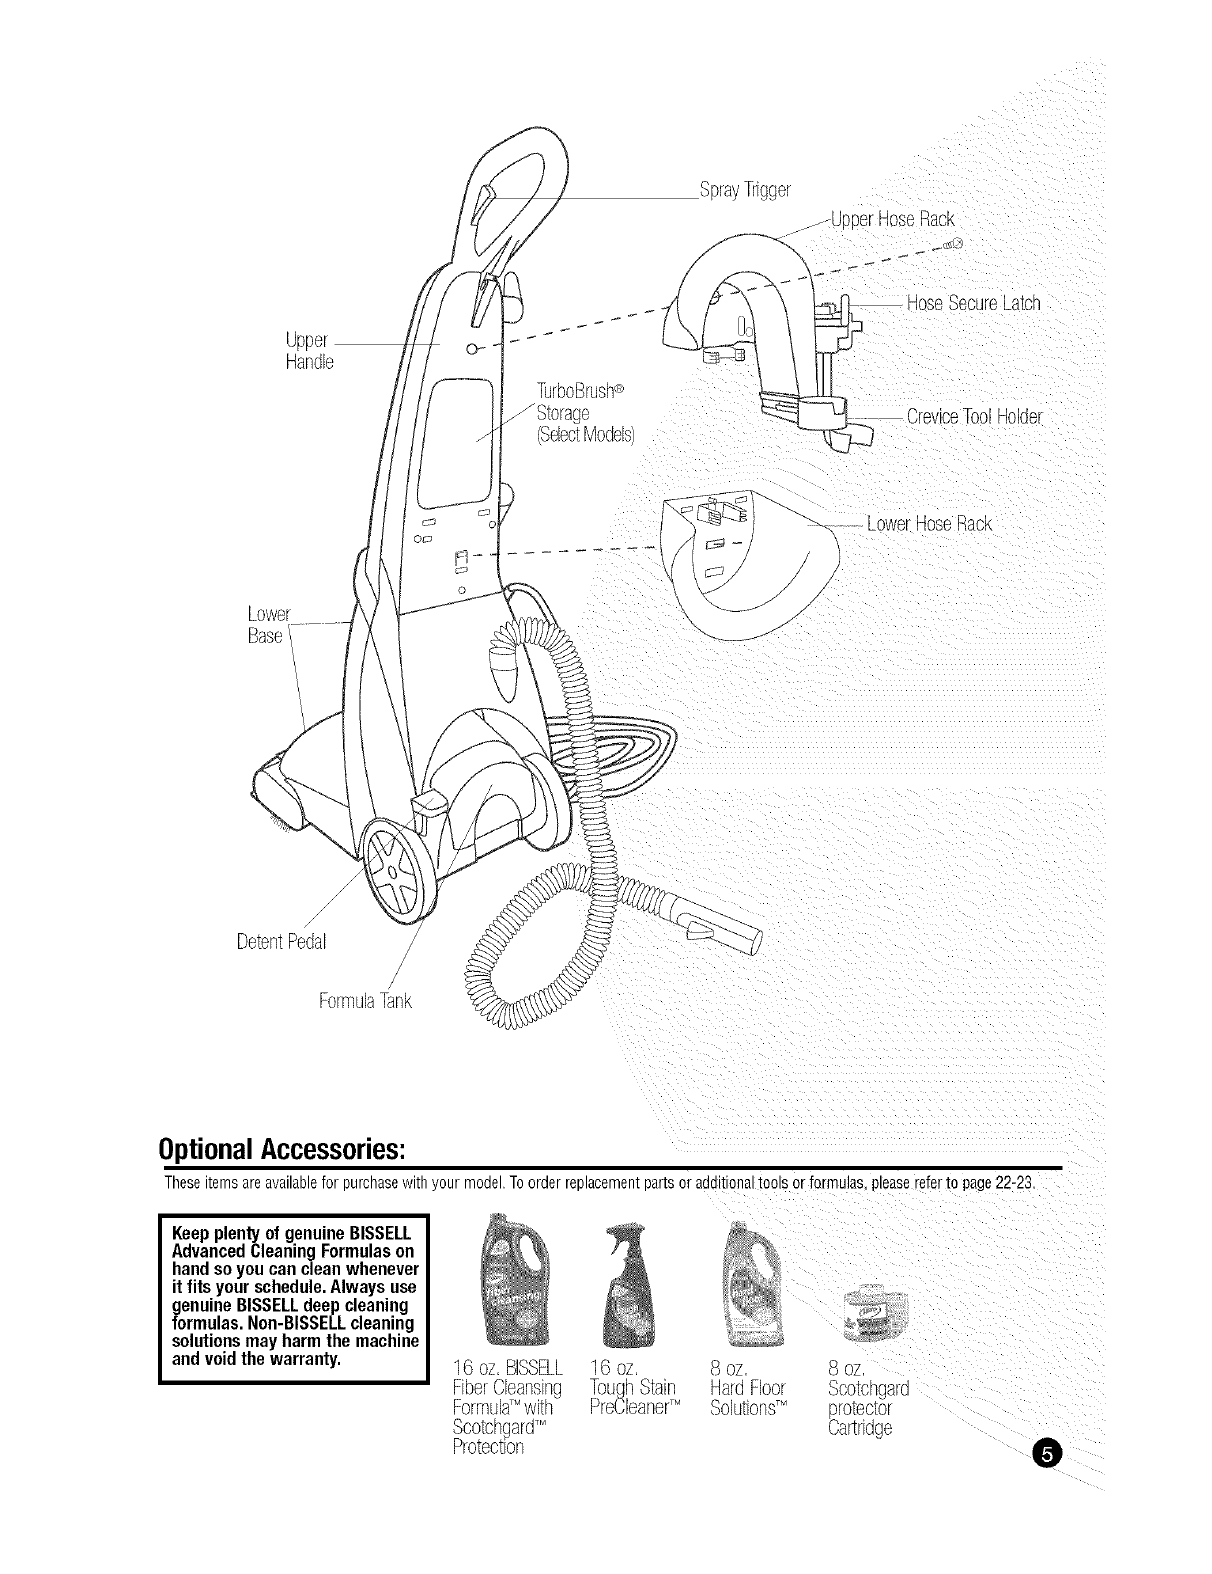
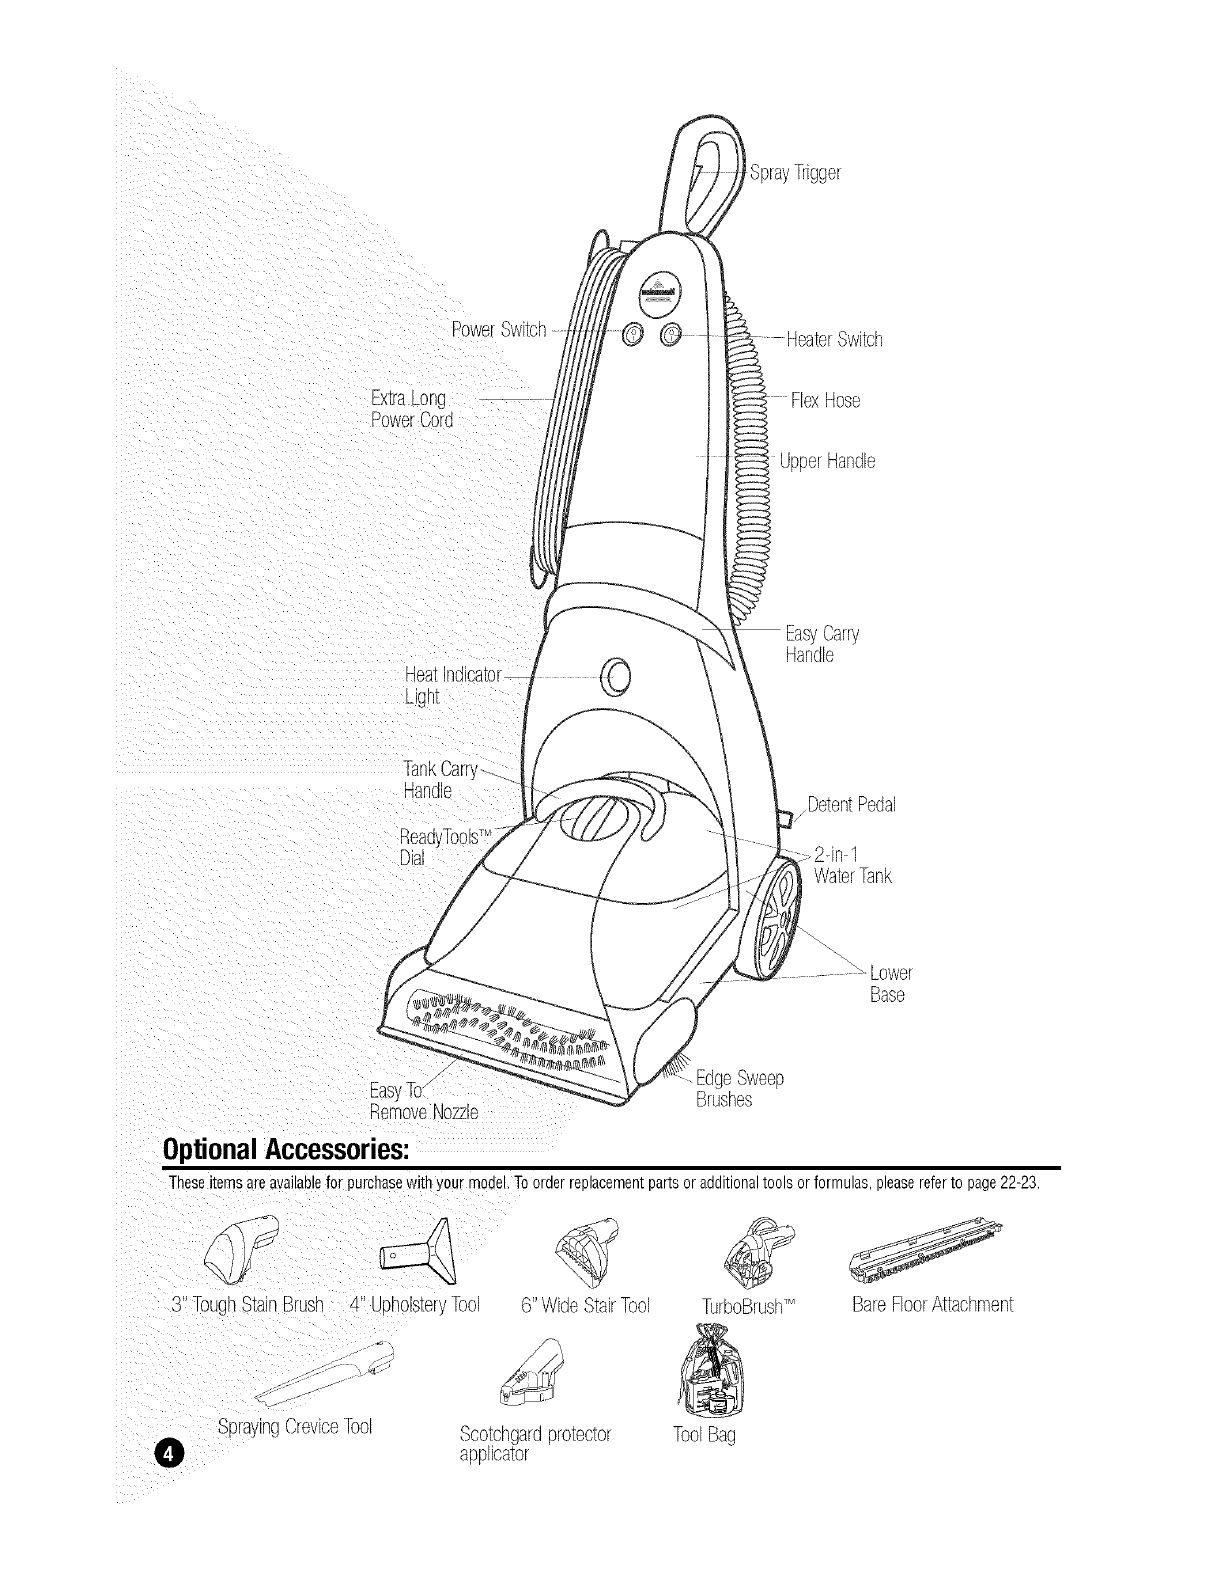
Upper
Handle
SprayTrigger
j_upper NoseRact
___HoseSecureLa_cr
TurboBrush_
Storage _ CreviceToolHolder
(SelectModels
---- LowerHoseRack
/
DetentPedal
FormulaTank
Optional Accessories:
Theseitems are availablefor purchase with your model.To order reDtacementDartsor additional :oots or formulas please referto page22-23.
Keepplentyof genuineBISSELL
AdvancedCleaningFormulason
handsoyoucancleanwhenever
it fitsyourschedule.Alwaysuse
genuineBISSELLdeepcleaning
formulas.Non-BISSELLcleaning
solutionsmayharmthemachine
andvoidthewarranty. 16 oz, BISSELL 16 oz, 8 oz
FiberCleansing ToughStair Scotchgaru
Formula_ with PreCleane¢ pro_ec_or
Scotchgard_ Cartridge
Protection
8 oz
HardFloor
Solutions_
0

ThisUser'sGuidehas beendesignedto helpyou get
the utmost satisfactionfrom your BISSELLProHeat2X.
You'llfind assemblyandoperatinginstructions,safety
precautions,as well as maintenanceandtroubleshooting
instructions.Pleasereadthis Guidethoroughlybefore
assemblingyourDeepCleaner.
Payparticularattentionto the productdiagram,assembly
instructions,andpartnames.Locateandorganizeall
partsbeforeassembly.Familiarizeyourselfwiththe
partsandwherethey go.Followingthis User'sGuidewill
greatlyenhanceyourabilityto getthe mosl performance
from yourBISSELLProHeat2X for manyyears.
YourProHeat2X comesin four easyto
assemblecomponents.
UpperHandle
LowerBase
ToolCaddy(2 piecesj
Theonlything youwill needto assembleyourcleaneris
a Phillipshead @ screwdriver.
Z WARNING:
Do Not plug in your cleaner
until you have completely
assembledit per thefollowing
instructionsand are famil-
iar with all instructions and
operating procedures.
Referto Assembly Diagram on page 4
Slide onto Lower Handle.Screwir
0
_erhoseRackontobackof Upper
_nusecureNIth 1 scre_
Oi PlaceLowerHoseRackonto back of Upper
F Handlebypushingin and slidirg downunti r
snapsinto place.
Snantoolsinto theToolCaddyas shownin
Jre4.
Wral:PowerCordandFlexHoseas snowr
Igure5,
Jglym placeDyusing me
ProHeat2X assembly is nowcomplete.
CreviceTool
I
Scotchgard
ProtectorTool
modelsonly)
se Secure
\ ...._:'! Latch
Stain Brush
\
modelsonly)
Spraying
CreviceTool
_ _l if _
YourBISSELLProHeat2X DeepCleaneris a home
cleaningsystem that usesthe power of heat and
brushesto get the deepdown dirt for a maximum
clean.Notonly does it come with a lot of unique
features, it has beendesignedwith you the customer.
in mind.
BISSELLProHeatmodelsall featurea patentedbuilt-in
heaterwhichwill heat1_ehot tap wateryou put in up
to 25 degreeshotterto safelyoptimizecleaning
effectiveness.The heaterwill neverallow the
temperatureto exceed190degrees.TheHeaterswitch
onme front of the machineconfrolsthe heaterso you
haveme optionto turn off the heat if you are cleaning
delicatewool or orientalrugs.
The 2 DirtLifterPowerBrushrolls aredesignedto
enhancecleaningperformance.The bristlepatternsafely
lifts out the deepdown dirt while gentlygroomingcarpet
fibers.Thefloatingsuspensionself-adjuststo all carpet
heightsand protectsyourcarpetif you leavethe power
switch ON( I ). Oncethe productis inthe Upright
position,me brushesautoma'dcallystop spinning.The
DetentPedalwill ac'dvateme brushwhenfloor cleaning....
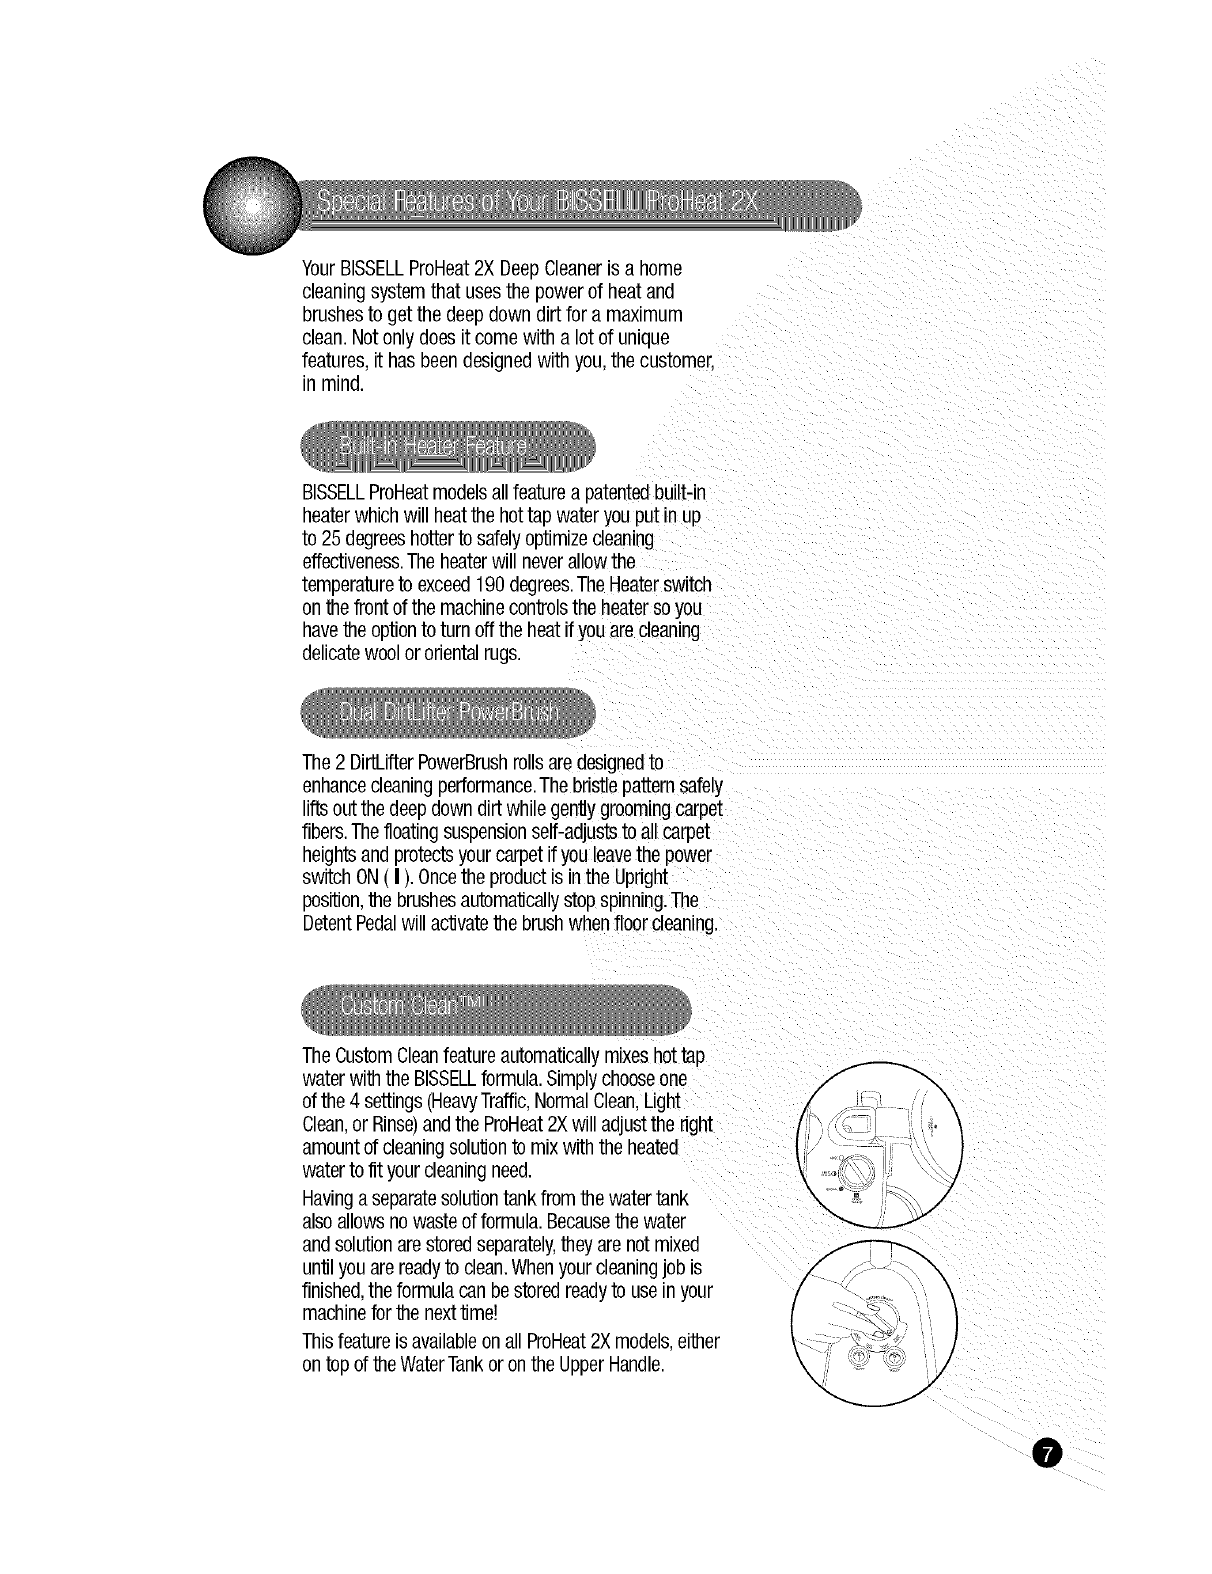
The CustomCleanfeatureautomaticallymixeshot tap
waterwi1_the BISSELLformula.Simplychooseone
of the 4 settings(HeavyTraffic,NormalClean.Light
Clean,or Rinse)andthe ProHeat2Xwill adjustthe right
amountof cleaningsolu'donto mix with the heated
waterto fit your cleaningneed.
Havinga separatesolu'dontank from me watertank
alsoallowsno wasteof formula.Becauseme water
andsolutionare storedseparately,_ey are not mixed
un'dlyou arereadyto clean.Whenyour cleaningjob is
finished,the formulacan bestoredreadyto use _nyour
machinefor me next'rim!!
Thisfeatureis availableonall ProHeat2Xmodels,either
ontop of me WaterTankor onthe UpperHandle. \
0
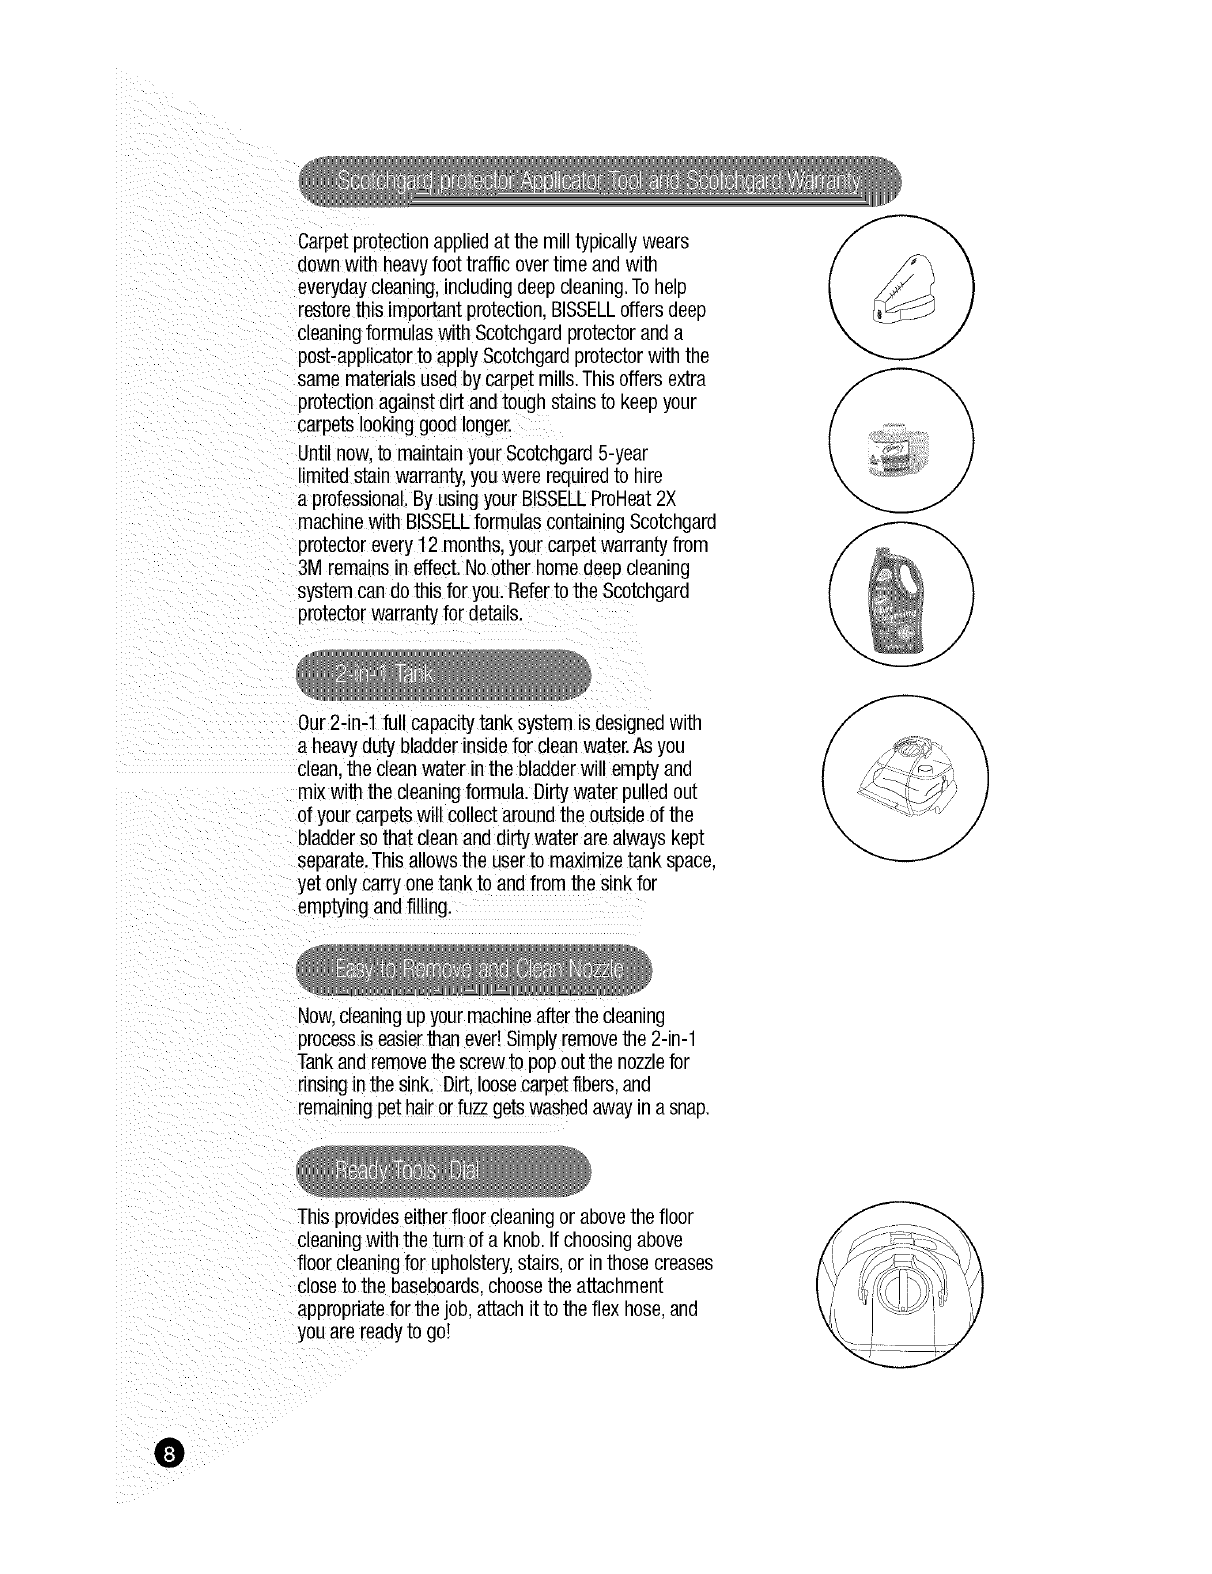
Carpetprotectionapplied at the mill typically wears
down with heavyfoot traffic over time andwith
everydaycleaning,includingdeep cleaning.To help
restorethis important protection.BISSELLoffers deep
cleaningformulas with Scotchgardprotector anda
post-applicatorto apply Scotchgardprotector with the
same materials used by carpet mills.This offers extra
protectionagainstdirt andtough stains to keep your
carpets lookinggood longer.
Until now.to maintainyour Scotchgard5-year
imited stainwarranty,youwere requiredto hire
a professional.By usingyour BISSELLProHeat2X
machinewith BISSELLformulas containingScotchgard
protectorevery12 months,your carpet warranty from
3M remalns in effect.No other homedeep cleaning
system can do this for you. Referto the Scotchgard
protectorwarranty for details.
Our2-in-1 full capacitytank system is designedwith
a heavyduty bladderinside for clean water.As you
clean,the cleanwater inthe bladderwill empty and
mix with the cleaningformula. Dirty water pulledout
of your carpets will collectaroundthe outsideof the
bladderso that clean and dirty water are always kept
separate.This allowsthe userto maximizetank space,
yet onlycarry onetank to andfrom the sink for
emptying and filling.
Now.cleaningupyour machineafterthe cleaning
processis easierthan ever!Simplyremovethe 2-in-1
Tankandremovethe screw to popout the nozzlefor
rinsinginthe sink. Dirt, loosecarpetfibers,and
remainingpet hairorfuzz getswashedawayin a snap.
This provideseither floor cleaningor abovethe floor
cleaningwith the turn of a knob. Ifchoosingabove
floor cleaningfor upholstery,stairs,or in those creases
closeto the baseboards,choosethe attachment
appropriatefor the job. attach it to the flex hose,and
you are readyto go!
O

0
0
0
0
Plan activitiesto giveyour carpe__lme_oar,
Move furniture to anotherarea if cleaningar
entireroom(optional)
Vacuumarea with a dry /acuumcteaner
thoroughlybeforedeepcleaning
Pretreating(optional)
Pretreatingisrecommendedtoimprovecleaning
effectivenessforheavilysoiledcarpetinhigh
trafficareassuchasentrywaysandhallways.
A.Spraythe BISSELLToughStain
Pre-treatformulaontoheavytraffic
areas,soiledareas,orstains.
B.Allowto penetratefor at least
3 minutes
C.Cleanas normal,usingthe BISSELL
Proheat2Xmachineonthe Hicq
TrafficSetting,followingthe
instructionsbelow.
Fill the Water Tank. Fillup the2-in-lTanK b;
removingtheTankfromthe baseof the machine
with theTankCarr_Handle.Carrylikea bucket
ATTENTION:
SomeBerber carpets have a
tendency to fuzz with wear.
Repeatedstrokes in the same
area with an ordinary vacuum
or deep cleaner may aggravate
this condition. Please see Stain
Removal instructionson page 15.
to thesink. Unlatchthe toFof theTankfrom me _1__ 0_
botbm by liftingthe TankLatchfromthe bottom T_1_'_"_ T,_/..t_
at the backof the tank.Fill upthe HeavyDuty
Bladderwith clean hottaFwa[er.
*Do not boil or microwavewater as it can
destroythe Bladder. _
Leavingthefilled bottomof theWaterTankor
a flat surface,only maneuverme_oDoartof the
Tank.Replacethe topof theTankto thebottom
by carefullyhookingthe frontof the nozztento
the grooveson the bottomof theTank,
Note: Rememberto secure the Tank
Latch in the back and test to make sure
it is secure beforepickingupthe Tank.
0
@
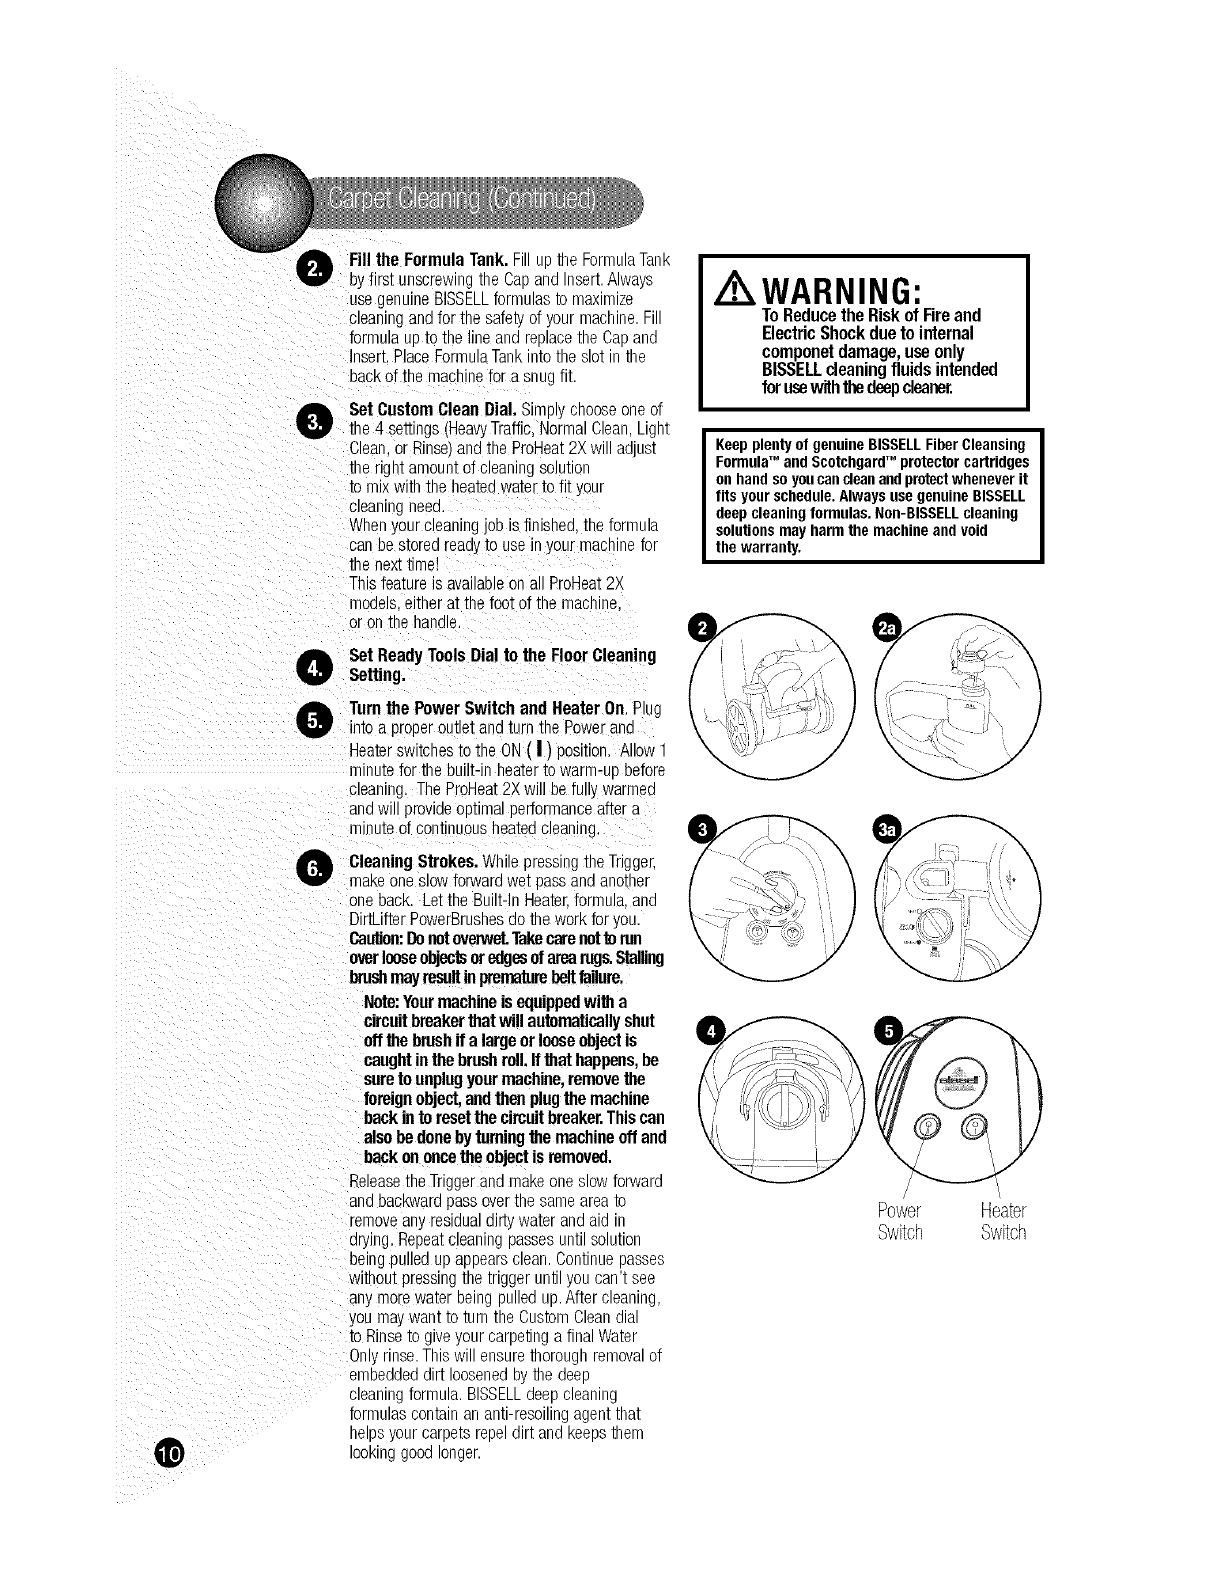
Fillthe FormulaTank. E U[ the FormulaTank
Dyfirst unscrewing[neCaDan(] nsert.Alway_
usegenuineBISSELLformulasb maximize
cJeanJngandfor thesafetyof your machine.F
brmula upto tne line and reelacethe CaDand
Insert.PlaceFcrmulaTankintothe s,o_n the
backof themachinefor a SnL_fit
Set Custom Clean Dial. Sirr Jl_cnooseone of
the 4 settings(HeavyTraffic.Normal CleanLlgN
Clean.or Rinse and the PreHeat2X will adlusl
[nengm amountof cleaningsoJuuon
[o mixwJ[nine neateawaterto fit your
cleaningneed
Whenyourcleaningjob is finished [ne formula
canbe storedreadyto usein yourmacnlnefor
menexttime!
Thisfeatureis avaJJanJeonaHPreHeat2X
moaeJseJtnerat me foot of the mact ne
or onthe hana,e.
Set Ready ToolsDial to the Floor Cleaning
Setting,
Turnthe PowerSwitch and HeaterOn.Plug
miDa properout_etana _urnthe Powerand
Heaterswitchesto the ON( |) position. Allow "
minutefor the built-in heaterto warm-u3 before
cleaning.ThePreHeat2Xwill be fullywarmed
ariawJJJprovideopumaJperformanceaftera
minuteof commuousheatedcleaning,
CleaningStrokes.Whileoressng tne Trigger,
slowforwardwet oassandanomer
one back. Letthe Built-Inheater,formula,and
DirtLifferPowerBrushesdothe work for you.
Oau'don:Donotoverwet.Takeca'enottorun
overlooseobjectsoredgesofarearugs.Stalling
brushmayresultinprematurebeltfailure.
Note:Yourmachineis equippedwith a
circuitbreakerthat willautomaticallyshut
offthe brashifa largeorlooseobjectis
caughtinthe brashroll.If that happens,be
sureto unplugyourmachine,removethe
foreignobject,andthenplugthemachine
backinto resetthe circuitbreaker.Thiscan
alsobedonebyturningthe machineoffand
backononcethe objectis removed.
ReleasetheTriggerana makeone SlOBforward
and oacks'varapassovertne same area[o
removeanyresidualdIE1wa[er andaid
drying.Repeatcleaning[)assesun[I solu[lon
uelngpuJJeaupappearsclean.Continue[)asses
WithOUtpressingme [nggerunnl} )u can[ see
anymorewa[er being Dulledue.Aftercleaning
youmaywan[[o [urn the CustomCleandia
to Rinse[o giveyour carpennga final Water
Onlyrinse.Thisw ensure[noroughremovalof
embeddeddie loosenedDy[ne deed
cleaning Iormula BISSELLdeedcleaning
formulascon[aman an[i-resomngagen[mar
neps your carpelsreDe air[ andKee[)s[nelT
lOOKinggoodlonger.
WARNING:
To Reducethe Risk of Fireand
ElectricShockdueto internal
componetdamage,useonly
BISSELLcleaningfluidsintended
forusewiththedeepcleaner.
Keep plentyof genuine BISSELLFiber Cleansing
Formula'" and Scotchgard'" protectorcartridges
on hand soyoucan cleanandprotectwhenever it
fits yourschedule,Always use genuine BISSELL
deep cleaningformulas. Non-BISSELLcleaning
solutionsmay harmthe machine and void
the warranty.
/
Power Heater
Switch Switch
0
0
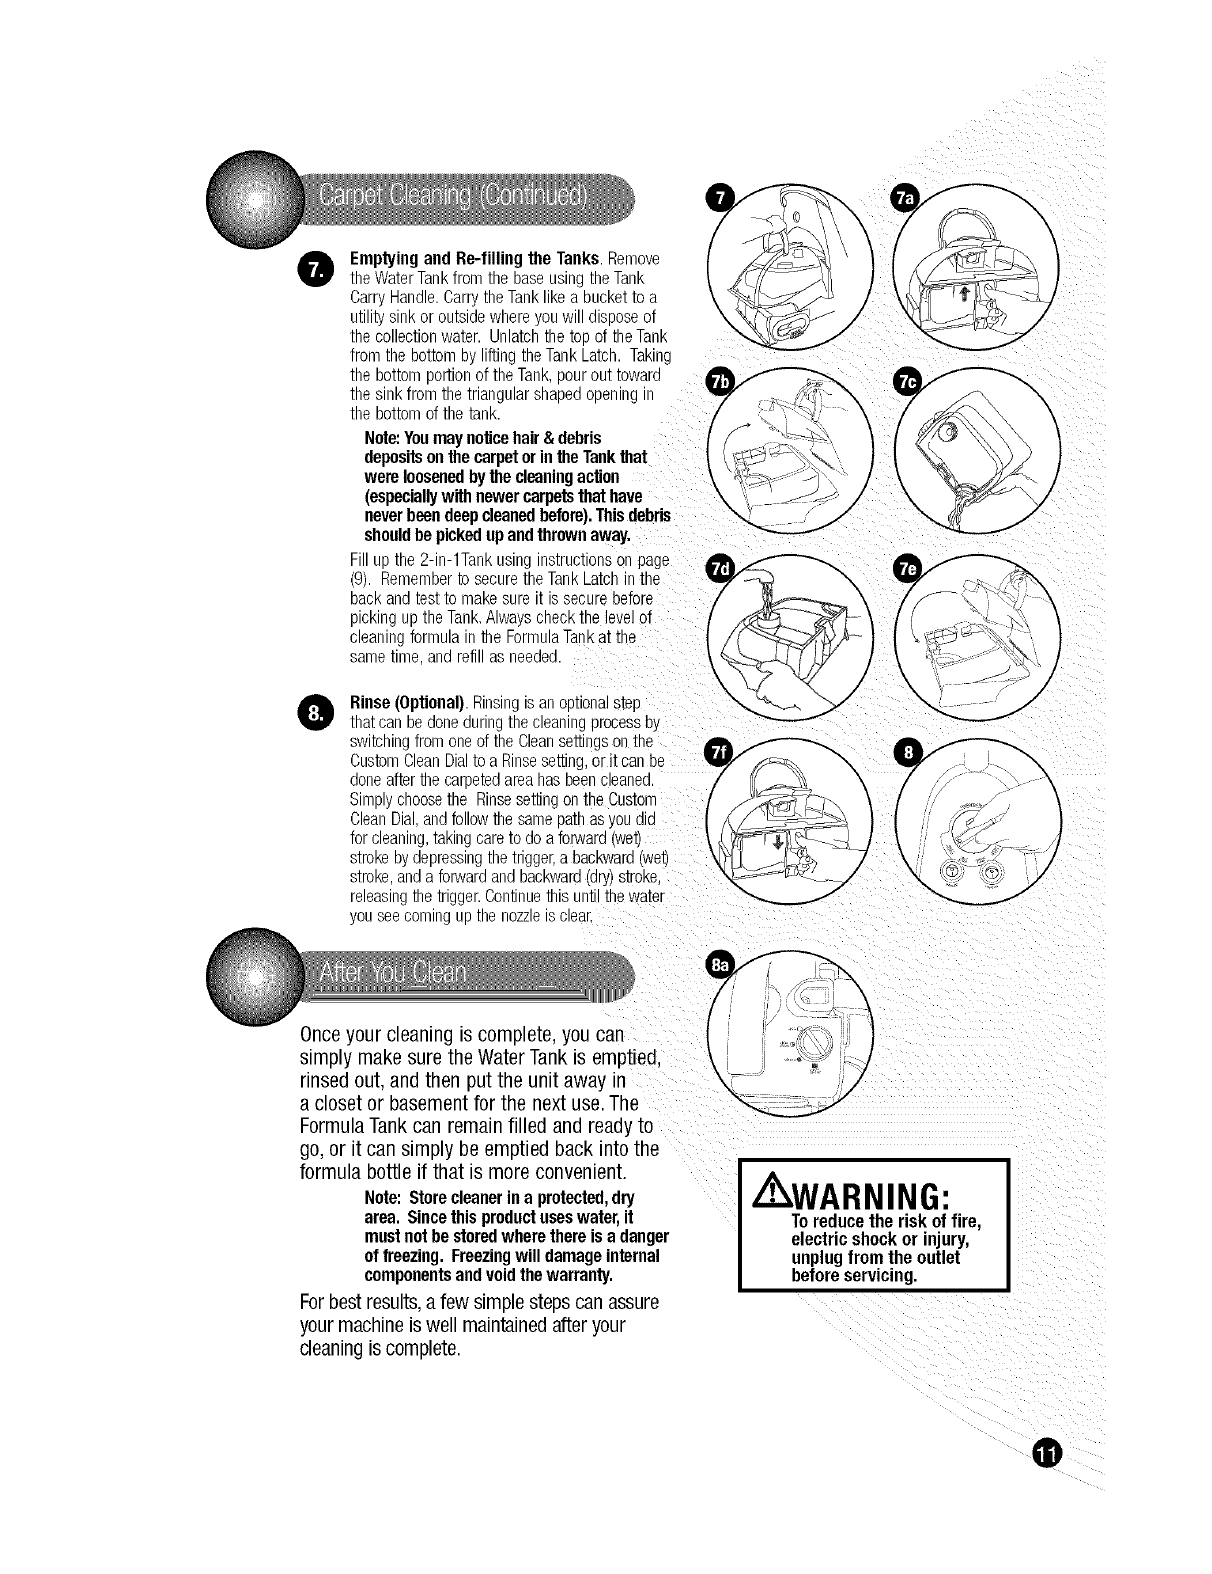
Emptyingand Re-tillingthe Tanks Remove
theWaterTankfromthe baseusmameTank
CarryHandle.CarrytheTank Kea DucKe[[0 a
utilitysink or outsidewhere youwmalsDoseof
thecollectionwater. Unlatch[ne[ODof theTank
fromthe botbm by lifting the TankLa[cn Taking
the bottomportionof theTank,pourou[ [oward
thesink fromthe triangularsnapeaopeningin
the bottomof the tank,
Note:Youmaynoticehair& debris
depositsonthe carpetorin theTankthat
wereloosenedbythecleaningaction
(especiallywith newercarpetsthat have
neverbeendeepcleanedbefore).Thisdebds
shouldbe pickedupandthrownaway.
Fillup the 2-in-lTank using ns[ruc_lonsonpage
(9). Rememberto securetheTankLatch
back andtest to make sureit is securebefore
pickinguptheTank,Alwayscheckme levelot
cleaningformulain the FormulaTankat the
sametime,and refill as needed.
Rinse(Optional).Rinsingis anOD[ionalstep
thatcanbedoneduringmecleaningorocessby
switchingfromoneof the Cleansearigson me
Cusbm CleanDialto a Rinsesetting,or itcan be
doneafterthe carpe[edareahasDeercleaned
Simplychoosethe Rinsesettingon the Custorr
CleanDial,andfollowthesameDarnas youaJa
for cleaning,takingcareto do a forward wet]
strokebydepressingthe trigger,a DacKwaraNet)
stroke,anda forwardand backward[ary)stroke,
releasingthetrigger.Continuethisunti tnewa[er
youseecomingupthenozzlesclear.
(
Once your cleaning is complete, you can
simply make sure the WaterTank is emptied.
rinsed out, and then put the unit away in
a closet or basement for the next use. The
FormulaTank can remain filled and ready to
go, or it can simply be emptied back into the
formula bottle if that is more convenient.
Note: Storecleanerin a protected,dry
area. Sincethisproductuseswater, it
mustnotbe storedwhere there is a danger
of freezing.Freezingwill damageinternal
componentsandvoidthe warranty.
Forbest results,a few simplesteps can assure
your machineis well maintainedafter your
cleaningis complete.
Z WARNING:
Toreduce the risk of fire,
electric shock or injury,
unplug from the outlet
beforeservicing.
®

TurnPowerandHeaterswltcnesOFFCO) unplug
machineana wraDme Dowercord.
After emptying the Water Tank nnse It put at a fau-
g npt Tap water. TaKingcare tp clear
unaerneatn the Heavy Duty Bladder and all around ii
Thetoe Tankcan be rinsedcleanmrough
Also pppoutthe Redfilter under-
neatnmetpo half of the Tankana nnsemat pul
ReplacebeforePu_ungtne tPDand PPttPmhalvesof
me tanKtpgetner.
BeforeypuplacethecleanedWaterTankback ontp
macnlne,slmpl_unscrewthe FloorNozzleusinga
headscrewdriver(_). This canbe rinsedoutPhillips
at the faucet.Thenreplacebackonto themachineby
stari- j fromthe bottomof the nozzleand nooHngthe
tabs Into the holeE on IRe DOIIOm Sides of the machine
Securei/tp 31acewltnme screv..
-ne reside of the ena caps pytne Drusn ro s car be
a cJean paper towel, or if a more
tnorougn cleaning is desired, ine end caps can be
taken off using a Phillips head @ screwdriver and
rinsed clean. Replace after cleanqng.
Anyloosehairor debnscanbepulledfromthe brush
Orollsandthrownaway.Forthemostthoroughclean
beforestorage,followulrecuonsonpages17 & 18 fpr
removalanareplacementof the brusnro,s an(]pelts.
OAftercarpet s dry,vacuumagainto removeflair
and fuzz.
Filter
G:
To reduce the risk of fire,
electric shock or injury,
unplugfrom the outlet
before servicing.
A few models are equipped with a Scotchgard
Protector post-treatment applicator and
cartridge. Using this, along with one of
the BlSSELLcleaning formulas containing
Scotchgard. can be used to help retain the
carpet cleanliness achieved with the ProHeat
2X machine. For best results, the post
cleaning treatment should be applied while
the carpet is still damp. It is recommended
that the Scotchgard protector be applied
every 12 months to all clean carpeted areas,
and after every deep cleaning for high traffic
areas such as entryways and stairs.
,aftercleaningandnnslngyourcarpets
theWaterTankandrefilltheHeavyDub/Bladder
WEnclear npttadwater
®
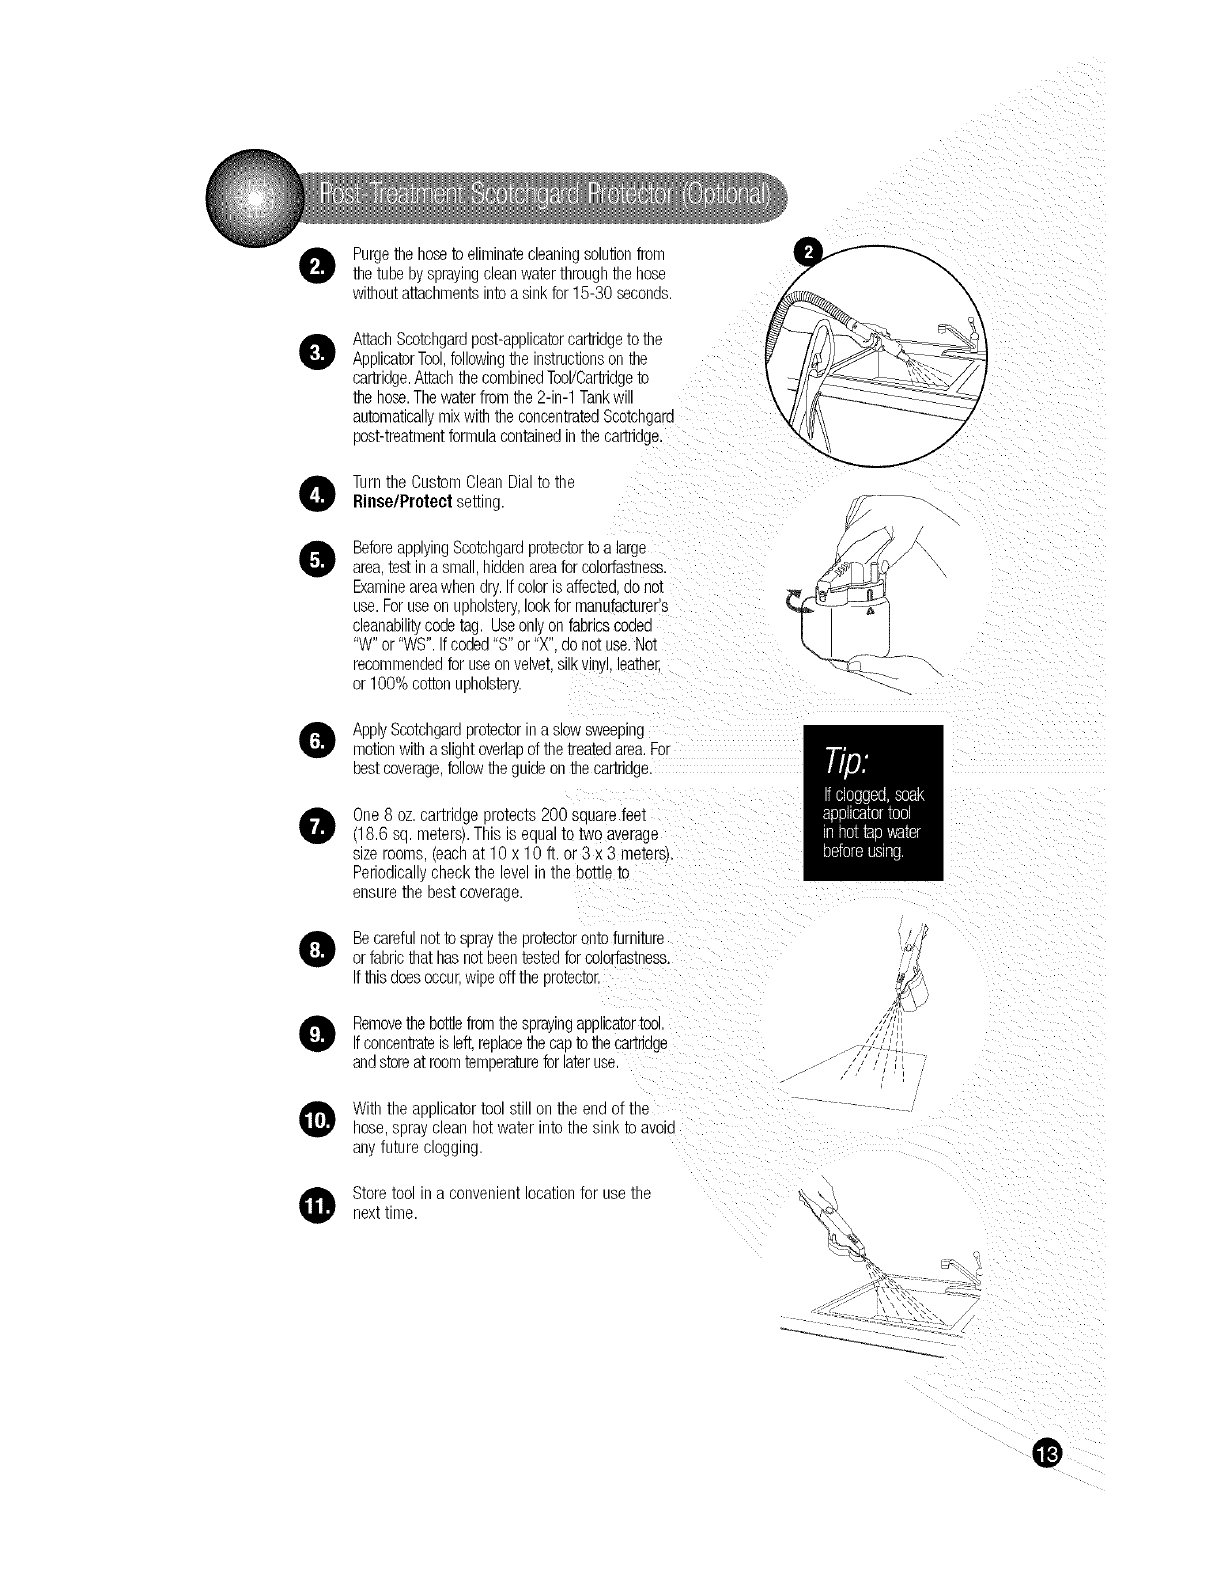
Purgethe hose[oellmlna[ecleaningSOlUnOnfrom
thetubebysprayingcleanwa[ermroujn [nenose
withoutattachmentsintoa sinkfor 15-30 seconds
AttachScotchgardpost-appllca[orcar[ridge[o[ne
ApplicatorTool,following[neins[ructlonson[ne
cartridge.AttachthecombinedTool/Cartridge[o
thehose.Thewaterfromthe2-in-1Tankwi
automaticallymixwith [neconcen[ra[eaScotchaara
post-treatmentformulacontainedin [necar[ridge.
Turnthe CustomCleanDialto the
Rinse/Protectsetting.
BeforeapplyingScotchgardprotector[oa large
area,testin a small,hiddenareaforcolorfastness.
Examineareawhendry f coloris affecteoaonot
use.Foruseonupholstery,)ok formanufacturer's
cleanabililycodetag. Useonlyonfabricscoaea
"W"or "WS".Ifcoded"S"or"X",do notuse.Not
recommendedfor useonvelvet,S,Kwnyl,leatne[
or 100%cottonupholstery.
ApplyScotchgardprotectorin a slowsweeping
motionwitha slightoverlapof thetreateaarea.For
bestcoverage,followtheguideonthecar[nage
One8 oz.cartridgeF"otects200 sc]are feet
(18.6 sq. meters).This is equalto two average
sizerooms,(eachat 10x 10 ft.or 3 x 3 metersl
Periodicallycheckthe level n the bottleto
ensurethebest coverage.
Becarefulnot to spraythe protec[orontofurniture
orfabricthathasnotbeentestedforcolorfastness.
If thisdoesoccur,wipeofftheprotector.
RemovethebottlefromthesprayingaDolicatortool.
If concentrateis left,reDlacetneCaDtotnecar[nage
andstoreat roomtemperatureforlateruse.
Withthe applicatortoolstill onme endof the
hose,spraycleanhotwater intome SInKtoavoJa
anyfutureclogging.
O toretool in a convenientlocationfor usethe
nexttime.
\\
i
/
0

YourProHeat2Xmachine comes equippedwith
a hoseand at east 1 attachmentfor cleaning
stairs,upholstery,and more,
_nnortant]If usingto cleanupnols[erycnecK
UpholsteryTags.
A.Checkmanufacturer'stagbefore
cleaning."W"or "WS"on thetagmeans
youcanuseyourProHeat2X.If thetag
iscoded.vithan "X"or an"S wl[na
diagonalstripethroughit),or says"Dry
CleanOnly",do notproceedwenanj
deepcleaningmachine.Donot useor
VelvetorSilk.If manufacturer'stag is
missingor nol coded,cnecKwen/our
fuml[uredealer,
B,Checkfor colorfastnessin an
inconsnlcuousEace,
C,If UOSSInle.cnecKupholsterystuffing.
Coloredstuffingmayr)leeamrougr
fabric whenwet.
D,Planactivitiesto allowtaholsterynine
Todry,
E,Vacuumthorougnlyto pick up loose
aeonsand pethair.Usea vacuum
_'vl[n a orusna[[acnmen[are a crevice
too [o clean n fabric folds.
Followthe mstrucnonson pages9 & 10 for
filling theWaterTankandthe FormulaTank.
Manufacturer'stag
Z WARNING:
To reducethe risk of
injury,be extra careful
when cleaning stairs.
Make sure machine is
secureand level.
)SetReadyToolsDial to the Hose
AttachmentsSetting. Thiswill allowspray and
suctionfromthe hose.
SetCustomCleanDialforHeavyTraftic,Normal
Clean,LightClean.or Rinseasdesired
0
0
Attacn ine cleaning tOOlI0 tne end of the nose
Plugin andturn or me PowerSwitchand Healer
iff desired
Cleanbypressingthetriggerto spraysolunor
areato becleaned.Slowlj q]oveme [OOl
Backandforth overthesoiledsurface. Release
[netriggerto suctionsoueawa[er Continue[c
cleaninthearea.worKingm smallsecuons un[
nomoredirtcan be removed Rinse )nnonal
an(]suc[Ionas needed.
Caution:Do no overwet.
Removeand nnse[oolsn clean runningwa[er
Dryand re[ acein theToolCaddy.
It isrecommended[na;j )usuctioncleanwa[er
fromthetaEto rinseoutthehose Beforerenlac-
ingliftendof hoseandstretchou[[oensurea
wa[eris clearedfromhose
0Cc FlexhosearoundtheToolCadd_
EmptyWaterTankandrinseout,followingme
instructionsonpage11.
ReturnReadyToolsDialtoFloorSettinj
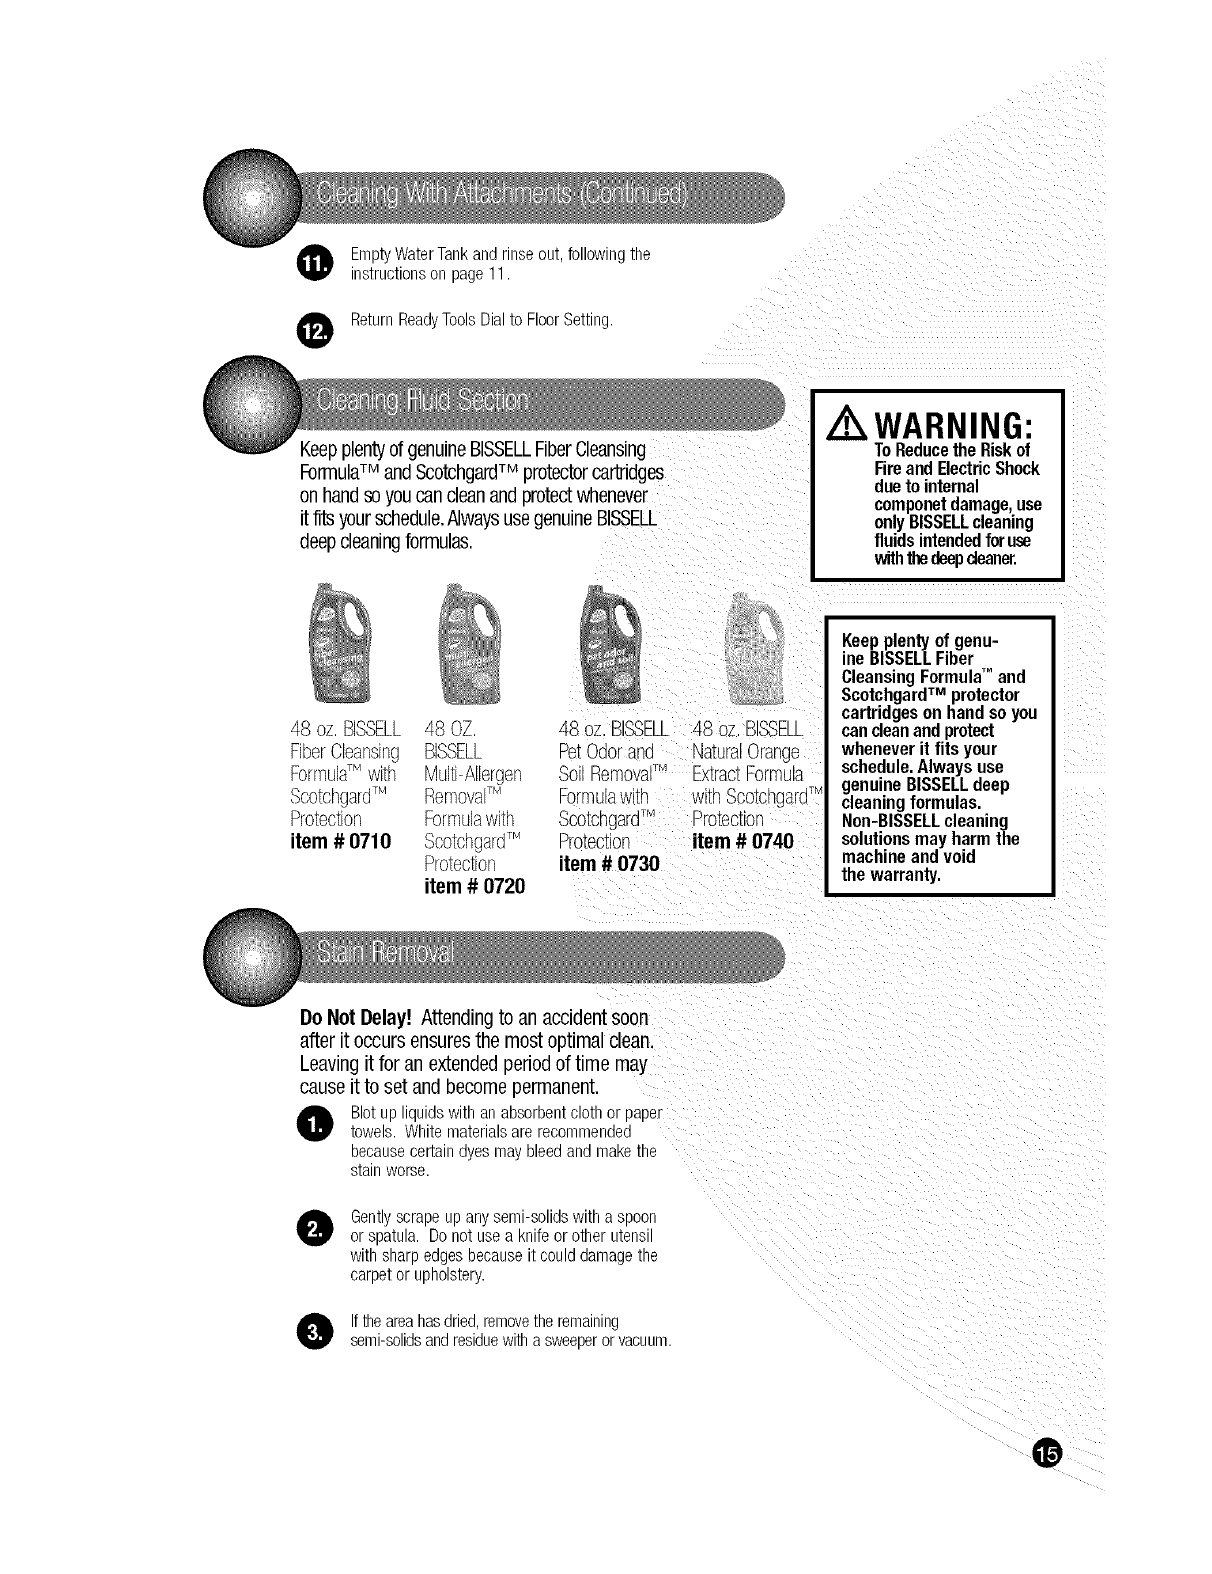
KeepplentydgenuineBISSELLFiberCleansing
FormulaTMandScotchgard TM protectorca_idges
onhandsoyoucan cleanand protectwhenever
it fits yourschedule,AlwaysusegenuineBISSELL
deepcleaningformulas.
/ WARNING:
ToReducethe Riskof
Fireand ElectricShock
dueto internal
componetdamage,use
onlyBISSELLcleaning
fluids intendedforuse
withthedeepdeaner,
48 oz,BISSELL 48 OZ,
FiberCleansing BISSELL
MuW-Allergen
ScotchgardTM Rer,rlovalTM
Protection Formulawith
item # 0710 ScotchgardTM
Protection
item #0720
48 oz,BISSELL 48 oz,B &SELL
Pet Ddorana NaturalOrange
Soi RemovalTM ExtractFormula
Formulawl_r wl_nScotchgardT'
ScotchgardTM Protectior
Protectior item #0740
item #0730
Keepplentyof genu-
ineBISSELLFiber
CleansingFormula'"and
ScotchgardTM protector
cartridgesonhandsoyou
cancleanandprotect
wheneverit fitsyour
schedule.Alwaysuse
genuineBISSELLdeep
cleaningformulas.
r_on-BISSELLcleaning
solutionsmayharmthe
machineandvoid
thewarranty.
DoNot Delay! Attendingto an accidentsoon
after it occurs ensuresthe most optimal clean.
Leavingit for an extendedperiodof time may
causeit to set and becomepermanent.
Blotup liquidswith anaesoreen_clomor _aDer
towels. Whitematerialsare recommended
becausecertaindyesmaybleedana makeme
stainworse.
@Gentlyscrapeupany semi-solidSwire a SPOOl1
or spatula. Do notusea knifeoromer u[ens
with sharpedgeseecausei_coulddamageme
carpetor upholstery.
If theareahasdried,removethe remaining
semi-solidsandresiduewirea sweeoeror vacuum
0
Besureto [es[any spotremovalformulas n an
inconspicuousareafirst.This _ -_c)rtant as
someayesan(] ma[erlalSCOUldDedamagedor
a_sco_oreauy c_eanmgsolvents.If sucha change
snouJaoccur,trya different solution)rcal
a professional.
If cleaningon Berbercarpeunggennyrun/ourmacnmeovera n adenarea,If nofuzzingoccurs
conunuecleaningin soiledarea.
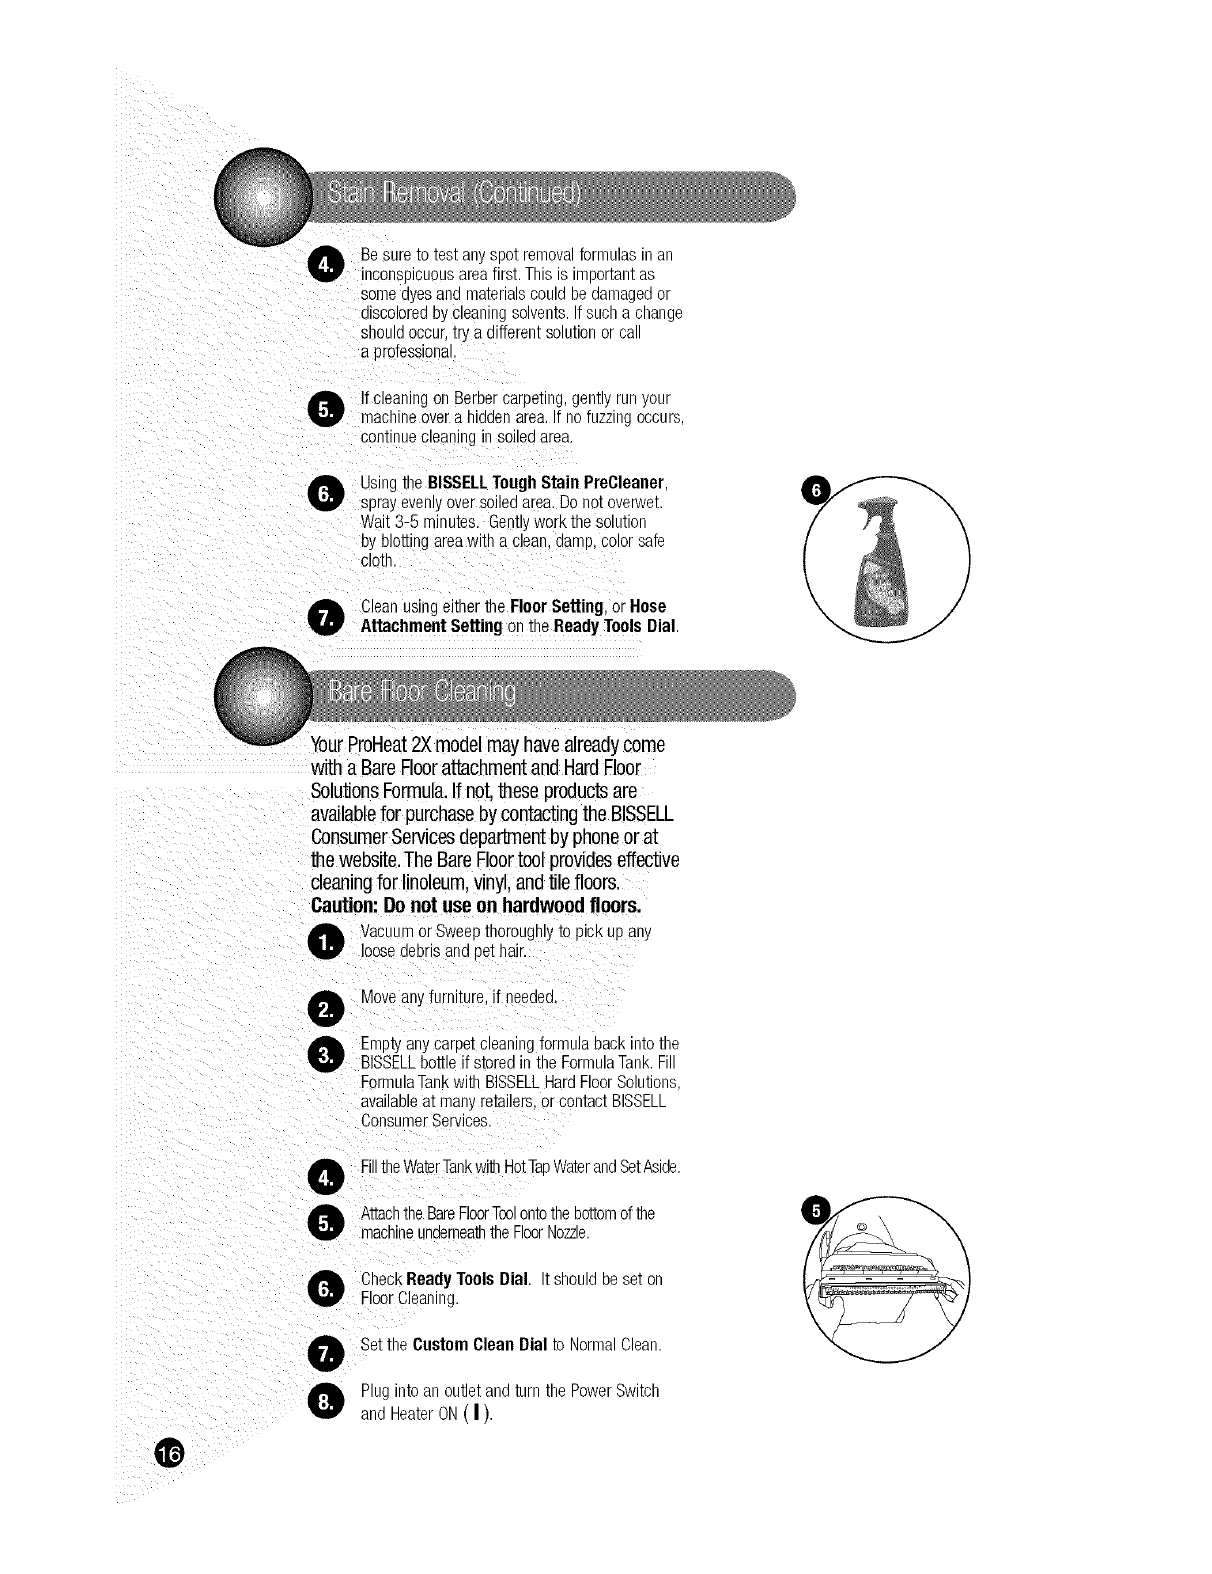
UsingtheBISSELLToughStain PreCleaner,
sprayevenlyoversoiledarea.Do notove_,et
Wait3-5 minutes. GemiyworKme solunon
by blottingareawltn a cJear dared,color safe
ClOth.
CleanusingeJtnerthe FloorSetting,or Hose
AttachmentSettingon the ReadyTools Dial
_Y
\
@
YourProHeat2X modelmay havealreadycome
with a BareFloorattachmentand HardFloor
SolufdonsFormula.If not._ese productsare
availablefor purchaseby contactingthe BISSELL
ConsumerServicesdepartmentby phoneor at
me website.The BareFloortool provideseffective
cleaningfor linoleum,vinyl,and'diefloors.
Caution:Donot use on hardwoodfloors.
Vacuumor SweepmorougHyto piCKup any
loosedebrisand pethair.
Moveanyfurniture,if needed.
0Emptyanycarpetcleaningformulaback midme
BISSELLbottleif storedin the FormulaTank.F
FormulaTankwitn BISSELLHardFloorSolutions,
avaJJaoJeat manyre_aHers,or contact BISSELL
ConsumerServices,
tFilltheWaterTankwithHotTaDWaterandSetAside
AttachtheBareFloorToolontothebottomofthe
a machineunderneaththeFloorNozzle
CheckReadyTools Dial [ snoulane se[ on
FloorCleaning.
Setthe Custom Clean Dial to NormalClear
Plug hid an )une[and [urnme PowerSwitch
and HealerON( I )

Slowlymovethe machineforwardand backover
barefloor surfaceonetimewnlle aepressmg
trigger.Caution:Do not overwet,
Repeatthe motionwithout pressingthe trigger
usingthe BareFloortoolto squeegeeana
suction upthe dirtywater.
Allowapproximatel_30 minutesfor floorsto ary.
w'll ii
3,
To reduce the risk of fire,
electric shock or injury,
unplug from the outlet
before servicing.
RemoveBareFloortool and rinseanddr, [o store.
If anyformularemainsin the FormulaTank,pour _h,
it backinto the HardFloorSolutionsbottlefor _ "_-
usethe nexttime. 7
Rinseout the FormulaTank.
Occasionalreplacementof one or both belts
may becomenecessary, f that is needed.
please follow the instructions below.
Turnoff themachine,andunplugit frorr [neounet.
Removeboth theWaterTankan(]me Formula
Tank. Set aside.
ill& ._-.-_
UnscrewtheFrontNozzleandremo_e it Setaside, l[ii_ _--\
Turnthe machineon its side.
IMPORTANT:cordside down.
Removethe ClearEndCapby unscrewing
BlackScrews. Takecare not to arcEtne screws
intothe unit.
Remove1 SilverScrew.
RemovePivotArm by gently iftingUD.
RemoveSmallBrushBelt.
GeplaceSmallBrushBelt,and ReverseSteo._
Above.
f
J
I
\
\
/)
®
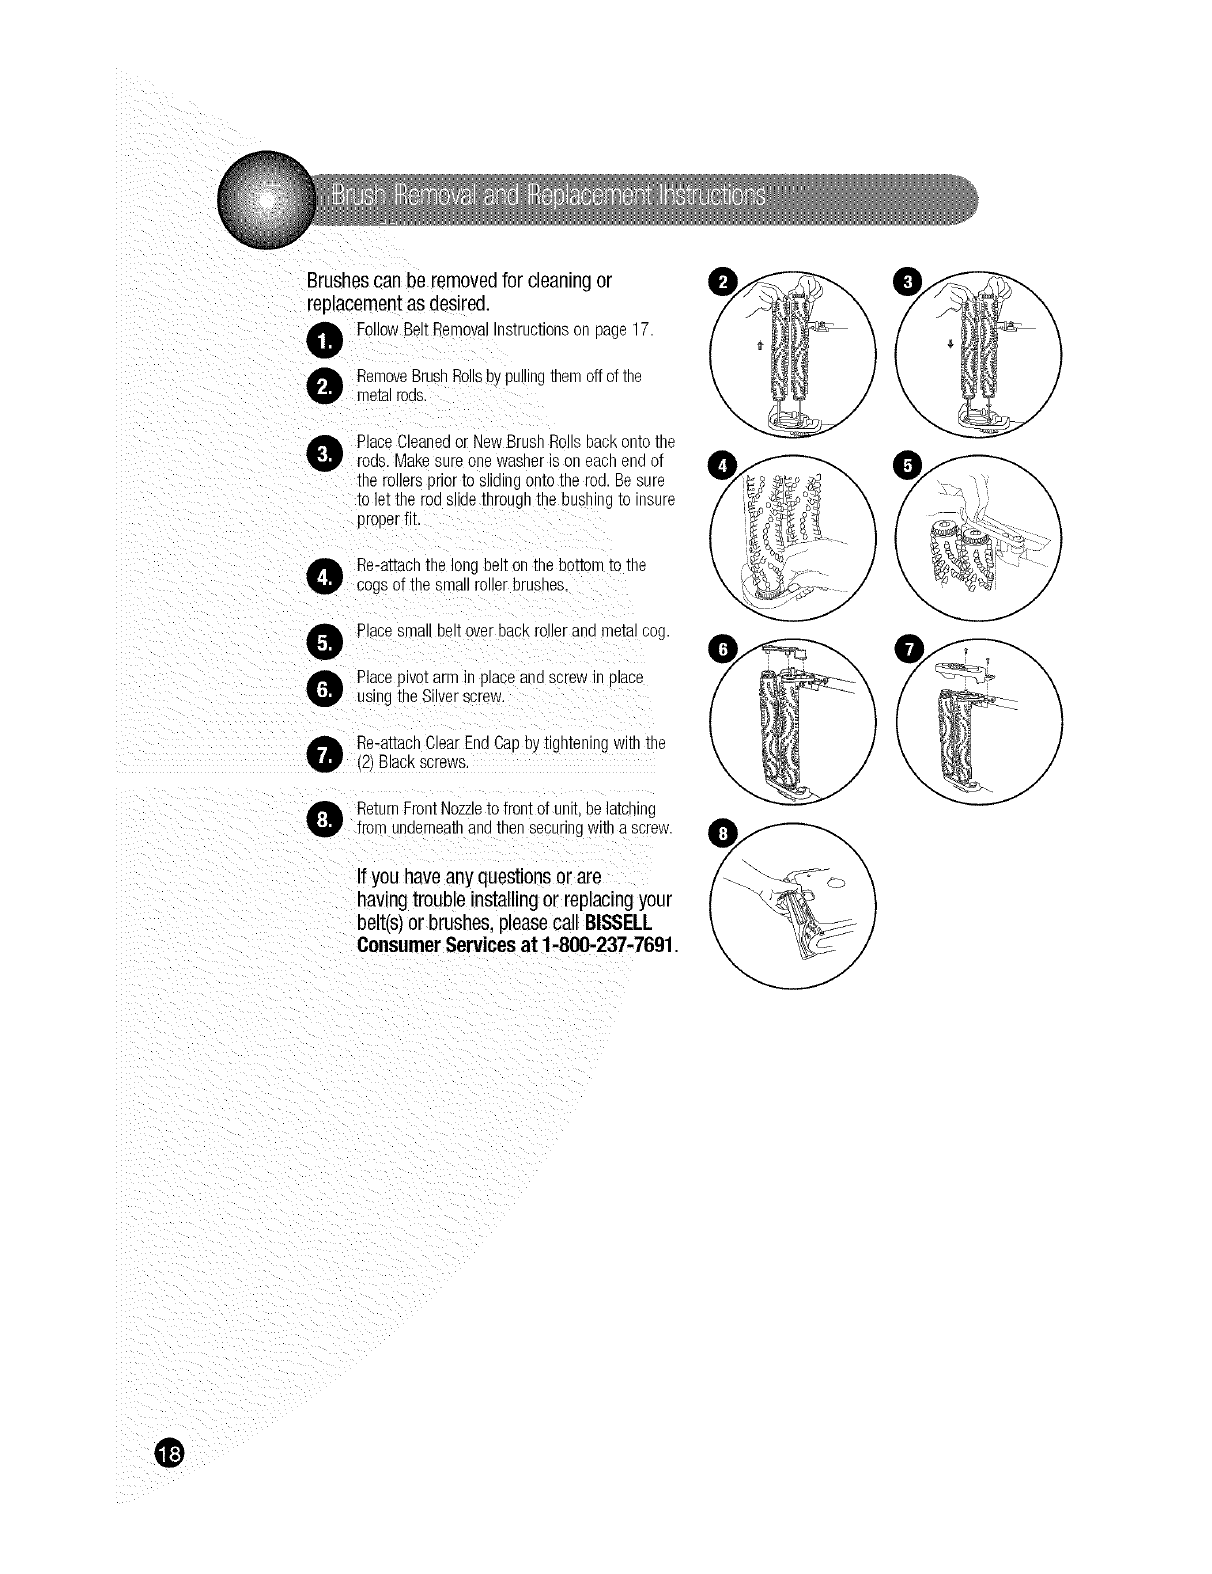
Brushescan be removedfor cleaningor
replacementas desired.
{emoval ns[ructlons on page 17
RemoveBrushRollsbypullng tnemoffof the
metalrods,
Ok Place Cleaned or New Brush Rolls eacKonto me
Prods. Make sure one washer is on eacn end of
me roiJersprior to sHalng onto me roe. Be sure
to let the roe sJJaewougn me uusnlng to isure
proper fit.
Re-at[acntne Jngbelt onthe boEo--to tne
cogs of the small roller brushes.
PlacesmaI beltover bacKrouerana metaJcog.
h, Placepivotarmin pJaceana screwin oJace
Pusingthe Silverscre_
Re-attachClearEndCapbytighteningwJ[ntne
Blackscrews.
ReturnFrontNozzleto front of unit be latching
unaernea[nanamen secunngwJtna screw,
If you haveany questionsor are
having trouble installingor replacingyour
belt(sl or brushes,pleasecall BISSELL
ConsumerServicesat 1-800-237-7691.
®
iI
ARNING
Toreducethe risk of
fire, electric shock or
injuryunplugfromoutlet
beforeservicing. .
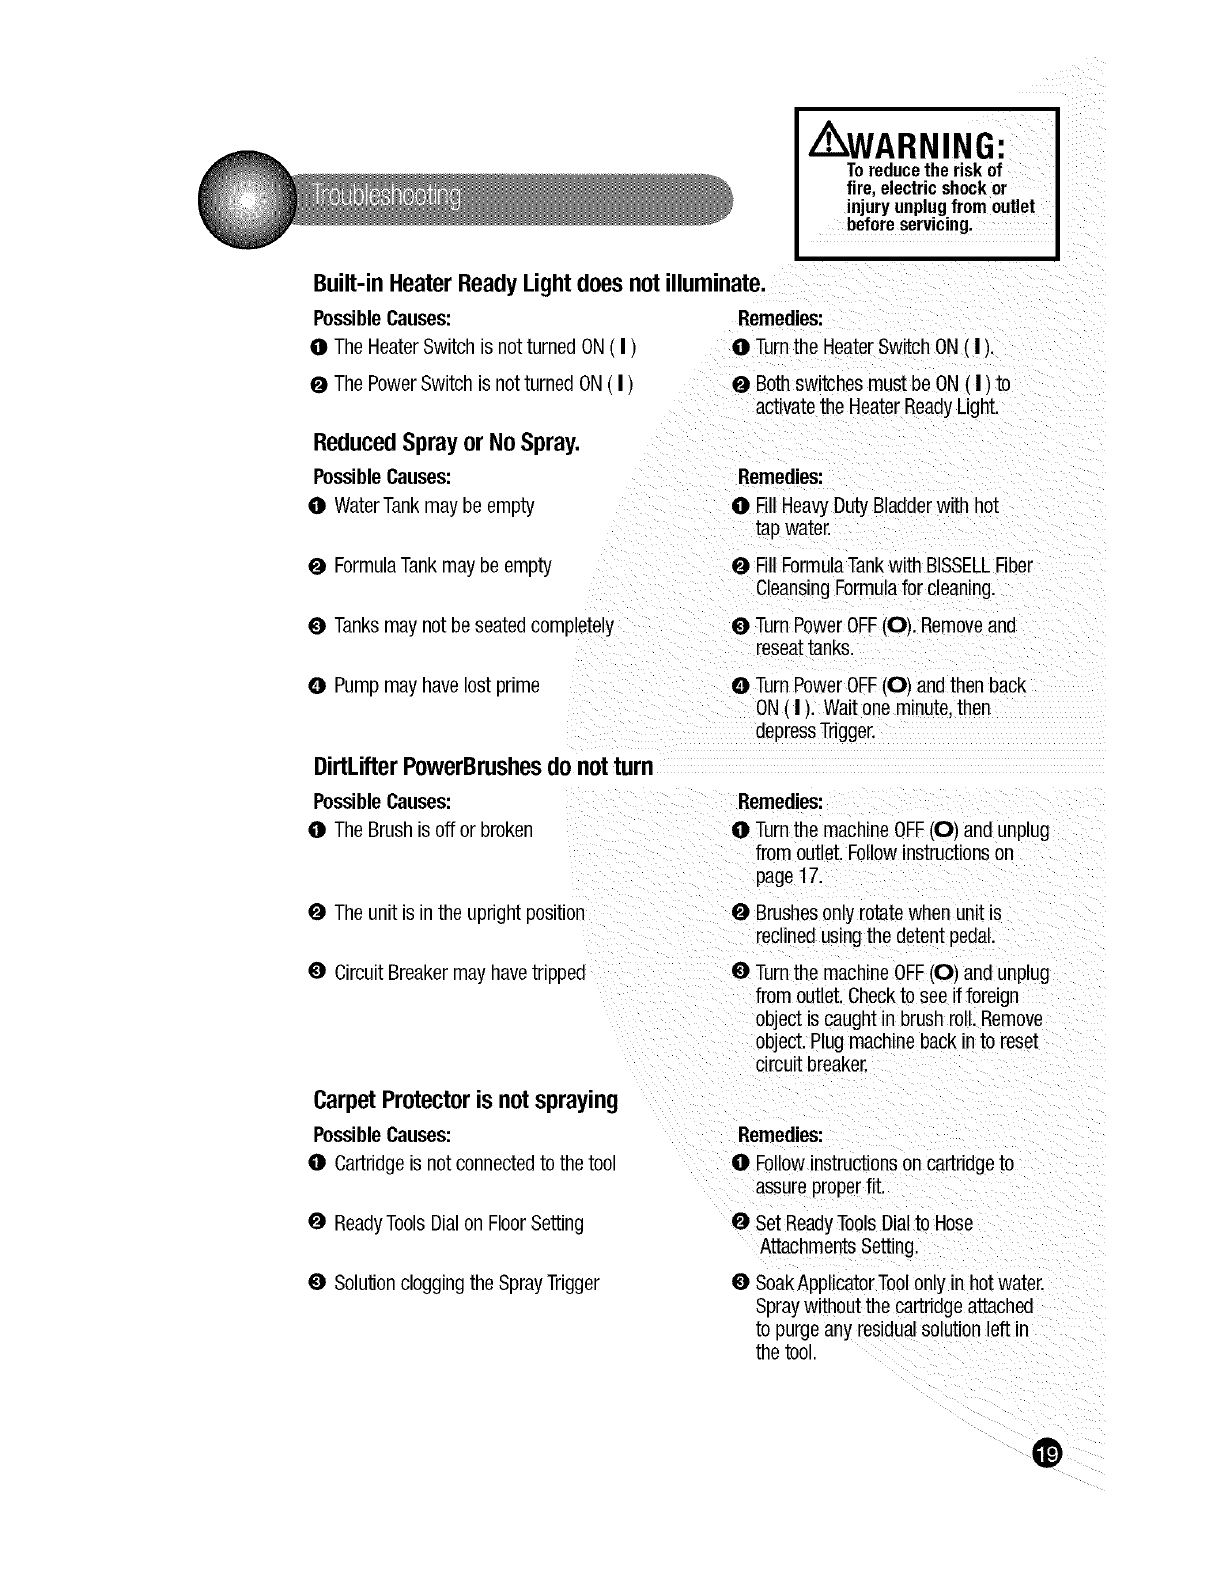
Built-inHeaterReadyLight doesnotilluminate.
Possible Causes:
@The HeaterSwitch is not turned ON( I)0Turn the HeaterSwitch ON( I).
0 The PowerSwitch is not turned ON( I ) 0 Bothswitches must be ON ( I )to
actvate the HeaterReadyL ght.
ReducedSprayorNo Spray.
Possible Causes:
0 WaterTankmay be empty _ Fill Hea_j Duty Bladderwith hot
0 FormulaTankmay be empty , Fill FormulaTankwith BISSELLFiber
Ceans ng Formua for cleaning.
i
0 Tanksmay not be seatedcompletely 0Turn PowerOFF(0). Removeand
reseattanks.
i :i
O Pump may have lost prime 0 Turn PowerOFF(0)and thenback
ON( I ). Wait one minute,then :
depressTdgger.I
DirtLifterPowerBrushesdonotturn
Possible Causes:
@The Brush is off or broken
0 The unit is in the upright position
0 CircuitBreaker may havetripped
Remedies:
0 Turnthe machine OFF(0) and unplug
from outlet.Followinstructionson
page 17.
0 Brushesonly rotate when unit is
reclined usingthe detent pedal.
0Turnthe machineOFF(0) and unplug
from outlet. Checkto see i_foreign
object is caught in brush rol. Remove
object. Plugmachine backin to reset
circuit breaker.
CarpetProtector is notspraying
Possible Causes: Remedies:
@Cartridgeis not connectedto the tool 0Followinstructionson cartridgeto
assureproperfit.
0 ReadyToolsDialon FloorSetting
0SolulJoncloggingthe SprayTrigger
0 Set ReadyToolsDialto Hose
AttachmentsSetting.
0SoakApplicatorToolonly in hot water.
Spraywithout the cartridgeattached
to purgeany residualsolutionleft in
the tool.
0

Cleanernotpickingupsolution
Possible Causes:
0ReadyToolsDial may beat wrongsetting
0 Tankmay not be seatedproperly
0Solution orWaterTankis Empty
Remedies:
0Set ReadyToolsDialto either Floor
Cleaningor HoseAttachmentsSetting.
0 Pick up both the WaterTankand
FormulaTankand reseatthem so
theyfit snugly on the unit,
0Checkfluid levels in HeavyDuty
Bladderand FormulaTank.
0 2-in-1Tankhaspickedup maximum
dirtywater 0Empty 2-in-1 Tankand Refillwith
CleanHotTapwater into the Heavy
DutyBladder.
Thank you for selecting a BISSELLproduct.
Ifyoushouldhappento needassistanceduringassemblyoroperations,call1-800-237-7691.
Pleasedo notreturnthis productto the store
For information about repairs or replacemem Dar_s.or aues_onsaDou_
your warranty,call:
BISSELLConsumer Services
1-800-237-7691
Monday- Friday 8 a.m. 10 D.rr EST
Saturday 9 a.m. 8 r _" EST
Orwrite:
BISSELLHOMECARE,INC
POBox3606
GrandRapids MI 49501
ATTN: ConsumerServices
Or visitthe BISSFLLwebsite- www.bissell.com
WhencontactingBISSELL,havemodelnumberof unitavailaLe.
Pleaserecordyour Model Number:
Pleaserecordyour PurchaseDate:
NOTE:Please keepyour original salesreceipt, It providesproof of date of
purchasein the eventof a warranty claim. See "About YourWarranty"
on page 24 for details,
0

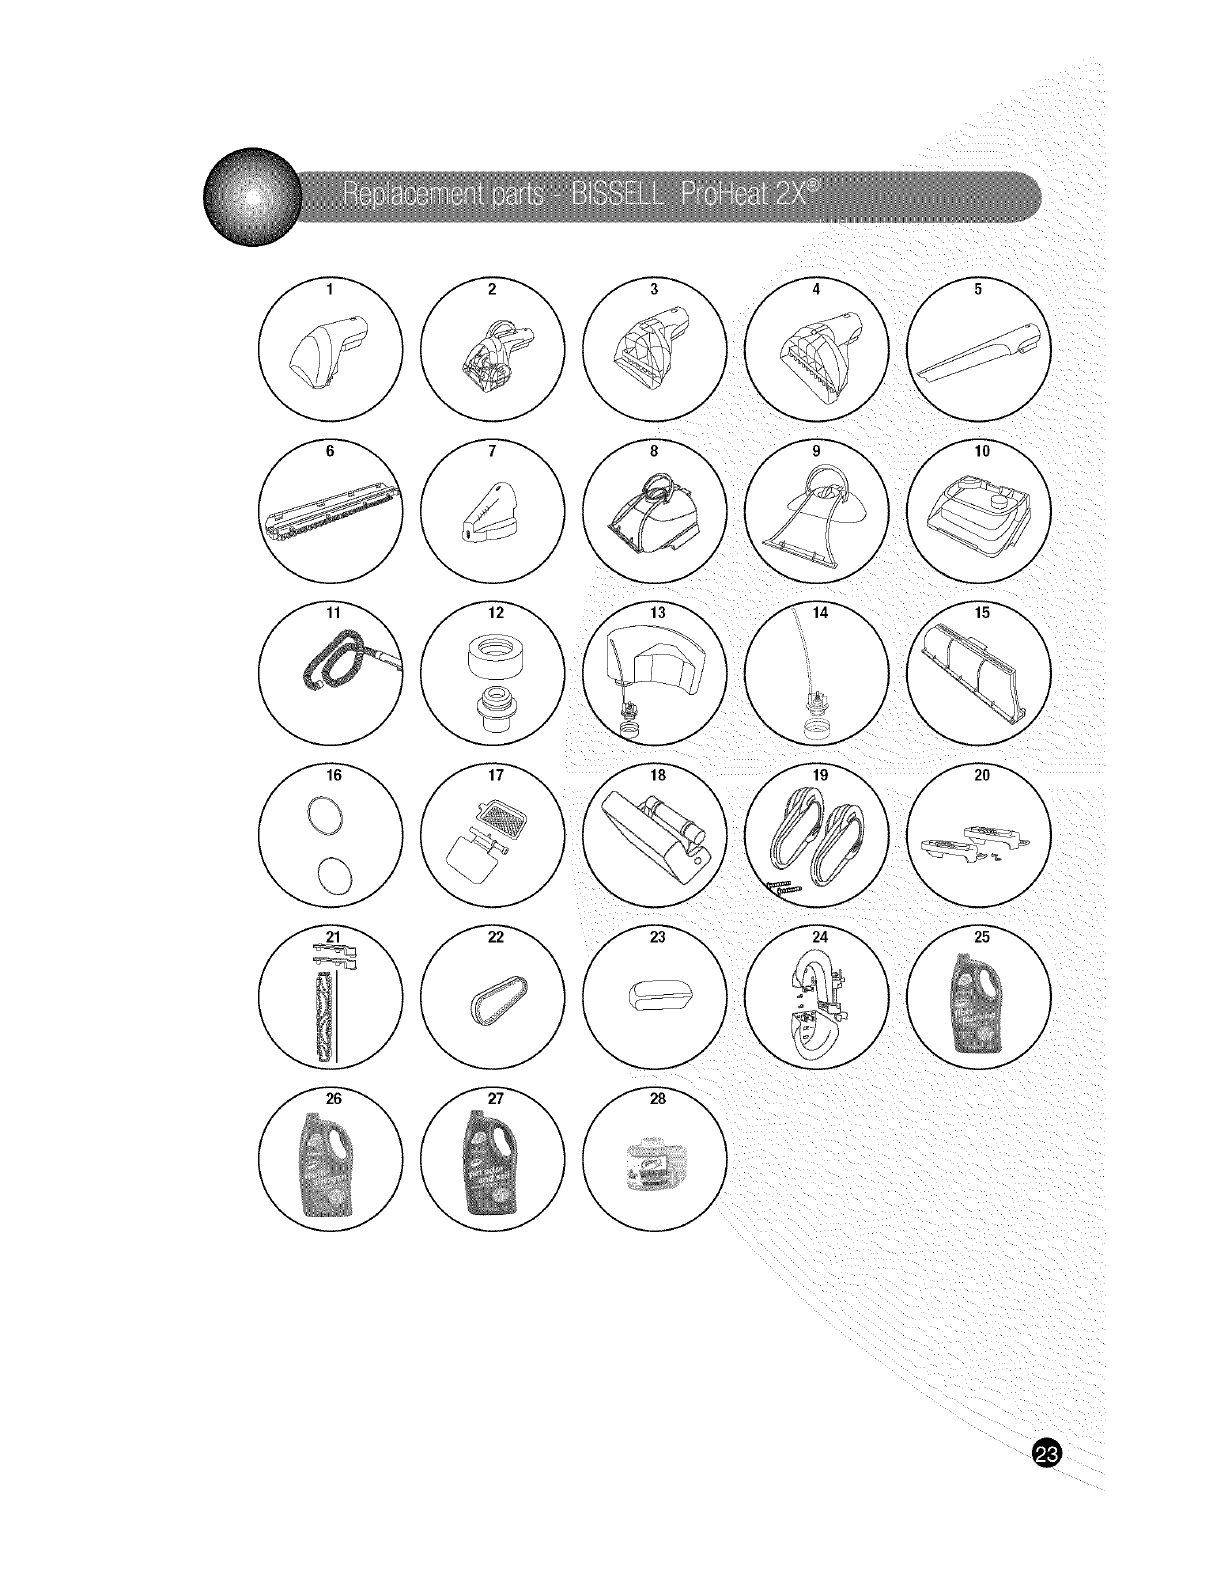
Replacement Parts
Below is a list of common replacementparts. While not all of these partsmay have
come with your specific machine,all are availableto you for purchase,if desired.
Item Part No. Part Name
203-6651 3" ToughStair Tool
2 203-6652 PoweredTurboBrustHandTool
3 203-6653 4" bpnols[e_Tool
4 203-6654 6" WideStairToo
5 203-6655 SuraflngCreviceToo
6 203-6692 BareFloorToo
7 203-6691 ScotchgardApplicatorTool
8 203-6611 Grej TankAssembly[comple[e;for Blackunit (Blueor Purple
comble[etanKassemo,esavailableuponrequest)
9 203-6660 GreyTankLid (Bue or PurpleTankLidsavailableuponrequest)
10 203-6618 GreyTankBottom(BIJeor PurpleTankBottomsavailableupon request)
11 203-6601 HoseAssembly
12 203-6675 Capana nsertfor WaterTank
-3 203-6676 FormulaTank(inc JdesCap& Insertfor FormulaTank)
14 203-6677 Capand Insertfor FormulaTank
-5 203-6678 FrontNozzle(incuaesgasKet)
16 203-6679 AutoloadGasket(fitsbothWaterandFormulaTank)
17 203-6680 Filterwith Doo_
18 203-6681 WaterTankLatch
19 203-6682 CordWrap(Black/(Blueor Purplecordwrapavailableuponrequest)
2(: 203-6685 ClearEndCapw/EdgeBrusnes/2 9ack,includesscrews)
21 203-6686 BrushRoll- 6 row(includes1 crust axle,2 swivelarms)
22 203-6688 BrushBe [ {non-cords_ue_
23 203-6689 HoseSecureLatcr
24 203-6690 HoseRackAssembly(Too/BottomHoseRack,Screws)
25 0710 FiberCleansingFormula48 oz
26 0720 Multi-,_ergenRemovalFormula48 oz
27 0730 DotOdorand SoilRemovalFormula48 oz
28 0464 Sco[cngaro[rotectorPostTreatmentCartridge
*No[ a Doris arencJaea wl[n everymoae
1
/\
(
1
0
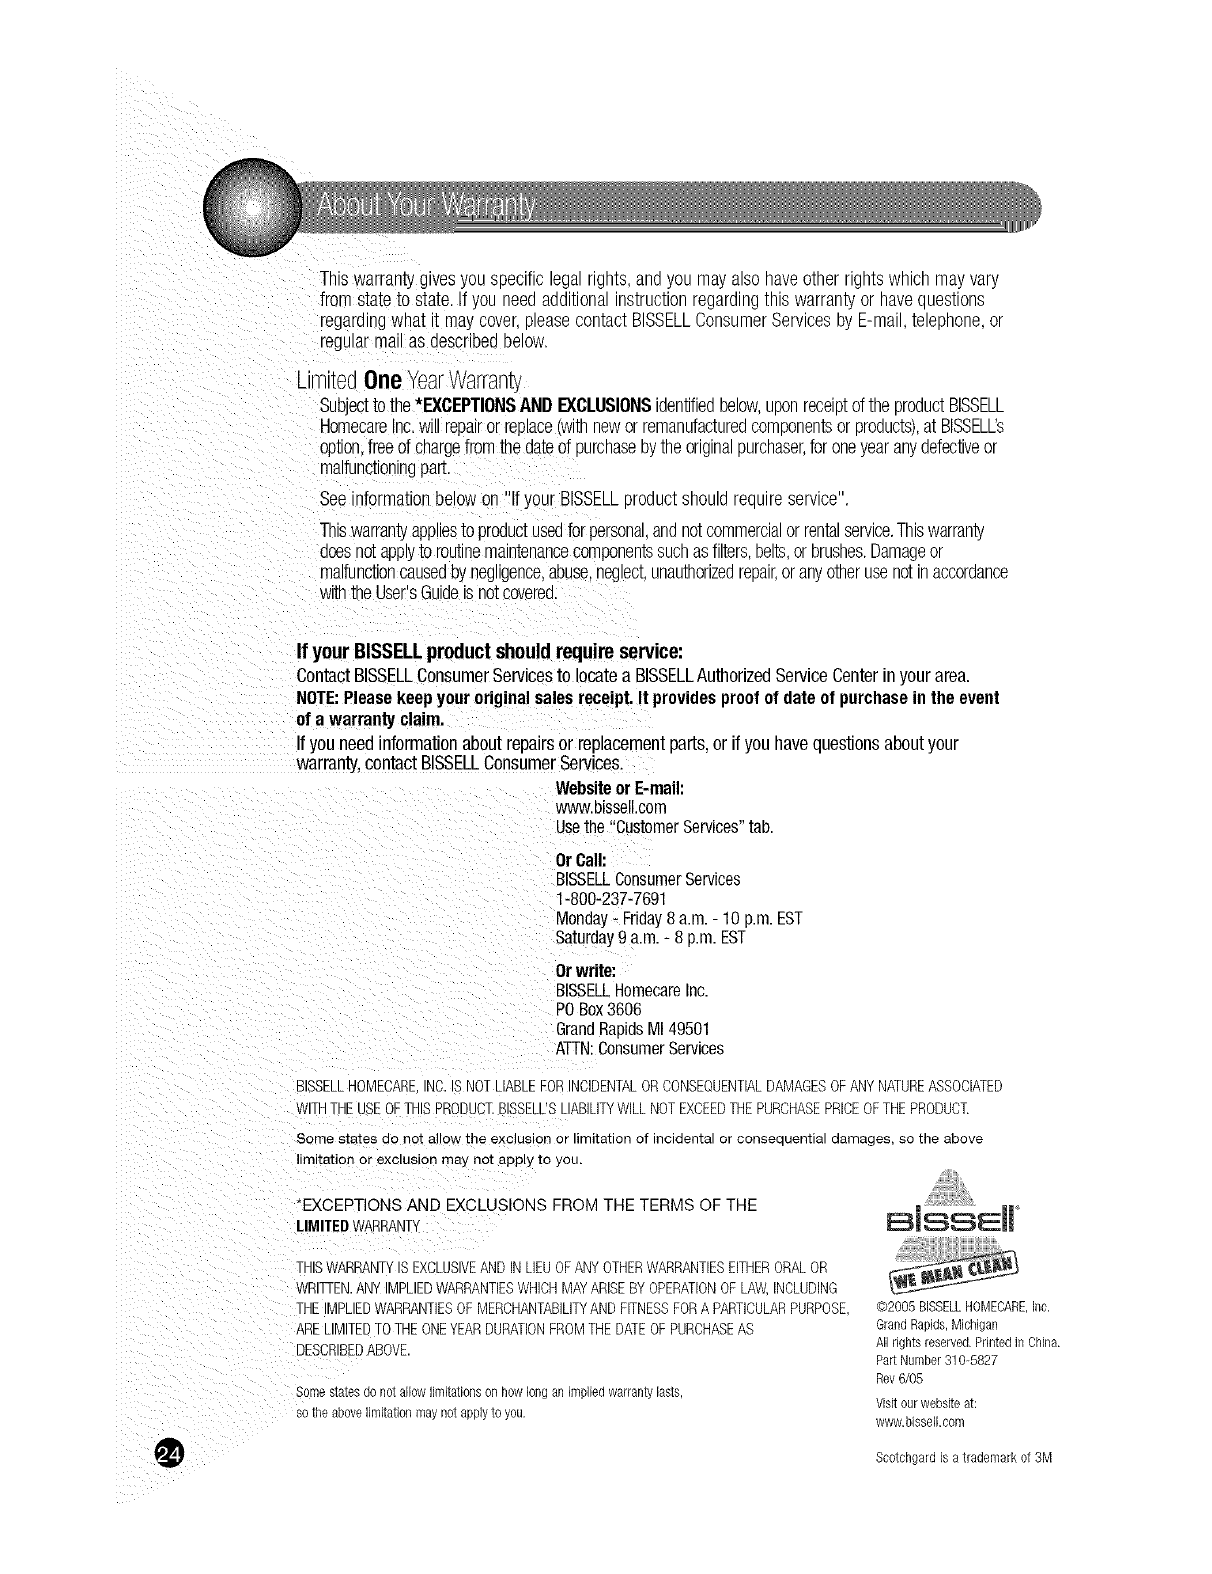
Thiswarrantygivesyou _Decificegalngnmanayoumayalsohaveotherrightswhichmayvary
fromstateto state.Ifyou neeaaaamonans_ruc_onregardingthis warrantyor havequestions
regaramgwhatit maj coverEeasecomactBISSELLConsumerServicesby E-mail,telephone,or
regularmallas aescribedeelow.
upnltegOneYearWarranty
Subacttothe*EXCEPTIONSANDEXCLUSIONSidentifiedbelow,uponreceiptdtheproductBISSELL
HomecareInc.willreparorreplace(withneworremanufacturedcomponentsorproducts),at BISSELL's
op[_on,freeofchargefromthedateof DurcnaseDymeong_napurchaser,foroneyearanydefectiveor
malfunctioningpar[.
Seereformationbelowon"If yourBISSELLoroauctshouldrequireservice".
Thiswarrantyappliesto productusedforpersonaananotcommercialorrentalservice.Thiswarranty
doesnotapplyb routinemaintenancecomponentssuchasfilters,belts,orbrushes.Damageor
malfunctioncausedbyneg,gence,abuse,necect.unaumonzearepair,oranyotherusenotinaccordance
withtheUser'sGudeis notco_ere&
If your BISSELLproductshouldrequire service:
ContactBISSELLConsumerServicesto locateaBISSELLAuthorizedServiceCenterinyourarea.
NOTE:Pleasekeepyouroriginalsalesreceipt.It providesproofofdateofpurchaseintheevent
ofa warrantyclaim.
Ifyouneedinformationaboutrepairsor replacementparts,or if youhavequestionsaboutyour
warranty,contactBISSELLConsumerServices.
WebsiteorE-mail:
wv,av.bissell.com
Usethe"CustomerServices"tab.
Or Call:
31SSELLConsumerServices
1-800-237-7691
Monday- Friday8 a.m. - 10 p.m.EST
Saturday9 a.m. - 8 p.m. EST
Orwrite:
31SSELLHomecareInc.
30 Box3606
BrandRapidsMI49501
ATTN:ConsumerServices
BISSELL HOMECARE INC. IS NOT LIABLE FOR NCIDENTAL )R CONSEQUENTIALDAMAGES OFANY NATUREASSOCIATED
tlTH THE USE OFTHIS PRODUCT.BISSELL'S LIABiLiTY WiLL NOT EXCEEDTHE PURCHASEPRICEOF THE PRODUCT.
Some states do not allow tile exclus on or limitation of incidenta or consequential damages, so the above
limitation or exclusion may not apply to yo_
EXCEPTIONS AND EXCLUSIONS FROM THE TERMS OF THE
LIMITEDWARRANT' BiSSEI[
THISWARRANTYISEXCLUSIVEAND INLIEUOFANYOTHERWARRANTIESEITHERORALOR
IRITTEN.ANYIMPLIEDWARRANTIESWHICHMAYARISEBYOPERATIONOFLAW,iNCLUDiNG
THEIMPLIEDWARRANTIESOFMERCHANTABiLiTYAND FITNESSFORA PARTICULARPURPOSE,
ARELIMITEDTCTHEONEYEARDURATIONFROMTHEDATEOFPURCHASEAS
DESCRIBFDABOVE
Somestates do notallow limitations on how Ior; an Jmp_Jeawarram_ asm.
so[ne adore iimKanonmay not aDDIVIOVOU
(c_2005BISSELLHOMECARE,Inc.
GrandRapids,Michigan
A, rights reserved.Printed in China.
Part Number310-5827
Rev6/05
Visit our websiteat:
www.bisselLe0m
Seotehgard is atrademark of 3M
