Boer Electrical Equipment US-5000 UHF WIRELESS MICROPHONE User Manual USERS MANUAL
Boer Electrical Equipment Co., Ltd. UHF WIRELESS MICROPHONE USERS MANUAL
USERS MANUAL

1
Preface
Because of the excellent and skilled in manufacture technique of wireless,
the wireless sytem can be your best choice.
The newly UHF wireless system uses the up-to-date PLL synthesized
technology, can bate the interferential signal.
And using automatic signal-selected receiving mode can reinforce the reception
of the receiver, avoid break off signal.
It's the firm and durable material of the microphone head. With high influence,
wide frequency response, the tone is clear and silvery.
Thank you very much for purchasing our products.
Our company proudly presents this high-technological professional microphone
to music lovers as a further proof of our company's pursuit of the ultimate in
sound quality. The high quality performance and easy operation are certain to
provide you with happy hours of listening and singing pleasure.
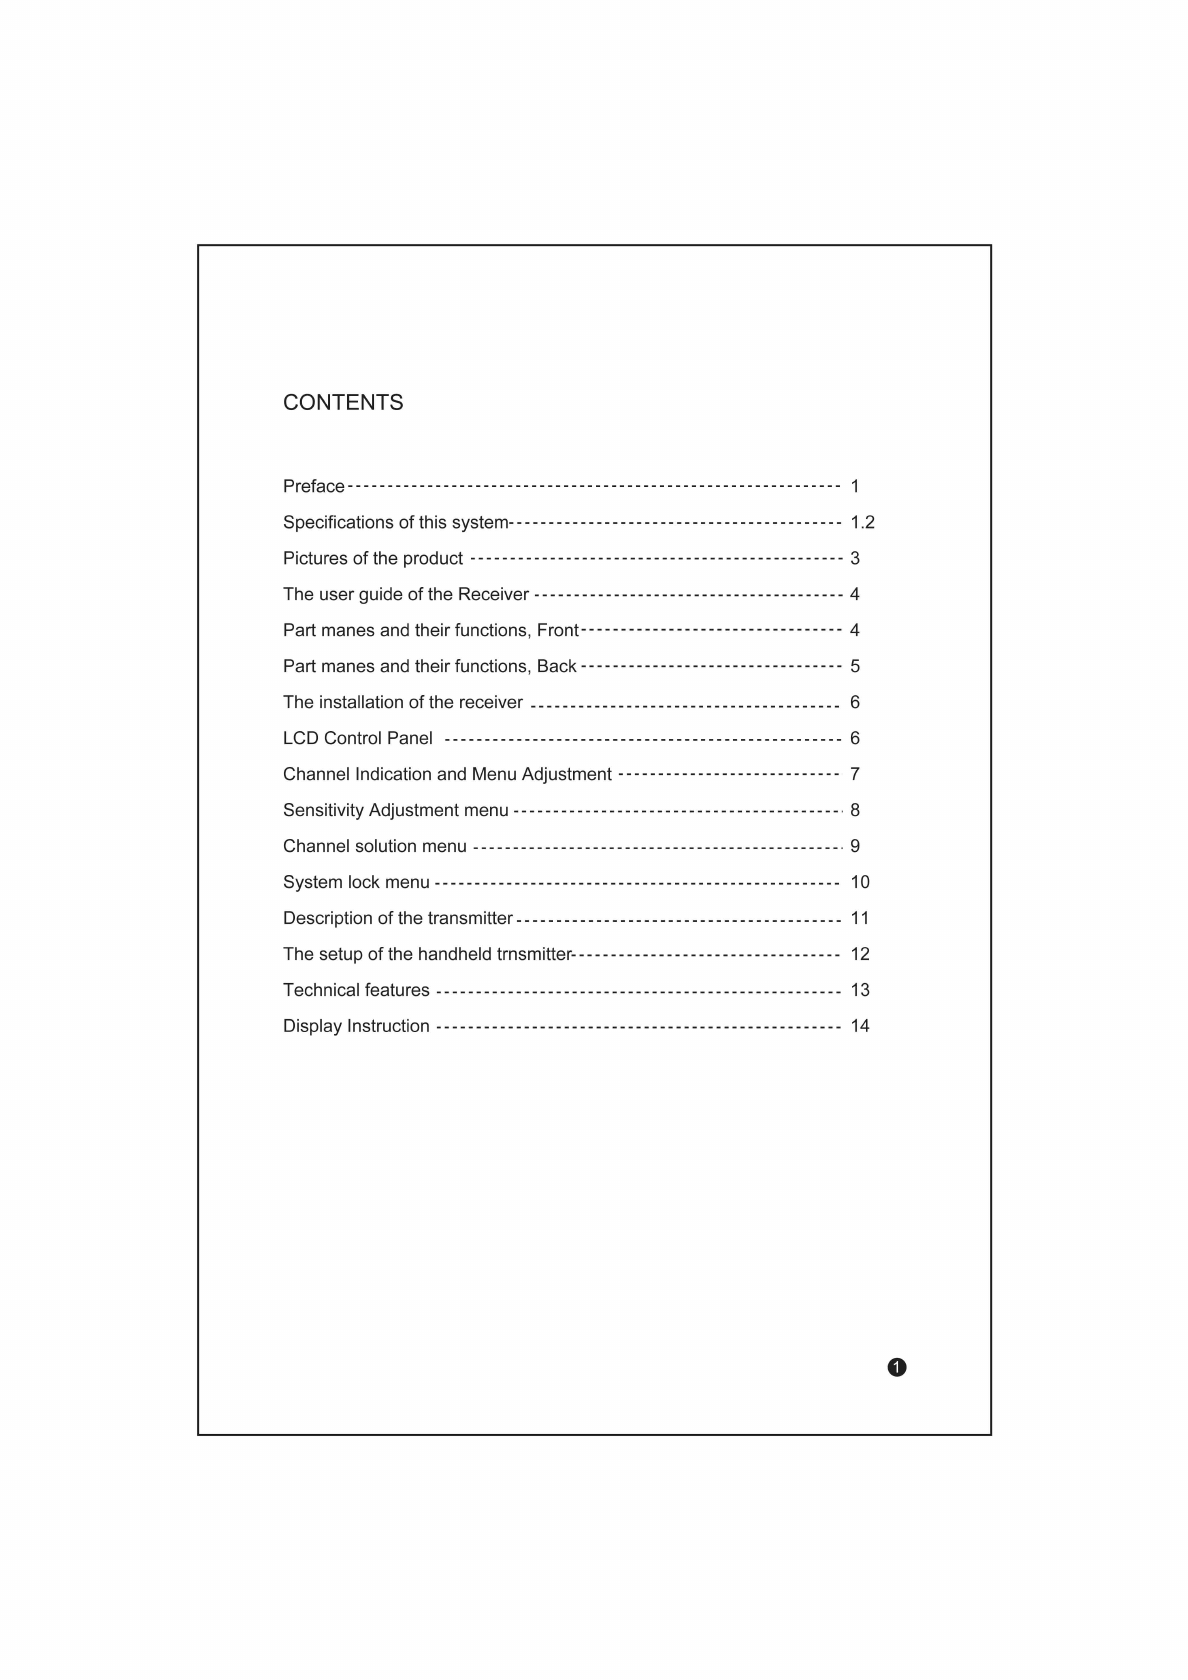
Specifications of this system
High precision PLL synthesized technology, UHF dual channel automatic
signal-selected receiving system
The receiver has two channels. There are eight mnemonic channels and 1280
frequencyies in each channel. The mnemonic channel can keep the frequency
which you have set before in each channel, covenience for using.
The system frequency is 785.1MHz-811MHz.
The perfect design of the exterior, fit for the 19 inches audio equipment chest,
the detached antenna is easy for connect and take down.
1.
2.
3.
4.

2
Wide and clear LCD, can display RF, AF incoming signal level and other
function.
Ascendant selectivity, can avoid interfere each other when use many sets
at the same time. There is SQELCH in the receiver, using for the complicated
surroundings.
The battery of MH-502 transmitter is 1.2V NI-MH rechargeable battery. The
rechargeable battery can be used for 8 hours.
The perfect indication circuit can shows you the state of the bttery.
The receiver can be set by system or direct by manpower.
The blance and imbalance output, can connect the mixed and amplifier.
10~150 meters receiving distance.
Suitable for the stage, nigtclub, disco, meeting room, classroom, and the
family Karaoke entertainment.
5.
6.
7.
8.
9.
10.
11.
12.
3
4
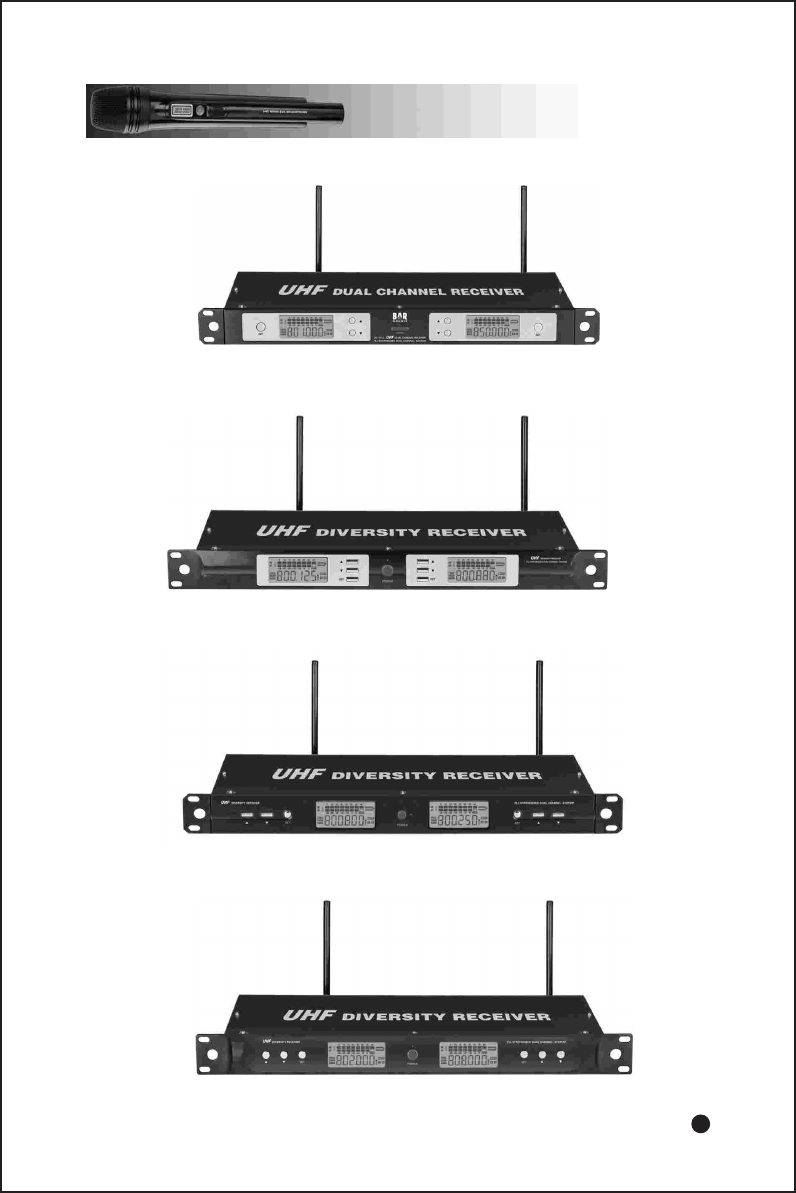
The user guide of the Receiver
1. CHA Function Key
2. CHA LCD Indicator
3. CHA up select Key
4. CHA down select Key
5. Power indicator light
A. Part manes and their functions
Front
SET SET
POWER
1 2 43 65 7 8 9 10
SET SET
POWER
1
34
2 6
510 87 9
SET POWER SET
4 3 1 2 6 5 9 10 7 8
SET SET
POWER
4 3 1 265 9 10 7 8
6. Power Switch
7. CHB up select Key
8. CHB down select Key
9. CHB LCD Indicator
10. CHB Function Key
5
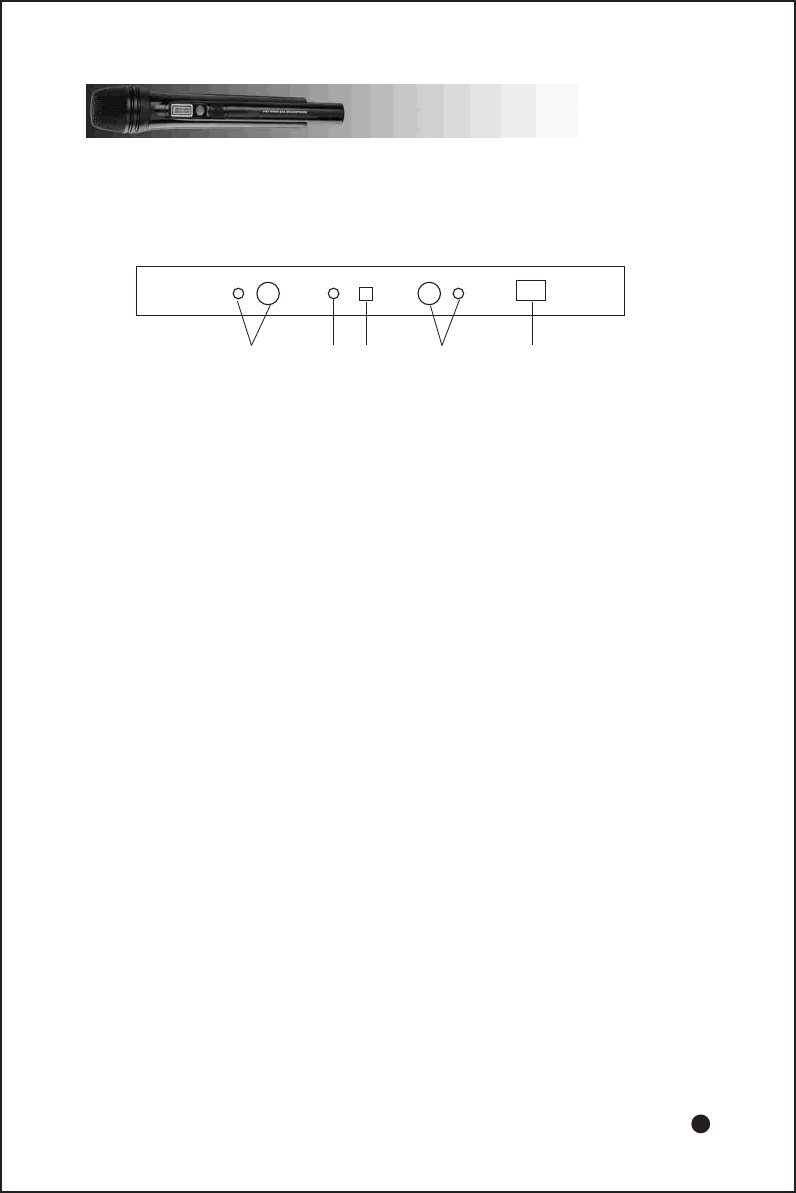
Back
1 1
2 3 4
Independent Audio Output Connectors: There is a separate balanced XLR
connector and unbalanced 1/4-inch phone jack for each channel.
Mixed Channels Audio Output Connector: An unbalanced, 1/4-inch phone jack
connector mixes both channels into a single output.
Power input connector: Connects to a PS20(120Vac) or PS20E(230Vac) power
adapter.
Alternating current jack: can use for 110V-230V.
1.
2.
3.
4.
6
B. The installation of the receiver
Put the two antennas into the socket A B at the back panel separately in a
vertical (990) angle.
Put the power plug into the power socket at the back of the machine (NOTE:
The power supply must comply the requirement of the system).
Turn volume smallest. Press the power switch for 1~2 seconds and then relax.
At that time, LCD appears normal picture.
Adjust all the function key for ready position you want (See the description
LCD or the control panel).
After using press the power switch for 2~3 seconds and the power stops. The
picture of LCD disappears automatically.
1.
2.
3.
4.
5.
SET SET
POWER
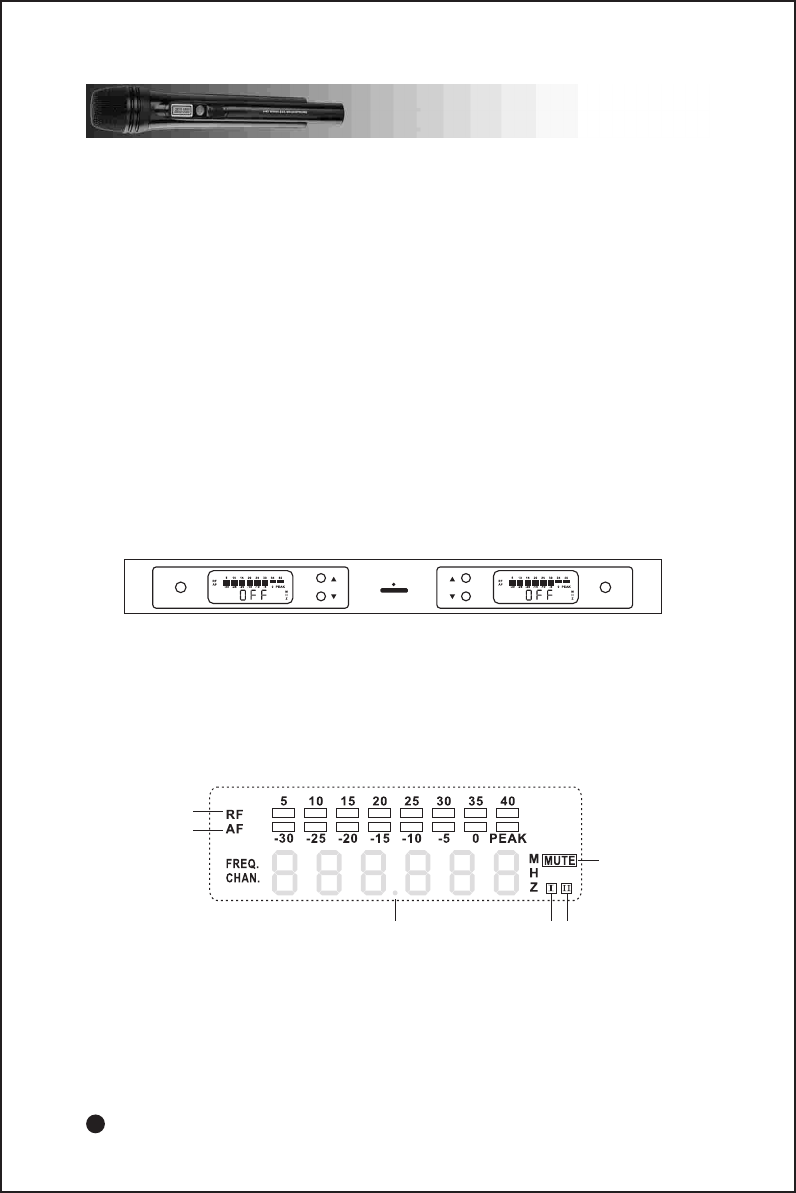
C. LCD Control Panel
1. RF Indicator
2. Audio Frequency Indicator
3. Signal Channel Indicator
Turn the power on, LCD appears as below:
1
2
3 4 5
6
4. A Receiving Channel Indicator
5. B Receiving Channel Indicator
6. MUTE Indicator
7
The names of the Buttons and their functions:
Button "SET" for menu solution and Definition. Press this buttorn for changing
what you want. First press" " or " " for solution and then press "SET" for
definition.
" " or " " Button, for adjusting or selecting the present menu statue
indicating.
Operating step of button "SET":
Signal Channel indicating adjustment Frequency sensitivity adjustment
(SQELCH) signal channel soultion Adjustment for system's locked statue,
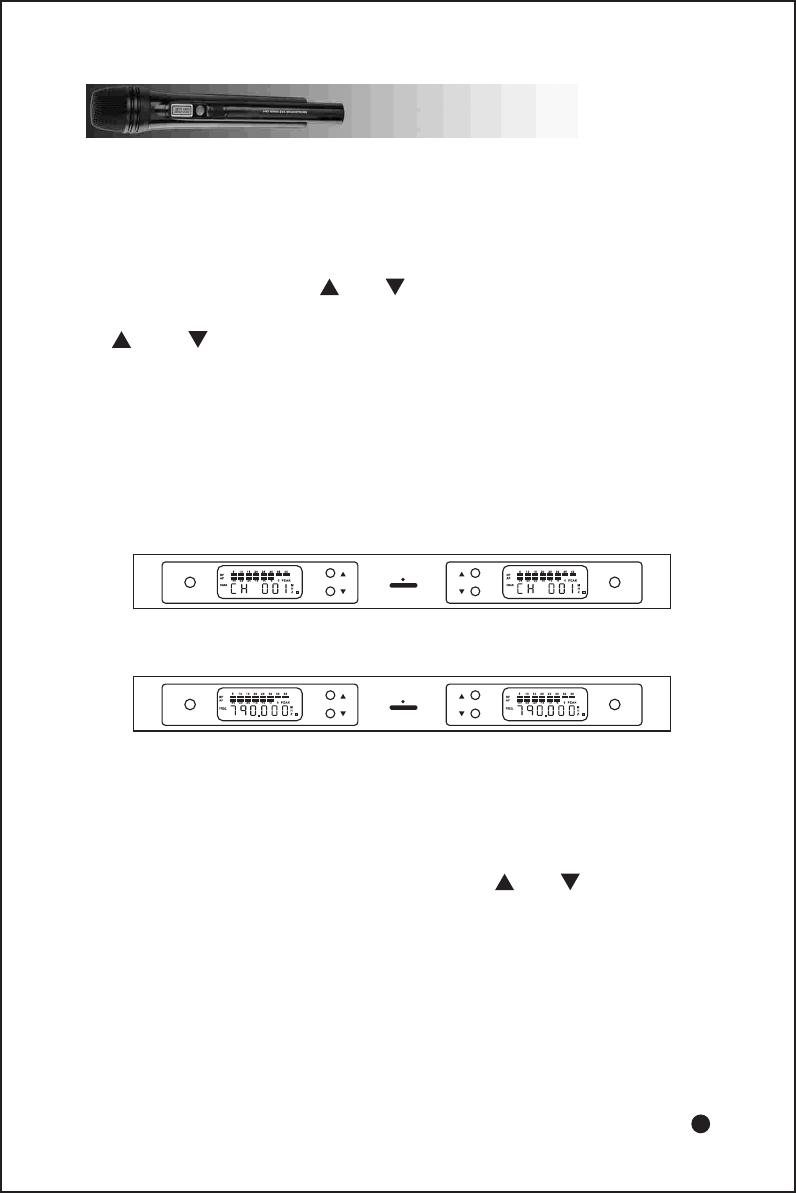
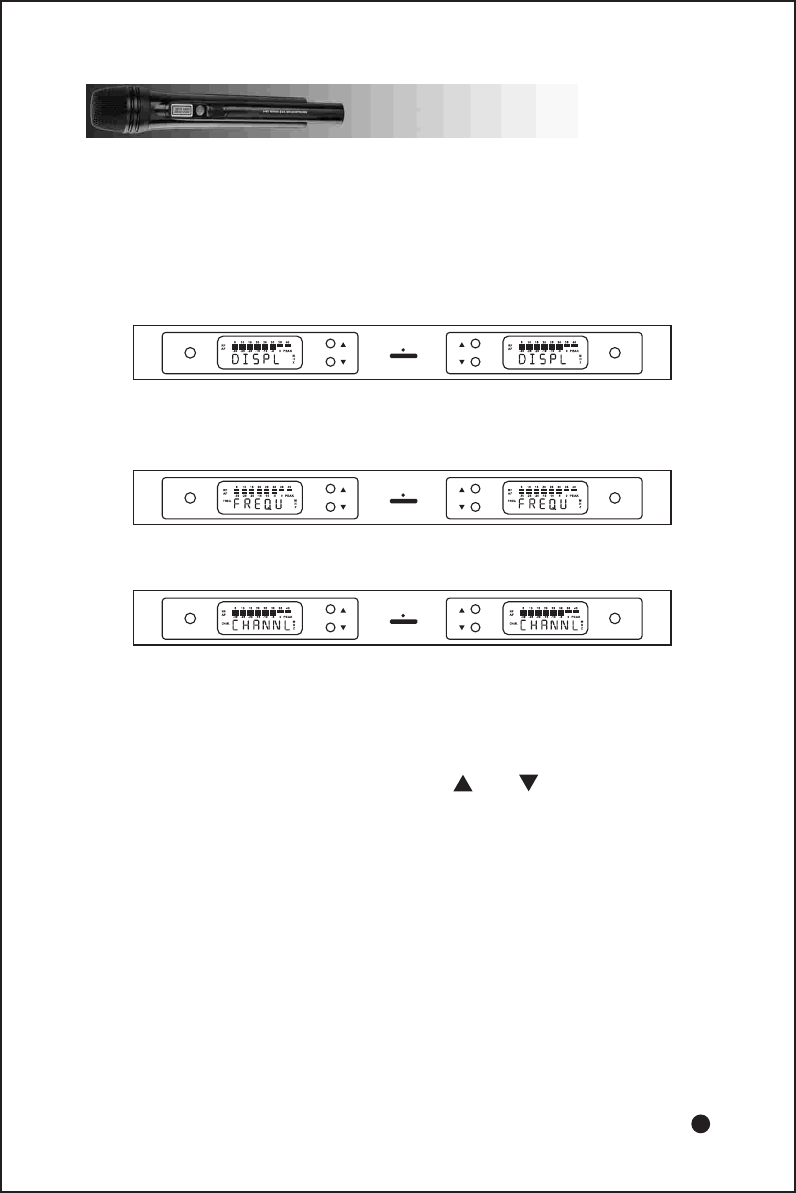
(a) Channel Indication and Menu Adjustment.
Press "SET" button to make LCD indicate as below:
1.
2.
3.
SET SET
POWER
SET SET
POWER
(NOTE: No matter which screen appear as above depend on the signal channel
solution functions)
The menu indicates the present receiver's working frequency or signal channel
(They can be changed by menu solution) press " " or " " to change the
present signal channel or frequency. After changing, please press "SET" for
definition. Otherwise, solutions do not effect. The system still works as previous
solution.
8
If you've selected the new channel or frequency and haven't pressed "SET"
for definition, LCD will flash for reminder after 2~3 seconds. And then press
"SET", LCD stops flashing.
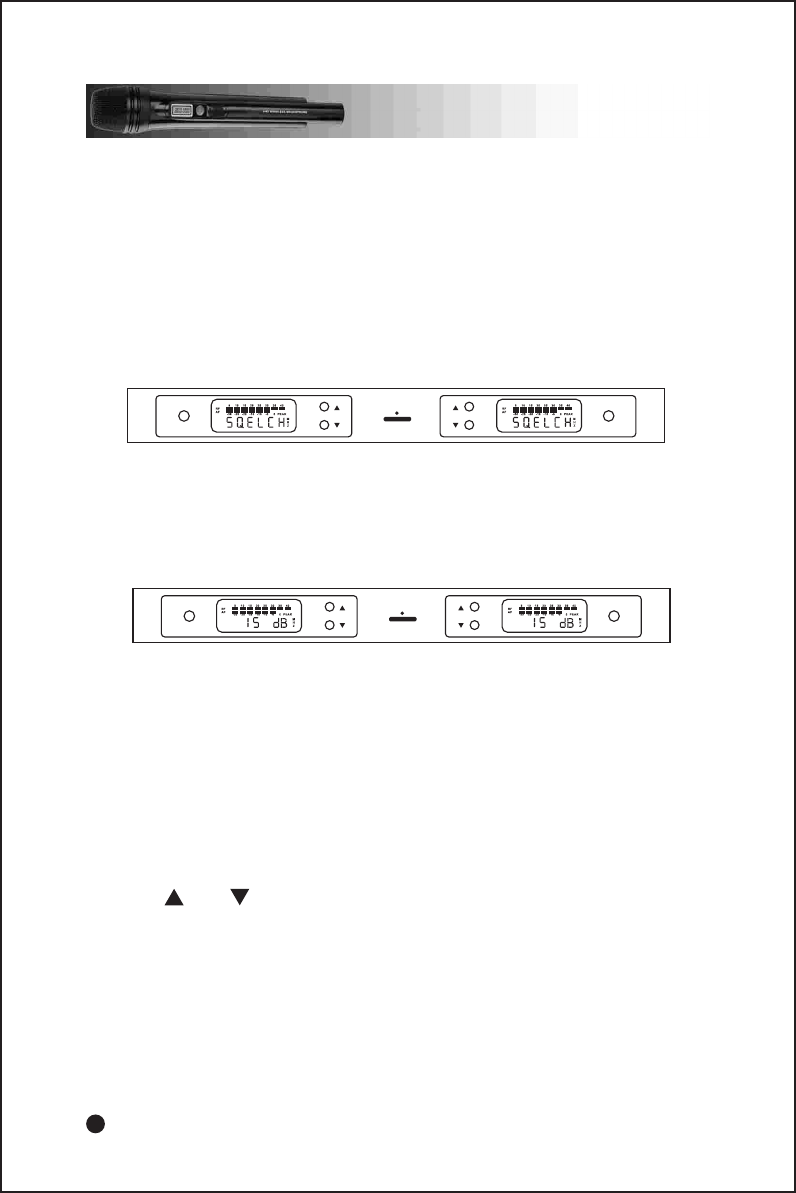
(b) Sensitivity Adjustment menu (SQELCH):
Press "SET" to make LCD indicate as below:
SET SET
POWER
SET SET
POWER
After the above screen is on , waiting for 2~3 seconds, the screen appears as
below:
This menu is for adjusting sensitivity (It is also called Mute Control). It is used
strengthening the system's capacity of preventing disturbing. The range of
adjustment is 0~40dB. Bigger numerical value, lower sensitivity. Nearer distance,
stronger capacity of preventing disturbance. On the other hand, smaller numerical
value (Minimum 15dB), Higher sensitivity and farther distance, but the capacity
of preventing disturbance will reduce. Usally, the normal setup is 20dB. (Factory
setup is 15dB).
Press " " or " " to change the data: After changing, please press "SET"
to conform. Otherwise, it won't effect and the system remain in the precious
statue.
If the data is changed and you haven't pressed "SET". LCD indicates flash
as a reminder after 2~3 seconds. After you press "SET", LCD stops flashing.
9
(c) channel soultion menu:
(NOTE:That which is shown as above depends on your previous setup).
Press "SET" to make LCD indicata as below:
SET SET
POWER
SET SET
POWER
SET SET
POWER
Then after 2~3 seconds, LCD Indicates as below:
This menu function is for indicating signal channel soultion. It is shown as
frequency or numerical value. When press " " or " ", LCD indicates two
modes as "Channer" or "Frequency". If you select channel, channel is shown
as unmerical value; If you select "Frequ", it is shown as actual working frequency.
After selecting, you must press "SET". Otherwise, your solution doese not effect.
And system indicates previous setup.
After you change and you don't conform, LCD indicates flash as a reminder
after 2~3 second. Press "SET" and flash stops on LCD.
10
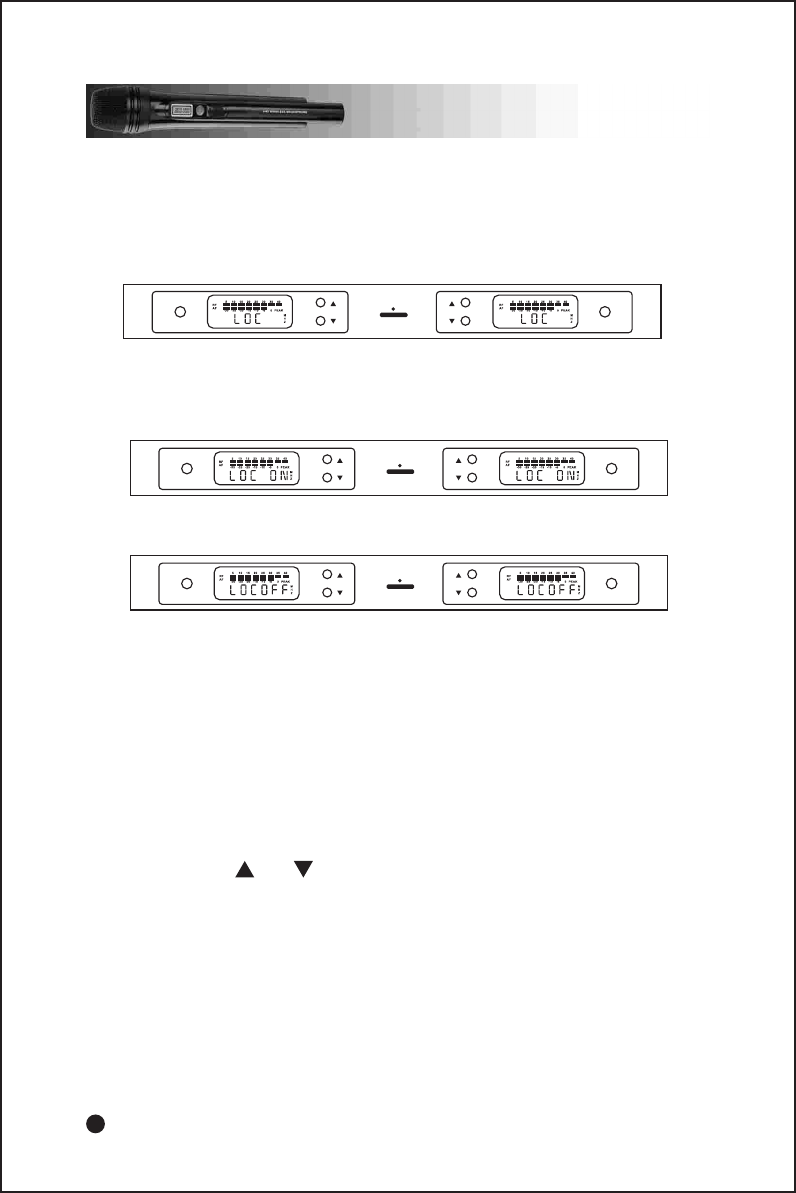
(d) System lock menu:
Press "SET" to make LCD indicata as below:
SET SET
POWER
The screen is shown as below after 2~3 seconds:
SET SET
POWER
SET SET
POWER
(NOTE:No matter which screen is shown, it depends on the previous setup).
This menu function is if the working statue of the receiver is locked (Channels,
Sensitivity, Indicator Solution and Power Switch). If it is in locked stantue "LOC
ON", you can't change the present various working staute you have set, and
you can't turn off the machine; if it is not in locked statue "LOC OFF", you can
change all the functions of the menu.
While pressing " " or " ", you can change the original statue, please press
"SET' to definite. Otherwise, setup will not effect.
After you have changed original statue and have not pressed "SET" to definite,
it will remind with flash after 2~3 seconds. After pressing "SET' , LCD will stop
flash.
11
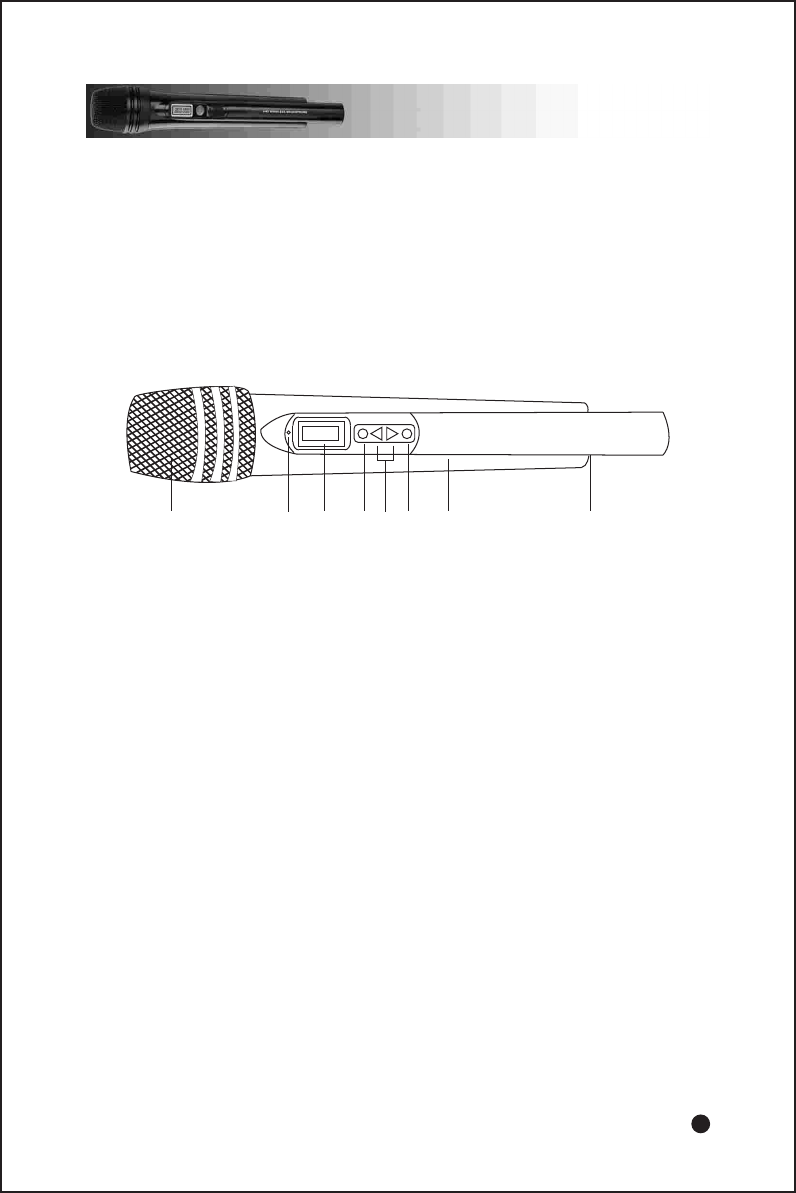
Description of the transmitter
A: The part manes and their functions:
1. Steel net-head mould
2. Microphone handhold
3. LCD screen
4. Function key
5. Function affirm key
6. Up and down selecting key
7. Power switch
8. Working indicator light
75 638 2 41
12
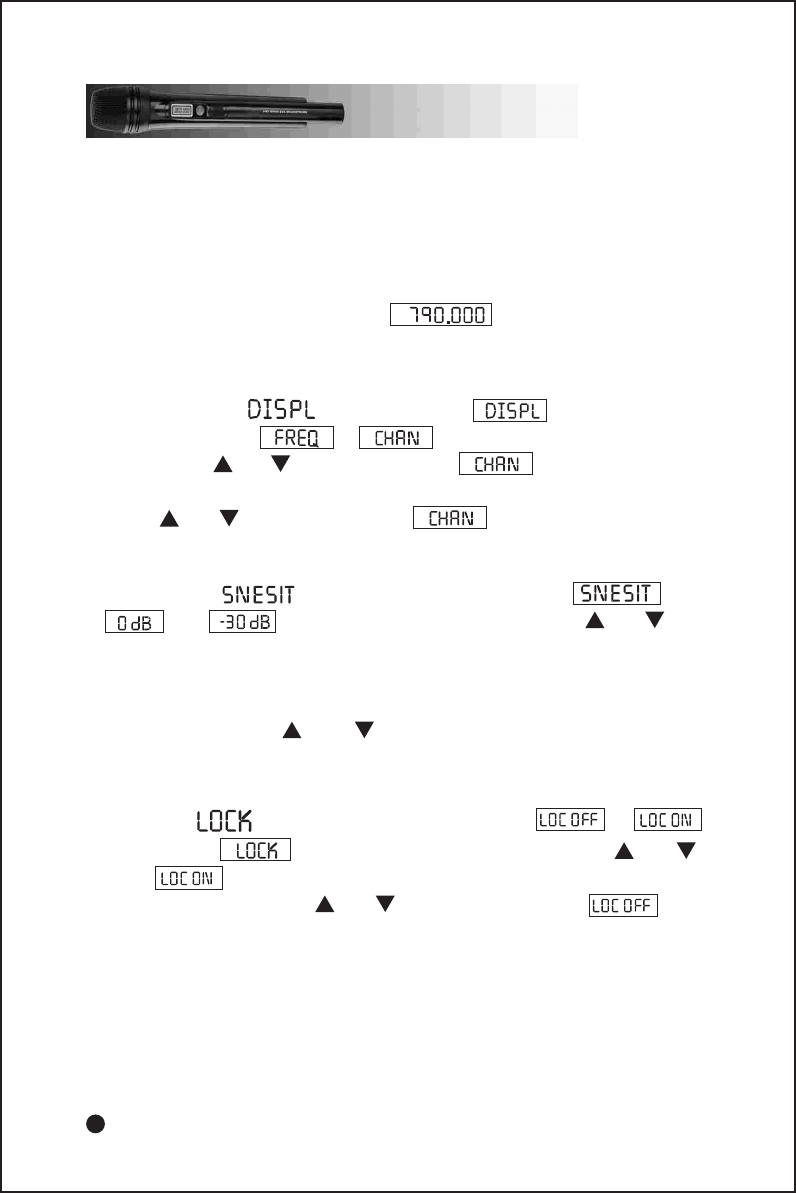
B.The in setup of Handheld transmitter
Press the power switch for 1 second and then relax. At that time, LCD appears
normal mode. when the indicator light brightiny, the transmitter can work.The
LCD appears the degrce of the battery Full shows 8 puints, middle
shows 4 puints. the end shows 1 puint. (please chanye the battery)
BAT
There are four main menus.
There is when press " " or " " there is 1-16 channel for choosing. And
press "set" other setup the channel.
3.
Volume setup( ):Press "SET", the screen appears ,
and ,each charnge is -10dB when press " " or " ".The
normal is:+30dB/-20dB for perform, -20dB/-10dB for generic speaking, -
10dB/0dB for interview.
2.
The main screen( ): the screen is on when press "SET" ,
the screen appears or soon. If want to set the frequency,
please press " " or " ", the screen appears twinkling, press "SET",
and then the screen appears the frequency. If want to set the channel, please
press " " or " ", the screen appears twinkling, press "SET", and
then the screen appears the channel.
1.
Lock setup( ): Press "SET", the screen appears or
4.
after appears .If need to lock the key, please press " " or" "
,when twinkling, press "SET" again. If need to release key, press
"SET" the screen appears" " or " " twinkling after appears press
"SET" again.And then you can go on setup other functions.
14
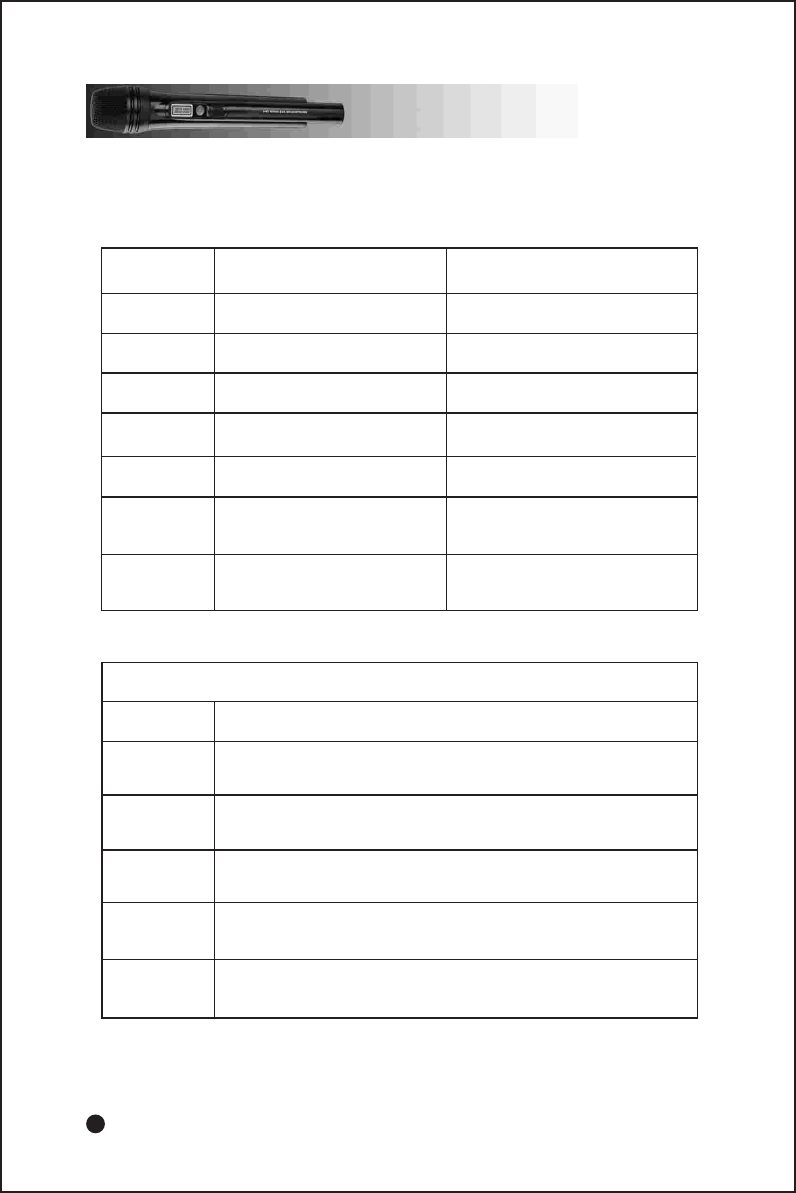
Display Instruction:
Senstivity adjusting
SQ adjusting
Content choice menus Content choice menus
Display Transmitters Receivers
SEnSit
SQEL
DISPL
CH channel choice(1-16) channel choice(1-16)
FREQU Frequency display Frequency display
Lock The lock key com prevent error
choice from the performance
The lock key com prevent error choice
from the performance
Cause
Service:
Problem
Digital display is
not lighted The battery is end/It has not been contact the electricity
RF indicator is
not lighted
(1)The transmitter frequency is difference from receiver
(2)The transmitter is out of work range
AR indicator is
not lighted
(1)The mute key turn on (In the bottom of the transmitter)
(2)The SQ is too high
Have noise and
the radio noise
(1)The senstivity of the transmitter is too low.
(2)The Audio output of the receiver is too low.(In the back of the receiver)
AR signal
distortion
(1)The senstivity of the transmitter is too high.
(2)The Audio output of the receiver is too high(In the back of the receiver)
The lock key com prevent error
choice from the performance
The lock key com prevent error choice
from the performance
Problem checking