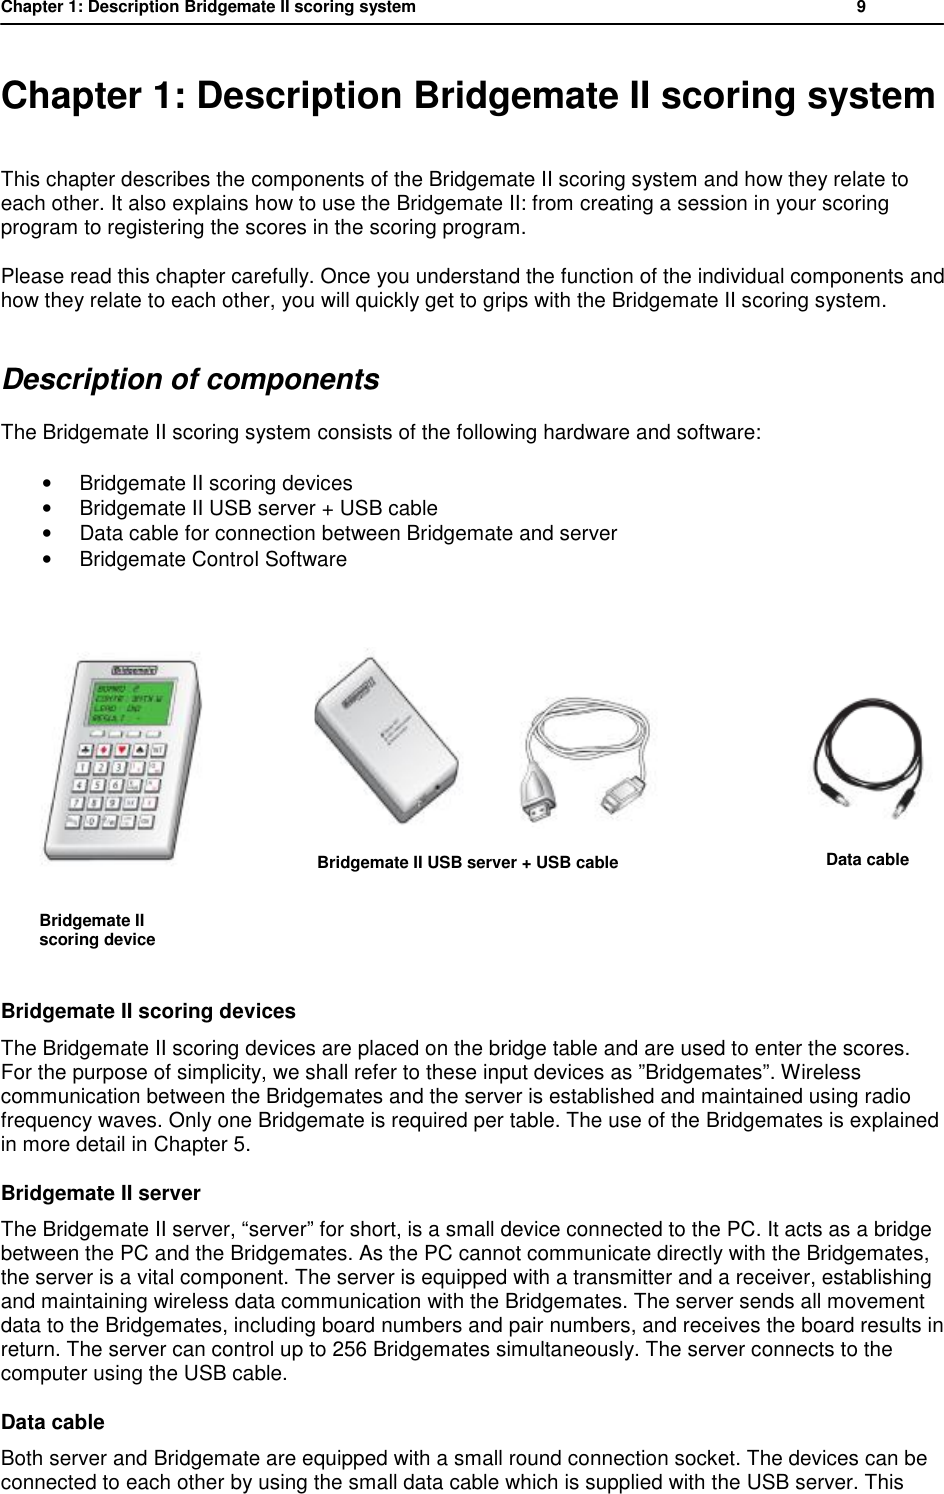
Bridge Systems BMS21A Wireless base station for Bridgemate scoring system User Manual BM2 manual english

Bridge Systems B.V. Wireless base station for Bridgemate scoring system BM2 manual english

BM2 manual

                 Bridgemate II Scoring system Manual        © 2004-2012 Bridge Systems BV
  All information contained in this document is subject to change without prior warning. Unless stated otherwise, all persons and details mentioned in this document are fictitious. No part of this publication may be reproduced and/or published, by print, photoprint, microfilm or otherwise, or stored in a retrieval system, without prior written permission from Bridge Systems BV.  © Copyright 2004-2012 Bridge Systems BV. All rights reserved.  Bridgemate, Bridgemate Pro, Bridgemate II and the Bridgemate logo are trademarks and/or registered trademarks of Bridge Systems BV in the Netherlands and other countries. Microsoft and Microsoft Windows are trademarks and/or registered trademarks of the Microsoft Corporation in the United States and other countries.
  Table of contents  LIMITED WARRANTY 1 SAFETY INSTRUCTIONS 5 INTRODUCTION 7 CHAPTER 1: DESCRIPTION BRIDGEMATE II SCORING SYSTEM 9 DESCRIPTION OF COMPONENTS 9 PROCEDURE 10 CHAPTER 2: HARDWARE CONFIGURATION 13 SYSTEM REQUIREMENTS 13 INSTALLING BRIDGEMATE CONTROL SOFTWARE 13 INSTALLING THE SERVER 13 INSTALL DRIVER AND CONNECT USB SERVER 13 POWER SUPPLY THROUGH USB PORT AND BATTERIES 13 SETTING THE REGION 14 SETTING THE CHANNEL 15 CONFIGURING THE BRIDGEMATES 15 OPERATING INSTRUCTIONS 15 CHAPTER 3: BRIDGEMATE CONTROL SOFTWARE 17 LAUNCHING BRIDGEMATE CONTROL SOFTWARE 17 LOGGING IN AND LOGGING OFF BRIDGEMATES 18 LOGGING IN BRIDGEMATE 18 LOGGING OFF BRIDGEMATE 19 BOARD RESULTS 19 READING FROM THE SERVER 19 VIEWING AND FILTERING OR SORTING SCORES 20 CHANGING AND DELETING SCORES 20 PROCESSING SCORES IN THE SCORING PROGRAM 21 OPENING, SAVING AND CLOSING RESULT FILES 21 USING MULTIPLE CLIENTS 22 ADDING A CLIENT TO THE RESULT FILE 22 MANAGING TABLES 22 SERVER CONTROL 23 ACTIVATING THE SERVER 23 ADDING TABLES 23 REMOVING TABLES 23 SYNCHRONIZING THE SERVER AND CLIENT 23 RECOVERING THE SERVER 25 UPDATING MOVEMENT IN THE SERVER 25 CLOSING ROUNDS 25 PROGRAM SETTINGS 26 CHAPTER 4: SERVER FUNCTIONS 29
  OVERVIEW OF TABLES 29 OVERVIEW OF ENTERED SCORES 29 RESTARTING BRIDGEMATE NETWORK 30 RESETTING THE SERVER 30 SETTING THE REGION 30 SETTING THE CHANNEL 30 CHAPTER 5:  USE OF THE BRIDGEMATE®  II  SCORING DEVICES 31 EXPLORING THE BRIDGEMATE 31 ACTIVATING THE BRIDGEMATE 32 CONFIGURING THE BRIDGEMATE 33 STARTING THE SESSION 34 ENTER RESULTS WITH THE BRIDGEMATES 37 REVIEWING SCORES AND RECTIFYING SCORES 43 POSTING BRIDGEMATE II SCORES 44 TD MENU 44 CHAPTER 6: ADDITIONAL BRIDGEMATE FUNCTIONS 48 BRIDGEMATE SETTINGS 48 UPDATE SETTINGS DURING PLAY 51 UPDATING BRIDGEMATE FIRMWARE 51 SHOWING PLAYER NAMES 53 USING HAND RECORDS 54 CHAPTER 7: TIPS FOR USE 55 BRIDGEMATE LOGGED ON AS THE WRONG TABLE 55 REPLACING BRIDGEMATE 55 RECOVERING THE SERVER 55 PROCEDURE IN THE EVENT OF DATA LOSS 56 RESENDING RESULTS 57 MULTIPLE BRIDGE CLUBS PLAYING SIMULTANEOUSLY 57 LARGE TOURNAMENTS 58 USING BRIDGEMATES II AND BRIDGEMATES PRO TOGETHER 58 FCC STATEMENT 60
Limited warranty           1  Limited warranty IMPORTANT—PLEASE READ THIS LIMITED WARRANTY CAREFULLY TO UNDERSTAND YOUR RIGHTS AND OBLIGATIONS! The term “Hardware Device” means the Bridge Systems hardware product. The term “You” means either an individual or a single legal entity who will be referred to in this Limited Warranty as “You” and “Your”.  A. WARRANTIES. 1. Express Warranty. Subject to the terms and conditions of this Limited Warranty and in lieu of any other (if any) express warranties, Bridge Systems warrants that under normal use and service, on the date of acquisition as shown on Your receipt or similar proof of payment and for the period of time stated below for the applicable Hardware Device (hereafter each defined as the “Warranty Period”), that the Hardware Device will substantially conform with the accompanying Bridge Systems packaging and documentation. As to any defects discovered after the Warranty Period, there is no warranty or condition of any kind. Warranty Period: For all hardware parts of the Bridgemate II scoring system: one (1) year. This Limited Warranty does not cover, and no warranty of any kind is provided with respect to any subjective or aesthetic aspects of the Hardware Device. The express warranty stated above is the only express warranty made to You and is provided in lieu of all other express or implied warranties and conditions (except for any nondisclaimable implied warranties that exist), including any created by any other documentation or packaging. No information or suggestions (oral or in a record) given by Bridge Systems, its distributors, agents, affiliates or suppliers or its or their employees or agents, shall create a warranty or condition or expand the scope of this Limited Warranty. 2. Limitation on Duration of Implied Warranties. If you are a consumer, You may also have an implied warranty and/or condition under the laws of some jurisdictions, which is hereby limited to the duration of the Warranty Period. Some jurisdictions do not allow limitations on how long an implied warranty or condition lasts, so the foregoing limitation may not apply to You. B. EXCLUSIVE REMEDY. Subject to applicable law and the following, and provided that You return the Hardware Device to Your place of acquisition (or, if that place will not accept the return, to Bridge Systems) with a copy of Your receipt or other bona fide proof of payment during the Warranty Period, Bridge Systems will, at its option and as Your exclusive remedy for breach of this Limited Warranty and any implied warranties:  repair or replace the defective Hardware Device; or make payment to You for the allowable damages that You incurred in reasonable reliance, but only up to the amount You paid (if any) for the Hardware Device less reasonable depreciation based on actual use. The above remedy is subject to the following: Any repaired or replaced Hardware Device will be new or refurbished or serviceably used, comparable in function and performance to the original Hardware Device, and may include third party items; Any Hardware Device repaired or replaced under this Limited Warranty will be warranted for the remainder of the original Warranty Period or 30 days from the date of shipment of the item back to You, whichever is longer. Except as otherwise required by legislation in Your jurisdiction, costs associated with transport (including packaging) for warranty service shall be at Your expense; and Bridge Systems, its distributors, agents, affiliates and suppliers do not provide any warranties regarding any other services provided under this Limited Warranty and disclaim all duties (if any) of workmanlike effort or of lack of negligence regarding such services. C. NO OTHER WARRANTIES. The express warranty stated above is the only express warranty made to You and is provided in lieu of all other express or implied warranties and conditions (if any)
Limited warranty           2  including any created by any other documentation or packaging. No other warranties or conditions are made with respect to the Hardware Device or the warranty services by any person, including but not limited to Bridge Systems, its distributors, agents, affiliates and suppliers. No information (oral or written) or suggestions given by Bridge Systems, its distributors, agents or suppliers or its or their employees, shall create a warranty or condition or expand the scope of this Limited Warranty. Also, there is no warranty or condition of title, quiet enjoyment, or noninfringement in the Hardware Device. You may have greater rights existing under legislation in your jurisdiction. D. EXCLUSION OF OTHER DAMAGES. TO THE FULL EXTENT ALLOWED BY LAW, BRIDGE SYSTEMS AND ITS DISTRIBUTORS, AGENTS, AFFILIATES AND SUPPLIERS ARE NOT LIABLE FOR ANY: (i) CONSEQUENTIAL OR INCIDENTAL DAMAGES; (ii) DAMAGES OR LOSS OF ANY NATURE WHATSOEVER RELATING TO LOST PROFITS, BUSINESS INTERRUPTION, LOSS OF DATA OR PRIVACY OR CONFIDENTIALITY, ANY INABILITY TO USE ALL OR PART OF THE HARDWARE DEVICE, PERSONAL INJURY, OR ANY FAILURE TO MEET ANY DUTY (INCLUDING BUT NOT LIMITED TO ANY DUTY OF NEGLIGENCE, GOOD FAITH OR OF WORKMANLIKE EFFORT); OR (iii) INDIRECT, SPECIAL, OR PUNITIVE DAMAGES ARISING OUT OF OR RELATING IN ANY WAY TO THE HARDWARE DEVICE. THE FOREGOING APPLIES EVEN IF BRIDGE SYSTEMS OR ANY DISTRIBUTOR, AGENT, AFFILIATE OR SUPPLIER HAS BEEN ADVISED OF THE POSSIBILITY OF SUCH LOSSES OR DAMAGES; AND EVEN IN THE EVENT OF FAULT, TORT (INCLUDING NEGLIGENCE), STRICT OR PRODUCT LIABILITY, MISREPRESENTATION OR OTHER REASON. Some jurisdictions do not allow the exclusion or limitation of incidental or consequential damages, so the above limitation or exclusions may not apply to You. E. EXCLUSIONS FROM COVERAGE. This Limited Warranty shall not apply and Bridge Systems, its distributors, agents, affiliates and suppliers have no liability under this Limited Warranty if the Hardware Device: - is used for commercial purposes (including rental or lease); - is modified or tampered with; - is damaged by Acts of God, power surge, misuse, abuse, negligence, accident, wear and tear, mishandling, misapplication, or other causes unrelated to defects in the Hardware Device; - is damaged by programs, data, viruses, or files, or during shipments; - is not used in accordance with the accompanying documentation and use instructions; or - is repaired, modified or altered by other than a Bridge Systems authorized repair center and the unauthorized center causes or contributes to any defect or damage. F. REGISTRATION. You need not register Your acquisition of the Hardware Device for the Limited Warranty to be effective. G. BENEFICIARY. To the extent allowed by applicable law, the Limited Warranty is only made to You, the first purchaser of the Hardware Device, and there are no third party beneficiaries of the Limited Warranty. It is not intended for and does not apply to anyone else (except as required by law), including anyone to whom You make any transfer of the Hardware Device. H. FURTHER INFORMATION. Bridge Systems is the warrantor under this Limited Warranty. To receive instructions for obtaining performance of this Limited Warranty You must either contact the local Bridgemate distributor serving your country, or write to: Bridge Systems BV, Postal Box 21570, Rotterdam, 3001 AN, The Netherlands, or visit Bridge Systems on the World Wide Web at http://www.bridgemate.com.  You must also: 1. Submit proof of payment in the form of a bona fide, dated receipt, or invoice (or a copy) evidencing that You are the beneficiary of this Limited Warranty and that Your request for a remedy is made within the Warranty Period; 2. Follow Bridge Systems’ shipping and other instructions if it determines that all or part of your Hardware Device requires return. To obtain the Limited Warranty performance, you must take or deliver the item in either its original packaging or packaging that provides an equal degree of protection to the location specified by Bridge Systems. Except as otherwise required by legislation in your jurisdiction, costs associated with transport (including packaging) for warranty service shall be at
Limited warranty           3  Your expense. Failure to follow the above instructions may result in delays, cause you to incur additional charges, or may void your warranty. This Limited Warranty gives You specific legal rights and You may also have other rights which vary from jurisdiction to jurisdiction. Where any term of this Limited Warranty is prohibited by such laws, it shall be null and void, but the remainder of the Limited Warranty shall remain in full force and effect if its allocation of risks is not materially disturbed.
Safety instructions           5  Safety instructions Important safety warning Failure to properly set up, use, and care for the Bridgemate II system can increase the risk of serious injury or death, or damage to the system. Read this manual and the manuals of any peripherals for important safety and health information. Keep all manuals for future reference. For replacement manuals, go to www.bridgemate.com/support.php or contact your local Bridgemate supplier. Select a safe location for the Bridgemate server and scoring devices If the Bridgemate II server or Bridgemate II scoring devices falls and hits someone, it could cause serious injury. To reduce the risk of such injuries and damage to parts of the system, set them up according to these instructions and place them on a surface that:  • Is flat and level. • Is stable and not likely to tip over. • Allows all four feet of both the server and scoring device to be in contact with the surface. • Is not likely to allow the server and scoring device to slip or slide off. • Is clean and free of dust and debris. If the surface or feet of server or scoring devices become dirty or dusty, clean them with a dry cloth.  Arrange all cables and cords so that people and pets are not likely to trip over or accidentally pull on them as they move around or walk through the area. When the Bridgemate II server is not in use, you may need to disconnect all cables and cords from the server to keep them out of the reach of children and pets. Do not allow children to play with cables and cords. Do not place any part of the Bridgemate II system on a bed, sofa, or other soft surface. Do not place any part near heat sources, such as radiators, heat registers, stoves, or amplifiers. Avoid smoke and dust Do not use the Bridgemate II system in smoky or dusty locations. Smoke and dust may damage the Bridgemate II server and scoring devices.  Insert batteries into the Bridgemate II scoring devices or server WARNING Improper use of batteries may result in battery fluid leakage, overheating, or explosion. Released battery fluid is corrosive and may be toxic. It can cause skin and eye burns, and is harmful if swallowed. To reduce the risk of injury:  • Keep batteries out of reach of children. • Do not heat, open, puncture, mutilate, or dispose of batteries in fire. • Do not mix new and old batteries or batteries of different types (for example, carbon-zinc and alkaline batteries)
Safety instructions           6  • Remove the batteries if they are worn out or before storing your Bridgemate II system for an extended period of time. When removing batteries from the Bridgemate II scoring device or server, do not use your fingers or finger nails to remove the batteries. Instead use a blunt object like a screwdriver or pen to safely remove the batteries. • If a battery leaks, remove all batteries, taking care to keep the leaked fluid from touching your skin or clothes. If fluid from the battery comes into contact with skin or clothes, flush skin with water immediately. Before inserting new batteries, thoroughly clean the battery compartment with a damp paper towel, or follow the battery manufacturer's recommendations for cleanup. • Dispose of batteries in accordance with Local and National Disposal Regulations, including those governing the recovery and recycling of waste electrical and electronic equipment (WEEE). Remove batteries aboard aircraft Before boarding any aircraft or packing the Bridgemate II scoring devices or server in luggage that will be checked, remove all batteries. The Bridgemate II server and scoring devices can transmit radio frequency (RF) energy, much like a cellular telephone, whenever batteries are installed.  Do not attempt repairs  Do not attempt to take apart, service, or modify the Bridgemate II server, Bridgemate II scoring devices, power supply, or its peripherals in any way. Doing so could present the risk of serious injury or death from electric shock or fire, and it will void your warranty. Any evidence of any attempt to open and/or modify the Bridgemate II system, including any peeling, puncturing, or removal of any of the labels, will void the Limited Warranty and render the Bridgemate II system ineligible for authorized repair.  Disposal of Waste Electrical and Electronic Equipment in the European Union and other countries/regions with separate collections systems This symbol on the product or its packaging means that this product must not be disposed of with your household waste. Instead, it is your responsibility to hand this over to an applicable collection point for the recycling of electrical and electronic equipment. This separate collection and recycling will help to conserve natural resources and prevent potential negative consequences for human health and the environment, which inappropriate disposal could cause due to the possible presence of hazardous substances in electrical and electronic equipment. For more information about where to drop off your electrical and electronic waste, please contact your local city/municipality office, your household waste disposal service, or the shop where you purchased this product.
Introduction           7  Introduction  Thank you for purchasing your Bridgemate® II scoring system. Bridgemate II is an advanced electronic scoring system for bridge clubs and tournaments, designed to enhance the enjoyment of bridge. Bridgemate II automatically registers board results. The scores are verified and fed to the central PC. Tournament directors will value the user-friendly features of Bridgemate II, as it enables them to focus fully on their core tasks. This manual describes the operation of the Bridgemate II scoring system, including the central software program, the server and the Bridgemate II scoring devices. This manual serves as an addition to the manual supplied with your scoring program. As the Bridgemate II scoring system operates independently from the scoring program, this manual does not include instructions for operating your scoring program. This manual consists of the following chapters: - The components of the Bridgemate II scoring system are explained in Chapter 1. A brief and concise explanation is given of the individual components and how they relate to each other. - Chapter 2 explains how to configure and install the Bridgemate II software and hardware and how to configure the Bridgemates per section and table. This chapter also explains how to set the radio channels to enable wireless data exchange. - Chapter 3 explores the use of the Bridgemate Control Software in more detail. - Chapter 4 explains the different Bridgemate Control Software options offered by the Bridgemate II server. - Use of the Bridgemate II scoring devices is explained in Chapter 5. - Chapter 6 highlights the additional functions for the Bridgemate. - Chapter 7 contains tips on how to operate the Bridgemate II scoring system when multiple bridge clubs are playing simultaneously in one room. Practical advice is also offered on how to deploy Bridgemate II in big tournaments, involving different rooms and/or multiple servers.  Version numbers This manual covers the following versions of the Bridgemate II components: Bridgemate Control Software  2.7.9 Bridgemate II server   2.0.1d (firmware version) Bridgemate II scoring devices  2.0.1 (firmware version)  Firmware updates Updates of the Bridgemate firmware can be downloaded from http://www.bridgemate.com/support.php
Chapter 1: Description Bridgemate II scoring system          9  Chapter 1: Description Bridgemate II scoring system This chapter describes the components of the Bridgemate II scoring system and how they relate to each other. It also explains how to use the Bridgemate II: from creating a session in your scoring program to registering the scores in the scoring program.  Please read this chapter carefully. Once you understand the function of the individual components and how they relate to each other, you will quickly get to grips with the Bridgemate II scoring system. Description of components The Bridgemate II scoring system consists of the following hardware and software: • Bridgemate II scoring devices • Bridgemate II USB server + USB cable • Data cable for connection between Bridgemate and server • Bridgemate Control Software             Bridgemate II scoring devices The Bridgemate II scoring devices are placed on the bridge table and are used to enter the scores. For the purpose of simplicity, we shall refer to these input devices as ”Bridgemates”. Wireless communication between the Bridgemates and the server is established and maintained using radio frequency waves. Only one Bridgemate is required per table. The use of the Bridgemates is explained in more detail in Chapter 5. Bridgemate II server The Bridgemate II server, “server” for short, is a small device connected to the PC. It acts as a bridge between the PC and the Bridgemates. As the PC cannot communicate directly with the Bridgemates, the server is a vital component. The server is equipped with a transmitter and a receiver, establishing and maintaining wireless data communication with the Bridgemates. The server sends all movement data to the Bridgemates, including board numbers and pair numbers, and receives the board results in return. The server can control up to 256 Bridgemates simultaneously. The server connects to the computer using the USB cable. Data cable Both server and Bridgemate are equipped with a small round connection socket. The devices can be connected to each other by using the small data cable which is supplied with the USB server. This                        Bridgemate II USB server + USB cable       Bridgemate II       scoring device          Data cable
Chapter 1: Description Bridgemate II scoring system          10  wired connection can be used for hardware analysis of the Bridgemate device. This cable is only required in the rare occasion of a hardware failure and is not used during normal operations. Bridgemate Control Software A specific program is required to control the server from the PC: Bridgemate Control Software (“BCS”). This program runs on Windows2000 or higher and is controlled in part by your scoring program. BCS fully controls the server and data exchange between the server and the PC. BCS first saves all the relevant session data used by the server to control the Bridgemates. BCS then retrieves all entered board results from the server and stores these in the result file. All other server controls are also executed from BCS. In addition, the following three components are important. Although they are not supplied together with your Bridgemate II scoring system, they are of crucial importance to the correct operation of the system. • Client (=Personal computer with Bridgemate Control Software) • Result file • Scoring program  Client Bridgemate Control Software runs on a so-called “client” (Windows-based) personal computer (PC). The scoring program and BCS usually run on one client PC, to which the server is also connected. During big tournaments, multiple servers may be required to support the high number of Bridgemates and/or to establish and maintain the wireless communication between the server and the Bridgemates. In this case, the servers are connected to a network PC, and the network consists of multiple clients. Note: The term “client” suggests that the Bridgemate II scoring system also consists of a PC network server. This is not the case. All (network) PCs running the Bridgemate II scoring system are known as clients. Result file The result file is created by the scoring program. It contains all the session data, including sections, tables, movements, etc. This data is generated by the session configured in the scoring program. BCS reads this session data and feeds the correct data to the server. During the session, BCS reads all the board results entered in the server and saves these in the result file. All Bridgemate II result files have the file extension .bws. Scoring program The scoring program creates the session and calculates the scores. After you have created a session, the scoring program will create the abovementioned result file. This file contains all the relevant session data. The scoring program will read all board results saved in the result file and process these during the session. These procedures are explained in more detail in the user manuals or help files of your scoring program. Procedure  Having examined the individual components of the Bridgemate II scoring system, the next step involves assessing the entire process and how the different components relate to each other. The process is outlined in the below diagram:
Chapter 1: Description Bridgemate II scoring system          11  Activity Explanation Step 1: Session created in the scoring program This is the starting point in the process. In the session, users can set the number of sections to be played, the number of pairs per section, boards and movements. Step 2: Result file created in the scoring program Using the session data, the scoring program creates a result file, containing all data relating to the sections, corresponding movements, boards and pairs. Step 3: Bridgemate Control Software reads the result file  The scoring program starts BCS. The result file is then read by BCS, generating the data for all tables used in each session. Step 4: Bridgemate Control Software transfers data to the server BCS initializes the server using the data contained in the result file. All session tables are stored in the server. Movements from each table are included, so that the server knows (per round) which pairs and boards correspond with which table. Step 5: The server has been activated and the Bridgemates can be activated  Now that all the relevant data has been stored in the server, the Bridgemates can be activated. The players activate the Bridgemates, which log in to the server. The scores can now be entered.  Step 6: Scores are entered in the Bridgemate and sent to the server During this process, the board number and pair number/direction of play are verified for accuracy. Verification is executed via direct communication between the Bridgemate and the server. The Bridgemate itself does not contain any movement data. Entered board results are sent directly to the server. This data is stored in the server memory. Step 7: Bridgemate Control Software retrieves the scores from the server. The scores are saved in the result file BCS reads all newly entered scores from the server and saves them in the result file.  Step 8: The scoring program reads the scores saved in the result file and adds these to the session The scoring program reads the scores saved in the result file and stores these in its session file. The scores are processed and incorporated in the session data to calculate the final score.  Automatic launch from your scoring program If your scoring program fully supports Bridgemate, BCS can execute steps 2 to 4 and read the scores (step 7) automatically via one simple command from the scoring program. For further information on how to enable automatic launch of the Bridgemate II scoring system, please contact the supplier of your scoring program.
Chapter 2: Hardware configuration           13  Chapter 2: Hardware configuration System requirements Operating system The Bridgemate II scoring system needs Windows XP SP3 or higher. Hardware Recommended configuration:  Processor Pentium III  600MHz or higher Memory 256MB or higher Installing Bridgemate Control Software To install the Bridgemate II scoring system, you will need to run the BCS install file. This software is supplied on CD Rom by your Bridgemate supplier, or the latest version may be downloaded from http://www.bridgemate.com/support or your Bridgemate supplier’s website. The requirements for the installation of the Bridgemate II software may differ, depending on your scoring program. For more information about where to install the software on your PC, please consult the information supplied with your scoring program or by your Bridgemate supplier. To install Bridgemate II on a separate client, we recommend the default folder (=C:\Program files\Bridgemate Pro). Installing driver for USB driver If this is the first time you are going to install Bridgemate Control Software on your computer, you are asked to install the driver for the Bridgemate II USB server. Please make sure you keep this option checked in order to have the driver properly installed. Installing the server Install driver and connect USB server Before connecting the Bridgemate II USB server to your computer, the driver must be installed. The driver is included in the installation package of Bridgemate Control Software. In case you haven’t installed this application yet, please do so. Once the driver has been installed on your computer, you can connect the server to any of your USB ports on your computer through the USB cable which is supplied with your server. Windows will automatically recognize the device and finalize the installation of the driver software.  Power supply through USB port and batteries The server will receive its power supply from your computer through the USB cable. If a USB hub is used, make sure the hub is powered through an external power supply. Otherwise the server may not receive sufficient power to operate properly.  Batteries Batteries are used in the event of power failure, for example when the computer is switched off. The battery compartment on the bottom of the server holds four AA 1.5 volt batteries (not included). Install the four batteries as indicated. If both USB power and batteries are used, the server will obtain its power from the USB port. The batteries will only be activated if the USB port is not supplying power (when the computer is switched
Chapter 2: Hardware configuration           14  off). Power will immediately transfer to the batteries and no data will be lost. We recommend installing batteries as a back-up while the server is in operation. This will ensure no data is lost during the session. The batteries will operate approximately 50 hours. When the server is switched off and not connected to the USB port of the computer (or the computer is switched off), inserting batteries will not switch on the server. The server will only switch on after it is connected to the computer and receiving power from the computer. The server will also automatically switch off when removed from the USB port (or when computer is switched off) and the server does not contain any data. Warning • Always install the batteries as indicated. Incorrectly installed batteries could damage the server and the batteries. The batteries may start leaking, potentially damaging the server and voiding the warranty. • When removing batteries from the Bridgemate II scoring device or server, do not use your fingers or finger nails to remove the batteries. Instead use a blunt object like a screwdriver or pen to safely remove the batteries. Switching on / off The server will automatically switch on once the server is connected to the USB port of your computer and the computer is switched on. To switch off the server, the server must be disconnected from USB power (switch off computer, or disconnect the server from the computer), and, if batteries are inserted, keep the small push button next to “Battery OFF” pressed for a few seconds. If the server does not contain any data, it will automatically switch off after being disconnected from the server, even when batteries are inserted.  Status indicators The server is equipped with two status indicators showing the texts “USB / battery power” and “Battery status”. “USB / battery power” indicator will light up green when the server is powered through USB, and red when powered by the batteries. “Battery status” indicates the voltage level of the inserted batteries. Green means sufficient power left, orange means batteries are half full, red means batteries have less than 25% power left, and blinking red means immediate replacement is required. When no batteries or empty batteries are placed, the indicator will not light up. Tip When connecting the server to your computer, verify that both indicators light up green. This ensures that the server is properly connected to the USB port of your computer and the batteries have sufficient power. Automatic power-off The server is equipped with an automatic power-off function. When the server runs on battery power, and there has been no activity for a certain period of time, the server will automatically switch off. The default auto power-off time is 1 hour. This can be changed in Bridgemate Control Software in menu Tools à Settings à General.  Setting the region When you start up Bridgemate Control Software for the first time, you will be asked to select your geographic region. To enable the server to transmit data to the Bridgemates over the correct radio frequency, it is vital that you select the appropriate region. If your region is not listed, please contact your Bridgemate supplier for further assistance.
Chapter 2: Hardware configuration           15  Setting the channel The radio frequency channel over which the server communicates is set to 0 by default. For more information on how to modify this channel, please see Chapter 4. Configuring the Bridgemates See chapter 5 on how to configure the Bridgemates and to put them in use. Operating instructions The Bridgemate II server is very easy to use. Only a few instructions need to be followed. The following rules must be observed: - Install the batteries as indicated. Incorrectly installed batteries could damage the server. - During use, make sure the server is placed horizontally on a level surface. - Do not place any objects on the server and make sure there is as much distance between the server and other objects as possible. The fewer objects there are between the Bridgemates and the server, the better the data exchange will be. - Where possible, make sure the Bridgemates and the server are not separated by a wall. The server should preferably be placed in a central location between the Bridgemates. If this is not possible, place the server as closely as possible to the Bridgemates along the edge of the playing room.
Chapter 3: Bridgemate II Control software           17  Chapter 3: Bridgemate Control Software The Bridgemate Control Software program is the bridge between your scoring program and the Bridgemate system. BCS reads the session data from the scoring program though the result file and loads it into the server so that the server can control the Bridgemates. Then, BCS retrieves the entered board results from the server and stores these in the result file for posting by the scoring program. BCS has been designed for simplicity and ease of use and is very user friendly.  This chapter contains information on the basic and advanced functions of Bridgemate Control Software. For general use of the program, it is not necessary to know all the information contained in this chapter. When first starting the system, make sure to read the paragraphs “Launching Bridgemate Control Software”, “Logging in and logging off Bridgemates” and “Board results” first. Launching Bridgemate Control Software Bridgemate Control Software is launched from your scoring program. Depending on your scoring program, there are several ways to launch BCS. The majority of scoring programs have a launching function, enabling fully automatic activation of the Bridgemate II server and results reading. For more information, please consult the manual of your scoring program. The BCS screen is displayed as follows:  The name of the active result file is displayed in the title bar. If no result files are open, the text “No session active” will be displayed. Server information The pane in the top left-hand corner of the screen displays information relating to the server. If a server has been found, the text “connected” and the version numbers will be displayed. If batteries are used, the power meter will display the number of operating hours remaining in percentages. If you are
Chapter 3: Bridgemate II Control software           18  using batteries, we would recommend replacing them in time rather than overusing them. BCS will indicate when to replace the batteries. Lastly, BCS will display the region and the channel over which the server is communicating. Tables The bottom left-hand corner of the screen contains the tables in your session. A red or green dot behind the table indicates the status of the table. Red means the Bridgemate for that table hasn’t been activated yet, or has finished the session. Green means the Bridgemate has been activated and is currently in use. Received board results All board results read from the server are displayed in the right-hand side of the screen. Per board result, users can see the table(s) to which this score relates, the pair numbers, declarer, the overall score and the time this score was logged in BCS. Note that the time/date registration logs the exact time the board results were saved in the result file. If there is a server delay in reading the scores, the system logs the time/date when the server was read and the board result was saved in the result file. In other words, the system does not log the time/date when the score was actually registered in the server. Board monitor and round monitor To provide the tournament director with up to date information on the progress of the session, a round monitor and board monitor are available. The round monitor shows how many scores have been recorded for each table in each round. The board monitor shows how many scores have been recorded at each board for each table. Both monitors are updated in realtime when new results come in. Result matrix The result matrix shows the results conveniently arranged. A quick glance tells you which scores are recorded per board or table. The matrix has different viewing orientations which can be controlled from the Options menu. Players The players tab shows the member numbers as they are entered on the Bridgemates, and the names of the players (requires naming support in the scoring program, see chapter six for more information). Filtering and sorting board results  The filtering and sorting functions, based on one or multiple criteria, are displayed in the bottom right-hand corner of the screen. This enables users to perform a fast search for specific scores or to compare scores. Filter and sort options are available per section, table, round and board number and only apply to the results list, and not to the board/round monitors and the result matrix. Logging in and logging off Bridgemates Logging in Bridgemate  After the corresponding tables have been added to the server, the Bridgemates can be activated.  Once the Bridgemate has been switched on, it will display the main screen with the Bridgemate II logo. Press OK to go to the section and table number screen. Depending on the setting of section and table number entry (see chapter 5), you may be asked to select your section and table number first. Press OK again to log the Bridgemate in to the server. The flashing symbol in the top right-hand corner of the Bridgemate screen indicates that radio communication is taking place. Once the Bridgemate has logged in, all first round data will be displayed. The Bridgemate has now been activated. In the BCS screen, the red symbol in the “Status” column of the table list will turn to green. This column also gives a clear overview of all inactive Bridgemates: if the status column is still red, the table has not activated the Bridgemate.
Chapter 3: Bridgemate II Control software           19  In the following cases, the Bridgemate will not be logged in to the server, but instead the message “TABLE NOT ACTIVATED YET” will be displayed and the Bridgemate is returned to the main screen: - The Bridgemate II scoring system has not been started yet by the scoring program. - The corresponding table has not been added to the server. - The server and the Bridgemate are not communicating over the same channel. - The region setting in BCS does not match the region setting of the Bridgemates. - The server is outside the range of the Bridgemate and cannot communicate with the Bridgemate. The message “SYSTEM NOT ACTIVATED YET” will appear in the following scenario: - The Bridgemate has been set to scan for existing sections in the setup menu but the Bridgemate II scoring system has not been started yet. Two other messages may be shown as an indication that the Bridgemate cannot start the session: “TABLE STARTED BY ANOTHER BRIDGEMATE” - Another Bridgemate with the same section/table number setting has already logged in to the server. It is not possible for two Bridgemates to log in with the same section/table number. “END OF SESSION” - The session of this table has finished, all scores have been registered for this table.  Logging off Bridgemate  The “End of session” message will be displayed for all Bridgemates that have completed the rounds and sent all the scores. These Bridgemates are returned to the Bridgemate II main screen and are automatically logged off from the server. The status column of this table will turn red again, indicating that the session has been completed on this table. A clear overview is given of all the active tables. All Bridgemates with the green status display are still in use. As well as logging off automatically at the end of the session, users are given three alternative options for logging off manually: - Using the reset function in the TD menu (option 0). The Bridgemate is returned to the start-up screen and is logged off from the server. See chapter 5 for more information on how to reset the Bridgemates from the TD menu. - Via menu Server à Show tables, Reset table(s). See chapter 4 for more information. - Via menu Server à Show tables, Log off table(s). See chapter 4 for more information.  The latter function can be used if you need to use another Bridgemate for a specific reason but cannot log off via the normal procedure. You will need to log off manually to start using another Bridgemate. See also chapter 7 for more information. Board results Reading from the server Once the Bridgemates have logged in, they will feed scores to the server during the session. These scores are first saved in the server. As long as the server is connected, BCS will continuously read the new scores from the server and save them in the result file. This is an automatic process and indicated by the following message in the status bar: “Status: retrieving data from server”.
Chapter 3: Bridgemate II Control software           20  If the server has been disconnected for a while, all scores not yet sent to BCS will be retrieved from the server, read and saved in the result file as soon as the server is reconnected. Delayed reading and processing of scores is therefore possible. It is advised, however, that the server is connected at all times during the session and BCS is running. Viewing and filtering or sorting scores Viewing scores  Scores that have been read and saved in the result file are displayed in the right-hand table of Bridgemate Control Software. Per score, an overview is given of the corresponding table, the round, the players, the player declaring the game and the contract. The registration time and date is also displayed in the result file. Remarks are also displayed (“Not played” = the Bridgemate indicates that the game has not been played, 40%/60% = arbitral score entered in the Bridgemate, “Result erased” = score has been erased).  Go to the menu Tools  à Show/hide columns to select the columns you would like to show or hide. Applying filter or sort order As more board results are added and displayed, the more time-consuming and difficult it becomes to find or compare specific scores. Although you will generally use your scoring program for this purpose, it is conceivable that you may wish to view the registered data in BCS. To display a specific section of board results, you can apply a filter to the entire list. This filter can be configured at the bottom of the screen. Enter specific criteria per section, table, round and board number and NS/EW pair number. It is possible to enter multiple criteria, for example section A, table 1, round 3. Per criterion, enter your filtering preference - equal to, not equal, equal or less, equal or greater, between - and enter the relevant values. Select Apply filter to apply the filter. To remove the filter and display all board results, press Reset filter. The sort function can be used to sort the (filtered) results according to various criteria. Select the criteria and choose Ascending or Descending for each criteria. Select Apply sort to start sorting the scores. Result matrix Another way of viewing the scores is the result matrix. The matrix shows the scores as a grid where the scores are outlined for each table and board. This provides a quick way for locating a specific score. The grid can be shown in four different formats: • Boards horizontally, tables vertically • Tables horizontally, boards vertically • Boards horizontally, declarer vertically • Declarer horizontally, boards vertically  Boards vs tables and vice versa is the most practical viewing method. However, in movements where pairs are rotating and boards are played more than once at the same table, the viewing method should be changed to boards vs declarer or vice versa.  To change the viewing method of the result matrix, go to menu Tools à Options à tab General, and select the desired method. If the score points should be shown as well, select the option “Contracts and score points”. Changing and deleting scores You have the option of changing or deleting results saved in the result file and displayed in the result list.
Chapter 3: Bridgemate II Control software           21  Changing scores  Right-click on the score you would like to change and select Edit score. A detail screen will appear displaying all the score data. You can now edit the score using the following notation: NS/N/S to indicate the North-South direction of play, EW/E/W for East-West direction of play; clubs = C, diamonds = D, hearts = H, Spades = S, no trumps = NT, double = x, redouble =xx, pas = PASS. Enter a space between the value of the contract, the contract type and double/redouble. Enter a = symbol in front of contracts that have been exactly made. If the board result has already been read by the scoring program, it makes little sense to change the board result in BCS. It would be better in this instance to change it directly in the scoring program. If however the score has not yet been read, it does make sense to perform this change in BCS. The edited score will be displayed in your scoring program. It is however also possible to process the score first before performing the desired changes in the scoring program. If you wish to change a score from the result matrix, double click on the score to pop up the edit score window. Note that any changes made to the results in the result file will be fed again to the server. The Bridgemates will therefore show the edited score in the overview of previous board results. If no server is connected or the server doesn’t contain the session information anymore, BCS will show message saying that the score could not be updated in the server. Deleting scores  To delete a board result, right-click on the score you would like to delete and select Delete score. To delete multiple scores simultaneously, press and hold the left mouse button and the Shift key to select the scores you would like to delete. Deleted scores will also be deleted from the scoring program (if it supports this function), even if the score has already been read. The score will also be deleted from the server. Scores cannot be deleted through the result matrix. Processing scores in the scoring program For information on how to read and process scores from the Bridgemate II result file, please consult the manual supplied with your scoring program.  The following text will describe the more advanced functions in Bridgemate Control Software. Opening, saving and closing result files The result file is the starting point in the process. If no result files are opened in BCS, your options are limited. The Session menu is inactive and no scores can be processed from the server. During normal use of the Bridgemate II scoring system, your scoring program will create and automatically read the result file in BCS. You do not need to open the result file or read the relevant session data. This is processed automatically. To read other result files in BCS, use the Open and Close functions in the File menu. Opening existing result file Use the File à Open menu to open an existing result file. If this result file has not been opened previously on this client, BCS will ask whether the client wants to log in to this result file. This step is necessary to add tables to the client and interact with the result file.  Saving existing result file The scoring program creates the result file and stores the file in a folder specified by the scoring program. Use the File à Save menu to create a copy of the file at a location of your choice.
Chapter 3: Bridgemate II Control software           22  Closing the result file Select File à Close to close the active result file. You can now open another result file. Using multiple clients In ordinary club sessions all scoring is done of one computer. In large tournaments, however, it may be necessary to split the session over multiple computers each serving a selection of the tables, while having the scores collected all in one Bridgemate result file. BCS supports multiple clients simultaneously logging in to a single result file and storing scores during the session from multiple Bridgemate servers. In order to change the program to multiple client mode, go to menu Tools à Options à tab General, and set the mode to “Tournament”. The list of tables will now show two tabs: “All tables” and “Client tables”. The All tables tab contains all the tables stored in the result file. These are generally all the tables used in the session. The Client tables tab displays the tables assigned to the client PC you are currently using. The name of this client is displayed in the bottom left-hand corner of the screen. The tables must be assigned to a client. If you are using one PC for your sessions, all tables will be assigned to the same client. In this case, the All tables and Client tables tabs contain the same tables. If you are using multiple clients, the All tables tab contains all tables in the session; the tables may be assigned to different clients. The Client tables tab only displays (on both PCs) those tables assigned to that specific client. The scoring program will create the result file for you. By default it is assumed that only one client is used. The program will automatically assign all tables to the PC you are currently using. You do not need to perform any manual changes. Manual changes are only required during big tournaments involving the use of multiple clients and servers. Adding a client to the result file The result file keeps track of which clients are using the result file. Your scoring program will automatically add your client to the result file.  If the result file has not previously been opened by the client PC (it was created on another PC), this client has not yet logged in to the result file and cannot use the file. To add a new client to the result file, open the result file on the relevant client. BCS will ask you to confirm whether the client needs to be logged in to the result file. Confirm. You will now be able to start using the result file.  Managing tables Assigning tables to a client Once a result file has been opened, all tables of the result file will be displayed under the All tables tab. The “Client” column will display the text “not assigned” if the scoring program has not assigned the table to the current client (this only occurs sporadically) or if the table has been removed by a client. To assign a table to the client you are currently using, right-click on the table and select Add to client. To add multiple tables simultaneously, select the table by clicking and holding the left mouse button and the Shift key, or use the Select all function to select all the tables. Once the table has been added to the client, the client name will be stored in the table. You can only assign tables to the client (PC) you are currently using. If you are using multiple clients in a network, the result file will need to be opened manually per client and the tables added to the relevant client.
Chapter 3: Bridgemate II Control software           23  Taking over tables from another client To transfer a table that has already been assigned to another client to your own client, repeat the above procedure. Right-click on the table and select Add to client. BCS will ask you to confirm whether you would like to take over the table from another client. Overview of tables assigned to a client The client to which the tables have been assigned is displayed in the “Client” column of the All tables tab. The Client tables tab only displays those tables assigned to the current client. Removing tables from the client Click on the Client tables tab for an overview of all the tables added to this client. Right-click on the table you would like to remove and select Remove from client. The table will now be removed from the client. Server control Activating the server To activate the server, connect it to the client PC and connect the power adapter or fit batteries. Once the server has been found, specific data will be displayed in the top left-hand corner of the BCS screen and the Server menu will be activated. You are advised to connect the server before launching BCS. Resetting the server The server contains no data when initially connected to a power source. New tables can be added instantly.  If the server contains data which you would like to delete, you will need to empty the server. This is done using the reset function. Go to Server  à Reset. You will be asked to enter a verification number which is displayed on the screen. This verification number ensures that the server cannot accidentally be reset. Once the correct verification number has been entered, the server is emptied and all data removed. Adding tables  The server is activated by adding tables. As soon as a table has been added, the server feeds this data to the corresponding Bridgemate, which in turn is activated. The Bridgemate cannot operate if the corresponding table has not been added to the server. Tables can only be added once to the server. If you attempt to add a table that has already been added to the server, an error message will be displayed. To add a table to the server, go to the Client tables tab, select the relevant tables, right-click on one of the tables and select Add to server. The tables will now be added one by one to the server, and the corresponding movement loaded per table. An overview of the added tables will be displayed. Removing tables  It is also possible to remove tables from the server using the Client tables tab. Select the tables you would like to remove, right-click on these tables and select Remove from server. The tables will now be removed. You will not be able to use any Bridgemates that are configured to these tables. Synchronizing the server and client  All data relating to the tables is saved separately in both the result file and the server. This may result in discrepancies between the two in the event of a temporary disconnection between the server and the PC. These discrepancies can be rectified using the Session à Synchronize client <-> server menu function.
Chapter 3: Bridgemate II Control software           24   Check the relevant options to indicate your synchronization preferences. You are effectively determining whether to synchronize the server to the result file, or whether to update the result file using the data stored in the server. Tables in server which are not in client Use this option to determine what to do with tables stored in the server but not assigned to the client. To delete these tables from the server, select “Delete from server”. To add them to the client, select “Add to client”. Tables that have already been assigned to another client can only be assigned to the current client if the “Take over from other client” option has been checked. If this box has not been checked, the tables cannot be added to the client. Tables in client which are not in server Conversely, some tables may have been assigned to the client but not to the server. To add these tables to the server, select the option “Add to server”. To delete these tables from the client, select the option “Delete from client”. This option also allows you to delete all the tables from the result file by checking the “Delete from session” option. Delete tables from server which are not in session The synchronization function will also verify whether the server contains tables not contained in the result file. These are so-called “obsolete tables”. Check the “Delete tables from server which are not in session” option to delete these tables from the server. If this option is unchecked, these tables will not be removed. Synchronizing client to server and vice versa As outlined above, the main function of the synchronization process is to synchronize the client to the server and vice versa. The default settings of this function are configured to synchronize the client to the server: tables that have been assigned to the server but not to the client are added to the client, and tables that have been assigned to the client but not to the server are removed from the client. These settings will need to be adjusted when synchronizing the server to the client. In this case, delete all tables from the server that have been assigned to the server but not to the client (select “Delete from server”). Conversely, add to the server all tables that have been assigned to the client but not to the server (select “Add to server”). In all these cases, make sure the “Delete tables from server which are not in session” option is checked to delete all tables that have been assigned to the server but not the result file (and therefore
Chapter 3: Bridgemate II Control software           25  not to the session). Should it transpire that these tables were correctly stored in the server and not in the result file, a new result file will need to be created, or the current file updated. Recovering the server The Synchronize menu function also offers users the opportunity to fully synchronize the result file and the server. To do this, go to the “Recovery” tab and press the “Recover server” button. All existing data will be deleted from the server and overwritten with the tables and the scores contained in the result file. The server is synchronized with the current position of the result file.  This function is ideal in the event of data loss and if you wish to configure the server from the moment data was lost. Make sure however to move the scores from the server to the result file in time. Updating movement in the server Movement data is assigned to all tables added to the server during the synchronization process. The synchronization function does not update the movement data of tables already stored in the server and which have not been updated. If the movement data of the result file has been synchronized from the scoring program, and the scoring program does not order BCS to update this data, use the Session à Update movement menu function to update the server with the correct movement for these tables.  All sections are checked by default. Uncheck all sections that you do not wish to update. By default, data is updated from round 1. To update from a later round, select another round number using the selection option. Press Update now to update the sections with the correct movement. All table scores belonging to sections that you wish to update will now be deleted from the selected round onwards. A report will be displayed of the executed operations. When the movement is set to be updated from round 2 or higher, your have the possibility to delete the movement of all prior rounds and have the Bridgemates automatically moving on the selected round. This is convenient for example when the Bridgemates are still in an earlier round and you want them to move on quickly. However, as this will erase all movement information of previous rounds and delete all scores from the server of those rounds, it is advised to be very cautious with this functionality. If you only want to move the Bridgemates to the next round, you should use the function “Close rounds”. Please note The scoring program will normally update all movements in BCS automatically. It is therefore not necessary to invoke this function manually. Please refer to the manual of your scoring program for more information on movement updating in BCS. Closing rounds If a Bridgemate hasn’t received all the scores of a round and it needs to be moved on the next round, for example due to late play or when players didn’t enter their score in the Bridgemate, you can simply close the round in BCS and force all Bridgemates to move on to the next round. Go to menu Session à Close rounds.
Chapter 3: Bridgemate II Control software           26   Select the sections of which you want the Bridgemates to move on, and select the number of round you wish to close. For example, if you want all Bridgemates of section B to move on the 4th round, then select only section B by deselecting the other sections, set close rounds 1 till 3 (not 4!), and press “Close rounds”. All missing scores up to round 3 for all tables of section B will be filled up with Not played, and this will also appear in the result list and result matrix. Bridgemates of section B which are still in round 3 will automatically move on to round 4. Program settings Program settings of BCS can be changed using menu Tools à Options à General.  To disable the automatic server detection while the program is running, check Disable server detection. You may decide to do so whenever you are running BCS without a server connected. During your sessions, however, you are always advised to leave this function unchecked. Note that disable server detection will not disable detection at startup of BCS. In order to close BCS automatically at the end of the session, check “Close program at end of session”. This requires that all tables at least one time during the session are logged in (all status indicators are green) and at end of the session all tables are logged off. In case some tables are not played, the program will not automatically close.
Chapter 3: Bridgemate II Control software           27  Some scoring programs require that the original score record is erased once a score in the Bridgemate is erased. If your scoring program requires this, check “Erase original records of deleted scores”. To view the settings that Bridgemates will be used before the Bridgemate system is actually started, check “Show Bridgemate options when starting new session”. This allows the TD to verify if all settings are correct and make changes where needed. Program mode is explained earlier in this chapter. Tab View  When the scoring program updates the movement, the result of it is shown on the BCS screen through a report window. If you want to disable this report, uncheck Show report when movement updated by external program. Results in BCS are by default shown as overtricks/downtricks. If you want to show results using a different method, you can select here the desired method. Result matrix options are explained earlier in this chapter. File locations BCS tracks important events and logs them in a log file. This log is named “BMProLog.log” and is by default stored in the same folder where BCS is stored, usually C:\Program files\Bridgemate Pro. If the default location is not suitable, a different location can be selected manually. In the Options window, select the tab “Log file”, click “Other folder”, and select the folder where the log file should be stored. If no log file exists yet, a new log file will be created.
Chapter 3: Bridgemate II Control software           28    The location of the BMplayerDB.mdb Bridgemate player names lookup database file is by default located in the same folder where BCS is installed. When a different location is required, the folder can be specified.
Chapter 4: Server functions           29  Chapter 4: Server functions Once the server is connected to the PC, menu Server is active in BCS. This menu contains several useful server functions. It is not necessary to open a result file to use these functions. Overview of tables Use the Server à Show tables menu to create an overview of the tables stored in the server.   Per table, the green or red status light indicates whether this table has logged in to the server, logged off, or has not yet logged in.  To delete a table from the server, select the relevant table(s) and choose “Delete table(s)”. The tables will be deleted from the server, as will all the registered scores of these tables. To log off a table manually, select the relevant table(s) and press “Log off table(s)”. Press the “Show scores” button to create an overview of the scores entered by the Bridgemate. Select the table(s) of which you would like to see the board results and select this function. Press the “Retrieve scores” button to move all entered scores for the selected tables to the result file. When the Bridgemate settings have been modified, they are updated in the Bridgemates by selecting the tables and pressing “Update settings”. To force a Bridgemate to reset itself, log off from the server and return to its main screen, select the table and press “Reset table(s)”. Upon next communication with the server, the Bridgemate will reset itself. Overview of entered scores The Server à Show all scores menu function displays an overview of all board results entered in the server. Depending on the number of tables stored in the server, there may be a delay in reading and displaying the data.
Chapter 4: Server functions           30  Restarting Bridgemate network The wireless network can be restarted from the server using the function Server à Force restart. Use this function to solve wireless communication problems between multiple Bridgemates and the server. Resetting the server The Reset server menu function resets the entire server and deletes all entered data. To avoid accidental resets, you will be asked to enter a verification number which is displayed on the screen. Note: If the server is not connected to the power adapter and/or is not fitted with batteries, all data will be lost. It is therefore not necessary to reset the server before disconnecting it from the power source or after connecting it to the power source. Setting the region The Bridgemate II score system communicates over a predetermined frequency spectrum. The permitted frequency differs per region. Three regions are currently supported: Europe, North America and Australia / New Zealand. When first launching Bridgemate Control Software, you will be asked to select your region. The server will select the corresponding frequency spectrum to communicate with the Bridgemates. Remember to set the corresponding region in the Bridgemate setup menu.  If you want to change the regional settings of the server, go to Server à Region selection.   The “Current region” function displays the current region. Select the new region and press “Set”. The new region has now been set. Setting the channel The server and the Bridgemates must be set to the same channel to communicate with each other. To set the channel on the server, use the Server à Channel selection menu.  The “Current channel” function displays the current channel. Select the new channel and press “Set”. The new channel has now been set.
Chapter 5: Use of the Bridgemate® II scoring devices           31  Chapter 5:  Use of the Bridgemate®  II  scoring devices The Bridgemate is a small device designed to enhance the enjoyment of bridge for tournament directors and bridge players alike. The system enables you to enter scores faster than before, and is guaranteed to prevent operator errors. As well as allowing players to enter board results, the Bridgemate also feeds information to the players, such as the achieved percentage on the board played, and the traveler overview. We are convinced that tournament directors and bridge players will appreciate the convenience of the Bridgemate!   Preparing the Bridgemate for use The Bridgemates are individually packed in compact sturdy cardboard boxes. Each Bridgemate comes complete with two AA batteries, which must be inserted into the bottom of the Bridgemate unit. The + and – signs in the casing indicate the insertion direction of the batteries. Insert the batteries in the direction indicated, close the lid and press the OK button. Check whether the “Bridgemate II” logo appears. The Bridgemate is now ready for use. Exploring the Bridgemate     Large LCD screen for easy entry of scores, viewing results and other information.      Four function keys offering all kind of additional functionality.   Keypad consisting of 25 large keys for easy input of scores and controlling the Bridgemate.
Chapter 5: Use of the Bridgemate® II scoring devices           32  The keyboard The Bridgemate keyboard contains 29 keys. Some of the keys have a dual function. Keys  Explanation 1 to 9, 10 These keys are used to enter numbers in the Bridgemate, for example board numbers, pair numbers, contract and result. The 10 button is used to enter 0 (when entering member numbers, board numbers etc) and to indicate 10 as the lead card. ♣, ♦, ♥, ♠, NT  These keys enable you to indicate the contract type or the card color of the lead card. +, -  Indicates overtricks or downtricks of the result. =  Indicates that the contract has been exactly made. J, Q, K, A  Use these keys to specify Jack/Queen/King/Ace as the lead card. X, XX  Double or redouble. N/S, E/W  Declarer’s direction of play. PASS  Indicates a pass-out. CANCEL  Correct an entry and cancel commands. OK  Confirm an entry. Function keys  4 functions keys in the top row provide access to all kind of additional functionality which is not covered by the 25 keys.  Switching on/off The Bridgemate does not have a separate on/off button. To switch on the Bridgemate, press the OK button. It is not possible to switch off the Bridgemate manually. The Bridgemate will automatically switch off after it has been idle for a while, i.e. no buttons have been pressed. No data will be lost when the Bridgemate switches off. Simply press the OK button to continue as before. In other words, you can continue entering scores as soon as the Bridgemate has been activated again.  The default autopower-off time is set to 20 seconds. This value can be changed to between 5 and 60 seconds. See chapter 6 for more information. Activating the Bridgemate When switching on the Bridgemate II for the first time, you will be taken to the main screen:
Chapter 5: Use of the Bridgemate® II scoring devices           33  Depending on the version you have, the version number and language may differ. Battery indicator In the upper left corner there is a small battery indicator. Full batteries are indicated with a full indicator. If the battery power is extremely low, the battery indicator will show an empty battery and the indicator starts blinking. Although it is safe to continue using the Bridgemate for several more sessions, it is recommended that you replace the batteries as soon as possible. The average battery life is approximately 400~500 sessions. However, this depends largely on the length of each session, the time frame over which these sessions are played, and how the Bridgemates are stored. Make sure no keys are pressed during storage. Configuring the Bridgemate Before the Bridgemate is put into use the first time, it needs to be configured with the correct settings. Press the SETUP function key to access its internal settings menu. In case the menu is proteced with a PIN code, enter one of the following fixed 3-digit PIN codes: 749 or 769.              You can scroll through the menu using the up and down function keys. Press the BACK function key to exit the setup menu. Any changes in the settings will then be saved. Configuring the section and table Before the Bridgemate can be used in the session, it needs to be configured with a section, table number. There are three ways to set this information:  • Fixed setting which the players cannot change • Flexible setting which can be changed before the session starts. • Flexible setting with selection of available sections only  Fixed section and table setting A fixed section and table setting allows you to configure the Bridgemate for a specific table, while not having the risk that this setting is changed by anyone. Once the setting is made, the Bridgemate must be placed on the correct table that matches the setting. To do so, scroll the focus up or down to “Section”, and use the + and - key to adjust the section. Sections range from A to Z. Once the correct section has been set, scroll one position down to table and use the number keys to set the correct table number. Press CANCEL to delete the current number. Table numbers range from 1 to 511. The Bridgemate will retain these settings until you next change the section and table number. In other words, these settings will be retained even after the session has been completed. It is therefore not necessary to change the settings for the next session. All you need to do now is move the Bridgemate to the correct table. Flexible setting of section and table A flexible setting allows you to freely distribute the Bridgemates over the tables, and upon start of the session, the Bridgemate will ask the players to confirm the section and table number of the table which
Chapter 5: Use of the Bridgemate® II scoring devices           34  they are sitting at. This method allows you to assign numbers and sections to tables at the very last minute while the Bridgemates are already placed on the table. In order to set the flexible setting, scroll the focus up or down to “Section” and press the - key just as much until you see “Select” behind “Section”. Automatically “Select” will also be placed behind “Table”. Press BACK function key to accept the settings and return to the main screen. The Bridgemate is now configured for flexible entry of section and table number at the start of the session. The Bridgemate can be freely placed on any table in the session. Flexible setting with selection of available sections only This setting is very similar to flexible setting of section of table, but it limits the selection of section to the sections which have been uploaded to the server. Instead of allowing the choose a section ranging from A to Z, only the sections which are used in the session can be selected. To configure the Bridgemate for this setting, scroll to “Section”, and press the - key until “Scan” appears behind “Section”. Press the BACK function key to exit the settings menu. The Bridgemate can be placed on any table in the session. Setting Bridgemate region and channel  Use the up and down function keys to move to the “Region” row. Use the + and – keys to browse through the available regions. Choose the region that matches the region of your server. The Bridgemate II scoring system can communicate over different radio channels. This enables users to install multiple systems next to each other without causing interference (see also Chapter 6,  “Multiple clubs”). To enable a Bridgemate to communicate with the server, both must be set to the same region and channel. The default setting for the Bridgemate and server channel is channel 0. To modify the channel, move to the “Channel” row. Erase any exisiting channel number with the Cancel key and input the new channel number. Language Indicates the language of the current firmware. SETUP security code By default the setup menu is always accessible. To protect the setup menu from unauthorized access by players, set the “PIN code” to On using the + or - key. Once the PIN code is set to On, the next time the setup menu is accessed, it will ask for a PIN security code. This is a fixed code and is 749. Alternatively, you can use 769 to access the setup menu with the focus directly on the channel row. This allows for quickly reconfiguration of the channel setting. Once you have finished all configuration settings, press the BACK function key to return to the main screen. Your Bridgemate is now ready to be used. Starting the session Who operates the Bridgemate?  As with the score card, the Bridgemate is operated normally by North. North is responsible for the correct operation. East (or west) is responsible for verification of the entered board results.  Switching on/off To switch on the Bridgemate, press the OK button. The Bridgemate will automatically switch off after it has been idle for a while, i.e. no buttons have been pressed. No data will be lost. Press the OK button again to continue as before.
Chapter 5: Use of the Bridgemate® II scoring devices           35  Activating the Bridgemate and confirming section and table setting At the start of the session, the Bridgemate will by default display the “Bridgemate II” main screen. Press OK to view the table and section settings of the Bridgemate.  Fixed section and table If the section and table numbers are set as fixed numbers, it will be shown as follows:  Confirm that the Bridgemate is placed on the correct table, and press OK once more to log it on to the server. The Bridgemate has now been activated and can be put into use. Flexible entry of section and table If the Bridgemate is set to flexible entry of section and table number, the players are asked to confirm the section and table number in the Bridgemate. The screen will look like:      and       First the section is configured using the + and – key. Once the correct section is choosen, press OK to confirm Next, enter the table number. Confirm again with OK. A confirmation screen appears:  In case of a wrongly entered table number, use the Cancel button to go back and correct the entry. Once the table number is correct, press the OK button to start the Bridgemate. Flexible entry with selection from available sections If the Bridgemate is set to selection from available sections, it will allow the players to choose their section from a list of available sections. After activating the Bridgemate with the OK key, the screen may look like this:
Chapter 5: Use of the Bridgemate® II scoring devices           36  Players choose their section by pressing the number that corresponds with the section they will play in. Next, they will be asked to confirm their choice by pressing OK. If a mistake has been made, pressing the Cancel key will bring the Bridgemate back to the selection screen. After confirmation of the section, the Bridgemate will ask for table number and final confirmation. This is indentical to the method of flexible entry of section and table number method. The flexible entry with selection from available sections requires that the server has been started and all section tables have been uploaded to the server. In case the server hasn’t been started yet, the Bridgemate will return the message “System not activated yet”. Players should then wait till the tournament director has started the Bridgemate system. Remark The SCAN function scans all available servers which are operating on the same channel as the Bridgemate. In case you have one server containing tables for section A, B and C, and another server containing tables of section D and E, and both servers are on the same channel, the Bridgemate will show all five sections. After selecting the section, it will automatically make contact with the appropriate server. Table logged on wrongly When players enter the section and table number, it may happen that accidently a wrong number is entered. Moreover, if the board numbers of the wrongly entered table are the same as what the players are supposed to play, it is very likely this will go unnoticed. As soon as the other, but correct, table wants to log on, the following message is displayed:  If you are sure your table is the table shown on this screen, press OK to proceed. The following screen is displayed:  To continue as this table, confirmation by the TD is required. The TD enters his PIN code to confirm this Bridgemate taking over the table. If data has already been entered on the incorrectly logged on  Bridgemate, your Bridgemate will now ask whether this data should be erased:  Press ERASE to delete all data entered on the previous Bridgemate. This includes player numbers and any scores. If you wish to proceed without erasing data, press CONTIN. The Bridgemate will now
Chapter 5: Use of the Bridgemate® II scoring devices           37  start the session. The wrongly logged on Bridgemate will show a message that its table has been taken over by another Bridgemate and it will reset itself. Entering member numbers (optional) If you have specified in BCS or your scoring program that you wish to enter member numbers, the Bridgemate will ask you  to enter the member numbers of the four players.   The number must be numeric and has a maximum of 12 digits. Use the number keys to enter the number, and confirm by pressing the OK key. If a player does not know his member number or does not have a member number, press OK without entering a number. No number will be registered for this player. Once a member number has been entered for West, the numbers will be fed to the server. If the scoring program has preloaded the names into Bridgemate Control, the Bridgemate system will be able to report the names back to the players for verification.   In case one or more names are incorrect, press the Cancel button to apply corrections. After the numbers have been corrected, the new names will be displayed again for verification. When all four names are correct, press OK to start the first round. Enter results with the Bridgemates Information before the start of the round  At the start of each new round, the Bridgemate will display the new round and the expected pairs, as well as the direction of play. The board numbers will also be displayed. For example, you can verify at the start of the round whether you are seated in the correct direction and have the correct boards on the table. This information is displayed as follows:  Press OK to confirm this screen. Review player names
Chapter 5: Use of the Bridgemate® II scoring devices           38  If the Bridgemate is configured to show player names, Bridgemate will show the names of the players at the start of the round. Player names must be pre-loaded by the scoring program, or players must have entered their player numbers at the beginning of the game.  Press OK to confirm this screen and continue with the board input.  Entering board results The following screen will be displayed when entering the board results:  The information at the top of the screen shows the current round, the pair numbers in the current round and the boards to be played. The flashing line indicates the input position. Entry and verification of board number Before starting to play the board, enter the board number and press OK to confirm. The Bridgemate will verify the number. In case the board number is incorrect, or the board has already been played in that round, the Bridgemate will notify so. It will also mention the boards that are yet to be played. To assist the players entering the correct board number, two additional features are available which can be enabled or disabled through the Bridgemate settings (see chapter 6): • Automatic entry of board number. When enabled, the Bridgemate will automatically fill in the next board number in sequence. Assuming that boards are played in order, this reduces the chance of entering a wrong board number.  • Board order verification. When enabled, the Bridgemate will verify if the board number corresponds to the logical order. If the Bridgemate expects a different board number to be entered, it will ask to confirm that the boards are played out of sequence. If you do wish to play an out-of-sequence board, press OK. The board number will be accepted, and the Bridgemate will assume that you have chosen to deviate from the logical order. If the board number was entered wrongly, press Cancel to return to the previous screen and enter a new board number. Once the board number has been entered and confirmed, the cursor will jump to the second line. You can now begin the bidding. As soon as the contract has been determined, enter the contract type and the direction of the declarer.  Entry of contract and declarer To enter the contract, use numbers 1 to 7 and the ♣, ♦, ♥, ♠ and NT keys. If required, you can also use the X and XX keys to indicate double or redouble. To specify the declarer, use the N/S and E/W
Chapter 5: Use of the Bridgemate® II scoring devices           39  keys. If the declarer is North, press N/S once. If the declarer is South, press this key twice. Ditto if the declarer is East or West. The screen is displayed as follows:   Entering lead card (optional) If you have specified in Bridgemate settings that lead cards must be entered, the Bridgemate will ask you to enter the lead card. If not, this line will not be visible and the input position will jump to result instead. Select the lead card using keys 2 to 9, 10, J, Q, K or A and the card type using ♣, ♦, ♥ or ♠. You are free to decide in which order to enter the card and the card suit. Entering the result Once you have finished playing the board, you can enter the result. When the contract has been exactly made, press the = key. To indicate overtricks, use the + key and enter the number of overtricks. For downtricks, use the – key. Depending on the settings in BCS, the result can also be entered as the total number of tricks won or by using the American style (tricks made/down). The standard method is entering overtricks or downtricks and is used in this manual. Verification by east and confirmation of board result Once you have entered the contract, the lead card and the result, press OK. The message "Verification by east" will now be displayed, including the number of score points which are calculated by the Bridgemate. Depending on the Bridgemate setting, the number of score points will be displayed as assigned to the North/South pair or to the declarer.  The Bridgemate must now be passed to East to verify the entered data.  In a short while, the screen will automatically change and repeat all the information previously entered by North. The verification screen will for example be displayed as follows:  The board data entered by North is displayed on one total screen.
Chapter 5: Use of the Bridgemate® II scoring devices           40  East verifies the data displayed on the verification screen. If this data is incorrect, East will press CANCEL to edit the data. If the result is correct, East will press the ACCEPT function key to confirm the result. The message “Entry completed” will now be displayed. The data is saved and sent to the server. Special entries: pass-out and board not played Pass-out If the players have passed four times without making any bid, enter ‘Pass’ at CONTR and confirm with OK. You will not be asked for the lead card and the result, and the Bridgemate will switch immediately to the verification screen. Board not played If a board has not been played in a particular round due e.g. to time constraints, the Bridgemate must be informed. If this step is skipped, the Bridgemate will remain in the uncompleted round, and other pairs will be prevented from entering their results. To enter an unplayed board, press the 10 key as contract in the CONTR row. The screen will now display the text ”NO PLAY”. Confirm by pressing OK. The Bridgemate will now display the verification screen again. The Bridgemate will not display an overview for unplayed boards. As it is possible to play the board in a later round, players must be prevented from seeing the results of previous boards. The board can be played afterwards without the Bridgemate; in that case, the relevant score must be entered manually in the scoring program. When rules in your club say that players are not allowed to skip a board without notifying the tournament director, the Bridgemate has the possibility to let the players confirm their entry of no play. In the Bridgemate settings in BCS, enable the option “No Play requires TD confirmation” (see chapter 6). The Bridgemate will show the following screen upon no play entry.  The tournament director enters his PIN code to confirm the no play. This prevents players from entering a no play when they are not authorized to do so. General comments: • It is not necessary to enter the number of score points (+420, -50 etc.) in the Bridgemate. The Bridgemate will calculate the score using the entered contract and result, taking vulnerability into account. • The Bridgemate monitors the active rounds. In case of a sit-out, the Bridgemate will skip this round. • Before starting a new round, verify whether you and your opponents are seated in the correct direction to avoid playing in the wrong direction. At the start of the round, press OK to display the directions. Overview of percentage achieved and previous results After East has confirmed the board result, players have feedback options for viewing their achieved result and board results achieved by other pairs. Depending on the Bridgemate settings, the following information can be displayed:
Chapter 5: Use of the Bridgemate® II scoring devices           41  • Achieved percentage for the entered board result • Overview of scores of other pairs on the entered board The percentage is shown directly after the board result has been transmitted to the server. The server calculates the percentage by reviewing the other scores registered on the board, the value of the entered score and how the entered score compares with the other scores. This percentage will have little significance at the start of a session. As the session progresses, the percentage will approximate the actual end percentage on the board.  Press OK to exit this screen. When you have enabled the overview of scores of other pairs on the board, these scores are now shown. The scores are shown as a frequency list, indicating the number of times a result has been recorded. The first score is the highest achieved score so far in the session on this board. Depending on the setting in BCS, the scores can be shown in three different formats:  4 scores per screen. Own score is indicated in bold.  6 scores per screen. Own score is indicated by an arrow.  6 scores per screen. Own score is indicated by an arrow. Scores in two columns. If there are multiple board results, up and/or down function keys are visible and can be used to move to the next or previous set of results. View hand record If a hand record has been preloaded for this board, or entered by the players in a previous round, the hand record can be reviewed by the players to verify if the correct board was played. Press the HANDS button in the overview of previous results to show the hand record.
Chapter 5: Use of the Bridgemate® II scoring devices           42    End of round  At the end of the round, the Bridgemate will display the message "End of round". You do not need to do anything. The Bridgemate will automatically switch off after a few seconds. Press OK again to begin entering the scores in the next round. Show seatings for the next round At the end of the round, Bridgemate can guide the pairs to their next table. This information is shown together with the end of round message.  Seatings for next round information can be enabled from the Bridgemate settings in BCS (see chapter 6). In case the Bridgemate has left the screen with next round’s seatings, it can be retrieved again by pressing BACK in the subsequent screen, which is the round information screen of the following round. End of session  At the end of the last round, the Bridgemate will display the message “End of session”. If no keys are pressed for a while, the Bridgemate will return to the Bridgemate II main screen after a few seconds. The Bridgemate has completed its tasks and can now be safely stored away. View ranking and end of game summary After each round, and at the end of the session, the Bridgemate system can calculate a provisional ranking based on the results collected so far. To view this ranking, press the RANK key. The ranking shown is for the two pairs that finished that round or that table.  The ranking shows the pair number and their direction, their current rank, and their percentage overall percentage. Note that this ranking is calculated by the Bridgemate system itself and consequently may differ from the rankings calculated by your scoring program, although the differences will be minimal.
Chapter 5: Use of the Bridgemate® II scoring devices           43  When the last round has been played, the Bridgemate offers the players to view their personal game summary. In the ranking screen, press the GAME SUMMARY key (only visible when the Bridgemate finished the session).  The game summary is initially shown for the NS pair. To switch over to EW pair game summary, press the E/W key. Results obtained on all boards are shown, including the final percentage or total match points awarded for these results. Use the up and down keys to browse through the summary. View ranking and end of game summary after session has completed After the session has finished, it is possible to retrieve the ranking and personal game summary from any random Bridgemate. Take any Bridgemate which belonged to the section you were playing in, and activate it on using its section letter and table number. It will show the End of Session screen. Press the RANK button and enter your pair number and direction in which you have played, for example 4 NS. The Bridgemate will now show your final rank and the personal game summary. Reviewing scores and rectifying scores Reviewing scores entered After a board result has been entered and confirmed in the Bridgemate, it may very well be that players still want to review what they just have entered. The Bridgemate allows the players to review their own scores at any time during the round and at end of round. To facilitate this function, the option “Score recap” in Bridgemate settings in BCS must be enabled first. When enabled, the Bridgemate will show the SCORES function key as shown below.   Pressing the SCORES function key will show the score recap.  The entered board results including the score points are shown in order of board number. If more than four boards are played in the round, up and down function keys are visible for navigating through the results. To exit the score recap screen press the BACK function key. Rectifying an input error During the entry process
Chapter 5: Use of the Bridgemate® II scoring devices           44  If you have made an input error while the board result has not been confirmed yet by East, press CANCEL to rectify the error. In principle, it is possible to return to the board number input row by repeatedly pressing this button. It is also possible for East to reject the entered data by pressing CANCEL. The Bridgemate will now return to the input screen, and the entered data can be deleted by pressing CANCEL again. After East has confirmed the board result Once East has confirmed the score and the message “Entry completed” has been displayed, the score can only be edited in the following two ways: • By the tournament director through the special tournament director’s menu (TD-menu). See the section “TD-menu” below. • By the players themselves through the score recap screen. To allow this, it is required that in Bridgemate settings in BCS the option “Allow players to erase scores” is enabled. The score recap screen will show the CORREC function key. Press this function key, and when asked for the board number to correct, enter the board number followed by OK. The result is now erased and can be entered again by the players. Posting Bridgemate II scores Scores to Bridgemate Control Software Scores entered on the Bridgemates are first saved on the server. The Bridgemate Control Software program continuously reads the scores from the server and stores these in the result file. Posting scores in the scoring program Once the scores have been saved in the result file, your scoring program can post the scores. For more information, please consult the manual of your scoring program. TD menu Tournament directors have far-reaching powers to verify and edit the entered scores and to award adjusted scores. A special TD menu is available for this purpose. This menu is accessed with a 4 digit PIN code which must be set in Bridgemate settings in BCS. The default PIN code is 0000. It is advised that the PIN code is modified before the Bridgemates are brought into use. Activating the menu To access the TD menu, press the TDMENU function key whenever it is visible. The Bridgemate will ask for the TD PIN code.  Enter the 4 digit PIN code. The TD-menu will now appear.
Chapter 5: Use of the Bridgemate® II scoring devices           45           The TD-menu consists of two pages. Use the up and down function key to navigate between the two pages. To exit the menu, press the BACK function key. Menu options The TD-menu has ten options:  1. To enter an arbitral (adjusted) score, press ‘1’. 2. For an overview of the entered scores, press ‘2’. 3. To delete an entry, press ‘3’. 4. If you would like to view the corresponding table and section of the Bridgemate and/or the corresponding round and pairs, press ‘4’ (retrieve status). 5. To retrieve an overview of the board numbers not yet entered, press ‘5’. 6. To retrieve a score recap of the current round, press ‘6’. 7. A sub-menu for various hand record functions. 8. To reset the Bridgemate, press ‘0’. 9. To set the contrast of the screen, press + or -. 10. To retransmit all scores to the server, press the RESEND function key. All options are available from both pages by pressing the corresponding key. There is no need to move to page which lists the options in order to use them. Entering an arbitral score It is possible to specify in the Bridgemate that an adjusted score must be entered for a certain board. Proceed as follows: in the principle entry screen of the Bridgemate, enter the board number and confirm with OK. The cursor is positioned at CONTR. Now access the TD-menu by pressing the TDMENU function key, enter the PIN code, and once arrived in the TD-menu, press '1'. The following screen appears:  Enter the arbitral score for both pairs. You can choose between 40% (average-minus), 50% (average) and 60% (average-plus). Press 4 or – key to enter 40%, 5 or = key to enter 50%, 6 or + key to enter 60%. It is not possible to enter a value other than these percentages. Press OK after you have entered both percentages. The Bridgemate will now return to the result entry screen and the assigned arbitral score is now displayed at CONTR. Press OK to confirm this, and confirm the verification screen. The
Chapter 5: Use of the Bridgemate® II scoring devices           46  Bridgemate has now saved an arbitral score for this board and will feed this to the scoring program during read-out. Retrieving overview To obtain a overview of the results that have been entered on a specifc board on this table, use the view results function of the TD menu. To access this overview, press ‘2’ in the TD-menu. You will be asked to enter the board number. The overview displays the pair number, direction of play, contract and result. The number of score points is not displayed in this overview. Note Results that have been entered on the same board but in other Bridgemates, will not be shown in this overview. Erasing entry Tournament directors have always the option of erasing entries. This can either be a board result from the current round or the previous round. If board results have not yet been entered in the current round, the board result of the previous round will be erased. This method enables you to erase all results from the Bridgemate. To erase a board input, press ‘3’ in the TD-menu. You will be asked to enter a board number. Enter a board number and confirm with OK. If that particular board can be erased, the message “Board erased” will be displayed to indicate that the entered result has been erased. If the board has not yet been played, or not played on this table in the current or previous round, the Bridgemate will return a message saying that no results could be found for that board number. When the board has been played multiple times on that table, the Bridgemate will ask you from which round the result should be erased. Retrieving current status If you no longer know to which table and section the Bridgemate relates, you can retrieve this information in the status part of the TD menu. Press ‘4’ to retrieve the status. The expected table and section of the Bridgemate will be displayed first, followed by the current round, corresponding pairs at the table and the boards to be played in this round.  Overview of missing scores From the TD menu, it is easy to establish which boards of the round have not yet been entered. Press ‘5’. The Bridgemate will now display the numbers of the boards not yet entered in this round at this table. Retrieving score recap From the TD-menu, the TD has at any time access to the score recap of the current round, even when access to the score recap function has been disabled for the players. In order to retrieve the score recap of the current round, press ‘6’. Hand records menu From the TD-menu, various functions for hand records are available to the tournament director. These functions can be accessed at any time by the tournament director.
Chapter 5: Use of the Bridgemate® II scoring devices           47   1. To view a pre-loaded or manually entered hand record, press 1.  2. The TD can manually enter a hand record himself by using option 2. It is not needed that this board is currently played at the table. 3. To erase any hand record, press 3. This can also be a hand record which was entered in a different Bridgemate. See chapter 6 for more explanations about using hand records with Bridgemate. Resetting the Bridgemate The Bridgemate can be reset from the TD menu. Press ‘10’ and OK when prompted to confirm ‘Reset Bridgemate?’. It will now return to the main screen. Setting contrast It is possible to set the contrast of the screen from the TD menu. Press + to make the screen darker,  – to make the screen lighter. Press the button several times to adjust the contrast.  It is also possible to adjust the contrast if the Bridgemate is in the Bridgemate II main screen without using the TD-key. Retransmitting all scores Each score entered in the Bridgemate is stored in the Bridgemate’s internal memory. When one or more scores are entered, the TD-menu will show the function key RESEND. This allows the TD to retransmit all scores to the central server. For more information about its usage, see chapter 7, part “Resending results”.
Chapter 6: Additional Bridgemate functions           48   Chapter 6: Additional Bridgemate functions Bridgemate Control Software has a number of functions specifically designed for the Bridgemate II scoring devices. Bridgemate settings Bridgemate settings can be changed via the menu Tools à Options à Bridgemate tab and Bridgemate II tab.          Settings specified by Bridgemate Control Software or scoring program Bridgemate settings can be specified either by the scoring program or by BCS. If you want your scoring program to control Bridgemate settings, choose “Use Bridgemate settings specified by Scoring program”. Consult the manual of your scoring program for more information on how to set Bridgemate settings through the scoring program. Select “Use Bridgemate settings specified by Bridgemate Control Software” when you want to manually set the Bridgemate settings. Settings Displaying previous results overview and percentage To enable the Bridgemate to display an overview of previous board results, check the “Show previous results” option.  Results can be shown in six different formats: frequency lists consisting of 4 results per screen, 6 result per screen with score points in two columns, or 6 results per screen with score points in one column, or travelers consisting of 4 results, 6 results in two columns or 6 results in one column. Traveler will show all individual results including lead cards. The 4 results per screen format displays the results in a large font, the other two formats use a smaller font. If you would also like to display your own score in this overview, check the “Show own result” option. Your own score is indicated by a à (when showing six scores per screen) or by bold characters (when showing four scores per screen). Limit the number of scores to be displayed by entering a maximum number. To remove the limitation, set the maximum to unlimited. To display the board result percentage achieved so far, check the “Show percentage of own result” box.
Chapter 6: Additional Bridgemate functions           49   When multiple sections are calculated as one, you should check the option “Group sections for results”. The percentage will be calculated across the field, and the results on all boards with the same number are shown in the overview of previous results. Especially in this case, it is recommended to set a maximum number of scores you want the Bridgemate to show. Without doing so, the players will use up a greater amount of time watching the results at large sessions. Perspective of score points The score points can be displayed from the perspective of the declarer or from the North/South direction of play. In the latter case, score points are obtained by displaying East-West as an opposite score (4H+1 by East-West is displayed as -450 of -650). This applies to the score points displayed in the verification screen for East and the score recap. The overview of previous board results (frequency list and traveler) always shows the scores as North/South scores. The end of game summary always shows the score points from the perspective of the pair whose summary is being viewed. Entering results Results can be entered in three ways: as overtricks / downtricks, as the total number of tricks won, or by using the American style (tricks made/down). The default setting is overtricks / downtricks. Displaying the pair number If you do not wish to display the pair numbers in the round-information screen, disable the “Show pair numbers at round info” function. This option can be used for team-of-four events.  Transmitting contracts The Bridgemate offers users the option of feeding information to the server immediately after the contract and/or lead card have been entered. This could for example be displayed on vuegraph presentations while the game is still being played. If you wish to feed this information to the server, check the “Intermediate transmission of contract” box.  Board order verification Check the relevant box if you would like the Bridgemate to check whether the boards are to be played in the logical order. An error message will appear on the Bridgemate if the entered board number does not correspond to the logical order. The logical order starts with the first board of the round and the numbers of subsequent boards should be entered in ascending order. For example, if boards 1 to 4 are to be played in round A, the logical order is 1, 2, 3, 4. Lead card  If you would like to enter the lead card on the Bridgemate, check this setting. Member numbers If you would like to enter the member numbers on the Bridgemate, check this setting. By default, players have the option of leaving the entry blank when entering the member number. If entry of member numbers is compulsory, check the “Blank entry not allowed” box.  Validate member number Some federation member number systems contain an checksum for validating the member number. Bridgemate contains algorithms of selected federations. Choose the federation to which your club belongs. Note: many federations don’t have such an algorithm and these are therefor not listed. View contract Use this function to specify whether the Bridgemate uses card symbols or letters for displaying the contracts.
Chapter 6: Additional Bridgemate functions           50   Autopower-off periods The Bridgemate will automatically go into autopower-off mode if it remains idle for a while. The default setting is 20 seconds. To change this setting, enter a value between 5 and 60 seconds in “Autopower-off period”. In “Verification message”, enter the length of time you would like the message “Verification by East” to be displayed on the screen. More Bridgemate settings The following Bridgemate settings can be found on the tab Bridgemate II. Pair number entry as part of declarer The declarer on a board is normally indicated by its direction only. If you require an additional verification of a possible arrow switch of the pairs (not uncommon in Howell games where pairs switch direction), the Bridgemate allows you to enter the pair number as part of the declarer as well. When the combination of pair number and direction input is not valid, Bridgemate will warn the players. Show player names Show the names of the players at the start of each round. See the paragraph below for more information. Ranking and game summary To show the provisional ranking after a round or only at the end of the session, set the option Ranking to “Show ranking after each round” or “Show ranking at end of session only”.  If you enable the ranking, the end of game summary can be enabled as well. This summary provides to the pairs an overview of what scores they have achieved on each board. The summary can be shown in percentage or match points. TD PIN code Set the PIN code which protects the TD-menu from unauthorized access. TD confirmation for No Play  Check the “No Play requires TD confirmation” box if players must call the TD for approval when they did not play a board, e.g. due to time constraints. Show remaining boards to be played Enable this option if the Bridgemate must show the number of remaining boards to be played in the current round after East has confirmed the board result. Show seatings for next round To let the Bridgemate indicate to which table the pairs should go in the next round, enable the option “Next seatings at end of round”. The Bridgemate will tell the pairs to which table they should go and to sit in which direction, or that they should stay in their current position or that they will have a bye. Show score recap and allow score corrections To allow the players to retrieve a score recap of their own scores entered in the current round without the TD’s assistance, check this box. If you enable the option “Show score recap automatically”, the Bridgemate will show the score recap automatically at the end of the round, which encourages players to verify once more their results for correct entry. If players are allowed to make corrections to their own scores, check the box “Allow players to erase scores”.
Chapter 6: Additional Bridgemate functions           51   Automatic entry of board number If you want the Bridgemate to automatically fill in the board number and players only to confirm the number with OK, enable this option. This is convenient when boards are always or most of the time played in logical and ascending order. If board sharing takes place frequently and the order of boards played deviates from the logical order, it is advised to disable this function. Enter first board in round manually When boards are shared among tables, some tables will not start with the first board of the series as this board is played at the table which the boards are shared with. Enable this function when the first board should be excluded from automatic entry. Players will need to enter the first board number themselves. Enable RESET function key The RESET function, which returns the Bridgemate to the title screen, is available to the players after pressing the TDMENU function key, but without accessing the TD-menu. If you won’t allow the players to be able to reset the Bridgemate, disable this function. Recording of bidding and play Bridgemate has a build-in capability of recording the bidding and play. This feature is generally only used at the larger/international tournaments where live coverage of the game or full recording for statistic or review purposes is done. Refer to the Bridgemate developer’s guide for more information on this topic. Update settings during play Bridgemate settings are sent to the Bridgemates when a new session is started and Bridgemates log in to the server. It is also possible to modify the Bridgemate settings during play and have the Bridgemates using these new settings. To update the Bridgemate settings while the Bridgemates have already started the session, do as follows: 1. Update the Bridgemate settings either through the Bridgemate and Bridgemate II settings tab in menu Options, or through your scoring program (verify with your scoring program whether it relays any changes in Bridgemate settings made during the session towards the Bridgemate system) 2. Go to menu Server à Show Tables. 3. Select the tables you wish to update the settings for, or press CTRL + A to select all tables at once. 4. Press the “Update settings” button. All Bridgemates will now receive the modified settings. Upon their next contact with the server, the settings will be updated. Updating Bridgemate firmware The Bridgemate is controlled by a piece of software in the internal memory. This software can be changed from BCS. In concrete terms, this means that the Bridgemate can be updated and that new functions can be added. In other words, the Bridgemate can be updated without requiring you to purchase new Bridgemates. WARNING
Chapter 6: Additional Bridgemate functions           52   Only use this option on the instructions of the supplier. Incorrect use may result in faulty operation. Only use those files supplied by your supplier and follow the instructions carefully. We strongly advise against any other use.  Preparing the Bridgemates: • Collect all the Bridgemates you want to update. • Make sure they are set to the same region and channel as the server. • Make sure they show the main screen with the Bridgemate logo. • Bridgemates should have enough battery power; the battery indicator should not blink.   Preparing the computer: • Connect the server to your computer and the mains power. • Start Bridgemate Control Software (BCS) without an active session. BCS can be started from the Windows Start menu. • Make sure the region and channel settings of the server match those of the Bridgemates.  Starting the firmware broadcast: • In BCS, go to menu Tools à Bridgemate à Bridgemate II update firmware. • Click “Select firmware file”. • Browse to the desired .bm2 firmware file and click “Open” to open the file. • In case different versions are available in the firmware file, select the desired version. Otherwise, if there is only one version available, this version will be automatically selected. • Click “Upload firmware” to upload the firmware to the server. This may take a while to complete.  • Make sure “Continuous transmit” is checked and press “Transmit firmware”. Press OK to confirm.  The firmware is now continuously being broadcasted by the server. A progress bar shows the ongoing status of the server’s broadcast – starting again after reaching 100%.  This will continue until the “Stop transmission” button is pressed, or after the firmware has been broadcasted twenty times. Next step is to let the Bridgemates start receiving the firmware update. Receiving the firmware by the Bridgemates: • Press OK on the Bridgemate to awaken the device. • Press SETUP to enter the setup screen; if needed, enter pin code 749. • Press INFO to enter the version info screen. • Press UPDATE to enter the firmware update mode, and press OK to start the receive mode.  Provided that the firmware broadcast has been started in BCS, the Bridgemates will start receiving the firmware. A progress bar on the Bridgemate indicates how much of the firmware has been received. When the firmware is received completely, the Bridgemate will return to the main screen. After all Bridgemates have finished the firmware update, press “Stop transmission” to stop the broadcast and close the firmware update window.  Remarks: • Do not abort the transmission before all Bridgemates that are receiving the firmware update have finished. • In case firmware transmission has been interrupted, the Bridgemate will remain in firmware update mode until the firmware is again broadcasted and received fully by the Bridgemate. • The transmission progress bars in BCS and on the Bridgemate do not necessarily progress equally.
Chapter 6: Additional Bridgemate functions           53   • When the progress bar on the Bridgemates reaches 100%, it will usually take a few more seconds to complete as it waits for parts of the firmware to be resent. This is normal behaviour. • The firmware update mode in Bridgemate can be activated at any time. Bridgemates will automatically start receiving the firmware, even when the transmission has started earlier. Bridgemates do not have to be in the firmware update mode before firmware transmission is started.  Showing player names To promote correct seating of the players, Bridgemate offers the possibility to show the names of the players at the start of the round. By reviewing the names, players understand whether they have taken their correct positions. Proper functioning of this feature depends on the support for player names in the scoring program. Please consult the manual of your scoring program to decide how this Bridgemate function should be utilized. Configure name settings To show names on the Bridgemate, go to menu Tools à Options à Bridgemate à tab Bridgemate II and set the player names option to “Show names at each round”. Next, click “Settings” to configure which source BCS should use to find the player names.  Choose “Bridgemate score file” when the scoring program stores the player names in the result file at the start of the session. This is the most common approach. The scoring program will store all known names in the result file, and BCS will retrieve the names from here. Choose “BMPlayerDB.mdb lookup database file” when you have been provided a separate file named BMPlayerDB.mdb which contains all the player names. This option is mostly used at national tournaments where large player databases are required. Choose “No name source” when the scoring program preloads the names of the participating players at their actual table position, or when the program continuously retrieves the entered player numbers and returns the player names. This option is mainly used when the players pre-register for the event, and their seatings are known before the session starts. Choose “First Bridgemate score file, second BMPlayerDB.mdb lookup database file” when BCS should first search the Bridgemate result file, and if the number is not found, thereafter the BMPlayerDB.mdb lookup file.
Chapter 6: Additional Bridgemate functions           54   In case your club or federation uses names which may contain leading zeros, you should check “Use text-based number search”. This ensures that numbers like 123 and 00123 are treated as different players. Remark: • The location of BMPlayerDB.mdb can be configured from the General Options window. See chapter 3 “Program settings” for more information. Showing names using member numbers When players are not pre-registered, entry of member numbers at the start of the session is mandatory to recognize the players. Make sure that member number entry is enabled. BCS uses the member number to find the player name. This requires that the correct source for the player names has been selected, either “Bridgemate score file” or “BMPlayerDB.mdb lookup database file” and that the source contains the names. If the wrong source is selected, or the source doesn’t contain any names, BCS will not be able to find the player name.  Once BCS has found the player name, it will show the name and number in the “Players” tab, and show the name on the Bridgemate. Showing the names using pre-registration of the players When players pre-register and their seatings are allocated before the start of the session (players cannot take random seats, they must take their starting seats according to the scoring program’s instructions), the scoring program can load the names and numbers of the participating players when the session is started. Entry of member number is not required in this case. Player names are directly shown on the Bridgemate without any further action of the players. Check the manual of your scoring program whether this function is supported. Changing names When players entered accidently a wrong member number, corrections can be made in BCS from the Players tab. Double-click in the column “Name” at the correct table and direction, and enter a new name or modify the existing name. The new name will automatically show on the Bridgemate. Alternatively you may double-click on the member number and provide the correct member number. BCS will look up the name belonging to this member number and update the name. Using hand records Hand records are at the core of each bridge session. Bridgemate II contains extensive functionality for both viewing and entry of hand records. Hand records can be entered by the players during the session to save this valuable information into the Bridgemate result file and for further export to the club’s website for example. When pre-dealt boards are used and the hand record is digitally available in .dup (Duplimate) format, this file can be imported in BCS and hand records can be loaded into the Bridgemate II system. This is useful for TDs who can retrieve the hand record at any time from the Bridgemate device and also players can be allowed the possibility to review the hand record after the board is played (for verification purposes). Manual entry of hand records by the players In sessions where the boards are manually shuffled and dealt by the players, hand records can be entered on the Bridgemates during the session. To activate this functionality, go to menu Tools – Options – Bridgemate – tab Bridgemate II, and check the option “Enter hand records”. You can enter hand records at the end of the round or at the end of the board.
Chapter 7: Tips for use            55   Chapter 7: Tips for use Bridgemate logged on as the wrong table When a Bridgemate logs on under a wrong section or table number, this will have its effect on this Bridgemate, but also on the Bridgemate of the other table which section and table number has now been occupied. To rectify this situation, the Bridgemate has a simple “take over table” procedure. Just let the Bridgemate of the correct section/table start the session. It will prompt that the table was already started by another Bridgemate asks to proceed or to cancel. Press OK to proceed, and call the TD to confirm the take-over through his PIN code. After his confirmation, the table will start the session. The wrongly logged on table will now stop functioning and they will soon report themselves to the TD. See also chapter 5, paragraph “Starting the session” for more information. Replacing Bridgemate If for whatever reason you need to replace a Bridgemate during a session, and you are unable to log off the Bridgemate using its reset function, proceed as follows: - In BCS, go to menu Server à Show tables. - Select the relevant table and press “Log off table(s)”. The Bridgemate will now be logged off from the server. - Take another Bridgemate and set this Bridgemate to the correct section and table number. Also make sure to set the correct channel. - Activate this Bridgemate. The Bridgemate will take over the position of the old Bridgemate. Besides this procedure, it is also possible to use the “take over table” feature of the Bridgemate. This makes it extremely simple to replace a Bridgemate with a new one. Proceed as follows: - Remove the Bridgemate to be replaced out of the game. - Take another Bridgemate and set this Bridgemate to the correct section and table number. Also make sure to set the correct channel. - Activate this Bridgemate. It will inform you that the table has been started by another Bridgemate. Press OK to proceed, enter TD PIN code and press OK again. When it asks you to erase or retain previously entered data, press CONTIN to retain the data and continue where the old Bridgemate has left the game. This Bridgemate has now replaced the old Bridgemate. Recovering the server If the server is accidentally disconnected from the power supply, all data will be lost and the Bridgemates will stop functioning. Bridgemate Control Software is able to recover the old situation. Proceed as follows: - Make sure the server is reconnected to the power supply. - In BCS, go to menu Session à Synchronize client <-> Server. - Go to the “Recovery” tab and press “Recover server”. All information from the result file will now be moved to the server.
Chapter 7: Tips for use            56   When recovering the server, it is important that all scores have been moved previously from the server to the result file. If this is not the case, scores that have not been moved to the computer will be lost and the server cannot restart fully from the previous position. Make sure therefore that the data retrieval is always activated during the session. Procedure in the event of data loss The security of the board results entered in the Bridgemate II scoring system is given top priority. The best defense against data loss is to store the results in multiple locations, namely: • The Bridgemate memory All results entered in the Bridgemate are sent to the server. At the same time, each result is also stored in the Bridgemate’s internal memory. These results are stored until the Bridgemate is started up again for a new session. Then the memory will be erased. The data remains stored in the internal memory of the Bridgemate, even if no batteries are installed. • The server memory Results entered in the Bridgemate are sent to the server, and stored in the server’s internal memory. It is essential that the server is connected to a power source (batteries and/or power adapter). If there is no power source, or in the event of power failure, all data will be lost. • Bridgemate Control Software result file and log file BCS continuously reads the new results from the server and processes these into the result file. This data is immediately written to the hard disk of your PC, ensuring the data is safe even in the event of power failure. All results shown on the BCS screen have been written to the result file. BCS also has a log file, containing all the relevant events. All received results are written to this log file. To view the log file, go to the Tools à Show log file menu.  • Session file in your scoring program Lastly, the scoring program retrieves the results from the result file. The scoring program stores the results in its own files. The results are therefore stored in five locations in total. In the event of data loss in one of the five locations, it is possible to check whether the results are still stored at the next level up, and to reprocess the results from that location. Scoring program data loss  In the event of data loss in the scoring program, check whether the results are still stored in the BCS result file. The recommended method is to launch BCS from the Windows Start menu à All Programs à Bridgemate II. Once BCS is started up, go to the File à Open menu and select the result file you used for your session. If the results appear on the screen, they have been stored in the result file. The results can now be reprocessed from the scoring program. For further information about processing Bridgemate results, see the instructions included with the scoring program. Bridgemate Control Software data loss If the result file contains no results (see the above-mentioned step), it is possible to retrieve them from the server and to read them in the result file. The first step is to check whether the results are still stored on the server. Use the Server à Show all scores menu for this purpose. All the results stored in the server will now be shown. If the correct results are shown, it is possible to read them manually using the Server à Show tables menu. Select all tables (hold down the left mouse button and the Shift key) and press “Retrieve scores”. The results of the selected tables are retrieved from the server and processed in the result file. The results can now be read by the scoring program.
Chapter 7: Tips for use            57   Server data loss  If neither the server, nor the result file, nor the scoring program contains any data, your last resort is to retrieve the results from the Bridgemates. All results entered in the Bridgemate are stored in the internal memory of the Bridgemate and can be resend to the server. See paragraph “Resending results” for more information. Warning The board results are stored in the internal memory of the Bridgemate. Once the Bridgemate has been started up again for a new session and the first result is entered and confirmed, the memory is erased and all the data removed. Ensure that no players are operating the Bridgemates at the end of the session to avoid a possible loss of data. Retrieving results from the log file Results can also be retrieved from the log file. All results entered in BCS are stored in the log file. To view the log file, go to the Tools à Show log file menu. The selected rows can be copied and saved to an empty text file and printed. Automatic processing is not possible; the results must be entered manually in the scoring program. The actual file, BMProLog.log, is located in the Bridgemate Control Software folder, normally C:\Program files\Bridgemate Pro. Resending results The Bridgemate retains the board results in its internal memory. With a simple command these results can be resent to the server. This is useful when results have been erased from both the computer and server inadvertently and your last resort is the Bridgemate device itself.  Results can be resent from both the TD-menu and the setup menu. Proceed as follows: 1. Make sure the server is connected, and is loaded with the session data (tables, movements). When all data in the server was lost as well, restart the Bridgemate II scoring system from your scoring program in order to load the session data back in the server. 2. a) Bridgemates which are still in result entry mode can resend the results from the TD-menu. Access the TD-menu with the TDMENU function key and PIN code, and press RESEND function key. b) Bridgemates which show the main screen can resend the results from the setup menu. Press SETUP function key to access the setup menu, press INFO function key, followed by RESEND function key. 3. The number of board results in the Bridgemate memory is displayed. Press OK to start the retransmission. Retransmission will only succeed when the server is activated and contains the session data. 4. After retransmission, the board results can be posted in the scoring program using the normal procedures.  Multiple bridge clubs playing simultaneously There may be times when two or more bridge clubs are playing at the same time in one building. As the Bridgemate II server can incorporate a specific table number only once at a time, it is not possible for two clubs to make use of one server simultaneously. Both bridge clubs will therefore require their own server. It is of course vitally important that they do not interfere with each other. This problem can be rectified by getting the systems to communicate over different channels. The first club sets its system (server and Bridgemates) to channel 0, while the other uses channel 1. A third and fourth club
Chapter 7: Tips for use            58   can then use channel 2, 3, etc. This method enables multiple clubs to use the Bridgemate II scoring system simultaneously without causing any interference. Large tournaments During large tournaments, more than one server will be required to control over 256 tables. The layout of the tables is important in this respect. If the tables are outside the range of the server, an extra server will be needed to increase the range. The Bridgemate II scoring system supports multiple servers over a network. In principle, this network can support an unlimited number of tables. The following guidelines must be observed: - You will need a fully operational network in which all used PCs are interconnected, enabling them to access and process files. - Only one result file is used, containing all session data and board results of all tables. - The scoring program is running on one of the computers in the network. It is not necessary for the scoring program and/or the result file to be running on one of the client computers that run BCS. From an organizational point of view, it may be easier to use a separate PC containing the scoring program and result file. Client PCs access the result file over the network. - Each Bridgemate server is connected to its own PC (=client) where BCS is running. Do not connect two servers to one client. Although technically feasible, it may cause unnecessary confusion, as both servers are using the same client name. Worse still, it may even be counter-productive if both servers are operating over the same channel. - Use different channels for each server, especially if the servers are within range of each other. Only use the same channels if you are sure that the servers are not interfering with each other (e.g. in different buildings). Using Bridgemates II and Bridgemates Pro together If you have both a Bridgemate Pro and a Bridgemate II system, it is possible to use both systems together to score a single event. As Bridgemates II only communicate with a Bridgemate II USB server, and Bridgemates Pro only communicate with a Bridgemate Pro server, it is a requirement that both servers are connected to the computer. To use both Bridgemate Pro and Bridgemate II in your event, act as follows: 1. Before you start Bridgemates, connect both Bridgemate II USB server and Bridgemate Pro server to your computer. The Bridgemate Pro server can be connected through the USB-serial converter. Please refer to the manual of Bridgemate Pro for operation instructions of the Bridgemate Pro server. 2. Start the Bridgemate system from your scoring program. This will start the Bridgemate II system first. 3. After the Bridgemate Control Software has been loaded and Bridgemate II has been activated, click on menu Session à Start Bridgemate Pro concurrently. This will load a second instance of the Bridgemate Control Software and this program instance will start the Bridgemate Pro server. You are now ready to use the both systems together. 4. When the session is finished, you manually close both instances of Bridgemate Control Software. Please keep in mind the following when working with both systems together:
Chapter 7: Tips for use            59   • All tables will be loaded into the Bridgemate II server and the Bridgemate Pro server. You decide which tables are used by the Pro system, and which by the II system. As a consequence, both systems may show that certain tables are not activated yet within their server, as they are logged into the other server. • Make sure that both Bridgemate Pro and Bridgemate II have their own tables, for example section A uses Bridgemate II, and section B uses Bridgemate Pro.  • Scores are exchanged between the two systems. Scores entered in Bridgemate Pro will also appear on the Bridgemate II scoring devices, and vice versa. • A movement update will first be carried out by Bridgemate II, and a few seconds later by Bridgemate Pro. This is done automatically. • If you accidently close the second instance of BCS, you can start it again by using the same menu Session à Start Bridgemate Pro concurrently. It will remember that it has already been started before, and will not start from round 1 but instead continues from where it left at the moment you closed the program. • Bridgemate II has more settings than Bridgemate Pro. Bridgemate Pro will only use those settings that are for Bridgemate Pro only. For example, the names appearing on Bridgemate II will not appear on Bridgemate Pro.
FCC statement            60   FCC statement Radiation Exposure Statement  This equipment complies with FCC RF radiation exposure limits set forth for an uncontrolled environment. This equipment must not be co-located or operating in conjunction with any other antenna or transmitter. This device complies with Part 15 of the FCC Rules. Operation is subject to the following two conditions: (1) This device may not cause harmful interference, and (2) This device must accept any interference received, including interference that may cause undesired operation.  NOTE: This equipment has been tested and found to comply with the limits for a Class B digital device, pursuant to part 15 of the FCC Rules. These limits are designed to provide reasonable protection against harmful interference in a residential installation. This equipment generates, uses and can radiate radio frequency energy and, if not installed and used in accordance with the instructions, may cause harmful interference to radio communications. However, there is no guarantee that interference will not occur in a particular installation. If this equipment does cause harmful interference to radio or television reception, which can be determined by turning the equipment off and on, the user is encouraged to try to correct the interference by one or more of the following measures: • Reorient or relocate the receiving antenna. • Increase the separation between the equipment and receiver. • Connect the equipment into an outlet on a circuit different from that to which the receiver is connected. • Consult the dealer or an experienced radio/TV technician for help.   Caution: Any changes or modifications not expressly approved by Bridge Systems BV could void the user's authority to operate the equipment.   Canada Regulatory Compliance Statement  This device complies with Industry Canada Standard RSS-210. Operation is subject to the following two conditions: (1) this device may not cause harmful interference, and (2) this device must accept any interference, including interference that may cause undesired operation of the device.  Ce dispositif est conforme avec la norme CNR-210 d’Industrie Canada. Le fonctionnement du dispositif est sujet aux deux conditions suivantes: (1) le dispositif ne doit pas causer de brouillage, et (2) le dispositif doit accepter tous brouillages, incluant tous brouillages.
    EC Declaration of Conformity  to the Essential Requirements of  the applicable Directive 1999/5/EC  We, Bridge Systems BV, Rotterdam The Netherlands, declare under our sole responsibility that the Radio-communication products  Product Name:    Bridgemate® II Product Description:   Bridgemate® II Wireless Scoring System Model Number of the Server:   BMS2-1 Model Number of the Table Terminal:  BM2-1  are fully in conformity with the essential requirements of the Council Directive 1999/5/EC (R&TTE). This declaration is based on the full compliance of the products with the following European Standards:  Radio:   EN 300 220-3 v1.1.1  EMC:   EN 301 489-1&3 v1.4.1 (August 2002)  Electrical safety: EN 60950-1:2001    Authorized Representative: BRIDGE SYSTEMS BV     Postbus 21570     3001 AN  Rotterdam     The Netherlands  Date:  August 31st, 2009  Signed:        R.F. Bouwland   Executive Director
   English  Hereby, Bridge Systems BV, declares that this Bridgemate® II Wireless Scoring System is in compliance with the essential requirements and other relevant provisions of Directive 1999/5/EC. Finnish Bridge Systems BV vakuuttaa täten että Bridgemate® II Wireless Scoring System tyyppinen laite on direktiivin 1999/5/EY oleellisten vaatimusten ja sitä koskevien direktiivin muiden ehtojen mukainen. Dutch  Hierbij verklaart Bridge Systems BV dat het toestel Bridgemate® II Wireless Scoring System in overeenstemming is met de essentiële eisen en de andere relevante bepalingen van richtlijn 1999/5/EG. French  Par la présente Bridge Systems BV déclare que l'appareil Bridgemate® II Wireless Scoring System est conforme aux exigences essentielles et aux autres dispositions pertinentes de la directive 1999/5/CE. Swedish  Härmed intygar Bridge Systems BV att denna Bridgemate® II Wireless Scoring System står I överensstämmelse med de väsentliga egenskapskrav och övriga relevanta bestämmelser som framgår av direktiv 1999/5/EG. Danish  Undertegnede Bridge Systems BV erklærer herved, at følgende udstyr Bridgemate® II Wireless Scoring System overholder de væsentlige krav og øvrige relevante krav i direktiv 1999/5/EF. German  Hiermit erklärt Bridge Systems BV, dass sich dieses Bridgemate® II Wireless Scoring System in Übereinstimmung mit den grundlegenden Anforderungen und den anderen relevanten Vorschriften der Richtlinie 1999/5/EG befindet. (BMWi) Greek ΜΕ ΤΗΝ ΠΑΡΟΥΣΑ Bridge Systems BV ΔΗΛΩΝΕΙ ΟΤΙ Bridgemate® II Wireless Scoring System ΣΥΜΜΟΡΦΩΝΕΤΑΙ ΠΡΟΣ ΤΙΣ ΟΥΣΙΩΔΕΙΣ ΑΠΑΙΤΗΣΕΙΣ ΚΑΙ ΤΙΣ ΛΟΙΠΕΣ ΣΧΕΤΙΚΕΣ ΔΙΑΤΑΞΕΙΣ ΤΗΣ ΟΔΗΓΙΑΣ 1999/5/ΕΚ. Italian  Con la presente Bridge Systems BV dichiara che questo Bridgemate® II Wireless Scoring System è conforme ai requisiti essenziali ed alle altre disposizioni pertinenti stabilite dalla direttiva 1999/5/CE. Spanish  Por medio de la presente Bridge Systems BV declara que el Bridgemate® II Wireless Scoring System cumple con los requisitos esenciales y cualesquiera otras disposiciones aplicables o exigibles de la Directiva 1999/5/CE. Portuguese Bridge Systems BV declara que este Bridgemate® II Wireless Scoring System está conforme com os requisitos essenciais e outras disposições da Directiva 1999/5/CE. Malti Hawnhekk, Bridge Systems BV, jiddikjara li dan Bridgemate® II Wireless Scoring System jikkonforma mal-ħtiġijiet essenzjali u ma provvedimenti oħrajn relevanti li hemm fid-Dirrettiva 1999/5/EC. Estonian Käesolevaga kinnitab Bridge Systems BV seadme Bridgemate® II Wireless Scoring System vastavust direktiivi 1999/5/EÜ põhinõuetele ja nimetatud direktiivist tulenevatele teistele asjakohastele sätetele. Hungarian Alulírott, Bridge Systems BV nyilatkozom, hogy a Bridgemate® II Wireless Scoring System megfelel a vonatkozó alapvetõ követelményeknek és az 1999/5/EC irányelv egyéb elõírásainak. Slovak Bridge Systems BV týmto vyhlasuje, že Bridgemate® II Wireless Scoring System spĺňa základné požiadavky a všetky príslušné ustanovenia Smernice 1999/5/ES. Czech Bridge Systems BV tímto prohlašuje, že tento Bridgemate® II Wireless Scoring System je ve shodě se základními požadavky a dalšími příslušnými ustanoveními směrnice 1999/5/ES. Slovene Šiuo Bridge Systems BV deklaruoja, kad šis Bridgemate® II Wireless Scoring System atitinka esminius reikalavimus ir kitas 1999/5/EB Direktyvos nuostatas. Lithuanian  Šiuo Bridge Systems BV deklaruoja, kad šis Bridgemate® II Wireless Scoring System atitinka esminius reikalavimus ir kitas 1999/5/EB Direktyvos nuostatas. Latvian Ar šo Bridge Systems BV deklarē, ka Bridgemate® II Wireless Scoring System atbilst Direktīvas 1999/5/EK būtiskajām prasībām un citiem ar to saistītajiem noteikumiem.

Navigation menu