Brightstar A710 Mobile phone User Manual
Brightstar Corporation Mobile phone
user manual

PN: 5839004523

ALL RIGHTS RESERVED
© 2012. All rights are reserved. No part of this document may be reproduced without
permission.
While all efforts have been made to ensure the accuracy of all contents in this manual, we
assume no liability for errors or omissions or statements of any kind in this manual, whether
such errors or omissions or statements resulting from negligence, accidents, or any other
cause. The contents of this manual are subject to change without notice.
Protect our environment! We strive to produce products in compliance with global
environmental standards. Please consult your local authorities for proper disposal.
Note: User’s Manual is Just to guide the user about the functionality of the phone. This does
not seems any certificate of technology. Some functions may very due to modifications and
up gradations of software or due to print mistake.

TABLE OF CONTENTS
ALL RIGHTS RESERVED .............................................................................. 1
TABLE OF CONTENTS .................................................................................. 2
SAFETY PRECAUTIONS ............................................................................... 4
GENERAL INFORMATION ............................................................................ 1
Antenna ....................................................................................................................... 1
Network Service .......................................................................................................... 1
Accessories ................................................................................................................. 1
PHONE OVERVIEW ....................................................................................... 2
Notification Panel ........................................................................................................ 3
Using the Touchscreen ............................................................................................... 3
ADDING A NEW HOME SCREEN ITEM ........................................................ 4
MOVING A HOME SCREEN ITEM ................................................................. 4
REMOVING A HOME SCREEN ITEM ............................................................ 4
Locking and Unlocking the Screen ............................................................................. 5
GETTING STARTED ...................................................................................... 6
Installing SIM Card and Battery .................................................................................. 6
Installing Memory Card ............................................................................................... 6
Charging the Battery ................................................................................................... 7
Switch On/Off the Phone ............................................................................................ 8
BASIC OPERATIONS .................................................................................... 9
Make Calls .................................................................................................................. 9
To Dial International Number ...................................................................................... 9
Clear Wrong Enters .................................................................................................. 10
Adjusting the Sound Volume ..................................................................................... 10
Answer/Reject an Incoming Call ............................................................................... 10
MAIN MENU ................................................................................................. 11
Phone ........................................................................................................................ 11
Messaging ................................................................................................................. 12
Browser ..................................................................................................................... 13
Email ......................................................................................................................... 14
Market ....................................................................................................................... 14
Maps ......................................................................................................................... 14
Music ......................................................................................................................... 15
Camera ..................................................................................................................... 16
Video Player .............................................................................................................. 16
File Manager ............................................................................................................. 16
Gallery ....................................................................................................................... 17
Clock ......................................................................................................................... 17
Calculator .................................................................................................................. 18
Calendar ................................................................................................................... 18
FM Radio .................................................................................................................. 18
Sound Recorder ........................................................................................................ 18
Gmail ......................................................................................................................... 18
Settings ..................................................................................................................... 18
APPENDIX ................................................................................................... 25
Troubleshooting ........................................................................................................ 25
FCC Regulations: ...................................................................................................... 25
RF Exposure Information (SAR) ............................................................................... 26
SAFETY PRECAUTIONS
Before using your phone, please read the following important information to eliminate or
reduce any possibility of causing damage and personal injury.
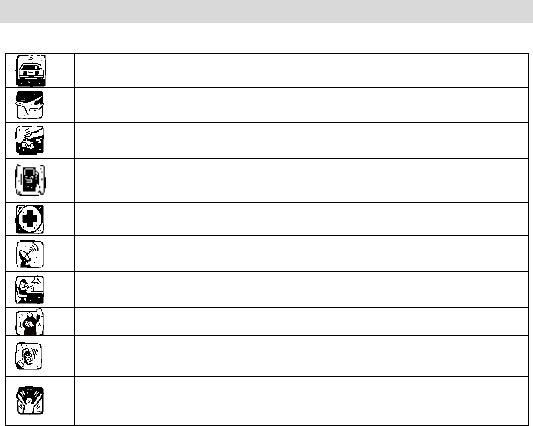
Do not use wireless phones while driving.
Switch off wireless devices in aircraft. The signal may cause interference.
Using them on aircraft is illegal.
Do not use mobile phones where blasting is in progress. Follow any
regulations and rules strictly.
Do not use mobile phones at Petrol stations. Don’t use near fuel or
chemicals. Do not dispose your battery or mobile in a fire.
Follow any regulations or rules in hospital and health care facilities. Switch
phone off near medical equipment.
All wireless devices may get interference that could affect performance.
The repair or installation of the device should be done at Authorized service
centers
Use only approved accessories and batteries.
Use only in normal position. Do not expose your phone to temperatures
between -10C ~ +55C. Do not use anything static to clean your phone.
Ensure the phone is turned on and in service. Enter the emergency number,
then press Pick Up key. Give your location. Do not end the call until told to
do so.
Improper use will invalidate the warranty! These safety instructions also apply to original
accessories.

1
GENERAL INFORMATION
Antenna
Use of other antenna devices could damage your mobile phone and reduce performance.
Your phone has a built-in antenna. Don’t touch the antenna area unnecessarily when the
phone is switched on. Contact with the antenna affects call quality and may cause the phone
to operate at a higher power level than otherwise needed.
Network Service
A lot of features described in this manual are called network service. They are special
services provided by wireless service providers. You should subscribe to these services
from your home service provider and learn instructions on uses before you select the
network you want to use.
Accessories
Li-Ion battery is the manufacturer-approved rechargeable battery available for your phone.
May be some batteries performs best after several full charge/discharge cycles.
Use batteries, chargers and accessories approved by the phone manufacturer with this
particular model. The use of any other types will invalidate any approval or warranty applying
to the phone, and may be dangerous.
Please consult with your dealer for availability of approved accessories.
2
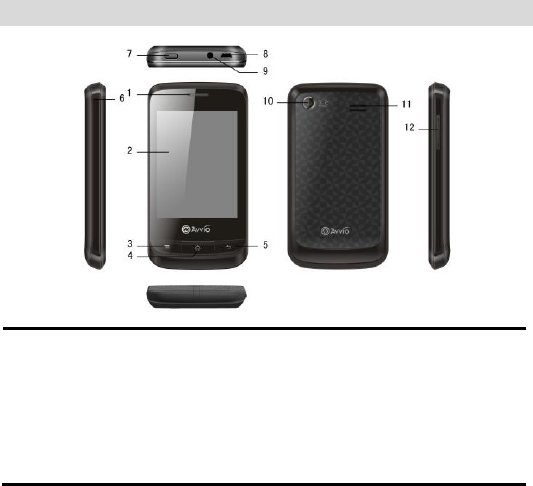
PHONE OVERVIEW
1
Receiver
7
Power Key
2
Screen
8
Earphone Jack
3
Left Soft Key
9
USB Connecter
4
Home Key
10
Camera
5
Back Key
11
Speaker
6
Cord Hole
12
Side Keys
3
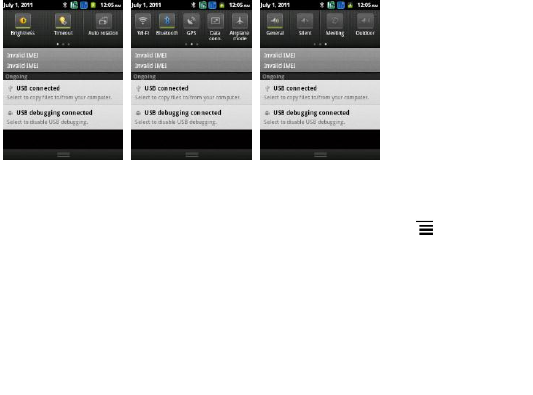
Notification Panel
Your mobile phone will notify you when you receive a new message or there is an upcoming
event. The notification panel also informs you of alarms and settings. Open the notification
panel to see your network operator or to view a message, reminder, or event notification.
Opening the Notification Panel
1. When a new notification icon appears on the notification bar, place your finger on the
notification bar and flick down to open the notification panel.
You can also open the notification panel from the Home screen: Press > Notifications
to open the panel.
2. On the panel, you can:
• Touch a notification to open the related application.
• Touch Clear to clear all notifications.
Closing the Notification Panel
Touch and hold the bottom of the panel. Then flick up to close it.
Using the Touchscreen
Touchscreen Actions
• Touch: Tap the screen with your finger to select an item, confirm a selection, or start an
application.

4
• Touch and hold: Touch an item with your finger and do not release it until the mobile
phone responds. For example, to open the options menu for the active screen, touch and
hold the screen until the menu appears.
• Flick: Move your finger either vertically or horizontally across the screen.
• Drag: Touch and hold the desired item with your finger. To move an item, drag the item to
any part of the screen. You can drag an icon to move or delete it.
Rotating Your Mobile Phone Screen
The orientation of most screens will change to landscape or portrait view when you rotate
your phone sideways.
Note: On the Home screen, Press > Settings > Display > Auto-rotate screen to
disable this function.
Viewing Other Parts of the Home Screen
The phone features a full touch screen with idle displays and access to utilities at just
one-touch. So swipe right or left to navigate through various screens accessing your favorite
features without entering the main menu. In the standby mode, tap the screen and then drag
left or right to view the desktop screens.
Customizing the Home Screen
Adding a New Home Screen Item
1. Touch and hold a blank area on the Home screen until the Add to Home screen menu is
displayed.
Note: You can also Press > Add on the Home screen to display the Select Flick your
finger left or right across the Home screen.
2. Select an item to add it to the Home screen.
Moving a Home Screen Item
1. Touch and hold an item on the Home screen until the item expands in size and the mobile
phone vibrates.
2. Without lifting your finger, drag the item to the desired position on the screen, and then
release it.
Removing a Home Screen Item
1. Touch and hold an item on the Home screen until the item expands and the mobile phone
5
vibrates.
2. Without lifting your finger, drag the item to the trash can. When the item and the trash can
turn red, the item is ready to be removed.
3. Release the item to remove it from the Home screen.
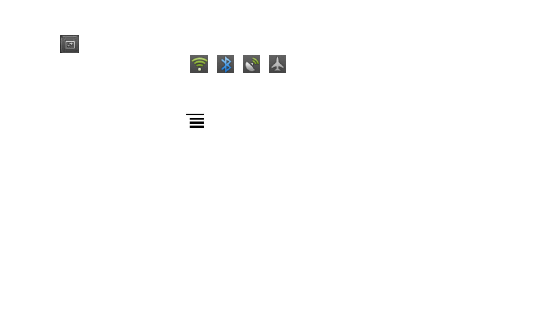
Service Shortcuts
1. Open the notification bar.
2. Touch at the top of the screen to switch data services on or off.
Note: You can also touch icon , , , , or turn the corresponding services on or
off.
Changing the Wallpaper
1. On the Home screen, Press > Wallpaper.
2. Touch the following menu items to select a picture and set it as the wallpaper:
• Gallery
• Live wallpapers
• Wallpapers
Locking and Unlocking the Screen
Locking the Screen
• When your phone is on, press the power key to lock the screen. When the screen is locked,
you can still receive messages and calls.
• If your phone is idle for a while, the screen will lock automatically.
Unlocking the Screen
1. Press the power key to wake up the screen.
2. Drag up the screen to unlock the screen.
6
GETTING STARTED
Please switch off your phone before inserting or removing the battery/SIM card or memory
card.
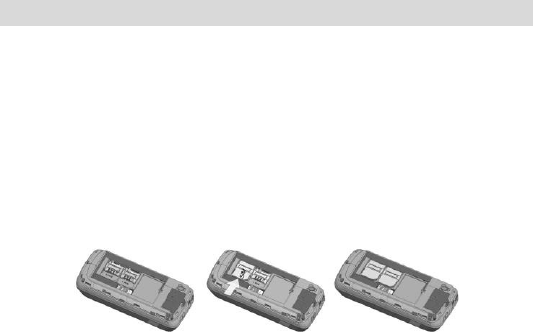
Installing SIM Card and Battery
Your phone is provided with two SIM slots for two different SIM cards. The SIM card inserted
in the slot1 is called SIM1, and the other one in the slot2 is known as SIM2.
Hold the phone with the front facing downwards; pull the battery cover.
Remove the back cover of the phone.
Insert the SIM cards in the slots.
Attach the battery.
Push the battery cover until it clicks into place.
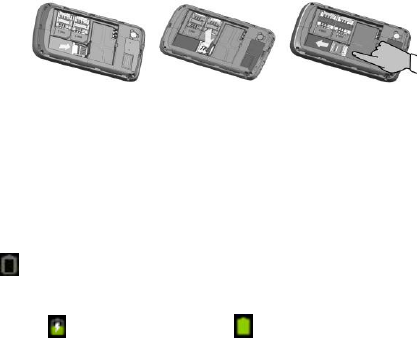
Installing Memory Card
The phone supports T-Flash card, which is a multimedia memory card used to multiply the
memory of the phone. The T-flash card is small and should be pulled out /installed carefully
and prudently in order to avoid any kind of damage.
Switch off your phone.
Remove the battery cover.
7
Slide the T-Flash card into the slot.
Attach the battery.
Push the battery cover until it clicks into place.
Charging the Battery
The phone prompts a warning tone and message stating insufficient battery when the power
of your phone is low. Please follow the instructions mentioned below to charge your phone:
Plug the connector of the charger into the jack of the phone.
Plug the charger into a standard AC wall outlet.
Note:
When is shown on the screen, it indicates that there is not enough power and you
should now charge your phone. When charging is complete, the battery icon will stop
flashing.
Charging……. Fully Charged……
You must fully charge the battery before using the phone for the first time. It is recommended to
charge the battery for four hours before using the phone for the first time.
If the phone is turned on during charging, you can still make or answer calls, but this will
consume battery power, thus will extend the charging time of the phone.
8
Switch On/Off the Phone
To turn on/off the phone, press and hold the Power Key. If you have enabled the SIM Lock
function then enter the PIN code (the 4 to 8 digits secret code of your SIM card). It is
preconfigured and provided to you by your network operator or retailer. If you enter an
incorrect PIN code 3 times in succession, your SIM card will be locked. To unlock it, you
must obtain a code from your network operator.
9
BASIC OPERATIONS
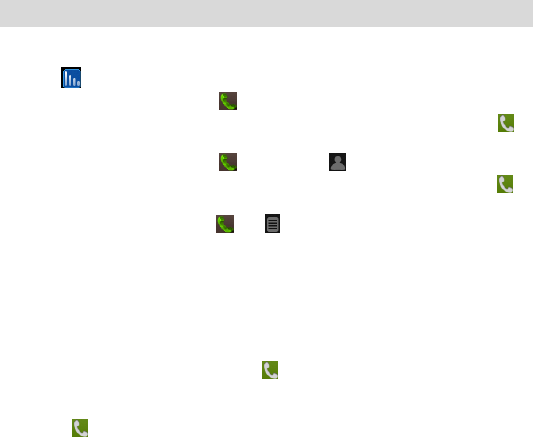
Make Calls
If the icon appears on the screen, then you can make or receive calls.
In the standby mode, tap Dialer , enter the desired phone number (should affix the
international/ national/ regional code or district code if necessary) and then tap to
make a call.
In the standby mode, tap Dialer , tap Contacts , use the scroll bar to select the
desired contact or enter the initials of the name to be searched and then tap to
make a call.
In the standby mode, tap Dialer , tap to dial a phone number listed in the recent
call log.
To Dial International Number
The phone supports dialing the international emergency phone number. Using your handset,
you can dial an emergency call in any country or region under the normal situation
regardless of SIM card inserted when the phone is located within the coverage of the GSM
network.
Input the emergency phone number and tap to dial.
In the idle mode, tap the * twice to prefix the international symbol +.
Enter the country code, area code and phone number.
Tap to make an International call.
The phone will select the main network automatically after powered on if it is located within
the coverage of the main network. The phone can use other network, called as roaming, if

10
the phone is not located within the coverage of the main network when the network operator
protocol permits.
Clear Wrong Enters
If you tap a wrong number, tap to erase the wrong number.
Adjusting the Sound Volume
During a call, you can press the Side Key to adjust the earpiece volume.
Answer/Reject an Incoming Call
To answer an incoming call, drag the icon from left to right. You can use the
earphone to answer the call when the generic earphone is inserted in the phone.
To end or reject an incoming/ongoing call, drag the icon from right to left.
11
MAIN MENU
Menu guides you to the various features, applications and services available in your phone.
Tap access to the Main Menu.
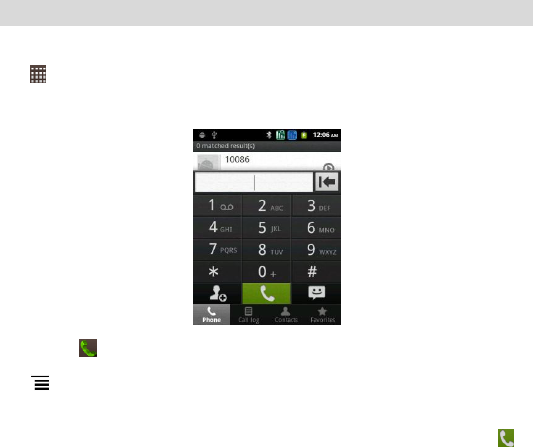
Phone
Tap the icon at the bottom of the Phone app to access Phone dialer, Call log, Contacts,
Favorites. In the Contacts pane, you can search through your contacts by name. Press the
key for more call related options.
Phone
This opens the dialer pad for you to enter the desired phone number and then tap to
make a call.
12
Call log
Access the call log menu to view the call details of the SIM1 and SIM2.
All Calls
This sub-menu lets you view the call details i.e. the missed, received and dialled call logs.
Scroll Up/Down to select a call and then select view to see the details. Long press the call
detail to perform the operations, such as call, send text message, add to contacts, and so on
Dialled/ Missed/ Received Calls
With this function, you can check recent dialed/ missed/ received calls. Scroll Up/Down to
select a call. Long press the call detail to perform the operations.
Contacts
This menu refers to the directory wherein all the contacts are stored in an alphabetical order.
You can view, edit, delete, send message and perform various other functions on each
contact of your phonebook.
Favorites
You can add some contacts to your list of favorites. Touch the contact you want to add to
your favorites.
Messaging
When F1 is locked, drag up the screen and tap icon access the Messaging app.
Tap and hold the Input box and tap “Input method” to switch between FKeyboard or Android
keyboard.
Press the key for more call related options: Add subject, Attach, Insert quick text, Insert
smiley, etc.

13
Browser
Load web pages in overview mode with the optimized browser, pinch to zoom in and out,
and auto fit web pages to the screen.
14
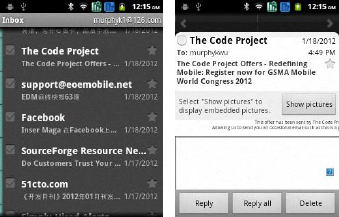
Email
By entering your e-mail address and password details, you’ll set up your personal account
that allows you to access e-mails on the go.
Market
App market featuring high quality, hand-picked Android apps. Sorted by the panes New, Top
and Categories; Market also synce application downloads with your phone account.
Maps
Locates your position quickly and precisely via GPS, compass, 3G, and WLAN triangulation.
15
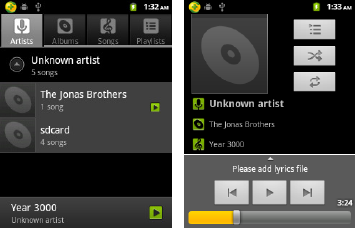
Music
Supporting both mainstream and lossless audio formats, the Music app lets you easily use
playlists, edit ID3 tags and adjust sound preferences.
16
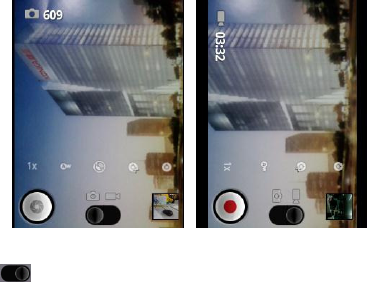
Camera
The phone is provided with a 3.2 MP camera, which supports the photographing and video
shooting functions. Pictures are saved in the file system of the phone or the memory card.
You can tap to switch between video and camera mode.
Combine auto-focus and touch-to-focus to take clearer photos; and let you share them
immediately with your friends via E-mail. MMS or Bluetooth.
Video Player
The video player supports a wide range of video codec’s, displays video information, playlist
thumbnails and texts, and lets you fast-forward and rewind during video playback.
File Manager
Copy, move or share files with this tree structured file explorer.
17
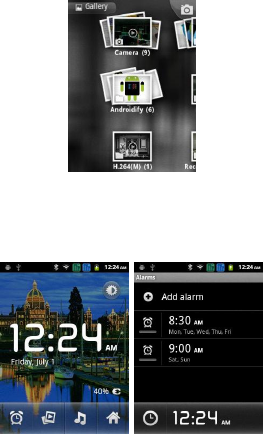
Gallery
Slide, double tap or pinch-to-zoom or flip pictures; auto-rotate between landscape and
portrait for your viewing pleasure.
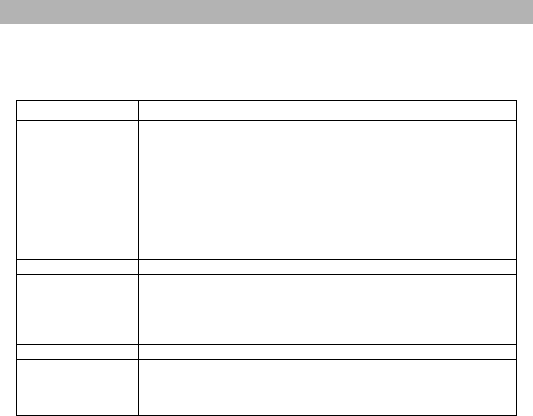
Clock

18
The mobile phone provides several alarms and you can set them as your need. If you have
configured an alarm, an icon indicated that you have configured the alarm will appear. No icon will
show if you don’t set an alarm.
Calculator
Calculator enables you to make basic arithmetic calculations, such as addition, subtraction,
multiplication and division. Enter the numbers using on-screen keyboard and choose the
desired operator. Use CLEAR to delete the entered numbers and = to get the output.
Calendar
You can view and edit the memo of a specified date with this function.
FM Radio
You can use your phone to listen to FM radio stations once the original Headset is plugged
into the connector. Please press the side key to adjust music volume. Tap the ( / ) to
play/stop the FM radio. Tap the ( ) to search the channels.
Sound Recorder
You can record conversations, which can be saved to the Audio folder under File Manager.
Gmail
Gmail is Google’s web-based email service. When you first set up your phone, you may have
configured it to use an existing Gmail account or create a new account.
The first time you open the Gmail application on your phone, your Inbox will contain the messages
from your Gmail web account.
Settings
To configure your mobile phone, touch > Settings.

19
Setting the Date and Time
By default, your mobile phone automatically uses the date, time, and time zone provided by
the network.
When your mobile phone is using the date and time settings provided automatically by the
network, you cannot manually set the date, time, and time zone.
1. On the Settings screen, touch Date & time.
2. Clear the Automatic check box.
3. Touch Set date. On the set date screen, touch or to adjust the date, month, and year, and
then touch Set when the configuration is complete.
4. Touch Select time zone, and then select the desired time zone from the list. Scroll the list
to view more time zones.
5. Touch Set time. On the set time screen, touch or to adjust the hour and minute. Touch
Set when the configuration is complete.
6. Select or clear the Use 24-hour format check box to switch between 24-hour and
12-hour formats.
7. Touch Select date format to select how you want the date to display on your mobile
phone.
Setting the Display
Adjusting the Screen Brightness
1. On the Settings screen, touch Display > Brightness.
2. Drag the slider left to make the screen darker, or right to make it brighter.
3. Touch OK to save the adjustment.
Adjusting the Time Before the Screen Turns Off
If your mobile phone is idle for several minutes, it will turn off the screen to save battery
power. To set a longer or shorter idle time:
1. On the Settings screen, touch Display > Screen timeout.
2. Select the duration you want the screen to be illuminated.
Setting Wi-Fi
You can access Wireless Application Protocol (WAP) sites and use WAP-based services on
your phone. To access WAP sites, you need to subscribe to the service from your service
provider and set the relevant parameters on your phone. Tap the status bar and scroll down

20
to open the notification bar. The notification bar provides immediate access to Wi-Fi.
Setting Bluetooth
You can transfer data, such as music to other device using Bluetooth. Search the device and
accept/transfer data. The received data is automatically stored in the directory.
Setting Ringers
Turning On Silent Mode
1. On the Settings screen, touch Audio profiles.
2. Select the Silent mode check box to silence all sounds except alarms, and music and
video media.
Note: The phone will automatically enter the headset profile if you connect the headset to
your phone.
Adjusting the Volume
You can adjust the volume from the Home screen or any application screen (except during a
call or when playing music or videos). Press the Volume keys to adjust volume to the level
you desire.
You can also adjust the volume from the settings screen.
1. On the Settings screen, touch Audio profiles > General/ Meeting/ Outdoor > Volume.
2. Drag the slider left to make the volume lower, or right to make it higher.
3. Touch OK to save the adjustment.
Changing the Phone Ringtone
1. On the Settings screen, touch Audio profiles > General/ Meeting/ Outdoor > Phone
ringtone.
2. In the displayed list, select an option:
• Ringtone: Select a preinstalled ringtone. The ringtone plays when selected.
• Music: Select the music stored in the phone or on the microSD card. The music plays
when selected.
3. Touch OK.
Changing the Message Ringtone
1. On the Home screen, touch > Messaging.
2. In the message list, Press > Settings > Select ringtone.
Select a preinstalled ringtone. The ringtone plays when selected.

21
4. Touch OK.
Setting Phone Services
Customizing Call Settings
Mobile phone service providers offer different services such as call forwarding, call waiting,
fixed dialing numbers, and voicemail. You can customize many of these services if they are
part of your calling plan.
On the Settings screen, touch Call settings to customize your call functions.
Turning on Data Roaming
1. On the Settings screen, touch SIM management > Data connection.
2. Select SIM1 or SIM2 check box.
Note: Accessing data services while roaming may incur additional charges. Ask your
wireless service provider about data roaming fees.
Switching off the Data Service
1. On the Settings screen, touch SIM management > Data connection.
2. Select the Off check box.
Configuring Text-to-Speech
Use the Text-to-Speech settings to configure the Android text-to-speech synthesizer, for
applications that can take advantage of this feature.
Installing Voice Data
1. On the Settings screen, touch Voice input & output > Text-to-speech settings > Install
voice data.
2. If your mobile phone does not have speech synthesizer data installed, connect to Android
Market and let it guide you through the process of downloading and installing the data.
3. Follow the instructions to install the voice data.
Adjusting the Speech Rate
1. On the Settings screen, touch Voice input & output > Text-to-speech settings >
Speech rate.
2. Select a speed at which the text is to be spoken.
Protecting Your Mobile Phone
Turning on Your SIM Card PIN
1. On the Settings screen, touch Security > Set up SIM card lock.

22
2. Select the Lock SIM card check box.
3. Use the keyboard to enter the PIN, and then touch OK.
4. To change the PIN at any time, touch Change SIM PIN.
Note: You can dial emergency numbers any time from your mobile phone.
Protecting Your Mobile Phone with a Screen Lock
To keep your data more secure, lock the screen and/or require a screen unlock pattern
every time your mobile phone is turned on or wakes up from sleep mode.
1. On the Settings screen, touch Security > Set up screen lock > Pattern.
2. Flick your finger vertically, horizontally or diagonally, connect at least four dots in any
order you choose. Lift your finger from the screen when you are finished.
You must drag your finger between the dots on the screen to create the pattern, not simply
touch individual dots.
3. Your mobile phone will record the pattern. Touch Continue.
4. When prompted, draw the screen unlock pattern again, and then touch Confirm.
To change your unlock screen pattern, touch Security > Change screen lock.
Protecting Your Mobile Phone with a Numeric PIN
You can set up a numeric PIN to lock your phone.
1. On the Settings screen, touch Security > Set up screen lock > PIN.
2. Enter at least four characters.
3. Touch Continue.
4. Enter the same characters again and touch OK.
To change your PIN, touch Security > Change screen lock.
Managing Applications
Viewing an Installed Application
1. On the Settings screen, touch Applications > Manage applications.
2. In the applications list, do either of the following:
• Touch , and then touch Sort by size. Then touch an application to view its details.
• Touch an application directly to view its details.
Uninstalling an Application
Note: You cannot uninstall the applications that are pre-installed on the system.
1. On the Settings screen, touch Applications > Manage applications.
2. Touch an application, and then touch Uninstall.

23
Moving an Application to the microSD Card
Some applications are designed to be stored on your phone’s USB storage or microSD card
(depending on the model of your phone), rather than in its internal storage. Others are
designed so you can change where they are stored. You may find it helpful to move large
applications off your internal storage, to make more room for other applications that do not
offer the option.
1. On the Settings screen, touch Applications > Manage applications.
2. Touch an application in the list. Then touch Move to SD card to move the bulk of the
application from the phone’s internal storage.
The Storage section of the application’s details screen shows details about the memory
used by the application. If the application can be moved, the Move to SD card button is
active.
Touch Move to phone to move the application back to the phone’s internal storage.
Ways to Free Up Your Mobile Phone Memory
• Move files and email attachments to the microSD card.
• In Browser, clear all temporary Internet files and Browser history information.
• Move applications to the microSD card.
• Uninstall any downloaded programs that you no longer use.
• Reset your mobile phone.
Resetting Your Mobile Phone
Backing Up My Data
You can use your Google account to back up your mobile phone’s settings to Google
servers. If you replace your mobile phone, the settings you have backed up will be
transferred to the new mobile phone the first time you sign in to your Google account.
1. On the Settings screen, touch Privacy.
2. Select the Back up my data check box.
Restoring Factory Data
If you reset your phone to the settings that were configured at the factory, all of your
personal data stored on the phone, including information about your Google Account, any
other accounts, your system and application settings, and any applications you have
downloaded will be erased. Resetting the phone does not erase any system software
updates you have downloaded or any files on your microSD card, such as music clips or

24
photos.
1. On the Settings screen, touch Privacy > Factory data reset.
2. When prompted, touch Reset phone, and then touch Erase everything. The mobile
phone resets the settings to the original factory settings, and then restarts.
Setting Power Saving Mode
1. On the Settings screen, touch Power saving mode.
2. Select the Power saving mode check box.
Synchronizing Information
Some applications on your mobile phone give you access to the same personal information that you
can add, view, and edit on your computer. If you add, change, or delete your information in any of
these applications on the web, the updated information also appears on your mobile phone.
This is made possible through over-the-air data synchronization. The process occurs in the
background and does not interfere with use of your mobile phone. When your phone is
synchronizing, a data synchronization icon will be shown in the notification bar.
25
APPENDIX
Troubleshooting
This section lists some problems that you might meet while using your phone. If you feel that your
phone do not operate normally, please reset settings first, and then follow Troubleshooting Guide. If
you are still unable to solve problems, please contact the authorized service center or the store from
where you purchased the phone.
Problems
Solutions
Can not answer or
make a call
Make sure that the phone has been switched on.
Make sure that the battery is charged.
Make sure that the signal intensity is high enough.
Make sure the own number function in the call setting is system
preset or number sending.
Make sure the line switch in call setting is the system preset line.
Check whether you have set up call barring or fixed dialing or any
other safety function.
Check whether you have set up call diverts. Check whether you
have inserted the proper SIM card correctly.
Low voice
Check if the volume has been set too low.
No ring
Check whether you have set up the” Silent” option.
Check whether the ring volume is not too low
Move away from a noisy place to check if you can hear the phone
ringing.
Check whether you have set up call diverts.
LCD unclear
Check whether the contrast has been set too low.
T-Flash card
detect slowly
Format your T-Flash card with your phone.
Note: To protect your files from getting lost, please backup the
important information into the safe place before you formatting
card.
FCC Regulations:
This mobile phone complies with part 15 of the FCC Rules. Operation is subject to the
following two conditions: (1) This device may not cause harmful interference, and (2) this device
must accept any interference received, including interference that may cause undesired operation.
26
This mobile phone has been tested and found to comply with the limits for a Class B
digital device, pursuant to Part 15 of the FCC Rules. These limits are designed to provide
reasonable protection against harmful interference in a residential installation. This equipment
generates, uses and can radiated radio frequency energy and, if not installed and used in
accordance with the instructions, may cause harmful interference to radio communications.
However, there is no guarantee that interference will not occur in a particular installation If this
equipment does cause harmful interference to radio or television reception, which can be
determined by turning the equipment off and on, the user is encouraged to try to correct the
interference by one or more of the following measures:
-Reorient or relocate the receiving antenna.
-Increase the separation between the equipment and receiver.
-Connect the equipment into an outlet on a circuit different from that to which the receiver is
connected.
-Consult the dealer or an experienced radio/TV technician for help.
Changes or modifications not expressly approved by the party responsible for compliance
could void the user‘s authority to operate the equipment.
The antenna(s) used for this transmitter must not be co-located or operating in
conjunction with any other antenna or transmitter.
RF Exposure Information (SAR)
This mobile phone meets the government’s requirements for exposure to radio waves.
This phone is designed and manufactured not to exceed the emission limits for exposure to
radio frequency (RF) energy set by the Federal Communications Commission of the U.S.
Government.
The exposure standard for wireless mobile phones employs a unit of measurement known
as the Specific Absorption Rate, or SAR. The SAR limit set by the FCC is 1.6W/kg. *Tests for
SAR are conducted using standard operating positions accepted by the FCC with the phone
transmitting at its highest certified power level in all tested frequency bands. Although the SAR is
determined at the highest certified power level, the actual SAR level of the phone while operating
can be well below the maximum value. This is because the phone is designed to operate at

27
multiple power levels so as to use only the power required to reach the network. In general, the
closer you are to a wireless base station, the lower the power output.
The highest SAR value for the model phone as reported to the FCC when tested for use at
the ear is 1.15 W/kg and when worn on the body, as described in this user guide, is 0.741 W/kg
(Body-worn measurements differ among phone models, depending upon available accessories and
FCC requirements.)
While there may be differences between the SAR levels of various phones and at various
positions, they all meet the government requirement.
The FCC has granted an Equipment Authorization for this model phone with all reported
SAR levels evaluated as in compliance with the FCC RF exposure guidelines. SAR information on
this model phone is on file with the FCC and can be found under the Display Grant section of
www.fcc.gov/oet/ea/fccid after searching on FCC ID: WVBA710.
For body worn operation, this phone has been tested and meets the FCC RF exposure
guidelines for use with an accessory that contains no metal and the positions the handset a
minimum of 1.0 cm from the body. Use of other accessories may not ensure compliance with FCC
RF exposure guidelines. If you do not use a body-worn accessory and are not holding the phone
at the ear, position the handset a minimum of 1.0 cm from your body when the phone is switched on.