Brightstar AVVIO100 GSM Mobile Phone User Manual WVB AVVIO100
Brightstar Corporation GSM Mobile Phone WVB AVVIO100
user manual

1
Contents
1. Foreword .......................................................................................................... 5
2. Safety Precautions ........................................................................................... 6
3. Introduction to This Phone ............................................................................. 8
3.1 Keys ........................................................................................................ 9
3.2 Display Screen ........................................................................................ 9
3.3 Status Icons ............................................................................................. 9
3.4 LCD Backlight ....................................................................................... 9
4. Quick Introduction ........................................................................................ 10
4.1 Remove the Battery Cover and Insert the SIM Card ........................... 10
How To Install ...................................................................................... 10
SIM Card Precautions: ......................................................................... 10
4.2 Install the Battery and Battery Cover: ................................................... 11
4.3 Charge/Recharge the Battery................................................................. 11
4.4 Use of Battery ....................................................................................... 12
Monitoring Battery Power .................................................................... 12
Battery Power Reminder ...................................................................... 12
4.5 Turn On or Off ...................................................................................... 13
4.6 First Call ............................................................................................... 13
4.7 Use of Password ................................................................................... 14
Phone Lock ........................................................................................... 14
PIN Code .............................................................................................. 14
PUK Code ............................................................................................. 15
PIN2 Code ............................................................................................ 15
PUK2 Code ........................................................................................... 15

2
Bar Password ........................................................................................ 16
5. General Functions ........................................................................................ 16
5.1 Dial a Number ...................................................................................... 16
International Call: ................................................................................. 16
Dial an Extension Number ................................................................... 16
Dial a Number By Use of the Phonebook ............................................ 16
Re-dial the Last Number ...................................................................... 17
Speed Dial: ........................................................................................... 17
5.2 Adjust Volume ...................................................................................... 17
5.3 Answer a Call ....................................................................................... 17
5.4 Option During a Call: ........................................................................... 18
Call Waiting.......................................................................................... 18
Call Holding ......................................................................................... 18
Answer a Second Call .......................................................................... 18
Hold/Swap ............................................................................................ 19
Mute/Unmute ........................................................................................ 19
Built MPTY: ......................................................................................... 19
5.5 Input Methods ....................................................................................... 20
5.6 Keypad Lock ........................................................................................ 20
6. Menu Instructions ......................................................................................... 21
6.1 Phonebook ............................................................................................ 21
Search ................................................................................................... 21
Create a New Entry .............................................................................. 22
Delete .................................................................................................... 22
Copy ..................................................................................................... 23
3
Setting ................................................................................................... 23
Storage Status ....................................................................................... 23
Speed Dial ............................................................................................ 23
6.2 Short Message ...................................................................................... 23
Write Message ...................................................................................... 24
Inbox ..................................................................................................... 24
Outbox .................................................................................................. 25
Drafts .................................................................................................... 25
Voice Mail ............................................................................................ 25
Broadcast Message ............................................................................... 26
Delete All .............................................................................................. 26
Check Storage ....................................................................................... 26
Message Counter .................................................................................. 26
Message Setup ...................................................................................... 27
6.3 Call Records ......................................................................................... 27
Incoming Calls ..................................................................................... 27
Outgoing Calls ...................................................................................... 28
Missed Calls ......................................................................................... 28
Delete .................................................................................................... 28
Call Duration ........................................................................................ 28
6.4 Settings ................................................................................................. 28
Display Settings .................................................................................... 28
Clock Settings ....................................................................................... 29
Call Settings.......................................................................................... 30
Phone Settings ...................................................................................... 30

4
Security ................................................................................................. 3 0
Network Settings .................................................................................. 31
Shortcuts ............................................................................................... 34
Factory Default ..................................................................................... 34
6.5 Profiles .................................................................................................. 34
Standard ................................................................................................ 34
Conference ............................................................................................ 35
Outdoor ................................................................................................. 35
Indoor ................................................................................................... 35
Headset ................................................................................................. 35
6.6 Tools ..................................................................................................... 35
Calendar ................................................................................................ 35
Alarm .................................................................................................... 35
Calculator ............................................................................................. 36
Flashlight .............................................................................................. 36
FM Radio .............................................................................................. 37
SIM Tool Kit ........................................................................................ 37
7. Extras: ............................................................................................................ 38
7.1 Maintenance ......................................................................................... 38
7.2 Specification Parameters ...................................................................... 39
7.3 Battery Information .............................................................................. 39
7.4 Disposal of Waste or Worn Battery ...................................................... 40

5
1. Foreword
Thank you for purchasing this mobile phone. To obtain best performance
of your phone, please read this user manual carefully.
This cell phone of the latest mode adopts the advanced technologies .It
allows communication signals to shift between the single frequency
mode and the dual frequency mode.
This product also offers such functions as Mid ring tone, Message,
multiple Alarms. Besides, it also provides Calculator, Calendar, FM
Radio, Flash Light, etc. which all help you ease both your work and life,
and allow you to communicate in a more effective and convenient way.
Important Notices
You are strongly recommended to keep a separate written record of all the
important data. The manufacturer assumes no responsibility for any data lost as a
result of accidents, improper use, replacement of batteries or any loss incurred by
the third party which may arise from the use of this device.
Our company reserves the right of amending the contents in this manual, and
owns the right of final interpretation to the contents, as well.
6
2. Safety Precautions
Please read through the following briefings carefully, and act in
accordance with these rules, so as to prevent causing any danger or
violating any law.
Safe driving
1)Do not use the phone when driving. When you have to use the phone,
please use the personal hands-free kit.
2)Please put the phone safely in the phone stand. Do not put it onto any
passenger seat or any place from which it may fall down in case of
vehicular collision or emergency braking.
Turn off during a flight
Flight is influenced by interference caused by the phone. It is illegal to
use a phone on the airplane. Please turn off your phone during a flight.
Turn off the phone when within an area where blasting takes place.
Be sure to strictly observe the related laws and statutes by turning off the
phone when you are within, or in the vicinity of, an area where blasting
takes place.
Turn off the phone when any dangerous goods are in vicinity
Please turn off your phone when you are within a gas station or in the
vicinity of any place where fuel and chemical preparations, or any other
dangerous goods are stored.
In hospital
Please obey the related rules or bylaws of the hospital when using your
phone in a hospital. Be sure to turn off your phone when near any
medical equipment. Your use of any wireless transmission equipment,

7
inclusive of the phone, will interfere with any medical equipment that is
not protected fully, and other electronic equipment items, too. Should
you have any question in this regard, please consult a related physician
or medical equipment supplier.
Interference
Each and every phone’s performance may be affected due to radio
interference.
Professional service:
The phone must be installed or repaired by no other personnel than
professionals. You are likely to suffer a huge risk when you install or
repair this phone by yourself, which also goes against the warranty rules.
Fittings and battery
You shall use the fittings and battery acknowledged by the phone
manufacturer only.
Proper use
Please use the phone in the normal way. Do not touch the antenna
unnecessarily after the phone is turned on.
Emergency call
You may enter a telephone number (112, etc.) to ask for emergency help
after making sure that the phone has been turned on and is in the service
status. Press the Send Key to call out, and report your position and
introduce what has happened briefly. Do not end the call without
authorization.
Note: Like any other phone, this phone’s specific features may not be
supported by some network whose coverage or wireless signaling is
troubled (some network does not support calling for emergency service
8
by 112, even). Therefore, do not rely wholly on this phone in case of
some especial emergency (such as medical first aid, etc.). Please consult
your local network operator for verification.
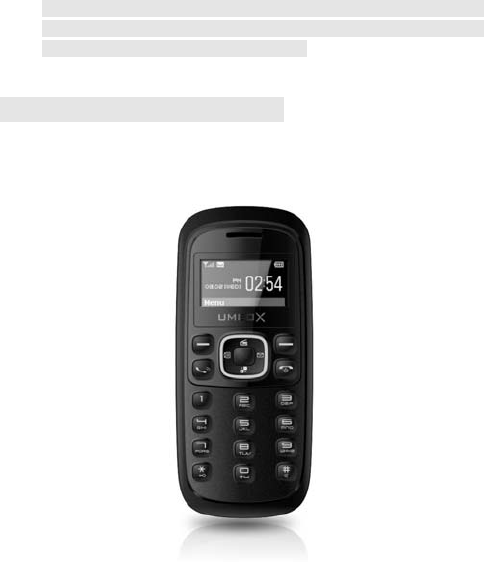
3. Introduction to This Phone
Front View

9
3.1 Keys
3.2 Display Screen
This phone has only one LCD (master LCD), which comprises three
parts:
1) Status icons are on the top which shows the signal strength and
battery power level, etc.
2) Behavioral Text and Graphics Area are in the middle, which shows
numbers, words and icons.
3) Names of the instruction are shown at the bottom.
3.3 Status Icons
| | | | | | |
| | | | | | |______ Battery power level
| | | | | |__ ____ _ Call divert (Changing by line)
| | | | |_________________ International Roam
| | | |_______________________Alarm on
| | |_____________________________ New Short Message
| |___________________________________Earphone
|_______________________________________ Received signal strength
Ring tone status: --- Mute ----- Ring
3.4 LCD Backlight
The backlight time duration on the display screen and keypad can be set
in Display Settings. If you do not press any key within a certain period of
time, the backlight will be turned off automatically when the set time

10
duration expires.
4. Quick Introduction
4.1 Remove the Battery Cover and Insert the SIM Card
The SIM card stores your phone numbers, PIN (personal identification
number), PIN2, PUK (PIN phone unlocking key), PUK2 (PIN2
unlocking key), IMSI (international mobile subscriber identity) codes
and network information, as well as Phonebook and SMS (Message
service) data, etc.
How To Install
1) Put the phone backside up, press the concave part on the battery
cover; push the battery back downward to take it out.
2) Locate the SIM card seat, and push the metal side of the SIM card
downward into the seat.
Note: The cropped corner of the SIM card shall correspond to that of
the mark.
Note: When installing the SIM card, make sure the phone is turned off,
and disconnected from other devices such as charger, etc.
SIM Card Precautions:
1)Turn off the phone, and wait a few seconds before pulling out or
inserting the SIM card again.
2)Handle the SIM card with care, as friction or bending is prone to
causing damage on the SIM card.
3)When the phone is not in use, please keep the SIM card in a place out

11
of children’s reach.
4) If a wrong SIM card is inserted or the SIM card is damaged, the
screen will display “No SIM Card” after the phone is turned on. Take out
the SIM card, check if it has been inserted along the correct route, and
then insert it into the phone again.
5)If the screen displays “SIM Card Damaged”, please forward it to the
network operator for repair.
4.2 Install the Battery and Battery Cover:
1) Refer to “How to remove the battery cover” to take out the battery
cover.
2) Aim the metal side of the battery at the metal contact area on the
phone (where the battery connector’s resilient slide), push the battery
into the battery seat.
3) Replace the battery cover, push it upward until tight.
4.3 Charge/Recharge the Battery
1) Put the phone backside up, find the charger socket at the side of the
phone.
2) Connect the charger with the charger socket; the shape of the plug
must be consistent with the socket.
3) Connect the other end of the charger with the power source.
4) After finishing charging, switch off the power, pull out the plug.
Notes:
1) If the remaining power in the battery is too low to turn on the phone,
you have to charge the phone for a relatively period of time, before the

12
screen resumes its indication of the power in the battery.
2) Make sure that the standard voltage and power in your place match
with the rated voltage and power of the charger.
3) During the charging/recharging period, you may turn on or off the
phone.
4) Use the battery only for its intended purpose. Never use any charger
or battery that is damaged.
4.4 Use of Battery
Monitoring Battery Power
When the battery is low:
1) The battery low message displays.
2) The empty battery icon blinks.
Battery Power Reminder
1) If the battery is not in use for a long time, please charge the battery
fully before putting it away.
2) The battery can be charged and discharged hundreds of times, but it
will eventually wear out. When the talk and standby times are noticeably
shorter than normal, replace the battery.
3) If the battery is completely discharged, it may take a few minutes
before the charging indicator appears on the display or before any calls
can be made.
4) Your device is powered by a rechargeable battery. The full
performance of a new battery is achieved only after two or three
complete charge and discharge cycles.
5) If a replacement battery is being used for the first time or if he battery
has not been used for a prolonged period, it maybe necessary to connect

13
the charger then disconnect and reconnect it to begin charging the
battery.
4.5 Turn On or Off
1) Press the End key for a short while, the phone will be turned on. The
screen shows a Power-on display.
2) Enter the wallpaper screen.
3) Enter your phone lock password when you are requested, by the
display screen, to do so, and press the Left soft key to confirm.
4) Enter your PIN code when you are requested, by the display screen,
to do so, and press the Left soft key to confirm.
5) Press the End key for a short while, to turn off the phone.
Note: The wallpaper screen is showed on the screen when the phone is
turned on and remains in idle mode.
4.6 First Call
1) Insert the SIM card (firstly, turn off the phone and take out the
battery). For detailed instructions on installation, please refer to “4.1
Remove the Phone’s Back Cover and Insert the SIM Card”.
2) Charge the phone’s battery. Refer to “4.3 Charge/Recharge the
Battery”.
3) Press the End key for a short while to turn on the phone.
4) Enter the area code and telephone number, and press the Send
Key .
Note: Before using the phone, be sure to insert an effective SIM card into
the phone at first, and charge the battery.

14
4.7 Use of Password
Your phone and SIM card have multiple passwords, which help prevent
your phone and SIM card from being used illegally.
Enter the correct password when you are requested to enter any of the
passwords that are introduced below (marked by a “*”), then press the
Left soft key to confirm. If you enter a wrong password, please press the
Right soft key to delete the wrong password firstly, before entering the
correct numerals.
You may use the menu “Settings —> Security” to change the PIN code,
PIN2 code and Phone Lock Password.
Phone Lock
The phone lock password is used to prevent your phone from being used
illegally. Usually, the phone lock password is supplied together with the
phone by the manufacturer. The default is 0000.
After the phone is locked up, you will be requested to enter the phone
lock password before turning it on again.
PIN Code
PIN code (4-8 digits) is used to prevent your SIM card from any
unauthorized use. The PIN code is usually provided together with the
SIM card by the network operator.
If the PIN verification function is activated, then you will be requested to
enter the PIN code every time when you turn on the phone.
If you have entered a wrong PIN code for three times, the SIM card will
be locked up.
Warning: Once you have entered your PIN codes wrongly for three times,

15
the SIM card will be locked up, and not be unlocked until you enter your
PUK code. The PUK code is usually kept by the network operator.
PUK Code
The PUK code (a password used to crack the PIN code, 8 digits) is used
to crack a locked PIN code. The PUK code is provided together with the
SIM card by the network operator. If not supplied, please contact your
network operator. In case you have entered your PUK code wrongly for
10 times, then the SIM card will lose its effect; in such a case, please
contact your network operator to replace your SIM card with a new one.
PIN2 Code
The PIN2 code (4-8 digits) is provided together with the SIM card, and
used to set such functions as “Call Cost” and “Fixed Dial”, etc.
To find out if your SIM card supports such functions, contact your
network operator.
If you have entered your PIN2 code wrongly for 3 times, the PIN2 code
will be locked up, and not be cracked until you enter the correct PUK2
code.
PUK2 Code
The PUK2 code (a password to crack the PIN2 code, 8 digits) is used to
crack a locked PIN2 code. The PUK2 code is provided together with the
SIM card by the network operator. If not supplied, please contact your
network operator. In case you have entered your PUK2 code wrongly for
10 consecutive times, you will be unable to use those functions that can
not be activated without the PIN2 code. To use such functions, contact
your network operator and replace the SIM card with a new one.
16
Bar Password
To activate the barred dial, it is necessary to use the Call-bar password.
When you apply for such a network function, you may acquire this
password from your network operator.
5. General Functions
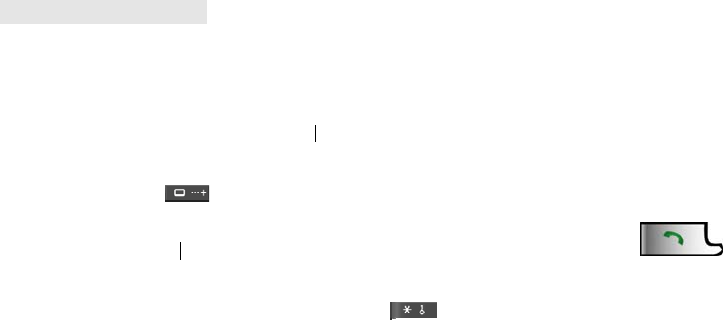
5.1 Dial a Number
1) In Idle mode, enter an area code and telephone number, and press the
Send key to dial the number.
2) Press the End key to end the call.
International Call:
Long press the key , the screen shows a “+” symbol. Enter the
country code, area code and telephone number, and press the Send
key to call out.
Dial an Extension Number
After entering the operator’s number, long press the key , the
screen shows a “p” symbol, then enter the extension number, and press
the Send key to call out.
Dial a Number By Use of the Phonebook
1) In Idle mode, press the down key to access the Phonebook List, search
for your desired item; The method: press the key containing the initial
letter of the name you want, and then press Up/Down Key to find
your desired name.

17
2) Press the Send Key to dial the number.
Re-dial the Last Number
1) In Idle mode, press the Send key to display the call records.
Press the Left/Right key to displays those telephone
2) Numbers of Incoming calls, Outgoing Calls and Missed Calls, use the
Up/Down Key to select your desired number.
3) Press the Send key to dial the number.
Speed Dial:
1) Edit the speed dial numbers in “Phonebook — Speed Dial”.
2) Press the numerals (2~9) on the Speed Dial list in Idle mode for a
short while to dial your desired number.
5.2 Adjust Volume
During a call, yon can press the Left and Right key to adjust the volume
directly.
5.3 Answer a Call
1) When someone is calling you, the phone will give a ring tone or
vibrate.
2) Press the Send Key to answer the call.
3) To end the call, you can press the End key .
4) To turn down a call, you can press the End key directly or
the Right soft key.
Note: If the caller ID can be identified, the phone will show the
telephone number of the caller (if this telephone number has been stored

18
into your Phonebook, then the caller’s name will be displayed).
5.4 Option During a Call:
During a call, you can use multiple control functions.
Call Waiting
If the network supports Call Waiting function, and you have activated
the Call Waiting function, you will hear a beep during a call if a third
person calls you.
Call Holding
If the network supports the Call Holding function, you can make another
call when talking to someone:
1) Directly enter a number or take the phone number you desire from the
Phonebook, press the Send key to make a second call.
2) The first call is held automatically after the second call is connected.
You can press the Right soft key to swap between them.
Answer a Second Call
1) Press Send key to answer the second call, and the first call
(on line) is held automatically; As for how to proceed after you
receive the second call, please refer to “Hold/Swap”.
Note: This function need to activate the Call Waiting function.
2) Press End key or press the Right soft key .
to turn down the second call, and continue with your current call.
19
Hold/Swap
When the first call is held, and you are answering a second call:
You can press the Right soft key to swap the first call for talking, and the
second call is held.
You can press the Left soft key to enter the option list screen to select
Mute, Hands-free, Build MPTY, Release All or Phone Book to execute.
Mute/Unmute
This function can turn off or on the phone’s microphone and other
microphone connected. The “Mute” function can prevent the person
whom you are talking to from hearing your voice.
During a call, press the Left soft key to enter the Option list to
select “Mute” to turn off , you can press the Left soft key again to select
“Unmute” to turn it on.
Built MPTY:
If the network supports the MPTY function, you can make a conference
call.
When you are answering a call and another call is held, you can press the
Left soft key to enter the option list to select Built MPTY to build a
conference call.
When the conference call is on, you can press the Left soft key to enter
the option list to select Browse MPTY to view the members, you can
press the Left soft key to enter the option list to select Split to split the
conference call or select Disconnect to end the selected call.
When the conference call is on, you can press the Right soft key to hold
the conference call, and dial another call.
20
When a call is incoming, you can press the Send key to answer it and the
conference call is held automatically.
5.5 Input Methods
This product is easy and convenient to use, and allows you to enter
English words, numerals, insert symbols.
You can enter words in English, including any letter, numeral,
punctuation mark or any special symbol into the phone.
Switch Input Methods
In the Editing mode, press the key to switch the input method;
Press the key to go to the Symbol selection screen.
When you use this input method, you shall press the letter key
you desire:
Press once to enter the first letter.
Press twice to enter the second letter.
Proceed likewise.
The same method as above.
Press once to enter the first capital letter, then small letter.
Numeric Input
When you use this input method, you can enter your desired
numerals.
5.6 Keypad Lock
In Idle mode, press the Left soft key , then press the key

21
to lock up the keypad. To unlock, you need to press the Left soft key
, and then press the key to unlock. You can also long
press the key to lock up the keypad in idle mode.
6. Menu Instructions
The following context lists out the brief explanations to each function
that this phone offers.
6.1 Phonebook
Search
This function allows you to browse the telephone records in Phonebook
in alphabetic order of the initial letters of the names. By use of this
function, you can search for your desired number in Phonebook.
Select “Search” in “Phonebook” to enter the index list screen, press the
key including the letter to display the relative record quickly.
You can press Up/Down Key to browse the items, press the Send
Key to make a call.
After pressing the “Option” soft key toward an item, you can proceed as
follows:
1) Dial: Dial the phone number you selected
2) Send Message: On the Options list, select “Send message” and
confirm, go to the Edit Message page; meanwhile, your selected
telephone number is automatically brought into the message and
taken as the telephone number of the recipient.
3) Edit: Edits the record in Phonebook.
4) Delete: Deletes a record from Phonebook.
22
5) Create: Add a new record.
6) Copy: If you have selected a telephone number in the Phonebook,
select “Copy” to copy this number to the SIM card; if you have
selected a telephone number in the SIM card, then select “Copy” to
copy this number to the phone.
7) Move: If the concerned number is stored in the SIM card, then it
will be moved into the phone; on the contrary, it will be moved into
the SIM card.
8) Storage Status: Displays the occupied capacity and total capacity
in Phonebook in the phone and those in the SIM card.
Create a New Entry
This function allows you to add a new number in Phonebook in either the
SIM card or the phone. Proceed as follows:
Now let’s cite an example to explain how to add a new record:
1) Select “Create” in the menu of Phonebook;
2) Select “Save to SIM” or “Save to Phone” to enter the edit screen.
3) Input the name first, and then the number.
4) If you enter anything wrong, please press the right soft key to clear
them.
5) At last, press the “Accept” soft key to finish the entire adding process
and save the new record.
Delete
You can select Delete One by One or Delete All to do the correlative
operations.
23
Copy
This function allows you to duplicate a record from Phone to SIM card
or from SIM card to Phone.
Setting
It includes Fixed dial and Service Dial No. These two functions need
network support. Please consult your local network operator for
verification.
Storage Status
Displays the occupied capacity and the total capacity in Phonebook in
the phone and those are in the SIM card.
Speed Dial
First edit the speed dial numbers and then long press the numerals (2~9)
key in Idle mode for a short while to call out.
6.2 Short Message
1) In Idle mode, press the Left soft key to enter Main Menu.
2) Press the Up/Down, Left/ Right Key to find the “Short Message”
function.
3) Press the Left soft Key to the SMS menu list screen to select one of
them, Write Message, Inbox, Outbox, Drafts, Voice Mail, Broadcast
Message, Delete All, Check Storage or Message Counter, Message
Setup, and then press the “Select” soft key to execute the correlative
operation.

24
Write Message
When editing a message, you can press the key to switch
among the input methods.
Firstly, enter the message content, press the key to insert
symbols, after that, you can do as follows:
1) Press the “Option” soft key; you can select the following options:
A. Send: Only allowing you to send a message, not save in Outbox.
B. Send and Save: Allowing you to send a message, then save it in
Outbox.
C. Send to Many: Allowing you to send a message to many recipients.
D. Save: Only allowing you to save the message in Drafts.
2) Select “Send and Save”, then enter the telephone number of the
recipient or select a telephone number from Phonebook, press the
Left soft key to send the message.
Inbox
After a new message is received or the full capacity of SMS memory is
occupied, it will display the icon on the top of the screen (which
will blink when the full capacity of SMS memory is occupied). If the full
capacity of SMS memory is occupied, you cannot receive any new
message any more, please delete unnecessary messages in such a case.
1) Select “Inbox” to enter, it displays the received messages in the Inbox;
the one which marked with an icon is unread.
2) Press the Left soft key to read the current message.
3) When reading messages, press the “Option” soft key; you can select
25
the following options:
A. Delete: Allows you to delete the message.
B. Text Reply: Allows you to reply to the message according to the
telephone number of the message forwarder.
C. Edit: Allows you to edit the original text message.
D. Extract Number: Allows you to save the telephone number.
E. Forward: Allows you to forward it to your desired destination.
F. Dial Back: Dial the telephone number back.
Outbox
1) After entering the “Outbox”, it displays those messages already sent
out or unsent. Each message sent out is marked by a sent icon; and
every message not sent successfully is marked by a not-sent mark.
2) Press the “Select” soft key to read the current message.
3) When reading a message, you can press the “Option” soft key to
select the following options, for concrete operations, refer to
“Inbox”.
Drafts
After entering Drafts, it displays those messages only saved in Drafts, for
concrete operations; please refer to “Outbox”.
Voice Mail
In the “Voice mail” menu, press the Up/Down key to select “Listen to
Voice Mail Message” or “Voice Mailbox Number”, press the “Select” soft
key to enter.
1) Listen to Voice Mail Message: This function allows you to listen to
the voice mails from the Voice Mail Server.

26
2) Voice Mailbox Number: Amend the voice mail server number.
Note: This is a service provided by the network, similar to that of an
answering machine. This function lets you allow the caller to leave a
message when you are unable or not willing to answer a call. The
telephone number of your Voice Mail Server is stored in the phone. For
details, please contact your network operator.
Broadcast Message
This network-based service allows you to receive various kinds of text
messages regarding weather conditions or traffic news. For details, please
contact your network operator.
1) Topic: You can select Topic, Add Topic, Edit Topic or Delete Topic to
do the correlative operation.
2) Language: This network-based service allows you to select a desired
language to display the broadcast information.
3) Service Status: Turns on or off the Broadcast Message.
Delete All
When you select “Delete all” to enter, you can select Delete All, Delete Inbox,
Delete Outbox or Delete Drafts to do the correlative operation.
Check Storage
Views the capacities occupied by Messages, and total capacities, in the SIM
card and Phone. The concrete capacities are determined by the contents of
Messages, Phone and SIM card.
Message Counter
To views the send counts and the receive counts, and you can clear zero counts.
27
Message Setup
It includes the three items: Storage Media , Service Center, Protocol
Type, Validity Period, Status Report and Reply Path.
1) Storage Media: You can set where the messages are to be saved (SIM
Preferred or Phone Preferred).
2) Service Center
You can save or edit the service center number.
3) Protocol Type
You can set the message type as Text, Fax or Email.
4) Validity Period
You can set the valid period of messages.
5) Status Report
After activating the delivery report function, you can receive a report
from the SMS center regarding whether or not a Message is sent
successfully.
6.3 Call Records
In Idle mode, press the Left soft key to enter the Main Menu, press
UP/Down and Left/Right key to select Call Records to enter.
Incoming Calls
After entering this function, press Up/Down key to browse the records,
you can press the Left soft key to the option list to select one of them:
Dial, Send Message, Send Number, Edit Number, Save Number, Delete,
Delete All or Details.

28
Note: In Idle mode, press the Send key to view the Call Records directly,
press the Left or Right key to switch among Incoming Calls, Outgoing
Calls and Missed Calls.
Outgoing Calls
The operation is the same as Incoming Calls.
Missed Calls
The operation is the same as Incoming Calls.
Delete
You can delete Incoming Calls, Outgoing Calls, Missed Calls, or delete
all call records.
Call Duration
After entering this function, you can view the outgoing duration,
incoming duration, last call duration, also you can clear zero all the time.
6.4 Settings
In Idle mode, press the Left soft key to enter Main Menu, press
UP/Down and Left/Right key to select Settings to enter.
Display Settings
Select “Settings→ Display Settings”.
1) LCD Contrast:
In LCD contrast screen you can press Left or Right key to adjust the
LCD contrast, press the Left soft key to confirm.
2) Back Light:
Press the Up/Down key to select, press the Left soft key to confirm. If
29
you do not press any key within a certain period of time, the backlight
will be turned off automatically when the set time duration expires.
3) Wallpaper:
The system has built-in pictures for your option, press the Up/Down key
to select, press the Left soft key to confirm.
4) Greeting Text:
Press the Up/Down key to select Enable or Disable, press the Left soft
key to confirm. Select “Enable” to edit the text, and then press the Left
soft key to save it. It will be displayed on the Start-up screen when it
powers on.
5) Date Time Display:
Press the Up/Down key to select Enable or Disable, press the Left soft
key to confirm. When you enable the function, the date and time will be
displayed on the idle screen.
Clock Settings
Select “Settings→ Clock Settings”.
1) Date & Time Settings:
You can set time and date in here.
2) Date Display Format:
You can set the date format. DD means date, MM means month, and
YYYY means year.
3) Time Display Format:
Yon can set a 12-hour system or a 24-hour system.
30
Call Settings
Select “Settings→ Call Settings”.
1) CLIR:
You can press the Up/Down key to set Default Setting, On or Off, press
the Left soft key to confirm.
2) Auto Redial:
You can press the Up/Down key to set Enable or Disable, press the Left
soft key to confirm.
3) Any Key Answer:
You can press the Up/Down key to set Enable or Disable, press the Left
soft key to confirm.
Phone Settings
Select “Settings→ Phone Settings”.
1) Language:
Display optional languages. You can select Automatic, English or other
language, and then press the Left soft key to confirm.
2) Keypad Lock:
You can press the Up/Down key to set Disable, 30 Seconds or 60
Seconds, and then press the Left soft key to confirm.
3) Own Number:
You can input the name and number of the owner, and then press the Left
soft key to confirm.
Security
Select “Settings→ Security”.
31
1) Power On PIN:
You can choose On or Off, and you can also change PIN code. If you
have set the SIM Lock as “On”, every time when you turn on the phone,
you have to enter the PIN code. If you have entered a wrong code for
three times, you will be requested to enter the PUK code (personal
unlocking key). The PUK code is used to crack and change the locked
PIN code. If the PUK code is lost or not supplied at all, please contact
your network operator.
2) Change PIN2:
You can change PIN 2 code. If you don’t know the PIN 2 code, please
contact your network operator.
3) Phone Lock:
You can choose On or Off, and you can also change Phone password. By
use of this function, you can lock or unlock your phone. To do so, enter
the password to lock or unlock. When your phone is locked, you will be
requested to enter the phone lock password when turning on the phone.
Network Settings
Select “Settings→ Network Settings”.
A. Call Waiting
1) Interrogate: This function is used to inquire the network of the current
status that your phone is in.
2) Activate: When the call waiting function is turned on, the phone will
contact the network. After a short while break, the network will make a
response, and forward a message to corroborate your operation. After
this function is activated, if a third party is calling you during the
conversation, the network will give you a beep alarm, and display the
telephone number of the third party, too.
32
3) Deactivate: If this function is turned off, the network will not give you
a beep alarm when any third party is calling you during your call
conversation.
B. Call Divert
This network-based function allows an incoming call to be diverted to
another phone you designated.
1) Unconditional Divert: When this function is set at “Activate”, all the
incoming calls will be diverted to the destination number. Select
“Activate” or “Deactivate”, the phone will contact the network; after a
short while, the network will make a response, and notify the operational
result.
2) Busy Divert: When this function is set at “Activate”, all the incoming
calls will be diverted to another phone number when your phone is busy.
Select “Activate” or “Deactivate”, the phone will contact the network;
after a short break, the network will make a response, and notify you of
the operational result.
3) No Answer Divert: When this function is set at “Activate”, if an
incoming call is not answered within the designated period, it will be
diverted to another phone number. Select “Activate” or “Deactivate”, the
phone will contact the network; after a short break, the network will
make a response, and notify you of the operational result.
4) No Service Divert: When this function is set at “Activate”, and your
phone is unreachable, then all the incoming calls will be diverted to a
phone number you have designated. Select “Activate” or “Deactivate”,
the phone will contact the network; after a short break, the network will
make a response, and notify you of the operational results.
Note: How to set these four kinds of diverts:
-Interrogate: Used to inquire the network of the current mode regarding a
certain diverting function. The phone will contact the network, after a
short break, the network will make a response, and notify you of the
operational result.
33
-Activate: To enter the number you want incoming calls to be diverted to,
and activate.
-Deactivate: To cancel the diverting function.
C. Call Barring
This function allows you to bar certain outgoing calls. When you set
this function, you have to enter the network barring password provided
by the network operator.
After selecting an item, you can select “Activate” or “Deactivate”;
the phone will request you to enter the call-barring password, and then
contact the network. After a short break, the network will make a
response and notify you of the operational result.
1) All Outgoing Calls: When this function is set at Activate, you cannot
dial out any number.
2) All Int'l Calls: When this function is set at Activate, you cannot dial
out international numbers
3) Int’l Except Home: When this function is set at Activate, you can only
dial out local numbers when being abroad or dial out homeward numbers
(i.e. the country where the network provider stays).
4) All Incoming Calls: When this function is set at Activate, you cannot
receive any call.
5) Incoming While Roam: When this function is set at Activate, you
cannot receive calls when you use the phone outside the service area.
D. Network Select Mode
You can set “Automatic” (preferred) or “Manual”. When you select the
“Automatic”, the phone will select the network where the SIM card falls
in. When you select “Manual”, you must select that network with which
the SIM card has been registered.
34
Shortcuts
You can set a few items as the normally used functions. In Idle mode,
press the Down key to enter the shortcuts list, press the Up/
Down key to select one of the functions to enter.
Factory Default
Select “Settings—> Factory Default”, enter the phone lock password to
activate this function.
6.5 Profiles
In Idle mode, press the Left soft key to enter Main Menu, press
UP/Down and Left/Right key to select Profiles to enter.
Standard
A. Set as default
Select the “Set as default”, and then press the Left soft key to activate the
setting.
B. Personalize
Include Ring Tone, SMS Alert Tone, Alarm Tone, Alert Type, Ring
Tone Volume, Key Volume, Vibration.
(1) Ring Tone: You can select your desired tone as the incoming call
ring.
(2) SMS Alert Tone: You can select your desired tone as SMS alert
ring.
(3) Alarm Tone: You can select your desired tone as the alarm ring.
(4) Alert Type: You can select single ring or repeat ring. Single: the ring
tone is heard once only. Repeat: the ring tone repeats uninterruptedly.
(5) Ring Tone Volume: Press the Left or Right key to adjust the
35
volume.
(6) Key Volume: Press the Left or Right key to adjust the volume.
Conference
For details, please refer to “Standard”.
Outdoor
For details, please refer to “Standard”.
Indoor
For details, please refer to “Standard”.
Headset
For details, please refer to “Standard”.
6.6 Tools
In Idle mode, press the Left soft key to enter the Main Menu, press
UP/Down and Left/Right key to select Tools.
Calendar
This function allows you to view the calendar.
Press the Left soft key to enter the search screen, enter date first and press the
Left soft key to jump to the date page.
Alarm
If the Alarm is not turned on, then no alarm will be given even when the set
time comes. If the Alarm is turned on, and when the set time reaches, an alarm
will be given even if the phone is turned off. Please follow these steps to set an
alarm:
1) Select "On".
36
2) Set the time on which the alarm is triggered off.
3) Select the repeat type: One Shot or Weekly. If you select "Weekly",
you can select some day of them or all days.
Note: When an alarm is given, if you select snooze or do nothing to stop
alarming, the clock will deem the case that you have not heard the alarm, after a
while, it will alarm again, but it will end after three times.
Calculator
The phone is supplied with a calculator, by use of which you can conduct
adding, deducting, multiplying and dividing. You can set exchange rate and
convert the currency in Calculator.
You can enter the operational symbols by use the navigation keys .
Up for plus (+), Down for minus (-), Left for division (x), and Right for
multiplication (/).
Press to enter the point, press or OK key to figure out the
result.
When you enter the blank calculator screen, you can press the Left soft key to
enter and set exchange rate first.
But when you enter numerals or get the result, you can press the Left soft key to
the option list to select one of these functions to operate: Flip Sign, Square Root,
Square, To Domestic Currency, To Foreign Currency.
Flashlight
In this function you can press Up or Down key to select On or Off and press the
Left soft key to turn on or turn off the flashlight.
In Idle screen you can long press the OK key to turn on the flashlight or turn it
off.

37
FM Radio
This is FM radio. Enter the FM radio interface, press the Left or Right key to
search the channel, and the frequency is on display. Press the Up or Down key
to adjust the volume. Press "*" or "#" key to select the saved channel circularly
to listen, you can also press the number key 1~9 directly to listen to the radio.
Press the Right soft key to exit.
On the FM Radio interface, press the left soft key to access the following
options:
1) Background Play: Enter the background play mode.
2) Channel List: If you have already saved the radio channels, you can move
the cursor to the channel you would like to listen to and play it. You can also
select Edit in the options to edit the list.
3) Set Frequency: If you know the frequency of the radio channel you would
like to listen to, enter the frequency and press the Left soft key to listen.
4) Save Channel: Save the channel which you are listening to.
5) Auto Search: The radio can automatically search the channel.
Note: The headset functions as the antenna of the FM Radio, you must connect
the headset to the phone before listening.
SIM Tool Kit
If your network operator offers such a service and you have subscribed
for it, you will be able to use this function. If you insert a SIM card with
a value-added (STK) function, you can use your desired service after
selecting the STK service function.

38
7. Extras:
7.1 Maintenance
※ Put the phone and all of its fittings in a place out of children’s reach.
※ Keep the SIM card in good conditions. Do not bend or scraper it; be
sure to avoid it from interference by static electricity. Use a piece of
cloth that is static electricity proofing, and contains no chemical
detergent, to clean the SIM card.
※ The phone shall be kept from moisture and shaking. Do not put it in
any place directly exposed to sunshine. Any liquid flowing into the
phone will cause corrosion of the metal made electric circuit; and
heat will shorten the service lives of the electronic component parts
and damage the battery.
※ If the phone is not in use for a long time (more than one month),
please take out the battery.
※ Phone ID: when you have lost your phone or SIM card, the
following information is rather important, and shall be recorded:
SIM card serial number (marked on the card); phone serial number
(15-digit), and client number given by the network operator.
※ If you have lost your phone or SIM card, please contact your
network operator immediately, to prevent any other person from
using your phone illegally.
※ If the phone is not in use for a long time after being turned off,
please separate the phone from its battery, so as to avoid the battery
from suffering an electric leakage, and thus damaging the phone. If
the battery is not in use for a long time (or has discharged its power),
and cannot be charged normally by use of a traveler’s charger,
39
please use the charging stand to resume its charging performance.
7.2 Specification Parameters
Network Type: GSM850MHz/DCS1900MHz
LCD: 1.2” , FSTN, 96x49 matrix (width*height)
Dimensions:103mm*45mm*11mm (length*width*height)
Working Voltage: 3.7V-4.2V
Battery Capacity: 650mAh (depends on the real object)
Standby Time duration (*): 100-200 hours (depends on the network)
Maximum Call Time (*): 1.5-2.5 hours (depends on the network)
SIM card working voltage: 3V/1.8V
* The Standby duration and Call Time will differ according to the SIM
card/Internet setting and the service mode.
7.3 Battery Information
※ Do not throw the battery into fire.
※ Do not dismantle or retrofit the battery.
※ Do not put the battery into any unauthorized use.
※ Do not put the battery in any place where powerful mechanical
impacts take place, or perforate the battery by use of any hard
object.
※ The battery shall be kept in a cool and dry place, and away from
high and exposure to direct sunshine.
※ Do not use the lithium battery in a rather cold environment, as the
battery is unable to honor its maximal Standby/Call Time.
※ Do not clean the battery by use of water or any organic solvent, or
put the battery into water.
40
※ Be sure to stop using the battery in case it gives out any peculiar
smell or gets excessively hot.
※ Be sure to stop using the battery in case it suffers any crevice,
deformation, or damage of any other type, or a leakage of
electrolyte.
※ In case the leaked electrolyte is splashed onto skin or clothes, be
sure to rinse it off by use of soap and clean water immediately; in
case the leaked electrolyte is splashed into eyes, be sure to rinse
your eyes by use of clean water immediately, and contact a hospital
for medical treatment.
※ Be sure to use the supplied battery and charger, so as to avoid the
phone from damage caused by any erroneous charging.
※ Be sure to turn off the phone before taking out the battery.
7.4 Disposal of Waste or Worn Battery
When the battery in the phone can not be used any more, please replace
it with a new one, and keep the waste or worn battery in a proper place,
before handing it to the competent organization for disposal.
41
RF Exposure Information and Statement
The SAR limit of USA (FCC) is 1.6 W/kg averaged over one gram of tissue.
This model (FCC ID: WVB-AVVIO100) has also been tested against this SAR
limit. The highest SAR value reported under this standard during product
certification for use at the ear is 1.521 W/kg and when properly worn on the
body is 0.780 W/kg. This device was tested for typical body-worn operations
with the back of the handset kept 1.5cm from the body. To maintain compliance
with FCC RF exposure requirements, use accessories that maintain a 1.5cm
separation distance between the user's body and the back of the handset. The use
of belt clips, holsters and similar accessories should not contain metallic
components in its assembly. The use of accessories that do not satisfy these
requirements may not comply with FCC RF exposure requirements, and should
be avoided.
This device complies with part 15 of the FCC rules. Operation is subject to the
following two conditions: (1) this device may not cause harmful interference,
and (2) this device must accept any interference received, including interference
that may cause undesired operation.