BroMax Communications UW200 FreePort 11M USB WLAN Adapter User Manual USB WLAN Adapter Manual
BroMax Communications Inc FreePort 11M USB WLAN Adapter USB WLAN Adapter Manual
users manual
Wireless USB Network Adapter
User Manual

USB 11M WLAN Adapter User Manual
2
Regulatory compliance
FCC Warning
This equipment has been tested and found to comply with the limits for a Class B digital
device, pursuant to part 15 of the FCC Rules. These limits are designed to provide
reasonable protection against harmful interference in a residential installation. This
equipment generates, uses and can radiate radio frequency energy and, if not installed and
used in accordance with the instructions, may cause harmful interference to radio
communications. However, there is no guarantee that interference will not occur in a
particular installation. If this equipment does cause harmful interference to radio or television
reception, which can be determined by turning the equipment off and on, the user is
encouraged to try to correct the interference by one or more of the following measures:
Ÿ Reorient or relocate the receiving antenna.
Ÿ Increase the separation between the equipment and receiver.
Ÿ Connect the equipment into an outlet on a circuit different from that to which the receiver
is connected.
Ÿ Consult the dealer or an experienced radio/TV technician for help.
You are cautioned that changes or modifications not expressly approved by the party
responsible for compliance could void your authority to operate the equipment.
CE Mark Warning
This is a Class B product. In a domestic environment, this product may cause radio
interference, in which case the user may be required to take adequate measures.
About this manual
This User manual describes how to install and operate your USB 11M WLAN Adapter.
Please read this manual before you install the product.
This manual includes the following topics:
Ø Product description and features.
Ø Hardware installation procedure.
Ø Software installation procedure.
RF Exposure Warning
Electronic Magnetic energy is intentionally radiated by this product. For compliance of FCC RF
exposure rule, the radiator of this product should be installed at least 20 cm far away from the user or
nearby person.

USB 11M WLAN Adapter User Manual
3
Table of Contents
Section 1
Introduction 4
1.1 Package Contents 4
1.2 System Requirements 4
1.3 Features 4
Section 2
Hardware Installation 6
2.1 Connecting the USB Adapter 6
2.2 Status LEDs 6
2.3 Disconnecting the USB Adapter 6
Section 3
Installation and Configuration Procedures
Under Windows 98 7
3.1 What You Need to Know About Windows 98 7
3.2 What You Will Need 7
3.3 Installing the Driver Under Windows 98 7
3.4 Configuration Under Windows 98 11
3.5 Uninstall Procedure Under Windows 98 12
Section 4
Installation and Configuration Procedures
Under Windows 2000 13
4.1 What You Need to Know About Windows 2000 13
4.2 What You Will Need 13
4.3 Installing the Driver Under Windows 2000 13
4.4 Configuration Under Windows 2000 17
4.5 How to Unplug the Device Under Windows 2000 18
4.6 Uninstall Procedure Under Windows 2000 19
Section 5
Installation and Configuration Procedures
Under Windows ME 20
5.1 What You Need to Know About Windows ME 20
5.2 What You Will Need 20
5.3 Installing the Driver Under Windows ME 20
5.4 Configuration Under Windows ME 21
5.5 Uninstall Procedure Under Windows ME 22
Section 6
Configuration and Monitor Application 23
6.1 How to Install the Configuration and Monitor Application 23
6.2 Using the Configuration and Monitor Application 23
6.3 How to Uninstall the Configuration and Monitor Application 27

USB 11M WLAN Adapter User Manual
4
Section 1 - Introduction
The USB 11M WLAN Adapter is a network adapter with a rate of 1, 2, 5.5, and
11 Mbps operating in the ISM band using Direct Sequence Spread Spectrum
(DSSS) transmission implementing the IEEE 802.11b standard. This adapter
provides Device Drivers for MS Windows ® 98, Windows ® 2000 and Windows
® ME. It also provides tools for the configuration and firmware upgrade of the
adapter. These tools, as well as the installation steps of the plug-and-play
procedure for the Microsoft Windows 98, Windows ME and Windows 2000
operating systems, are described in this document.
1.1 Package Contents
Please make sure that items below are included on package.
ü A USB 11M WLAN Adapter
ü A USB cables
ü Floppy Diskette (include Device Drivers and User Manual)
1.2 System Requirements
Ø Operating System: MS Windows 98, Windows 2000, Windows ME
Ø Desktop PC or notebook PC
Ø One free USB port
1.3 Features
The USB 11M WLAN Adapter offers compliance with the IEEE 802.11b
specification. This feature allows them to communicate with other wireless
devices that support the standard. Features of the adapter are:
ü Uses 2.4GHz frequency band, which complies with worldwide requirement
ü Wireless interface following the IEEE 802.11b standard
ü Using Universal Serial Bus (USB) interface
ü Enciphering/deciphering of wireless data by the implementation of the
WEP algorithm (WEP-40 bits)
ü Wire-free access to networked resources from anywhere beyond the
desktop
ü Allows users move between Access Points without resetting their
connection reconfiguration
ü Delivers data rate up to 11 Mbps
ü Supports 11, 5.5, 2, and 1 Mbps rates
ü Roaming
ü Provide USB 11M WLAN Configuration utility

USB 11M WLAN Adapter User Manual
5
ü Dielectric Antenna is built in to the Adapter with LEDs indicating Power
and Link
ü Supports most popular operating systems: Window 98/2000 & Windows
ME

USB 11M WLAN Adapter User Manual
6
Section 2 - Hardware Installation
This chapter covers connecting your USB 11M WLAN Adapter to the desktop /
notebook PC’s USB port.
2.1 Connecting the USB Adapter
NOTE: These instructions apply to most notebook computers. For detailed
information on inserting USB adapters into your desktop/notebook PC, consult the
desktop/notebook PC User manual.
With the adapter’s USB connector facing the desktop / notebook PC’s USB ports,
connect the adapter into an available USB port.
2.2 Status LEDs
The following table describes the meaning of the LEDs:
LED MEANING
PWR Indicates that the Card is powered on.
Link Indicates link status. It is normally blinking. When blinking,
indicates that the card is scanning the channels, and the link
is not active. When lit, indicates that the card is locked to a
channel, and the link is active.
2.3 Disconnecting the USB Adapter
In Win 98/ME operating systems, you do not have to power down the notebook to
remove the adapter. The adapter is hot-swappable—you can remove the card
when the notebook is powered on. However, Microsoft recommends that you stop
the adapter. Refer to your Win 98/ME online help for information on stopping the
Fast Ethernet Adapter.
WARNING: Do not remove the USB 11M WLAN Adapter when a data transmission is
taking place. Exit your communications program normally, stop the adapter if
necessary, and then remove the adapter.

USB 11M WLAN Adapter User Manual
7
Section 3 - Installation and Configuration
Procedures Under Windows 98
Use the procedures described in this chapter to install and configure the USB
11M WLAN Adapter under MS Windows 98.
3.1 What You Need to Know About Windows 98
Throughout this section it is assumed that you have a basic working knowledge
of Windows 98 and of how to install new network cards on them. However, in
this paragraph, some specific features of Windows 98 are briefly explained.
Windows 98 operating system supports the “Plug & Play” feature. That means
that once you connect the Adapter to your PC for the very first time, this
operating system will detect the Adapter and prompt you to install the driver.
Another feature is the “Hot Swapping”. With this feature, you can remove and
reconnect the Adapter whenever you want.
3.2 What You Will Need
During the installation, you may be prompted to load operating system files from
the Windows installation disk. Please have this disc handy.
You will also need the Drivers and Software Tools CD provided with your
package.
3.3 Installing the Driver Under Windows 98
1. Plug the Adapter into the USB port of a notebook or desktop PC.
2. The Add New Hardware Wizard will indicate that Windows have recognized
a new network device that has not been used before.

USB 11M WLAN Adapter User Manual
8
3. Click Next to continue the installation. A screen appears prompting you to
select an installation method:
4. Select Search for the best driver for your device. (Recommended) and
click Next. The following screen appears:

USB 11M WLAN Adapter User Manual
9
5. Ensure that the Floppy disk drives box is checked.
6. Insert the driver disk into your floppy drive and click Next. The following
screen appears:
7. Click Next to continue.
8. Under Windows 98, you will have the chance to set up USB 11M WLAN
Adapter operational parameters during the installation of the Adapter.
Please note that you can change these parameters later (for more details
see the “Configuration Under Windows 98” paragraph).

USB 11M WLAN Adapter User Manual
10
Figure 3-1. USB 11M WLAN Adapter Properties
You can set the following USB operational parameters:
• Channel: Select the channel to be used. There are 11 channels
available.
• ESSID: Select the ESSID to be used. The ESSID can be either the
ESSID of the access point to which the station will be associated if in
infrastructure mode, or the ESSID of the ad-hoc network in case the
station will operate in ad-hoc mode. In the latter case, all stations
participating in the ad-hoc network should have the same ESSID.
• Fragmentation Threshold: This is the option for the Fragmentation
Threshold activation.
• Network Address: This is a unique MAC address.
• Operating Mode: Infrastructure or ad-hoc.
• Preamble Type: Select either “Long”, or “Short” Preamble Type.
• Rate: Select the rate to be used among the following options: 1 Mbps, 2
Mbps, 5.5 Mbps and 11Mbps.
• RTS Threshold: This is the option for the RTS Threshold activation.
• WEP Key: Select which of the 4 WEP keys is going to be used. You
can select “None” if you do not need WEP encryption.
• WEP KEY #1 - #4 : You can set the value of 4 different WEP keys.
For every station participating in a Network the user must select the same
Channel and Rate (1, 2, 5.5, or 11 Mbps) but a different Network Address
(MAC Address). Also the user can set the Fragmentation Threshold (the
threshold for the activation of the fragmentation mechanism), as well as the
USB 11M WLAN Adapter User Manual
11
RTS threshold (the threshold for the activation of the RTS/CTS mechanism).
Also, the user can select the operating Mode. Two modes are available:
Ad-Hoc Mode and Infrastructure Mode. In Ad-Hoc Mode the wireless
stations can directly communicate, however, in Infrastructure Mode, an
Access Point is necessary. The user can also specify the ESSID (up to 32
characters). The ESSID field is case sensitive. The user can select long or
short preamble as referred in 802.11b specification. Finally, the user can
select among four user-defined WEP keys for encryption e.g. by setting the
WEP Key To Use field to 3, the WEP KEY #3 will be used; by setting it to
“None”, no WEP encryption will be used.
Please keep in mind that the WEP keys must be in HEX and in two
characters per byte formats e.g. if you want the WEP KEY #1 to be 12345,
then you must set it as 0102030405.
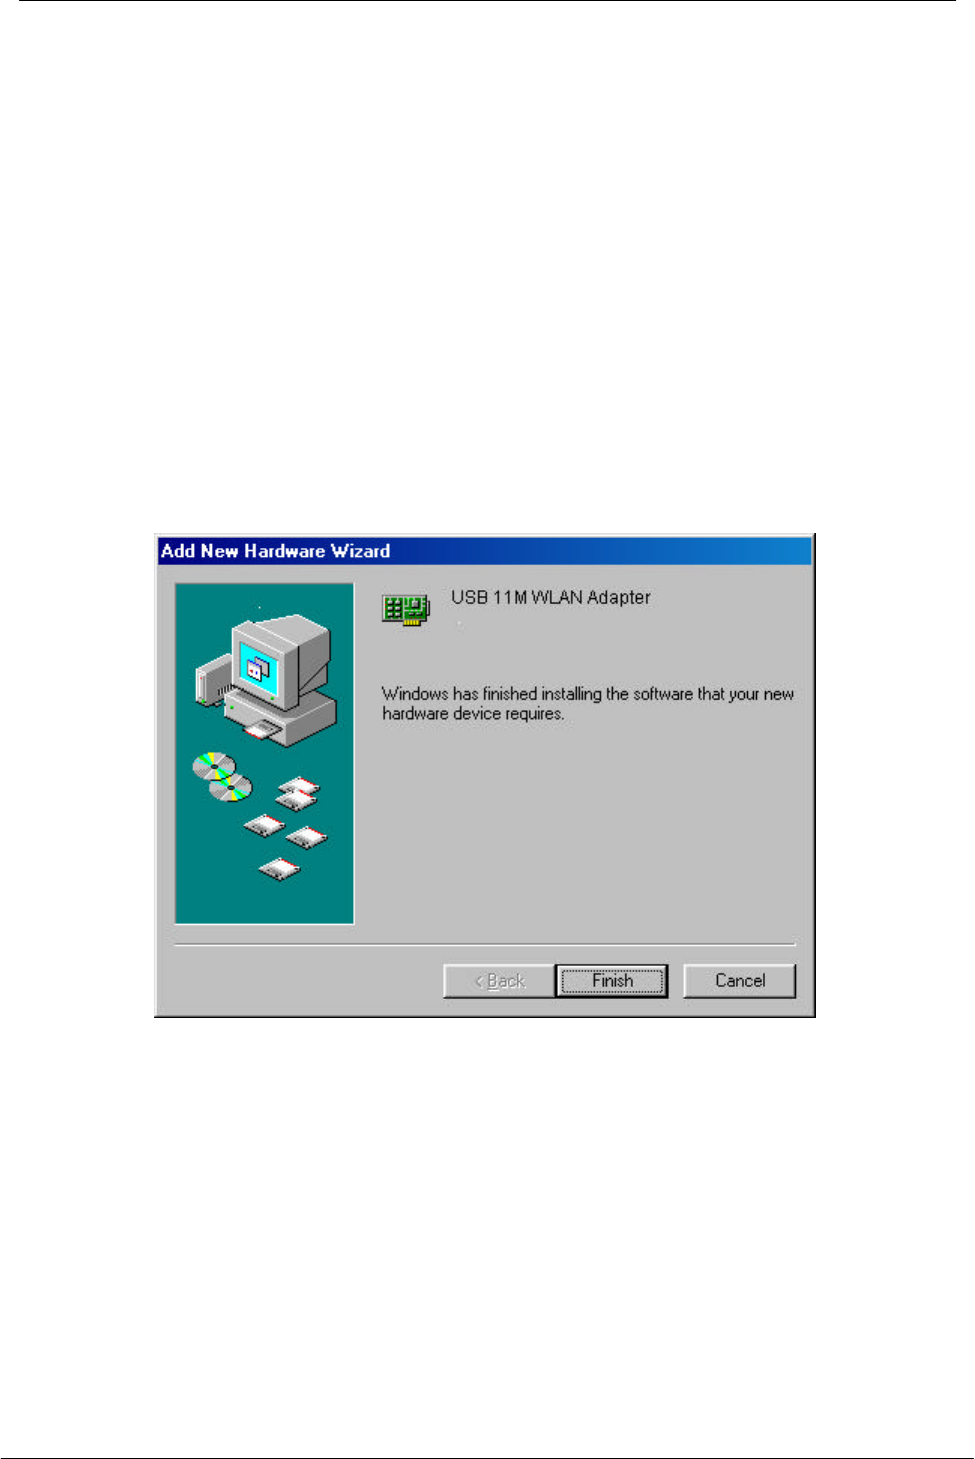
9. Windows 98 copies files to your hard disk drive, and you see the following
screen:
10. Click Finish to complete the installation.
11. When Windows ask you if you wand to restart your system now, press “No”
in the dialog box and restart you system manually. If you press “Yes”, it is
possible that the installation will not be completed (this is an operating
system related problem).
3.4 Configuration Under Windows 98
Note: The following procedure applies to the configuration of the cards when
they are not running. In case a communication has been established, the
configuration parameters of the adapter can be changed “on the fly” by using the

USB 11M WLAN Adapter User Manual
12
Configuration and Monitor Application described in the section “Configuration
and Monitor Application”.
After you have installed the Adapter, you can easily change its configuration
through the Control Panel (Start -> Settings -> Control Panel), where you select
the “Network” icon and then the “USB 11M WLAN Adapter” card in the
Configuration tab.
With the “USB 11M WLAN Adapter” card highlighted press the “Properties”
button or double-click on the higlighted icon in order to configure the Adapter. In
the new window, select the “Advanced” tab and adjust the operational
parameters of the card. This tab is the same with the one that appeared during
the installation (Figure 3-1). Please check the paragraph “Installing the Driver
Under Windows 98” for details about the configuration parameters.
Please note that in order for any change in these parameters to take effect, the
computer must be restarted. Windows will prompt you to restart the computer.
3.5 Uninstall Procedures Under Windows 98
In order to uninstall the Adapter from Windows 98, you must double click on the
“Network” option in the “Control Panel” (Start -> Settings -> Control Panel).
Select the “USB 11M WLAN Adapter” card from the list and press the “Remove”
button. The system will prompt you to re-boot. Press "Yes" to re-boot.

USB 11M WLAN Adapter User Manual
13
Section 4 - Installation and Configuration
Procedures Under Windows 2000
Use the procedures described in this chapter to install and configure the USB
11M WLAN Adapter under MS Windows 2000.
4.1 What You Need to Know About Windows 2000
Throughout this section it is assumed that you have a basic working knowledge
of Windows 2000 and of how to install new network cards on them. However, in
this paragraph, some specific features of Windows 2000 are briefly explained.
Windows 2000 operating system supports the “Plug & Play” feature. That means
that once you plug the Adapter into your PC for the very first time, this operating
system will detect the card and prompt you to install the driver.
Another feature is the “Hot Swapping”. With this feature, you can remove and
re-insert the Adapter whenever you want.
4.2 What You Will Need
During the installation, you may be prompted to load operating system files from
the Windows installation disk. Please have this disc handy.
You will also need the Device Drivers and Software Tools CD provided with your
package.
Note: In order to be able to install the Adapter on to your PC running under
Windows 2000, you will need to log on as “Administrator”.
4.3 Installing the Driver Under Windows 2000
1. Plug the Adapter into the USB port of a notebook or desktop PC.
2. The Found New Hardware Wizard will indicate that Windows have
recognized a new network device that has not been used before.

USB 11M WLAN Adapter User Manual
14
3. Click Next to continue the installation. A screen appears prompting you to
select an installation method:
4. Select Search for a suitable driver for my device (recommended) and
click Next. The following screen appears:

USB 11M WLAN Adapter User Manual
15
5. Ensure that the Floppy disk drives box is checked and insert the driver disk
into floppy drive. Click Next to continue. The following screen appears:
6. Click Next to continue.

USB 11M WLAN Adapter User Manual
16
7. Windows may display the message “Digital Signature Not Found”. Ignore it
by pressing “Yes”. Windows will start copying the files and then the following
screen appears:
8. Click Finish to complete the installation.

USB 11M WLAN Adapter User Manual
17
4.4 Configuration Under Windows 2000
Note: The following procedure applies to the configuration of the cards when
they are not running. In case a communication has been established, the
configuration parameters of the adapter can be changed “on the fly” by using the
Configuration and Monitor Application described in the section “Configuration
and Monitor Application”.
You can use the standard configuration method for network cards of Windows
2000 by going to “My Network Places” and double click on the Adapter. Press
“Properties” in the “Local Area Connection Status” dialog.
In the “Local Area Connection Properties” dialog, press “Configure” in order to
configure the card. You can configure the parameters shown in the Figure 4-1.
After you have made your changes, you must restart your system for the new
parameters to take effect.
Figure 4-1. USB 11M WLAN Adapter Properties
You can set the following USB operational parameters:
• Channel: Select the channel to be used. There are 14 channels available.
• ESSID: Select the ESSID to be used.
• Fragmentation Threshold: This is the option for the Fragmentation
Threshold activation.

USB 11M WLAN Adapter User Manual
18
• Network Address: This is a unique MAC address.
• Operating Mode: Infrastructure or ad-hoc.
• Preamble Type: You can select long or short preamble
• Rate: Select the rate to be used among the following options: 1 Mbps, 2
Mbps, 5.5 Mbps and 11Mbps.
• RTS Threshold: This is the option for the RTS Threshold activation.
• WEP Key: Select one of the four available keys to be used for encryption.
When no key is selected, the encryption is disabled.
• WEP KEY #1 - #4 : Set the value of the WEP key.
For every station participating in a Network the user must select the same
Channel and Rate (1, 2, 5.5, or 11 Mbps) but a different Network Address (MAC
Address). Also the user can set the Fragmentation Threshold (the threshold for
the activation of the fragmentation mechanism), as well as the RTS threshold
(the threshold for the activation of the RTS/CTS mechanism). Also, the user can
select the operating Mode. Two modes are available: Ad-Hoc Mode and
Infrastructure Mode. In Ad-Hoc Mode the wireless stations can directly
communicate, however, in Infrastructure Mode, an Access Point is necessary.
The user can also specify the ESSID (up to 32 characters). The ESSID field is
case sensitive. The user can select long or short preamble as referred in
802.11b specification. Finally, the user can select among four user-defined WEP
keys for encryption e.g. by setting the WEP Key To Use field to 3, the WEP KEY
#3 will be used; by setting it to “None”, no WEP encryption will be used. Please
keep in mind that the WEP keys must be in HEX and in two characters per byte
formats e.g. if you want the WEP KEY #1 to be 12345, then you must set it as
0102030405.
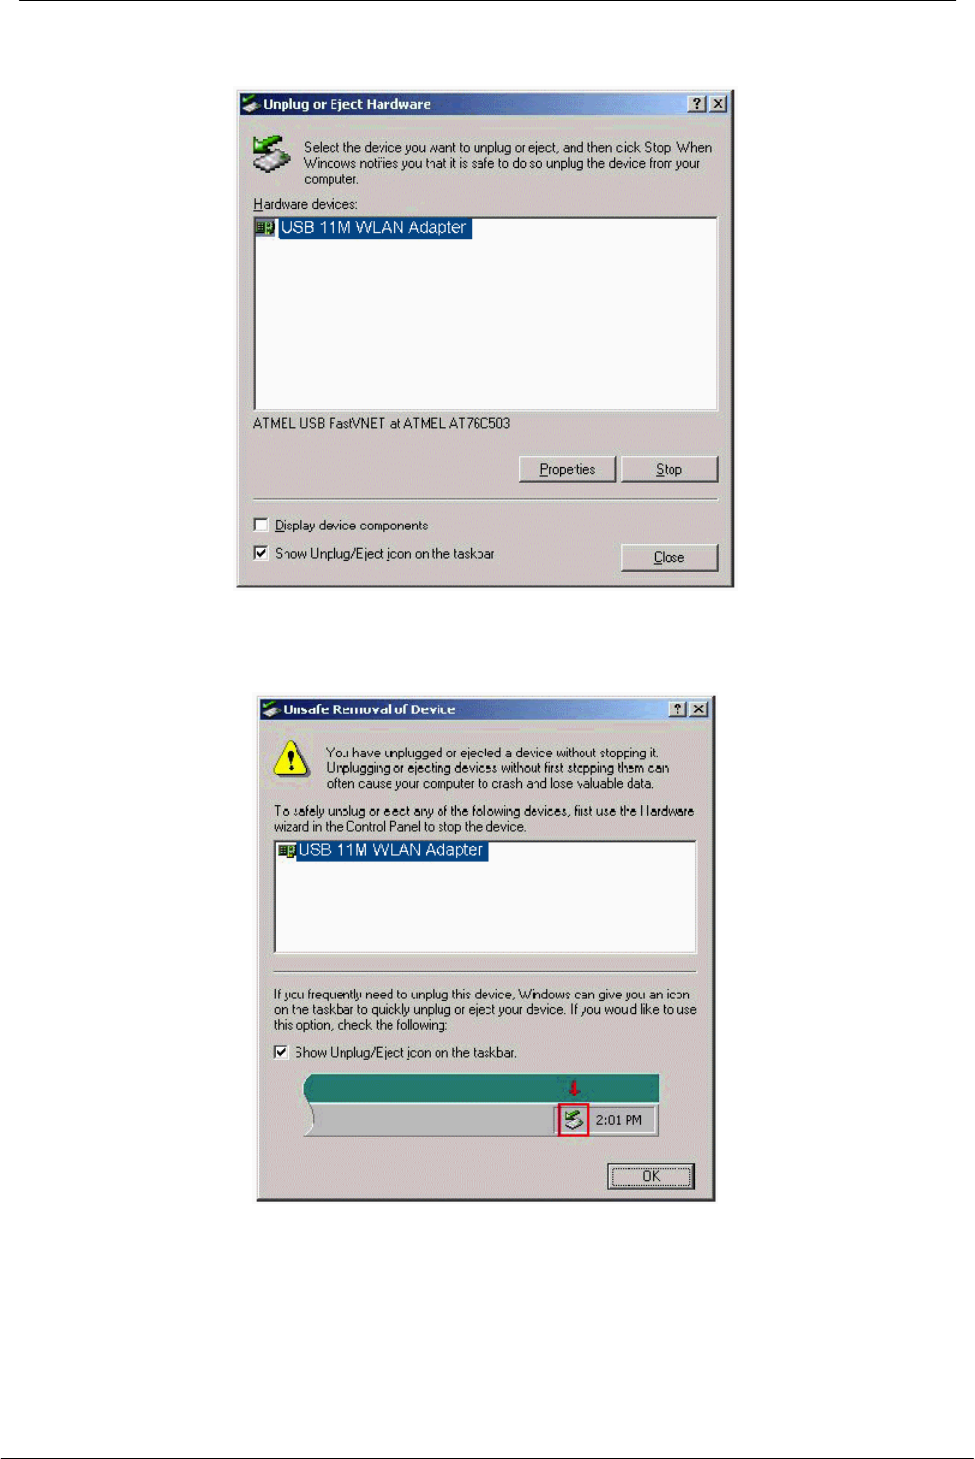
4.5 How to Unplug the Device Under Windows 2000
After the successful installation of the Adapter, you will see an icon
corresponding to the device in the Windows taskbar for as long as the device is
connected to the PC (see the lower part of Figure 4-3). If you want to unplug the
device double click on this icon. The dialog of Figure 4-2 will appear where you
must press “Stop”. Now it is safe to unplug the device from the PC.
In case you unplug the device without having followed the above procedure the
dialog of Figure 4-3 will appear reminding you the problems this action may have
caused. Press “OK”. It is recommended not to unplug the device unless you
have followed first the above procedure to stop the card.
USB 11M WLAN Adapter User Manual
19
Figure 4-2. Stop card dialog
Figure 4-3. Unsafe removal notification
4.6 Uninstall Procedures Under Windows 2000
In order to uninstall the Adapter you must select it in the Device Manager of
Windows 2000 and press “Uninstall”. The “Uninstall” procedure can be
performed only if the Adapter is plugged-into your computer.

USB 11M WLAN Adapter User Manual
20
Section 5 - Installation and Configuration
Procedures Under Windows ME
Use the procedures described in this chapter to install and configure the USB
11M WLAN Adapter under MS Windows ME
5.1 What You Need to Know About Windows ME
Throughout this section it is assumed that you have a basic working knowledge
of Windows ME and of how to install new network cards on them. However, in
this paragraph, some specific features of Windows ME are briefly explained.
Windows ME operating system supports the “Plug & Play” feature. That means
that once you connect the Adapter to your PC for the very first time, this
operating system will detect the Adapter and prompt you to install the driver.
Another feature is the “Hot Swapping”. With this feature, you can remove and
reconnect the Adapter whenever you want.
5.2 What You Will Need
During the installation, you may be prompted to load operating system files from
the Windows installation disk. Please have this disc handy.
You will also need the Drivers and Software Tools CD provided with your
package.
5.3 Installing the Driver Under Windows ME
1. Plug the Adapter into the USB port of a notebook or desktop PC.
2. The Add New Hardware Wizard will indicate that Windows have recognized
a new network device that has not been used before

USB 11M WLAN Adapter User Manual
21
3. Select Automatic search for a better driver (Recommended) and insert the
drivers disk into floppy drive. Click Next to continue.
4. The system will find the setup files and follow the instruction of the setup file
to copy drivers. After the drivers were copied, the following screen appears:
5. Click Finish. You should reboot your system to finish the installation.
5.4 Configuration Under Windows ME
Note: The following procedure applies to the configuration of the cards when

USB 11M WLAN Adapter User Manual
22
they are not running. In case a communication has been established, the
configuration parameters of the adapter can be changed “on the fly” by using the
Configuration and Monitor Application described in the section “Configuration
and Monitor Application”.
After you have installed the Adapter, you can easily change its configuration
through the Control Panel (Start -> Settings -> Control Panel), where you select
the “Network” icon and then the “USB 11M WLAN Adapter” card in the
Configuration tab.
With the “USB 11M WLAN Adapter” card highlighted press the “Properties”
button or double-click on the higlighted icon in order to configure the Adapter. In
the new window, select the “Advanced” tab and adjust the operational
parameters of the card. This tab is the same with the one that appeared during
the installation (Figure 3-1). Please check the paragraph “Installing the Driver
Under Windows ME” for details about the configuration parameters.
Please note that in order for any change in these parameters to take effect, the
computer must be restarted. Windows will prompt you to restart the computer.
5.5 Uninstall Procedures Under Windows ME
In order to uninstall the Adapter from Windows ME, you must double click on the
“Network” option in the “Control Panel” (Start -> Settings -> Control Panel).
Select the “USB 11M WLAN Adapter” card from the list and press the “Remove”
button. The system will prompt you to re-boot. Press "Yes" to re-boot.

USB 11M WLAN Adapter User Manual
23
Section 6 - Configuration and Monitor
Application
The Configuration and Monitor Application is a powerful utility that helps you to
configure the Adapter and monitor the statistics of the communication. Unlike
the standard method of configuring the Adapter via the operating system utilities
(e.g. Control Panel), this application permits the dynamic modification of the
configuration parameters while the Adapter is operating. It also offers some
more configuration options.
The Adapter offers the Configuration and Monitor Application for Windows 98,
Windows 2000 and Windows ME.
Note: Please keep in mind that the Configuration and Monitor Application can
be used to change the above configuration parameters when the Adapter is
active. When the Adapter is not in use, please use the Control Panel method
described in previous sections.
6.1 How to Install the Configuration and Monitor
Application
In order to setup the Configuration and Monitor Application, run the program
SETUP.EXE, which you will find in the “Config_Utility” folder of your installation
CD and follow the instructions as they appear on the screen. As soon as a link is
established, the application will start running and will appear as an icon on the
system tray. You can locate the application under Start -> Programs -> ATMEL
11MBPS WIRELESS LAN USB -> USB 11M WLAN Adapter Configuration.
6.2 Using the Configuration and Monitor Application
The Configuration and Monitor Application appears as an icon on the system
tray of Windows every time the Adapter is running. You can open it by double-
clicking on this icon. While the station is in infrastructure mode and not
associated to an access point, the color of the icon is red. As soon as the station
associates itself to an access point, the icon color turns to blue. In ad-hoc mode
the color is always blue, except when the card is reseting where it turns to red
during the reset procedure.
A typical screen of the application in infrastructure mode is shown in Figure 6-1.
The configuration parameters are shown at the top of the screen, while the
statistics of the communication are shown at the bottom. In the middle of the
screen there is information about which Access Point the Adapter is associated
with, the address of the AP, its SSID and the channel. The four “LEDs” at the
bottom of the dialog box indicate which of these features are enabled.

USB 11M WLAN Adapter User Manual
24
Figure 6-1. A typical screen of the Configuration and
Monitor Application in infrastructure mode.
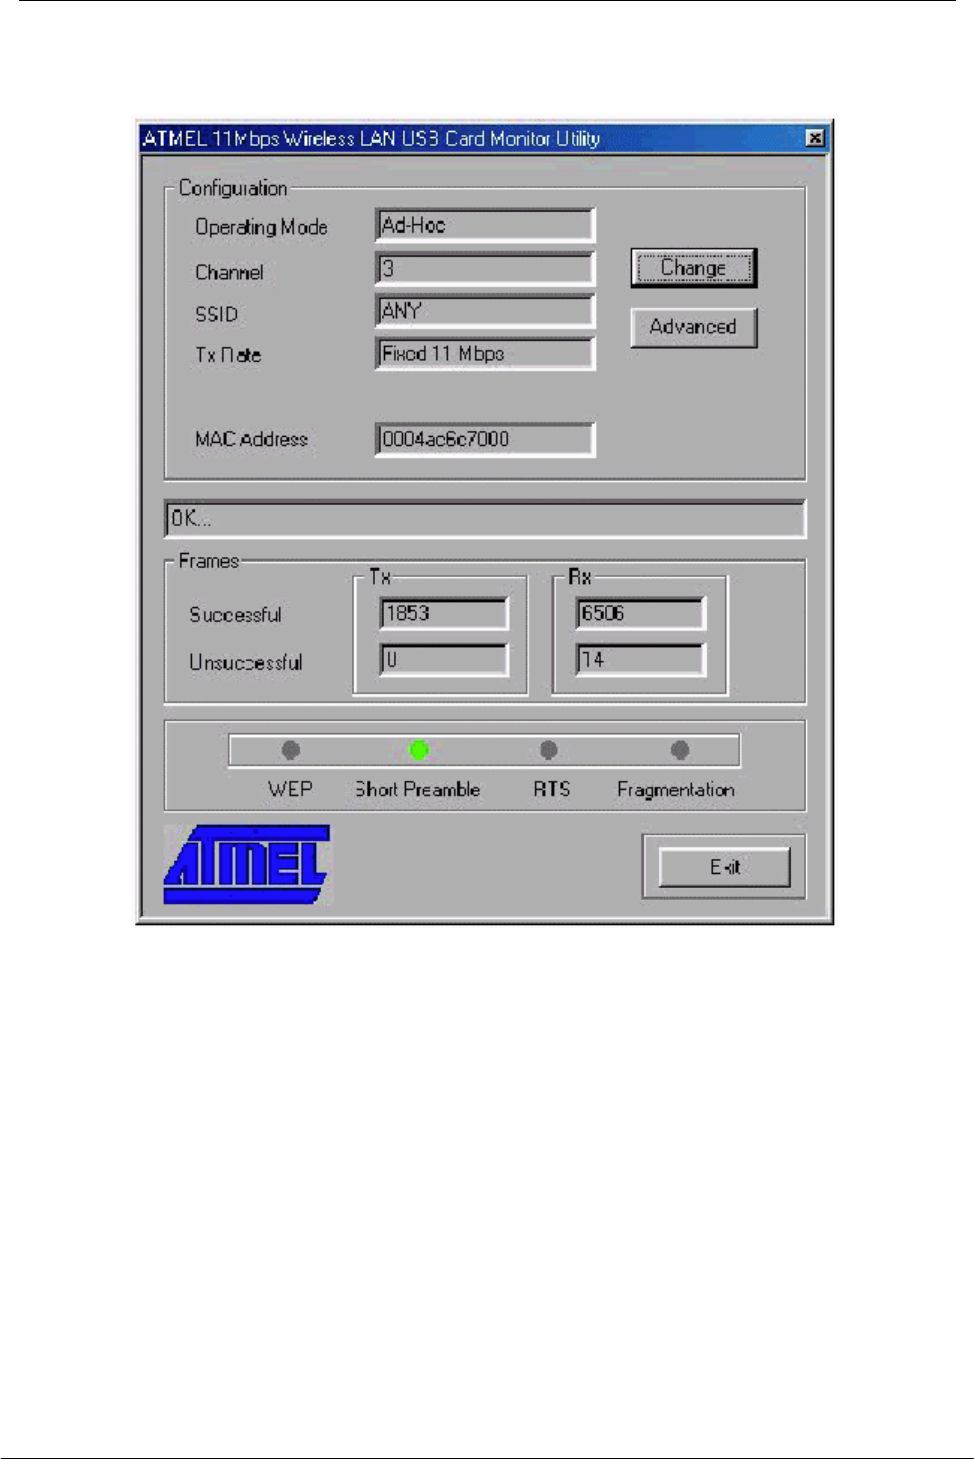
A similar screen appears in case the Adapter operates in ad hoc. In this case,
Short Preamble has been enabled (Figure 6-2).
USB 11M WLAN Adapter User Manual
25
Figure 6-2. A typical screen of the Configuration and
Monitor Application in ad-hoc mode.
By pressing the “Change” button in any of the two modes, you can change basic
configuration settings such as the Operating Mode, Channel, SSID, and
Transmission Rate (Figure 6-3). While in infrastructure mode you can select a
preferred Access Point (AP) by checking the “Enable” check box and giving the
MAC address of the AP. In that case you must also specify the channel the
preferred AP is using.

USB 11M WLAN Adapter User Manual
26
Figure 6-3. Change of basic configuration.
By pressing the Advanced button in any of the two modes, you can change
advanced configuration settings, such as the Preamble Type, Fragmentation
Threshold, and RTS/CTS Threshold (Figure 6-4). Figure 6-4 shows the
recommended configuration for the advanced settings. Before selecting Short
Preamble, make sure that the other stations and APs are also supporting this
feature.

USB 11M WLAN Adapter User Manual
27
Figure 6-4. Change of advanced configuration settings.
6.3 How to Uninstall the Configuration and Monitor
Application
In order to uninstall the Configuration and Monitor Application, go to Start ->
Programs -> ATMEL 11MBPS WIRELESS LAN USB and select “Uninstall USB
11M WLAN Adapter”.