Broadcom BRCM1005-H 802.11g Mini PCI Card built in Laptops User Manual startup and reference guide
Broadcom Corporation 802.11g Mini PCI Card built in Laptops startup and reference guide
UserManual.wiki
>
Broadcom
>
BRCM1005-H User Manual
>
User Guide Part 4
Contents
1.
WLAN Guide PP2160
2.
WLAN Guide CRVSA 02T1 75 and 90
3.
User Guide Main PP2160
4.
User Guide Main CRVSA 02T1 75 and 90
5.
User Guide Part 1
6.
User Guide Part 2
7.
User Guide Part 3
8.
User Guide Part 4
9.
User Guide Part 5
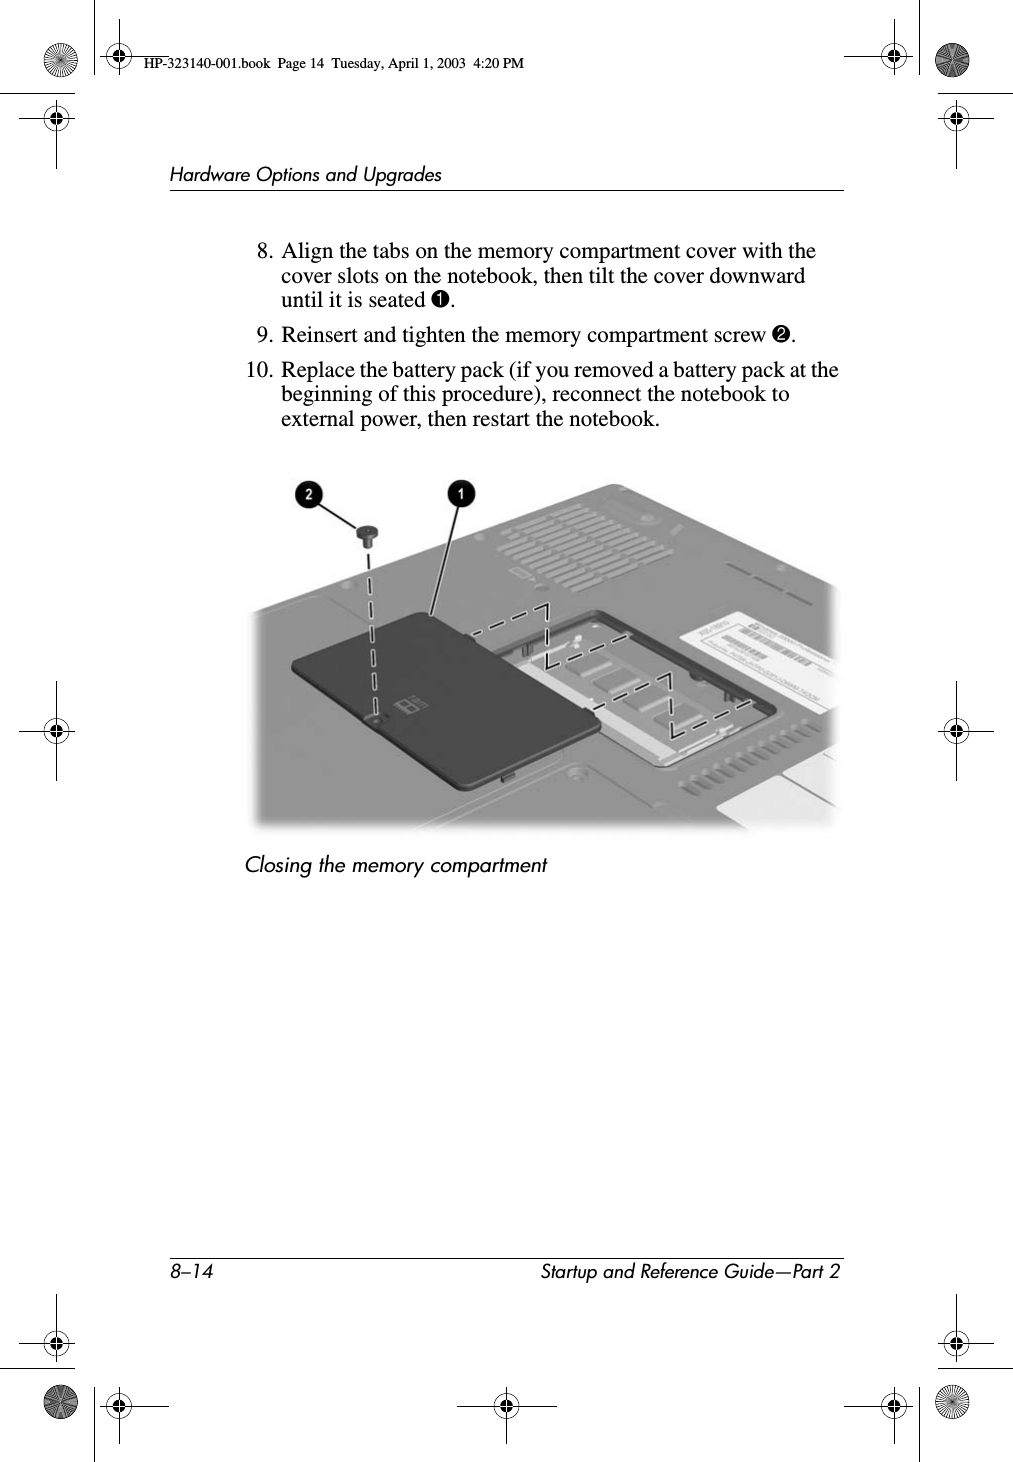
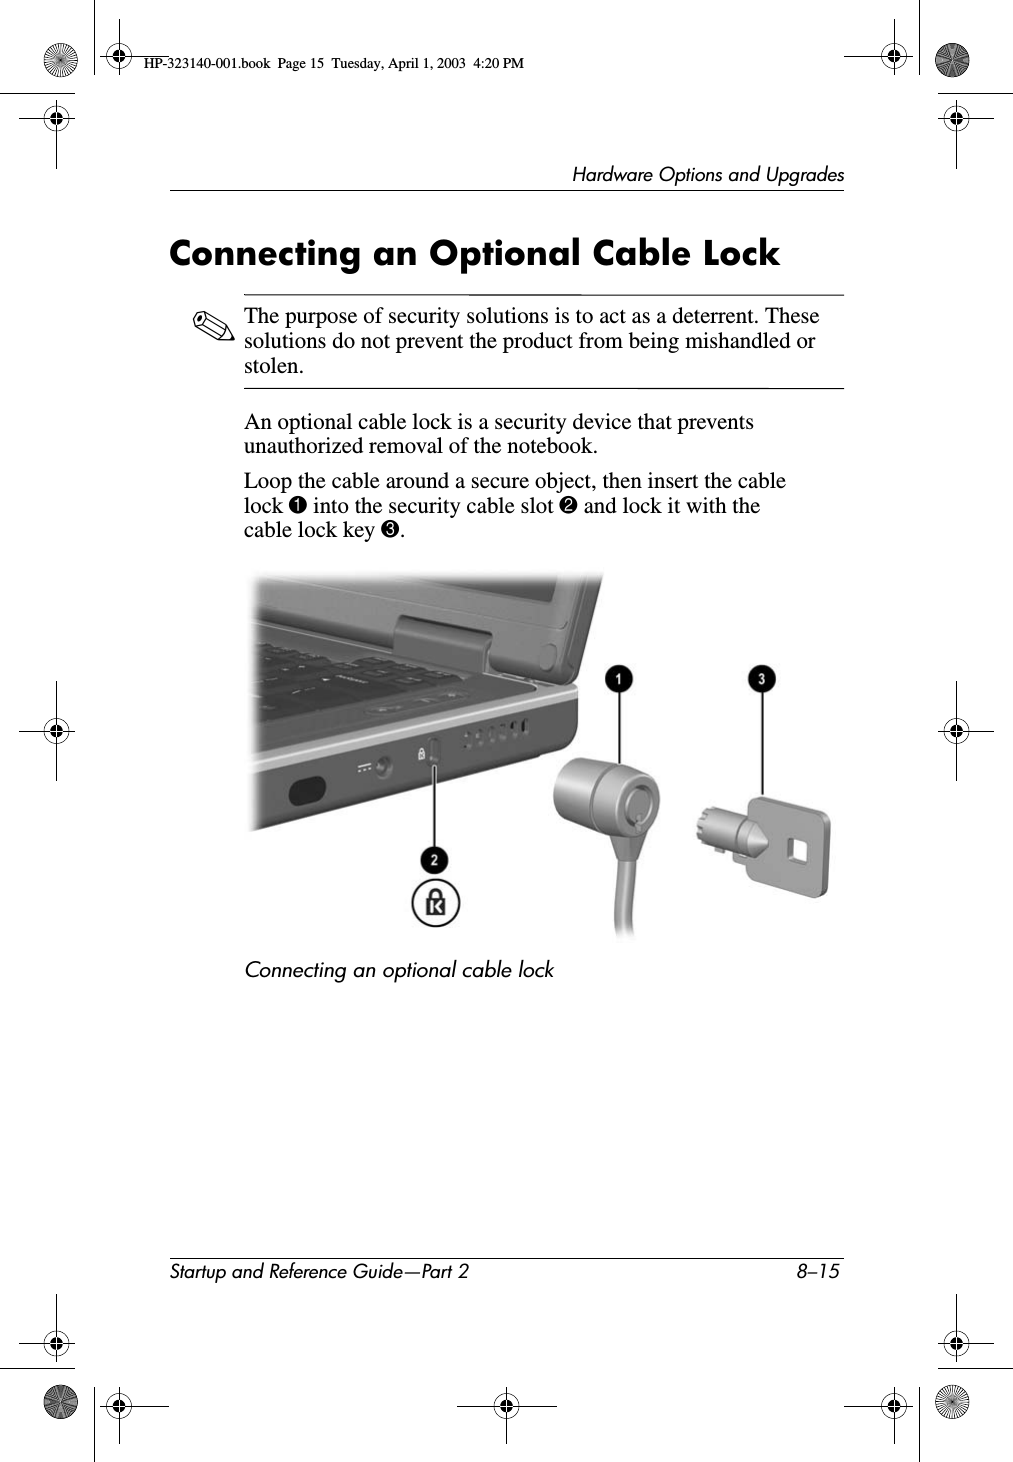
User Guide Part 4
Navigation menu
Upload a User Manual
Namespaces
Wiki Guide
HTML
PDF
Info
Views
User Manual
Discussion / Help
Navigation