Broadcom BRCM1052 802.11 agn WLAN + BT PCI-E Minicard User Manual User Guide
Broadcom Corporation 802.11 agn WLAN + BT PCI-E Minicard User Guide
UserManual.wiki
>
Broadcom
>
BRCM1052 User Manual
>
User Guide
Contents
1.
User Manual
2.
OEM Installation Guide
3.
OEM installation guide
4.
User Guide
User Guide
Navigation menu
Upload a User Manual
Namespaces
Wiki Guide
HTML
PDF
Info
Views
User Manual
Discussion / Help
Navigation


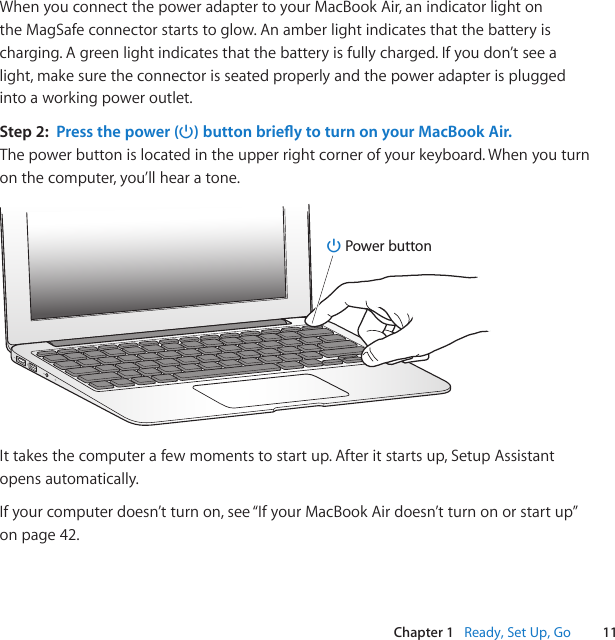

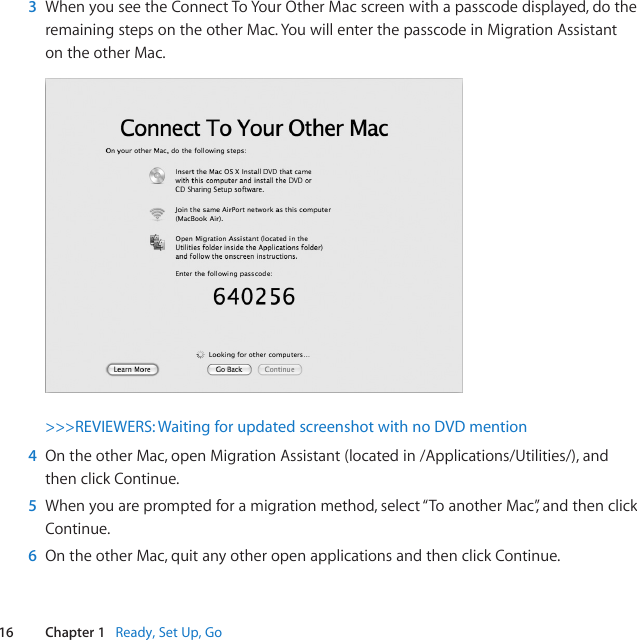
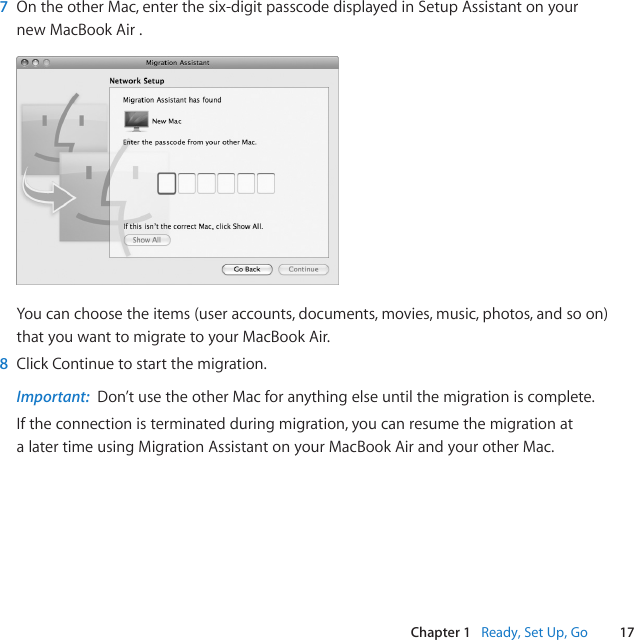

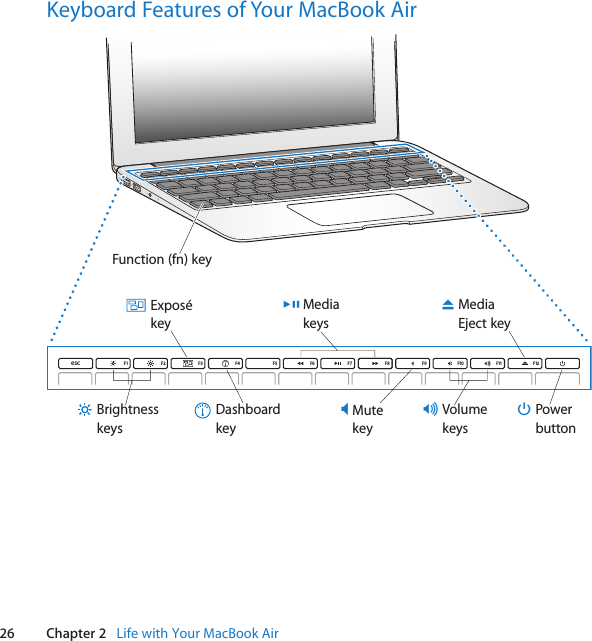
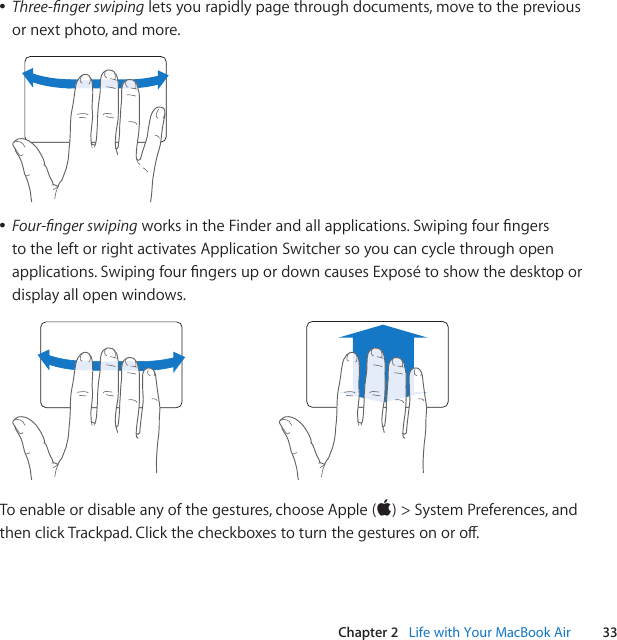
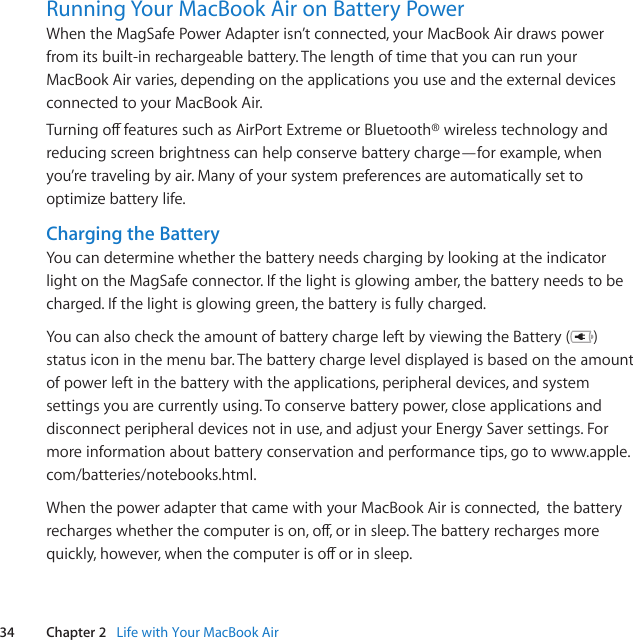
![27Chapter 2 Life with Your MacBook AirFunction (fn) keyPress and hold this key to activate customized actions assigned to the function keys (F1toF12).Tolearnhowtocustomizefunctionkeys,chooseHelp>MacHelpfromthemenu bar and search for “function keys.”¤Brightness keys (F1, F2)Increase ( ) or decrease ( ) the brightness of the screen.Exposé key (F3)Open Exposé for quick access to all your open windows.Dashboard key (F4)Open Dashboard to access your widgets.’Media keys (F7, F8, F9)Rewind (]), play or pause (’), or fast-forward (‘) a song, movie, or slideshow.—Mute key (F10)Mute the sound coming from the built-in speakers and audio out port.-Volume keys (F11, F12)Increase (-) or decrease (–) the volume of sound coming from the built-in speakers or audio out port.CMedia Eject keyPress and hold this key to eject a disc from a MacBook Air Superdrive (available separately). You can also eject a disc by dragging its icon from the desktop to the Trash.®Power buttonTurnyourMacBookAironoro,orputittosleep.](https://usermanual.wiki/Broadcom/BRCM1052.User-Guide/User-Guide-1363292-Page-27.png)