Broadcom BRCM1056 802.11b/g/n WLAN + Bluetooth Module Combo User Manual
Broadcom Corporation 802.11b/g/n WLAN + Bluetooth Module Combo
Broadcom >
Contents
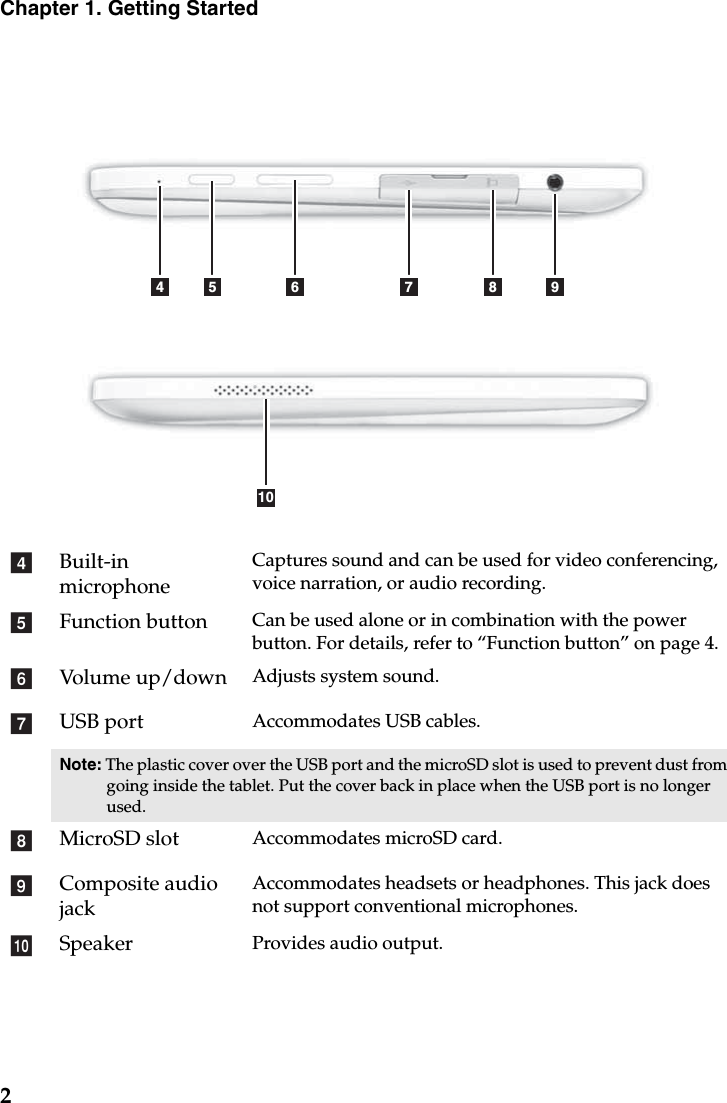
- 1. Regulatory Users Guide
- 2. Installation Guide
- 3. Regulatory Users Manual
- 4. Host user manual
Host user manual