Brother Ce 5000Prw Quick Start Guide
2014-07-05
: Brother Brother-Ce-5000Prw-Quick-Start-Guide brother-ce-5000prw-quick-start-guide brother pdf
Open the PDF directly: View PDF ![]() .
.
Page Count: 252 [warning: Documents this large are best viewed by clicking the View PDF Link!]
Please visit us at http://solutions.brother.com when you can get product
support and answers to frequently asked questions (FAQs).
Computerized Sewing and Embroidery Machine
Operation Manual
Product Code:882-S96
Getting Ready
Sewing Basics
Utility Stitches
Character/
Decorative Stitches
Embroidery
Embroidery Edit
My Custom Stitch
Appendix

i
IMPORTANT SAFETY INSTRUCTIONS
When using this machine, basic safety precautions should always be taken, including the following:
Read all instructions before using.
DANGER - To reduce the risk of electric shock:
1. The machine should never be left unattended while plugged in. Always unplug the machine from the electrical
outlet immediately after using and before cleaning.
WARNING - To reduce the risk of burns, fire, electric shock, or injury to persons:
1. Do not allow this machine to be used as a toy. Close attention is necessary when the machine is used by or
near children.
2. Use this machine only for its intended use as described in this manual. Use only accessories recommended by
the manufacturer as contained in this manual.
3. Never operate this machine if it has a damaged cord or plug, if it is not working properly, if it has been dropped
or damaged, or dropped into water. Return the machine to the nearest authorized dealer or service center for
examination, repair, electrical or mechanical adjustment.
4. Never operate the machine with any air openings blocked. Keep ventilation openings of the machine and foot
control free from the accumulation of lint, dust, and loose cloth.
5. Never drop or insert any object into any opening.
6. Do not use outdoors.
7. Do not operate where aerosol (spray) products are being used or where oxygen is being administered.
8. To disconnect, turn the main switch to the symbol “ ” position which represents off, then remove plug from
outlet.
9. Do not unplug by pulling on cord. To unplug, grasp the plug, not the cord.
10. Keep fingers away from all moving parts. Special care is required around the machine needle.
11. Always use the proper needle plate. The wrong plate can cause the needle to break.
12. Do not use bent needles.
13. Do not pull or push fabric while stitching. It may deflect the needle causing it to break.
14. Switch the machine to the symbol “ ” position when making any adjustments in the needle area, such as
threading needle, changing needle, threading bobbin, or changing presser foot, and the like.
15. Always unplug the machine from the electrical outlet when removing covers, lubricating, or when making any
other user servicing adjustments mentioned in the instruction manual.
16. This sewing machine is not intended for use by young children or infirm persons without supervision.
17. Young children should be supervised to ensure that they do not play with this machine.
18. If the light unit is damaged, it must be replaced by authorized dealer.
19. Hold the foot controller plug when rewinding into cord reel. Do not allow the plug to whip when rewinding.

ii
Use this machine only for its intended use as described in this manual.
Use accessories recommended by the manufacturer as contained in this manual.
The contents of this manual and specifications of this product are subject to change without notice.
For additional product information, visit our web site at www.brother.com
SAVE THESE INSTRUCTIONS
This machine is intended for household use.
This appliance is not intended for use by persons (including children) with reduced physical, sensory or mental
capabilities, or lack of experience and knowledge, unless they have been given supervision or instruction
concerning use of the appliance by a person responsible for their safety. Children should be supervised to ensure
that they do not play with the appliance.
FOR USERS IN THE UK, EIRE, MALTA
AND CYPRUS ONLY
IMPORTANT
• In the event of replacing the plug fuse, use a fuse approved by ASTA to BS 1362, i.e. carrying the mark,
rating as marked on plug.
• Always replace the fuse cover. Never use plugs with the fuse cover omitted.
• If the available electrical outlet is not suitable for the plug supplied with this equipment, you should contact your
authorized dealer to obtain the correct lead.

iii
Federal Communications Commission (FCC)
Declaration of Conformity (For USA Only)
complies with Part 15 of the FCC Rules. Operation is subject to the following two conditions: (1) this device may
not cause harmful interference, and (2) this device must accept any interference received, including interference
that may cause undesired operation.
This equipment has been tested and found to comply with the limits for a Class B digital device, pursuant to Part 15
of the FCC Rules. These limits are designed to provide reasonable protection against harmful interference in a
residential installation. This equipment generates, uses, and can radiate radio frequency energy and, if not installed
and used in accordance with the instructions, may cause harmful interference to radio communications. However,
there is no guarantee that interference will not occur in a particular installation. If this equipment does cause
harmful interference to radio or television reception, which can be determined by turning the equipment off and on,
the user is encouraged to try to correct the interference by one or more of the following measures:
• Reorient or relocate the receiving antenna
• Increase the separation between the equipment and receiver.
• Connect the equipment into an outlet on a circuit different from that to which the receiver is
connected.
• Consult the dealer or an experienced radio/TV technician for help.
• The enclosed interface cable should be used in order to ensure compliance with the limits for a Class
B digital device.
• Changes or modifications not expressly approved by Brother Industries, Ltd. could void the user's
authority to operate the equipment.
Responsible Party: Brother International Corporation
100 Somerset Corporate Boulevard
Bridgewater, NJ 08807-0911 USA
TEL : (908) 704-1700
declares that the product
Product Name:
Model Number:
Brother Sewing Machine
NV5000

iv
CONGRATULATIONS ON CHOOSING OUR
MACHINE
Your machine is the most advanced computerized household embroidery and sewing machine. To fully enjoy all
the features incorporated, we suggest that you study the manual.
PLEASE READ BEFORE USING THIS MACHINE
For safe operation
1. Be sure to keep your eye on the needle while sewing. Do not touch the handwheel, thread take-up, needle, or
other moving parts.
2. Remember to turn off the power switch and unplug the cord when:
• Operation is completed
• Replacing or removing the needle or any other parts
• A power failure occurs during use
• Maintaining the machine
• Leaving the machine unattended.
3. Do not store anything on the foot controller.
4. Plug the machine directly into the wall. Do not use extension cords.
For a longer service life
1. When storing this machine, avoid direct sunlight and high humidity locations. Do not use or store the machine
near a space heater, iron, halogen lamp, or other hot objects.
2. Use only neutral soaps or detergents to clean the case. Benzene, thinner, and scouring powders can damage
the case and machine, and should never be used.
3. Do not drop or hit the machine.
4. Always consult the operation manual when replacing or installing any assemblies, the presser feet, needle, or
other parts to assure correct installation.
For repair or adjustment
In the event a malfunction occurs or adjustment is required, first follow the troubleshooting table in the back of the
operation manual to inspect and adjust the machine yourself. If the problem persists, please consult your local
authorized Brother dealer.
For additional product information and updates, visit our web site at www.brother.com
The contents of this manual, specifications of this product and also design of display are subject to change without
notice.

v
vi
WHAT YOU CAN DO WITH THIS MACHINE
Check operations and view advice on the large LCD (liquid crystal display).
SPECIAL FEATURES
Prepare the bobbin thread with one touch.
The automatic thread tension makes trial sewing unnecessary.
Automatic threading makes threading quick and easy.
Utility Stitches Character/Decorative
Stitches
Chapter 1
Chapter 3Chapter 4
Chapter 2
To learn the operation of the principal
parts and the screens
Pre-programmed with more than
100 frequently used stitches
To learn how to prepare for sewing and
basic sewing operations
The variety of stitches widen your creativity
Getting Ready Sewing Basics
Embroidery
Chapter 5
Maximum 30 cm x 18 cm (approx. 12 x 7
inches) for large embroidery designs
Embroidery Edit
Chapter 6
Designs can be combined, rotated or enlarged
My Custom Stitch
Chapter 7
Create original decorative stitches
Appendix
Chapter 8
Caring for your machine and dealing with
errors and malfunctions
Page 7 Page 37
Page 47 Page 97
Page 125 Page 175
Page 199 Page 209
vii
HOW TO USE THIS MANUAL
Chapter 1 and Chapter 2 explain your sewing machine’s basic operation procedures for someone who is
using the sewing machine for the first time. If you want to sew utility stitches or character/ decorative
stitches, read Chapter 1 and Chapter 2, then go on to Chapter 3 (Utility Stitches) or Chapter 4 (Character/
Decorative Stitches).
When you are ready to begin using the embroidery function after reading Chapter 1 and Chapter 2,
proceed to Chapter 5 (Embroidery). Once you understand the steps explained in Chapter 5, go on to
Chapter 6 (Embroidery Edit) for an explanation about the convenient embroidery edit functions.
In the screens that appear in the step-by-step directions the parts that are used for the operation are shown
in . Compare the screen in the directions with the actual screen, and carry out the operation.
If, while using the machine, you experience something you do not understand, or there is a function you
would like to know more about, refer to the index at the back of the operation manual in conjunction
with the table of contents to find the section of the manual you should refer to.
To sew utility stitches
To sew character or
decorative stitches
To do machine
embroidery
Chapter 1 Chapter 2
Chapter 3
Chapter 4
Chapter 1 Chapter 2 Chapter 5 Chapter 6

Contents
viii
CONTENTS
IMPORTANT SAFETY INSTRUCTIONS ..................i
WHAT YOU CAN DO WITH THIS MACHINE.....vi
HOW TO USE THIS MANUAL ............................vii
NAMES OF MACHINE PARTS AND THEIR
FUNCTIONS .........................................................1
Machine ................................................................................. 1
Needle and Presser Foot Section ............................................. 2
Embroidery Unit ..................................................................... 2
Operation Buttons................................................................... 3
Included Accessories .............................................................. 3
Options................................................................................... 6
Chapter 1 Getting Ready 7
TURNING THE MACHINE ON/OFF .....................8
LCD SCREEN .........................................................9
Using the Machine Setting Mode Key .................................. 12
Using the Machine Operation Mode Key .............................. 17
Using the Pattern Explanation Key ........................................ 18
LOWER THREADING..........................................19
Winding the Bobbin.............................................................. 19
Setting the Bobbin................................................................. 22
Pulling Up the Bobbin Thread............................................... 23
UPPER THREADING ...........................................25
Threading Using the “Automatic Threading” Button.............. 25
Threading Manually.............................................................. 27
Using the Twin Needle Mode .............................................. 29
Using Threads that Unwind Quickly ..................................... 31
CHANGING THE PRESSER FOOT .......................32
Removing the Presser Foot .................................................... 32
Attaching the Presser Foot..................................................... 32
Attaching the Walking Foot................................................... 33
CHANGING THE NEEDLE...................................34
Chapter 2 Sewing Basics 37
SEWING ..............................................................38
Sewing a Stitch ..................................................................... 38
Sewing Reinforcement Stitches ............................................ 40
Sewing Curves ...................................................................... 40
Changing Sewing Direction ................................................. 40
Sewing Heavyweight Fabrics ............................................... 41
Sewing Lightweight Fabrics .................................................. 41
STITCH SETTINGS ..............................................42
Setting the Stitch Width......................................................... 42
Setting the Stitch Length ....................................................... 42
Setting the Thread Tension ................................................... 43
USEFUL FUNCTIONS..........................................44
Automatic Reinforcement Stitching ...................................... 44
Automatic Thread Cutting ..................................................... 45
Locking the Screen ............................................................... 46
Chapter 3 Utility Stitches 47
SELECTING UTILITY STITCHES ..........................48
Selecting a Stitch................................................................... 48
Saving Your Stitch Settings ................................................... 50
Using the Sewing Type Selection Key .................................. 51
SEWING THE STITCHES .....................................53
Straight Stitches..................................................................... 53
Dart Seam............................................................................. 57
Gathering.............................................................................. 57
Flat Fell Seam ....................................................................... 58
Pintuck ................................................................................. 59
Zigzag Stitches ..................................................................... 60
Elastic Zigzag Stitches .......................................................... 62
Overcasting ......................................................................... 63
Quilting ............................................................................... 67
Blind Hem Stitches .............................................................. 72
Appliqué ..............................................................................73
Shelltuck Stitches .................................................................74
Scallop Stitches ....................................................................75
Top Stitching .........................................................................75
Smocking Stitches ................................................................76
Fagoting ...............................................................................76
Tape or Elastic Attaching ......................................................77
Heirloom ..............................................................................78
One-step Buttonholes ...........................................................80
Four-step Buttonholes............................................................84
Bar Tacks .............................................................................88
Button Sewing ......................................................................90
Eyelet ...................................................................................92
Multi-directional Sewing (Straight Stitch and Zigzag Stitch) ..93
Zipper Insertion ....................................................................94
Chapter 4 Character/Decorative Stitches 97
SELECTING STITCH PATTERNS .......................... 98
Selecting Decorative Stitch Patterns/7mm Decorative Stitch
Patterns/Satin Stitch Patterns/7mm Satin Stitch Patterns/Cross
Stitch/Utility Decorative Stitch Patterns ...............................100
Alphabet Characters ...........................................................100
SEWING STITCH PATTERNS ........................... 102
Sewing Attractive Finishes ..................................................102
Basic Sewing .......................................................................102
Making Adjustments ...........................................................103
EDITING STITCH PATTERNS ........................... 105
Changing the Size ...............................................................106
Changing the Length (for 7mm Satin Stitch Patterns Only) ..107
Creating a Vertical Mirror Image ........................................107
Creating a Horizontal Mirror Image ....................................107
Sewing a Pattern Continuously ...........................................107
Changing Thread Density
(for Satin Stitch Patterns Only) ............................................108
Checking the Image.............................................................108
COMBINING STITCH PATTERNS .................... 110
Before Combining ...............................................................110
Combining Various Stitch Patterns ......................................110
Combining Large and Small Stitch Patterns .........................112
Combining Horizontal Mirror Image Stitch Patterns ............112
Combining Stitch Patterns of Different Length .....................113
Making Step Stitch Patterns
(for 7mm Satin Stitch Patterns Only) ...................................114
USING THE MEMORY FUNCTION .................. 116
Stitch Data Precautions .......................................................116
Saving Stitch Patterns in the Machine’s Memory .................118
Saving Stitch Patterns to USB Media
(Commercially Available) ....................................................120
Saving Stitch Patterns in the Computer ................................121
Retrieving Stitch Patterns from the Machine’s Memory ........122
Recalling from USB Media ..................................................123
Recalling from the Computer...............................................124
Chapter 5 Embroidery 125
BEFORE EMBROIDERING................................. 126
Embroidery Step by Step .....................................................126
Attaching Embroidery Foot “W” .........................................127
Attaching the Embroidery Unit ...........................................128
SELECTING PATTERNS .................................... 130
Selecting Embroidery Patterns/Heirloom Patterns/Border
Patterns/Cross stitch Patterns/Floral alphabet Patterns ..........132
Selecting Alphabet Character Patterns .................................133
Selecting Frame Patterns .....................................................134
Selecting Patterns from Embroidery Cards ..........................135
Selecting Patterns from USB media/Computer .....................135
VIEWING THE SEWING SCREEN ..................... 136
PREPARING THE FABRIC ................................. 138
Attaching Iron-on Stabilizers (backing) to the Fabric ...........138

Contents
ix
1
2
3
4
5
6
7
8
Hooping the Fabric in the Embroidery Frame .....................139
Embroidering Small Fabrics or Fabric Edges .......................141
ATTACHING THE EMBROIDERY FRAME..........143
CONFIRMING THE PATTERN POSITION ........144
Checking the Pattern Position .............................................144
Previewing the Completed Pattern ......................................145
SEWING AN EMBROIDERY PATTERN .............146
Sewing Attractive Finishes ..................................................146
Sewing Embroidery Patterns ................................................147
Sewing Embroidery Patterns Which Use Appliqué ..............148
ADJUSTMENTS DURING THE EMBROIDERY
PROCESS ..........................................................150
If the Bobbin Runs Out of Thread .......................................150
If the Thread Breaks During Sewing ....................................151
Restarting from the Beginning .............................................152
Resuming Embroidery After Turning Off the Power .............152
MAKING EMBROIDERY ADJUSTMENTS .........154
Adjusting Thread Tension ...................................................154
Using the Automatic Thread Cutting Function
(END COLOR TRIM) ...........................................................155
Using the Thread Trimming Function (JUMP STITCH TRIM) 155
Adjusting the Embroidery Speed .........................................156
Changing the Thread Color Display.....................................157
Changing the Embroidery Frame Display ............................158
REVISING THE PATTERN .................................159
Changing the Pattern Position .............................................159
Aligning the Pattern and the Needle ....................................159
Changing the Size ...............................................................160
Rotating the Pattern .............................................................161
Creating a Horizontal Mirror Image ....................................162
Changing the Density (Alphabet Character
and Frame Patterns Only) ...................................................162
Changing the Colors of Alphabet Character Patterns ...........163
USING THE MEMORY FUNCTION ..................164
Embroidery Data Precautions ..............................................164
Saving Embroidery Patterns in the Machine’s Memory ........166
Saving Embroidery Patterns to USB Media (Commercially
Available)............................................................................168
Saving Embroidery Patterns in the Computer .......................169
Retrieving Patterns from the Machine’s Memory .................170
Recalling from USB Media ..................................................170
Recalling from the Computer...............................................171
EMBROIDERY APPLICATIONS .........................173
Using a Frame Pattern to Make an Appliqué (1) ..................173
Using a Frame Pattern to Make an Appliqué (2) ..................174
Chapter 6 Embroidery Edit 175
EXPLANATION OF FUNCTIONS .....................176
SELECTING PATTERNS TO EDIT ......................177
Selecting Embroidery Patterns/Heirloom Patterns/Border
Patterns/Cross stitch Patterns/Floral Alphabet Patterns/Frame
Patterns ...............................................................................178
Selecting Alphabet Character Patterns .................................178
EDITING PATTERNS .........................................181
Moving the Pattern .............................................................183
Rotating the Pattern ............................................................183
Changing the Size of the Pattern .........................................184
Deleting the Pattern ............................................................185
Changing the Configuration of Alphabet Character Patterns 185
Changing Alphabet Character Spacing ...............................185
Changing the Color of Each
Alphabet Character in a Pattern ..........................................186
Changing the Thread Color ................................................187
Creating a Custom Thread Table .........................................188
Choosing a Color from the Custom Thread Table ................189
Designing Repeated Patterns ...............................................190
After Editing ........................................................................194
COMBINING PATTERNS...................................195
Editing Combined Patterns ..................................................195
Sewing Combined Patterns..................................................197
USING THE MEMORY FUNCTION...................198
Chapter 7 MY CUSTOM STITCH 199
DESIGNING A STITCH .................................... 200
ENTERING STITCH DATA ............................... 202
USING STORED CUSTOM STITCHES............... 207
Storing Custom Stitches in Your List.................................... 207
Retrieving Stored Stitches.................................................... 208
Chapter 8 Appendix 209
CARE AND MAINTENANCE ............................. 210
About the Maintenance Message ....................................... 210
Cleaning the LCD Screen ................................................... 210
Cleaning the Machine Casing ............................................ 210
Cleaning the Race............................................................... 210
Adjusting the Alternate Bobbin Case (with no marking) ...... 211
ADJUSTING THE SCREEN ................................ 212
Screen Visibility is Low....................................................... 212
Touch Panel is Malfunctioning ........................................... 212
TROUBLESHOOTING ...................................... 214
ERROR MESSAGES ........................................... 217
SPECIFICATIONS.............................................. 223
UPGRADING YOUR MACHINE’S SOFTWARE. 224
Upgrade Procedure Using USB Media ................................ 224
Upgrade Procedure Using Computer .................................. 224
STITCH SETTING CHART ................................. 227
INDEX............................................................... 234

Contents
x

NAMES OF MACHINE PARTS AND THEIR FUNCTIONS
1
NAMES OF MACHINE PARTS AND THEIR FUNCTIONS
The names of the various parts of the sewing machine and their functions are described below. Before
using the sewing machine, carefully read these descriptions to learn the names of the machine parts.
Machine
■Front View
aTop cover
Open the top cover to thread the machine and wind the bobbin.
bThread cutter
Pass the threads through the thread cutter to cut them.
cThread take-up lever check window
Look through the window to check the upper thread passing
through in it.
dFlat bed attachment with accessory compartment
Store presser feet and bobbins in the accessory compartment
of the flat bed attachment. When sewing cylindrical pieces,
remove the flat bed attachment.
eOperation buttons (6 buttons) and sewing speed
controller
Use these buttons and the slide to operate the sewing machine.
fKnee lifter slot
Insert the knee lifter into the slot.
gKnee lifter
Use the knee lifter to raise and lower the presser foot.
hLCD (liquid crystal display)
Settings for the selected stitch and error messages appear in
the LCD.
iThread guide plate
Pass the thread around the thread guide plate when threading
upper thread.
jSpool cap
Use the spool cap to hold the spool in place.
kSpool pin
Place a spool of thread on the spool pin.
lBobbin winder
Use the bobbin winder when winding the bobbin.
mSupplemental spool pin
Use this spool pin to wind the bobbin thread, or to sew with the
twin needle.
nThread guide for bobbin winding
Pass the thread around this thread guide when winding the
bobbin thread.
oPretension disk
Pass the thread around the pretension disk when winding the
bobbin thread.
■Right-side/Rear View
aHandle
Carry the sewing machine by its handle when transporting the
machine.
bHandwheel
Turn the handwheel toward you to raise and lower the needle.
The wheel should be turned toward the front of the machine.
cEmbroidery card slot
Insert the embroidery cards (sold separately) into the
embroidery card slot.
dUSB port connector for media
In order to send patterns from/to USB media, plug the USB
media directly into the USB port connector.
eUSB port connector for computer
In order to import/export patterns between a computer and the
machine, plug the USB cable into the USB port connector.
fTouch pen holder
Use the touch pen holder to hold the touch pen when not in use.
gMain power switch
Use the main power switch to turn the sewing machine ON and
OFF.
hJack connector
Insert the power cord into the connector jack.
iFeed dog position switch
Use the feed dog position switch to lower the feed dogs.
jPresser foot lever
Raise and lower the presser foot lever to raise and lower the
presser foot.
kAir vent
The air vent allows the air surrounding the motor to circulate. Do
not cover the air vent while the sewing machine is being used.
lFoot controller with retractable cord
Depress the foot controller to control the speed of the machine.
mFoot controller jack
Insert the foot controller plug into its jack on the machine.
m
a
n
l
h
b
c
g
f
k
j
i
d
e
i
a
b
de
f
g
h
on
c
m
l
j
k
c
b
h
a
g
l
k
f
d
e
j
i
m
NAMES OF MACHINE PARTS AND THEIR FUNCTIONS
2
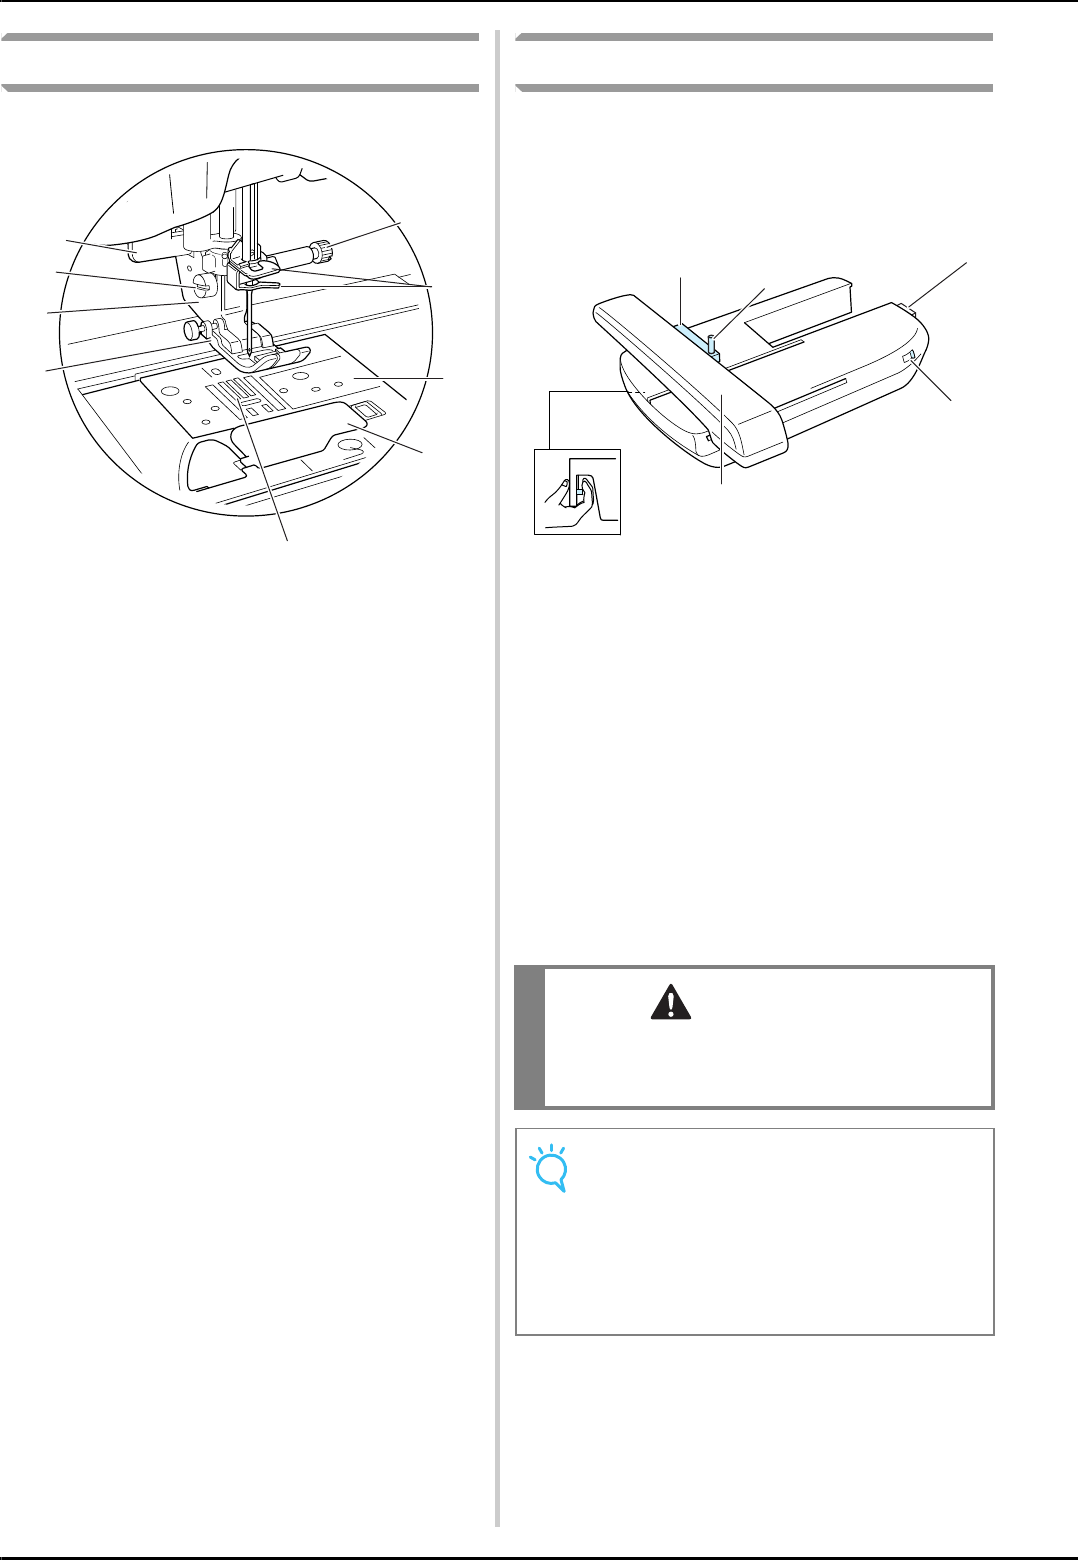
Needle and Presser Foot Section
aPresser foot holder
The presser foot is attached onto the presser foot holder.
bPresser foot
The presser foot applies pressure consistently on the fabric as
sewing takes place. Attach the appropriate presser foot for the
selected stitch.
cFeed dogs
The feed dogs feed the fabric in the sewing direction.
dBobbin cover
Open the bobbin cover to set the bobbin.
eNeedle clamp screw
Use the needle clamp screw to hold the needle in place.
fButtonhole lever
The buttonhole lever is used with the one-step buttonhole foot
to create buttonholes.
gNeedle bar thread guides
Pass the upper thread through the two needle bar thread
guides.
hNeedle plate
The needle plate is marked with guides to help sew straight
seams.
iPresser foot holder screw
Use the presser foot holder screw to hold the presser foot in
place.
Embroidery Unit
aCarriage
The carriage moves the embroidery frame automatically when
embroidering.
bRelease button (located under the embroidery unit)
Press the release button to remove the embroidery unit.
cFeed dog position switch
Use the feed dog position switch to raise and lower the feed
dogs while the embroidery unit is attached.
dEmbroidery unit connection
Insert the embroidery unit connection into the connection port
when attaching the embroidery unit.
eEmbroidery frame holder
Insert the embroidery frame into the embroidery frame holder to
hold the frame in place.
fFrame-securing lever
Press the frame-securing lever down to secure the embroidery
frame.
f
i
a
b
c
e
g
h
d
CAUTION
• After the embroidery frame is set in the frame
holder, be sure the frame-securing lever is
correctly lowered.
Note
• Be sure that the feed dog position switch on
the embroidery unit is located at right when
embroidering.
• You can also sew utility/decorative stitches
with the embroidery unit attached. Set the
feed dog position switch on the embroidery
unit to the appropriate setting.
ef
d
a
c
b
NAMES OF MACHINE PARTS AND THEIR FUNCTIONS
3
Operation Buttons
a“Start/Stop” button
Press this button and the machine will sew a few stitches at a
slow speed and then begin sewing at the speed set by the
sewing speed controller. Press the button again to stop the
machine. Hold the button in to sew at the machine’s slowest
speed. The button changes color according to the machine’s
operation mode.
b“Reverse/Reinforcement Stitch” button
Use this button to sew reinforcement stitches at the beginning
and end of sewing. Press this button, and the machine sews 3
stitches in the same spot and stops automatically. For straight
and zigzag stitch patterns that take reverse stitches, the
machine will sew reverse stitches at low speed only while
holding down the “Reverse/Reinforcement Stitch“ button (the
stitches are sewn in the opposite direction).
c“Needle Position” button
Use this button when changing sewing direction or for detailed
sewing in small areas. Press this button to raise or lower the
needle position. Press the button twice to sew a single stitch.
d“Thread Cutter” button
Press this button after sewing to automatically trim the excess
thread.
e“Presser Foot Lifter” button
Press this button to lower the presser foot and apply pressure to
the fabric. Press this button again to raise the presser foot.
fSewing Speed controller
Use this controller to adjust the sewing speed. Move the slide to
the left to sew at slower speeds. Move the slide to the right to
sew at higher speeds. Beginners should sew at a slow speed.
g“Automatic Threading” button
Use this button to automatically thread the needle.
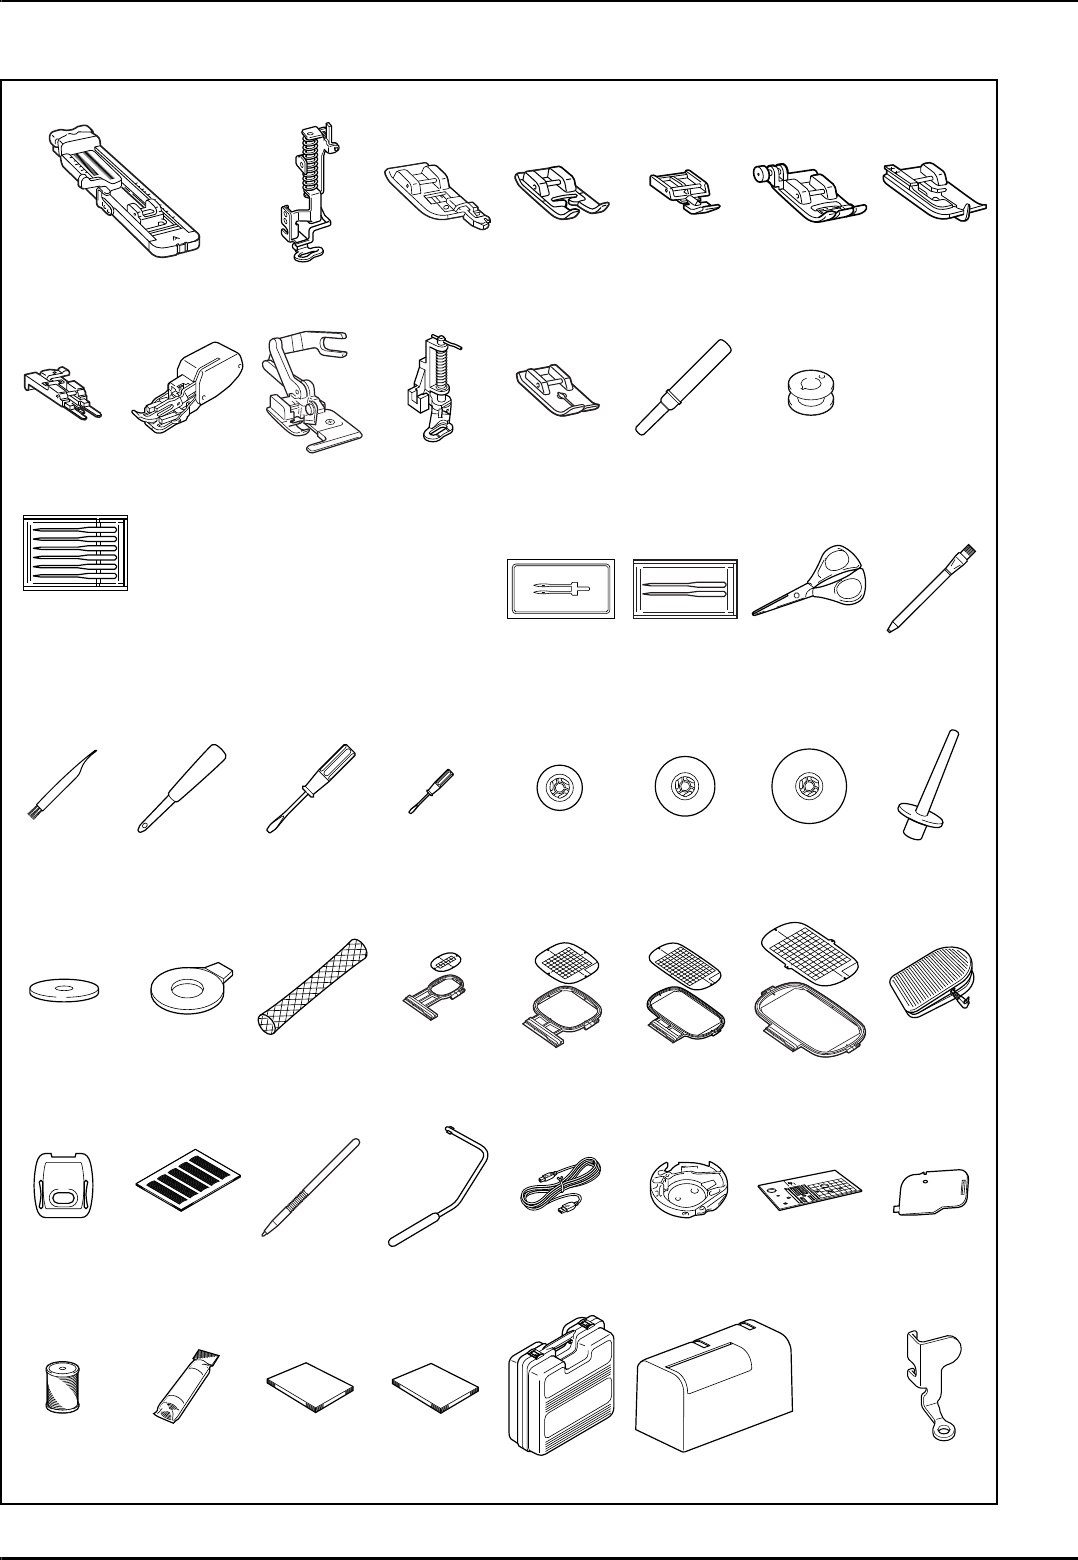
Included Accessories
Pull the top of the flat bed attachment to open the
accessory compartment.
aStorage space
bPresser foot storage space
cPresser foot storage space
Included Accessories 31-34 are contained in the
embroidery unit carrying case. To open the
embroidery unit carrying case, unhook the two
latches on the case. To re-hook the latches and
securely close the case, press on the latches until
each of them clicks.
aLatches
Green: the machine is ready to sew or is sewing.
Red: the machine cannot sew.
CAUTION
• Do not press the thread cutter button after the
threads have already been cut. Otherwise, the
needle may break, the threads may become
tangled, or damage to the machine may occur.
a
c
b
a
NAMES OF MACHINE PARTS AND THEIR FUNCTIONS
4
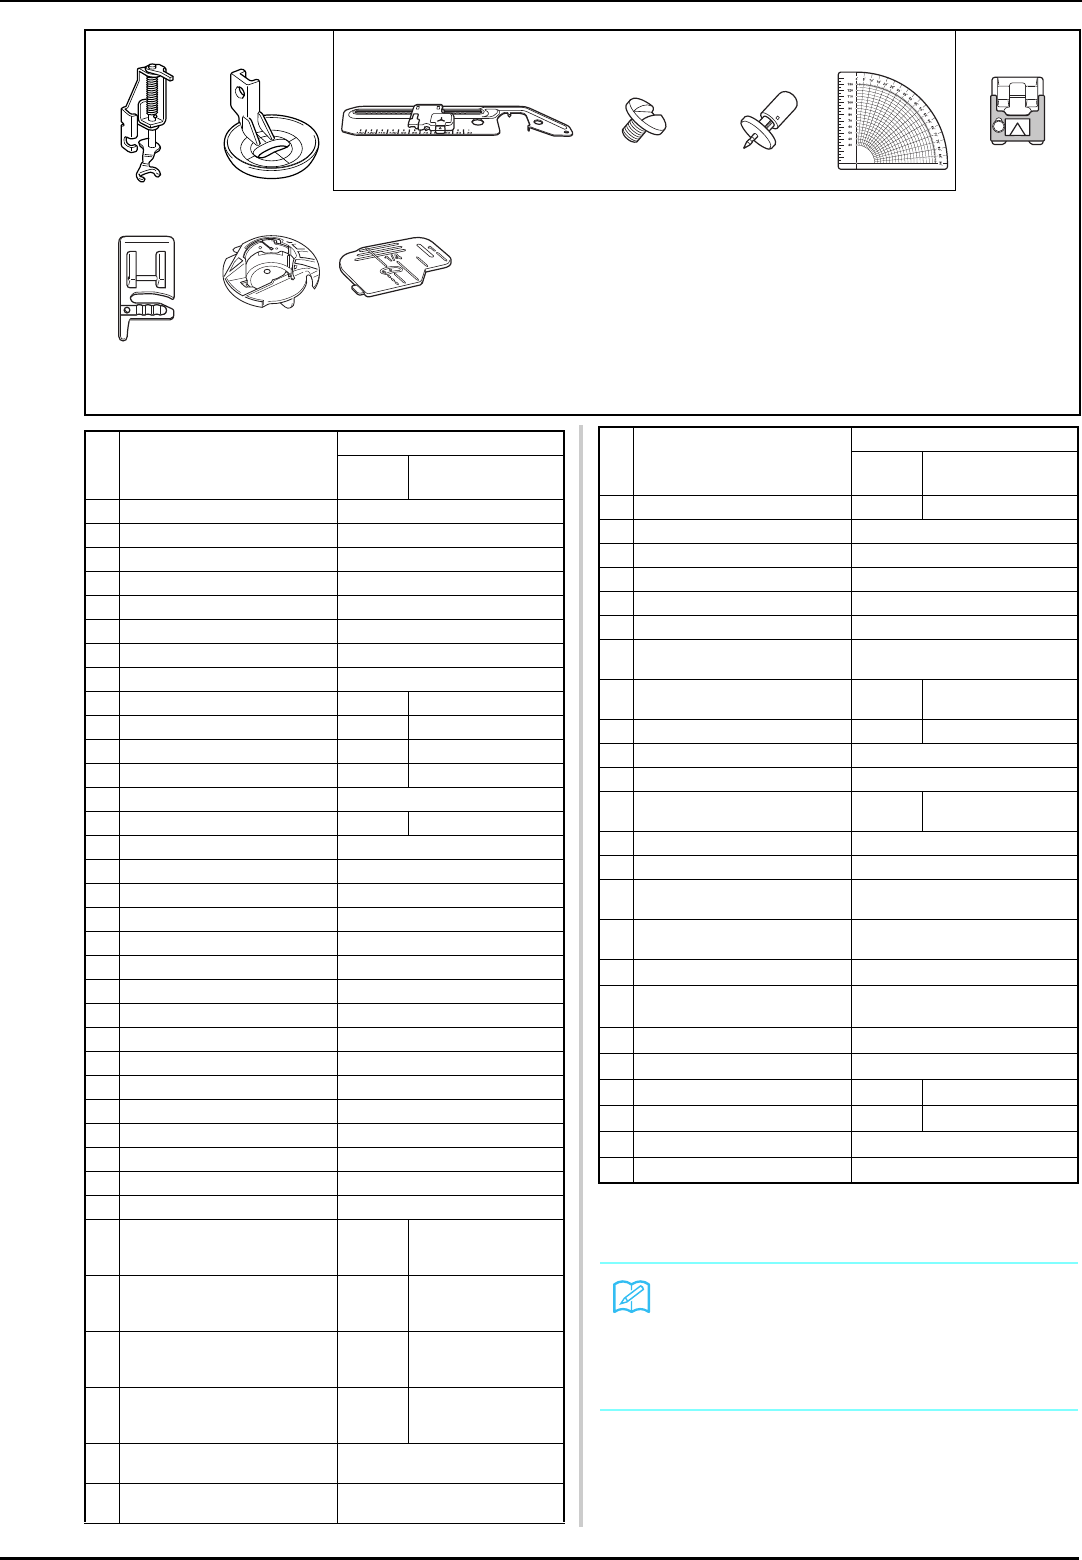
→ Included Accessories
1 234567
8 9 10 11 12 13 14
15 16 17 18 19
20 21 22 23 24 25 26 27
28 29 30 31*132*133*134*135
36 37 38 39 40 41 42 43
44 45 46 47 48 49 50
*1Included Accessories 31-34 are contained in the embroidery unit carrying case.
75/11 2 needles
90/14 2 needles
90/14 2 needles: Ball point
needle (gold colored)
NAMES OF MACHINE PARTS AND THEIR FUNCTIONS
5
50
* See Circular Attachment Instruction Manual for detailed
instruction.
** See Operation Manual Addendum for detailed instruction.
51 52 53*254*255*256*257*2
58*259*360*3
*2See Circular Attachment Instruction Manual for detailed instruction.
*3See Operation Manual Addendum for detailed instruction.
No. Part Name
Part Code
U.S.A./
Canada Others
1 Buttonhole foot “A” X57789-151
2 Embroidery foot “W” XC8156-651
3 Overcasting foot “G” XC3098-051
4 Monogramming foot “N” X53840-351
5 Zipper foot “I” X59370-051
6 Zigzag foot “J” (on machine) XC3021-051
7 Blind stitch foot “R” X56409-051
8 Button fitting foot “M” 130489-001
9 Walking foot SA140 F033N:X81125-001
10 Side cutter foot SA177 F054:XC3198-101
11 Free-motion quilting foot SA129 F005N:XC1948-002
12 Straight stitch foot SA167 F042N:XC1973-102
13 Seam ripper X54243-051
14 Bobbin × 10 SA156 SFB
15 Needle set X58358-051
16 Twin needle X59296-151
17 Ball point needle set XD0705-051
18 Scissors XC1807-121
19 Chalk pen XE8568-001
20 Cleaning brush X59476-051
21 Eyelet punch 135793-001
22 Screwdriver (large) XC8349-021
23 Screwdriver (small) X55468-021
24 Spool cap (small) 130013-154
25 Spool cap (medium) × 2 X55260-153
26 Spool cap (large) 130012-054
27 Vertical spool pin XC8619-051
28 Spool felt X57045-051
29 Disc-shaped screwdriver XC1074-051
30 Spool net XA5523-050
31 Embroidery frame set (small)
H 2 cm × W 6 cm
(H 1 inch × W 2-1/2 inches)
SA437 EF73:XC8479-052
32 Embroidery frame set
(medium) H 10 cm × W 10 cm
(H 4 inches × W 4 inches)
SA438 FE74:XC8480-052
33 Embroidery frame set (large)
H 18 cm × W 13 cm
(H 7 inches × W 5 inches)
SA439 EF75:XC8481-052
34 Embroidery frame set (extra
large) H 30 cm × W 18 cm
(H 12 inches × W 7 inches)
SA440 EF76:XC8482-052
35 Foot controller XD0500-151 (EU area)
XC8028-051 (other area)
36 Embroidery needle plate
cover
XA9939-051
37 Grid sheet set SA507 GS3:X81277-150
38 Touch pen (stylus) XA9940-051
39 Knee lifter XA6941-052
40 USB cable XD0745-051
41 Bobbin case (no marking) XC8167-551
42 Straight stitch needle plate XC8362-151
43 Cord guide bobbin cover (with
single hole)
XE8991-001
44 Embroidery bobbin thread SA-EBT EBT-CEN:
X81164-001
45 Stabilizer material SA519 BM3:X81175-101
46 Operation manual XF0649-001
47 Quick reference guide XF0584-001
48 Embroidery unit carrying
case
SA529 D6EUC:
XC9862-052
49 Hard case XC7750-051
50 Free-motion quilting foot “C” XE0765-101
51 Free-motion open toe quilting
foot “O”
XE0767-001
52 Free-motion echo quilting foot
“E”
XE0766-001
53 Circular attachment*BL-CSA
54 Attachment screw
(2pcs. one is extra)*
XE6022-001
55 Pivot pin*XE6016-001
56 Te m p la t e *XE6024-001
57 Braiding foot*SA141 F021N
58 Cording foot*SA110 F013N
59 Bobbin case (gray)** XE8298-001
60 Bobbin cover (with mark)** XF0750-001
Memo
(For U.S.A. only)
Foot controller: Model S
This foot controller can be used with this
machine model NV5000.
No. Part Name
Part Code
U.S.A./
Canada Others

NAMES OF MACHINE PARTS AND THEIR FUNCTIONS
6
Options
Memo
• Always use accessories recommended for
this machine.
• The screw of the presser foot holder is avail-
able through your authorized dealer (Part
code XA4813-051).
• Included accessories 35, 46, and 47 can be
stored in the machine’s hard case.
123
No. Part Name
Part Code
U.S.A./
Canada Others
1 Embroidery bobbin thread
(White)
SA-EBT X81164-001
Embroidery bobbin thread
(Black)
SAEBT999 XC5520-001
2 Stabilizer material SA519 X81175-101
Water soluble stabilizer SA520 X81267-001
3 Embroidery card
No. 1 Alphabet SA298 X58317-001
No. 2 Flower SA299 X58321-001
No. 3 Dinosaur SA300 X58362-001
No. 6 Moskowitz’s World SA303 X58497-001
No. 7 Country Life SA304 X59322-001
No. 8 Holiday SA305 X59357-001
No. 9 Hobby Craft SA306 X59511-001
No. 10 Monogram Emblem SA307 X59567-001
No. 11 Frame SA311 XA0257-001
No. 12 Transportation SA312 XA0275-001
No. 13 Sports Emblem SA313 XA0517-001
No. 14 Large Floral SA314 XA1223-001
No. 16 Cats & Dogs SA316 XA1406-001
No. 19 Marine SA319 XA2452-001
No. 20 Petite Designs SA320 XA2869-001
No. 21 Needlework SA321 XA2873-001
No. 22 Large Quilt SA322 XA3431-001
No. 23 White on White SA323 XA3430-001
No. 25 Horse SA325 XA3791-001
3 No. 27 Birds SA327 XA4289-001
No. 28 Christmas SA328 XA4502-001
No. 29 Lace SA329 XA4664-001
No. 30 Wildlife Animals SA330 XA4771-001
No. 31 Large Flower II SA331 XA5037-001
No. 32 Musical Instruments SA332 XA5386-001
No. 33 Trees SA333 XA5567-001
No. 35 Cats & Dogs II SA335 XA5629-001
No. 36 Fruits & Vegetables SA336 XA5659-001
No. 37 Appliqué Alphabet SA337 XA5753-001
No. 38 Angel SA338 XA5781-001
No. 39 Doll Face SA339 XA5978-001
No. 40 Sports 3 SA340 XA6111-001
No. 41 Renaissance Alphabet SA341 XA6586-001
No. 42 Farm SA342 XA6733-001
No. 43 Victorian SA343 XA6769-001
No. 44 Lace2 SA344 XA6849-001
No. 45 Fancy Work SA345 XA7770-001
No. 46 Australian Animals SA346 XA7893-001
No. 47 Butterfly SA347 XA8206-001
No. 48 Australian Flowers SA348 XA8250-001
No. 49 Folk Art SA349 XA8348-001
No. 50 Fairy & Floral SA350 XA8414-001
No. 52 Bear Collections SA352 XA8511-001
No. 53 Scene SA353 XA8936-001
No. 54 Tea Time SA354 XA9129-001
No. 55 Gardening SA355 XA9348-001
No. 56 Asian SA356 XC0025-001
No. 57 Large Christmas SA357 XC0057-001
No. 58 New Quilt Traditions SA358 XC0861-001
No. 60 Summer Fun SA360 XC1168-001
No. 61 Blouse Embellishment SA361 XC1304-001
No. 62 Zodiac Signs SA362 XC1502-001
No. 63 Bunny SA363 XC1646-001
No. 64 Grand Mom SA364 XC2176-001
No. 65 Red Work SA365 XC4220-001
No. 66 Pop Mix SA366 XC4819-001
No. 67 Home Dec Collection SA367 XC7048-001
No. 68 Cross Stitch
Collection1
SA368 XC7097-001
No. 69 Sport Shirt Motifs SA369 XC7274-001
No. 70 Cross Stitch
Collection2
SA370 XC7550-001
Memo
• You can use any of the brother embroidery
cards listed above with your machine.
• Please be aware that some specifications
may change without notice.
Note
• Embroidery cards purchased in foreign
countries may not work with your machine.
No. Part Name
Part Code
U.S.A./
Canada Others

Chapter 1
Getting Ready
TURNING THE MACHINE ON/OFF......................................................8
LCD SCREEN..........................................................................................9
■Key Functions..................................................................................................................10
Using the Machine Setting Mode Key......................................................................12
■Adjusting Screen Brightness ............................................................................................15
■Choosing the Display Language.......................................................................................16
Using the Machine Operation Mode Key ................................................................17
Using the Pattern Explanation Key ..........................................................................18
LOWER THREADING ..........................................................................19
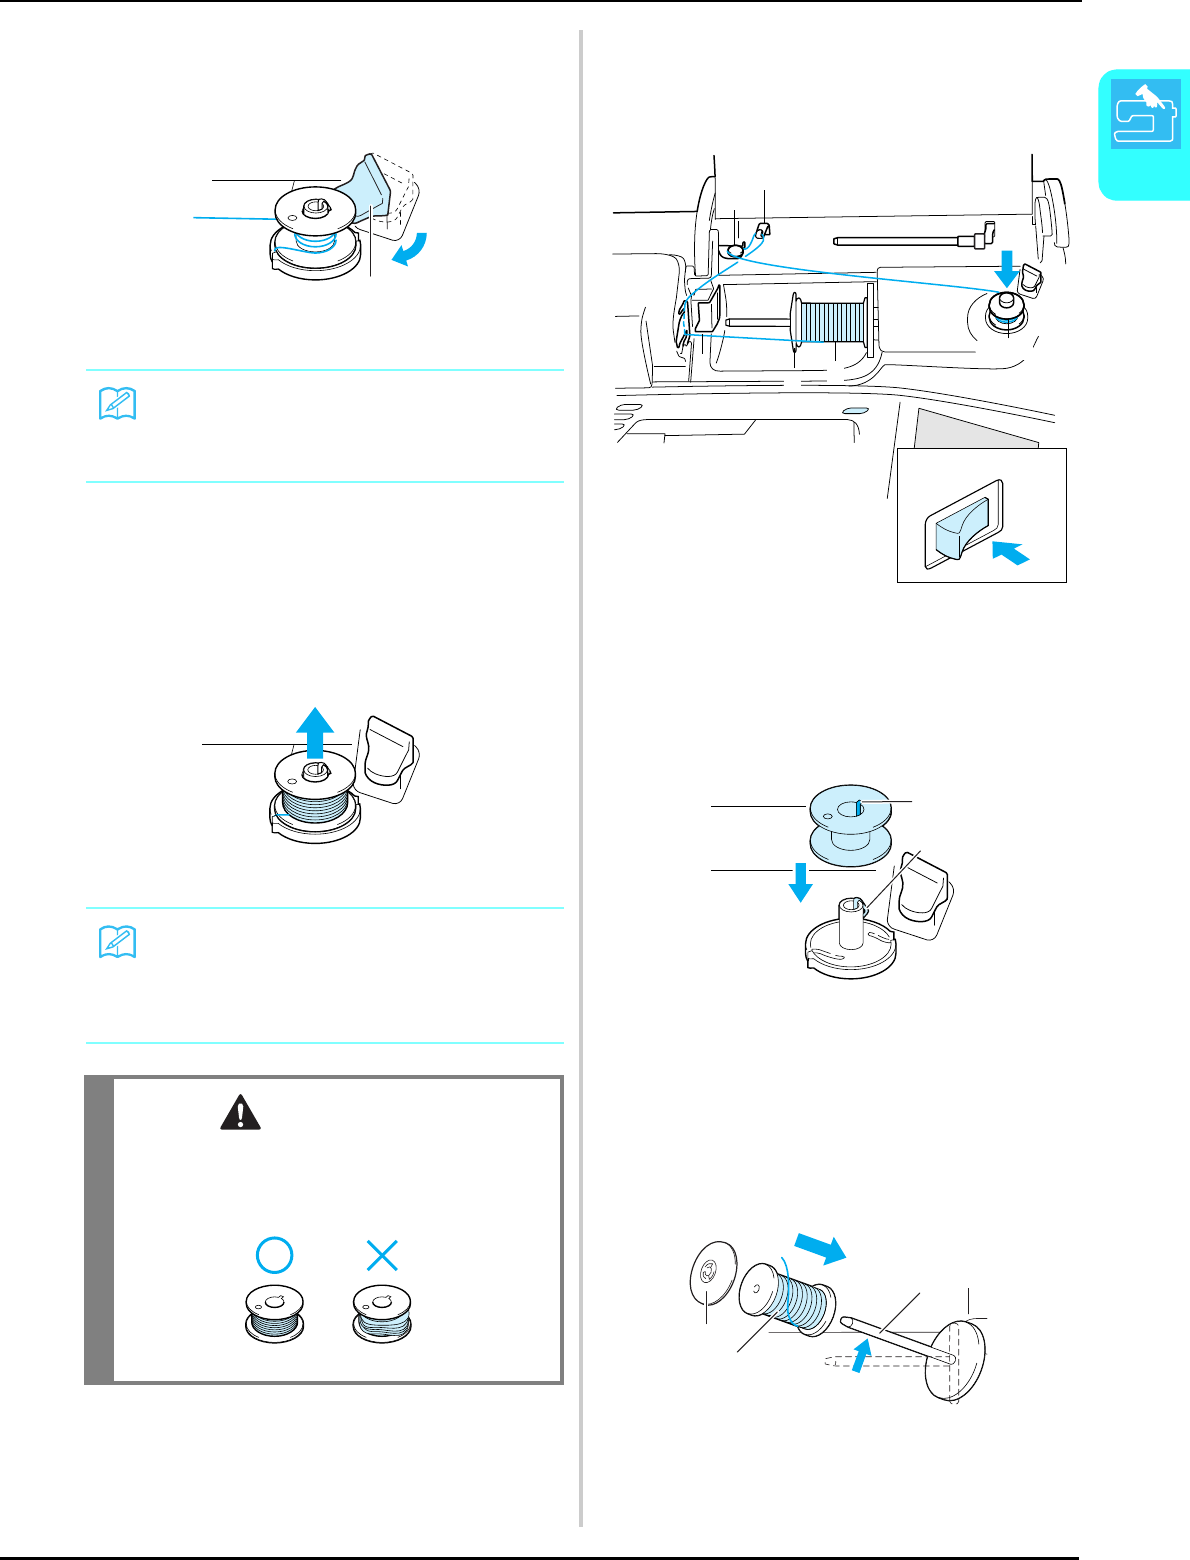
Winding the Bobbin ................................................................................................19
■Using the Supplemental Spool Pin...................................................................................19
■Using the Spool Pin .........................................................................................................21
Setting the Bobbin...................................................................................................22
Pulling Up the Bobbin Thread .................................................................................23
UPPER THREADING............................................................................25
Threading Using the “Automatic Threading” Button...............................................25
Threading Manually ................................................................................................27
Using the Twin Needle Mode..................................................................................29
Using Threads that Unwind Quickly .......................................................................31
■Using the Spool Net ........................................................................................................31
■Using the Vertical Spool Pin............................................................................................31
CHANGING THE PRESSER FOOT .......................................................32
Removing the Presser Foot ......................................................................................32
Attaching the Presser Foot ......................................................................................32
Attaching the Walking Foot.....................................................................................33
CHANGING THE NEEDLE...................................................................34
■About the Needle ............................................................................................................36
■Fabric/Thread/Needle Combinations ..............................................................................36
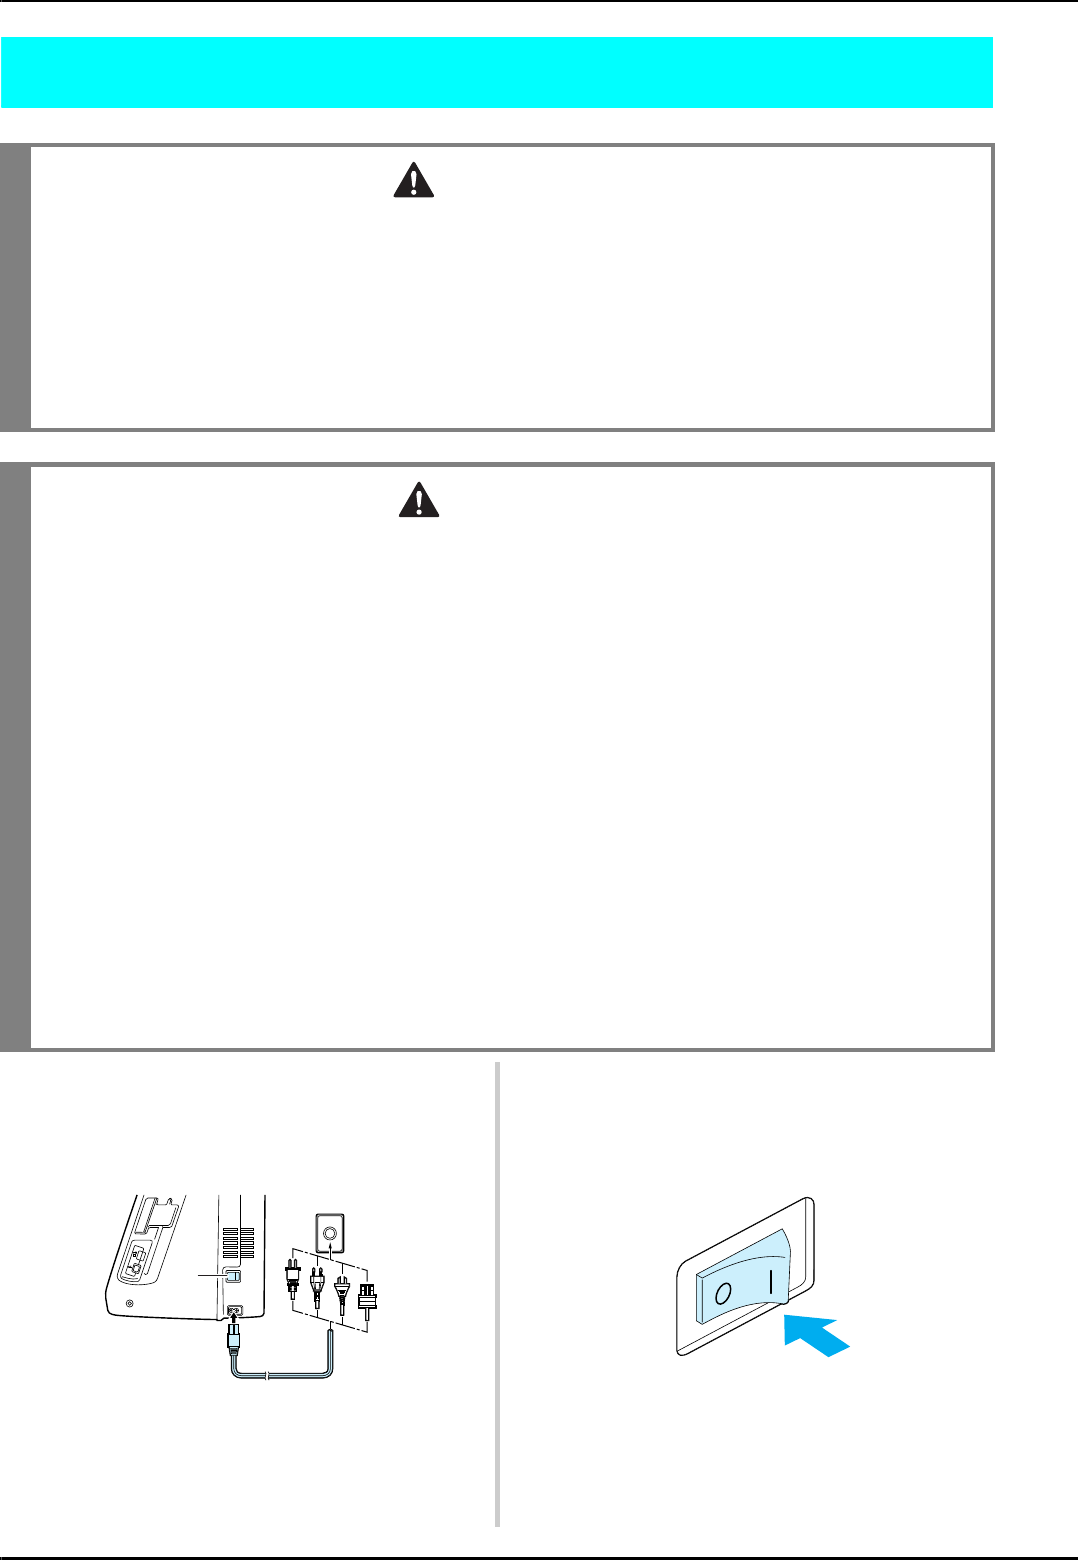
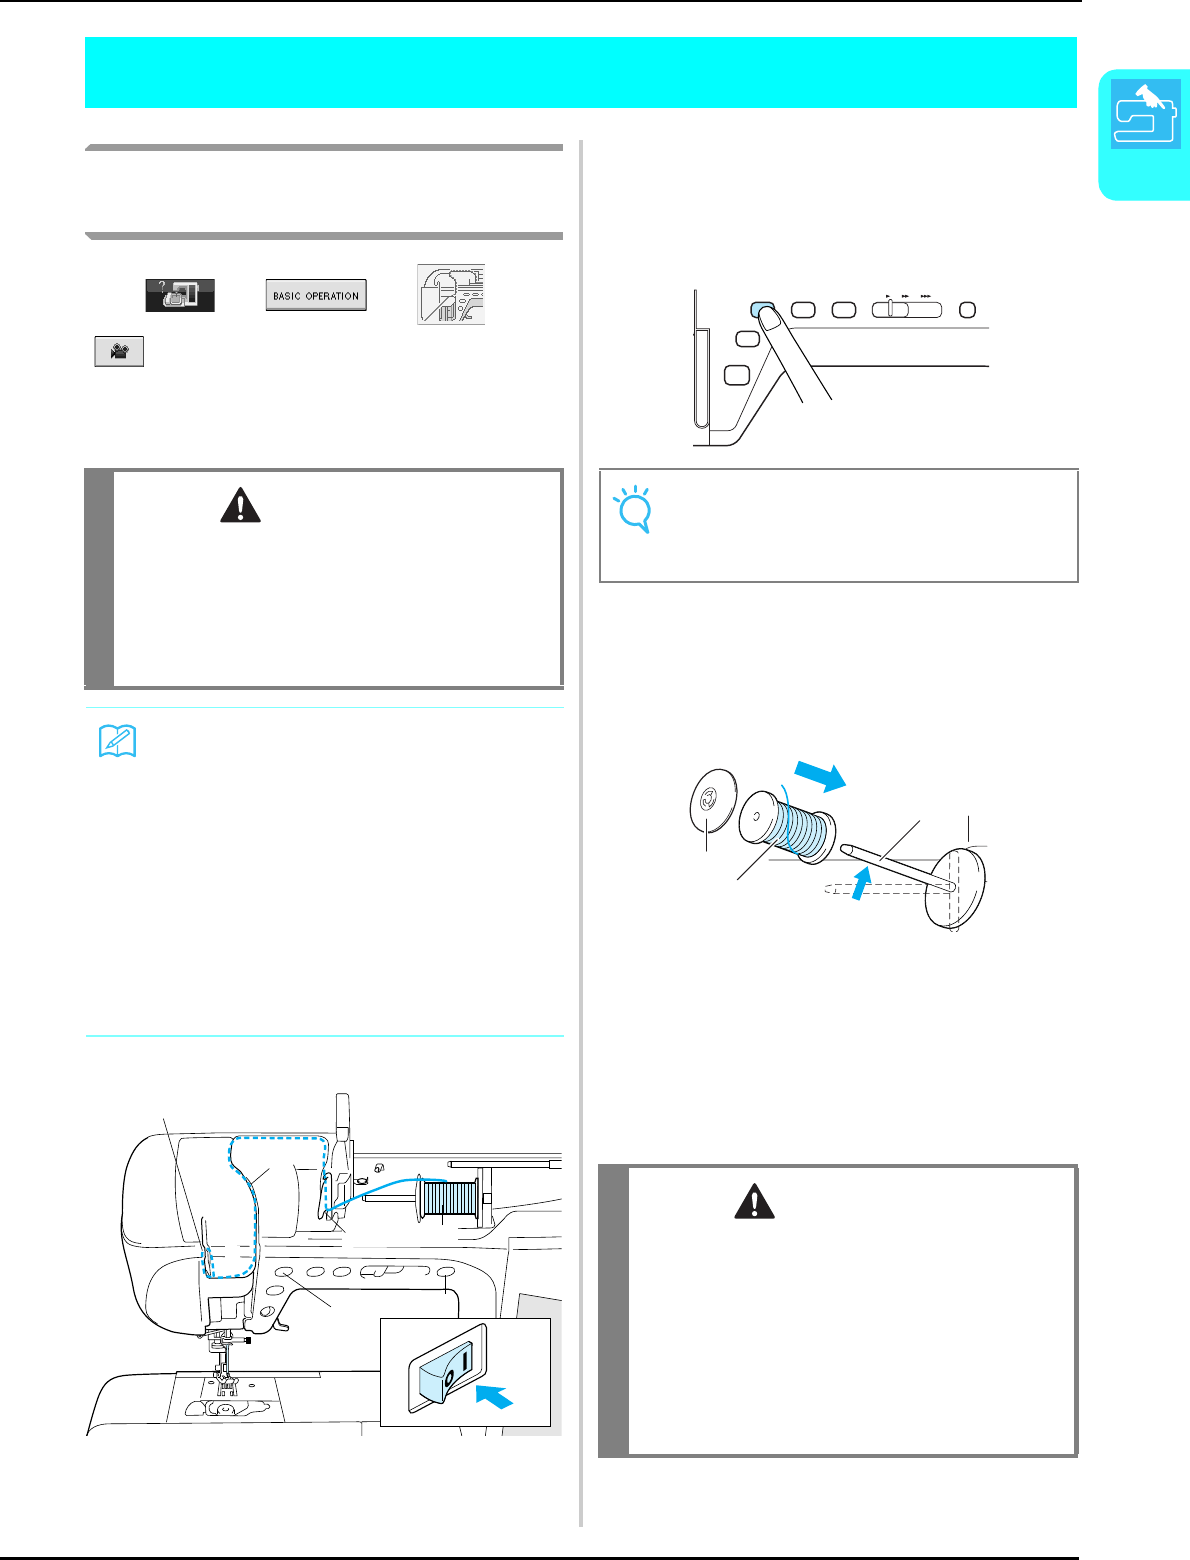
TURNING THE MACHINE ON/OFF
8
TURNING THE MACHINE ON/OFF
aInsert the power cord into the power cord
jack connector, then insert the plug into a
wall outlet.
aMain power switch
bPower cord
bTurn the main power switch to “I” to turn
on the machine.
aOFF
bON
cTurn the main power switch to “O” to turn
off the machine.
WARNING
• Use only regular household electricity as the power source. Using other power sources may result in fire,
electric shock, or damage to the machine.
• Turn the main power to OFF and remove the plug in the following circumstances:
When you are away from the machine
After using the machine
When the power fails during use
When the machine does not operate correctly due to a bad connection or a disconnection
During electrical storms
CAUTION
• Do not use extension cords or multi-plug adapters with many other appliances plugged in to them. Fire or
electric shock may result.
• Do not touch the plug with wet hands. Electric shock may result.
• When unplugging the machine, always turn the main power to OFF first. Always grasp the plug to remove
it from the outlet. Pulling on the cord may damage the cord, or lead to fire or electric shock.
• Do not allow the power cord to be cut, damaged, modified, forcefully bent, pulled, twisted, or bundled.
Do not place heavy objects on the cord. Do not subject the cord to heat. These things may damage the
cord, or cause fire or electric shock. If the cord or plug is damaged, take the machine to your authorized
dealer for repairs before continuing use.
• Unplug the power cord if the machine is not to be used for a long period of time. Otherwise, a fire may
result.
• When leaving the machine unattended, either the main switch of the machine should be turned to OFF or
the plug must be removed from the socket-outlet.
• When servicing the machine or when removing covers, either the machine or the electrical set must be
unplugged.
• For U.S.A. only
This appliance has a polarized plug (one blade wider than the other). To reduce the risk of electrical
shock, this plug is intended to fit in a polarized outlet only one way.
If the plug does not fit fully in the outlet, reverse the plug. If it still does not fit, contact a qualified
electrician to install the proper outlet. Do not modify the plug in any way.
a
b
a
b
LCD SCREEN
Getting Ready
9
1
LCD SCREEN
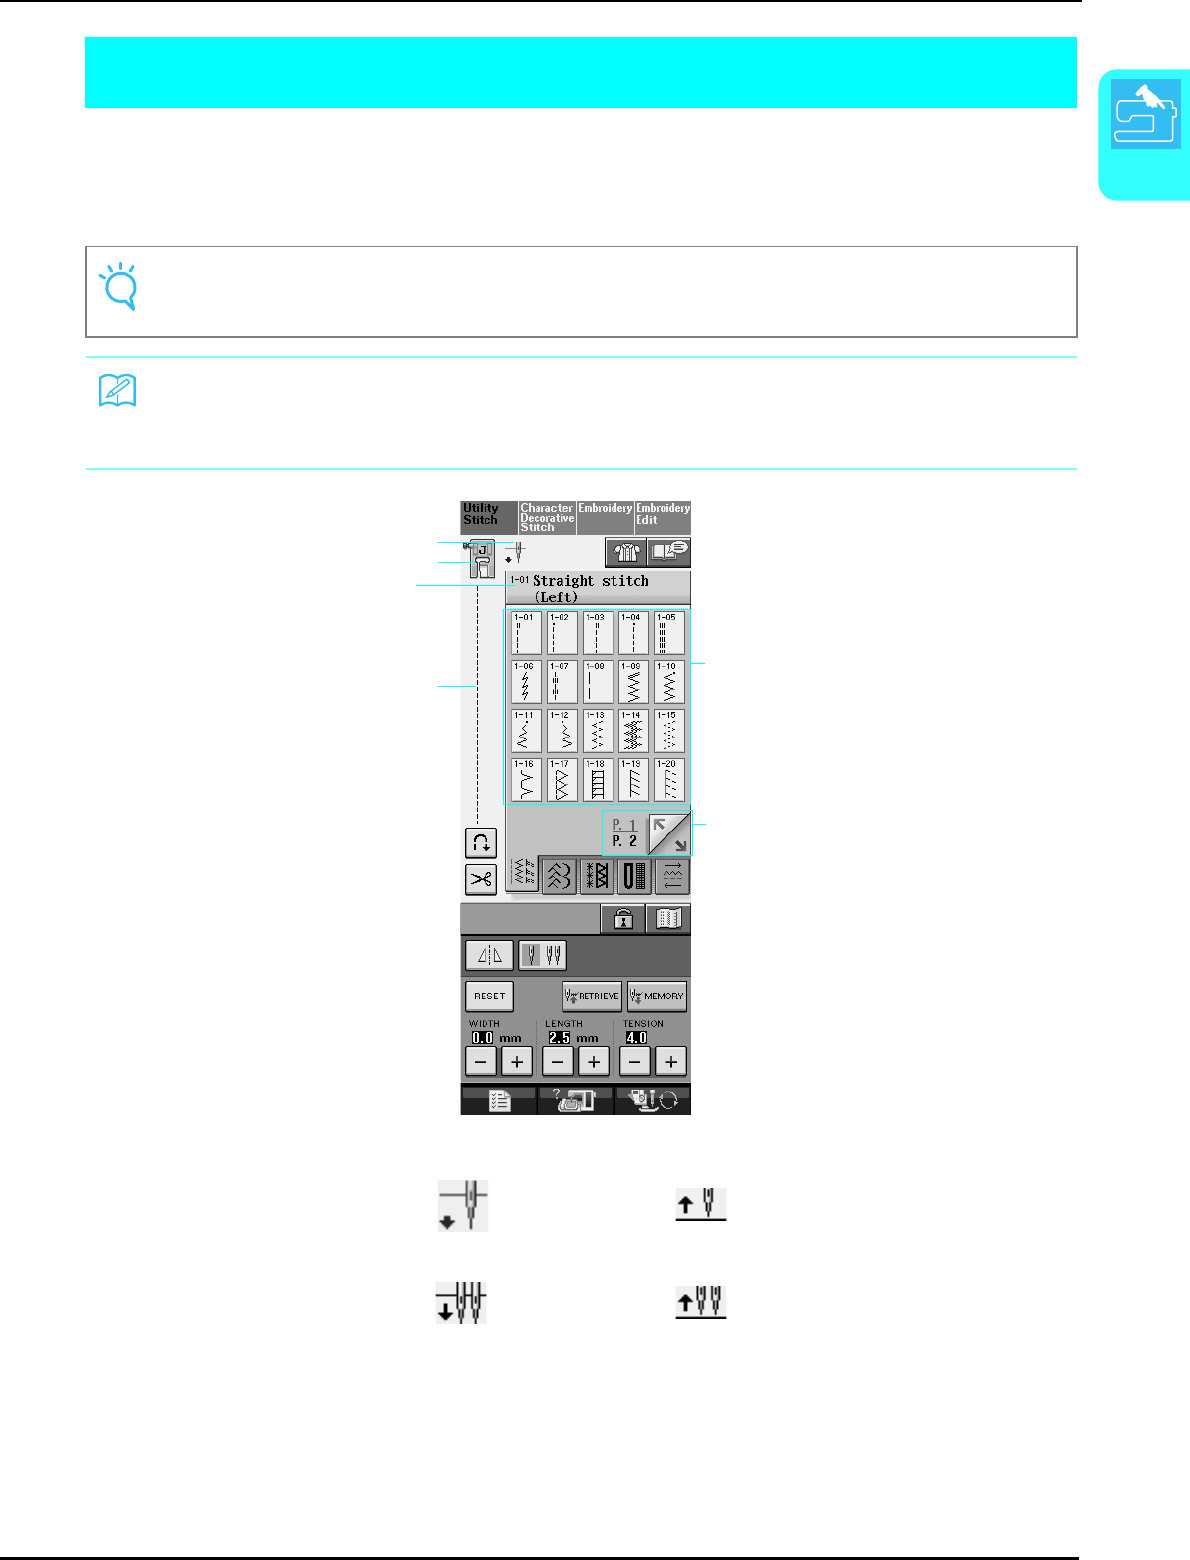
When switching on the machine, the screen will display the name of the machine. Touch the screen to
display the utility stitch. Either “1-01 Straight stitch (Left)” or “1-03 Straight stitch (Middle)” is selected,
depending on the setting selected in the setting screen (See page 12).
Press a key with your finger to select the stitch pattern, to select a machine function, or to select an
operation indicated on the key.
aShows single or twin needle mode setting, and the needle stop position.
bShows the presser foot code. Attach the presser foot indicated in this display before sewing.
cShows the name and code number of the selected stitch.
dShows a preview of the selected stitch.
eShows the stitch patterns.
fShows additional pages that can be displayed.
* All key functions of the LCD are explained in the “key functions” table on the following page.
Note
When the straight stitch needle plate is on the machine, the needle will automatically move to the middle
position.
Memo
• Only touch the screen with your finger or the included touch pen. Do not use a sharp pencil, screw-
driver, or other hard or sharp object. It is not necessary to press hard on the screen. Pressing too hard
or using a sharp object may damage the screen.
Single needle/down position Single needle/up position
Twin needle/down position Twin needle/up position
b
c
d
e
f
a
LCD SCREEN
10
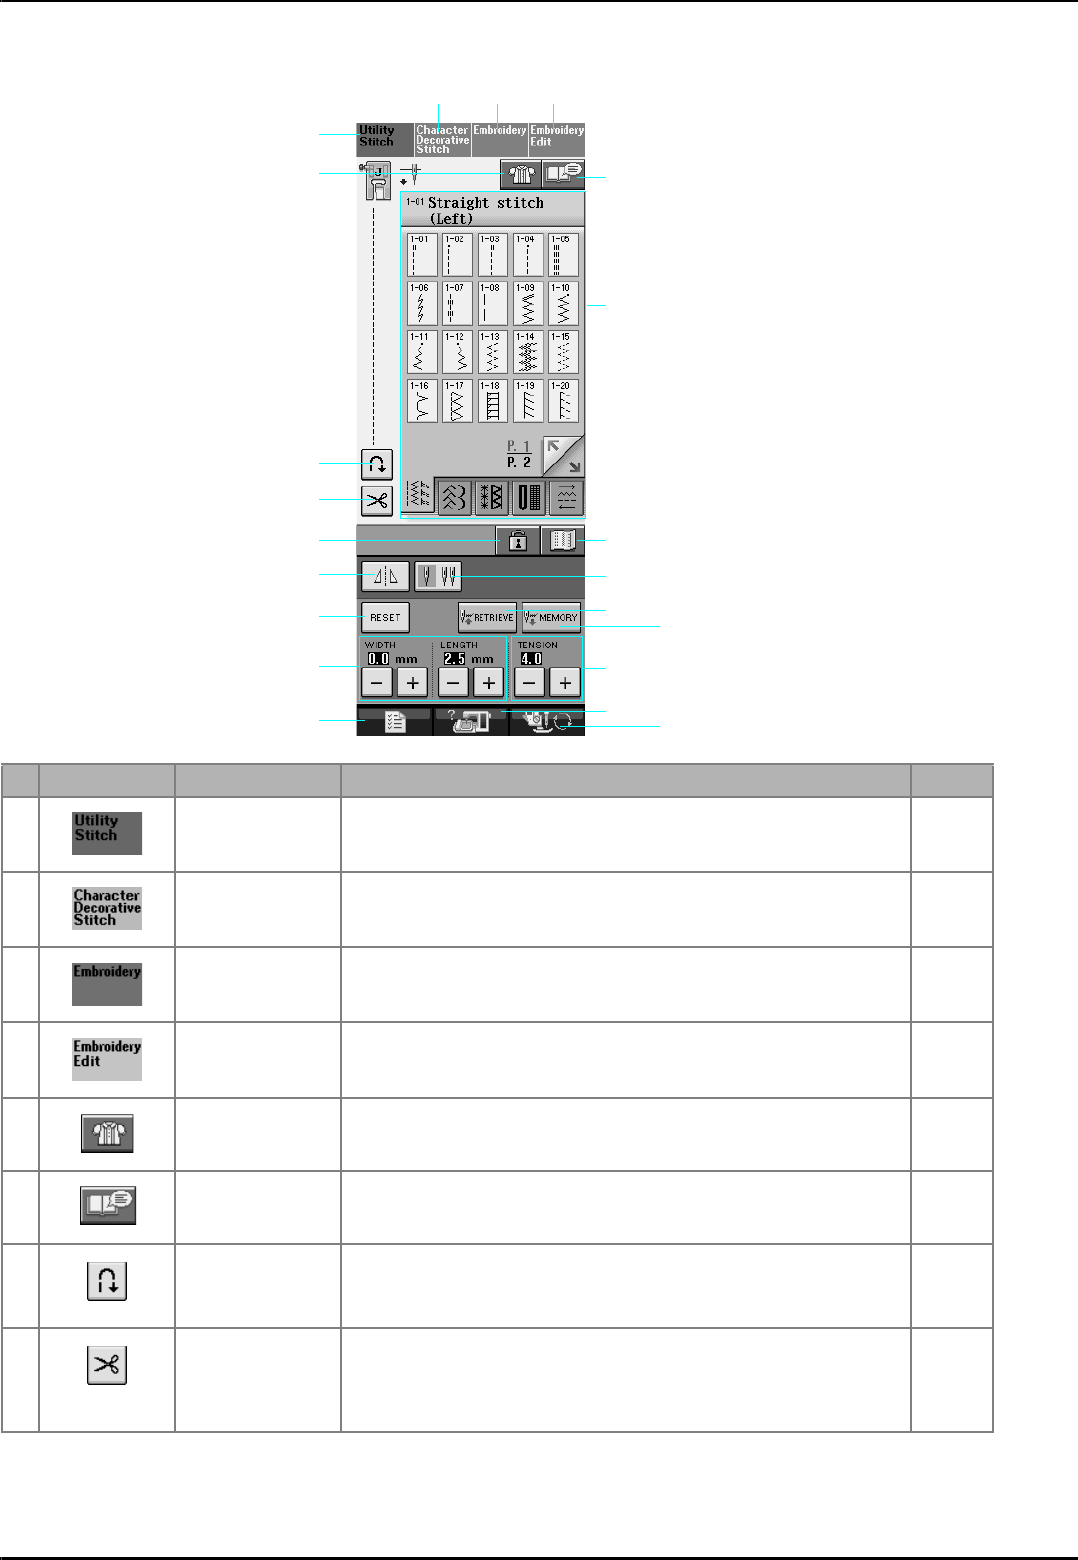
■Key Functions
No. Display Key Name Explanation Page
aUtility stitch key Press this key to select a straight stitch, zigzag stitch, buttonhole, blind hem
stitch, or other stitches commonly used in garment construction.
48
bCharacter/Decorative
stitch key
Press this key to select character or decorative stitch patterns. 98
cEmbroidery key Attach the embroidery unit and press this key to sew embroidery. 130
dEmbroidery edit key Press this key to combine embroidery patterns. With the embroidery edit
functions, you can also create original embroidery patterns or frame patterns.
177
eSewing type selection
key
Press this key when you need help selecting the appropriate stitch pattern for
the sewing application and when you need instructions on how to sew the stitch
pattern. This key is very helpful for beginners.
51
fPattern explanation
key
Press this key to see an explanation of the selected pattern. 18
gAutomatic
reinforcement stitch
key
Press this key to use the automatic reinforcement stitching (reverse stitching)
setting. If you select this setting before sewing, the machine will automatically
sew reinforcement stitches at the beginning and end of sewing (depending on
the pattern, the machine may sew reverse stitches).
44
hAutomatic thread
cutting key
Press this key to set the automatic thread cutting function. Set the automatic
thread cutting function before sewing to have the machine automatically sew
reinforcement stitches at the beginning and end of sewing (depending on the
pattern, the machine may sew reverse stitches) and trim the threads after
sewing.
45
a
g
h
j
l
n
q
s
bcd
f
i
k
m
op
r
tu
e
LCD SCREEN
Getting Ready
11
1
iStitch selection
display Press the key of the pattern you want to sew. Use to
change selection screens.
48
jScreen lock key Press this key to lock the screen.When the screen is locked, the various
settings, such as the stitch width and stitch length, are locked and cannot be
changed. Press this key again to unlock the settings.
46
kImage key Press this key to display an enlarged image of the selected stitch pattern. 49
lMirror image key Press this key to create a mirror image of the selected stitch pattern. If the key
display is light gray, a mirror image of the selected stitch pattern cannot be
sewn.
49
mNeedle mode
selection key (single/
double)
Press this key to select twin needle sewing mode. The sewing mode changes
between single needle mode and twin needle mode each time you press the
key. If the key display is light gray, the selected stitch pattern cannot be sewn in
twin needle mode.
29
nReset key Press this key to return the selected stitch pattern’s saved settings to the
original settings.
42-43
oRetrieve key Press this key to retrieve a saved pattern. 51
pManual memory key Change the stitch pattern settings (zigzag width and stitch length, thread
tension, automatic thread cutting or automatic reinforcement stitching, etc.),
then save them by pressing this key. Five sets of settings can be saved for a
single stitch pattern.
50
qStitch width and stitch
length key
Shows the zigzag width and stitch length settings of the currently selected stitch
pattern. You can use the plus and minus keys to adjust the zigzag width and
stitch length settings.
42
rThread tension key Shows the thread tension setting of the currently selected stitch pattern. The
thread tension is usually set automatically. You can use the plus and minus keys
to change the thread tension settings.
43
sMachine setting mode
key
Press this key to change the needle stop position, turn the buzzer ON/OFF,
adjust the pattern or screen, and change other machine settings.
12
tMachine operation
mode key
Press this key to see explanations for upper threading, winding the bobbin,
changing the presser foot, and how to use the machine.
17
uPresser foot/Needle
exchange key
Press this key before changing the needle, the presser foot, etc. This key locks
all key and button functions to prevent operation of the machine.
32-35
No. Display Key Name Explanation Page
LCD SCREEN
12
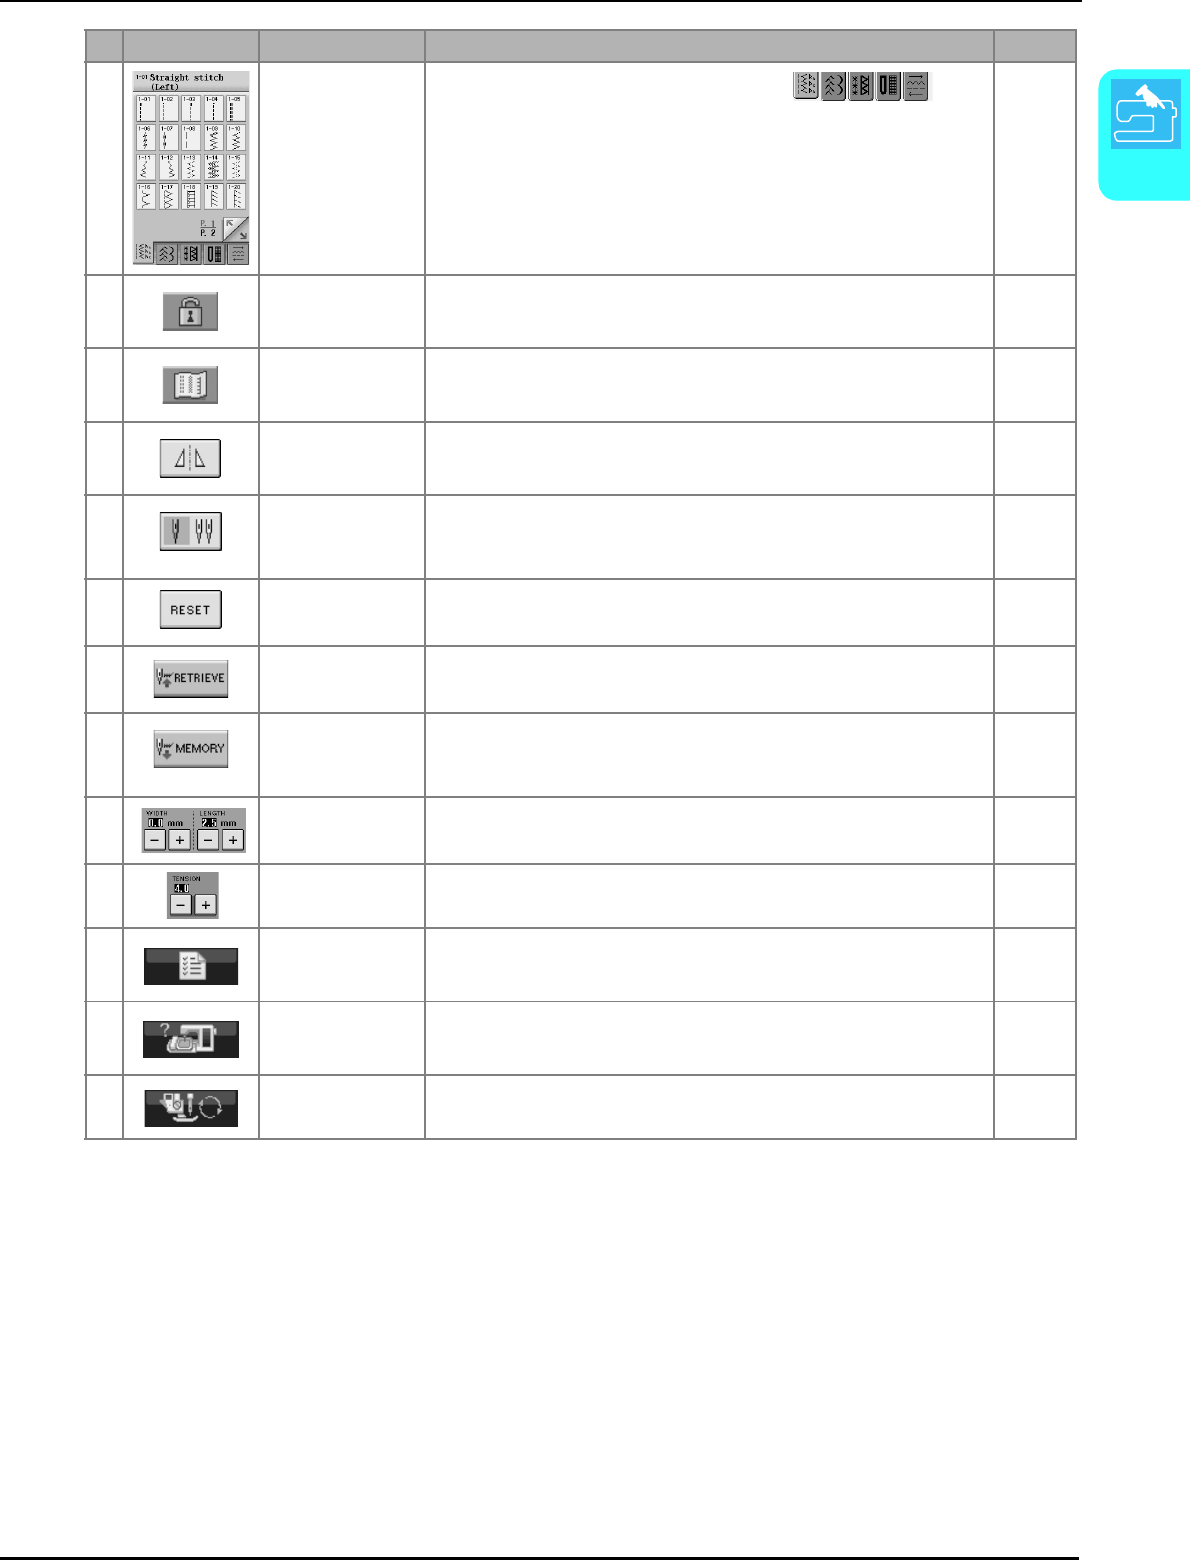
Using the Machine Setting Mode Key
Press to change the default machine settings (needle stop position, embroidery speed, opening
display, etc.) Press , or to display the different settings screens.
Sewing settings
aSelect whether to use the sewing speed controller to determine the zigzag width (see page 70).
bMake adjustments to character or decorative stitch patterns (see page 103).
cAdjust the presser foot height. (Select the height of the presser foot when the presser foot is raised.)
dAdjust the presser foot pressure. (The higher the number, the higher the pressure will be. Set the pressure at 3 for
normal sewing.)
eSelect whether “1-01 Straight stitch (Left)” or “1-03 Straight stitch (Middle)” is the utility stitch that is automatically
selected when the machine is turned on.
fChange the height of the presser foot when sewing is stopped when the pivot setting is selected (see page 53).
Adjust the presser foot to one of the three heights (3.2 mm, 5.0 mm and 7.5 mm).
gChange the height of the presser foot when the machine is set to free-motion sewing mode (see page 83).
hWhen set to “ON”, the thickness of the fabric is automatically detected by an internal sensor while sewing, so the
fabric can be fed smoothly (see pages 47 and 55).
iAdjust the character spacing on Character/Decorative stitch (see page 101).
Memo
• This function will be available in future technology upgrades.
• Press or to display a different settings screen.
a
b
c
d
e
f
g
h
i
LCD SCREEN
Getting Ready
13
1
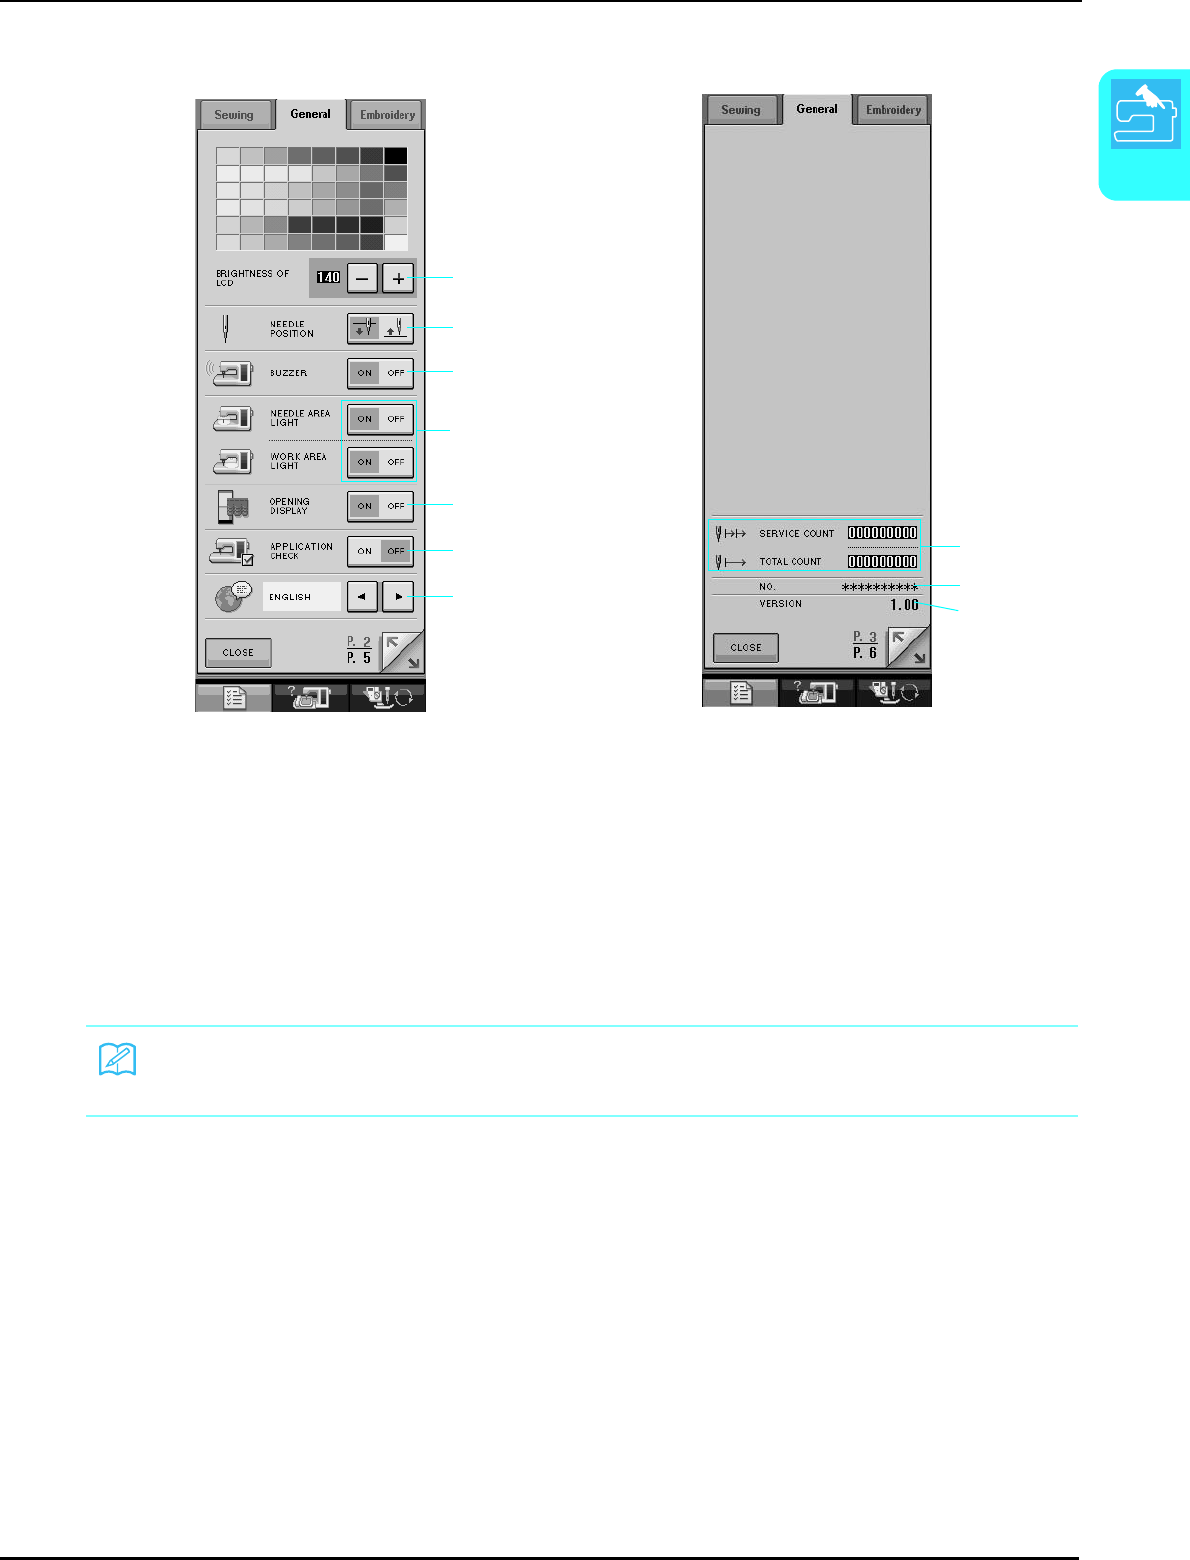
General settings
aChange the brightness of the LCD (see page 15).
bSelect the needle stop position (the needle position when the machine is not operating) to be up or down.
cTurn the buzzer ON/OFF.
dTurn the Needle Area and Work Area Lights ON/OFF.
eTurn the opening screen display ON/OFF.
fUse when running an application.
gChange the display language (see page 16).
hDisplay the service count and the total number of embroidery stitches. The service count is a reminder to take your
machine in for regular servicing. (Contact your authorized dealer for details.)
iThe “NO.” is the number for the embroidery and sewing machine.
jDisplay the program version.
Memo
The latest version of software is installed in your machine. Check with your local authorized Brother
dealer or at www.brother.com for notification of available updates (see page 224).
a
c
d
e
g
f
b
h
i
j
LCD SCREEN
14
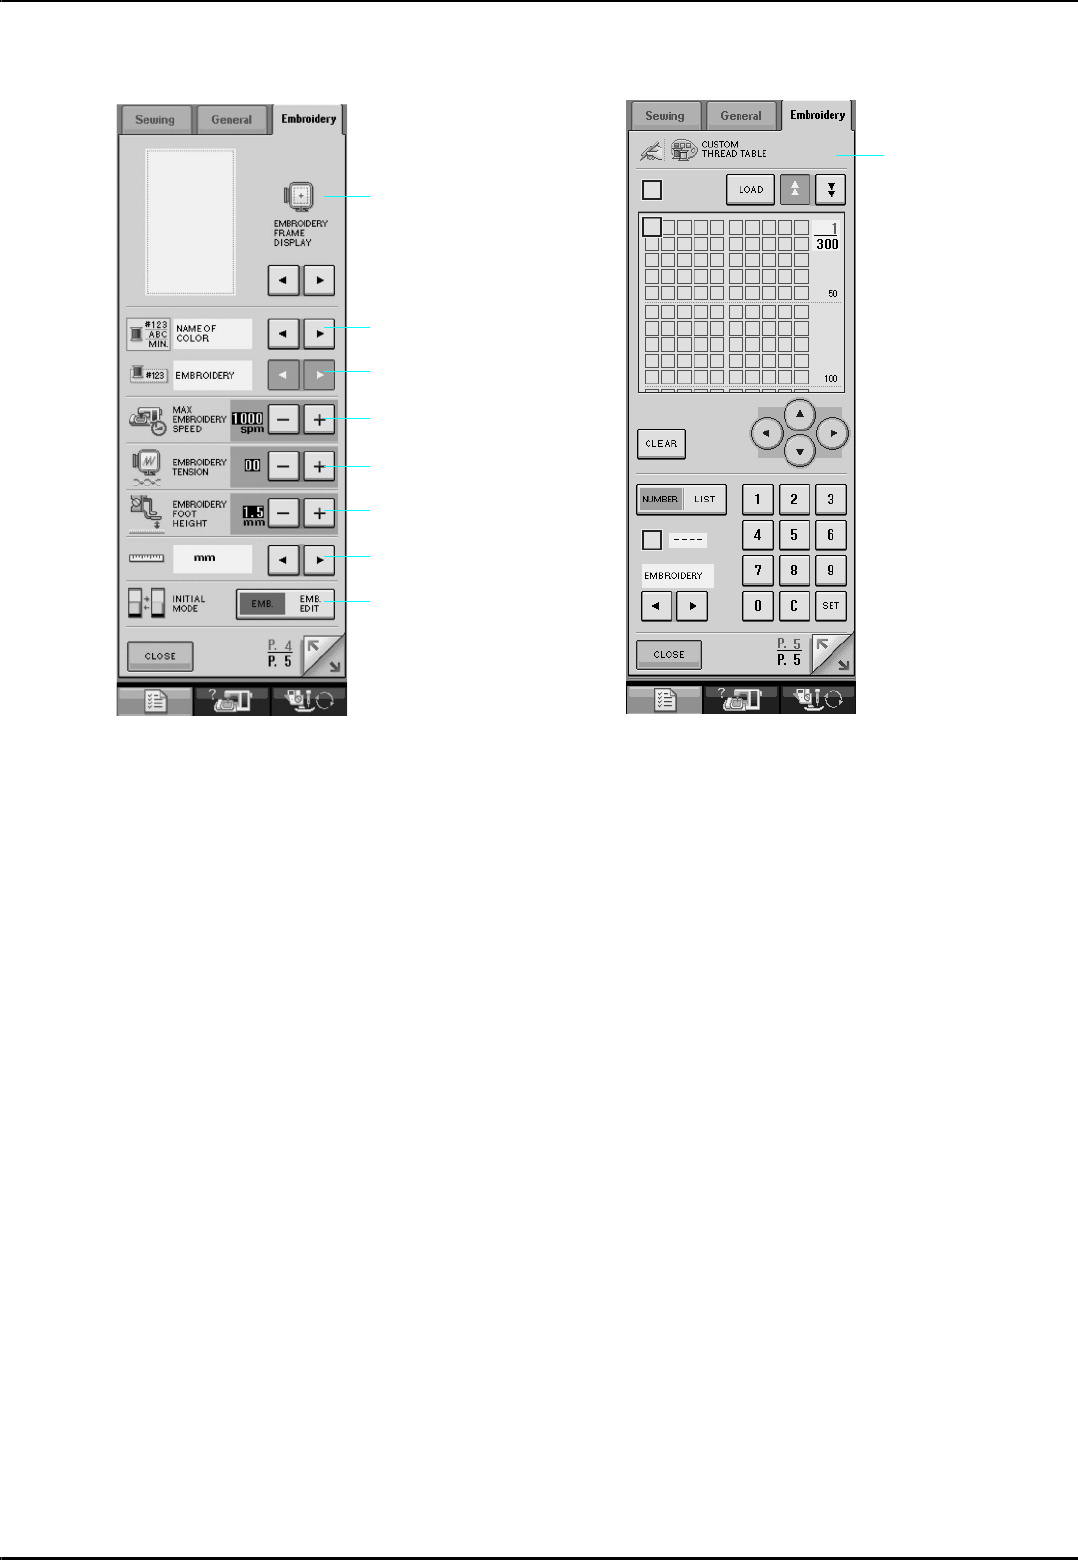
Embroidery settings
aSelect from among 10 embroidery frame displays (see page 158).
bChange the thread color display on the embroidery screen; thread number, color name or each time to embroider
(see page 156).
cWhen the thread number #123 is selected, select among six thread brands (see page 156).
dAdjust the maximum embroidery speed setting (see page 156).
eAdjust the thread tension for embroidering.
fSelect the height of the embroidery foot “W” during embroidering (see page 138).
gChange the display units (mm/inch).
hChange the initial mode of the display (embroidery/embroidery edit).
iCustomize the thread color numbers (see page 188).
a
b
c
d
e
f
g
h
i
LCD SCREEN
Getting Ready
15
1
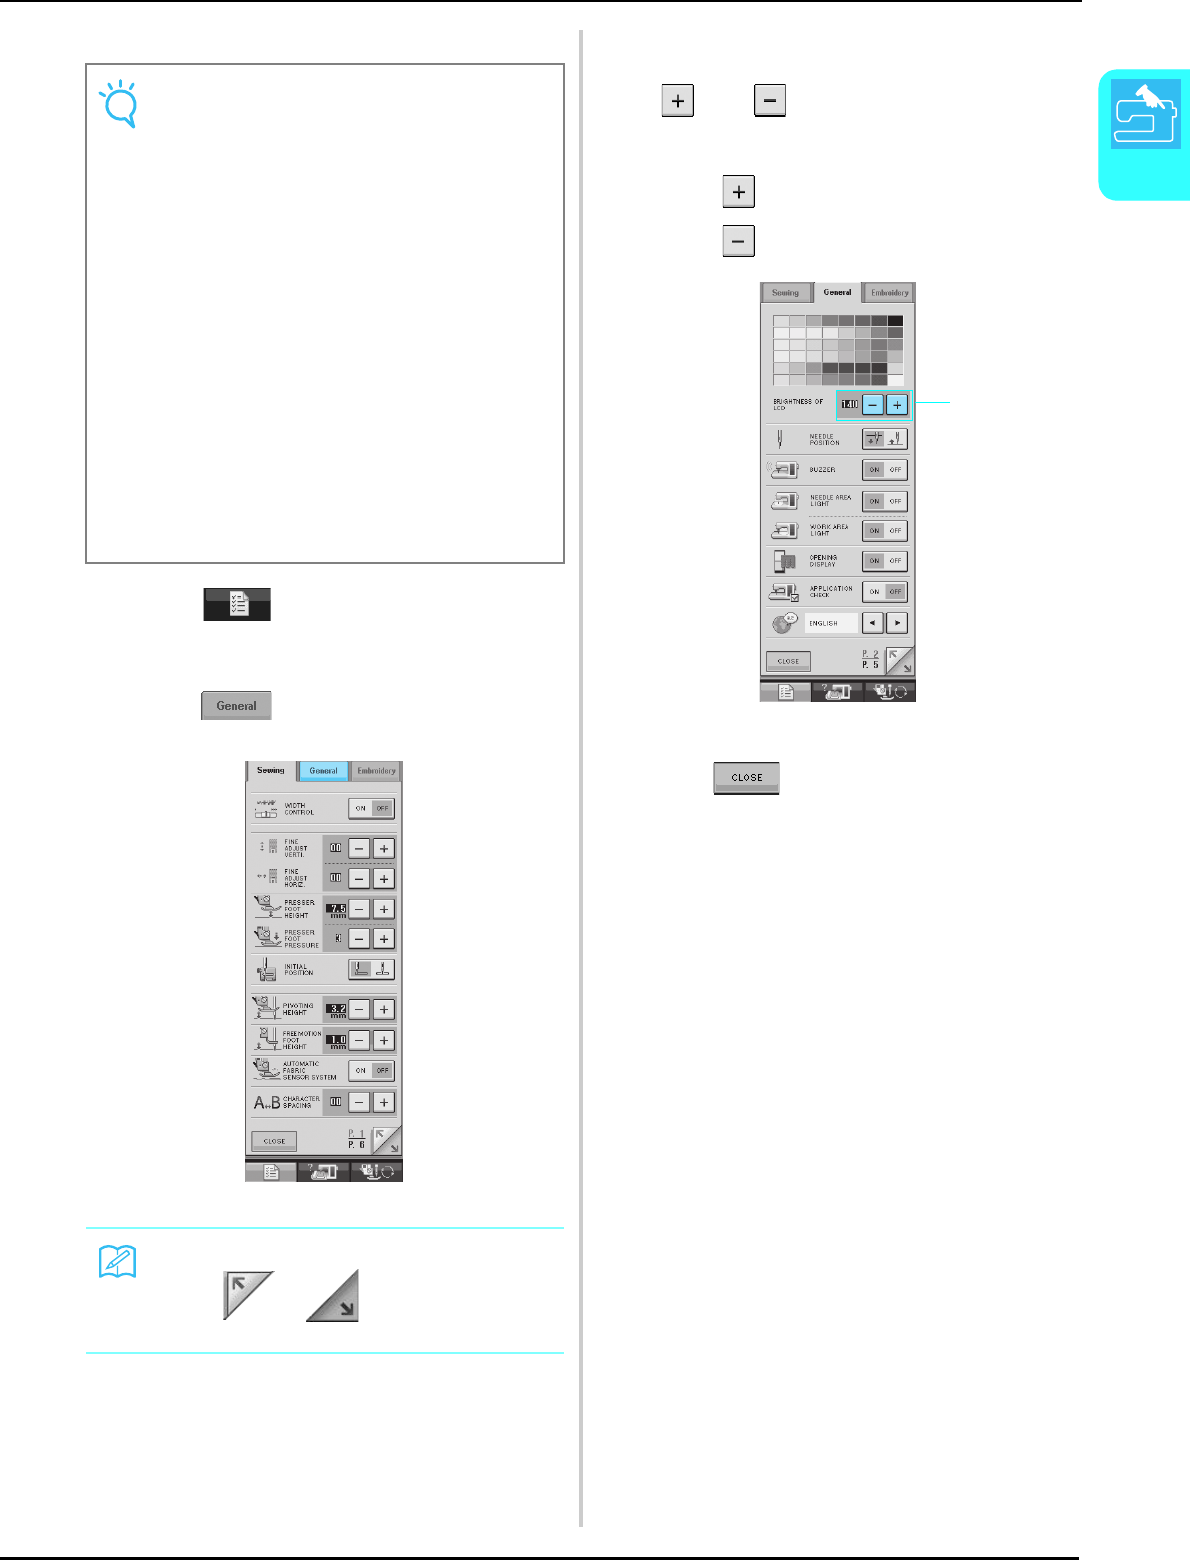
■Adjusting Screen Brightness
aPress .
→The Sewing settings screen appears.
bPress .
→The General settings screen appears.
cOn the BRIGHTNESS OF LCD display, use
and to adjust the screen
brightness.
* Press to make the screen darker.
* Press to make the screen lighter.
aBrightness of LCD display
dPress .
Note
• All or part of the screen may sometimes
become darker or lighter because of
changes in the air temperature or other
changes in the environment around the
screen. This is normal and is not a sign of
malfunction. Adjust the screen if it is difficult
to read.
• The screen may be dark immediately after
turning on the power. This is a function of
the LCD back light screen, and it is not a
sign of malfunction. The screen will return to
its normal level of brightness after approxi-
mately 10 minutes.
• If you are not directly in front of the machine
when you view the LCD, the colors may
appear to change or the screen may be diffi-
cult to see. This is a characteristic of the
LCD, and not a sign of damage or malfunc-
tion. For best results operate the screen
while sitting in front of the machine.
Memo
• Press or to display a different
settings screen.
a
LCD SCREEN
16
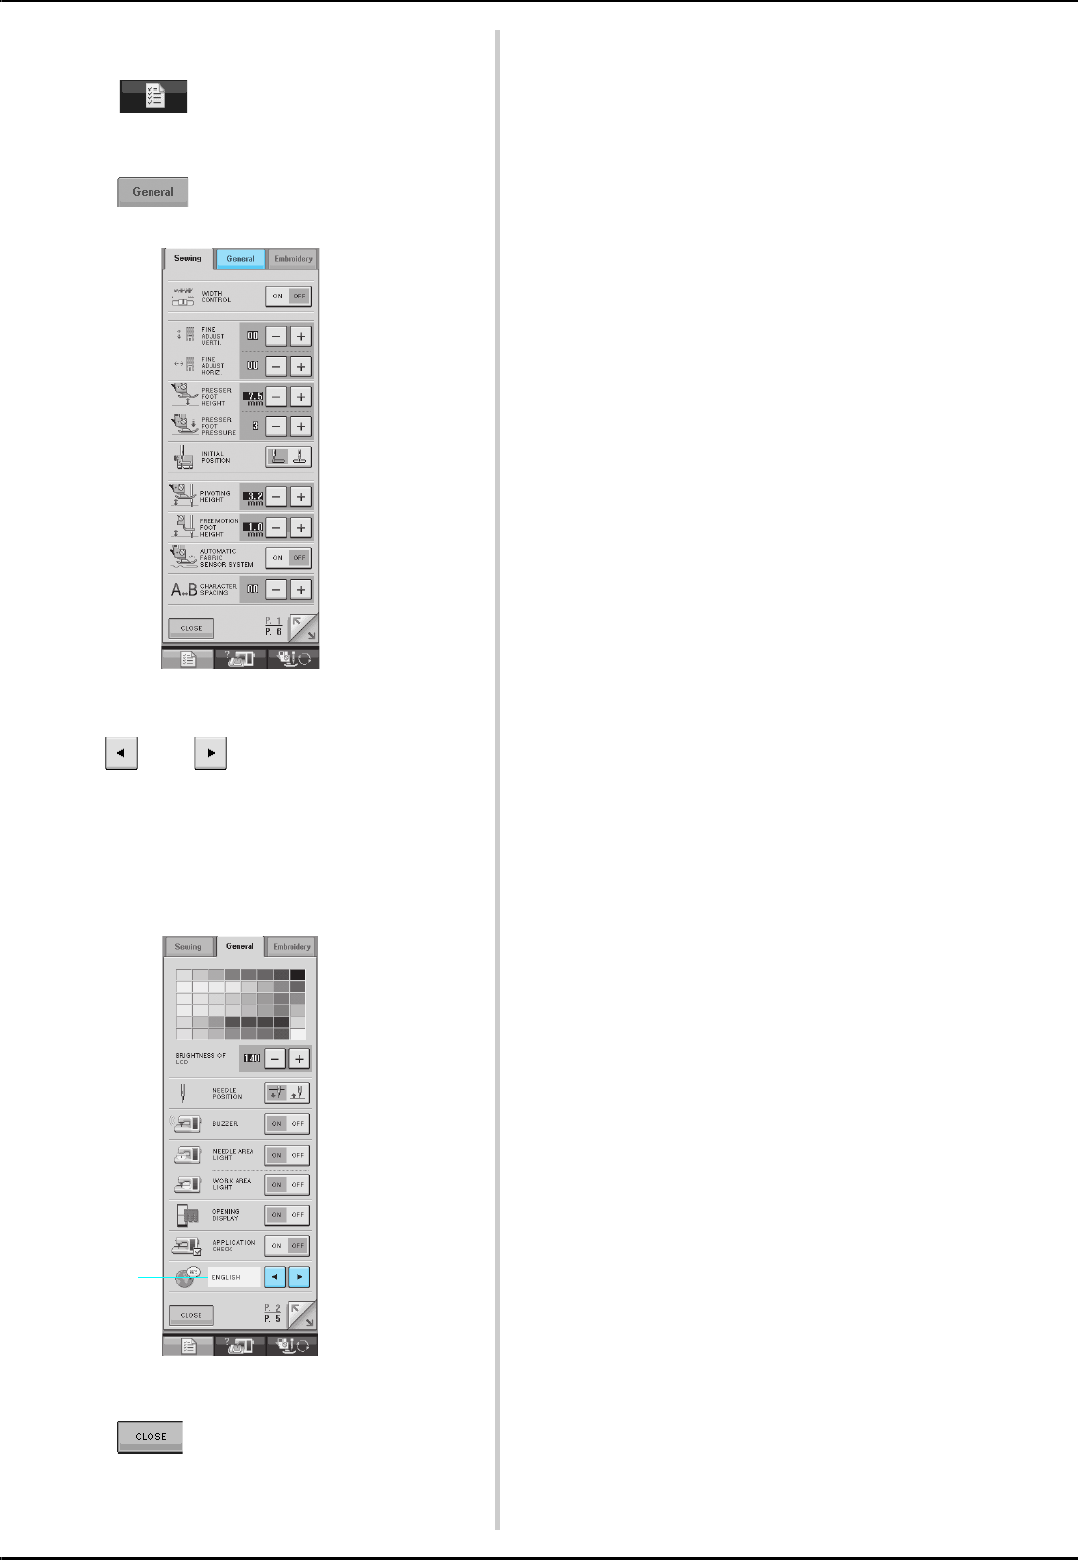
■Choosing the Display Language
aPress .
→The Sewing settings screen appears.
bPress .
→The General settings screen appears.
cUse and to choose the display
language.
* Choose from the following languages: [ENGLISH],
[GERMAN], [FRENCH], [ITALIAN], [DUTCH],
[SPANISH], [DANISH], [FINNISH], [SWEDISH],
[PORTUGEUSE], [RUSSIAN], [NORWEGIAN] or
[JAPANESE].
aDisplay language
dPress .
a
LCD SCREEN
Getting Ready
17
1
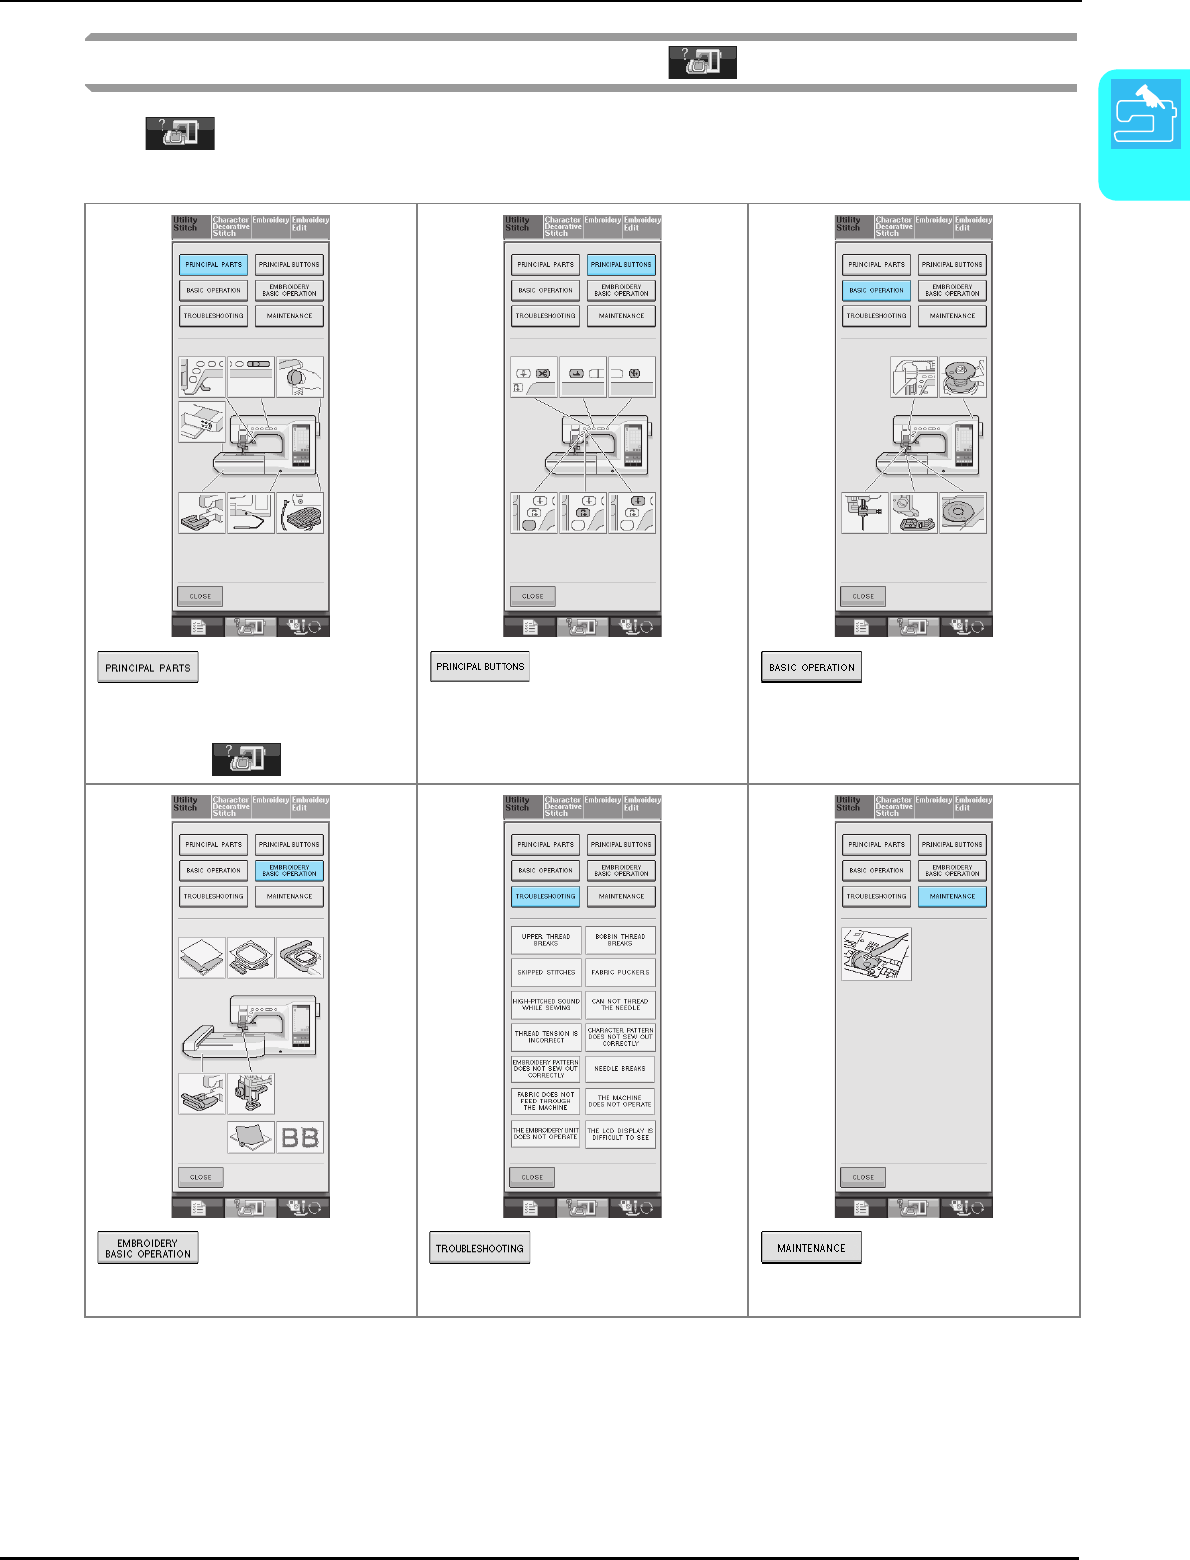
Using the Machine Operation Mode Key
Press to open the screen shown below. Six categories are displayed at the top of the screen.
Press a key to see more information about that category.
displays information about
the main parts of the machine and their
functions. This is the first screen displayed
when you press .
displays information about
the operation buttons.
displays information about
threading the machine, changing presser feet,
etc.
displays information about
attaching the embroidery unit, preparing
fabric for embroidering, etc.
displays troubleshooting
information.
displays information about
cleaning the machine, etc.
LCD SCREEN
18
Example: Displaying information about
upper threading
aPress .
bPress .
→The lower half of the screen will change.
cPress (upper threading).
→The screen shows instructions for threading the
machine.
dRead the instructions.
* Press to see a video of the displayed
instructions.
* Press to view the next page.
ePress to return to the original
screen.
Using the Pattern Explanation
Key
If you want to know more about the uses of a stitch
pattern, select the pattern and press to see
an explanation of the stitch selection.
Example: Displaying information about
aPress .
bPress .
→The screen shows information about .
cPress to return to the original
screen.
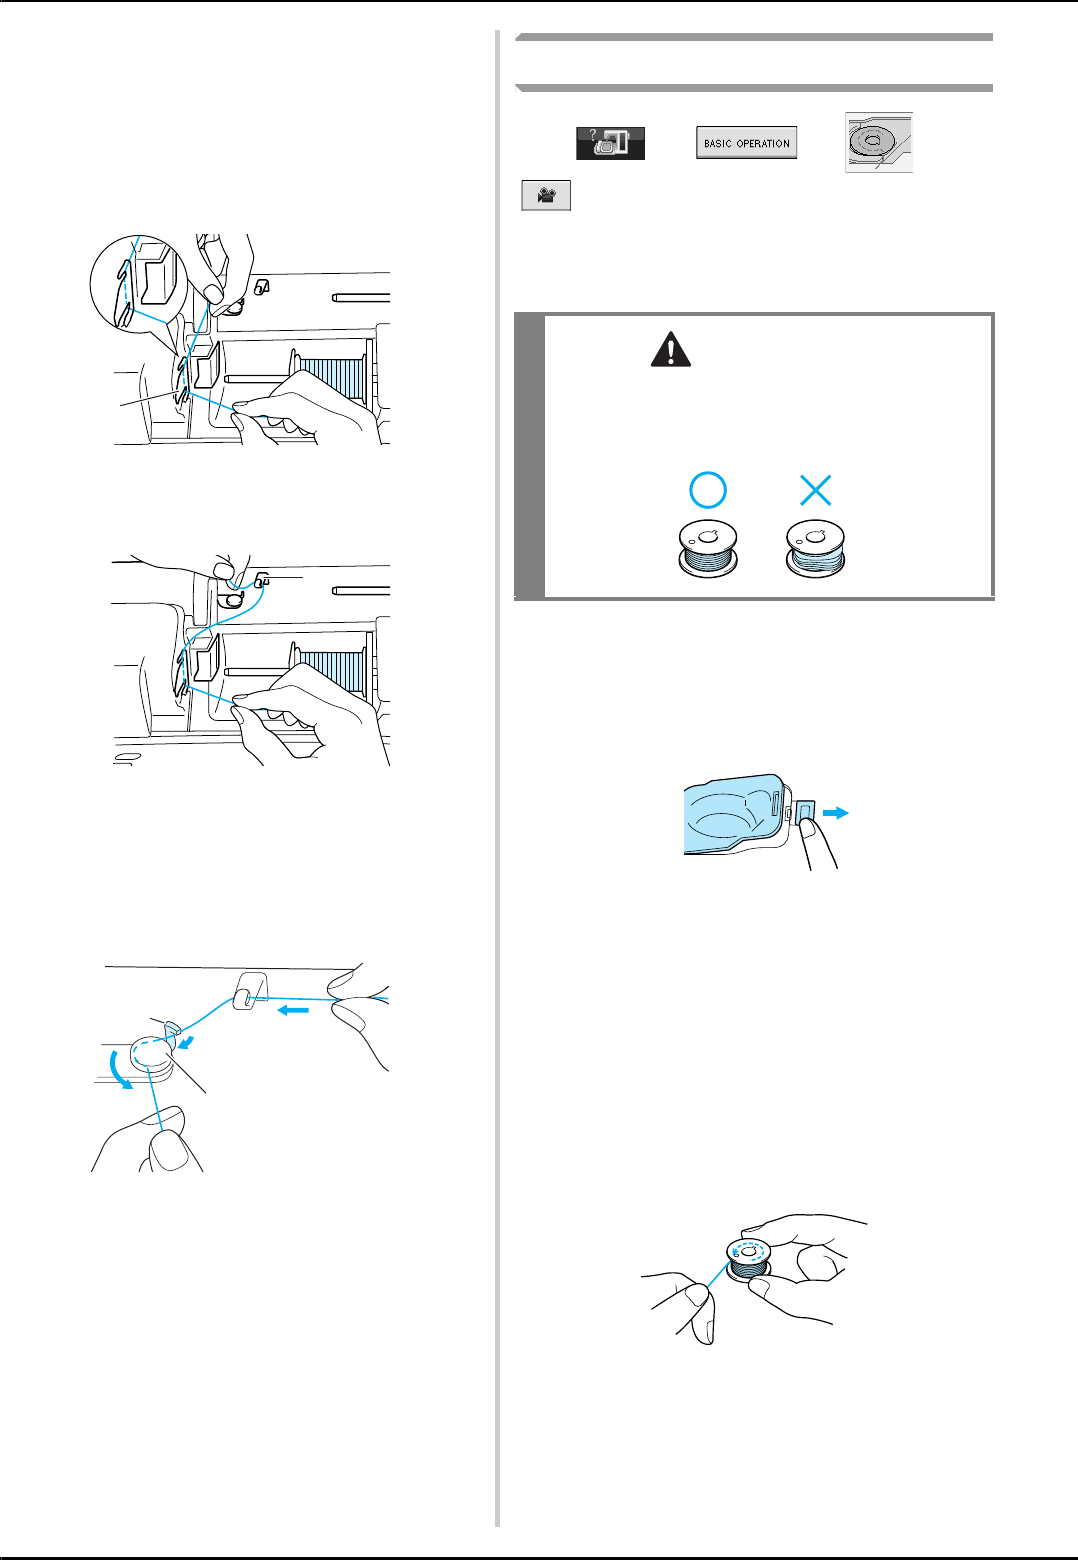
LOWER THREADING
Getting Ready
19
1
LOWER THREADING
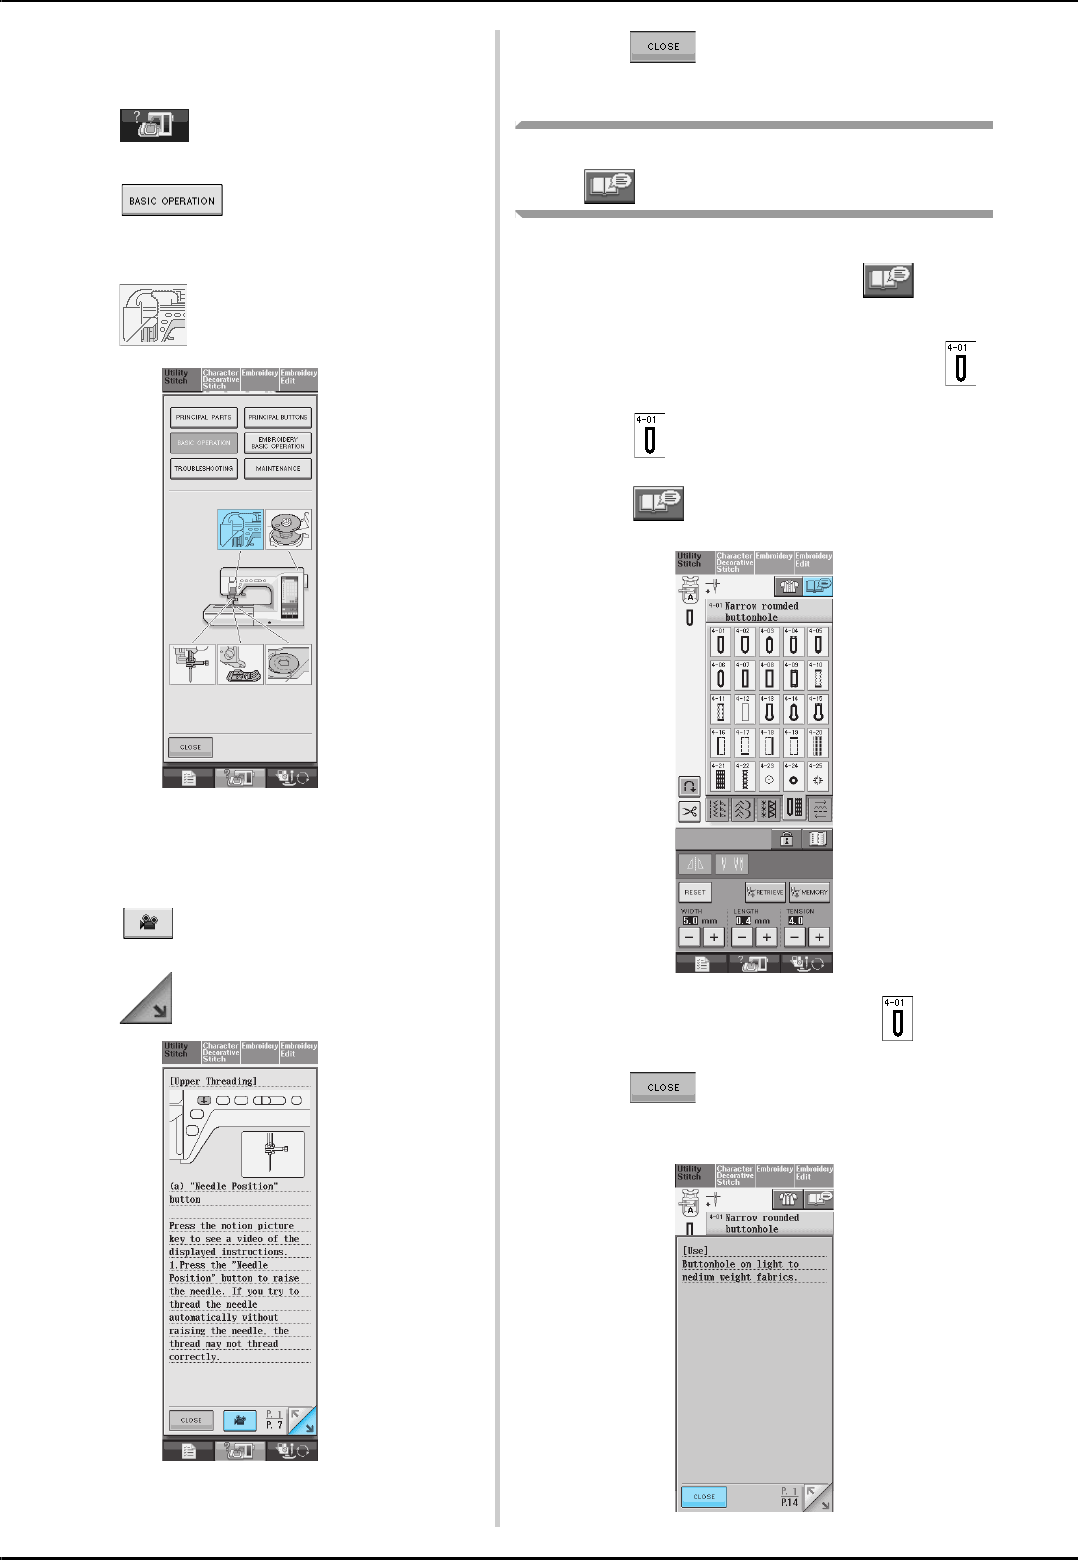
Winding the Bobbin
Press → → →
in that order to display a video example of
bobbin winding on the LCD (see page 18). Follow
the steps explained below to complete the
operation.
■Using the Supplemental Spool Pin
With this machine, you can wind the bobbin during
sewing. While using the main spool pin to sew
embroidery, you can conveniently wind the bobbin
using the supplemental spool pin.
aSupplemental spool pin
aTurn the main power to ON.
bAlign the groove in the bobbin with the
spring on the bobbin winder shaft, and set
the bobbin on the shaft.
aGroove of the bobbin
bSpring on the shaft
cSet the supplemental spool pin in the “up”
position.
aSupplemental spool pin
dPlace the spool of thread on the
supplemental spool pin, so that thread
unrolls from the front. Then push the spool
cap onto the spool pin as far as possible to
secure the thread spool.
aSpool pin
bSpool cap
cThread spool
CAUTION
• The enclosed bobbin was designed specifically
for this sewing machine. If bobbins from other
models are used, the machine will not operate
correctly. Use only the enclosed bobbin or
bobbins of the same type (part code: SA156,
SFB).
Actual size
This model Other models
11.5 mm
(approx.
7/16 inch)
1
7, 8
3, 4
2
9
5
6
o
l
a
a
b
a
a
bc
LOWER THREADING
20
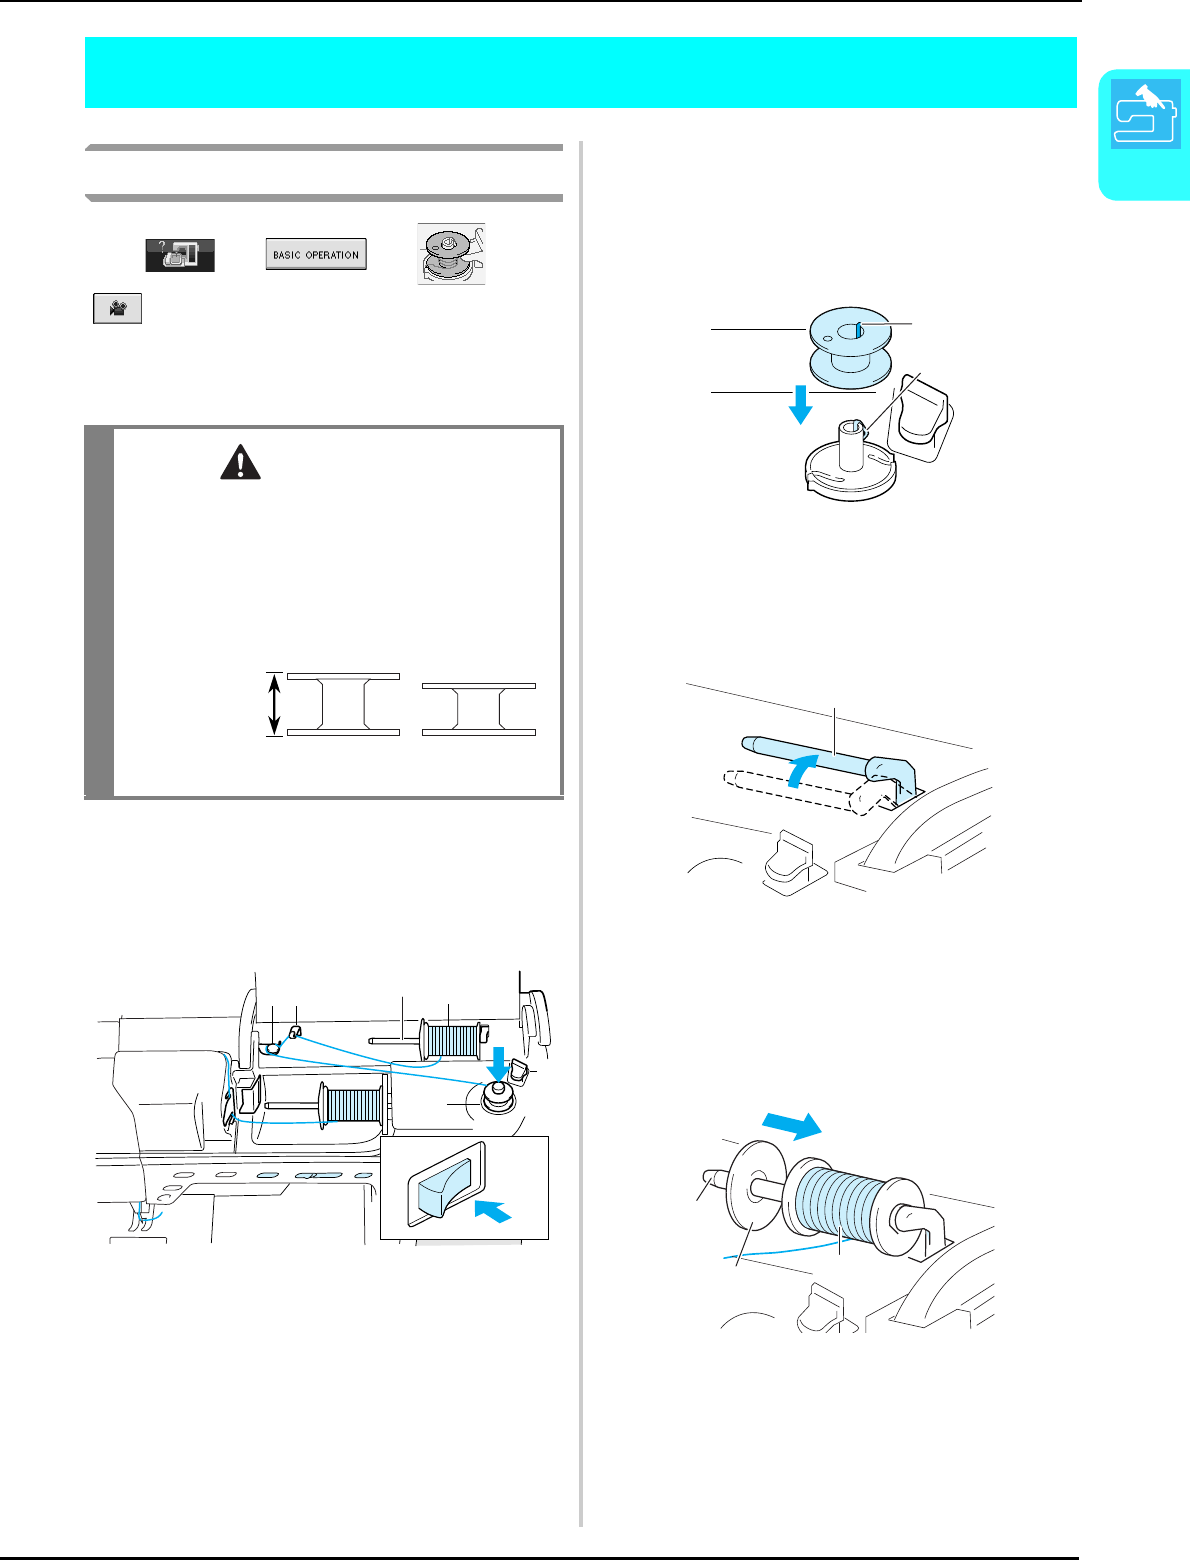
eWith your right hand, hold the thread near
the thread spool. With your left hand, hold
the end of the thread, and use both hands to
pass the thread through the thread guide.
aThread guide
fPass the thread under the pin, and pass the
thread around the pretension disk making
sure that the thread is under the pretension
disk.
aPin
bPretension disk
gWind the thread clockwise around the
bobbin 4-5 times.
hPass the end of the thread through the guide
slit in the bobbin winder seat, and pull the
thread to the right to cut the thread with
the cutter.
aGuide slit
bBobbin winder seat
CAUTION
• If the thread spool and/or spool cap are set
incorrectly, the thread may tangle on the spool
pin and cause the needle to break.
• Use the spool cap (large, medium, or small)
that is closest in size to the thread spool. If a
spool cap smaller than the thread spool is
used, the thread may become caught in the slit
on the end of the spool and cause the needle
to break.
Memo
When sewing with fine, cross-wound thread,
use the small spool cap, and leave a small
space between the cap and the thread spool.
aSpool cap (small)
bThread spool (cross-wound thread)
cSpace
a
cb
a
CAUTION
• Be sure to follow the process described. If the
thread is not cut with the cutter, and the
bobbin is wound, when the thread runs low it
may tangle around the bobbin and cause the
needle to break.
a
b
1
2
3
a
b
LOWER THREADING
Getting Ready
21
1
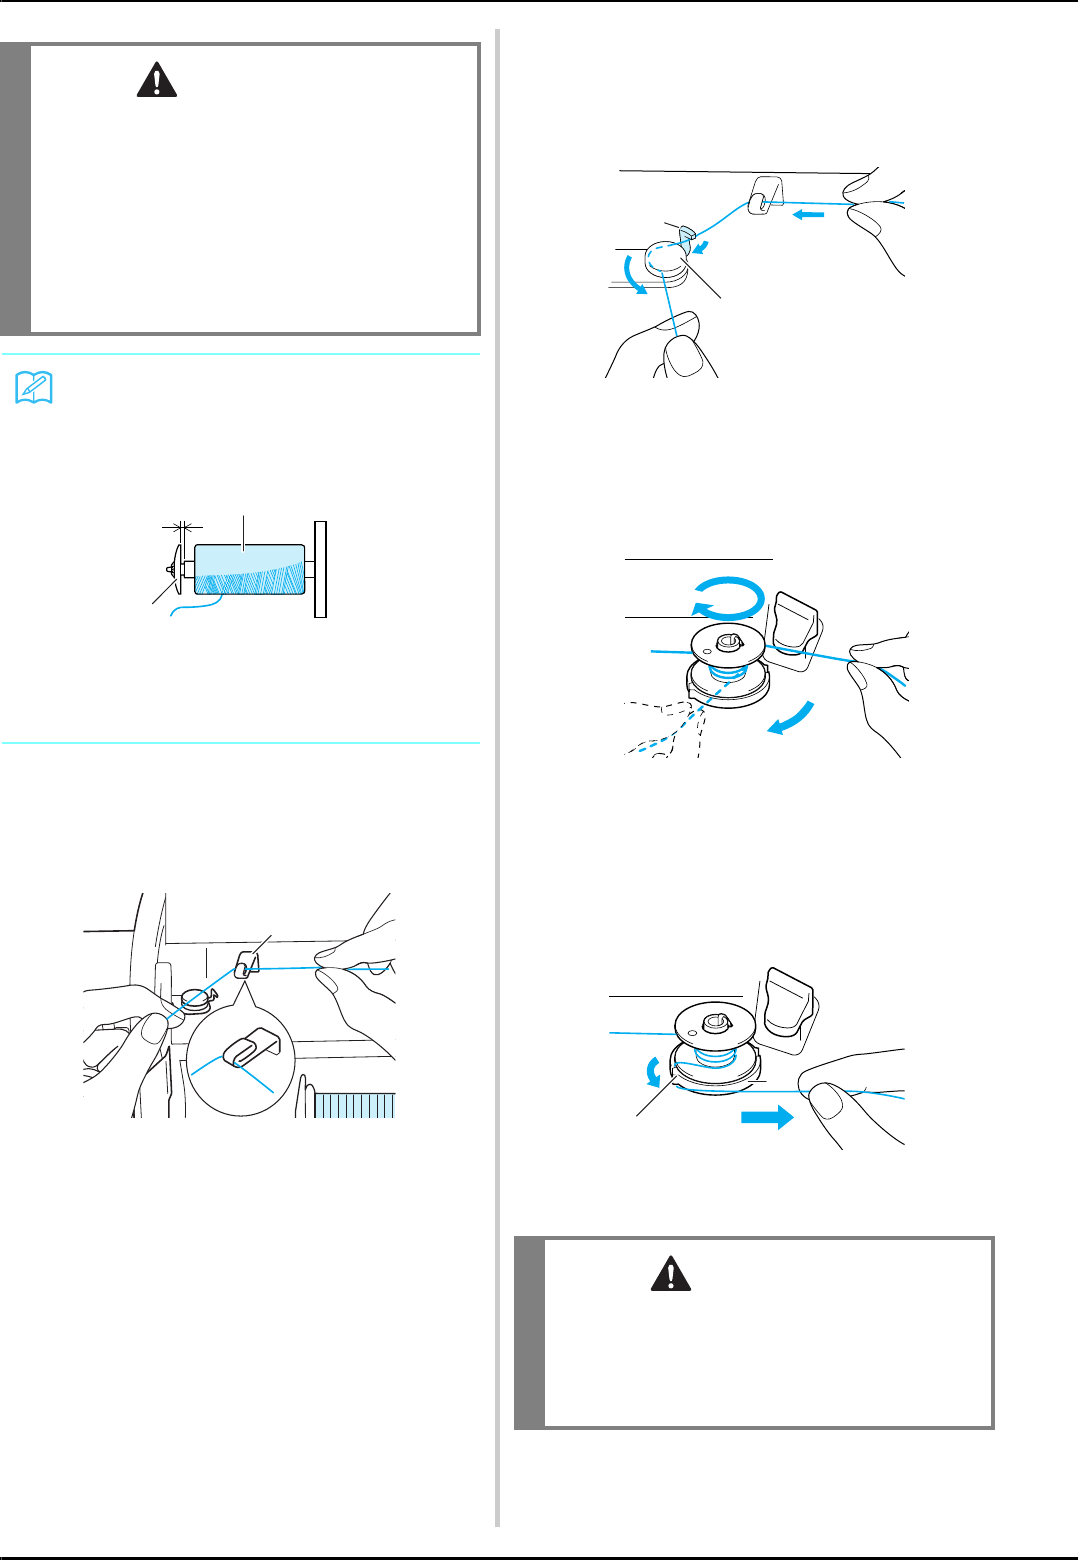
iSet the bobbin holder to the left, until it
clicks into place.
aBobbin holder (switch)
→The bobbin starts winding automatically and stops
rotating when it is done winding. The bobbin holder
will return to the original position.
jCut the thread with the cutter and remove
the bobbin.
■Using the Spool Pin
You can use the main spool pin to wind the bobbin
before sewing. You cannot use this spool pin to
wind the bobbin while sewing.
aTurn the main power to ON.
bAlign the groove in the bobbin with the
spring on the bobbin winder shaft, and set
the bobbin on the shaft.
aGroove of the bobbin
bSpring on the shaft
cPivot the spool pin so that it angles upward.
Set the thread spool on the spool pin so that
the thread unwinds from the front of the
spool.
aSpool pin
bSpool cap
cThread spool
Memo
When the bobbin holder is set to the left, it
works as a switch to make the bobbin wind
automatically.
Memo
• When removing the bobbin, do not pull on
the bobbin winder seat. Doing so could
loosen or remove the bobbin winder seat,
and could result in damage to the machine.
CAUTION
• Setting the bobbin improperly may cause the
thread tension to loosen, breaking the needle
and possibly resulting in injury.
a
ab
2
3
4
5
6
8
1
o
l
7
a
b
b
c
a
LOWER THREADING
22
dPush the spool cap onto the spool pin as far
as possible, then return the spool pin to its
original position.
eHolding the thread with your hands, slide
the thread into the grooves on the thread
guide plate.
aThread guide plate
fPass the thread through the thread guide.
aThread guide
gPass the thread under the pin. Then pass the
thread around the pretension disk making
sure that the thread is under the pretension
disk.
aThread guide
bPin
cPretension disk
hFollow steps g through j on page 20
through 21.
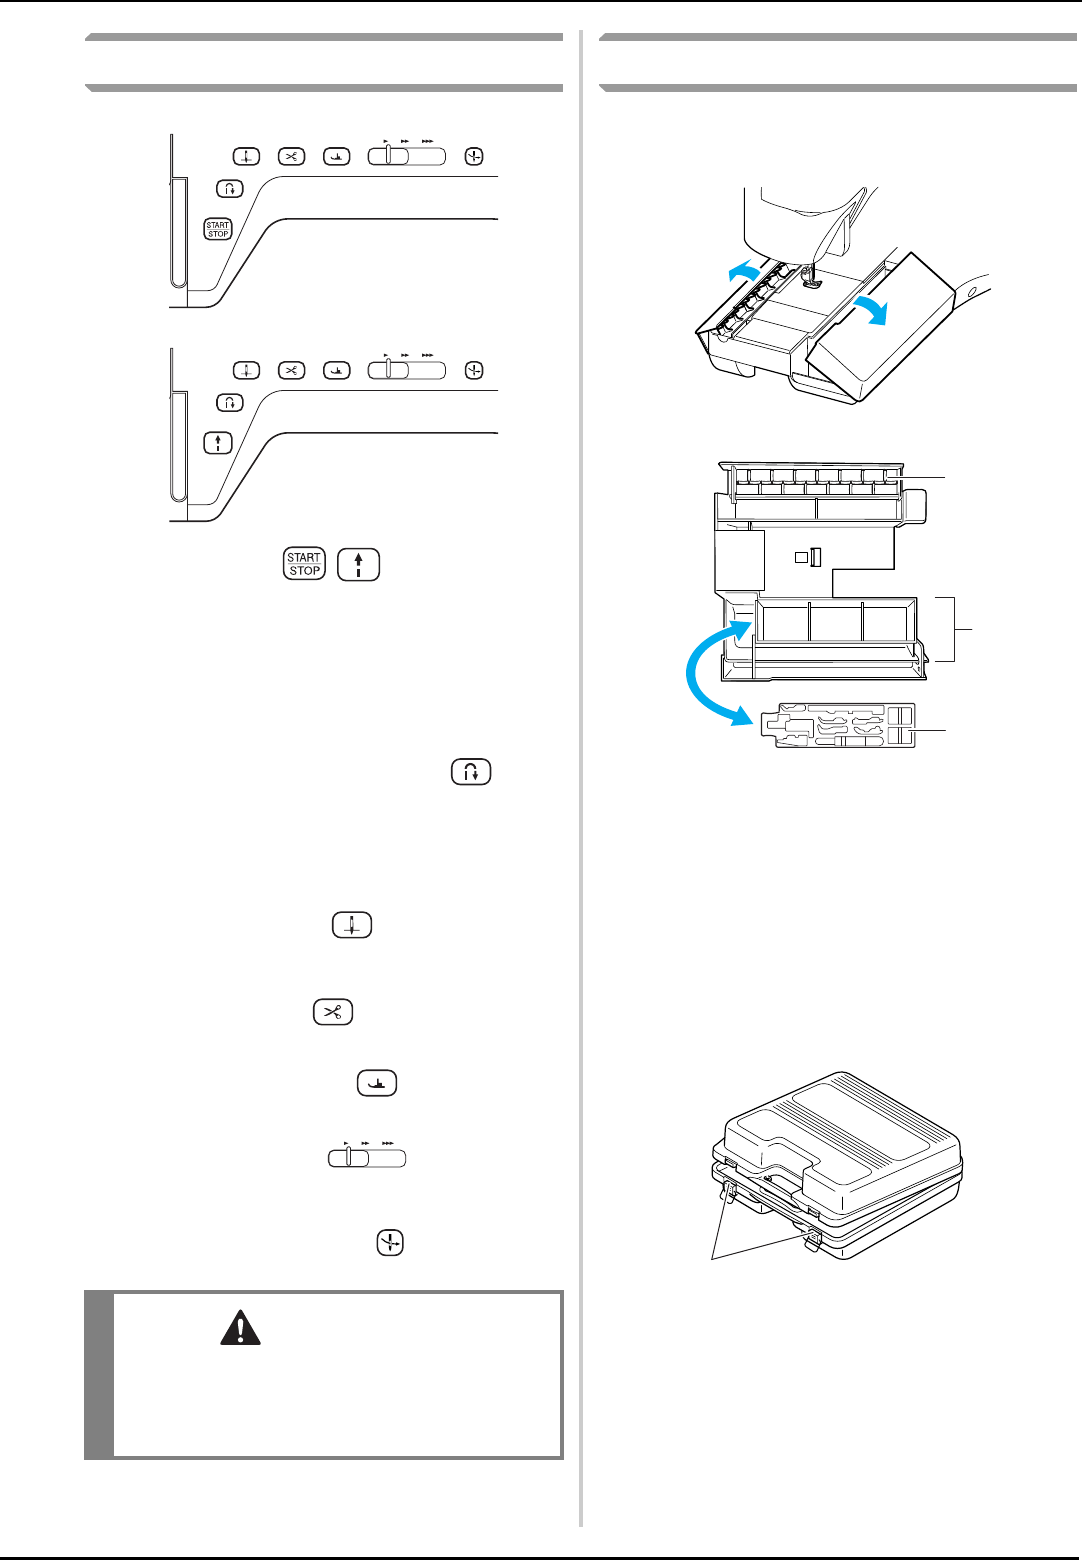
Setting the Bobbin
Press → → →
in that order to display a video example of
the operation on the LCD (see page 18). Follow
the steps explained below to complete the
operation.
aPress the “Presser Foot Lifter” button to
raise the presser foot.
bSlide the bobbin cover latch to the right.
aBobbin cover
bLatch
→The bobbin cover opens.
cRemove the bobbin cover.
dHold the bobbin with your right hand and
hold the end of the thread with your left
hand.
a
a
a
b
CAUTION
• Use a bobbin thread that has been correctly
wound. Otherwise, the needle may break or
the thread tension will be incorrect.
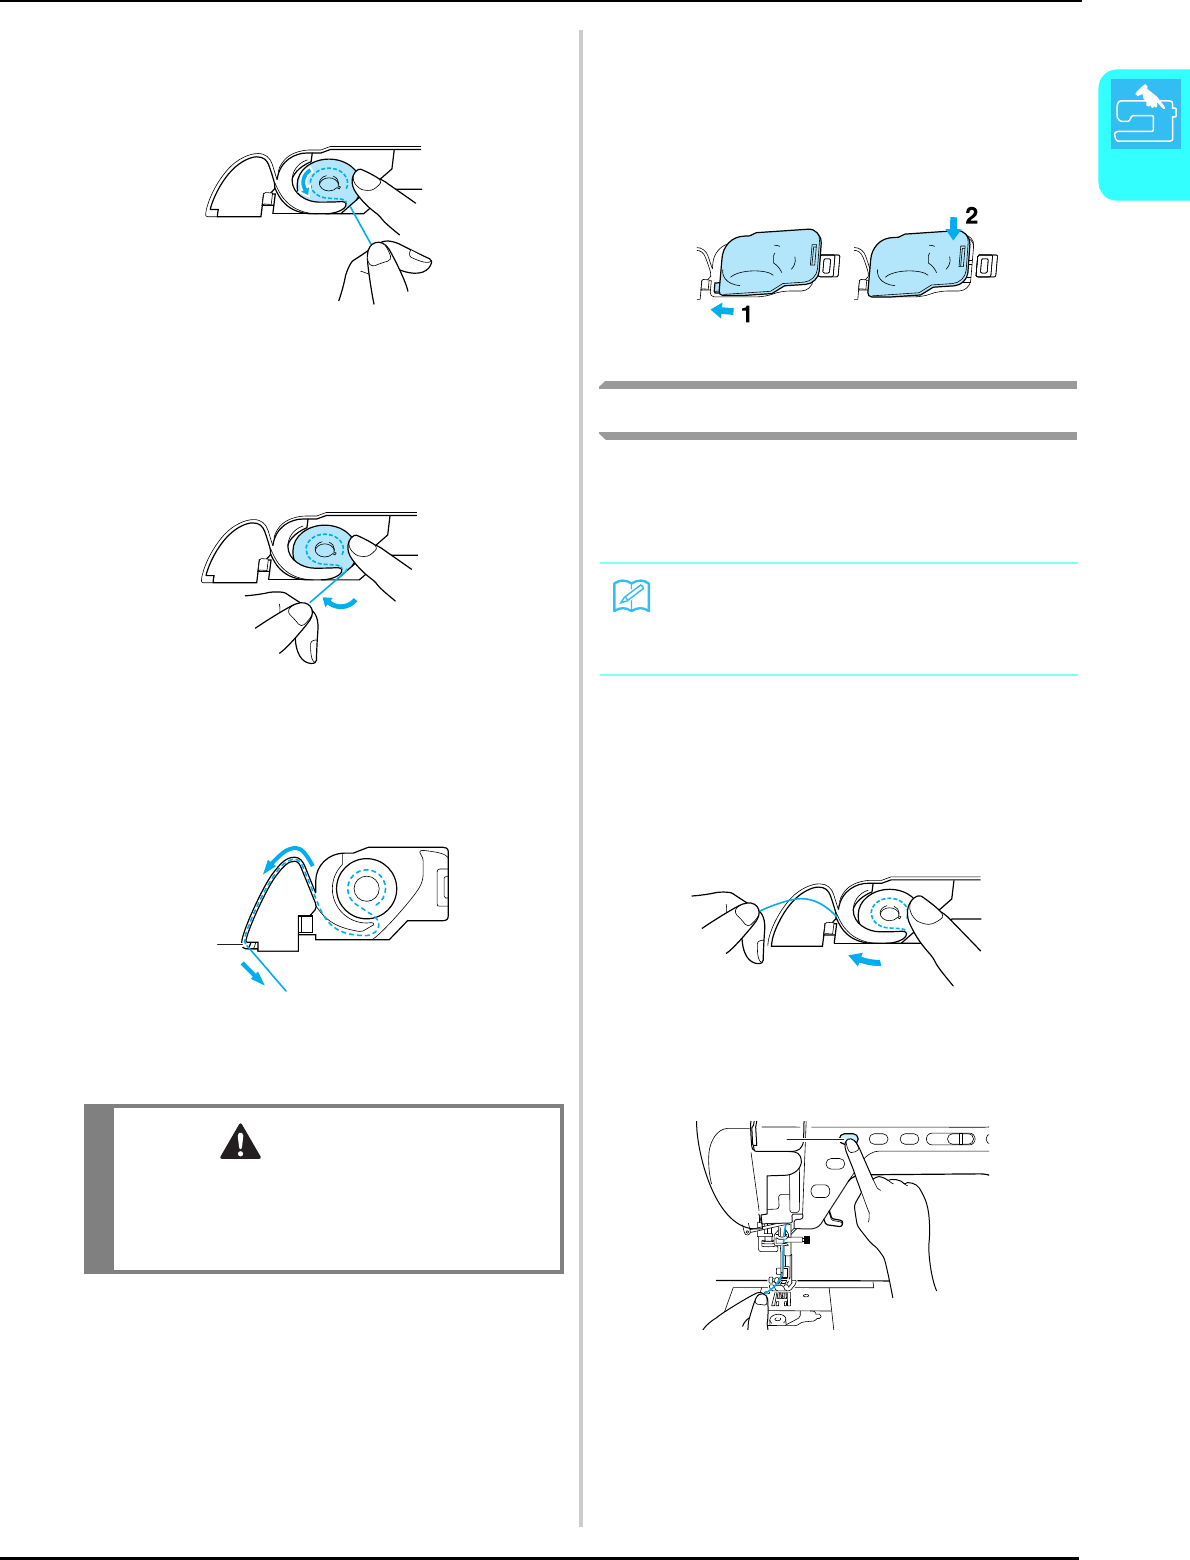
LOWER THREADING
Getting Ready
23
1
eSet the bobbin in the bobbin case so that
the thread unwinds to the left.
fHold the bobbin lightly with your right
hand, and then guide the thread with your
left hand.
gPass the thread through the guide, and then
pull the thread out towards the front.
aCutter
→The cutter cuts the thread.
hInsert the tab in the lower-left corner of the
bobbin cover, and then lightly press down
on the right side to close the cover.
Pulling Up the Bobbin Thread
There may be some sewing applications where
you want to pull up the bobbin thread; for
example, when making gathers, darts, or doing
free motion quilting or embroidery.
aGuide the bobbin thread through the
groove, following the arrow in the
illustration.
* Do not cut the thread with the cutter.
* Do not replace the bobbin cover.
bWhile holding the upper thread, press the
needle position button to lower the needle.
aNeedle position button
CAUTION
• Be sure to hold down the bobbin with your
finger and unwind the bobbin thread
correctly. Otherwise, the thread may break or
the thread tension will be incorrect.
a
Memo
You can pull up the bobbin thread after thread-
ing the upper thread (see “UPPER THREAD-
ING” on page 25).
a
LOWER THREADING
24
cPress the “Needle Position” button to raise
the needle.
dGently pull the upper thread, and a loop of
the bobbin thread will come out of the hole
in the needle plate.
ePull up the bobbin thread, then pass it
under the presser foot and pull it about
100 mm (approx. 3-4 inches) toward the
back of the machine, making it even with
the upper thread.
aUpper thread
bBobbin thread
fReplace the bobbin cover.
a
b
UPPER THREADING
Getting Ready
25
1
UPPER THREADING
Threading Using the “Automatic
Threading” Button
Press → → →
in that order to display a video example of
the operation on the LCD (see page 18). Follow
the steps explained below to complete the
operation.
aTurn the main power to ON.
bPress the “Needle Position” button to raise
the needle.
cPivot the spool pin so that it angles upward.
Set the thread spool on the spool pin so that
the thread unwinds from the front of the
spool.
aSpool pin
bSpool cap
cThread spool
dPush the spool cap onto the spool pin as far
as possible, then return the spool pin to its
original position.
CAUTION
• Be sure to thread the machine properly.
Improper threading can cause the thread to
tangle and break the needle, leading to injury.
• When using accessories not included with this
machine, attach the accessory to the machine
after threading the machine.
Memo
• The automatic threading function can be
used with sewing machine needles 75/11
through 100/16.
• Thread such as transparent nylon monofila-
ment thread and thread with a thickness of
130/20 or thicker cannot be used with the
automatic threading function.
• The automatic threading function cannot be
used with the wing needle or the twin nee-
dle.
• If the automatic threading function cannot be
used, see “Threading Manually” on page 27.
7
6
2
3, 4
8
5
1
Note
If you try to thread the needle automatically
without raising the needle, the thread may not
thread correctly.
CAUTION
• If the thread spool and/or spool cap are set
incorrectly, the thread may tangle on the spool
pin and cause the needle to break.
• Use the spool cap (large, medium, or small)
that is closest in size to the thread spool. If a
spool cap smaller than the thread spool is
used, the thread may become caught in the slit
on the end of the spool and cause the needle
to break.
b
c
a
UPPER THREADING
26
eHolding the thread with your hands, slide
the thread into the grooves on the thread
guide plate.
aThread guide plate
fWhile holding the thread in your right
hand, pass the thread through the thread
guide in the direction indicated.
gWhen finished pulling the thread through
the thread guide, cut the thread and leave
the thread in position.
aCutter
hPress the “Automatic Threading” button to
have the machine automatically thread the
needle.
→The upper threading is finished.
Memo
When sewing with fine, cross-wound thread,
use the small spool cap, and leave a small
space between the cap and the thread spool.
aSpool cap (small)
bThread spool (cross-wound thread)
cSpace
a
cb
a
a
Memo
When the “Automatic Threading” button is
pressed, the presser foot will be automatically
lowered.
Note
In case the needle is not completely thread,
slowly pull the loop of the thread through from
the back of the needle.
aAbout 50mm (approx. 2 inches)
Memo
If the needle could not be threaded or the
thread was not passed through the needle bar
thread guides, perform the procedure again
starting from step c.
a
UPPER THREADING
Getting Ready
27
1
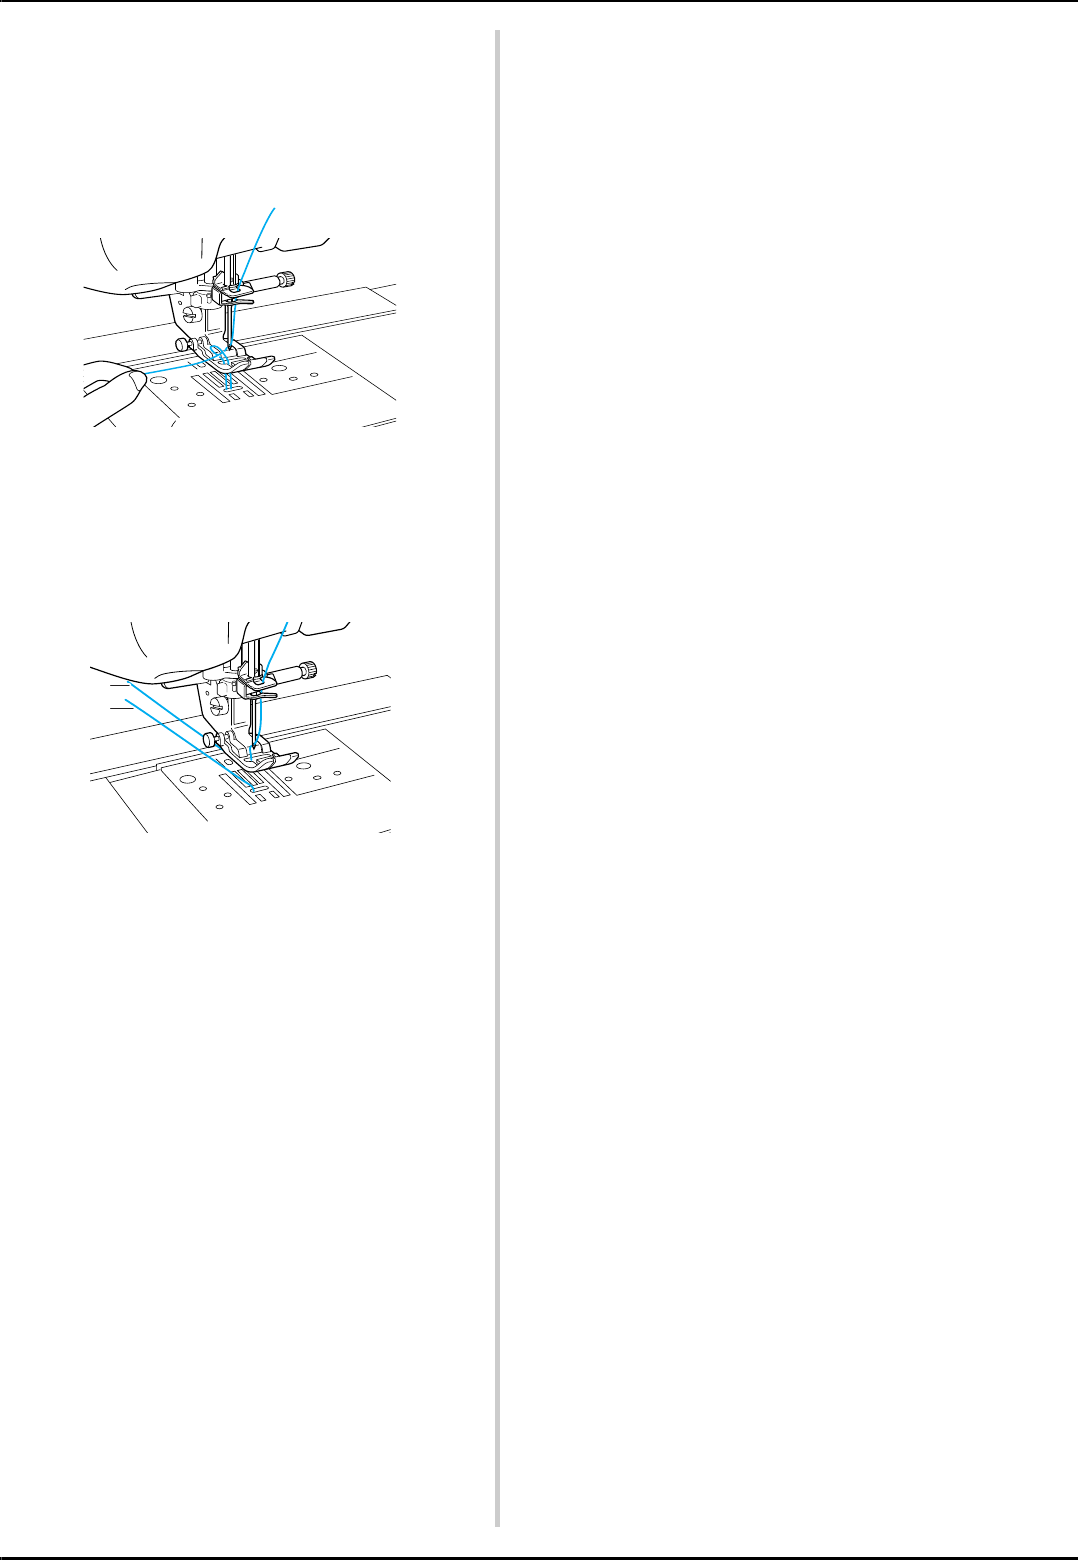
Threading Manually
Automatic threading cannot be used when using
the wing needle, the twin needle, or special thread
with a thickness of 130/20 or thicker. In these
cases, thread the needle as described below.
aTurn the main power to ON.
bTurn the handwheel so that the line on the
machine is aligned with the line on the
handwheel.
aLine on handwheel
cPress .
→The key appears as .
dRaise the presser foot lever.
ePivot the spool pin so that it angles upward.
Set the thread spool on the spool pin so that
the thread unwinds from the front of the
spool.
aSpool pin
bSpool cap
cThread spool
Note
When the “Automatic Threading” button is
pressed, the presser foot will be automatically
lowered.
If you are using an incorrect needle and thread
combination, the hook may sometimes get
caught in the needle. If this happens, remove
the hook from the needle as described below.
CAUTION
• The needle thread carrier will automatically
thread the needle when the “Automatic
Threading” button is pressed. Be sure to keep
your hands and other items away from the
needle area, otherwise injuries may occur.
15
8
10
9
11
5, 6
7
3
4, 12
13
14
1
2
Memo
If the line on the machine is not aligned with
the line on the handwheel, the sewing
machine cannot be threaded. Check that the
line on the handwheel is facing up as shown in
the illustration above.
a
b
c
a
UPPER THREADING
28
fPush the spool cap onto the spool pin as far
as possible, then return the spool pin to its
original position.
gHolding the thread with both hands, slide
the thread into the grooves on the thread
guide plate.
aThread guide plate
hWhile holding the thread in your right
hand, use your left hand to pull the thread
toward the threading path cover, then pass
it along the thread path as shown in the
illustration.
Be sure to pass the thread along the right
side of the thread path guide.
aThreading path cover
bThread path guide
iPull the thread under the thread path guide.
aThread path guide
jPull back up the thread along the left side of
the thread path guide to the top left corner
of the threading path cover.
aTop left corner
bThreading path cover
kPull the thread back down to the needle bar
along the left side of the thread path guide.
* Make sure the thread is hooked at the top corner
and positioned behind the transparent front cover.
aThread take-up lever check window
bTransparent front cover
CAUTION
• If the thread spool and/or spool cap are set
incorrectly, the thread may tangle on the spool
pin and cause the needle to break.
• Use the spool cap (large, medium, or small)
that is closest in size to the thread spool. If a
spool cap smaller than the thread spool is
used, the thread may become caught in the slit
on the end of the spool and cause the needle
to break.
a
1
a
b
Memo
Look through the thread take-up lever check
window and check that the thread is correctly
fed through the take-up lever, turning the
handwheel toward you.
a
(A)
a
(B)
b
a
(C)
b
a
a
b
a Take-up lever b Thread
a
b
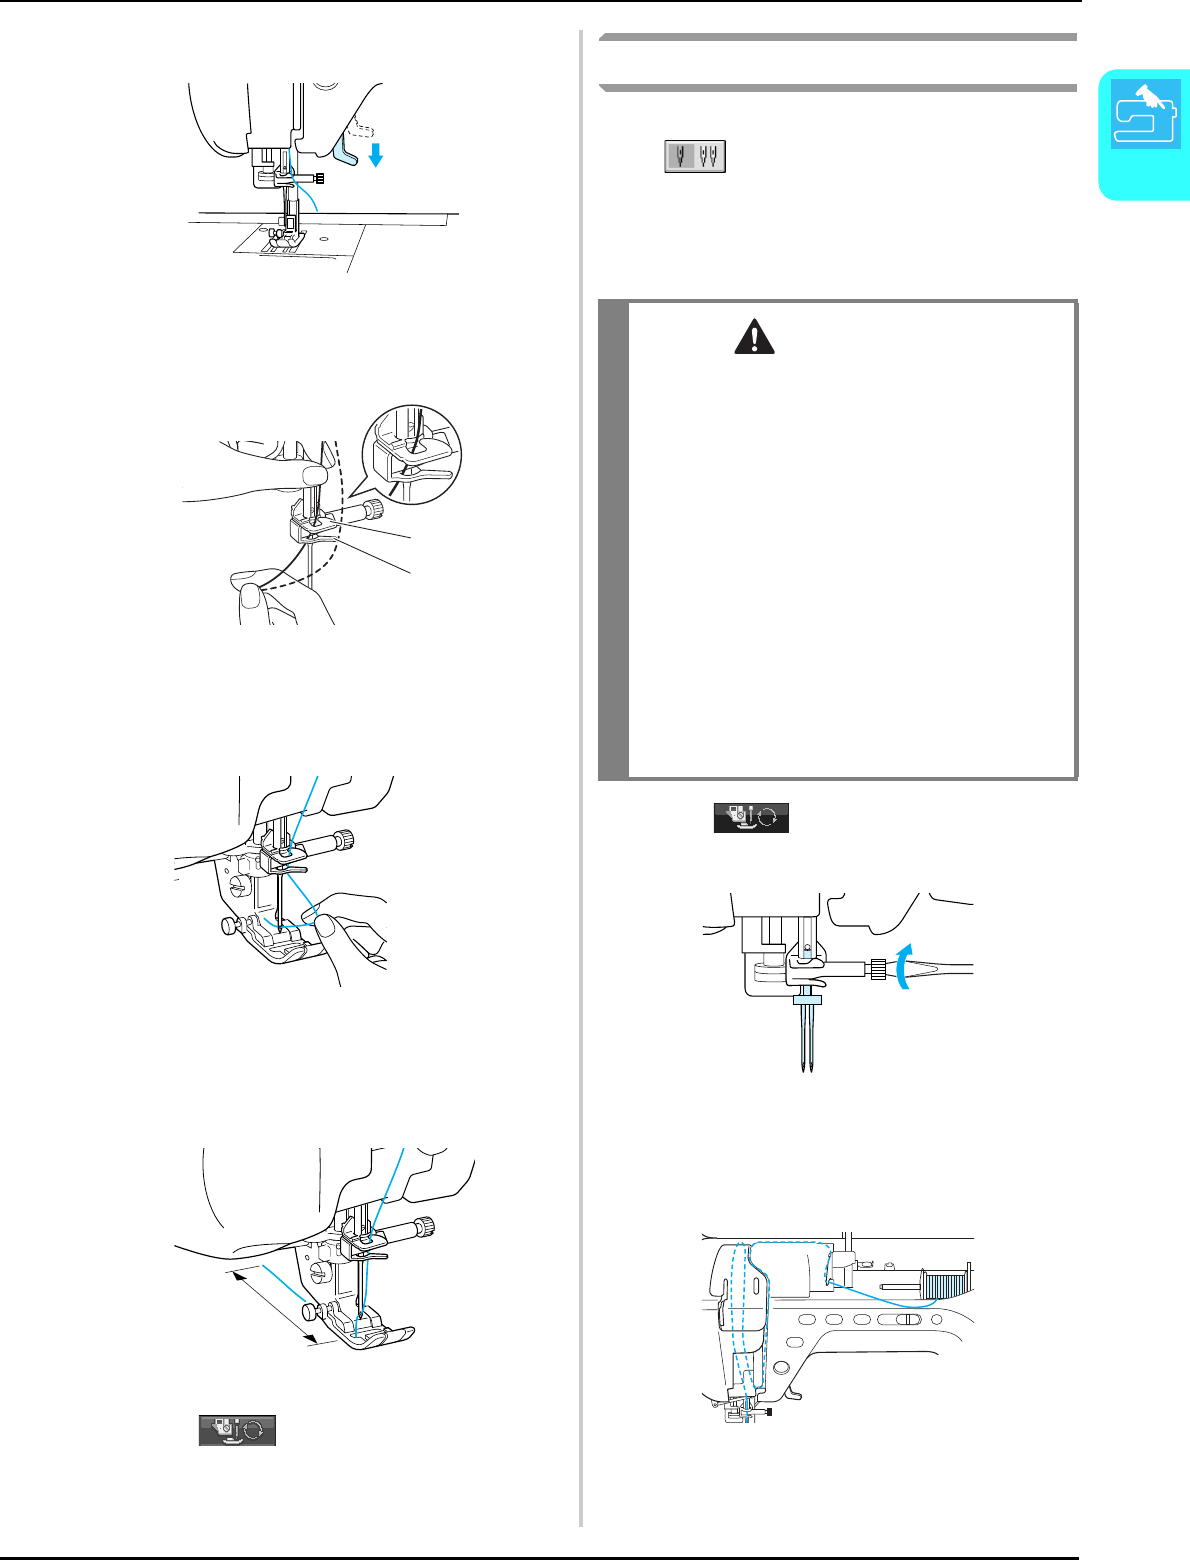
UPPER THREADING
Getting Ready
29
1
lLower the presser foot lever.
mHolding the thread with both hands, pass
the thread through both the upper and
lower needle bar thread guides.
aNeedle bar thread guide (upper)
bNeedle bar thread guide (lower)
nPass the thread through the eye of the
needle from front to back.
oPass the thread through the presser foot,
and then pull out about 100-150 mm
(approx. 4-6 inches) of thread toward the
back of the machine.
a100-150 mm (approx. 4-6 inches)
pPress to unlock all keys and
buttons.
Using the Twin Needle Mode
The twin needle can only be used for patterns that
show after being selected. Before you
select a stitch pattern, make sure the stitch can be
sewn in the twin needle mode (refer to the
“STITCH SETTING CHART” at the end of this
manual).
aPress and install the twin needle
(see “CHANGING THE NEEDLE” on page 34).
bManually thread the machine.
* Follow the steps for threading a single needle for the
first threading (see “Threading Manually” on page
27).
1
2
a
b
a
CAUTION
• Use only twin needles made for this machine
(part code X59296-151). Other needles could
break, resulting in damage.
• Be sure to set the twin needle mode when
using the twin needle. Using the twin needle
while the machine is in single needle mode
could cause the needle to break, resulting in
damage.
• Do not sew with bent needles. The needle
could break and cause injury.
• When using the twin needle, be sure to use
presser foot “J” only.
• When the twin needle is used, bunched
stitches may occur depending on the types of
fabric and thread that are used.
If this occurs, use monogramming foot “N”.
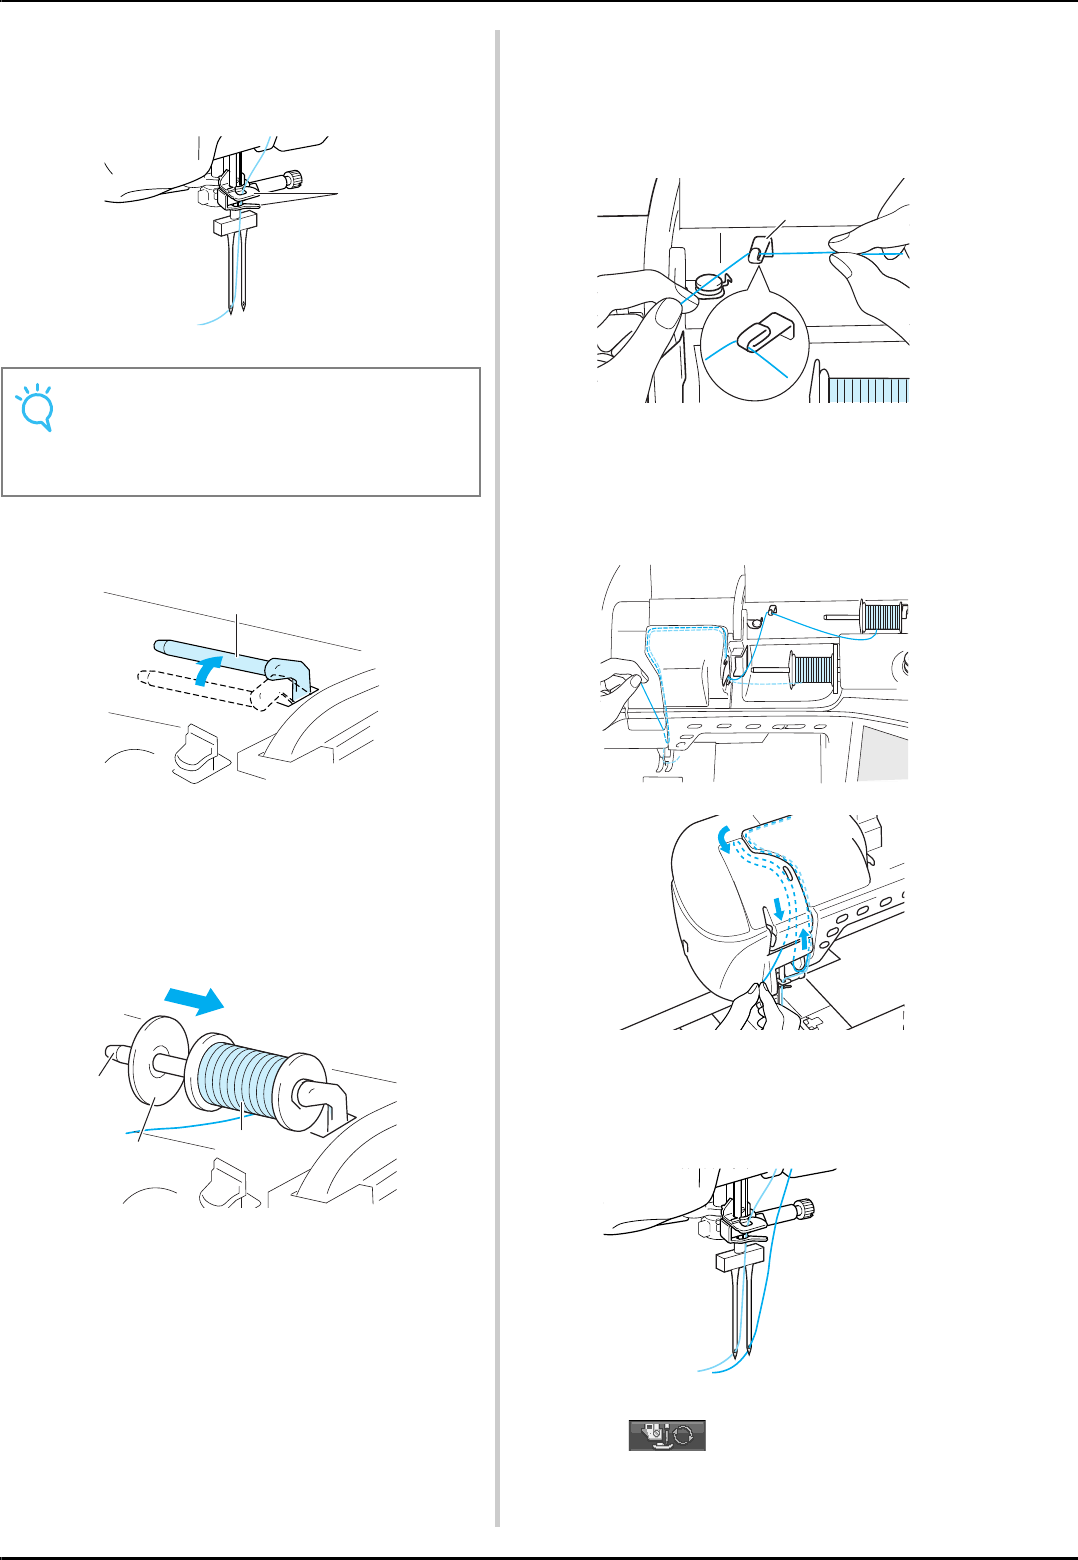
UPPER THREADING
30
cPass the thread through the needle bar
thread guides on the needle bar, then
thread the needle on the left side.
aNeedle bar thread guides
dPull up the supplemental spool pin and set it
in the up position.
aSupplemental spool pin
ePlace the additional spool of thread on the
supplemental spool pin, so that the thread
unwinds from the front. Then push the
spool cap onto the spool pin as far as
possible to secure the thread spool.
aSpool pin
bSpool cap
cThread spool
fHold the thread from the spool with both
hands, and place the thread in the thread
guide.
* Do not place the thread in the bobbin winding
thread guide.
aThread guide
gPass the thread through the thread guide
plate, following the sequence as described
below.
hDo not pass the thread in the needle bar
thread guides on the needle bar. Thread the
needle on the right side.
iPress .
Note
• The “Automatic Threading” button cannot be
used. Manually thread the twin needle from
front to back. Using the “Automatic Threading”
button may result in damage to the machine.
a
a
a
bc
a
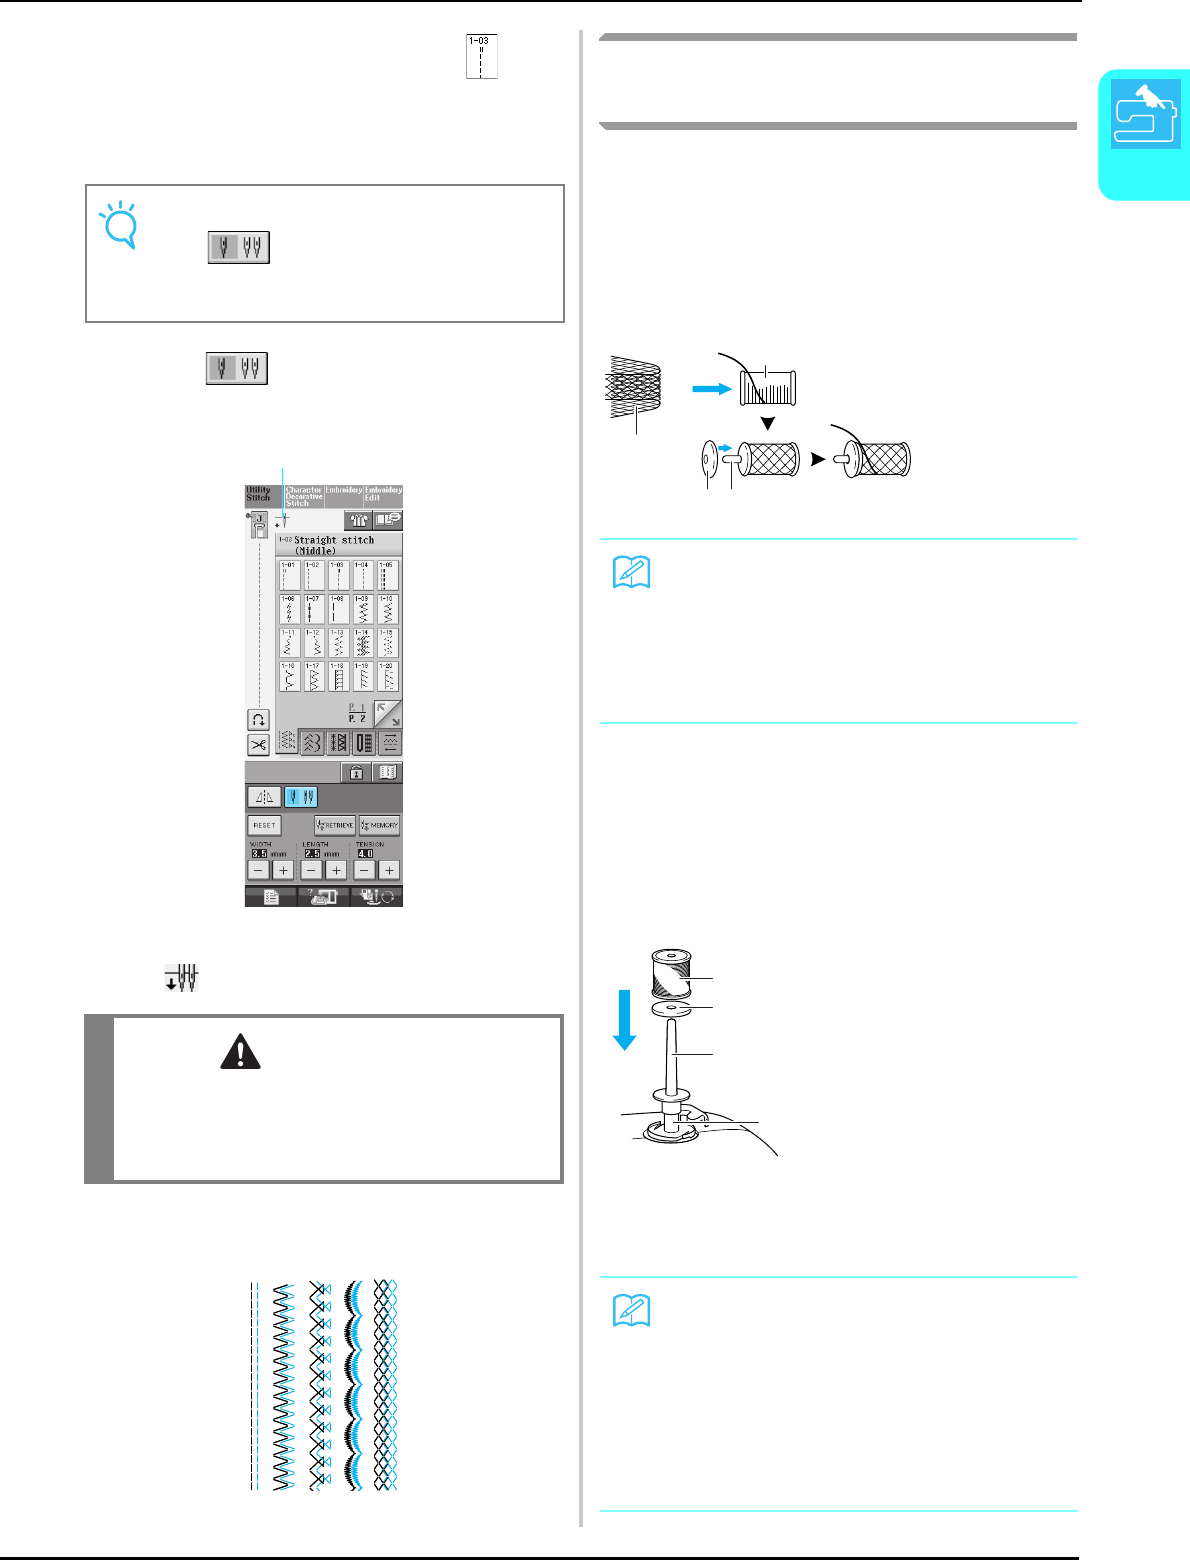
UPPER THREADING
Getting Ready
31
1
jSelect a stitch pattern. (Example: )
* Refer to the “STITCH SETTING CHART” at the end
of this manual for proper stitch to use with presser
foot “J”.
→The Selected stitch is displayed.
kPress to select the twin needle
mode.
aSingle needle/twin needle setting
→ appears.
lStart sewing.
Sample of Twin Needle Sewing
Using Threads that Unwind
Quickly
■Using the Spool Net
If using transparent nylon thread, metallic thread, or
other strong thread, place the included spool net
over the spool before using it. When using these
threads, threading must be done manually.
If the spool net is too long, fold it once to match it to
the spool size before placing it over the spool.
■Using the Vertical Spool Pin
Use the vertical spool pin when using an irregularly
shaped thread spool, and when sewing or
embroidering with metallic thread.
aInsert the vertical spool pin into the end of
the bobbin winder shaft.
bInstall the spool felt and the thread spool in
that order, and then thread the upper
thread.
Note
If the key is light gray after selecting
the stitch, the selected stitch cannot be sewn
in the twin needle mode.
CAUTION
Be sure to set the twin needle mode when using
the twin needle. Using the twin needle while the
machine is in single needle mode could cause the
needle to break, resulting in damage.
a
Memo
• When threading the spool with the spool net
on, the thread may not come out enough.
Make sure that 5-6 cm (approx. 2 - 2-1/2
inches) of thread are pulled out.
• It may be necessary to adjust the thread ten-
sion when using the spool net.
Memo
• When setting the thread spool, set it so that
the thread winds off from the front of the
spool.
• If using metallic thread, we recommend that
you use a 90/14 home sewing machine nee-
dle.
• This method keeps the thread from twisting
as it comes off the spool pin.
a
d c
b
aSpool net
bThread spool
cSpool pin
dSpool cap
d
c
b
a
aBobbin winder shaft
bVertical spool pin
cSpool felt
dThread spool
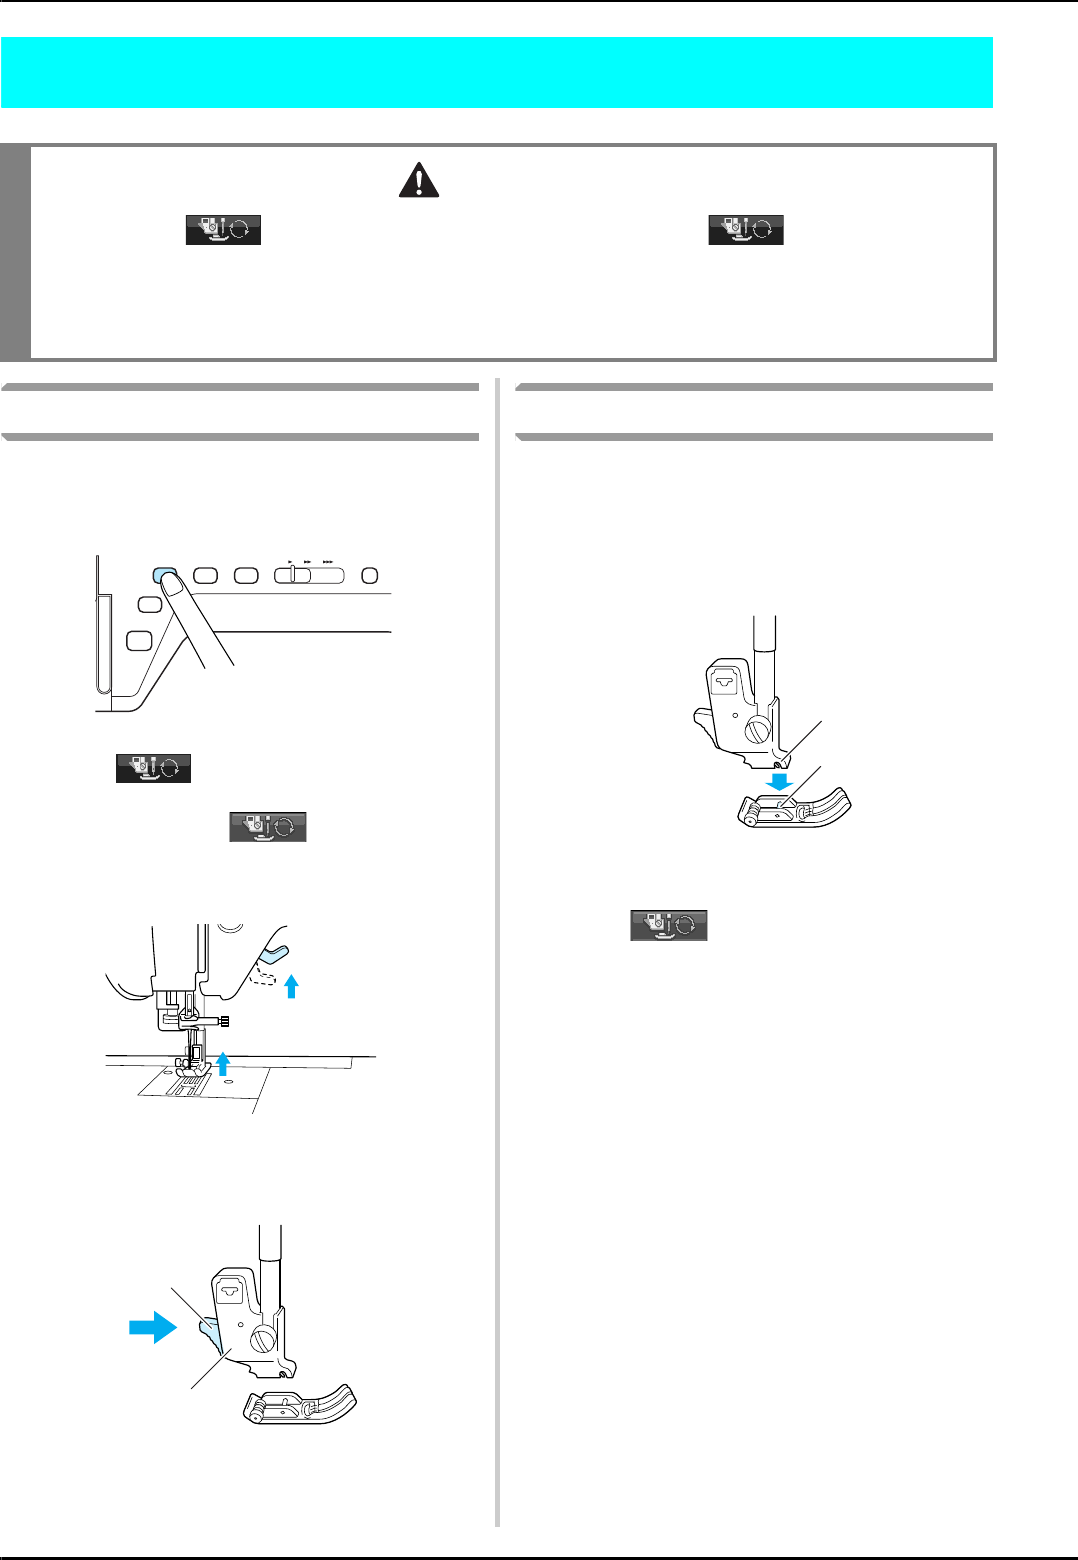
CHANGING THE PRESSER FOOT
32
CHANGING THE PRESSER FOOT
Removing the Presser Foot
aPress the “Needle Position” button to raise
the needle.
bPress .
→The key appears as .
cRaise the presser foot lever.
dPress the black button on the presser foot
holder and remove the presser foot.
aBlack button
bPresser foot holder
Attaching the Presser Foot
aPlace the new presser foot under the
holder, aligning the foot pin with the notch
in the holder. Lower the presser foot lever
so that the presser foot pin snaps into the
notch in the holder.
aNotch
bPin
bPress to unlock all keys and
buttons.
cRaise the presser foot lever.
CAUTION
• Always press on the screen before changing the presser foot. If is not pressed and the
“Start/Stop” button or another button is pressed, the machine will start and may cause injury.
• Always use the correct presser foot for the selected stitch pattern. If the wrong presser foot is used, the
needle may strike the presser foot and bend or break, and may cause injury.
• Only use presser feet made for this machine. Using other presser feet may lead to accident or injury.
b
a
a
b
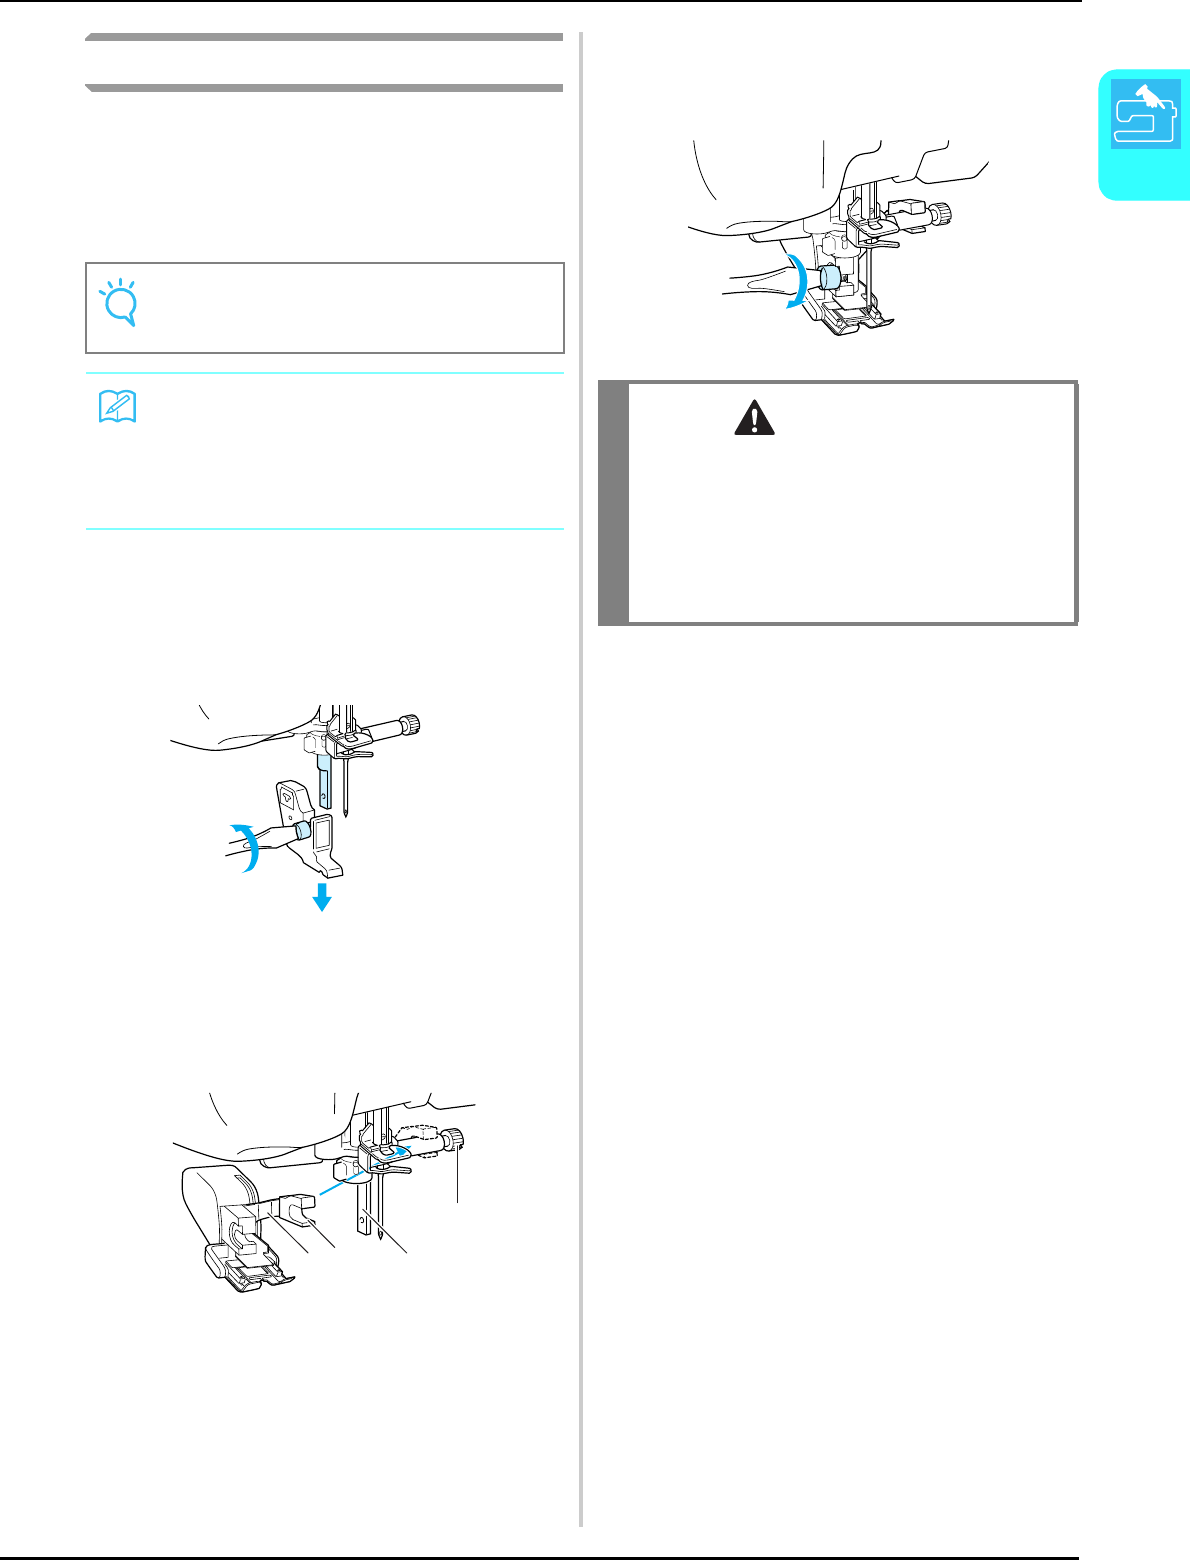
CHANGING THE PRESSER FOOT
Getting Ready
33
1
Attaching the Walking Foot
The walking foot holds the fabric between the
presser foot and the feed dogs to feed the fabric.
This enables you to have better fabric control
when sewing difficult fabrics (such as quilting or
velvet) or fabrics that slip easily (such as vinyl
cloth, leather, or synthetic leather).
aFollow the steps in “Removing the Presser
Foot” on the previous page.
bLoosen the screw of the presser foot holder
to remove the presser foot holder.
cSet the operation lever of the walking foot
so that the needle clamp screw is set
between the fork, and position the walking
foot on the presser foot bar.
aOperation lever
bNeedle clamp screw
cFork
dPresser foot bar
dLower the presser foot lever. Insert the
screw, and tighten the screw securely with
the screwdriver.
Note
• When sewing with the walking foot, sew at
medium to low speeds.
Memo
• The walking foot can only be used with
straight or zigzag stitch patterns. Reverse
stitches cannot be sewn with the walking
foot. Only select straight or zigzag stitch pat-
terns with reinforcement stitches.
acd
b
CAUTION
• Use the screwdriver to tighten the screw
securely. If the screw is loose, the needle may
strike the presser foot and cause injury.
• Be sure to turn the handwheel toward the
front of the machine to check that the needle
does not strike the presser foot. If the needle
strikes the presser foot, injury may result.
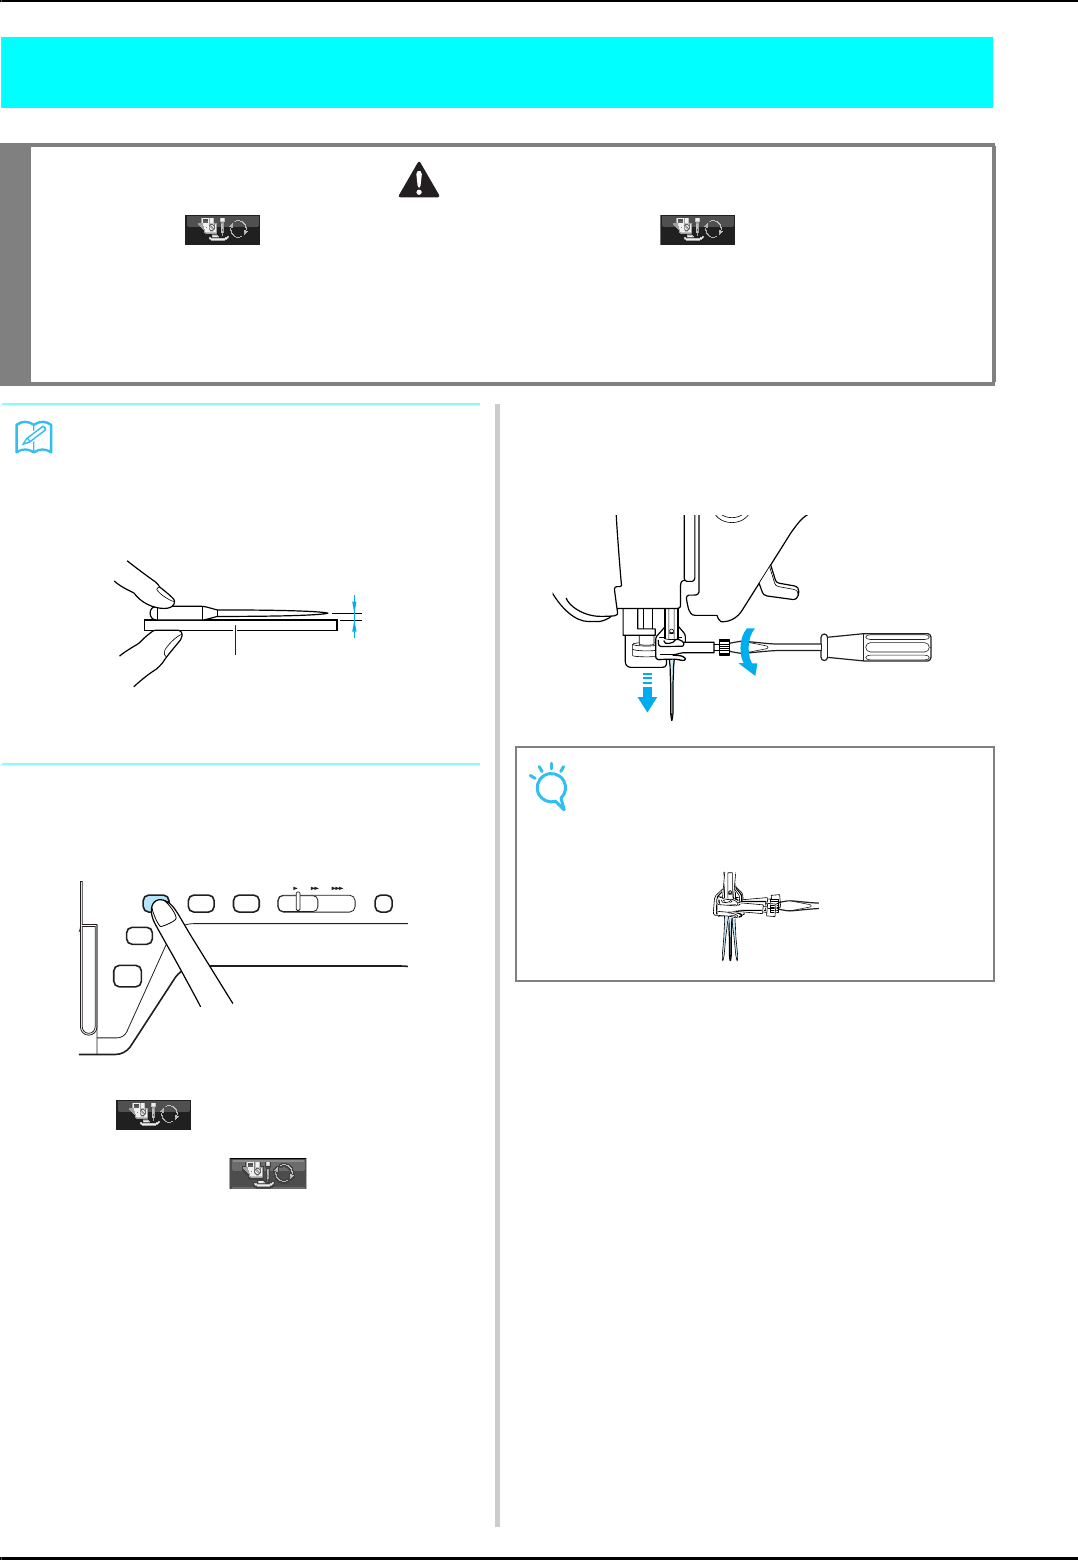
CHANGING THE NEEDLE
34
CHANGING THE NEEDLE
aPress the “Needle Position” button to raise
the needle.
bPress .
→The key appears as .
cUse the screwdriver to turn the screw
toward the front of the machine and loosen
the screw, then remove the needle.
CAUTION
• Always press on the screen before changing the needle. If is not pressed and the Start/
Stop button or another operation button is pressed accidentally, the machine will start and injury may
result.
• Use only sewing machine needles made for home use. Other needles may bend or break and may cause
injury.
• Never sew with a bent needle. A bent needle will easily break and may cause injury.
Memo
To check the needle correctly, place the flat
side of the needle on a flat surface. Check the
needle from the top and the sides. Throw
away any bent needles.
aParallel space
bLevel surface (bobbin cover, glass, etc.)
b
a
Note
• Do not apply pressure to the needle clamp
screw. Doing so may damage the needle or
machine.
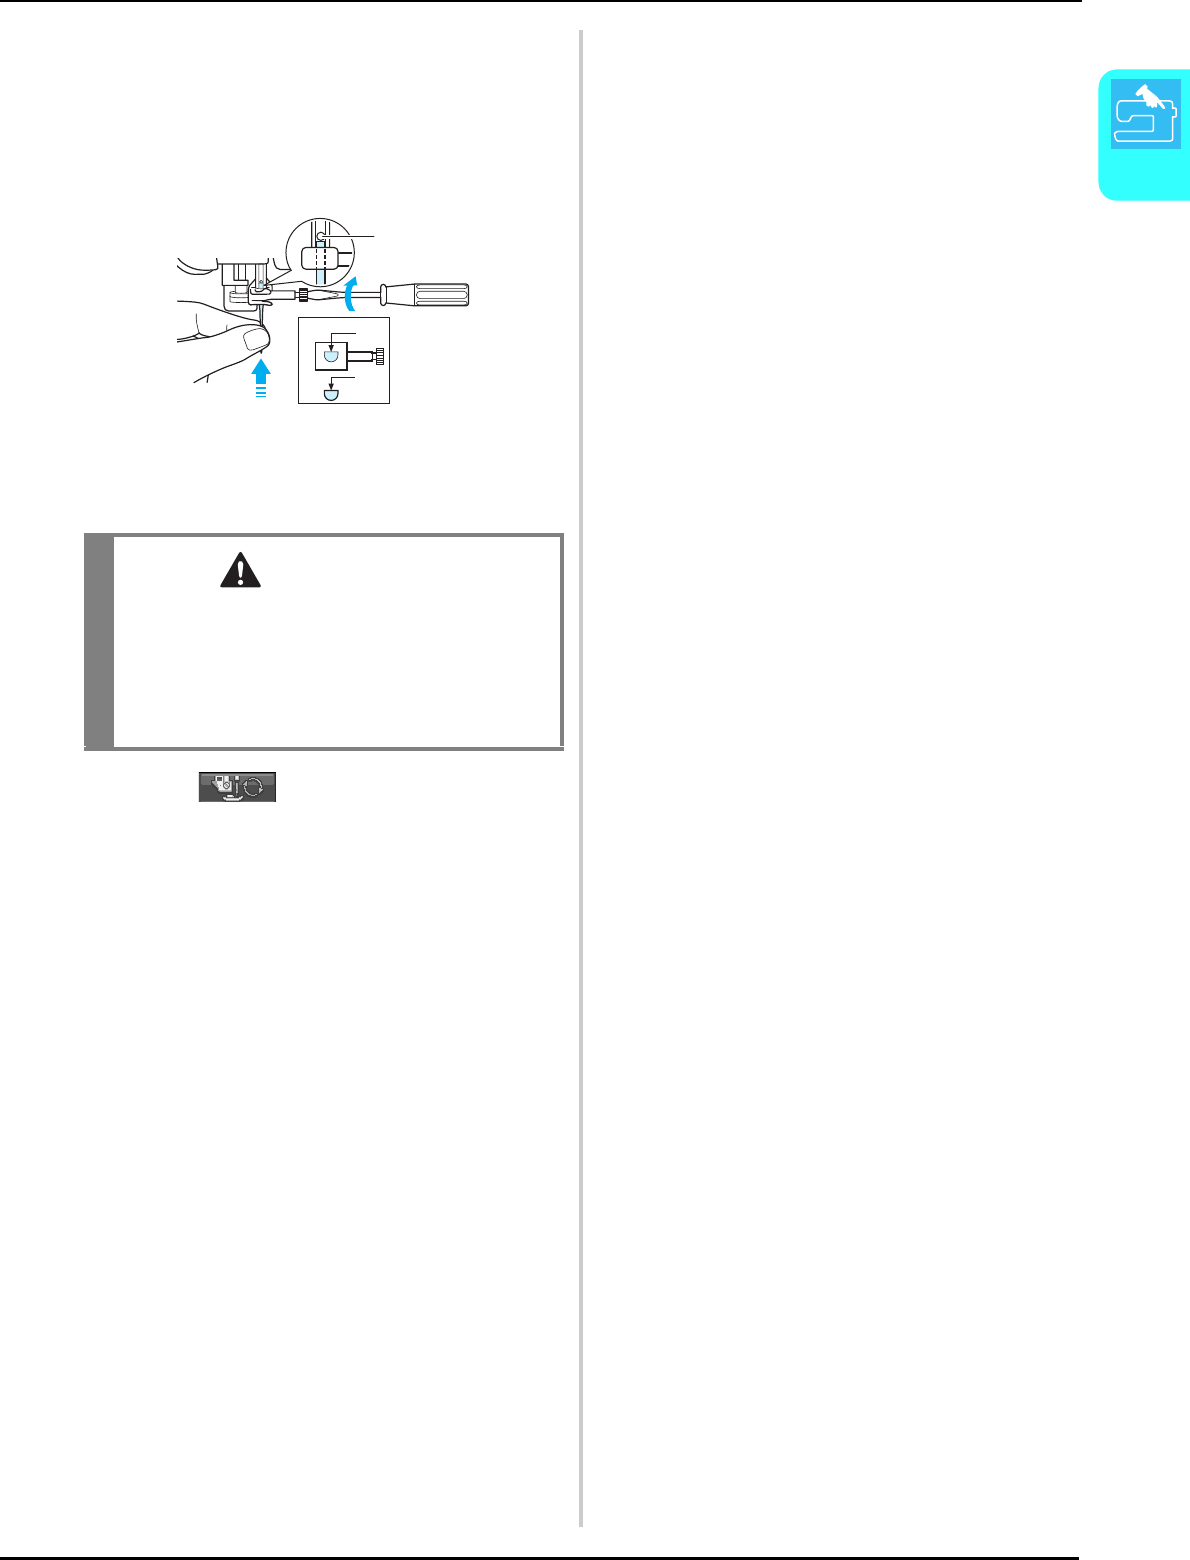
CHANGING THE NEEDLE
Getting Ready
35
1
dWith the flat side of the needle facing the
back, insert the new needle all the way to
the top of the needle stopper (viewing
window) in the needle clamp. Use a
screwdriver to securely tighten the needle
clamp screw.
aNeedle stopper
bHole for setting the needle
cFlat side of needle
ePress to unlock all keys and
buttons.
CAUTION
• Be sure to push in the needle until it touches
the stopper, and securely tighten the needle
clamp screw with a screwdriver. If the needle
is not completely inserted or the needle clamp
screw is loose, the needle may break or the
machine may be damaged.
a
c
b

CHANGING THE NEEDLE
36
■About the Needle
The sewing machine needle is probably the most important part of the sewing machine. Choosing the proper
needle for your sewing project will result in a beautiful finish and fewer problems. Below are some things to keep
in mind about needles.
• The smaller the needle number, the finer the needle. As the numbers increase, the needles get thicker.
• Use fine needles with lightweight fabrics, and thicker needles with heavyweight fabrics.
• To avoid skipped stitches, use ball point needle (golden colored) 90/14 with stretch fabrics.
• To avoid skipped stitches, use ball point needle (golden colored) 90/14 when sewing character or decorative
stitches.
• Use needle 75/11 for embroidery. Use ball point needle 75/107 for embroidering patterns with short jump
stitches such as alphabet characters when the thread trimming function is turned on. Ball point needles
(golden colored) 90/14 are not recommended for embroidery, as they may bend or break, causing injury.
• It is recommended that a 90/14 needle should be used when embroidering on heavyweight fabrics or
stabilizing products (for example, denim, puffy foam, etc.). A 75/11 needle may bend or break, which could
result in injury.
■Fabric/Thread/Needle Combinations
The following table provides information concerning the appropriate thread and needle for various fabrics.
Please refer to this table when selecting a thread and needle for the fabric you wish to use.
Fabric Thread Size of needle
Type Size
Medium weight fabric Broadcloth Cotton 60 - 80 75/11 - 90/14
Taffeta Synthetic mercerized 60 - 80
Flannel, Gabardine Silk or silk finished 50
Lightweight fabric Lawn, Batiste Cotton 60 - 80 65/9 - 75/11
Georgette Synthetic mercerized 60 - 80
Challis, Satin Silk 50
Heavyweight fabric Denim Cotton 30 - 50 90/14 - 100/16
Corduroy Synthetic mercerized 50
Tweed Silk 50
Stretch fabric Jersey Thread for knits 50 - 60 Ball point needle
(golden colored)
75/11 - 90/14
Tr i c o t
For top stitching Synthetic mercerized 30 90/14 - 100/16
Silk 30
Memo
For transparent nylon thread, always use needle 90/14 - 100/16.
The same thread is usually used for the bobbin thread and upper threading.
CAUTION
• Be sure to follow the needle, thread, and fabric combinations listed in the table. Using an improper
combination, especially a heavyweight fabric (i.e., denim) with a small needle (i.e., 65/9 - 75/11), may
cause the needle to bend or break, and lead to injury. Also, the seam may be uneven, the fabric may
pucker, or the machine may skip stitches.

Chapter 2
Sewing Basics
SEWING ..............................................................................................38
Sewing a Stitch........................................................................................................38
■Using the Foot Controller................................................................................................39
Sewing Reinforcement Stitches ...............................................................................40
Sewing Curves.........................................................................................................40
Changing Sewing Direction.....................................................................................40
Sewing Heavyweight Fabrics...................................................................................41
■If the Fabric does not Fit under the Presser Foot .............................................................41
■If the Fabric does not Feed at the Beginning of Stitching.................................................41
Sewing Lightweight Fabrics .....................................................................................41
STITCH SETTINGS...............................................................................42
Setting the Stitch Width ..........................................................................................42
Setting the Stitch Length .........................................................................................42
Setting the Thread Tension......................................................................................43
■Proper Thread Tension ....................................................................................................43
■Upper Thread is Too Tight...............................................................................................43
■Upper Thread is Too Loose..............................................................................................43
USEFUL FUNCTIONS..........................................................................44
Automatic Reinforcement Stitching ........................................................................44
Automatic Thread Cutting.......................................................................................45
■Using the Knee Lifter.......................................................................................................46
Locking the Screen ..................................................................................................46
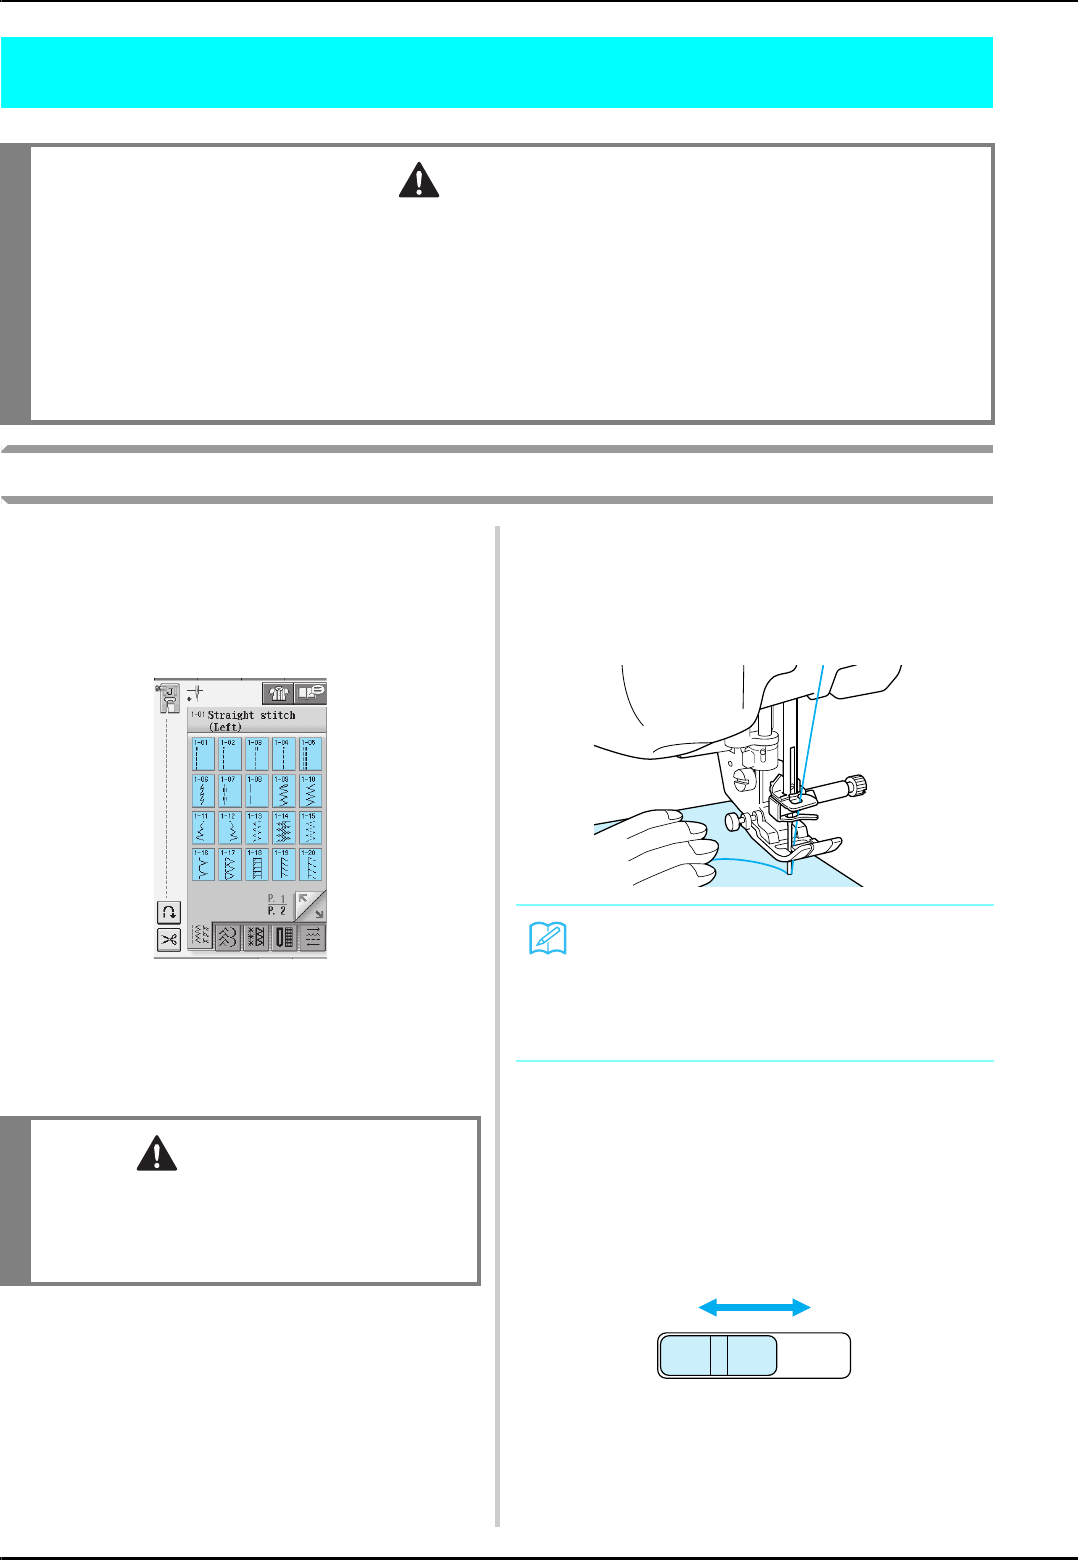
SEWING
38
SEWING
Sewing a Stitch
aTurn the main power to ON, and push the
“Needle Position” button to raise the
needle.
bPress the key of the stitch you want to sew.
→The symbol of the correct presser foot will be
displayed in the upper left corner of the LCD.
cInstall the presser foot (see “CHANGING
THE PRESSER FOOT” on page 32).
dSet the fabric under the presser foot. Hold
the fabric and thread ends in your left hand,
and turn the handwheel to set the needle in
the sewing start position.
eLower the presser foot.
* You do not have to pull up the bobbin thread.
fAdjust the sewing speed with the speed
control slide.
* You can use this slide to adjust sewing speed during
sewing.
aSlow
bFast
CAUTION
• To avoid injury, pay special attention to the needle while the machine is in operation. Keep your hands
away from moving parts while the machine is in operation.
• Do not stretch or pull the fabric during sewing. Doing so may lead to injury.
• Do not use bent or broken needles. Doing so may lead to injury.
• Take care that the needle does not strike basting pins or other objects during sewing. Otherwise, the
needle may break and cause injury.
• If stitches become bunched, lengthen the stitch length setting before continuing sewing. Otherwise, the
needle may break and cause injury.
CAUTION
• Always use the correct presser foot. If the
wrong presser foot is used, the needle may
strike the presser foot and bend or break,
possibly resulting in injury.
Memo
The black button on the left side of presser
foot “J” should be pressed only if the fabric
does not feed or when sewing thick seams
(see page 41). Normally, you can sew without
pressing the black button.
ab
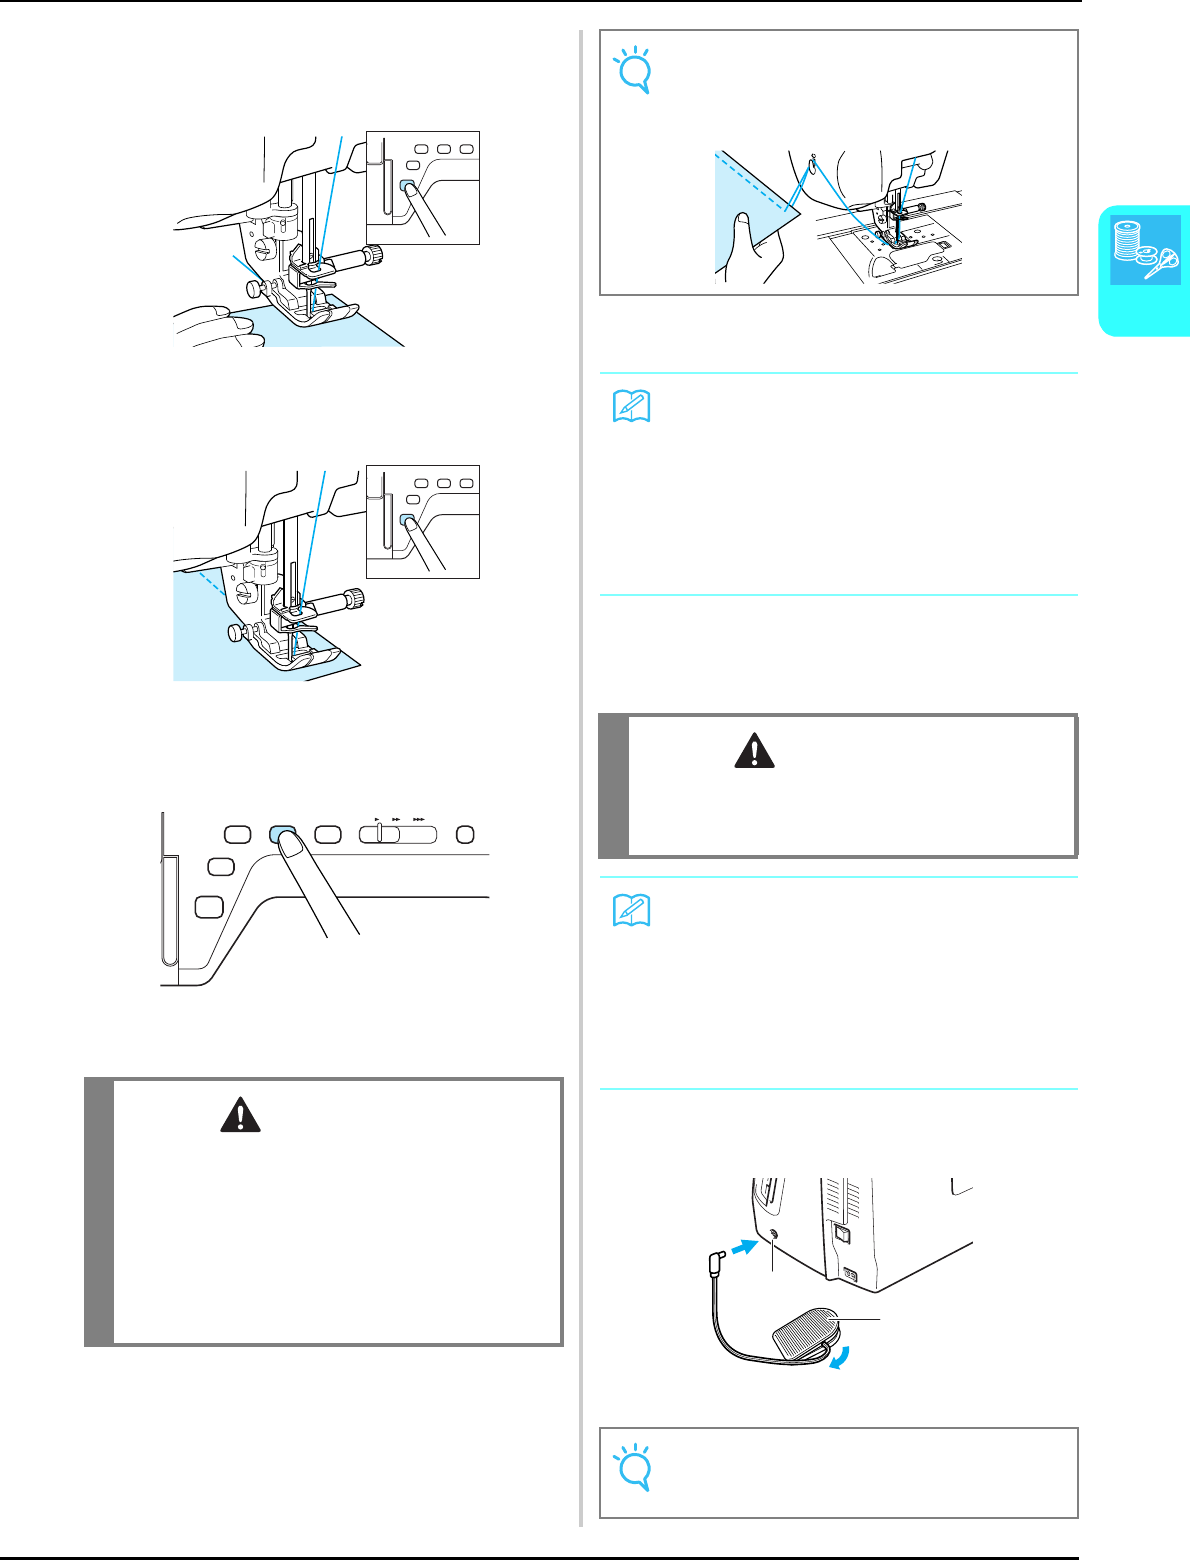
SEWING
Sewing Basics
39
2
gPress the “Start/Stop” button to start
sewing.
* Guide the fabric lightly by hand.
hPress the “Start/Stop” button again to stop
sewing.
iPress the “Thread Cutter” button to trim
the threads.
→The needle will return to the up position
automatically.
jWhen the needle has stopped moving, raise
the presser foot and remove the fabric.
■Using the Foot Controller
You can also use the foot controller to start and stop
sewing.
aInsert the foot controller plug into its jack
on the machine.
aFoot controller
bFoot controller jack
CAUTION
• Do not press the “Thread Cutter” button after
the threads have been cut. Doing so could
tangle the thread or break the needle and
damage the machine.
• Do not press the “Thread Cutter” button when
there is no fabric set in the machine or during
machine operation. The thread may tangle,
possibly resulting in damage.
Note
• When cutting thread thicker than #30, nylon
thread, or other decorative threads, use the
thread cutter on the side of the machine.
Memo
This machine is equipped with a bobbin thread
sensor that warns you when the bobbin thread
is almost empty. When the bobbin thread is
nearly empty, the machine automatically
stops. However, if the “Start/Stop” button is
pressed, a few stitches can be sewn. If the
warning displays, re-thread the machine
immediately.
CAUTION
Do not allow fabric pieces and dust to collect in
the foot controller. Doing so could cause a fire or
an electric shock.
Memo
• When the foot controller is being used, the
“Start/Stop” button has no effect on sewing.
• The foot controller cannot be used when
embroidering.
• The foot controller can be used for sewing
utility and decorative stitches when the
embroidery unit is attached.
Note
Do not pull the retractable cord out beyond the
red mark on the cord.
b
a
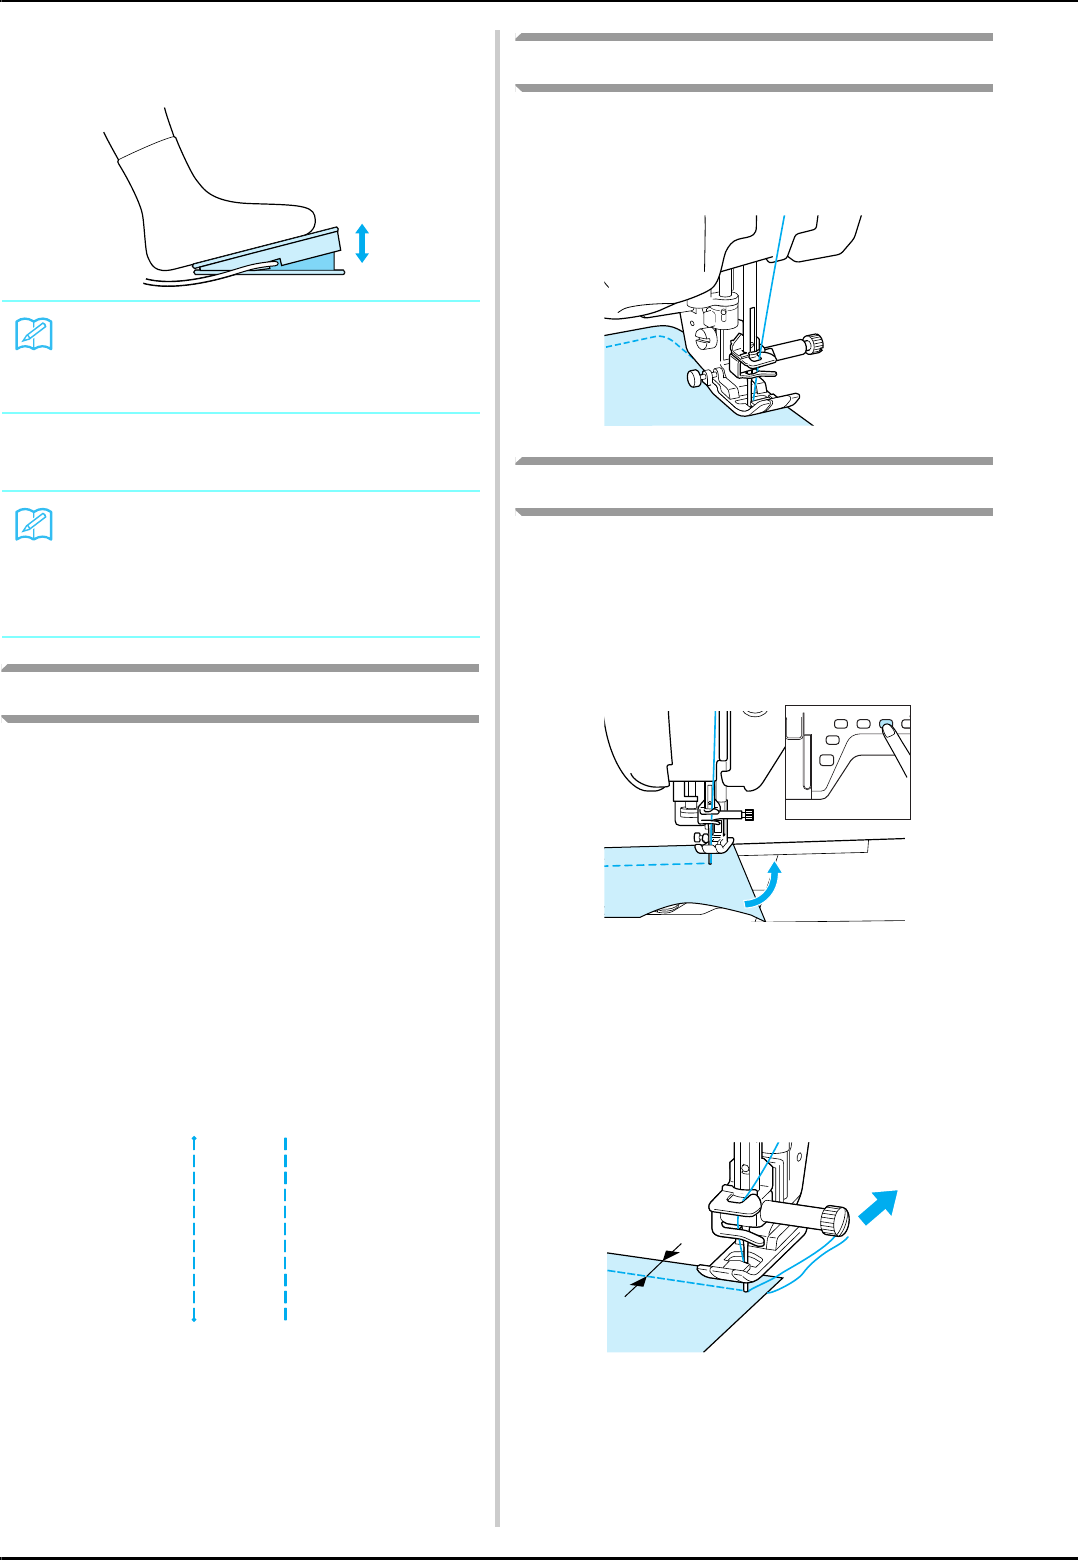
SEWING
40
bSlowly depress the foot controller to start
sewing.
cRelease the foot controller to stop the
machine.
Sewing Reinforcement Stitches
Reverse/reinforcement stitches are generally
necessary at the beginning and end of sewing. You
can use the “Reverse/Reinforcement Stitch” button
to sew reverse/reinforcement stitches manually
(see page 3).
If the automatic reinforcement stitch is selected on
the screen, reverse stitches (or reinforcement
stitches) will be sewn automatically at the
beginning of sewing when the “Start/Stop” button
is pressed. Press the “Reverse/Reinforcement
Stitch” button to sew reverse stitches (or
reinforcement stitches) automatically at the end of
sewing (see page 44).
Sewing Curves
Sew slowly while keeping the seam parallel with
the fabric edge as you guide the fabric around the
curve.
Changing Sewing Direction
Stop the machine. Leave the needle in the fabric,
and press the “Presser Foot Lifter” button to raise
the presser foot. Using the needle as a pivot, turn
the fabric so that you can sew in the new
direction. Press the “Presser Foot Lifter” button to
lower the presser foot and start sewing.
When edge stitching a short stitch length close to
the edge of the fabric, the presser foot may not
cover enough fabric for proper feeding. Before you
begin to sew, sew a basting thread at the corner
point. When you change direction at the corner,
start sewing as you pull the basting thread toward
the back.
a5 mm (approx. 3/16 inch)
Memo
The speed set using the sewing speed con-
troller is the foot controller’s maximum sewing
speed.
Memo
(For U.S.A. only)
Foot controller: Model S
This foot controller can be used with model
NV5000
a
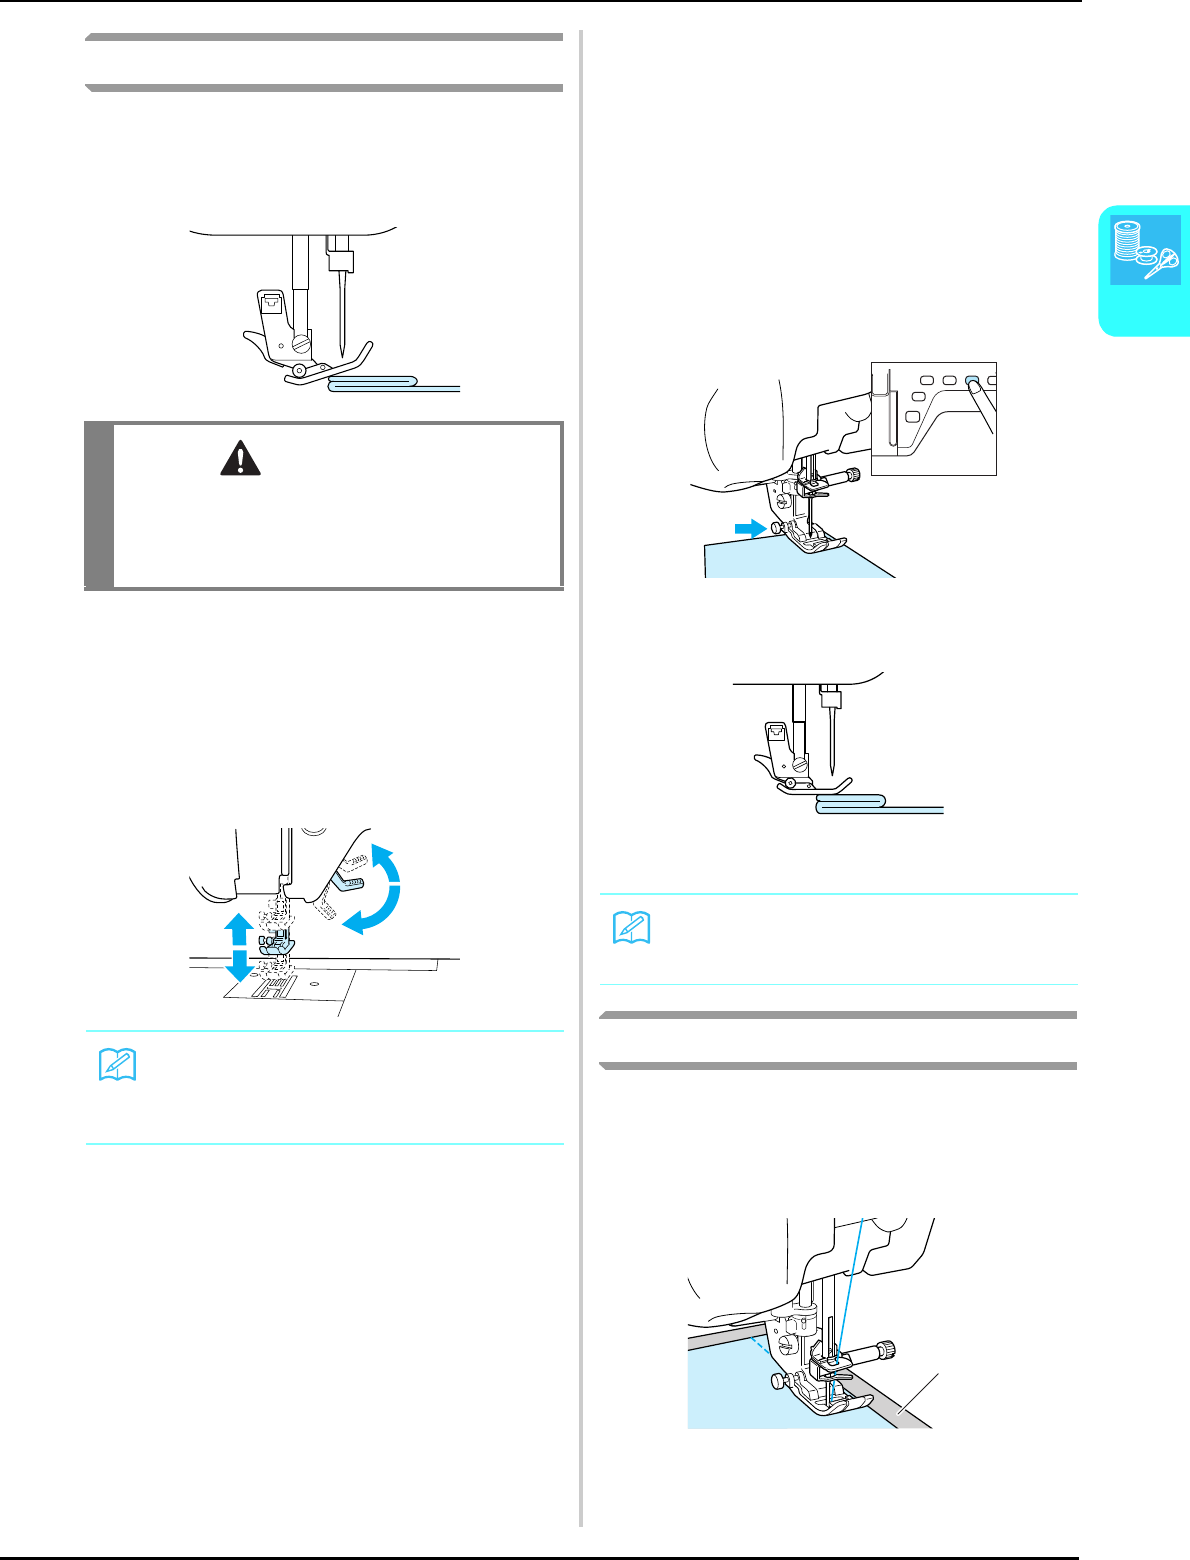
SEWING
Sewing Basics
41
2
Sewing Heavyweight Fabrics
The sewing machine can sew fabrics up to 6 mm
(approx. 1/4 inch) thick. If the thickness of a seam
causes sewing to occur at an angle, help guide the
fabric by hand and sew on the downward slope.
■If the Fabric does not Fit under the
Presser Foot
If the presser foot is in the up position, and you are
sewing heavyweight or multiple layers of fabric
which do not fit easily under the presser foot, use
the presser foot lever to raise the presser foot to its
highest position. The fabric will now fit under the
presser foot.
■If the Fabric does not Feed at the
Beginning of Stitching
If the fabric does not feed when starting to sew or
when sewing thick seams, press the black button on
the left side of presser foot “J”.
aRaise the presser foot.
bWhile keeping the black button on the left
side of presser foot “J” pressed in, press the
“Presser Foot Lifter” button to lower the
presser foot.
cRelease the button.
→The presser foot remains level, enabling the fabric to
be fed.
Sewing Lightweight Fabrics
Place thin paper or tear away embroidery
stabilizer under thin fabrics to make sewing easier.
Gently tear off the paper or the stabilizer after
sewing.
aThin paper
CAUTION
• Do not forcefully push fabrics more than
6 mm (approx. 1/4 inch) thick through the
sewing machine. This may cause the needle to
break and cause injury.
Memo
You cannot use the presser foot lever after the
presser foot has been raised using the
“Presser Foot Lifter” button.
Memo
Once the trouble spot has been passed, the
foot will return to its normal position.
a
STITCH SETTINGS
42
STITCH SETTINGS
When you select a stitch, your machine automatically selects the appropriate stitch width, stitch length,
and upper thread tension. However, if needed, you can change any of the individual settings.
Setting the Stitch Width
Follow the steps below when you want to change
the zigzag stitch pattern width.
Example:
Press to narrow the zigzag stitch pattern width.
→ The value in the display gets smaller.
Press to widen the zigzag stitch pattern width.
→ The value in the display gets bigger.
Setting the Stitch Length
Follow the steps below when you want to change
the stitch pattern length.
Example:
Press to shorten the stitch length.
→ The value in the display gets smaller.
Note
• Settings for some stitches cannot be changed (refer to the “STITCH SETTING CHART” at the end of
this manual).
• If you turn off the machine or select another stitch without saving stitch setting changes (see “Saving
Your Stitch Settings” on page 50), the stitch settings will return to their default settings.
Memo
• For an alternate method of changing the
stitch width using the speed controller, see
page 70.
Memo
• Press to return the stitch width to the
original setting.
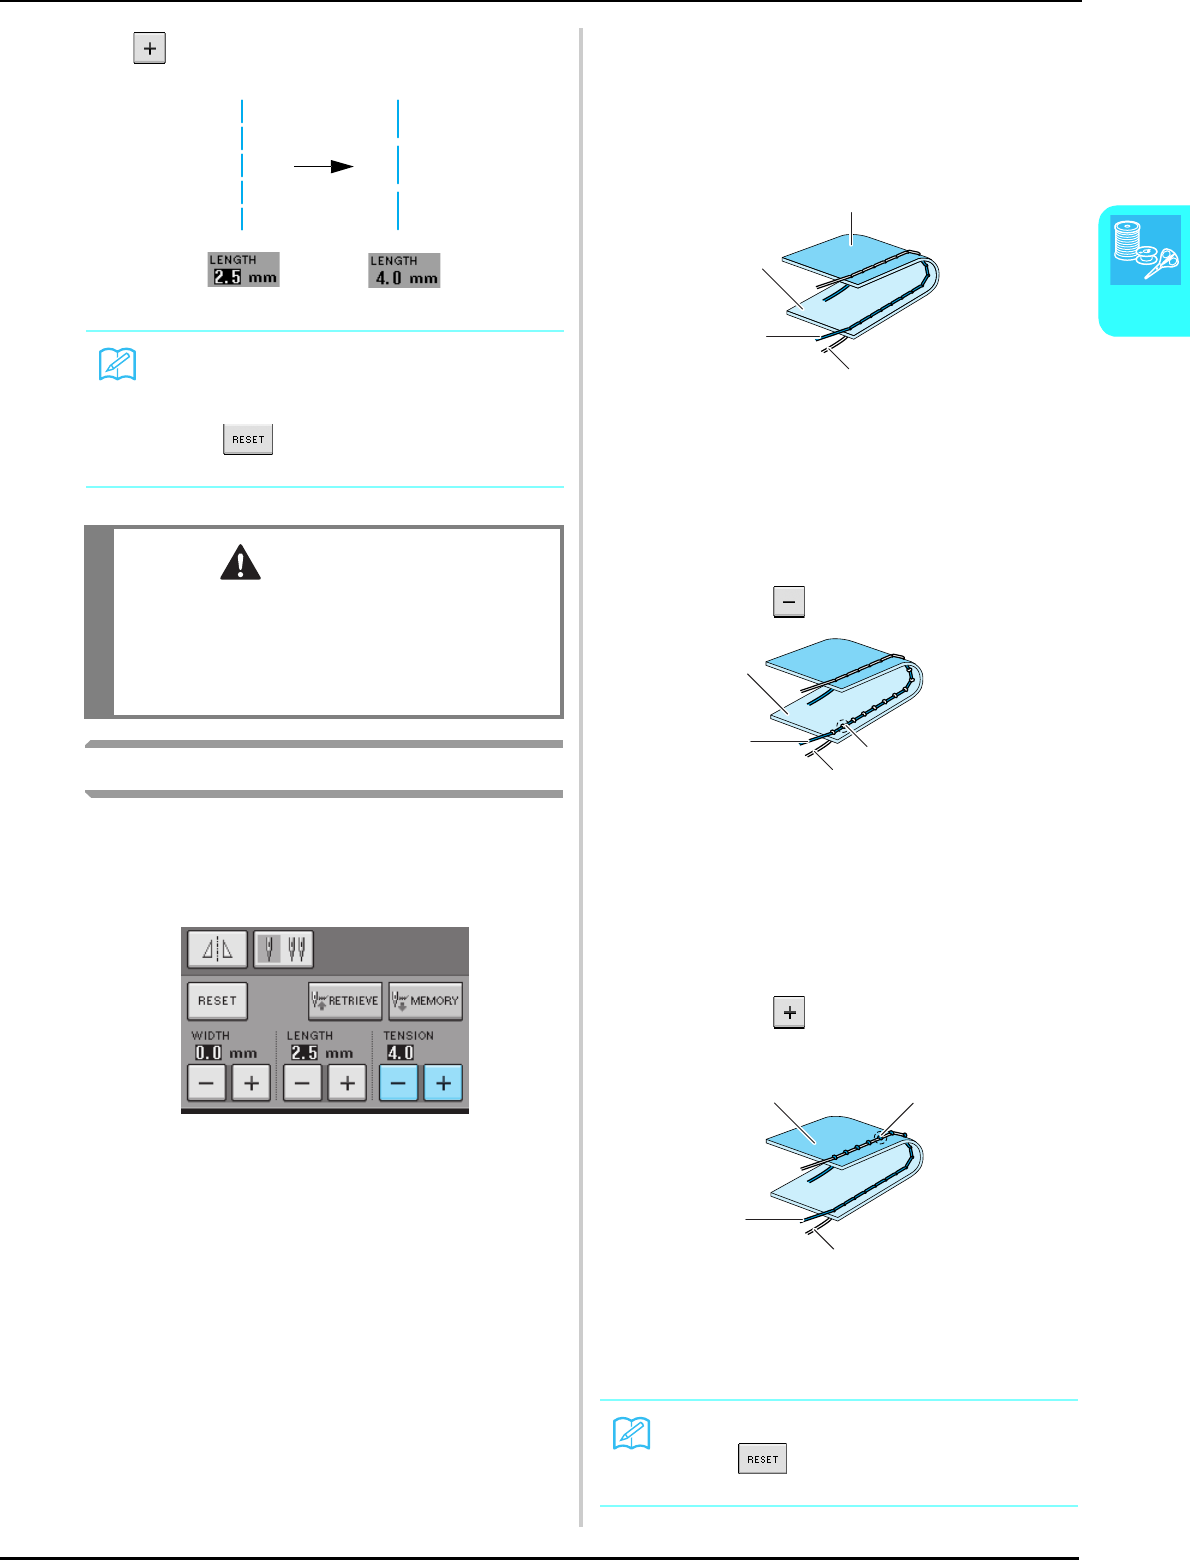
STITCH SETTINGS
Sewing Basics
43
2
Press to lengthen the stitch length.
→ The value in the display gets bigger.
Setting the Thread Tension
You may need to change the thread tension,
depending on the fabric and thread being used.
Follow the steps below to make any necessary
changes.
■ Proper Thread Tension
The upper and lower threads should cross near the
center of the fabric. If the thread tension is not
properly set, the seam may have a poor finish or the
fabric may pucker.
aWrong side
bSurface
cUpper thread
dBobbin thread
■Upper Thread is Too Tight
If the bobbin thread can be seen on the surface of
the fabric, press .
aBobbin thread
bUpper thread
cSurface
dLocks appear on surface of fabric
■Upper Thread is Too Loose
If the upper thread can be seen on the wrong side of
the fabric, press .
aUpper thread
bBobbin thread
cWrong side
dLocks appear on wrong side of fabric
Memo
• Using the Image Key, you can check
changes made to the stitch.
• Press to return the stitch length to the
original setting.
CAUTION
If the stitches get bunched together, lengthen the
stitch length and continue sewing. Do not
continue sewing without lengthening the stitch
length. Otherwise, the needle may break and
cause injury.
Memo
• Press to return the thread tension to
the original setting.
c
a
d
b
b
a
d
c
c
a
b
d
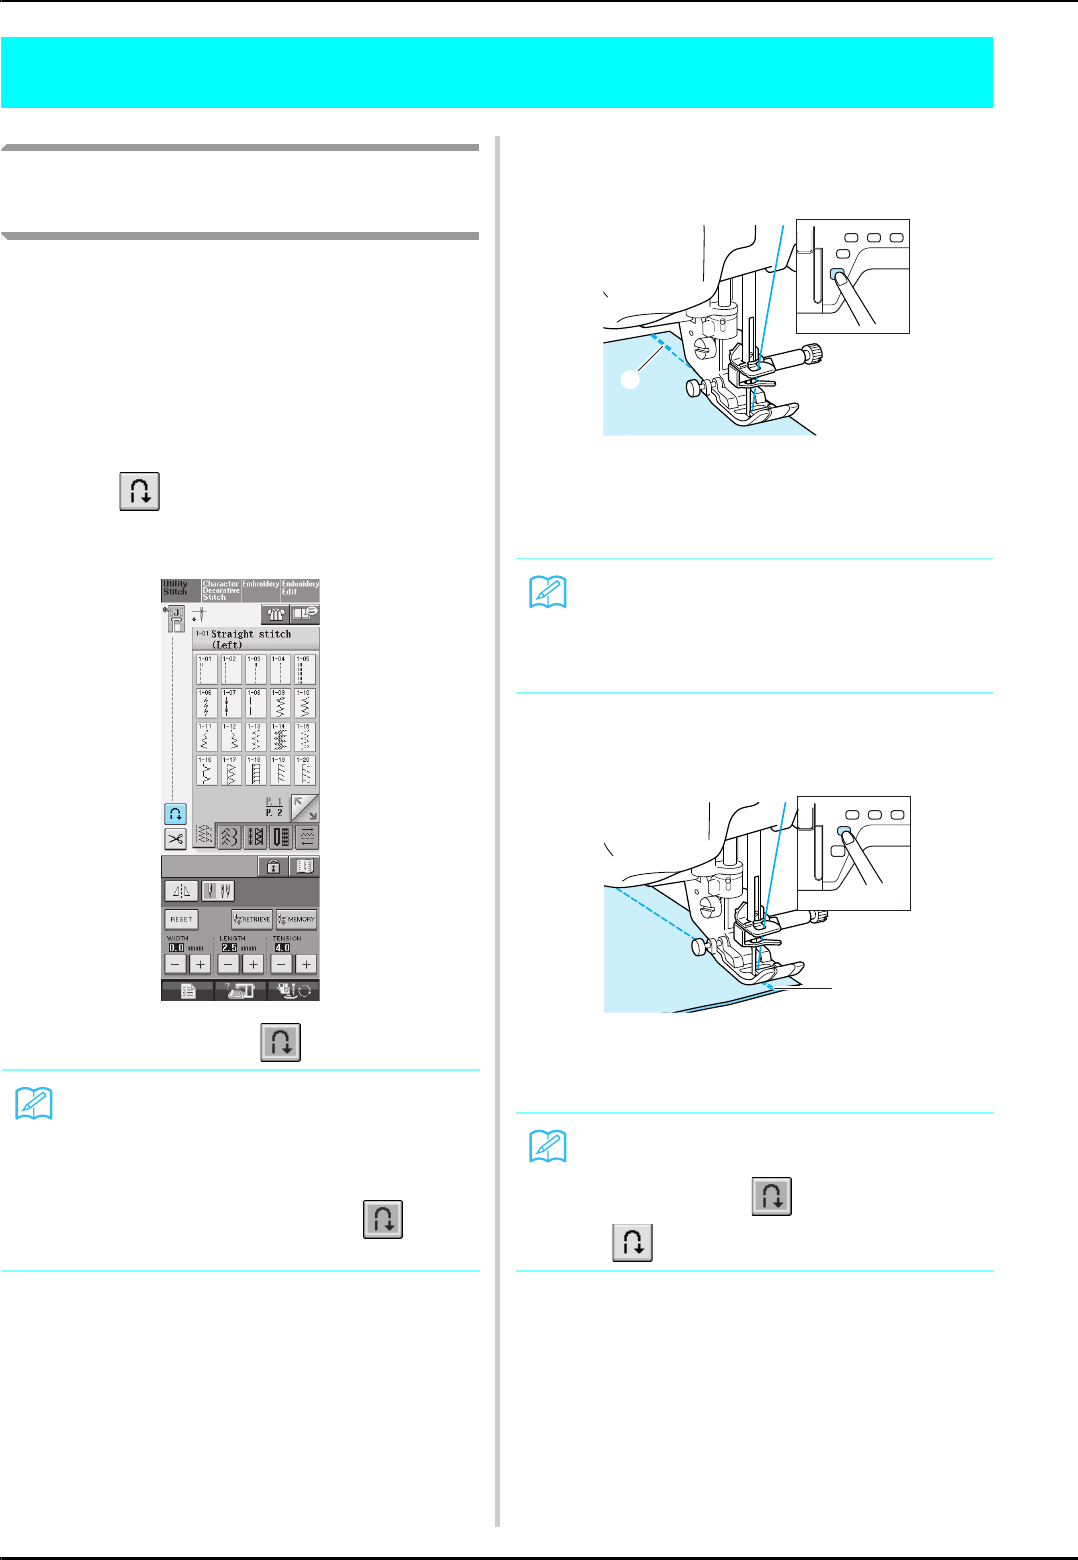
USEFUL FUNCTIONS
44
USEFUL FUNCTIONS
Automatic Reinforcement
Stitching
After selecting a stitch pattern, turn on the
automatic reinforcement stitching function before
sewing, and the machine will automatically sew
reinforcement stitches (or reverse stitches,
depending on the stitch pattern) at the beginning
and end of sewing.
aSelect a stitch pattern.
bPress to set the automatic
reinforcement stitching function.
→The key will display as .
cSet the fabric in the start position and start
sewing.
aReverse stitches (or reinforcement stitches)
→The machine will automatically sew reverse stitches
(or reinforcement stitches) and then continue
sewing.
dPress the “Reverse/Reinforcement Stitch”
button.
aReverse stitches (or reinforcement stitches)
→The machine will sew reverse stitches (or
reinforcement stitches) and stop.
Memo
Some stitches, such as buttonholes and bar
tacks, require reinforcement stitches at the
beginning of sewing. If you select one of these
stitches, the machine will automatically turn on
this function (the key appears as when
the stitch is selected).
Memo
If you press the “Start/Stop” button to pause
sewing, press it again to continue. The
machine will not sew reverse reinforcement
stitches again.
Memo
To turn off the automatic reinforcement stitch-
ing function, press again, so it appears
as .
a
a
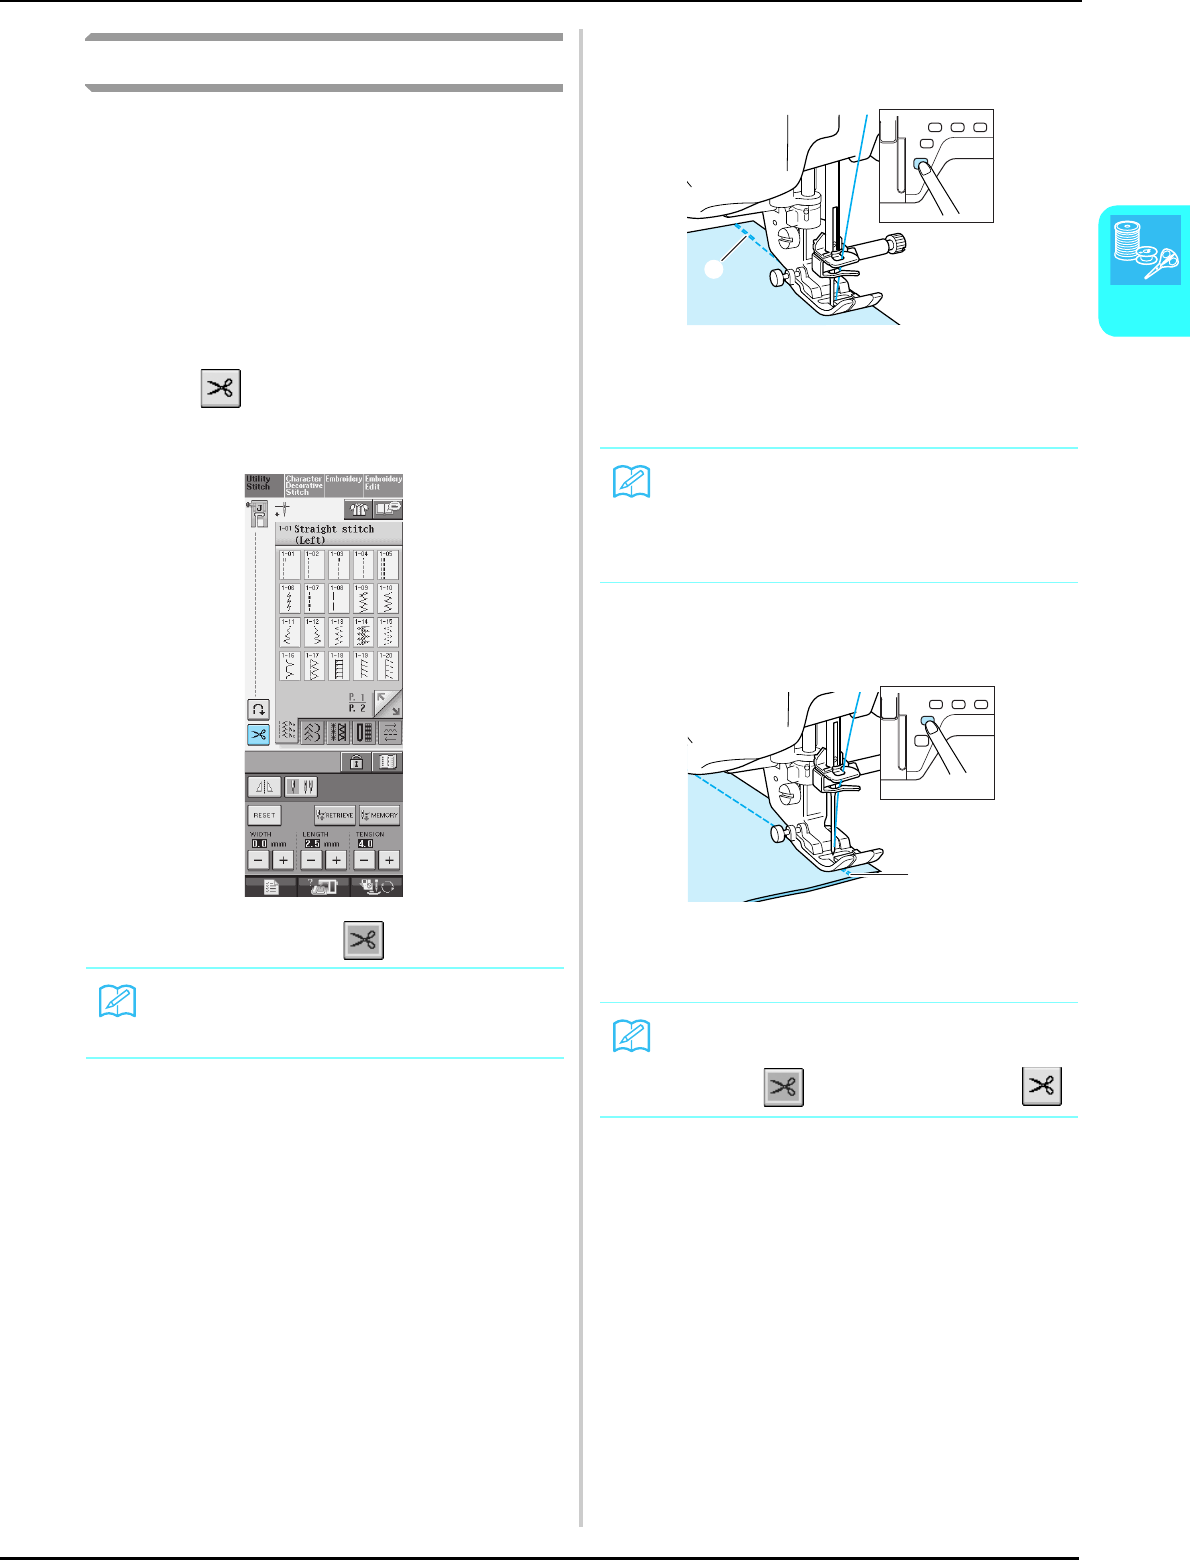
USEFUL FUNCTIONS
Sewing Basics
45
2
Automatic Thread Cutting
After selecting a stitch pattern, turn on the
automatic thread cutting function before sewing,
and the machine will automatically sew
reinforcement stitches (or reverse stitches,
depending on the stitch pattern) at the beginning
and end of sewing, and trim the threads at the end
of sewing. This function is useful when sewing
buttonholes and bar tacks.
aSelect a stitch pattern.
bPress to set the automatic thread
cutting function.
→The key will display as .
cSet the fabric in the start position and start
sewing.
aReverse stitches (or reinforcement stitches)
→The machine will automatically sew reverse stitches
(or reinforcement stitches) and then continue
sewing.
dPress the “Reverse/Reinforcement
Stitching” button.
aReverse stitches (or reinforcement stitches)
→The machine will sew reverse stitches (or
reinforcement stitches), then trim the thread.
Memo
This function is set automatically when sewing
embroidery.
Memo
If you press the “Start/Stop” button to pause
sewing, press the same button again to con-
tinue. The beginning reverse/reinforcement
stitches will not be sewn again.
Memo
To turn off the automatic thread cutting func-
tion, press again, so it appears as .
a
a
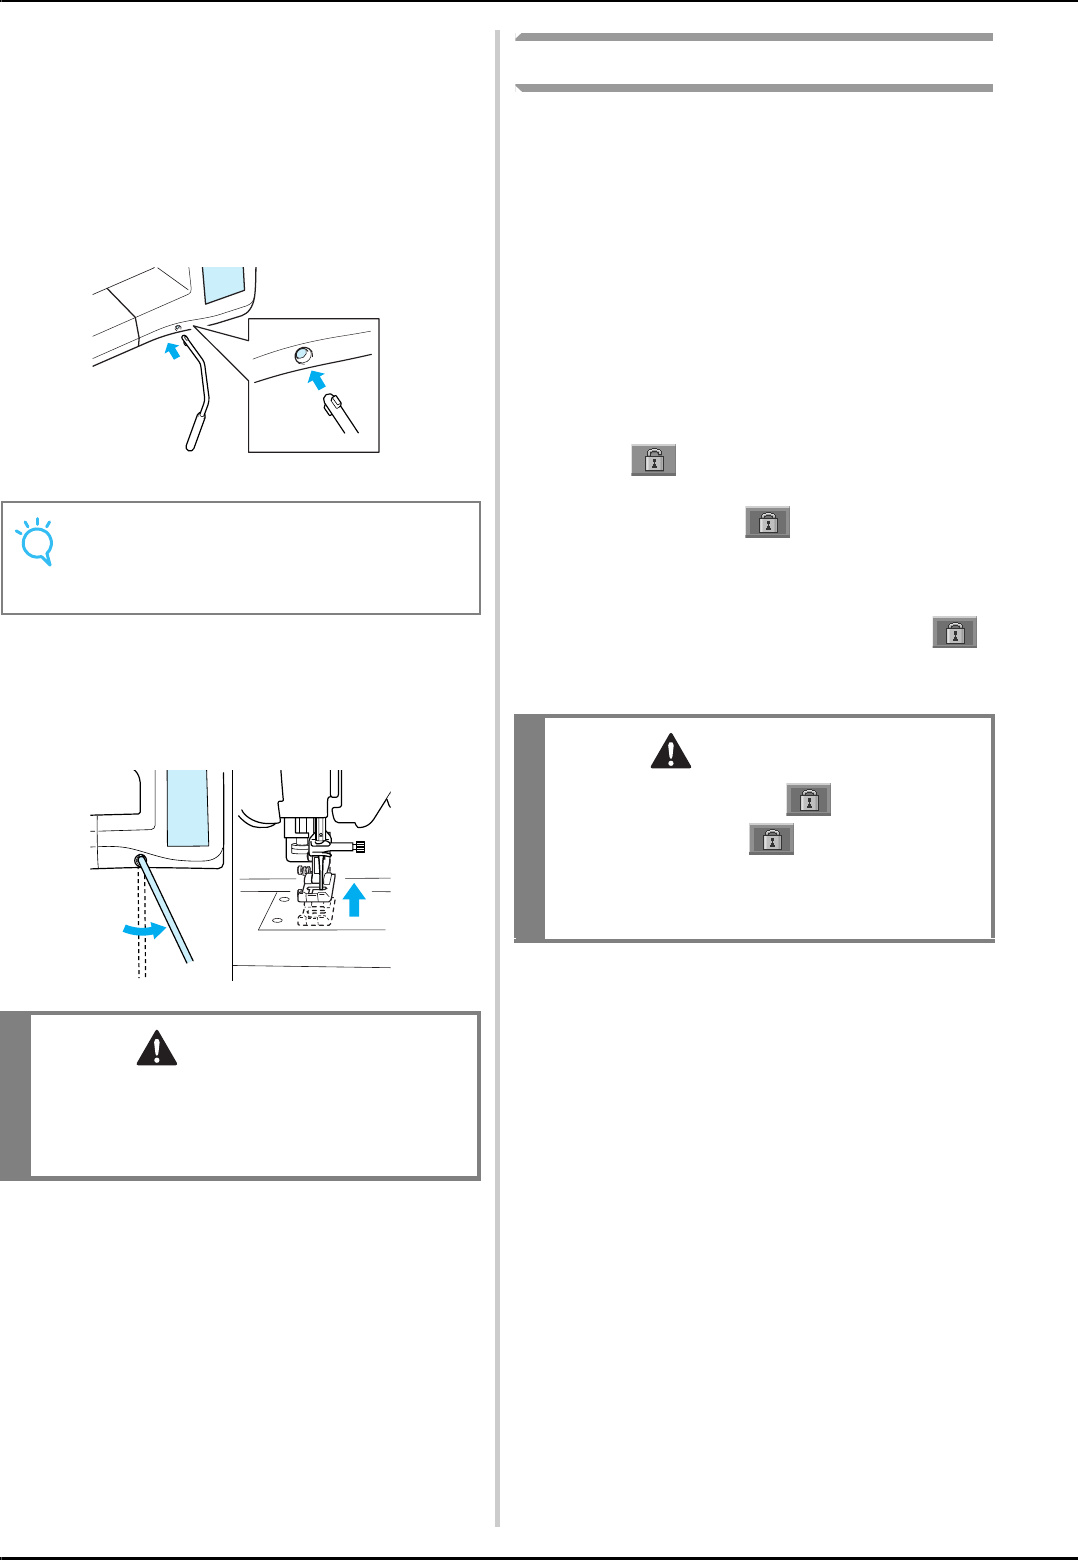
USEFUL FUNCTIONS
46
■Using the Knee Lifter
Using the knee lifter, you can raise and lower the
presser foot with your knee, leaving both hands free
to handle the fabric.
aAlign the tabs on the knee lifter with the
notches in the jack, and then insert the knee
lifter as far as possible.
bUse your knee to move the knee lifter to the
right in order to raise the presser foot.
Release the knee lifter to lower the presser
foot.
Locking the Screen
If the screen is locked before starting to sew, the
various settings such as the stitch width and stitch
length are locked and cannot be changed. This
prevents screen settings from accidentally being
changed or the machine from being stopped while
large pieces of fabric or projects are being sewn.
The screen can be locked when sewing utility
stitches and character decorative stitches.
aSelect a stitch pattern.
bIf necessary, adjust any settings such as the
stitch width and stitch length.
cPress to lock the screen settings.
→The key appears as .
dSew your project.
eWhen you are finished sewing, press
again to unlock the screen settings.
Note
If the knee lifter is not pushed into the mount-
ing slot as far as possible, it may come out
during use.
CAUTION
Be sure to keep your knee away from the knee
lifter during sewing. If the knee lifter is pushed
during machine operation, the needle may break
or the thread tension may loosen.
CAUTION
• If the screen is locked ( ), unlock the
screen by pressing . While the screen is
locked, no other key can be operated.
• The settings are unlocked when the machine is
turned off and on.

Chapter 3
Utility Stitches
SELECTING UTILITY STITCHES......................48
Selecting a Stitch .............................................................. 48
■Stitch Selection Screens............................................................ 48
■Using the Mirror Image Key..................................................... 49
■Using the Image Key................................................................. 49
Saving Your Stitch Settings ............................................... 50
■Saving Settings.......................................................................... 50
■Retrieving Saved Settings.......................................................... 51
Using the Sewing Type Selection Key ............................... 51
SEWING THE STITCHES.................................53
Straight Stitches ................................................................ 53
■Changing the Needle Position (Left or Middle Needle Position
Stitches Only) .......................................................................... 55
■Using the Straight Stitch Needle Plate and the Straight
Stitch Foot................................................................................ 55
■Basting ..................................................................................... 56
Dart Seam......................................................................... 57
Gathering.......................................................................... 57
Flat Fell Seam.................................................................... 58
Pintuck.............................................................................. 59
Zigzag Stitches.................................................................. 60
■Overcasting (Using a Zigzag Stitch) ......................................... 60
■Appliqué (Using a Zigzag Stitch) .............................................. 60
■Patchwork (for Crazy Quilt)..................................................... 61
■Sewing Curves (Using a Zigzag Stitch) ..................................... 61
■Cord Guide Bobbin Cover (Using a Zigzag Stitch) ................... 61
Elastic Zigzag Stitches....................................................... 62
■Tape Attaching ......................................................................... 62
■Overcasting.............................................................................. 62
Overcasting ...................................................................... 63
■Overcasting Using Presser Foot “G” ........................................ 63
■Overcasting Using Presser Foot “J”..........................................64
■Overcasting Using the Side Cutter ........................................... 65
■When Sewing Straight Stitches While Using the Side Cutter.... 66
Quilting ............................................................................ 67
■Piecing ..................................................................................... 68
■Quilting.................................................................................... 68
■Appliqué................................................................................... 69
■Quilting with Satin Stitches...................................................... 70
■Free-motion Quilting................................................................ 71
Blind Hem Stitches ........................................................... 72
■If the Needle does not Catch the Fold...................................... 73
■If the Needle Catches Too Much of the Fold ............................ 73
Appliqué ........................................................................... 73
■Sewing Sharp Curves................................................................74
Shelltuck Stitches.............................................................. 74
Scallop Stitches................................................................. 75
Top Stitching..................................................................... 75
Smocking Stitches ............................................................. 76
Fagoting............................................................................ 76
Tape or Elastic Attaching .................................................. 77
Heirloom .......................................................................... 78
■Hemstitching (1) (Daisy Stitch) ................................................ 78
■Hemstitching (2) (Drawn Work)............................................... 78
■Hemstitching (3).......................................................................79
One-step Buttonholes ....................................................... 80
■Sewing Stretch Fabrics..............................................................83
■Odd Shaped Buttons/Buttons that do not Fit into
the Button Holder Plate ............................................................83
Four-step Buttonholes........................................................84
■Darning.....................................................................................86
Bar Tacks ...........................................................................88
■Bar Tacks on Thick Fabrics........................................................89
Button Sewing ...................................................................90
■Attaching 4 Hole Buttons..........................................................91
■Attaching a Shank to the Button ...............................................91
Eyelet.................................................................................92
Multi-directional Sewing (Straight Stitch and
Zigzag Stitch).....................................................................93
Zipper Insertion.................................................................94
■Centered Zipper........................................................................94
■Inserting a Side Zipper..............................................................95
SELECTING UTILITY STITCHES
48
SELECTING UTILITY STITCHES
Selecting a Stitch
■Stitch Selection Screens
There are 5 categories of Utility Stitches. indicates that there is more than one stitch selection screen
for that category.
Straight/Overcasting/Quilting Stitches Decorative Stitches
Heirloom Stitches Buttonholes/Bar tacks Multi-directional Sewing
SELECTING UTILITY STITCHES
Utility Stitches
49
3
aTurn the main power to ON.
→Either “1-01 Straight stitch (Left)” or “1-03 Straight
stitch (Middle)” is selected, depending on the setting
selected in the setting screen.
bUse to select the
category you want.
* Press to view this screen if another screen
displays.
* Press to view the next page.
aPreview of the selected stitch
bStitch selection screen
cPress the key of the stitch you want to sew.
■Using the Mirror Image Key
Depending on the type of utility stitch you select,
you may be able to sew a horizontal mirror image of
the stitch.
If is lit when you select a stitch, it will be
possible to make a mirror image of the stitch.
Press to create a horizontal mirror image of
the selected stitch.
The key will display as .
■Using the Image Key
You can display an actual size image of the selected
stitch. You can also check and change the colors of
the image on the screen.
aPress .
→An image of the selected stitch is displayed.
Memo
For details on each stitch, refer to the
“STITCH SETTING CHART” at the end of this
manual.
a
b
Note
If is light gray after you select a stitch,
you cannot create a horizontal mirror image of
the selected stitch (this is true of buttonholes,
multi-directional sewing, and others).
SELECTING UTILITY STITCHES
50
bPress to change the thread color of
the stitch on the screen.
* Press to display an enlarged image of the
stitch.
aStitch screen
cPress to go back to the original
screen.
Saving Your Stitch Settings
The settings for the zigzag stitch width, stitch
length, thread tension, automatic thread cutting,
automatic reinforcement stitching, etc., are preset
in the machine for each stitch. However, if you
have specific settings that you wish to reuse later
for a stitch, you can change the settings so that
they can be saved for that stitch. Five sets of
settings can be saved for a single stitch.
■Saving Settings
aSelect a stitch. (Example: )
bSpecify your preferred settings.
Memo
• The color changes every time you press
.
• The units of the stitch display area are in
mm.
a
SELECTING UTILITY STITCHES
Utility Stitches
51
3
cPress .
→The settings are saved and the original screen
automatically appears.
■Retrieving Saved Settings
aSelect a stitch.
bPress .
cPress the numbered key of the settings to be
retrieved.
* Press to return to the original screen
without retrieving settings.
aNumbered keys
dPress .
→The selected settings are retrieved, and the original
screen automatically appears.
Using the Sewing Type Selection
Key
You can also select utility stitches using .
Use this key when you are not sure which stitch to
use for your application, or to get advice about
sewing particular stitches. For example, if you
want to sew overcasting, but you do not know
which stitch to use or how to sew the stitch, you
can use this screen to get advice. We recommend
that beginners use this method to select stitches.
Memo
If you try to save settings when there are
already 5 sets of settings saved for a stitch, a
message will appear. Follow the directions in
the message to erase one set of currently
saved settings and save the new settings.
Memo
When a stitch is selected, the last settings
retrieved are displayed. The last settings
retrieved are retained even if the machine was
turned off or a different stitch was selected.
Memo
You can delete the selected settings by press-
ing .
a
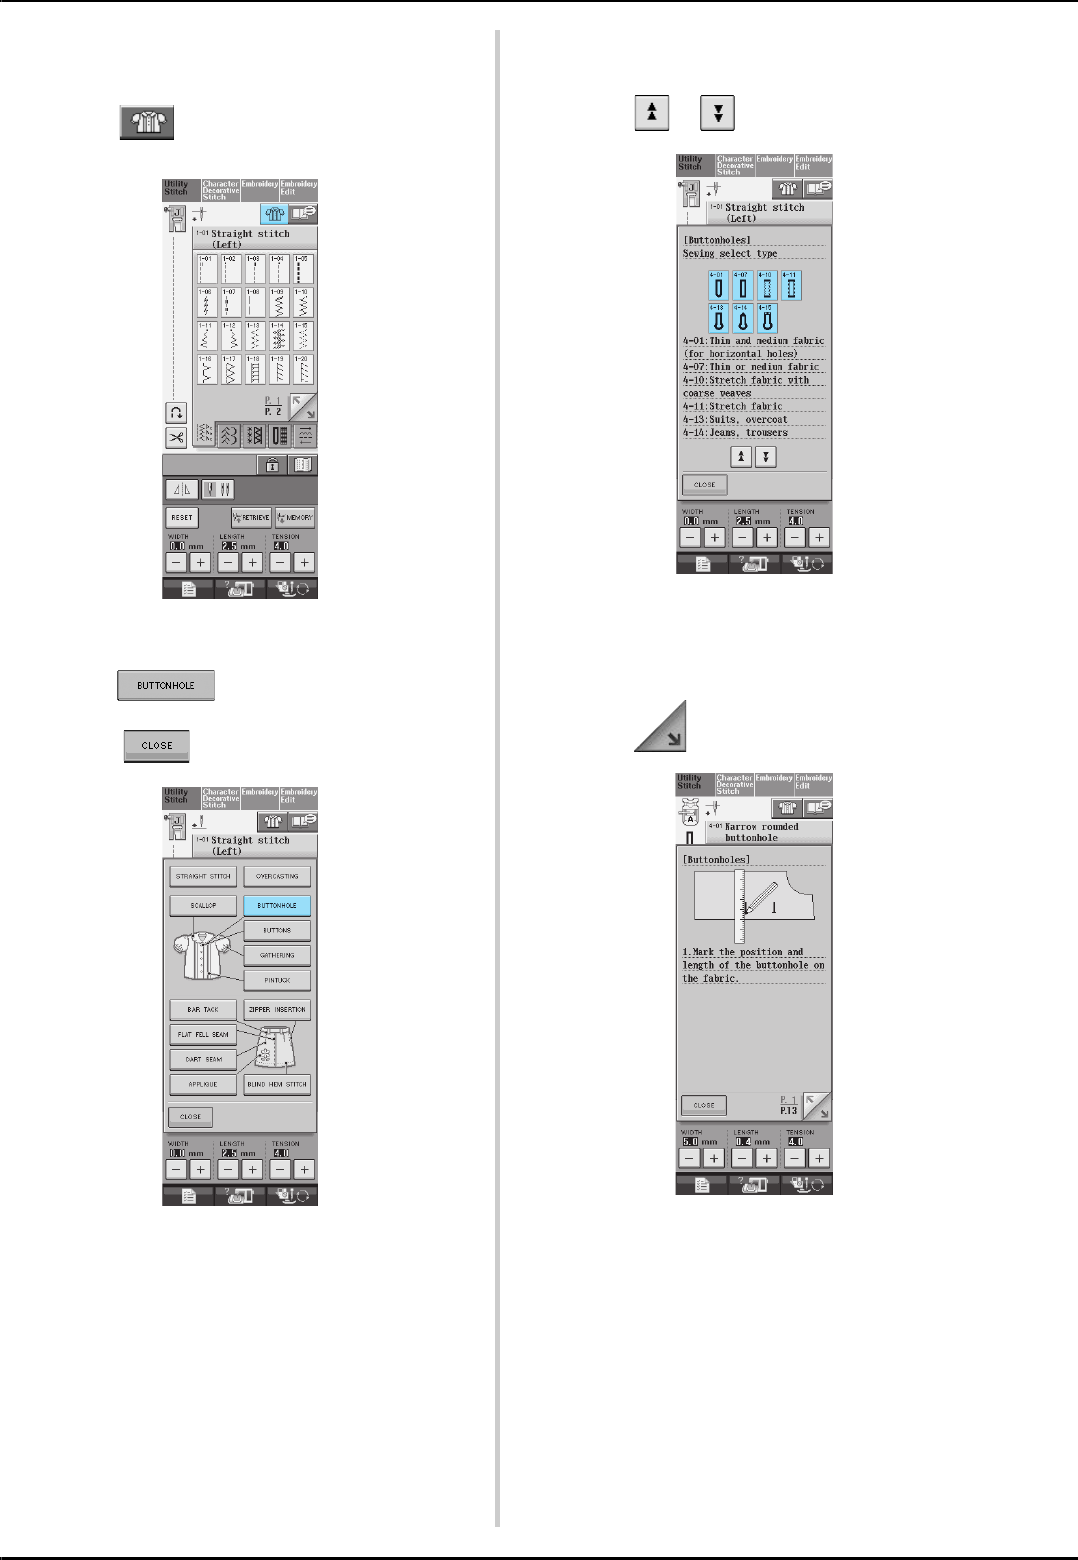
SELECTING UTILITY STITCHES
52
Example: Displaying information about
overcasting
aPress .
→The advice screen is displayed.
bPress .
* Press to return to the original screen.
→The upper part of the screen displays a selection of
overcasting stitches with explanations.
cRead the explanations and select the
appropriate stitch.
* Press or to scroll the page.
→The screen displays directions for sewing the
selected stitch.
dFollow the directions to sew the stitch.
* Press to view the next page.
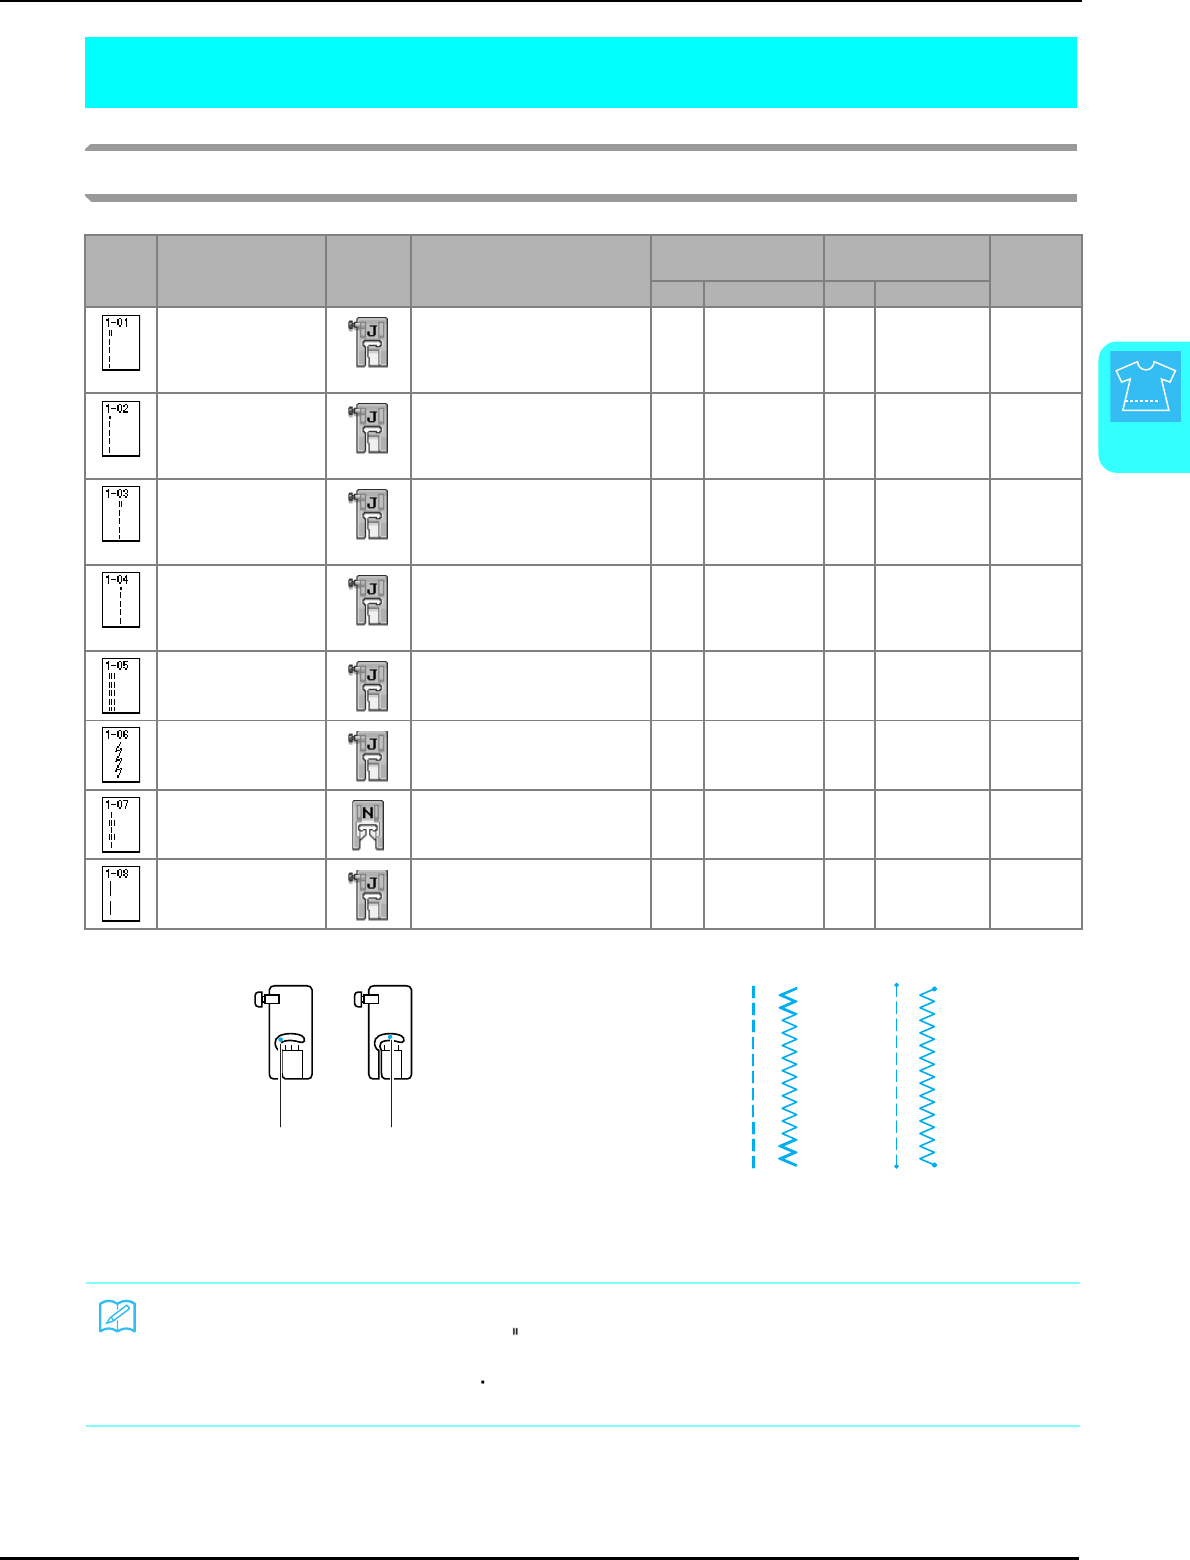
SEWING THE STITCHES
Utility Stitches
53
3
SEWING THE STITCHES
Straight Stitches
Stitch Stitch name Presser
foot Applications
Stitch width
[mm (inch.)]
Stitch length
[mm (inch.)] Twin
needle
Auto. Manual Auto. Manual
Straight stitch (Left) General sewing, gather, pintuck,
etc. Reverse stitch is sewn while
pressing “Reverse/
Reinforcement Stitch” button.
0.0
(0)
0.0 - 7.0
(0 - 1/4)
2.5
(3/32)
0.2 - 5.0
(1/64 - 3/16)
OK
( J )
Straight stitch (Left) General sewing, gather, pintuck,
etc. Reinforcement stitch is sewn
while pressing “Reverse/
Reinforcement Stitch” button.
0.0
(0)
0.0 - 7.0
(0 - 1/4)
2.5
(3/32)
0.2 - 5.0
(1/64 - 3/16)
OK
( J )
Straight stitch
(Middle)
General sewing, gather, pintuck,
etc. Reverse stitch is sewn while
pressing “Reverse/
Reinforcement Stitch” button.
3.5
(1/8)
0.0 - 7.0
(0 - 1/4)
2.5
(3/32)
0.2 - 5.0
(1/64 - 3/16)
OK
( J )
Straight stitch
(Middle)
General sewing, gather, pintuck,
etc. Reinforcement stitch is sewn
while pressing “Reverse/
Reinforcement Stitch” button.
3.5
(1/8)
0.0 - 7.0
(0 - 1/4)
2.5
(3/32)
0.2 - 5.0
(1/64 - 3/16)
OK
( J )
Triple stretch stitch General sewing for
reinforcement and decorative
topstitching
0.0
(0)
0.0 - 7.0
(0 - 1/4)
2.5
(3/32)
1.5 - 4.0
(1/16 - 3/16)
OK
( J )
Stem stitch Reinforced stitching, sewing and
decorative applications 1.0
(1/16)
1.0 - 3.0
(1/16 - 1/8)
2.5
(3/32)
1.0 - 4.0
(1/16 - 3/16)
OK
( J )
Decorative stitch Decorative stitching, top
stitching 0.0
(0)
0.0 - 7.0
(0 - 1/4)
2.5
(3/32)
1.0 - 4.0
(1/16 - 3/16)
OK
( J )
Basting stitch Basting 0.0
(0)
0.0 - 7.0
(0 - 1/4)
20.0
(3/4)
5.0 - 30.0
(3/16 - 1-3/16) NO
aLeft needle position
bMiddle needle position
aReverse stitch
bReinforcement stitch
Memo
If the selected stitch has a double mark “ ” at the top of the key display, you can sew reverse stitches
holding the “Reverse/Reinforcement Stitch” button.
If the selected stitch has a dot mark “ ” at the top of the key display, you can sew reinforcement stitches
holding the “Reverse/Reinforcement Stitch” button (see page 40).
J J
ab
ba

SEWING THE STITCHES
54
aSelect a stitch.
bAttach presser foot “J”.
cHold the thread tails and fabric with your
left hand, and turn the handwheel with
your right hand to insert the needle into the
fabric.
aSewing start position
dLower the presser foot, and hold the
“Reverse/Reinforcement Stitch” button to
sew 3-4 stitches.
→The machine sews reverse stitches (or reinforcement
stitches).
ePress the “Start/Stop” button to sew
forward.
aReverse stitches
→The machine will begin sewing slowly.
fWhen sewing is completed, hold the
“Reverse/Reinforcement Stitch” button to
sew 3-4 reverse stitches (or reinforcement
stitches) at the end of the seam.
gAfter sewing, press the “Thread Cutter”
button to trim the threads.
■Changing the Needle Position (Left
or Middle Needle Position Stitches
Only)
When you select left or middle needle position
stitches, you can use and in the stitch
width display to change the position of the needle.
Match the distance from the right edge of the presser
foot to the needle with the stitch width, then align
the edge of the presser foot with the edge of the
fabric during sewing for an attractive finish.
a
a
CAUTION
Be sure the needle does not strike a basting pin, or
any other objects, during sewing. The thread
could tangle or the needle could break, causing
injury.
Memo
When the automatic thread cutting and auto-
matic reinforcement stitch keys on the screen
are selected, reverse stitches (or reinforce-
ment stitches) will be sewn automatically at
the beginning of sewing when the “Start/Stop”
button is pressed. Press the “Reverse/Rein-
forcement Stitch” button to sew reverse
stitches (or reinforcement stitches) and trim
the thread automatically at the end of sewing.
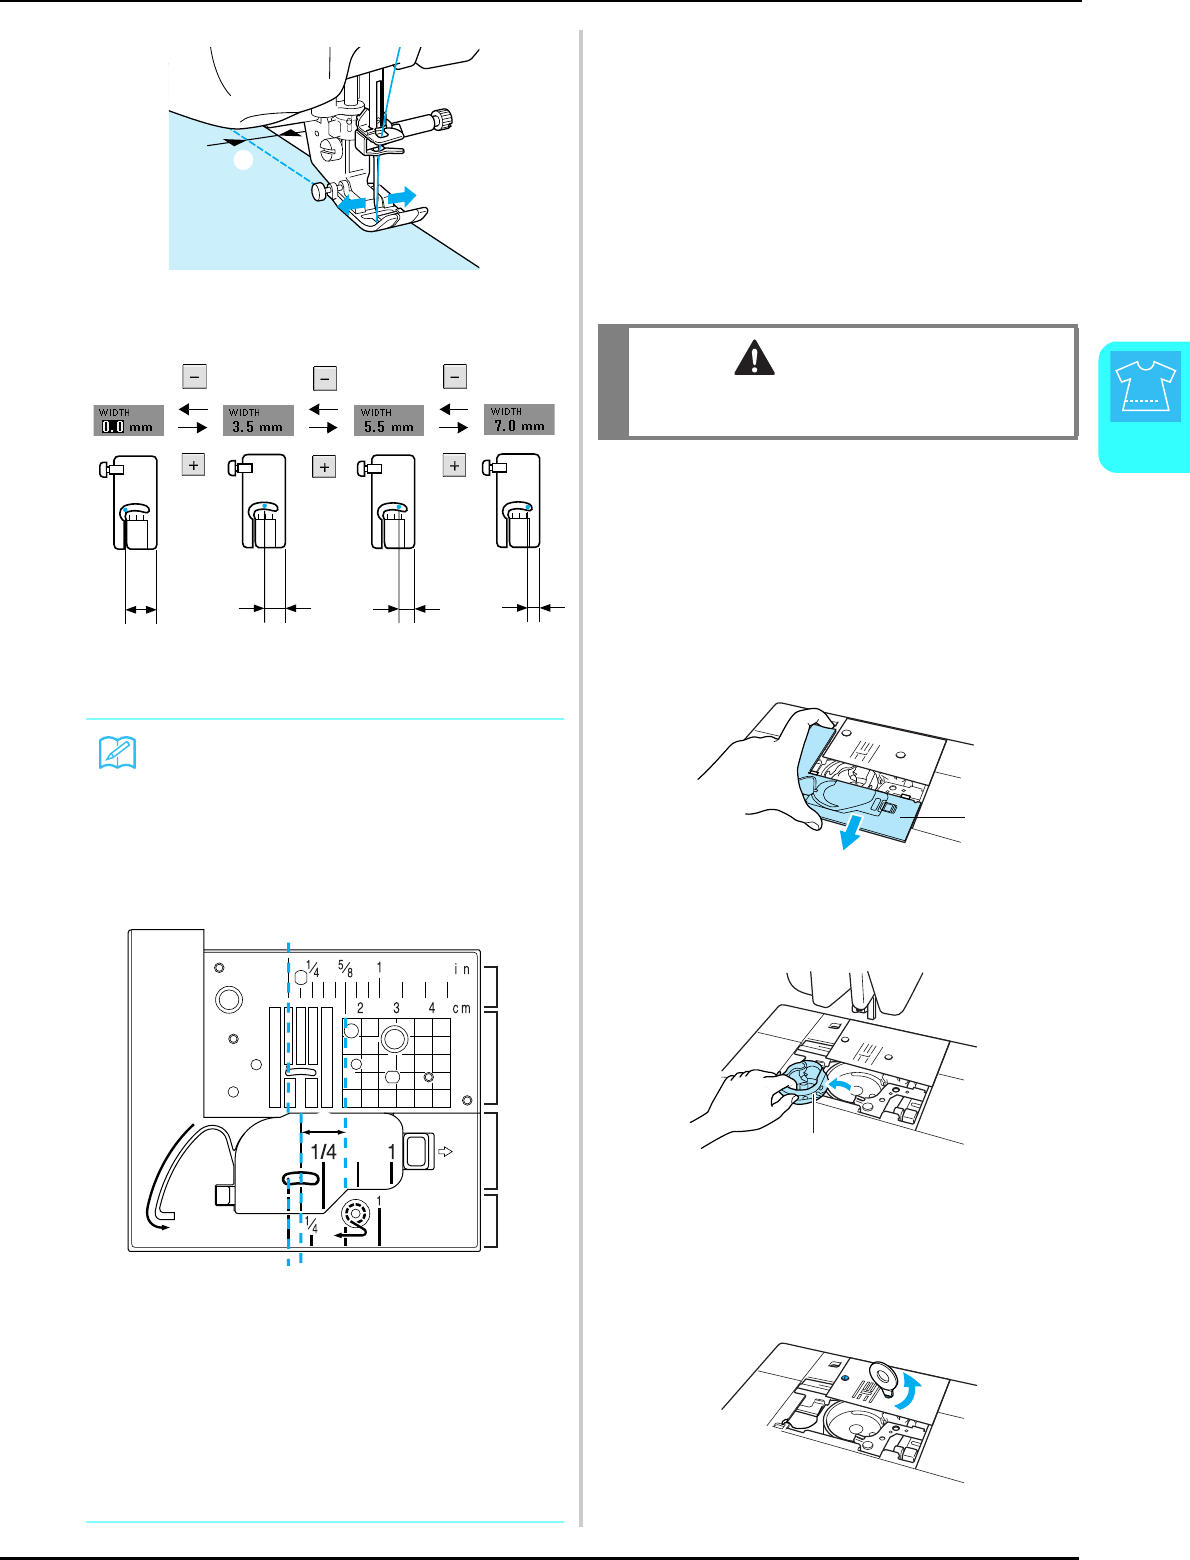
SEWING THE STITCHES
Utility Stitches
55
3
aStitch width
Example: Left/Middle needle position stitches
■Using the Straight Stitch Needle
Plate and the Straight Stitch Foot
The straight stitch needle plate and the straight stitch
foot can only be used for straight stitches (middle
needle position stitches). Use the straight stitch
needle plate and the straight stitch foot when sewing
thin fabrics or when sewing small pieces which tend
to sink into the hole of the regular needle plate
during sewing. The straight stitch foot is perfect to
reduce puckering on lightweight fabrics. The small
opening on the foot provides support for the fabric
as the needle travels through the fabric.
aPress the “Presser Foot Lifter” button to
raise the presser foot and turn the main
power to OFF.
bRemove the flat bed attachment or the
embroidery unit if either are attached.
cGrasp both sides of the needle plate cover,
and then slide it toward you.
aNeedle plate cover
dGrasp the bobbin case, and then pull it out.
aBobbin case
eUse the screwdriver included with the
machine to unscrew and remove the regular
needle plate.
12.0 mm
(approx.
1/2 inch)
8.5 mm
(approx.
11/32
inch)
6.5 mm
(approx.
1/4 inch)
5.0 mm
(approx. 3/
16 inch)
Memo
For a standard 16 mm (approx. 5/8 inch) seam
allowance, set the width to 0.0 mm on the
screen. While sewing, align the edge of the
fabric with the 16 mm (approx. 5/8 inch) mark
on the needle plate.
a16 mm (approx. 5/8 inch)
bFor stitches with a middle (center) needle position
cFor stitches with a left needle position
dLeft needle position on the needle plate <inch>
eLeft needle position on the needle plate <cm>
fMiddle (center) needle position on the bobbin
cover <inch>
gLeft needle position on the needle plate cover
<inch>
a
J
J
J
J
c
b
a
a
c
d
e
f
g
CAUTION
Always use the straight stitch foot in combination
with the straight stitch needle plate.
a
a
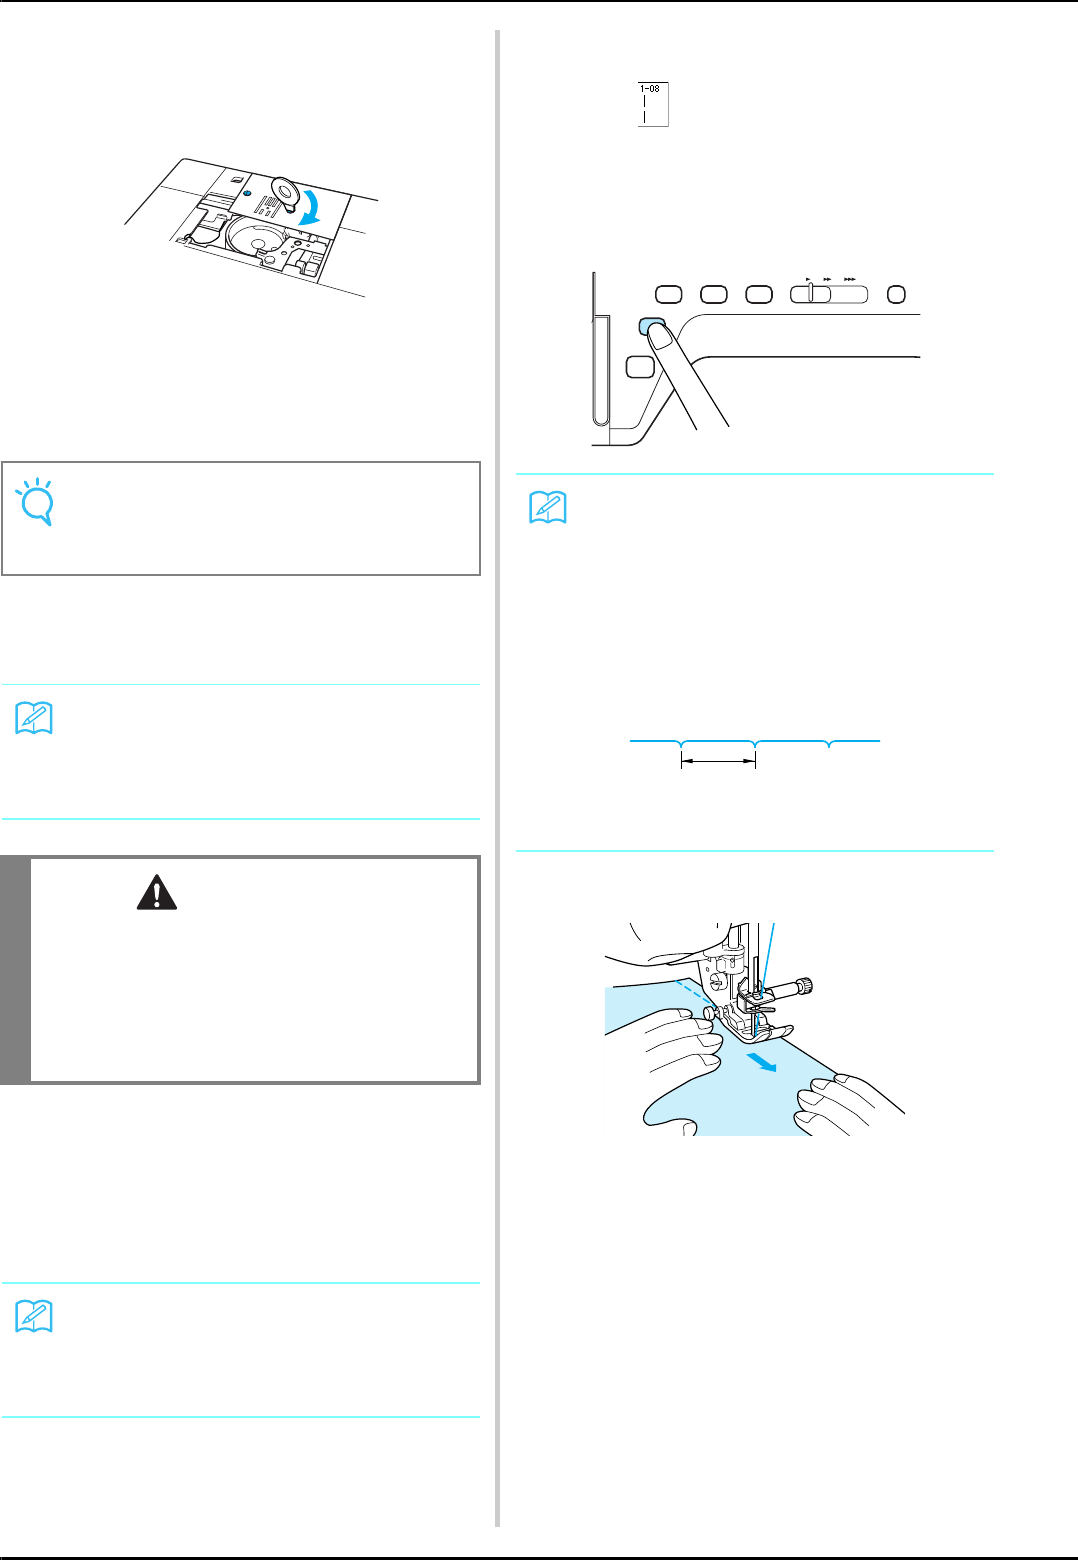
SEWING THE STITCHES
56
fSet the straight stitch needle plate in place
and use the screwdriver to tighten the plate.
gInsert the bobbin case in its original
position, and then attach the needle plate
cover.
hAfter reinstalling the needle plate cover,
select any of the straight stitches.
iAttach the straight stitch foot.
jStart sewing.
* After sewing, make sure to remove the straight stitch
needle plate and the straight stitch foot, and reinstall
the regular needle plate, the needle plate cover and
the presser foot “J”.
■Basting
aSelect and attach presser foot “J”.
bPress the “Reverse/Reinforcement Stitch”
button to sew reinforcement stitches, then
continue sewing.
cSew while keeping the fabric straight.
dEnd the basting with reinforcement stitches.
Note
Align the two screw holes on the needle plate
with the two holes on the machine and screws
in the needle plate.
Memo
When using the straight stitch needle plate, all
straight stitches become middle needle posi-
tion stitches. You cannot change the needle
position using the width display.
CAUTION
• Selecting other stitches will cause an error
message to be displayed.
• Be sure to turn the handwheel slowly in your
direction before sewing and make sure that
the needle is not contacting the straight stitch
foot and straight stitch needle plate.
Memo
To prevent puckering on fine fabrics, use a
fine needle, size 75/11, and a short stitch
length. For heavier fabrics, use a heavier nee-
dle, size 90/14, and longer stitches.
Memo
If you do not want to use a reinforcement
stitch at the beginning; you should lift the
presser foot, rotate the handwheel, pull up the
bobbin thread and pull a length of top and
bobbin thread out from the rear of the
machine.
You can set the stitch length between 5 mm
(approx. 3/16 inch) and 30 mm (approx.
1-3/16 inches)
aBetween 5 mm (approx. 3/16 inch) and 30 mm
(approx. 1-3/16 inches)
a
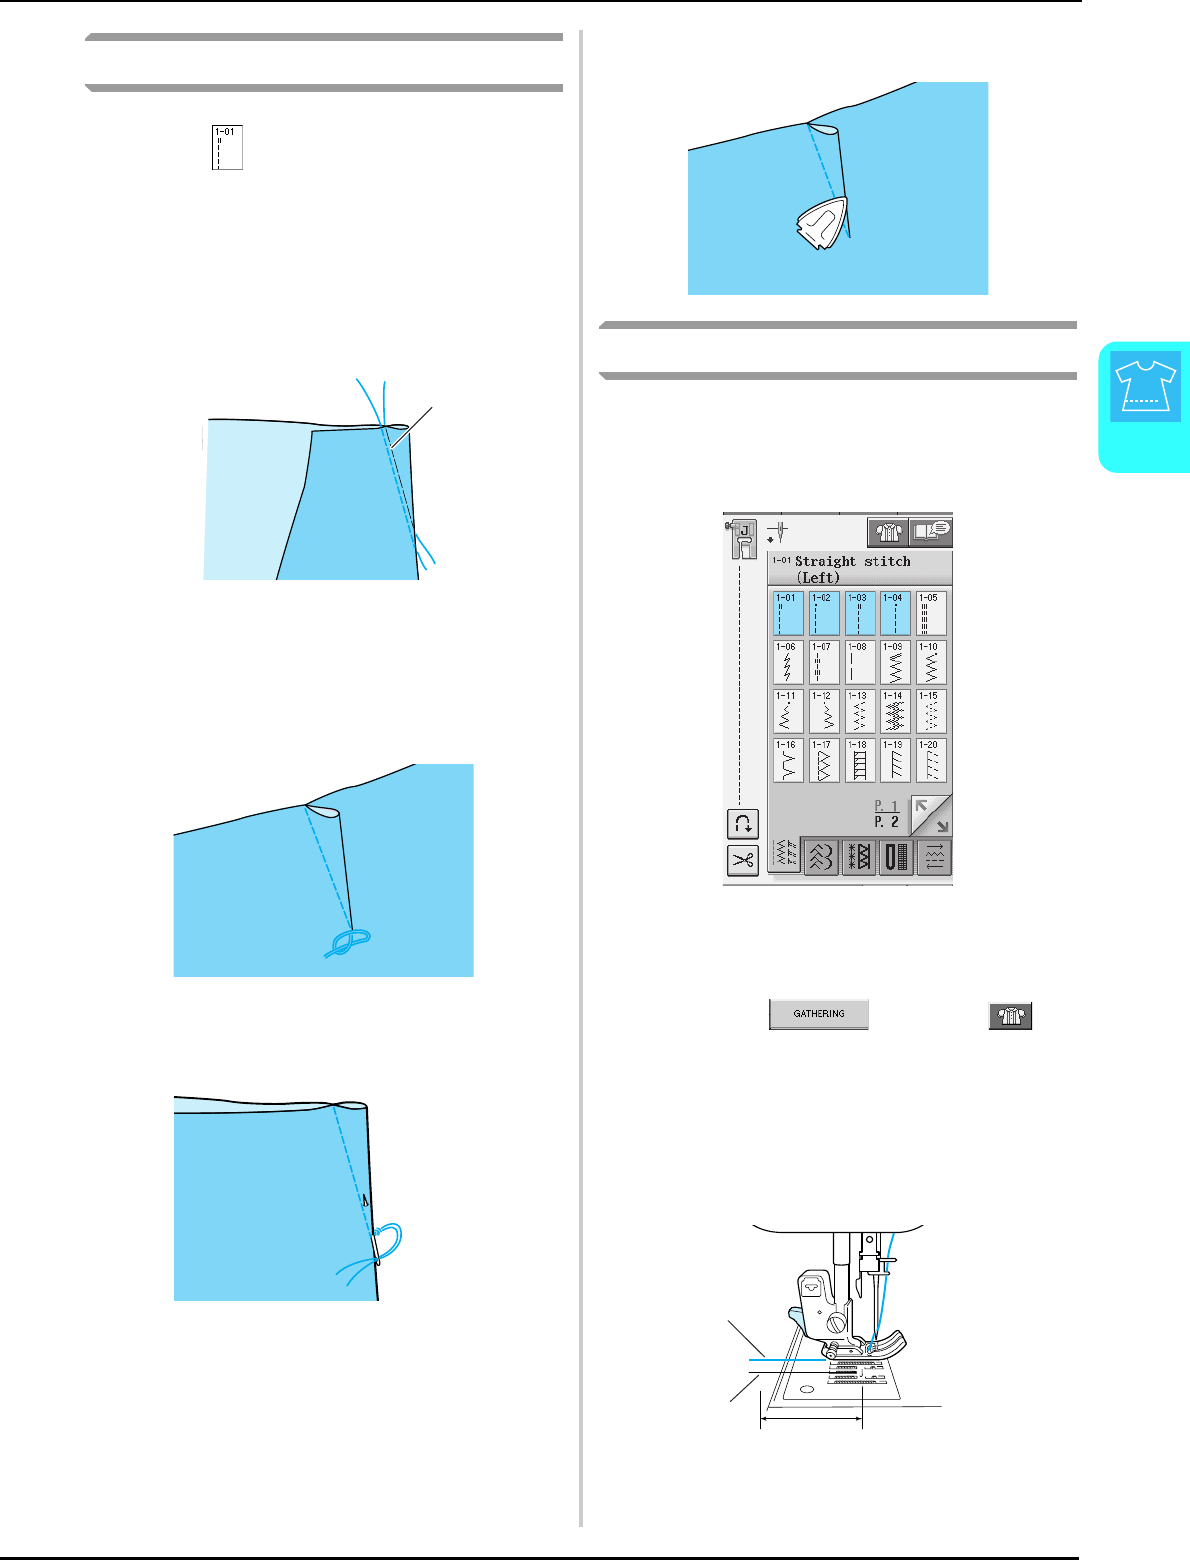
SEWING THE STITCHES
Utility Stitches
57
3
Dart Seam
aSelect and attach presser foot “J”.
bSew a reverse stitch at the beginning of the
dart and then sew from the wide end to the
other end without stretching the fabric.
* If automatic reinforcement stitching is preset, a
reinforcement stitch will automatically be sewn at
the beginning of sewing.
aBasting
cCut the thread at the end leaving 50 mm
(approx. 1-15/16 inches), and then tie both
ends together.
* Do not sew a reverse stitch at the end.
dInsert the ends of the thread into the dart
with a needle.
eIron the dart to one side so that it is flat.
Gathering
Use on waists of skirts, sleeves of shirts, etc.
aSelect a straight stitch and attach presser
foot “J”.
bSet the stitch length to 4.0 mm (approx.
3/16 inch) and the thread tension to
approximately 2.0 (weaker tension).
* If you press after pressing , the
stitch length will be set automatically to 4.0 mm
(approx. 3/16 inch) and the thread tension will be
automatically set to 2.0.
cPull the bobbin and upper threads out by
50 mm (approx. 1-15/16 inches) (see page
23).
aUpper thread
bBobbin thread
cAbout 50 mm (approx. 1-15/16 inches)
a
a
b
c
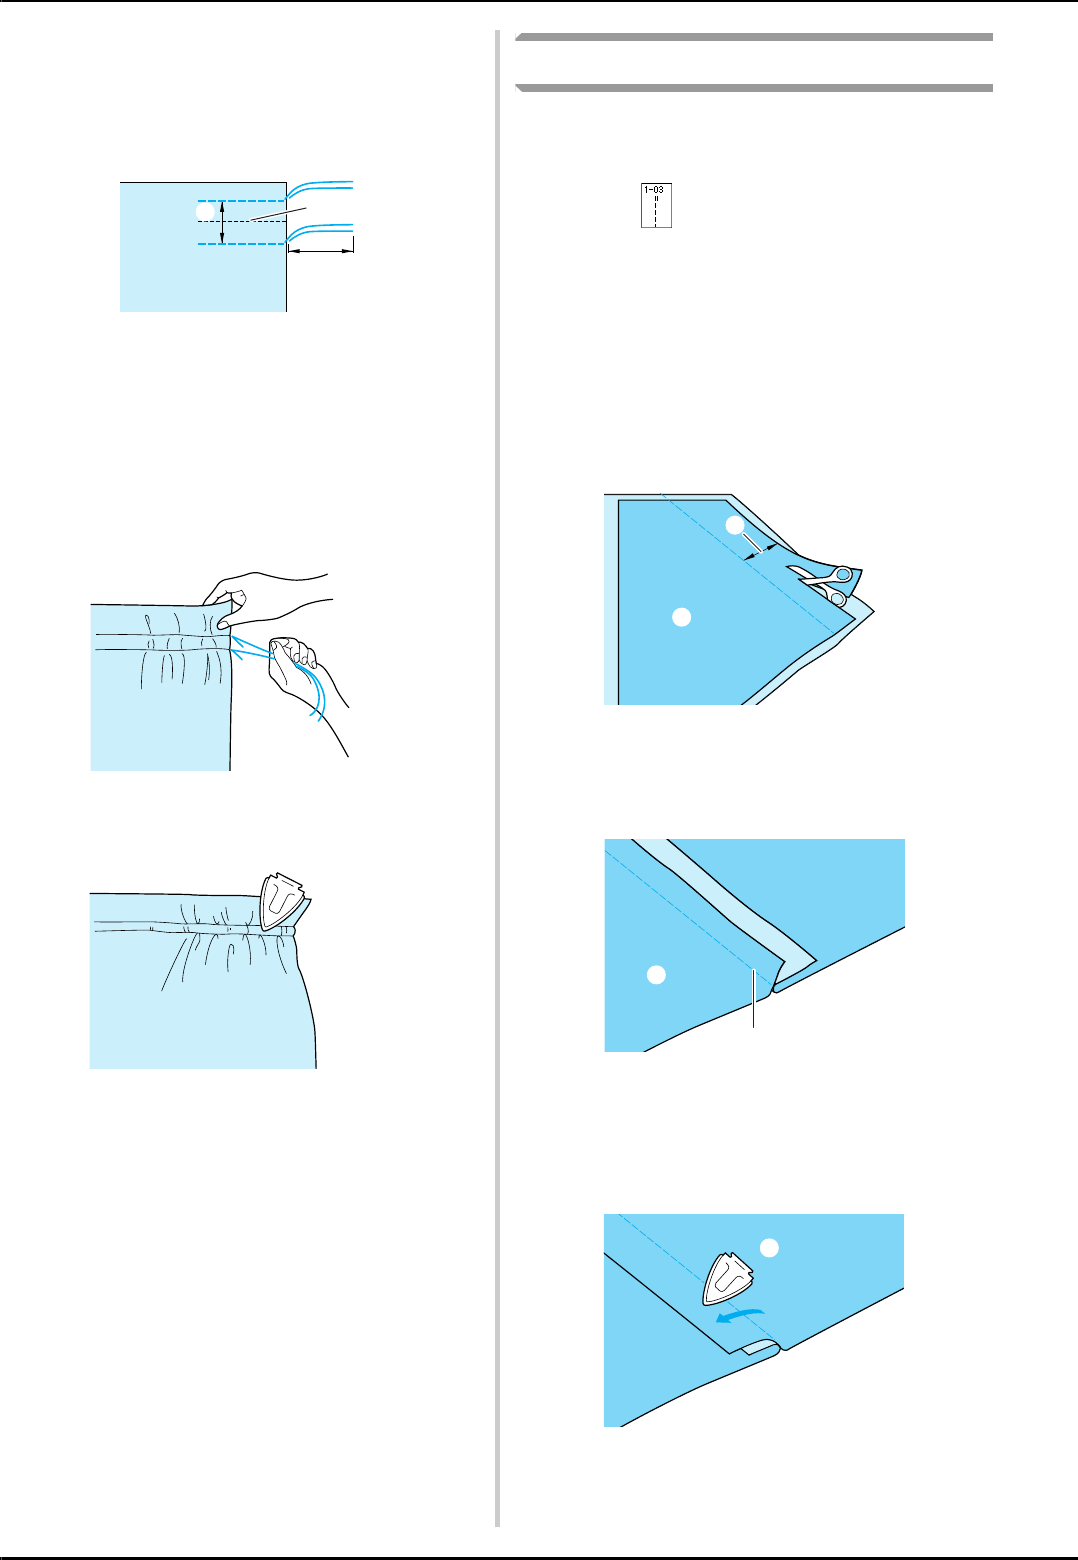
SEWING THE STITCHES
58
dSew two rows of straight stitches parallel to
the seam line, then trim excess thread
leaving 50 mm (approx. 1-15/16 inches).
aSeam line
b10 to 15 mm (approx. 3/8 inch to 9/16 inch)
cAbout 50 mm (approx. 1-15/16 inches)
ePull the bobbin threads to obtain the
desired amount of gather, then tie the
threads.
fSmooth the gathers by ironing them.
gSew on the seam line and remove the
basting stitch.
Flat Fell Seam
Use for reinforcing seams and finishing edges
neatly.
aSelect and attach presser foot “J”.
bSew the finish line, then cut half of the seam
allowance from the side on which the flat
fell seam will lie.
* When the automatic thread cutting and automatic
reinforcement stitching are preset, reinforcement
stitches will be sewn automatically at the beginning
of sewing. Press the “Reverse/Reinforcement Stitch”
button to sew a reinforcement stitch and trim the
thread automatically at the end of sewing.
aAbout 12 mm (approx. 1/2 inch)
bWrong side
cSpread the fabric out along the finish line.
aFinish line
bWrong side
dLay both seam allowances on the side of the
shorter seam (cut seam) and iron them.
aWrong side
a
c
b
a
b
a
b
a
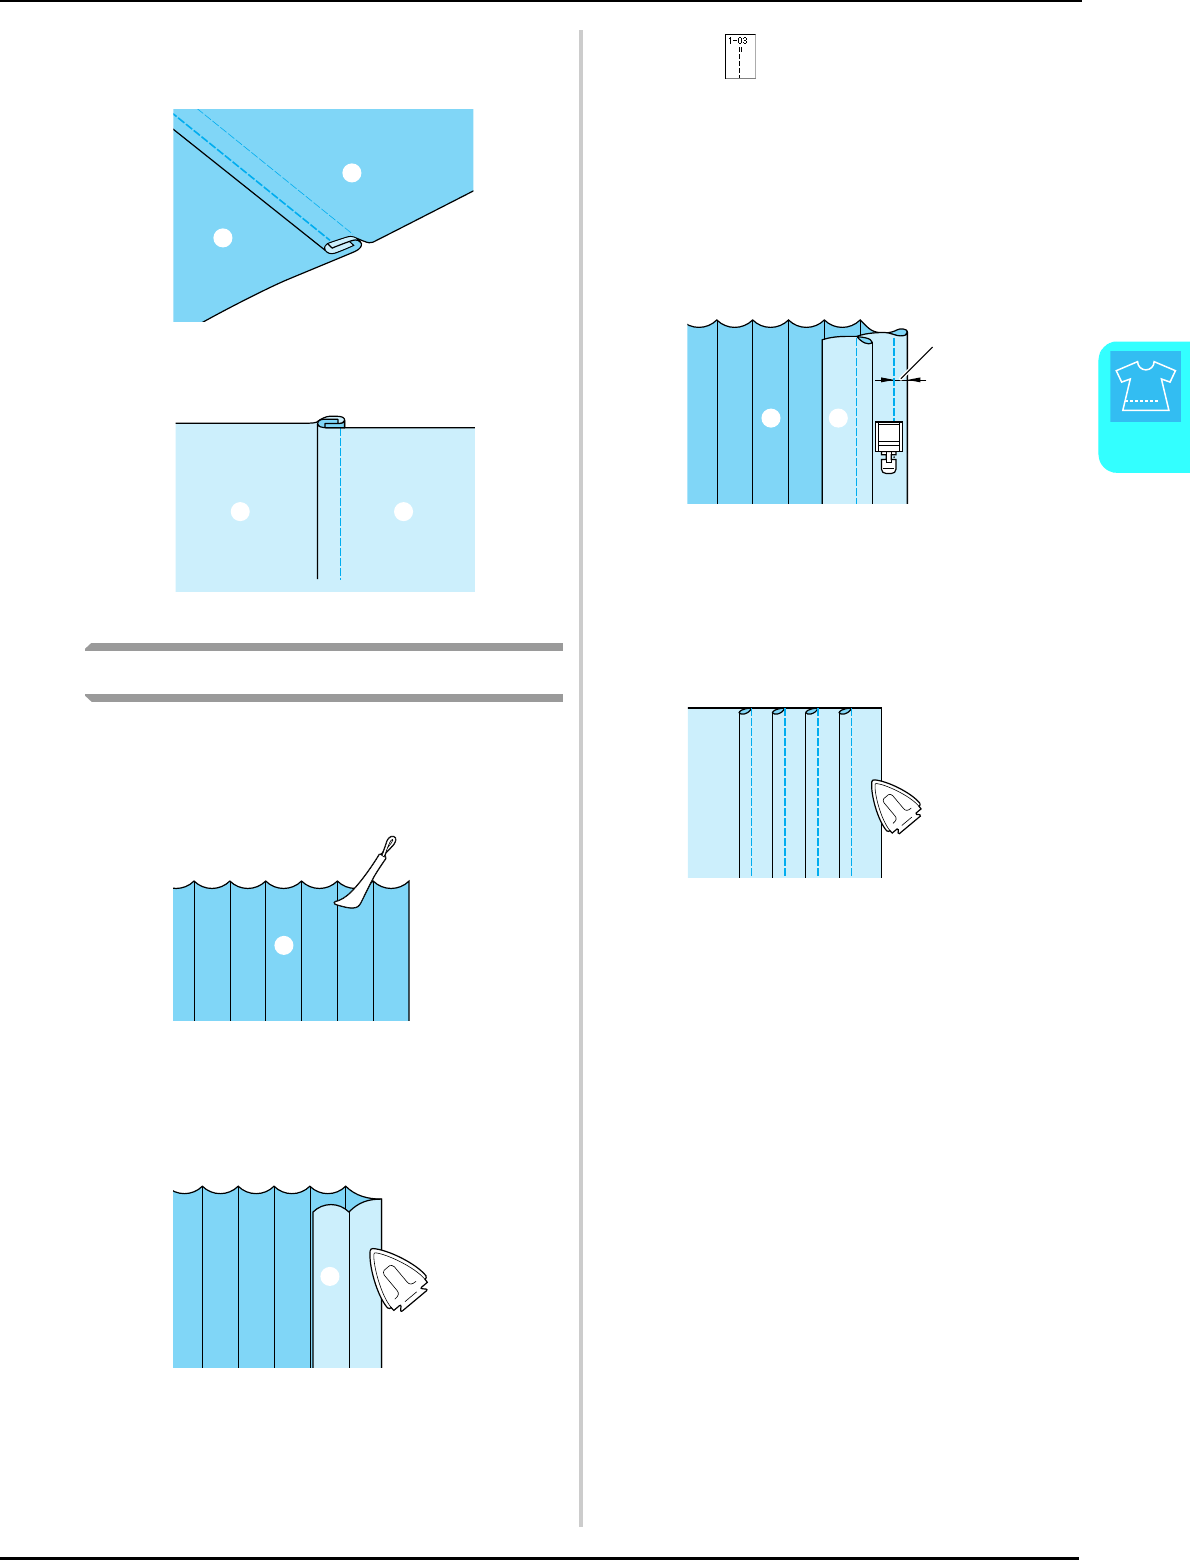
SEWING THE STITCHES
Utility Stitches
59
3
eFold the longer seam allowance around the
shorter one, and sew the edge of the fold.
aWrong side
aSurface
Pintuck
aMark along the folds on the wrong side of
the fabric.
aWrong side
bTurn the fabric and iron the folded parts
only.
aSurface
cSelect and attach presser foot “I”.
dSew a straight stitch along the fold.
* When the automatic thread cutting and automatic
reinforcement stitching are preset, reinforcement
stitches will be sewn automatically at the beginning
of sewing. Press the “Reverse/Reinforcement Stitch”
button to sew a reinforcement stitch and trim the
thread automatically at the end of sewing.
aWidth for pintuck
bWrong side
cSurface
eIron the folds in the same direction.
a
a
aa
Finished flat fell seam
a
a
a
I
cb
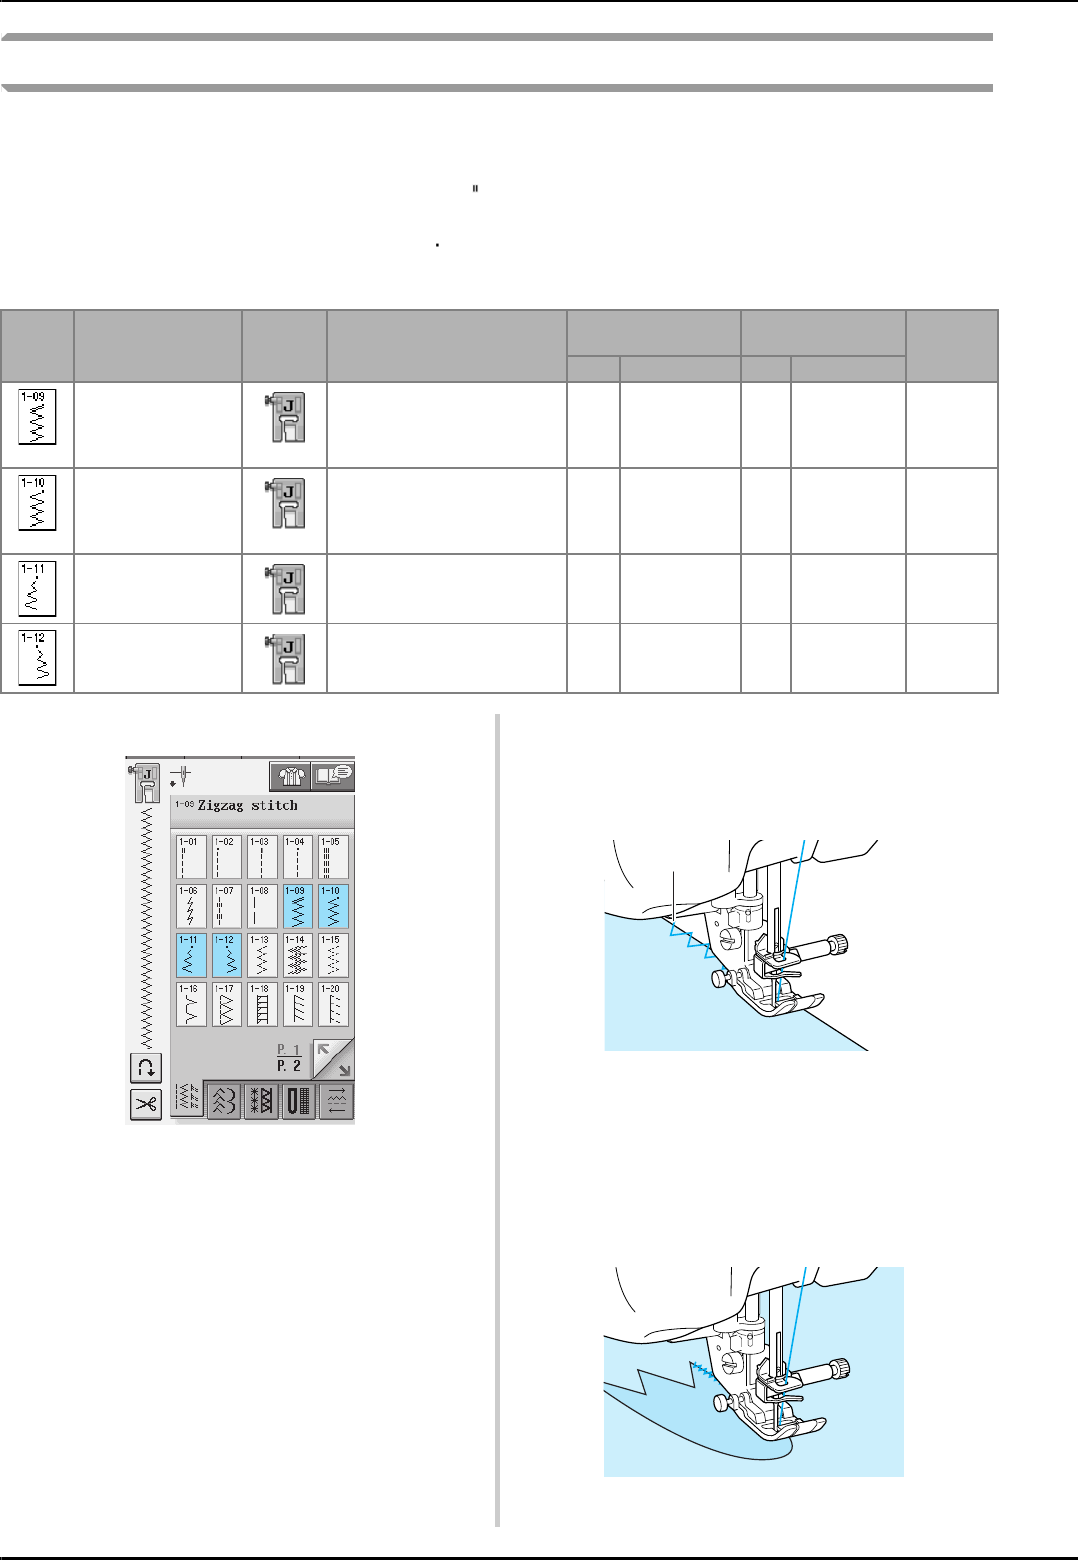
SEWING THE STITCHES
60
Zigzag Stitches
Zigzag stitches are useful for overcasting, appliqué, patchwork, and many other applications.
Select a stitch, and attach presser foot “J”.
If the stitch which you select has a double mark “ ” at the top of the key display, you can sew reverse
stitches by holding the “Reverse/Reinforcement Stitch” button.
If the stitch which you select has a dot mark “ ” at the top of the key display, you can sew reinforcement
stitches by holding the “Reverse/Reinforcement Stitch” button (see page 40).
aSelect a stitch.
bAttach presser foot “J”.
■Overcasting (Using a Zigzag Stitch)
Sew the overcasting along the edge of the fabric
while positioning the right-hand side needle drop
point just outside the edge of the fabric.
aNeedle drop position
■Appliqué (Using a Zigzag Stitch)
Attach the appliqué using a temporary spray
adhesive or basting, then sew it.
* Sew a zigzag stitch while positioning the right-hand
side needle drop point just outside the edge of the
fabric.
Stitch Stitch name Presser
foot Applications
Stitch width
[mm (inch.)]
Stitch length
[mm (inch.)] Twin
needle
Auto. Manual Auto. Manual
Zigzag stitch For overcasting, mending.
Reverse stitch is sewn while
pressing “Reverse/
Reinforcement Stitch” button.
3.5
(1/8)
0.0 - 7.0
(0 - 1/4)
1.4
(1/16)
0.0 - 4.0
(0 - 3/16)
OK
( J )
Zigzag stitch For overcasting, mending.
Reinforcement stitch is sewn
while pressing “Reverse/
Reinforcement Stitch” button.
3.5
(1/8)
0.0 - 7.0
(0 - 1/4)
1.4
(1/16)
0.0 - 4.0
(0 - 3/16)
OK
( J )
Zigzag stitch (right) Start from right needle position,
zigzag sew at left. 3.5
(1/8)
2.5 - 5.0
(3/32 - 3/16)
1.4
(1/16)
0.3 - 4.0
(1/64 - 3/16)
OK
( J )
Zigzag stitch (left) Start from left needle position,
zigzag sew at right. 3.5
(1/8)
2.5 - 5.0
(3/32 - 3/16)
1.4
(1/16)
0.3 - 4.0
(1/64 - 3/16)
OK
( J )
a

SEWING THE STITCHES
Utility Stitches
61
3
■Patchwork (for Crazy Quilt)
Turn back the desired width of fabric and position it
over the lower fabric, then sew so that the stitch
bridges both pieces of fabric.
■Sewing Curves (Using a Zigzag
Stitch)
Shorten the stitch length setting to obtain a fine
stitch. Sew slowly, keeping the seams parallel with
the fabric edge as you guide the fabric around the
curve.
■Cord Guide Bobbin Cover (Using a
Zigzag Stitch)
aRemove the bobbin cover from the machine
(see page 22).
bThread the gimp thread through the hole in
the cord guide bobbin cover from top to
bottom. Position the thread in the notch at
the back of the cord guide bobbin cover.
aNotch
bGimp thread
cSnap the cord guide bobbin cover into
place, making sure that the gimp thread can
be fed freely.
* Make sure there are no restrictions when feeding the
thread.
dSet the zigzag width from 2.0-2.5 mm
(approx. 1/16 - 3/32 inch).
eAttach presser foot “N”.
fPosition the fabric right side up on top of
the cord and place the cord to the rear of
the machine under the presser foot.
aFabric (right side)
bGimp thread
gLower the presser foot and start sewing to
make a decorative finish.
a
b
N
b
a
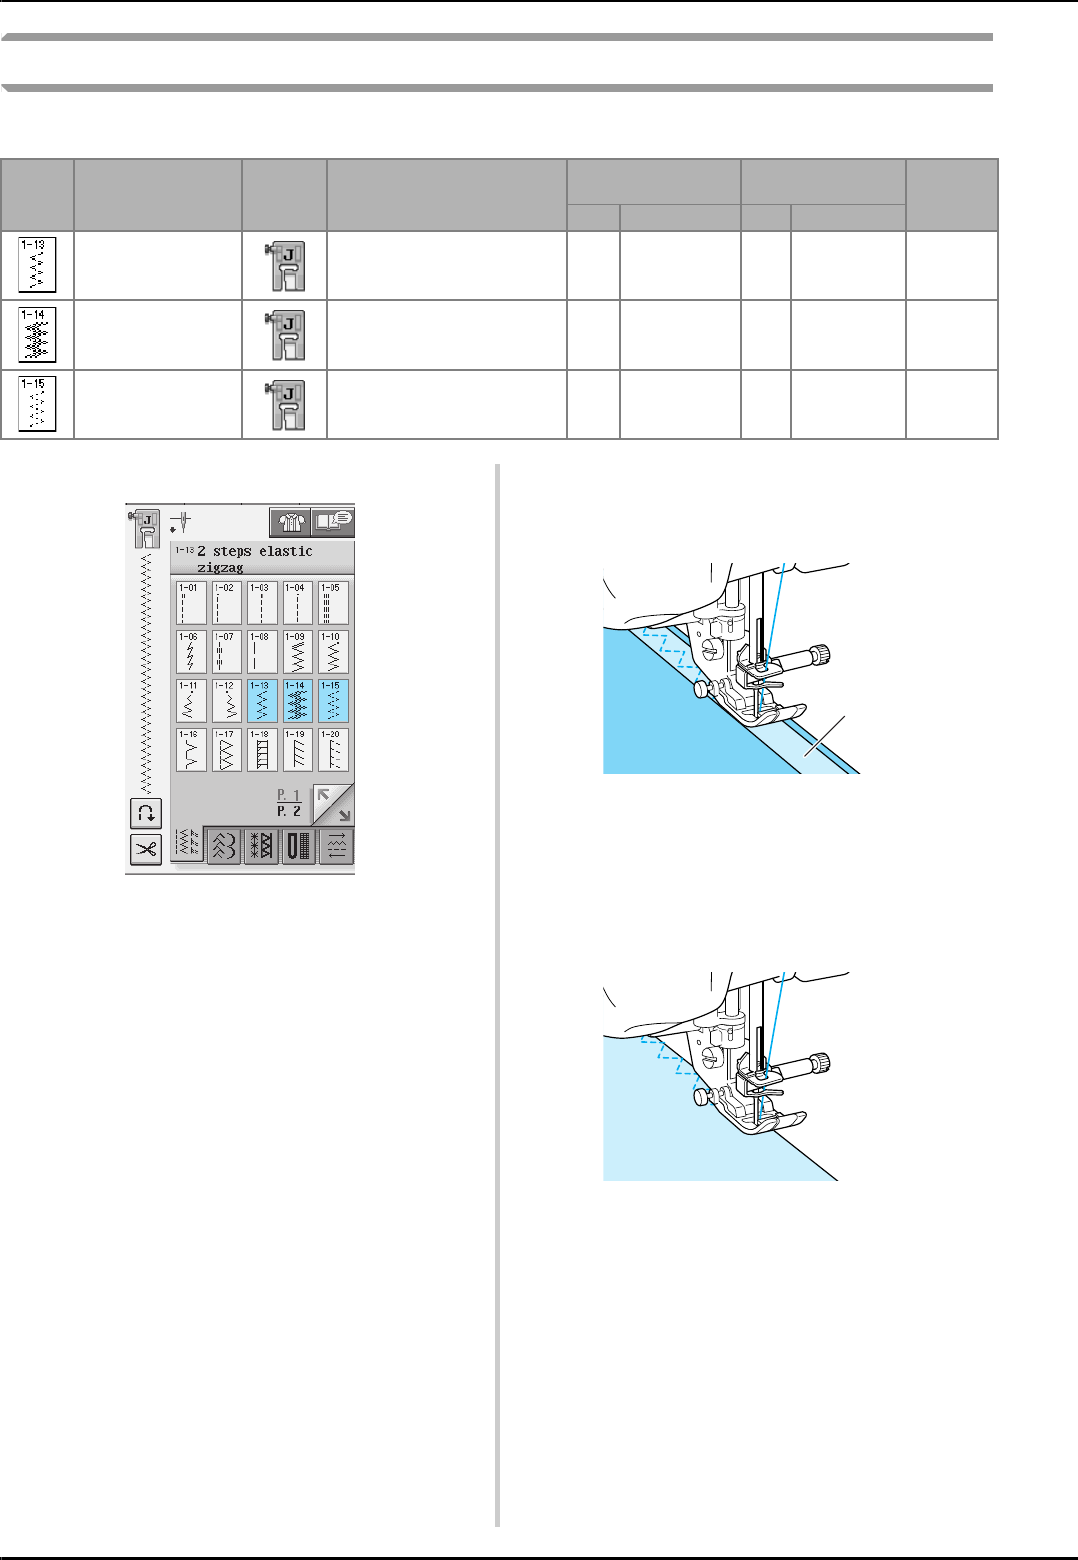
SEWING THE STITCHES
62
Elastic Zigzag Stitches
Use elastic zigzag stitches for tape attaching, overcasting, darning, or a wide variety of other uses.
aSelect a stitch.
bAttach presser foot “J”.
■Tape Attaching
Stretch the tape flat. While stretching the tape flat,
sew the tape to the fabric.
aTape
■Overcasting
Use this stitch to sew overcasting on the edge of
stretch fabrics. Sew the overcasting along the edge
of the fabric while positioning the right-hand side
needle drop point just outside the edge of the fabric.
Stitch Stitch name Presser
foot Applications
Stitch width
[mm (inch.)]
Stitch length
[mm (inch.)] Twin
needle
Auto. Manual Auto. Manual
2 step elastic zigzag Overcasting (medium weight
and stretch fabrics), tape and
elastic
5.0
(3/16)
1.5 - 7.0
(1/16 - 1/4)
1.0
(1/16)
0.2 - 4.0
(1/64 - 1/16)
OK
( J )
2 step elastic zigzag Overcasting (medium weight
and stretch fabrics), tape and
elastic
5.0
(3/16)
1.5 - 7.0
(1/16 - 1/4)
1.0
(1/16)
0.2 - 4.0
(1/64 - 1/16)
OK
( J )
3 step elastic zigzag Overcasting (medium,
heavyweight and stretch fabrics),
tape and elastic
5.0
(3/16)
1.5 - 7.0
(1/16 - 1/4)
1.0
(1/16)
0.2 - 4.0
(1/64 - 1/16)
OK
( J )
a
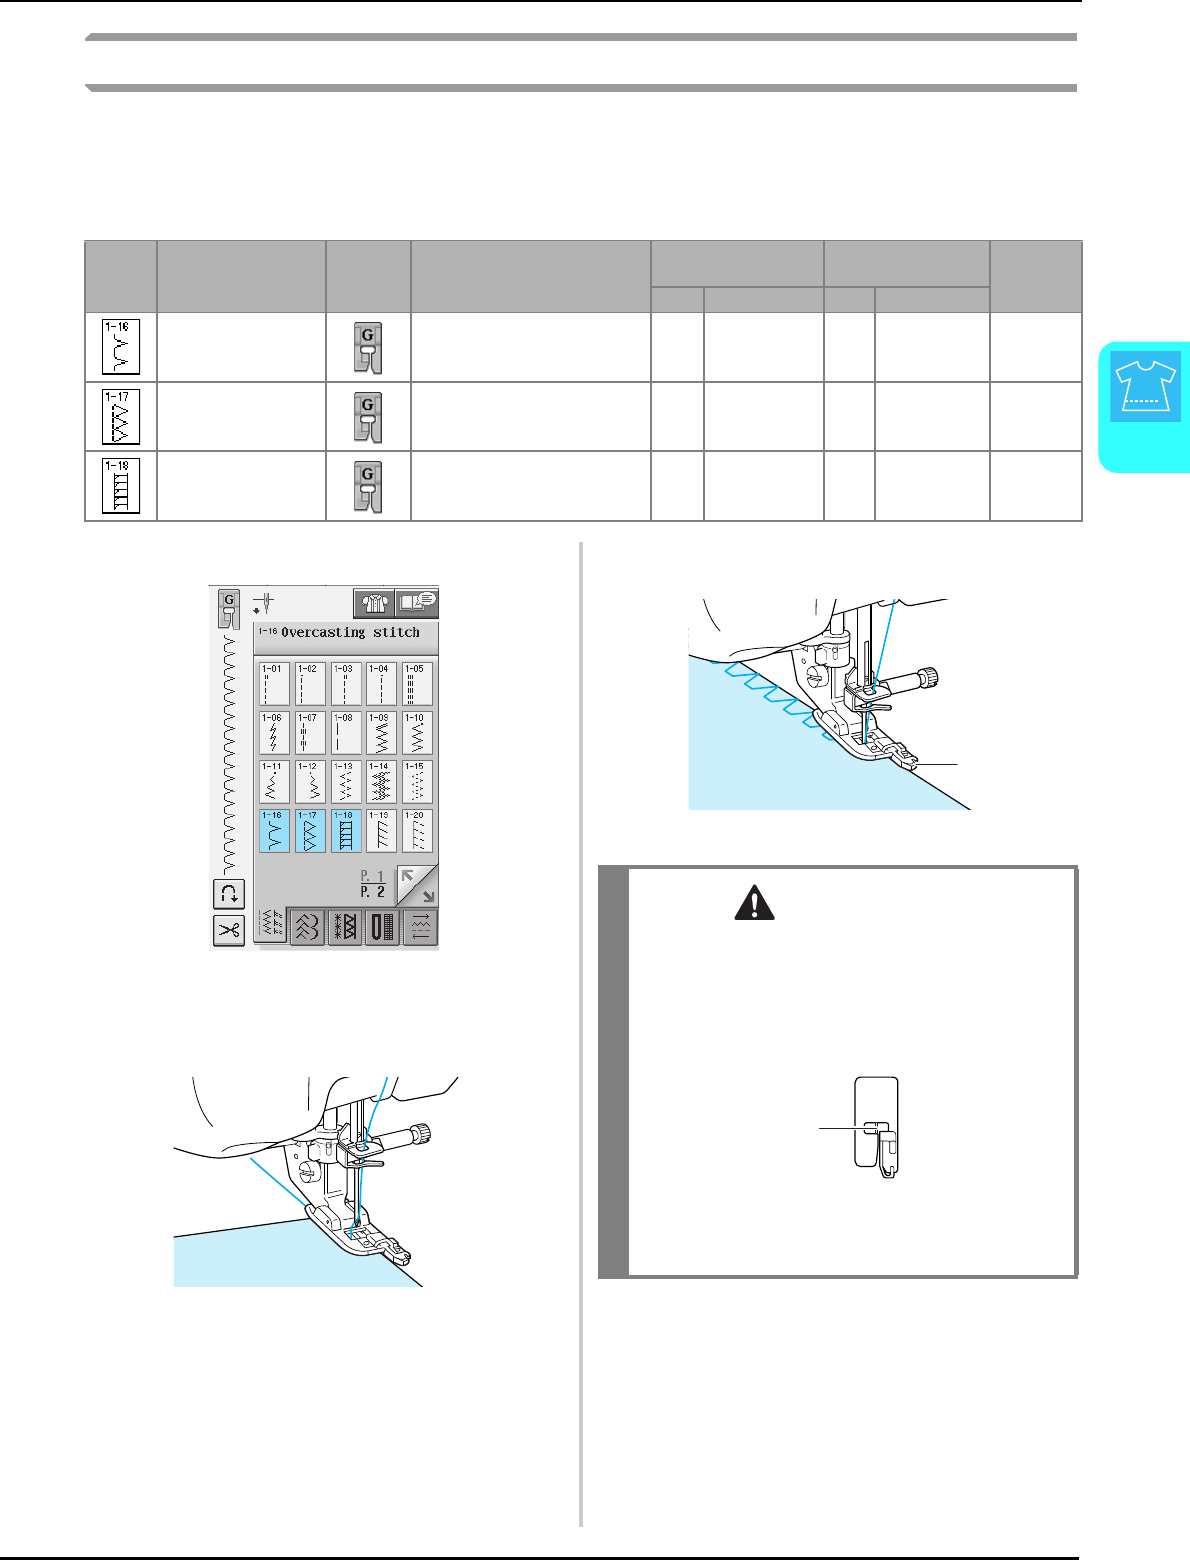
SEWING THE STITCHES
Utility Stitches
63
3
Overcasting
Use for the beginning and end of seams in skirts or trousers, and the beginning and end of all cuttings.
Use presser foot “G”, presser foot “J”, or the side cutter attachment depending on the kind of overcasting
stitch you select.
■Overcasting Using Presser Foot “G”
aSelect a stitch and attach presser foot “G”.
bLower the presser foot so that the presser
foot guide is set flush against the edge of the
fabric.
cSew along the presser foot guide.
aGuide
Stitch Stitch name Presser
foot Applications
Stitch width
[mm (inch.)]
Stitch length
[mm (inch.)] Twin
needle
Auto. Manual Auto. Manual
Overcasting stitch Reinforcing of light and medium
weight fabrics 3.5
(1/8)
2.5 - 5.0
(3/32 - 3/16)
2.0
(1/16)
1.0 - 4.0
(1/16 - 3/16) NO
Overcasting stitch Reinforcing of heavyweight
fabric 5.0
(3/16)
2.5 - 5.0
(3/32 - 3/16)
2.5
(3/32)
1.0 - 4.0
(1/16 - 3/16) NO
Overcasting stitch Reinforcing of medium,
heavyweight and easily frayable
fabrics or decorative stitching.
5.0
(3/16)
3.5 - 5.0
(1/8 - 3/16)
2.5
(3/32)
1.0 - 4.0
(1/16 - 3/16) NO
CAUTION
• After the stitch width is adjusted, turn the
handwheel toward you by hand and check that
the needle does not touch the presser foot. If
the needle hits the presser foot, the needle
may break and cause injury.
aThe needle should not touch
• If the presser foot is raised to its highest level,
the needle may strike the presser foot.
a
G
a
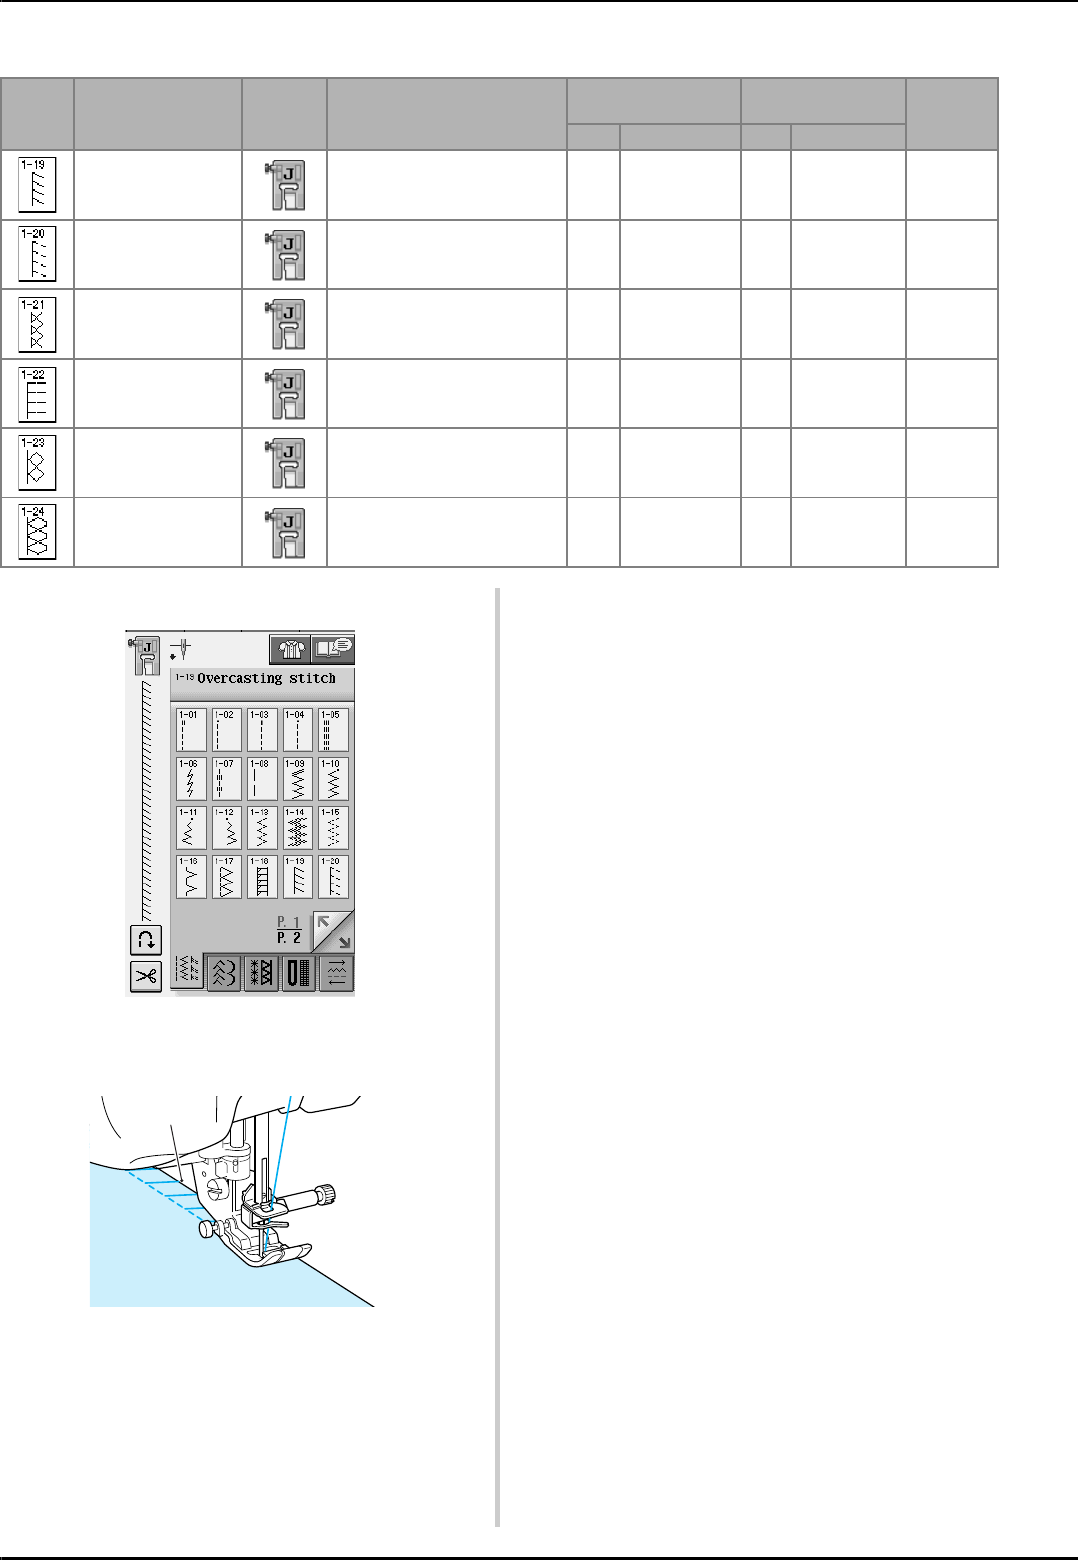
SEWING THE STITCHES
64
■Overcasting Using Presser Foot “J”
aSelect a stitch and attach presser foot “J”.
bSew with the needle dropping slightly off
the edge of the fabric.
aNeedle drop position
Stitch Stitch name Presser
foot Applications
Stitch width
[mm (inch.)]
Stitch length
[mm (inch.)] Twin
needle
Auto. Manual Auto. Manual
Overcasting stitch Reinforced seaming of stretch
fabric 5.0
(3/16)
0.0 - 7.0
(0 - 9/32)
2.5
(3/32)
0.5 - 4.0
(1/32 - 3/16)
OK
( J )
Overcasting stitch Reinforcing of medium stretch
fabric and heavyweight fabric,
decorative stitching
5.0
(3/16)
0.0 - 7.0
(0 - 9/32)
2.5
(3/32)
0.5 - 4.0
(1/32 - 3/16)
OK
( J )
Overcasting stitch Reinforcement of stretch fabric
or decorative stitching 4.0
(3/16)
0.0 - 7.0
(0 - 1/4)
4.0
(3/16)
1.0 - 4.0
(1/16 - 3/16)
OK
( J )
Overcasting stitch Stretch knit seam 5.0
(3/16)
0.0 - 7.0
(0 - 1/4)
4.0
(3/16)
1.0 - 4.0
(1/16 - 3/16) NO
Single diamond
overcast
Reinforcement and seaming
stretch fabric
6.0
(15/
64)
1.0 - 7.0
(1/16 - 1/4)
3.0
(1/8)
1.0 - 4.0
(1/16 - 3/16)
OK
( J )
Single diamond
overcast
Reinforcement of stretch fabric 6.0
(15/
64)
1.0 - 7.0
(1/16 - 1/4)
1.8
(1/16)
1.0 - 4.0
(1/16 - 3/16)
OK
( J )
a
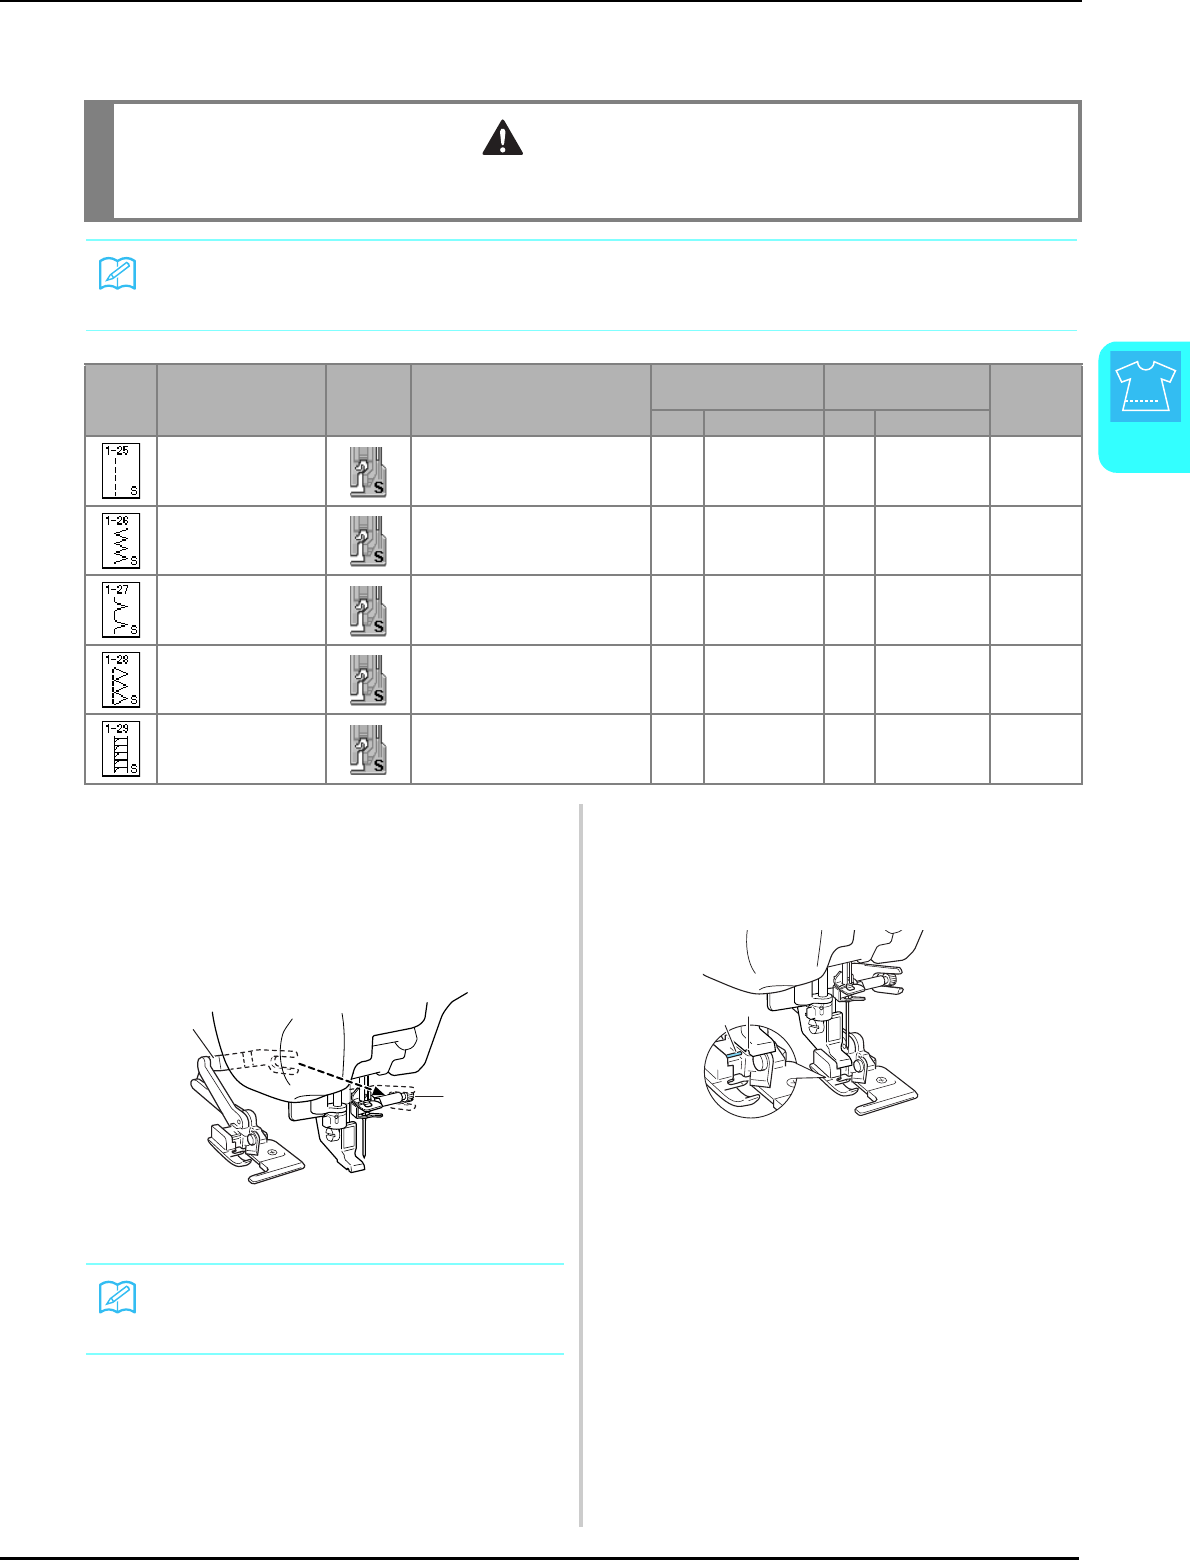
SEWING THE STITCHES
Utility Stitches
65
3
■Overcasting Using the Side Cutter
By using the side cutter, you can do overcasting while cutting the fabric.
aFollow the steps on page 32 to remove the
presser foot.
bPosition the fork on the side cutter’s
operating lever onto the needle clamp
screw.
aNeedle clamp screw
bOperating lever
cPosition the side cutter so that the side
cutter pin is aligned with the notch in the
presser foot holder, and then lower the
presser foot.
aNotch in presser foot holder
bPin
→The side cutter is attached.
CAUTION
• Make sure to only select one of the stitches listed below. Using another stitch may cause the needle to hit
the presser foot and break, possibly causing injury.
Memo
Thread the needle manually when using the side cutter, or only attach the side cutter after threading the
needle using the “Automatic Threading” button.
Stitch Stitch name Presser
foot Applications
Stitch width
[mm (inch.)]
Stitch length
[mm (inch.)] Twin
needle
Auto. Manual Auto. Manual
With side cutter Straight stitch while cutting
fabrics 0.0
(0)
0.0 - 2.5
(0 - 3/32)
2.5
(3/32)
0.2 - 5.0
(1/64 - 3/16) NO
With side cutter Zigzag stitch while cutting fabrics 3.5
(1/8)
3.5 - 5.0
(1/8 - 3/16)
1.4
(1/16)
0.0 - 4.0
(0 - 3/16) NO
With side cutter Overcasting stitch while cutting
fabrics 3.5
(1/8)
3.5 - 5.0
(1/8 - 3/16)
2.0
(1/16)
1.0 - 4.0
(1/16 - 3/16) NO
With side cutter Overcasting stitch while cutting
fabrics 5.0
(3/16)
3.5 - 5.0
(1/8 - 3/16)
2.5
(3/32)
1.0 - 4.0
(1/16 - 3/16) NO
With side cutter Overcasting stitch while cutting
fabrics 5.0
(3/16)
3.5 - 5.0
(1/8 - 3/16)
2.5
(3/32)
1.0 - 4.0
(1/16 - 3/16) NO
Memo
Make sure that the fork of the operating lever
is set onto the needle screw firmly.
a
b
a
b
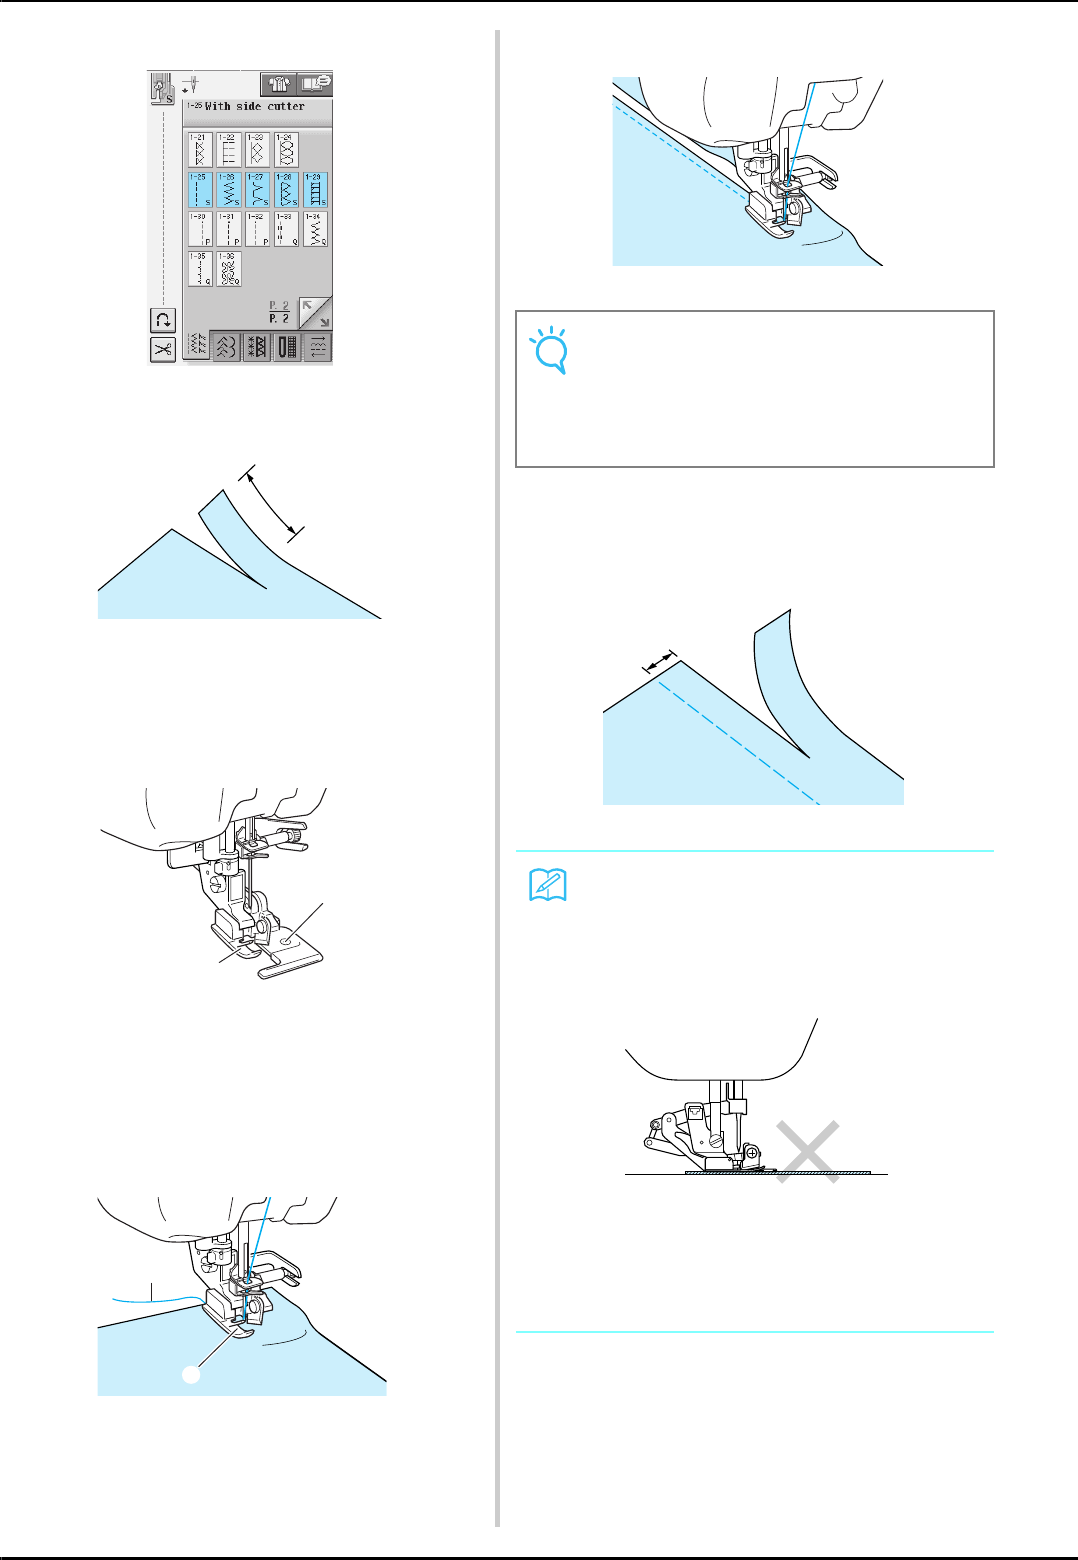
SEWING THE STITCHES
66
dSelect a stitch.
eMake a cut of approximately 20 mm
(approx. 3/4 inch) in the fabric.
a20 mm (approx. 3/4 inch)
fPosition the fabric so that the right side of
the cut is on top of the guide plate and the
left side of the cut is underneath the presser
foot.
aGuide plate (lower knife)
bPresser foot
gThread the needle manually and pull out a
long section of the upper thread. Pass it
below the presser foot and pull it out in the
fabric feed direction.
aPresser foot
bUpper thread
hStart sewing.
→A seam allowance is cut while the stitching is sewn.
■When Sewing Straight Stitches
While Using the Side Cutter
The seam margin should be approximately 5 mm
(approx. 3/16 inch).
aSeam margin
a
a
b
b
a
Note
If the width has been adjusted, turn the hand-
wheel by hand to check that the needle does
not touch the side cutter. If the needle touches
the side cutter, it might cause the needle to
break.
Memo
• The fabric will not be cut if the whole fabric is
simply spread out underneath the presser
foot guide plate. Set the fabric as explained
in step f from the previous section, and
then start sewing.
• One layer of 13 oz. denim can be cut.
• Clean the side cutter after use to avoid hav-
ing dust and scraps of thread build up on it.
• Add a small amount of oil as required to the
cutting edge of the cutter.
a
SEWING THE STITCHES
Utility Stitches
67
3
Quilting
You can make beautiful quilts quickly and easily with this machine. When making a quilt, you will find it
convenient to use the knee lifter and foot controller to free your hands for other tasks (see “Using the Foot
Controller” on page 39 and /or see “Using the Knee Lifter” on page 46).
If there is a “P” or “Q” at the bottom of the key display, the indicated stitch is intended for quilting.
Pattern Name of pattern
Type of
presser
foot
Use
Stitch width
[mm (inch.)]
Stitch length
[mm (inch.)]
Twin
needle
possibility
Auto. Manual Auto. Manual
Piecing stitch (Right) Piecework/patchwork
6.5 mm (approx. 1/4 inch) right
seam allowance
5.5
(7/32)
0.0 - 7.0
(0 - 1/4)
2.0
(1/16)
0.2 - 5.0
(1/64 - 3/16) NO
Piecing stitch
(Middle)
Piecework/patchwork
——2.0
(1/16)
0.2 - 5.0
(1/64 - 3/16) NO
Piecing stitch (Left) Piecework/patchwork
6.5 mm (approx. 1/4 inch) left
seam allowance
1.5
(1/16)
0.0 - 7.0
(0 - 1/4)
2.0
(1/16)
0.2 - 5.0
(1/64 - 3/16) NO
Hand-look quilting Quilting stitch made to look like
hand quilting stitch 0.0
(0)
0.0 - 7.0
(0 - 1/4)
2.5
(3/32)
1.0 - 4.0
(1/16 - 3/16) NO
Quilting appliqué
zigzag stitch
Zigzag stitch for quilting and
sewing on appliqué quilt pieces 3.5
(1/8)
0.0 - 7.0
(0 - 1/4)
1.4
(1/16)
0.0 - 4.0
(0 - 3/16) NO
Quilting appliqué
stitch
Quilting stitch for invisible
appliqué or attaching binding 1.5
(1/16)
0.5 - 5.0
(1/64 - 3/16)
1.8
(1/16)
1.0 - 4.0
(1/16 - 3/16) NO
Quilting stippling Background quilting 7.0
(1/4)
1.0 - 7.0
(1/16 - 1/4)
1.6
(1/16)
1.0 - 4.0
(1/16 - 3/16) NO
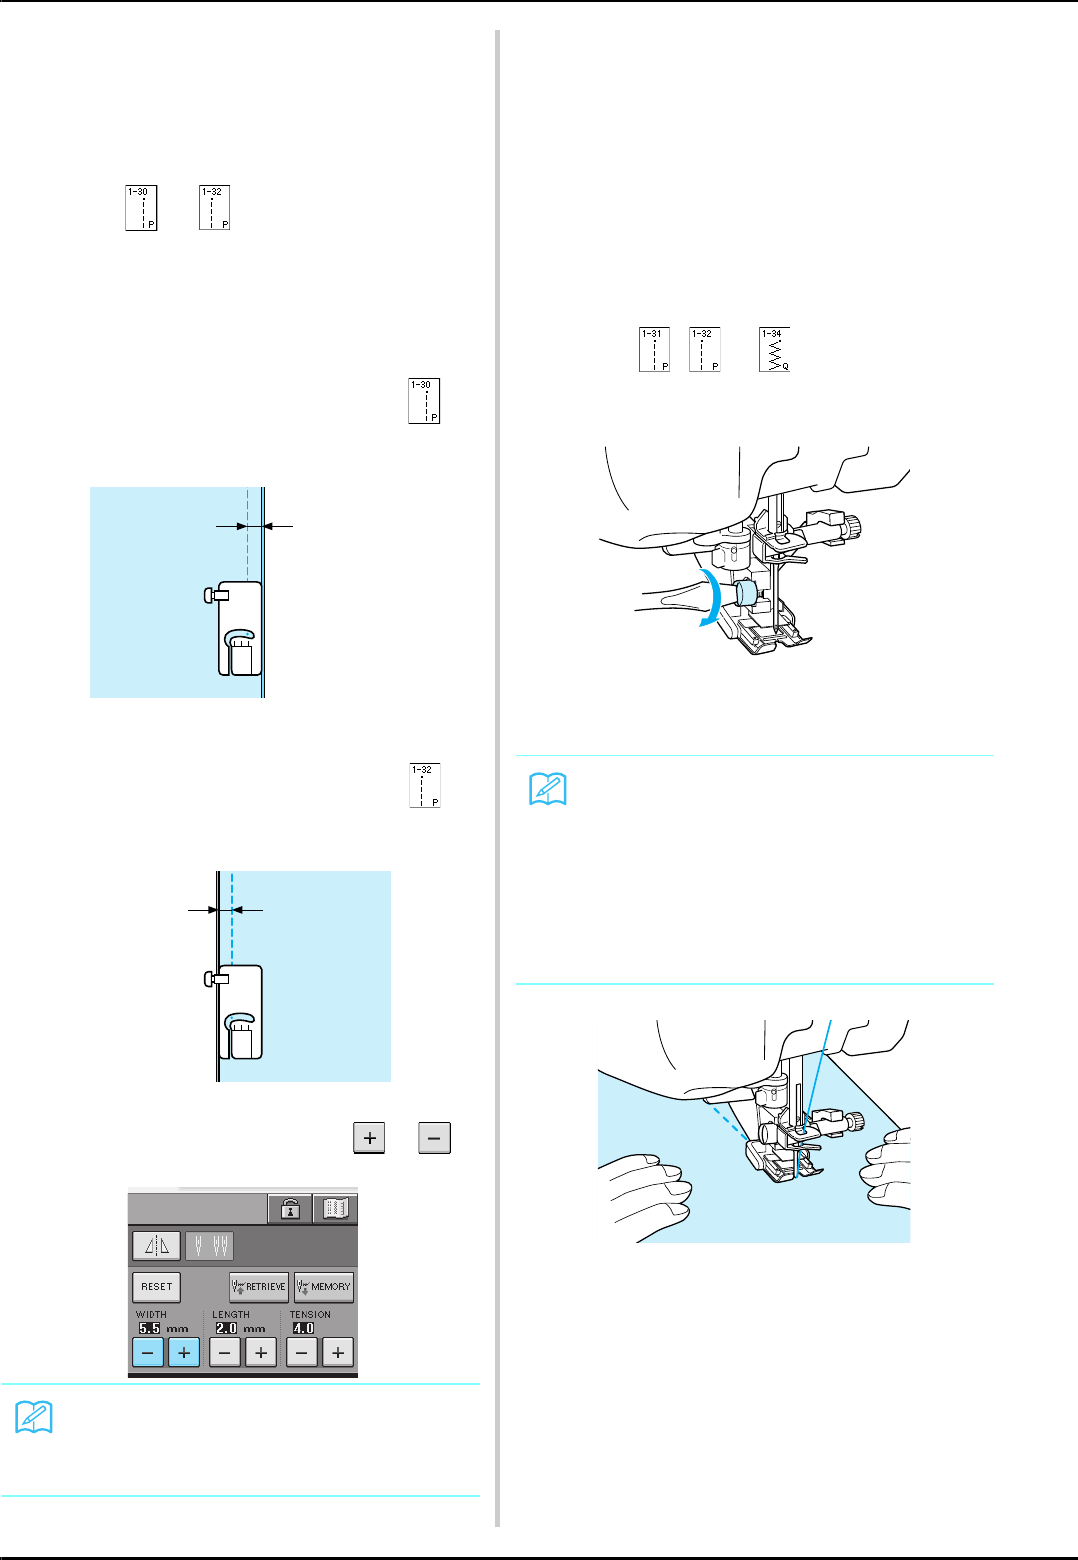
SEWING THE STITCHES
68
■Piecing
Sewing two pieces of fabric together is called
piecing. When cutting pieces for quilt blocks, make
sure the seam allowance is 6.5 mm (approx.
1/4 inch).
aSelect or and attach presser foot
“J”.
bAlign the edge of the fabric with the edge of
the presser foot, and start sewing.
* To sew a 6.5 mm (approx. 1/4 inch) seam allowance
along the left edge of the presser foot with
selected, the width should be set to 5.5 mm (approx.
7/32 inch).
a6.5 mm (approx. 1/4 inch)
* To sew a 6.5 mm (approx. 1/4 inch) seam allowance
along the left edge of the presser foot with
selected, the width should be set to 1.5 mm (approx.
1/32 inch).
a6.5 mm (approx. 1/4 inch)
* To change the needle position, use or in
the width display.
■Quilting
Sewing together the quilt top, batting, and backing is
called quilting. You can sew the quilt with the
walking foot to keep the quilt top, batting, and
backing from sliding. The walking foot has a set of
feed dogs that move together with the feed dogs in
the needle plate during sewing.
For straight line quilting, use the walking foot and
the straight stitch needle plate. Always select a
straight stitch (middle needle position) when using
the straight stitch needle plate.
aSelect , or .
bAttach the walking foot (see page 33).
cPlace one hand on each side of the presser
foot to hold the fabric secure while sewing.
Memo
Using a straight stitch (middle needle position)
makes it easier to sew smoothly (see page
53).
J
a
J
a
Memo
• Sew at slow to medium speed.
• Do not sew in reverse or use stitches that
require side ways or reverse feeding.
Always check to be sure that your quilting
surface is securely basted before beginning
to sew. Specialized machine quilt needles
and threads are also available for machine
quilting.
SEWING THE STITCHES
Utility Stitches
69
3
■Appliqué
aTrace the pattern onto the appliqué fabric
and then cut around it, leaving a 3 to 5 mm
(approx. 1/8 to 3/16 inch) seam allowance.
aSeam allowance: 3 to 5 mm
(approx. 1/8 to 3/16 inch)
bPlace a piece of thick paper cut to the
finished size of the appliqué design onto the
fabric, and then fold over the seam margin
using an iron. Clip curves when necessary.
cTurn the appliqué over, and attach the thick
paper with basting pins or a basting stitch.
dSelect and attach presser foot “J”.
eUse the quilting appliqué stitch to attach
the appliqué. Sew around the edge while
dropping the needle as close to the edge as
possible.
aNeedle drop position
You can use the appliqué technique to attach
appliqué designs like the three pictured below.
a
CAUTION
• Be careful that the needle does not strike a
basting pin during sewing. Striking a pin can
cause the needle to break, resulting in injury.
aDresden plate
bStained glass
cSunbonnet sue
J
a
a
b
c
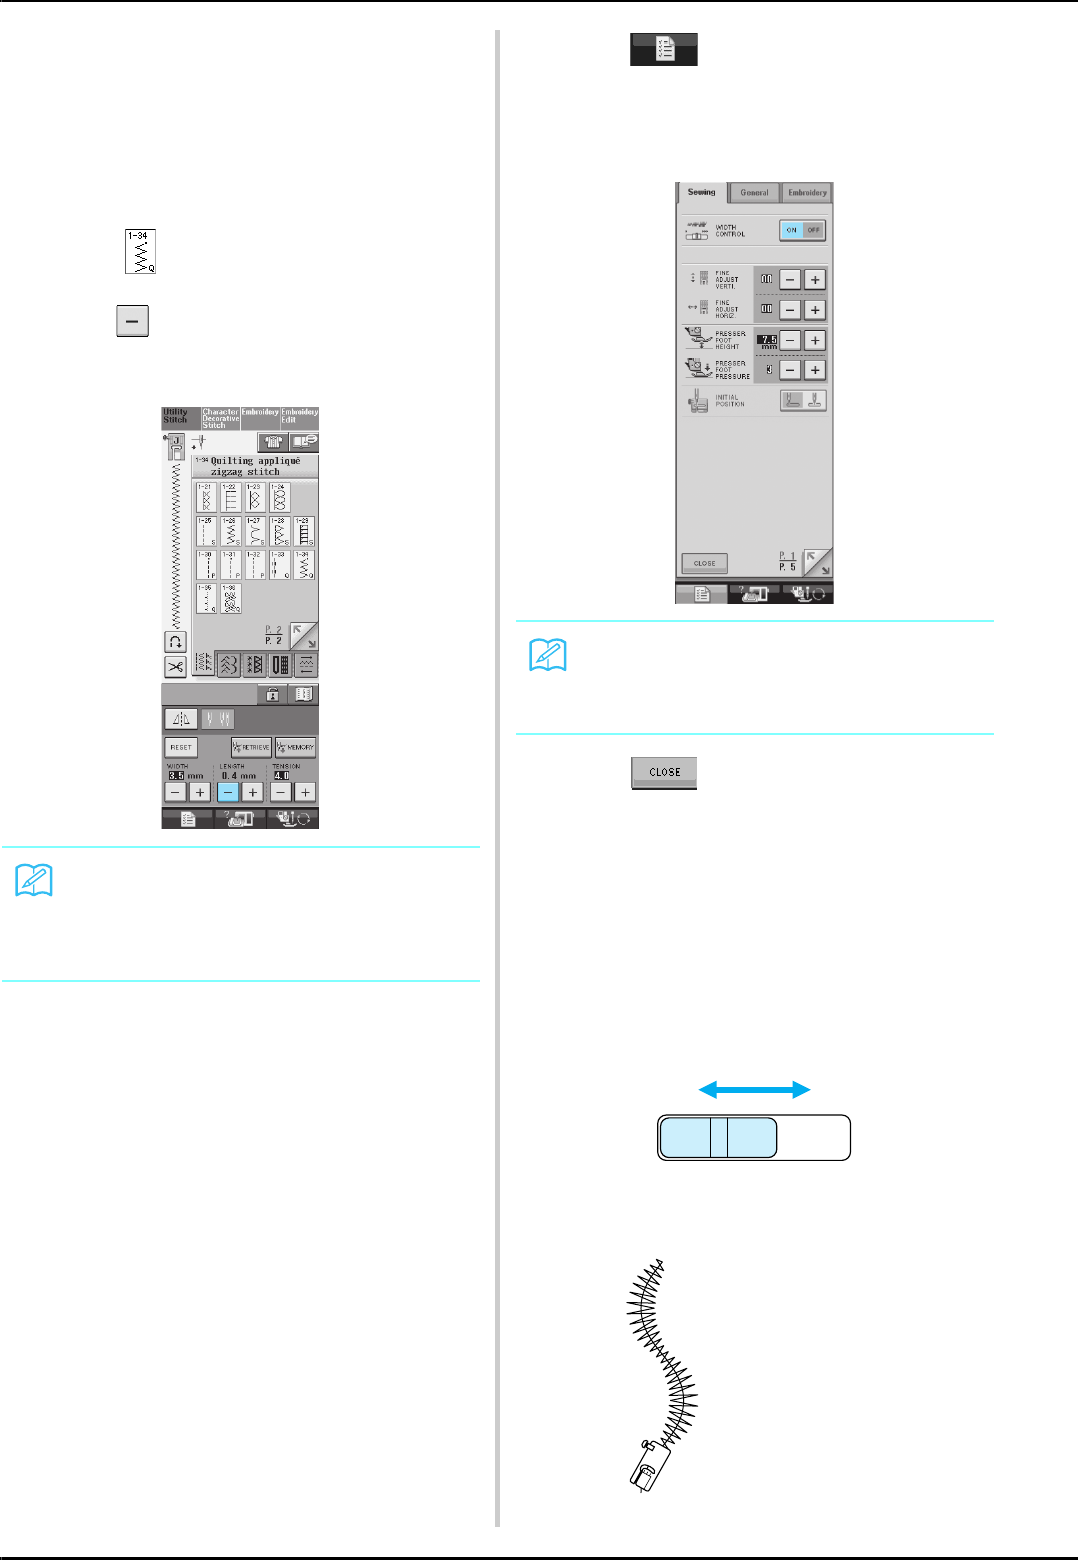
SEWING THE STITCHES
70
■Quilting with Satin Stitches
Use the foot controller to sew with satin stitches. If
you set the speed control slide to control the stitch
width, you can make subtle changes in the stitch
width during sewing.
aAttach the foot controller (see page 39).
bSelect and attach presser foot “J”.
cPress in the length display to shorten
the stitch length.
dPress to use the speed control slide
to control the stitch width.
eSet the width control to “ON”.
fPress .
→The display will return to the original screen.
gStart sewing
* You can adjust the stitch width during sewing by
moving the sewing speed controller. Slide the lever
to the left, and the stitch width becomes narrower.
Slide it to the right, the stitch width becomes wider.
The size of the width changes equally on both sides
of the middle needle position.
anarrower
bwider
Memo
The setting will vary according to the kind of
fabric and the thickness of the thread, but a
length of 0.3 to 0.5 mm (approx. 1/64 to 1/32
inch) is best for satin stitches.
Memo
You can use the speed control slide to adjust
the stitch width. Use the foot controller to
adjust the sewing speed.
ab
J
Rough sketch (line)
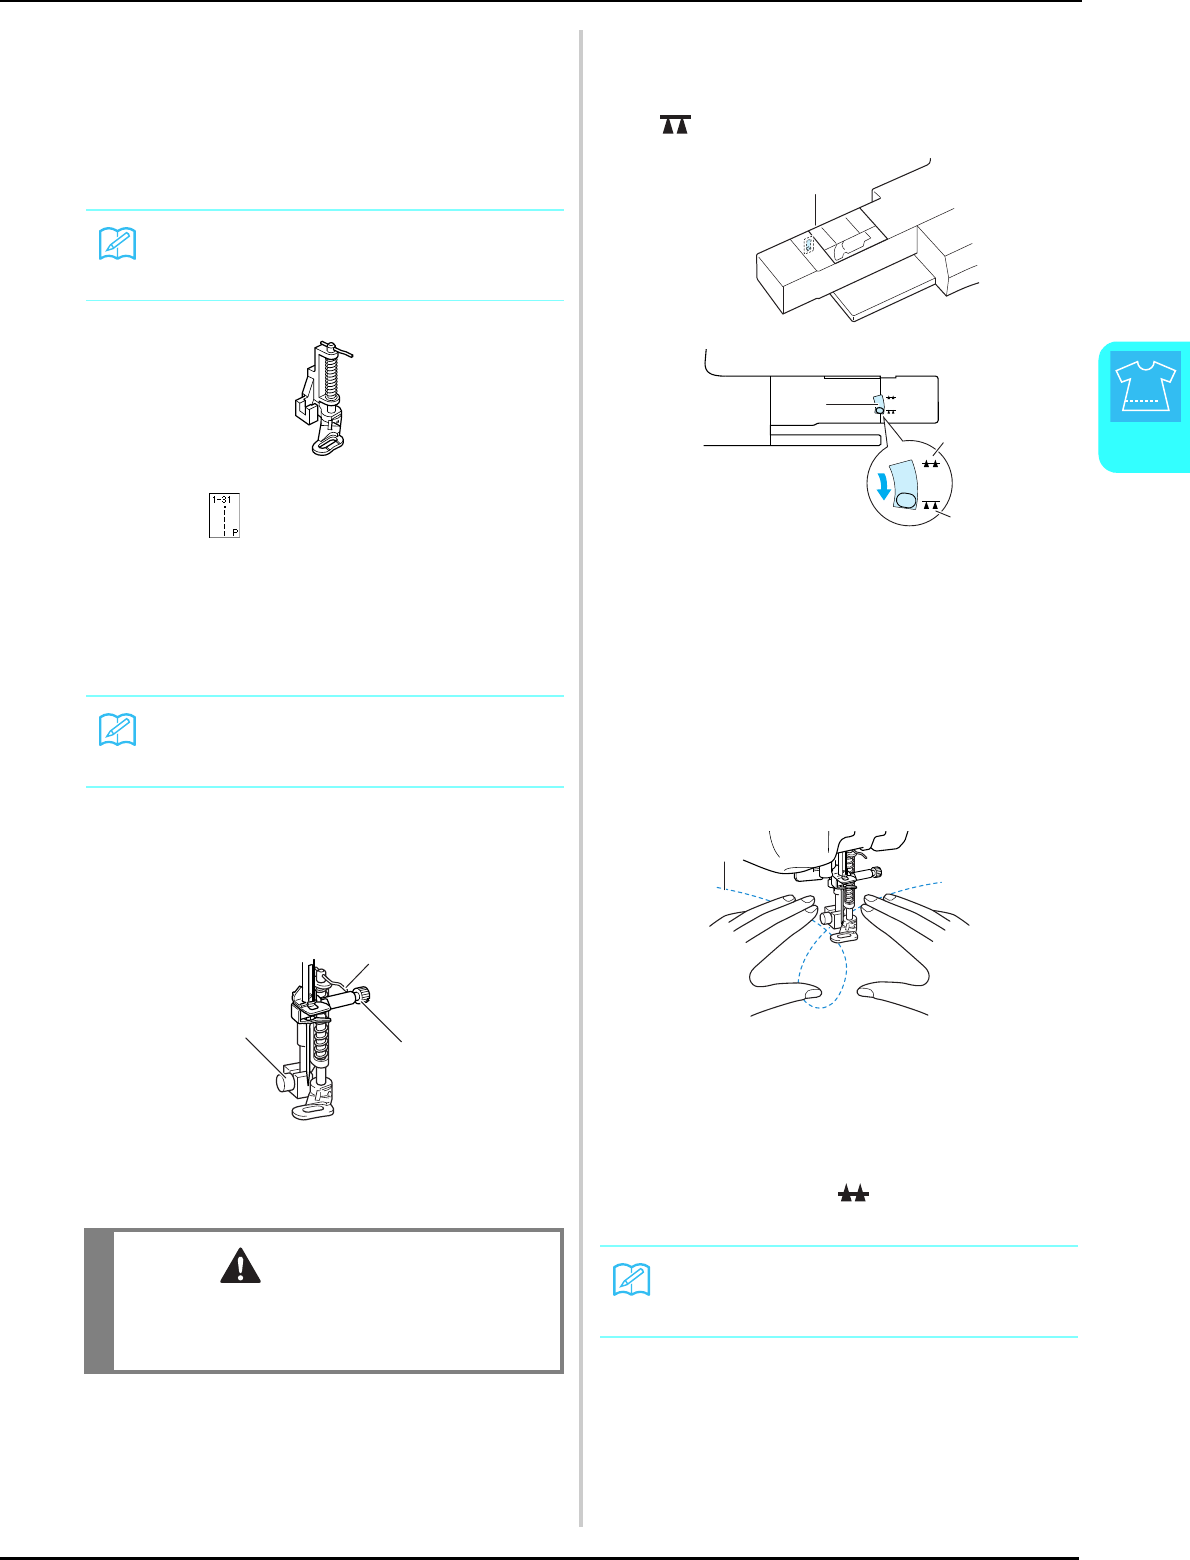
SEWING THE STITCHES
Utility Stitches
71
3
■Free-motion Quilting
With free-motion quilting, the feed dogs can be
lowered (using the feed dog position switch) so that
the fabric can be moved freely in any direction.
The quilting foot is needed for free-motion quilting.
We recommend attaching the foot controller and
sewing at a consistent speed.
aSelect .
bRemove the presser foot holder (see page
33).
cAlign the quilting foot with the lower-left
side of the presser bar.
dHold the quilting foot in place with your
right hand, and then tighten the presser foot
holder screw using the screwdriver in your
left hand.
aPin on quilting foot
bPresser foot holder screw
cNeedle clamp screw
eLower the feed dog position switch, located
at the rear of the base of the machine, to
.
aRear of machine
bFeed dog position switch
(as seen from the rear of the machine)
cUp
dDown
fUse both hands to stretch the fabric taut,
and then move the fabric at a regular pace
in order to sew uniform stitches roughly
2.0-2.5 mm (approx. 1/16 - 3/32 inch) in
length.
aStitch
→Reinforcement stitches are sewn at the beginning
and end of sewing.
gAfter sewing is finished, raise the feed dog
position switch to to raise the feed
dogs.
Memo
In order to sew a balanced stitch, it may be
necessary to lower the upper thread tension.
Memo
The pin on the quilting foot should be posi-
tioned over the needle clamp screw.
CAUTION
• Be sure to securely tighten the screws with the
screwdriver. Otherwise, the needle may touch
the presser foot, causing it to bend or break.
b
a
c
Memo
Normally, the feed dog position switch is in the
up position.
a
b
c
d
a
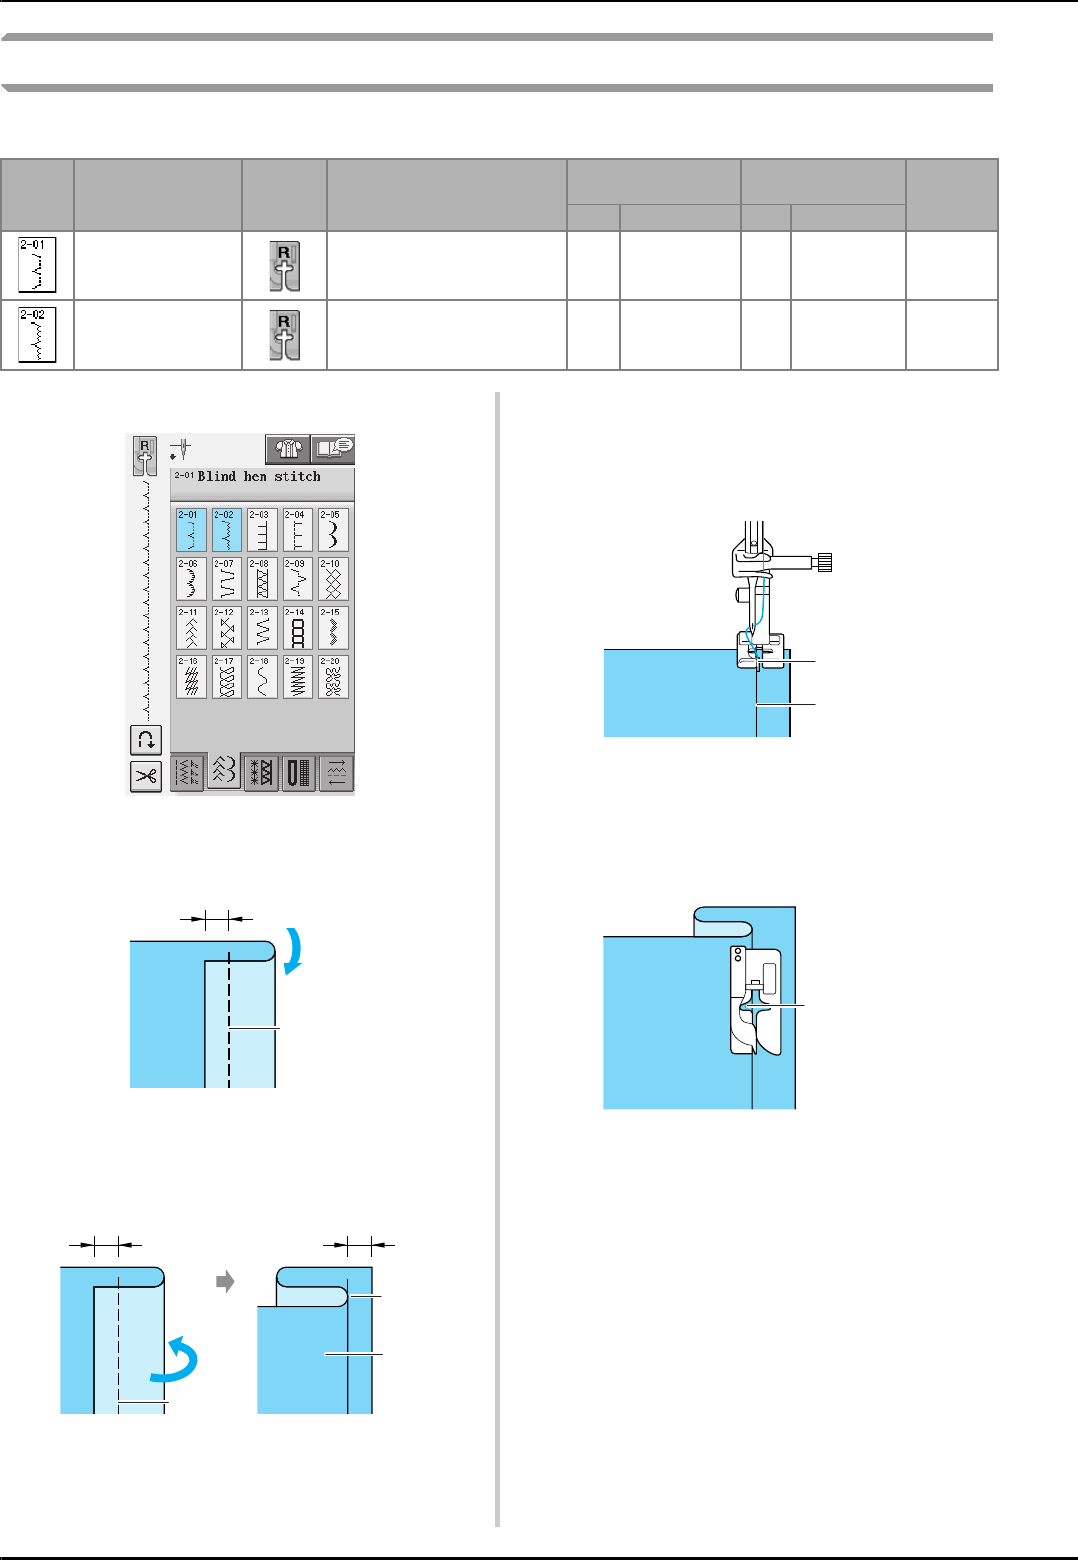
SEWING THE STITCHES
72
Blind Hem Stitches
Select from these stitches to sew the hems or cuffs of dresses, blouses, pants, or skirts.
aSelect a stitch.
bPlace the fabric wrong side up, and fold and
baste the fabric.
a5 mm (approx. 3/16 inch)
bBasting stitches
cFold the fabric again.
a5 mm (approx. 3/16 inch)
bWrong side of fabric
cBasting stitches
dAttach blind hem stitch foot “R”, and lower
the presser foot. Position the fabric so the
folded edge touches the guide of the presser
foot.
aGuide
bFold
eSew the fabric, keeping the folded edge in
contact with the presser foot.
aNeedle position
Stitch Stitch name Presser
foot Applications
Stitch width
[mm (inch.)]
Stitch length
[mm (inch.)] Twin
needle
Auto. Manual Auto. Manual
Blind hem stitch Hemming woven fabrics 0.0
(0)
+3.0 - -3.0
(+1/8 - -1/8)
2.0
(1/16)
1.0 - 3.5
(1/16 - 1/8) NO
Blind hem stitch
stretch
Hemming stretch fabric 0.0
(0)
+3.0 - -3.0
(+1/8 - -1/8)
2.0
(1/16)
1.0 - 3.5
(1/16 - 1/8) NO
a
b
a
b
a
c
c
a
b
R
a
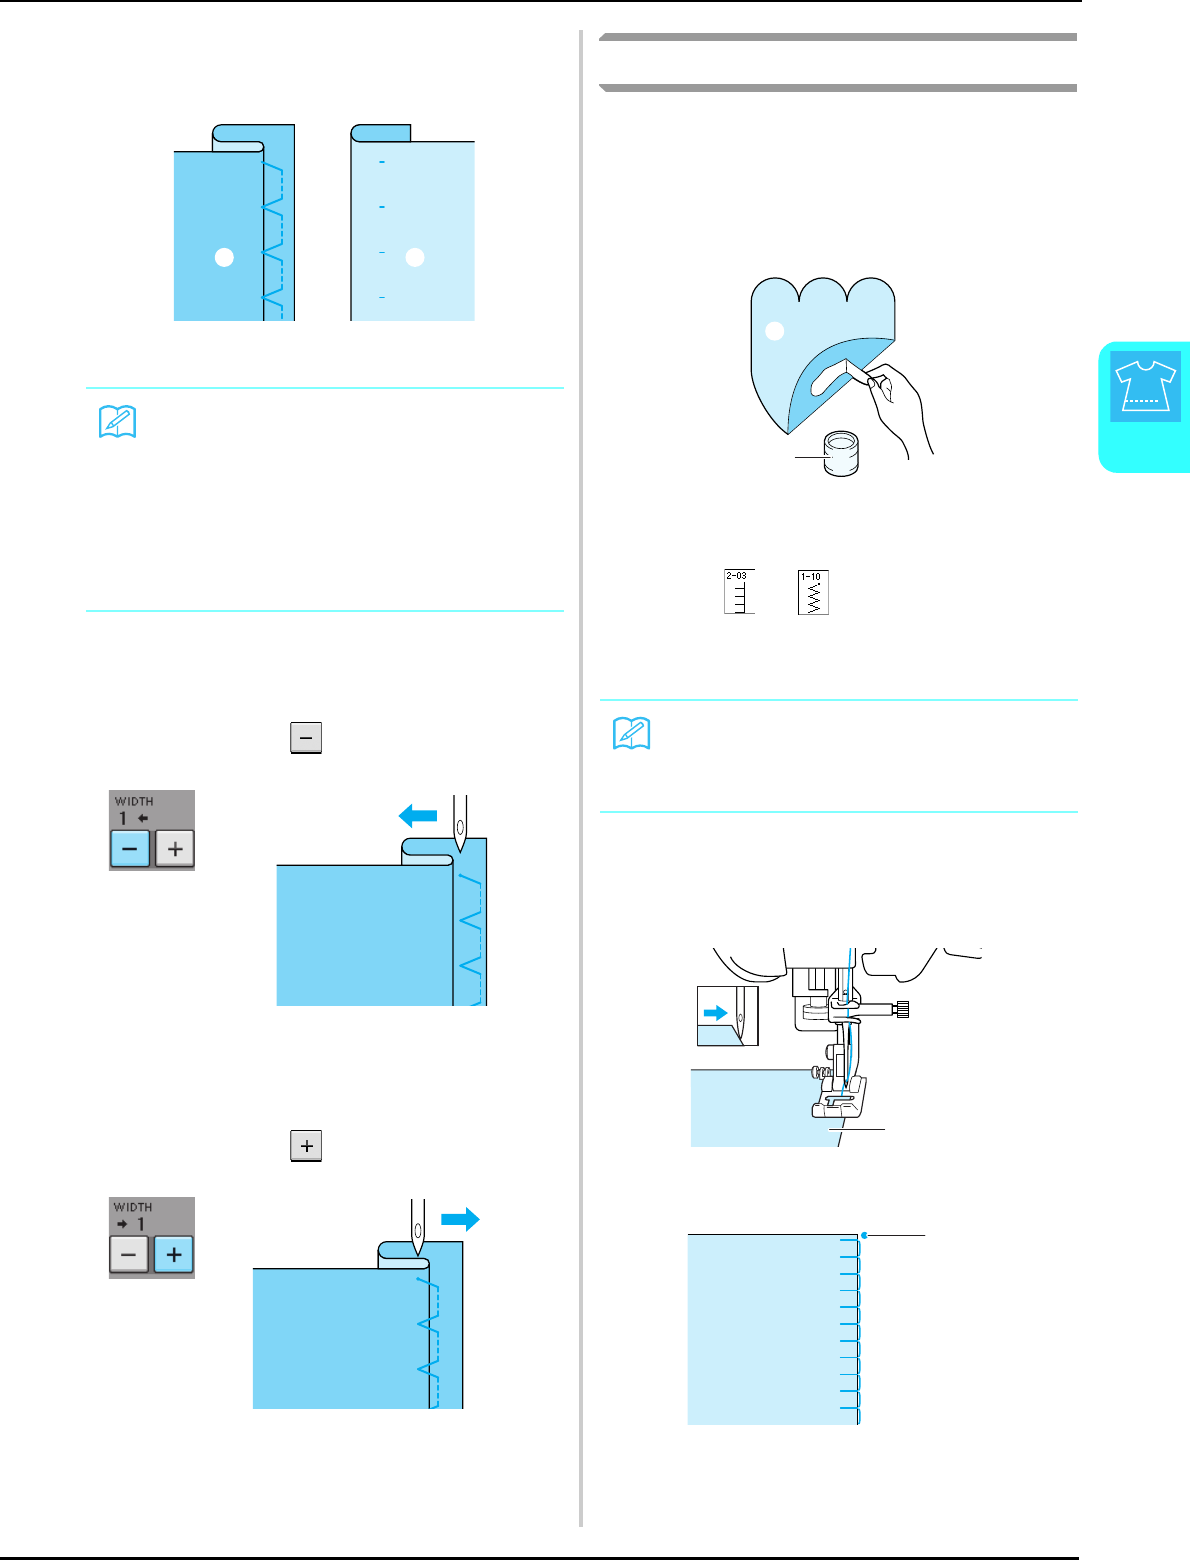
SEWING THE STITCHES
Utility Stitches
73
3
fRemove the basting stitches and turn the
fabric over.
aWrong side of fabric
bRight side of fabric
■If the Needle does not Catch the
Fold
Adjust the width so that the needle slightly catches
the fold by pressing in the width display.
■If the Needle Catches Too Much of
the Fold
Adjust the width so that the needle slightly catches
the fold by pressing in the width display.
Appliqué
aUse a temporary spray adhesive, fabric glue
or a basting stitch to attach the appliqué to
the fabric.
* This will keep the fabric from moving during
sewing.
aAppliqué
bFabric glue
bSelect or .
* Adjust the stitch length and width to correspond to
the appliqué shape, size, and quality of material (see
page 42).
cAttach presser foot “J”. Check that the
needle drops slightly off the edge of the
appliqué, then start sewing.
aAppliqué material
aNeedle drop position
Memo
Blind hem stitches cannot be sewn if the left
needle drop point does not catch the fold. If
the needle catches too much of the fold, the
fabric cannot be unfolded and the seam
appearing on the right side of the fabric will be
very large, leaving an unattractive finish. If you
experience either of these cases, follow the
instructions below to solve the problem.
a b
Memo
For details on each stitch, refer to the
“STITCH SETTING CHART” at the end of this
manual.
b
a
a
a
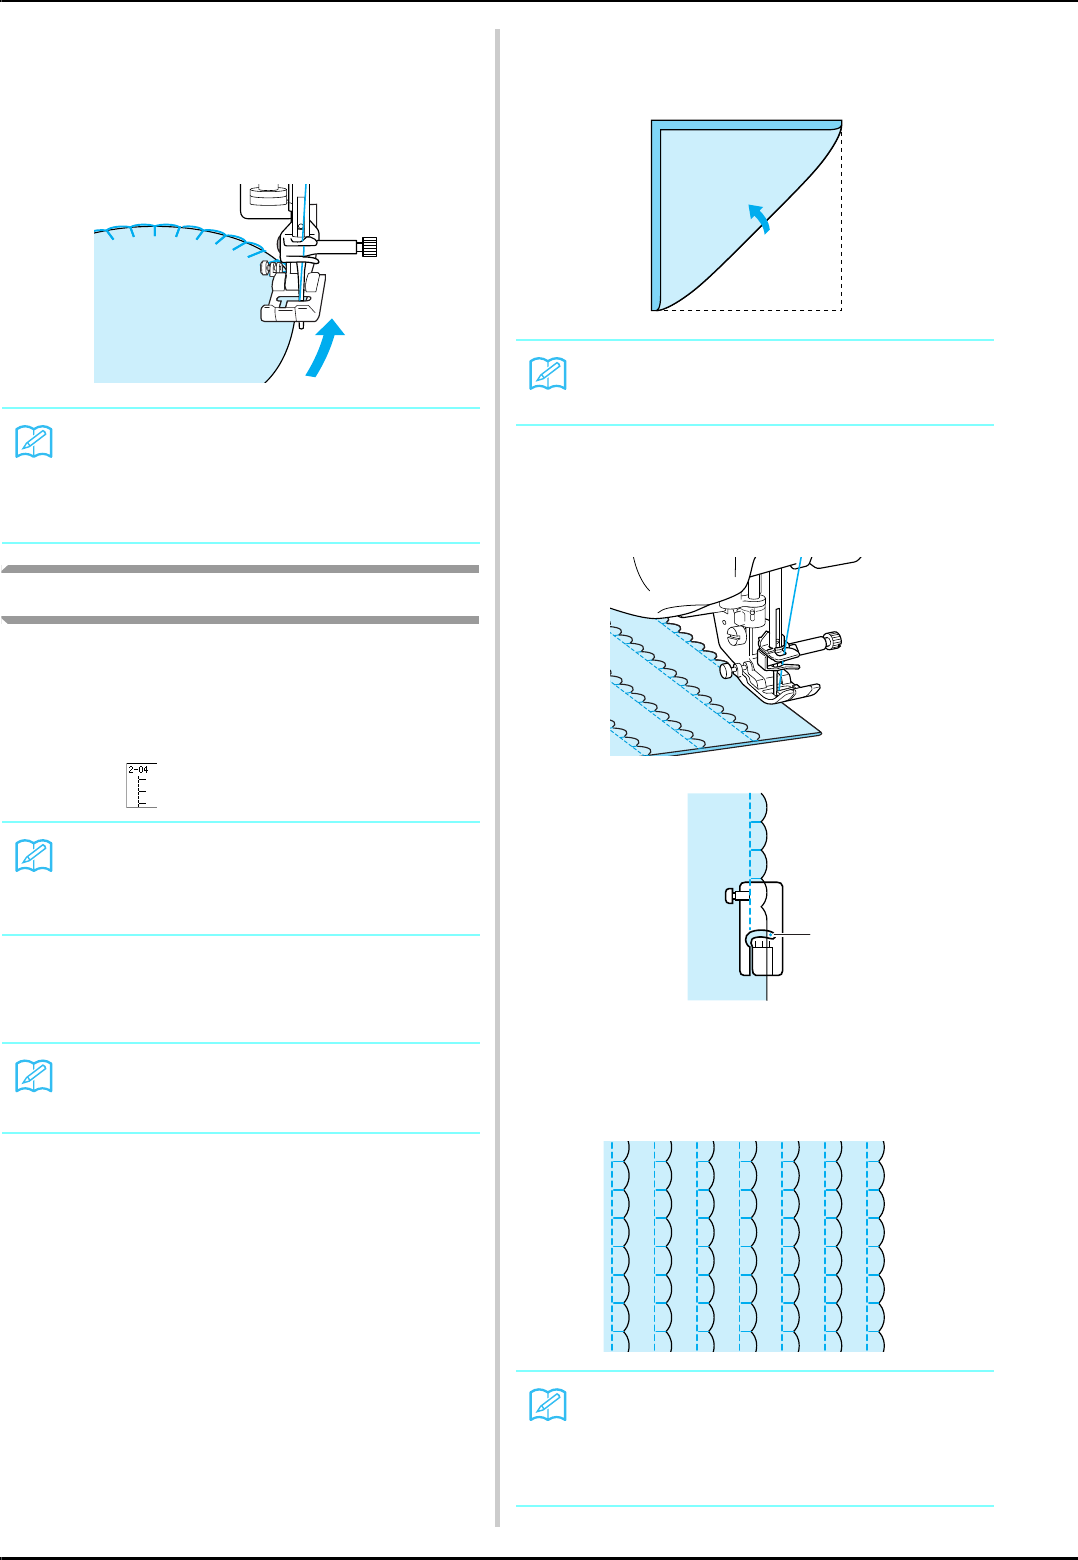
SEWING THE STITCHES
74
■Sewing Sharp Curves
Stop the machine with the needle in the fabric
outside the appliqué. Raise the presser foot and turn
the fabric a little bit at a time while sewing for an
attractive finish to the seam.
Shelltuck Stitches
Shelltuck stitches give an attractive appearance to
shells along the curve of a collar. This stitch
pattern can be used for edging the neckline or
sleeves of dresses and blouses.
aSelect .
bIncrease the upper thread tension for an
attractive scallop finish to the shelltuck
stitches (see page 43).
cTo make rows of shell tuck stitches, fold the
fabric in half along the bias.
dAttach presser foot “J”. Set the needle drop
point slightly off the edge of the fabric, and
start sewing.
aNeedle drop position
eUnfold the fabric, and iron the tucks to one
side.
Memo
Placing a lightweight tear away stabilizer
beneath the stitching area will improve the
stitch placement along the edge of the appli-
qué fabric.
Memo
For details on each stitch, refer to the
“STITCH SETTING CHART” at the end of this
manual.
Memo
If the upper thread tension is too weak, the
shelltuck stitches will not scallop.
Memo
Use a thin fabric.
Memo
To make shell tucks at the edge of a collar or
neckline, follow the pattern’s instructions and
then use this stitch to make a decorative finish
on the collar or neckline.
a
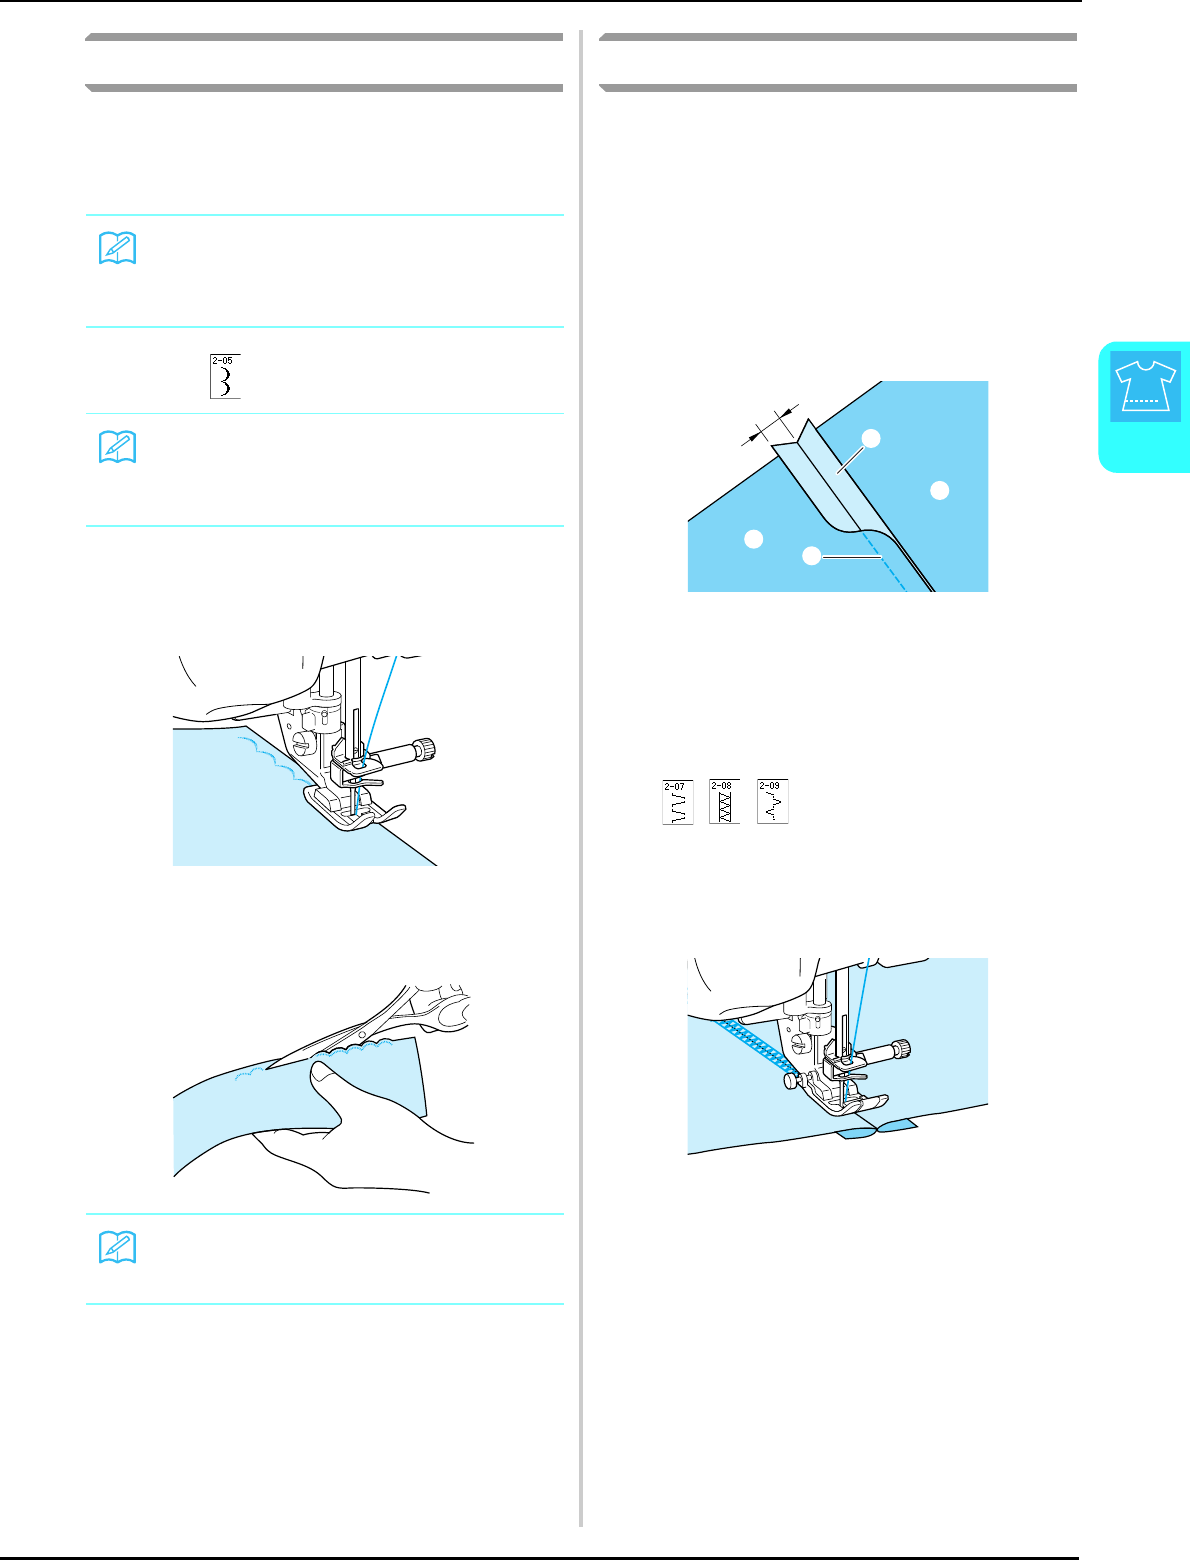
SEWING THE STITCHES
Utility Stitches
75
3
Scallop Stitches
This wave-shaped running stitch is called the
scallop stitch. Use this stitch to decorate the edges
of blouse collars and handkerchiefs or use it as a
hem accent.
aSelect .
bAttach presser foot “N”. Sew scallop
stitches along the edge of the fabric.
* Do not sew directly on the edge of the fabric.
cTrim along the seam, making sure not to cut
the stitches.
Top Stitching
For a decorative look called “Crazy Quilting”, the
following stitches can be sewn on top of a pressed
seam allowance.
aSelect a straight stitch and attach presser
foot “J”.
bWith the right sides facing each other, sew
two pieces of fabric together, and then
press open the seam allowance.
aStraight stitch
bSeam margins
c6.5 mm (approx. 1/4 inch)
dWrong side
cSelect a stitch for top stitching.
dPlace the fabric right side up in the
machine, and center the presser foot over
the seam when sewing.
aRight side of fabric
Memo
A temporary spray adhesive may be neces-
sary for lightweight fabrics. Test sew
the fabric before sewing a project.
Memo
For details on each stitch, refer to the
“STITCH SETTING CHART” at the end of this
manual.
Memo
Use a seam sealant to secure the edges of the
scallop stitches.
c
b
a
d
d
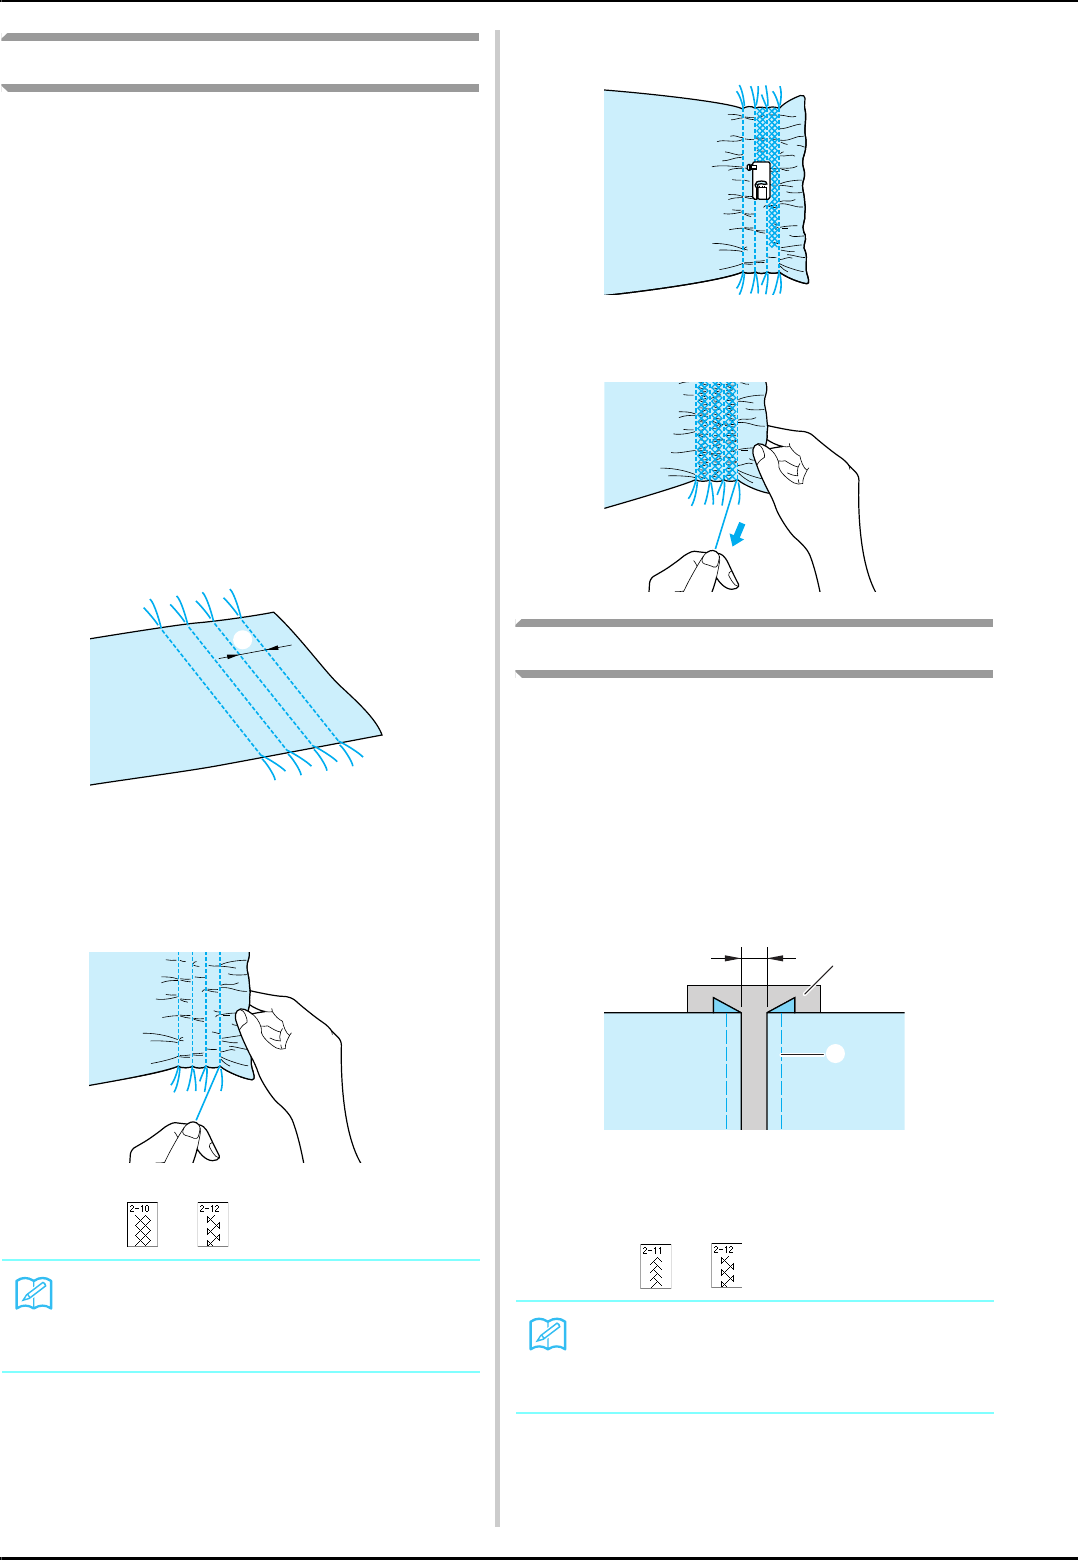
SEWING THE STITCHES
76
Smocking Stitches
Use smocking stitches for decorative sewing on
clothes, etc.
aSelect a straight stitch and attach presser
foot “J”.
bSet the stitch length to 4.0 mm (approx.
3/16 inch) and loosen the upper thread
tension to approximately 2.0 (See pages 42
through 43).
cPull the bobbin and upper threads out by
50 mm (approx. 1-15/16 inches).
dSew the seams, leaving approximately
10 mm (approx. 3/8 inch) between the
seams, then trim excess thread, leaving
50 mm (approx. 1-15/16 inches).
aApproximately 10 mm (approx. 3/8 inch)
ePull the bobbin threads to obtain the
desired amount of gather, and then smooth
the gathers by ironing them.
fSelect or .
gSew the spaces between the straight seams.
hPull out the straight stitch threads.
Fagoting
When there is a space between two fabrics with
thread sewn over the space to join the fabrics
together, it is called fagoting. Use this stitch when
sewing blouses or children’s clothes.
aBaste two pieces of fabric onto thin paper,
leaving a space of 4 mm (approx. 3/16 inch)
between the fabrics.
a4 mm (approx. 3/16 inch)
bPaper
cBasting stitches
bSelect or .
Memo
For details on each stitch, refer to the
“STITCH SETTING CHART” at the end of this
manual.
a
Memo
For details on each stitch, refer to the
“STITCH SETTING CHART” at the end of this
manual.
J
b
a
c
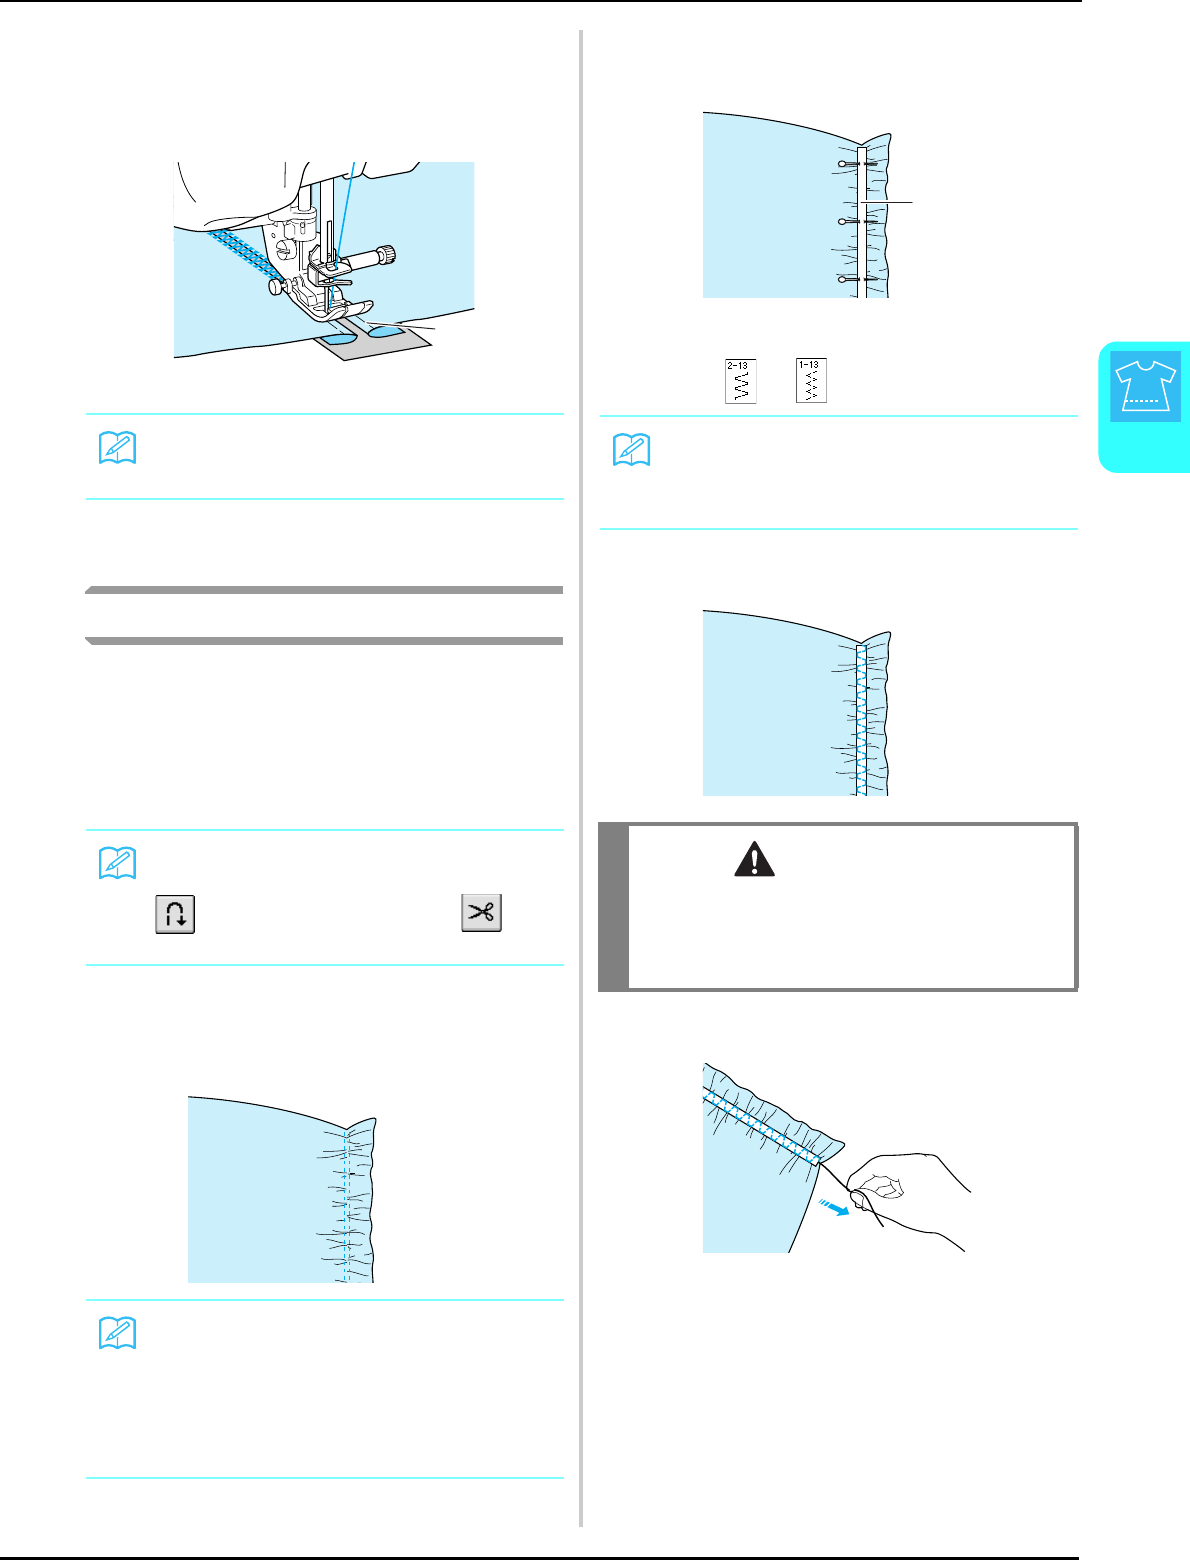
SEWING THE STITCHES
Utility Stitches
77
3
cAttach presser foot “J”. Align the center of
the presser foot with the middle of the
space between the fabrics and begin
sewing.
aBasting stitches
dWhen sewing is finished, gently tear the
paper away.
Tape or Elastic Attaching
aSelect a straight stitch and attach presser
foot “J”.
bSet the stitch length to 4.0 mm (approx.
3/16 inch), and loosen the upper thread
tension to 2.0 (See pages 42 through 43).
cSew two rows of straight stitches on the
right side of the fabric, then pull the bobbin
thread to create the necessary gather.
dPlace the tape over the gather, and hold it
in place with basting pins.
aTape
eSelect or .
fSew over the tape (or elastic).
gPull out the straight stitch threads.
Memo
Use a thick thread.
Memo
Be sure that neither automatic reinforcement
nor automatic thread cutting is
selected.
Memo
Before sewing the straight stitch, rotate the
handwheel and pull up the bobbin thread.
Holding the top and bobbin thread, pull a
length of thread out from the rear of the
machine. (Be sure that the presser foot is
raised.)
a
Memo
For details on each stitch, refer to the
“STITCH SETTING CHART” at the end of this
manual.
CAUTION
Be sure the needle does not strike a basting pin, or
any other objects, during sewing. The thread
could tangle or the needle could break, causing
injury.
a
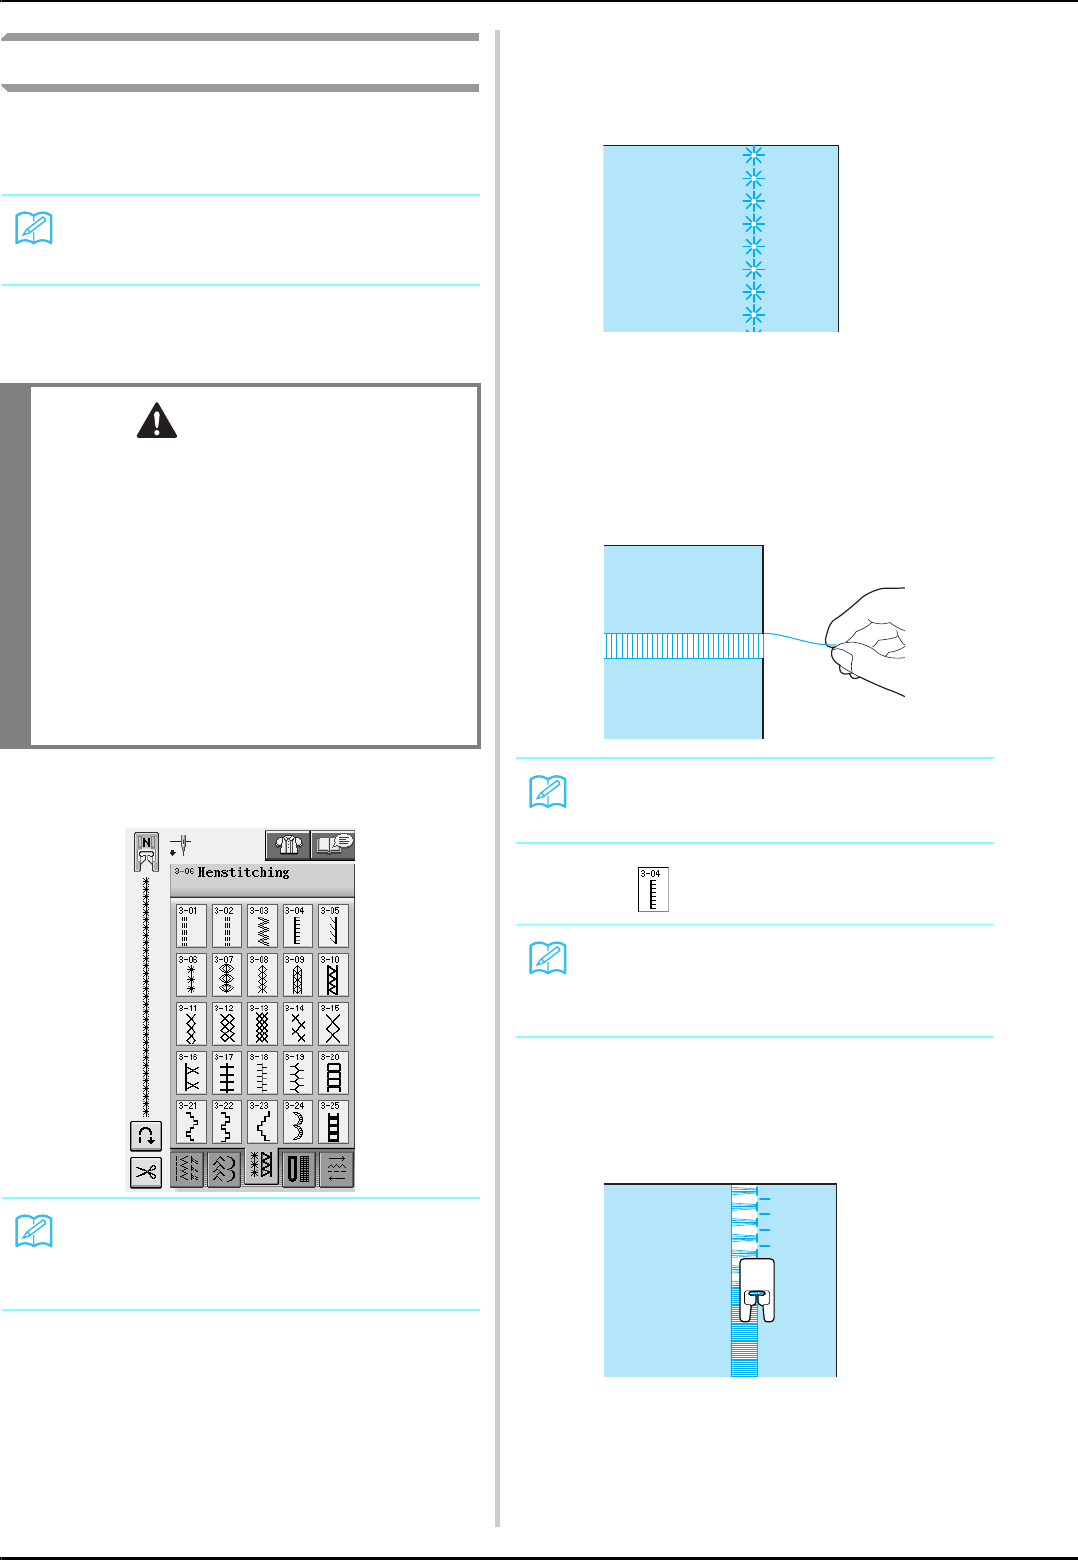
SEWING THE STITCHES
78
Heirloom
■Hemstitching (1) (Daisy Stitch)
Use for sewing tablecloths, decorative hems, and
decorative stitching on shirt fronts.
aInsert a type 130/705H, size 100/16 Wing
needle.
bSelect a stitch and attach presser foot “N”.
* Select any stitch between 3-01 and 3-25.
cStart sewing.
Example: Illustration of finished product
■Hemstitching (2) (Drawn Work)
aPull out several threads from one area on a
piece of fabric to open the area.
* Pull out 5 or 6 threads to leave a 3 mm
(approx. 1/8 inch) area open.
bSelect .
cAttach presser foot “N”. With the right side
of the fabric facing up, sew one edge of the
open area.
Memo
Use a light to medium weight homespun fabric
with a little stiffness.
CAUTION
• The “Automatic Threading” button cannot be
used. Thread the wing needle by hand, from
front to back. Using the “Automatic
Threading” button may result in damage to the
machine.
• A more attractive finish can be obtained if you
use a “130/705H Wing” needle when sewing
these patterns. If using a wing needle and the
stitch width has been set manually, check that
the needle will not touch the presser foot by
carefully rotating the handwheel before
starting sewing.
Memo
• For details on each stitch, refer to the
“STITCH SETTING CHART” at the end of
this manual.
Memo
Loosely woven fabrics work best for this.
Memo
For details on each stitch, refer to the
“STITCH SETTING CHART” at the end of this
manual.
N
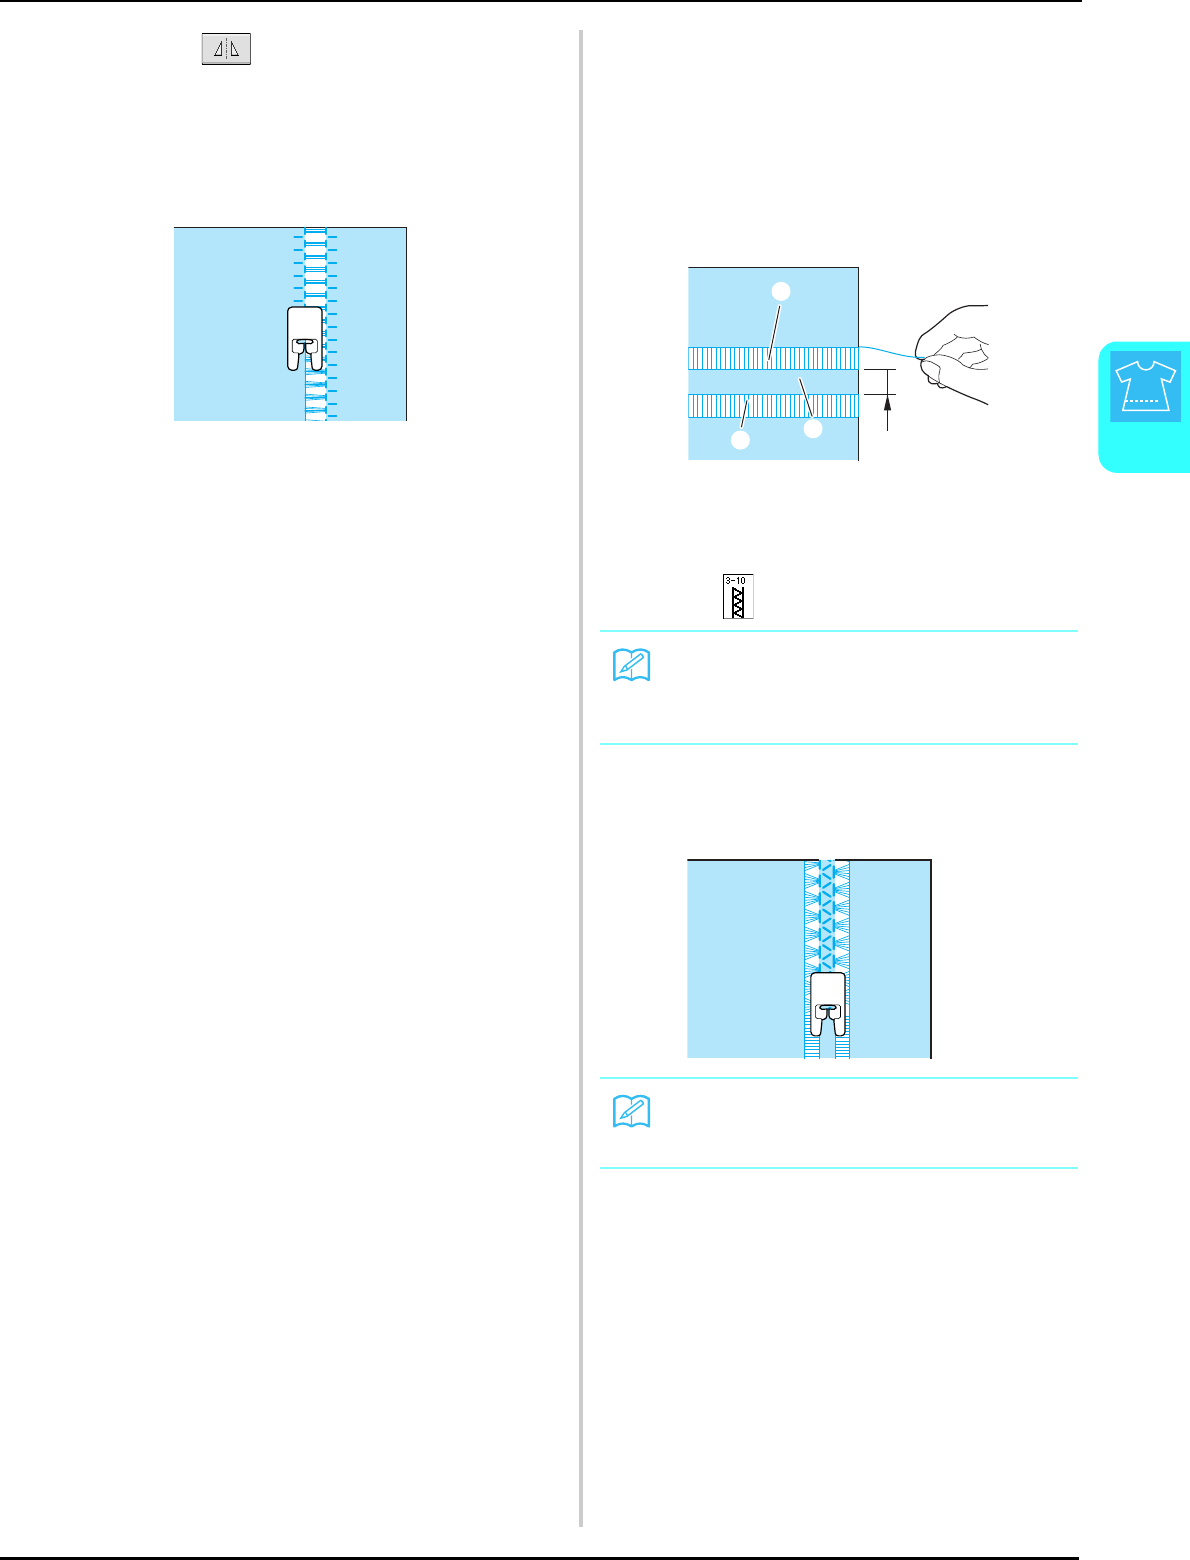
SEWING THE STITCHES
Utility Stitches
79
3
dPress to create a mirror image of the
stitch.
eSew the opposite side to keep the stitch
symmetrical.
■Hemstitching (3)
aPull out several threads from both sides of
the 4 mm (approx. 3/16 inch) area which
are not yet open.
* Pull out four threads, leave five threads, and then
pull out four threads. The width of five threads is
approximately 4 mm (approx. 3/16 inch) or less.
aApprox. 4 mm (approx. 3/16 inch) or less
bFour threads (pull out)
cFive threads (leave)
bSelect .
cSew the decorative stitch in the center of
the five threads created above.
N
Memo
For details on each stitch, refer to the
“STITCH SETTING CHART” at the end of this
manual.
Memo
A wing needle can be used for Hemstitching
(3).
a
b
bc
N
SEWING THE STITCHES
80
One-step Buttonholes
With one-step buttonholes, you can make buttonholes appropriate to the size of your button.
Stitch Stitch name Presser
foot Applications
Stitch width
[mm (inch.)]
Stitch length
[mm (inch.)] Twin
needle
Auto. Manual Auto. Manual
Narrow rounded
buttonhole
Buttonhole on light to medium
weight fabrics 5.0
(3/16)
3.0 - 5.0
(1/8 - 3/16)
0.4
(1/64)
0.2 - 1.0
(1/64 - 1/16) NO
Wide round ended
buttonhole
Buttonholes with extra space for
larger buttons 5.5
(7/32)
3.5 - 5.5
(1/8 - 7/32)
0.4
(1/64)
0.2 - 1.0
(1/64 - 1/16) NO
Tapered round
ended buttonhole
Reinforced waist tapered
buttonholes 5.0
(3/16)
3.0 - 5.0
(1/8 - 3/16)
0.4
(1/64)
0.2 - 1.0
(1/64 - 1/16) NO
Round ended
buttonhole
Buttonholes with vertical bar
tack in heavyweight fabrics 5.0
(3/16)
3.0 - 5.0
(1/8 - 3/16)
0.4
(1/64)
0.2 - 1.0
(1/64 - 1/16) NO
Round ended
buttonhole
Buttonholes with bar tack 5.0
(3/16)
3.0 - 5.0
(1/8 - 3/16)
0.4
(1/64)
0.2 - 1.0
(1/64 - 1/16) NO
Round double ended
buttonhole
Buttonholes for fine, medium to
heavyweight fabrics 5.0
(3/16)
3.0 - 5.0
(1/8 - 3/16)
0.4
(1/64)
0.2 - 1.0
(1/64 - 1/16) NO
Narrow squared
buttonhole
Buttonholes for light to medium
weight fabrics 5.0
(3/16)
3.0 - 5.0
(1/8 - 3/16)
0.4
(1/64)
0.2 - 1.0
(1/64 - 1/16) NO
Wide squared
buttonhole
Buttonholes with extra space for
larger decorative buttons 5.5
(7/32)
3.5 - 5.5
(1/8 - 7/32)
0.4
(1/64)
0.2 - 1.0
(1/64 - 1/16) NO
Squared buttonhole Heavy-duty buttonholes with
vertical bar tacks 5.0
(7/32)
3.0 - 5.0
(1/8 - 3/16)
0.4
(1/64)
0.2 - 1.0
(1/64 - 1/16) NO
Stretch buttonhole Buttonholes for stretch or woven
fabrics
6.0
(15/
64)
3.0 - 6.0
(1/8 - 15/64)
1.0
(1/16)
0.5 - 2.0
(1/32 - 1/16) NO
Heirloom buttonhole Buttonholes for heirloom and
stretch fabrics
6.0
(15/
64)
3.0 - 6.0
(1/8 - 15/64)
1.5
(1/16)
1.0 - 3.0
(1/1 - 1/8) NO
Bound buttonhole The first step in making bound
buttonholes 5.0
(3/16)
0.0 - 6.0
(0 - 15/64)
2.0
(1/16)
0.2 - 4.0
(1/64 - 3/16) NO
Keyhole buttonhole Buttonholes in heavyweight or
thick fabrics for larger flat
buttons
7.0
(1/4)
3.0 - 7.0
(1/8 - 1/4)
0.5
(1/32)
0.3 - 1.0
(1/64 - 1/16) NO
Tapered keyhole
buttonhole
Buttonholes in medium to heavy
weight fabrics for larger flat
buttons
7.0
(1/4)
3.0 - 7.0
(1/8 - 1/4)
0.5
(1/32)
0.3 - 1.0
(1/64 - 1/16) NO
Keyhole buttonhole Buttonholes with vertical bar
tack for reinforcement in
heavyweight or thick fabrics
7.0
(1/4)
3.0 - 7.0
(1/8 - 1/4)
0.5
(1/32)
0.3 - 1.0
(1/64 - 1/16) NO
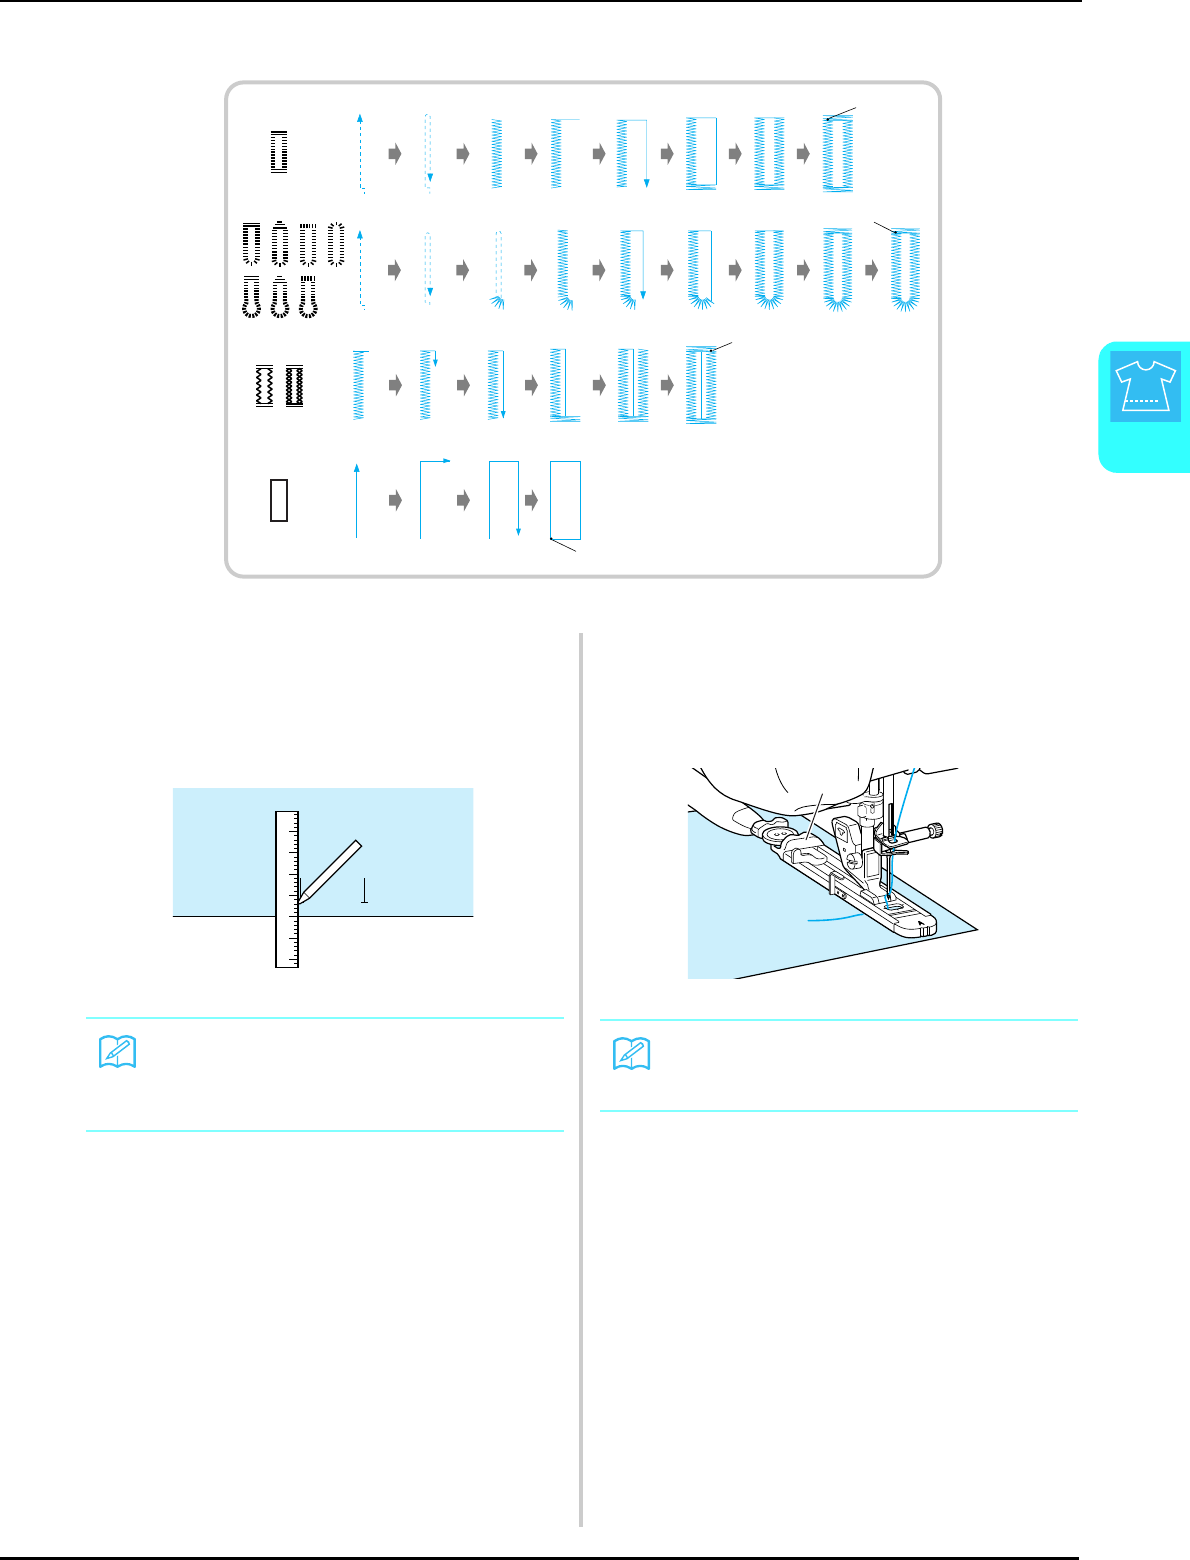
SEWING THE STITCHES
Utility Stitches
81
3
One-step buttonholes are sewn from the front of the presser foot to the back, as shown below.
aReinforcement stitching
aSelect a buttonhole stitch, and attach
buttonhole foot “A”.
bMark the position and length of the
buttonhole on the fabric.
cPull out the button holder plate on the
presser foot, and insert the button that will
be put through the buttonhole. Then tighten
the button holder plate around the button.
aButton holder plate
a
a
a
a
Memo
The maximum buttonhole length is about
28 mm (approx. 1-1/16 inches) (diameter +
thickness of the button).
Memo
The size of the buttonhole is decided by the
button holder plate holding the button.
a
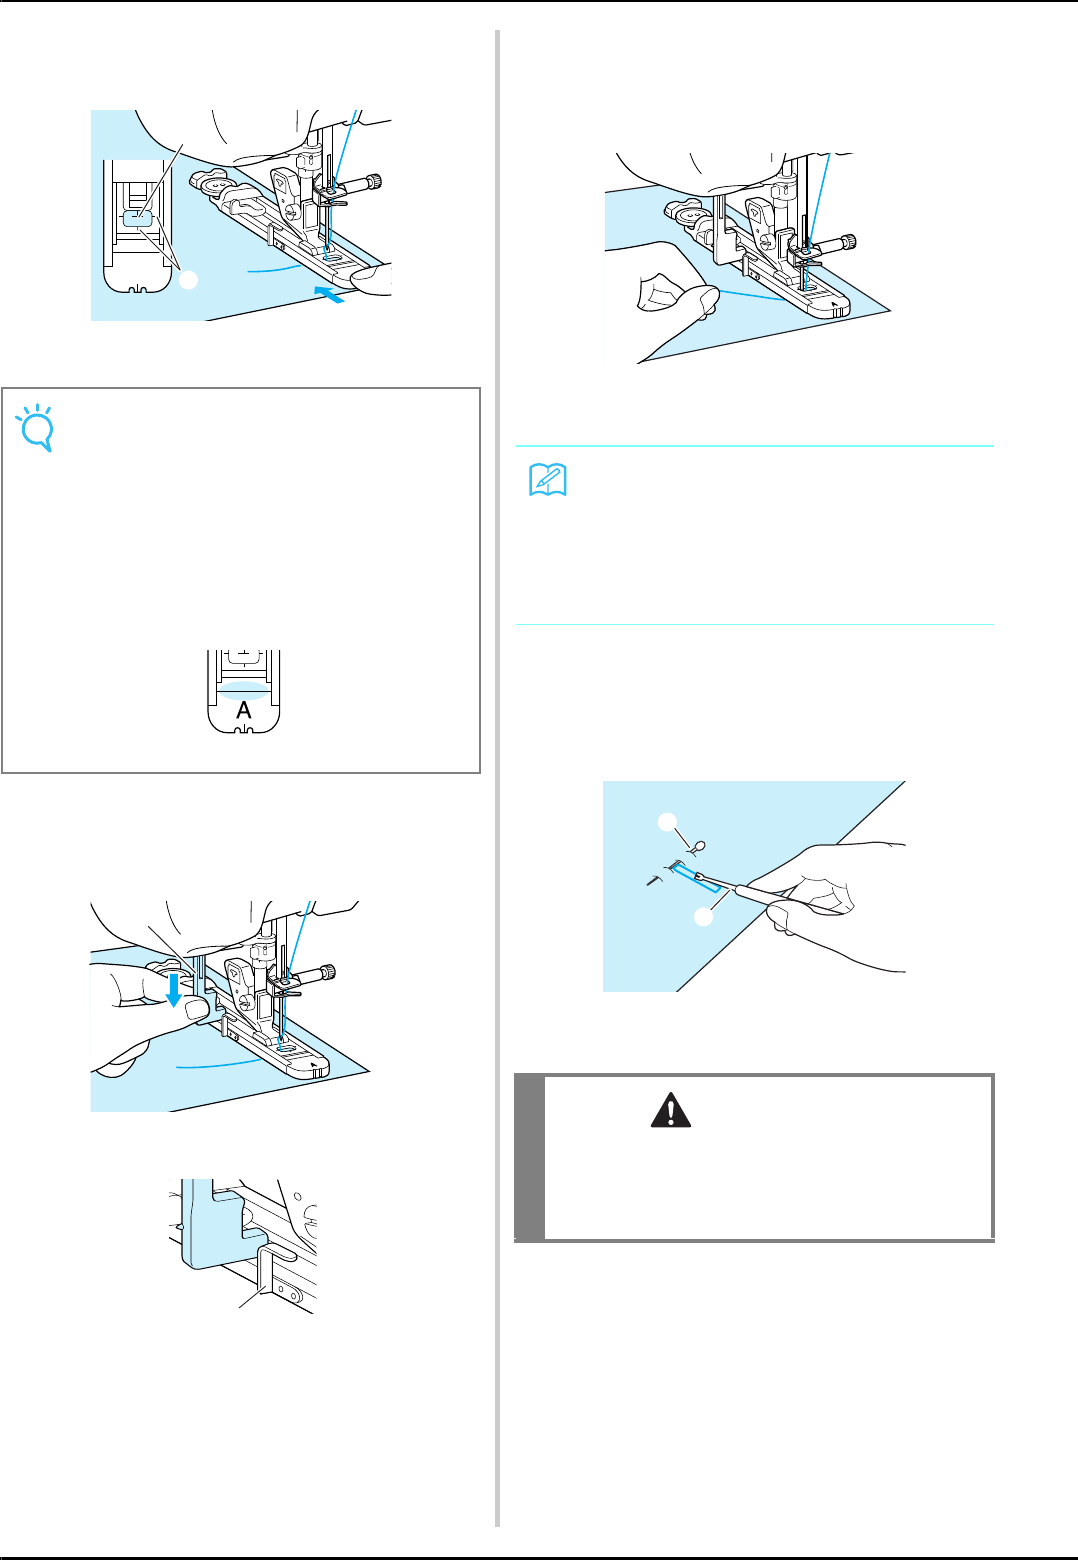
SEWING THE STITCHES
82
dAlign the presser foot with the mark on the
fabric, and lower the presser foot.
aMark on the fabric
bMarks on the presser foot
eLower the buttonhole lever so that it is
positioned behind the metal bracket on the
buttonhole foot.
aButtonhole lever
aMetal bracket
fGently hold the end of the upper thread,
and then start sewing.
* Feed the fabric carefully by hand while the
buttonhole is sewn.
→Once sewing is completed, the machine
automatically sews reinforcement stitches, and then
stops.
gInsert a pin along the inside of one of the
bar tacks, and then insert the seam ripper
into the center of the buttonhole and cut
towards the pin.
aBasting pin
bSeam ripper
Note
• Pass the thread underneath the presser
foot.
• Slide the outside frame of the buttonhole
foot backward as far as possible as shown in
the illustration, making sure that there is no
gap behind the part of the foot marked “A”. If
the buttonhole foot is not slid back as far as
possible, the buttonhole will not be sewn at
the correct size.
A
a
b
a
a
Memo
If automatic thread cutting is turned on before
you start sewing, both threads are automati-
cally cut after the reinforcement stitches are
sewn. If the fabric does not feed (for example,
because it is too thick), increase the stitch
length setting.
CAUTION
When using the seam ripper to open the
buttonhole, do not put your hand or finger in the
path of the ripper. The ripper may slip and cause
injury.
b
a
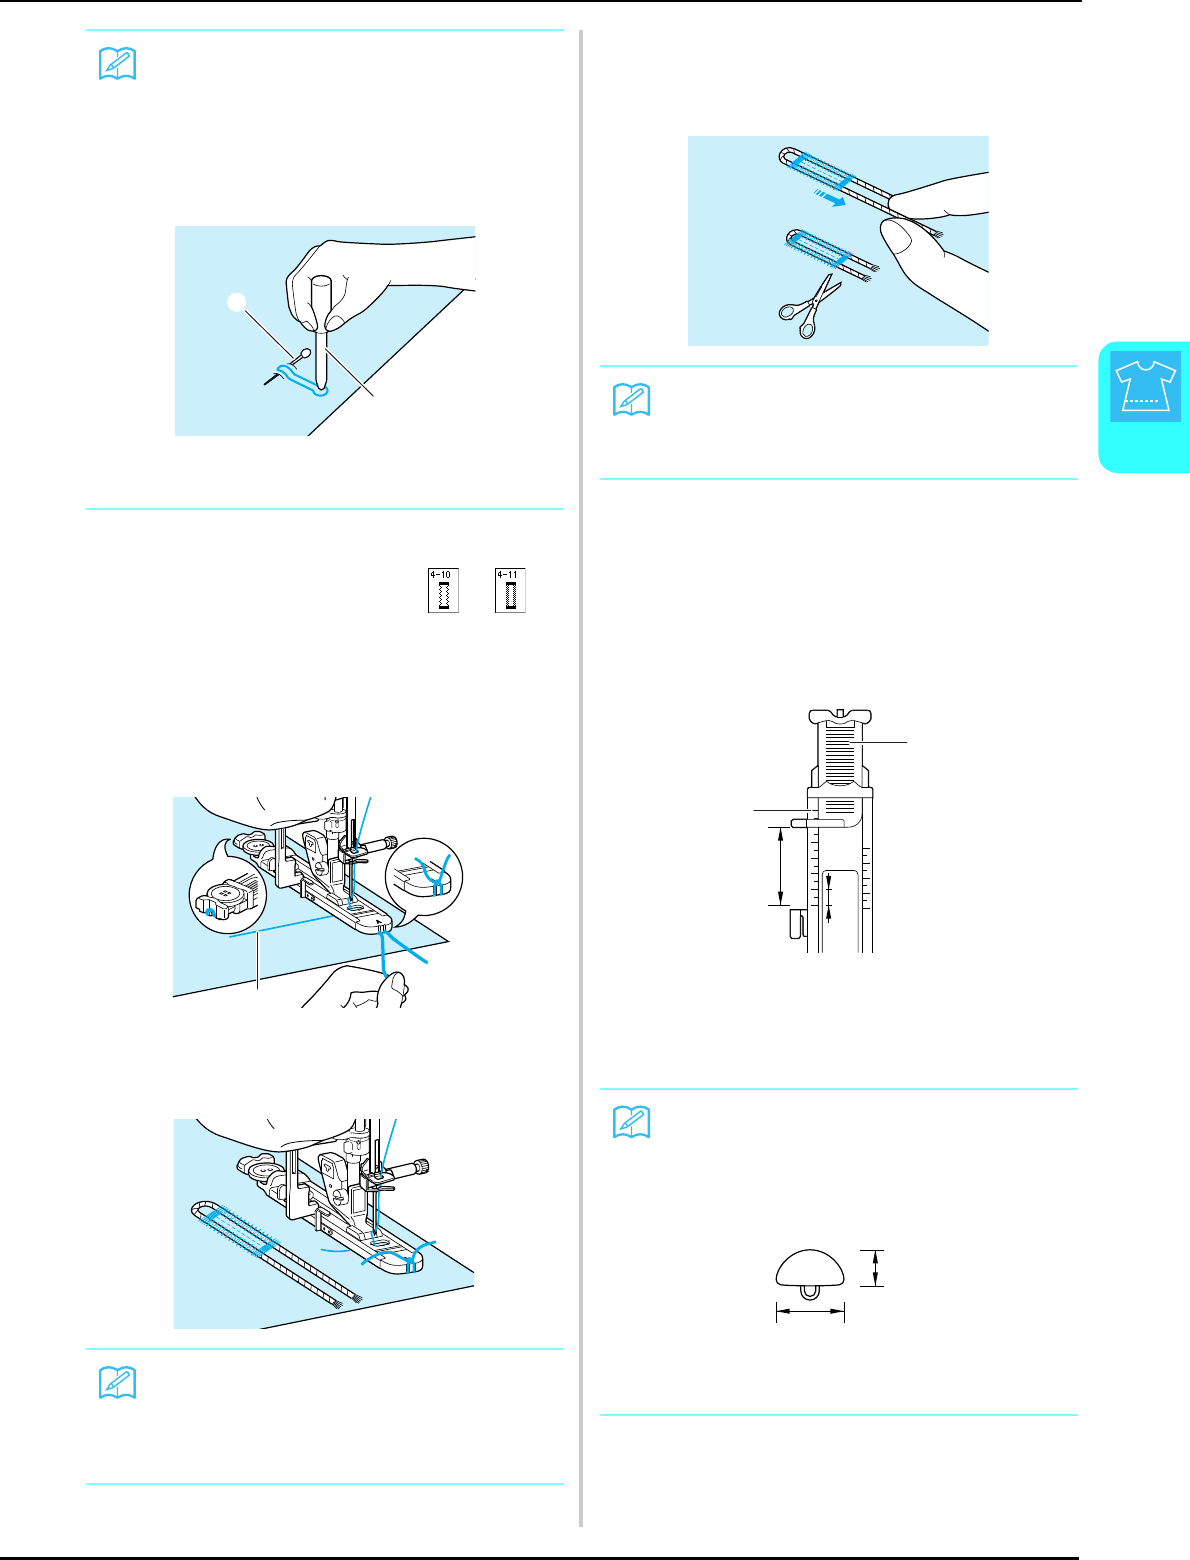
SEWING THE STITCHES
Utility Stitches
83
3
■Sewing Stretch Fabrics
When sewing on stretch fabric with or ,
sew the buttonhole stitches over a gimp thread.
aHook the gimp thread onto the back of
presser foot “A”. Insert the ends into the
grooves at the front of the presser foot, and
then temporarily tie them there.
aUpper thread
bLower the presser foot and start sewing.
cOnce sewing is completed, gently pull the
gimp thread to remove any slack, and trim
off any excess.
■Odd Shaped Buttons/Buttons that do
not Fit into the Button Holder Plate
Use the markings on the presser foot scale to set the
size of the buttonhole. One mark on the presser foot
scale equals 5 mm (approx. 3/16 inch).
Add the button diameter and thickness together, and
then set the plate at the calculated value.
aPresser foot scale
bButton holder plate
cCompleted measurement of diameter + thickness
d5 mm (approx. 3/16 inch)
Memo
For keyhole buttonholes, use the eyelet punch
to make a hole in the rounded end of the but-
tonhole. Then insert a pin along the inside of
one of the bar tacks, insert a seam ripper into
the hole made with the eyelet punch, and cut
towards the pin.
aEyelet punch
bBasting pin
Memo
Set the width of the satin stitches to the width
of the gimp thread, and set the buttonhole
width to be 2-3 times the width of the gimp
thread.
a
b
a
Memo
After using the seam ripper to cut open the
threads over the buttonhole, trim off the
threads.
Memo
For example, for a button with a diameter of
15 mm (approx. 9/16 inch) and a thickness of
10 mm (approx. 3/8 inch), the scale should be
set at 25 mm (approx. 1 inch).
a10 mm (approx. 3/8 inch)
b15 mm (approx. 9/16 inch)
a
b
d
c
a
b
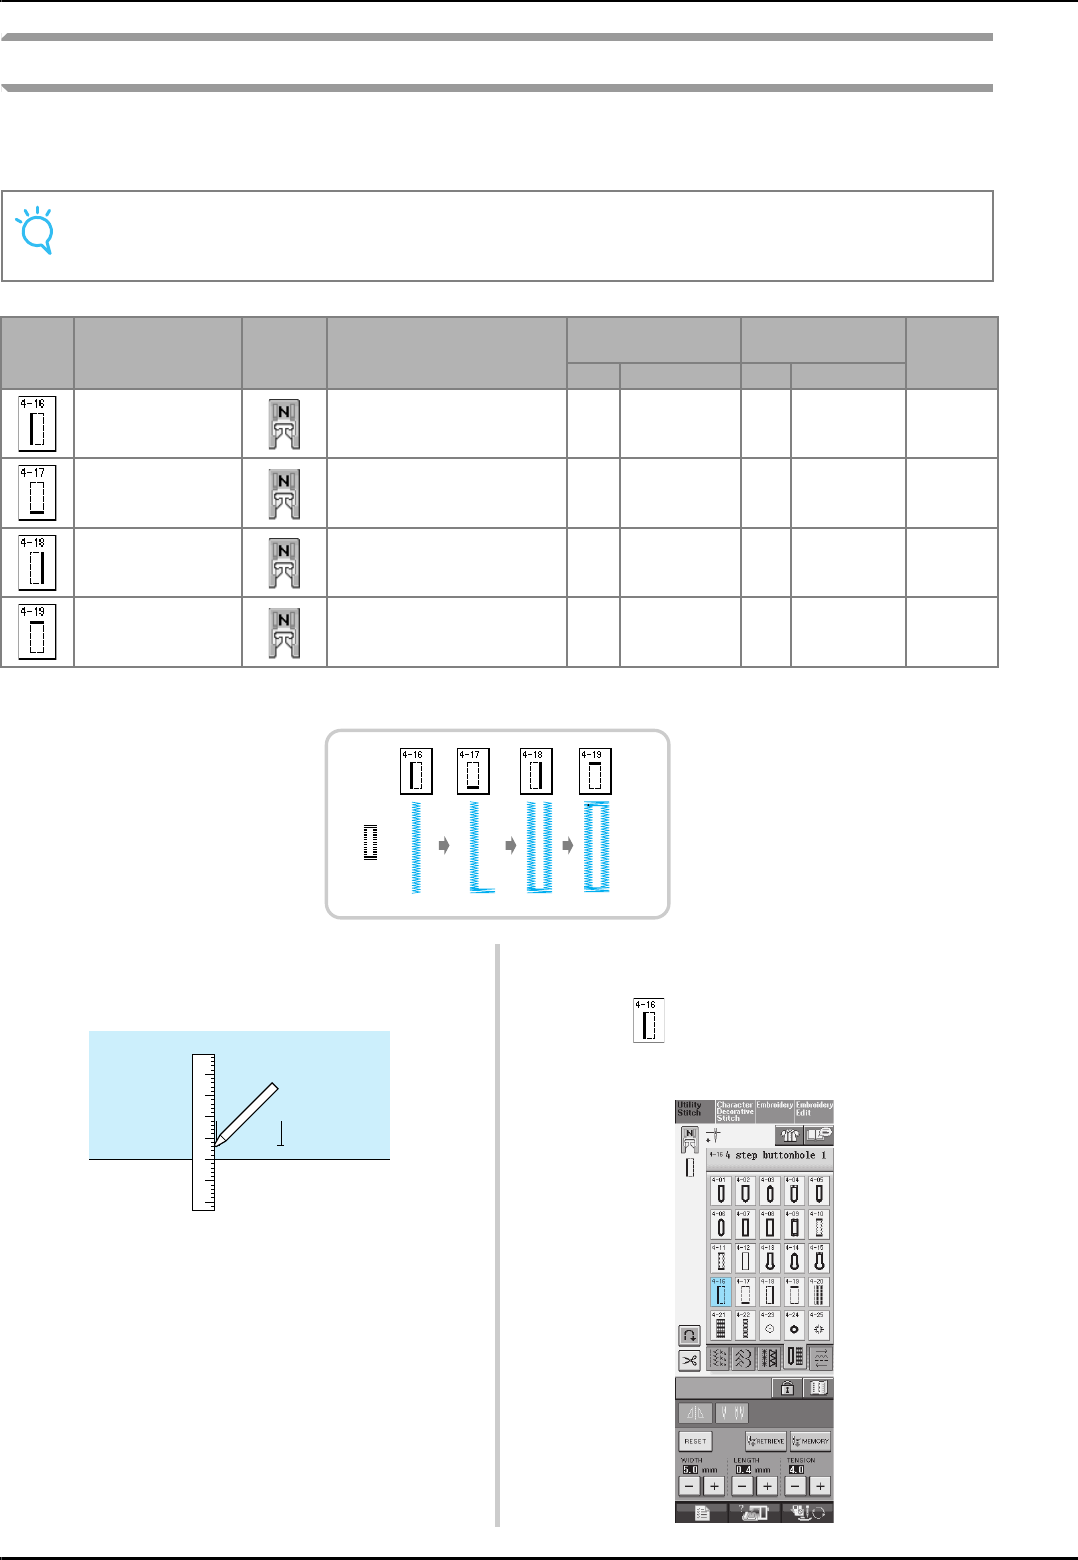
SEWING THE STITCHES
84
Four-step Buttonholes
You can sew 4-step buttonholes using the following 4 stitches together. You can sew any desired length
for the buttonhole when using 4-step buttonholes. 4-step buttonholes are a good option when attaching
oversize buttons.
Four-step buttonholes are sewn as shown below.
aMark the position and length of the
buttonhole on the fabric. bAttach monogramming foot “N”, and select
stitch to sew the left side of the
buttonhole.
Note
When changing the stitch settings for the left side of the buttonhole, make sure that all setting should be
changed to match.
Stitch Stitch name Presser
foot Applications
Stitch width
[mm (inch.)]
Stitch length
[mm (inch.)] Twin
needle
Auto. Manual Auto. Manual
4 step buttonhole 1 Left side of 4 step buttonhole 5.0
(7/32)
1.5 - 7.0
(1/16 - 1/4)
0.4
(1/64)
0.2 - 1.0
(1/64 - 1/16) NO
4 step buttonhole 2 Bar tack of 4 step buttonhole 5.0
(7/32)
1.5 - 7.0
(1/16 - 1/4)
0.4
(1/64)
0.2 - 1.0
(1/64 - 1/16) NO
4 step buttonhole 3 Right side of 4 step buttonhole 5.0
(7/32)
1.5 - 7.0
(1/16 - 1/4)
0.4
(1/64)
0.2 - 1.0
(1/64 - 1/16) NO
4 step buttonhole 4 Bar tack of 4 step buttonhole 5.0
(7/32)
1.5 - 7.0
(1/16 - 1/4)
0.4
(1/64)
0.2 - 1.0
(1/64 - 1/16) NO
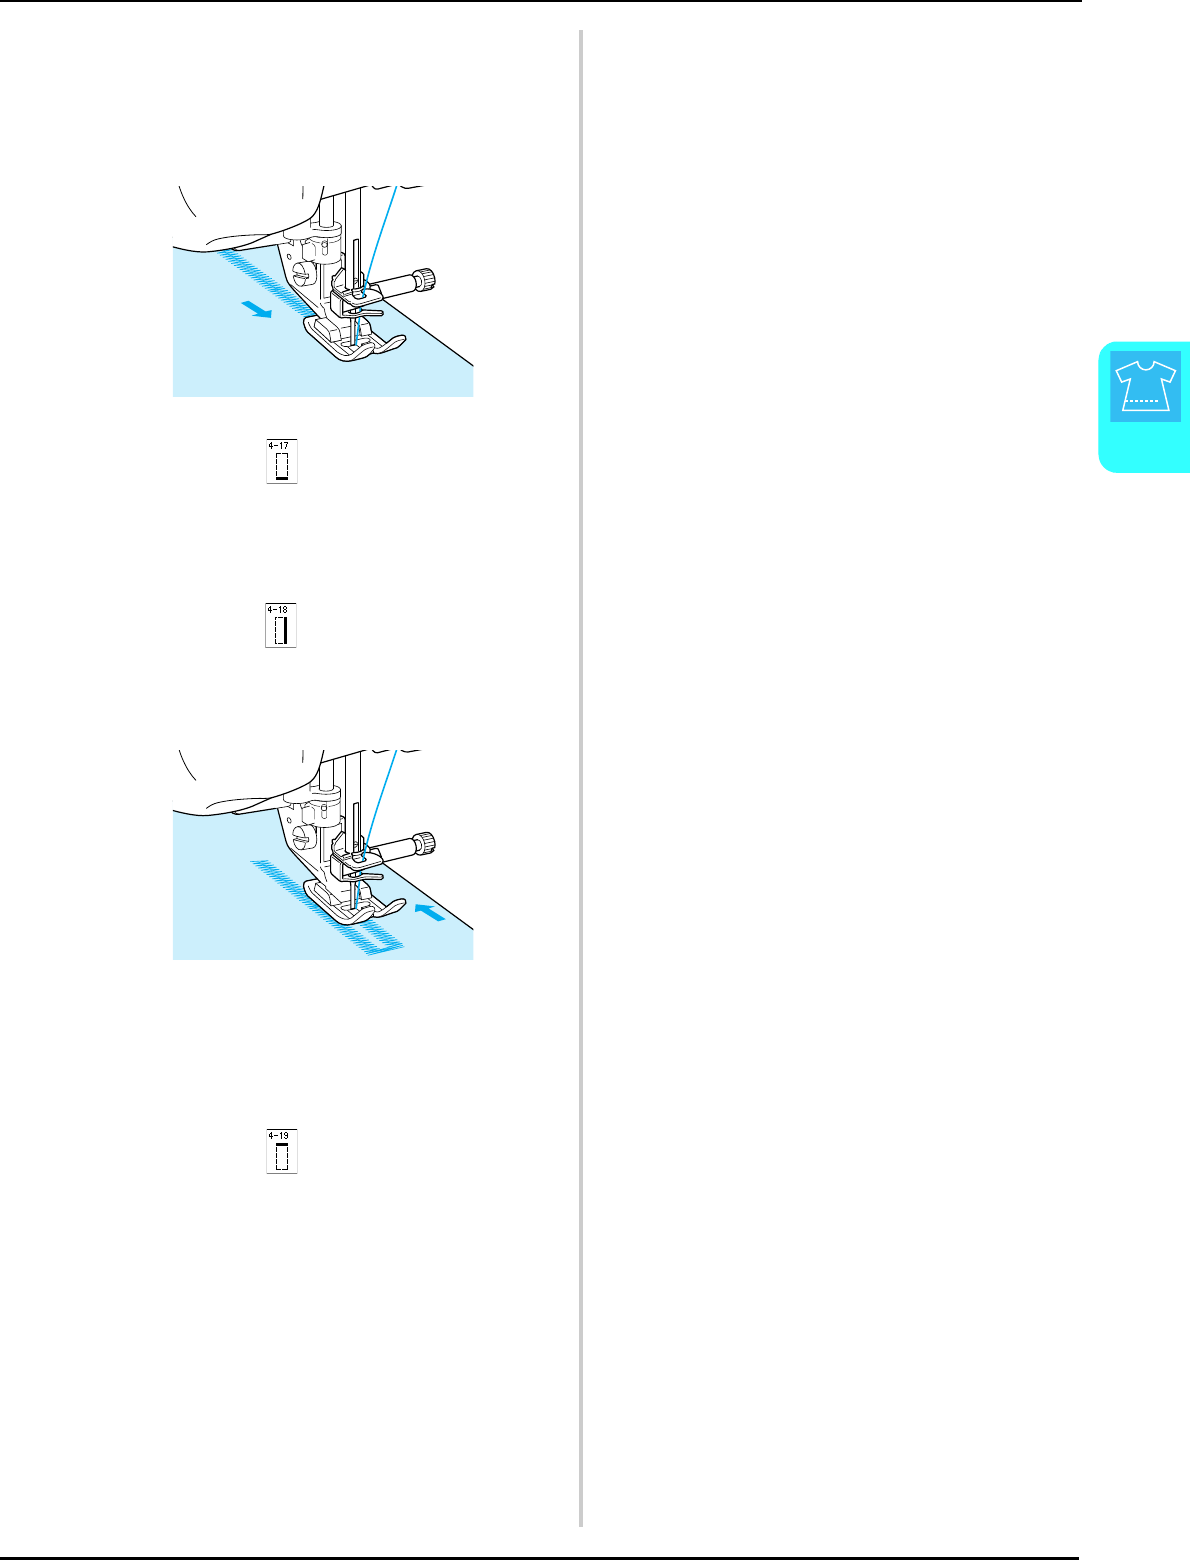
SEWING THE STITCHES
Utility Stitches
85
3
cPress the “Start/Stop” button to start
sewing.
dSew the desired length for the buttonhole
and press the “Start/Stop” button again.
eSelect stitch to sew the bar tack and
press the “Start/Stop” button.
→The machine will automatically stop after sewing
the bar tack.
fSelect stitch to sew the right side of the
buttonhole, and press the “Start/Stop”
button to begin sewing.
gSew the right side of the buttonhole and
press the “Start/Stop” button again.
* Sew the right side of the buttonhole the same length
as the left.
hSelect stitch to sew the bar tack and
then press the “Start/Stop” button.
→The machine will automatically sew off the bar tack
tie and stop when the bar tack is complete.
iRaise the presser foot and remove the
fabric.
jRefer to page 82 to open the buttonhole.
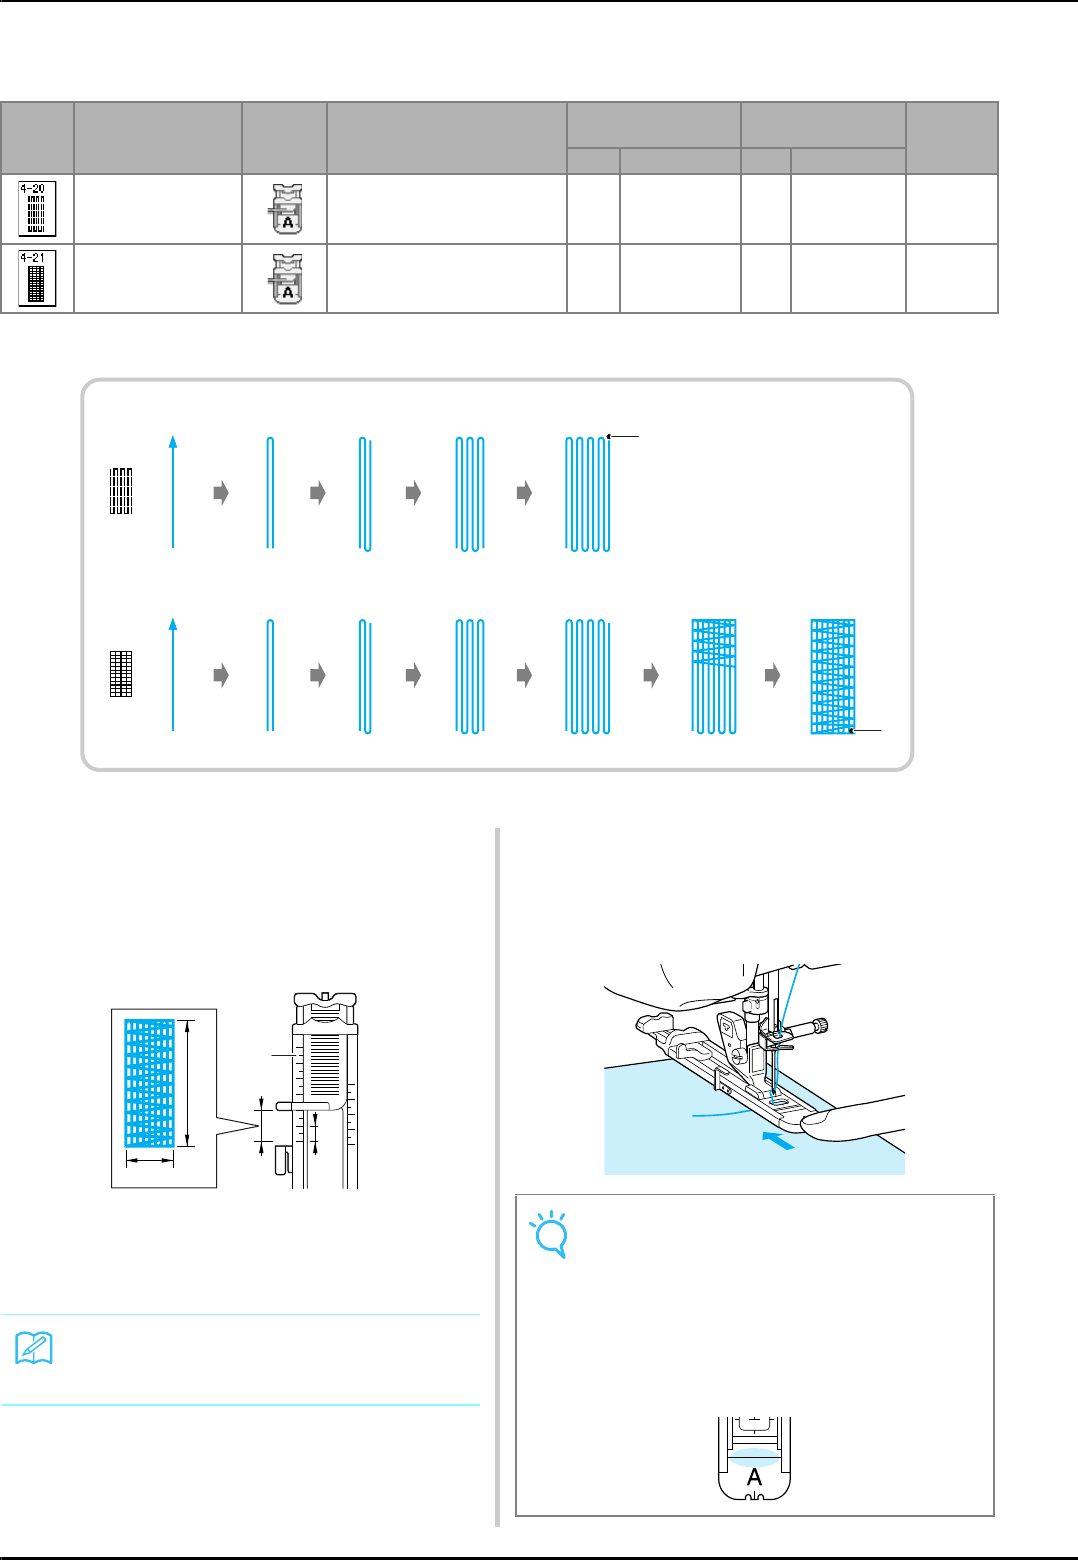
SEWING THE STITCHES
86
■Darning
Use darning stitches for mending and other applications.
Darning is performed by sewing from the front of the presser foot to the back as shown below.
aReinforcement stitches
aSelect a stitch, and attach buttonhole foot
“A”.
bSet the scale to the desired length of the
darning.
aPresser foot scale
bCompleted length measurement
cWidth 7 mm (approx. 1/4 inch)
d5 mm (approx. 3/16 inch)
cCheck that the needle drops at the desired
position and lower the presser foot, making
sure the upper thread passes underneath
the buttonhole foot.
Stitch Stitch name Presser
foot Applications
Stitch width
[mm (inch.)]
Stitch length
[mm (inch.)] Twin
needle
Auto. Manual Auto. Manual
Darning Darning of medium weight fabric 7.0
(1/4)
2.5 - 7.0
(3/32 - 1/4)
2.0
(1/16)
0.4 - 2.5
(1/64 - 1/16) NO
Darning Darning of heavyweight fabric 7.0
(1/4)
2.5 - 7.0
(3/32 - 1/4)
2.0
(1/16)
0.4 - 2.5
(1/64 - 1/16) NO
a
a
Memo
The maximum length for darning is 28 mm
(approx. 1-1/16 inches).
a
b
c
d
Note
• Pass the thread underneath the presser
foot.
• Set the presser foot so that there is no gap
behind the section marked with an “A” (the
shaded area in the illustration below). If
there is a gap, the size of the darning will not
be correct.
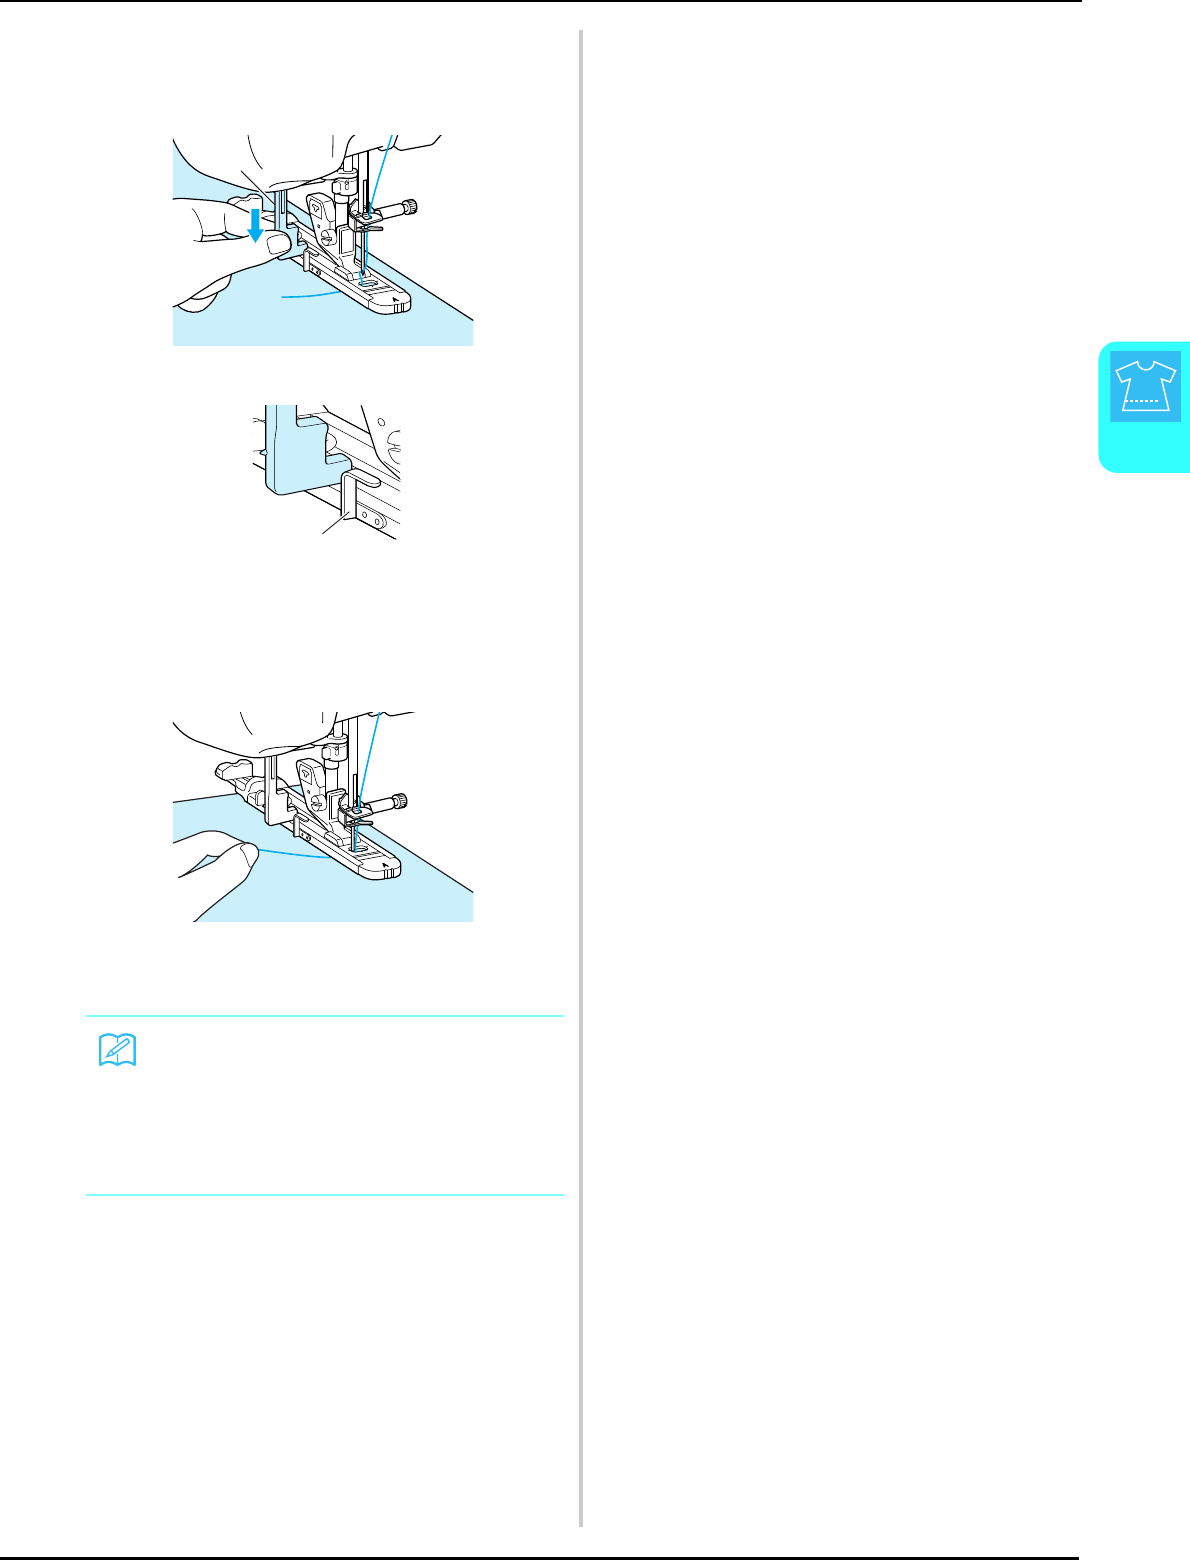
SEWING THE STITCHES
Utility Stitches
87
3
dLower the buttonhole lever so that it is
positioned behind the metal bracket on the
buttonhole foot.
aButtonhole lever
aMetal bracket
eGently hold the end of the upper thread,
and then press the “Start/Stop” button to
start the machine.
→Once sewing is completed, the machine
automatically sews reinforcement stitches, and then
stops.
Memo
If automatic thread cutting is turned on before
you start sewing, both threads are automati-
cally cut after the reinforcement stitches are
sewn. If the fabric does not feed (for example,
because it is too thick), increase the stitch
length setting.
a
a
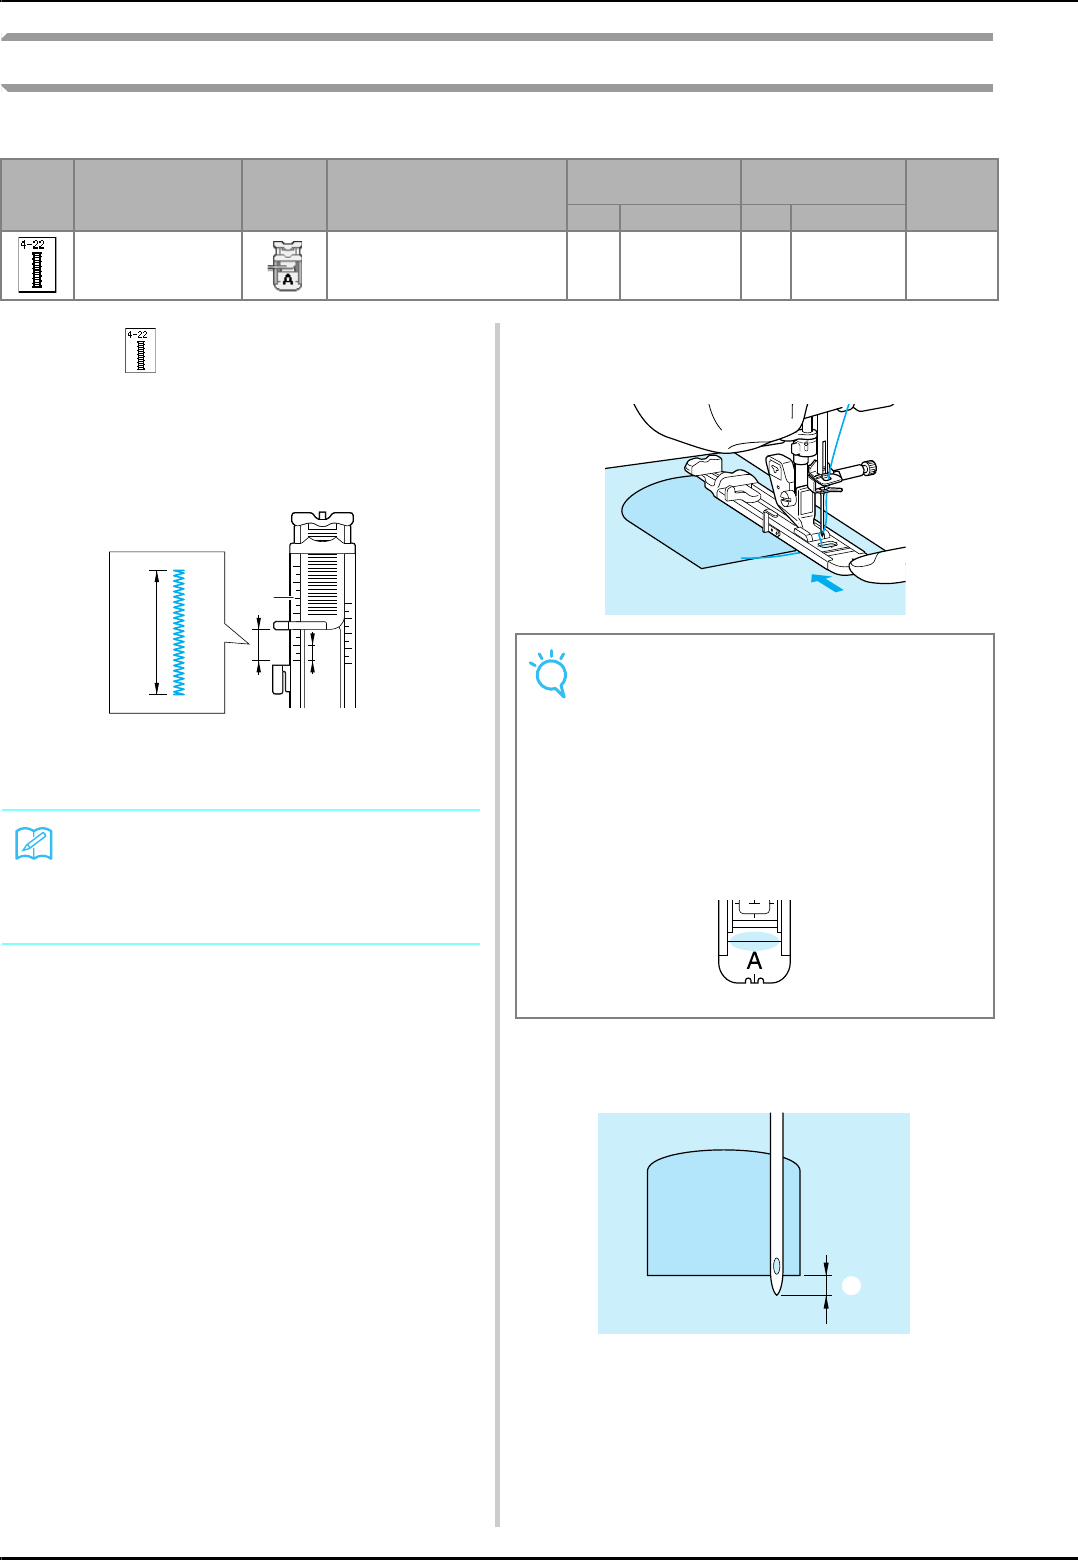
SEWING THE STITCHES
88
Bar Tacks
Use bar tacks to reinforce areas that will be subject to strain, such as pocket corners.
aSelect .
bAttach buttonhole foot “A” and set the
scale to the length of the bar tack you wish
to sew.
aPresser foot scale
bCompleted length measurement
c5 mm (approx. 3/16 inch)
cSet the fabric so that the pocket moves
towards you during sewing.
dCheck the first needle drop point and lower
the presser foot.
a2 mm (approx. 1/16 inch)
Stitch Stitch name Presser
foot Applications
Stitch width
[mm (inch.)]
Stitch length
[mm (inch.)] Twin
needle
Auto. Manual Auto. Manual
Bar tack Reinforcement at opening of
pocket, etc. 2.0
(1/16)
1.0 - 3.0
(1/16 - 1/8)
0.4
(1/64)
0.3 - 1.0
(1/64 - 1/16) NO
Memo
Bar tacks can be between 5 mm (approx.
3/16 inch) and 28 mm (approx. 1-1/16 inches).
Bar tacks are usually between 5 mm (approx.
3/16 inch) and 10 mm (approx. 3/8 inch).
a
c
b
Note
• Pass the thread underneath the presser
foot.
• Slide the outside frame of the buttonhole
foot backward as far as possible as shown in
the illustration, making sure that there is no
gap behind the part of the foot marked “A”. If
the buttonhole foot is not slid back as far as
possible, the bar tack will not be sewn to the
correct size.
a
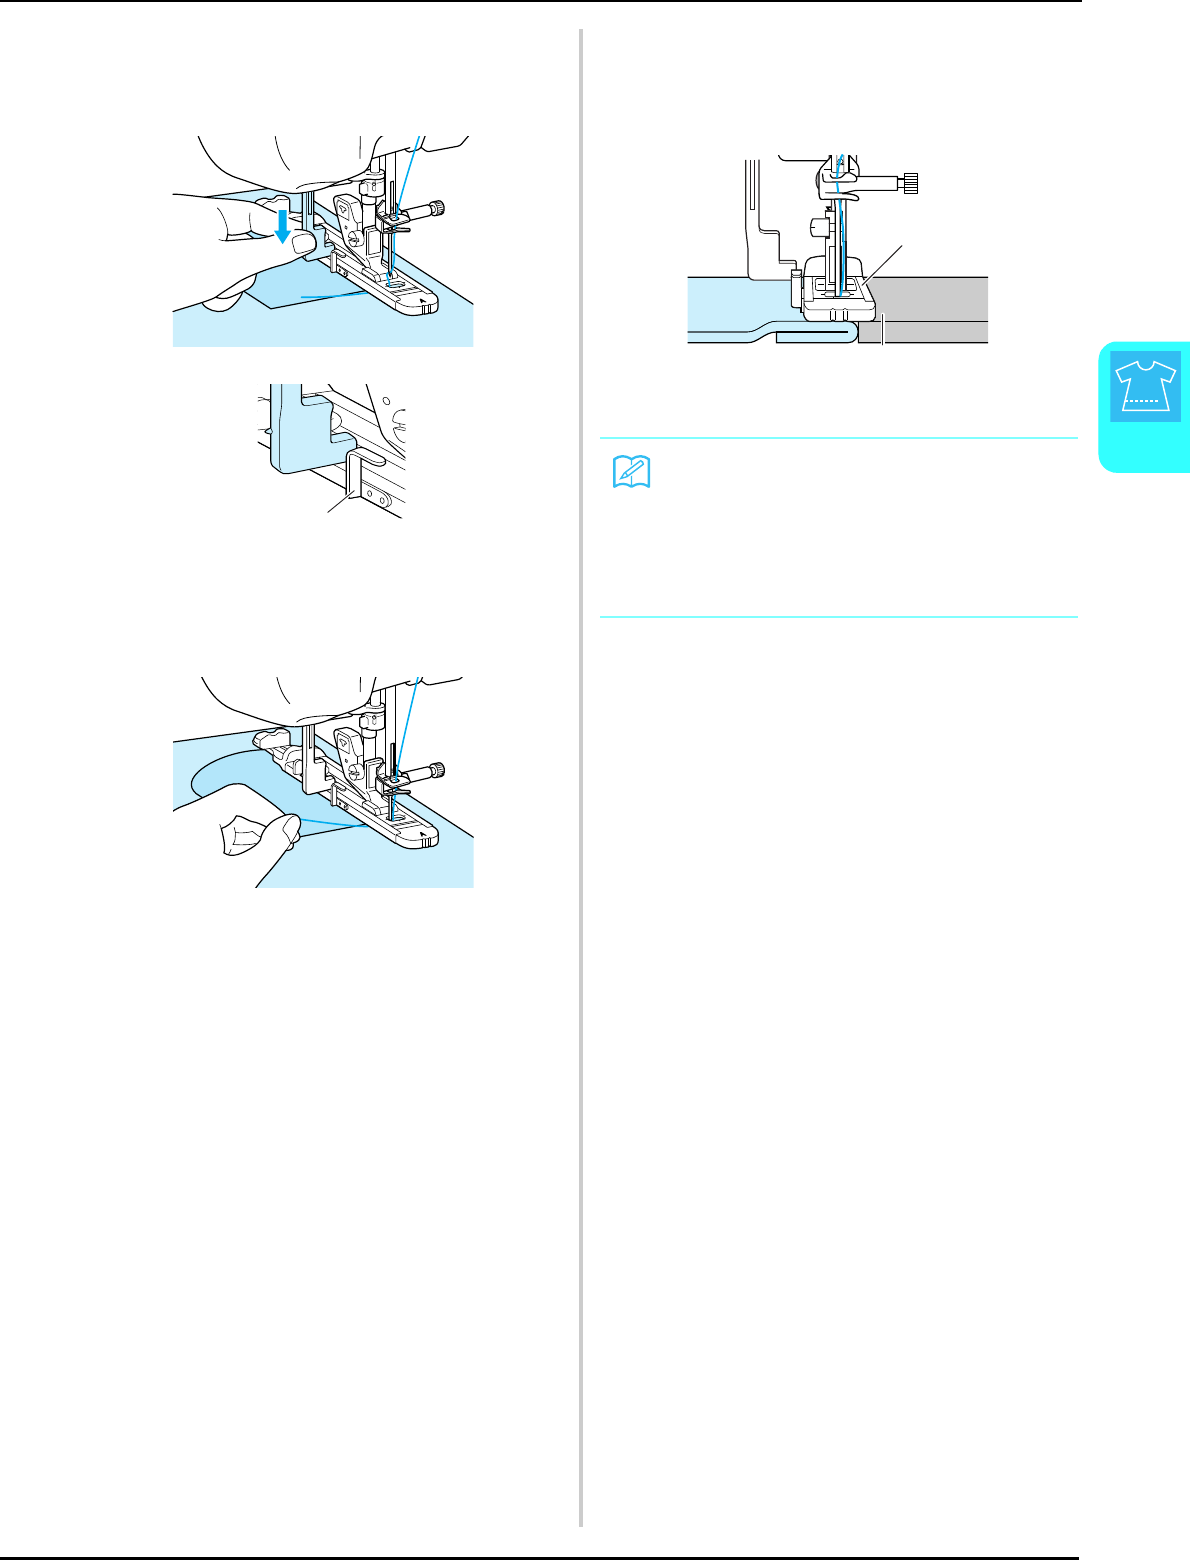
SEWING THE STITCHES
Utility Stitches
89
3
eLower the buttonhole lever so that it is
positioned behind the metal bracket on the
buttonhole foot.
aMetal bracket
fGently hold the end of the upper thread and
begin sewing.
→When sewing is completed, the machine will sew
reinforcement stitches and stop automatically.
■Bar Tacks on Thick Fabrics
Place a piece of folded fabric or cardboard beside
the fabric being sewn to level the buttonhole foot
and allow for easier feeding.
aPresser foot
bThick paper
a
Memo
If automatic thread cutting is turned on before
you start sewing, both threads are automati-
cally cut after the reinforcement stitches are
sewn. If the fabric does not feed (for example,
because it is too thick), increase the stitch
length setting.
a
b
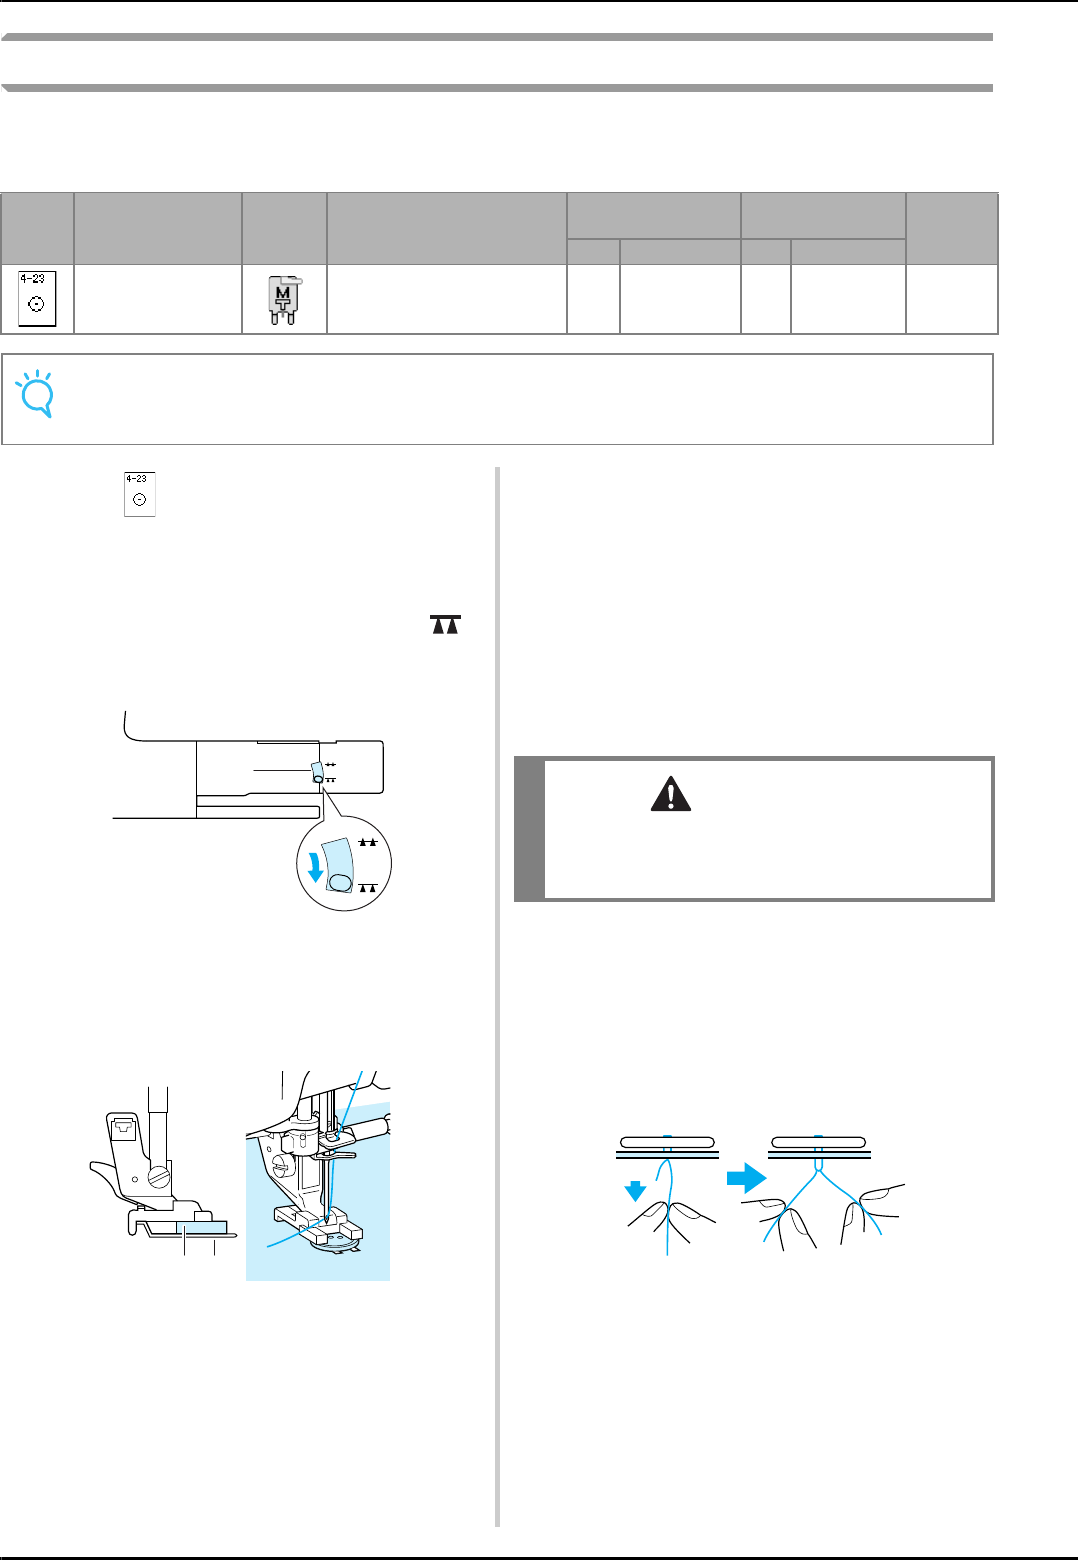
SEWING THE STITCHES
90
Button Sewing
Buttons can be sewn on using the machine.
Buttons with 2 or 4 holes can be attached.
aSelect .
bRaise the presser foot and detach the flat
bed table attachment.
cLower the feed dog position switch to
to lower the feed dogs.
aFeed dog position switch
dAttach button sewing foot “M”, slide the
button along the metal plate and into the
presser foot, and lower the presser foot.
aButton
bMetal plate
eTurn the handwheel to check that the
needle goes into each hole correctly.
* If the needle does not reach the holes on the left
side, adjust the stitch width.
* To attach the button more securely, repeat the
process.
fGently hold the end of the upper thread and
start sewing.
→The machine stops automatically when sewing is
finished.
gFrom the wrong side of the fabric, pull the
end of the bobbin thread to pull the upper
thread through to the wrong side of the
fabric. Tie the two thread ends together and
cut the threads.
Stitch Stitch name Presser
foot Applications
Stitch width
[mm (inch.)]
Stitch length
[mm (inch.)] Twin
needle
Auto. Manual Auto. Manual
Button sewing Attaching buttons 3.5
(1/8)
2.5 - 4.5
(3/32 - 3/16) ——NO
Note
• Do not use the automatic thread cutting function when sewing buttons. Otherwise, you will lose the
thread ends.
a
a b
CAUTION
Make sure the needle does not strike the button
during sewing. The needle may break and cause
injury.
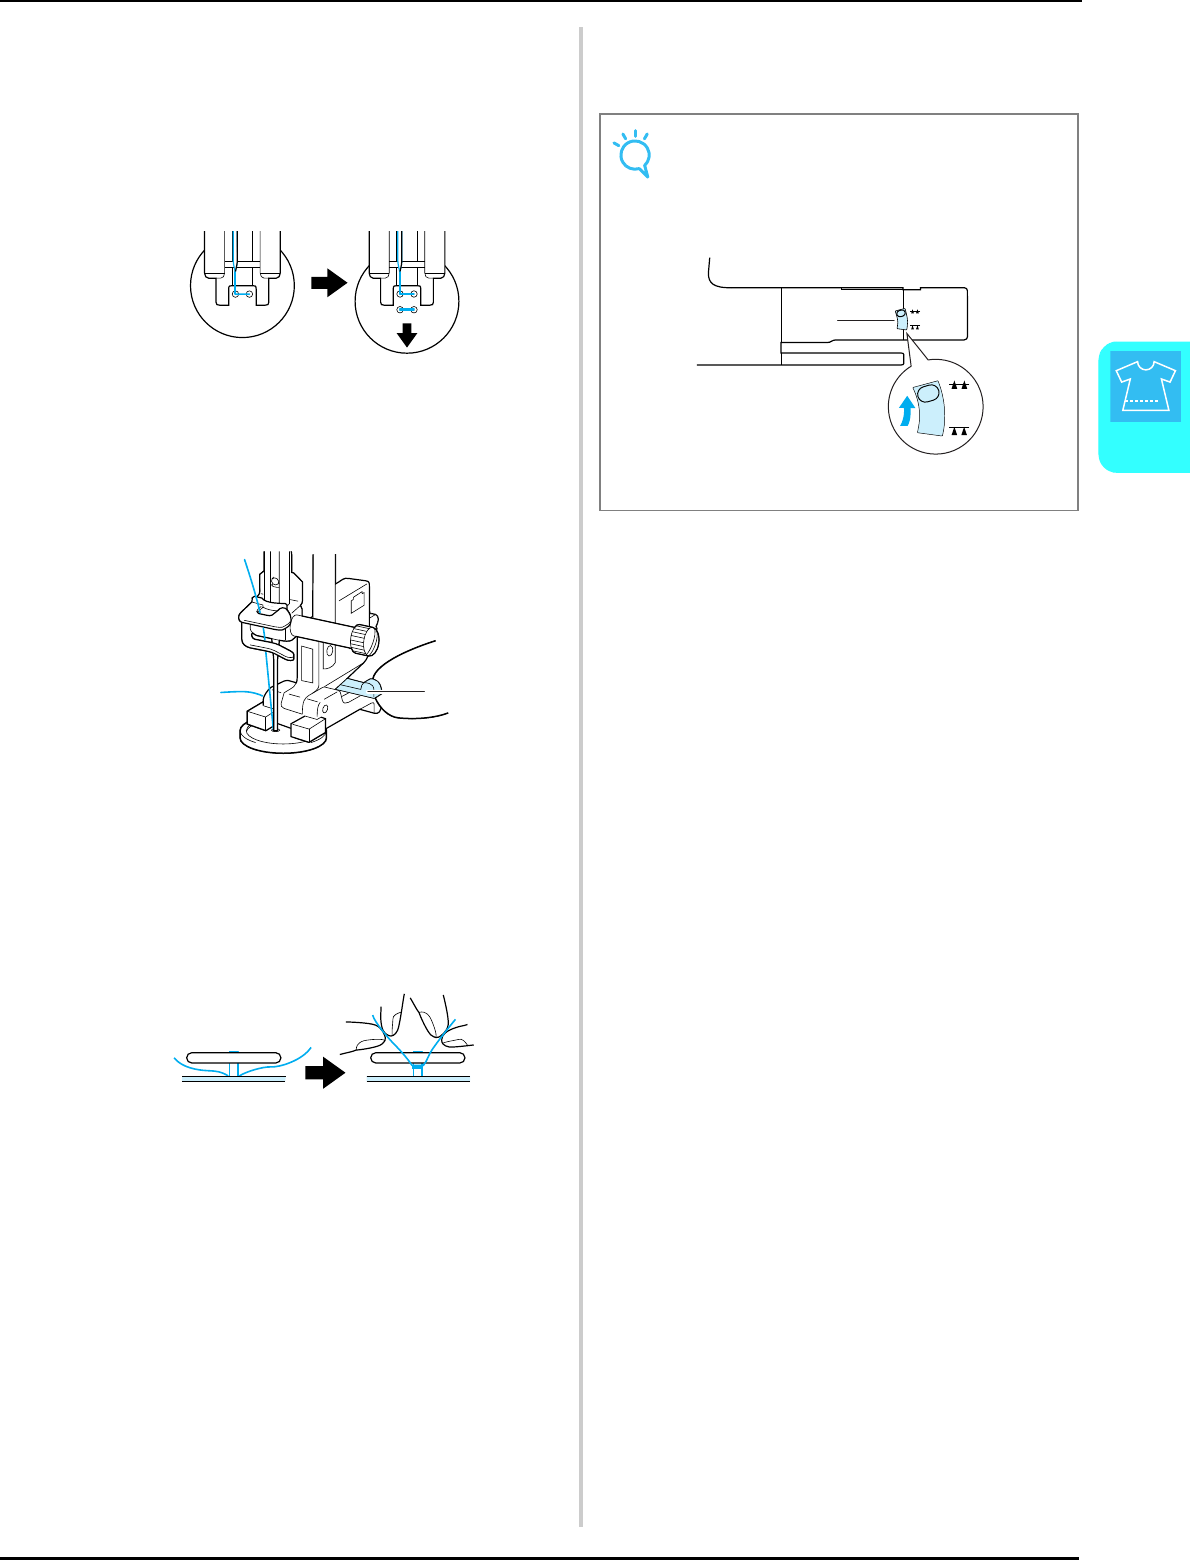
SEWING THE STITCHES
Utility Stitches
91
3
■Attaching 4 Hole Buttons
Sew the two holes closest to you. Then raise the
presser foot and move the fabric so that the needle
goes into the next two holes, and sew them in the
same way.
■Attaching a Shank to the Button
aPull the shank lever toward you before
sewing.
aShank lever
bPull the two ends of the upper thread
between the button and the fabric, wind
them around the shank, and then tie them
firmly together.
cTie the ends of the bobbin thread from the
beginning and end of sewing together on
the wrong side of the fabric.
a
Note
• When sewing is completed, be sure to return
the feed dog position switch to its original
position.
aFeed dog position switch
a
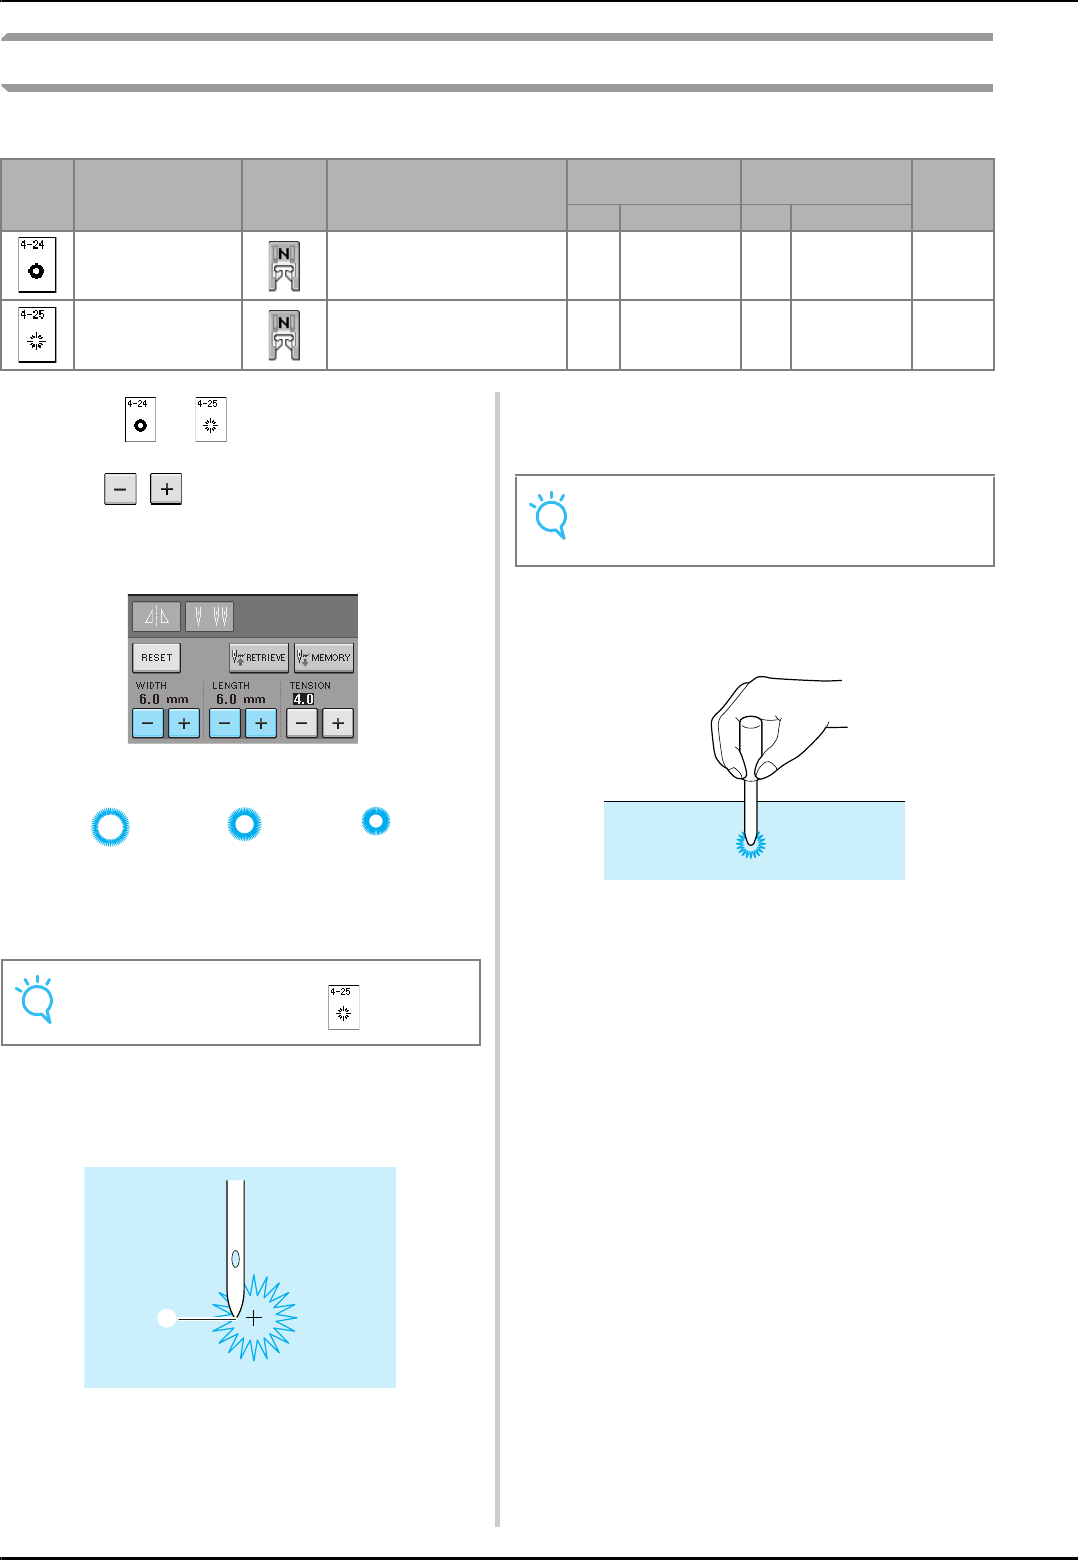
SEWING THE STITCHES
92
Eyelet
Use this stitch for making belt holes and other similar applications.
aSelect or .
bUse in either the stitch width
display or the stitch length display to
choose the size of the eyelet.
aLarge 7 mm (approx. 1/4 inch)
bMedium 6 mm (approx. 15/64 inch)
cSmall 5 mm (approx. 3/16 inch)
cAttach monogramming foot “N”, then turn
the handwheel to check the needle drop
position.
aNeedle drop position
dLower the presser foot and start sewing.
→When sewing is finished, the machine sews
reinforcement stitches and stops automatically.
eUse the eyelet punch to make a hole in the
center of the stitching.
Stitch Stitch name Presser
foot Applications
Stitch width
[mm (inch.)]
Stitch length
[mm (inch.)] Twin
needle
Auto. Manual Auto. Manual
Eyelet For making eyelets, holes on
belts, etc. 7.0
(1/4)
7.0 6.0 5.0
(1/4 15/64 3/16)
7.0
(1/4)
7.0 6.0 5.0
(1/4 15/64 3/16) NO
Star eyelet For making star-shaped eyelets
on holes. ————NO
Note
Only one size is available for .
abc
(Actual size)
a
Note
If the stitch pattern comes out poorly, make
adjustments (see page 103).
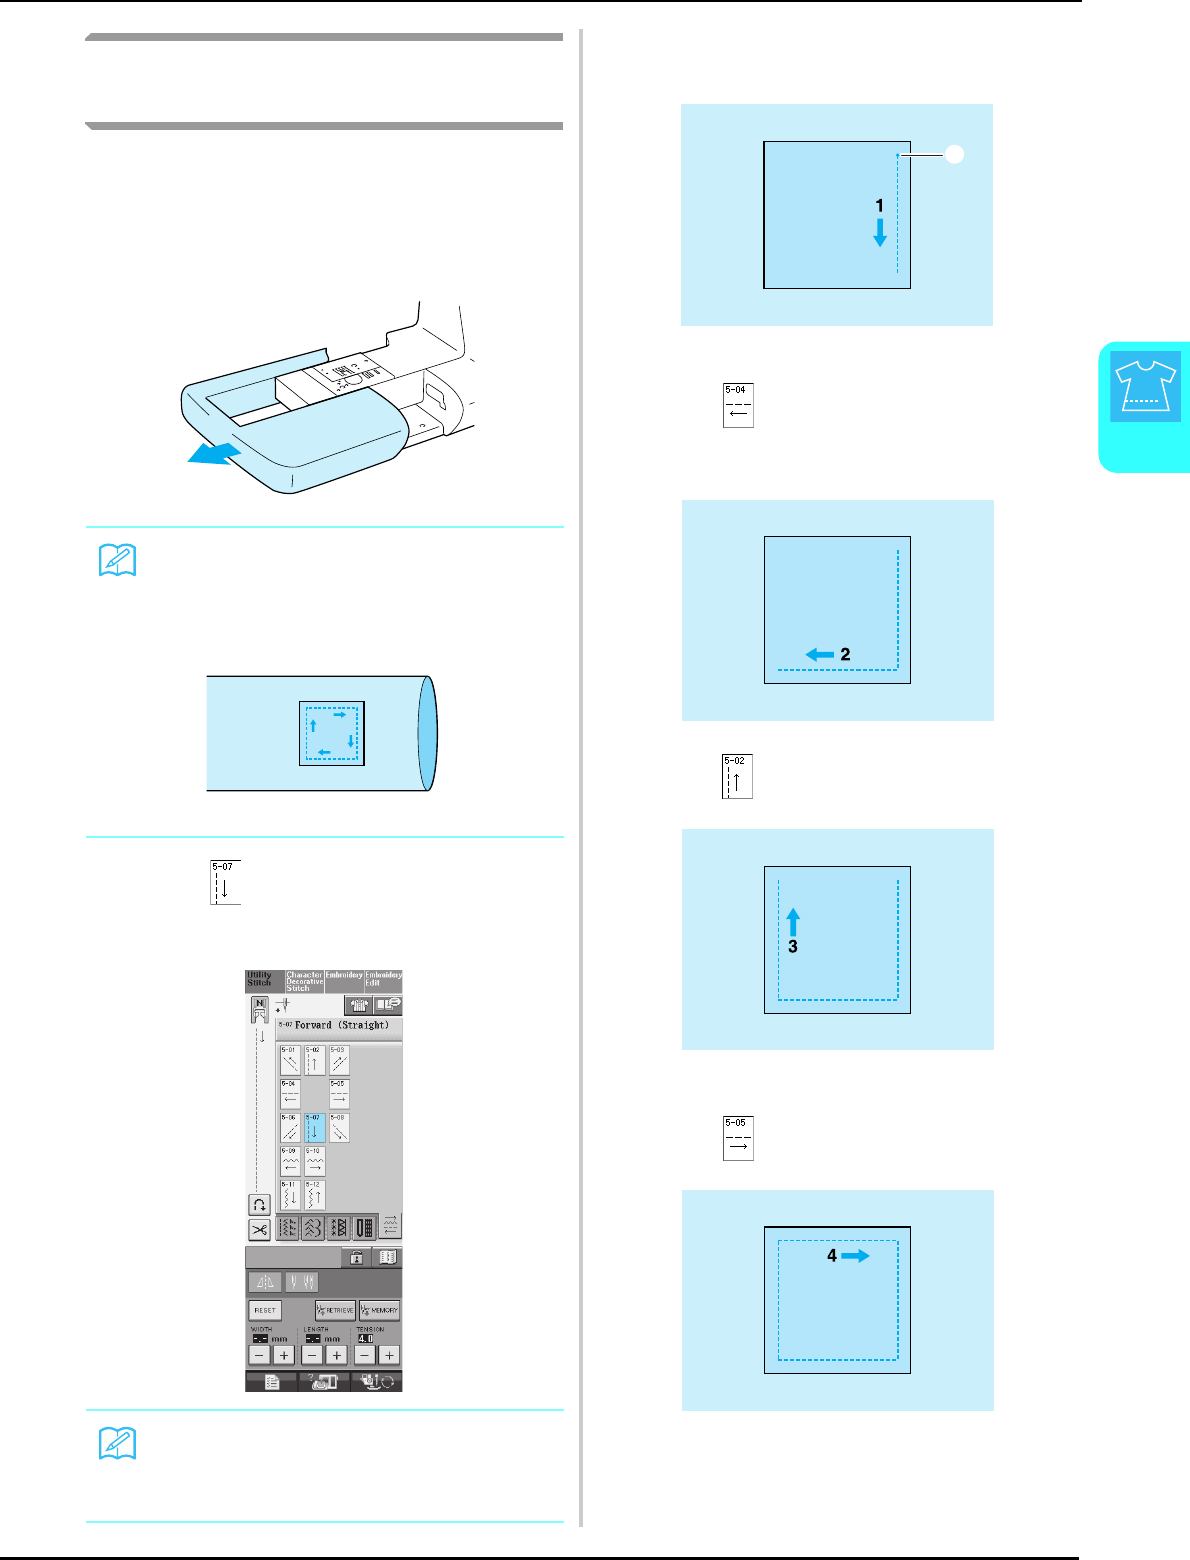
SEWING THE STITCHES
Utility Stitches
93
3
Multi-directional Sewing
(Straight Stitch and Zigzag Stitch)
Use these stitch patterns to attach patches or
emblems to pant legs, shirt sleeves, etc.
aRemove the flat bed attachment to create
the free arm function.
bSelect and attach monogramming foot
“N”.
cSet the needle in the fabric at the sewing
start point, and sew seam “1” as shown.
aStart Point
dSelect and sew seam “2” as shown.
* The fabric will move sideways, so guide the fabric
by hand to keep sewing straight.
eSelect and sew seam “3” as shown.
→The fabric feeds forward while stitching backward.
fSelect and sew seam “4” as shown.
→The seam will be connected to the starting point of
seam 1.
Memo
Pass the free arm through a tubular piece of
fabric, and then sew in the order shown in the
illustration.
Memo
For details on each stitch, refer to the
“STITCH SETTING CHART” at the end of this
manual.
13
4
2
a
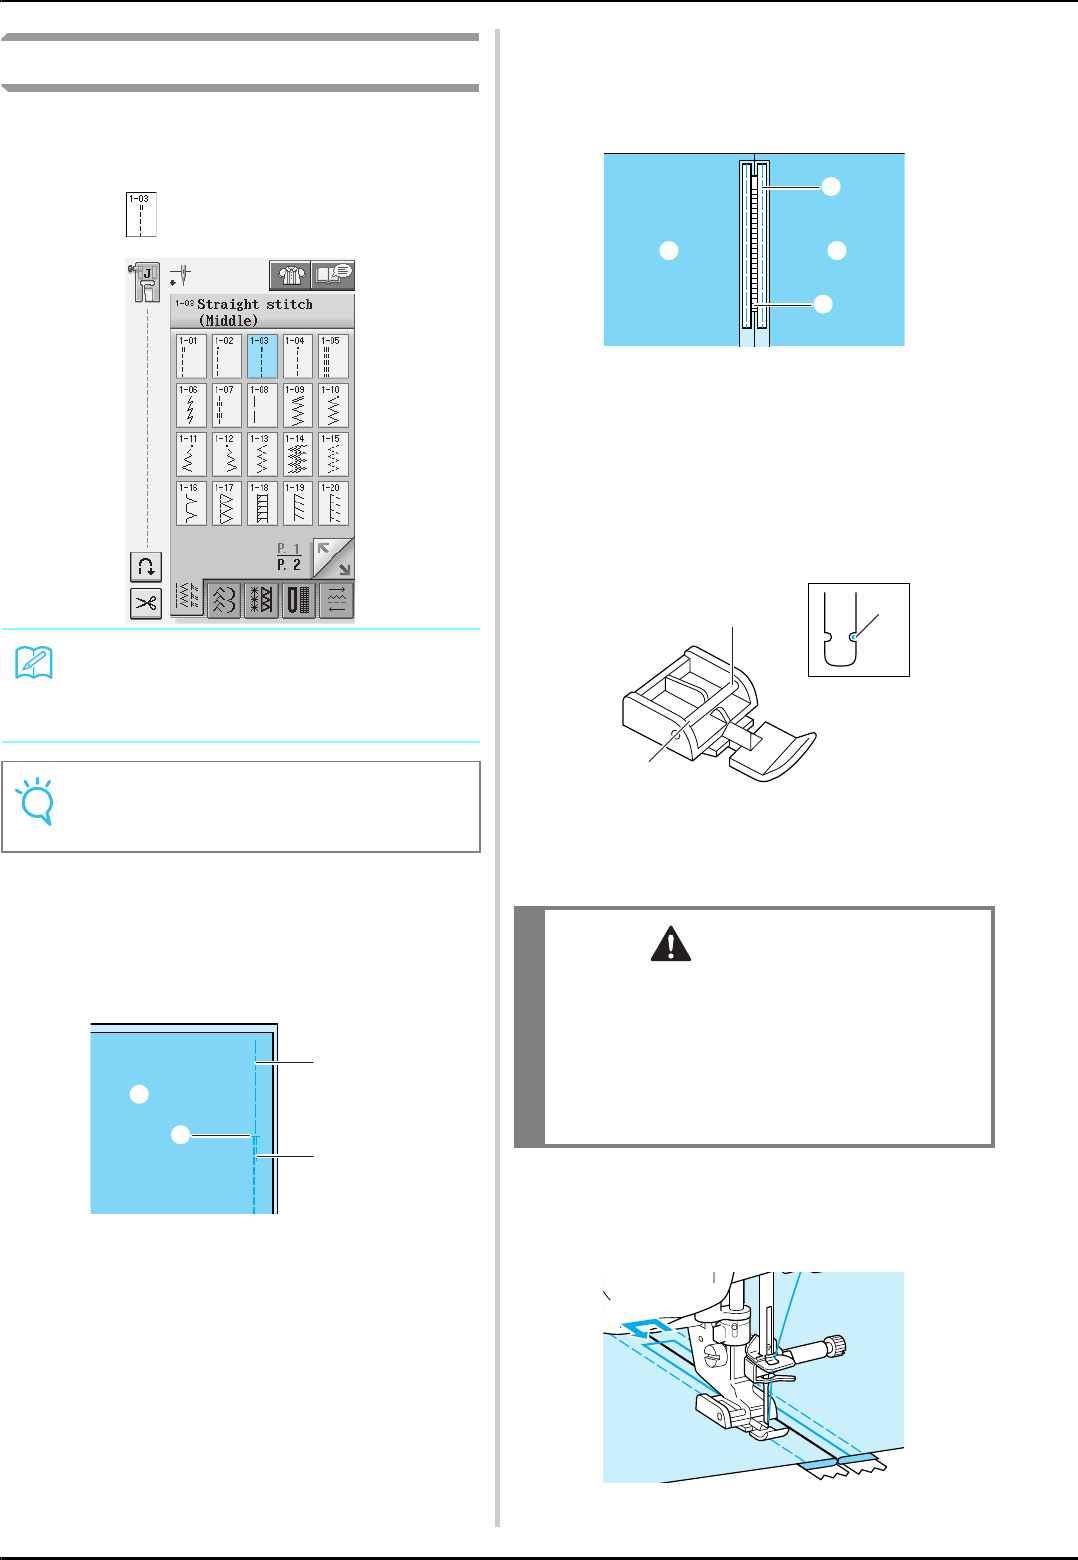
SEWING THE STITCHES
94
Zipper Insertion
■Centered Zipper
Use for bags and other such applications.
aSelect .
bAttach presser foot “J” and sew straight
stitches up to the zipper opening. Change to
a basting stitch (see page 56) and sew to the
top of the fabric.
aBasting stitches
bReverse stitches
cEnd of zipper opening
dWrong side
cPress the seam allowance open and attach
the zipper with a basting stitch in the
middle of each side of the zipper tape.
aBasting stitches
bZipper
cWrong side
dRemove presser foot “J”. Align the right
side of the pin in zipper foot “I” with the
presser foot holder, and attach the zipper
foot.
aRight
bLeft
cNeedle drop position
eTopstitch 7 to 10 mm (approx. 1/4 to
3/8 inch) from the seamed edge of the
fabric, then remove the basting.
Memo
• For details on each stitch, refer to the
“STITCH SETTING CHART” at the end of
this manual.
Note
• Make sure you sew using the middle needle
position.
a
b
c
d
CAUTION
• When using zipper foot “I”, make sure the
straight stitch, middle needle position is
selected. Turn the handwheel to make sure the
needle does not strike the presser foot. If
another stitch is selected, the needle will strike
the presser foot, causing the needle to break
and possibly causing injury.
c
a
c
b
a
b
c
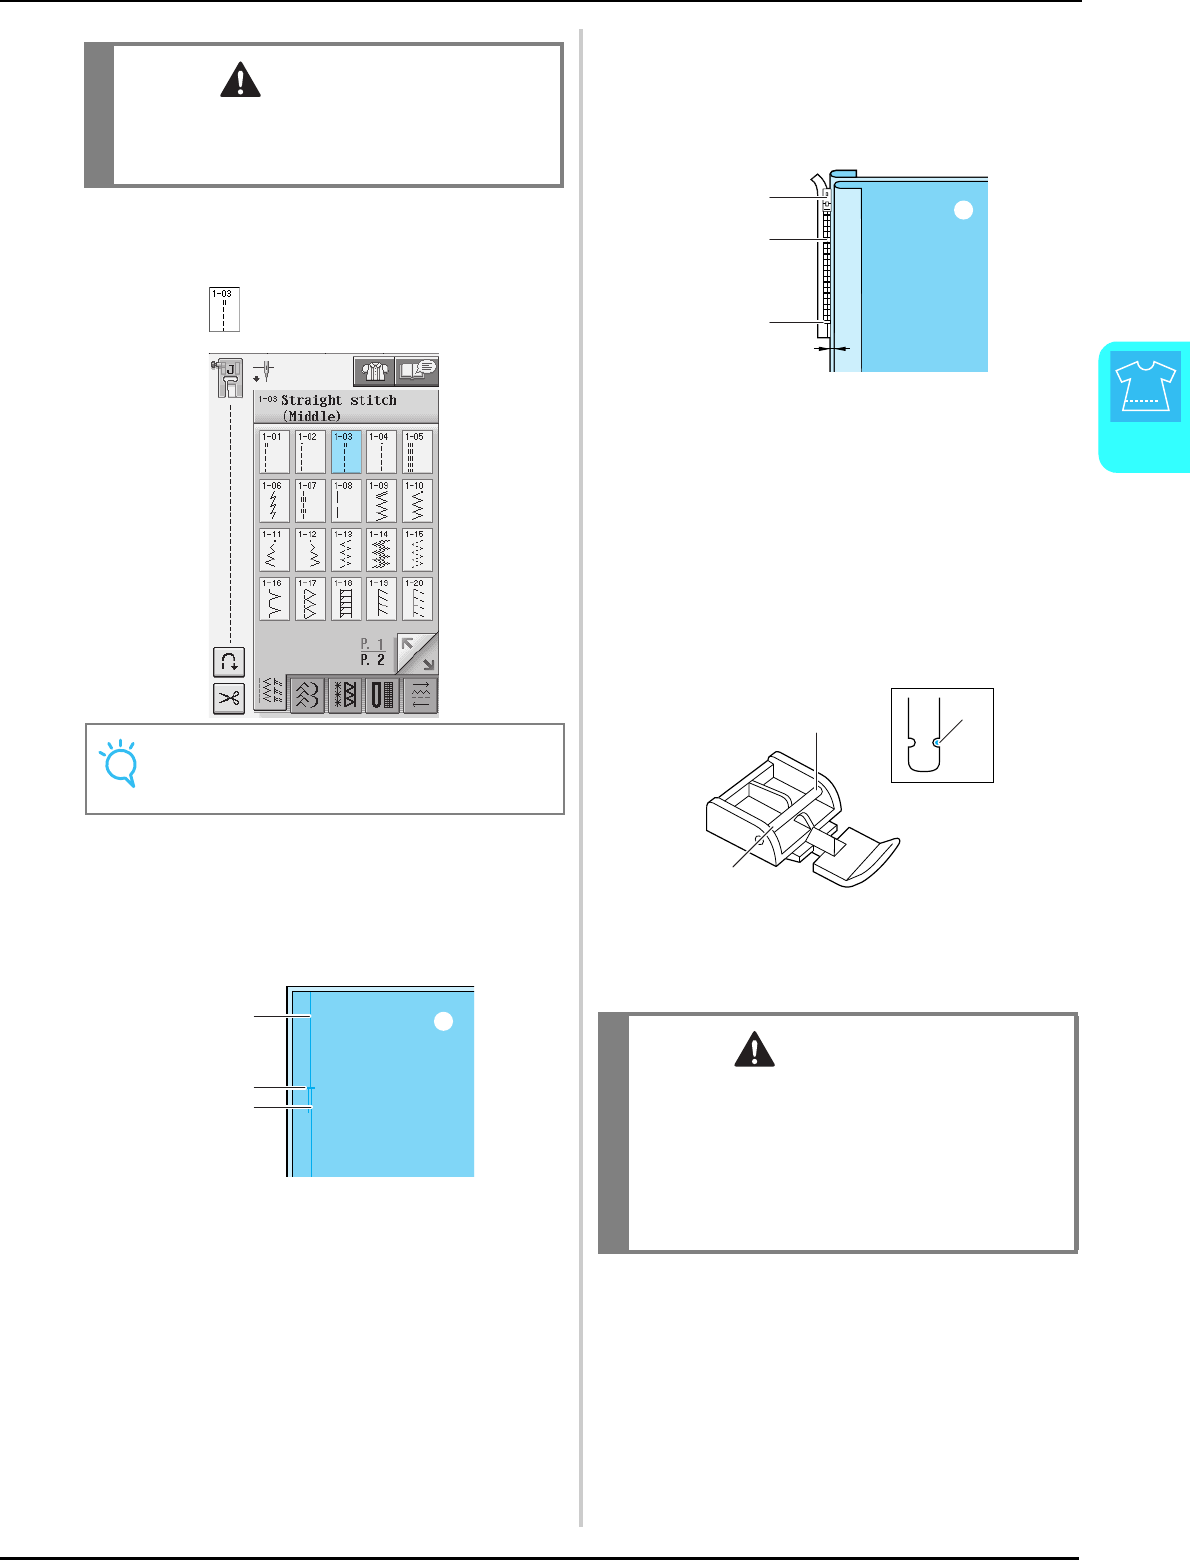
SEWING THE STITCHES
Utility Stitches
95
3
■Inserting a Side Zipper
Use for side zippers in skirts or dresses.
aSelect .
bAttach presser foot “J” and sew straight
stitches up to the zipper opening. Change to
a basting stitch and sew to the top of the
fabric.
aReverse stitches
bWrong side of fabric
cBasting stitches
dEnd of zipper opening
cPress the seam allowance open and align
the folded hem along the teeth of the
zipper, while maintaining 3 mm (approx.
1/8 inch) of sewing space.
aZipper pull tab
bWrong side of fabric
cZipper teeth
dEnd of zipper opening
e3 mm (approx. 1/8 inch)
dRemove presser foot “J”.
eAlign the right side of the pin in zipper foot
“I” with the presser foot holder, and attach
the presser foot.
aRight
bLeft
cNeedle drop position
CAUTION
Make sure the needle does not strike the zipper
during sewing. If the needle strikes the zipper, the
needle may break, leading to injury.
Note
• Make sure you sew using the middle needle
position.
a
d
cb
CAUTION
When using zipper foot “I”, make sure the
straight stitch, middle needle position is selected.
Turn the handwheel to make sure the needle does
not strike the presser foot. If another stitch is
selected, the needle will strike the presser foot,
causing the needle to break and possibly causing
injury.
a
c
d
e
b
a
b
c
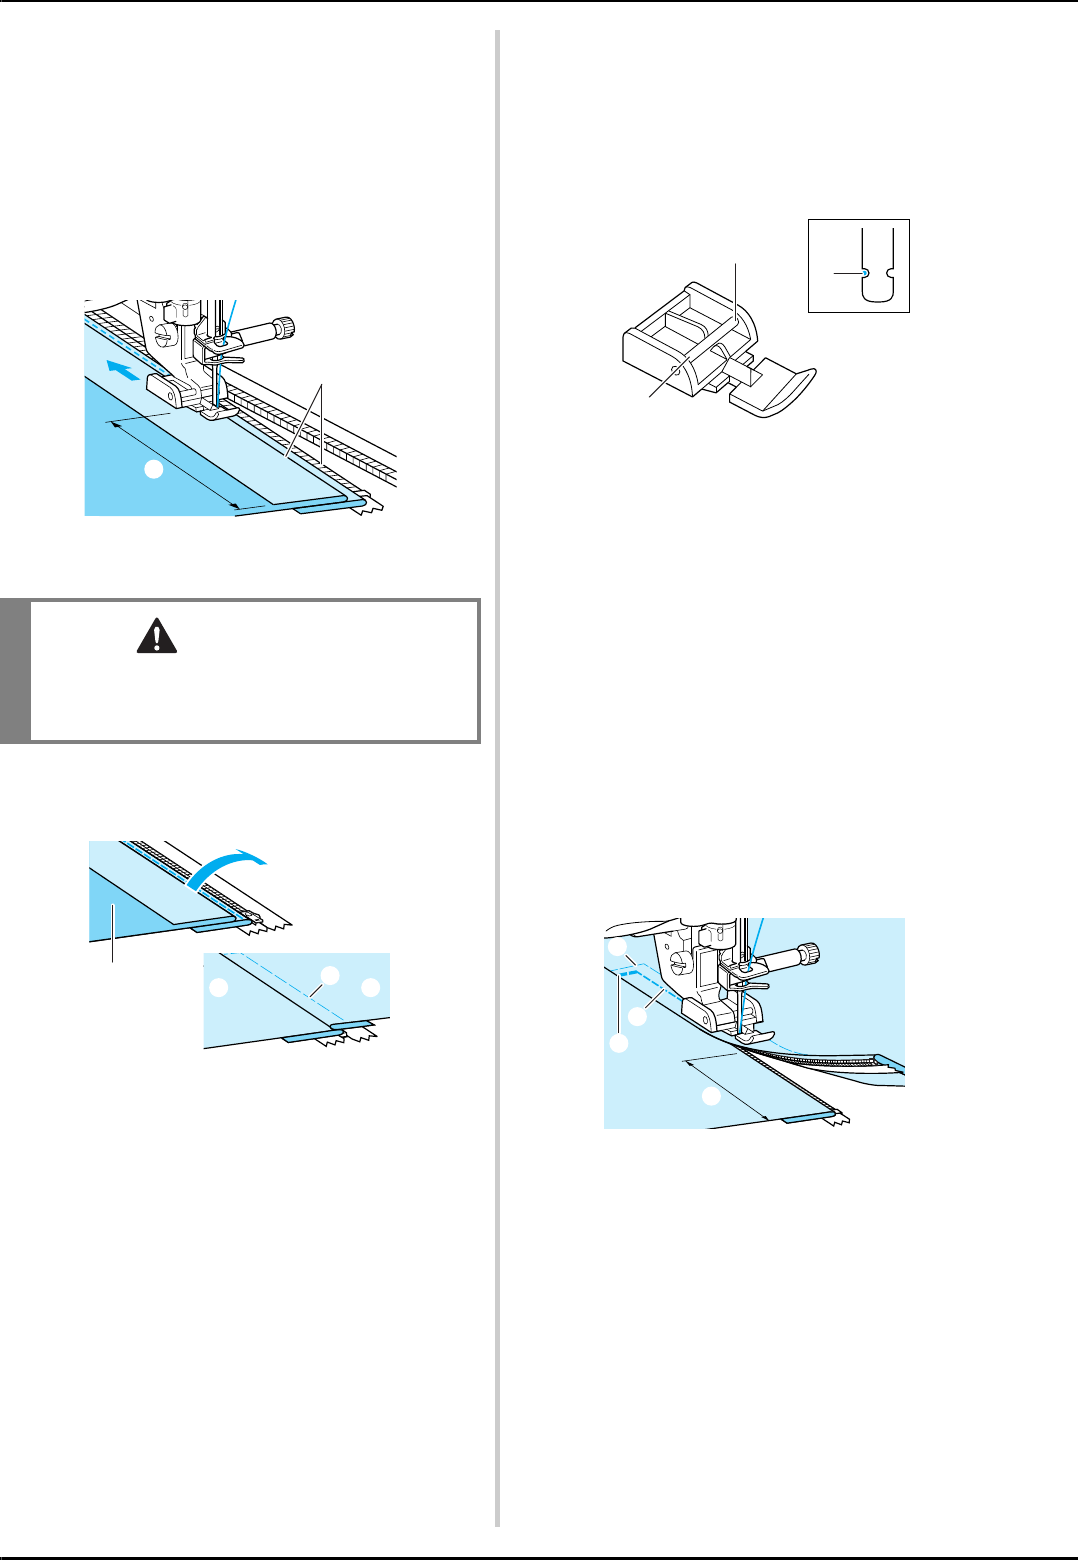
SEWING THE STITCHES
96
fSet the presser foot in the 3 mm (approx.
1/8 inch) margin.
gStarting from the end of the zipper opening,
sew to a point about 50 mm (approx.
2 inches) from the edge of the fabric, then
stop the machine.
hPull down the zipper slider, then continue
sewing to the edge of the fabric.
a50 mm (approx. 2 inches)
b3 mm (approx. 1/8 inch)
iClose the zipper, turn the fabric over, and
sew a basting stitch.
aFront of the skirt (wrong side of fabric)
bBasting stitches
cFront of the skirt (right side of fabric)
dBack of the skirt (right side of fabric)
jRemove the presser foot, and reattach it so
that the left side of the pin is attached to the
presser foot holder.
* When sewing the left side of the zipper, the needle
should drop on the right side of the presser foot.
When sewing the right side of the zipper, the needle
should drop on the left side of the presser foot.
aRight
bLeft
cNeedle drop position
kSet the fabric so that the left edge of the
presser foot touches the edge of the zipper
teeth.
lSew reverse stitches at the top of the
zipper, then continue sewing.
mStop sewing about 50 mm (approx.
2 inches) from the edge of the fabric, leave
the needle in the fabric, and remove the
basting stitches.
nOpen the zipper and sew the rest of the
seam.
aBasting stitches
b7 to 10 mm (approx. 1/4 inch to 3/8 inch)
cReverse stitches
d50 mm (approx. 2 inches)
CAUTION
Make sure the needle does not strike the zipper
during sewing. If the needle strikes the zipper, the
needle may break, leading to injury.
b
a
adbc
a
b
c
d
c
b
a

Chapter 4
Character/
Decorative
Stitches
SELECTING STITCH PATTERNS.................................................................................................98
■Stitch Selection Screens......................................................................................................................................... 99
Selecting Decorative Stitch Patterns/7mm Decorative Stitch Patterns/Satin Stitch Patterns/
7mm Satin Stitch Patterns/Cross Stitch/Utility Decorative Stitch Patterns .................................................................... 100
Alphabet Characters ...................................................................................................................................................... 100
■Deleting Characters............................................................................................................................................. 101
■Character Spacing Adjustment ............................................................................................................................ 101
SEWING STITCH PATTERNS ...................................................................................................102
Sewing Attractive Finishes ............................................................................................................................................. 102
Basic Sewing .................................................................................................................................................................. 102
Making Adjustments ...................................................................................................................................................... 103
EDITING STITCH PATTERNS ..................................................................................................105
■Key Functions ...................................................................................................................................................... 105
Changing the Size .......................................................................................................................................................... 106
Changing the Length (for 7mm Satin Stitch Patterns Only)............................................................................................ 107
Creating a Vertical Mirror Image ................................................................................................................................... 107
Creating a Horizontal Mirror Image .............................................................................................................................. 107
Sewing a Pattern Continuously ...................................................................................................................................... 107
Changing Thread Density (for Satin Stitch Patterns Only) ............................................................................................. 108
Checking the Image ....................................................................................................................................................... 108
COMBINING STITCH PATTERNS ...........................................................................................110
Before Combining .......................................................................................................................................................... 110
Combining Various Stitch Patterns ................................................................................................................................ 110
Combining Large and Small Stitch Patterns ................................................................................................................... 112
Combining Horizontal Mirror Image Stitch Patterns ..................................................................................................... 112
Combining Stitch Patterns of Different Length .............................................................................................................. 113
Making Step Stitch Patterns (for 7mm Satin Stitch Patterns Only) ................................................................................. 114
■More Examples .................................................................................................................................................... 115
USING THE MEMORY FUNCTION.........................................................................................116
Stitch Data Precautions ................................................................................................................................................. 116
■Types of Stitch Data that can be Used ................................................................................................................. 116
■Types of USB Devices/Media that can be Used ................................................................................................... 116
■Computers and Operating Systems with the Following Specifications can be Used ............................................ 116
■Precautions on Using the Computer to Create and Save Data............................................................................. 116
■Trademarks.......................................................................................................................................................... 117
Saving Stitch Patterns in the Machine’s Memory ........................................................................................................... 118
■If the Memory is Full............................................................................................................................................ 118
Saving Stitch Patterns to USB Media (Commercially Available)..................................................................................... 120
Saving Stitch Patterns in the Computer.......................................................................................................................... 121
Retrieving Stitch Patterns from the Machine’s Memory ................................................................................................. 122
Recalling from USB Media ............................................................................................................................................. 123
Recalling from the Computer......................................................................................................................................... 124
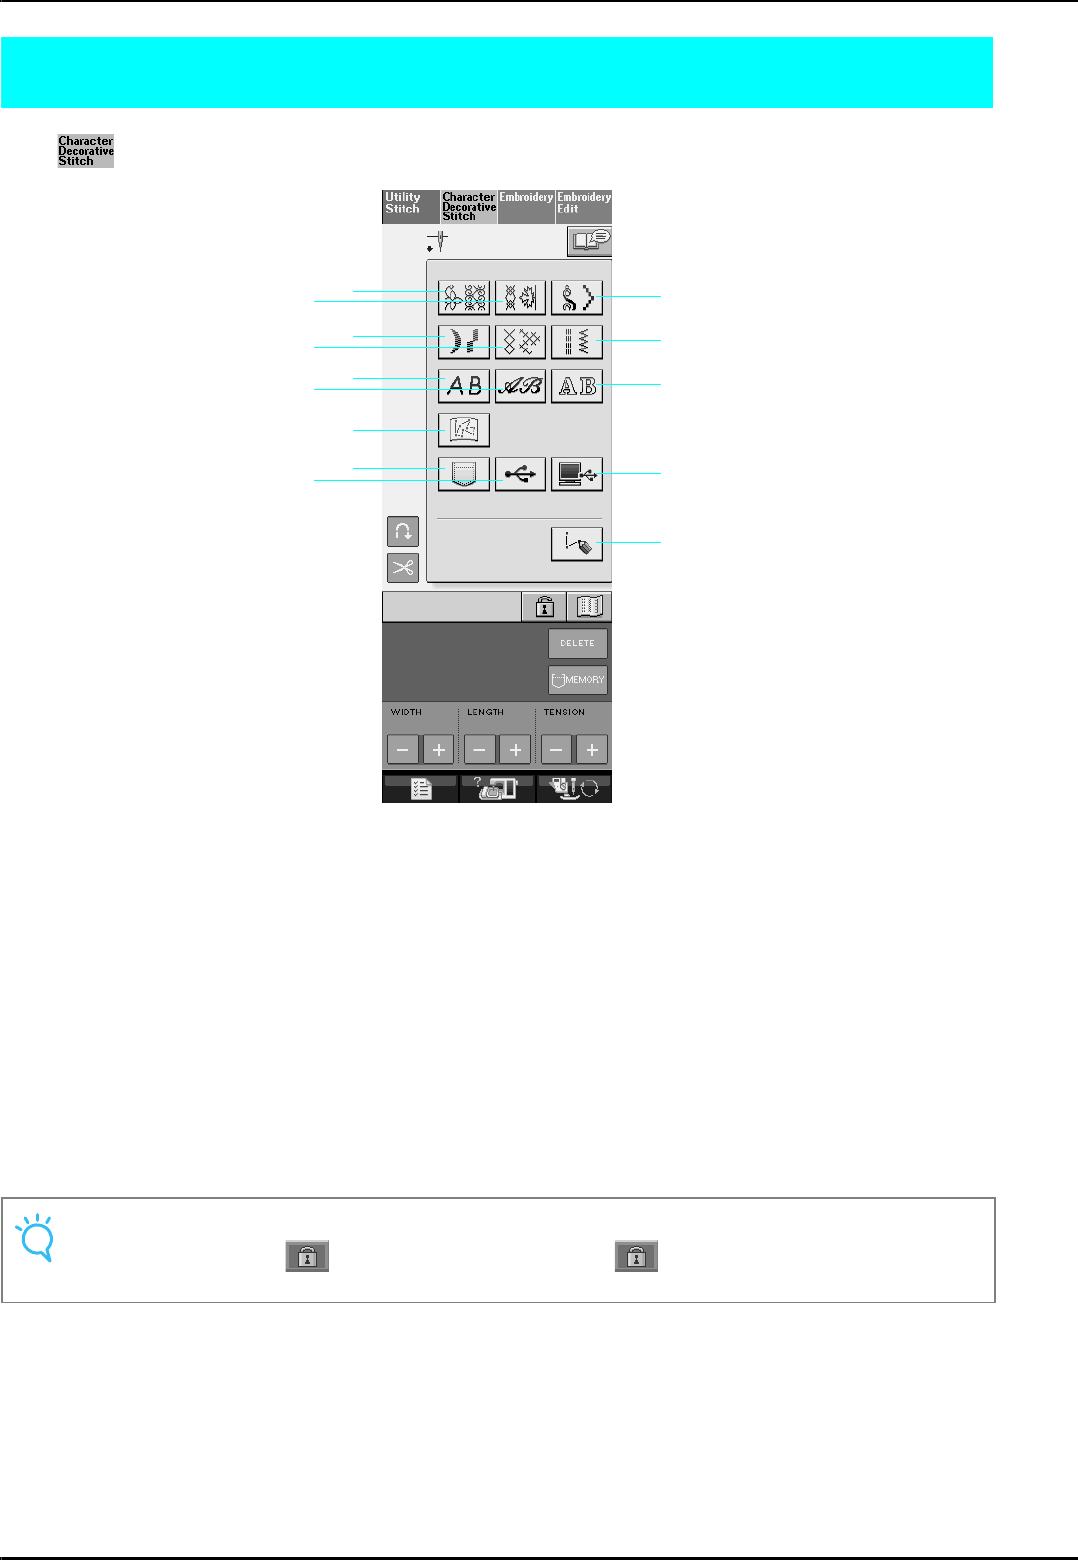
SELECTING STITCH PATTERNS
98
SELECTING STITCH PATTERNS
Press to display the screen below.
aDecorative stitch patterns
b7mm decorative stitch patterns. You can set stitch length and width.
cSatin stitch patterns
d7mm satin stitch patterns. You can set stitch length and width.
eCross stitch
fUtility decorative stitch patterns
gAlphabet characters (gothic font)
hAlphabet characters (handwriting font)
iAlphabet characters (outline)
jPatterns stored in “MY CUSTOM STITCH™” (see page 208)
kPatterns saved in the machine’s memory (see page 122)
lPatterns saved in USB media (see page 123)
mPatterns saved on the computer (see page 123)
nPress this key to create your own stitches with the “MY CUSTOM STITCH™” function (see page 202).
Note
• If the screen is locked ( ), unlock the screen by pressing . While the screen is locked, no other
key can be operated.
a
b
d
g
j
e
h
k
l
c
f
i
m
n
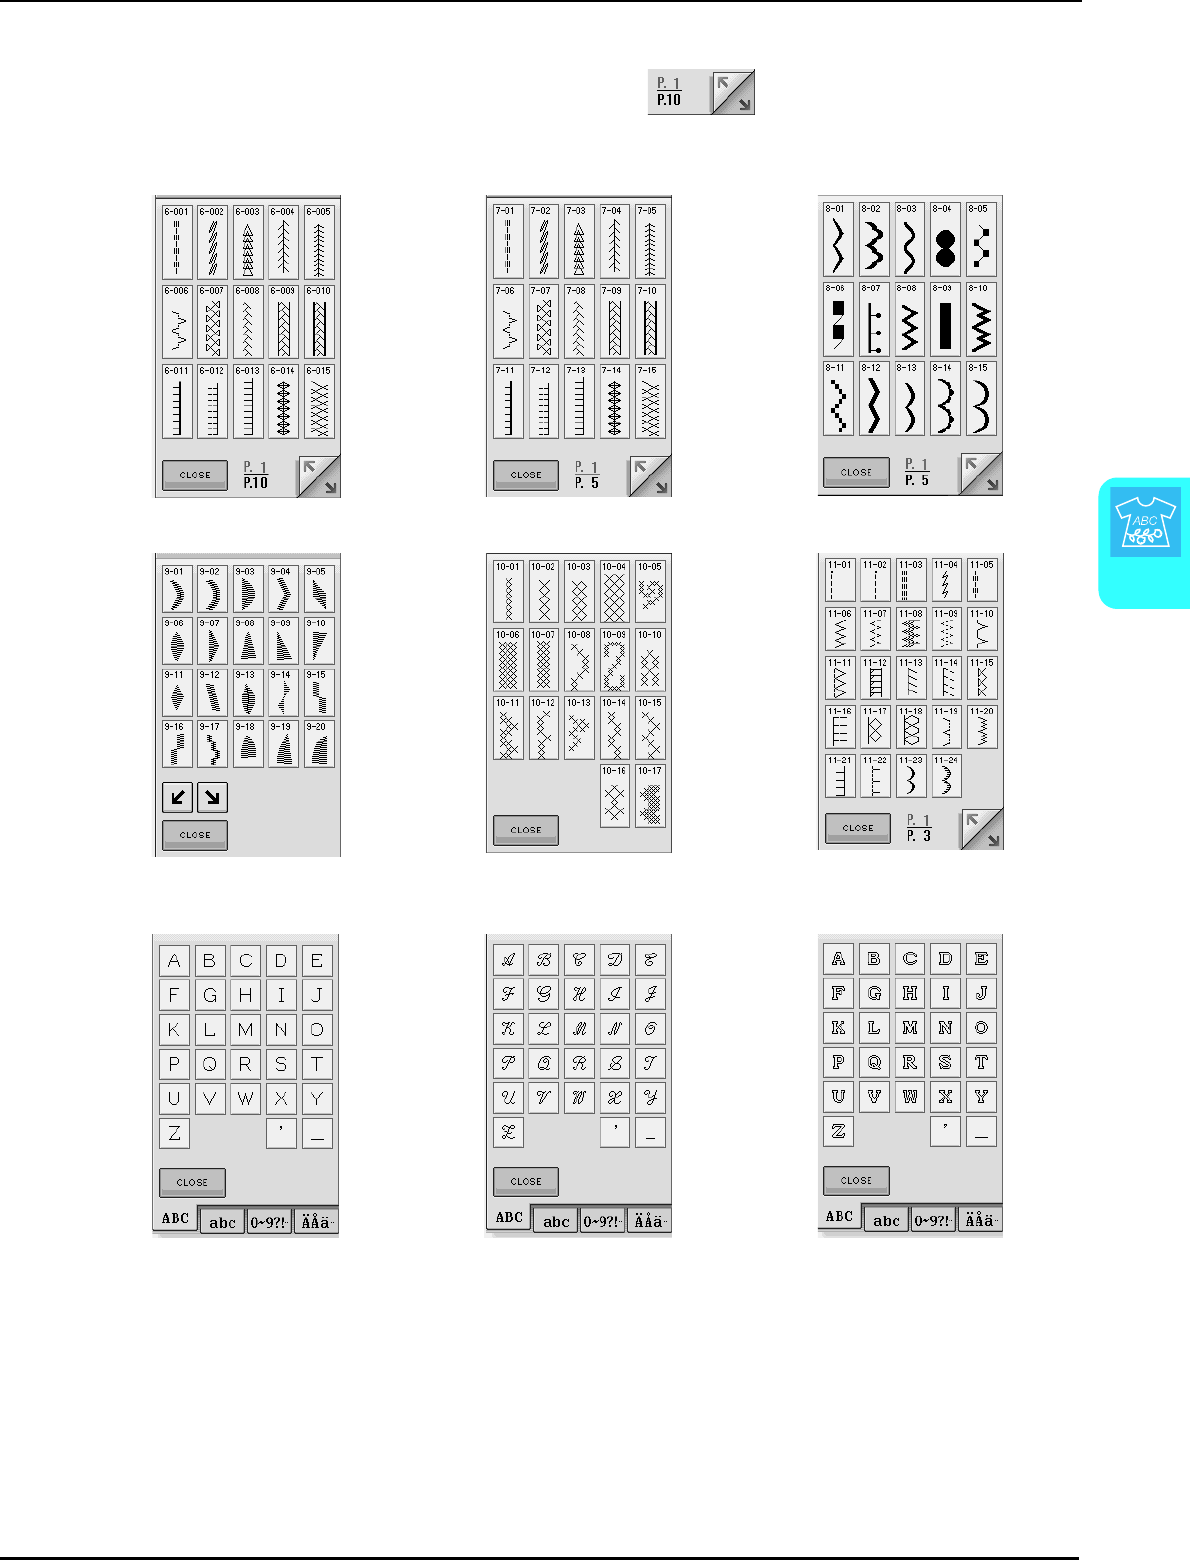
SELECTING STITCH PATTERNS
Character/Decorative Stitches
99
4
■Stitch Selection Screens
There are 9 categories of Character/Decorative stitch patterns. indicates that there is more than one
stitch selection screen for that category.
Decorative Stitch Patterns 7mm Decorative Stitch Patterns Satin Stitch Patterns
7mm Satin Stitch Patterns Cross Stitch Utility Decorative Stitch Patterns
Alphabet Characters
(Gothic Font)
Alphabet Characters
(Handwriting Font)
Alphabet Characters
(Outline)
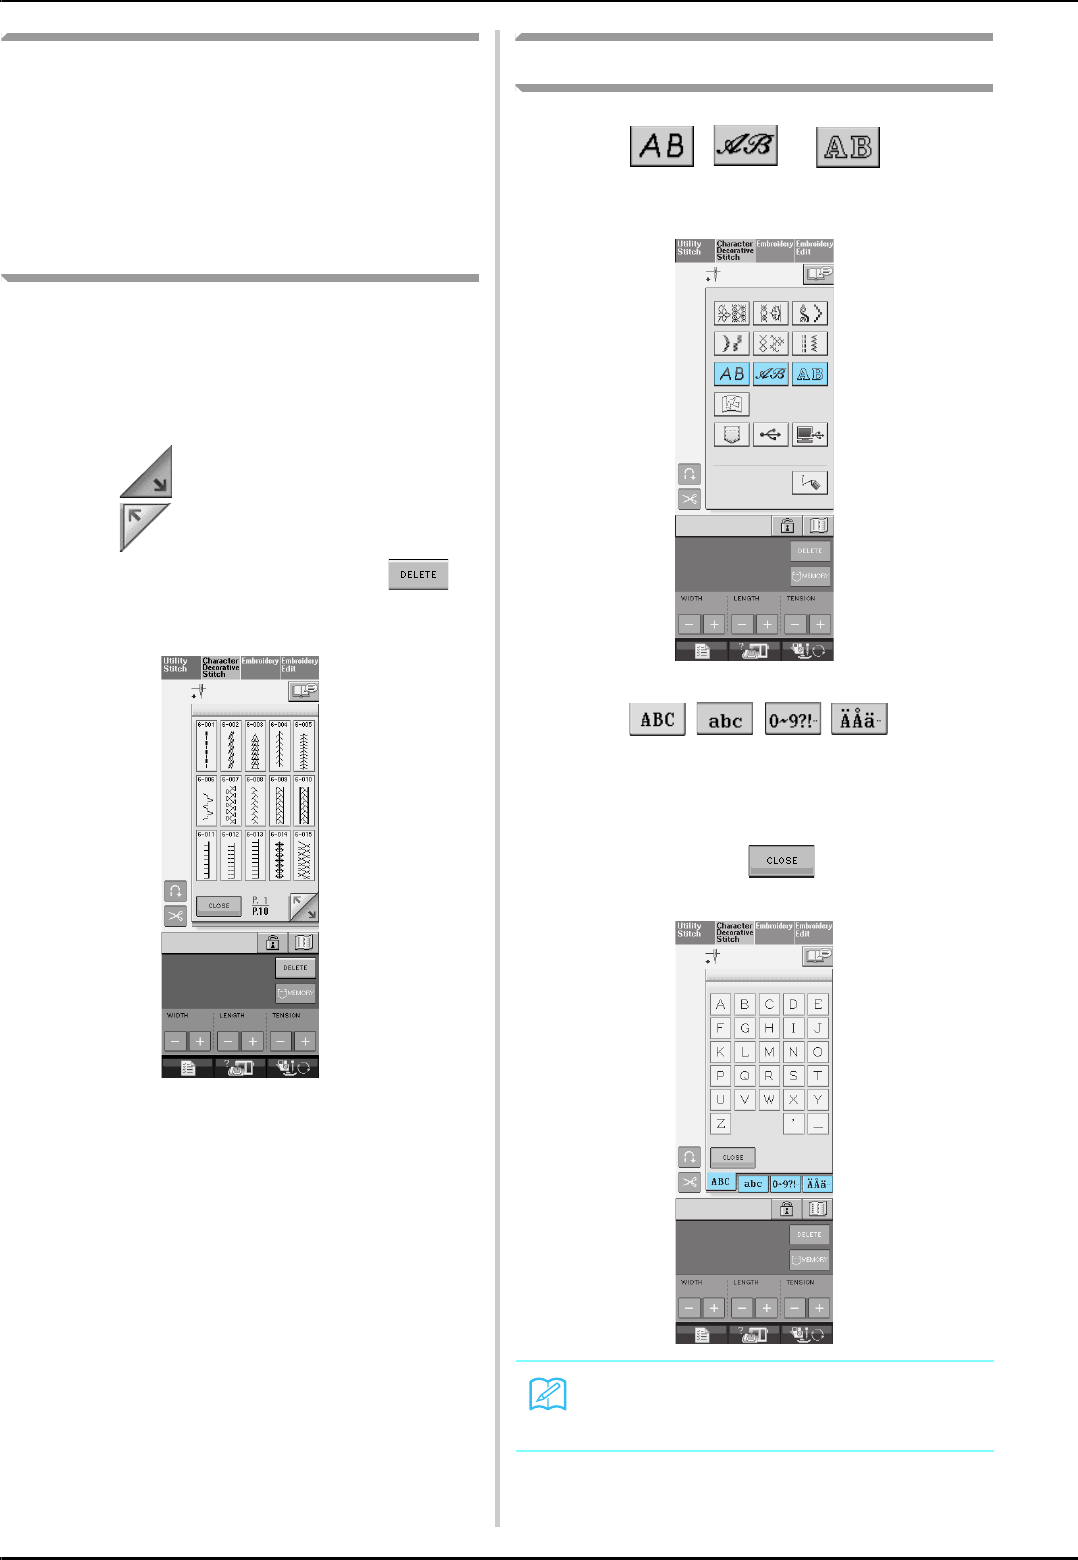
SELECTING STITCH PATTERNS
100
Selecting Decorative Stitch
Patterns/7mm Decorative Stitch
Patterns/Satin Stitch Patterns/
7mm Satin Stitch Patterns/Cross
Stitch/Utility Decorative Stitch
Patterns
aSelect the category of the pattern you want
to sew.
bPress the key of the stitch pattern you want
to sew.
* Press to view the next page.
* Press to view the previous page.
* To select a different stitch pattern, press .
When the current stitch pattern is erased, select the
new stitch pattern.
→The selected pattern is displayed.
Alphabet Characters
aPress , or to select a
font.
bPress to change
the selection screen, and then enter the
characters that you want to sew.
* If you want to continue entering characters in a
different font, press , and then repeat from
step a.
Memo
There are three fonts for alphabet character
stitching.
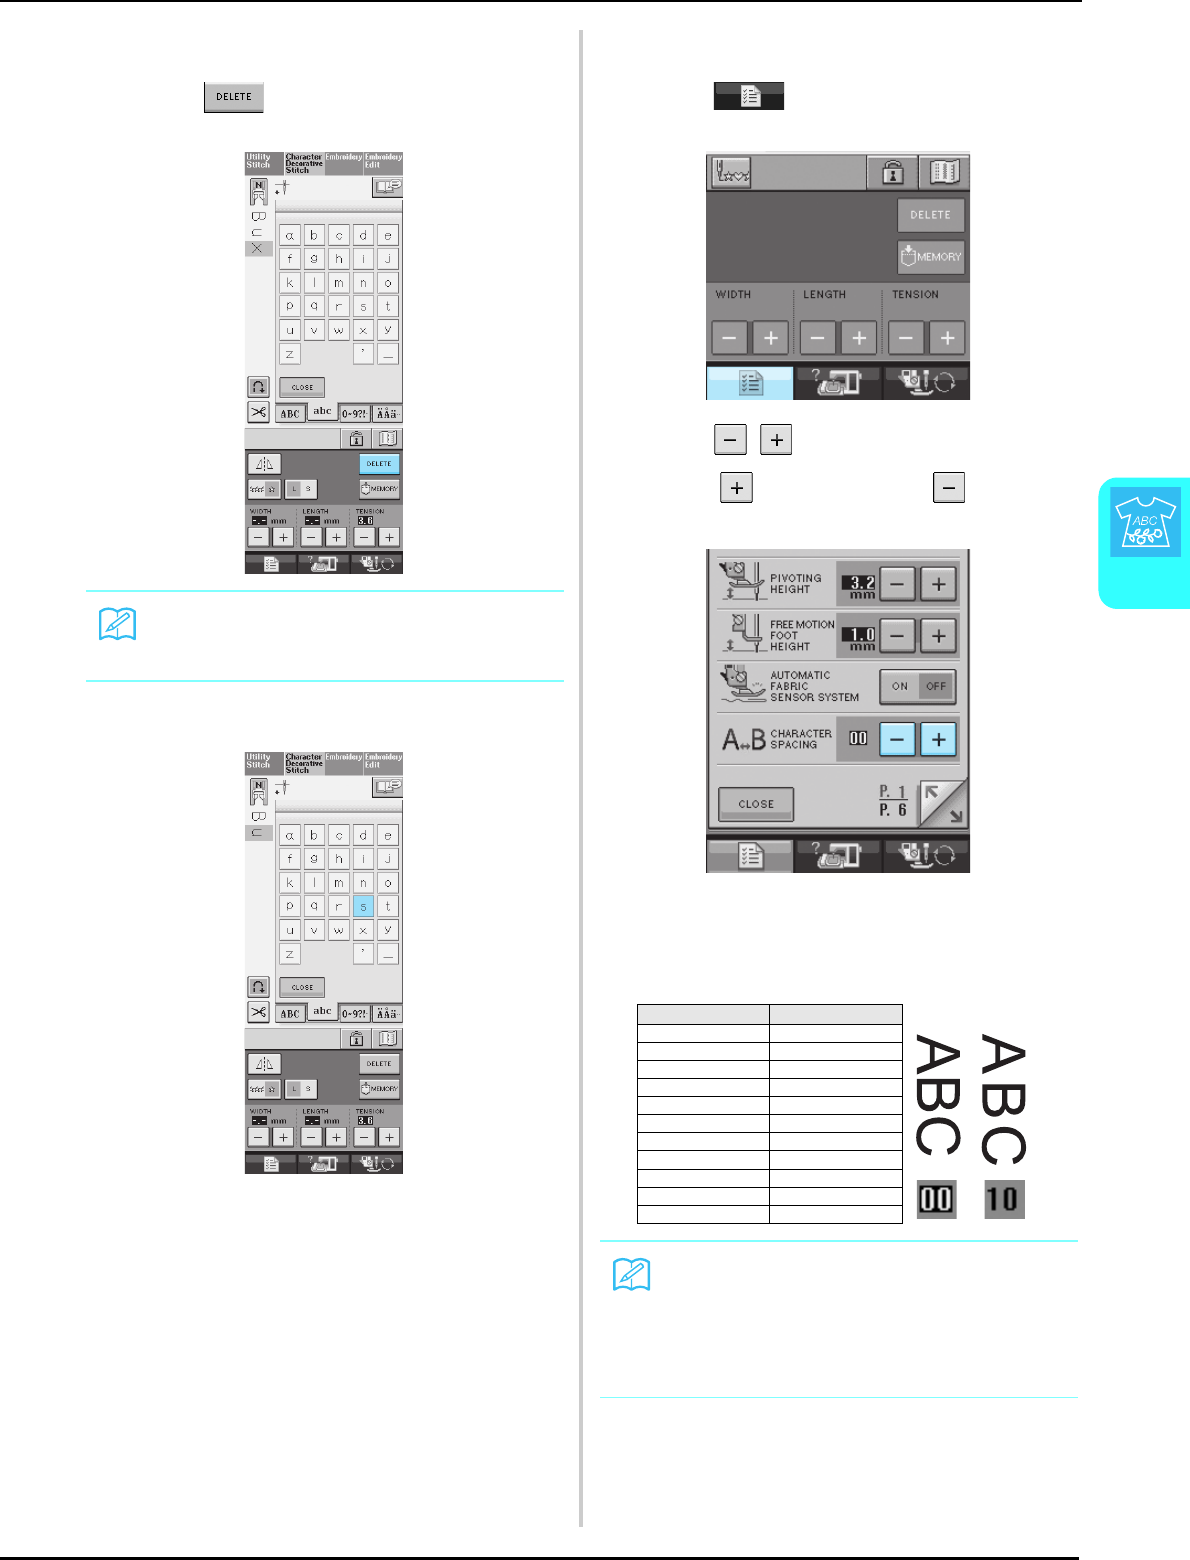
SELECTING STITCH PATTERNS
Character/Decorative Stitches
101
4
■Deleting Characters
aPress to delete the last character.
bSelect the correct character.
■Character Spacing Adjustment
aPress to display the setting screen.
bPress to adjust character spacing.
* Press to increase and press to decrease
the character spacing.
The setting range is from “00” through “10”. The
default setting is “00”.
Each setting equals a specific distance between
characters.
Memo
Characters are deleted individually starting
with the last character entered.
Value mm Example:
00 0
01 0.18
02 0.36
03 0.54
04 0.72
05 0.9
06 1.08
07 1.26
08 1.44
09 1.62
10 1.8
Memo
Changing Character Spacing by this method,
pertains to all characters. Spacing changes
are valid not only while entering characters but
also before and after the entering of charac-
ters.
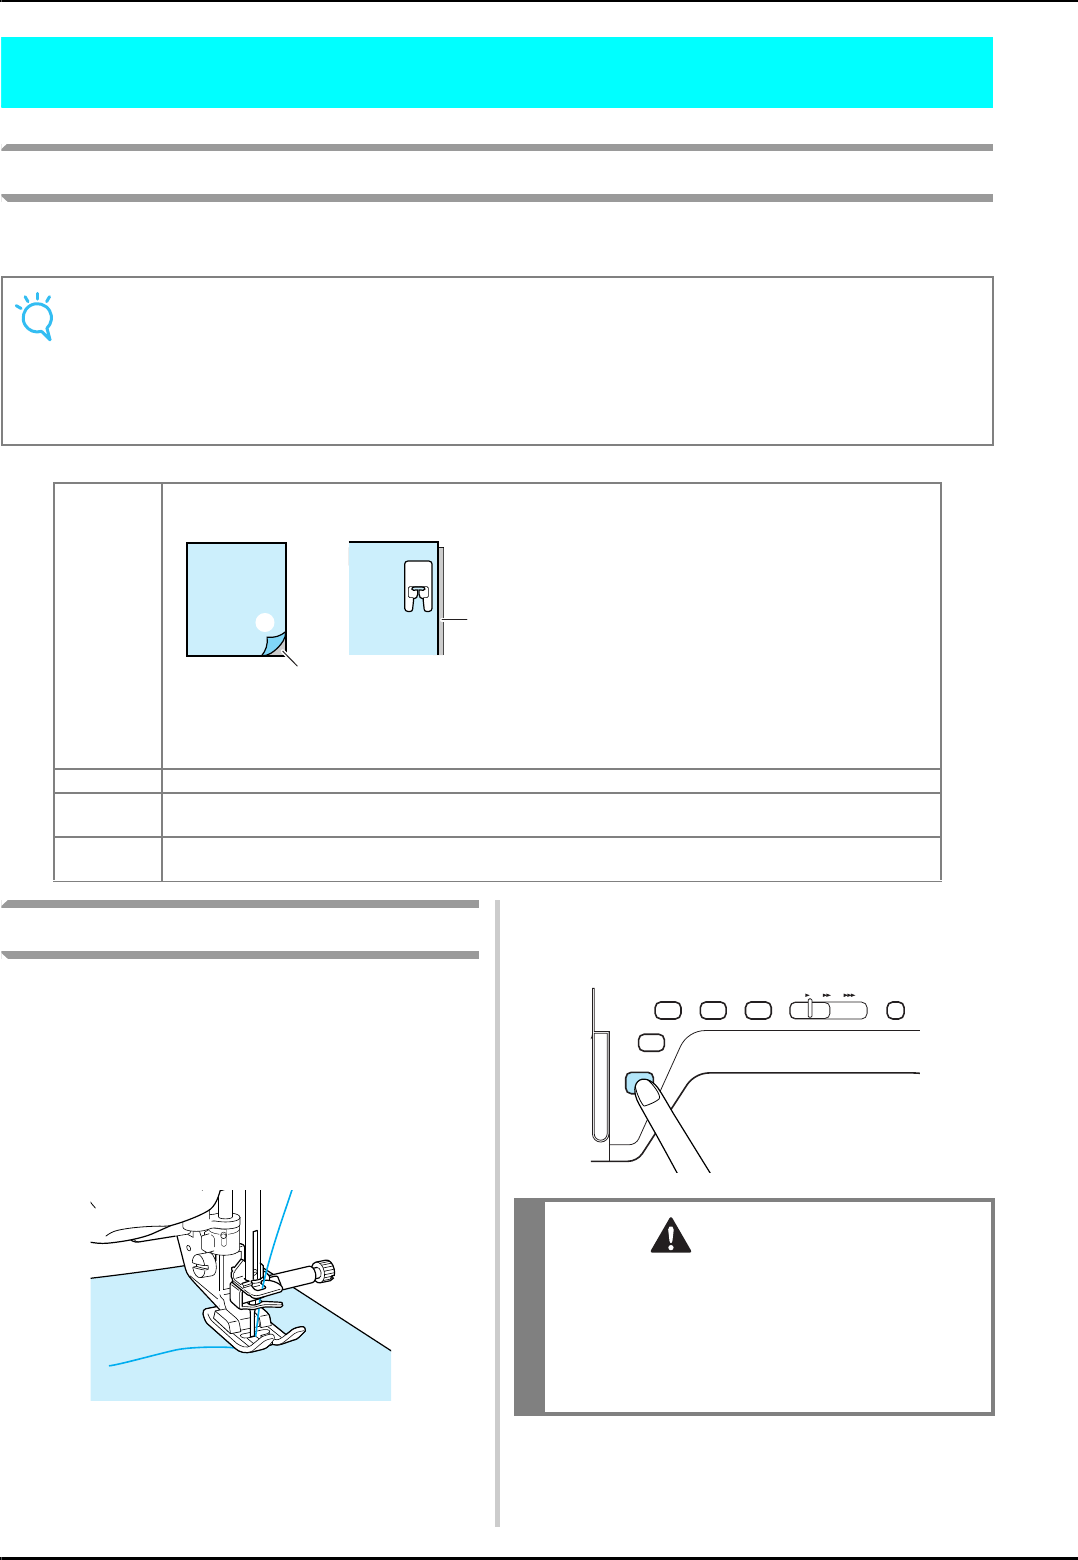
SEWING STITCH PATTERNS
102
SEWING STITCH PATTERNS
Sewing Attractive Finishes
To achieve attractive results when sewing character/decorative stitches, check the table below for the
proper fabric/needle/thread combinations.
Basic Sewing
aSelect a stitch pattern.
bAttach monogramming foot “N”.
cPlace the fabric under the presser foot, pull
the upper thread out to the side, and then
lower the presser foot.
dPress the “Start/Stop” button to start
sewing.
Note
• Other factors, such as fabric thickness, stabilizer material, etc., also have an effect on the stitch, so you
should always sew a few trial stitches before beginning your project.
• When sewing satin stitch patterns, there may be shrinking or bunching of stitches, so be sure to attach
a stabilizer material.
• Guide the fabric with your hand to keep the fabric feeding straight and even during sewing.
Fabric When sewing on stretch fabrics, lightweight fabrics, or fabrics with coarse weaves, attach stabilizer on the
wrong side of the fabric. If you do not wish to do so, place the fabric on a thin paper such as tracing paper.
aFabric
bStabilizer
cThin paper
Thread #50 - #60
Needle With lightweight, regular, or stretch fabrics: the Ball point needle (golden colored)
With heavyweight fabrics: home sewing machine needle 90/14
Presser foot Monogramming foot “N”.
Using another presser foot may give inferior results.
N
b
c
a
CAUTION
• When sewing 7 mm satin stitch patterns and
the stitches are bunched, lengthen the stitch
length. If you continue sewing when the
stitches are bunched, the needle may bend or
break (see “Setting the Stitch Length” on page
42).
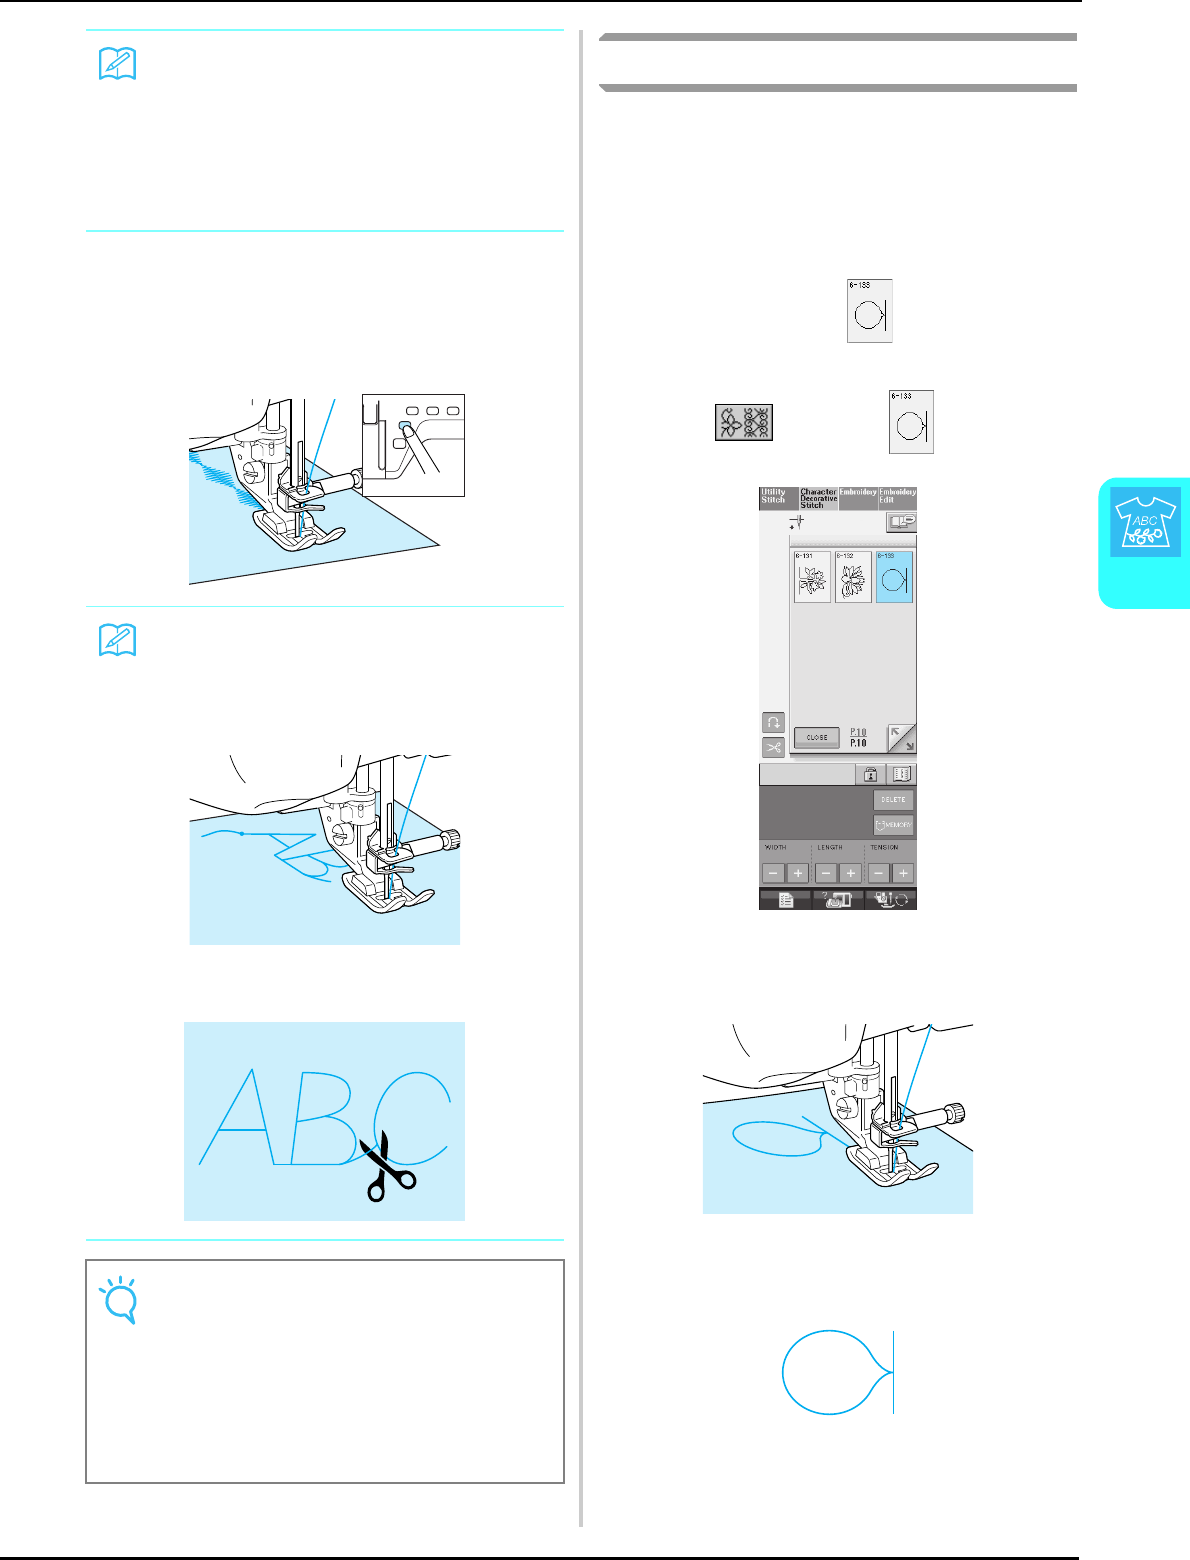
SEWING STITCH PATTERNS
Character/Decorative Stitches
103
4
ePress the “Start/Stop” button to stop
sewing.
fPress the “Reverse/Reinforcement Stitch”
button to sew reinforcement stitches.
Making Adjustments
Your stitch pattern may sometimes turn out poorly,
depending on the type or thickness of fabric, the
stabilizer material used, sewing speed, etc. If your
sewing does not turn out well, sew trial stitches
using the same conditions as the real sewing, and
adjust the stitch pattern as explained below. If the
pattern does not turn out well even after making
adjustments based on the pattern, make
adjustments for each pattern individually.
aPress and select on P.10.
bAttach monogramming foot “N” and sew
the pattern.
cCompare the finished pattern to the
illustration of the correct pattern below.
Memo
If the fabric is pulled or pushed during sewing,
the pattern may not turn out correctly. Also,
depending on the pattern, there may be move-
ment to the left and right as well as front and
back. Guide the fabric with your hand to keep
the fabric feeding straight and even during
sewing.
Memo
• When sewing character stitches, the
machine automatically sews reinforcement
stitches at the beginning and end of each
character.
• When sewing is completed, trim any excess
thread.
Note
• When sewing some patterns, the needle will
stop in the raised position while the fabric is
fed due to the operation of the needle bar
separation mechanism which is used in this
machine. At such times, a clicking sound dif-
ferent from the sound generated during sew-
ing will be heard. This sound is normal and
is not the sign of a malfunction.
SEWING STITCH PATTERNS
104
dPress , and then adjust the pattern
with the FINE ADJUST VERTI. or HORIZ.
displays.
* If the pattern is bunched:
Press in the FINE ADJUST VERTI. display.
→The displayed value increases each time the button
is pressed and the pattern will lengthen.
* If the pattern has gaps:
Press in the FINE ADJUST VERTI. display.
→The displayed value decreases each time the button
is pressed and the pattern will shorten.
* If the pattern is skewed to the left:
Press in the FINE ADJUST HORIZ. display.
→The displayed value increases each time the button
is pressed and the pattern will slide to the right.
* If the pattern is skewed to the right:
Press in the FINE ADJUST HORIZ. display.
→The displayed value decreases each time the button
is pressed and the pattern will slide to the left.
eSew the stitch pattern again.
* If the stitch pattern still comes out poorly, make
adjustments again. Adjust until the stitch pattern
comes out correctly.
fPress to return to the original
screen.
Memo
You can sew with the setting screen on the
display.
EDITING STITCH PATTERNS
Character/Decorative Stitches
105
4
EDITING STITCH PATTERNS
■Key Functions
You can create just the finish you want using the editing functions. Make patterns larger or smaller, make mirror
images, etc.
Note
• Some editing functions cannot be used with certain stitch patterns. Only the functions for the displayed
keys are available when a pattern is selected.
No. Display Key Name Explanation Page
aAutomatic
reinforcement stitch
key
Press this key to turn on the automatic reinforcement stitching mode. 44
bAutomatic thread
cutting key
Press this key to turn on the automatic thread cutting mode. 45
cScreen lock key Press this key to lock the screen. When the screen is locked, the various
settings, such as the stitch width and stitch length, are locked and cannot be
changed. Press this key again to unlock the settings.
46
dImage key Press this key to check large combination patterns. 108
eHorizontal mirror
image key
After selecting the stitch pattern, use this key to create a horizontal mirror image
of the stitch pattern.
107
fVertical mirror image
key
After selecting the stitch pattern, use this key to create a vertical mirror image of
the stitch pattern.
107
gNeedle mode
selection key
(Single/Double)
Press this key to choose single needle sewing or twin needle sewing. 29
a
b
c
f
e
h
d
o
l
m
i
n
g
a
b
c
f
e
h
d
o
l
m
k
n
j
EDITING STITCH PATTERNS
106
Changing the Size
Select a stitch pattern, then press to change the size of the stitch pattern. The stitch pattern will be
sewn in the size highlighted on the key.
Actual Stitch Pattern Size
hSingle/Repeat sewing
key
Press this key to choose single stitches or continuous stitches. 107
iElongation key When 7mm satin stitch patterns are selected, press this key to choose from 5
automatic length settings, without changing the stitch zigzag width or stitch
length settings.
107
jSize selection key Use this key to select the size of the stitch pattern (large, small). 106
kThread density key After selecting the stitch pattern, use this key to change the thread density of the
pattern.
108
lDelete key When you make a mistake selecting a stitch pattern, use this key to delete the
mistake. When you make a mistake in combining stitch patterns, use this key to
delete stitch patterns.
100, 101
mMemory key Use this key to save stitch pattern combinations. 118-119
nStitch width and stitch
length key
Shows the stitch width and stitch length of the selected stitch pattern. The
machine has default settings.
42-43
oThread tension key Shows the thread tension setting for the selected stitch pattern. The machine
has default settings.
43
Memo
• If you continue entering stitch patterns after changing the size, those patterns will also be sewn in that
size.
• You cannot change the size of combined stitch patterns once the stitch pattern is entered.
No. Display Key Name Explanation Page
LS
LS
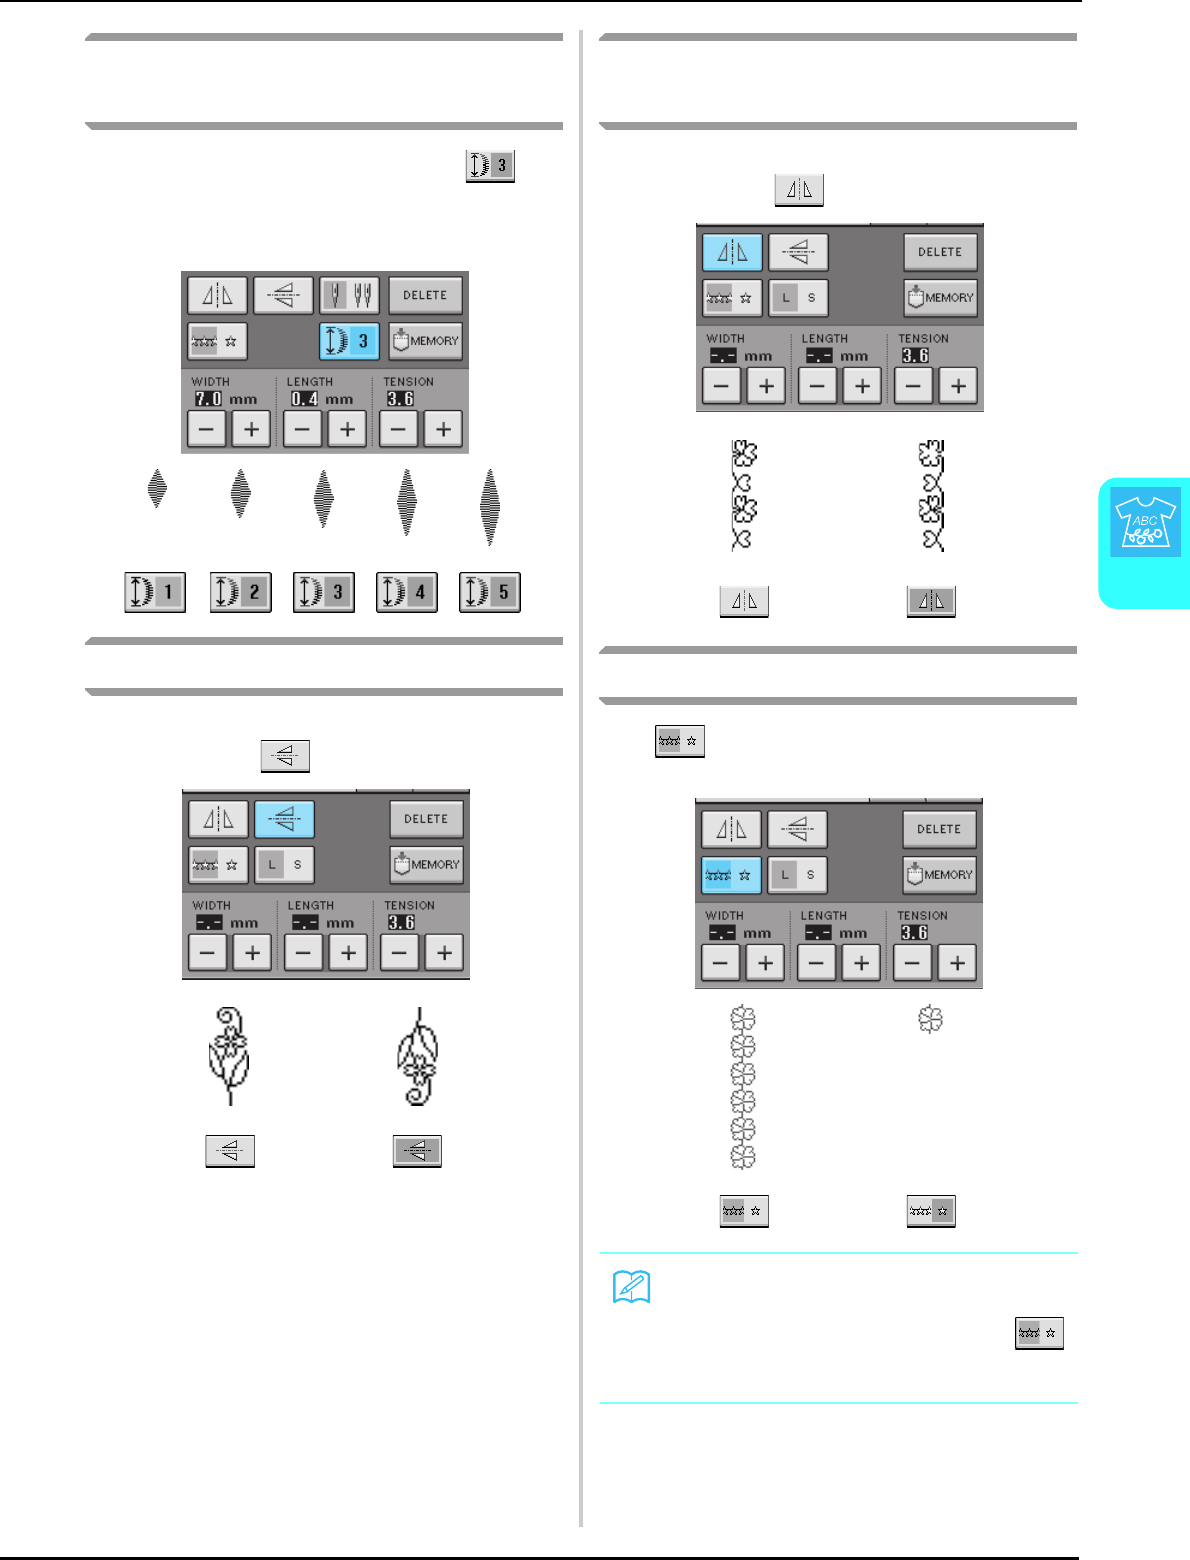
EDITING STITCH PATTERNS
Character/Decorative Stitches
107
4
Changing the Length (for 7mm
Satin Stitch Patterns Only)
When stitch patterns are selected, press to
choose from 5 automatic length settings, without
changing the stitch zigzag width or stitch length
settings.
Creating a Vertical Mirror Image
To create a vertical mirror image, select a stitch
pattern then press .
Creating a Horizontal Mirror
Image
To create a horizontal mirror image, select a stitch
pattern then press .
Sewing a Pattern Continuously
Press to select continuous sewing or single
stitch sewing.
Memo
To finish a complete motif while sewing the
pattern continuously, you can press the
key while sewing. The machine will automati-
cally stop when the motif is finished.
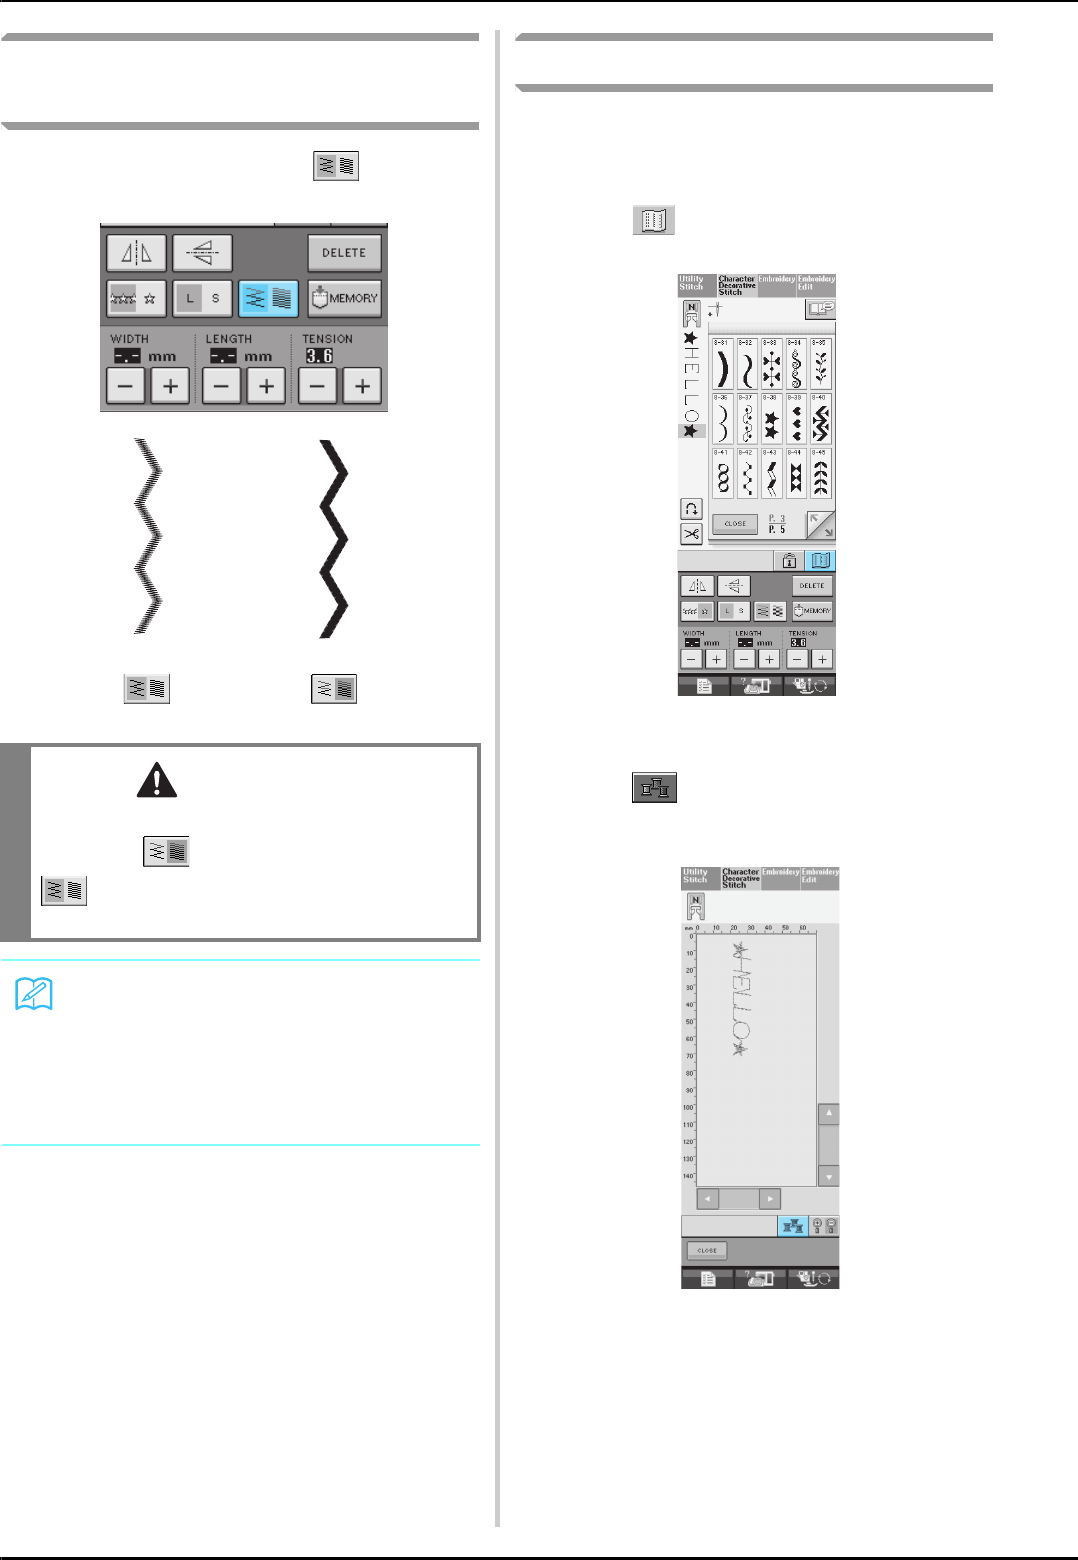
EDITING STITCH PATTERNS
108
Changing Thread Density
(for Satin Stitch Patterns Only)
After selecting the pattern, press to select
your preferred thread density.
Checking the Image
You can display an actual size image of the
selected stitch pattern. You can also check and
change the colors of the image on the screen.
aPress .
→An image of the selected pattern is displayed.
bPress to change the thread color in
the image.
→The color changes every time you press the button.
CAUTION
If the stitches bunch when thread density is
changed to , return the thread density to
. If you continue sewing when the stitches
are bunched, the needle may bend or break.
Memo
• Even if you select a new pattern after chang-
ing the thread density, the thread density
remains the same until you change it.
• You cannot change thread density for a
combined pattern after the combination is
finished.
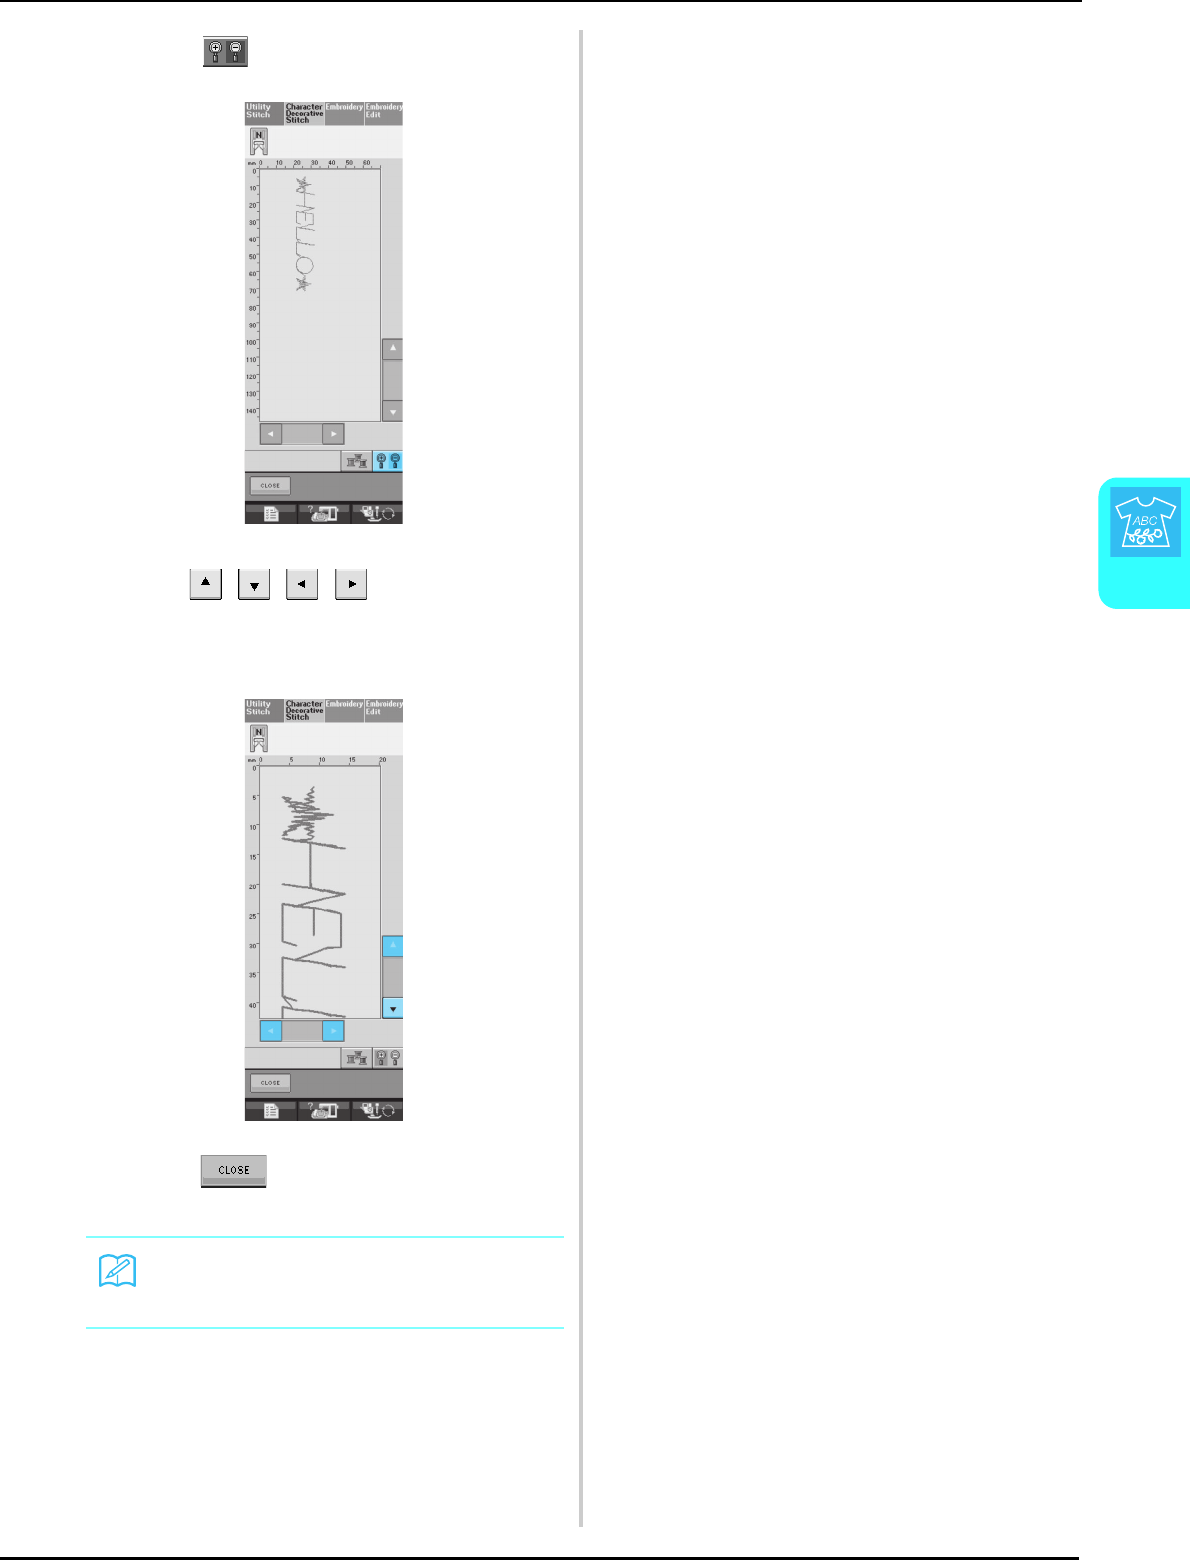
EDITING STITCH PATTERNS
Character/Decorative Stitches
109
4
cPress to display the enlarged image.
dUse to view any part of
the image that extends out of the viewable
display area.
ePress to return to the original
screen.
Memo
You can also sew from this screen when the
presser foot symbol is displayed.
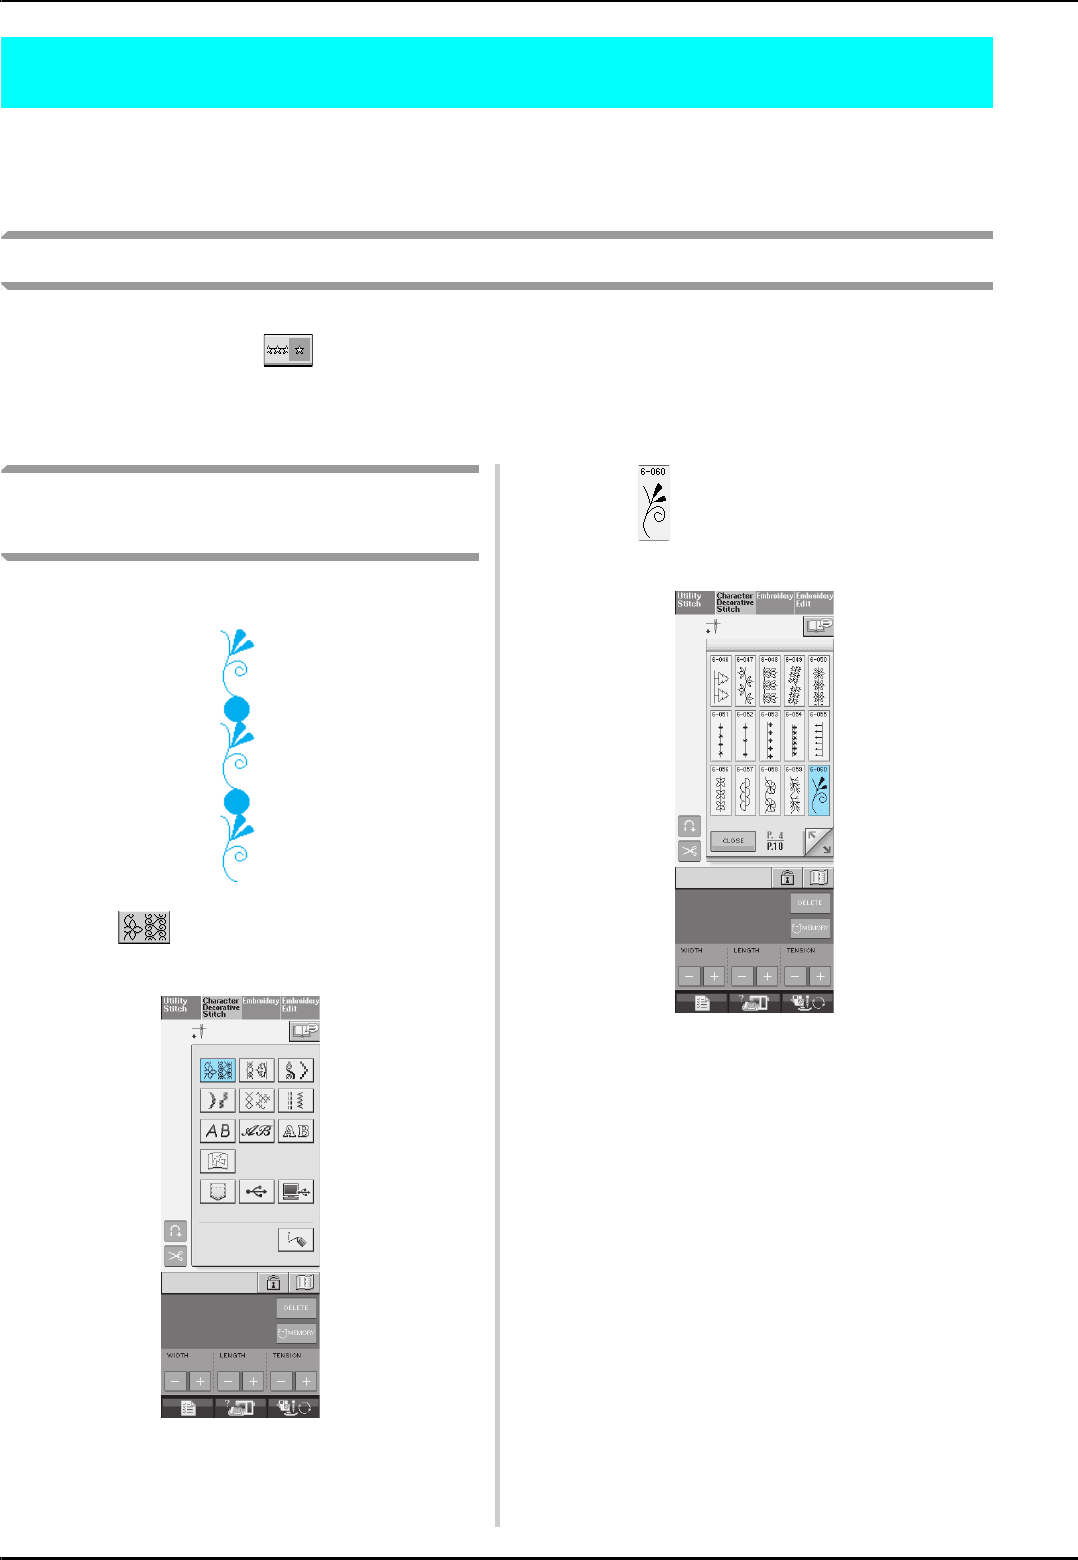
COMBINING STITCH PATTERNS
110
COMBINING STITCH PATTERNS
You can combine many varieties of stitch patterns, such as character stitches, cross stitches, satin stitches,
or stitches you design with MY CUSTOM STITCH function (see chapter 7 for information about MY
CUSTOM STITCH). You can also combine stitch patterns of different sizes, mirror image stitch patterns,
and others.
Before Combining
Single stitch sewing is automatically selected for sewing combined patterns. If you want to sew the
pattern continuously, press after finishing the stitch pattern combination.
When changing sizes, creating mirror images, or making other adjustments to a combined stitch pattern,
be sure to edit the selected stitch pattern before selecting the next one. You cannot edit a stitch pattern
once the next stitch pattern is selected.
Combining Various Stitch
Patterns
Example:
aPress .
bSelect .
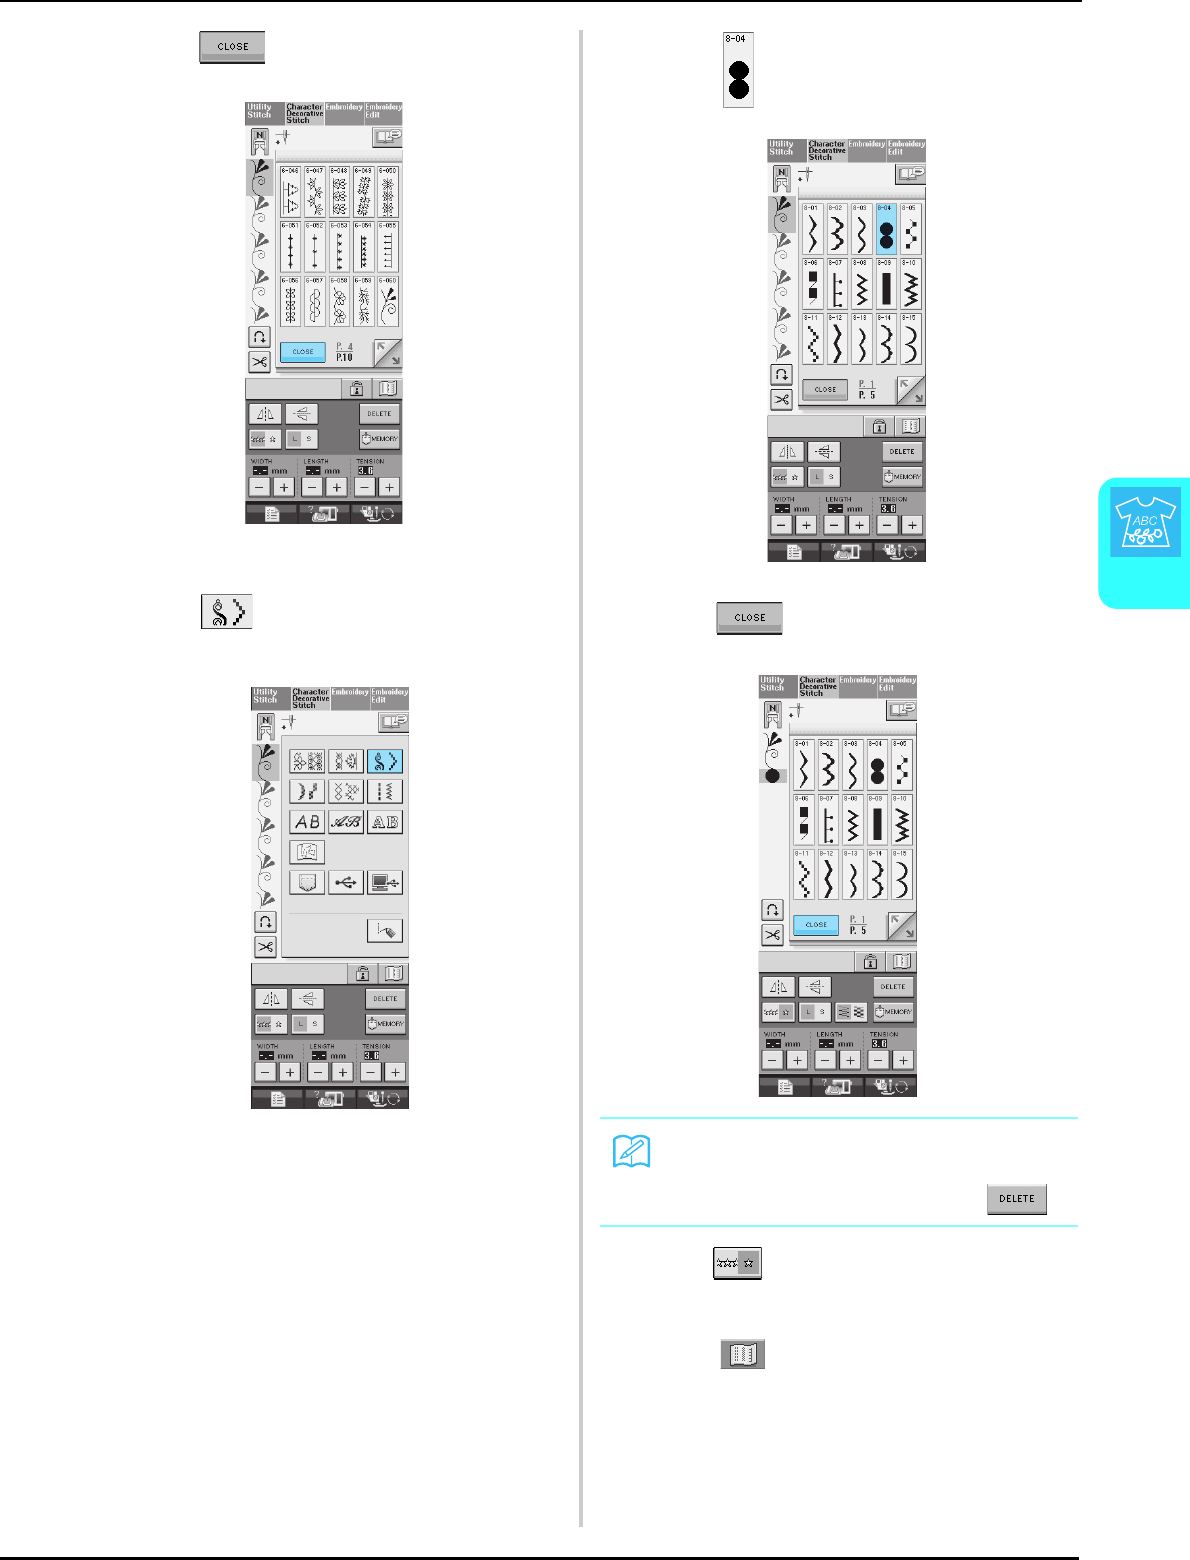
COMBINING STITCH PATTERNS
Character/Decorative Stitches
111
4
cPress .
→The display returns to the stitch selection screen.
dPress .
eSelect .
fPress .
gPress to sew the pattern
continuously.
* Press to view the completed pattern (see
page 108).
Memo
Patterns are deleted individually starting with
the last pattern entered by pressing .
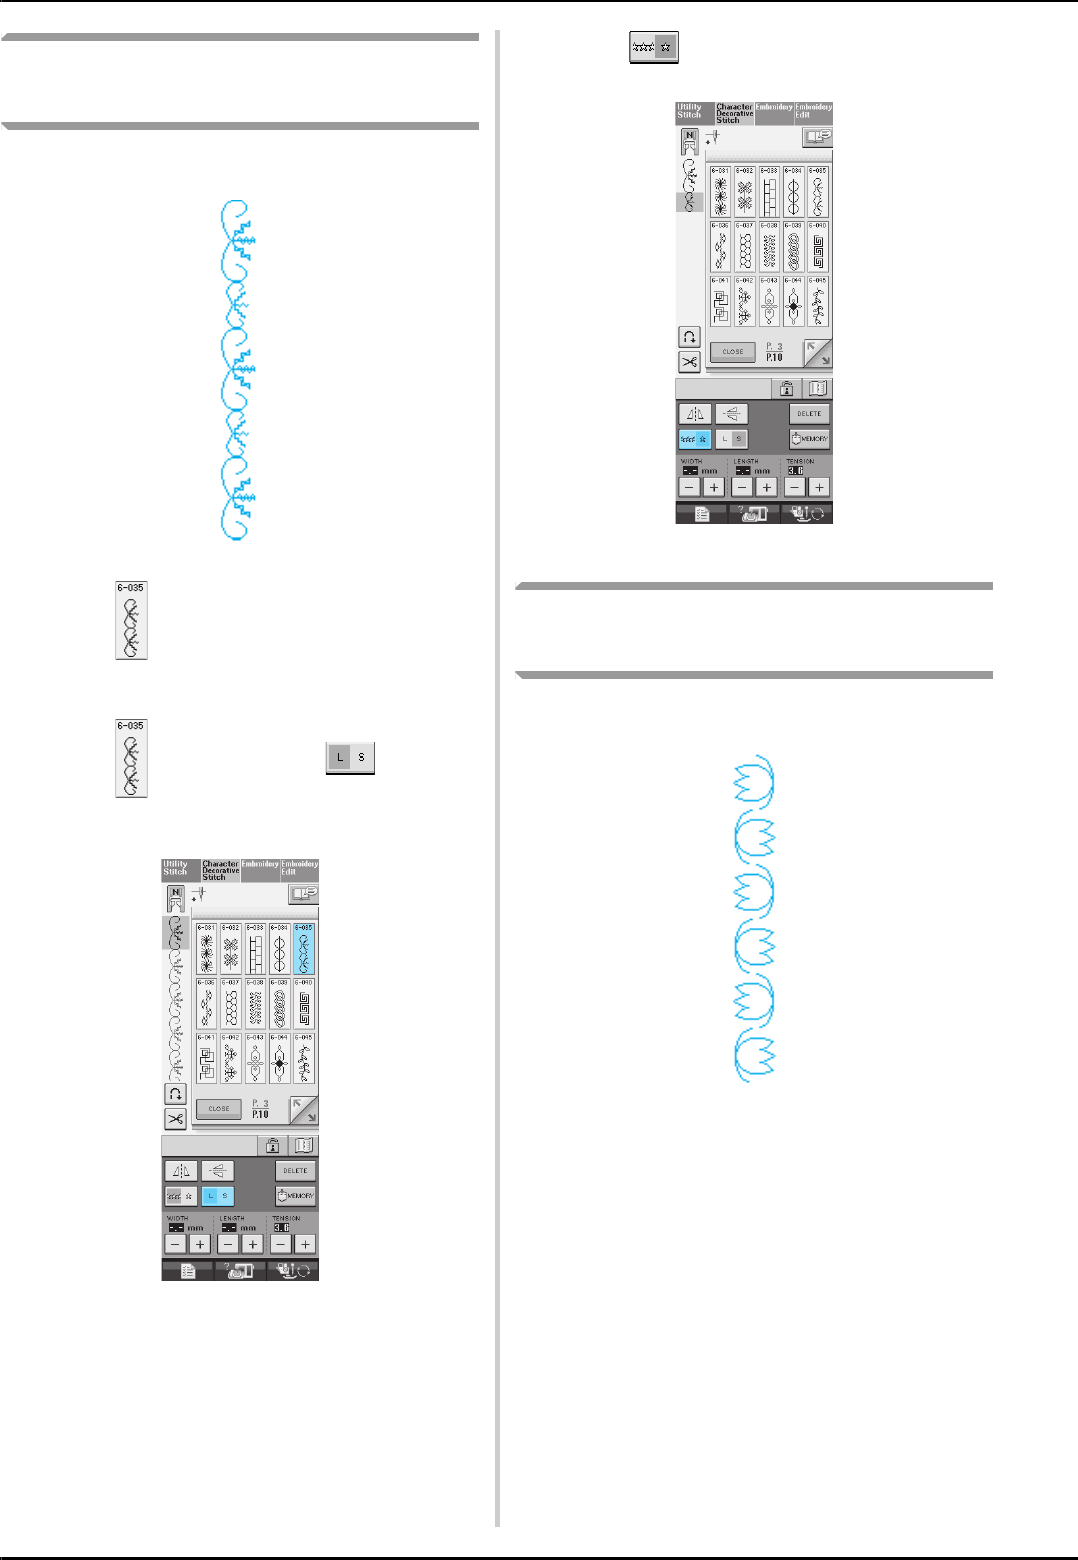
COMBINING STITCH PATTERNS
112
Combining Large and Small
Stitch Patterns
Example:
aPress .
→The large size stitch will be selected.
bPress again, then press to select
the small size.
→The pattern is displayed in a smaller size.
cPress to sew continuously.
→The entered pattern is repeated.
Combining Horizontal Mirror
Image Stitch Patterns
Example:
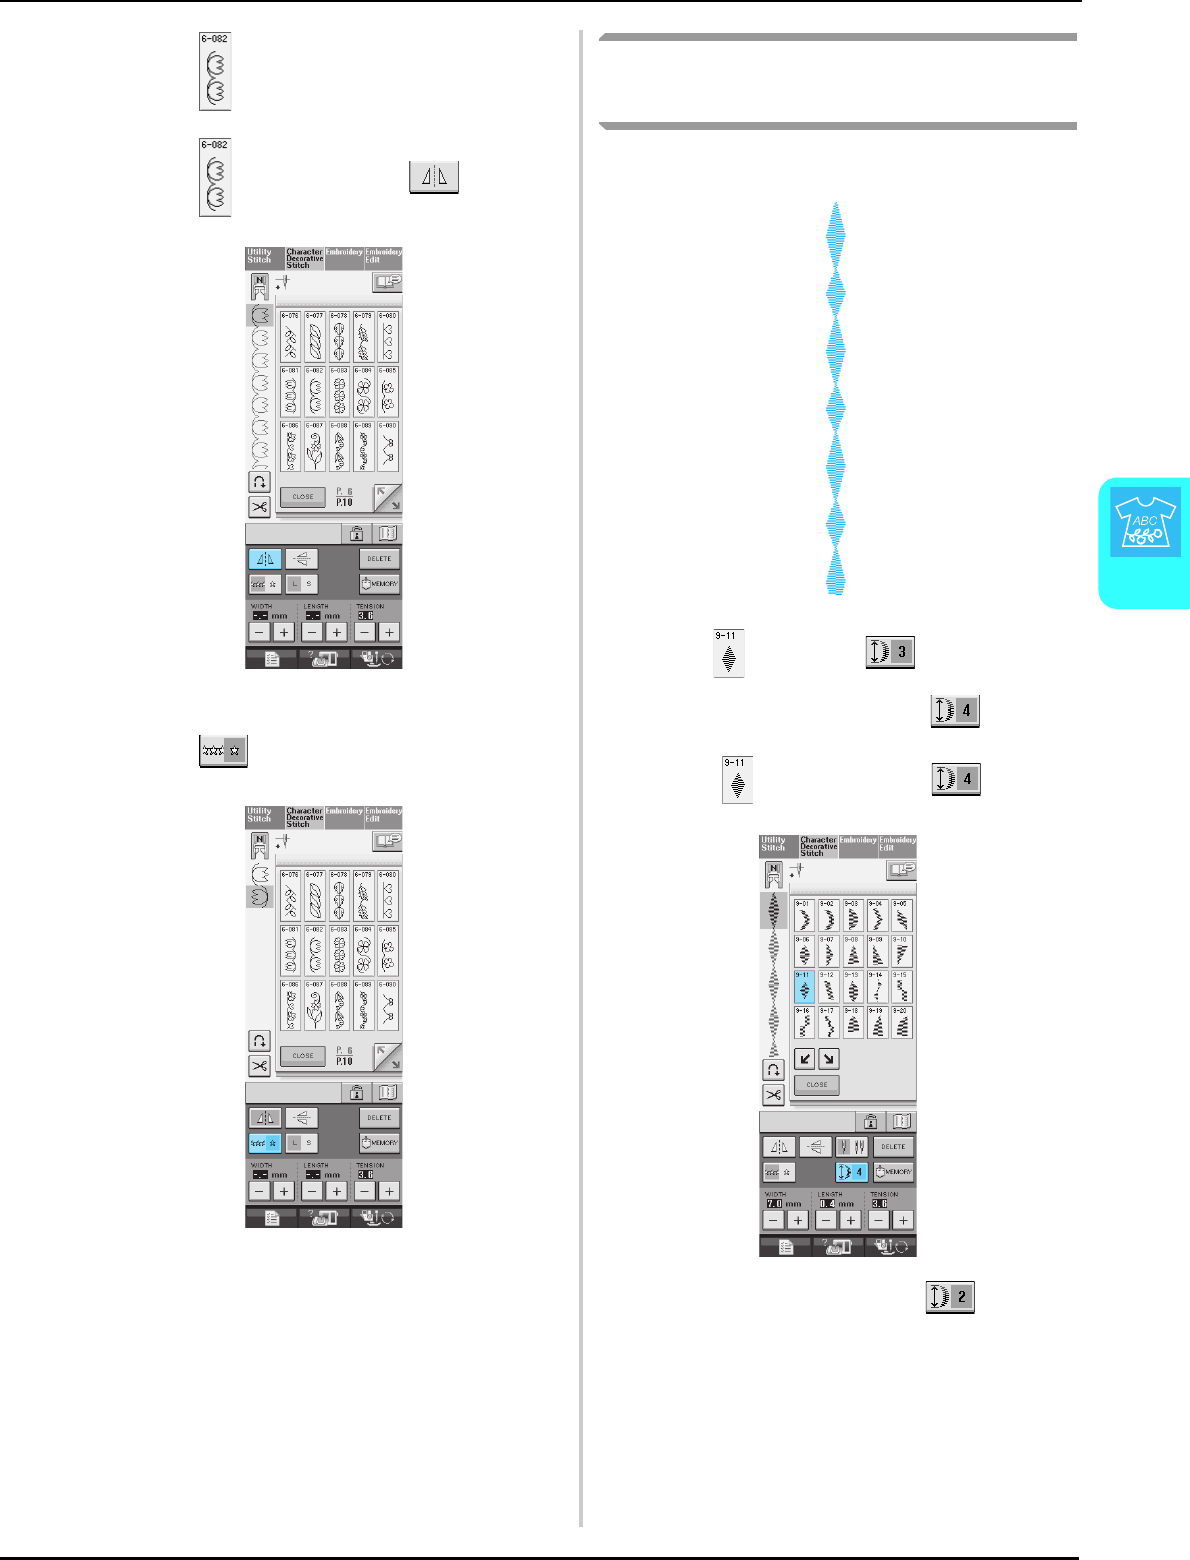
COMBINING STITCH PATTERNS
Character/Decorative Stitches
113
4
aPress .
bPress again, then press .
→The pattern is flipped along a vertical axis.
cPress .
→The entered pattern is repeated.
Combining Stitch Patterns of
Different Length
Example:
aPress , then press once.
→ The length of the image is set to .
bSelect again, then press 3 times.
→The length of the image is set to .
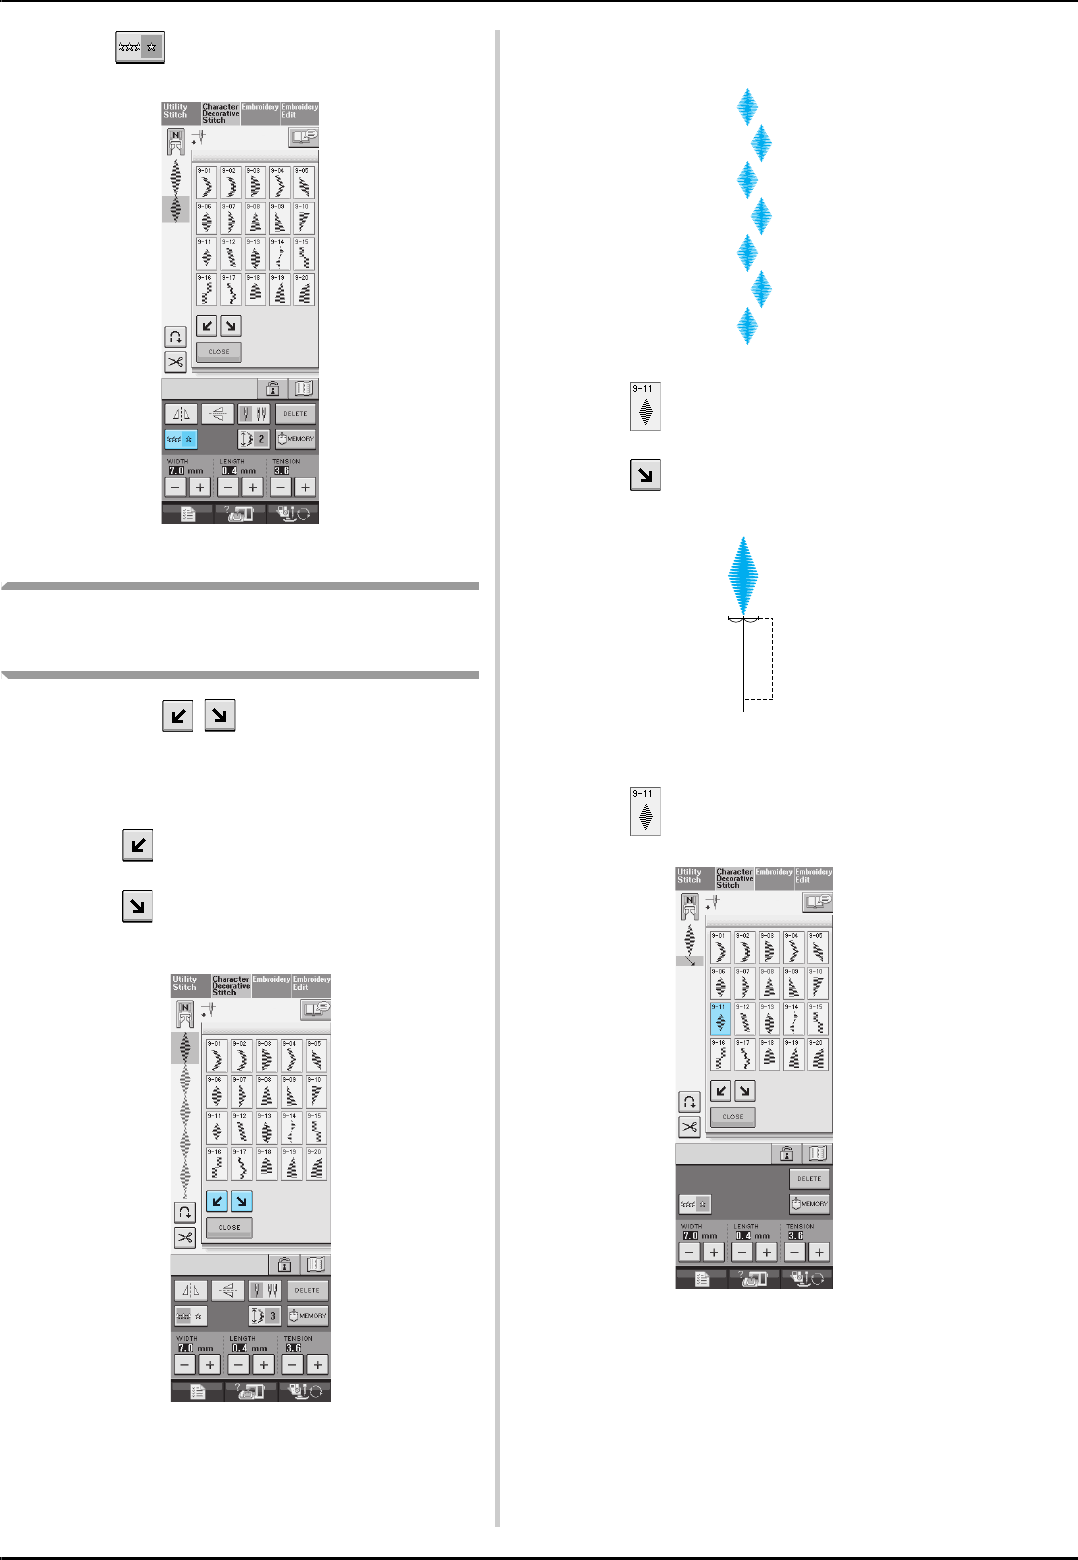
COMBINING STITCH PATTERNS
114
cPress .
→The entered pattern is repeated.
Making Step Stitch Patterns (for
7mm Satin Stitch Patterns Only)
You can use the keys with 7mm satin
stitch patterns to create a step effect.
Stitch patterns sewn so that they create a step
effect are called step stitch patterns.
* Press to move the stitch pattern a distance
equal to half of the stitch pattern’s size to the left.
* Press to move the stitch pattern a distance
equal to half of the stitch pattern’s size to the right.
Example:
aPress .
bPress .
→The next stitch pattern will move to the right.
cPress again.
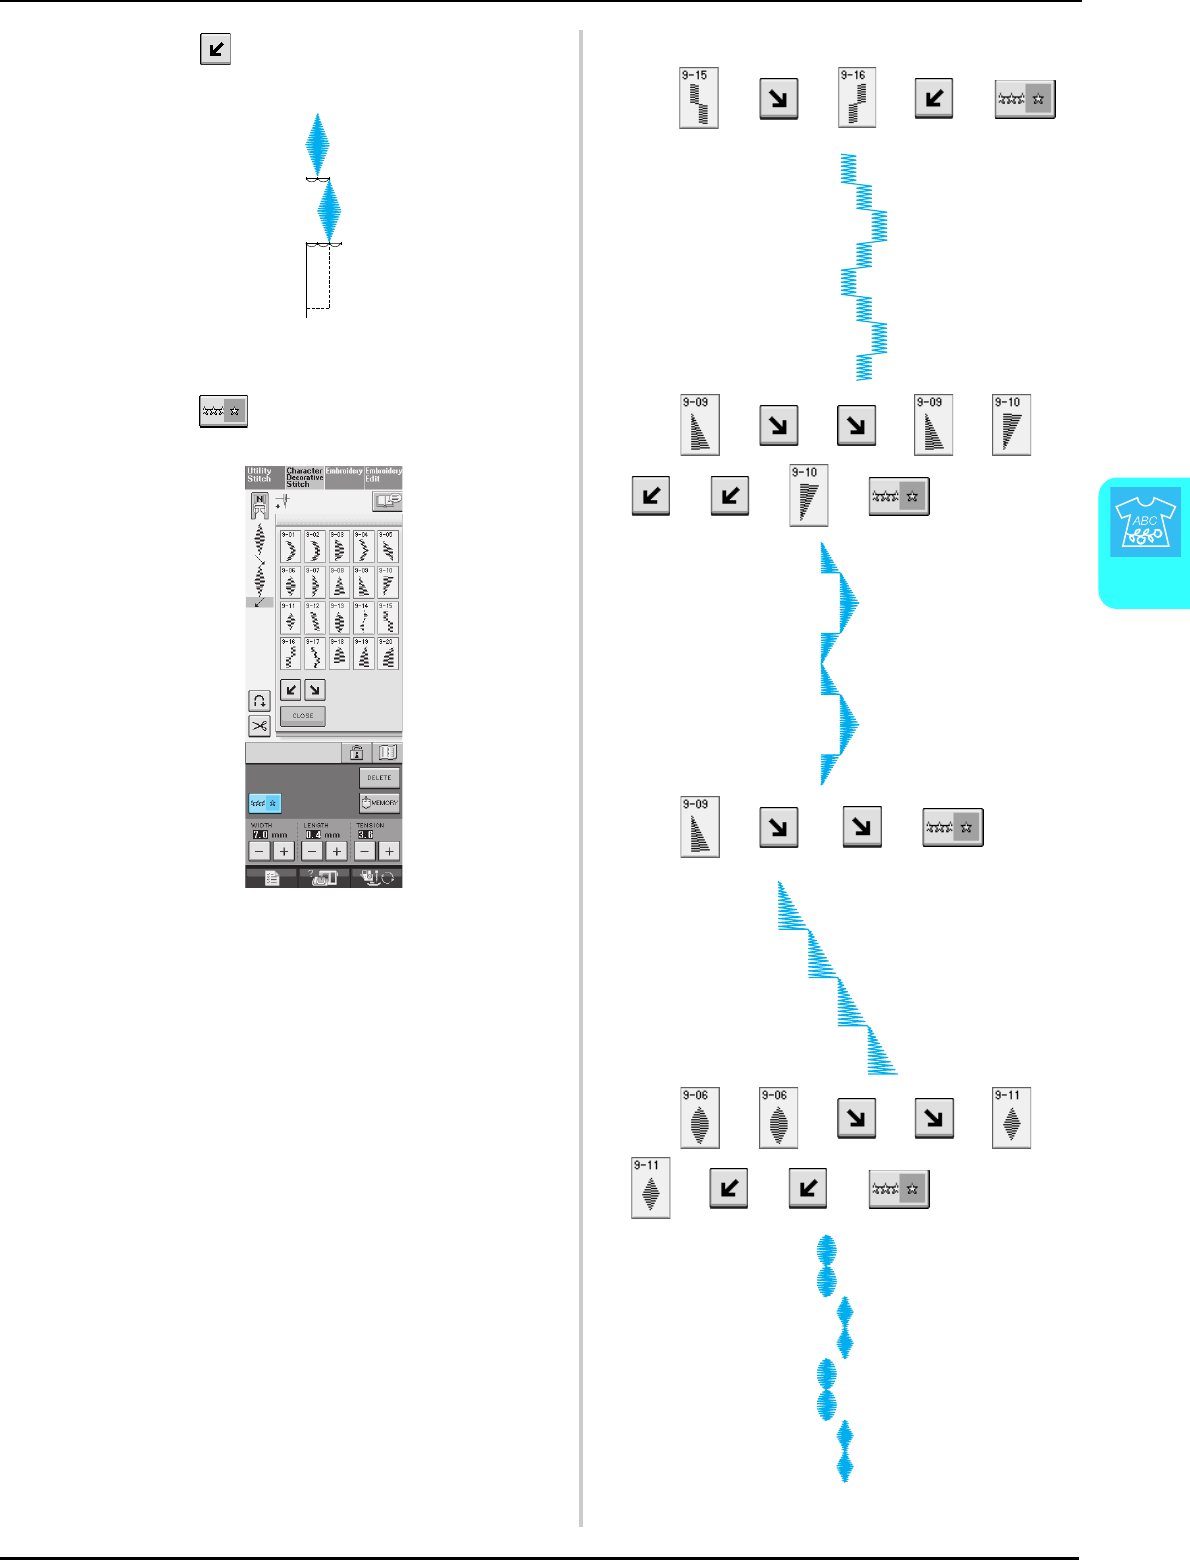
COMBINING STITCH PATTERNS
Character/Decorative Stitches
115
4
dPress .
→The next stitch pattern will move to the left.
ePress .
→The entered pattern is repeated.
■More Examples
Press → → → → .
Press → → → → →
→ → → .
Press → → → .
Press → → → → →
→ → → .

USING THE MEMORY FUNCTION
116
USING THE MEMORY FUNCTION
Stitch Data Precautions
Observe the following precautions when using stitch data other than that created and saved in this
machine.
■Types of Stitch Data that can be Used
• Only .pmu stitch data files can be used with this machine. Using data other than that created using this
machine may cause the machine to malfunction.
■Types of USB Devices/Media that can be Used
Stitch data can be saved to or recalled from USB media. Use media that meets the following specifications.
• USB Floppy disk drive
• USB Flash drive (USB Flash memory)
Stitch data can be recalled only.
• USB CD-ROM, CD-R, CD-RW drives
You can also use the following types of USB media with the USB Memory Card Reader/Writer.
• Secure Digital (SD) Card
• CompactFlash
• Memory Stick
•Smart Media
• Multi Media Card (MMC)
• XD-Picture Card
• When a file folder is necessary to create, use a computer.
■Computers and Operating Systems with the Following Specifications can be
Used
• Compatible models:
IBM PC with a USB port as standard equipment
IBM PC-compatible computer equipped with a USB port as standard equipment
• Compatible operating systems:
Microsoft Windows 98SE/Me/2000/XP/Windows Vista/7
(Windows 98SE requires a driver. Download the driver from our Web site (www.brother.com). In addition,
only Windows 98 Second Edition can use the driver.).
■Precautions on Using the Computer to Create and Save Data
• If the file name of stitch data cannot be identified, for example, because the name contains special characters,
the file is not displayed. If this occurs, change the name of the file.
Note
• Some USB media may not be usable with this machine. Please visit our website for more details.
• USB hubs cannot be used with this machine. The machine will not recognize the above USB devices or
USB memory cards through a USB hub.
• The access lamp will begin blinking after inserting USB Devices/Media, and it will take about 5 to 6 sec-
onds to recognize the Devices/Media. (Time will differ depending on the USB Device/Media).

USING THE MEMORY FUNCTION
Character/Decorative Stitches
117
4
■Trademarks
• Secure Digital (SD) Card is a registered trademark or a trademark of SD Card Association.
• CompactFlash is a registered trademark or a trademark of Sandisk Corporation.
• Memory Stick is a registered trademark or a trademark of Sony Corporation.
• Smart Media is a registered trademark or a trademark of Toshiba Corporation.
• Multi Media Card (MMC) is a registered trademark or a trademark of Infineon Technologies AG.
• xD-Picture Card is a registered trademark or a trademark of Fuji Photo Film Co. Ltd.
• IBM is a registered trademark or a trademark of International Business Machines Corporation.
• Microsoft and Windows are registered trademarks or trademarks of Microsoft Corporation.
Each company whose software title is mentioned in this manual has a Software License Agreement specific to its
proprietary programs.
All other brands and product names mentioned in this manual are registered trademarks of their respective
companies. However, the explanations for markings such as ® and ™ are not clearly described within the text.

USING THE MEMORY FUNCTION
118
Saving Stitch Patterns in the
Machine’s Memory
You can save often-used stitch patterns in the
machine’s memory. The machine’s memory can
hold up to 20 stitch patterns.
aPress .
bPress .
* Press to return to the original screen
without saving.
→The “Saving” screen is displayed. When the pattern
is saved, the display returns to the original screen
automatically.
■If the Memory is Full
If this screen appears while you are trying to save a
pattern on the machine’s memory, the memory is
too full to hold the currently selected stitch pattern.
To save the stitch pattern in the machine’s memory,
you have to delete a previously saved stitch pattern.
aPress .
* Press to return to the original screen
without saving.
Note
• Do not turn the main power to OFF while the
“Saving” screen is displayed. You will lose
the stitch pattern you are saving.
Memo
• It takes a few seconds to save a stitch pat-
tern.
• See page 122 for information on retrieving a
saved stitch pattern.
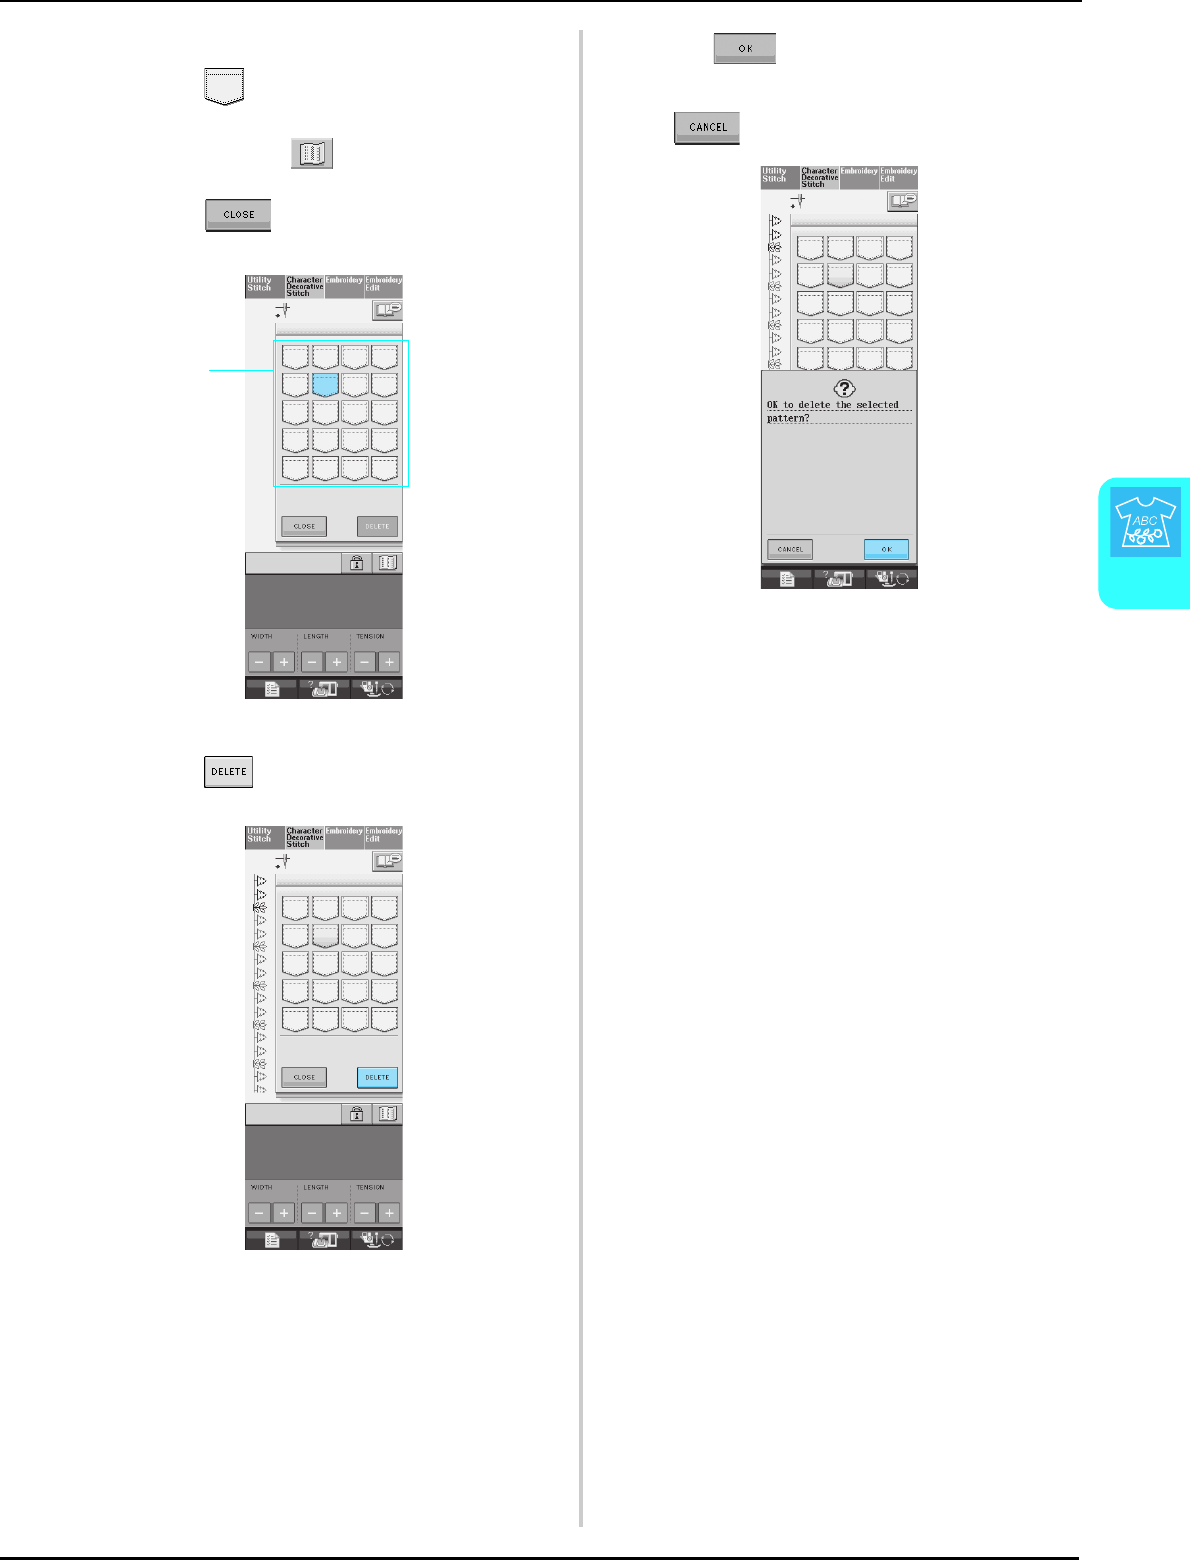
USING THE MEMORY FUNCTION
Character/Decorative Stitches
119
4
bChoose a stitch pattern to delete.
* Press so the pattern saved in that pocket
appears. If the entire saved stitch pattern is not
displayed, press to view the entire stitch
pattern.
* Press if you decide not to delete the stitch
pattern.
aPockets holding saved stitch patterns
cPress .
→A confirmation message appears.
dPress .
* If you decide not to delete the stitch pattern, press
.
→The machine deletes the stitch pattern, then
automatically saves the new stitch pattern.
a
USING THE MEMORY FUNCTION
120
Saving Stitch Patterns to USB
Media (Commercially Available)
When sending stitch patterns from the machine to
USB media, plug the USB media into the
machine’s USB port. Depending on the type of
USB media being used, either directly plug the
USB device into the machine’s USB port or plug
the USB Card Writer/Reader into the machine’s
USB port.
aPress .
bInsert the USB media into the USB port
connector on the machine.
aUSB port connector for media
bUSB media
cPress .
* Press to return to the original screen
without saving.
→The “Saving” screen is displayed. When the pattern
is saved, the display returns to the original screen
automatically.
Memo
Some USB media may not be usable with this
machine. Please visit our web site for more
details.
Memo
• The USB media can be inserted or removed
at any time.
• Do not insert anything other than USB
media into the USB media port connector.
Otherwise, the USB media drive may be
damaged.
a
b
USING THE MEMORY FUNCTION
Character/Decorative Stitches
121
4
Saving Stitch Patterns in the
Computer
Using the included USB cable, the stitch machine
can be connected to your computer, and the stitch
patterns can be temporarily retrieved from and
saved on your computer.
aPlug the USB cable connector into the
corresponding USB port connectors for the
computer and for the machine.
* The USB cable can be plugged into the USB port
connectors on the computer and machine whether
or not they are turned on.
aUSB port connector for computer
bUSB cable connector
→The “Removable Disk” icon will appear in “My
Computer” on the computer.
bPress .
cPress .
* Press to return to the original screen
without saving.
→The stitch pattern will be temporarily saved to
“Removable Disk” under “My Computer”.
Note
• Do not turn the main power to OFF while the
“Saving” screen is displayed. You will lose
the stitch pattern you are saving.
Note
• The connectors on the USB cable can only
be inserted into a connector in one direction.
If it is difficult to insert the connector, do not
insert it with force and check the orientation
of the connector.
• For details on the position of the USB port
on the computer, refer to the instruction
manual for the correesponding equipment.
a
b

USING THE MEMORY FUNCTION
122
dSelect the stitch pattern’s .pmu file and
copy the file to the computer.
Retrieving Stitch Patterns from
the Machine’s Memory
aPress .
→The pocket selection screen appears.
bChoose a stitch pattern to retrieve.
* Press so the pattern saved in that pocket
appears. If the entire saved stitch pattern is not
displayed, press to view the entire stitch
pattern.
* Press to return to the original screen
without saving.
aPockets holding saved stitch patterns
cPress .
* Press to delete the stitch pattern.
→The selected stitch pattern is retrieved and the
sewing screen will be displayed.
Note
• Do not turn off the machine while the “Sav-
ing” screen is showing. You may lose the
data.
a
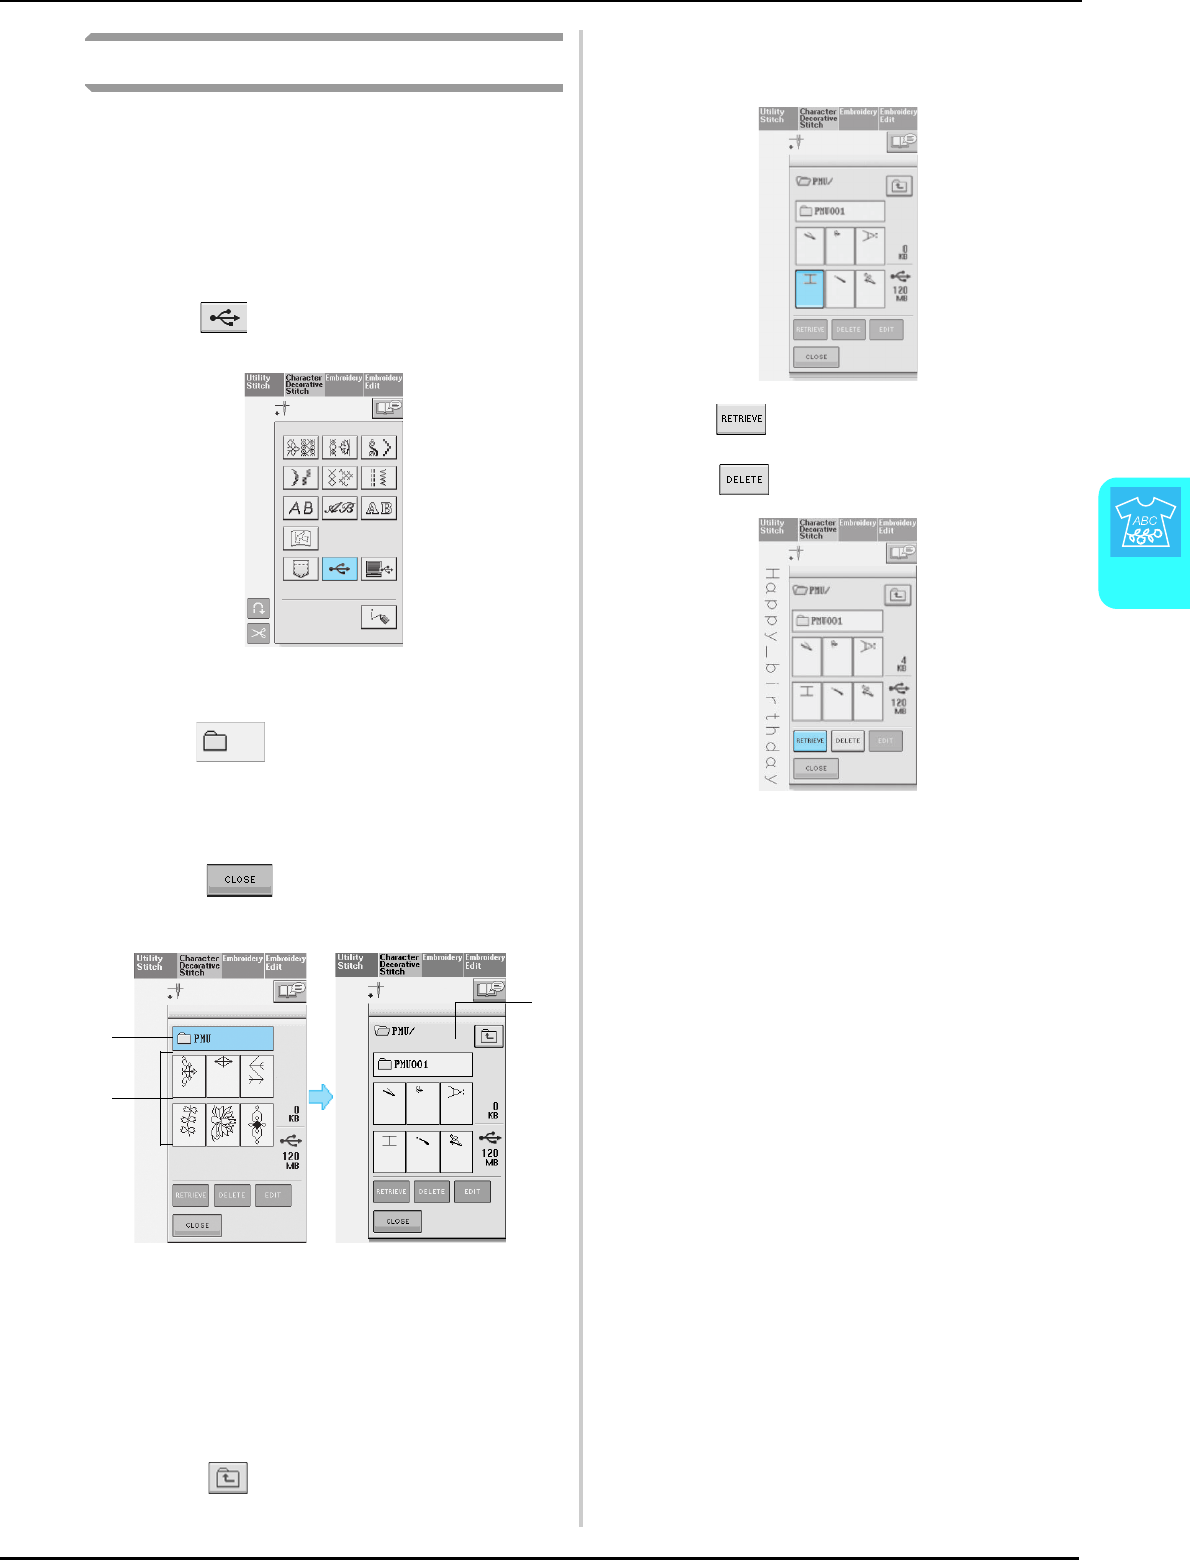
USING THE MEMORY FUNCTION
Character/Decorative Stitches
123
4
Recalling from USB Media
You can recall a specific stitch pattern from either
directly USB media or a folder in the USB media.
If the stitch pattern is under the folder, move down
layers of folders following a path to it.
aInsert the USB Media into the USB port
connector on the machine (see page 120).
bPress .
→Stich patterns and a folder in a top folder are
displayed.
cPress when there is a subfolder to
sort two or more stitch patterns to USB
media, the stitch pattern in the subfolder is
displayed.
* Press to return to the original screen
without recalling.
aFolder name
bStitch patterns in a top folder: “key” shows only the
first pattern over if the patterns is combined.
cPath
→The path shows the current holder at the top of the
list.
Stitch patterns and a folder in a subfolder are
displayed.
* Press to return to the previous folder.
dPress the key of the stitch pattern you want
to recall.
ePress .
* Press to delete the stitch pattern.
→The selected stitch pattern is recalled and the sewing
screen will be displayed.
a
b
c
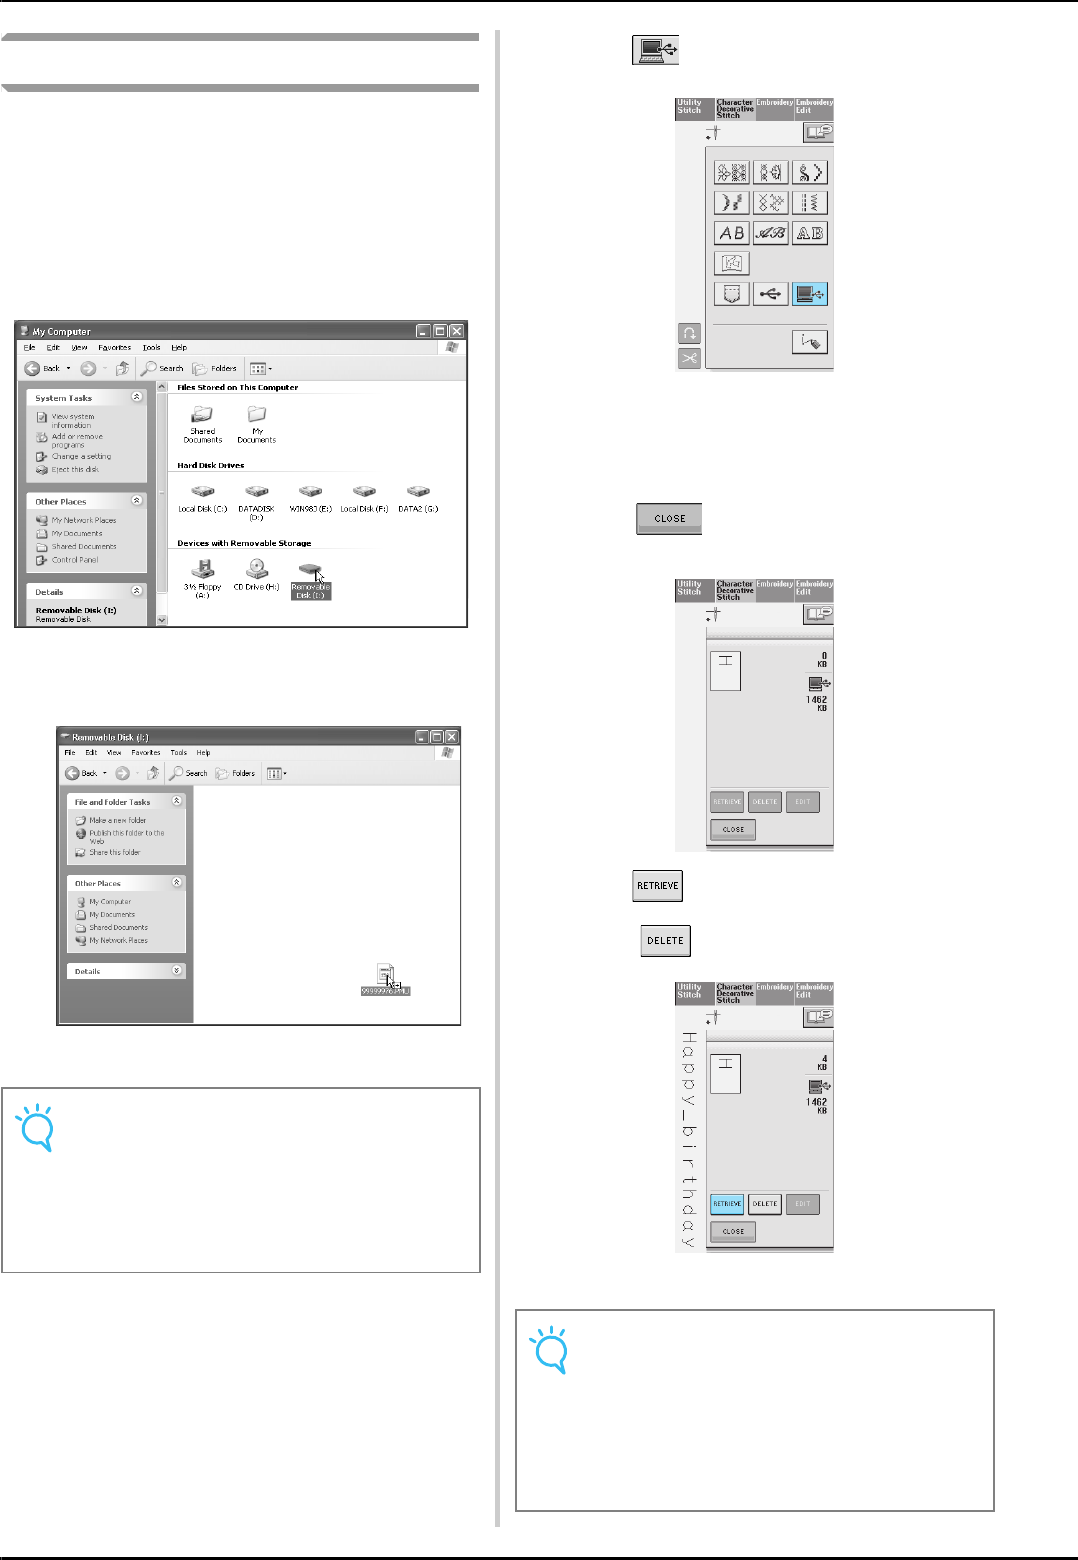
USING THE MEMORY FUNCTION
124
Recalling from the Computer
aPlug the USB cable connector into the
corresponding USB connectors for the
computer and for the machine (see page
121).
bOn the computer, open “My Computer”
then go to “Removable Disk”.
cMove/copy the pattern data to “Removable
Disk”.
→Stitch pattern data in “Removable Disk” is written to
the machine.
dPress .
→The stitch patterns in the computer are displayed on
the selection screen.
ePress the key of the stitch pattern you want
to recall.
* Press to return to the original screen
without recalling.
fPress .
* Press to delete the stitch pattern.
→The selected stitch pattern is recalled and the sewing
screen will be displayed.
Note
• While data is being written, do not discon-
nect the USB cable.
• Do not create folders within “Removable
Disk”. Since folders are not displayed, stitch
pattern data within folders cannot be
recalled.
Note
• The pattern recalled from the computer is
only temporarily written to the machine. It is
erased from the machine when the machine
is turned off. If you wish to keep the stitch
pattern, store it in the machine (see “Saving
Stitch Patterns in the Machine’s Memory” on
page 118).

Chapter 5
Embroidery
BEFORE EMBROIDERING ............................126
Embroidery Step by Step................................................. 126
Attaching Embroidery Foot “W”..................................... 127
Attaching the Embroidery Unit ....................................... 128
■About the Embroidery Unit .................................................... 128
■Removing the Embroidery Unit .............................................. 129
SELECTING PATTERNS.................................130
■Copyright Information............................................................ 130
■Pattern Selection Screens ....................................................... 131
Selecting Embroidery Patterns/Heirloom Patterns/Border
Patterns/Cross stitch Patterns/Floral alphabet Patterns .. 132
Selecting Alphabet Character Patterns............................ 133
Selecting Frame Patterns................................................. 134
Selecting Patterns from Embroidery Cards...................... 135
■About Embroidery Cards (Sold Separately)............................. 135
Selecting Patterns from USB media/Computer ............... 135
VIEWING THE SEWING SCREEN .................136
■Key Functions......................................................................... 137
PREPARING THE FABRIC .............................138
Attaching Iron-on Stabilizers (backing) to the Fabric...... 138
Hooping the Fabric in the Embroidery Frame ................. 139
■Types of Embroidery Frames ..................................................139
■Inserting the Fabric ................................................................ 140
■Using the Embroidery Sheet ................................................... 141
Embroidering Small Fabrics or Fabric Edges ................... 141
■Embroidering Small Fabrics....................................................141
■Embroidering Edges or Corners .............................................. 141
■Embroidering Ribbons or Tape ............................................... 142
ATTACHING THE EMBROIDERY FRAME.....143
■Removing the Embroidery Frame ........................................... 143
CONFIRMING THE PATTERN POSITION ....144
Checking the Pattern Position......................................... 144
Previewing the Completed Pattern ................................. 145
SEWING AN EMBROIDERY PATTERN .........146
Sewing Attractive Finishes .............................................. 146
■Embroidery Needle Plate Cover ............................................. 146
Sewing Embroidery Patterns ........................................... 147
■When Threading Manually..................................................... 148
Sewing Embroidery Patterns Which Use Appliqué.......... 148
ADJUSTMENTS DURING THE EMBROIDERY
PROCESS ......................................................150
If the Bobbin Runs Out of Thread................................... 150
If the Thread Breaks During Sewing ............................... 151
Restarting from the Beginning ........................................ 152
Resuming Embroidery After Turning Off the Power........ 152
MAKING EMBROIDERY ADJUSTMENTS..... 154
Adjusting Thread Tension ................................................154
■Correct Thread Tension ..........................................................154
■Upper Thread is Too Tight ......................................................154
■Upper Thread is Too Loose .....................................................154
Using the Automatic Thread Cutting Function
(END COLOR TRIM) .......................................................155
Using the Thread Trimming Function (JUMP STITCH
TRIM) ..............................................................................155
■Selecting the length of JUMP STITCH not to trim...................156
Adjusting the Embroidery Speed......................................156
Changing the Thread Color Display.................................157
Changing the Embroidery Frame Display.........................158
REVISING THE PATTERN............................. 159
Changing the Pattern Position .........................................159
Aligning the Pattern and the Needle................................159
Changing the Size ............................................................160
Rotating the Pattern.........................................................161
Creating a Horizontal Mirror Image ................................162
Changing the Density (Alphabet Character
and Frame Patterns Only)................................................162
Changing the Colors of Alphabet Character Patterns ......163
USING THE MEMORY FUNCTION ............. 164
Embroidery Data Precautions ..........................................164
■Types of Embroidery Data that can be Used ...........................164
■Types of USB Devices/Media that can be Used ......................164
■Computers and Operating Systems with the Following
Specifications can be Used .....................................................164
■Precautions on Using the Computer to Create
and Save Data.........................................................................165
■Tajima (.dst) Embroidery Data ................................................165
■Trademarks .............................................................................165
Saving Embroidery Patterns in the Machine’s Memory....166
■If the Memory is Full...............................................................166
Saving Embroidery Patterns to USB Media
(Commercially Available) ............................................... 168
Saving Embroidery Patterns in the Computer ..................169
Retrieving Patterns from the Machine’s Memory.............170
Recalling from USB Media...............................................170
Recalling from the Computer ..........................................171
EMBROIDERY APPLICATIONS .................... 173
Using a Frame Pattern to Make an Appliqué (1) ..............173
Using a Frame Pattern to Make an Appliqué (2) ..............174
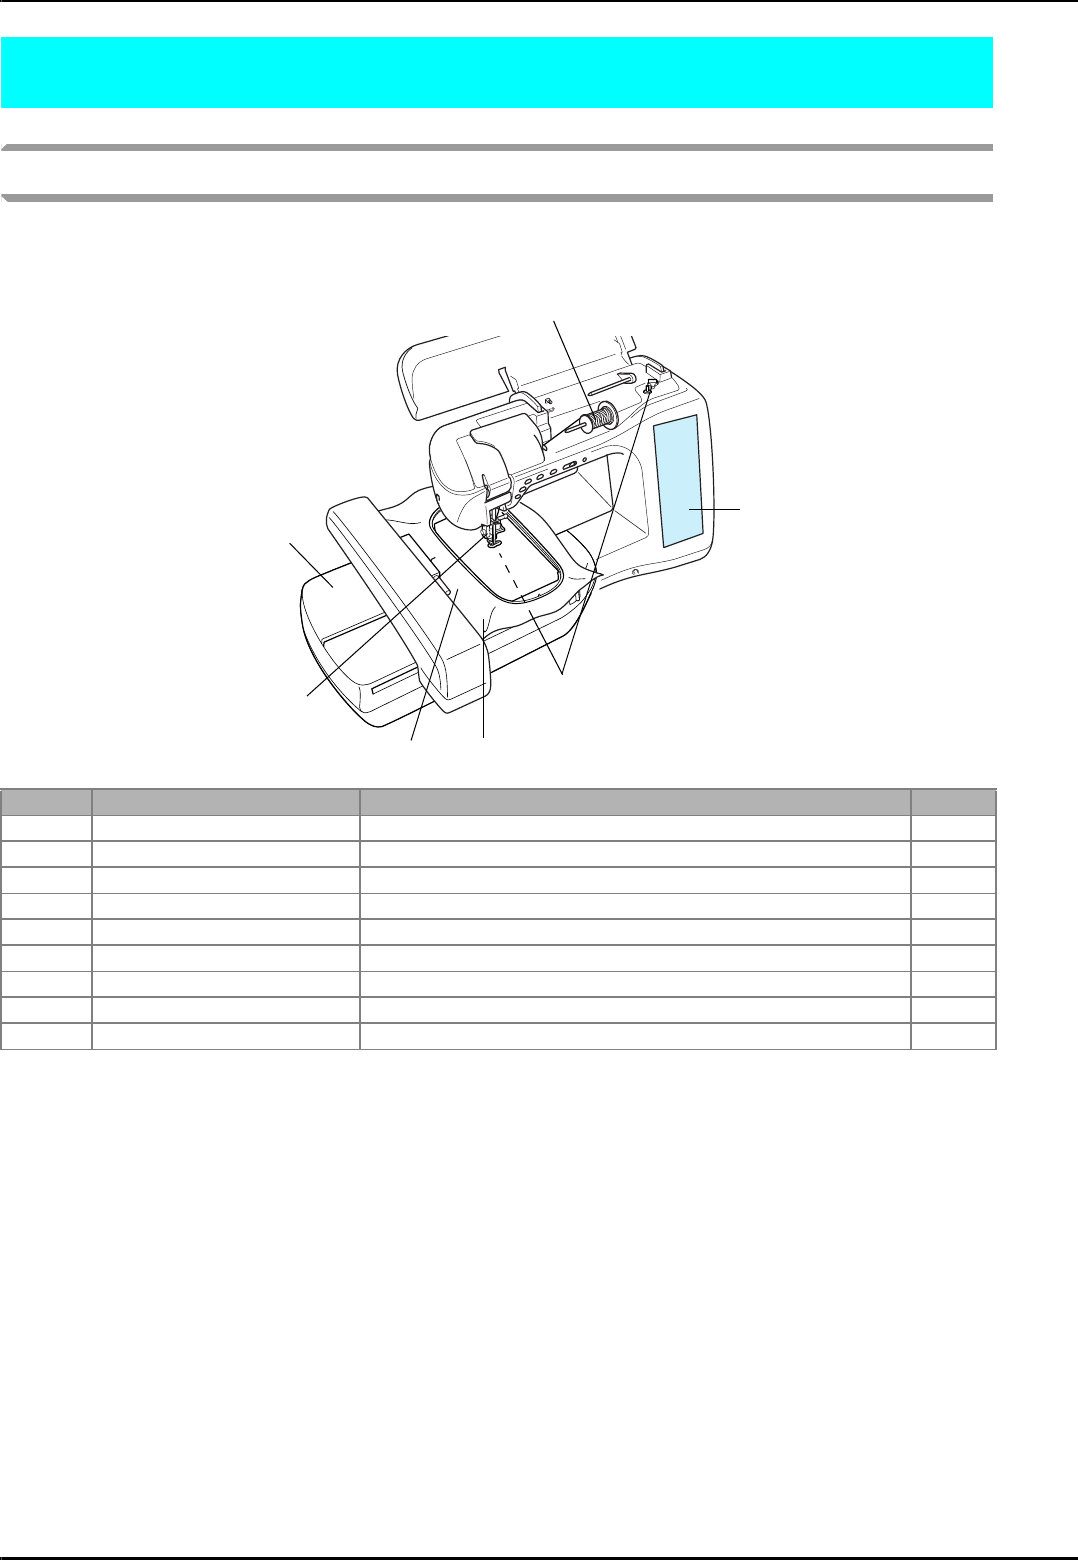
BEFORE EMBROIDERING
126
BEFORE EMBROIDERING
Embroidery Step by Step
Follow the steps below to prepare the machine for embroidery.
Step # Aim Action Page
1 Presser foot attachment Attach embroidery foot “W”. 127
2 Checking the needle Use needle 75/11 for embroidery. * 36
3 Embroidery unit attachment Attach the embroidery unit. 128
4 Bobbin thread setup For the bobbin thread, wind embroidery bobbin thread and set it in place. 19
5 Fabric preparation Attach a stabilizer material to the fabric, and hoop it in the embroidery frame. 138
6 Pattern selection Turn the main power to ON, and select an embroidery pattern. 130
7 Embroidery frame attachment Attach the embroidery frame to the embroidery unit. 143
8 Checking the layout Check and adjust the size and position of the embroidery. 144
9 Embroidery thread setup Set up embroidery thread according to the pattern. 25
* It is recommended that a 90/14 needle should be used when embroidering on heavy weight fabrics or stabilizing products (for example;
denim, puffy foam, etc.).
Step 3
Step 1, 2
Step 7 Step 5
Step 4
Step 6, 8
Step 9
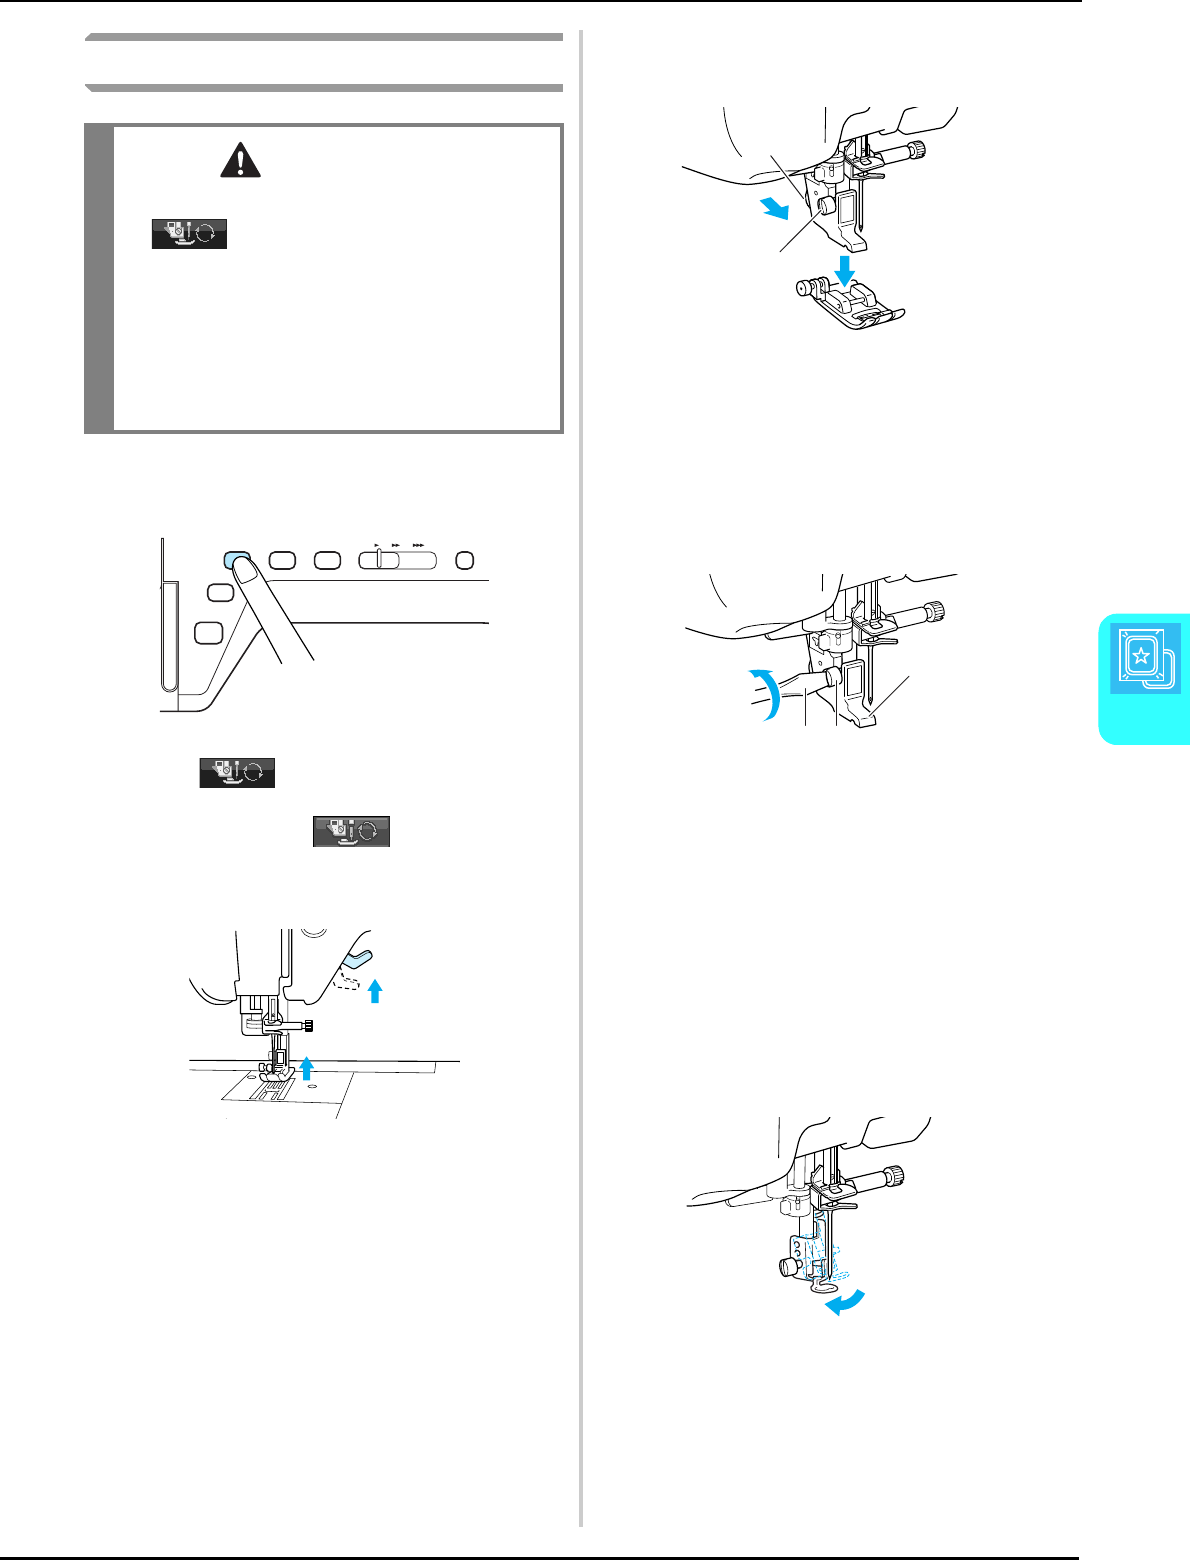
BEFORE EMBROIDERING
Embroidery
127
5
Attaching Embroidery Foot “W”
aPress the “Needle Position” button to raise
the needle.
bPress .
→The key appears as .
cRaise the presser foot lever.
dPush the black button on the presser foot
holder and remove the presser foot.
aBlack button
bPresser foot holder
→Remove the presser foot from the presser foot
holder.
eUse the included screwdriver to loosen the
screw of the presser foot holder, then
remove the presser foot holder.
aScrewdriver
bPresser foot holder
cPresser foot holder screw
→Remove the presser foot holder.
fLower the presser foot lever.
gPosition embroidery foot “W” on the
presser foot bar so that the arm of
embroidery foot “W” is in contact with the
back of the needle holder.
CAUTION
• When attaching a presser foot, always press
on the screen. You may accidentally
press the “Start/Stop” button and possibly
cause injury.
• Be sure to use embroidery foot “W” when
doing embroidery. Using another presser foot
may cause the needle to strike the presser foot,
causing the needle to bend or break and
possibly cause injury.
a
b
a c
b
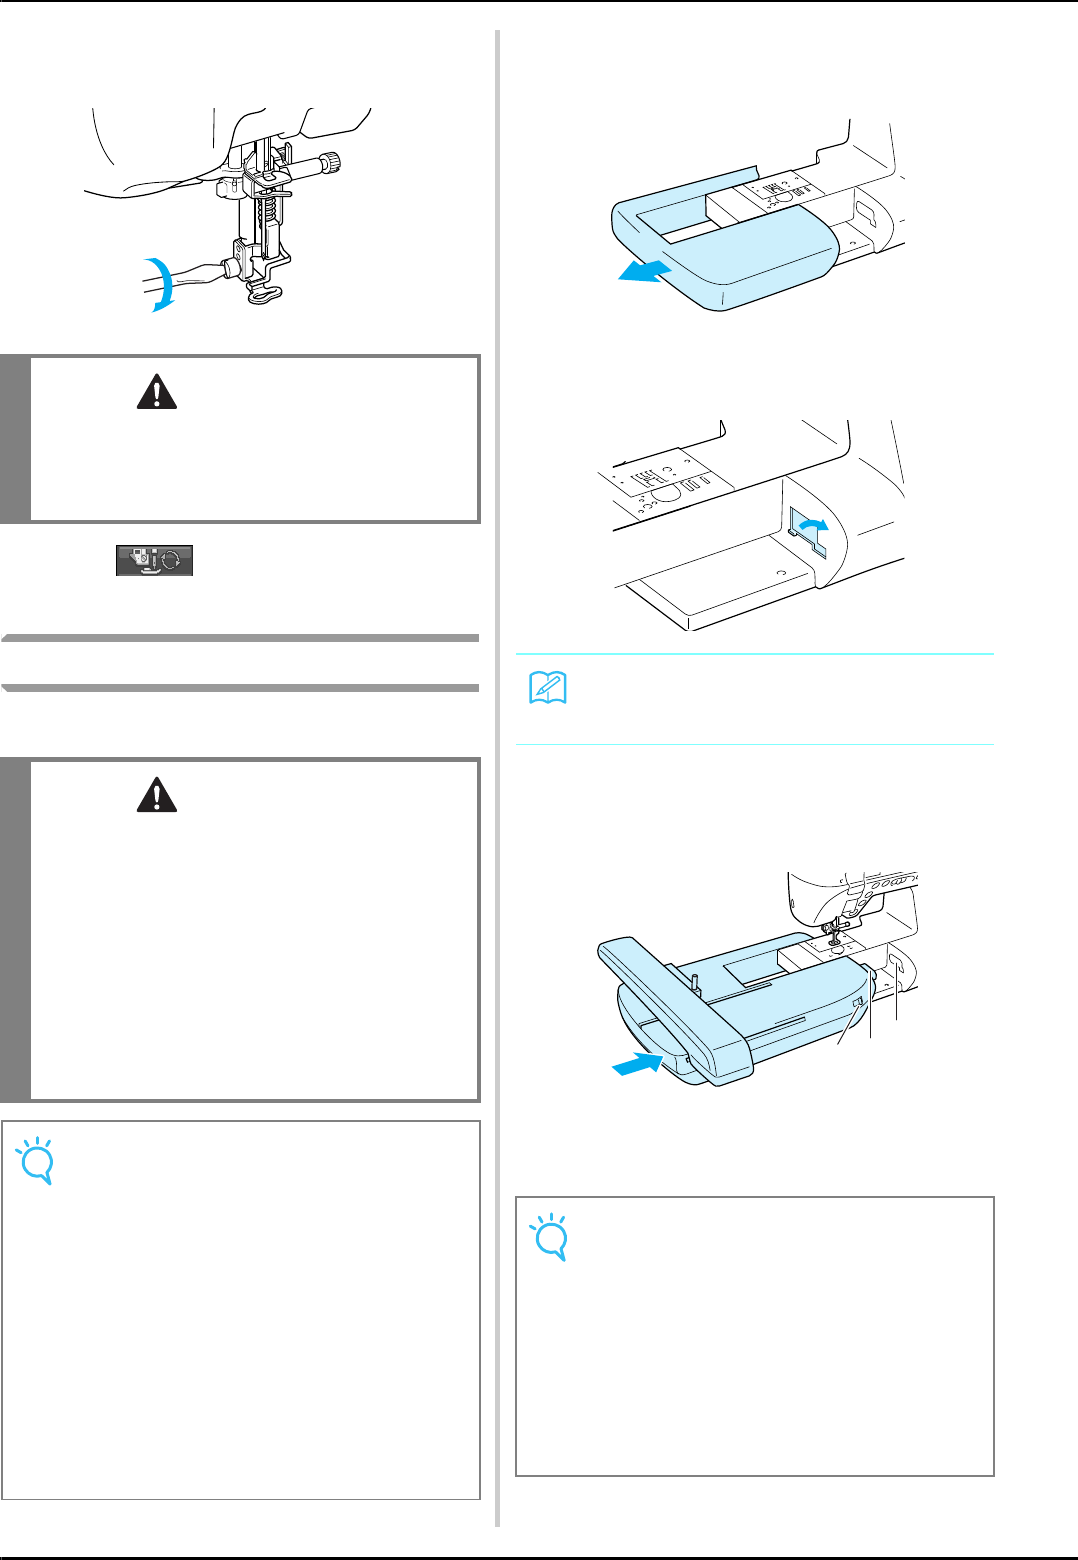
BEFORE EMBROIDERING
128
hUse the included screwdriver to firmly
tighten the screw of the presser foot holder.
iPress to unlock all keys and
buttons.
Attaching the Embroidery Unit
■About the Embroidery Unit
aTurn the main power to OFF, and remove
the flat bed attachment.
bOpen the cover of the connection port.
cInsert the embroidery unit connection into
the machine connection port. Push lightly
until the unit clicks into place.
aEmbroidery unit connection
bMachine connection port
cFeed dog position switch
CAUTION
• Use the included screwdriver to firmly tighten
the screw of the presser foot holder. If the
screw is loose, the needle may strike the
presser foot and possibly cause injury.
CAUTION
• Do not move the machine with the
embroidery unit attached. The embroidery
unit could fall off and cause injury.
• Keep your hands and foreign objects away
from the embroidery carriage and frame when
the machine is embroidering. Otherwise,
injury may result.
• If the embroidery unit could not be initialized
correctly, a buzzer will sound. If this happens,
go through the initialization process again.
This is not a malfunction.
Note
• You can sew utility stitches even while the
embroidery unit is attached.
• Be sure to turn off the power before install-
ing the embroidery unit. Otherwise, the
machine may be damaged.
• Do not touch the inner connector of the
embroidery unit. The pins on the embroidery
unit connection may be damaged.
• Do not apply strong force to the embroidery
unit carriage or pick up the unit by the car-
riage. Otherwise, the embroidery unit may
be damaged.
• Store the embroidery unit in the proper stor-
age case.
Memo
Be sure to replace the cover when the embroi-
dery unit is not installed.
Note
• Be sure there is no gap between the embroi-
dery unit and the sewing machine. If there is
a gap, the embroidery patterns will not
embroider with the correct registration.
• Do not push on the carriage when installing
the embroidery unit onto the machine. Mov-
ing the carriage may damage the embroi-
dery unit.
• Be sure to set the feed dog position switch
to right to lower the feed dogs.
b
a
c
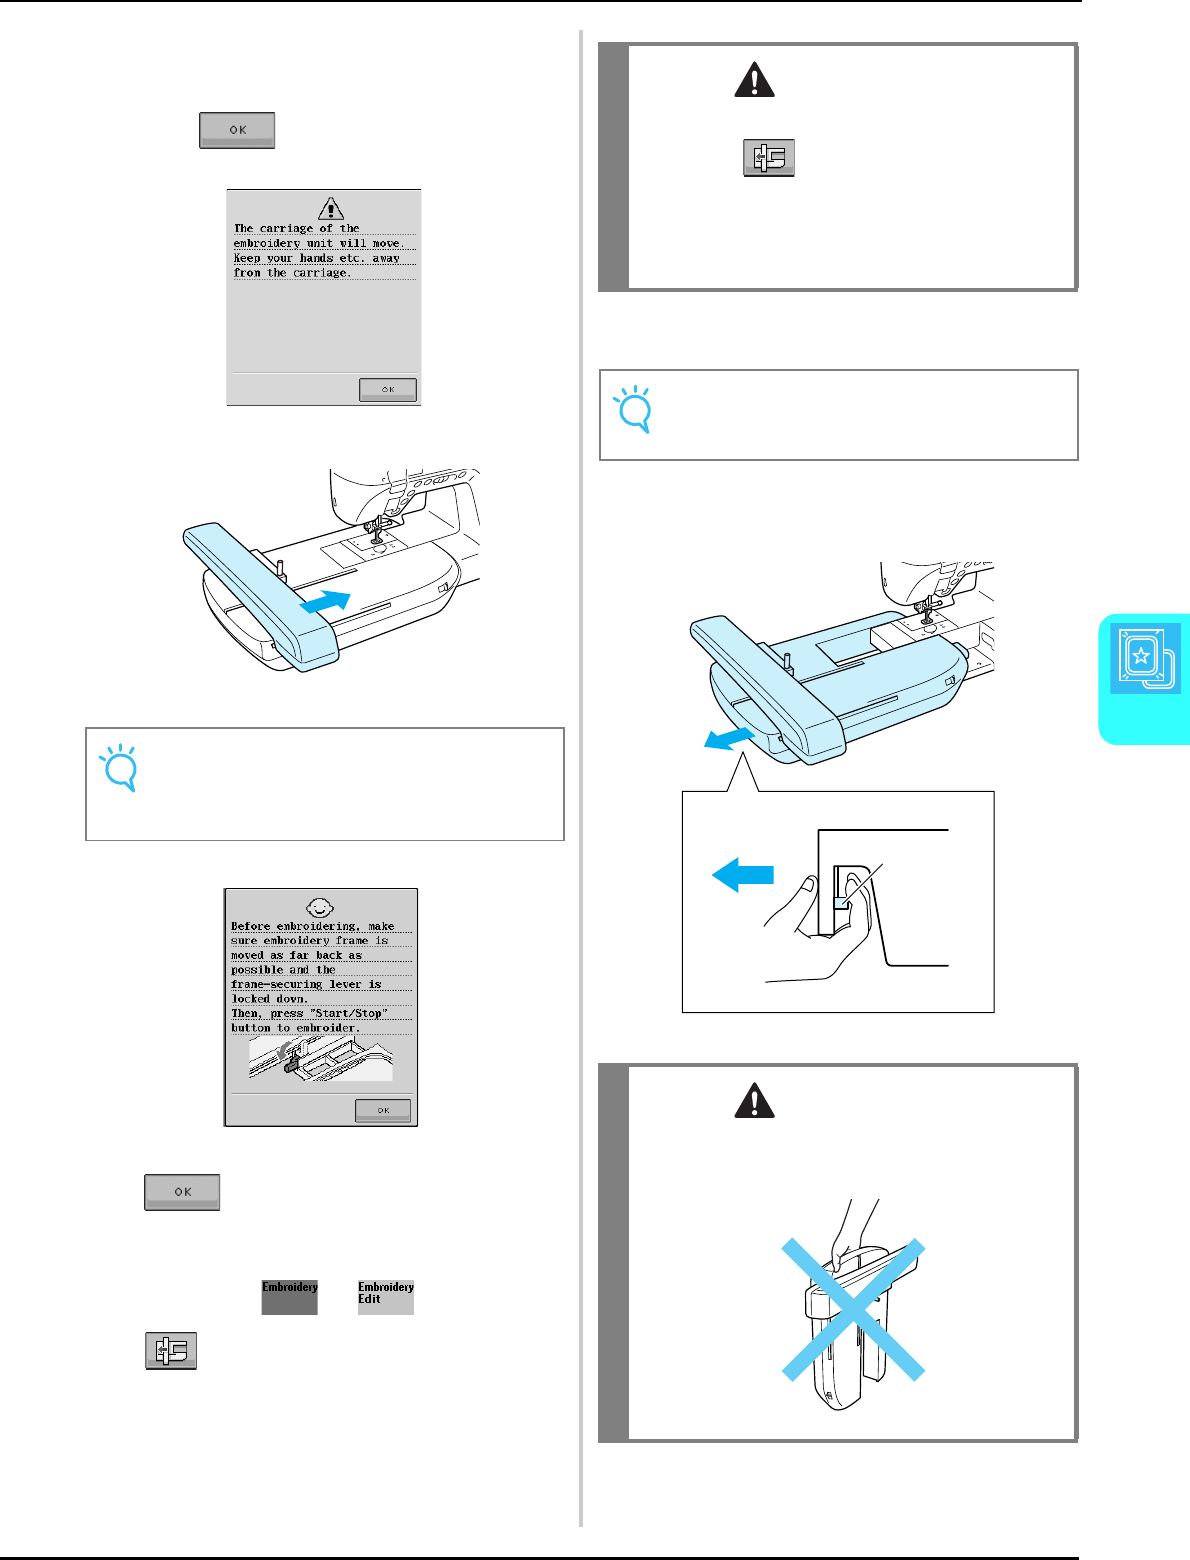
BEFORE EMBROIDERING
Embroidery
129
5
dTurn the main power to ON.
→The following message will appear.
ePress .
→The carriage will move to the initialization position.
The message will disappear after 15 seconds or press
to move to the next step.
■Removing the Embroidery Unit
aPress either or , then press
.
→The carriage will move to the removal position.
bTurn the main power to OFF.
cHold down the release button, and pull the
embroidery unit away from the machine.
aRelease button
Note
• A confirmation message to lower the frame-
securing lever after the carriage moves to its
initial position.
CAUTION
• Always remove the embroidery frame before
pressing . Otherwise, the frame may
strike the embroidery foot, and possibly cause
injury.
• The embroidery unit will not fit in the storage
case if this step is not done.
Note
• Be sure to turn the main power to OFF.
Otherwise, the machine may be damaged.
CAUTION
Do not carry the embroidery unit by holding the
release button compartment.
a
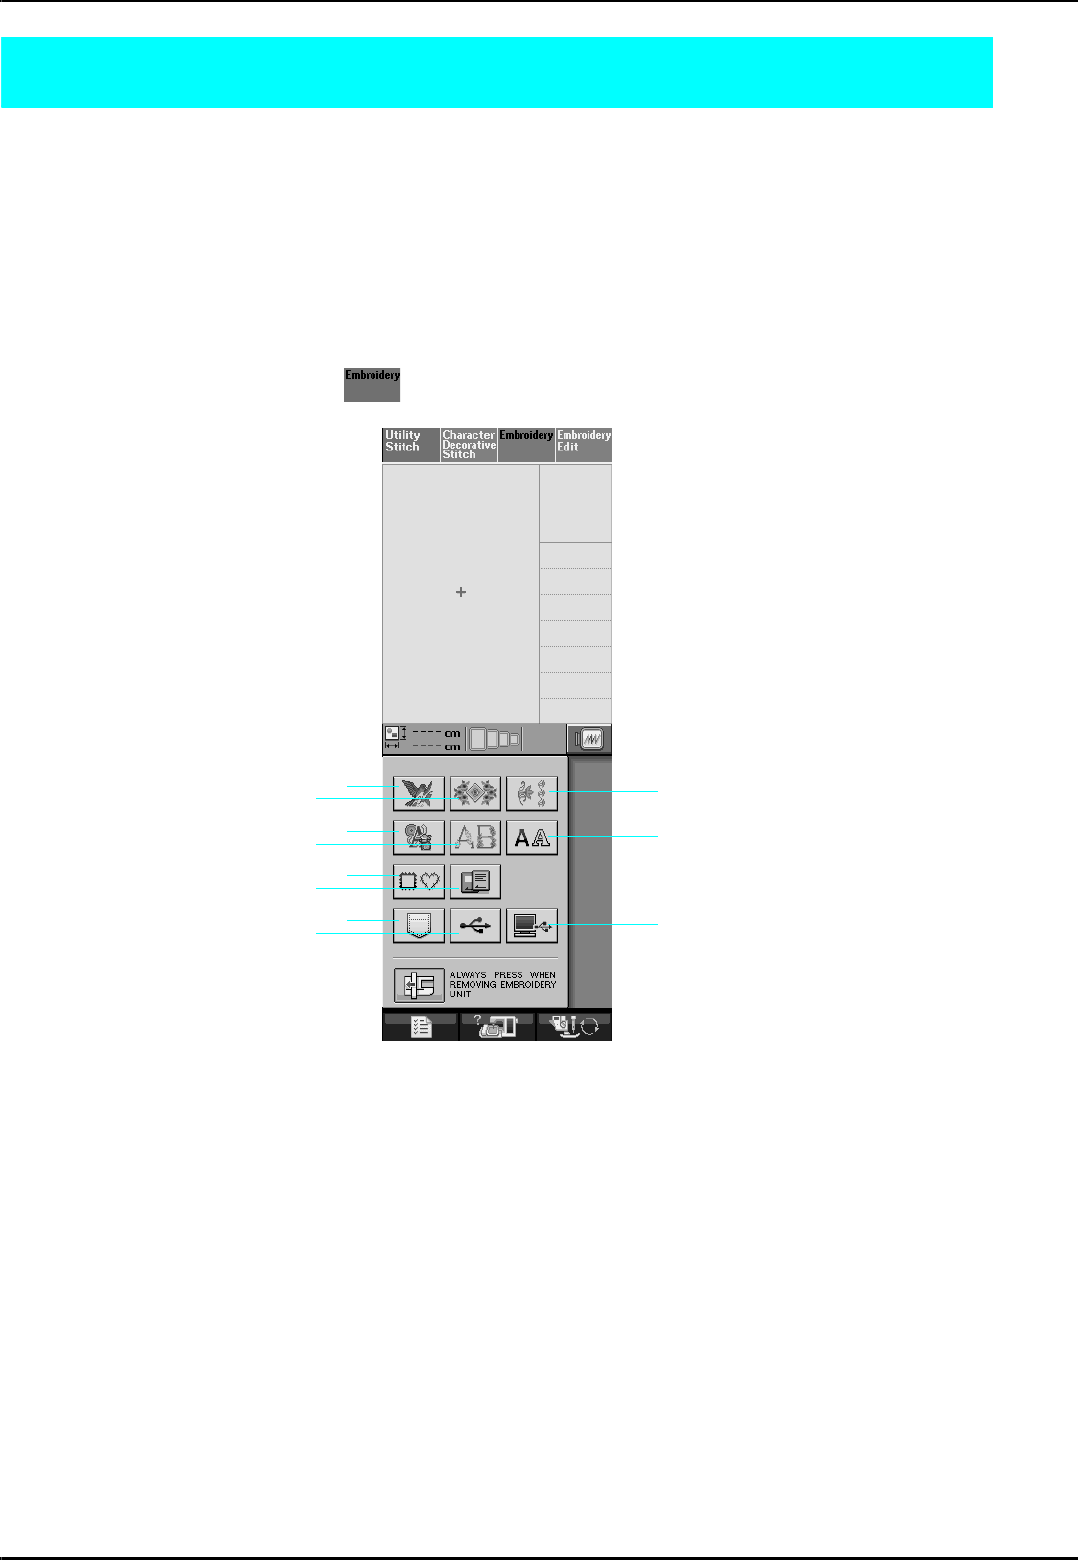
SELECTING PATTERNS
130
SELECTING PATTERNS
■Copyright Information
The patterns stored in the sewing machine and embroidery cards are intended for private use only. Any public or
commercial use of copyrighted patterns is an infringement of copyright law and is strictly prohibited.
There are many character and decorative embroidery patterns stored in the machine’s memory (see the “QUICK
REFERENCE GUIDE” for a full summary of patterns in the machine’s memory). You can also use patterns from
the embroidery cards (sold separately).
Once the machine has finished the initialization and the carriage has moved to the start position, the pattern type
selection screen will display.
If another screen is displayed, press to display the screen below.
aEmbroidery patterns
bHeirloom patterns
cBorder patterns
dCross stitch patterns
eFloral alphabet patterns
fAlphabet character patterns
gFrame patterns
hPatterns from an embroidery card (sold separately)
iPatterns saved in the machine’s memory (see page 170)
jPatterns saved in USB media (see page 170)
kPatterns saved on the computer (see page 171)
a
b
d
g
i
e
h
j
c
f
k
SELECTING PATTERNS
Embroidery
131
5
■Pattern Selection Screens
There are 7 categories of patterns in this machine. indicates that there is more than one pattern
selection screen for that category.
Embroidery patterns Heirloom patterns Border patterns
Cross stitch patterns Floral alphabet patterns Alphabet characters
Frame patterns
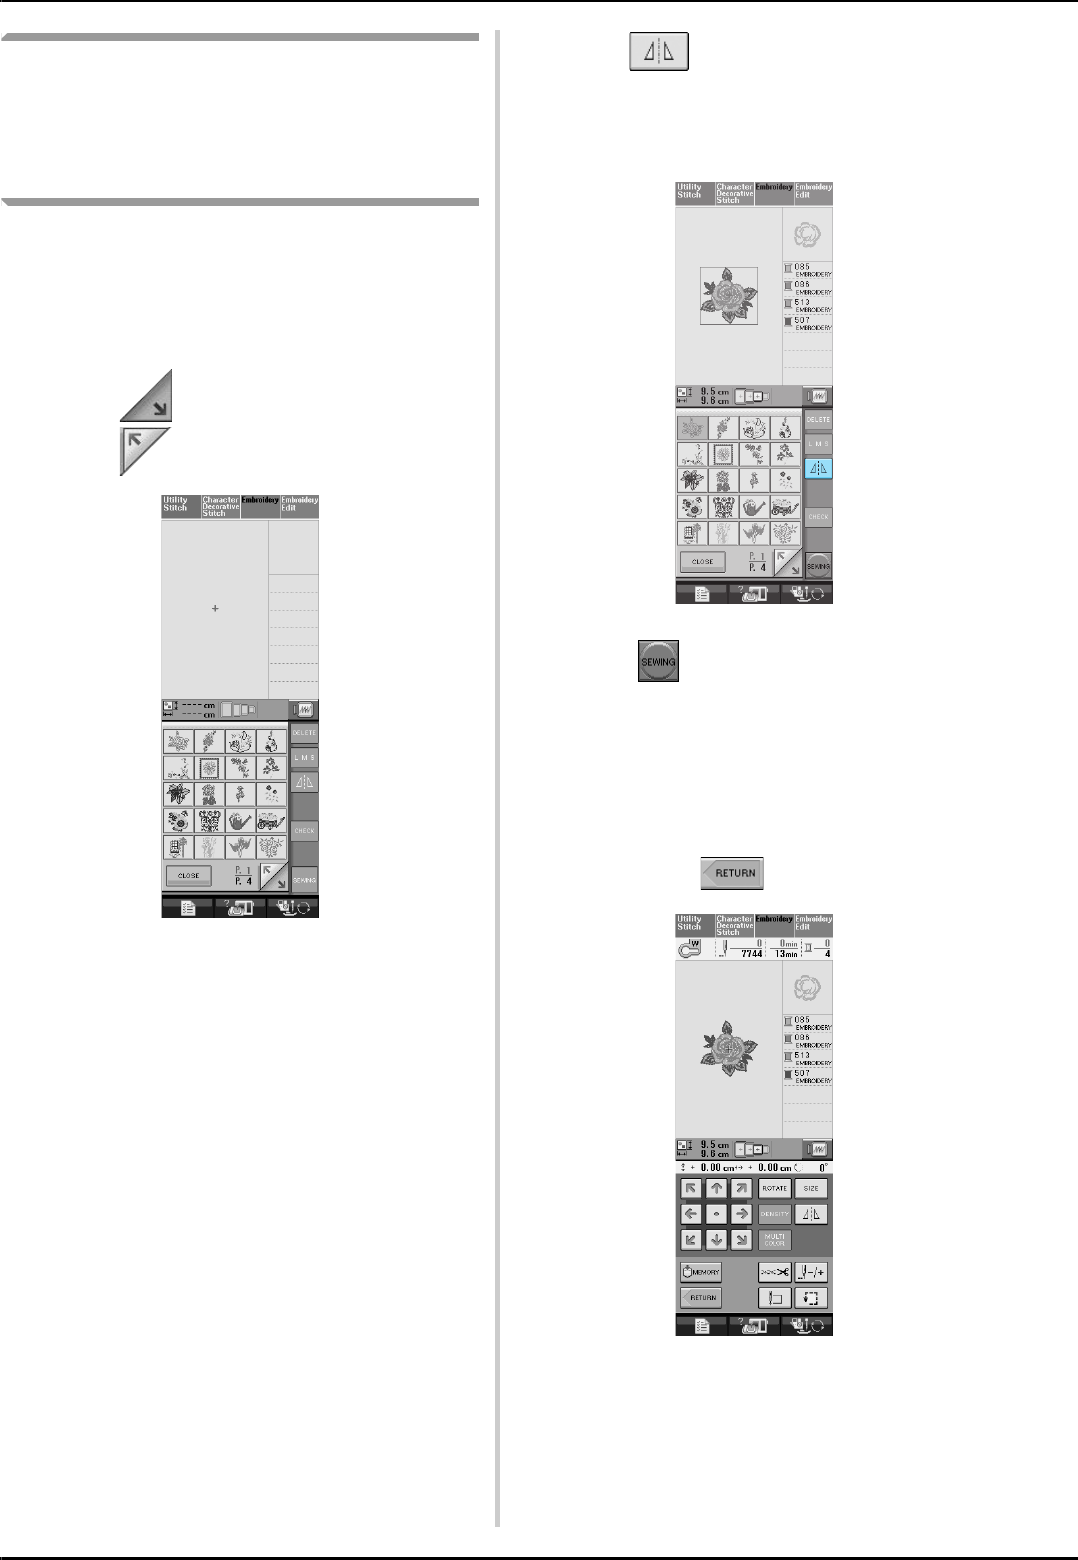
SELECTING PATTERNS
132
Selecting Embroidery Patterns/
Heirloom Patterns/Border
Patterns/Cross stitch Patterns/
Floral alphabet Patterns
aSelect the category of the pattern you want
to embroider.
bPress the key of the pattern you want to
embroider.
* Press to view the next page.
* Press to view the previous page.
→The selected pattern is displayed.
cPress to create a mirror image of the
pattern as needed.
* If you make a mistake selecting the pattern, press the
key of the pattern you want to embroider.
d Press .
→The sewing screen is displayed.
eProceed to see “VIEWING THE SEWING
SCREEN” on page 136 to embroider the
pattern.
* To return to the previous screen to select another
pattern, press .
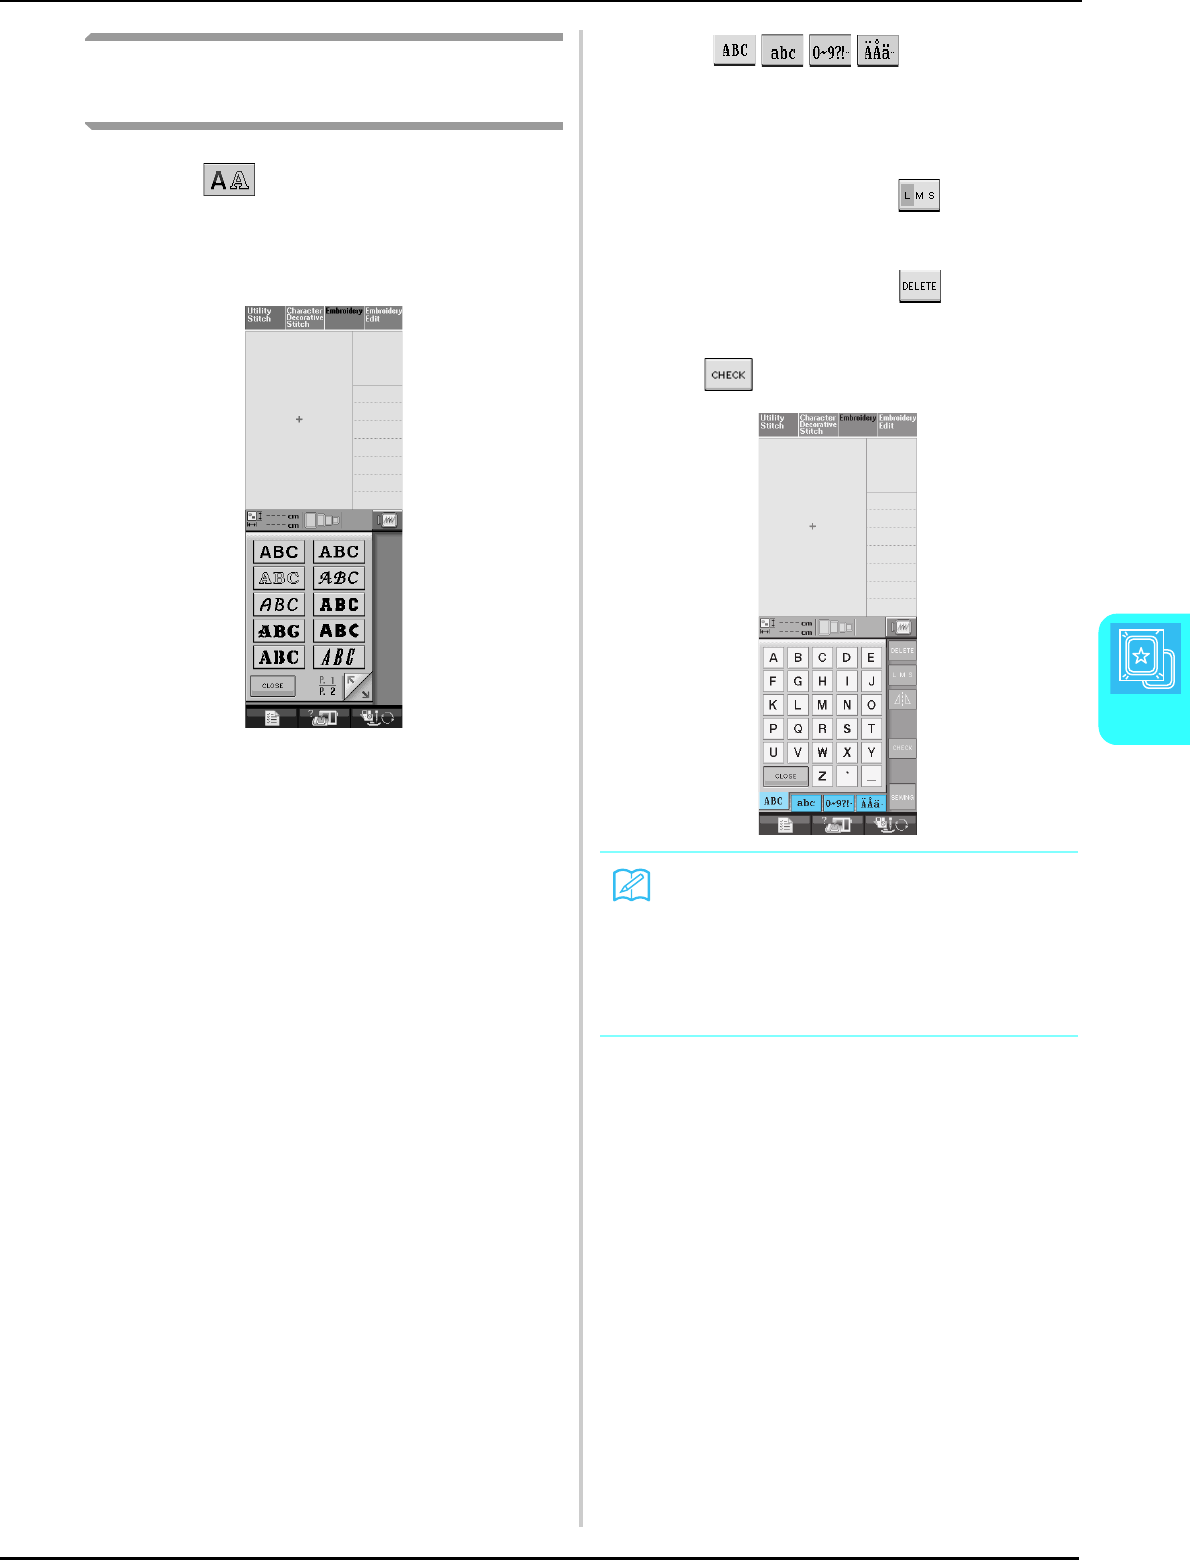
SELECTING PATTERNS
Embroidery
133
5
Selecting Alphabet Character
Patterns
aPress .
bPress the key of the font you want to
embroider.
cPress to change the
selection screen, and then enter the
characters that you want to embroider.
* If you want to change the size of a character, select
the character and then press to change the
size. The size changes each time you press the key,
from large to medium to small.
* If you make a mistake, press to erase the
mistake.
* If the pattern is too small to see clearly, you can use
the key to check it.
Memo
If you continue adding characters after chang-
ing the size, the new characters will be
entered in the new size.
You cannot change the size of the entered
characters after combining character stitch
patterns.
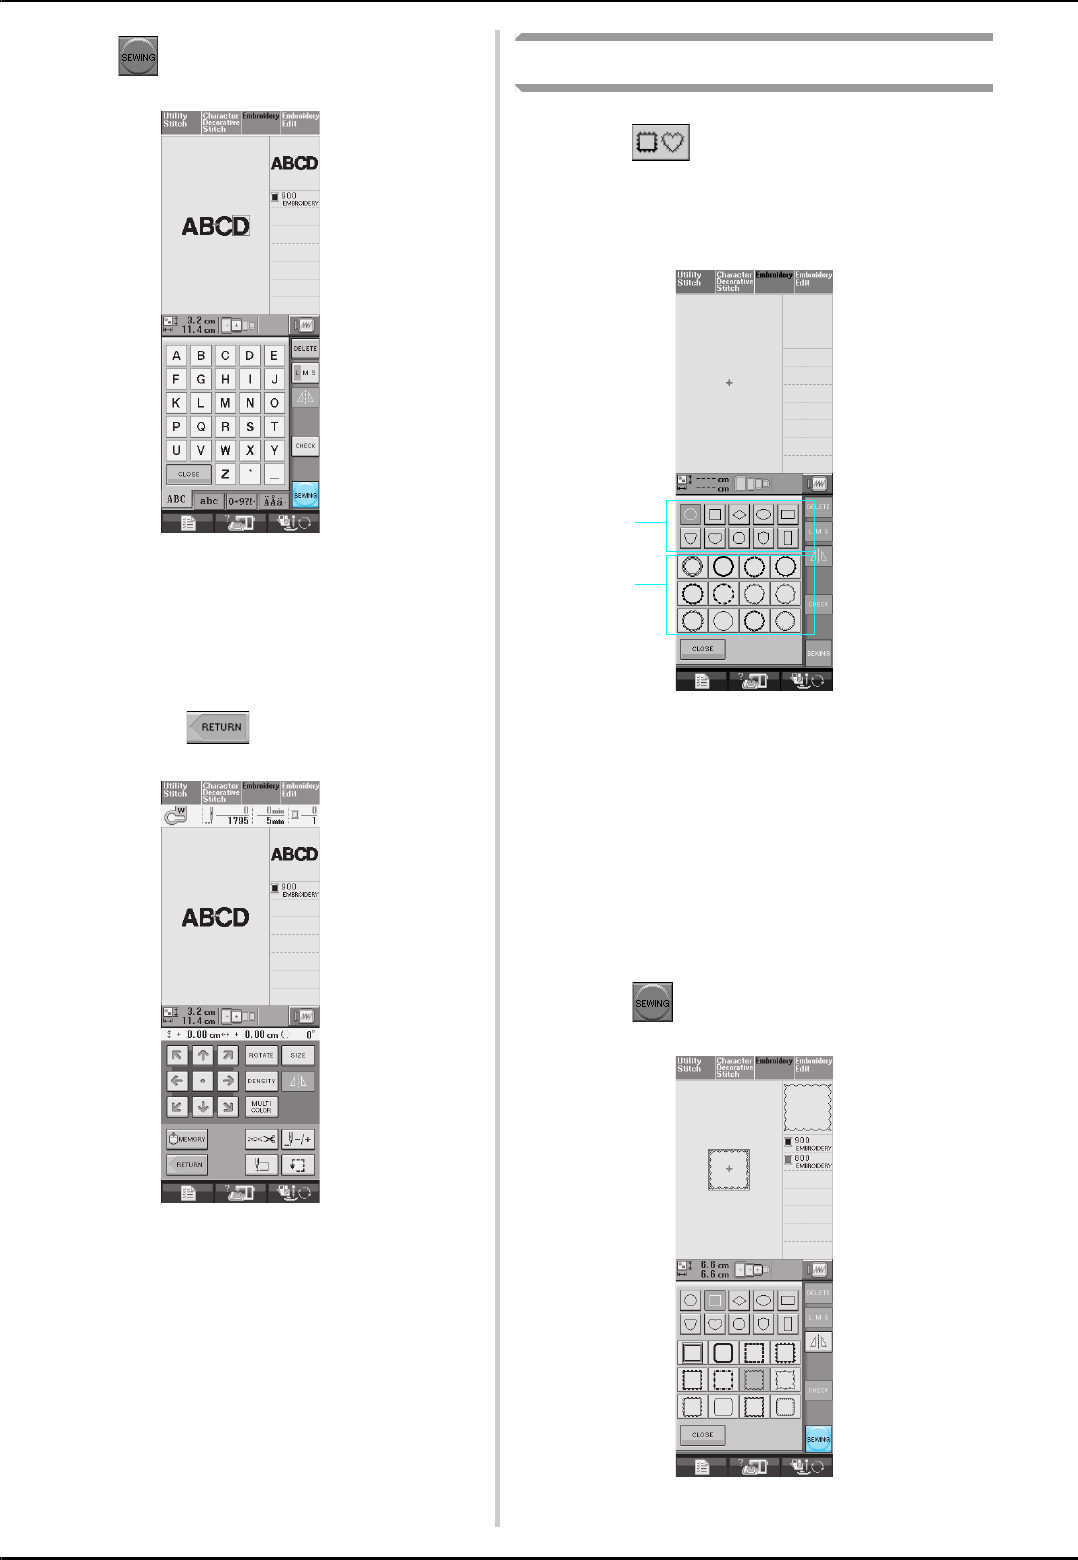
SELECTING PATTERNS
134
dPress .
→The sewing screen is displayed.
eProceed to see “VIEWING THE SEWING
SCREEN” on page 136 to embroider the
pattern.
* To return to the previous screen to select another
pattern, press .
Selecting Frame Patterns
aPress .
bPress the key of the frame shape you want
to embroider in the top part of the screen.
aFrame shapes
bFrame patterns
→Various frame patterns are displayed at the bottom
part of the screen.
cPress the key of the frame pattern you want
to embroider.
* If you make a mistake selecting the pattern, press the
key of the pattern you want to embroider.
→The selected pattern is displayed on the screen.
dPress .
→The sewing screen is displayed.
a
b
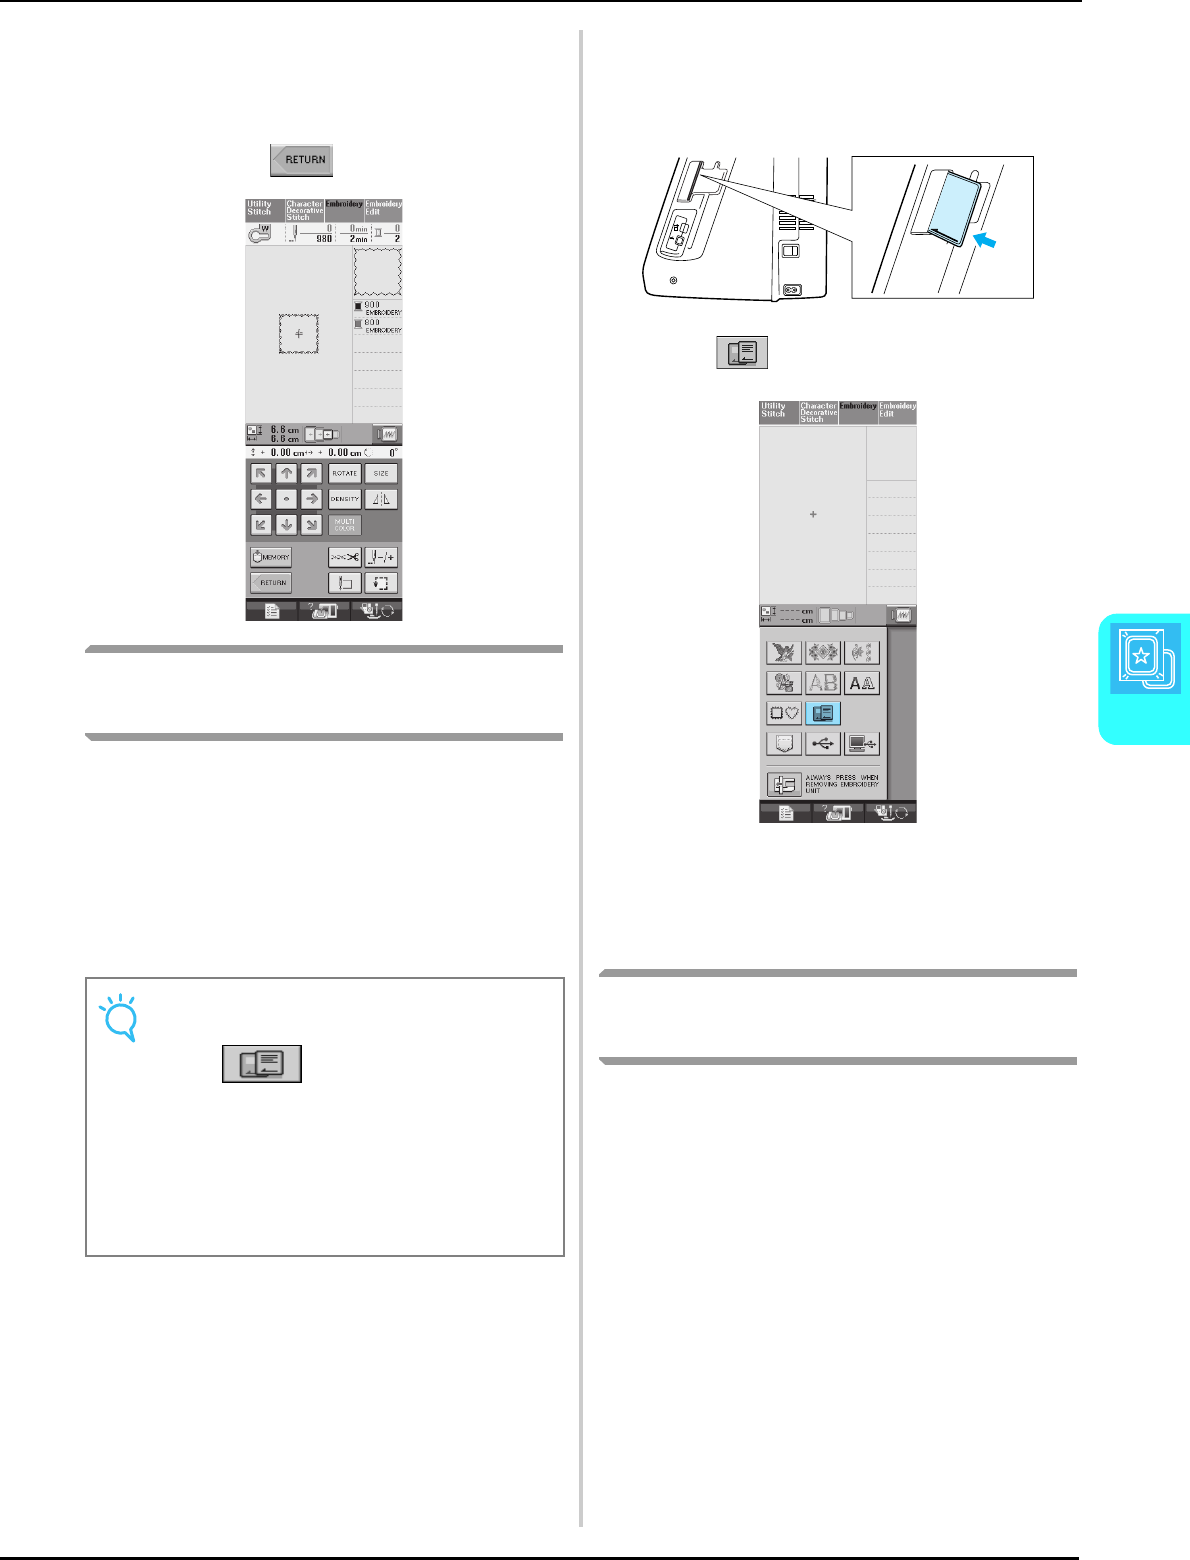
SELECTING PATTERNS
Embroidery
135
5
eProceed to see “VIEWING THE SEWING
SCREEN” on page 136 to embroider the
pattern.
* To return to the previous screen to select another
pattern, press .
Selecting Patterns from
Embroidery Cards
■About Embroidery Cards
(Sold Separately)
• Use only embroidery cards manufactured for this
machine. Using unauthorized cards may cause
your machine to operate incorrectly.
• Embroidery cards sold in foreign countries
cannot be used with this machine.
• Store embroidery cards in the hard case.
aInsert the card completely into the slot on
the right side of the machine.
* Insert the embroidery card so that the end with a
printed arrow is facing the front.
bPress .
→The patterns on the embroidery card are displayed
on the selection screen.
cFollow the steps on page 132 to select a
pattern.
Selecting Patterns from USB
media/Computer
To recall patterns from the computer or USB
media, see pages 170 through 172.
Note
• Only insert or remove the embroidery card
when is displayed, or when the
machine is turned off.
• Do not insert the card in a direction other
than that shown by the arrow on the card,
and do not force the card into the slot
strongly. Do not put any object except for the
embroidery cards into the slot. Otherwise,
your machine may be damaged.
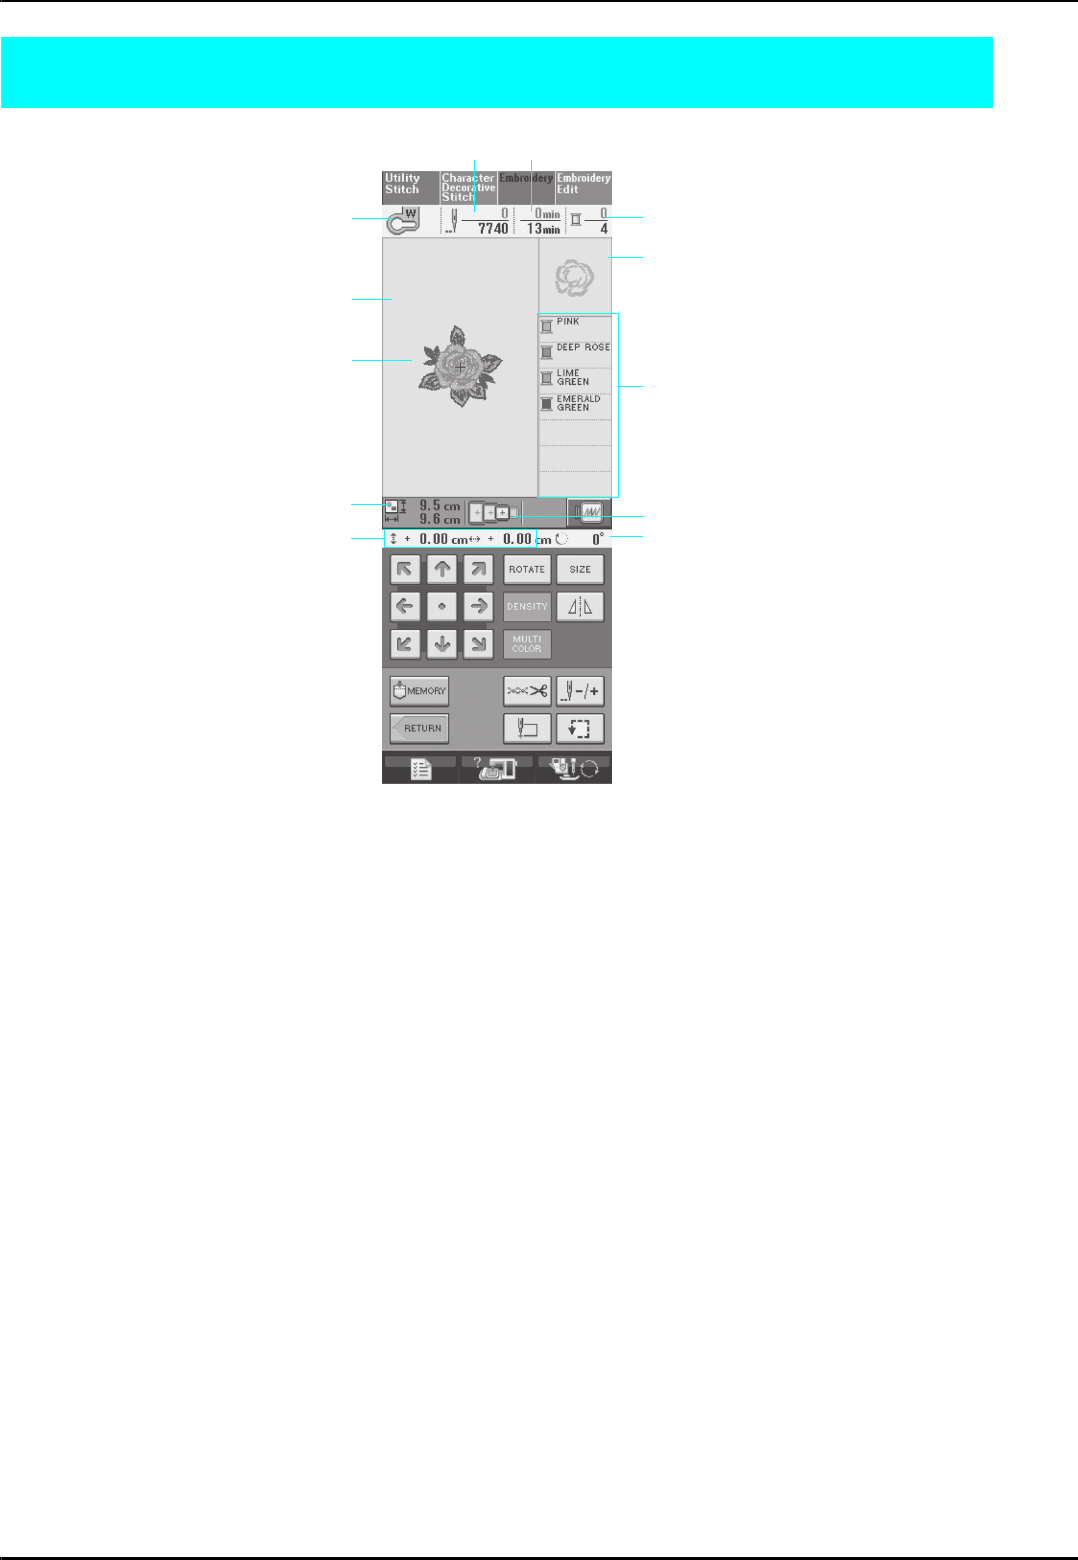
VIEWING THE SEWING SCREEN
136
VIEWING THE SEWING SCREEN
aShows the presser foot code.
Attach embroidery foot “W” for all embroidery projects. When the foot presser symbol is displayed on the screen, you
are able to sew.
bShows the boundary for embroidering with the extra large frame (30 cm × 18 cm (approx. 12 inches × 7 inches)).
cShows a preview of the selected pattern.
dShows the size of the selected pattern.
eShows how far the sewing position is from the center (when you move the sewing position).
fShows how many stitches are in the selected pattern and how many stitches have been sewn so far.
gShows the time necessary to sew the pattern, and the time already spent sewing the pattern (not including time for
changing and automatically trimming the thread).
hShows the number of colors in the selected pattern, and the number of the color currently being sewn.
iShows the part of the embroidery that will be sewn with the first thread color.
jShows the order the colors are sewn in.
kShows the embroidery frames that can be used for the selected pattern. Be sure to use the proper frame (see page
139).
lShows the degree of rotation of the pattern.
* There is an explanation of each key’s function on the next page.
a
b
c
d
e
fg
h
i
j
k
l
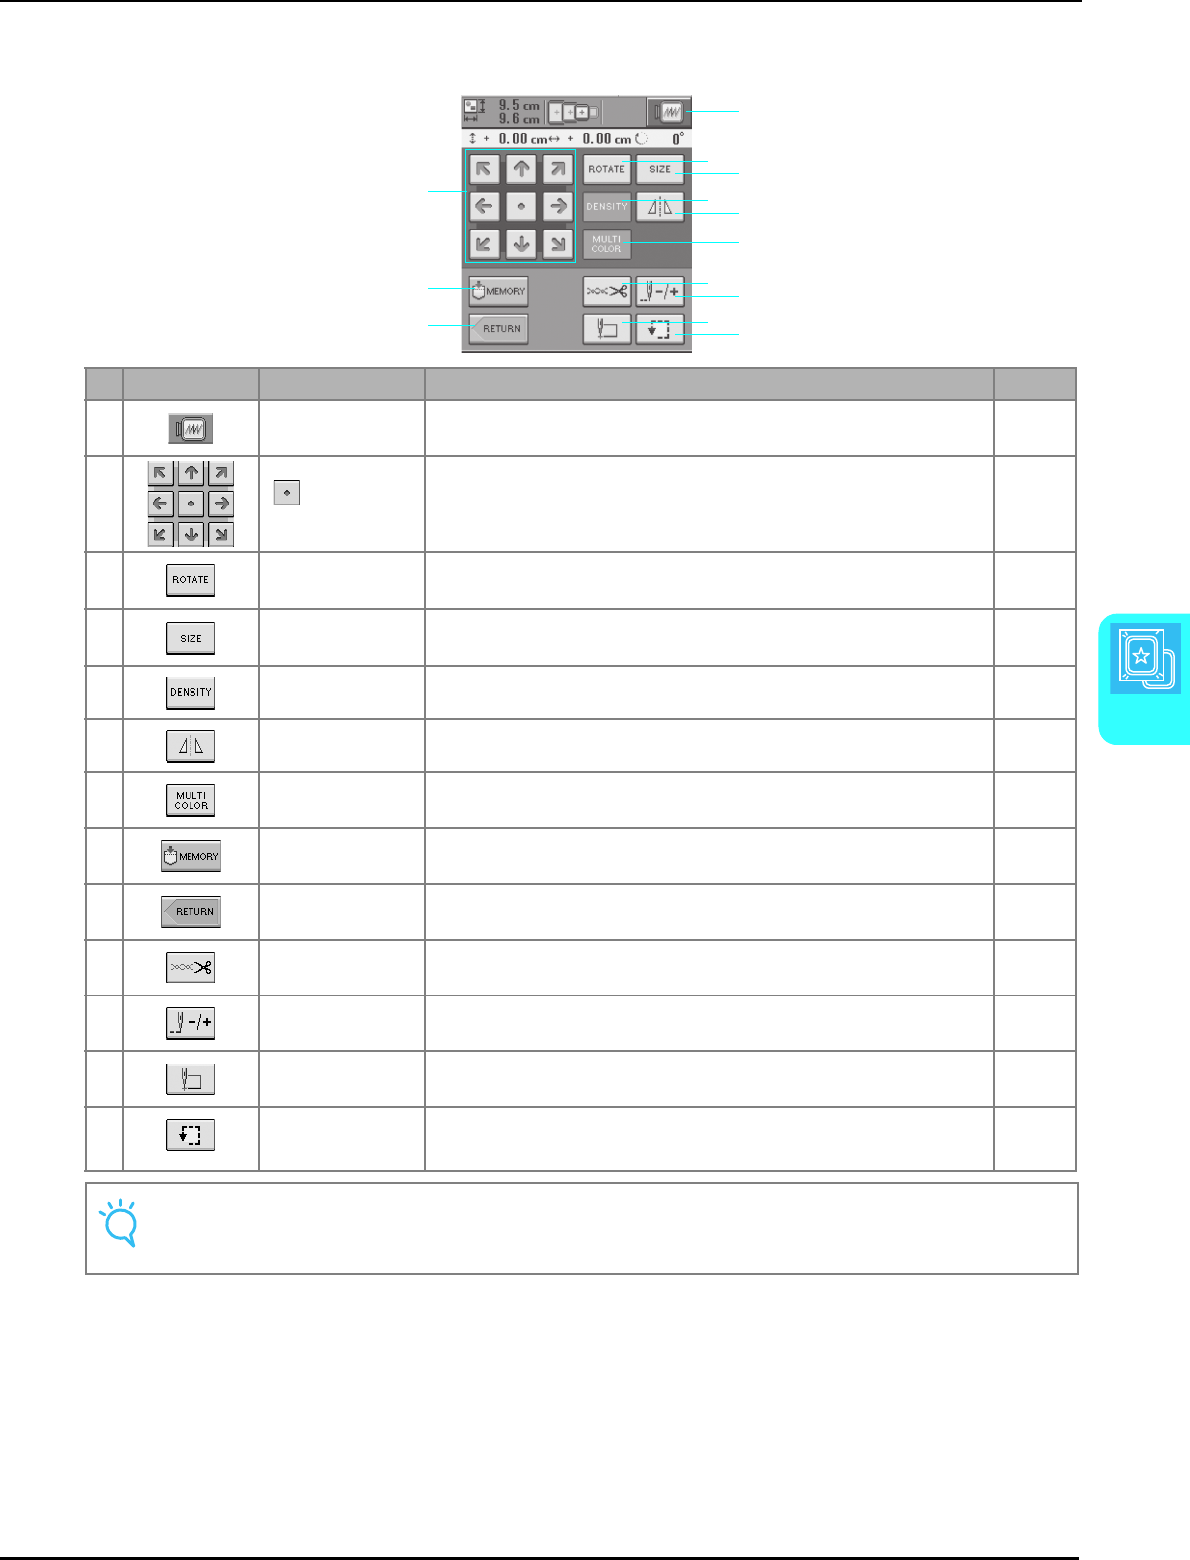
VIEWING THE SEWING SCREEN
Embroidery
137
5
■Key Functions
Using these keys, you can change the size of the pattern, rotate the pattern, etc.
No. Display Key Name Explanation Page
mImage key Press this key for a preview of the sewn image. 145
nArrow keys
( Center key)
Press an arrow key to move the pattern in the direction shown by the arrow.
(Press the Center key to return the pattern to the center of the embroidery
area.)
159
oRotate key Press this key to rotate the pattern. You can rotate a pattern one degree, 10
degrees or 90 degrees at a time.
161
pSize key Press this key to change the size of the pattern. 160
qDensity key Press this key to change the density of alphabet character or frame patterns. 162
rHorizontal mirror
image key
Press this key to create a horizontal mirror image of the pattern. 162
sMulti color key Press this key to change the color of each letter when sewing alphabet
character patterns.
163
tMemory key Saves a pattern in the machine’s memory, USB media or a computer. 166-169
uReturn key Press this key to return to the pattern type selection screen. —
vCut/Tension key Press this key to specify automatic thread cutting, thread trimming or the thread
tension. For embroidery, these functions are set automatically.
154-155
wForward/Back key Press this key to move the needle forward or back in the pattern; useful if the
thread breaks while sewing or if you want to start again from the beginning.
151-153
xStarting point key Press this key to move the needle start position to align the needle with the
pattern position.
159
yTrial key Press this key to check the position of the pattern.The embroidery frame moves
to the desired position so you can check that there is enough space to sew the
pattern.
144
Note
• Some operations or functions are not available for certain patterns. If the key display is light gray, you
cannot use that function or operation with the selected pattern.
t
n
u
m
p
o
q
v
x
r
s
w
y
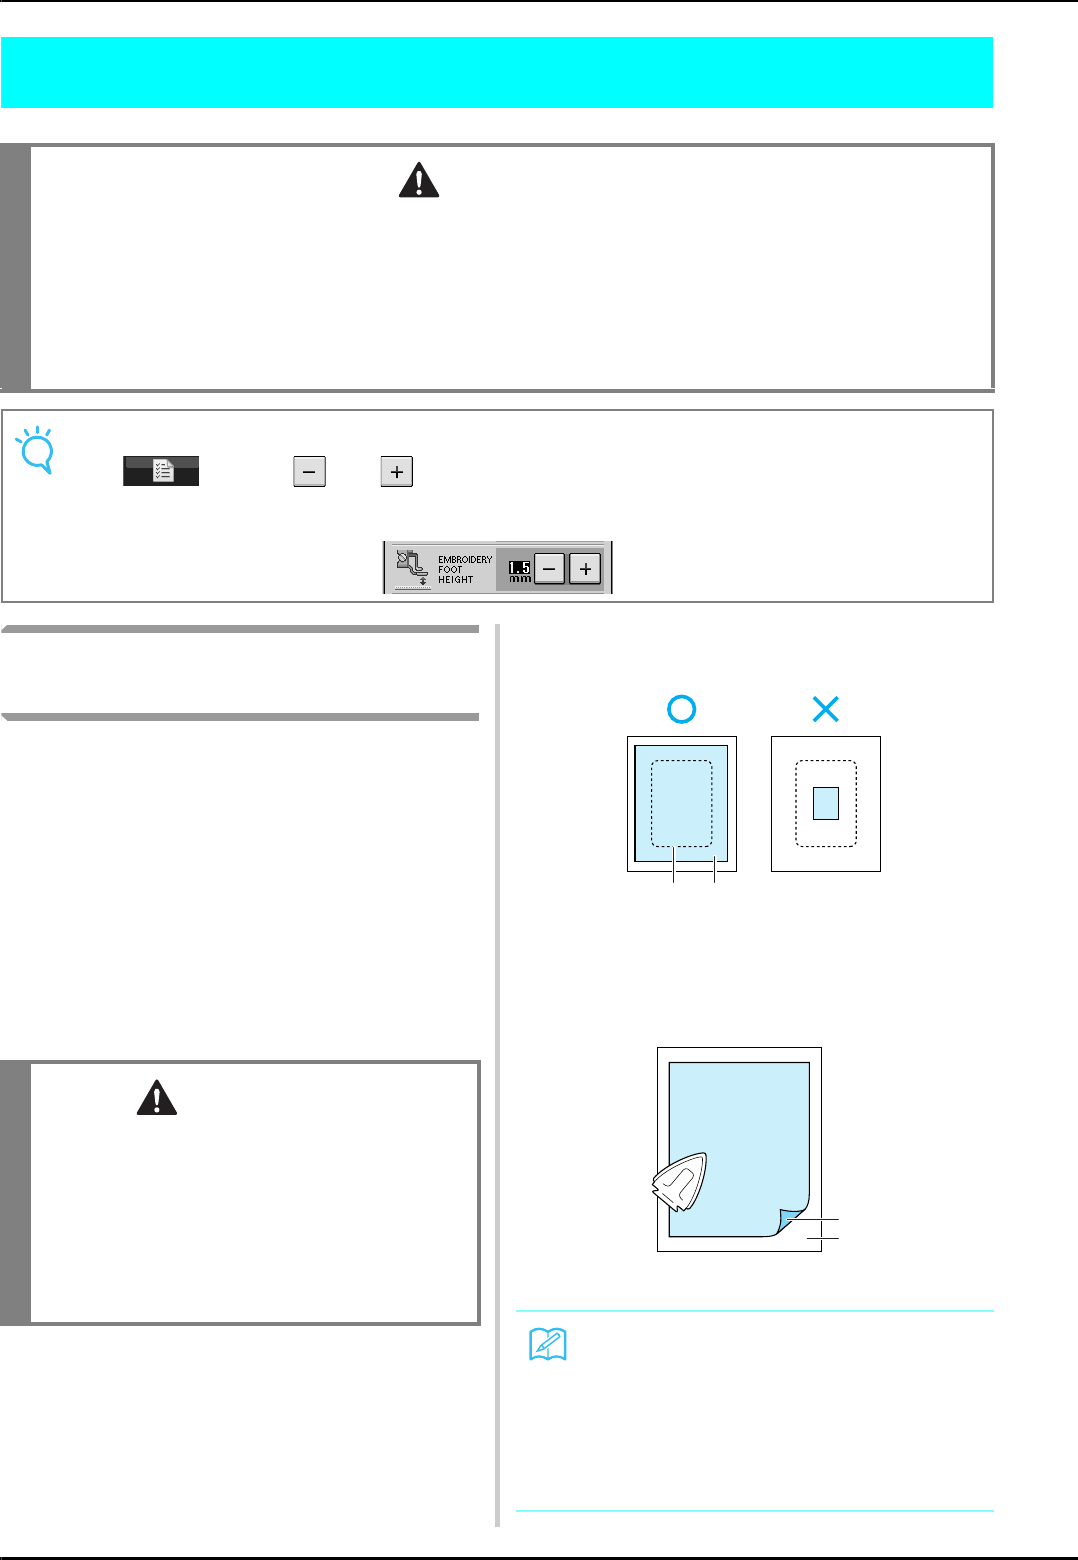
PREPARING THE FABRIC
138
PREPARING THE FABRIC
Attaching Iron-on Stabilizers
(backing) to the Fabric
For best results in your embroidery projects,
always use stabilizer material for embroidery.
Follow the package instructions for the stabilizer
being used.
When using fabrics that cannot be ironed (such as
towel or fabrics that have loops which expand
when ironed) or in places where ironing is
difficult, position the stabilizer material under the
fabric without fusing it, then position the fabric
and stabilizer in the embroidery frame, or check
with your authorized dealer for the correct
stabilizer to use.
aUse a piece of stabilizer which is larger
than the embroidery frame being used.
aSize of the embroidery frame
bIron-on stabilizer (backing)
bIron the iron-on stabilizer material to the
wrong side of the fabric.
aFusible side of stabilizer
bFabric (wrong side)
CAUTION
• Use fabrics with a thickness of less than 3 mm (approx. 1/8 inch). Using fabrics thicker than 3 mm
(approx. 1/8 inch) may cause the needle to break.
• When using layers with thicker batting etc., you can sew more attractive embroidery by adjusting the
embroidery presser foot height in the embroidery settings screen (see below).
• In the case of thick terry cloth towels we recommend that you place a piece of water soluble stabilizer on
the top surface of the towel. This will help to reduce the nap of the toweling and result in more attractive
embroidery.
Note
Press , and use and in the EMBROIDERY FOOT HEIGHT display in the embroidery
settings screen to adjust the presser foot height.
CAUTION
• Always use a stabilizer material for
embroidery when sewing stretch fabrics,
lightweight fabrics, fabrics with a coarse
weave, or fabrics which cause pattern
shrinkage. Otherwise, the needle may break
and cause injury. Not using a stabilizer
material may result in a poor finish to your
project.
Memo
• When embroidering on thin fabrics such as
organdy or lawn, or on napped fabrics such
as towel or corduroy, use water soluble sta-
bilizer (sold separately) for best results. The
water soluble stabilizer material will dissolve
completely in water, giving the project a
more attractive finish.
a b
a
b
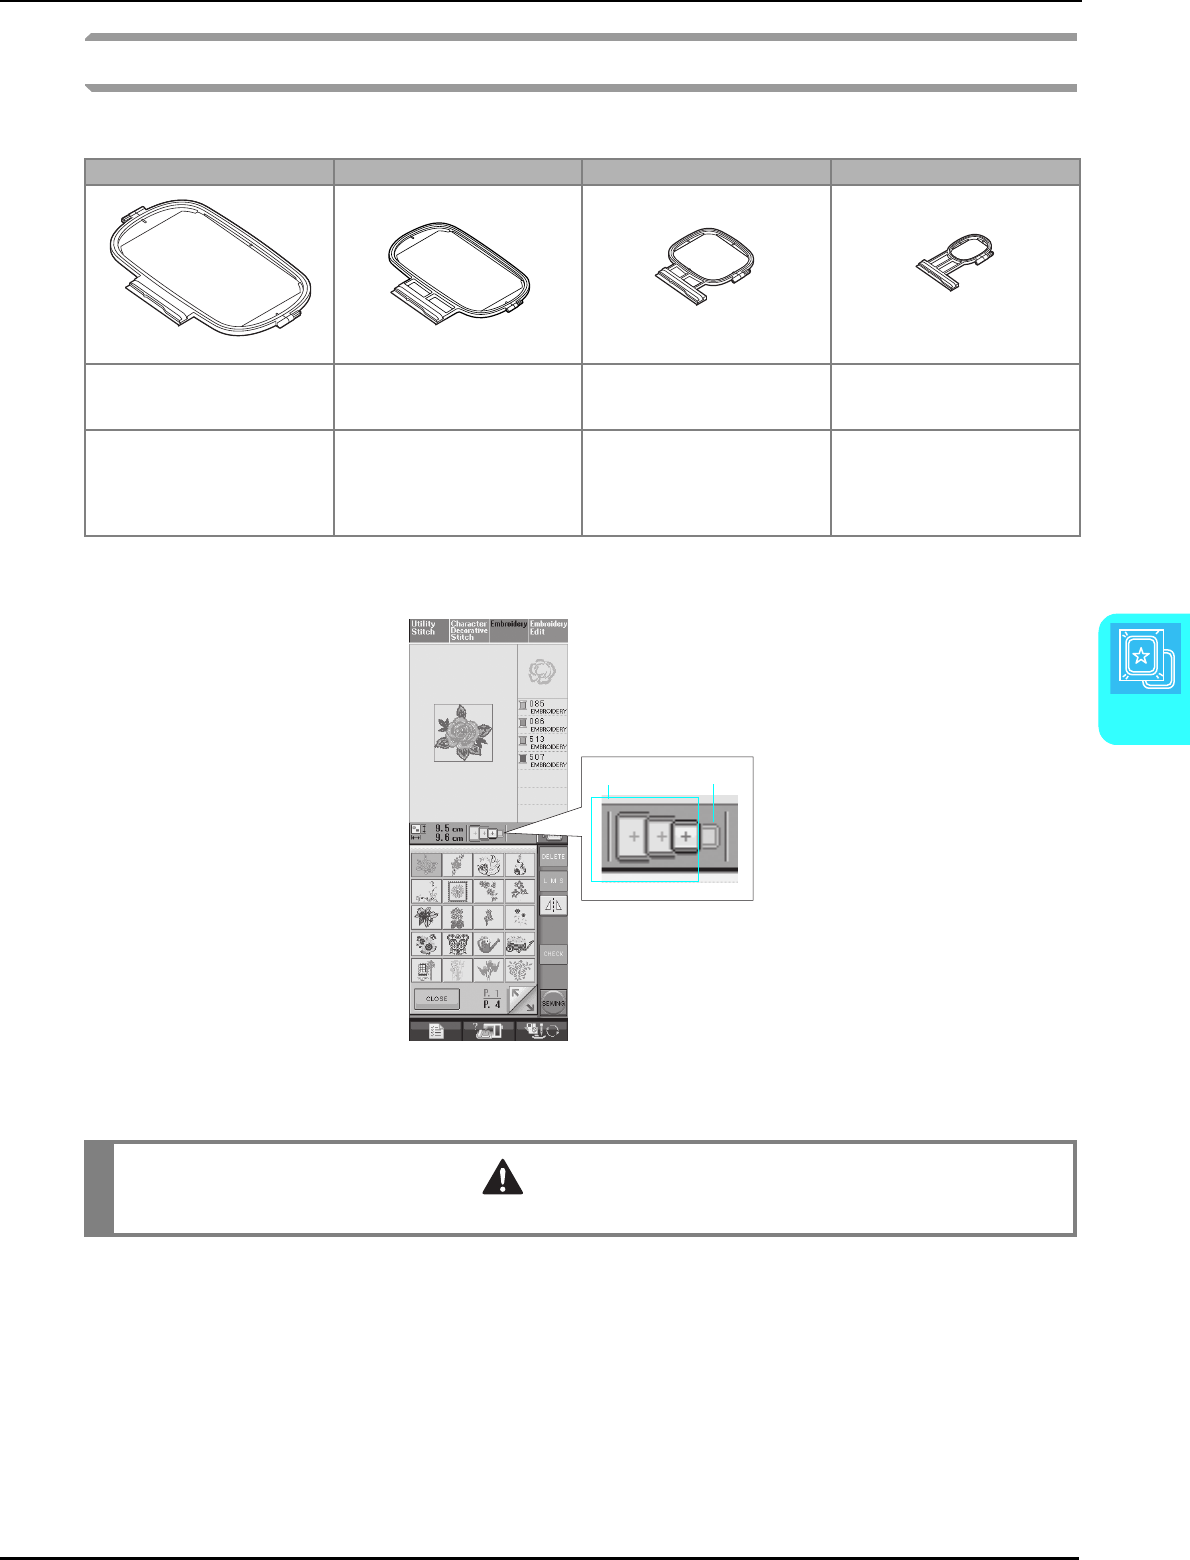
PREPARING THE FABRIC
Embroidery
139
5
Hooping the Fabric in the Embroidery Frame
■Types of Embroidery Frames
Embroidery Frame 26 cm × 16 cm (approx. 10-1/4 inches × 6-1/4 inches) can be used.
Select a frame that matches the pattern size. Frame options are displayed on the LCD.
aCan be used
bCannot be used
Extra Large Large Medium Small
Can embroider an area
30 cm × 18 cm
(approx. 12 inches × 7 inches)
Can embroider an area
18 cm × 13 cm
(approx. 7 inches × 5 inches)
Can embroider an area
10 cm × 10 cm
(approx. 4 inches × 4 inches)
Can embroider an area
2 cm × 6 cm
(approx. 1 inch × 2-1/2 inches)
Use when embroidering
connected or combined
characters or patterns, or when
embroidering large patterns.
Use when embroidering patterns
between 10 cm × 10 cm (approx.
4 inches × 4 inches) and
18 cm × 13 cm (approx. 7 inches
× 5 inches).
Use when embroidering patterns
under 10 cm x 10 cm
(approx. 4 inches × 4 inches).
Use for embroidering names or
very small patterns.
ab
CAUTION
• If you use a frame that is too small, the presser foot may strike the frame during sewing and cause injury.
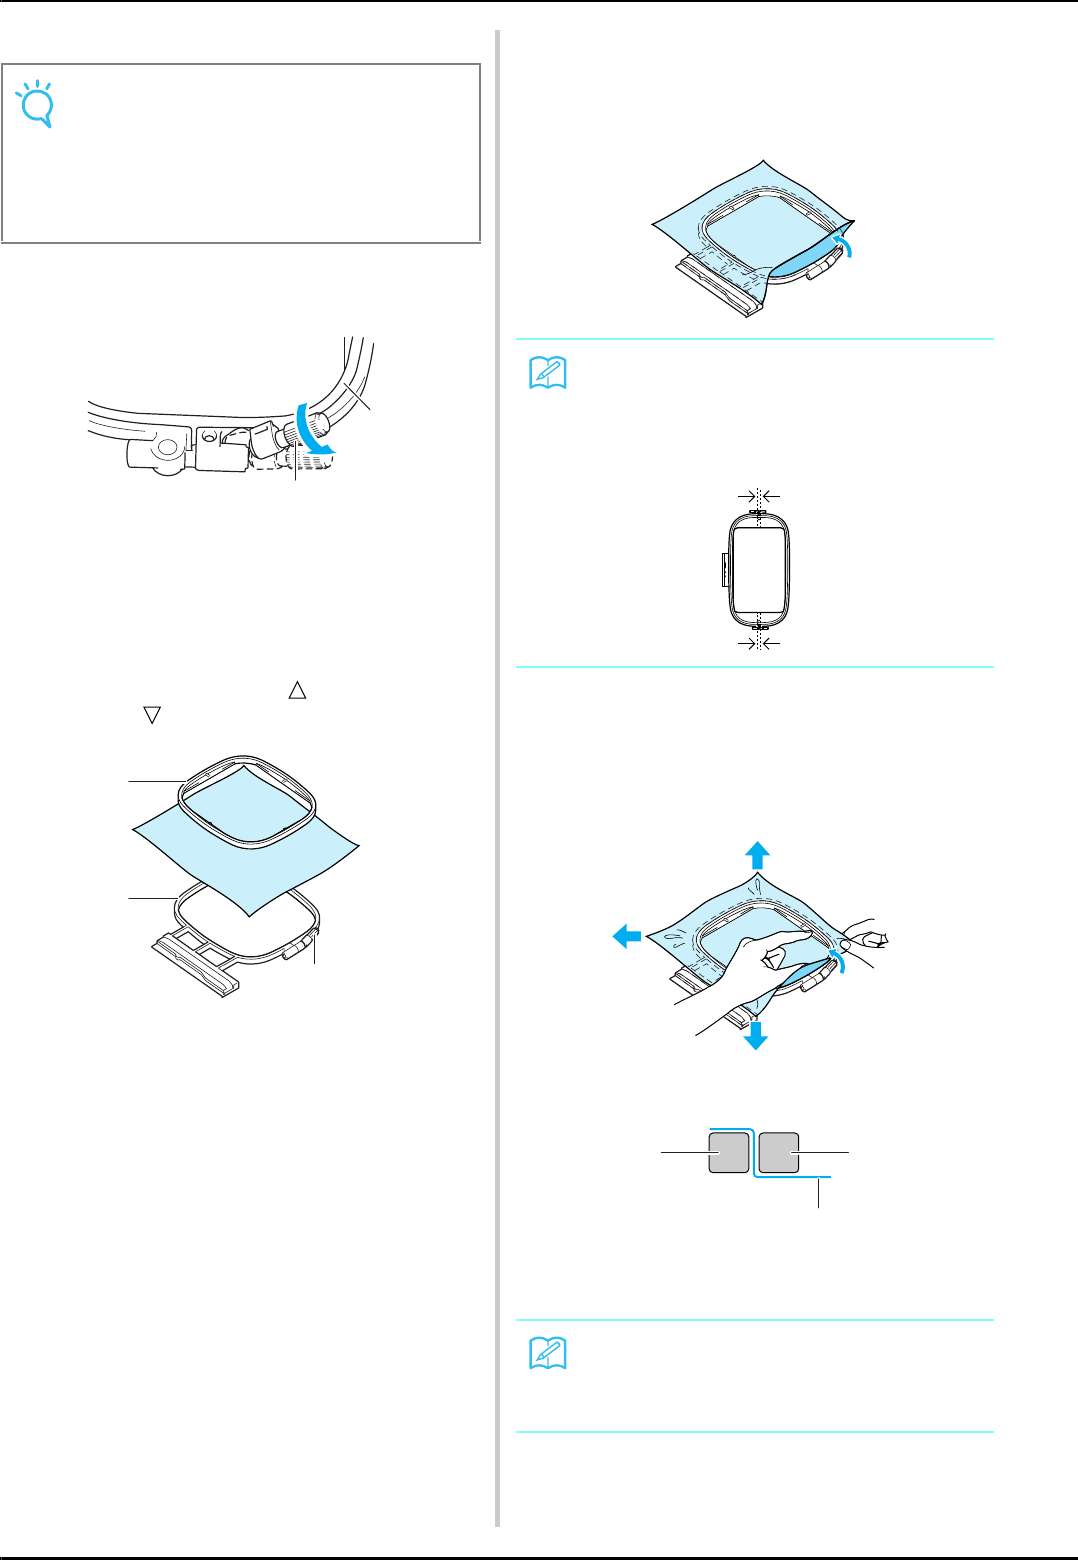
PREPARING THE FABRIC
140
■Inserting the Fabric
aLift-up and loosen the frame adjustment
screw and remove the inner frame.
aFrame adjustment screw
bInner frame
bLay the fabric right side up on top of the
outer frame.
Re-insert the inner frame making sure to
align the inner frame’s with the outer
frame’s .
aInner frame
bOuter frame
cFrame adjustment screw
cSlightly tighten the frame adjustment screw,
and then remove the slack in the fabric by
pulling on the edges and corners. Do not
loosen the screw.
dGently stretch the fabric taut, and tighten
the frame adjustment screw to keep the
fabric from loosening after stretching.
* After stretching the fabric, make sure the fabric is
taut.
* Make sure the inside and outside frames are even
before you start embroidering.
aOuter frame
bInner frame
cFabric
Note
• If the fabric is placed loose in the embroidery
frame, the embroidery design will sew out
poorly. Insert the fabric on a level surface,
and gently stretch the fabric taut in the
frame. Follow the steps below to insert the
fabric correctly.
a
b
a
b
c
Memo
When using the extra large frame, tighten the
adjustment screws at the top and bottom of
the frame, so that the spaces at the top and
bottom of the frame are equal.
Memo
Stretch the fabric from all four corners and all
four edges. While stretching the fabric, tighten
the frame adjustment screw.
ab
c
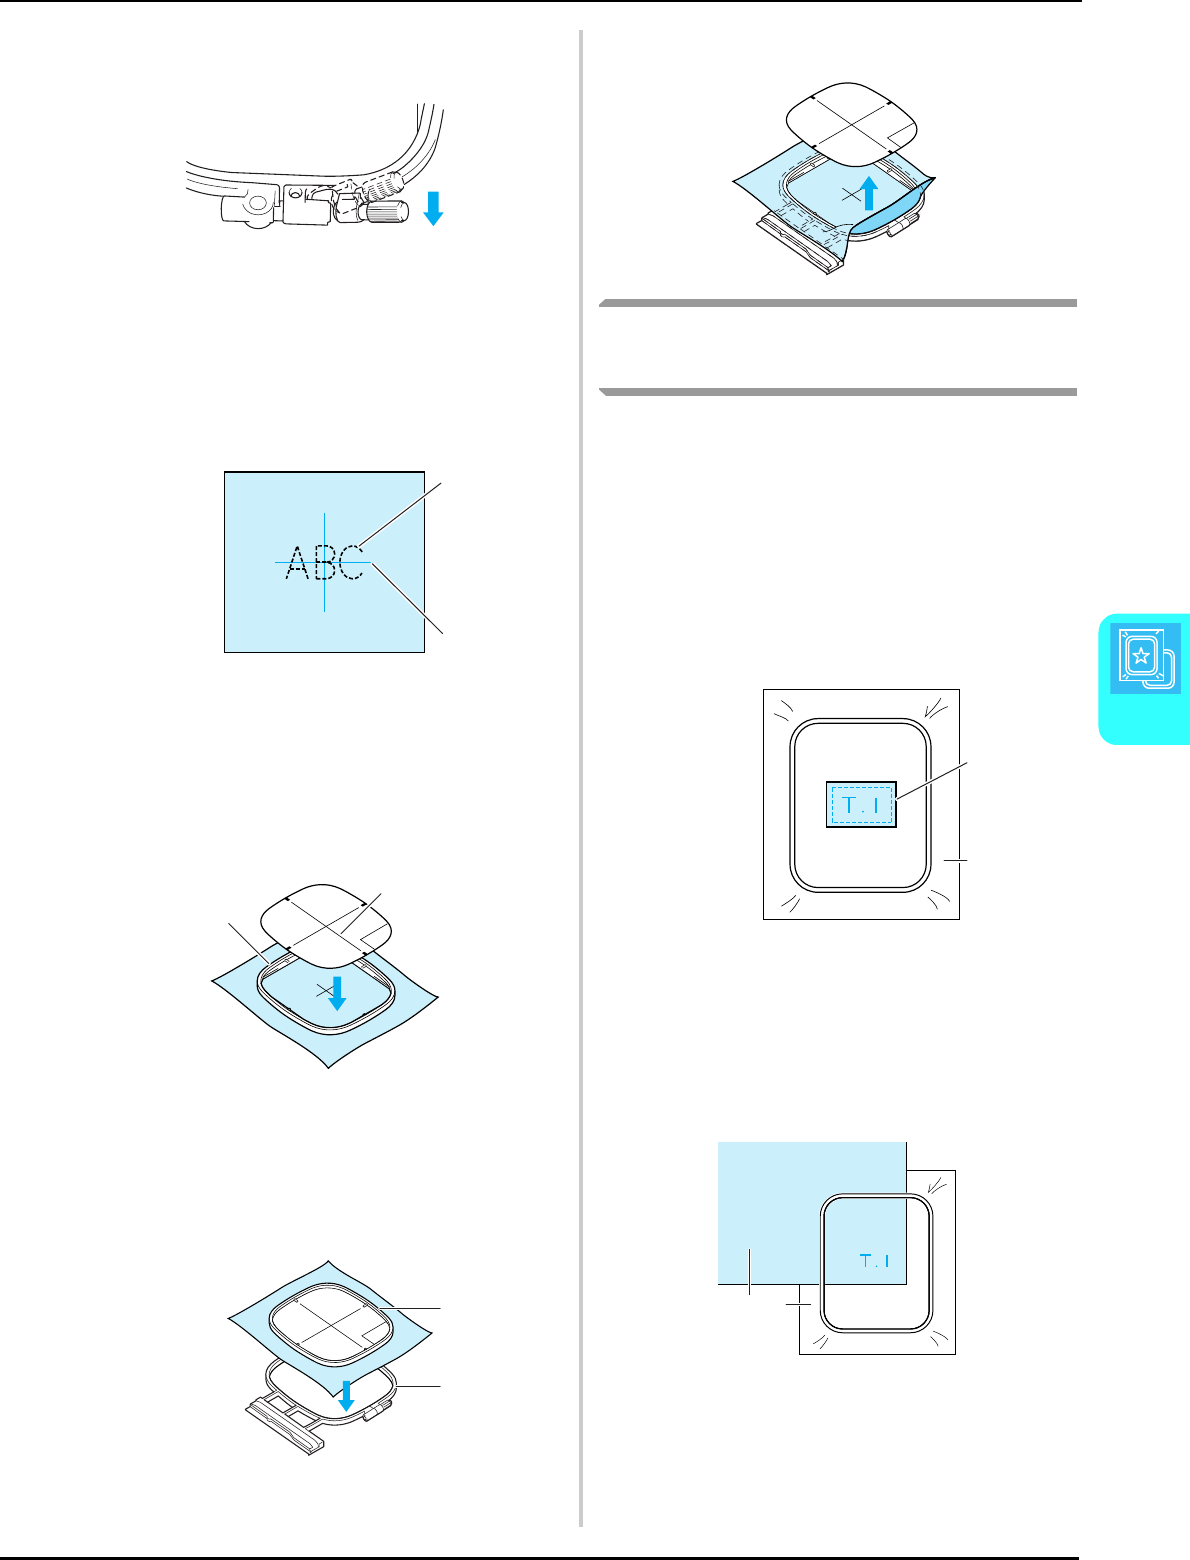
PREPARING THE FABRIC
Embroidery
141
5
eReturn the frame adjustment screw to its
initial position.
■Using the Embroidery Sheet
When you want to embroider the pattern in a
particular place, use the embroidery sheet with the
frame.
aWith a chalk pen, mark the area of the
fabric you want to embroider.
aEmbroidery pattern
bMark
bPlace the embroidery sheet on the inner
frame. Align the guide lines on the
embroidery sheet with the mark you made
on the fabric.
aInner frame
bGuide line
cGently stretch the fabric so there are no
folds or wrinkles, and press the inner frame
into the outer frame.
aInner frame
bOuter frame
dRemove the embroidery sheet.
Embroidering Small Fabrics or
Fabric Edges
Use an embroidery stabilizer to provide extra
support. After embroidering, remove the stabilizer
carefully. Attach the stabilizer as shown in the
examples below. We recommend using a
stabilizer for embroidery.
■Embroidering Small Fabrics
Use a temporary spray adhesive to adhere the small
piece of fabric to the larger piece in the frame.
If you do not wish to use a temporary spray
adhesive, attach the stabilizer with a basting stitch.
aFabric
bStabilizer
■Embroidering Edges or Corners
Use a temporary spray adhesive to adhere the small
piece of fabric to the larger piece in the frame.
If you do not wish to use a temporary spray
adhesive, attach the stabilizer with a basting stitch.
aFabric
bStabilizer
a
b
a
b
a
b
b
a
a b
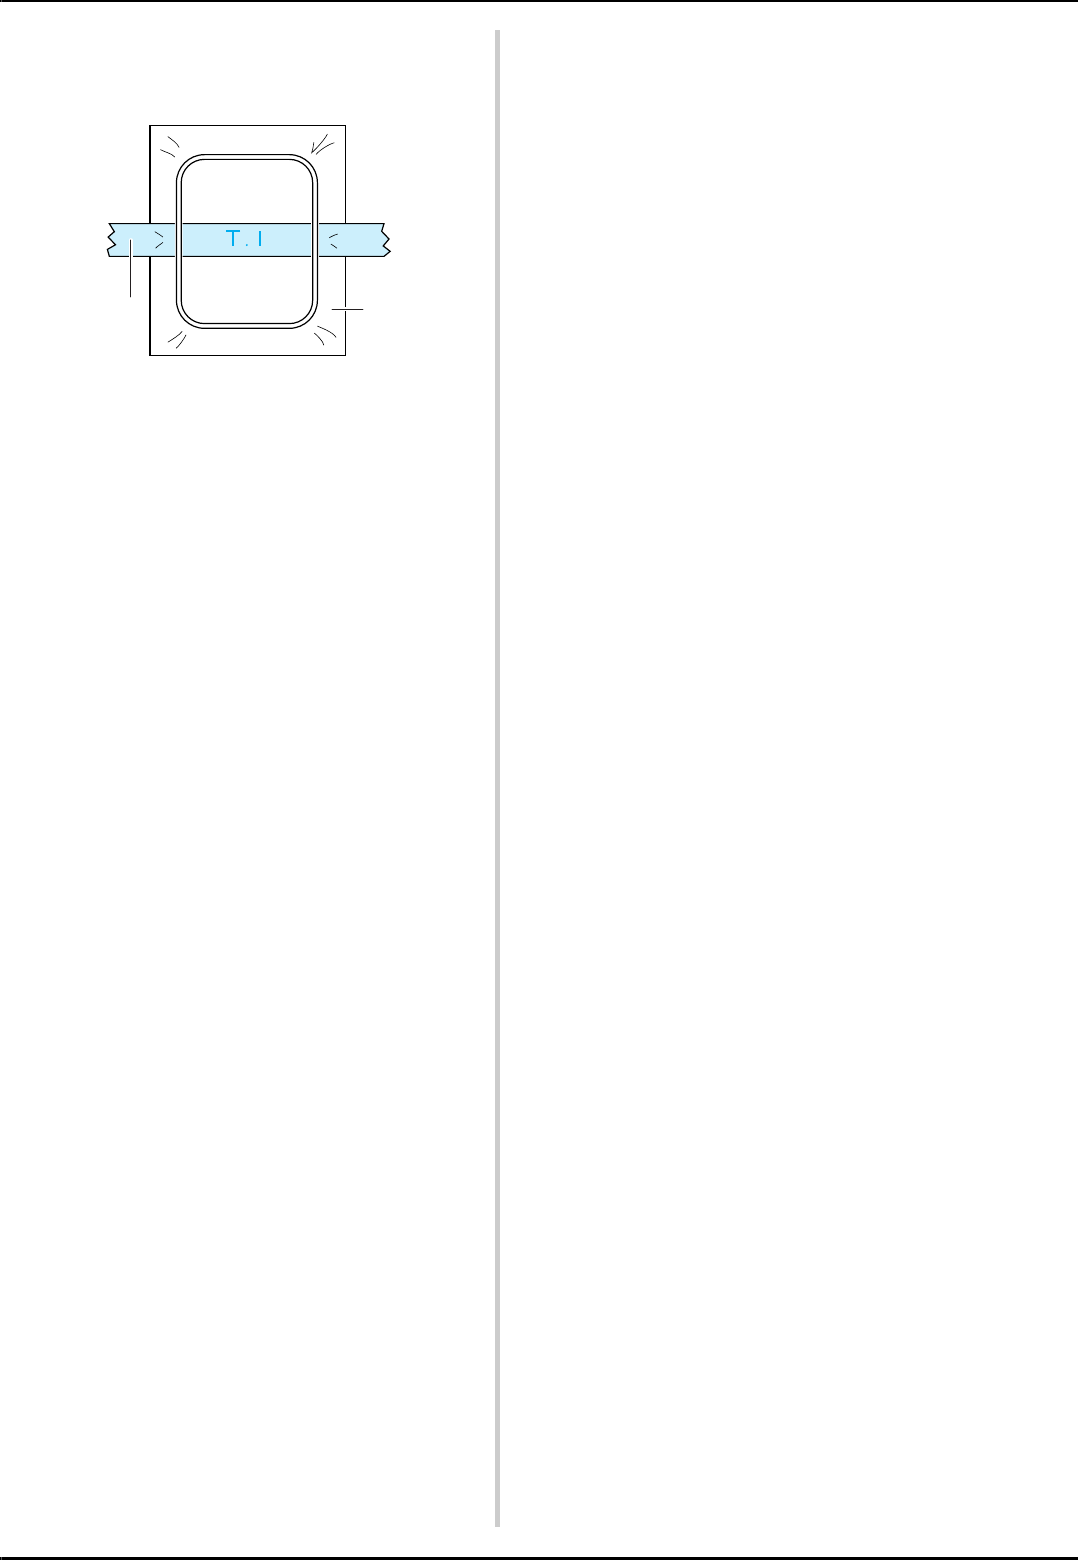
PREPARING THE FABRIC
142
■Embroidering Ribbons or Tape
Secure with double-sided tape or a temporary spray
adhesive.
aRibbon
bStabilizer
ab
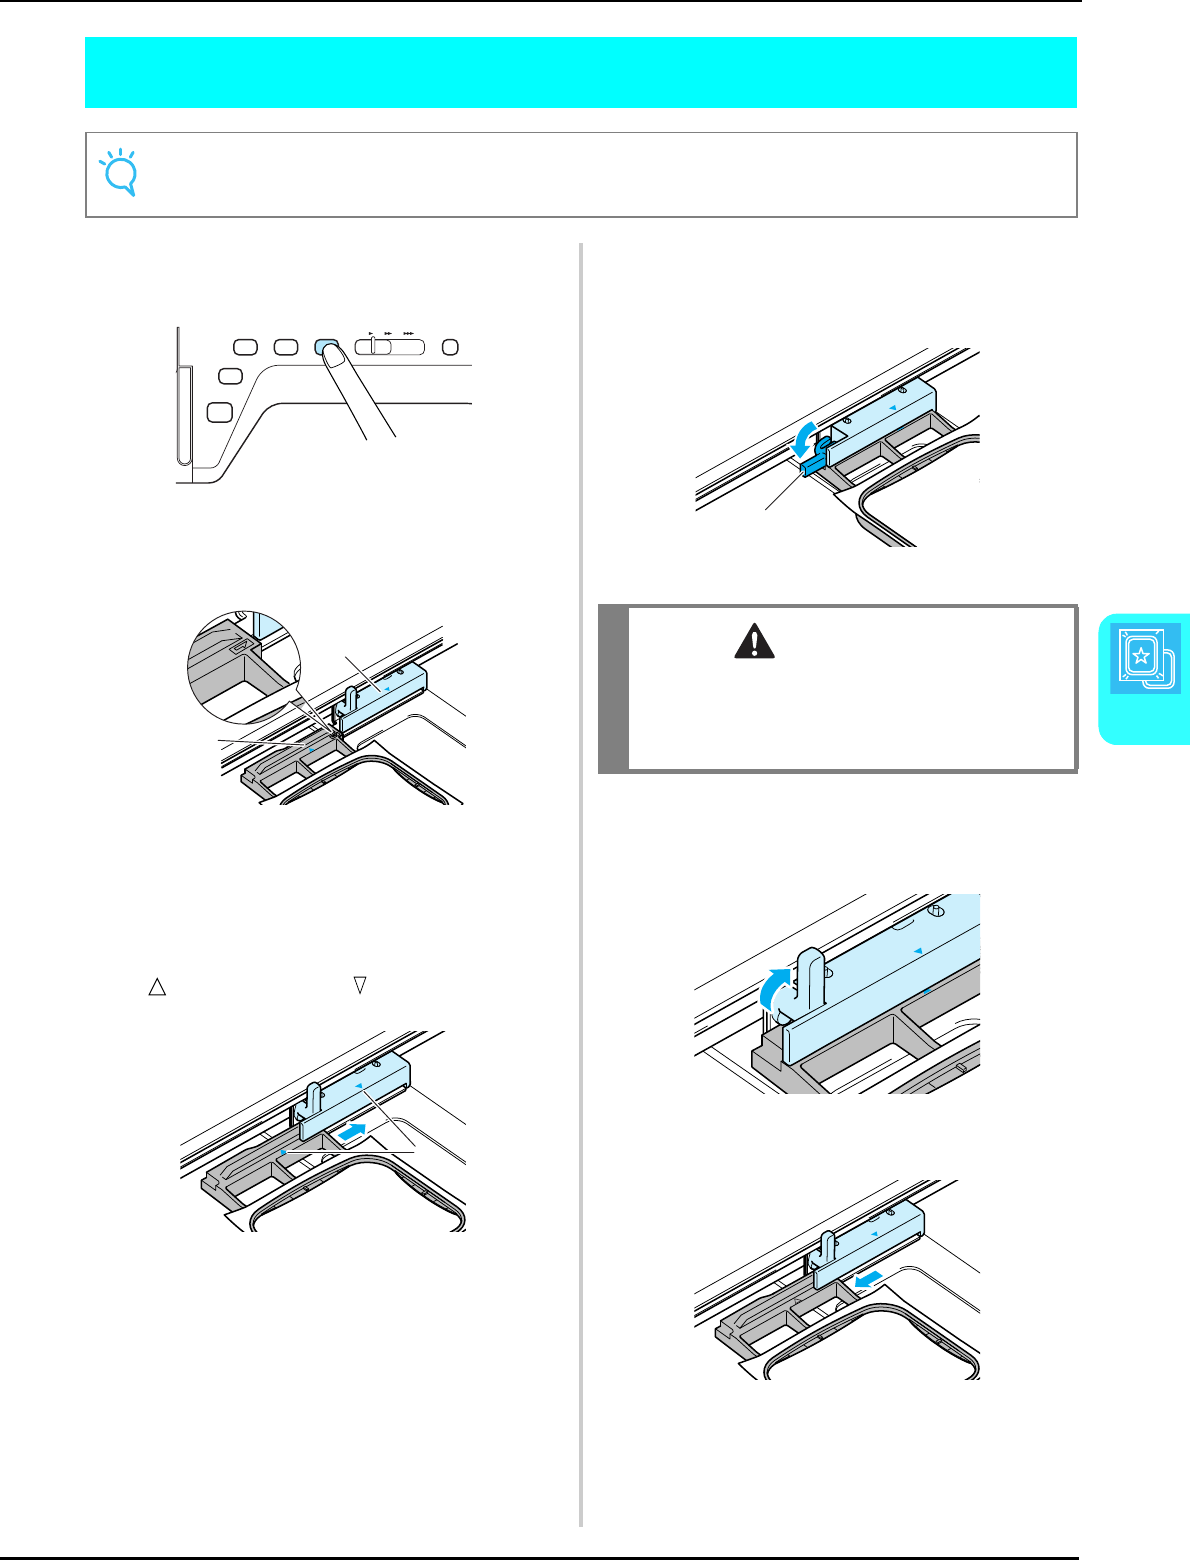
ATTACHING THE EMBROIDERY FRAME
Embroidery
143
5
ATTACHING THE EMBROIDERY FRAME
aPress the “Presser Foot Lifter” button to
raise the presser foot.
bAlign the embroidery frame guide with the
right edge of the embroidery frame holder.
aEmbroidery frame holder
bEmbroidery frame guide
cSlide the embroidery frame into the holder,
making sure to align the embroidery frame’s
with the holder’s .
aArrow mark
dLower the frame-securing lever to be level
with the frame to secure the embroidery
frame in the embroidery frame holder.
aFrame-securing lever
■Removing the Embroidery Frame
aRaise the frame-securing lever.
bPull the embroidery frame toward you.
Note
Wind and insert the bobbin before attaching the embroidery frame.
a
b
a
CAUTION
• If the frame-securing lever is not lowered, the
embroidery pattern may not sew out correctly
or the presser foot may strike the embroidery
frame and cause injury.
a
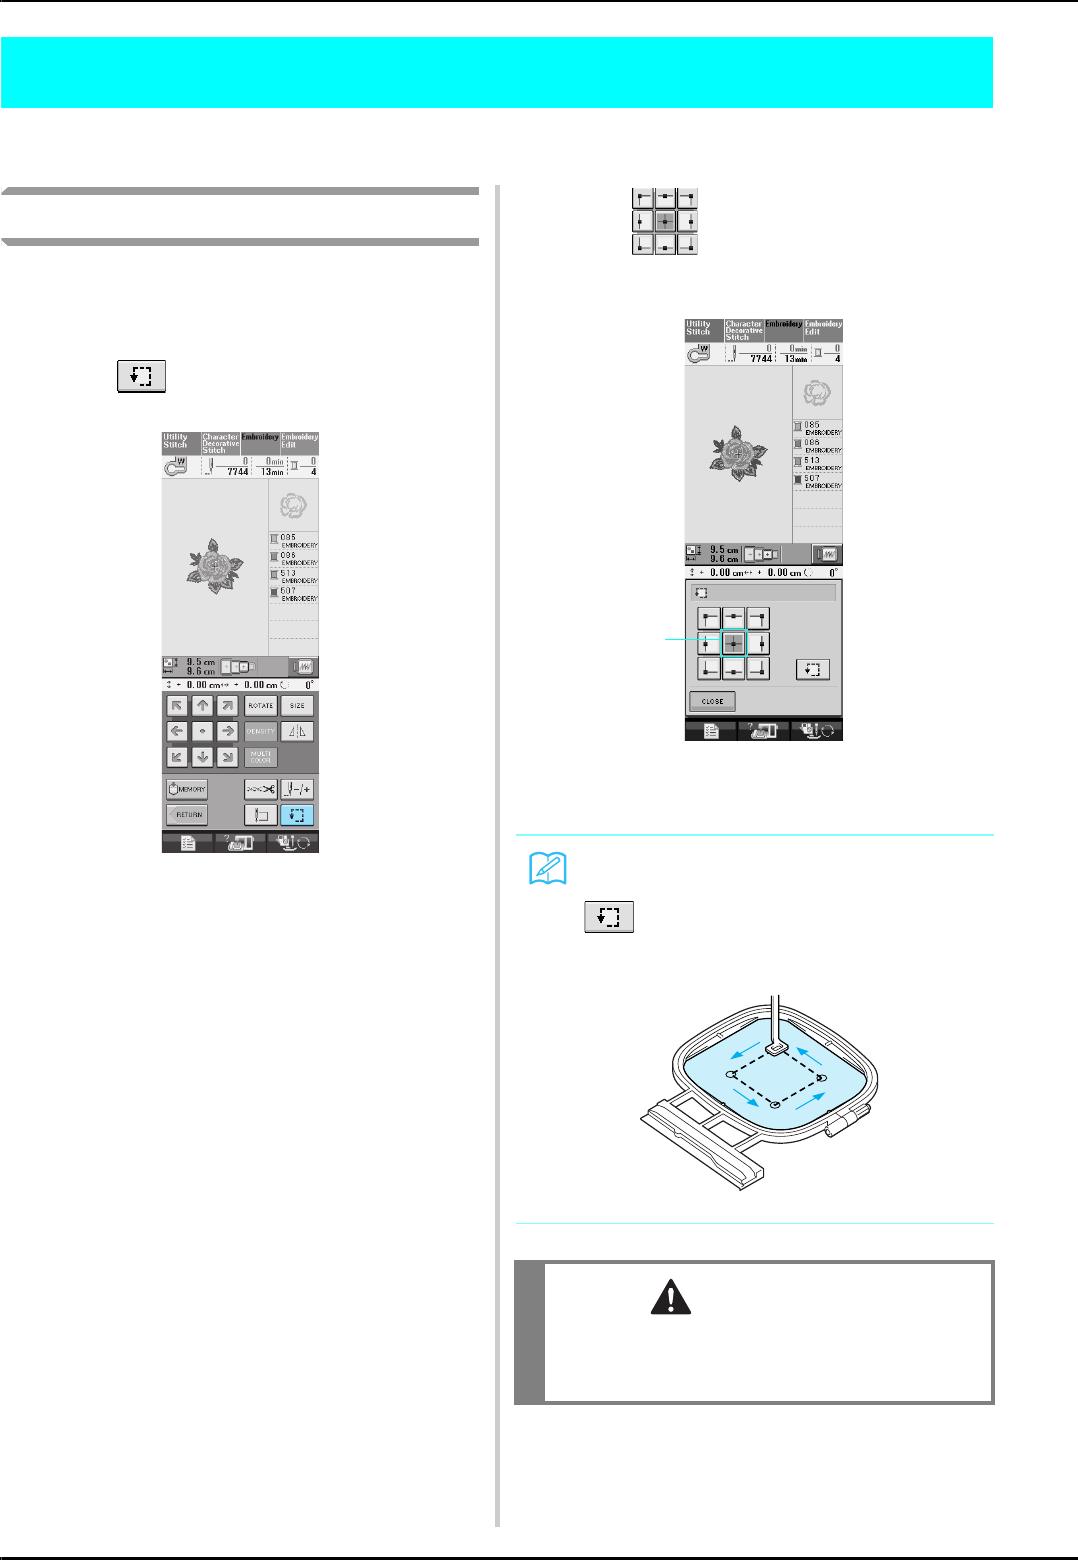
CONFIRMING THE PATTERN POSITION
144
CONFIRMING THE PATTERN POSITION
The pattern is normally positioned in the center of the embroidery frame.
You can check the layout before starting embroidery and change the position.
Checking the Pattern Position
The embroidery frame moves and shows the
pattern position. Watch the frame closely to make
sure the pattern will be sewn in the right place.
aPress .
→The following screen is displayed.
bFrom , press the key for the position
that you want to check.
aSelected position
→The needle will move to the selected position on the
pattern.
Memo
To see the entire embroidering area, press
. The embroidery frame moves and
shows the embroidery area.
CAUTION
• Make sure the needle is up when the
embroidery frame is moving. If the needle is
down, it could break and result in injury.
a
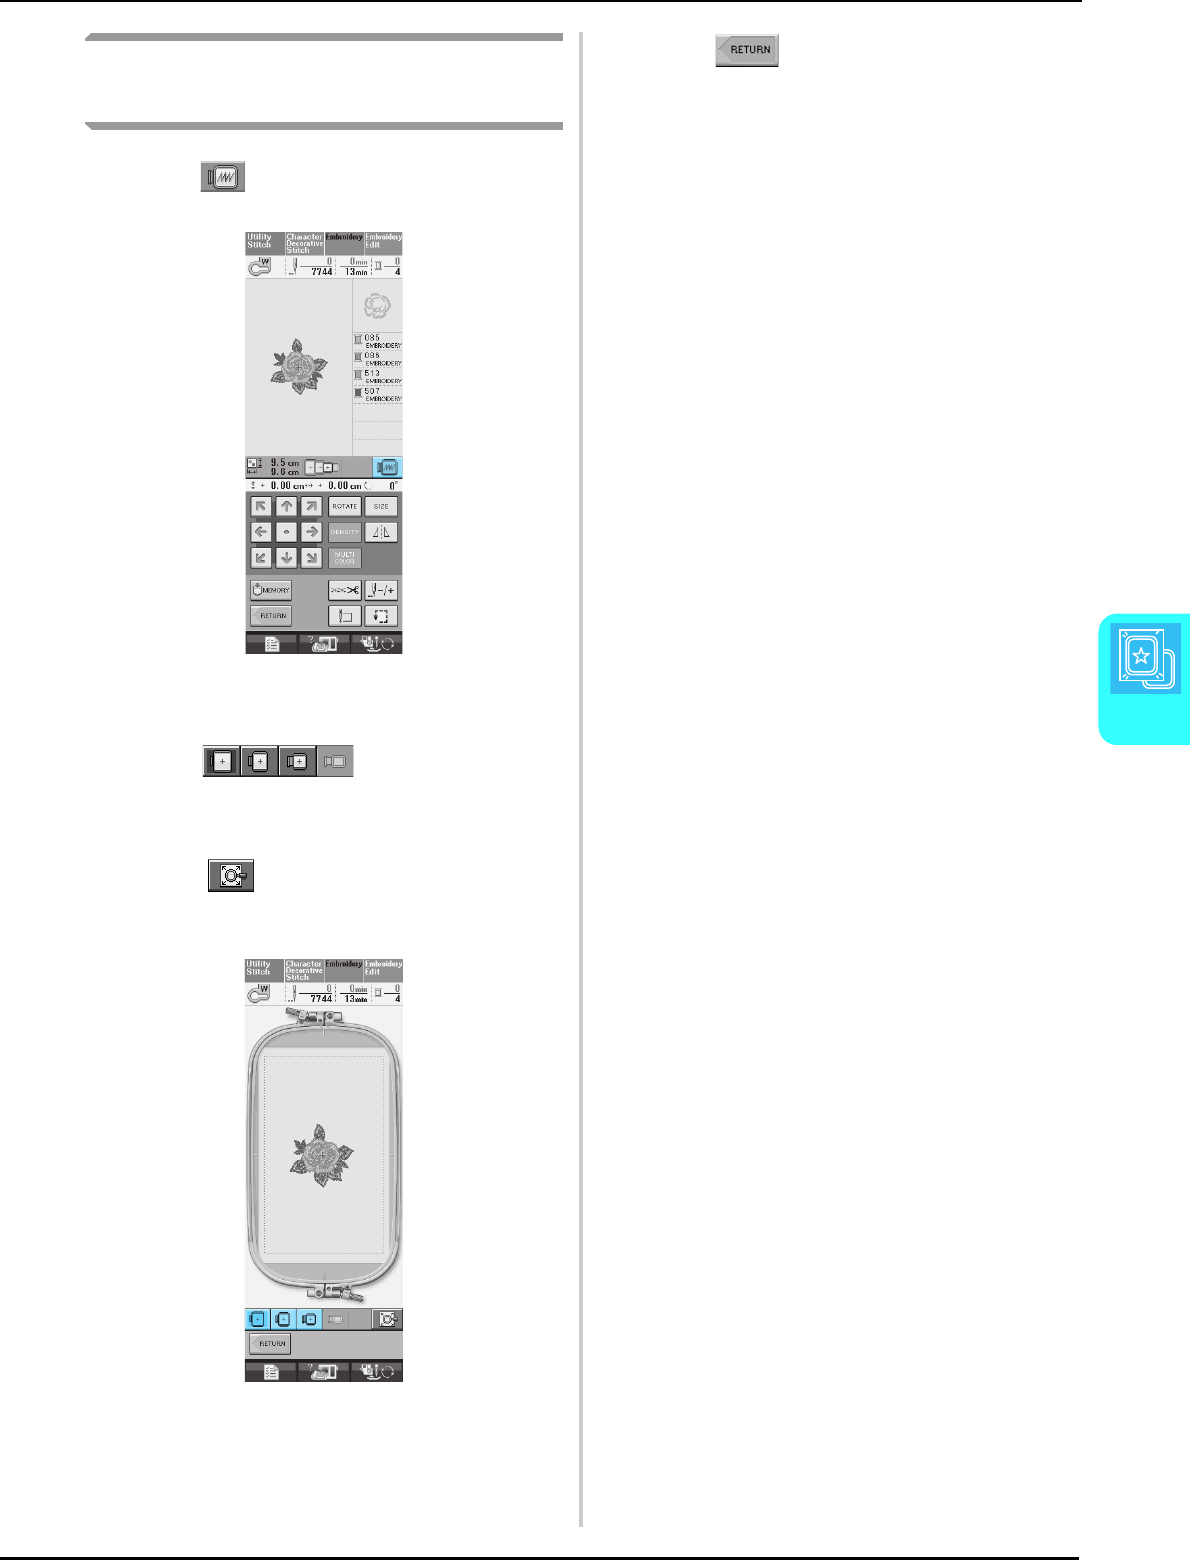
CONFIRMING THE PATTERN POSITION
Embroidery
145
5
Previewing the Completed
Pattern
aPress .
→An image of the pattern as it will be embroidered
appears.
bPress to select the frame
used in the preview.
* Frames displayed in light gray cannot be selected.
* Press to see a full screen preview.
* The pattern can be sewn as it appears in the
following display.
→You can begin sewing from this screen by pressing
the “Start/Stop” button.
cPress to return to the original
screen.
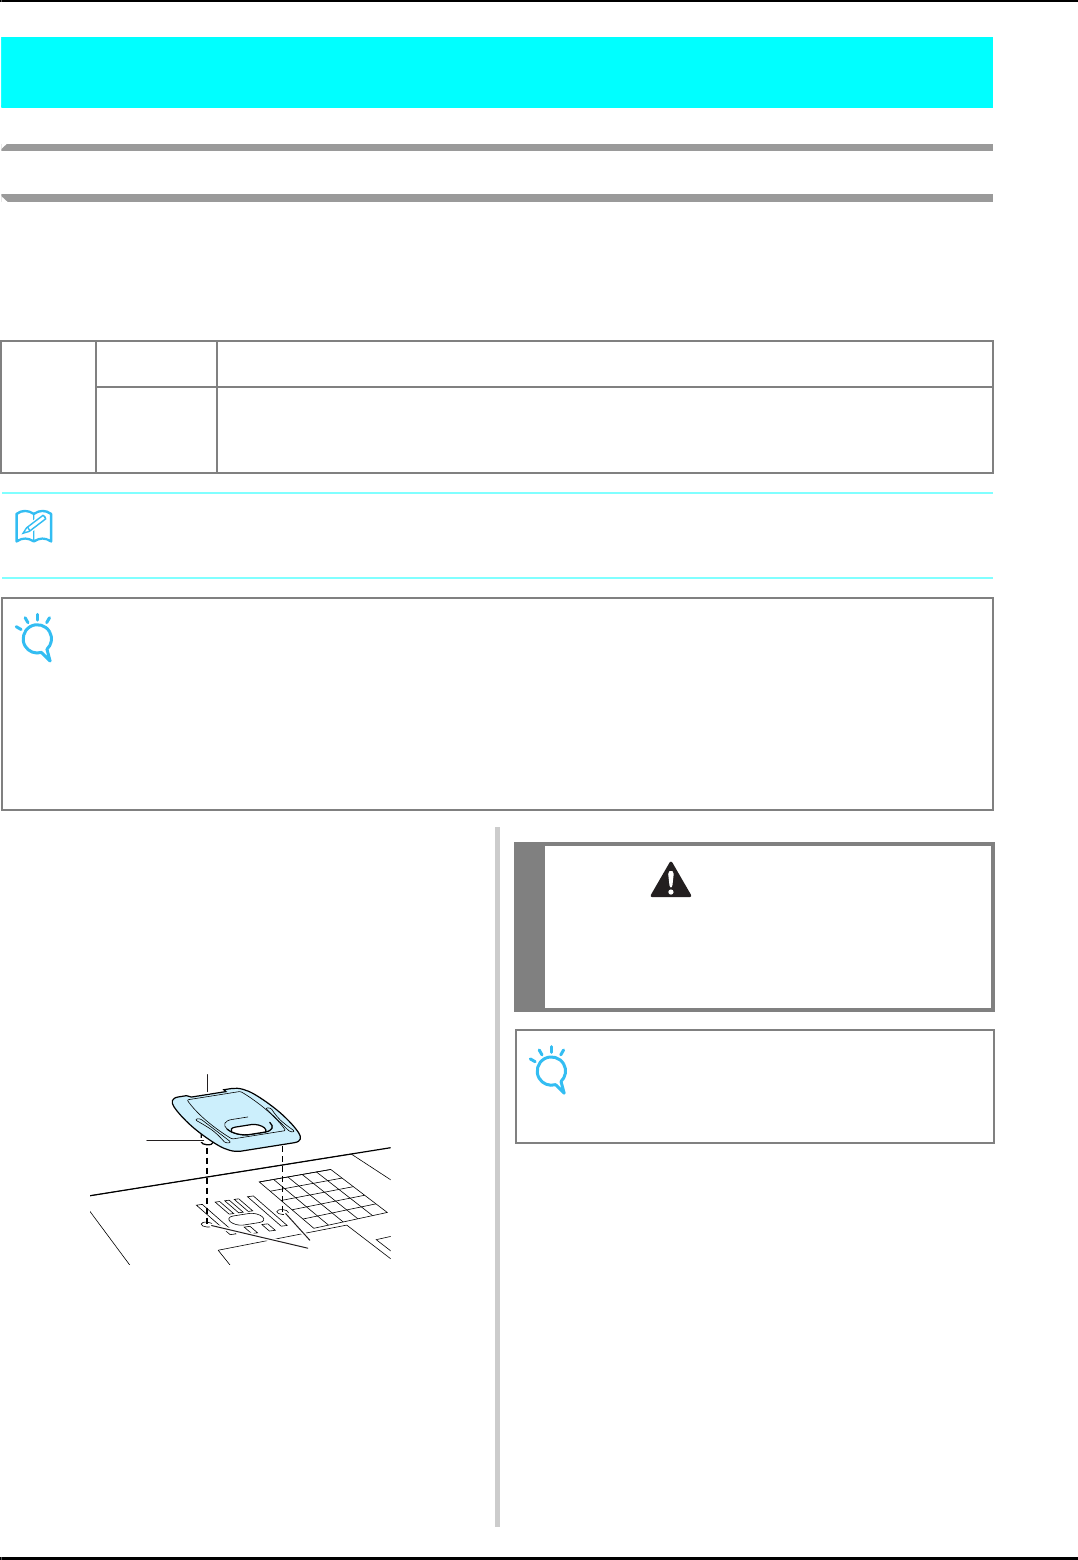
SEWING AN EMBROIDERY PATTERN
146
SEWING AN EMBROIDERY PATTERN
Sewing Attractive Finishes
There are many factors that go into sewing beautiful embroidery. Using the appropriate stabilizer (see
page 138) and hooping the fabric in the frame (see page 139) are two important factors mentioned earlier.
Another important point is the appropriateness of the needle and thread being used. See the explanation
of threads below.
■Embroidery Needle Plate Cover
Under some conditions, based on the type of fabric,
stabilizer, or thread being used, there may be some
looping in the upper thread. In this case, attach the
included embroidery needle plate cover to the
needle plate. Attach the cover by inserting the two
projections on the underside of the cover into the
notches on the needle plate as shown below.
aGroove
bProjection
cNotch
To remove the embroidery needle plate cover, place
your fingernail in the groove and lift the plate out.
Thread Upper thread Use embroidery thread, or country embroidery thread intended for use with this machine.
Other embroidery threads may not yield optimum results.
Bobbin thread Use embroidery bobbin thread intended for use with this machine.
When using other kinds of embroidery bobbin thread, use the bobbin case (no marking) included with this
machine (The bobbin case originally installed in the machine has a green screw). (See page 210 for how to
remove the bobbin case.)
Memo
If you use threads other than those listed above, the embroidery may not sew out correctly.
Note
• Before embroidering, check that there is enough thread in the bobbin. If you continue sewing without
enough thread in the bobbin, the thread may tangle.
• Do not leave objects in the range of motion of the embroidery frame. The frame may strike the object
and cause a poor finish to the embroidery pattern.
• When embroidering on large garments (especially jackets or other heavy fabrics), do not let the fabric
hang over the table. Otherwise, the embroidery unit cannot move freely, and the pattern may not turn
out as planned.
a
b
c
CAUTION
• Push the embroidery needle plate cover as far
as possible to attach it. If the embroidery
needle plate cover is not securely attached, it
may cause the needle to break.
Note
• Do not use the embroidery needle plate
cover for any applications other than embroi-
dery.
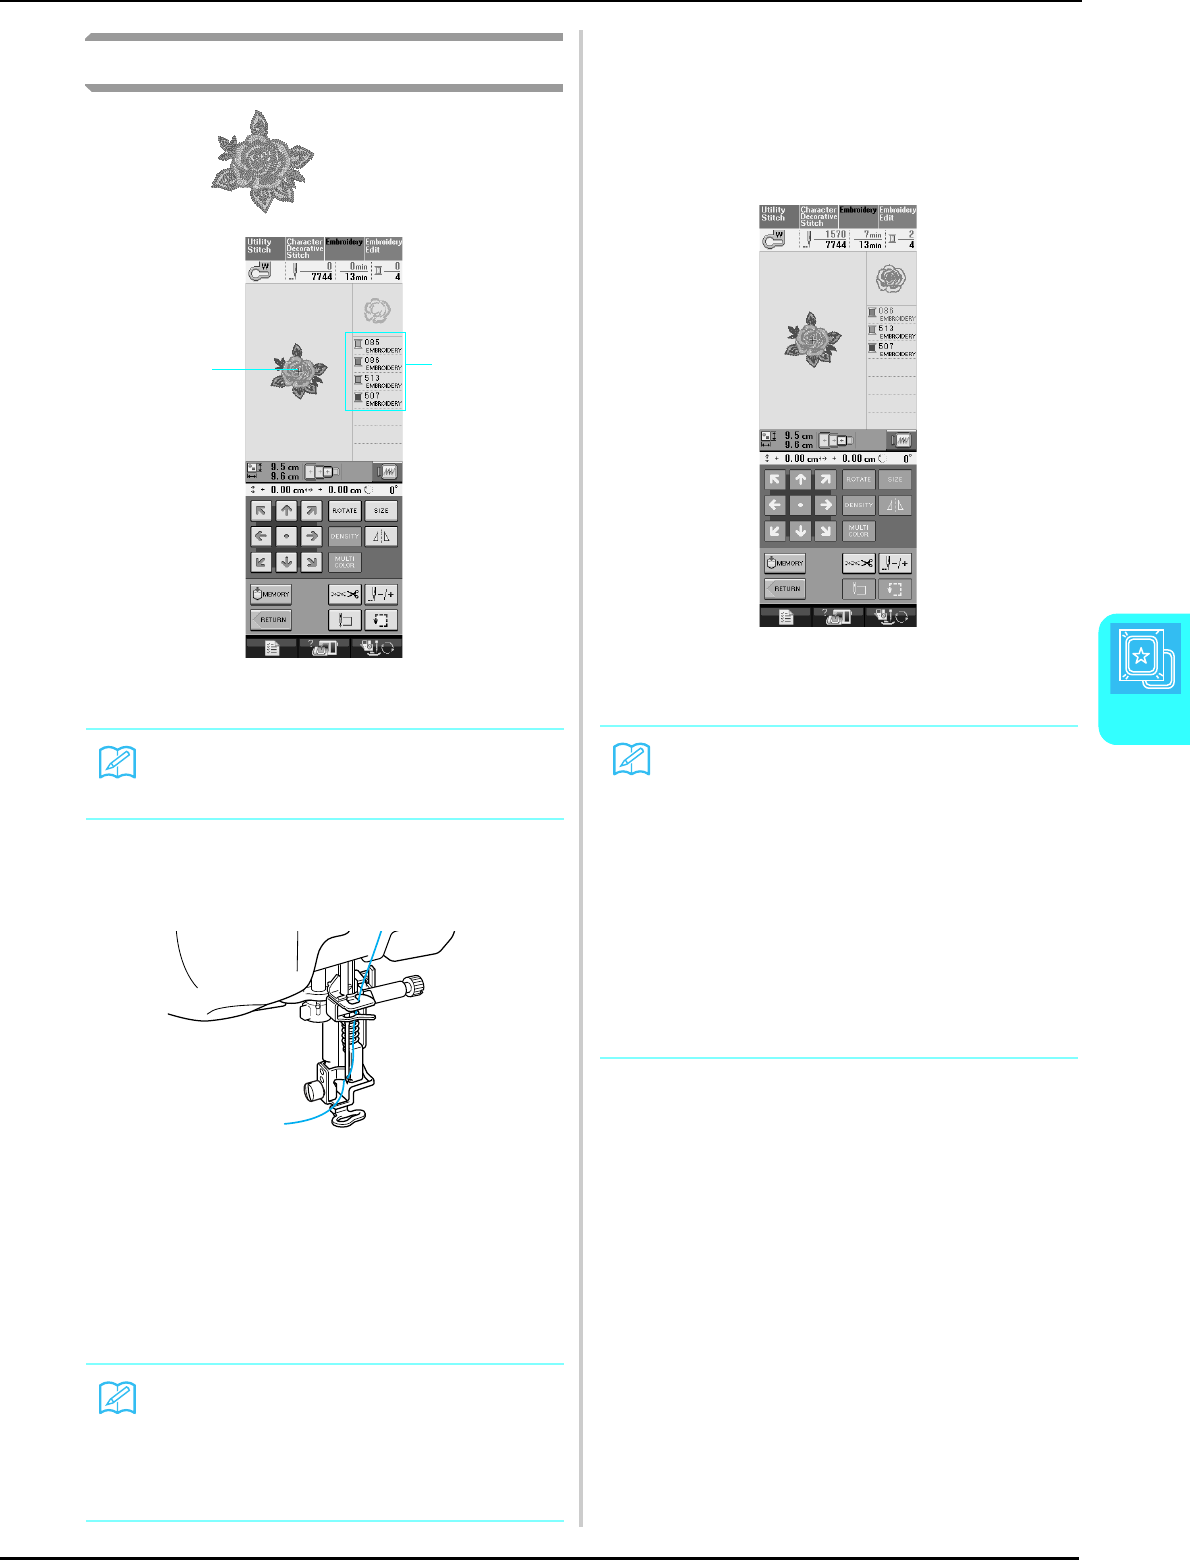
SEWING AN EMBROIDERY PATTERN
Embroidery
147
5
Sewing Embroidery Patterns
Example:
aEmbroidery color order
bCursor
aThread the machine with the first color (see
“Threading Using the “Automatic
Threading” Button” on page 25).
bPress the “Presser Foot Lifter” button to
lower the presser foot, and press the “Start/
Stop” button to start embroidering.
→When the first color is completely sewn, the machine
will automatically trim the threads and stop. The
presser foot will then automatically be raised.
On the embroidery color order display, the next
color will move to the top.
cRemove the thread for the first color from
the machine. Thread the machine with the
next color.
dRepeat the same steps for embroidering the
remaining colors.
→When the last color is sewn, “Finish sewing” will
appear on the display. Press (CLOSE), and the
display will return to the original screen.
Memo
The [+] cursor moves over the pattern, show-
ing which part of the pattern is being sewn.
Memo
If there is thread left over from the beginning
of sewing, it may be sewn over as you con-
tinue embroidering the pattern, making it very
difficult to deal with the thread after the pattern
is finished. Trim the threads at the beginning.
ba
Memo
The Thread Trimming Function is originally set
to trim excess thread jumps (threads linking
parts of the pattern, etc.). When an end of
upper thread may remain on the surface of the
fabric at the beginning of the stitching,
depending on the type of thread and fabric
that are used. After embroidering is finished,
cut off this excess thread.
*If the setting has been turned off, trim the
excess thread jumps using scissors after the
pattern is finished.
See page 155 for information on the thread
trimming function.
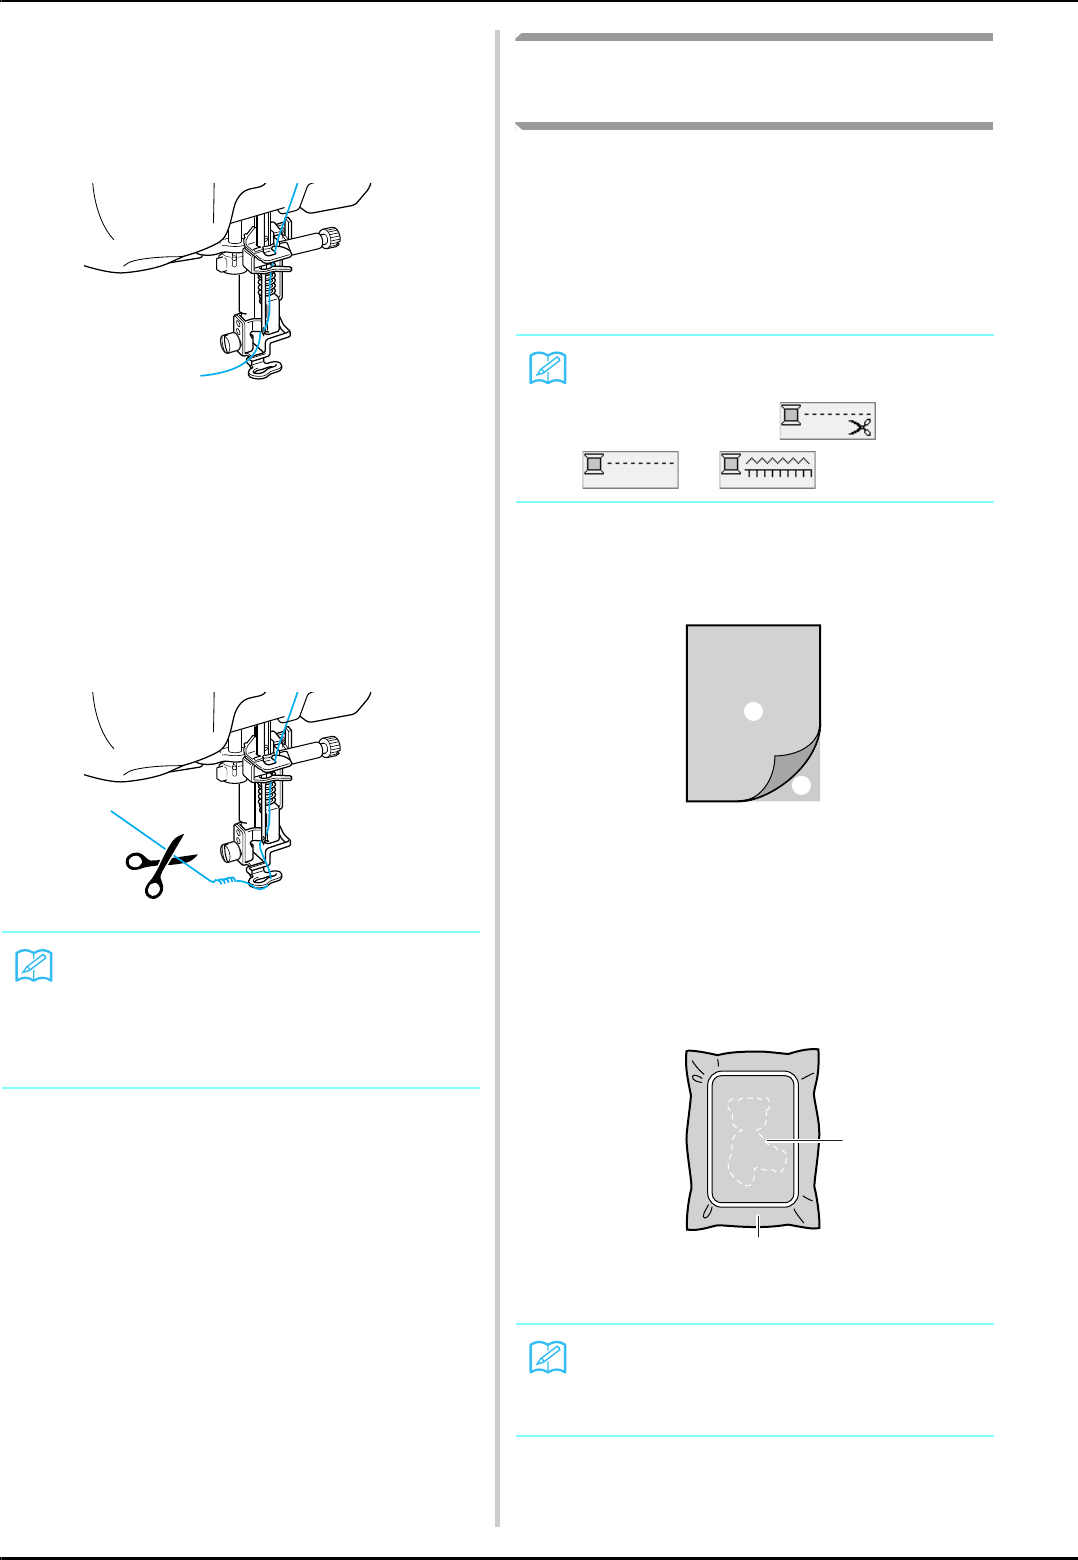
SEWING AN EMBROIDERY PATTERN
148
■When Threading Manually
aThread the machine manually with the first
color (see “Threading Manually” on page
27).
bLower the presser foot, then press the
“Start/Stop” button to start embroidering.
After 5-6 stitches, press the “Start/Stop”
button again to stop the machine.
cTrim the excess thread at the end of the
seam. If the end of the seam is under the
presser foot, raise the presser foot, then
trim the excess thread.
dPress the “Start/Stop” button again to
restart the machine.
eRepeat steps c and d from the previous
section.
Sewing Embroidery Patterns
Which Use Appliqué
There are some patterns which call for an appliqué
inside the pattern.
When sewing an embroidery pattern with an
appliqué, the color sewing order display shows
“Appliqué Material”, “Appliqué Position”,
“Appliqué”, and then the sewing order of the
colors around the appliqué.
aAttach an iron-on stabilizer to the wrong
side of the appliqué material.
aAppliqué material (cotton, felt, etc.)
bIron-on stabilizer
bPlace the appliqué material into the
embroidery frame, and then press the
“Start/Stop” button to sew the outline of
the appliqué.
aOutline of appliqué
bAppliqué material
→The machine will sew around the outline of the
appliqué pieces and will then stop.
Memo
If there is thread left over from the beginning
of sewing, it may be sewn over as you con-
tinue embroidering the pattern, making it very
difficult to deal with the thread after the pattern
is finished. Trim the threads at the beginning.
Memo
Depending on the thread color display setting,
the display may show ,
, or .
Memo
The embroidery procedure is the same as the
basic procedure explained on pages 147
through 148.
a
b
a
b
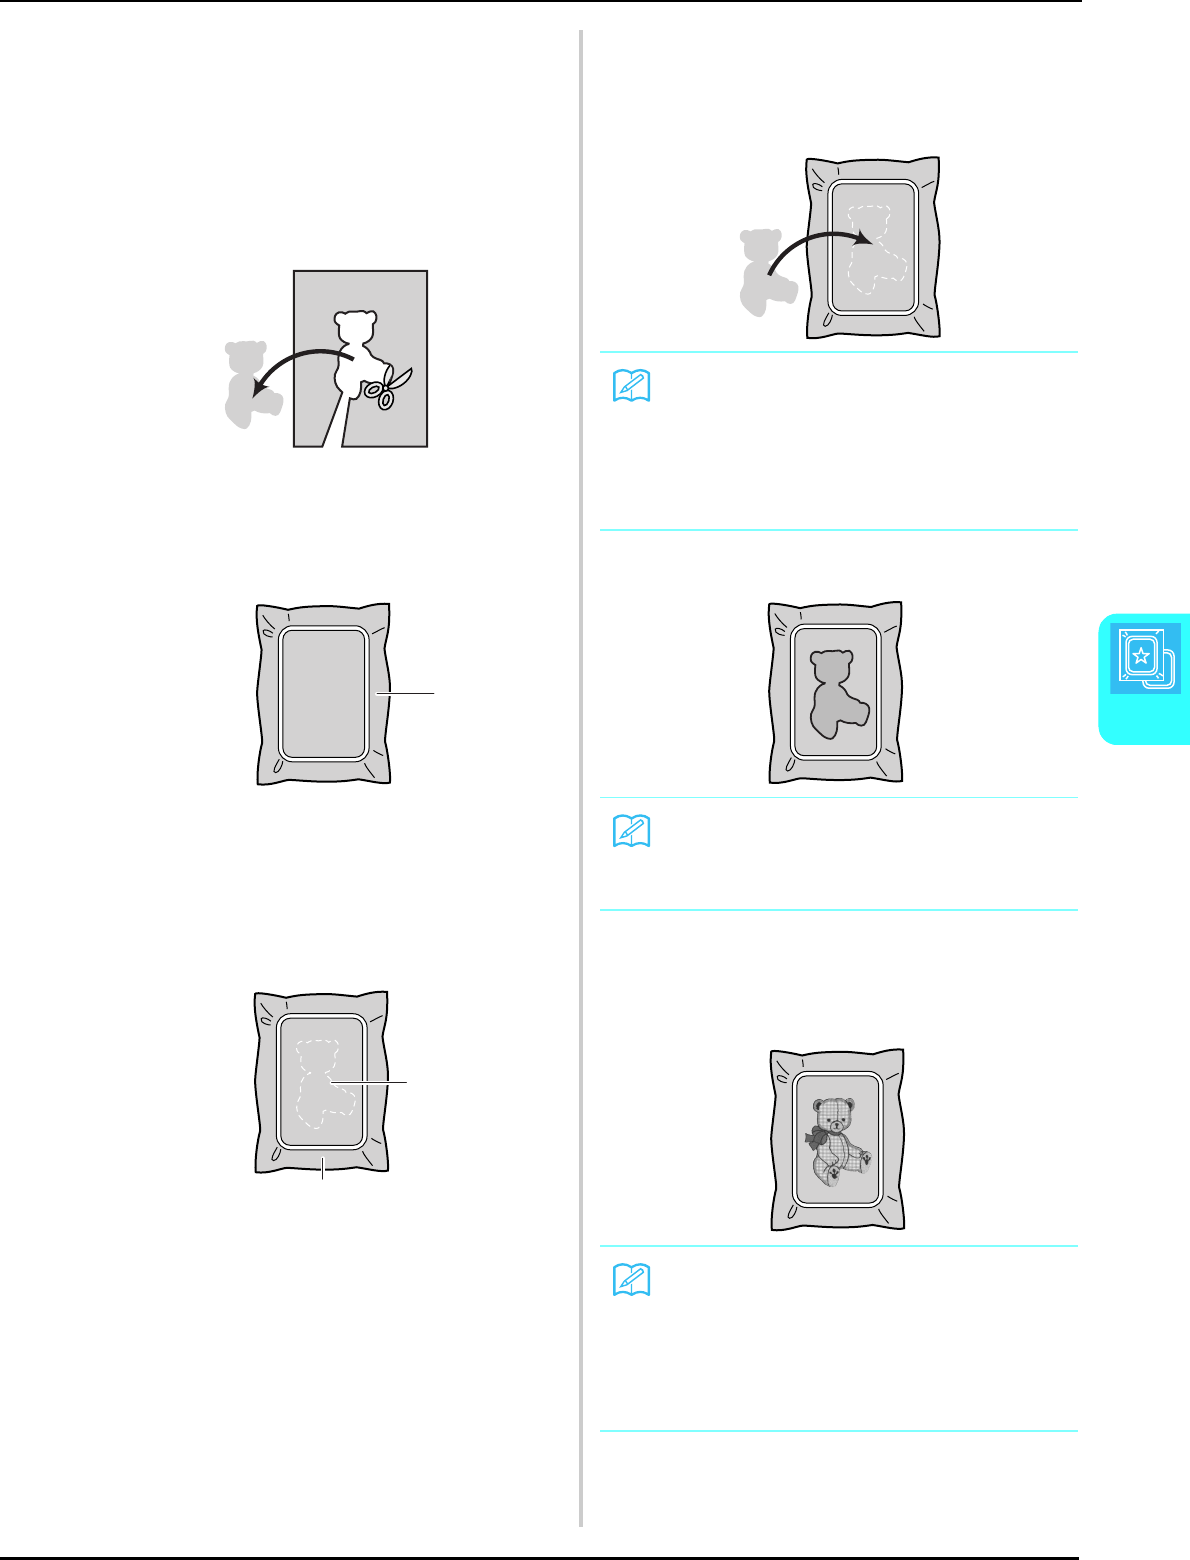
SEWING AN EMBROIDERY PATTERN
Embroidery
149
5
cRemove the appliqué material from the
embroidery frame, and then cut carefully
along the stitching. After cutting, remove all
of the stitching thread carefully.
* Carefully cut out the pattern on the outline you just
sewed. Do not cut inside the stitching line, as the
appliqué fabric will not be caught by the appliqué
stitch.
dPlace the base material into the embroidery
frame.
aBase material
ePress the “Start/Stop” button to sew the
position of the appliqué.
* Use the same thread color you plan to use when
attaching the appliqué in step g.
aPosition of appliqué
bBase material
→The machine will sew around the position of the
appliqué and will then stop.
fApply a thin layer of adhesive or spray
adhesive to the back of the appliqué piece
and attach it to the appliqué position so that
it follows the seam of the outline.
gPress the “Start/Stop” button.
→The appliqué will then be completed.
hChange the upper thread and then carry out
the rest of the embroidering.
a
a
b
Memo
If the appliqué material is a lightweight fabric,
you may want to use a fusible web on the back
to stabilize the fabric and for appliqué place-
ment. Fuse appliqué in place with an iron.
Do not remove fabric from the frame to iron
the appliqué material.
Memo
Some patterns may not show all three appli-
qué steps. Sometimes the “Appliqué” step will
be shown as a color.
Memo
• Some glue may get onto the presser foot,
needle, and needle plate at this time. Finish
embroidering the appliqué pattern and then
clean away the glue.
• For best sewing results clip all threads
between color steps.
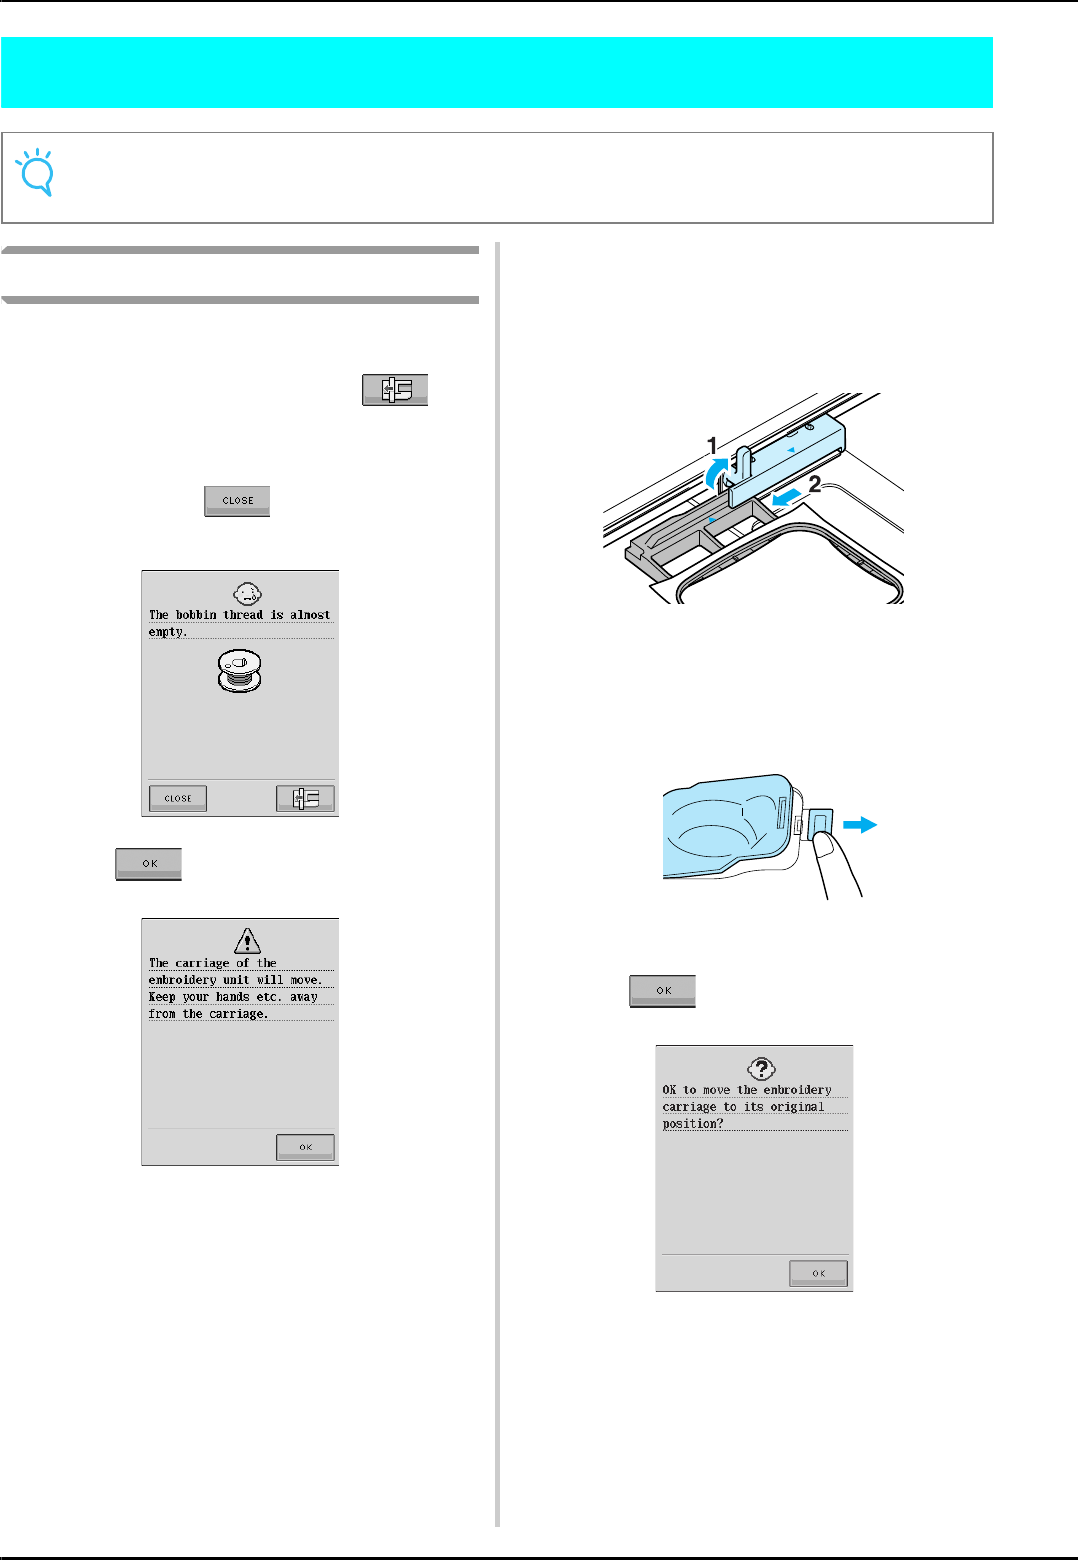
ADJUSTMENTS DURING THE EMBROIDERY PROCESS
150
ADJUSTMENTS DURING THE EMBROIDERY PROCESS
If the Bobbin Runs Out of Thread
When the bobbin begins to run out of thread
during embroidering, the machine will stop and
the message below will appear. Press and
follow the directions below to rethread the lower
threading. If very little sewing remains, you can
thread 10 final stitches without rethreading the
machine by pressing . The machine will
stop after sewing the 10 stitches.
aPress .
→The carriage will move and the thread will be
automatically cut.
bUnlock the frame-securing lever and
remove the embroidery frame.
* Be careful not to apply strong force to the fabric at
this time. Otherwise, the fabric may loosen in the
frame.
cInsert a wound bobbin into the machine,
then reattach the embroidery frame.
dPress .
→The carriage will return to its original position.
eTo return to the spot in the pattern where
you stopped sewing, follow steps c
through f in the next section.
Note
• Be careful not to bump the embroidery unit carriage or the presser foot when removing or attaching the
embroidery frame. Otherwise, the pattern will not embroider correctly.
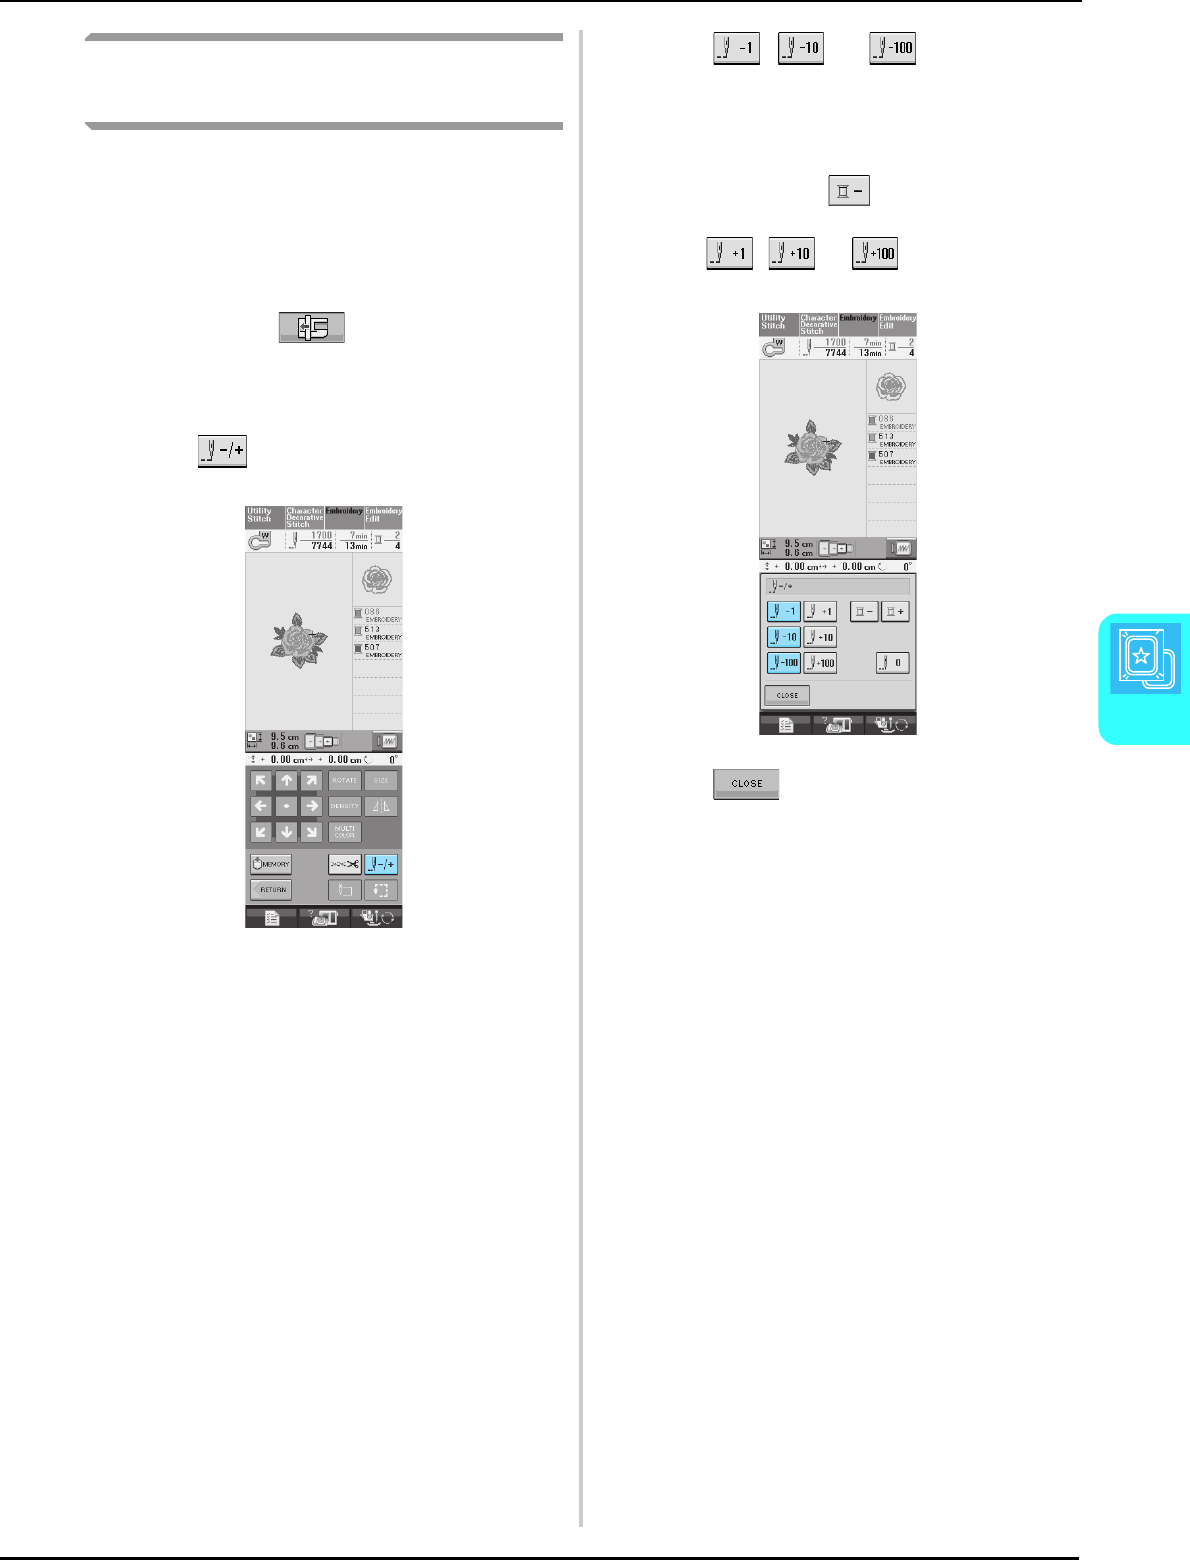
ADJUSTMENTS DURING THE EMBROIDERY PROCESS
Embroidery
151
5
If the Thread Breaks During
Sewing
aPress the “Start/Stop” button to stop the
machine.
bIf the upper thread is broken, redo the
upper threading. If the bobbin thread is
broken, press and follow the
directions in steps a through d from the
previous section to reset the bobbin.
cPress .
dPress , , or to move the
needle back the correct number of stitches
before the spot where the thread broke.
* If you cannot move back to the spot where the
thread broke, press to select the color and
move to the beginning position of that color, then
use , , or to move ahead to
slightly before where the thread broke.
ePress to return to the original
screen.
fPress the “Presser Foot Lifter” button to
lower the presser foot, and press the “Start/
Stop” button to continue sewing.
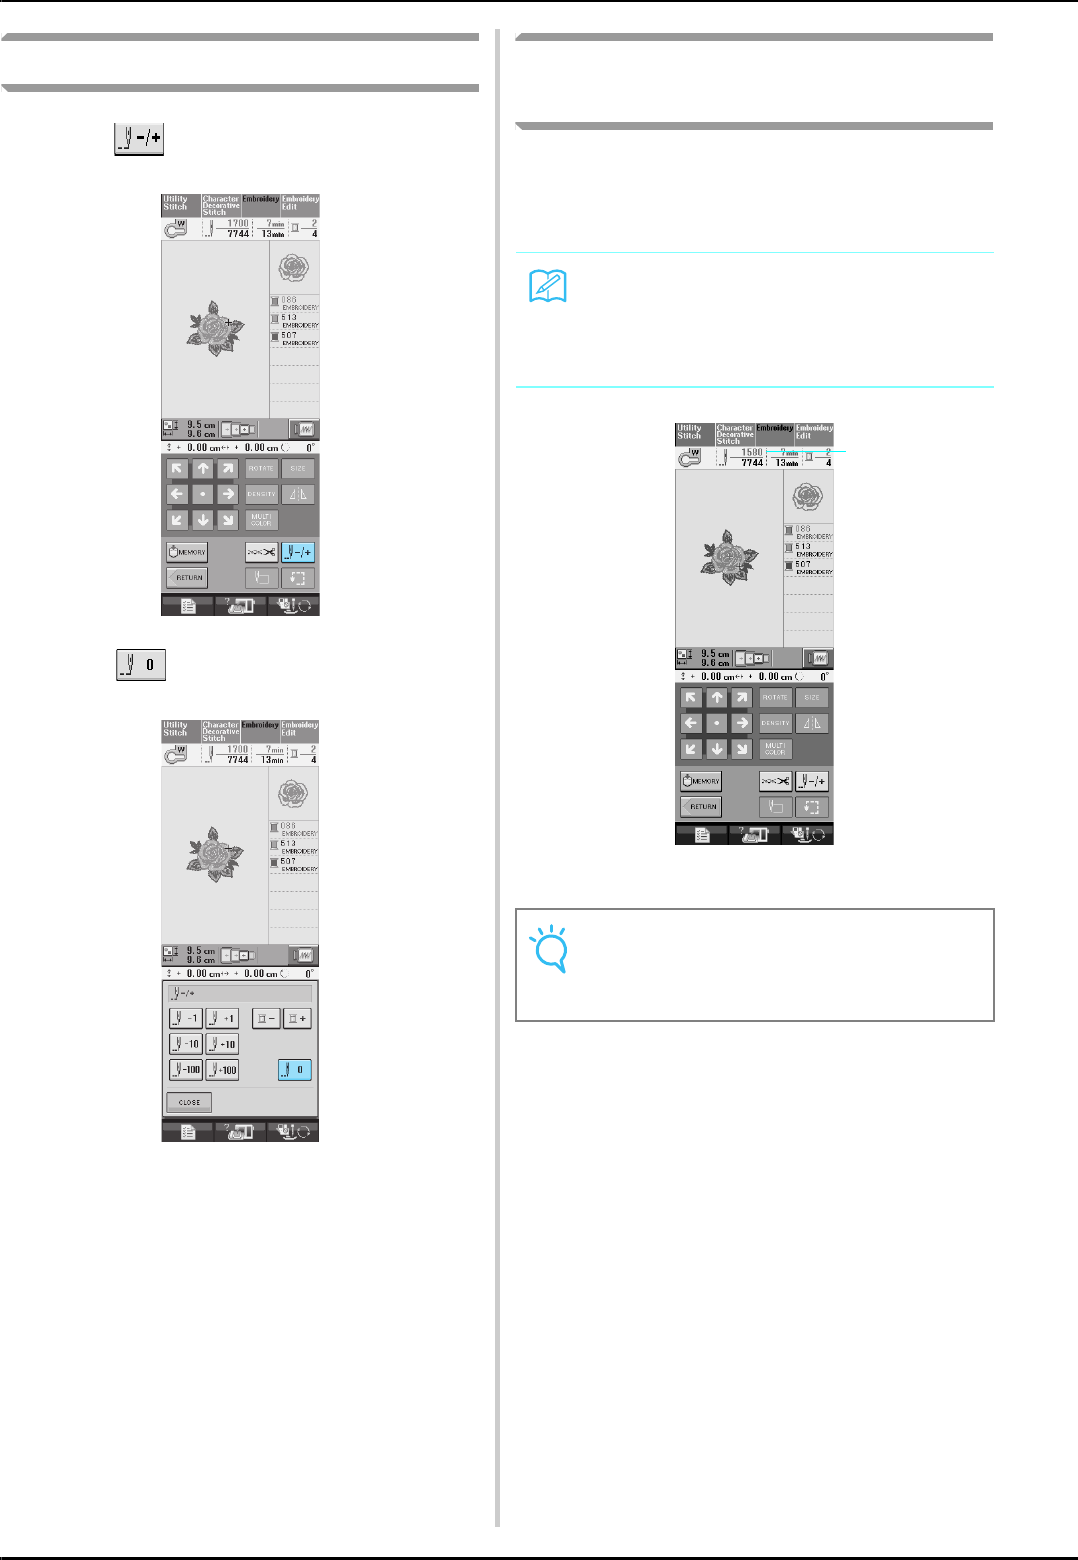
ADJUSTMENTS DURING THE EMBROIDERY PROCESS
152
Restarting from the Beginning
aPress .
bPress .
→The embroidery frame moves, returning the needle
to the pattern’s beginning position.
cPress the “Presser Foot Lifter” button to
lower the presser foot and start sewing.
Resuming Embroidery After
Turning Off the Power
The current color and stitch number are saved
when embroidery is stopped. The next time that
the machine is turned on, you can choose whether
or not to continue the stopped sewing operation.
aCurrent stitch number when embroidery was
stopped
aTurn the main power to ON.
bFollow the instructions shown on the screen
and remove the embroidery frame.
→The following message will appear.
Memo
Even if the power goes out in the middle of
embroidery, the machine returns to the point
where embroidery was stopped when the
machine is turned on again.
Note
• Do not remove the embroidery unit or the
memory will no longer remember your
design.
a
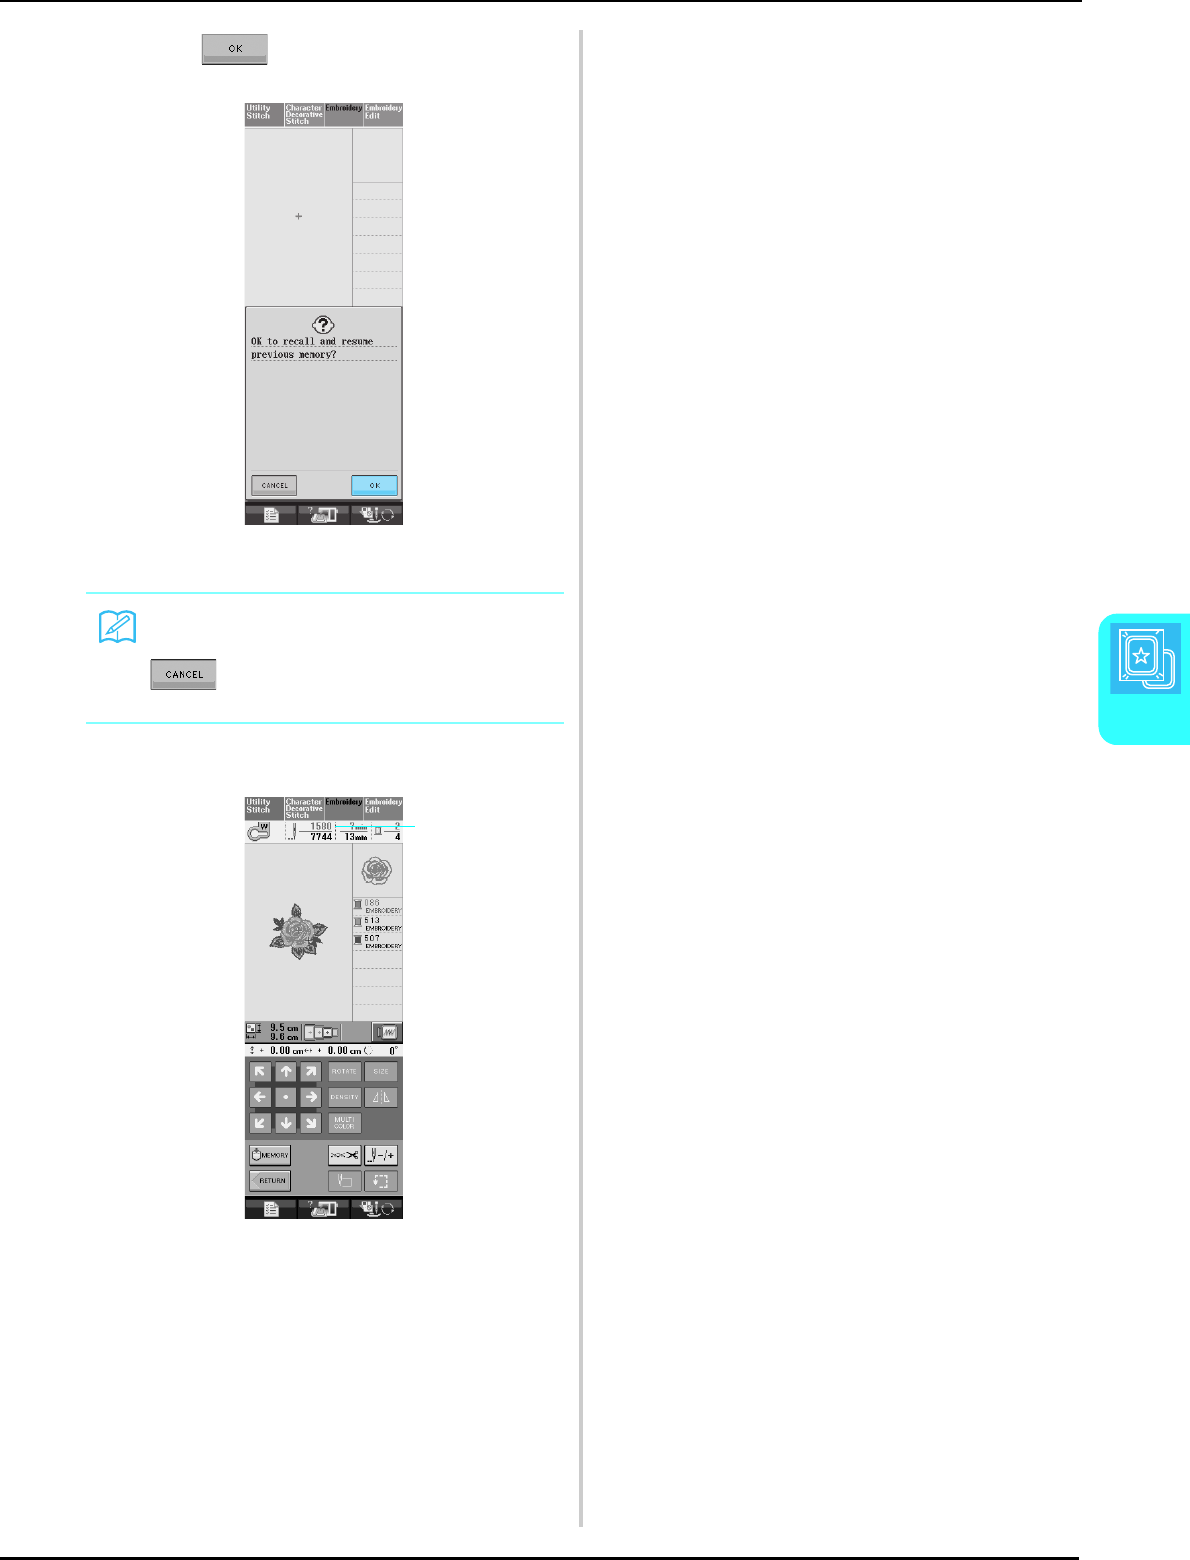
ADJUSTMENTS DURING THE EMBROIDERY PROCESS
Embroidery
153
5
cPress .
→The previous sewing screen displayed before the
machine was turned off appears.
dContinue embroidering.
aStitch number when embroidery is resumed
Memo
If you want to start a new operation, press
so the pattern selection screen
appears.
a
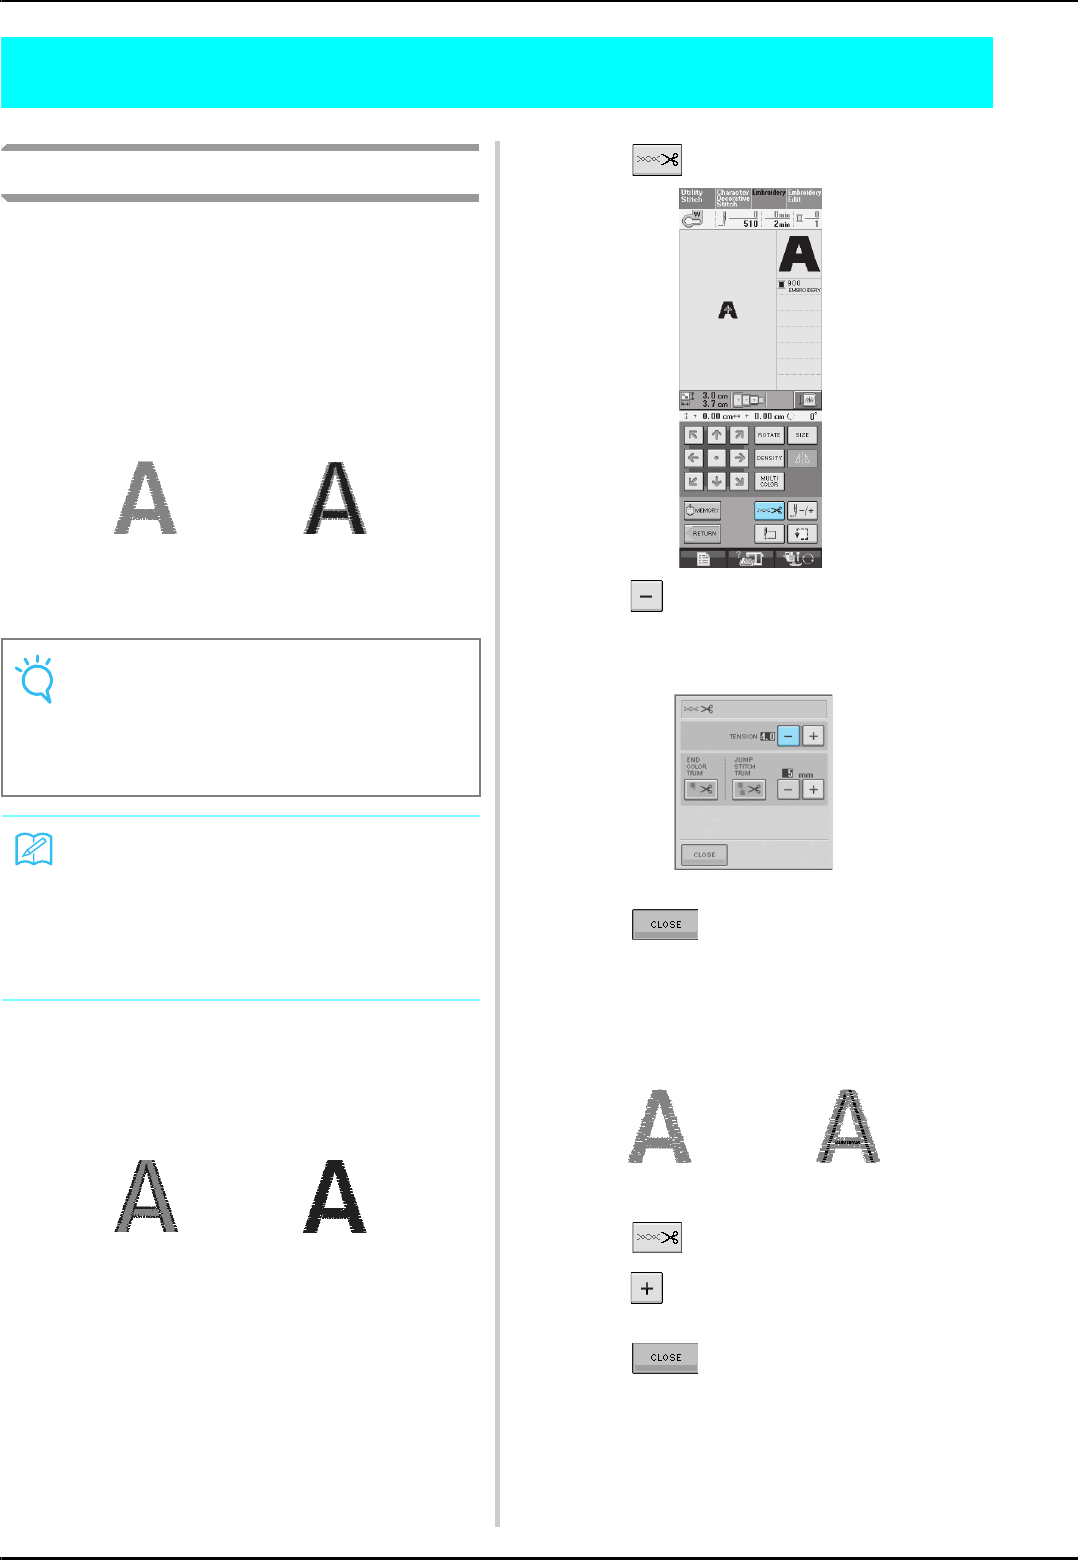
MAKING EMBROIDERY ADJUSTMENTS
154
MAKING EMBROIDERY ADJUSTMENTS
Adjusting Thread Tension
When embroidering, the thread tension should be
set so that the upper thread can slightly be seen on
the wrong side of the fabric.
■Correct Thread Tension
The pattern can be seen from the wrong side of the
fabric. If the thread tension is not set correctly, the
pattern will not finish well. The fabric may pucker or
the thread may break.
Follow the operations described below to adjust
thread tension according to the situation.
■Upper Thread is Too Tight
The tension of the upper thread is too tight, resulting
in the bobbin thread being visible from the right side
of the fabric.
aPress .
bPress to weaken the upper thread
tension. (The tension number will
decrease.)
cPress .
■Upper Thread is Too Loose
The tension of the upper thread is too loose,
resulting in a loose upper thread, loose thread locks,
or loops appearing on the right side of the fabric.
aPress .
bPress to tighten the upper thread
tension. (The tension number will increase.)
cPress .
(Right side) (Wrong side)
Note
• If the thread tension setting is made
extremely weak, the machine may stop dur-
ing sewing. This is not the sign of a malfunc-
tion. Increase the thread tension slightly,
and begin sewing again.
Memo
• If you turn the main power to OFF or select a
different pattern, the thread tension will reset
to the automatic setting.
• When you retrieve a saved pattern, the
thread tension setting will be the same as
when the pattern was saved.
(Right side) (Wrong side)
(Right side) (Wrong side)
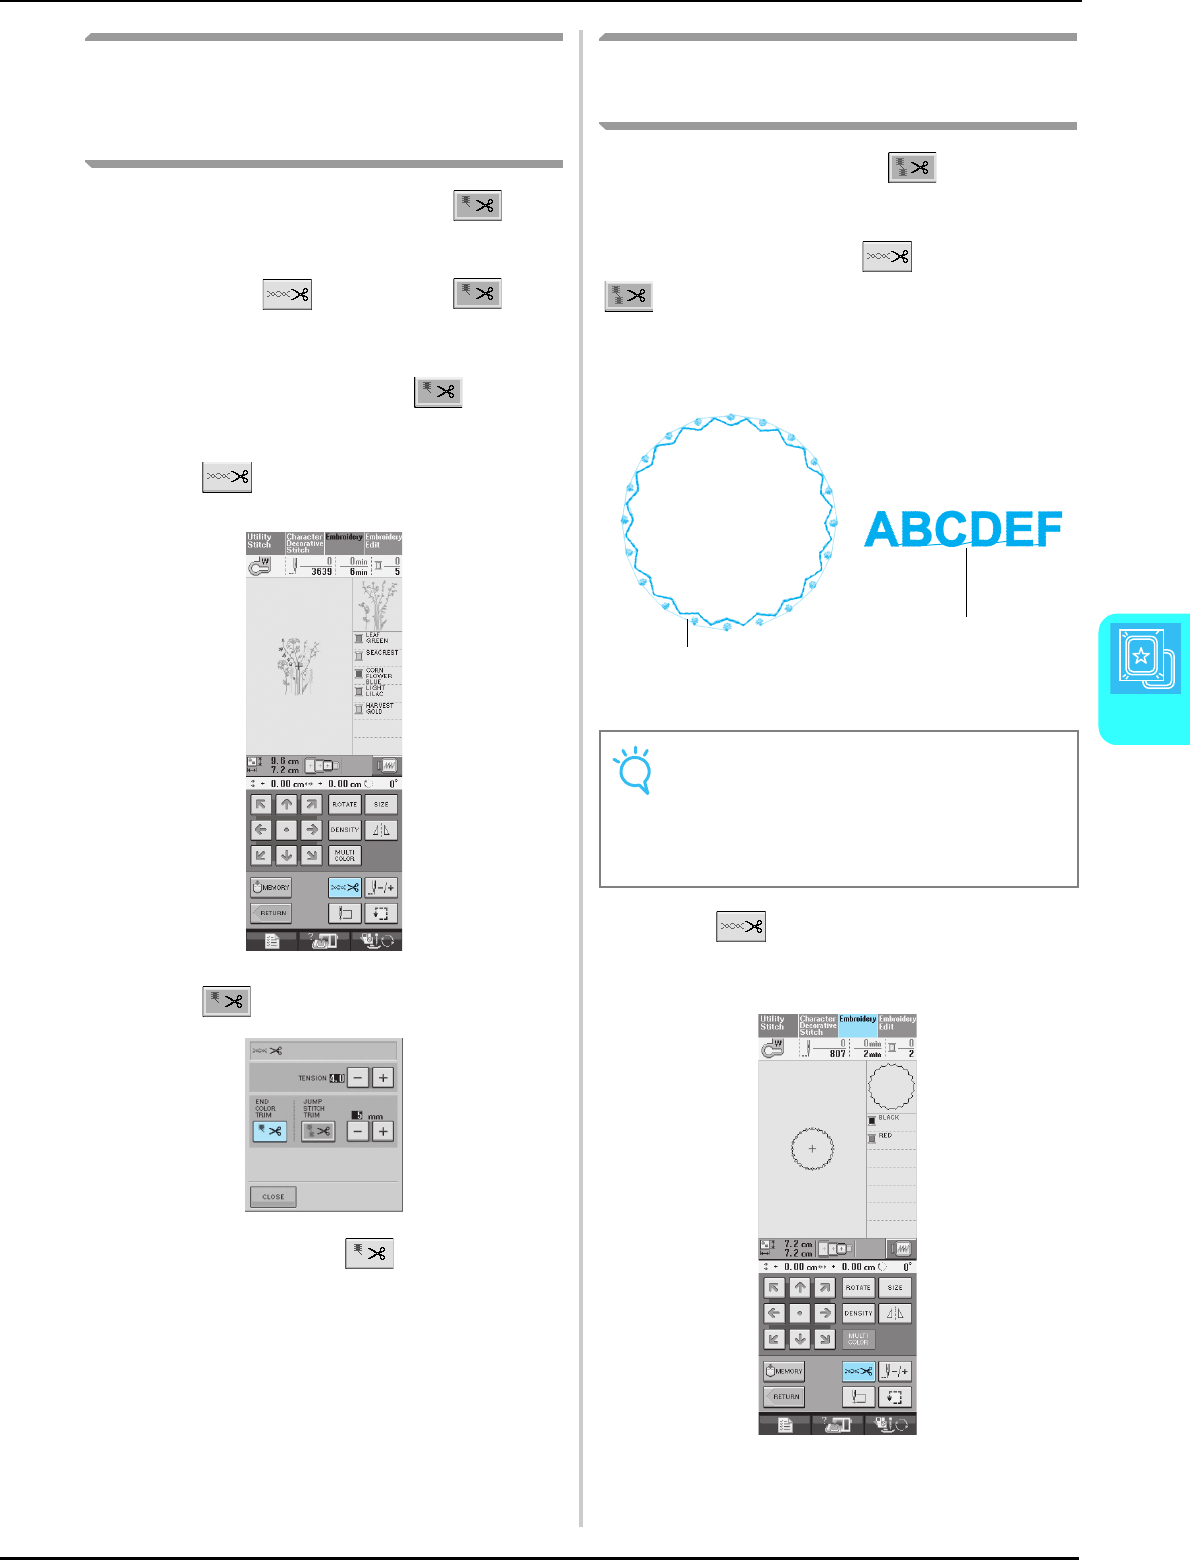
MAKING EMBROIDERY ADJUSTMENTS
Embroidery
155
5
Using the Automatic Thread
Cutting Function
(END COLOR TRIM)
The automatic thread cutting function will
cut the thread at the end of sewing each color.
This function is initially turned on. To turn this
function off, press key and then . This
function can be turned on or off during
embroidering.
* This setting returns to its default
when the machine is turned off.
aPress .
The automatic thread cutting function (END COLOR TRIM) will cut the thread at the end of one color sewing. This function is initially turned on. To turn this function off, press (TENSION/CUT) key and then (END COLOR TRIM).
bPress to turn off END COLOR TRIM.
→The key will display as
* When one color thread is sewn, the machine will
stop without cutting the thread.
Using the Thread Trimming
Function (JUMP STITCH TRIM)
The thread trimming function will
automatically trim any excess thread jumps within
the color. This function is initially turned on. To
turn this function off, press key and then
. This function can be turned on or off
during embroidering.
* Your customized setting remains after turning off
and on the machine.
aJump stitch
aPress .
Note
• When this function is turned on, use the
enclosed ball point needle 75/107 for
embroidering patterns with short jump
stitches such as alphabet characters. Using
other needled may cause a thread breaking.
a
a
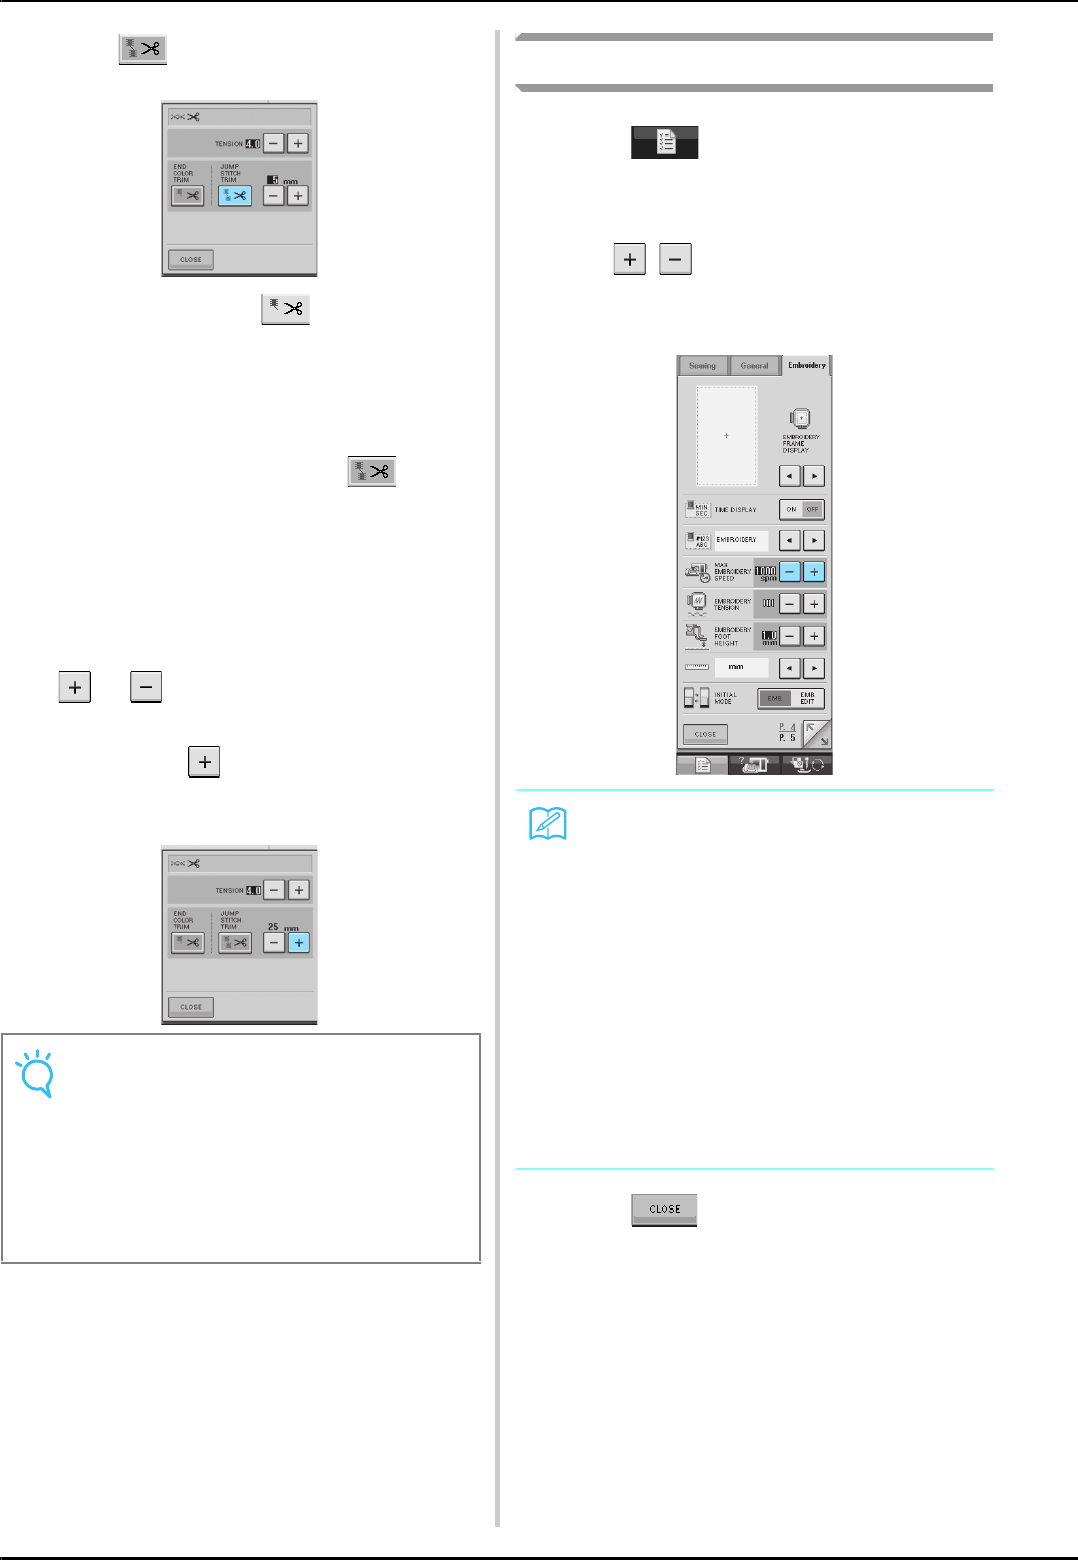
MAKING EMBROIDERY ADJUSTMENTS
156
bPress to turn off JUMP STITCH
TRIM.
→The key will display as
* The machine will not trim the thread before moving
to the next stitching.
■Selecting the length of JUMP
STITCH not to trim
When the thread trimming function is
turned on, you can select the length of the jump
stitch not to trim the thread. This function can be
turned on or off during embroidering.
Select a setting from 5 mm to 50 mm in 5 mm
increments.
* Your customized setting remains after turning off
and on the machine.
Press or to select the length of JUMP
STITCH.
For example: Press to select 25mm (1 inch)
and the machine will not trim 25mm or less length
of jump stitch before moving to the next stitching.
Adjusting the Embroidery Speed
aPress and Embroidery.
bIn the MAX EMBROIDERY SPEED display,
use to change the maximum
embroidery speed.
* You can choose from 3 different speed levels.
cPress .
Note
• If design has many trims it is recommended
to select a higher jump stitch trim setting in
order to reduce the amount of excess tails
on backside of fabric.
• The higher number of the jump stitch length
selected, the fewer number of times the
machine will trim. In this case, more jump
stitches remain on the surface of the fabric.
Memo
• SPM is the number of stitches sewn in one
minute.
• Decrease the sewing speed when embroi-
dering on thin, thick, or heavy fabrics.
• The sewing speed can be changed while
embroidery is being sewn.
• The maximum sewing speed setting does
not change until a new setting is selected.
The setting specified before the main power
is set to OFF remains selected the next time
that the machine is turned on.
• Decrease the sewing speed to 600 spm
when using a speciality thread like a metallic
thread.
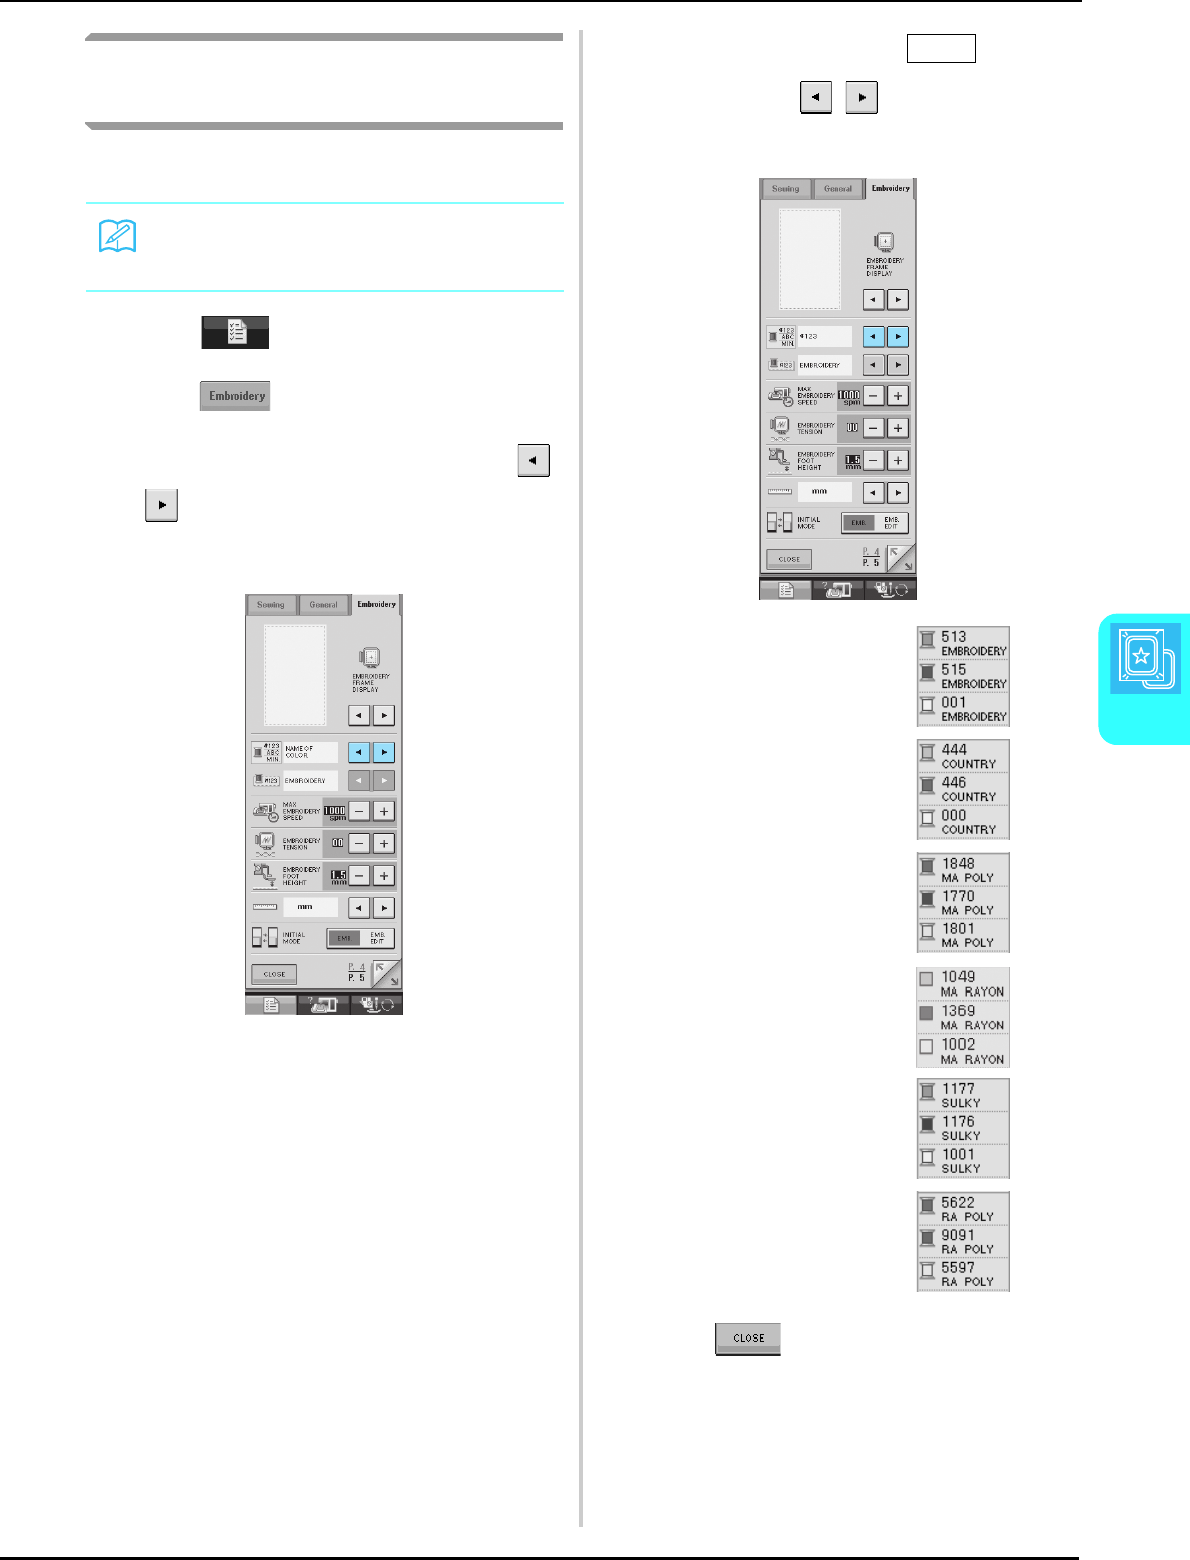
MAKING EMBROIDERY ADJUSTMENTS
Embroidery
157
5
Changing the Thread Color
Display
You can display the name of the thread colors, the
time or embroidery thread number.
aPress .
bPress .
cIn the THREAD COLOR DISPLAY, use
to display the name of the thread
colors, the time or the embroidery thread
number.
dWhen the thread number is
displayed, use to select from six
embroidery thread brands pictured below.
ePress .
Memo
Colors on the screen may vary slightly from
actual spool colors.
EMBROIDERY/POLYESTER
THREAD#
COUNTRY/COTTON THREAD#
MADEIRA POLY THREAD#
MADEIRA RAYON THREAD#
SULKY POLY THREAD#
ROBISON-ANTON POLY
THREAD#
#123
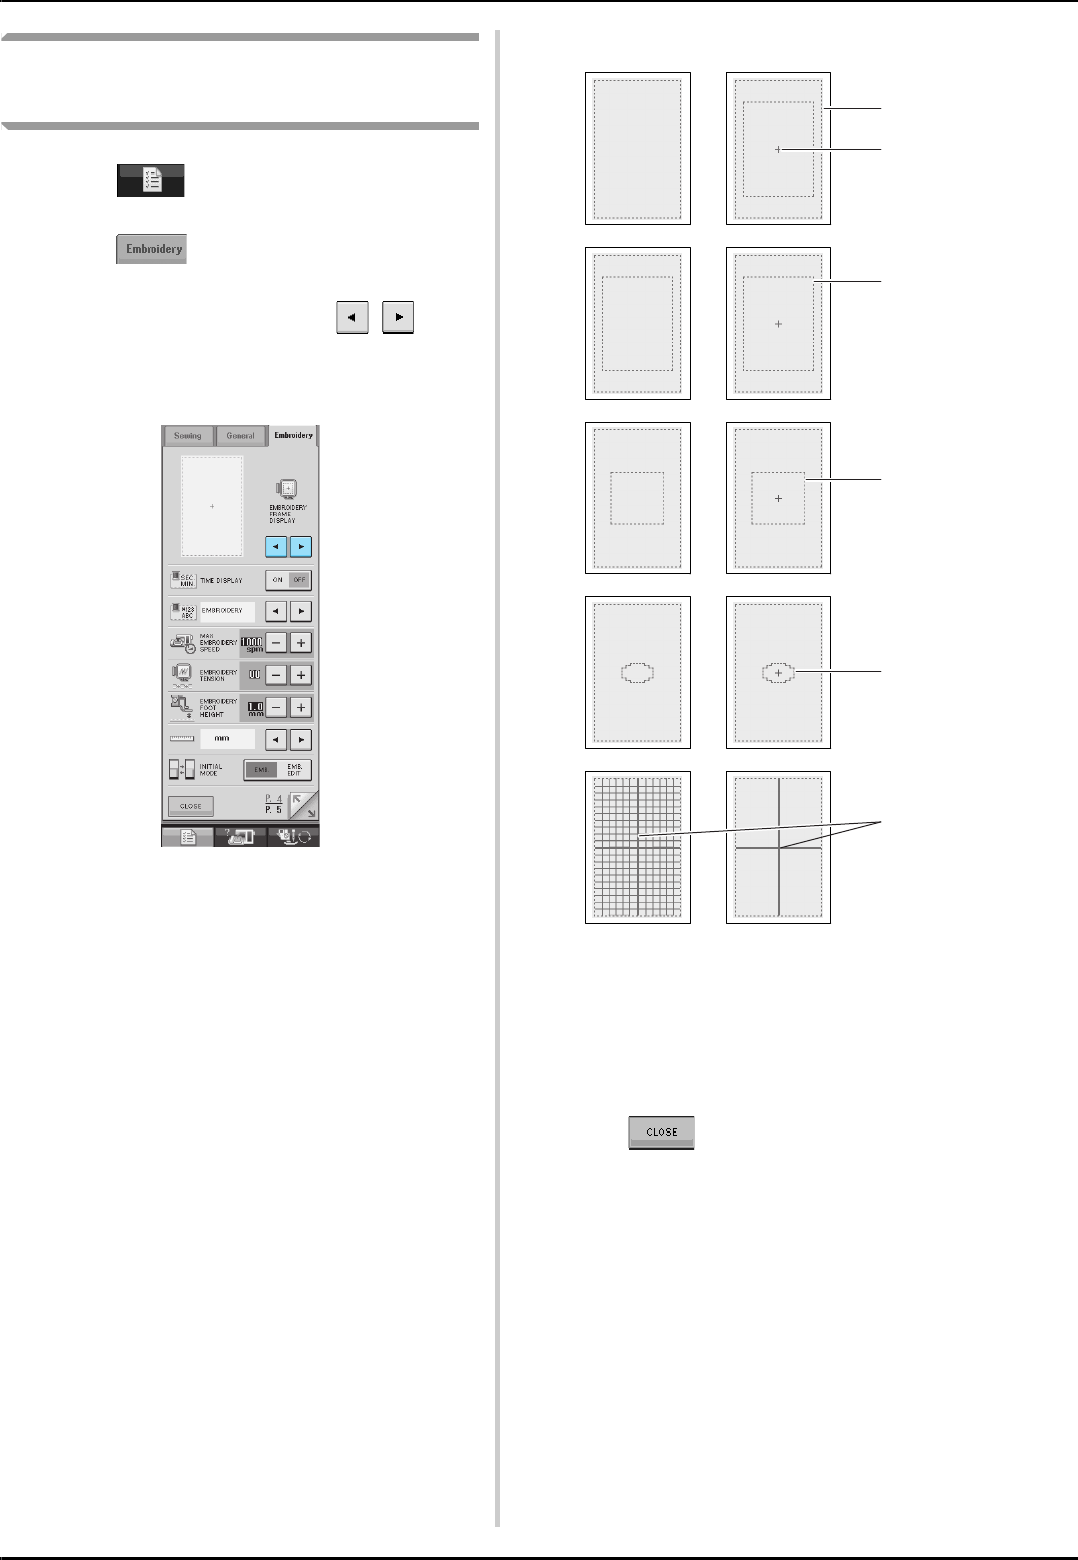
MAKING EMBROIDERY ADJUSTMENTS
158
Changing the Embroidery Frame
Display
aPress .
bPress .
cIn the FRAME DISPLAY, use to
change the embroidery frame display mode.
* There are 10 choices.
aExtra large frame embroidering area
bCenter line
cLarge frame embroidering area
dMedium frame embroidering area
eSmall frame embroidering area
fGrid lines
dPress .
a
c
d
e
f
b
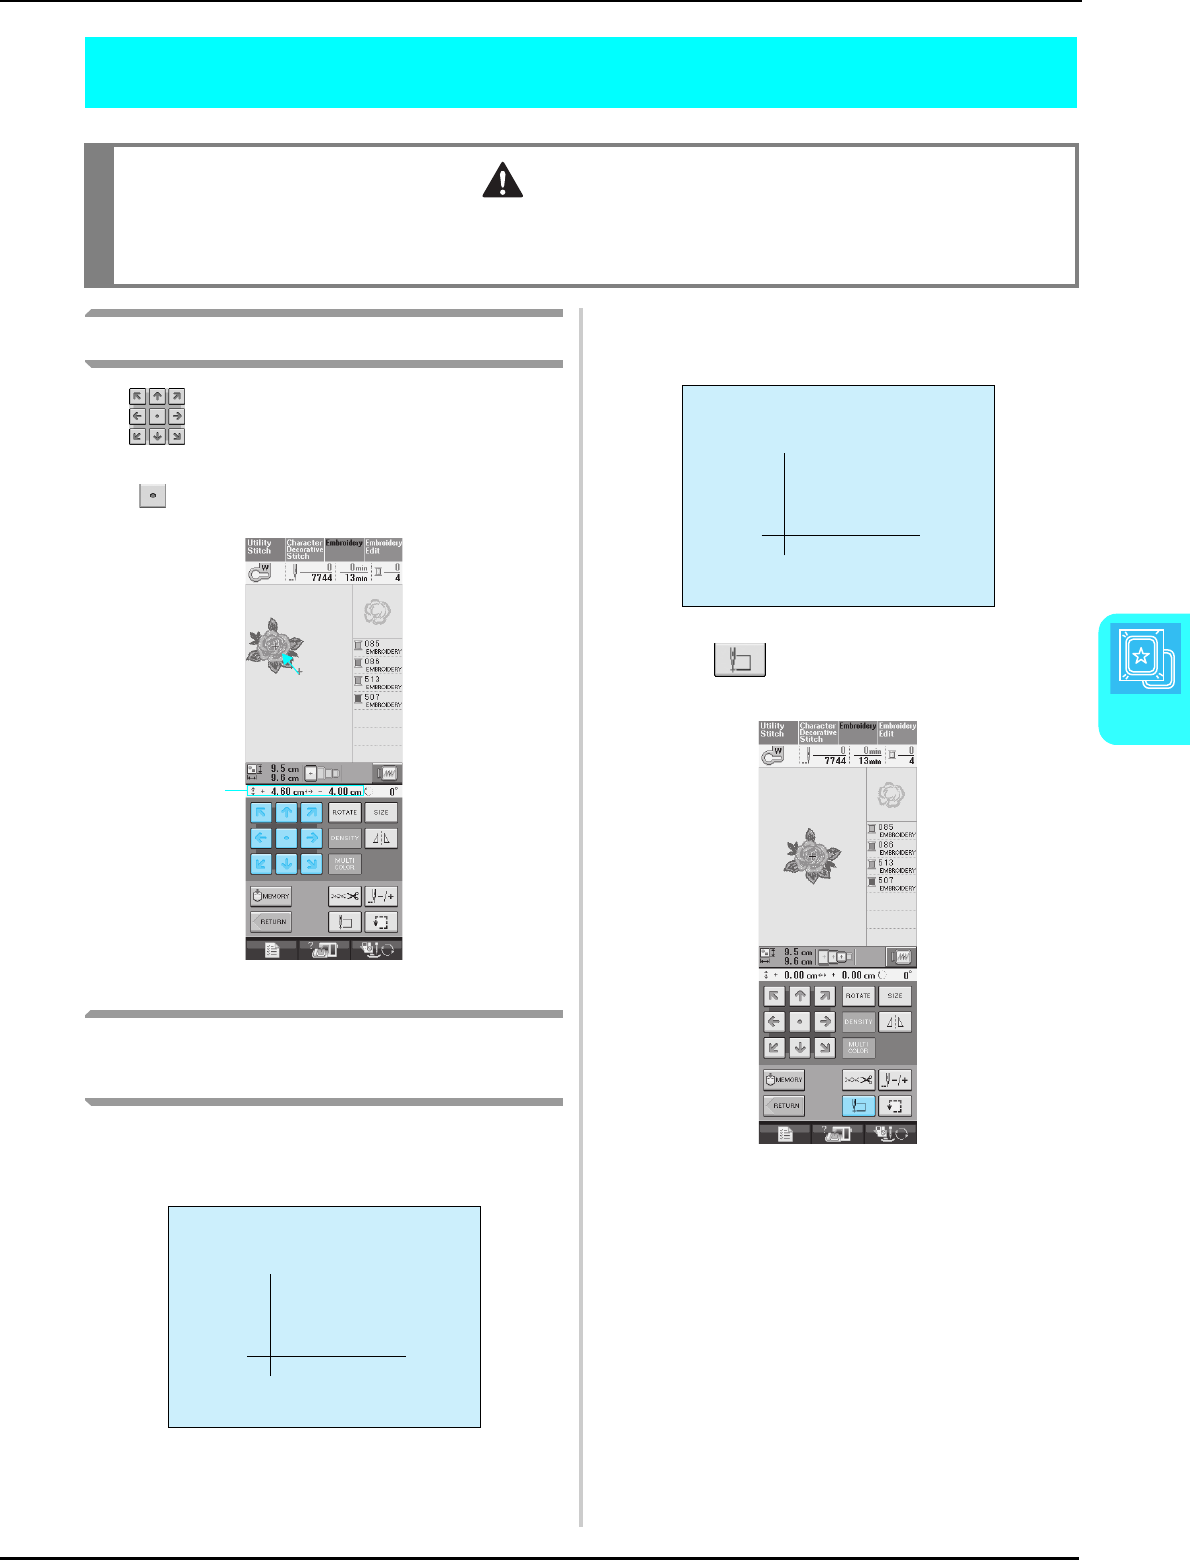
REVISING THE PATTERN
Embroidery
159
5
REVISING THE PATTERN
Changing the Pattern Position
Use to move the pattern in the direction
shown by the arrow.
Press to center the pattern.
aDistance from the center
Aligning the Pattern and the
Needle
Example: Aligning the lower left side of a
pattern and the needle
aMark the embroidery start position on the
fabric, as shown.
bPress .
CAUTION
• When you have revised the pattern, check the display of available embroidery frames and use an
appropriate frame. If you use an embroidery frame not displayed as available for use, the presser foot may
strike the frame and possibly cause injury.
a
ABC

REVISING THE PATTERN
160
cPress .
aStart position
→The needle position moves to the bottom left corner
of the pattern (the embroidery frame moves so that
the needle is positioned correctly).
dPress .
eUse to align the needle and the mark
on the fabric, and begin embroidering the
pattern.
Changing the Size
aPress .
bSelect the direction in which to change the
size.
* Press to enlarge the pattern.
* Press to shrink the pattern.
* Press to stretch the pattern horizontally.
* Press to compact the pattern horizontally.
* Press to stretch the pattern vertically.
* Press to compact the pattern vertically.
* Press to return the pattern to its original
appearance.
aSize of the pattern
cPress to return to the original
screen.
a
Memo
• Some patterns or characters can be
enlarged more than others.
• Some patterns or characters can be
enlarged to a greater degree if they are
rotated 90 degrees.
a
REVISING THE PATTERN
Embroidery
161
5
Rotating the Pattern
aPress .
bSelect the angle of rotation for the pattern.
* Press to rotate the pattern 90 degrees to the
left.
* Press to rotate the pattern 90 degrees to the
right.
* Press to rotate the pattern 10 degrees to the
left.
* Press to rotate the pattern 10 degrees to the
right.
* Press to rotate the pattern 1 degree to the
left.
* Press to rotate the pattern 1 degree to the
right.
* Press to return the pattern to its original
position.
aDegree of rotation
cPress to return to the original
screen.
0°
a
REVISING THE PATTERN
162
Creating a Horizontal Mirror
Image
Press so it appears as to create a
horizontal mirror image of the selected pattern.
Press again to return the pattern to normal.
Changing the Density (Alphabet
Character and Frame Patterns
Only)
The thread density for some alphabet character
and frame patterns can be changed.
A setting between 80% and 120% in 5%
increments can be specified.
aPress .
REVISING THE PATTERN
Embroidery
163
5
bChange the density.
* Press to make the pattern less dense.
* Press to make the pattern more dense.
aNormal
bFine (stitches closer together)
cCoarse (stitches farther apart)
→The pattern density changes each time you press a
button.
cPress to return to the pattern
selection screen.
Changing the Colors of Alphabet
Character Patterns
Combined alphabet character patterns can be
sewn with each letter in a different color. If
“MULTI COLOR” is set, the machine stops after
each character is sewn so that the thread can be
changed to a different color.
aPress so that it appears as .
* Press the key again to return to the original setting.
bAfter a character is sewn, change the thread
color, and then sew the next character.
cab
USING THE MEMORY FUNCTION
164
USING THE MEMORY FUNCTION
Embroidery Data Precautions
Observe the following precautions when using embroidery data other than that created and saved in this
machine.
■Types of Embroidery Data that can be Used
• Only .pes,.pha,.phb,.phc, and .dst embroidery data files can be used with this machine. Using data other
than that saved using our data design systems or sewing machines may cause the embroidery machine to
malfunction.
■Types of USB Devices/Media that can be Used
Stitch data can be saved to or recalled from USB media. Use media that meets the following specifications.
• USB Floppy disk drive
• USB Flash drive (USB Flash memory).
Stitch data can be recalled only.
• USB CD-ROM, CD-R, CD-RW drives
You can also use the following types of USB media with the USB Memory Card Reader/Writer.
• Secure Digital (SD) Card
• CompactFlash
• Memory Stick
•Smart Media
• Multi Media Card (MMC)
• XD-Picture Card
When a file folder is necessary to create, use a computer.
■Computers and Operating Systems with the Following Specifications can be
Used
• Compatible models:
IBM PC with a USB port as standard equipment
IBM PC-compatible computer equipped with a USB port as standard equipment
• Compatible operating systems:
Microsoft Windows 98SE/Me/2000/XP/Windows Vista/7
(Windows 98SE requires a driver. Download the driver from our Web site (www.brother.com). In addition,
only Windows 98 Second Edition can use the driver.).
CAUTION
• When using embroidery data other than our original patterns, the thread or needle may break when
sewing with a stitch density that is too fine or when sewing three or more overlapping stitches. In that
case, use one of our original data design systems to edit the embroidery data.
Note
• Some USB media may not be usable with this machine. Please visit our website for more details.
• USB hubs cannot be used with this machine. The machine will not recognize the above USB devices or
USB memory cards through a USB hub.
• The access lamp will begin blinking after inserting USB Devices/Media, and it will take about 5 to 6 sec-
onds to recognize the Devices/Media. (Time will differ depending on the USB Device/Media).

USING THE MEMORY FUNCTION
Embroidery
165
5
■Precautions on Using the Computer to Create and Save Data
• If the file name of embroidery data cannot be identified, for example, because the name contains special
characters, the file is not displayed. If this occurs, change the name of the file.
• If embroidery date larger than 300 mm (H) × 180 mm (W) (approx.12 inches (H) × 7 inches (W)) is selected, a
message is shown asking if you wish to rotate the pattern 90 degrees.
Even after being rotated 90 degrees, embroidery data larger than 300 mm (H) × 180 mm (W) (approx.
12 inches (H) × 7 inches (W)) cannot be used. (All designs must be within the 300 mm (H) × 180 mm (W)
(approx. 12 inches (H) × 7 inches (W)) design field size.)
• .pes files saved with the number of stitches or the number of colors exceeding the specified limits cannot be
displayed. Use one of our original data design systems to edit the embroidery pattern so that it meets the
specifications.
• Even if the embroidery unit is not attached, the machine will manage embroidery data.
■Tajima (.dst) Embroidery Data
• .dst data is displayed in the pattern list screen by file name (the actual image cannot be displayed). Only the
first eight characters of the file name can be displayed.
• Since Tajima (.dst) data does not contain specific thread color information, it is displayed with our default
thread color sequence. Check the preview and change the thread colors as desired.
■Trademarks
• Secure Digital (SD) Card is a registered trademark or a trademark of SD Card Association.
• CompactFlash is a registered trademark or a trademark of Sandisk Corporation.
• Memory Stick is a registered trademark or a trademark of Sony Corporation.
• Smart Media is a registered trademark or a trademark of Toshiba Corporation.
• Multi Media Card (MMC) is a registered trademark or a trademark of Infineon Technologies AG.
• xD-Picture Card is a registered trademark or a trademark of Fuji Photo Film Co. Ltd.
• IBM is a registered trademark or a trademark of International Business Machines Corporation.
• Microsoft and Windows are registered trademarks or trademarks of Microsoft Corporation.
Each company whose software title is mentioned in this manual has a Software License Agreement specific to its
proprietary programs.
All other brands and product names mentioned in this manual are registered trademarks of their respective
companies. However, the explanations for markings such as ® and ™ are not clearly described within the text.
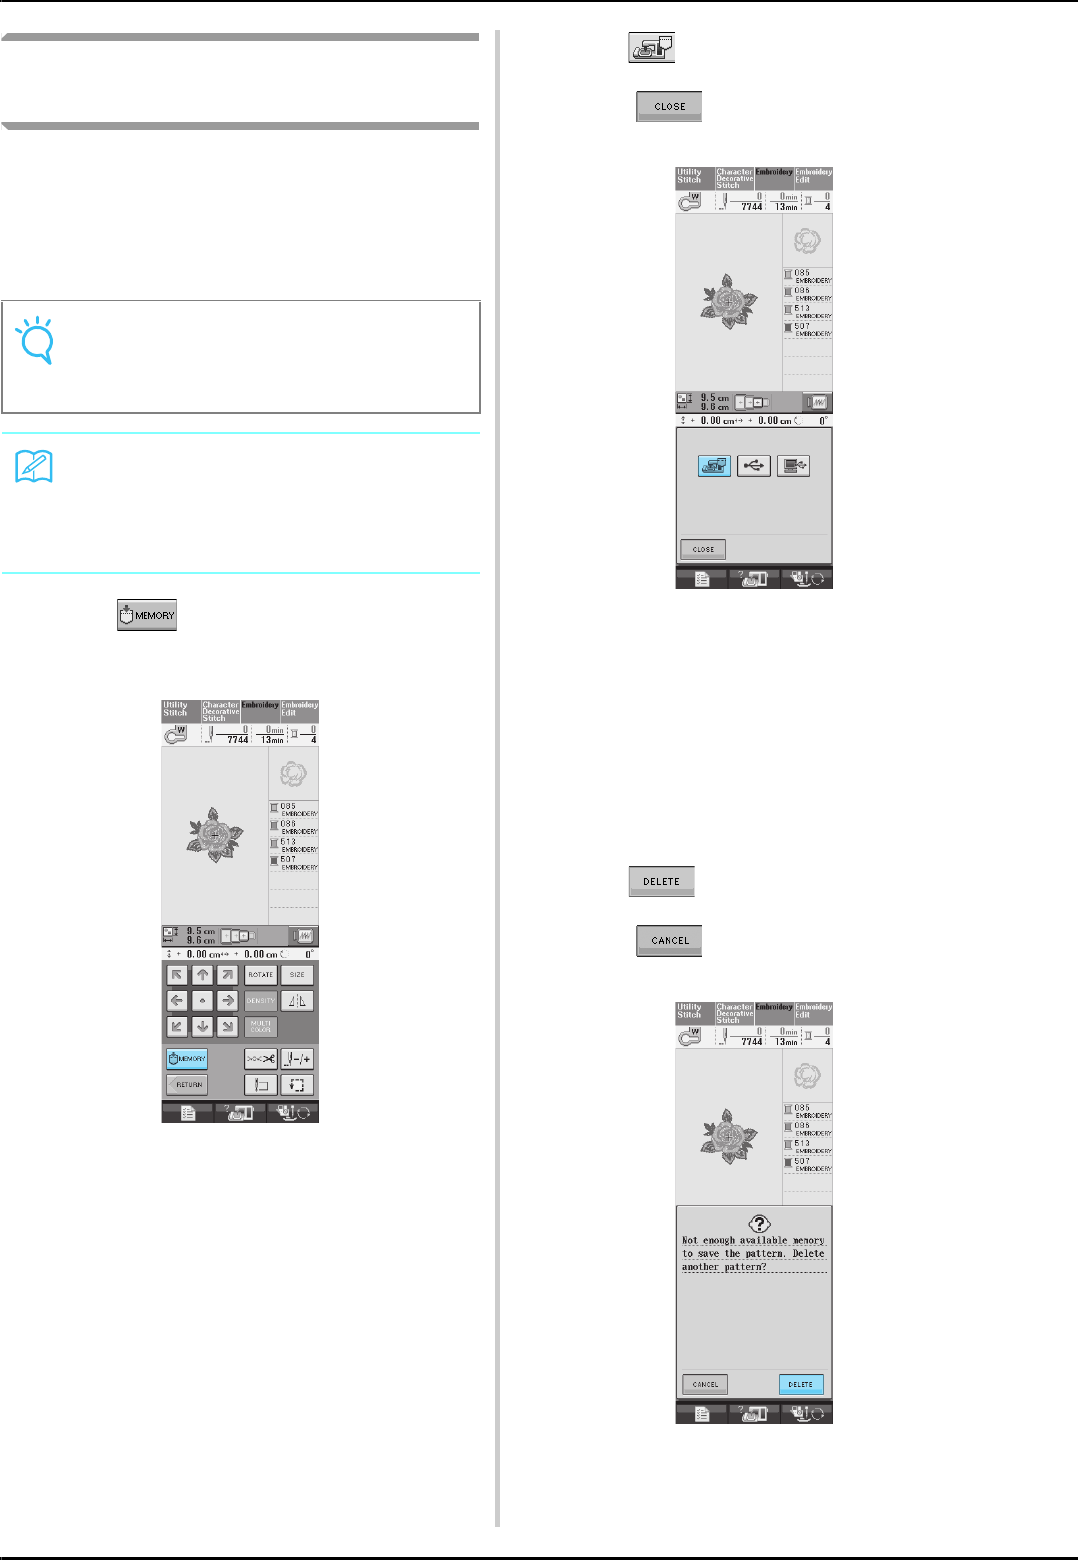
USING THE MEMORY FUNCTION
166
Saving Embroidery Patterns in
the Machine’s Memory
You can save embroidery patterns that you have
customized and will use often; for example, your
name or other combined patterns, patterns that
have been rotated or had the size changed,
patterns that have had the sewing position
changed, etc.
aPress when the pattern you want to
save is in the sewing screen.
bPress .
* Press to return to the original screen
without saving.
→The “Saving” screen is displayed. When the pattern
is saved, the display returns to the original screen
automatically.
■If the Memory is Full
If the screen below displays, either the maximum
number of patterns have been saved or the pattern
you want to save takes a lot of memory, and the
machine cannot save it. If you delete a previously
saved pattern, you can save the current pattern.
aPress .
* Press to return to the original screen
without saving.
→The machine displays the patterns currently saved.
Note
• Do not turn the main power to OFF while the
“Saving” screen is displayed. You will lose
the pattern you are saving.
Memo
• It takes a few seconds to save a pattern to
the machine’s memory.
• See page 170 for information on retrieving a
saved pattern.
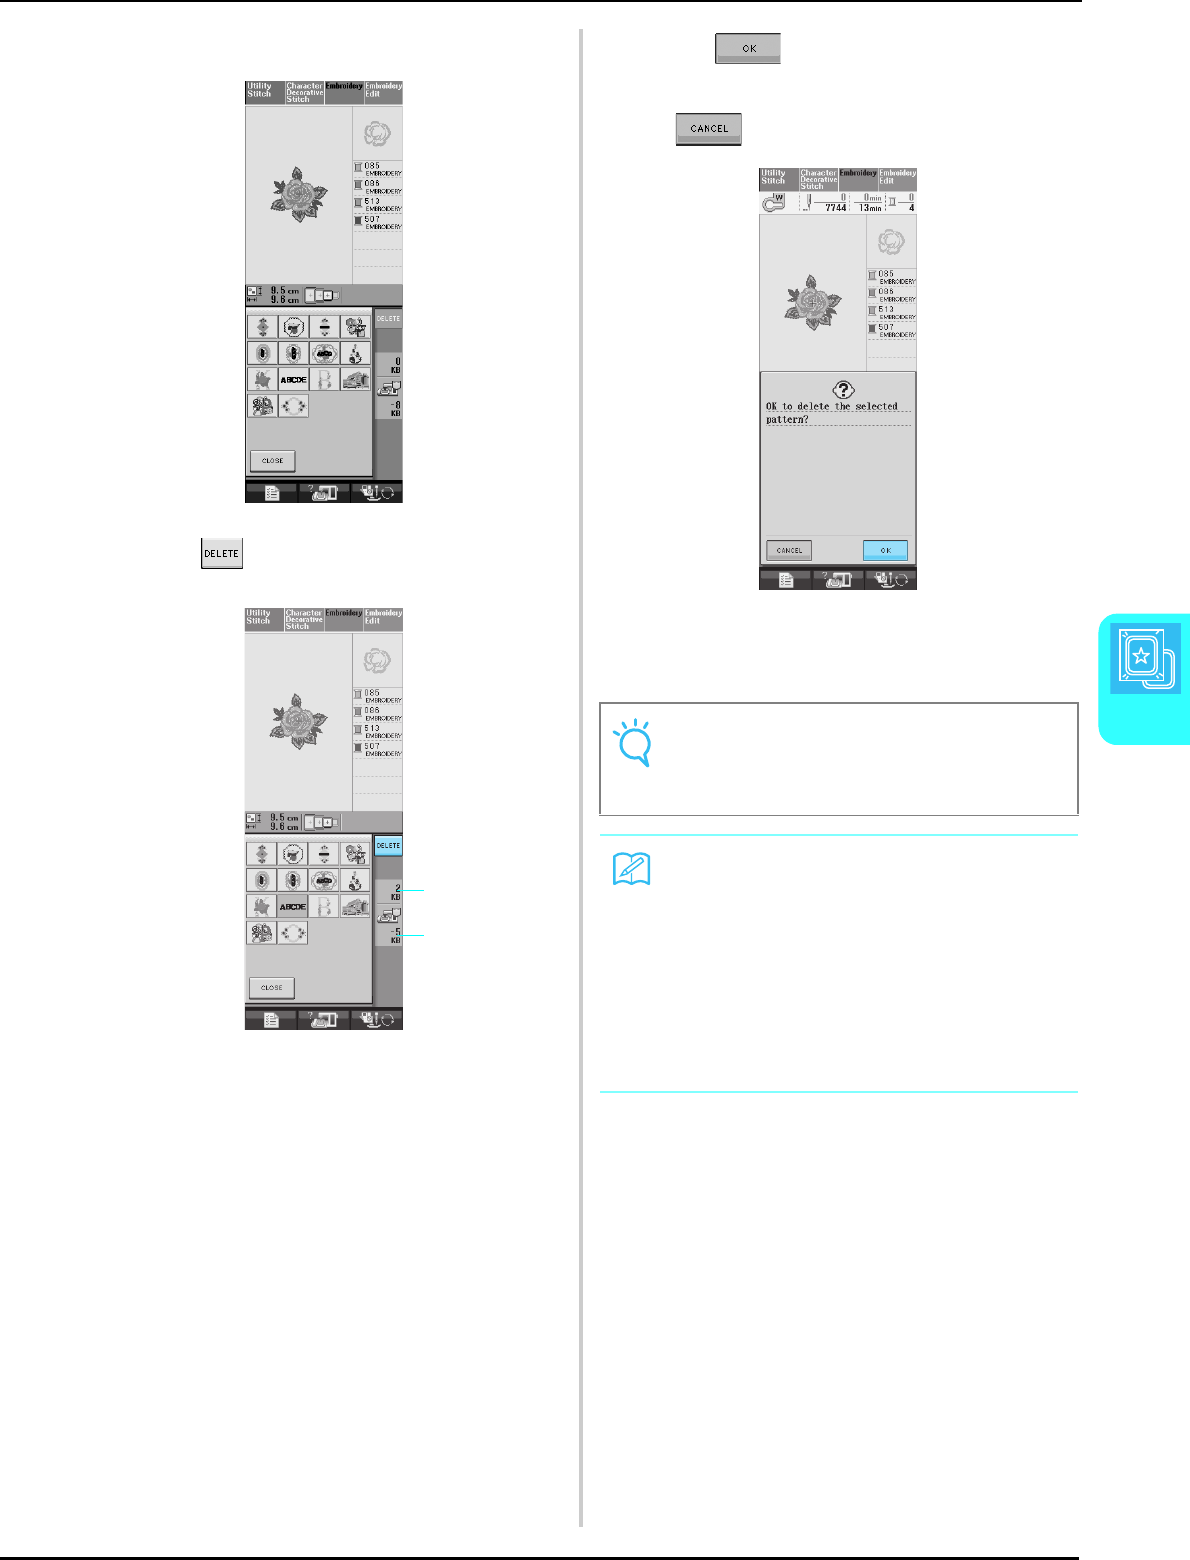
USING THE MEMORY FUNCTION
Embroidery
167
5
bSelect the pattern you want to delete.
cPress .
aAmount of memory used by the pattern to be
deleted
bAmount of memory needed to save the current
pattern
dPress .
* If you decide not to delete the pattern, press
.
→The “Saving” screen displays. When the pattern is
saved, the display returns to the original screen
automatically.
a
b
Note
• Do not turn the main power to OFF while the
“Saving” screen is displayed. You will lose
the pattern you are saving.
Memo
• If there is enough memory available after
deleting the pattern, the pattern you want to
save will be saved automatically. If there is
not enough memory available after deleting
the pattern, repeat the steps above to delete
another pattern from the machine’s memory.
• It takes a few seconds to save a pattern.
• See page 170 for more information about
retrieving saved patterns.
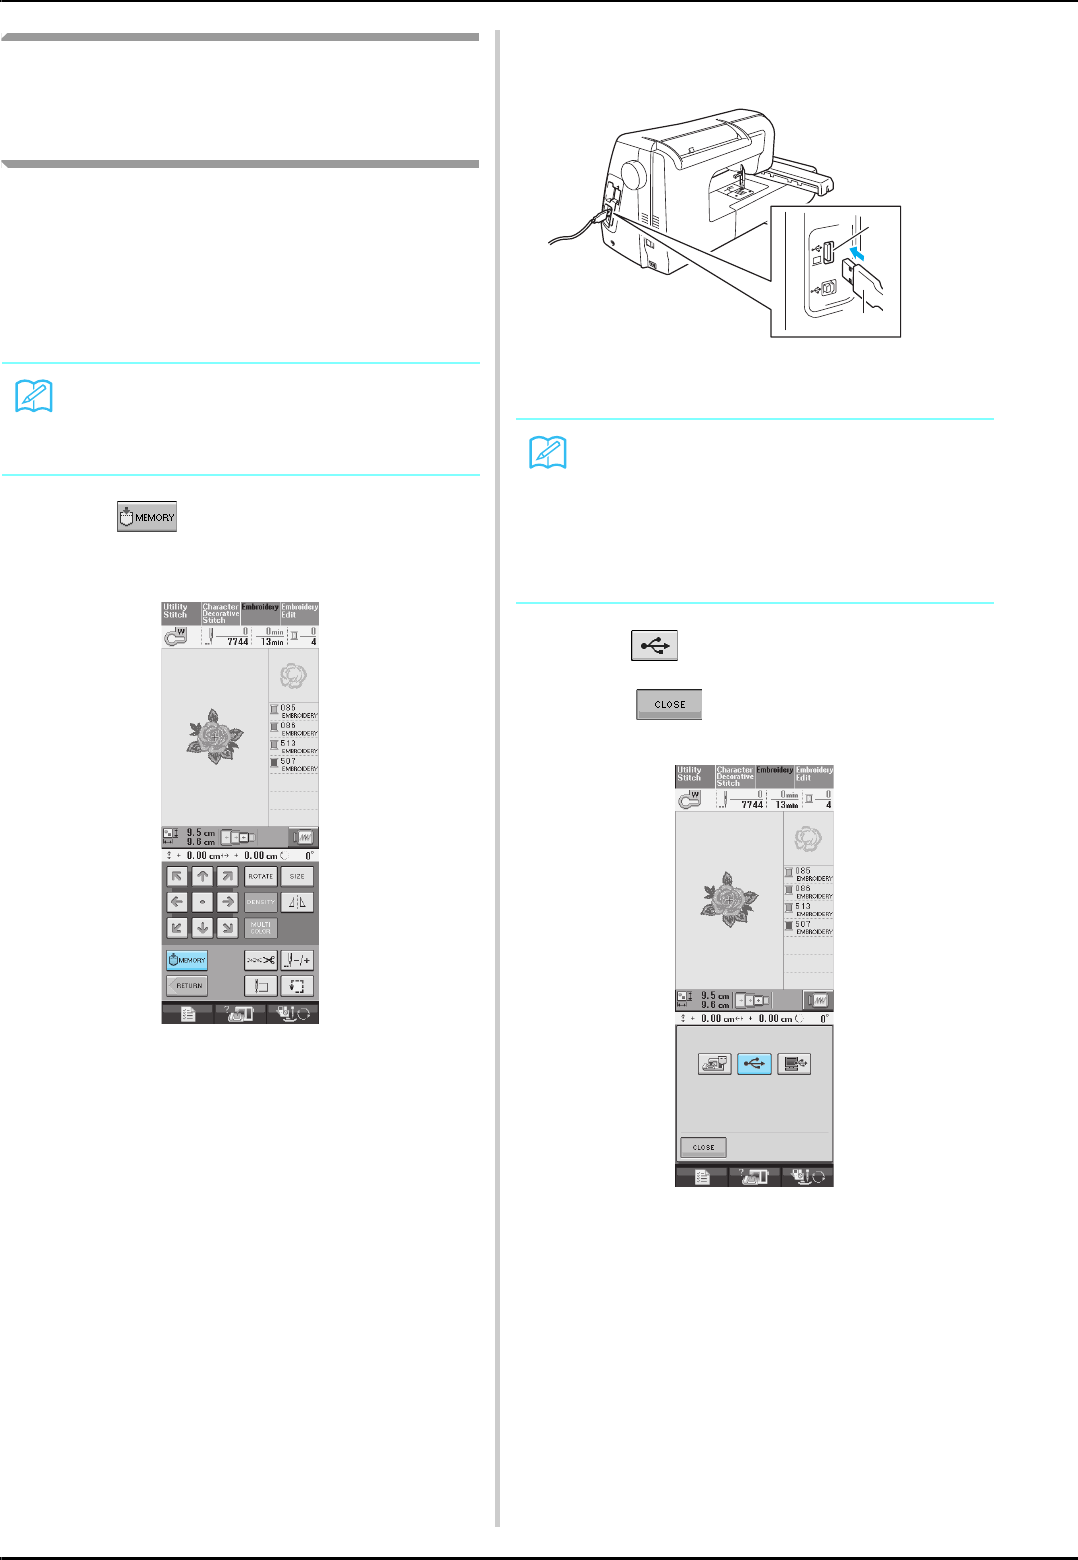
USING THE MEMORY FUNCTION
168
Saving Embroidery Patterns to
USB Media (Commercially
Available)
When sending embroidery patterns from the
machine to USB media, plug the USB media into
the machine’s USB port. Depending on the type of
USB media being used, either directly plug the
USB device into the machine’s USB port or plug
the USB Card Writer/Reader into the machine’s
USB port.
aPress when the pattern you want to
save is in the sewing screen.
bInsert the USB media into the USB port
connector on the machine.
aUSB port connector for media
bUSB media
cPress .
* Press to return to the original screen
without saving.
→The “Saving” screen is displayed. When the pattern
is saved, the display returns to the original screen
automatically.
Memo
Some USB media may not be usable with this
machine. Please visit our web site for more
details.
Memo
• The USB media can be inserted or removed
at any time.
• Do not insert anything other than USB
media into the USB media port connector.
Otherwise, the USB media drive may be
damaged.
b
a
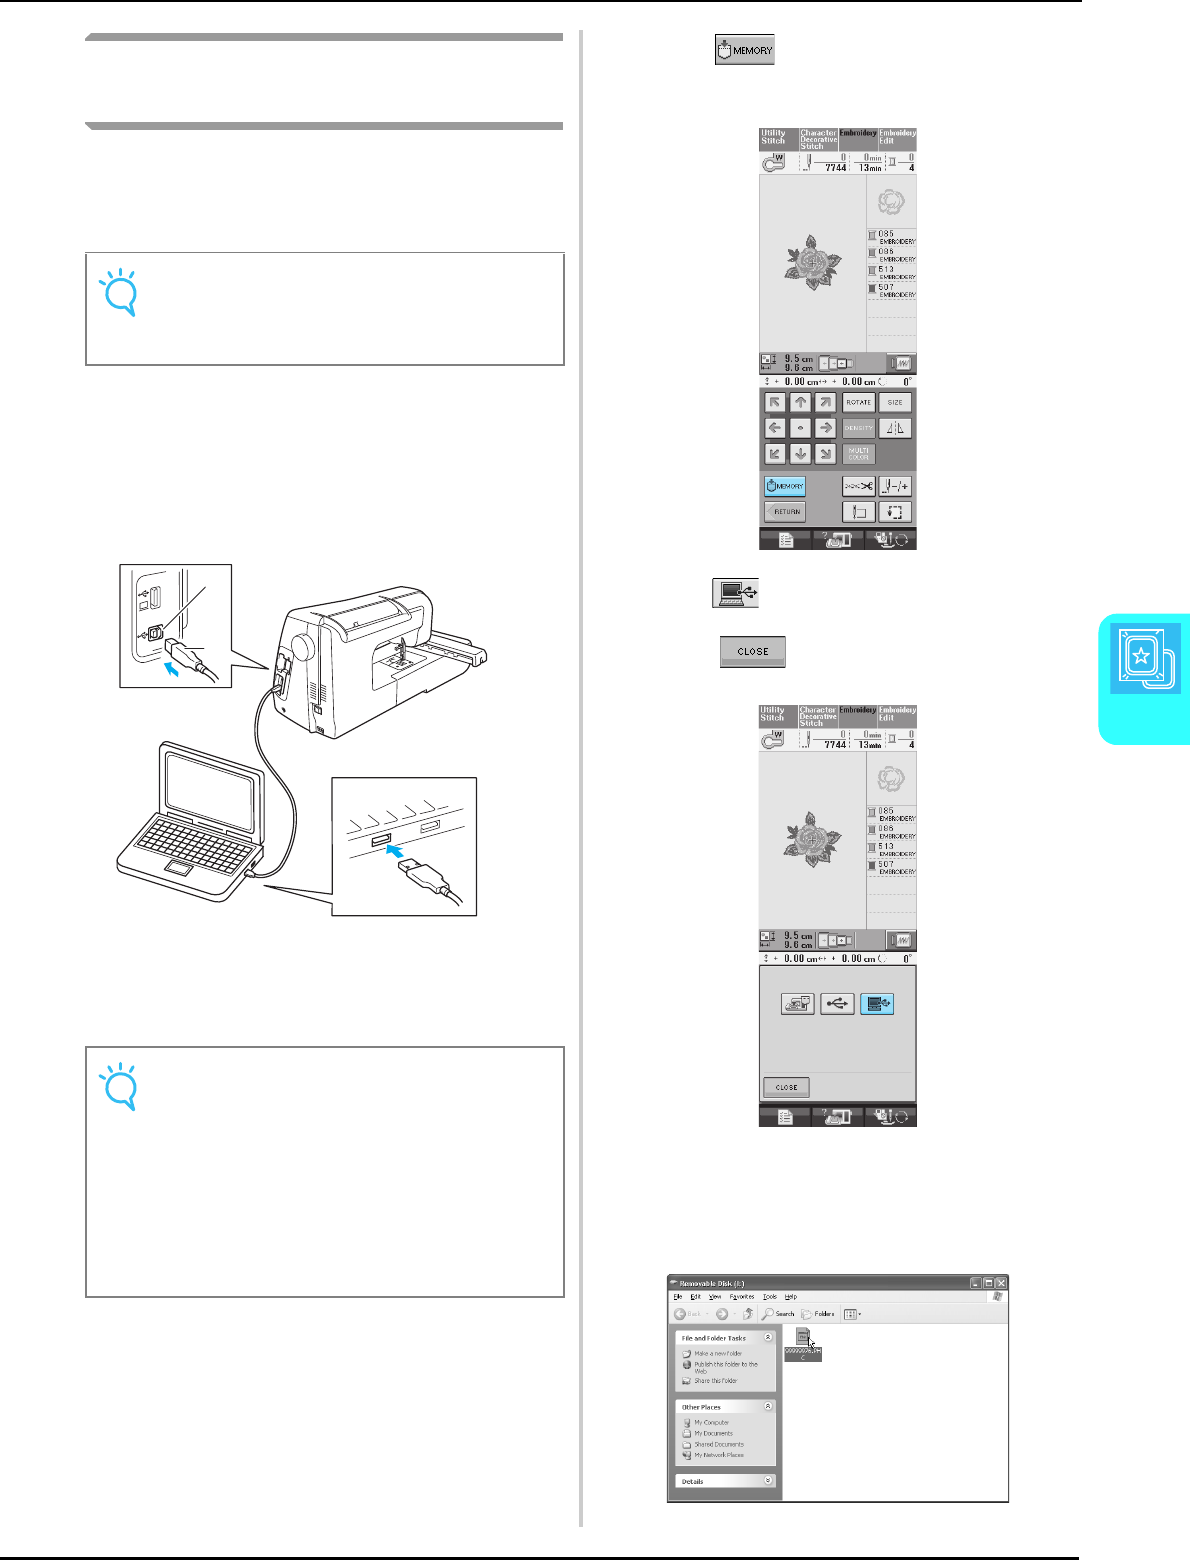
USING THE MEMORY FUNCTION
Embroidery
169
5
Saving Embroidery Patterns in
the Computer
Using the included USB cable, the machine can
be connected to your computer, and the
embroidery patterns can be temporarily retrieved
from and saved in your computer.
aPlug the USB cable connector into the
corresponding USB port connectors for the
computer and for the machine.
* The USB cable can be plugged into the USB port
connectors on the computer and embroidery
machine whether or not they are turned on.
aUSB port connector for computer
bUSB cable connector
→The “Removable Disk” icon will appear in “My
Computer” on the computer.
bPress when the pattern you want to
save is in the sewing screen.
cPress .
* Press to return to the original screen
without saving.
→The pattern will be temporarily saved to
“Removable Disk” under “My Computer”.
dSelect the pattern’s .phc file in “Removable
Disk” and copy the file to the computer.
Note
• Do not turn the main power to OFF while the
“Saving” screen is displayed. You will lose
the pattern you are saving.
Note
• The connectors on the USB cable can only
be inserted into a connector in one direction.
If it is difficult to insert the connector, do not
insert it with force. Check the orientation of
the connector.
• For details on the position of the USB port
on the computer (or USB hub), refer to the
instruction manual for the corresponding
equipment.
a
b
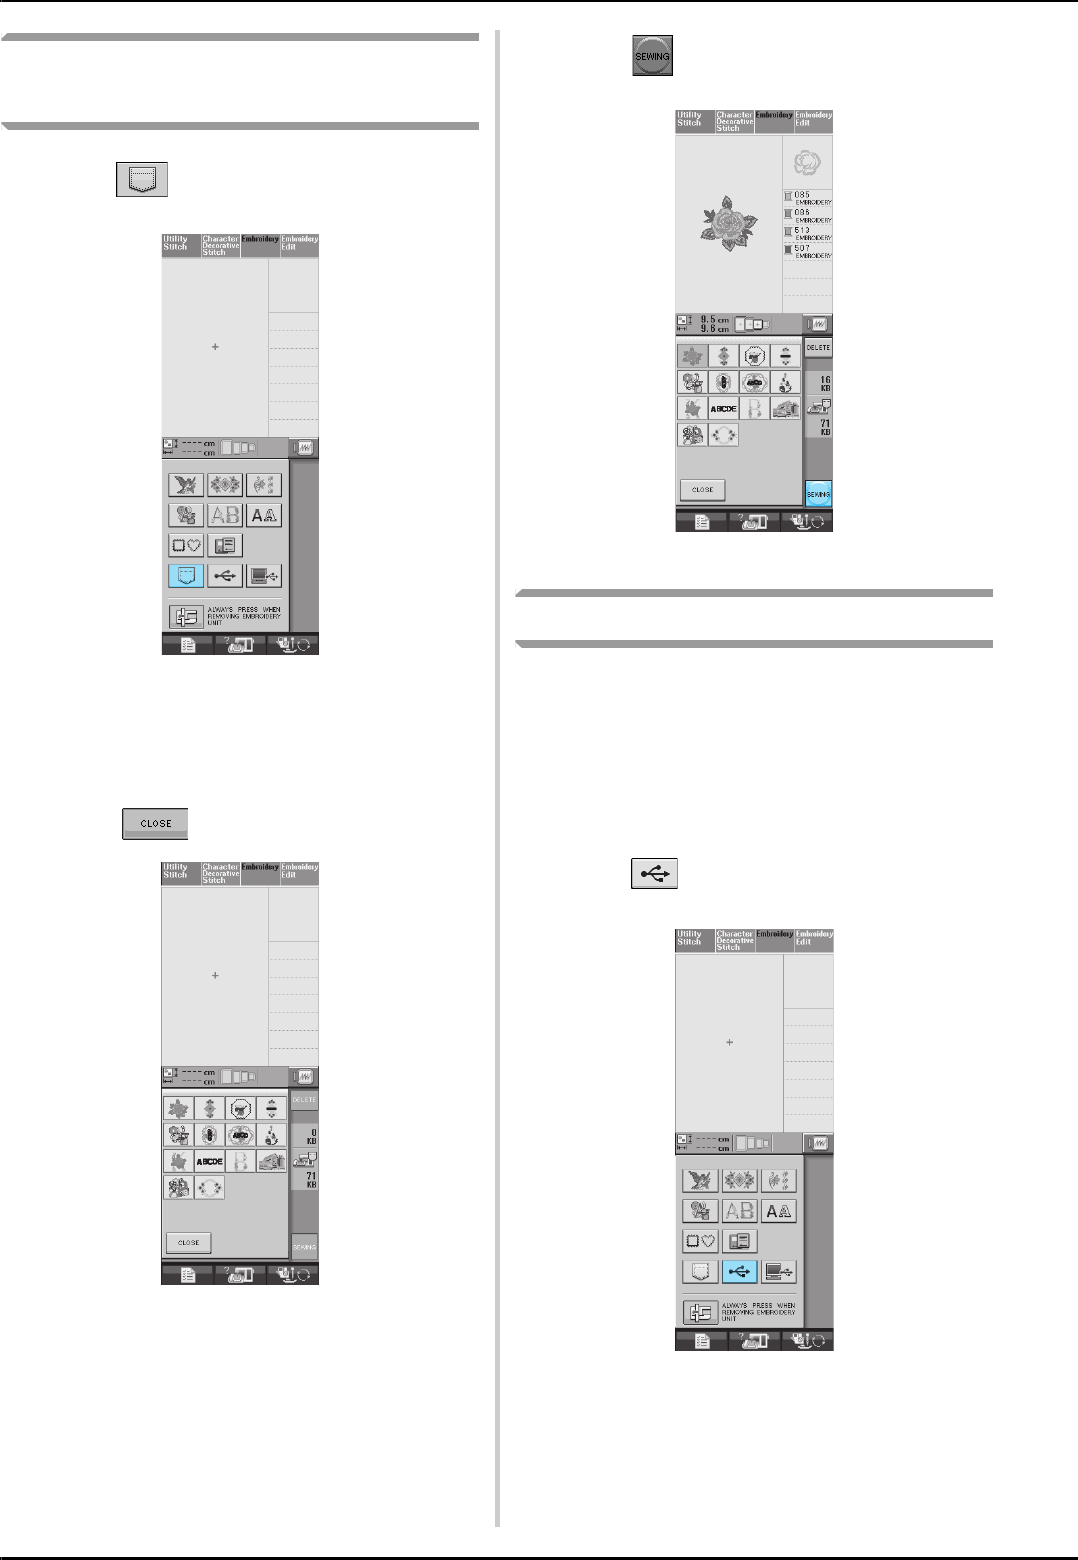
USING THE MEMORY FUNCTION
170
Retrieving Patterns from the
Machine’s Memory
aPress .
→The machine displays the patterns currently in the
memory.
bPress the key of the pattern you want to
retrieve.
* Press to return to the original screen.
cPress .
→The sewing screen is displayed.
Recalling from USB Media
You can recall a specific embroider pattern from
either directly USB media or a folder in the USB
media. If the pattern is under the folder, move
down layers of folders following a path to it.
aInsert the USB media into the USB port
connector on the machine (see page 168).
bPress .
→Embroidery patterns and a folder in a top folder are
displayed.

USING THE MEMORY FUNCTION
Embroidery
171
5
cPress when there is a subfolder to
sort two or more stitch patterns to USB
media, the embroidery pattern in the
subfolder is displayed.
* Press to return to the original screen
without recalling.
aFolder name
bEmbroidery patterns in a top folder
cPath
→The path to shows the current folder at the top of the
list.
Embroidery patterns and folders in a subfolder are
displayed.
* Press to return to the previous folder.
dPress the key of the pattern you want to
retrieve.
* Press to return to the original screen.
ePress .
→The sewing screen is displayed.
Recalling from the Computer
aPlug the USB cable connector into the
corresponding USB port connectors for the
computer and for the machine (see page
169).
bOn the computer, open “My Computer”
then go to “Removable Disk”.
a
b
c
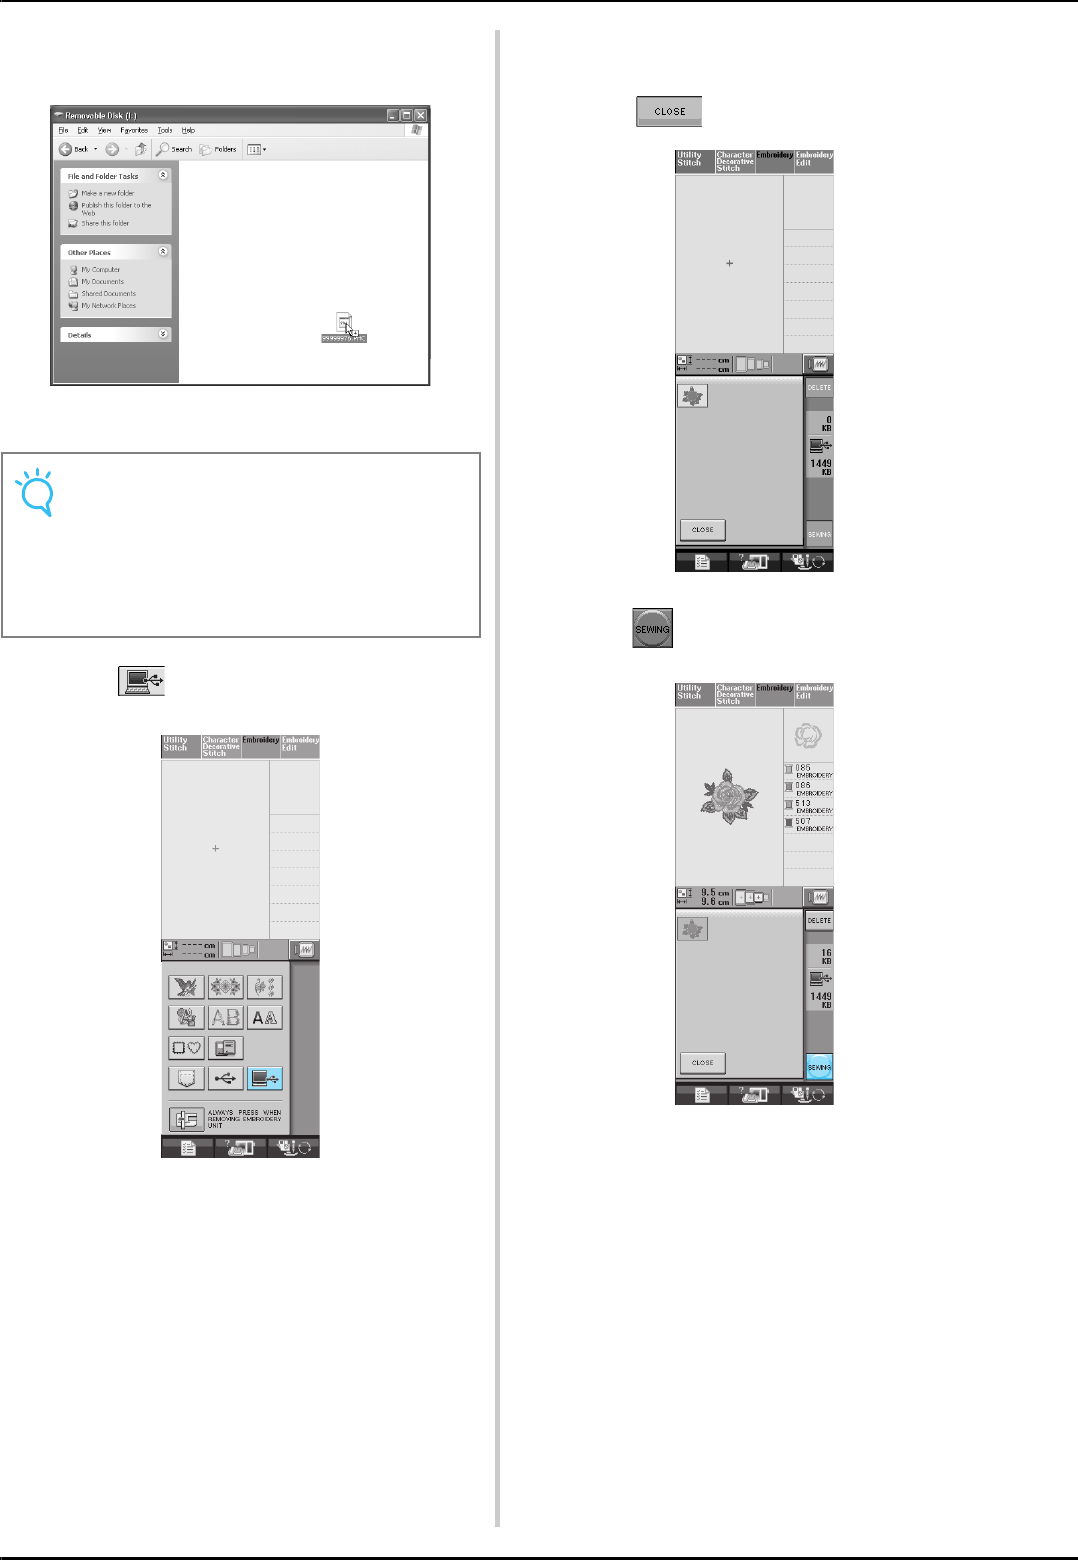
USING THE MEMORY FUNCTION
172
cMove/copy the pattern data to “Removable
Disk”.
→Pattern data in “Removable Disk” is written to the
machine.
dPress .
→The patterns in the computer are displayed on the
selection screen.
ePress the key of the pattern you want to
recall.
* Press to return to the original screen.
fPress .
→The sewing screen is displayed.
Note
• While data is being written, do not discon-
nect the USB cable.
• Do not create folders within “Removable
Disk”. Since folders are not displayed, stitch
pattern data within folders cannot be
recalled.
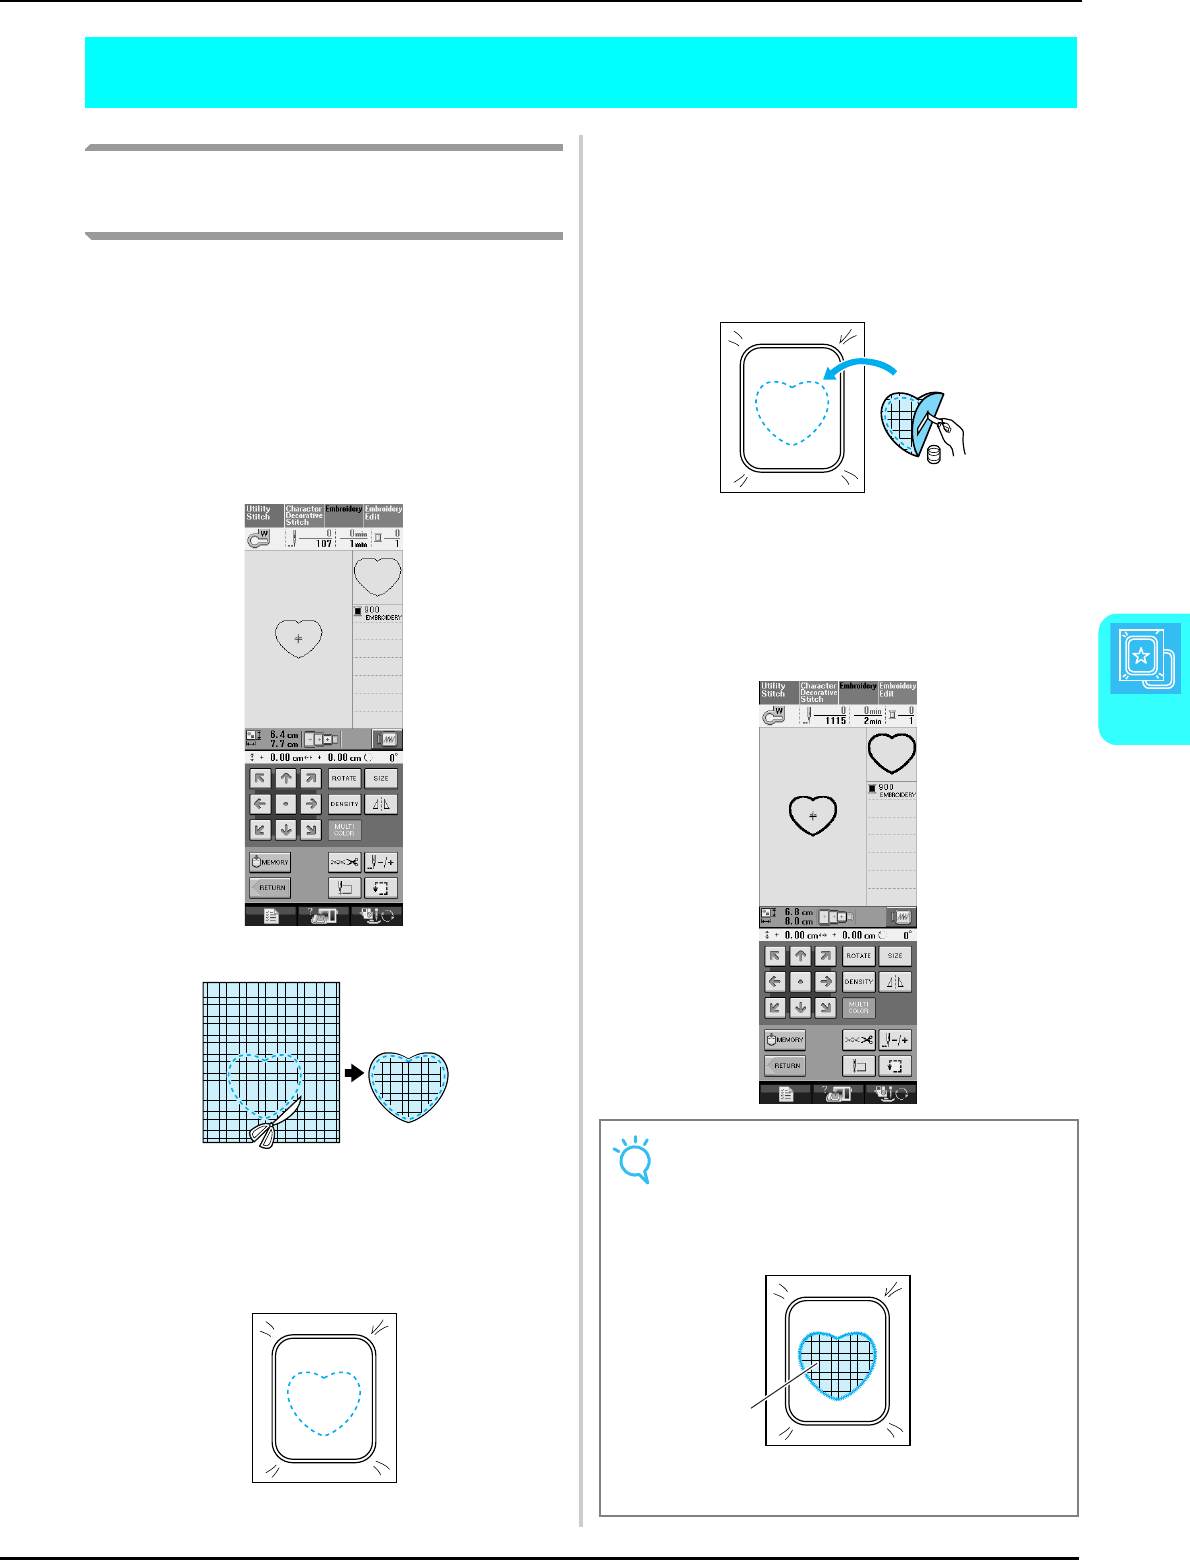
EMBROIDERY APPLICATIONS
Embroidery
173
5
EMBROIDERY APPLICATIONS
Using a Frame Pattern to Make
an Appliqué (1)
You can use framed patterns of the same size and
shape to create an appliqué. Embroider one
pattern with a straight stitch and one pattern with a
satin stitch.
aSelect a straight stitch frame pattern.
Embroider the pattern onto the appliqué
material, then cut neatly around the outside
of the shape.
bEmbroider the same pattern from step a
onto the base fabric.
cApply a thin layer of fabric glue or a
temporary spray adhesive to the rear of the
appliqué created in step a. Attach the
appliqué to the base fabric matching the
shapes.
dSelect the satin stitch frame pattern of the
same shape as the appliqué. Embroider over
the appliqué and base fabric from step c to
create the appliqué.
Note
• If you change the size or position of the pat-
terns when selecting them, make a note of
the size and location.
aAppliqué material
a
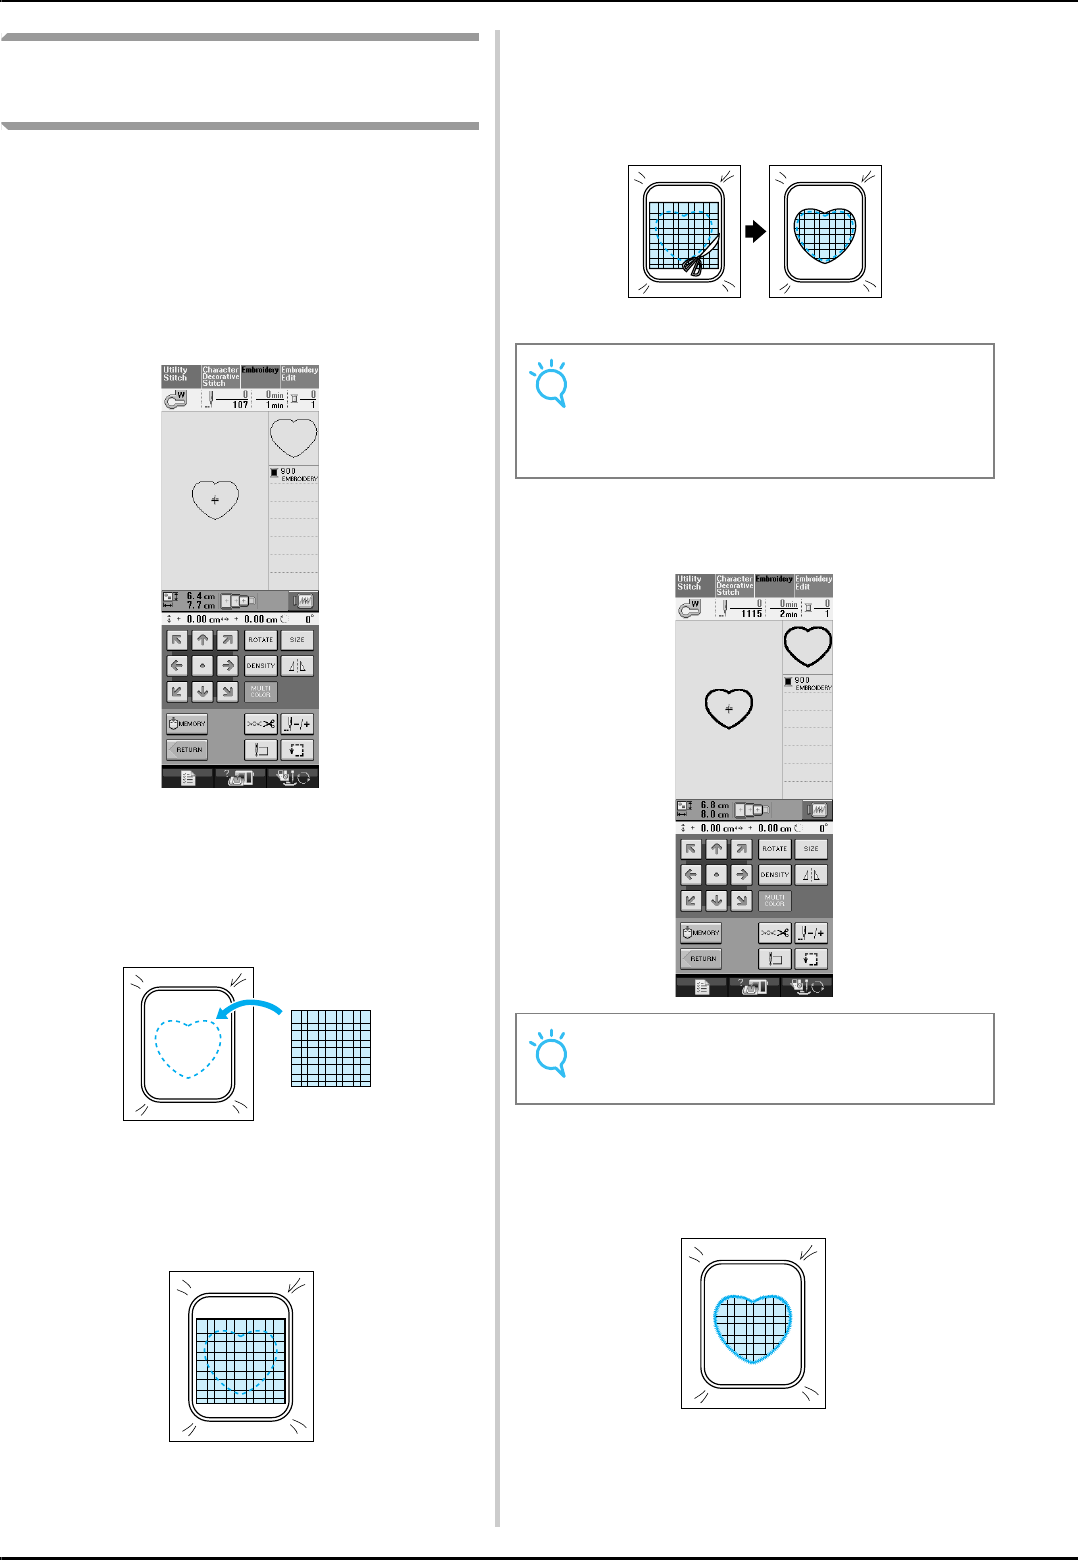
EMBROIDERY APPLICATIONS
174
Using a Frame Pattern to Make
an Appliqué (2)
This is a second method to make appliqué using
embroidery patterns. You do not have to change
the fabric in the embroidery frame using this
method. Embroider one pattern with a straight
stitch and one pattern with a satin stitch.
aSelect a straight stitch frame pattern, and
embroider the pattern onto the base fabric.
bPlace the appliqué fabric over the pattern
embroidered in step a.
* Be sure that the appliqué fabric completely covers
the seam.
cEmbroider the same pattern on the appliqué
fabric.
dRemove the embroidery frame from the
embroidery unit, and cut around the
outside of the stitches.
eSelect the satin stitch frame pattern of the
same shape as the appliqué.
fReattach the embroidery frame to the
embroidery unit, and embroider the satin
stitch pattern to create an appliqué.
Note
• Do not remove the fabric from the embroi-
dery frame to cut it. Also, do not pull strongly
on the fabric. Otherwise, the fabric may
loosen in the frame.
Note
• Do not change the size or position of the
pattern.

Chapter 6
Embroidery Edit
EXPLANATION OF FUNCTIONS.......................................................176
SELECTING PATTERNS TO EDIT .......................................................177
Selecting Embroidery Patterns/Heirloom Patterns/Border Patterns/
Cross stitch Patterns/Floral Alphabet Patterns/Frame Patterns .............................178
Selecting Alphabet Character Patterns ..................................................................178
EDITING PATTERNS..........................................................................181
■Key Functions................................................................................................................182
Moving the Pattern................................................................................................183
Rotating the Pattern ..............................................................................................183
Changing the Size of the Pattern ...........................................................................184
Deleting the Pattern ..............................................................................................185
Changing the Configuration of Alphabet Character Patterns.................................185
Changing Alphabet Character Spacing ..................................................................185
Changing the Color of Each Alphabet Character in a Pattern................................186
Changing the Thread Color ...................................................................................187
Creating a Custom Thread Table ...........................................................................188
■Adding a Color to the Custom Thread Table from the List ............................................189
Choosing a Color from the Custom Thread Table .................................................189
Designing Repeated Patterns.................................................................................190
■Sewing Repeated Patterns .............................................................................................190
■Repeating One Element of a Repeated Pattern ..............................................................192
■Assigning Thread Marks.................................................................................................193
After Editing ..........................................................................................................194
COMBINING PATTERNS...................................................................195
Editing Combined Patterns ....................................................................................195
Sewing Combined Patterns....................................................................................197
USING THE MEMORY FUNCTION...................................................198
EXPLANATION OF FUNCTIONS
176
EXPLANATION OF FUNCTIONS
With the Embroidery Edit functions, you can combine embroidery patterns and character patterns,
change the size of patterns, rotate patterns, and perform many other editing functions. This machine can
perform the 9 functions listed below.
■Combine Patterns
You can easily create combinations of embroidery patterns, frame patterns, character patterns, patterns from the machine’s
memory, patterns from separately sold embroidery cards, and many other patterns.
■Move Patterns
Within the 30 cm × 18 cm (approx. 12 inches × 7 inches) wide embroidery area, you can change the position of patterns, and
check the position on the LCD.
■Rotate Patterns
You can rotate patterns one degree, ten degrees or ninety degrees at a time.
■Enlarge or Reduce Patterns
You can make patterns larger or smaller.
• This function is not available for some patterns.
■Create Mirror Images
You can create horizontal mirror images.
• This function is not available for some patterns.
■Change Alphabet Character Spacing
You can increase or decrease the spacing between characters in combined patterns.
■Change Alphabet Character Appearance/Layout
You can change the layout of the characters to a curved line, diagonal, etc. There are 6 choices total.
■Change the Thread Colors of Patterns
You can change the thread colors of the pattern to your favorite colors.
■Creating a Repeating Pattern
You can add copies of a pattern to create a pattern that repeats in a vertical or horizontal direction.
SELECTING PATTERNS TO EDIT
Embroidery Edit
177
6
SELECTING PATTERNS TO EDIT
Prepare the machine for embroidery according to the instructions on page 126, and press to
display the screen below.
aEmbroidery patterns
bHeirloom patterns
cBorder patterns
dCross stitch patterns
eFloral alphabet patterns
fAlphabet character patterns
gFrame patterns
hPatterns from an embroidery card (sold separately)
iPatterns saved in the machine’s memory (see page 170)
jPatterns saved in USB media (see page 170)
kPatterns saved on the computer (see page 171)
Memo
See page 131 for more information on each category’s selection screen.
Note
You can also sew Utility Stitches or Character/Decorative Stitches with the embroidery unit attached by
pressing or (a confirmation message for moving the carriage will appear). Raise the
feed dogs, and then attach the appropriate presser foot before sewing.
a
d
g
i
b
e
h
j
c
f
k
SELECTING PATTERNS TO EDIT
178
Selecting Embroidery Patterns/
Heirloom Patterns/Border
Patterns/Cross stitch Patterns/
Floral Alphabet Patterns/Frame
Patterns
aSelect the category of the pattern.
bPress the key of the pattern you want to
edit.
* See pages 132 and 134 for more information on
selecting patterns.
→The pattern is displayed in the top part of the screen.
cPress .
→The pattern selected for editing is outlined in red on
the embroidery edit display.
dProceed to see “EDITING PATTERNS” on
page 181 to edit the pattern.
Selecting Alphabet Character
Patterns
When you select character patterns from the
embroidery edit screen, you can edit the
appearance of the pattern at the same time.
aPress .
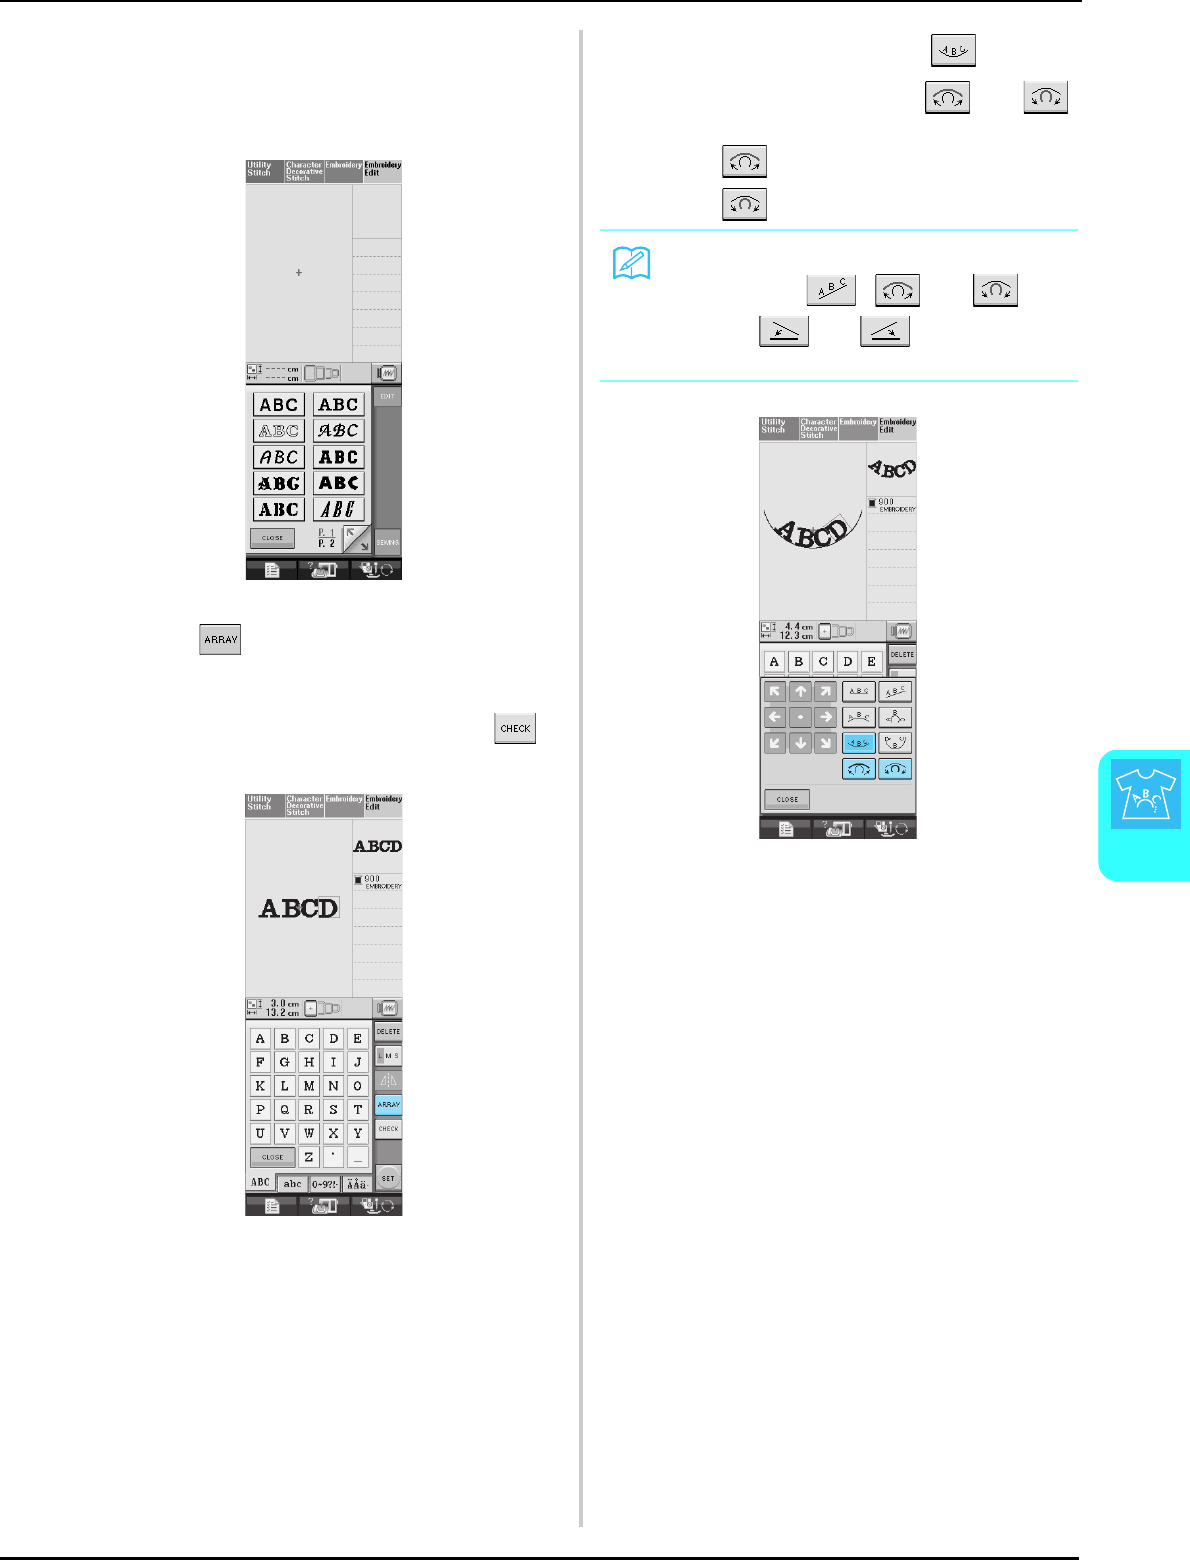
SELECTING PATTERNS TO EDIT
Embroidery Edit
179
6
bSelect the font, then enter the characters.
(Example: A B C D)
* See page 133 for more information about selecting
characters.
cPress to change the layout of the
pattern.
* If the characters are too small to see, press to
view a display of all entered characters.
dSelect the layout. (Example: )
When selecting an arc, use and
to change the degree of the arc.
* Press to make the arc flatter.
* Press to make the arc rounder.
Memo
When selecting , and
change to and . You can
increase or decrease the incline.
SELECTING PATTERNS TO EDIT
180
ePress to return to the original
screen.
fAfter you finish your selections, press
.
→The embroidery edit screen will appear.
gProceed to see “EDITING PATTERNS” on
page 181 to edit the pattern.
EDITING PATTERNS
Embroidery Edit
181
6
EDITING PATTERNS
aShows the size of the entire combined pattern.
bShows the size of the pattern currently selected.
cShows the distance from the center of the frame.
dShows the color currently selected, and the number of colors in the pattern.
eShows the degree of rotation for the pattern.
Memo
If a key display is light gray, you cannot use that function with the selected pattern.
a
b
c
d
e
a
b
c
d
e
EDITING PATTERNS
182
■Key Functions
No. Display Key Name Explanation Page
aArrow keys
( Center key)
Press these keys to move the pattern in the direction indicated by the arrow on
the key. (Press to return the pattern to its original position.)
183
bBorder key Press this key to make a repeating pattern. 190
cRotate key Press this key to rotate the pattern. You can rotate a pattern one degree, ten
degrees or ninety degrees at a time.
183
dSize key Press this key to change the size of the pattern. Patterns can be enlarged or
reduced.
184
eDensity key Press this key to change the density of frame patterns or character patterns. 162
fHorizontal mirror
image key
Press this key to make a horizontal mirror image of the selected pattern. 162
gCharacter spacing key Press this key to change the spacing of character patterns. 185
hArray key Press this key to change the configuration of a character pattern. 185
iMulti color key Press this key to change the color of individual characters in a pattern. 186
jThread palette key Press this key to change the colors of the displayed pattern. 187
kPattern select key When a combined pattern is selected, use these keys to select a part of the
pattern to edit.
—
lDelete key Press this key to delete the selected pattern (the pattern outlined by the red
box).
185
mEdit end key Press this key to continue to the next step. 194
a
b
k
c
e
g
i
l
d
f
h
j
m
EDITING PATTERNS
Embroidery Edit
183
6
Moving the Pattern
Press to move the pattern in the direction
shown on the key.
Press to return the pattern to the center.
aDistance from the center
Rotating the Pattern
aPress .
bSelect the angle by which the pattern is
rotated.
* Press to rotate the pattern 90 degrees to the
left.
* Press to rotate the pattern 90 degrees to the
right.
* Press to rotate the pattern 10 degrees to the
left.
* Press to rotate the pattern 10 degrees to the
right.
* Press to rotate the pattern 1 degree to the
left.
* Press to rotate the pattern 1 degree to the
right.
* Press to return the pattern to its original
position.
aDegree of the pattern’s rotation
a
a
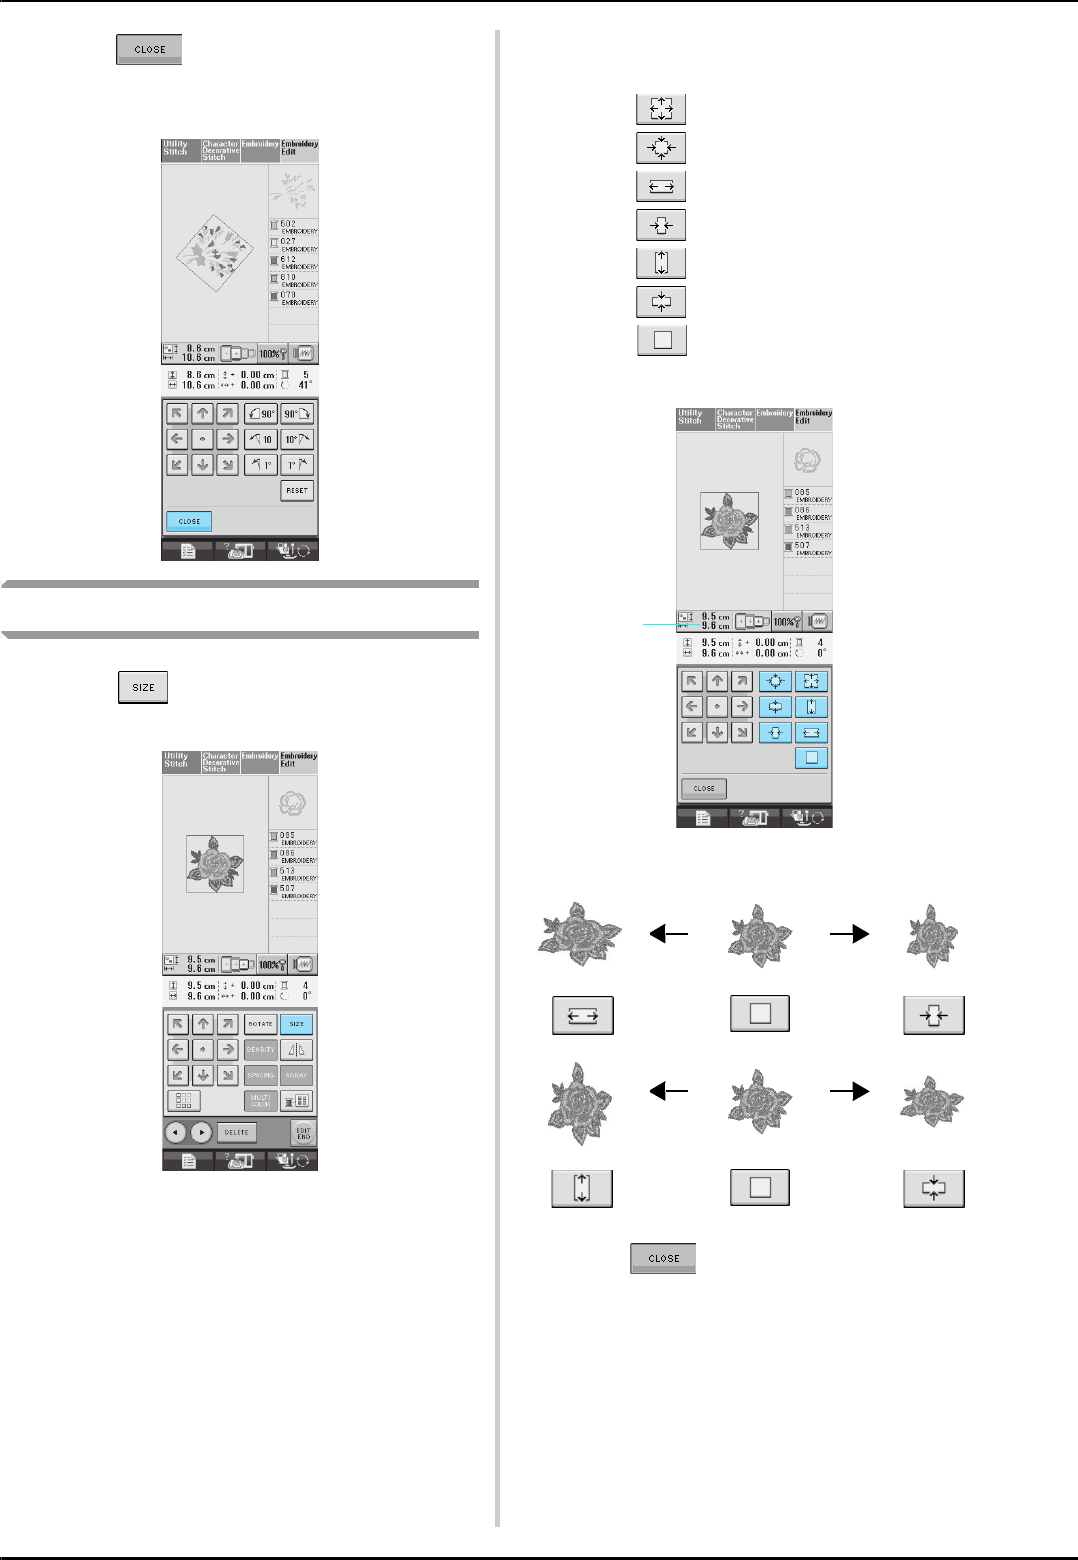
EDITING PATTERNS
184
cPress to return to the original
screen.
Changing the Size of the Pattern
aPress .
bSelect the direction in which to change the
size.
* Press to enlarge the pattern.
* Press to shrink the pattern.
* Press to stretch the pattern horizontally.
* Press to compact the pattern horizontally.
* Press to stretch the pattern vertically.
* Press to compact the pattern vertically.
* Press to return the pattern to its original
appearance.
aShows the size of the pattern being edited.
cPress to return to the original
screen.
a
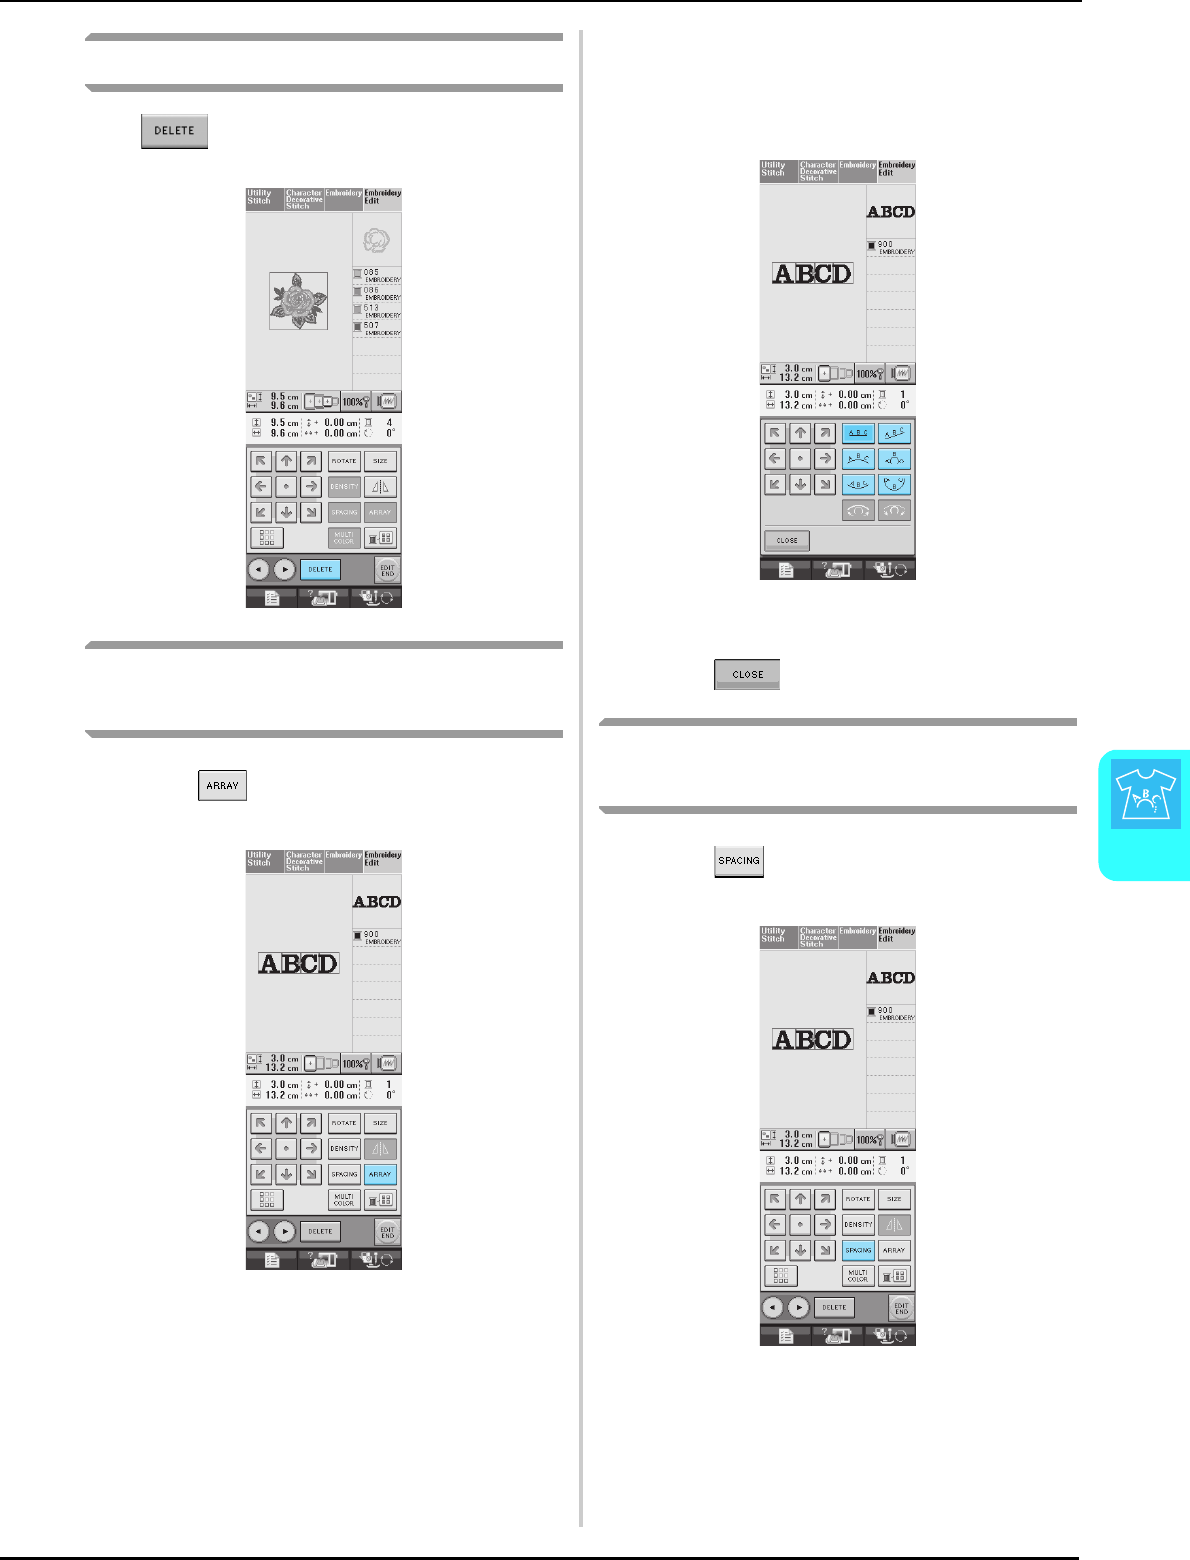
EDITING PATTERNS
Embroidery Edit
185
6
Deleting the Pattern
Press to delete the pattern from the screen.
Changing the Configuration of
Alphabet Character Patterns
aPress .
bPress the key of the layout you want to
embroider.
* See page 179 for more information about layout
types.
→The display will show the selected layout.
cPress .
Changing Alphabet Character
Spacing
aPress .
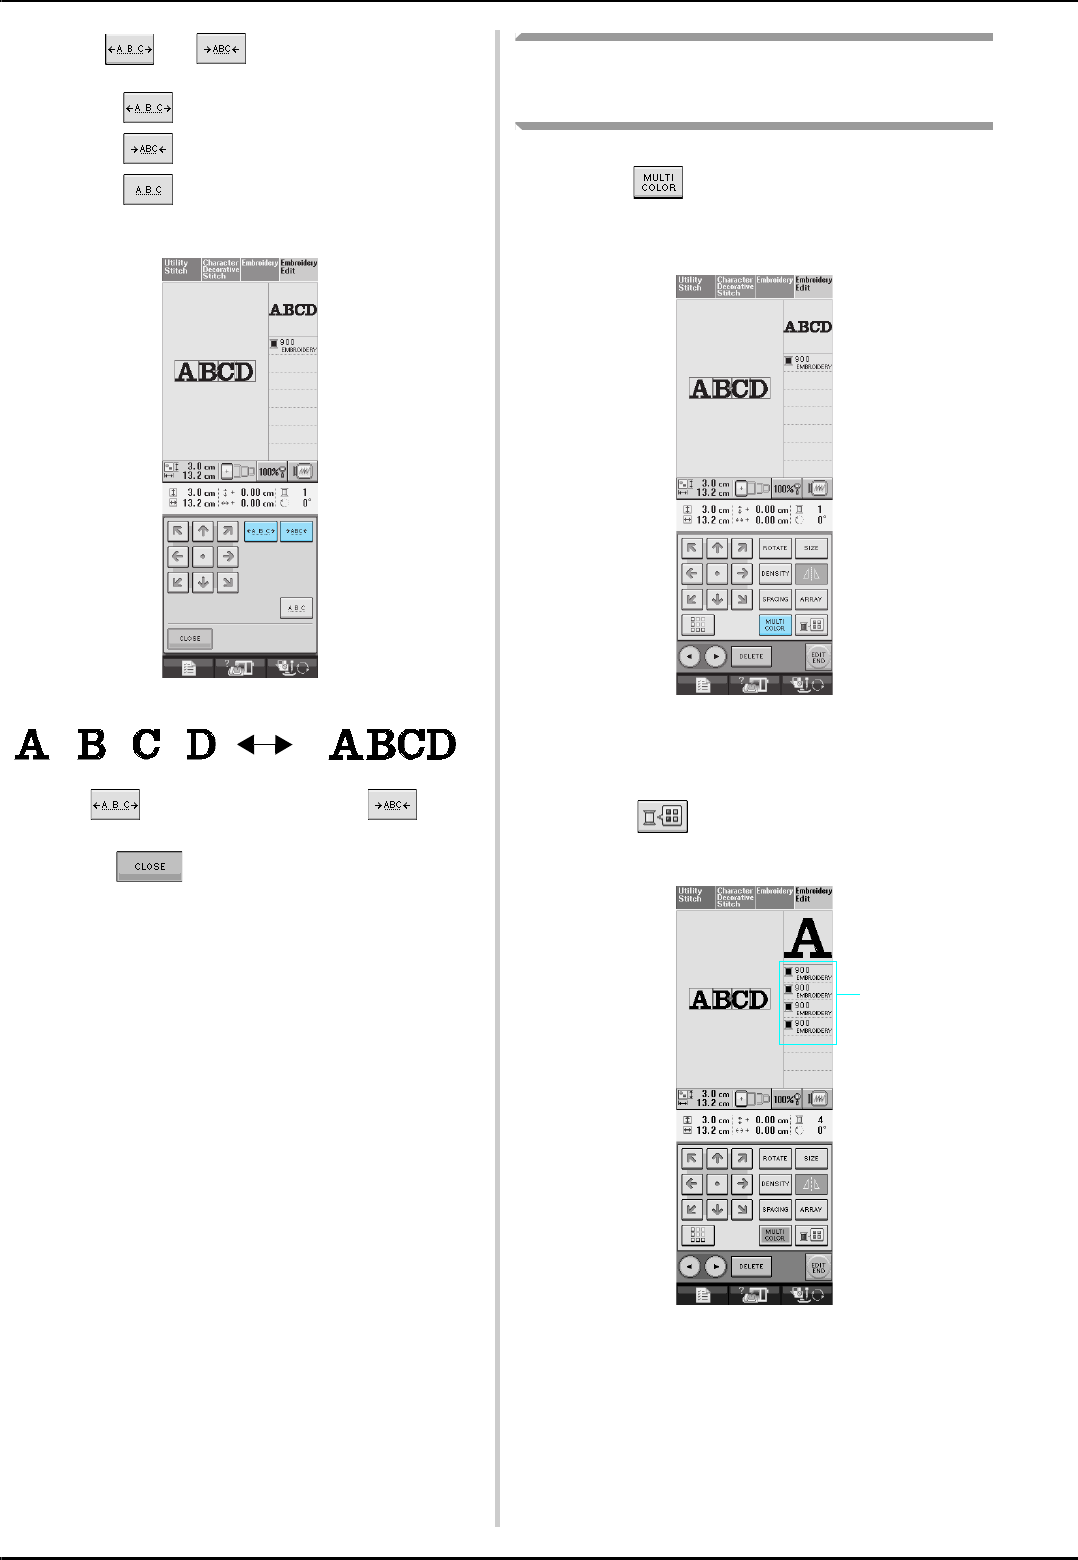
EDITING PATTERNS
186
bUse or to change the spacing.
* Press to widen the character spacing.
* Press to tighten the character spacing.
* Press to return the pattern to its original
appearance.
cPress to return to the original
screen.
Changing the Color of Each
Alphabet Character in a Pattern
aPress so you can assign a thread
color to each character.
bChange the thread to sew each character in
a different color.
* Press to change the colors in the sewing
order (see page 187).
aColor for each character
a
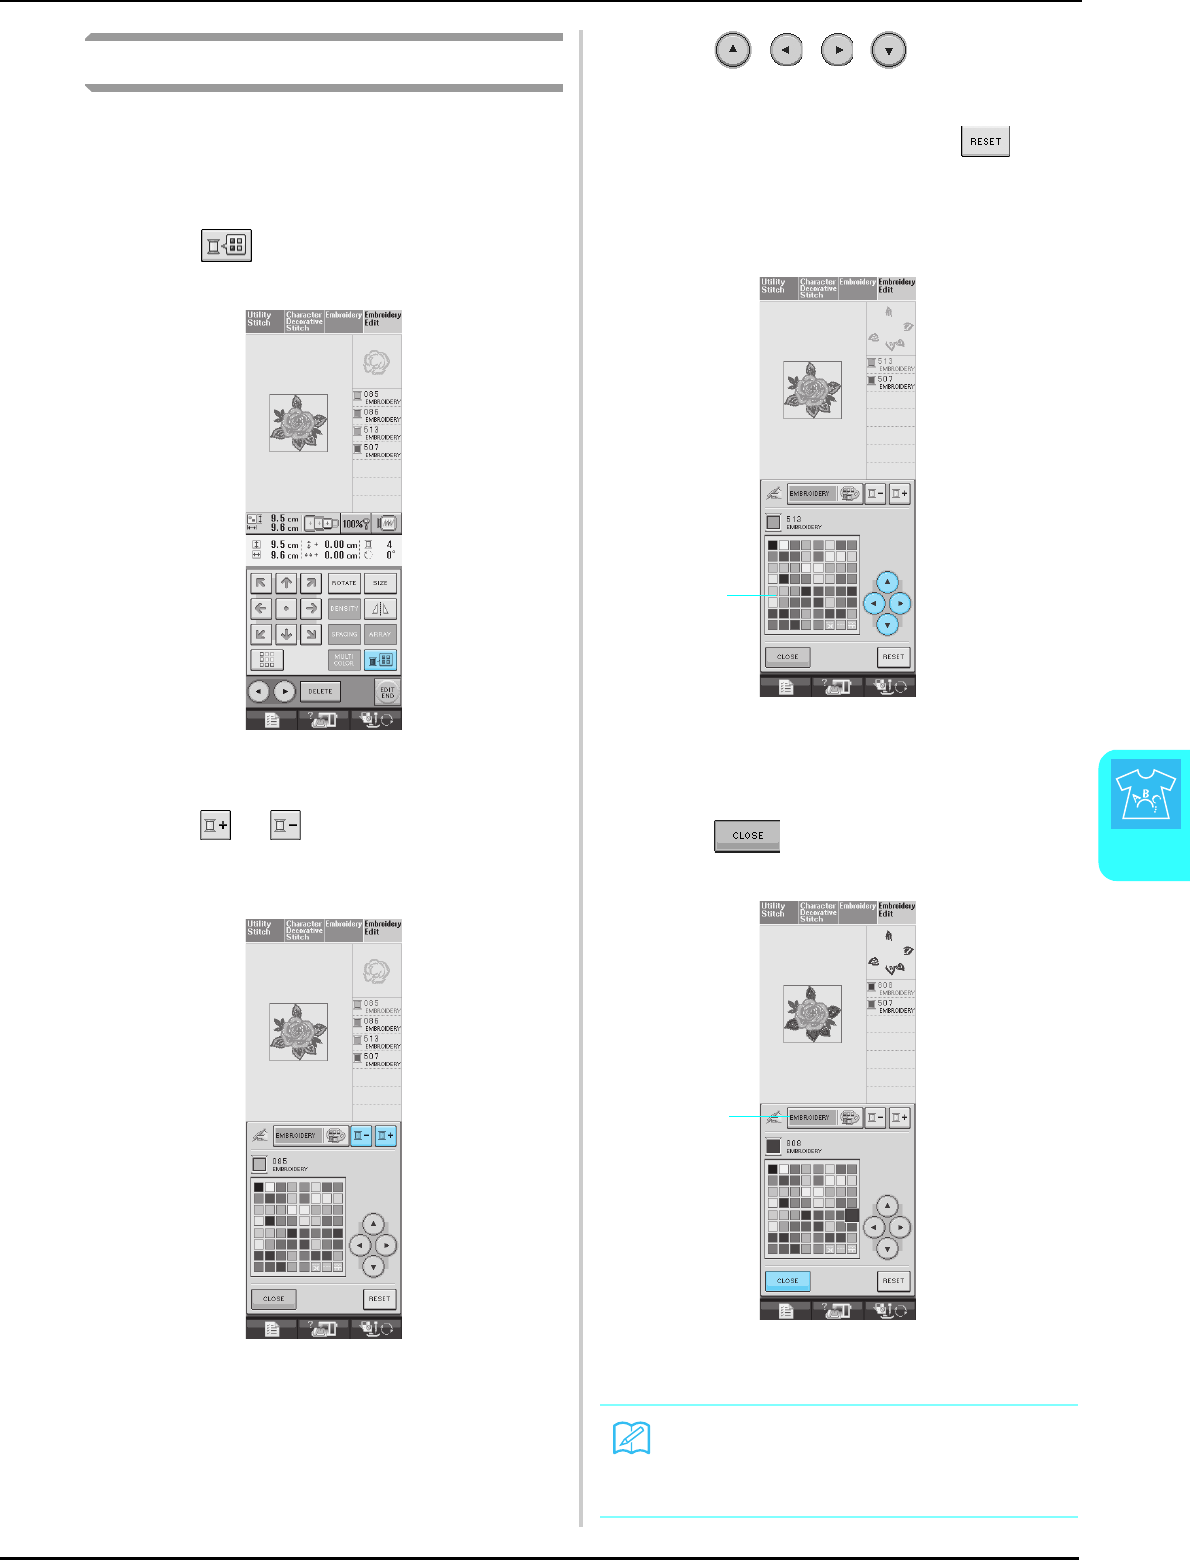
EDITING PATTERNS
Embroidery Edit
187
6
Changing the Thread Color
You can change the thread color by moving the
color to be changed to the top of the sewing order
and selecting a new color from the thread colors in
the machine.
aPress .
→The thread color palette screen displays.
bPress or to put the color you want
to change at the top of the sewing order.
cPress to choose a new
color from the color palette.
* To return to the original color, press . If
multiple colors have been changed, this command
will return all colors to their original colors.
* You can select colors from the color palette by
directly touching the screen with the touch pen.
aColor palette
→The selected color appears at the top of the sewing
order.
dPress .
aColor palette/Custom thread table change key
→The display shows the changed colors.
Memo
To select a color from the Custom Thread
Table, see “Choosing a Color from the Cus-
tom Thread Table” on page 189.
a
a
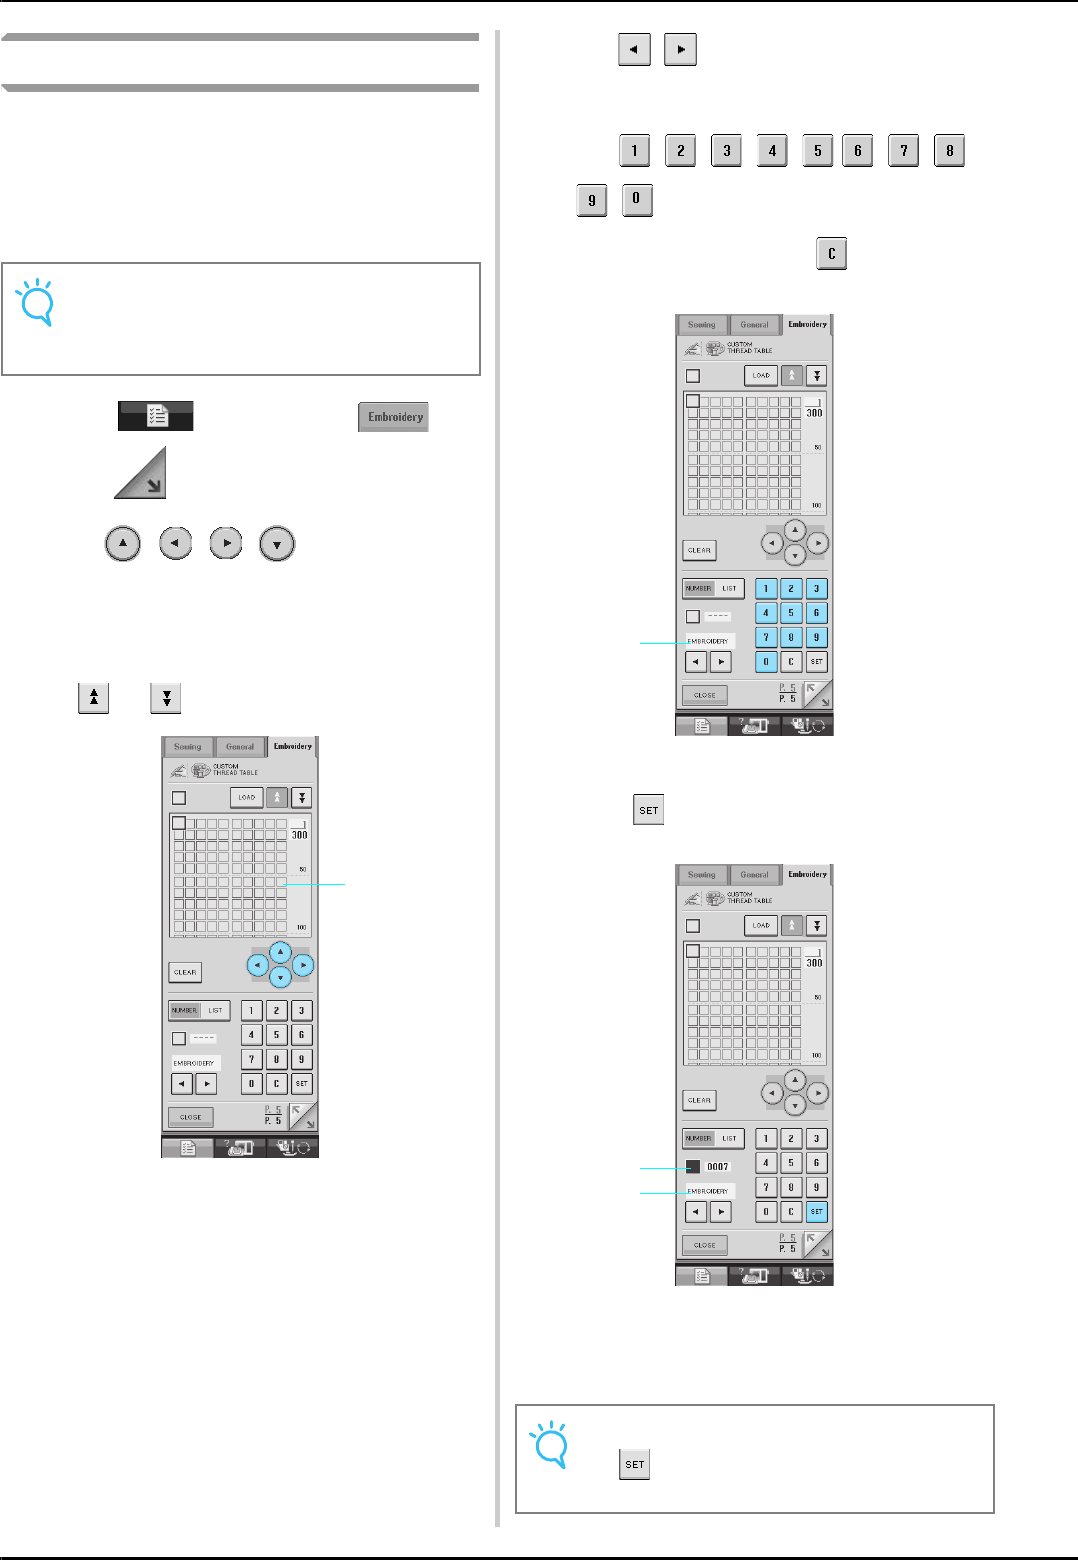
EDITING PATTERNS
188
Creating a Custom Thread Table
You can create a custom thread table containing
the thread colors that you most often use. You can
select thread colors from the machine’s extensive
list of thread colors from five different thread
brands. You can select any color and move the
color to your custom thread table.
aPress , and then press .
Press to display P. 5.
bUse to select where to
add a color on the custom thread table.
* You can also touch the palette directly with the
touch pen.
* You can scroll through 100 colors at a time using
and on the custom thread table.
aCustom thread table
cUse to select one of the thread
brands in the machine.
dUse
to enter a color’s 4-digit number.
* If you make a mistake, press to erase the
entered number, and then enter the correct number.
aThread brand
ePress .
aThread brand
bEntered number
→The selected thread color is set in the custom thread
table.
Note
Some machines may already have an addi-
tional 300 Robison-Anton thread colors con-
tained in the custom thread table.
a
Note
• If is not pressed, the thread color num-
ber will not be changed.
a
b
a
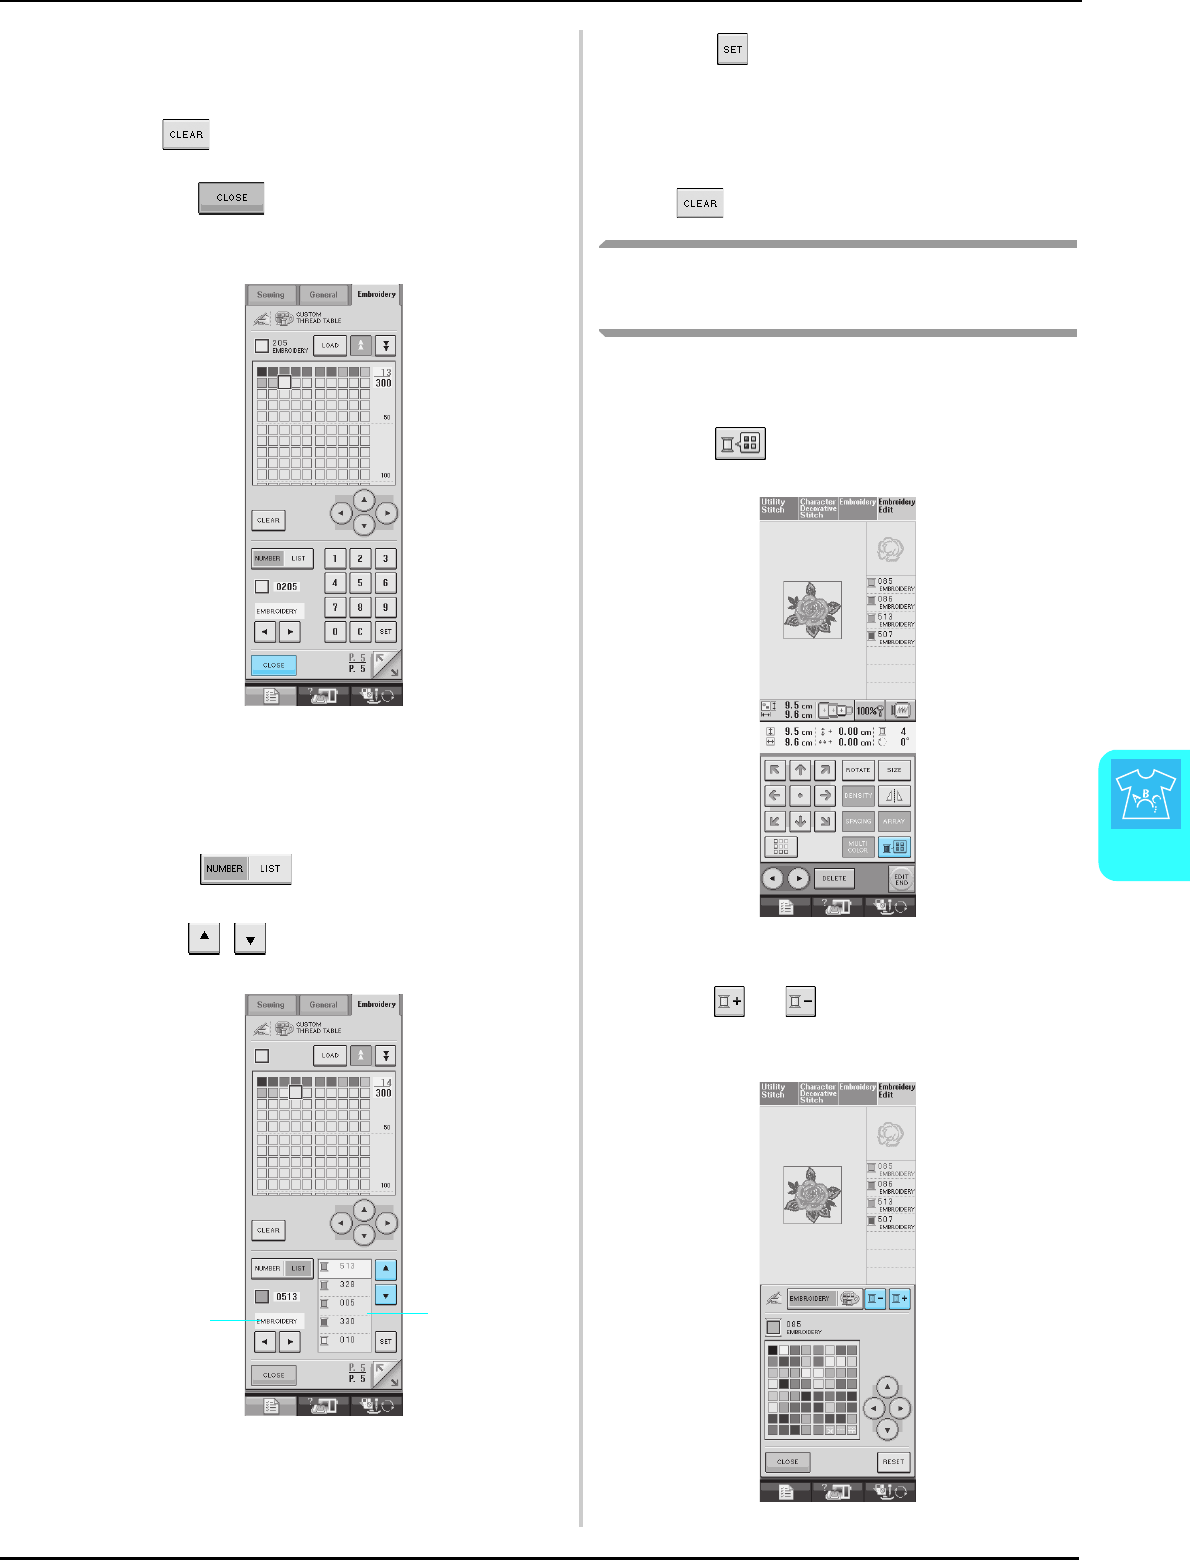
EDITING PATTERNS
Embroidery Edit
189
6
fRepeat the previous steps until all desired
thread colors are specified.
* To delete a specified color from the palette, press
.
gPress to return to the original
screen.
■Adding a Color to the Custom
Thread Table from the List
aRepeat the previous steps a through c.
bPress to display the thread list.
cUse to select a thread color.
aThread list
bThread brand
dPress .
eRepeat the previous steps until all desired
thread colors are specified.
* To delete a specified color from the palette, press
.
Choosing a Color from the
Custom Thread Table
You can select a color from the up to 300 thread
colors you have set in the custom thread table.
aPress .
→The thread color palette screen displays.
bPress or to put the color you want
to change at the top of the sewing order.
a
b
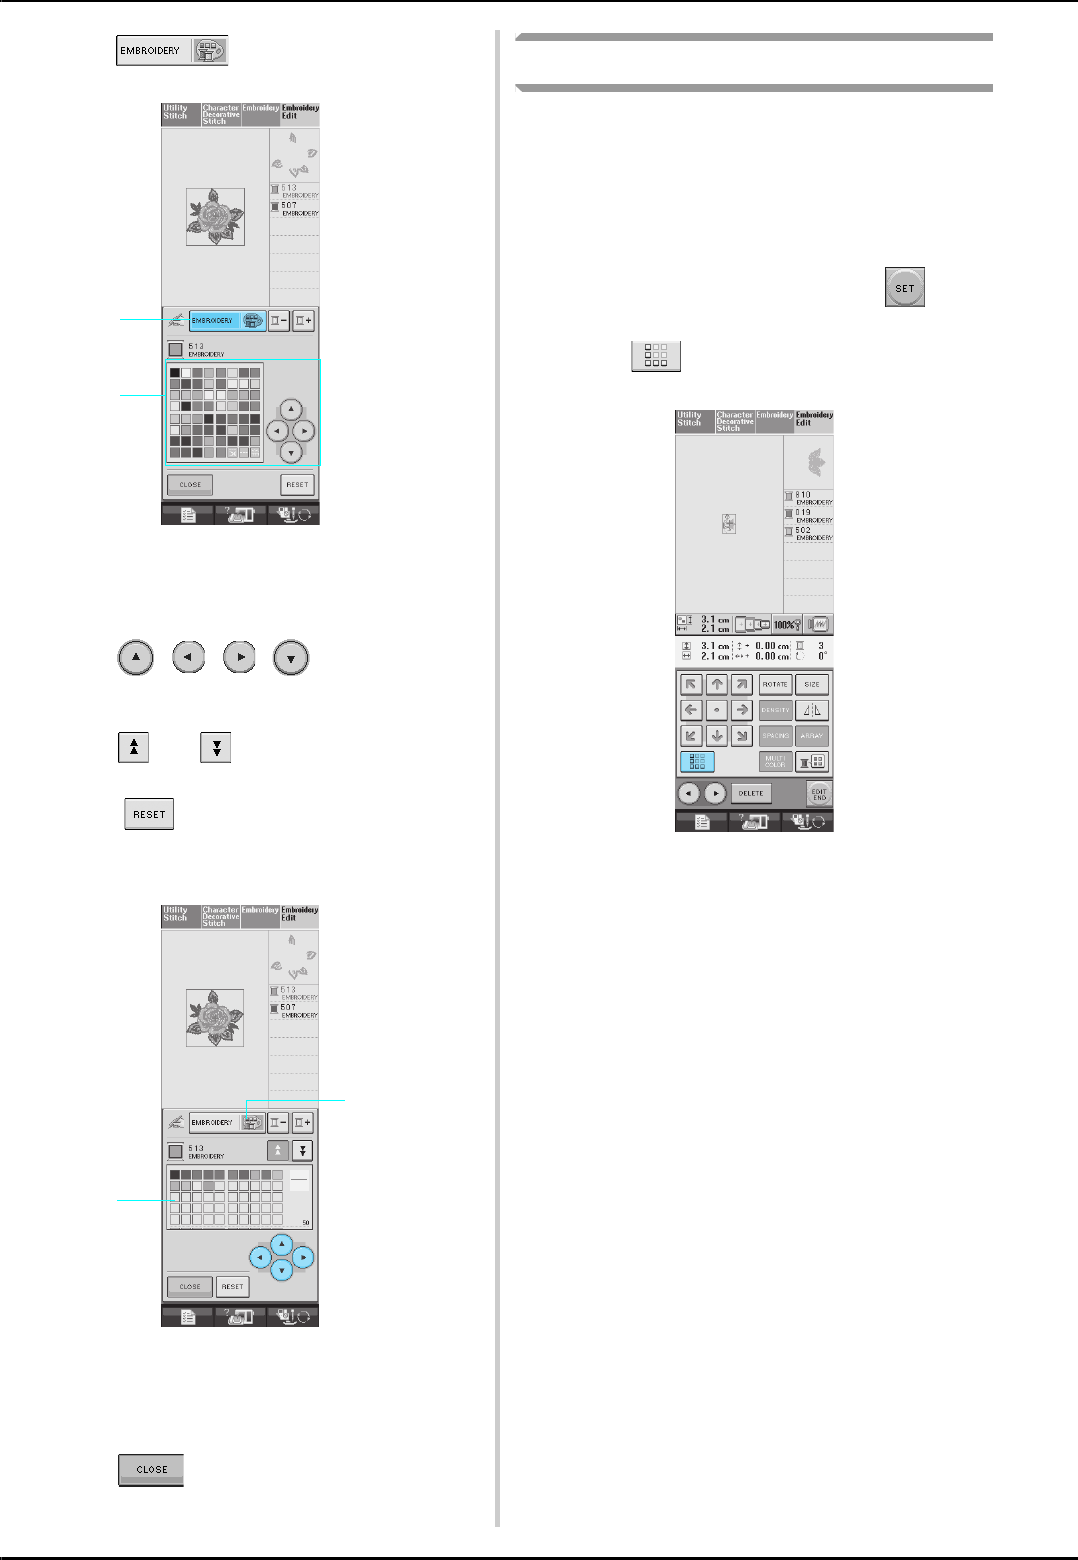
EDITING PATTERNS
190
cPress .
aColor palette/Custom thread change key
bColor palette
→The custom thread table will appear.
dPress to choose a new
color from the custom thread table.
* Use and to scroll through the custom
thread table.
* Press to return to the original color.
* You can select colors from the custom thread table
by directly touching the screen with the touch pen.
aCustom thread
bCustom thread table
→The display shows the changed colors.
ePress .
Designing Repeated Patterns
■Sewing Repeated Patterns
Using the border function, you can create stitches
using repeated patterns. You can also adjust the
spacing of the patterns within a repeated pattern
stitch.
aSelect a pattern, and then press .
bPress .
a
b
b
a
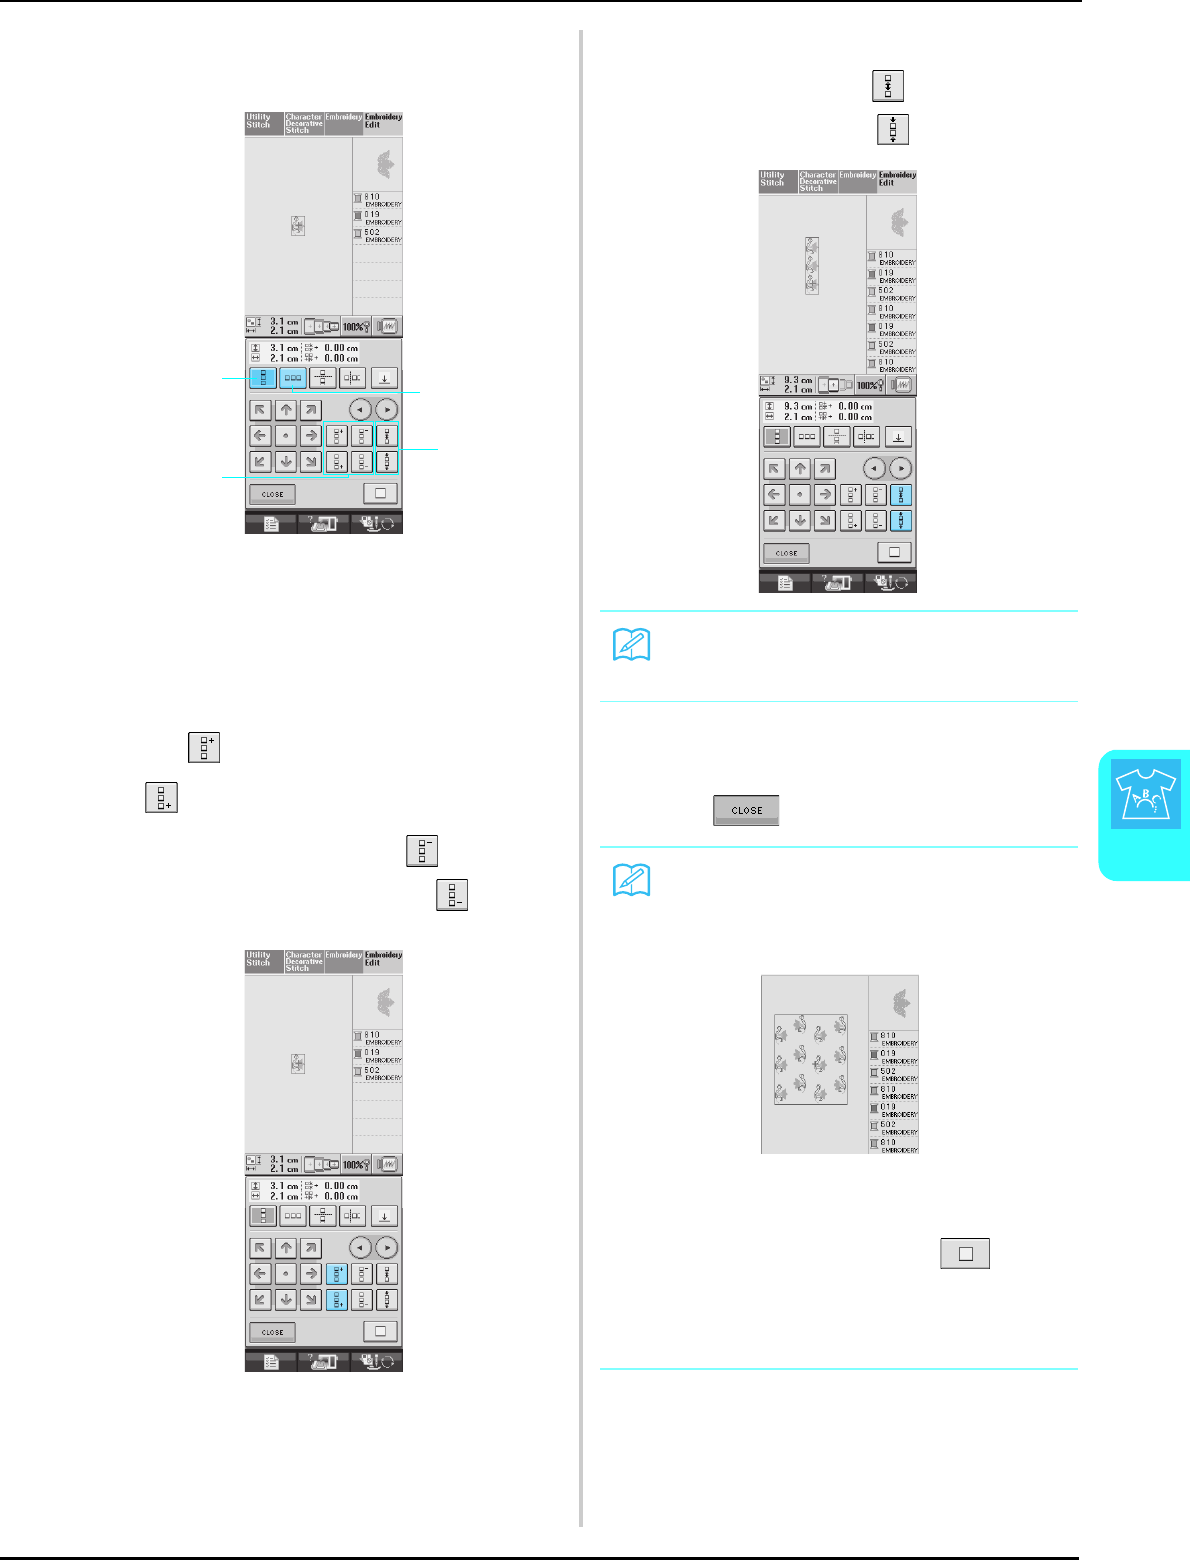
EDITING PATTERNS
Embroidery Edit
191
6
cSelect the direction in which the pattern
will be repeated.
aVertical direction
bHorizontal direction
cRepeating and deleting keys
dSpacing keys
→The pattern direction indicator will change
depending on the direction selected.
dUse to repeat the pattern on top and
to repeat the pattern at the bottom.
* To delete the top pattern, press .
* To delete the bottom pattern, press .
eAdjust the spacing of the repeated pattern.
* To widen spacing, press .
* To tighten spacing, press .
fComplete repeated patterns by repeating
steps c through e.
gPress to finish repeating.
ab
c
d
Memo
You can only adjust the spacing of patterns
enclosed in the red frame.
Memo
• When there are two or more patterns, all
patterns will be grouped together as one
pattern in the red frame.
• When changing the direction in which the
pattern will be repeated, all of the patterns in
the red frame will automatically be grouped
as one repeating unit. Press to
change a repeated pattern back to one sin-
gle pattern. See the following section on
how to repeat one element of a repeated
pattern.
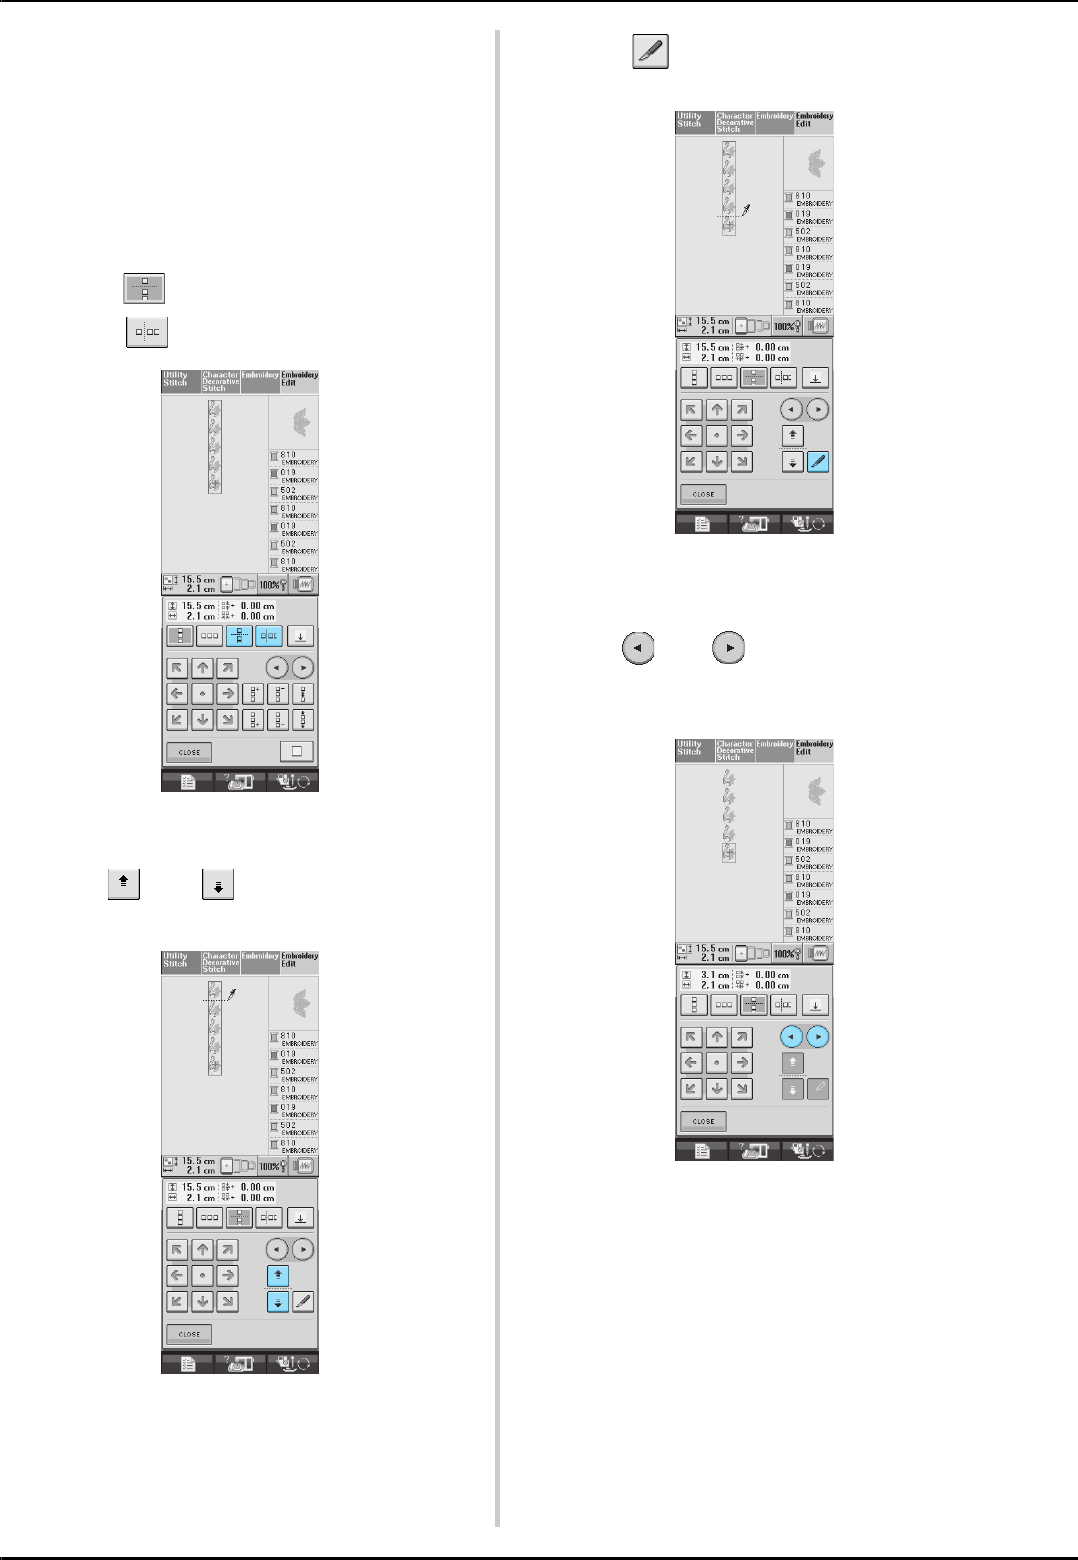
EDITING PATTERNS
192
■Repeating One Element of a
Repeated Pattern
By using the Cut function, you can select one
element of a repeated pattern and repeat only that
single element. This function allows you to design
complex repeated patterns.
aChoose the direction in which the repeated
pattern will be cut.
* Press to cut horizontally.
* Press to cut vertically.
→The pattern direction indicator will change
depending on the direction selected.
bUse and to select the cut line.
→The cut line will move.
cPress .
→The repeated pattern will be divided into separate
elements.
dUse and to select the element to
repeat.
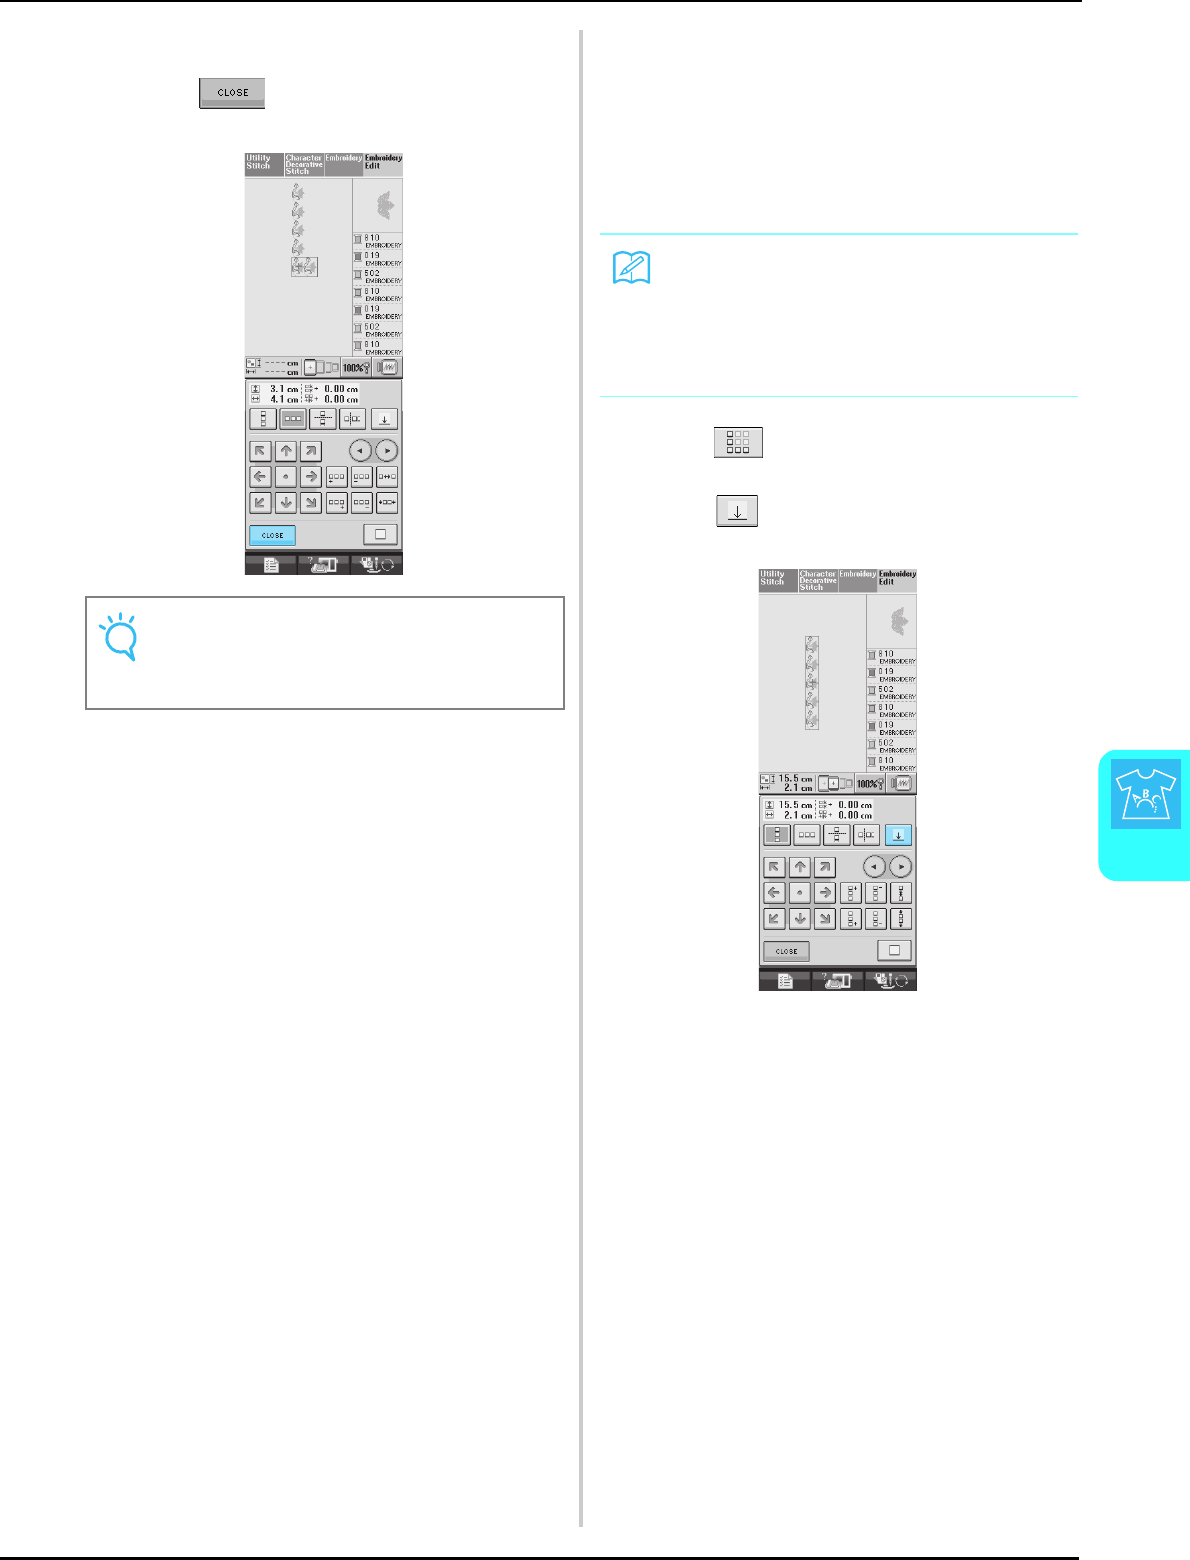
EDITING PATTERNS
Embroidery Edit
193
6
eRepeat the selected element.
fPress to finish repeating.
■Assigning Thread Marks
By sewing thread marks, you can easily align
patterns when sewing a series. When sewing is
finished on a pattern, a thread mark in the shape of
an arrow will be sewn using the final thread. When
sewing a series of patterns, use the point of this
arrow for positioning the following designs to be
sewn.
aPress
bPress .
Note
• Once you have cut a repeated pattern into
separate elements, you cannot return to the
original repeated pattern.
Memo
• When repeatedly sewing individual patterns,
thread marks can be sewn around the
perimeter of the pattern only.
• You cannot sew marks in locations dis-
played in light gray.
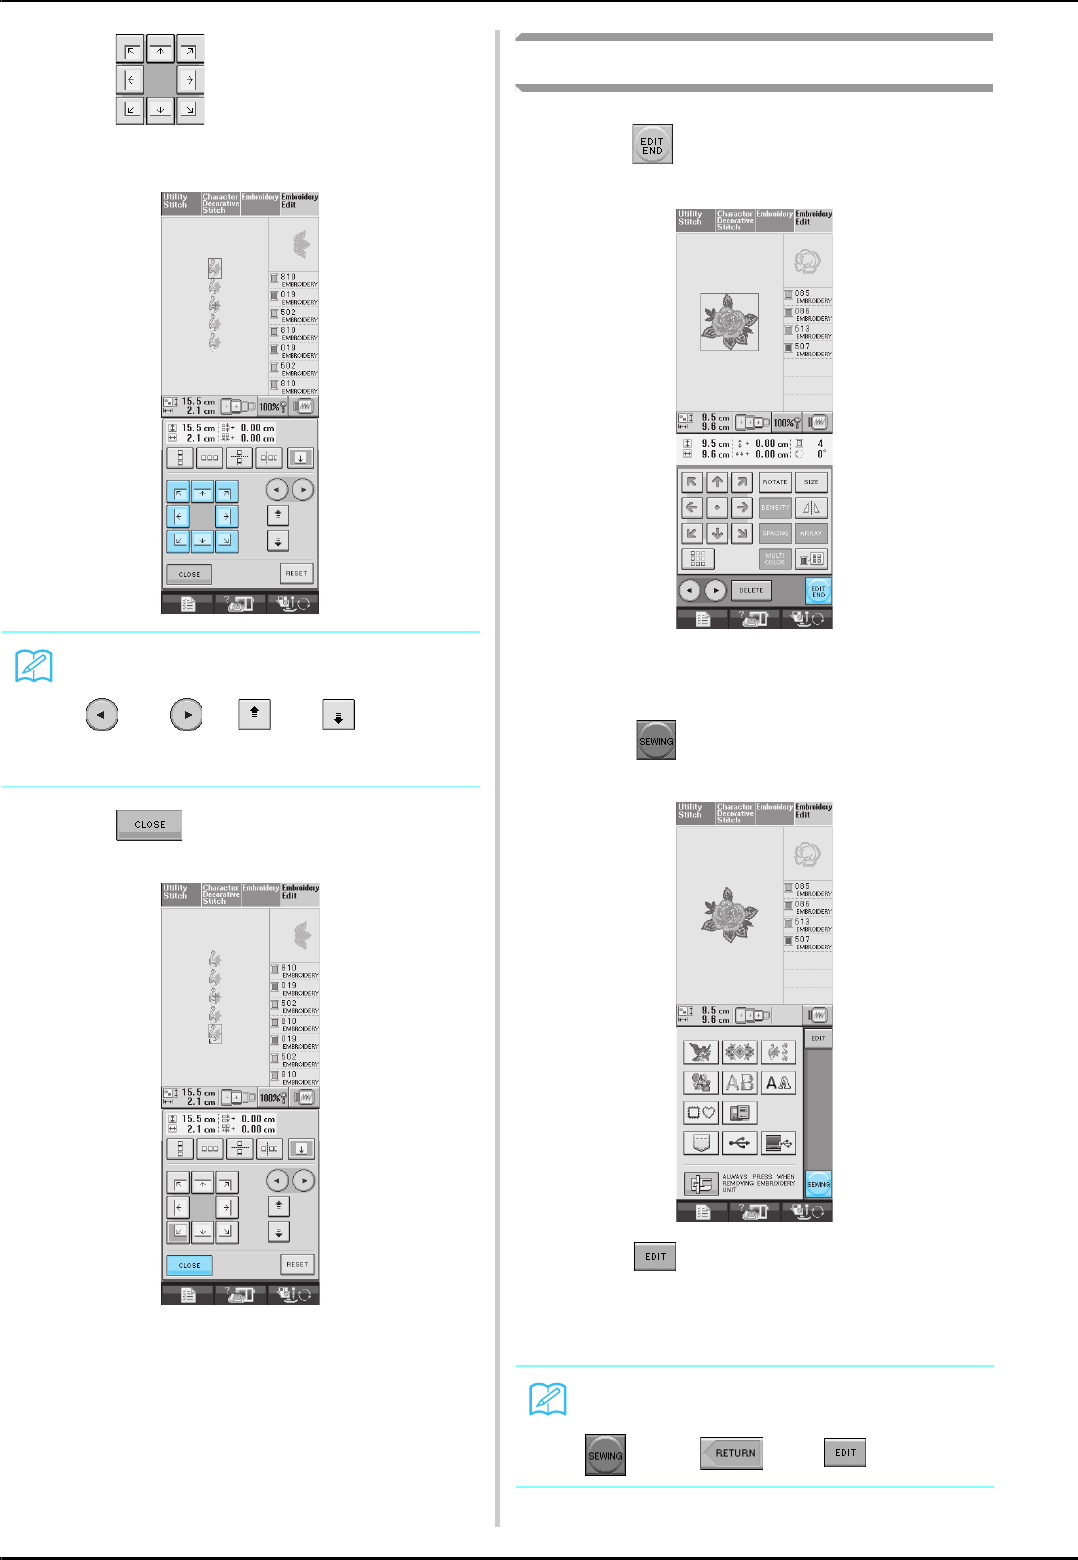
EDITING PATTERNS
194
cPress to select the thread mark to
be sewn.
dPress .
After Editing
aPress .
bIf you want to sew the pattern immediately,
press to call up the sewing screen.
* Press to return to the embroidery edit screen.
* To combine the pattern with other patterns, select
the next pattern from this screen (see page 195).
* See page 146 for more information about sewing
patterns.
Memo
• When there are two or more elements, use
and or and to select a
pattern that you want to assign a thread
mark(s) to.
Memo
If you return to the edit screen after pressing
, press , then .
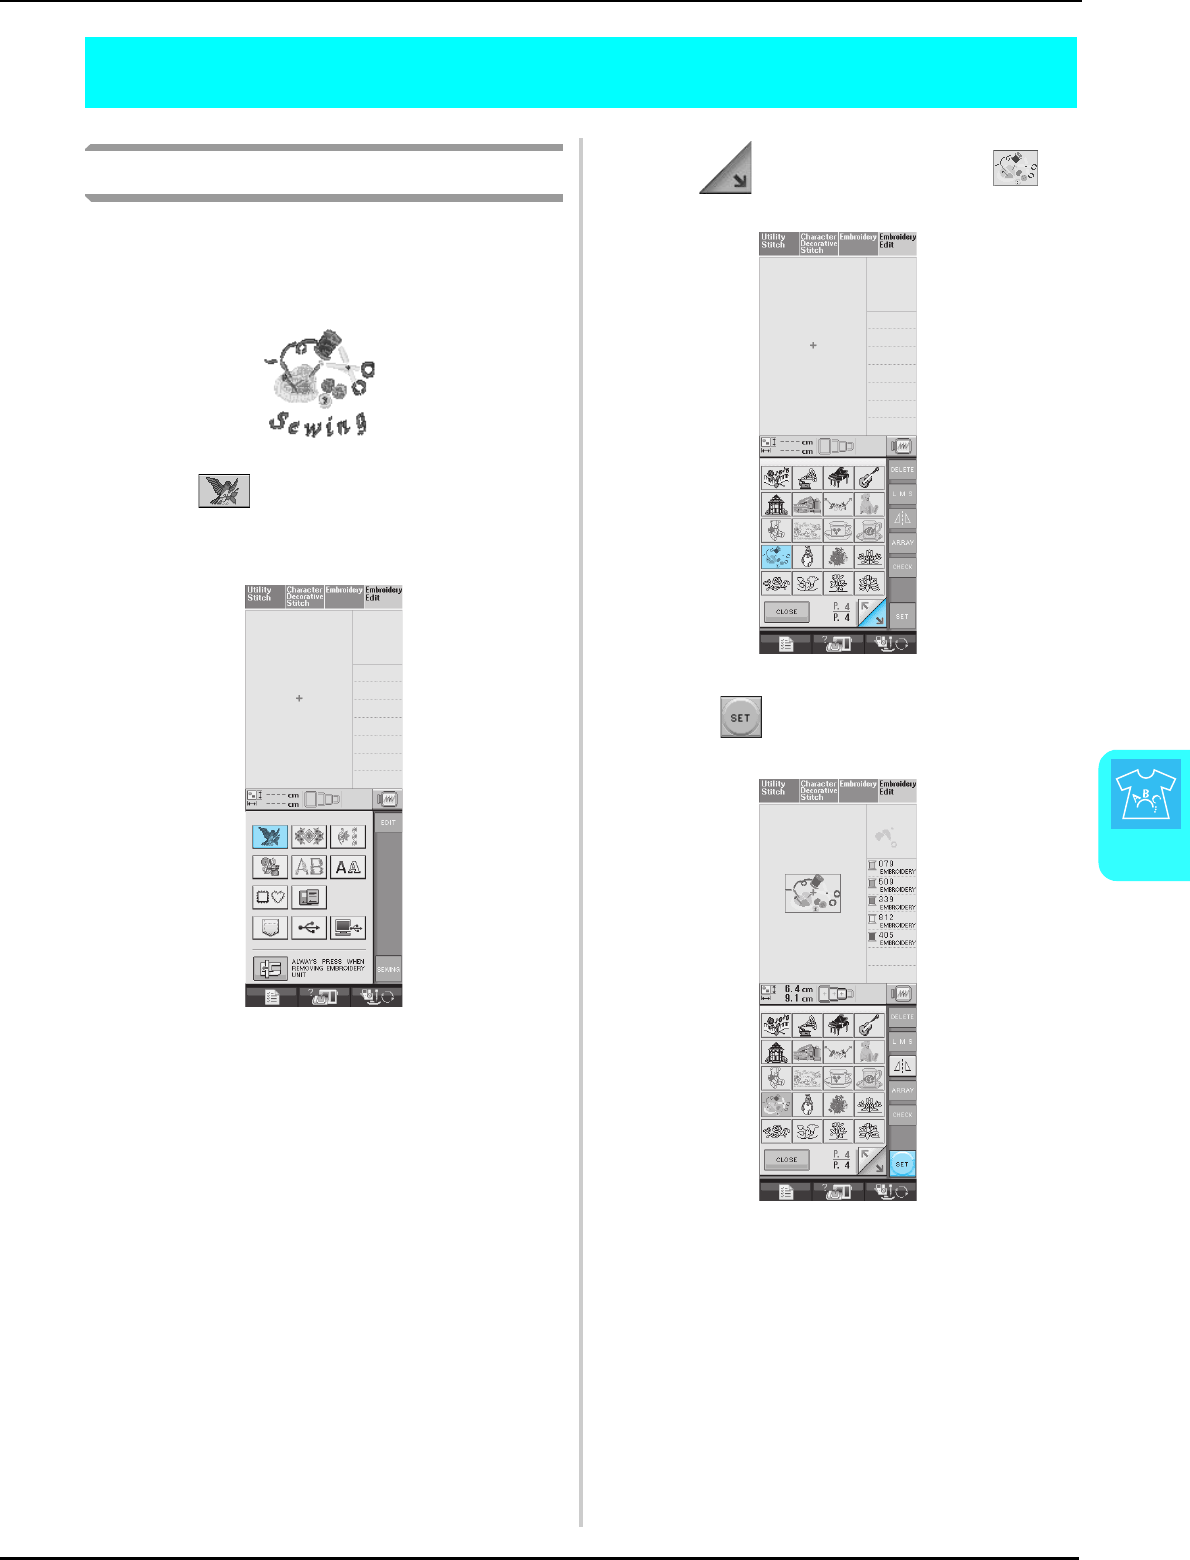
COMBINING PATTERNS
Embroidery Edit
195
6
COMBINING PATTERNS
Editing Combined Patterns
Example: Combining alphabet characters
with an embroidery pattern and
editing
aPress to select an embroidery
pattern.
bUse to view P.4, then select .
cPress .
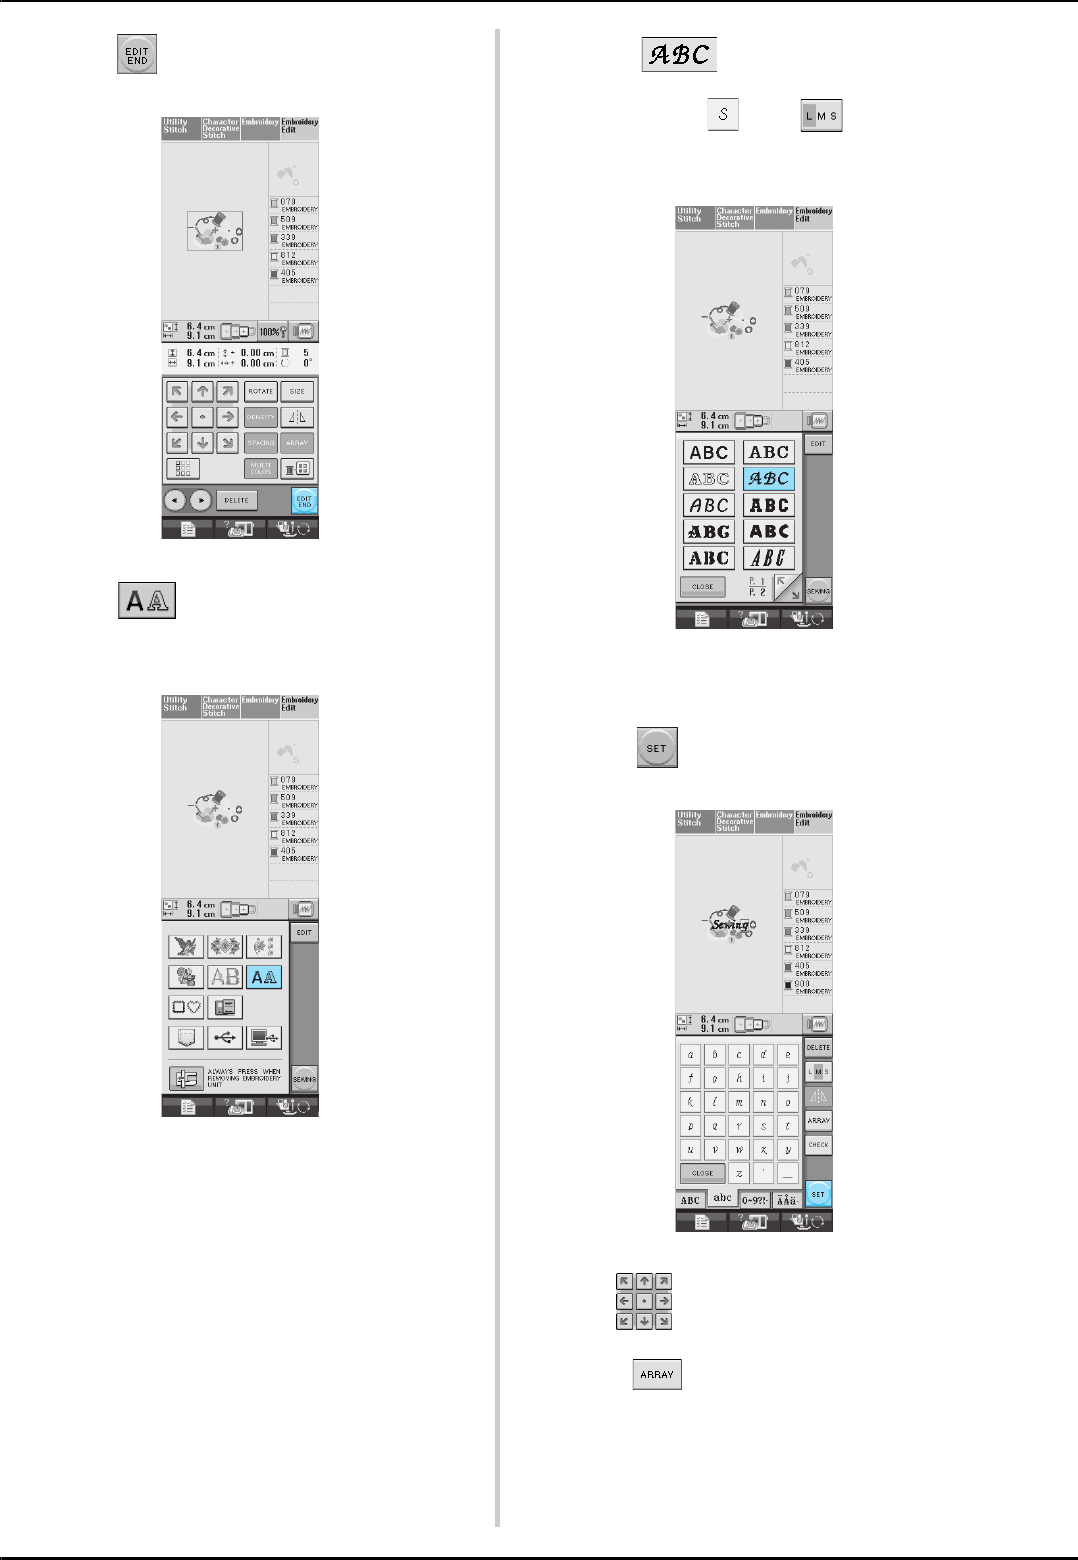
COMBINING PATTERNS
196
dPress .
ePress to enter the alphabet
characters.
fSelect and enter “Sewing”.
* After selecting , press to change the
character size to M, then enter the remaining
characters.
→The characters you enter will be displayed in the
center of the display.
gPress .
hUse to move the characters.
iPress to change the layout of the
characters.
* See page 185 for more information about changing
the layout.
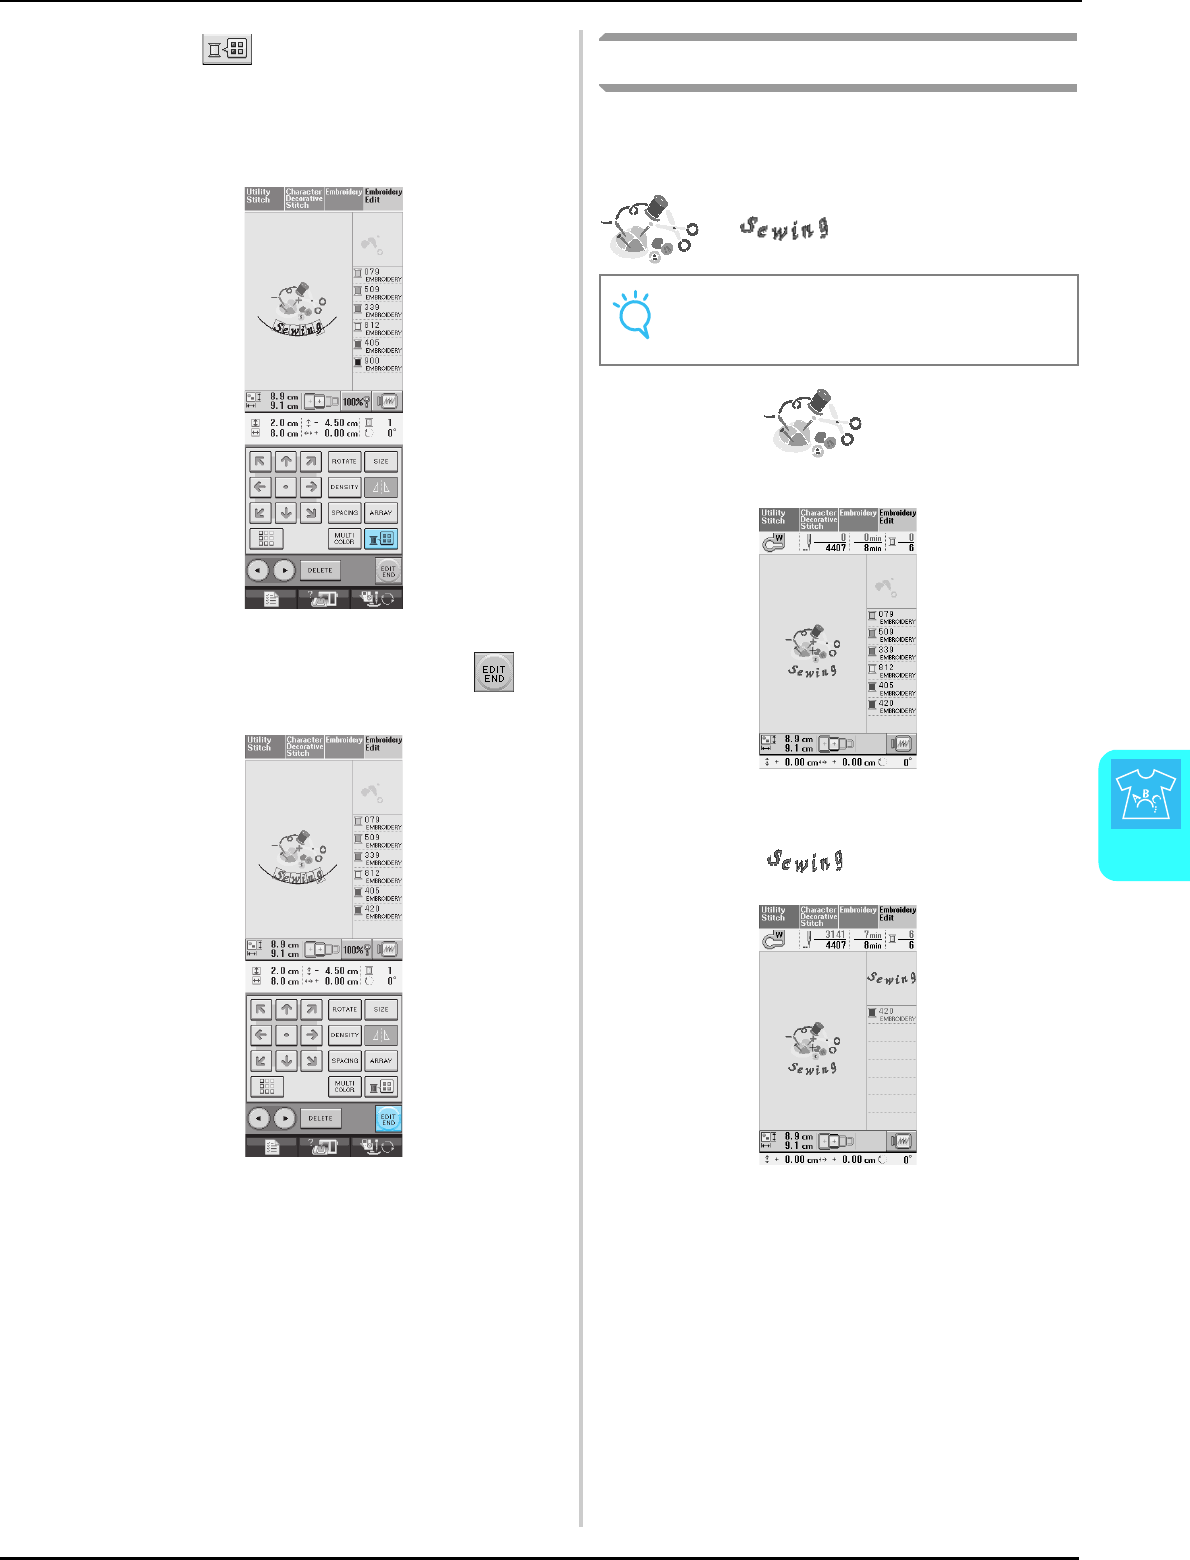
COMBINING PATTERNS
Embroidery Edit
197
6
jPress to change the color of the
characters.
* See page 187 for more information about changing
the color.
kWhen all editing is finished, press .
Sewing Combined Patterns
Combined patterns will be embroidered in the
order they were entered. In this example, the
embroidery order will be as follows:
→
aEmbroider by following the
color order on the right side of the display.
→When the border is finished, the [+] cursor will
move to the “Sewing” part of the pattern.
bEmbroider .
→When “Sewing” is embroidered, the display returns
to the sewing screen.
Note
Follow the directions in “Sewing Embroidery
Patterns” on page 147.

USING THE MEMORY FUNCTION
198
USING THE MEMORY FUNCTION
In the same way as embroidery patterns in Chapter 5, you can save and retrieve edited embroidery
patterns to and from the machine’s memory, a personal computer, or USB media. Refer to the relevant
sections in Chapter 5 on saving and retrieving embroidery patterns and follow the same procedures in
order to save and retrieve edited embroidery patterns.
See page 164 for more information about the MEMORY FUNCTION.

Chapter 7
MY CUSTOM
STITCH
DESIGNING A STITCH......................................................................200
ENTERING STITCH DATA .................................................................202
■Key Functions................................................................................................................202
■Moving a Point ..............................................................................................................204
■Moving Part or All of the Design ...................................................................................205
■Inserting New Points .....................................................................................................206
USING STORED CUSTOM STITCHES ...............................................207
Storing Custom Stitches in Your List .....................................................................207
■If the Memory is Full .....................................................................................................207
Retrieving Stored Stitches .....................................................................................208
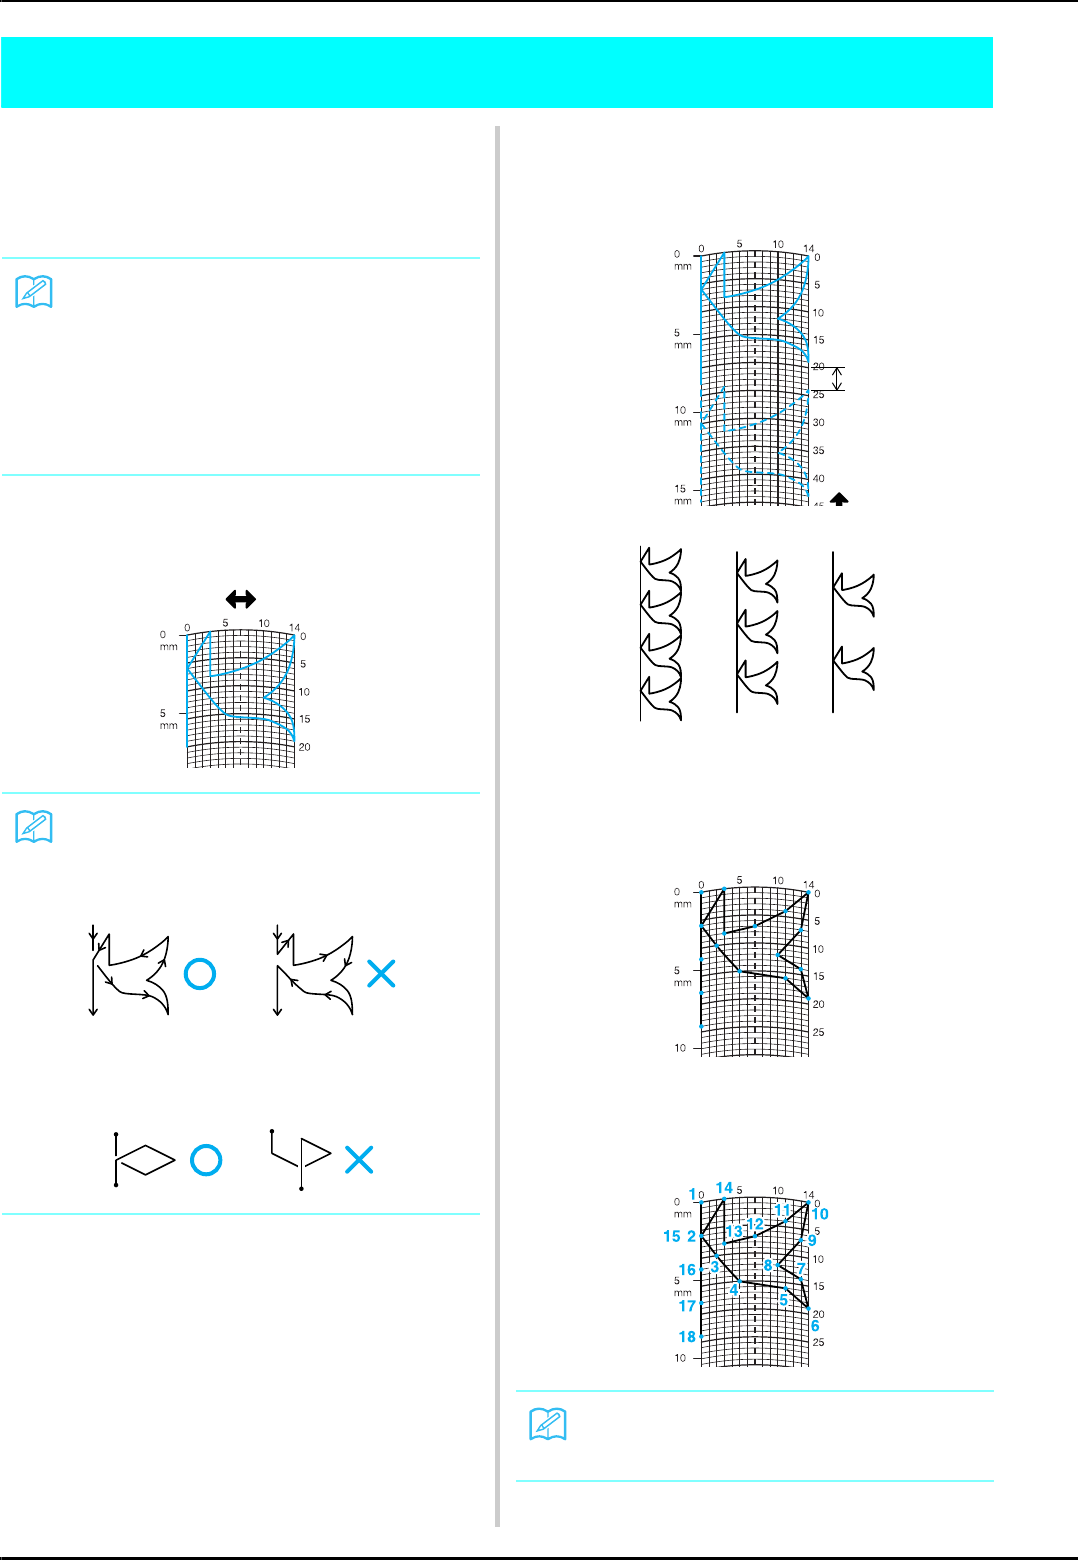
DESIGNING A STITCH
200
DESIGNING A STITCH
By using the MY CUSTOM STITCH™ function, you
can register stitches you have created yourself.
You can also sew designs combining MY
CUSTOM STITCH™ creations with built-in
characters (see page 110).
aDraw the stitch design on the grid sheet
(part code SA507, X81277-001).
bDecide the spacing of the stitch.
* By adjusting the spacing of a stitch, you can create
various patterns with one stitch.
cPlace points where the pattern intersects
with the grid, and connect all the points
with a line.
dDetermine the x and y coordinates of each
of the marked points.
Memo
• Stitches that you create with MY CUSTOM
STITCH™ can be a maximum of 7 mm
(approx. 9/32 inch) wide and 37 mm
(approx. 1-1/3 inches) long.
• Stitches can be designed more easily with
MY CUSTOM STITCH™ if you first draw the
stitch on the included grid sheet.
Memo
Simplify the design so that it can be sewn as a
continuous line. For a more attractive stitch,
close the design by intersecting lines.
If the design is to be repeated and linked, the
start point and end point of the design should
be at the same height.
Memo
This will determine the stitch design that will
be sewn.
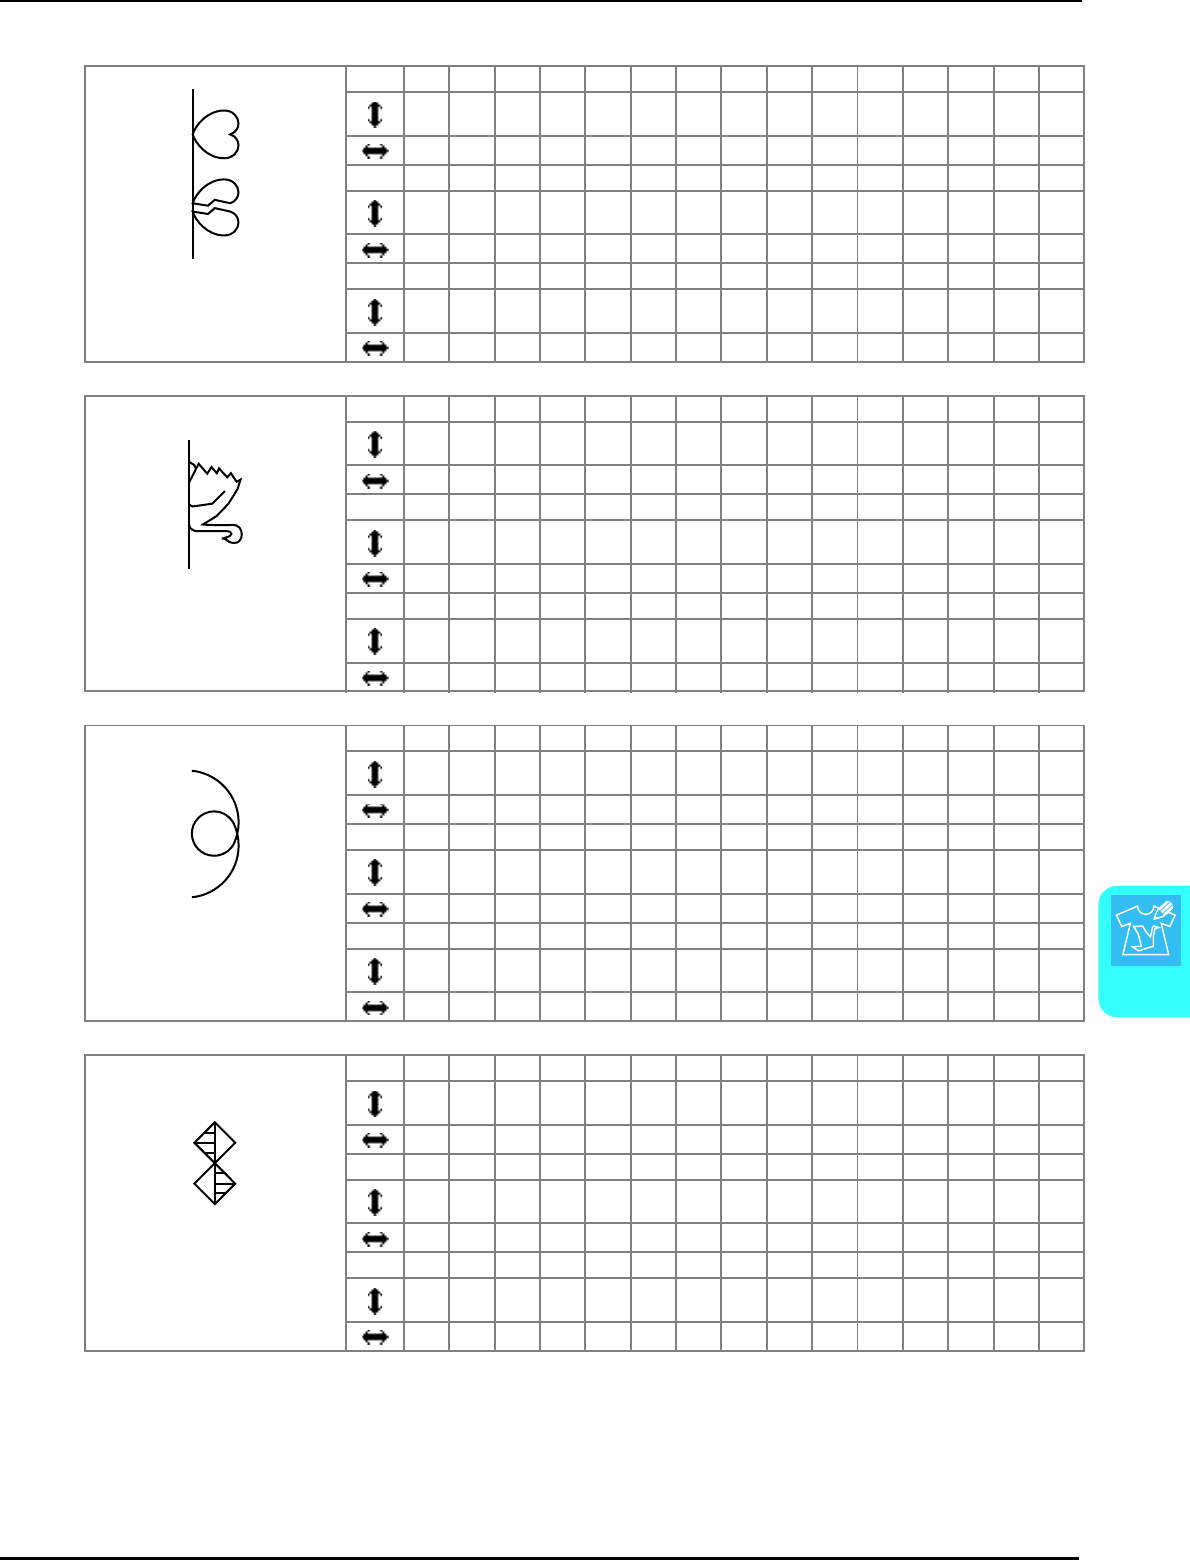
DESIGNING A STITCH
MY CUSTOM STITCH
201
7
Examples of Custom Stitches
Stitch123456789101112131415
01218222321171412963136
003610131413111314131063
Stitch 16 17 18 19 20 21 22 23 24 25 26 27 28 29 30
12 41 43 40 41 38 35 32 30 32 35 41 45 47 44
00471113141310630047
Stitch 31 32 33 34 35 36 37 38 39 40 41 42 43 44 45
45 47 50 54 56 55 51 45 70
11131413106300
Stitch123456789101112131415
0 3032323233353537353230302926
0017101211812141411538
Stitch 16 17 18 19 20 21 22 23 24 25 26 27 28 29 30
24 18 13 12 13 10 12 8 12 7 12 6 10 5 10
1013141412111098663202
Stitch 31 32 33 34 35 36 37 38 39 40 41 42 43 44 45
16 19 23 22 17 22 23 19 42
1006106000
Stitch123456789101112131415
03581217202427293132302724
0581113141413121196310
Stitch 16 17 18 19 20 21 22 23 24 25 26 27 28 29 30
21 18 16 15 15 16 18 21 25 28 33 37 41 43 44
0135810121314141311850
Stitch 31 32 33 34 35 36 37 38 39 40 41 42 43 44 45
Stitch123456789101112131415
05458781111111611740
773770773773037
Stitch 16 17 18 19 20 21 22 23 24 25 26 27 28 29 30
4 7 11 16 21 20 21 24 23 24 27 27 27 32 27
11 14 11 7 7 11 7 7 14 7 7 11 7 7 11
Stitch 31 32 33 34 35 36 37 38 39 40 41 42 43 44 45
23 20 16 20 23 27 32
141173037

ENTERING STITCH DATA
202
ENTERING STITCH DATA
■Key Functions
aThis area displays the stitch being created.
bDisplays the number of the present set point over the total number of points in the stitch.
cDisplays the y-coordinate of over the x-coordinate of .
No. Display Key Name Explanation Page
dEnlarger key Press this key to see an enlarged version of the stitch being created. 203
eGrid direction key Press this key to change the direction of the grid sheet. 203
fImage key Press this key to view an image of the stitch. 204
gArrow keys Use these keys to move over the display area. 203-206
hSet key Press this key to set a point on the stitch design. 203-205
iSingle/triple stitching key Press this key to select whether one or three stitches will be sewn
between two points.
203
jPoint delete key Press this key to delete a selected point. 204
kBlock move key Press this key to group points together and move them together. 205
lInsert key Press this key to insert new points on the stitch design. 206
mPoint-to-point key Use these keys to move from point to point on the stitch, or to
the first or last point entered on the stitch.
204-206
nReturn key Press this key to exit the entering stitch data screen. —
oTest key Press this key to sew a test-run of the stitch. 204, 207
pMY CUSTOM STITCH™
memory key
Press this button to store the stitch being created. 207
a
d
g
h
n
c
b
ef
k
p
l
m
i
j
o
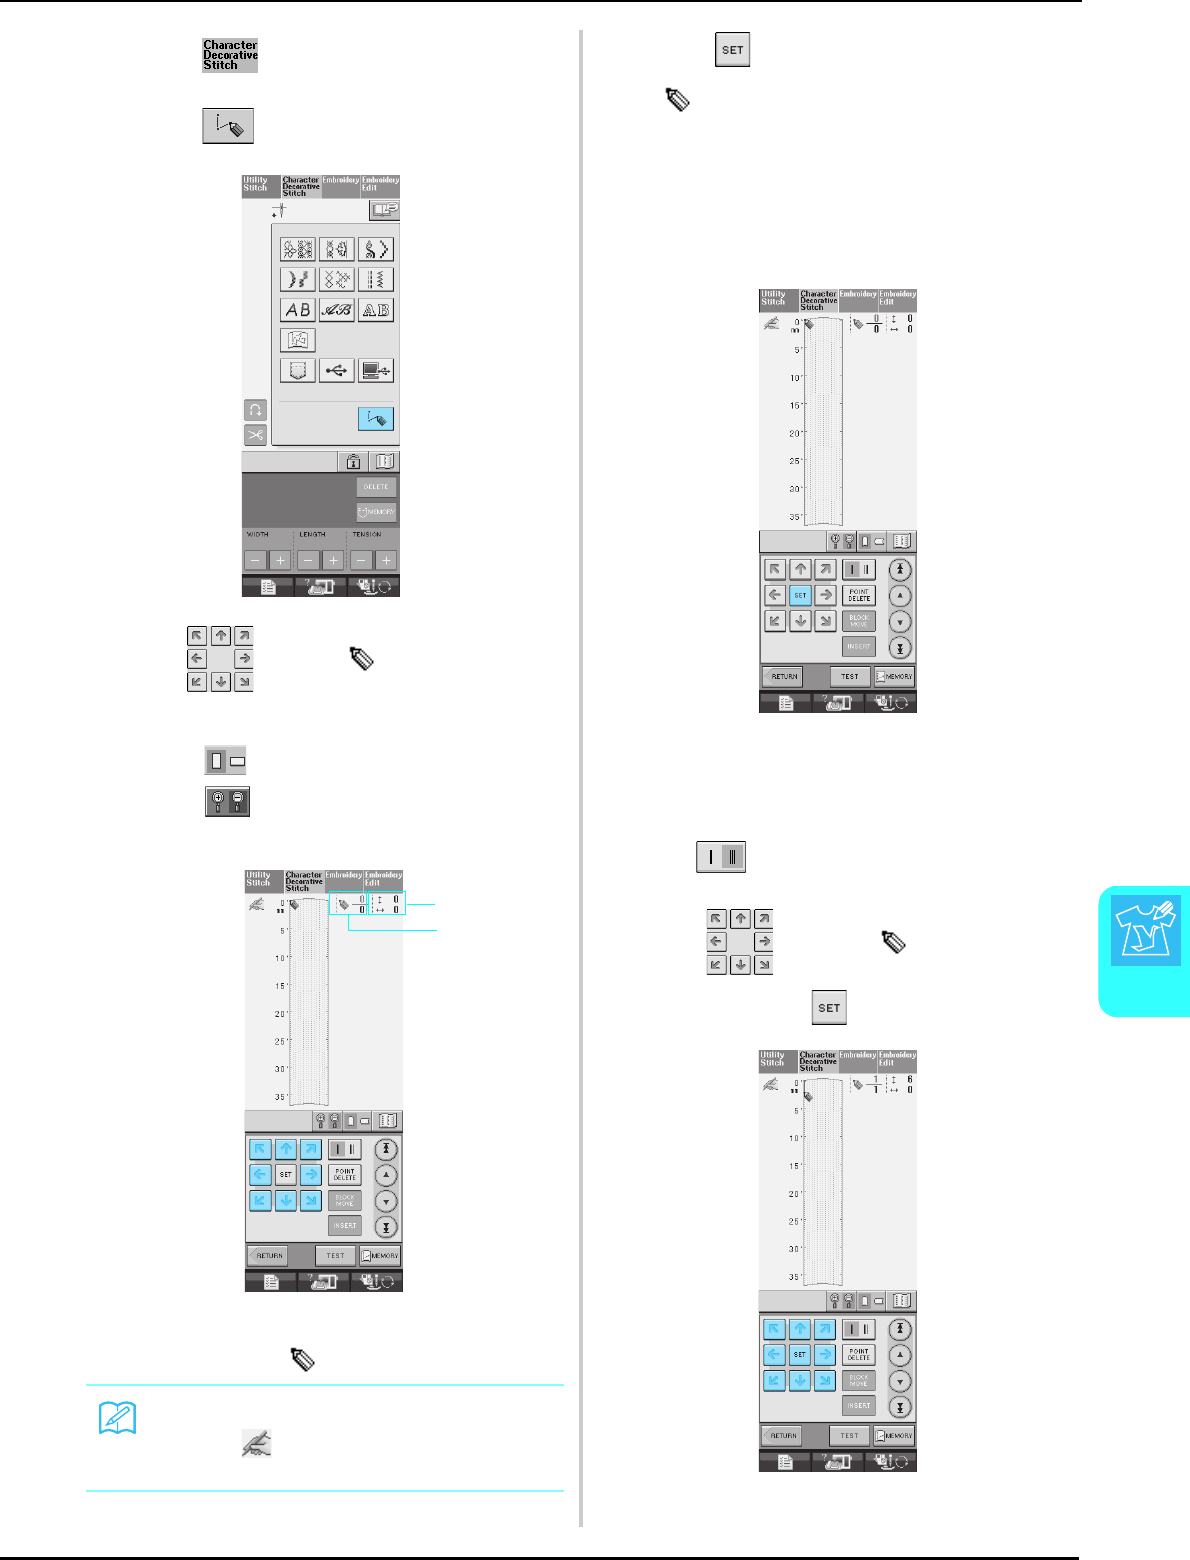
ENTERING STITCH DATA
MY CUSTOM STITCH
203
7
aPress .
bPress .
cUse to move to the coordinates
of the first point on the grid sheet.
* Press to change the direction of the grid sheet.
* Press to enlarge the image of the stitch being
created.
aCurrently selected point/Total number of points
bCoordinates of
dPress to add the point indicated by
.
* To insert coordinates with the touch pen, move the
tip of the pen to a desired point. Once you release
the pen from the screen a point will be entered into
the graph at those coordinates. The number of the
currently selected point along with the total number
of points will be displayed.
eSelect whether one stitch or three stitches
will be sewn between the first two points.
* To sew three stitches, press the key so that it appears
as .
fUse to move to the second
point and press .
Memo
Whenever is in the top left corner of the LCD
display, you can use the touch pen to enter data.
a
b
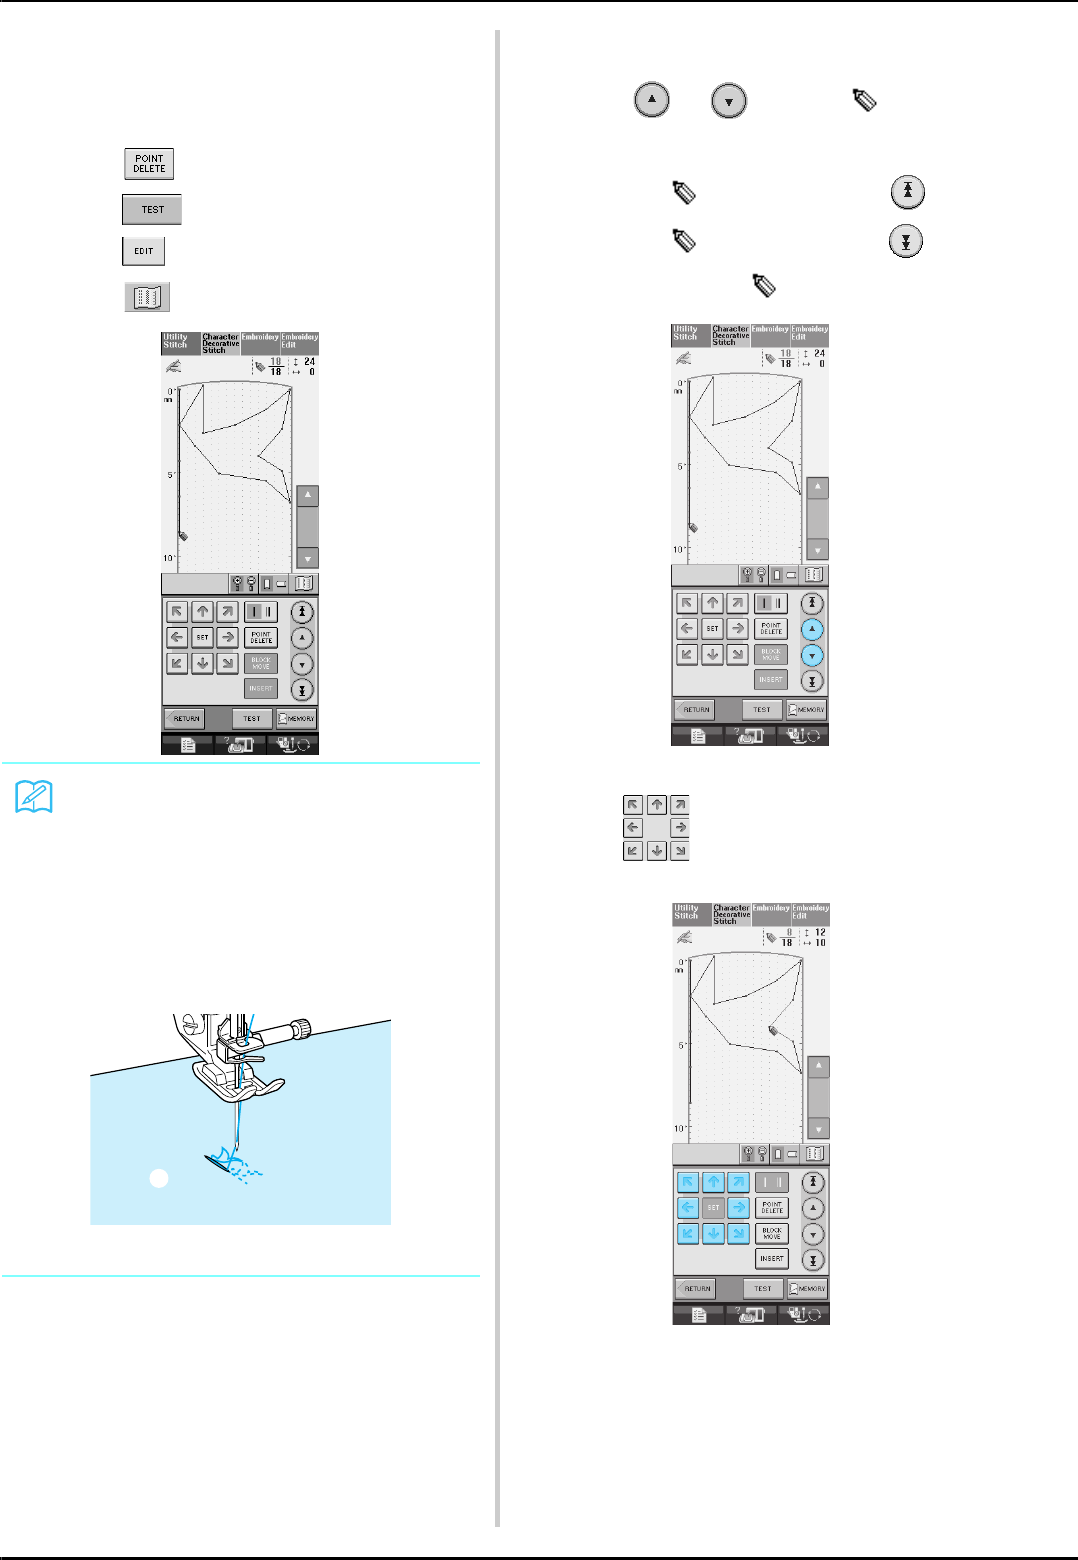
ENTERING STITCH DATA
204
gRepeat the steps above for each point that
you have drawn on the grid sheet until the
stitch design is drawn on the screen as a
continuous line.
* Press to delete a selected point entered.
* Press to sew a test-run of the stitch.
Press to return to the original screen.
* Press to view an image of the stitch.
■Moving a Point
aPress or to move to the
point that you want to move.
* To move to the first point, press .
* To move to the last point, press .
* You can also move by using the touch pen.
bUse to move the point.
Memo
• If you have entered points that are too close
together, the fabric may not feed properly.
Edit the stitch data to leave a larger space
between points.
• If the stitch design is to be repeated and
linked, make sure that linking stitches are
added so that the stitch designs will not
overlap.
aLinking stitches
a
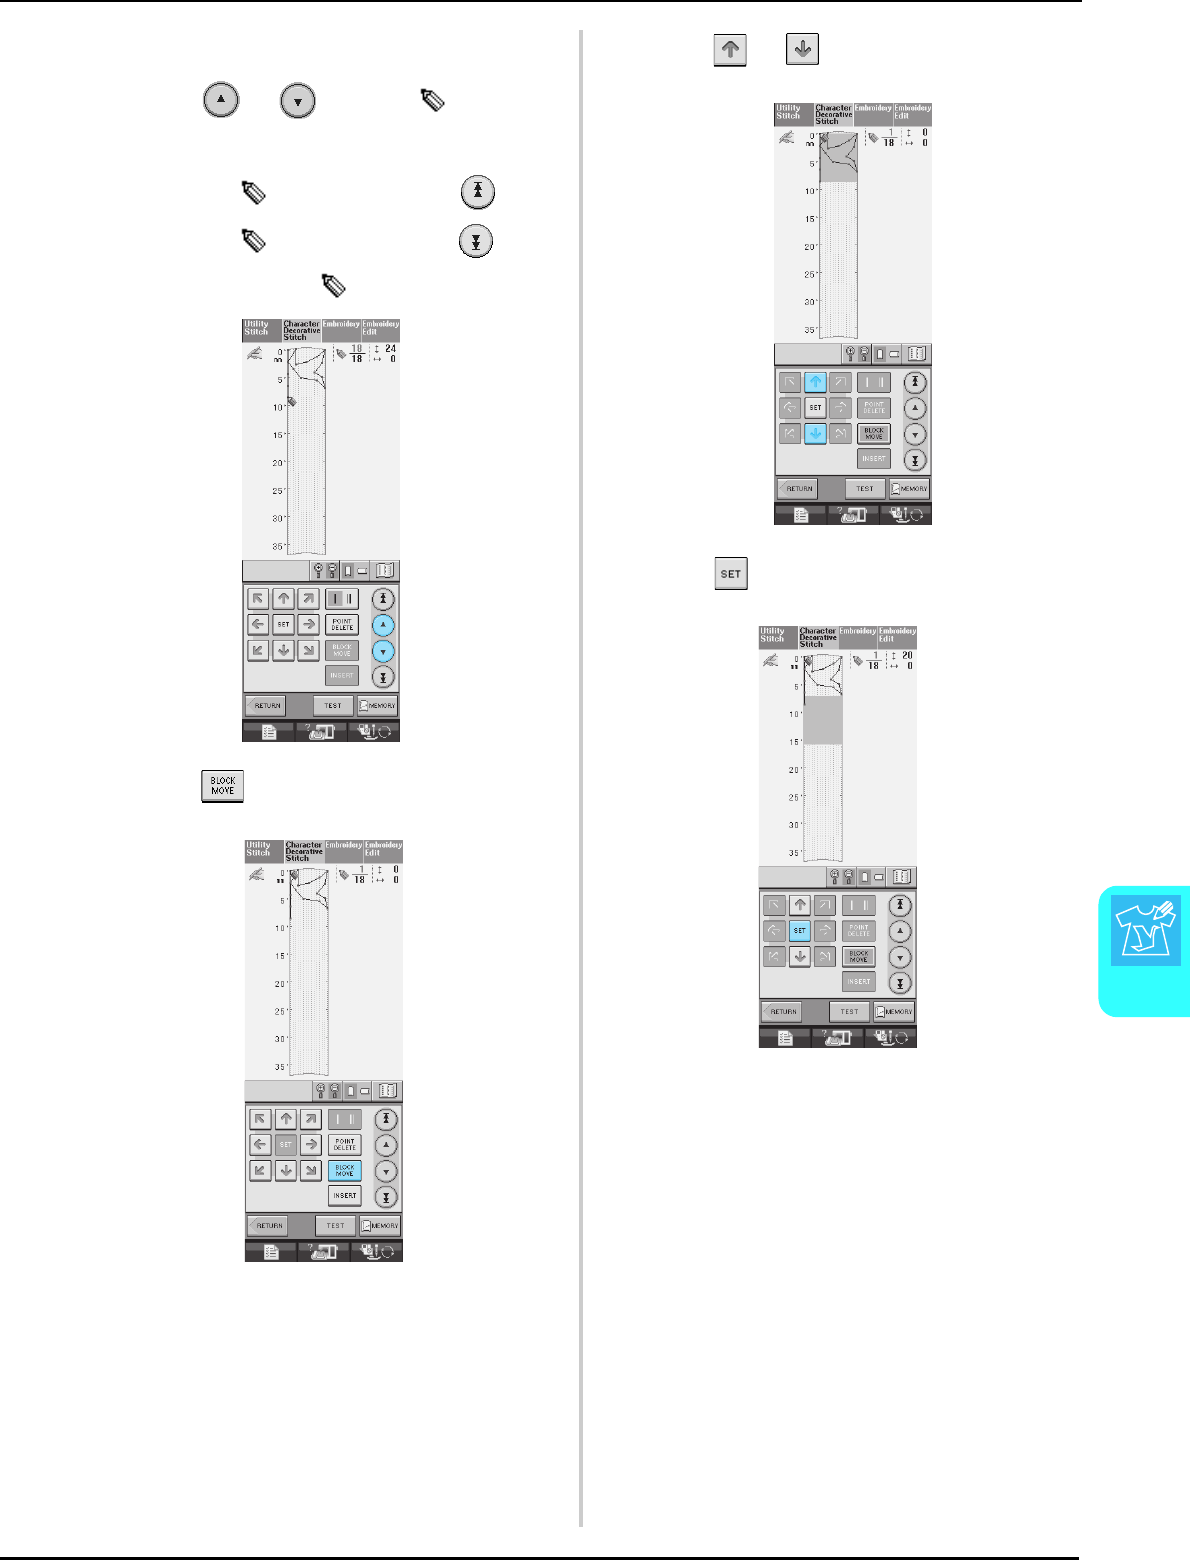
ENTERING STITCH DATA
MY CUSTOM STITCH
205
7
■Moving Part or All of the Design
aPress or to move to the first
point of the section that you want to move.
* To move to the first point, press .
* To move to the last point, press .
* You can also move by using the touch pen.
bPress .
→The selected point and all points that were entered
after it are selected.
cPress or to move the section.
dPress .
→The section will be moved.
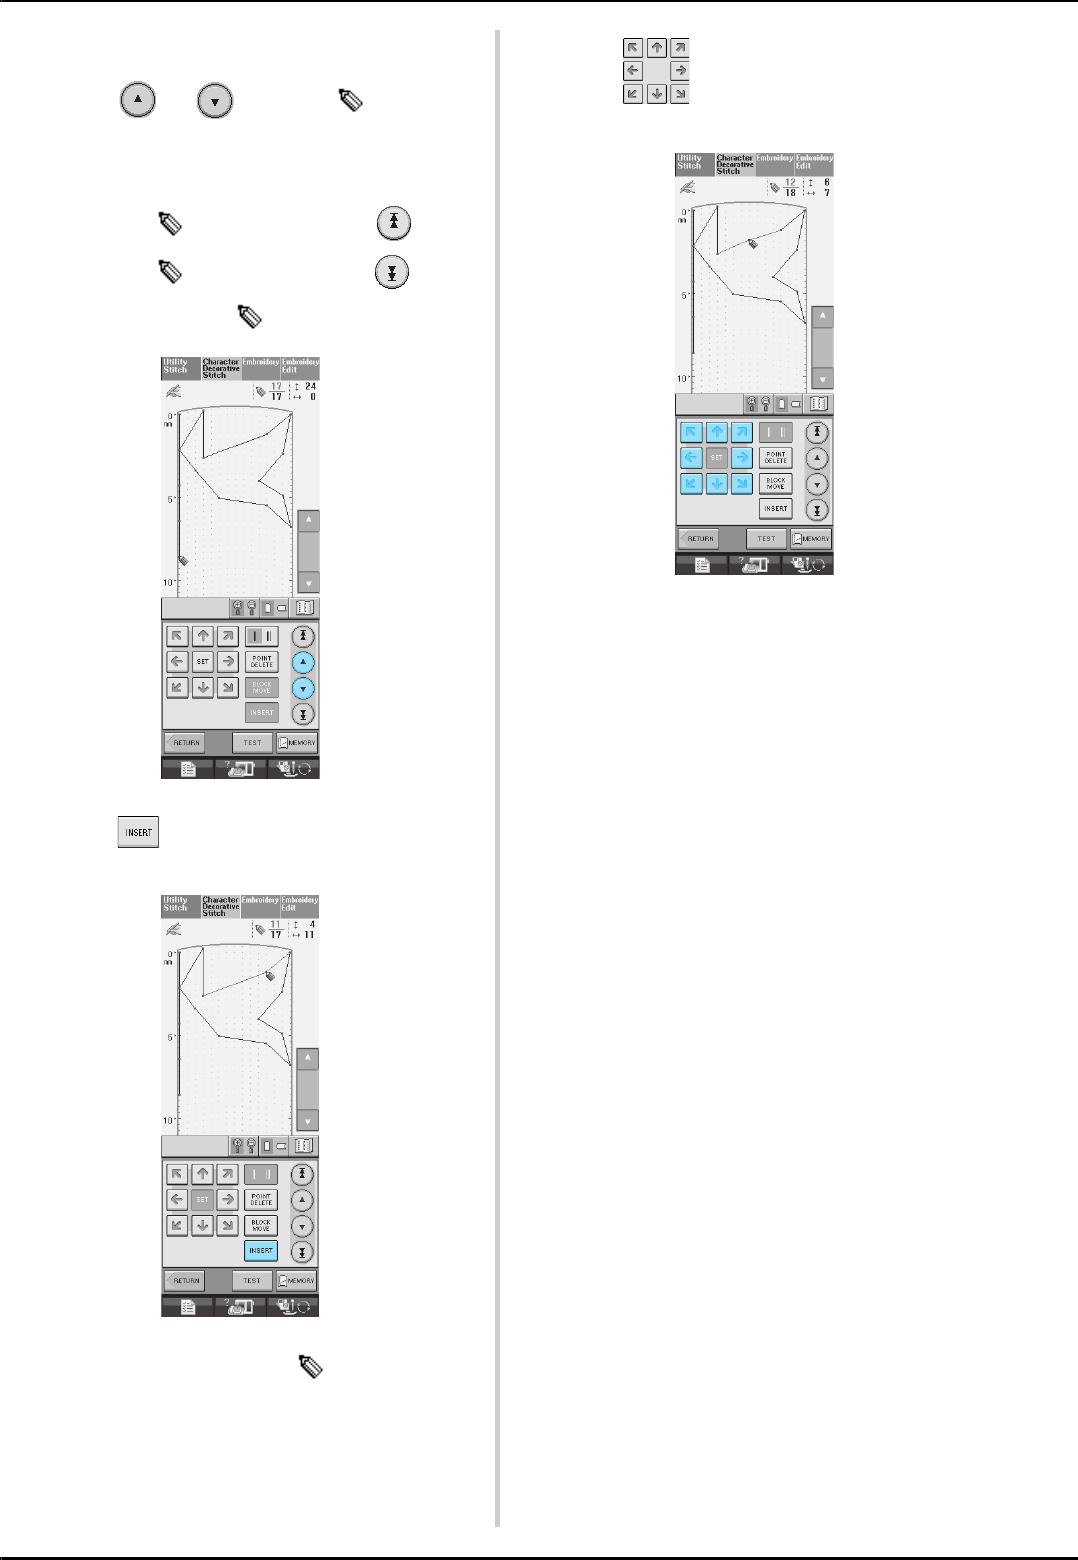
ENTERING STITCH DATA
206
■Inserting New Points
aPress or to move to a place
on the design where you want to add a new
point.
* To move to the first point, press .
* To move to the last point, press .
* You can also move by using the touch pen.
bPress .
→A new point is entered and moves to it.
cUse to move the point.
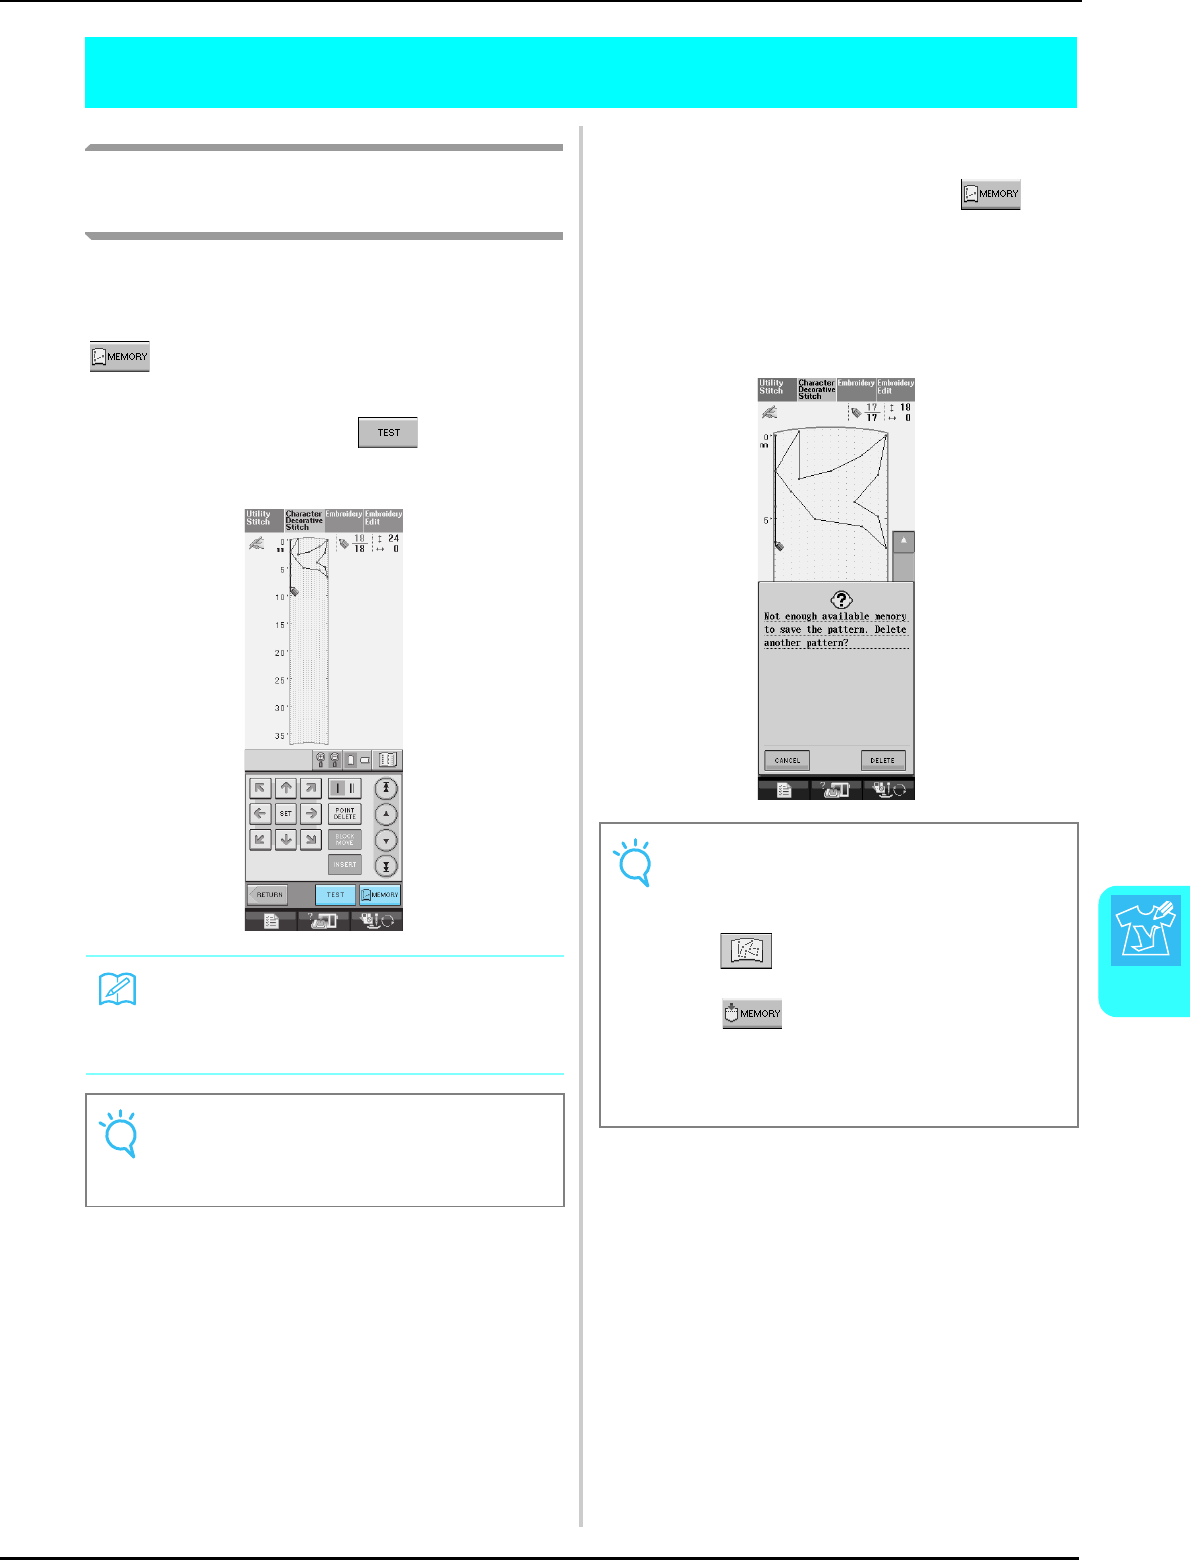
USING STORED CUSTOM STITCHES
MY CUSTOM STITCH
207
7
USING STORED CUSTOM STITCHES
Storing Custom Stitches in Your
List
Stitch patterns created using the MY CUSTOM
STITCH™ function can be stored for later use.
Once you finish entering the stitch data, press
. The “Saving” message appears and the
stitch will be stored.
Before storing a stitch, press to sew a test-
run of the stitch.
■If the Memory is Full
If the following message appears after is
pressed, the stitch pattern cannot be stored because
either the machine’s memory is full or the stitch
pattern being stored is larger than the amount of
space available in the memory. To be able to store
the stitch pattern in the machine’s memory, a
previously stored stitch pattern must be deleted.
Memo
• Storing a stitch pattern takes a few seconds.
• For details on retrieving a stored stitch pat-
tern, see page 208.
Note
• Do not turn off the machine while the “Sav-
ing” message is displayed, otherwise the
stitch pattern data being saved may be lost.
Note
To save custom stitches to USB media or in
the computer, follow the previously described
procedure to store the custom stitch, and then
press to select the stitch (see the fol-
lowing “Retrieving Stored Stitches” section).
Press to save the stitch to USB media
or in the computer. (For details, see “Saving
Stitch Patterns to USB Media (Commercially
Available)” on page 120 or “Saving Stitch Pat-
terns in the Computer” on page 121.)
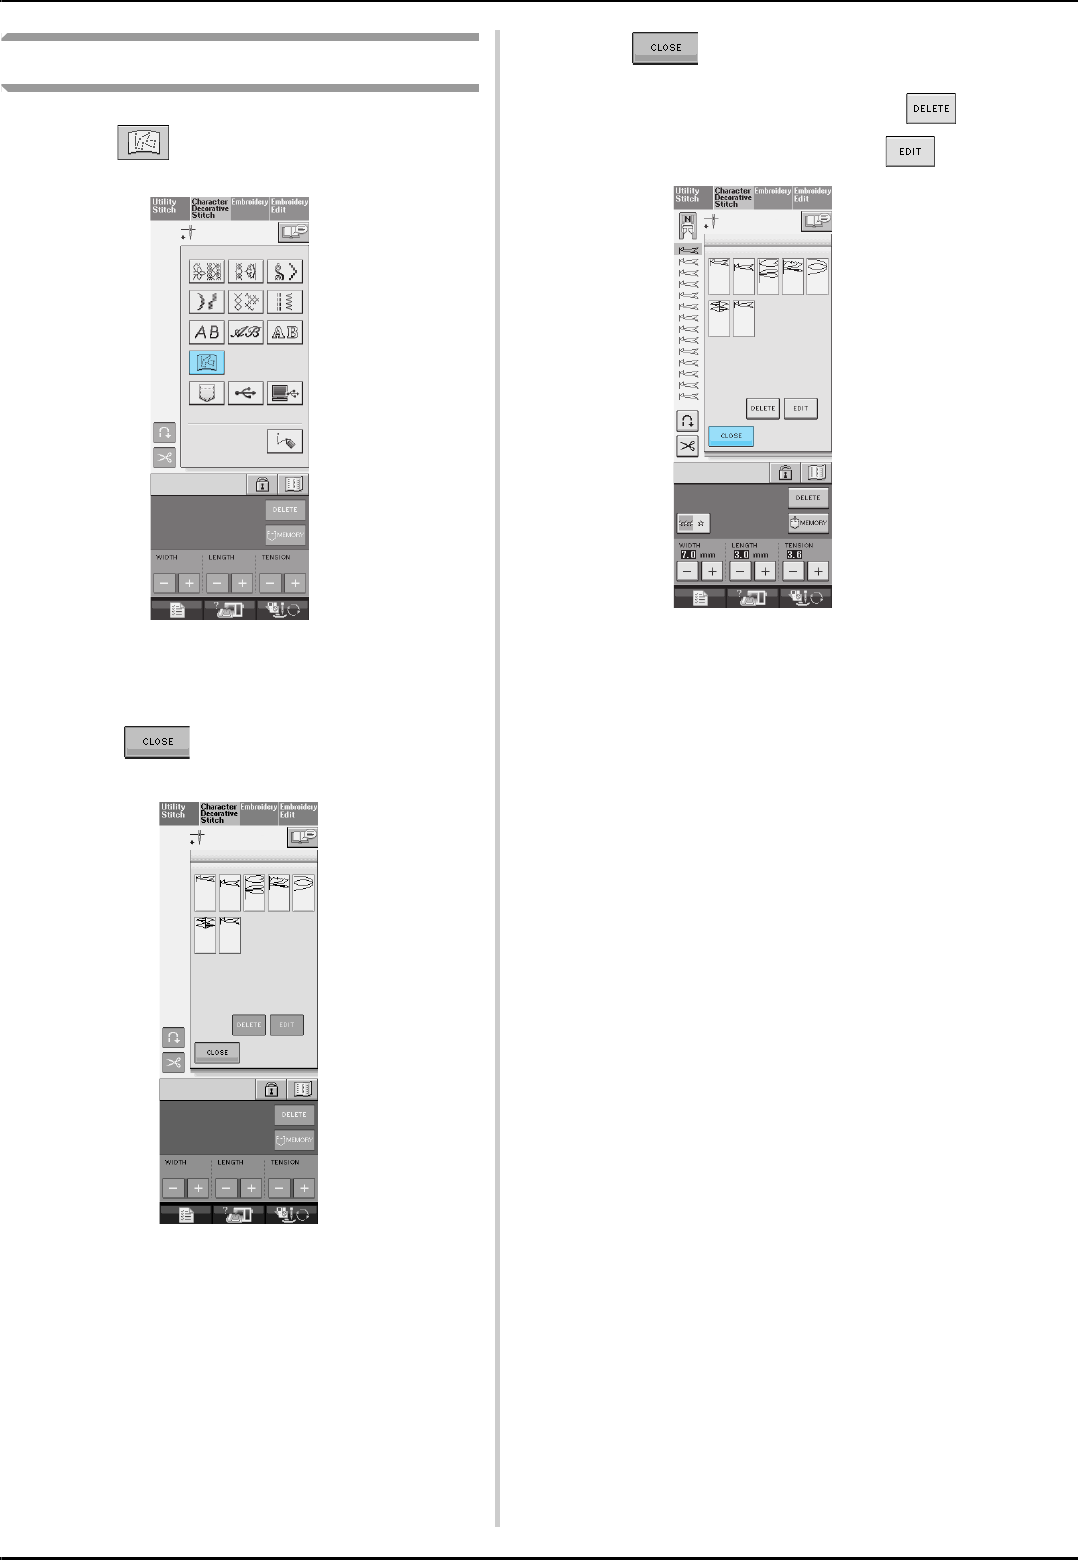
USING STORED CUSTOM STITCHES
208
Retrieving Stored Stitches
aPress .
→A list of stored stitch patterns is displayed.
bSelect the stitch pattern.
* Press to return to the previous screen
without retrieving.
cPress .
* To delete the stored stitch pattern, press .
* To edit the stored stitch pattern, press .

Chapter 8
Appendix
CARE AND MAINTENANCE..............................................................210
About the Maintenance Message...........................................................................210
Cleaning the LCD Screen ......................................................................................210
Cleaning the Machine Casing ................................................................................210
Cleaning the Race .................................................................................................210
Adjusting the Alternate Bobbin Case (with no marking)........................................211
ADJUSTING THE SCREEN .................................................................212
Screen Visibility is Low .........................................................................................212
Touch Panel is Malfunctioning ..............................................................................212
TROUBLESHOOTING .......................................................................214
ERROR MESSAGES.............................................................................217
■Alarm Sounds ................................................................................................................222
SPECIFICATIONS...............................................................................223
UPGRADING YOUR MACHINE’S SOFTWARE .................................224
Upgrade Procedure Using USB Media ..................................................................224
Upgrade Procedure Using Computer ....................................................................225

CARE AND MAINTENANCE
210
CARE AND MAINTENANCE
About the Maintenance Message
Once this message appears, it is recommended to
take your machine to an authorized retailer for a
regular maintenance check. Although this message
will disappear and the machine will continue to
function once you press , the message will
display several more times until the appropriate
maintenance is performed.
Please take the time to arrange the maintenance
your machine requires once this message appears.
Such steps will help to ensure you receive
continued, uninterrupted hours of machine
operation for the future.
Cleaning the LCD Screen
If the screen is dirty, gently wipe it with a soft, dry
cloth. Do not use organic solvents or detergents.
Cleaning the Machine Casing
If the surface of the machine is dirty, lightly soak a
cloth in a neutral detergent, squeeze it out firmly,
and then wipe the surface. Then wipe again with a
dry cloth.
Cleaning the Race
If dust or bits of dirt collect in the race or bobbin
case, the machine will not run well, and the
bobbin thread detection function may not operate.
Keep the machine clean for best results.
aPress the “Needle Position” button to raise
the needle.
bLower the presser foot.
cTurn the main power to OFF.
dRemove the needle and the presser foot
holder (see pages 33 through 34).
eRemove the flat bed attachment or the
embroidery unit if either is attached.
fGrasp both sides of the needle plate cover,
and then slide it toward you.
aNeedle plate cover
→The needle plate cover is removed.
gGrasp the bobbin case, and then pull it out.
aBobbin case
hUse the cleaning brush or a vacuum cleaner
to remove any lint and dust from the race
and its surrounding area.
* Do not apply oil to the bobbin case.
aCleaning brush
bRace
CAUTION
• Be sure to unplug the machine before cleaning it. Otherwise, electric shock or injury may result.
a
a
a
b
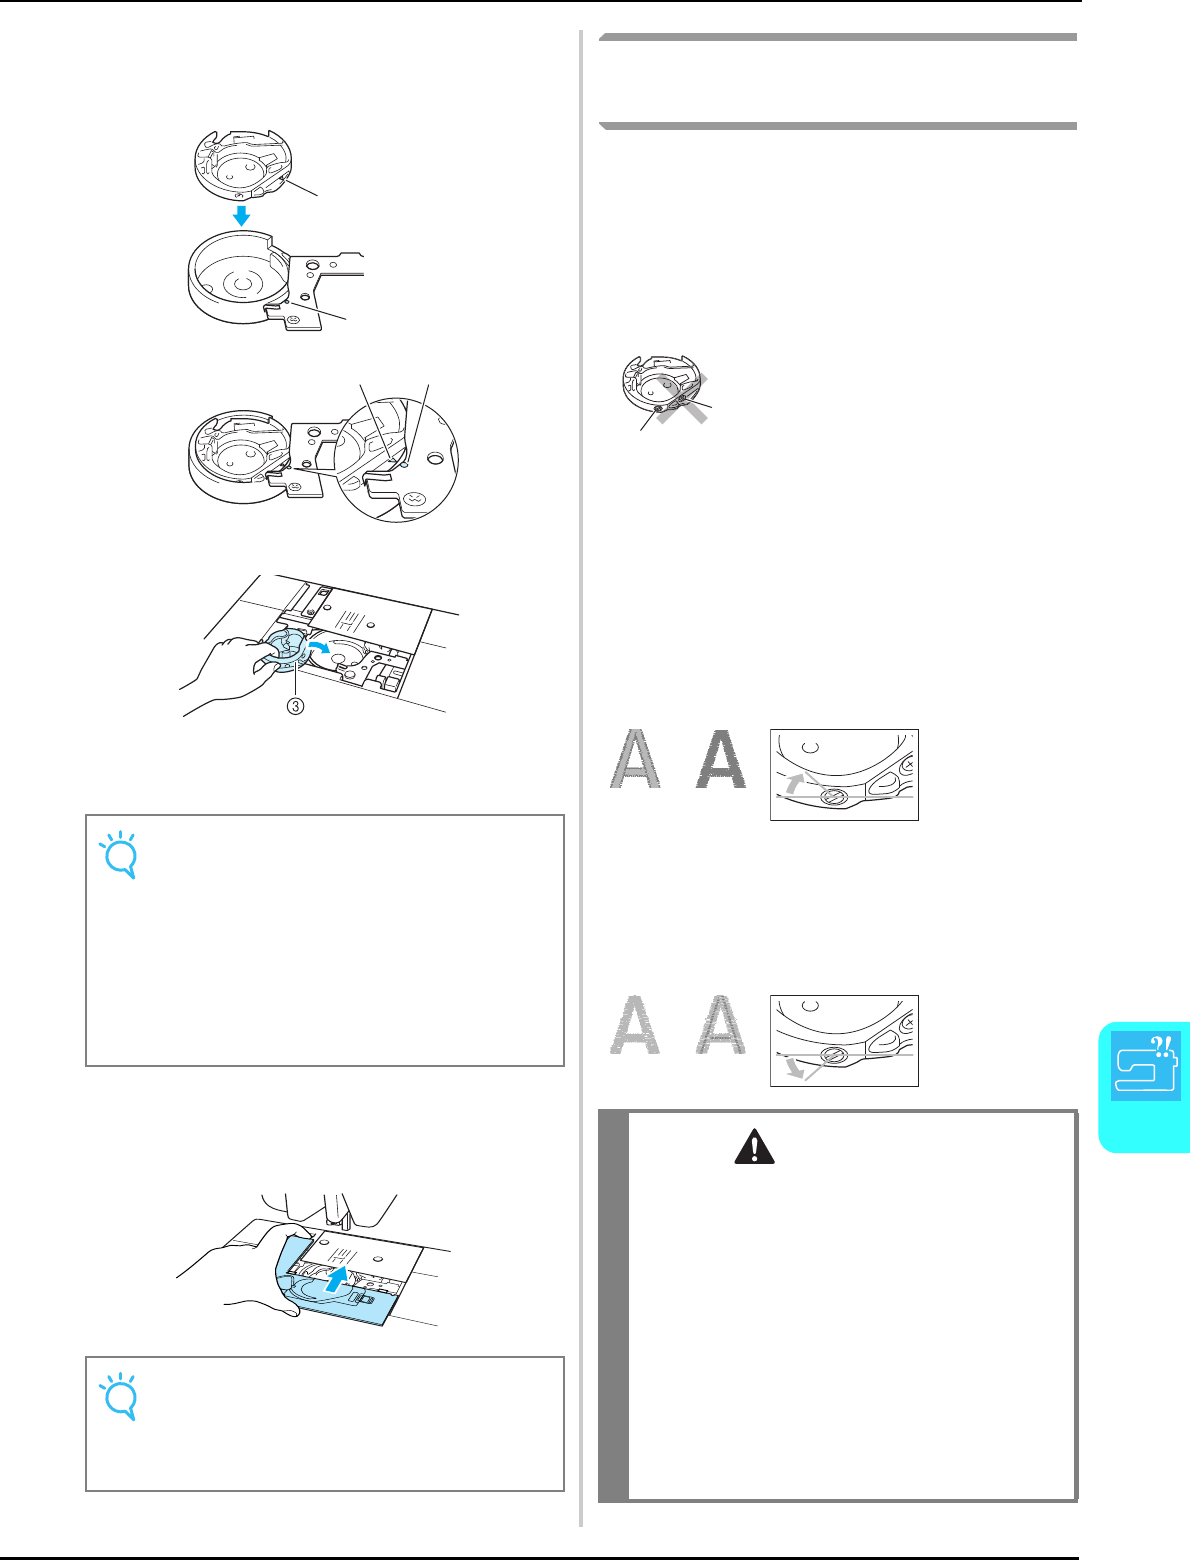
CARE AND MAINTENANCE
Appendix
211
8
iInsert the bobbin case so that the S mark
on the bobbin case aligns with the z mark
on the machine.
* Align the S and z marks.
aS mark
bz mark
cBobbin case
jInsert the tabs on the needle plate cover
into the needle plate, and then slide the
cover back on.
Adjusting the Alternate Bobbin
Case (with no marking)
The alternate bobbin case (with no marking) can
be easily adjusted when bobbin tension changes
are required to accommodate different bobbin
threads. To adjust the bobbin tension for
embroidery function, using the alternate bobbin
case (with no marking), turn the slotted-head (-)
screw with a (small) screwdriver.
■Correct tension
See page 154 about the correct tension.
■Bobbin thread is loose
Bobbin thread appears slightly on the right side of
fabric. If this occurs, turn the slotted-head screw (-)
clockwise, being careful not to over-tighten the
screw, approximately 30-45 degrees to increase
bobbin tension.
■Bobbin thread is tight
If this occurs, turn the slotted-head screw (-)
counterclockwise, being careful not to over-tighten
the screw, approximately 30-45 degrees to decrease
bobbin tension.
Note
• Never use a bobbin case that is scratched;
otherwise, the upper thread may become
tangled, the needle may break, or sewing
performance may suffer. For a new bobbin
case (part code: XC3153-351 (green screw),
XC8167-551 (no marking)), contact your
nearest authorized service center.
• Be sure that the bobbin case is correctly
installed. Otherwise, the needle may break.
Note
• If the needle plate has been removed it is
especially important to reinstall the needle
plate and tighten the screws prior to
installing the bobbin case.
a
b
b
a
aDo not turn a phillips screw (+).
bAdjust with a screwdriver (small).
aRight side
bWrong side
aRight side
bWrong side
CAUTION
• When adjusting the alternate bobbin case, be
sure to remove the bobbin from the alternate
bobbin case.
• DO NOT adjust the position of the Phillips (+)
screw on the alternate bobbin case as this may
result in damage to the bobbin case, rendering
it unusable.
• If the slotted-head screw (-) is difficult to turn,
do not use force. Turning the screw too much
or providing force in either (rotational)
direction may cause damage to the bobbin
case. Should damage occur, the bobbin case
may not maintain proper tension.
1
2
12
12
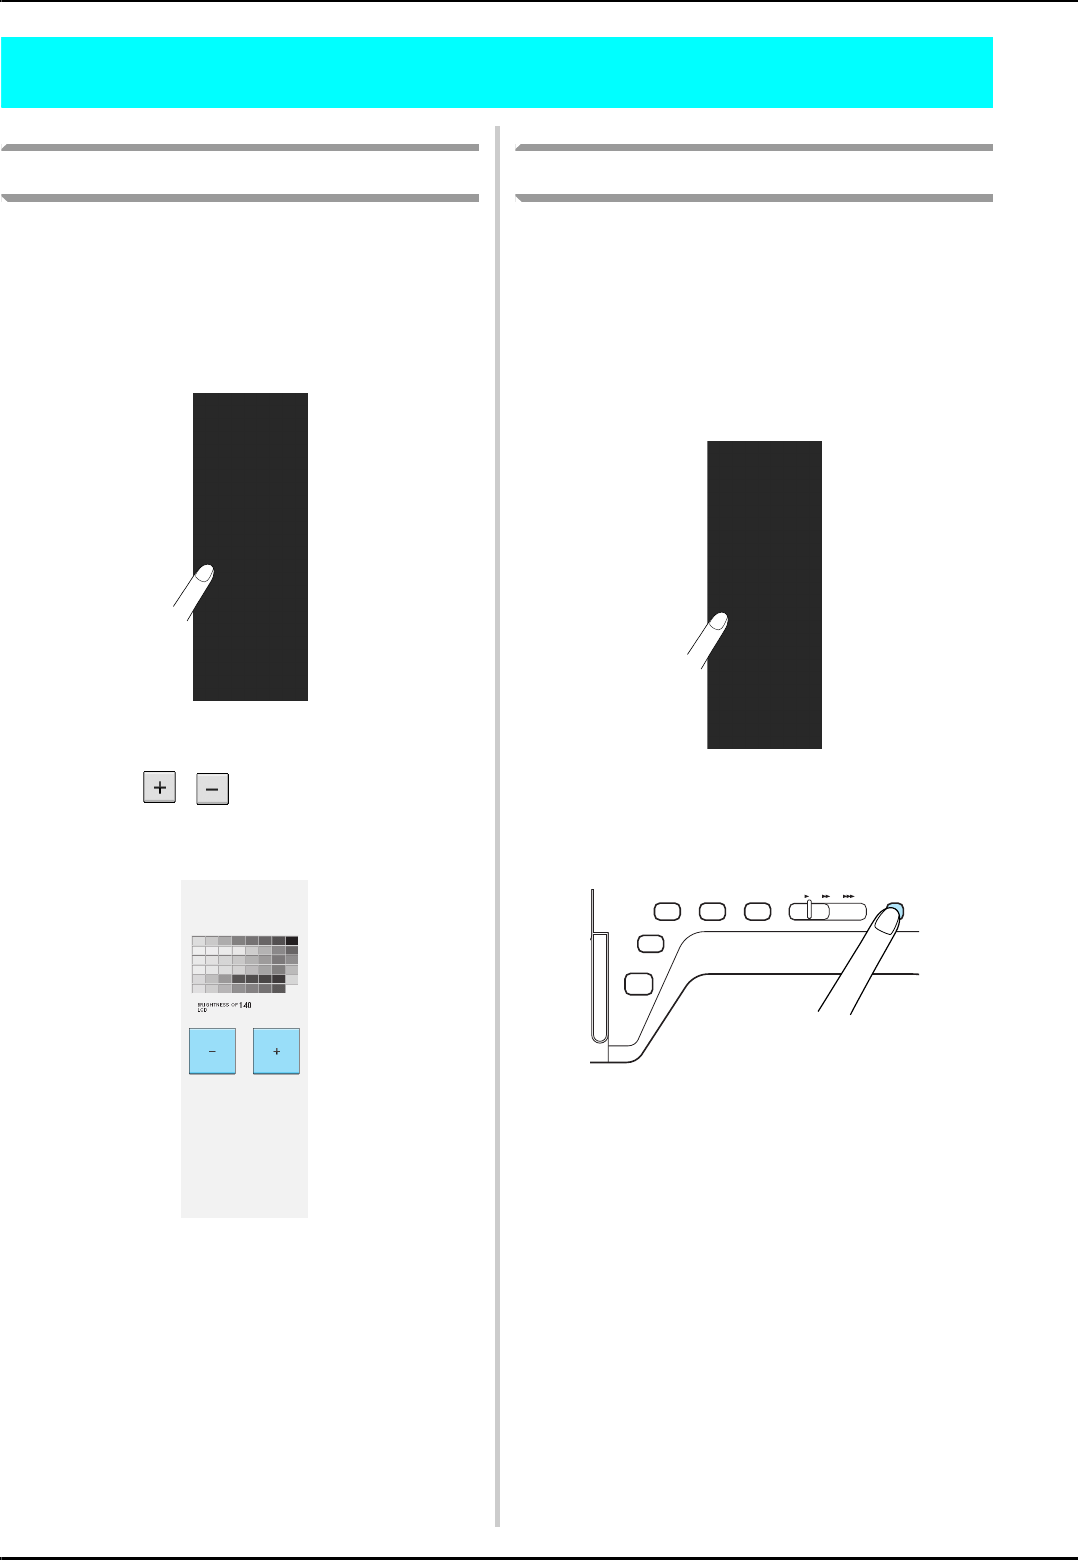
ADJUSTING THE SCREEN
212
ADJUSTING THE SCREEN
Screen Visibility is Low
If the screen is difficult to see when you turn on
the power, follow the steps below.
aPress your finger anywhere on the screen.
Holding your finger on the screen, turn the
main power switch to OFF and back to ON.
→BRIGHTNESS OF LCD is displayed.
bUse the , keys to adjust the screen
until you can see it easily.
cTurn the main power to OFF and back to
ON.
Touch Panel is Malfunctioning
If the screen does not respond correctly when you
touch a key (the machine does not perform the
operation or performs a different operation), follow
the steps below to make the proper adjustments.
aPress your finger anywhere on the screen.
Holding your finger on the screen, turn the
main power switch to OFF and back to ON.
→BRIGHTNESS OF LCD is displayed.
bPress the “Automatic Threading” button.
→The touch panel adjustment screen is displayed.
ADJUSTING THE SCREEN
Appendix
213
8
cUsing the included touch pen, lightly touch
the center of each +, in order from 1 to 5.
* If the buzzer sounds one time after you press
number 5, the operation is finished. If the buzzer
sounds twice, there was an error. In this case, repeat
the steps above.
dTurn the main power to OFF, then turn it
back to ON.
Note
• Only use the included touch pen to touch the
screen. Do not use a mechanical pencil, pin,
or other sharp object. Do not press strongly
on the screen. Otherwise, damage may
result.
Note
• If you finish the screen adjustment and the
screen still does not respond, or if you can-
not do the adjustment, contact your autho-
rized dealer.
+1 +4
+2
+5
+3
TROUBLESHOOTING
214
TROUBLESHOOTING
If you have a minor problem with your sewing machine, check the following solutions. If the solutions
suggested do not correct the problem, contact your authorized dealer. You can also press then
for advice about minor sewing problems during sewing. Press at any time to return to
the original screen.
Problem Cause Solution Page
Upper thread breaks Machine is not threaded correctly (used the
wrong spool cap, spool cap is loose, the thread
did not catch the needle bar threader, etc.)
Rethread the machine correctly. 25
Thread is knotted or tangled. Rethread upper and lower thread. 22, 25
Thread is too thick for the needle. Check needle and thread combinations. 36
Upper thread tension is too strong. Adjust the thread tension. 43, 154
Thread is twisted. Use scissors, etc., to cut the twisted thread
and remove it from the race, etc.
—
Needle is turned, bent or the point is dull. Replace the needle. 34
Needle is installed incorrectly. Reinstall the needle correctly. 34
There are scratches near the hole of the needle
plate.
Replace the needle plate, or consult your
authorized dealer.
55
There are scratches near the hole in the presser
foot.
Replace the presser foot, or consult your
authorized dealer.
32
There are scratches on the race. Replace the race, or consult your authorized
dealer.
210
Bobbin thread breaks Bobbin is set incorrectly. Reset the bobbin thread correctly. 22
There are scratches on the bobbin or it doesn’t
rotate properly.
Replace the bobbin. 22
Thread is twisted. Use scissors, etc. to cut the twisted thread
and remove it from the race, etc.
—
Skipped stitches Machine is threaded incorrectly. Check the steps for threading the machine
and rethread it correctly.
25
Using improper needle or thread for the
selected fabric.
Check the “Fabric/Thread/Needle
Combination” chart.
36
Needle is turned, bent or the point is dull. Replace the needle. 34
Needle is installed incorrectly. Reinstall the needle correctly. 34
Needle is defective. Replace the needle. 34
Dust or lint has collected under the needle plate. Remove the dust or lint with the brush. 210
Fabric puckers There is a mistake in the upper or bobbin
threading.
Check the steps for threading the machine
and rethread it correctly.
22, 25
Spool cap is set incorrectly. Check the method for attaching the spool cap,
then reattach the spool cap.
25
Using improper needle or thread for the
selected fabric.
Check the “Fabric/Thread/Needle
Combination” chart.
36
Needle is turned, bent or the point is dull. Replace the needle. 34
Stitches are too long when sewing thin fabrics. Shorten the stitch length. 42
Thread tension is set incorrectly. Adjust the thread tension. 43, 154
Wrong presser foot. Use the correct presser foot. “STITCH SETTING
CHART”
High-pitched sound
while sewing
Dust or lint is caught in the feed dogs. Remove the dust or lint. 210
Pieces of thread are caught in the race. Clean the race. 210
Upper threading is incorrect. Check the steps for threading the machine
and rethread the machine.
25
There are scratches on the race. Replace the race, or consult your authorized
dealer.
210
Cannot thread the
needle
Needle is not in the correct position. Press the “Needle Position” button to raise the
needle.
3
Threading hook does not pass through the eye
of the needle.
Press the “Needle Position” button to raise the
needle.
3
Needle is installed incorrectly. Reinstall the needle correctly. 34
TROUBLESHOOTING
Appendix
215
8
Cannot lower the
presser foot with the
presser foot lever
Presser foot was raised using the “Presser Foot
Lifter” button.
Press the “Presser Foot Lifter” button to lower
the presser foot.
3
Thread tension is
incorrect
Upper threading is incorrect. Check the steps for threading the machine
and rethread the machine.
25
Bobbin is set incorrectly. Reset the bobbin. 22
Using improper needle or thread for the
selected fabric.
Check the “Fabric/Thread/Needle
Combination” chart.
36
Presser foot holder is not attached correctly. Reattach the presser foot holder correctly. 33
Thread tension is set incorrectly. Adjust the thread tension. 43, 154
Character pattern
does not turn out
Wrong presser foot was used. Attach the correct presser foot. “STITCH SETTING
CHART”
Pattern adjustment settings were set incorrectly. Revise the pattern adjustment settings. 103
Did not use a stabilizer material on thin fabrics
or stretch fabrics.
Attach a stabilizer material. 102
Thread tension is set incorrectly. Adjust the thread tension. 43, 154
Embroidery pattern
does not sew out
correctly
Thread is twisted. Use scissors, etc., to cut the twisted thread
and remove it from the race, etc.
—
Fabric was not inserted into the frame correctly
(fabric was loose, etc.).
If the fabric is not stretched tight in the frame,
the pattern may turn out poorly or there may
be shrinkage of the pattern. Set the fabric into
the frame correctly.
140
Stabilizing material was not attached. Always use stabilizing material, especially
with stretch fabrics, lightweight fabrics, fabrics
with a coarse weave, or fabrics that often
cause pattern shrinkage. See your authorized
dealer for the proper stabilizer.
138
There was an object placed near the machine,
and the carriage or embroidery frame hit the
object during sewing.
If the frame bumps something during sewing,
the pattern will turn out poorly. Do not place
anything in the area where the frame may
bump it during sewing.
146
Fabric outside the frame edges interferes with
the sewing arm, so the embroidery unit cannot
move.
Reinsert the fabric in the embroidery frame so
that the excess fabric is away from the sewing
arm, and rotate the pattern 180 degrees.
140
Fabric is too heavy, so the embroidery unit
cannot move freely.
Place a large thick book or similar object
under the arm head to lightly lift the heavy
side and keep it level.
—
Fabric is hanging off the table. If the fabric is hanging off the table during
embroidery, the embroidery unit will not move
freely. Place the fabric so that it does not hang
off the table or hold the fabric to keep it from
dragging.
146
Fabric is snagged or caught on something. Stop the machine and place the fabric so that
it does not get caught or snagged.
—
Embroidery frame was removed during sewing
(for example, to reset the bobbin). The presser
foot was bumped or moved while removing or
attaching the embroidery frame, or the
embroidery unit was moved.
If the presser foot is bumped or the
embroidery unit is moved during sewing, the
pattern will not turn out. Be careful when
removing or reattaching the embroidery frame
during sewing.
150
Loops appear on the
surface of the fabric
when embroidering
The thread tension is incorrectly set. Adjust the thread tension. 154
The tension of the upper thread is incorrectly set
for the combination of the fabric, thread and
pattern being used.
Use the embroidery needle plate cover. 146
The combination of the bobbin case and bobbin
thread is incorrect.
Change the bobbin case or bobbin thread so
that the correct combination is used.
146
Problem Cause Solution Page

TROUBLESHOOTING
216
Needle breaks Needle is installed incorrectly. Reinstall the needle correctly. 34
Needle clamp screw is not tightened. Tighten the needle clamp screw. 35
Needle is turned or bent. Replace the needle. 34
Using improper needle or thread for the
selected fabric.
Check the “Fabric/Thread/Needle
Combination” chart.
36
Wrong presser foot was used. Use the recommended presser foot. “STITCH SETTING
CHART”
Upper thread tension is too strong. Adjust the thread tension setting. 43, 154
Fabric is pulled during sewing. Do not pull the fabric during sewing. —
Spool cap is set incorrectly. Check the method for attaching the spool cap,
then reattach the spool cap.
25
There are scratches around the holes in the
needle plate.
Replace the needle plate, or consult your
authorized dealer.
55
There are scratches around the hole(s) in the
presser foot.
Replace the presser foot, or consult your
authorized dealer.
32
There are scratches on the race. Replace the race, or consult your authorized
dealer.
210
Needle is defective. Replace the needle. 34
Fabric does not feed
through the machine
Feed dogs are set in the down position. Use the feed dog position lever to raise the
feed dogs.
71
Stitches are too close together. Lengthen the stitch length setting. 42
Wrong presser foot was used. Use the correct presser foot. “STITCH SETTING
CHART”
Needle is turned, bent or the point is dull. Replace the needle. 34
Thread is entangled. Cut the entangled thread and remove it from
the race.
—
Machine does not
operate
There is no pattern selected. Select a pattern. 48, 98, 130, 177
“Start/Stop” button was not pushed. Press the “Start/Stop” button. 3
Main power switch is not turned on. Turn the main power to ON. 8
Presser foot is not lowered. Lower the presser foot. 3
“Start/Stop” button was pushed with the foot
controller attached.
Remove the foot controller, or use the foot
controller to operate the machine.
39
Speed control lever is set to control the zigzag
stitch width.
Use the foot controller instead of the “Start/
Stop” button to operate the machine.
39
All keys and buttons have been locked by
.
Press to unlock all keys and
buttons.
32, 34
Embroidery unit does
not operate
There is no pattern selected. Select a pattern. 130, 177
Main power switch is not turned on. Turn the main power to ON. 8
Embroidery unit is not attached correctly. Reattach the embroidery unit correctly. 128
Embroidery frame was attached before the unit
was initialized.
Perform the initialization process correctly. 128
LCD display is difficult
to see
LCD contrast is not properly adjusted. Adjust the LCD contrast. 15, 212
Nothing happens,
even if the LCD
display is pressed
The screen has been locked. Press either of the following keys to unlock the
screen.
—
Problem Cause Solution Page
CAUTION
• This machine is equipped with a thread detection device. If the “Start/Stop” button is pushed before the
upper threading is done, the machine will not operate properly. Also, depending on the pattern selected,
the machine may feed the fabric even if the needle is raised. This is due to the needle bar release
mechanism. At these times, the machine will make a sound different from that made during normal
sewing. This is not the sign of a malfunction.
• If the power is disconnected during sewing:
Turn the main power to OFF and unplug the machine.
If you restart the machine, follow the instructions for operating the machine correctly.
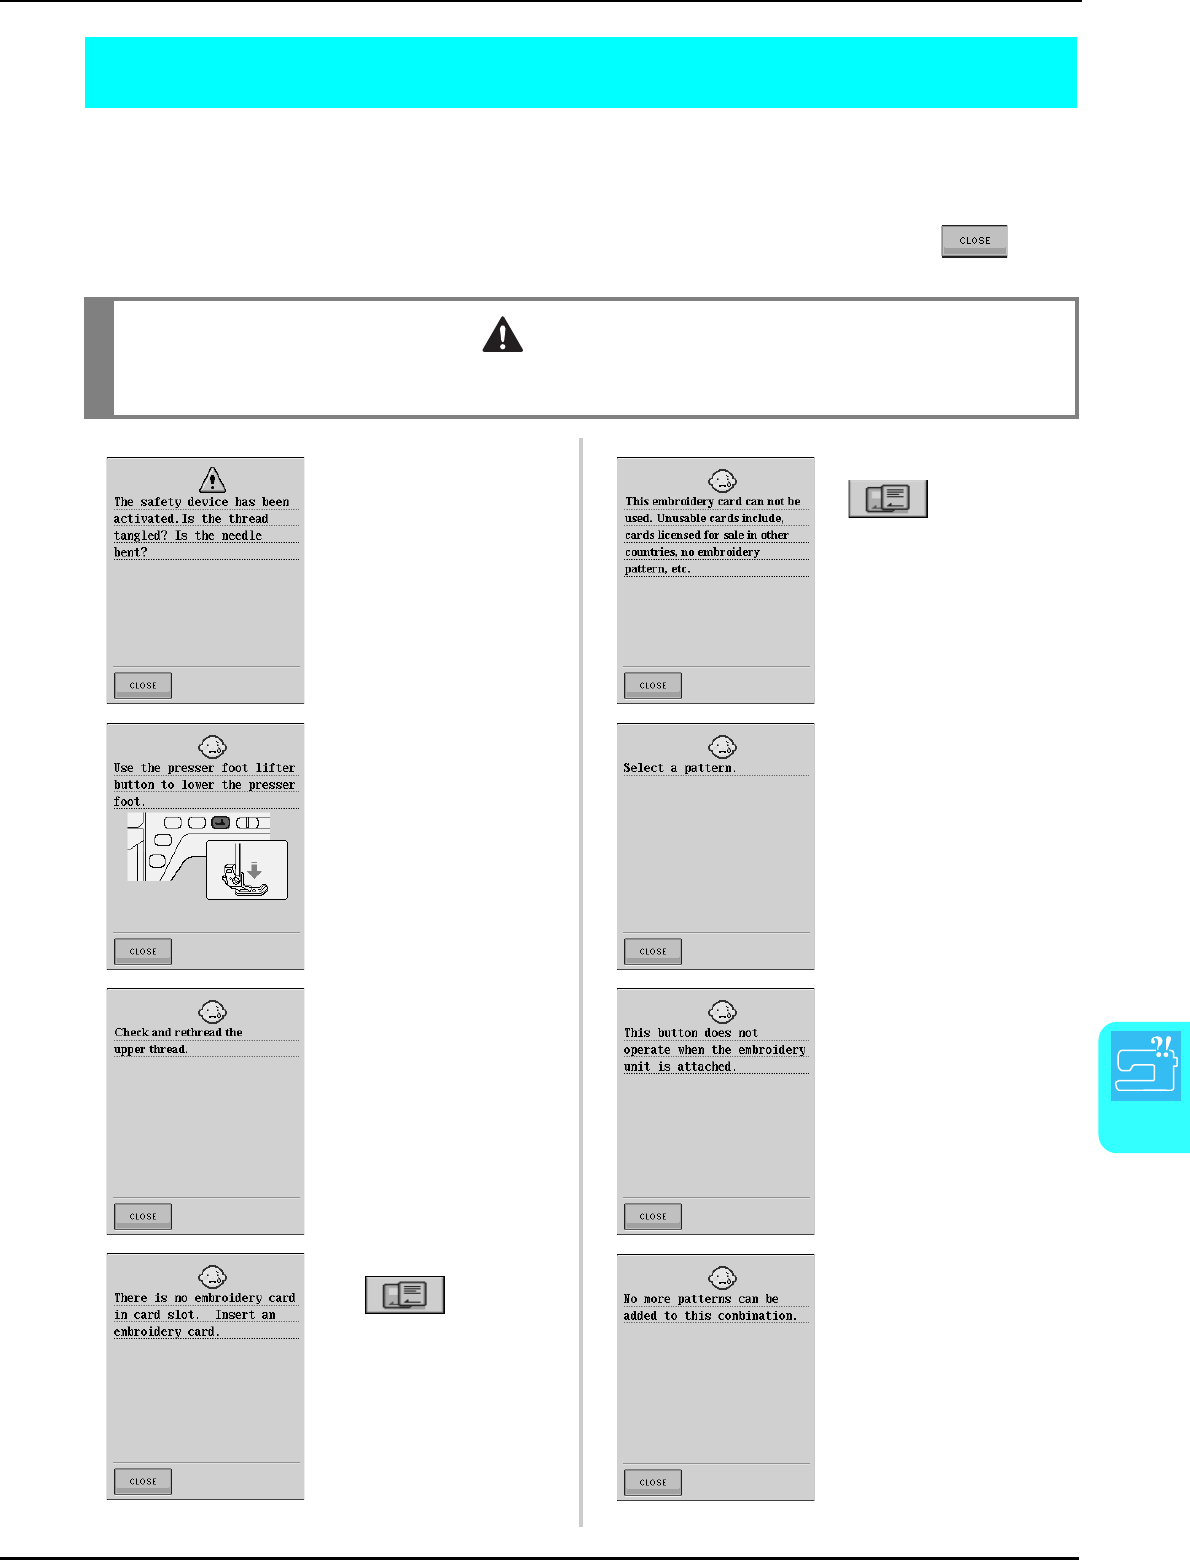
ERROR MESSAGES
Appendix
217
8
ERROR MESSAGES
If the machine is not properly set and the “Start/Stop” button or the “Reverse/Reinforcement Stitch” button
is pressed, or if the operation procedure is incorrect, the machine does not start. An alarm sounds and an
error message is displayed on the LCD. If an error message displays, follow the instructions in the
message.
Below is an explanation of 55 error messages. Refer to these when necessary (if you press or do
the operation correctly while the error message is displayed, the message disappears).
CAUTION
• Be sure to rethread the machine. If you press the “Start/Stop” button without rethreading the machine,
the thread tension may be wrong or the needle may break and cause injury.
This message is displayed when
the motor locks due to tangled
thread or for other reasons
related to thread delivery.
This message is displayed if the
is touched when
an unusable embroidery card is
inserted.
This message is displayed when
a button, such as the “Start/Stop”
button, is pushed while the
presser foot is raised.
This message is displayed when
there is no stitch or embroidery
pattern selected and the “Start/
Stop” button or the “Reverse/
Reinforcement Stitch” button is
pressed.
This message is displayed when
the upper thread is broken or not
threaded correctly, and the
“Start/Stop” button or the
“Reverse/ Reinforcement Stitch”
button is pressed.
This message is displayed when
the “Reverse/Reinforcement
Stitch” button is pushed while the
embroidery unit is attached.
This message is displayed when
the is touched
without an embroidery card
inserted.
This message is displayed when
you try to combine more than 71
patterns.
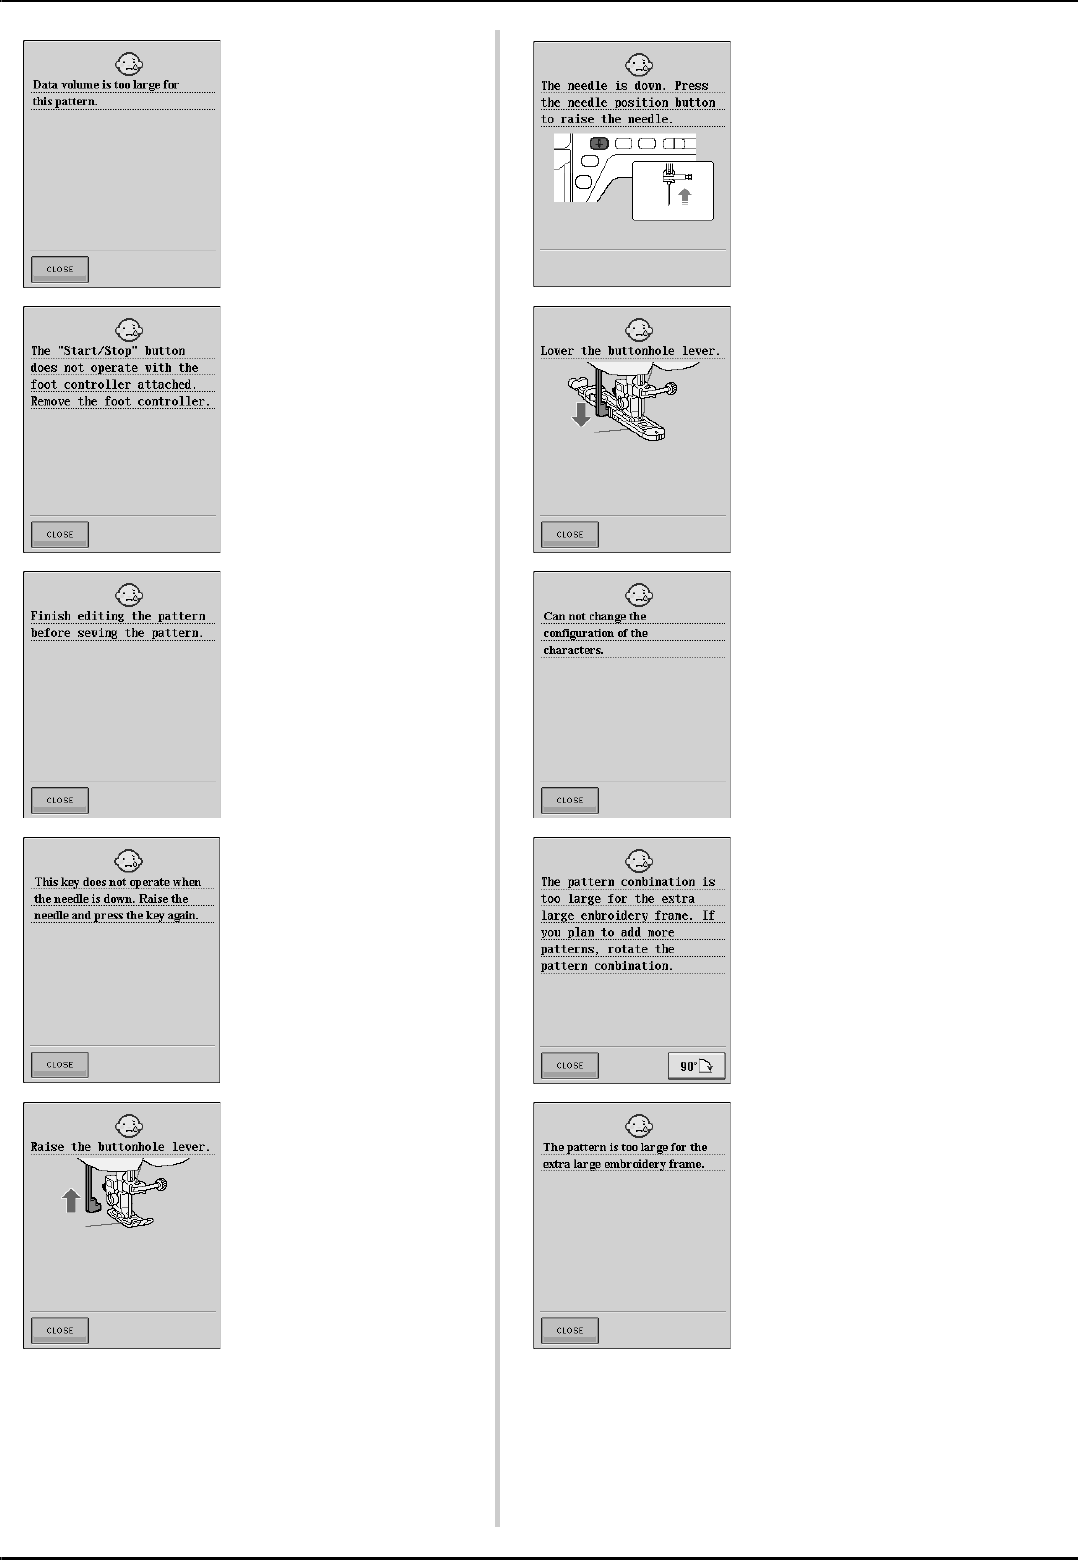
ERROR MESSAGES
218
This message is displayed when
the patterns you are editing take
up too much memory, or if you
are editing too many patterns for
the memory.
This message is displayed when
the embroidery unit is attached
and the power is turned on with
the needle in the down position.
This message is displayed when
the “Start/Stop” button is pushed
to sew Utility stitches or
Character/Decorative stitches
while the foot controller is
connected. (This message does
not appear when embroidering.)
This message is displayed when
the buttonhole lever is up, a
buttonhole stitch is selected, and
the “Start/ Stop” button or
“Reverse/Reinforcement Stitch”
button is pushed.
This message is displayed when
the “Start/ Stop” button is pushed
while the machine is in
embroidery edit mode and a
pattern is being edited.
This message is displayed when
there are too many characters
and the curved character
configuration is impossible.
This message is displayed when
a key on the LCD display is
touched while the needle is in
the down position.
This message is displayed when
the machine is in embroidery
mode and the combined
character pattern is too large for
the embroidery frame. You can
rotate the pattern 90 degrees
and continue combining
characters.
This message is displayed when
the buttonhole lever is down, a
stitch other than a buttonhole is
selected, and the “Start/ Stop”
button or the “Reverse/
Reinforcement Stitch” button is
pushed.
This message is displayed when
the machine is in embroidery
mode, and the character pattern
combination is too large to fit in
the embroidery frame.
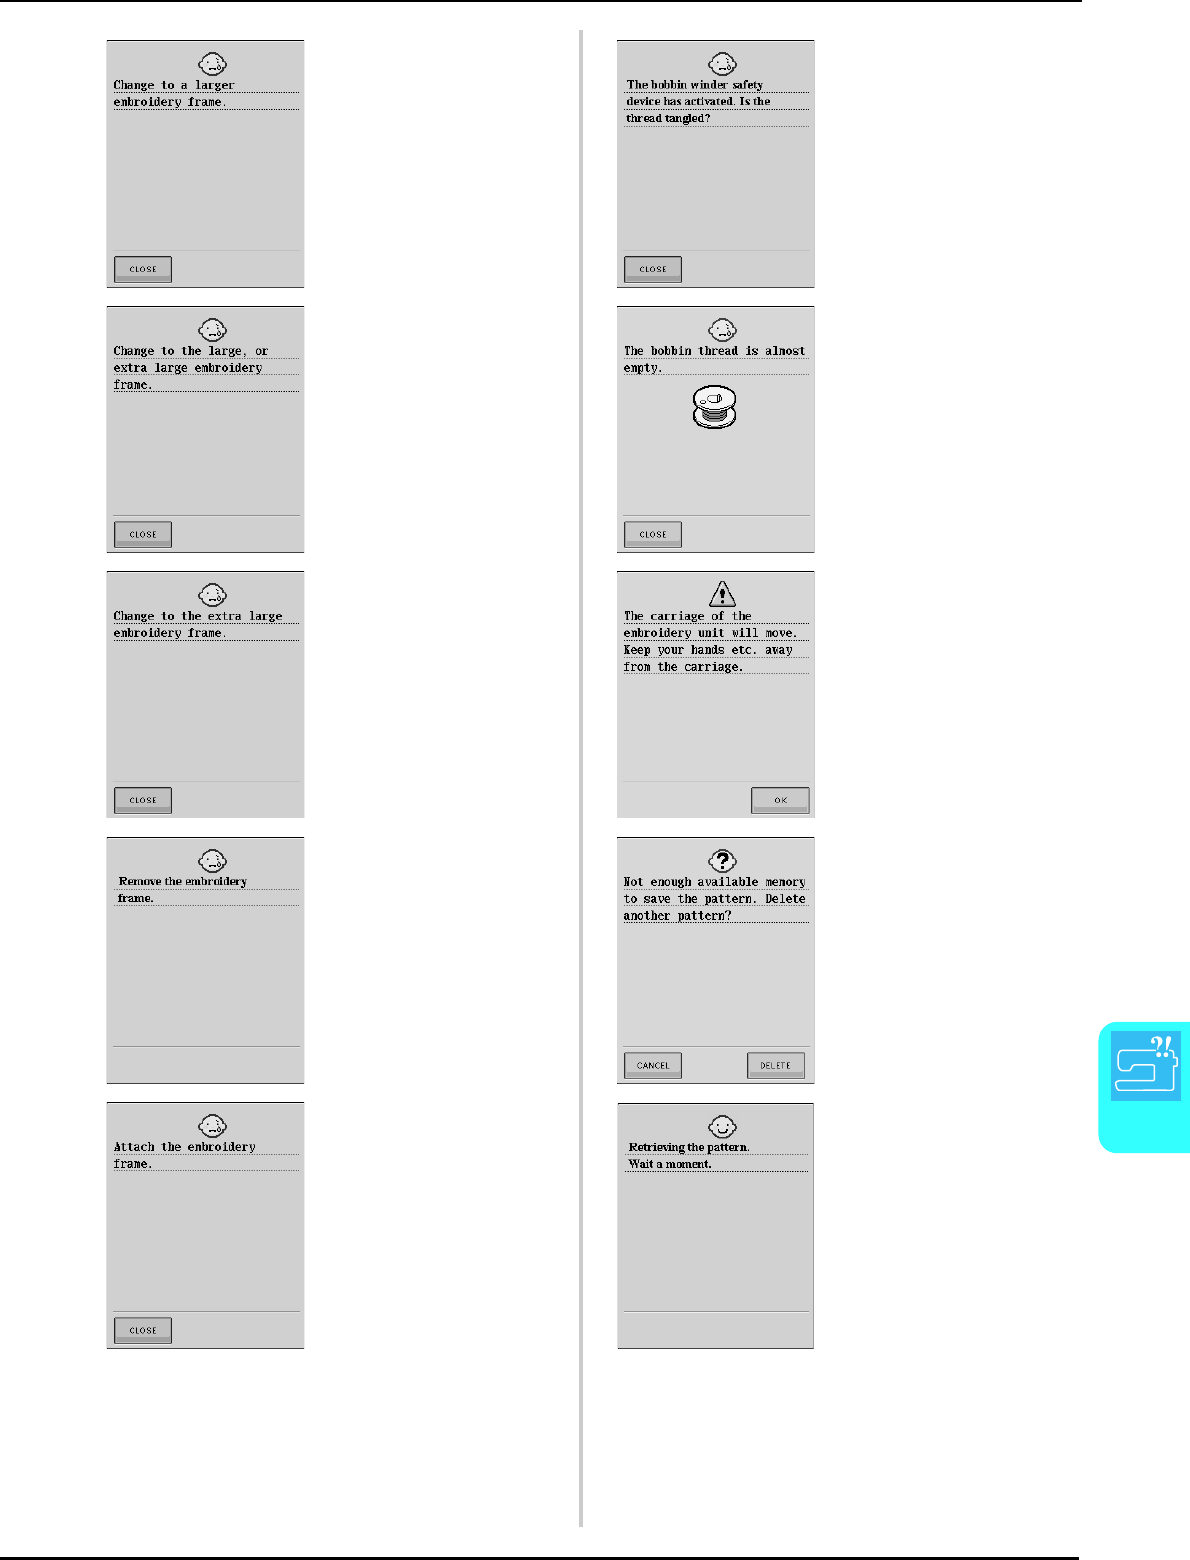
ERROR MESSAGES
Appendix
219
8
This message is displayed when
the machine is in embroidery
mode and the small frame is
attached, and the selected
pattern does not fit in the small
frame.
This message is displayed when
the bobbin is being wound, and
the motor locks because the
thread is tangled, etc.
This message is displayed when,
with the machine in embroidery
mode and the small embroidery
frame or medium embroidery
frame attached, the selected
pattern is larger than the
embroidery area of the medium
embroidery frame.
This message is displayed when
the bobbin thread is running out.
This message is displayed when,
with the machine in embroidery
mode and the small embroidery
frame, medium embroidery
frame or large embroidery frame
attached, the selected pattern is
larger than the embroidery area
of the large embroidery frame.
This message is displayed when
the embroidery unit is initializing.
This message is displayed when
the machine is in embroidery
mode and the embroidery unit
tries to initialize while the
embroidery frame is attached.
This message is displayed when
the memory is full and the stitch
or pattern cannot be saved.
This message is displayed when
the machine is ready to sew an
embroidery pattern, and the
“Start/Stop” button is pushed
while the embroidery frame is
not attached.
This message is displayed when
the machine is retrieving a
previously saved pattern while in
embroidery edit mode.
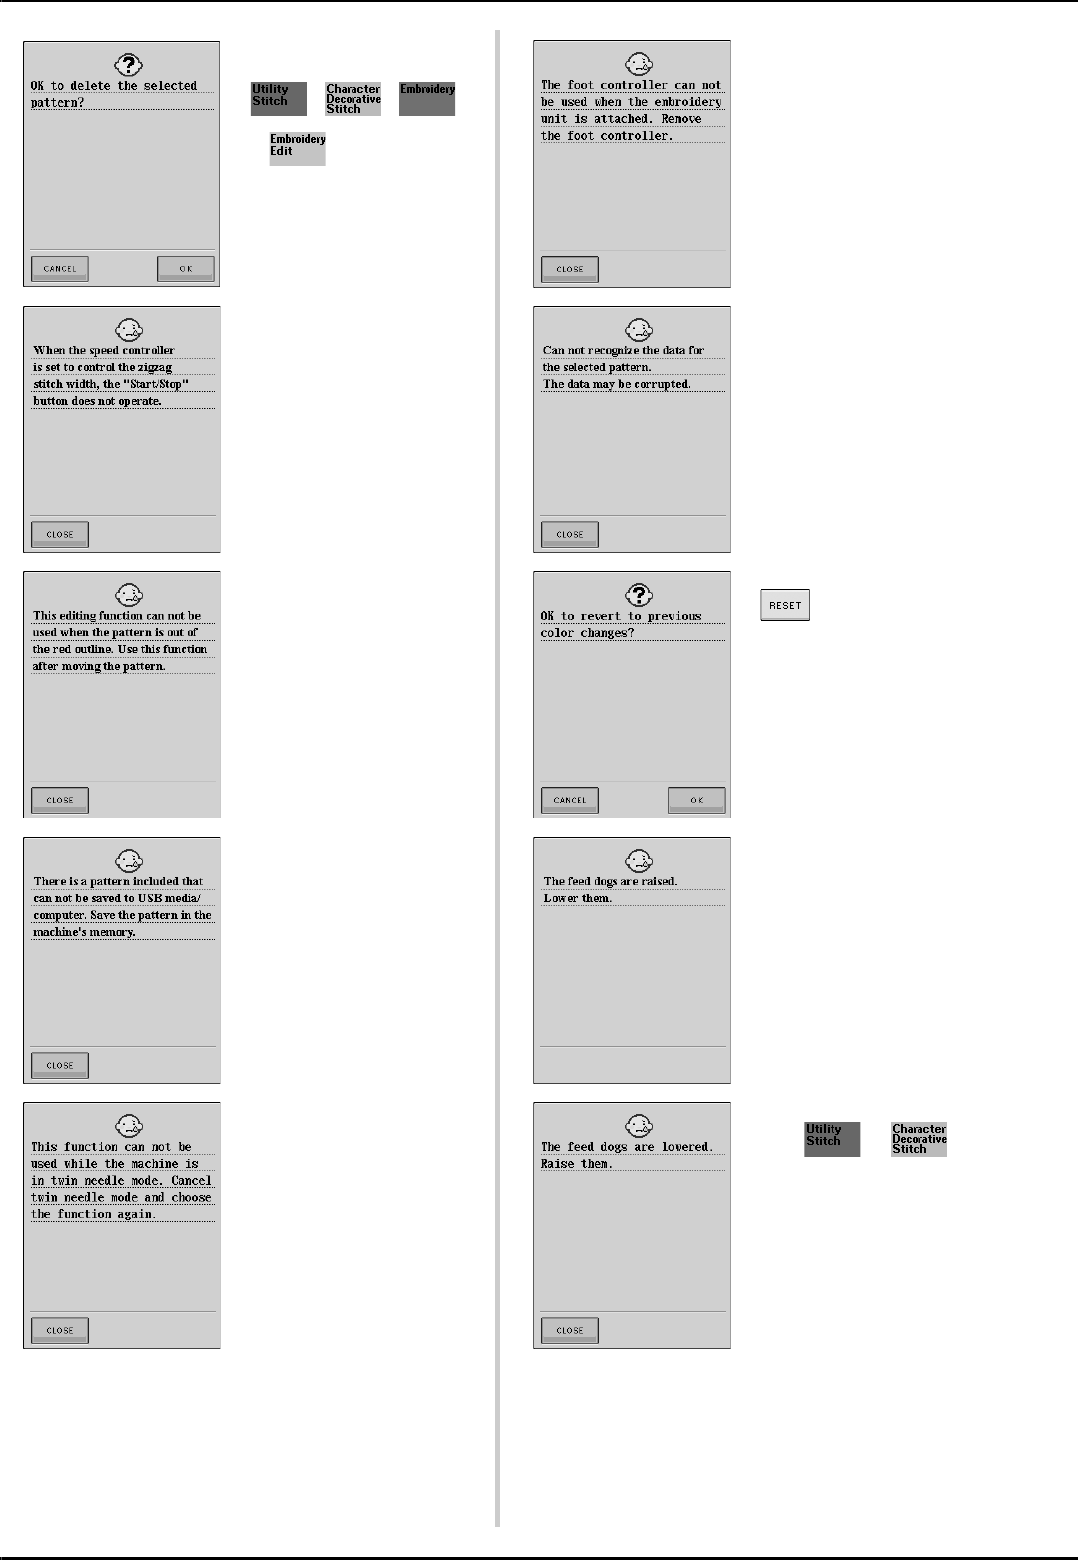
ERROR MESSAGES
220
This message is displayed when,
after selecting a pattern,
, , ,
or is pressed and the
pattern is about to be deleted.
This message is displayed when
the foot controller is pressed
while the embroidery unit is
attached.
This message is displayed when
the speed control lever is set to
control the zigzag stitch width,
and the “Start/ Stop” button is
pushed. Use the foot controller
to operate the machine.
This message is displayed when
there is a possibility that the data
for the selected pattern is
corrupted.
This message is displayed when
the machine is in embroidery edit
mode, and you try to use an
editing function when the pattern
is not completely within the red
outline.
This message is displayed when
is pressed when
changing thread colors.
This message is displayed when
you try to save a copyright
protected pattern to USB media/
Computer. According to
copyright laws, patterns that are
illegal to reproduce or edit
cannot be saved to floppy disks.
If this message displays, save
the pattern in the machine’s
memory.
This message is displayed when
the “Start/Stop” button is pushed
without raising the feed dogs
after the feed dogs are lowered
or after the embroidery unit is
attached.
This message is displayed when
the machine is in twin needle
mode and a pattern that cannot
be sewn with the twin needle is
selected.
This message is displayed when
either or is
pressed when the feed dogs are
lowered.
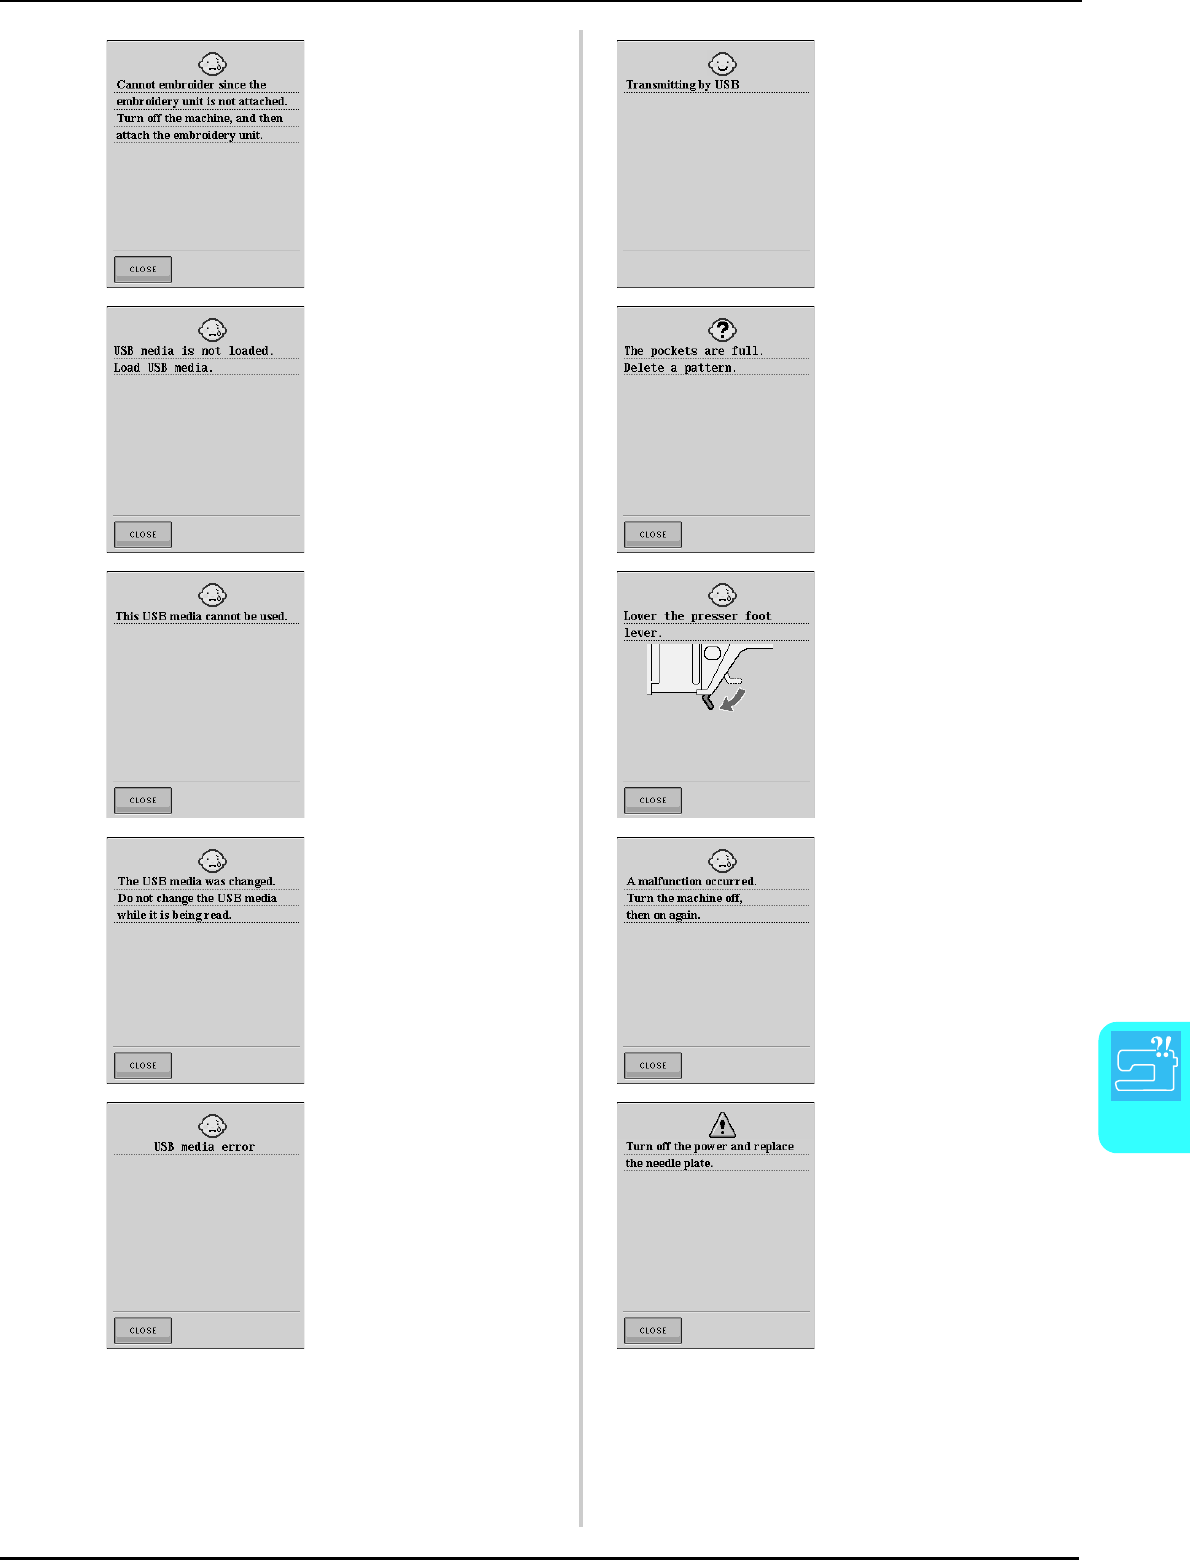
ERROR MESSAGES
Appendix
221
8
This message is displayed when
the “Start/Stop” button is pushed
and the machine is in
embroidery mode, but the
embroidery unit is not attached.
This message is displayed while
the USB media is transmitting.
This message is displayed when
you try to recall or save a pattern
while no USB media is loaded.
This message is displayed when
the memory is full and a pattern
must be deleted.
This message is displayed when
you try to use incompatible
media.
This message is displayed when
the “Presser Foot Lifter” button is
pushed while the presser foot
lever is raised/the needle is
lowered.
This message is displayed when
you attempt to select a pattern
after the USB media in which the
pattern is saved has been
changed.
This message is displayed if
some malfunction occurs.
This message is displayed when
an error occurs with the USB
media.
This message is displayed when
you try to sew with a stitch other
than a middle needle position
stitch while the single-hole
needle plate is installed.
This message is displayed when
the needle plate is removed with
the machine on or when the
machine is turned on in the
embroidery or embroidery edit
mode.
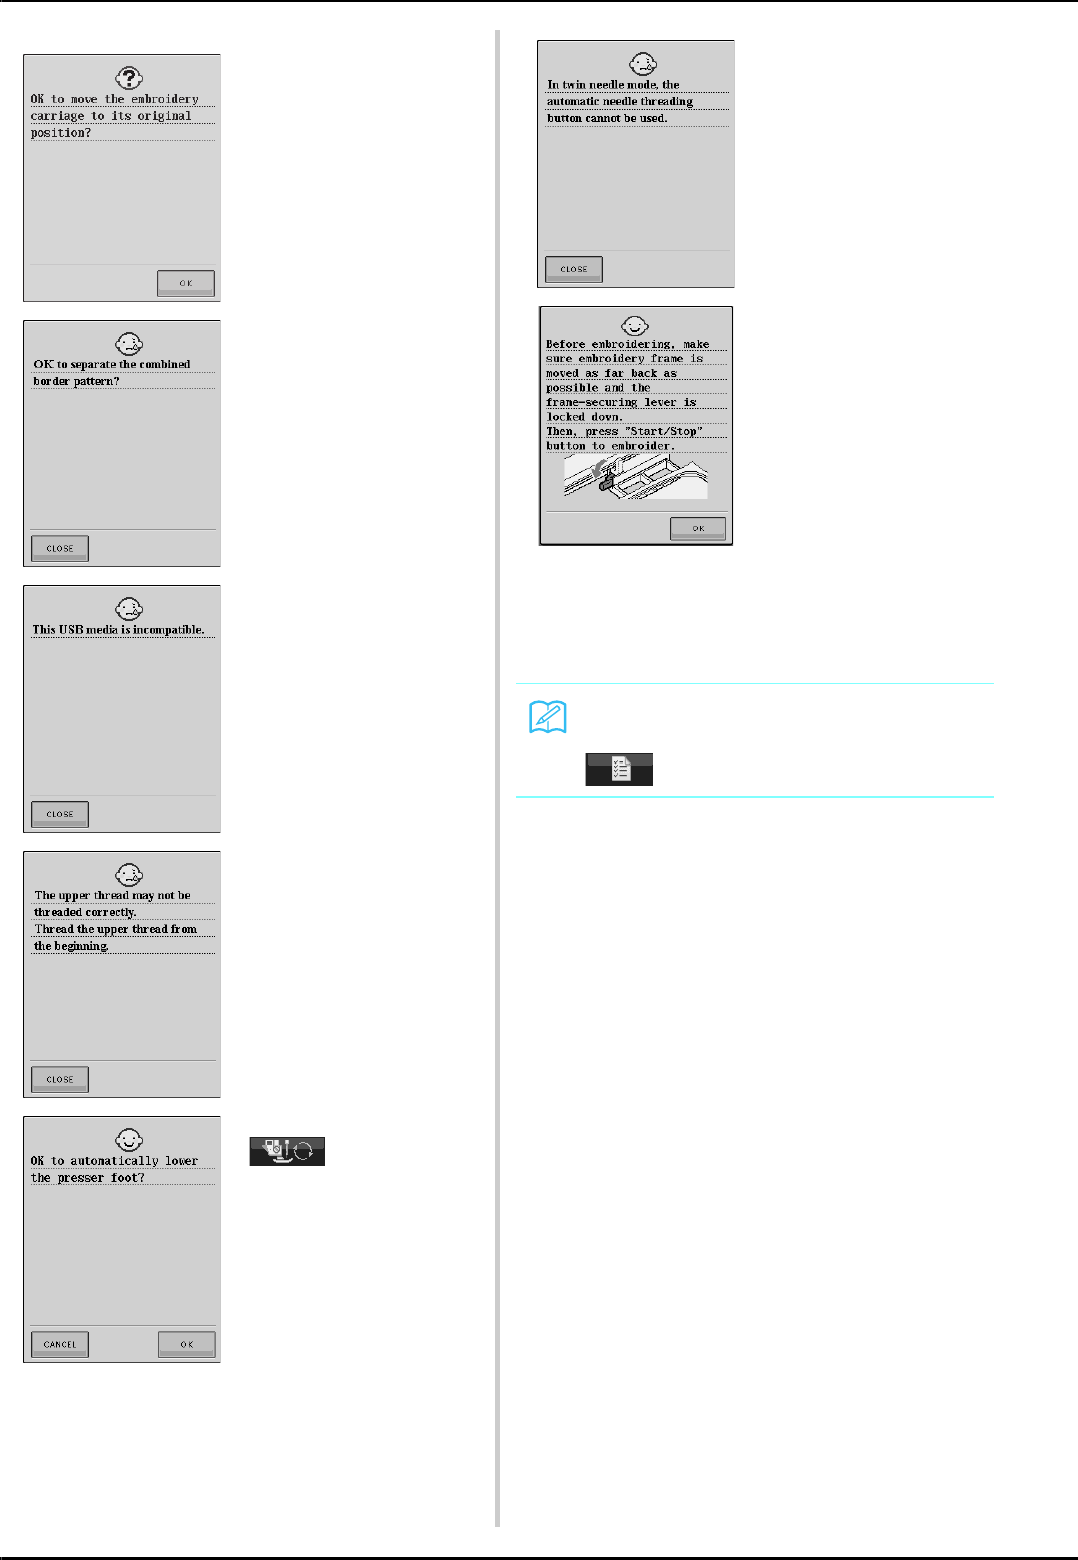
ERROR MESSAGES
222
■Alarm Sounds
If the operation procedure was correct, the machine
will beep once. If the operation procedure was
incorrect, the machine will beep twice or four times.
This message is displayed when
replacing the embroidering
bobbin thread.
This message is displayed when
a border pattern is displayed in
the embroidery edit screen after
being displayed in the sewing
screen.
This message is displayed when
you try to use incompatible USB
media.
This message is displayed when
it seems that the upper thread
has not been threaded correctly.
This message is displayed when
is pressed (the
presser foot is raised).
This message is displayed when
the automatic needle threading
button is pushed while twin
needle sewing is set.
This confirmation message
appears after the machine is
turned on and the carriage of the
embroidery unit has moved to its
initial position.
Memo
If you want to turn the alarm off, press
. See page 12 for more details.

SPECIFICATIONS
Appendix
223
8
SPECIFICATIONS
Item Specification
Sewing Machine Dimensions 55.6 cm (W) × 30.5 cm (H) × 25.8 cm (D) (approx.
21-7/8 inches (W) × 12 inches (H) × 10-1/8 inches (D))
Case Dimensions 58.2 cm (W) × 31.9 cm (H) × 28.4 cm (D) (approx.
22-7/8 inches (W) × 12-1/2 inches (H) × 11-1/8 inches (D))
Weight 12 kg (27 lb.) (with case: 14.3 kg (32 lb.))
Sewing speed 70 to 1000 stitches per minute
Needles Home sewing machine needles (HA × 130)
Embroidery Unit Dimensions 45.8 cm (W) × 13.1cm (H) × 46.2 cm (D) (approx.
18 inches (W) × 5-1/8 inches (H) × 18-1/4 inches (D))
Dimensions of machine with
embroidery unit attached
72.4 cm (W) × 30.5 cm (H) × 46.2 cm (D) (approx.
28-1/2 inches (W) × 12 inches (H) × 18-1/4 inches (D))
Weight 3.6 kg (8 lb.)
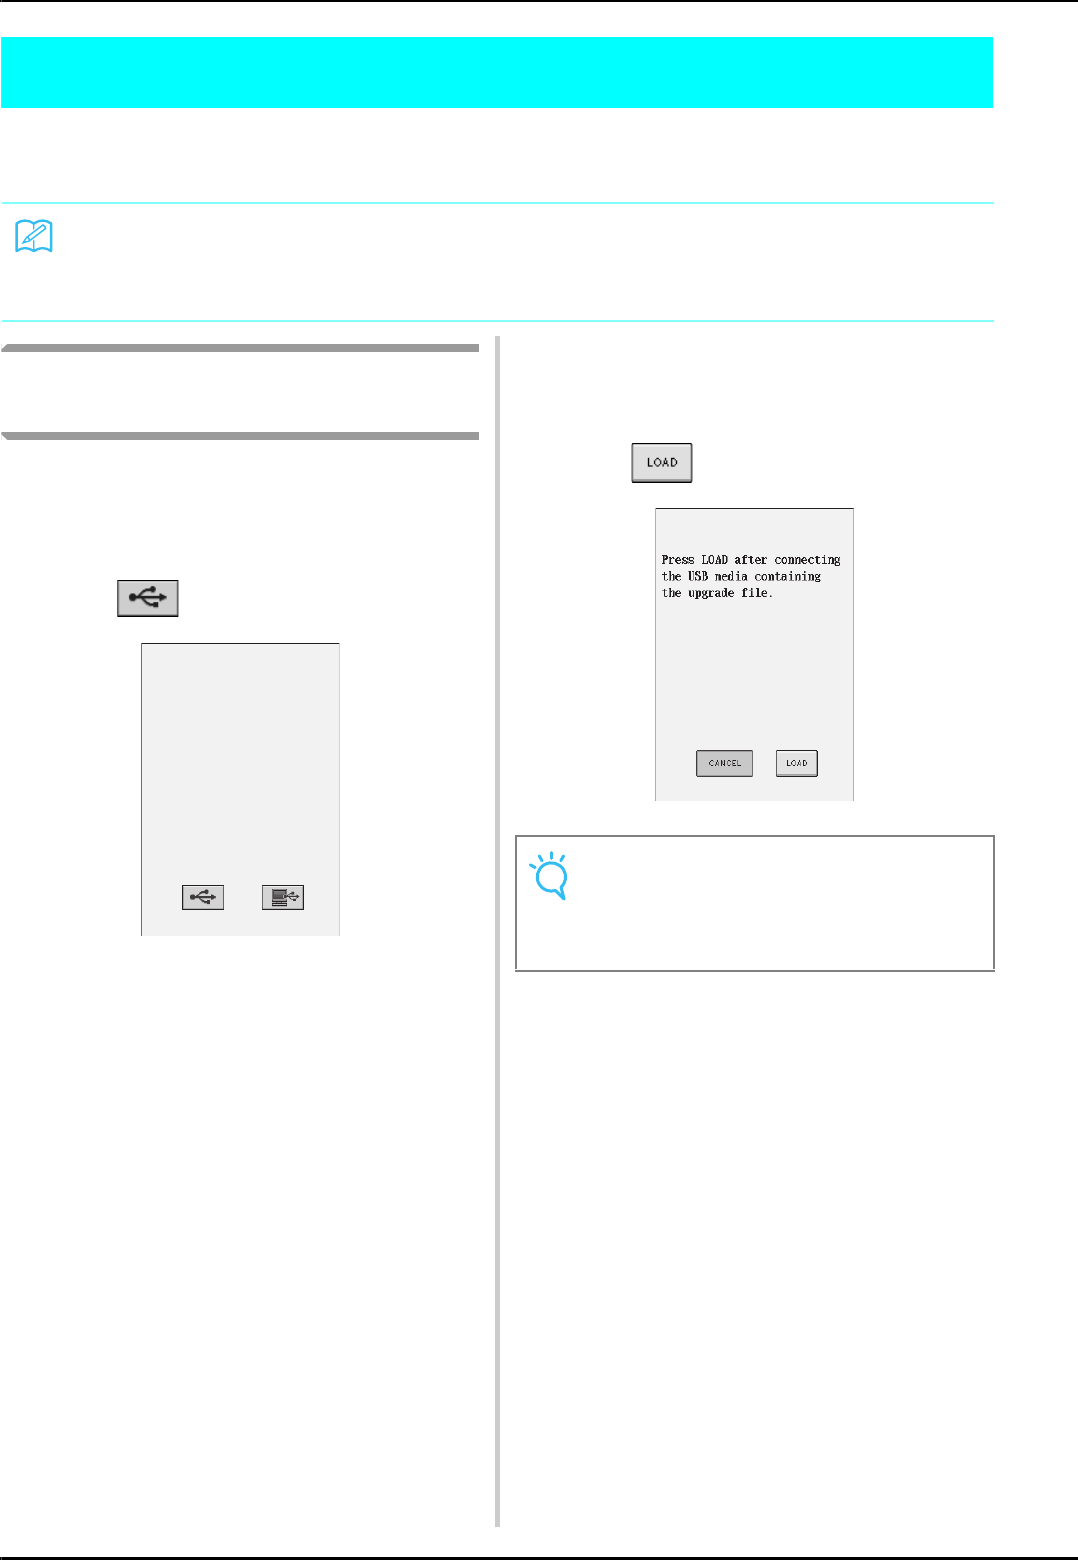
UPGRADING YOUR MACHINE’S SOFTWARE
224
UPGRADING YOUR MACHINE’S SOFTWARE
You can use USB media or a computer to download software upgrades for your sewing machine.
When an upgrade program is available on “ http://solutions.brother.com ”, please download the files
following the instructions on the web site and steps below.
Upgrade Procedure Using USB
Media
aWhile pressing the “Automatic Threading”
button, turn the main power to ON.
→The following screen will appear on the LCD.
bPress .
cInsert the USB media into the USB port
connector on the machine, making sure the
media only contains the upgrade file.
dPress .
→The upgrade file is downloaded.
eRemove the USB media, and turn the
machine off and on again.
Memo
• When the machine’s software is upgraded, saved combinations of character and decorative stitches
are erased.
• During the process of upgrading software, the buzzer will not sound when a key is pressed.
Note
If an error occurs, a red text error message will
appear. If the download is performed success-
fully, an “Upgrade complete.” message will
appear.
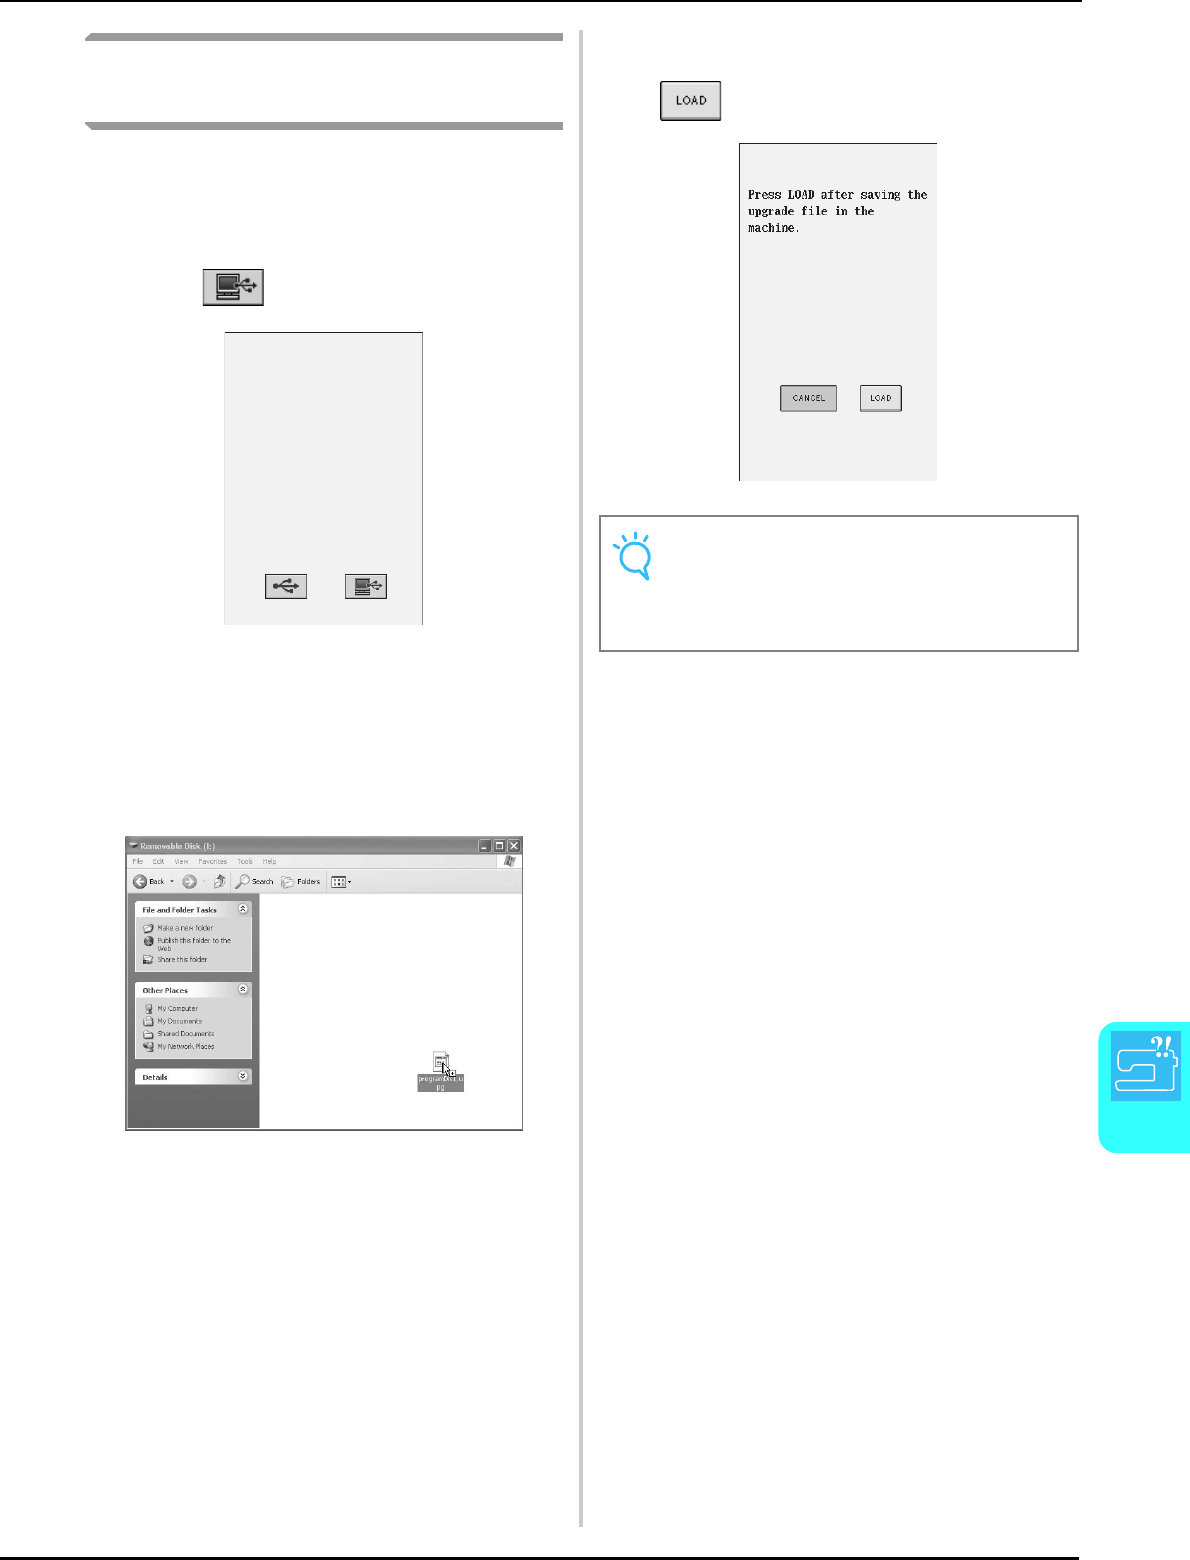
UPGRADING YOUR MACHINE’S SOFTWARE
Appendix
225
8
Upgrade Procedure Using
Computer
aWhile pressing the “Automatic Threading”
button, turn the main power to ON.
→The following screen will appear on the LCD.
bPress .
cPlug the USB cable connector into the
corresponding USB port connectors for the
computer and for the machine.
→“Removable Disk” will appear in “My Computer”.
dCopy the upgrade file to “Removable Disk”.
→The “Connected to PC. Do not disconnect the USB
cable.” message will appear.
eWhen the message disappears, press
.
→The upgrade file is downloaded.
fUnplug the USB cable, and turn the
machine off and on again.
Note
If an error occurs, a red text error message will
appear. If the download is performed success-
fully, an “Upgrade complete.” message will
appear.

UPGRADING YOUR MACHINE’S SOFTWARE
226
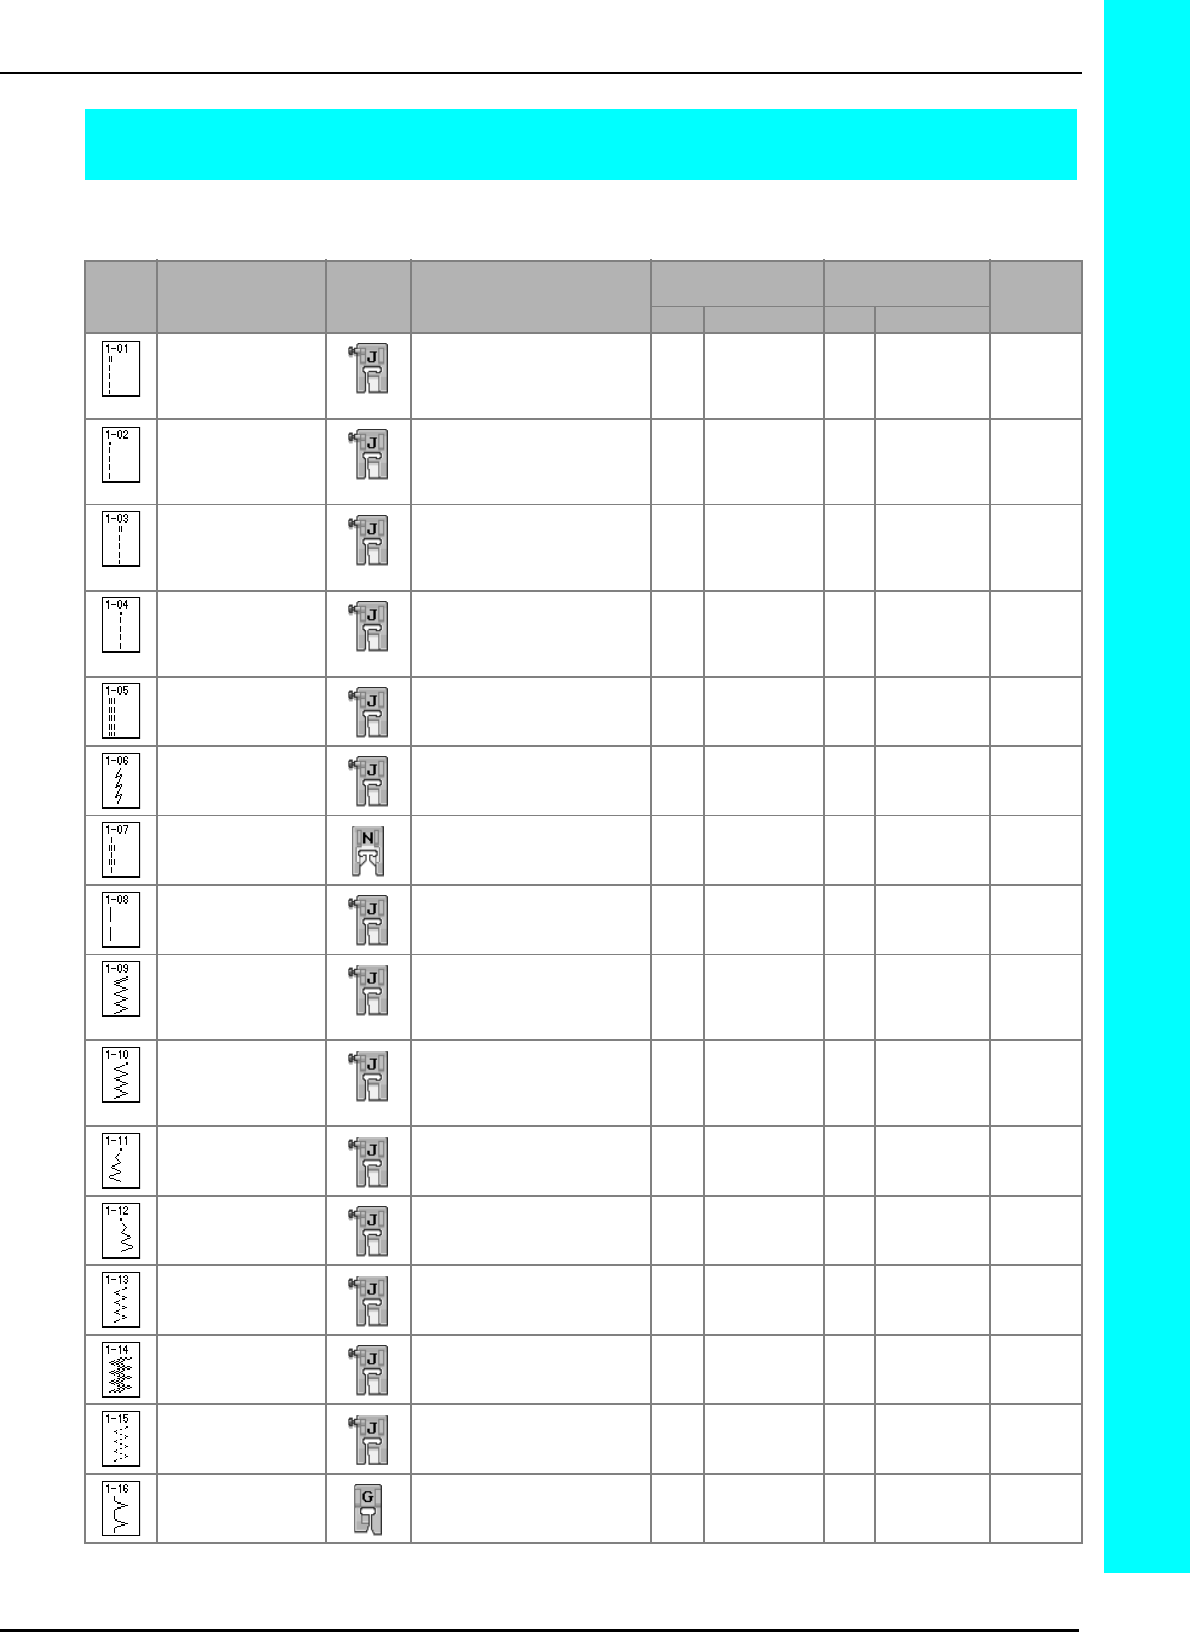
227
STITCH SETTING CHART
STITCH SETTING CHART
The following chart shows information for each utility stitch concerning applications, stitch lengths, stitch
widths, and whether or not the twin needle mode can be used.
Stitch Stitch name Presser
foot Applications
Stitch width
[mm (inch.)]
Stitch length
[mm (inch.)] Twin
needle
Auto. Manual Auto. Manual
Straight stitch (Left) General sewing, gather, pintuck,
etc. Reverse stitch is sewn while
pressing “Reverse/
Reinforcement Stitch” button.
0.0
(0)
0.0 - 7.0
(0 - 1/4)
2.5
(3/32)
0.2 - 5.0
(1/64 - 3/16)
OK
( J )
Straight stitch (Left) General sewing, gather, pintuck,
etc. Reinforcement stitch is sewn
while pressing “Reverse/
Reinforcement Stitch” button.
0.0
(0)
0.0 - 7.0
(0 - 1/4)
2.5
(3/32)
0.2 - 5.0
(1/64 - 3/16)
OK
( J )
Straight stitch
(Middle)
General sewing, gather, pintuck,
etc. Reverse stitch is sewn while
pressing “Reverse/
Reinforcement Stitch” button.
3.5
(1/8)
0.0 - 7.0
(0 - 1/4)
2.5
(3/32)
0.2 - 5.0
(1/64 - 3/16)
OK
( J )
Straight stitch
(Middle)
General sewing, gather, pintuck,
etc. Reinforcement stitch is sewn
while pressing “Reverse/
Reinforcement Stitch” button.
3.5
(1/8)
0.0 - 7.0
(0 - 1/4)
2.5
(3/32)
0.2 - 5.0
(1/64 - 3/16)
OK
( J )
Triple stretch stitch General sewing for
reinforcement and decorative
topstitching
0.0
(0)
0.0 - 7.0
(0 - 1/4)
2.5
(3/32)
1.5 - 4.0
(1/16 - 3/16)
OK
( J )
Stem stitch Reinforced stitching, sewing and
decorative applications 1.0
(1/16)
1.0 - 3.0
(1/16 - 1/8)
2.5
(3/32)
1.0 - 4.0
(1/16 - 3/16)
OK
( J )
Decorative stitch Decorative stitching, top
stitching 0.0
(0)
0.0 - 7.0
(0 - 1/4)
2.5
(3/32)
1.0 - 4.0
(1/16 - 3/16)
OK
( J )
Basting stitch Basting 0.0
(0)
0.0 - 7.0
(0 - 1/4)
20.0
(3/4)
5.0 - 30.0
(3/16 - 1-3/16) NO
Zigzag stitch For overcasting, mending.
Reverse stitch is sewn while
pressing “Reverse/
Reinforcement Stitch” button.
3.5
(1/8)
0.0 - 7.0
(0 - 1/4)
1.4
(1/16)
0.0 - 4.0
(0 - 3/16)
OK
( J )
Zigzag stitch For overcasting, mending.
Reinforcement stitch is sewn
while pressing “Reverse/
Reinforcement Stitch” button.
3.5
(1/8)
0.0 - 7.0
(0 - 1/4)
1.4
(1/16)
0.0 - 4.0
(0 - 3/16)
OK
( J )
Zigzag stitch (right) Start from right needle position,
zigzag sew at left. 3.5
(1/8)
2.5 - 5.0
(3/32 - 3/16)
1.4
(1/16)
0.3 - 4.0
(1/64 - 3/16)
OK
( J )
Zigzag stitch (left) Start from left needle position,
zigzag sew at right. 3.5
(1/8)
2.5 - 5.0
(3/32 - 3/16)
1.4
(1/16)
0.3 - 4.0
(1/64 - 3/16)
OK
( J )
2 step elastic zigzag Overcasting (medium weight
and stretch fabrics), tape and
elastic
5.0
(3/16)
1.5 - 7.0
(1/16 - 1/4)
1.0
(1/16)
0.2 - 4.0
(1/64 - 1/16)
OK
( J )
2 step elastic zigzag Overcasting (medium weight
and stretch fabrics), tape and
elastic
5.0
(3/16)
1.5 - 7.0
(1/16 - 1/4)
1.0
(1/16)
0.2 - 4.0
(1/64 - 1/16)
OK
( J )
3 step elastic zigzag Overcasting (medium,
heavyweight and stretch fabrics),
tape and elastic
5.0
(3/16)
1.5 - 7.0
(1/16 - 1/4)
1.0
(1/16)
0.2 - 4.0
(1/64 - 1/16)
OK
( J )
Overcasting stitch Reinforcing of light and medium
weight fabrics 3.5
(1/8)
2.5 - 5.0
(3/32 - 3/16)
2.0
(1/16)
1.0 - 4.0
(1/16 - 3/16) NO
228
STITCH SETTING CHART
Overcasting stitch Reinforcing of heavyweight
fabric 5.0
(3/16)
2.5 - 5.0
(3/32 - 3/16)
2.5
(3/32)
1.0 - 4.0
(1/16 - 3/16) NO
Overcasting stitch Reinforcing of medium,
heavyweight and easily frayable
fabrics or decorative stitching.
5.0
(3/16)
3.5 - 5.0
(1/8 - 3/16)
2.5
(3/32)
1.0 - 4.0
(1/16 - 3/16) NO
Overcasting stitch Reinforced seaming of stretch
fabric 5.0
(3/16)
0.0 - 7.0
(0 - 9/32)
2.5
(3/32)
0.5 - 4.0
(1/32 - 3/16)
OK
( J )
Overcasting stitch Reinforcing of medium stretch
fabric and heavyweight fabric,
decorative stitching
5.0
(3/16)
0.0 - 7.0
(0 - 9/32)
2.5
(3/32)
0.5 - 4.0
(1/32 - 3/16)
OK
( J )
Overcasting stitch Reinforcement of stretch fabric
or decorative stitching 4.0
(3/16)
0.0 - 7.0
(0 - 1/4)
4.0
(3/16)
1.0 - 4.0
(1/16 - 3/16)
OK
( J )
Overcasting stitch Stretch knit seam 5.0
(3/16)
0.0 - 7.0
(0 - 1/4)
4.0
(3/16)
1.0 - 4.0
(1/16 - 3/16) NO
Single diamond
overcast
Reinforcement and seaming
stretch fabric
6.0
(15/
64)
1.0 - 7.0
(1/16 - 1/4)
3.0
(1/8)
1.0 - 4.0
(1/16 - 3/16)
OK
( J )
Single diamond
overcast
Reinforcement of stretch fabric 6.0
(15/
64)
1.0 - 7.0
(1/16 - 1/4)
1.8
(1/16)
1.0 - 4.0
(1/16 - 3/16)
OK
( J )
With side cutter Straight stitch while cutting
fabrics 0.0
(0)
0.0 - 2.5
(0 - 3/32)
2.5
(3/32)
0.2 - 5.0
(1/64 - 3/16) NO
With side cutter Zigzag stitch while cutting fabrics 3.5
(1/8)
3.5 - 5.0
(1/8 - 3/16)
1.4
(1/16)
0.0 - 4.0
(0 - 3/16) NO
With side cutter Overcasting stitch while cutting
fabrics 3.5
(1/8)
3.5 - 5.0
(1/8 - 3/16)
2.0
(1/16)
1.0 - 4.0
(1/16 - 3/16) NO
With side cutter Overcasting stitch while cutting
fabrics 5.0
(3/16)
3.5 - 5.0
(1/8 - 3/16)
2.5
(3/32)
1.0 - 4.0
(1/16 - 3/16) NO
With side cutter Overcasting stitch while cutting
fabrics 5.0
(3/16)
3.5 - 5.0
(1/8 - 3/16)
2.5
(3/32)
1.0 - 4.0
(1/16 - 3/16) NO
Piecing stitch (Right) Piecework/patchwork
6.5 mm (approx. 1/4 inch) right
seam allowance
5.5
(7/32)
0.0 - 7.0
(0 - 1/4)
2.0
(1/16)
0.2 - 5.0
(1/64 - 3/16) NO
Piecing stitch
(Middle)
Piecework/patchwork
——2.0
(1/16)
0.2 - 5.0
(1/64 - 3/16) NO
Piecing stitch (Left) Piecework/patchwork
6.5 mm (approx. 1/4 inch) left
seam allowance
1.5
(1/16)
0.0 - 7.0
(0 - 1/4)
2.0
(1/16)
0.2 - 5.0
(1/64 - 3/16) NO
Hand-look quilting Quilting stitch made to look like
hand quilting stitch 0.0
(0)
0.0 - 7.0
(0 - 1/4)
2.5
(3/32)
1.0 - 4.0
(1/16 - 3/16) NO
Quilting appliqué
zigzag stitch
Zigzag stitch for quilting and
sewing on appliqué quilt pieces 3.5
(1/8)
0.0 - 7.0
(0 - 1/4)
1.4
(1/16)
0.0 - 4.0
(0 - 3/16) NO
Quilting appliqué
stitch
Quilting stitch for invisible
appliqué or attaching binding 1.5
(1/16)
0.5 - 5.0
(1/64 - 3/16)
1.8
(1/16)
1.0 - 4.0
(1/16 - 3/16) NO
Quilting stippling Background quilting 7.0
(1/4)
1.0 - 7.0
(1/16 - 1/4)
1.6
(1/16)
1.0 - 4.0
(1/16 - 3/16) NO
Stitch Stitch name Presser
foot Applications
Stitch width
[mm (inch.)]
Stitch length
[mm (inch.)] Twin
needle
Auto. Manual Auto. Manual
229
STITCH SETTING CHART
Blind hem stitch Hemming woven fabrics 0.0
(0)
+3.0 - -3.0
(+1/8 - -1/8)
2.0
(1/16)
1.0 - 3.5
(1/16 - 1/8) NO
Blind hem stitch
stretch
Hemming stretch fabric 0.0
(0)
+3.0 - -3.0
(+1/8 - -1/8)
2.0
(1/16)
1.0 - 3.5
(1/16 - 1/8) NO
Blanket stitch Appliqués, decorative blanket
stitch 3.5
(1/8)
2.5 - 7.0
(3/32 - 1/4)
2.5
(3/32)
1.6 - 4.0
(1/16 - 3/16)
OK
( J )
Shell tuck edge Shell tuck edge finish on fabrics 4.0
(3/16)
0.0 - 7.0
(0 - 1/4)
2.5
(3/32)
0.2 - 4.0
(1/64 - 1/16)
OK
( J )
Satin scallop stitch Decorating collar of blouse, edge
of handkerchief 5.0
(3/16)
2.5 - 7.0
(3/32 - 1/4)
0.5
(1/32)
0.1 - 1.0
(1/64 - 1/16)
OK
( J )
Scallop stitch Decorating collar of blouse, edge
of handkerchief 7.0
(1/4)
0.0 - 7.0
(0 - 1/4)
1.4
(1/16)
1.0 - 4.0
(1/16 - 3/16) NO
Patchwork join stitch Patchwork stitches, decorative
stitching 4.0
(1/16)
0.0 - 7.0
(0 - 1/4)
1.2
(1/16)
0.2 - 4.0
(1/64 - 1/16)
OK
( J )
Patchwork double
overlock stitch
Patchwork stitches, decorative
stitching 5.0
(3/16)
2.5 - 7.0
(3/32 - 1/4)
2.5
(3/32)
1.0 - 4.0
(1/16 - 3/16)
OK
( J )
Couching stitch Decorative stitching, attaching
cord and couching 5.0
(3/16)
0.0 - 7.0
(0 - 1/4)
1.2
(1/16)
0.2 - 4.0
(1/64 - 1/16)
OK
( J )
Smocking stitch Smocking, decorative stitching 5.0
(3/16)
0.0 - 7.0
(0 - 1/4)
1.6
(1/16)
1.0 - 4.0
(1/16 - 3/16)
OK
( J )
Feather stitch Fagoting, decorative stitching 5.0
(3/16)
0.0 - 7.0
(0 - 1/4)
2.5
(3/32)
1.0 - 4.0
(1/16 - 3/16)
OK
( J )
Fagoting cross stitch Fagoting, bridging and
decorative stitching 5.0
(3/16)
2.5 - 7.0
(3/32 - 1/4)
2.5
(3/32)
1.0 - 4.0
(1/16 - 3/16)
OK
( J )
Tape attaching Attaching tape to seam in stretch
fabric 4.0
(3/16)
0.0 - 7.0
(0 - 1/4)
1.0
(1/16)
0.2 - 4.0
(1/61 - 3/16)
OK
( J )
Ladder stitch Decorative stitching 4.0
(3/16)
0.0 - 7.0
(0 - 1/4)
3.0
(1/8)
2.0 - 4.0
(1/16 - 3/16) NO
Rick-rack stitch Decorative top stitching 4.0
(3/16)
0.0 - 7.0
(0 - 1/4)
2.5
(3/32)
1.0 - 4.0
(1/16 - 3/16)
OK
( J )
Decorative stitch Decorative stitching 1.0
(1/16)
1.0 - 3.0
(1/16 - 1/8)
2.5
(3/32)
1.0 - 4.0
(1/16 - 3/16)
OK
( J )
Decorative stitch Decorative stitching 5.5
(3/16)
0.0 - 7.0
(0 - 1/4)
1.6
(1/16)
1.0 - 4.0
(1/16 - 3/16)
OK
( J )
Serpentine stitch Decorative stitching and
attaching elastic 5.0
(3/16)
1.5 - 7.0
(1/16 - 1/4)
1.0
(1/16)
0.2 - 4.0
(1/64 - 3/16)
OK
( J )
Decorative stitch Decorative stitching and
appliqué
6.0
(15/
64)
1.0 - 7.0
(1/16 - 1/4)
1.0
(1/16)
0.2 - 4.0
(1/64 - 3/16)
OK
( J )
Decorative stippling
stitch
Decorative stitching 7.0
(1/4)
1.0 - 7.0
(1/16 - 1/4)
1.6
(1/16)
1.0 - 4.0
(1/16 - 3/16) NO
Stitch Stitch name Presser
foot Applications
Stitch width
[mm (inch.)]
Stitch length
[mm (inch.)] Twin
needle
Auto. Manual Auto. Manual
230
STITCH SETTING CHART
Hemstitching Decorative hems, triple straight
at left 1.0
(1/16)
1.0 - 7.0
(1/16 - 1/4)
2.5
(3/32)
1.5 - 4.0
(1/16 - 3/16)
OK
( J )
Hemstitching Decorative hems, triple straight
at center 3.5
(1/8)
1.0 - 7.0
(1/16 - 1/4)
2.5
(3/32)
1.5 - 4.0
(1/16 - 3/16)
OK
( J )
Hemstitching zigzag Decorative hems, top stitching 6.0
(15/
64)
1.5 - 7.0
(1/16 - 1/4)
3.0
(1/8)
1.0 - 4.0
(1/16 - 3/16)
OK
( J )
Hemstitching Decorative hems, lace attaching
pin stitch 3.5
(1/8)
1.5 - 7.0
(1/16 - 1/4)
2.5
(3/32)
1.6 - 4.0
(1/16 - 3/16) NO
Hemstitching Decorative hems 3.0
(1/8)
1.5 - 7.0
(1/16 - 1/4)
3.5
(1/8)
1.6 - 4.0
(1/16 - 3/16) NO
Hemstitching Decorative hems daisy stitch 6.0
(15/
64)
1.5 - 7.0
(1/16 - 1/4)
3.0
(1/8)
1.5 - 4.0
(1/16 - 3/16) NO
Hemstitching Heirloom, decorative hems 5.0
(3/16)
1.5 - 7.0
(1/16 - 1/4)
3.5
(1/8)
1.6 - 4.0
(1/16 - 3/16) NO
Hemstitching Heirloom, decorative hems 5.0
(3/16)
1.5 - 7.0
(1/16 - 1/4)
3.5
(1/8)
1.5 - 4.0
(1/16 - 3/16) NO
Hemstitching Heirloom, decorative hems 5.0
(3/16)
1.5 - 7.0
(1/16 - 1/4)
3.5
(1/8)
1.6 - 4.0
(1/16 - 3/16)
OK
( J )
Hemstitching Heirloom, decorative hems 5.0
(3/16)
1.5 - 7.0
(1/16 - 1/4)
4.0
(3/16)
1.5 - 4.0
(1/16 - 3/16)
OK
( J )
Hemstitching Heirloom, decorative hems 4.0
(3/16)
1.5 - 7.0
(1/16 - 1/4)
2.5
(3/32)
1.5 - 4.0
(1/16 - 3/16)
OK
( J )
Honeycomb stitch Heirloom, decorative hems 5.0
(3/64)
1.5 - 7.0
(1/16 - 1/4)
2.5
(3/32)
1.5 - 4.0
(1/16 - 3/16)
OK
( J )
Honeycomb stitch Heirloom, decorative hems 6.0
(15/
64)
1.5 - 7.0
(1/16 - 1/4)
3.5
(1/8)
1.5 - 4.0
(1/16 - 3/16)
OK
( J )
Hemstitching Heirloom, decorative hems 6.0
(15/
64)
1.5 - 7.0
(1/16 - 1/4)
1.6
(1/16)
1.0 - 4.0
(1/16 - 3/16)
OK
( J )
Hemstitching Heirloom, decorative hems 6.0
(15/
64)
1.5 - 7.0
(1/16 - 1/4)
3.0
(1/8)
1.5 - 4.0
(1/16 - 3/16) NO
Hemstitching Heirloom, decorative hems 6.0
(15/
64)
1.5 - 7.0
(1/16 - 1/4)
4.0
(3/16)
1.5 - 4.0
(1/16 - 3/16)
OK
( J )
Hemstitching Heirloom, decorative hems 4.0
(3/16)
1.5 - 7.0
(1/16 - 1/4)
2.5
(3/32)
1.6 - 4.0
(1/16 - 3/16) NO
Hemstitching Heirloom, decorative hems 5.0
(3/16)
1.5 - 7.0
(1/16 - 1/4)
2.0
(1/16)
1.5 - 4.0
(1/16 - 3/16)
OK
( J )
Hemstitching Decorative hems and bridging
stitch
6.0
(15/
64)
1.5 - 7.0
(1/16 - 1/4)
2.0
(1/16)
1.5 - 4.0
(1/16 - 3/16)
OK
( J )
Hemstitching Decorative hems. Fagoting,
attaching ribbon 5.0
(3/16)
1.5 - 7.0
(1/16 - 1/4)
3.0
(1/8)
1.5 - 4.0
(1/16 - 3/16)
OK
( J )
Stitch Stitch name Presser
foot Applications
Stitch width
[mm (inch.)]
Stitch length
[mm (inch.)] Twin
needle
Auto. Manual Auto. Manual
231
STITCH SETTING CHART
Hemstitching Decorative hems, smocking 6.0
(15/
64)
1.5 - 7.0
(1/16 - 1/4)
1.6
(1/16)
1.0 - 4.0
(1/16 - 3/16) NO
Hemstitching Decorative hems, smocking 5.0
(3/16)
1.5 - 7.0
(1/16 - 1/4)
1.6
(1/16)
1.0 - 4.0
(1/16 - 3/16) NO
Hemstitching Decorative hems, smocking 5.0
(3/16)
1.5 - 7.0
(1/16 - 1/4)
1.6
(1/16)
1.0 - 4.0
(1/16 - 3/16) NO
Hemstitching Decorative hems 5.0
(3/16)
1.5 - 7.0
(1/16 - 1/4)
1.6
(1/16)
1.0 - 4.0
(1/16 - 3/16) NO
Ladder stitch Decorative hems. Fagoting,
attaching ribbon 7.0
(1/4)
5.0 - 7.0
(3/16 - 1/4)
1.6
(1/16)
1.0 - 4.0
(1/16 - 3/16) NO
Narrow rounded
buttonhole
Buttonhole on light to medium
weight fabrics 5.0
(3/16)
3.0 - 5.0
(1/8 - 3/16)
0.4
(1/64)
0.2 - 1.0
(1/64 - 1/16) NO
Wide round ended
buttonhole
Buttonholes with extra space for
larger buttons 5.5
(7/32)
3.5 - 5.5
(1/8 - 7/32)
0.4
(1/64)
0.2 - 1.0
(1/64 - 1/16) NO
Tapered round
ended buttonhole
Reinforced waist tapered
buttonholes 5.0
(3/16)
3.0 - 5.0
(1/8 - 3/16)
0.4
(1/64)
0.2 - 1.0
(1/64 - 1/16) NO
Round ended
buttonhole
Buttonholes with vertical bar
tack in heavyweight fabrics 5.0
(3/16)
3.0 - 5.0
(1/8 - 3/16)
0.4
(1/64)
0.2 - 1.0
(1/64 - 1/16) NO
Round ended
buttonhole
Buttonholes with bar tack 5.0
(3/16)
3.0 - 5.0
(1/8 - 3/16)
0.4
(1/64)
0.2 - 1.0
(1/64 - 1/16) NO
Round double ended
buttonhole
Buttonholes for fine, medium to
heavyweight fabrics 5.0
(3/16)
3.0 - 5.0
(1/8 - 3/16)
0.4
(1/64)
0.2 - 1.0
(1/64 - 1/16) NO
Narrow squared
buttonhole
Buttonholes for light to medium
weight fabrics 5.0
(3/16)
3.0 - 5.0
(1/8 - 3/16)
0.4
(1/64)
0.2 - 1.0
(1/64 - 1/16) NO
Wide squared
buttonhole
Buttonholes with extra space for
larger decorative buttons 5.5
(7/32)
3.5 - 5.5
(1/8 - 7/32)
0.4
(1/64)
0.2 - 1.0
(1/64 - 1/16) NO
Squared buttonhole Heavy-duty buttonholes with
vertical bar tacks 5.0
(7/32)
3.0 - 5.0
(1/8 - 3/16)
0.4
(1/64)
0.2 - 1.0
(1/64 - 1/16) NO
Stretch buttonhole Buttonholes for stretch or woven
fabrics
6.0
(15/
64)
3.0 - 6.0
(1/8 - 15/64)
1.0
(1/16)
0.5 - 2.0
(1/32 - 1/16) NO
Heirloom buttonhole Buttonholes for heirloom and
stretch fabrics
6.0
(15/
64)
3.0 - 6.0
(1/8 - 15/64)
1.5
(1/16)
1.0 - 3.0
(1/1 - 1/8) NO
Bound buttonhole The first step in making bound
buttonholes 5.0
(3/16)
0.0 - 6.0
(0 - 15/64)
2.0
(1/16)
0.2 - 4.0
(1/64 - 3/16) NO
Keyhole buttonhole Buttonholes in heavyweight or
thick fabrics for larger flat
buttons
7.0
(1/4)
3.0 - 7.0
(1/8 - 1/4)
0.5
(1/32)
0.3 - 1.0
(1/64 - 1/16) NO
Tapered keyhole
buttonhole
Buttonholes in medium to heavy
weight fabrics for larger flat
buttons
7.0
(1/4)
3.0 - 7.0
(1/8 - 1/4)
0.5
(1/32)
0.3 - 1.0
(1/64 - 1/16) NO
Keyhole buttonhole Buttonholes with vertical bar
tack for reinforcement in
heavyweight or thick fabrics
7.0
(1/4)
3.0 - 7.0
(1/8 - 1/4)
0.5
(1/32)
0.3 - 1.0
(1/64 - 1/16) NO
Stitch Stitch name Presser
foot Applications
Stitch width
[mm (inch.)]
Stitch length
[mm (inch.)] Twin
needle
Auto. Manual Auto. Manual
232
STITCH SETTING CHART
4 step buttonhole 1 Left side of 4 step buttonhole 5.0
(7/32)
1.5 - 7.0
(1/16 - 1/4)
0.4
(1/64)
0.2 - 1.0
(1/64 - 1/16) NO
4 step buttonhole 2 Bar tack of 4 step buttonhole 5.0
(7/32)
1.5 - 7.0
(1/16 - 1/4)
0.4
(1/64)
0.2 - 1.0
(1/64 - 1/16) NO
4 step buttonhole 3 Right side of 4 step buttonhole 5.0
(7/32)
1.5 - 7.0
(1/16 - 1/4)
0.4
(1/64)
0.2 - 1.0
(1/64 - 1/16) NO
4 step buttonhole 4 Bar tack of 4 step buttonhole 5.0
(7/32)
1.5 - 7.0
(1/16 - 1/4)
0.4
(1/64)
0.2 - 1.0
(1/64 - 1/16) NO
Darning Darning of medium weight fabric 7.0
(1/4)
2.5 - 7.0
(3/32 - 1/4)
2.0
(1/16)
0.4 - 2.5
(1/64 - 1/16) NO
Darning Darning of heavyweight fabric 7.0
(1/4)
2.5 - 7.0
(3/32 - 1/4)
2.0
(1/16)
0.4 - 2.5
(1/64 - 1/16) NO
Bar tack Reinforcement at opening of
pocket, etc. 2.0
(1/16)
1.0 - 3.0
(1/16 - 1/8)
0.4
(1/64)
0.3 - 1.0
(1/64 - 1/16) NO
Button sewing Attaching buttons 3.5
(1/8)
2.5 - 4.5
(3/32 - 3/16) ——NO
Eyelet For making eyelets, holes on
belts, etc. 7.0
(1/4)
7.0 6.0 5.0
(1/4 15/64 3/16)
7.0
(1/4)
7.0 6.0 5.0
(1/4 15/64
3/16)
NO
Star eyelet For making star-shaped eyelets
on holes. ————N
O
Diagonally left up
(Straight)
For attaching appliqué on tubular
pieces of fabric and mitering
corners
————NO
Reverse (Straight) For attaching appliqué on tubular
pieces of fabric and mitering
corners
————NO
Diagonally right up
(Straight)
For attaching appliqué on tubular
pieces of fabric and mitering
corners
————NO
Sideways to left
(Straight)
For attaching appliqué on tubular
pieces of fabric ————NO
Sideways to right
(Straight)
For attaching appliqué on tubular
pieces of fabric ————NO
Diagonally left down
(Straight)
For attaching appliqué on tubular
pieces of fabric and mitering
corners
————NO
Forward (Straight) For attaching appliqué on tubular
pieces of fabric and mitering
corners
————NO
Diagonally right
down (Straight)
For attaching appliqué on tubular
pieces of fabric and mitering
corners
————NO
Sideways to left
(Zigzag)
For attaching appliqué on tubular
pieces of fabric ————NO
Sideways to right
(Zigzag)
For attaching appliqué on tubular
pieces of fabric ————NO
Stitch Stitch name Presser
foot Applications
Stitch width
[mm (inch.)]
Stitch length
[mm (inch.)] Twin
needle
Auto. Manual Auto. Manual

233
STITCH SETTING CHART
Forward (Zigzag) For attaching appliqué on tubular
pieces of fabric and mitering
corners
————NO
Reverse (Zigzag) For attaching appliqué on tubular
pieces of fabric and mitering
corners
————NO
Stitch Stitch name Presser
foot Applications
Stitch width
[mm (inch.)]
Stitch length
[mm (inch.)] Twin
needle
Auto. Manual Auto. Manual

Index
234
Index
A
Accessories
included accessories ................................................................... 3
options ....................................................................................... 6
Accessory compartment ................................................................. 3
Adjustments
screen ..................................................................................... 212
screen brightness ...................................................................... 15
Air vent .......................................................................................... 1
Alarm sounds ............................................................................. 222
Alphabet characters
character/decorative stitches ................................................... 100
embroidery ............................................................................. 133
embroidery edit ...................................................................... 178
Appliqué ...................................................................................... 73
embroidery patterns ................................................................ 148
quilting ..................................................................................... 69
using a zigzag stitch .................................................................. 60
using an embroidery frame pattern ......................................... 173
Array key ........................................................................... 179, 185
Arrow keys ....................................................... 159, 183, 196, 203
Automatic reinforcement stitch key .............................................. 44
Automatic thread cutting key ........................................................ 45
Automatic Threading button .................................................... 3, 25
B
Bar tacks ....................................................................................... 88
Basting ......................................................................................... 56
Blind hem stitches ........................................................................ 72
Block move key .......................................................................... 205
Bobbin
pulling up the bobbin thread .................................................... 23
runs out of thread ................................................................... 150
setting ....................................................................................... 22
winding .................................................................................... 19
Bobbin case ................................................................................ 210
Bobbin cover ........................................................................... 2, 22
Bobbin holder (switch) ................................................................. 21
Bobbin winder ................................................................................ 1
Border key ......................................................................... 190, 193
Button sewing ............................................................................... 90
4 hole buttons ........................................................................... 90
shank ........................................................................................ 91
Buttonhole lever ................................................................2, 82, 87
Buttonholes
four-step ................................................................................... 84
odd-shaped/buttons that do not fit the button holder plate ........ 83
one-step .................................................................................... 80
C
Character spacing key ................................................................ 185
Character/Decorative Stitches
adjustments ............................................................................ 103
combining .............................................................................. 110
editing .................................................................................... 105
key functions .......................................................................... 105
retrieving ...............................................................122, 123, 124
saving ....................................................................118, 120, 121
selecting ................................................................................... 98
sewing .................................................................................... 102
stitch selection screens ............................................................. 99
Cleaning
LCD screen ............................................................................. 210
machine casing ....................................................................... 210
race ........................................................................................ 210
Combining Patterns
character/decorative stitches ................................................... 110
embroidery edit .......................................................................195
Cord guide bobbin cover ..............................................................61
Crazy quilt ....................................................................................61
Custom Thread Table ......................................................... 188, 189
Cut/Tension key ..........................................................................154
D
Darning ........................................................................................86
Dart seam .....................................................................................57
Density key .................................................................................162
E
Edit end key ................................................................................194
Editing
character/decorative stitches ...................................................105
embroidery .............................................................................159
embroidery edit .......................................................................181
MY CUSTOM STITCH .............................................................202
Elastic zigzag stitches ....................................................................62
Elongation key ............................................................................107
Embroidery
adjusting the speed ........................................................ 155, 156
edges or corners ......................................................................141
key functions ...........................................................................137
restarting from the beginning ...................................................152
resuming embroidery after turning off the power .....................152
ribbons or tape ........................................................................142
selecting patterns ....................................................................130
small fabrics ............................................................................141
thread color display ................................................................157
thread trimming function .........................................................155
Embroidery card .........................................................................135
Embroidery card slot .......................................................................1
Embroidery edit
changing the thread color .......................................................187
combined patterns ......................................................... 195, 197
custom thread table ........................................................ 188, 189
explanation of functions ..........................................................176
key functions ...........................................................................182
repeated patterns .....................................................................190
Embroidery foot “W” ..................................................................127
Embroidery frame display ...........................................................158
Embroidery frames
attaching .................................................................................143
inserting fabric ........................................................................140
removing .................................................................................143
types .......................................................................................139
using the embroidery sheet .....................................................141
Embroidery needle plate cover ....................................................146
Embroidery patterns
checking the position ..............................................................144
combining ...............................................................................195
editing .....................................................................................181
pattern selection screens .........................................................131
patterns which use appliqué ....................................................148
retrieving ........................................................................ 170, 171
revising ...................................................................................159
saving ................................................................... 166, 168, 169
selecting ......................................................................... 130, 177
sewing ....................................................................................146
using a frame pattern to make an appliqué ..................... 173, 174
Embroidery sheet ........................................................................141
Embroidery unit ..................................................................... 2, 128
carriage .......................................................................................2
carrying case ...............................................................................3
Enlarger key ................................................................................203
Error messages ............................................................................217
Eyelet ............................................................................................92

Index
235
F
Fabrics
fabric/thread/needle combinations ............................................36
sewing heavyweight fabrics .......................................................41
sewing lightweight fabrics .........................................................41
sewing stretch fabrics ................................................................83
Fagoting ........................................................................................76
Feed dog position switch ..............................................1, 2, 71, 90
Feed dogs ......................................................................... 2, 71, 90
Flat bed attachment ............................................................... 1, 128
Flat fell Seam ................................................................................58
Foot controller ......................................................................... 1, 39
Forward/Back key .............................................................. 151, 152
G
Gathering ......................................................................................57
Grid direction key .......................................................................203
H
Handle ............................................................................................1
Handwheel .............................................................................. 1, 27
Hard case .......................................................................................6
Heirloom ......................................................................................78
Hemstitching
daisy stitch ................................................................................78
drawn work ...............................................................................79
I
Image key ...........................................................49, 108, 145, 204
Insert key ....................................................................................206
J
Jack connector ................................................................................1
K
Key functions
character/decorative stitches ...................................................105
embroidery .............................................................................137
embroidery edit .......................................................................182
MY CUSTOM STITCH .............................................................202
utility stitches ............................................................................10
Knee lifter ................................................................................ 1, 46
L
LCD screen ................................................................................ 1, 9
adjusting .................................................................................212
cleaning ..................................................................................210
locking ......................................................................................46
Lower threading
pulling up the bobbin thread .....................................................23
setting the bobbin .....................................................................22
winding the bobbin ...................................................................19
M
Machine operation mode key .............................................. 17, 214
Main power switch .................................................................... 1, 8
Maintenance Message..................................................................210
Mirror image key ........................................................ 49, 107, 162
Multi color key .................................................................. 163, 186
Multi-directional sewing ...............................................................93
MY CUSTOM STITCH
designing ................................................................................200
entering data ...........................................................................202
key functions ...........................................................................202
retrieving .................................................................................208
saving .....................................................................................207
storing in your list ...................................................................207
N
Needle
changing the needle ................................................................. 34
changing the needle position .................................................... 54
fabric/thread/needle combinations ............................................ 36
mode .......................................................................................... 9
twin needle .............................................................................. 29
Needle bar thread guides ..................................................2, 29, 30
Needle clamp screw ....................................................................... 2
Needle mode selection key .......................................................... 29
Needle plate ................................................................................... 2
Needle position ............................................................................ 54
Needle Position button ................................................................... 3
O
Operation buttons ......................................................................1, 3
Overcasting .....................................................................60, 62, 63
P
Patchwork .................................................................................... 61
Piecing ......................................................................................... 68
Pintuck ......................................................................................... 59
Point delete key .......................................................................... 204
Power cord ..................................................................................... 8
Presser foot
attaching .................................................................................. 32
removing .................................................................................. 32
types ....................................................................................... 227
Presser foot code ....................................................................9, 136
Presser foot holder ....................................................................2, 32
Presser foot holder screw ................................................................ 2
Presser foot lever ......................................................................1, 41
Presser Foot Lifter button ................................................................ 3
Presser foot/Needle exchange key ....................27, 29, 32, 34, 127
Pretension disk .................................................................. 1, 20, 22
Q
Quilting ........................................................................................ 67
free-motion ............................................................................... 71
with satin stitches ..................................................................... 70
R
Race ........................................................................................... 210
Repeated patterns ....................................................................... 190
Retrieving
character/decorative stitch patterns ......................................... 122
computer ........................................................................124, 171
embroidery patterns ................................................................ 170
machine’s memory .........................................................122, 170
MY CUSTOM STITCH designs ................................................ 208
stitch settings ............................................................................ 51
USB media .....................................................................123, 170
utility stitches ........................................................................... 51
Reverse/Reinforcement Stitch button .................................3, 40, 44
Reverse/Reinforcement stitches ..............................................40, 44
Rotate key ..........................................................................161, 183
S
Satin stitches ........................................................................70, 108
Saving
character/decorative stitches ................................................... 118
computer ........................................................................121, 169
embroidery patterns ................................................................ 166
machine’s memory .........................................................118, 166
MY CUSTOM STITCH designs ................................................ 207
stitch settings ............................................................................ 50
USB media .....................................................................120, 168
utility stitches ........................................................................... 50
Scallop stitches ............................................................................. 75

Index
236
Set key ........................................................................................ 203
Settings
automatic reinforcement stitching ............................................. 44
automatic thread cutting ........................................................... 45
display language ....................................................................... 16
embroidery settings ................................................................... 14
general settings ......................................................................... 13
machine setting mode key .............................. 12, 155, 156, 188
screen brightness ...................................................................... 15
sewing settings .......................................................................... 12
stitch length .............................................................................. 42
stitch width ............................................................................... 42
thread tension .................................................................. 43, 154
thread trimming ...................................................................... 155
Sewing speed controller (speed control slide) ......................1, 3, 38
Sewing type selection key ............................................................. 51
Shelltuck stitches .......................................................................... 74
Side cutter .................................................................................... 65
Single/Repeat sewing key ........................................................... 107
Single/triple stitching key ............................................................ 203
Size key ............................................................................. 160, 184
Size selection key ....................................................................... 106
Smocking stitches ......................................................................... 76
Specifications ............................................................................. 223
Spool cap ....................................................................................... 1
Spool net ...................................................................................... 31
Spool pin ........................................................................................ 1
Stabilizer .................................................................................... 138
Start/Stop button ............................................................................. 3
Starting point key ........................................................................ 159
Step stitch patterns ...................................................................... 114
Stitch setting chart ...................................................................... 227
Straight stitch needle plate ............................................................ 54
Straight stitches ............................................................................. 53
Supplemental spool pin .....................................................1, 19, 30
T
Tape attaching .............................................................................. 62
Tape or elastic attaching ............................................................... 77
Test key ............................................................................. 204, 207
Thread
fabric/thread/needle combinations ............................................ 36
thread tension .................................................................. 43, 154
Thread color display ................................................................... 157
Thread cutter ........................................................................... 1, 39
Thread Cutter button ...................................................................... 3
Thread density key ..................................................................... 108
Thread guide .............................................................. 1, 20, 22, 30
Thread guide plate .............................................................1, 22, 25
Thread marks .............................................................................. 193
Thread palette key .....................................................186, 187, 189
Top cover ....................................................................................... 1
Top stitching ................................................................................. 75
Touch pen .................................................................187, 203, 212
holder ......................................................................................... 1
Trial key ..................................................................................... 144
Troubleshooting ......................................................................... 214
Twin needle ................................................................................. 29
U
Upgrading .................................................................................. 224
Upper threading
threading manually ................................................................... 27
twin needle mode ..................................................................... 29
using the “Automatic Threading” button ................................... 25
using the spool net .................................................................... 31
using the vertical spool pin ....................................................... 31
USB media
recalling ........................................................................ 123, 170
saving ............................................................................ 120, 168
usable ............................................................................ 116, 164
USB port connector
for computer ..............................................................1, 121, 169
for media .................................................................. 1, 120, 168
Utility stitches
key functions .............................................................................10
pattern explanation key .............................................................18
retrieving ...................................................................................51
saving .......................................................................................50
selecting ....................................................................................48
sewing type selection key ..........................................................51
stitch selection screens ..............................................................48
stitch setting chart ...................................................................227
V
Vertical spool pin ..........................................................................31
W
Walking foot .................................................................................33
Z
Zigzag stitches ..............................................................................60
Zipper insertion
centered ....................................................................................94
side ...........................................................................................95

Index
237
English
882-S96
XF0649-001
Printed in Taiwan
