Brother Dcp J100 Quick Start Guide
2014-12-12
: Brother Brother-Dcp-J100-Quick-Start-Guide-119212 brother-dcp-j100-quick-start-guide-119212 brother pdf
Open the PDF directly: View PDF ![]() .
.
Page Count: 24
- Quick Setup Guide DCP-J100 DCP-J105
- Start Here
- For Windows® USB interface users (Windows® XP Home/XP Professional/Windows Vista®/Windows® 7/Windows® 8)
- For Macintosh USB interface users (Mac OS X v10.6.8, 10.7.x, 10.8.x)
- For wireless network interface users (DCP-J105 only)
- 11 Before you begin
- 12 Choose your wireless setup method
- 13 Setup using the CD-ROM (Windows® and Macintosh)
- 13 Manual setup from the control panel using the Setup Wizard (Windows®, Macintosh and mobile devices)
- 13 One-push setup using WPS or AOSS™ (Windows®, Macintosh and mobile devices)
- Install the drivers and software (Windows® XP Home/XP Professional/Windows Vista®/Windows® 7/Windows® 8)
- Install the drivers and software (Mac OS X v10.6.8, 10.7.x, 10.8.x)
- Install Optional Applications Windows®
- For Network Users
- Other Information
- brother CEE-ENG
1
Start Here DCP-J100
DCP-J105
Quick Setup Guide
CEE-ENG Version 0
Please read the Product Safety Guide first before you set up your machine. Then, please read this Quick Setup
Guide for the correct setup and installation.
User’s Guides for this model are available on the enclosed CD-ROM.
1
Unpack the machine
WARNING
Plastic bags are used in the packing of your machine. To avoid the danger of suffocation, keep these
plastic bags away from babies and children. Plastic bags are not toys.
aRemove the protective tape and film covering the machine, and also from the LCD.
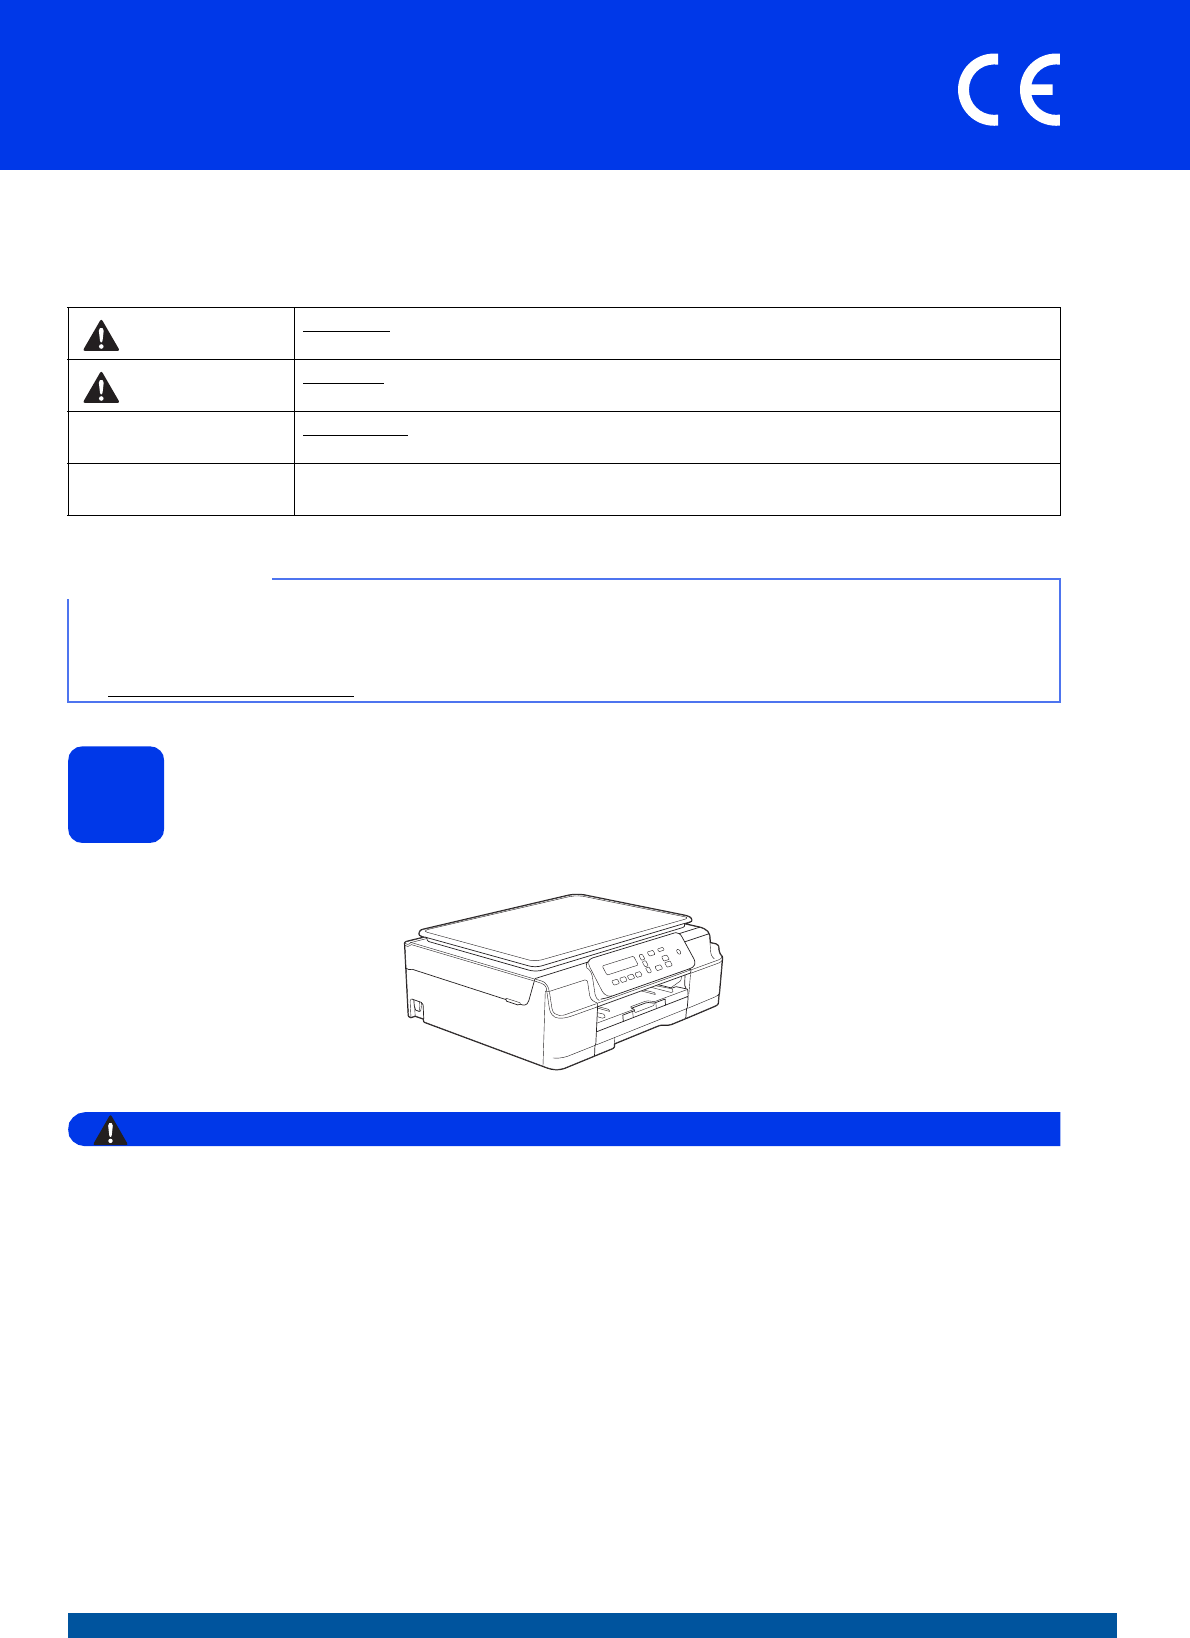
WARNING WARNING indicates a potentially hazardous situation which, if not avoided, could result in death
or serious injuries.
CAUTION CAUTION indicates a potentially hazardous situation which, if not avoided, may result in minor
or moderate injuries.
IMPORTANT IMPORTANT indicates a potentially hazardous situation which, if not avoided, may result in
damage to property or loss of product functionality.
NOTE Notes tell you how to respond to a situation that may arise or give tips about how the operation
works with other features.
NOTE
• Most of the illustrations in this Quick Setup Guide show the DCP-J105.
• If your computer does not have a CD-ROM drive, the supplied CD-ROM does not contain drivers for your
operating system, or you want to download manuals and utilities, visit your model page at
http://solutions.brother.com/.

2
2
Changing the control
panel (if needed)
aRemove the original control panel from the
machine with both hands. Then attach the
control panel of your chosen language.
3
Connect the power cord
WARNING
The machine must be fitted with an earthed
plug.
aConnect the power cord.
4
Choose your language
aWhen the LCD shows this message, press OK.
Select Language
q
Press OK Key
bPress aor b to choose your language and
press OK.
cPress a (Yes) to confirm the language setting.
NOTE
DO NOT connect the USB cable yet (if you are
using a USB cable).
NOTE
• The Warning LED on the control panel will stay
on until you have installed the ink cartridges.
• To prolong the life of the print head, provide the
best ink cartridge economy and maintain print
quality, we do not recommend unplugging the
machine frequently and/or leaving the machine
unplugged for extended periods of time. Each
time you plug the machine in, it automatically
cleans the print head, which uses some of your
ink.
We recommend using to power down the
machine. Using allows minimal power to
the machine, resulting in periodic, but less
frequent, cleaning of the print head.
3
5
Install the ink cartridges
CAUTION
If ink gets in your eyes, wash it out with water at
once and call a doctor if you are concerned.
aMake sure that the power is turned on.
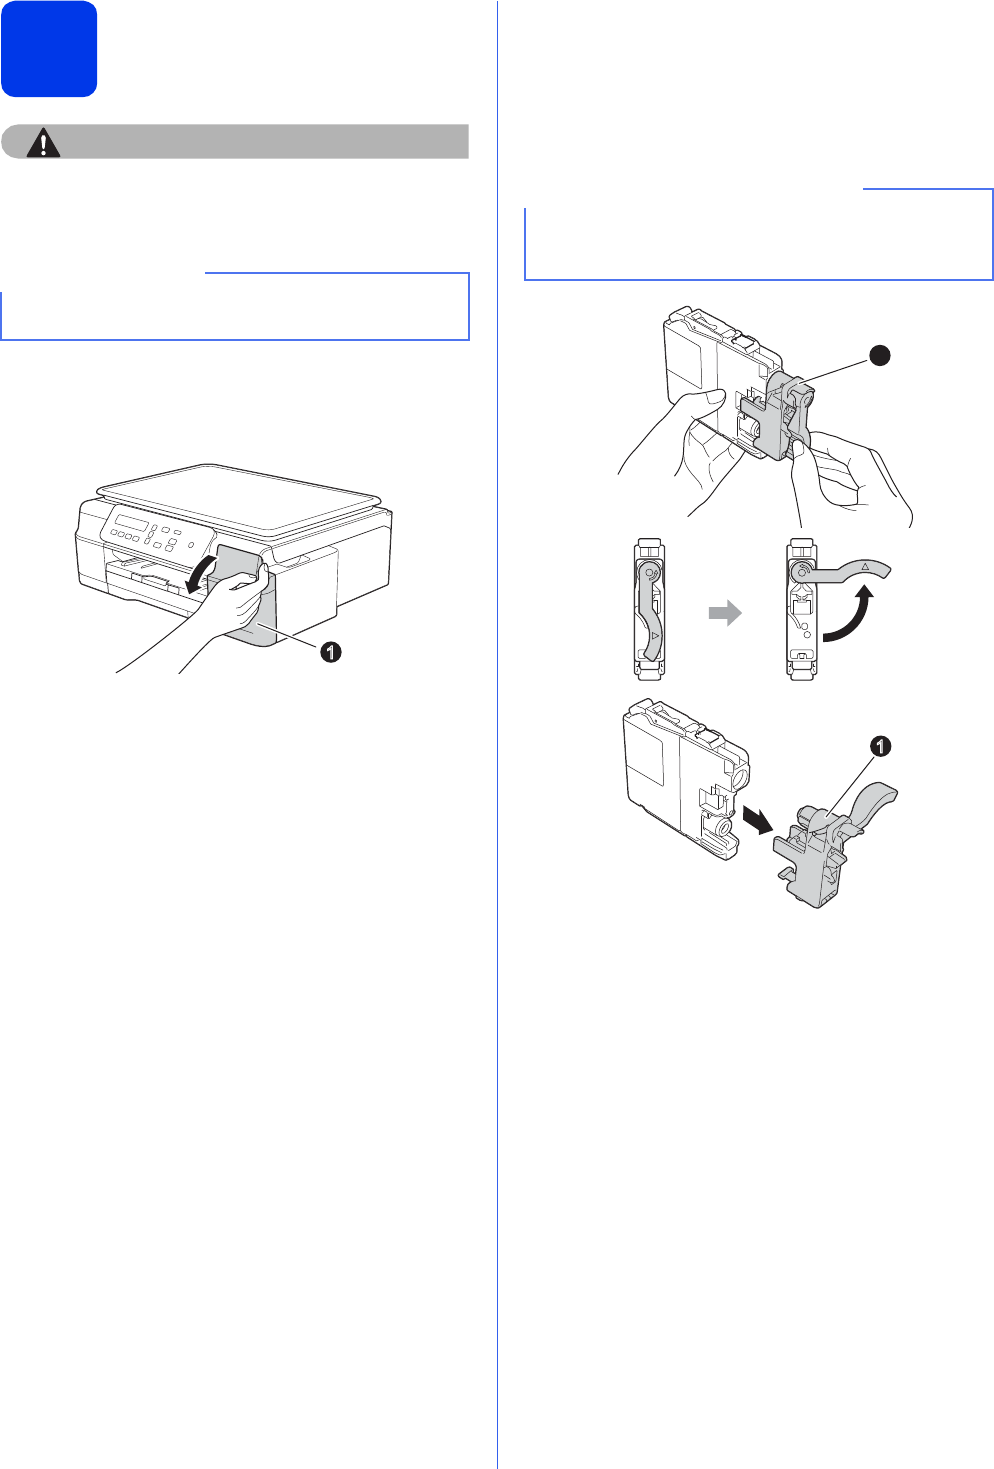
bOpen the ink cartridge cover a.
cRemove the orange protective part.
dUnpack the ink cartridge.
Turn the green release lever on the orange
protective packing a counterclockwise until it
clicks to release the vacuum seal. Then
remove the orange protective packing a as
shown.
eTake care to match the sticker colour with the
cartridge colour.
Install each ink cartridge in the direction of the
arrow on the label.
NOTE
Make sure you install the Introductory Ink
Cartridges included with your machine first.
1
IMPORTANT
DO NOT shake the ink cartridges. If ink stains
your skin or clothing, wash with soap or detergent
at once.
1
1

4
fGently push the back of the ink cartridge
marked “PUSH” until the cartridge lever lifts.
After all the ink cartridges are installed, close
the ink cartridge cover.
6
Load plain A4 paper
aPull the paper tray completely out of the
machine.
bOpen the output paper tray cover.
cGently press and slide the paper width
guides a and then the paper length guide b to
fit the paper size.
Make sure that the triangular marks c on the
paper width guides a and paper length
guide b line up with the mark for the paper size
you are using.
dFan the stack of paper well to avoid paper jams
and misfeeds.
eGently put the paper into the paper tray print
side down and top edge first. Check that the
paper is flat in the tray.
NOTE
The machine will prepare the ink tube system for
printing. This process will take approximately four
minutes. Do not turn off the machine. We
recommend you perform the next step while
waiting.
1
2
3
3
NOTE
Always make sure that the paper is not curled or
wrinkled.
IMPORTANT
Be careful that you do not push the paper in too
far; it may lift at the back of the tray and cause
paper feed problems.

5
fGently adjust the paper width guides to the
paper with both hands. Make sure that the
paper width guides touch the edges of the
paper.
gClose the output paper tray cover.
hSlowly push the paper tray completely into the
machine.
iWhile holding the paper tray in place, pull out
the paper support until it clicks, and then unfold
the paper support flap.
7
Check the print quality
aWhen the preparation process has finished, the
LCD shows this message
Set Paper and
q
Press Start
Press Colour Start.
bCheck the quality of the four colour blocks on
the sheet. (black/yellow/cyan/magenta)
cIf all lines are clear and visible, press a (Yes) to
finish the quality check and go to the next step.
If lines are missing, press b (No) and follow the
steps on the LCD.
8
Set the date and time
Setting the date and time allows the machine to clean
the print head regularly and maintain optimum print
quality.
aWhen the LCD shows this message, press OK.
Date&Time
q
Enter & OK Key
bPress aor b to enter the last two digits of the
year, and then press OK.
cRepeat for the Month and Day, and then Hours
and Minutes in 24-hour format.
NOTE
You can change the date and time if needed. For
more information uuBasic User’s Guide: Setting
the date and time

6
9
Wireless setup
(DCP-J105 only)
(if needed)
Setup Wi-Fi? message appears on the LCD.
For wireless setup using a mobile device, go to a.
For Windows® and Macintosh users, go to b.
aPress a to choose Yes.
Go to step 11 on page 13 to continue with the
wireless setup.
bPress b to choose No.
Wireless setup instructions for Windows® and
Macintosh users will be covered later, starting
on page 13.
7
Windows®Macintosh
USB Wireless Network
10
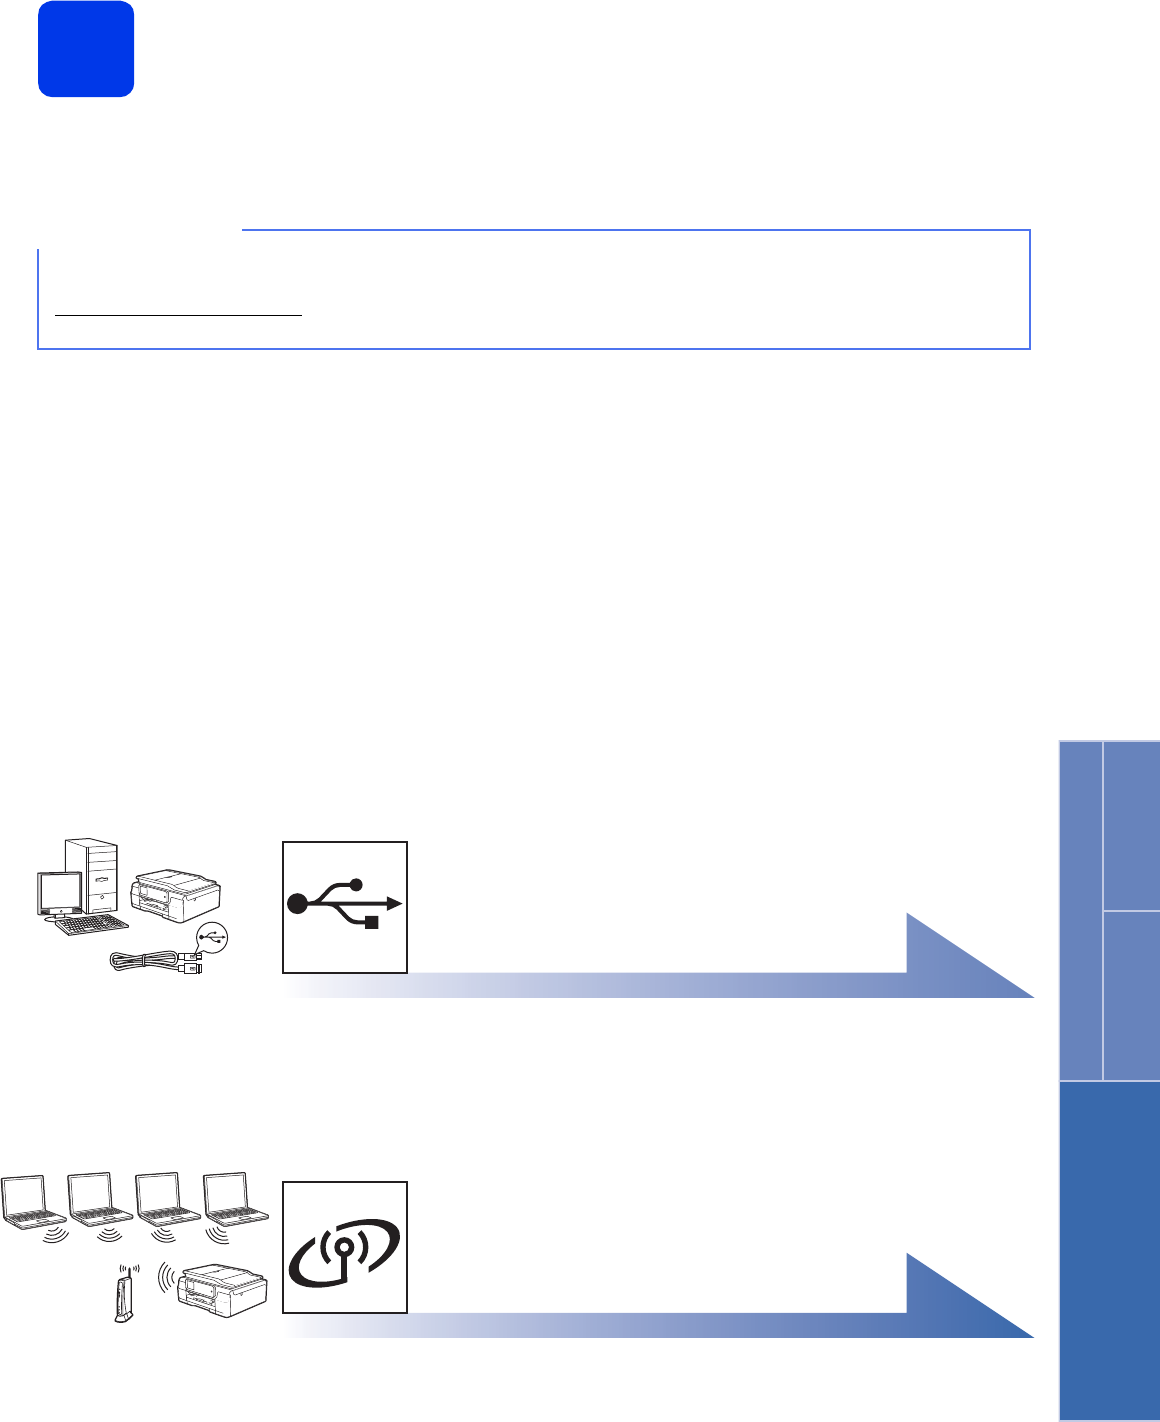
Choose your connection type
These installation instructions are for Windows®XP Home, XP Professional, XP Professional x64 Edition,
Windows Vista®, Windows®7, Windows®8, and Mac OS X v10.6.8, 10.7.x, 10.8.x.
NOTE
If your computer does not have a CD-ROM drive, the supplied CD-ROM does not contain drivers for your
operating system, or you want to download manuals and utilities, visit your model page at
http://solutions.brother.com/. Some software applications included on the CD-ROM may not be available as a
download.
For USB interface cable
Windows
®
, go to page 8
Macintosh, go to page 11
For Wireless Network
(DCP-J105 only)
Windows
®
and Macintosh,
go to page 13
8
Windows®
USB
For Windows
®
USB interface users
(Windows®XP Home/XP Professional/Windows Vista®/Windows®7/Windows®8)
11
Before you install
Make sure that your computer is ON and you are
logged on with Administrator rights.
12
Install MFL-Pro Suite
aPut the CD-ROM into your CD-ROM drive. If
the model name screen appears, choose your
machine. If the language screen appears,
choose your language.
bClick Install MFL-Pro Suite and click Yes if
you accept the license agreements.
c(DCP-J105)
Choose Local Connection (USB), and then
click Next.
(DCP-J100)
Choose Standard, and then click Next.
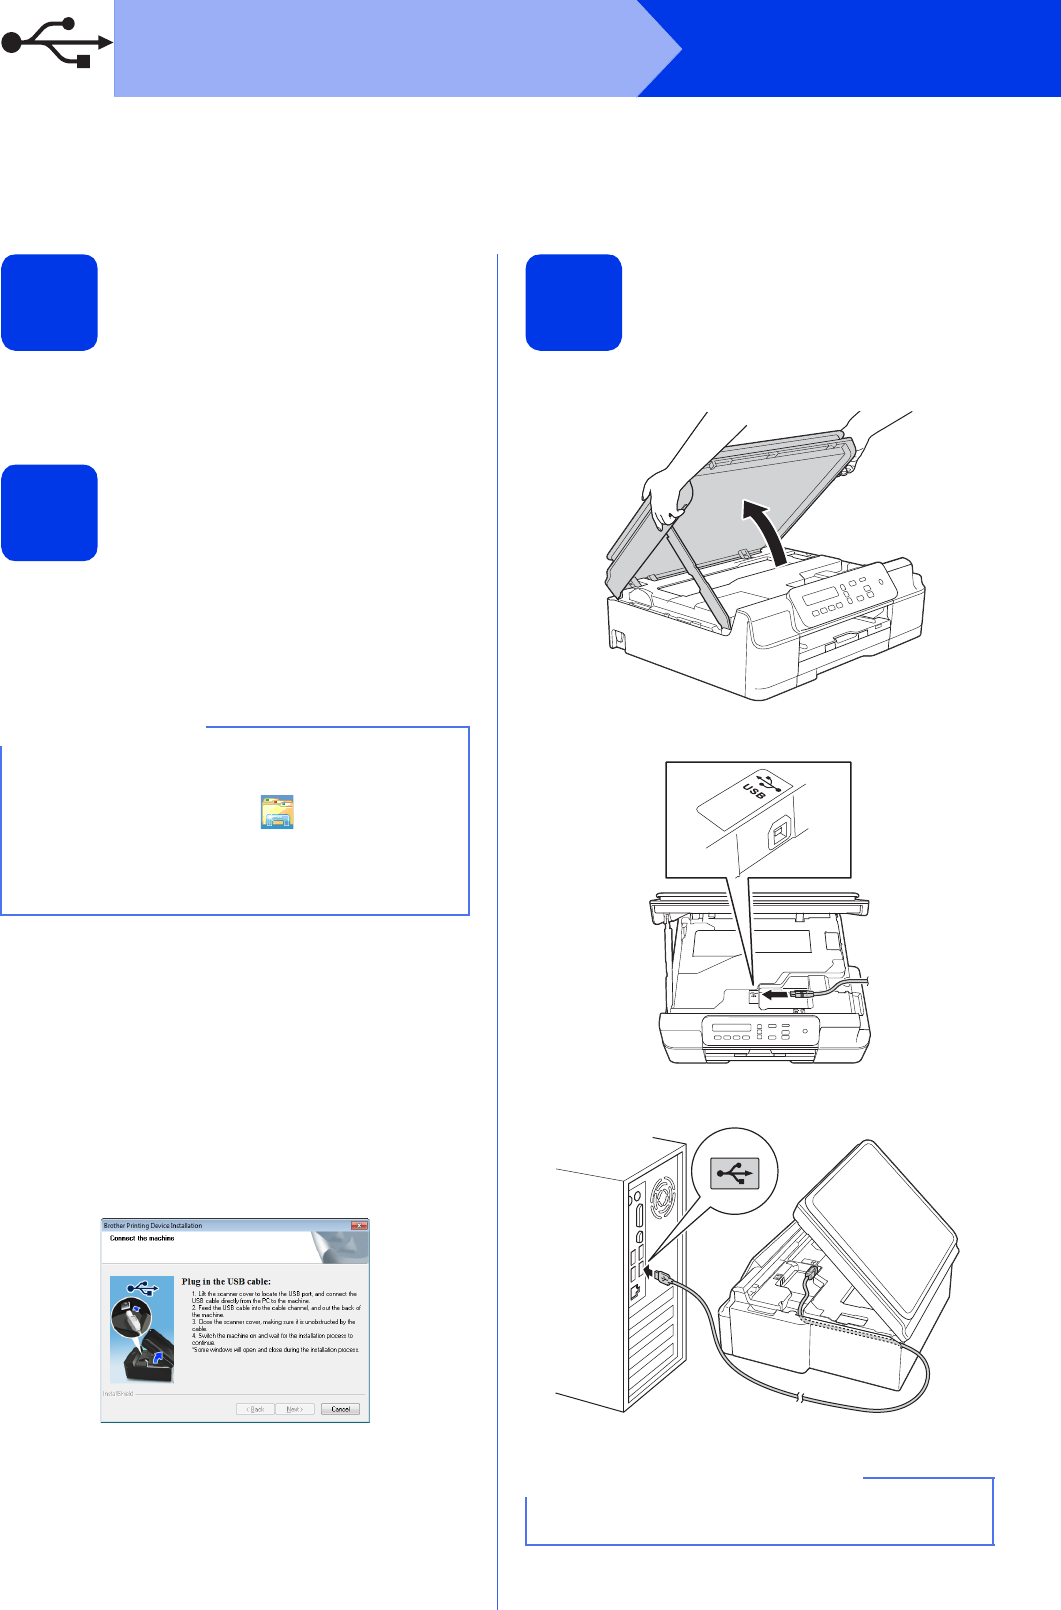
dFollow the on-screen instructions until the Plug
in the USB cable screen appears.
13
Connect the USB cable
a
b
c
NOTE
If the Brother screen does not appear
automatically, go to Computer (My Computer).
(For Windows® 8: click the (File Explorer)
icon on the taskbar, and then go to Computer.)
Double-click the CD-ROM icon, and then
double-click start.exe.
IMPORTANT
Make sure that the cable does not restrict the
cover from closing, or an error may occur.
9
Windows®
USB
Windows®Macintosh
USB
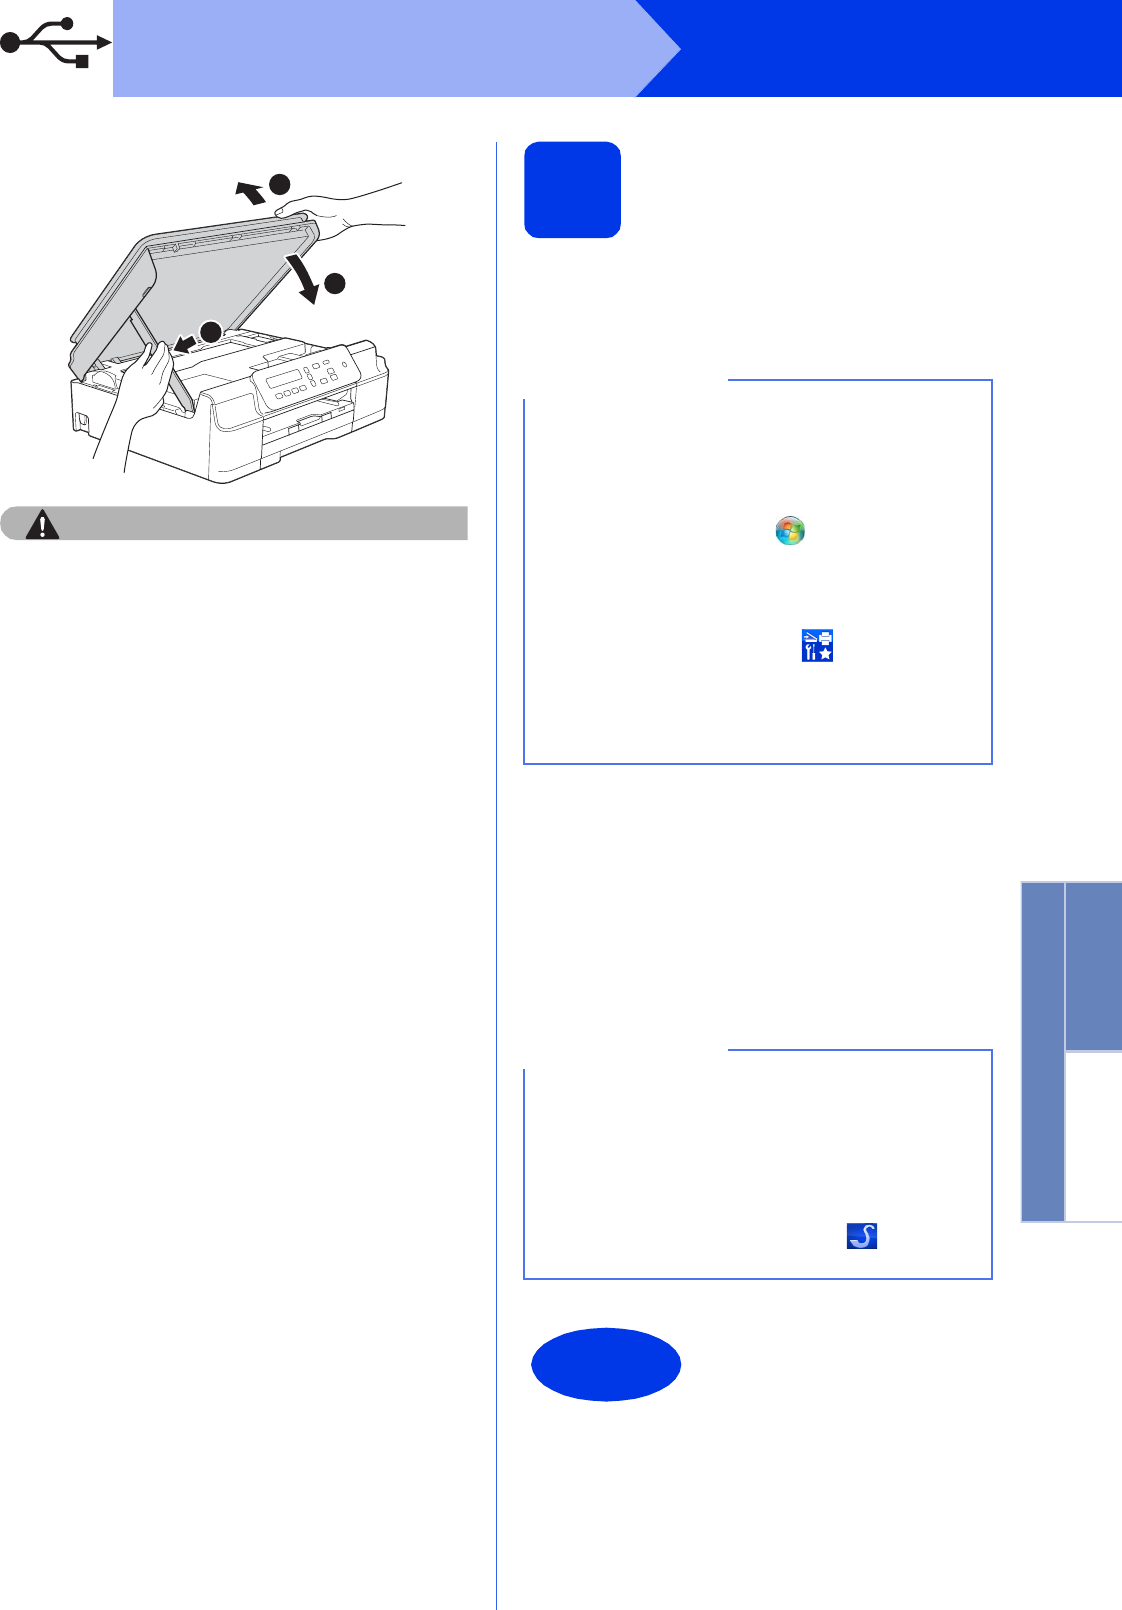
d
CAUTION
Be careful not to pinch your fingers when the
scanner cover closes.
eThe installation will continue automatically.
The installation screens appear one after
another.
fIf the Environmental Advice for Imaging
Equipment screen appears, click Next.
gWhen the On-Line Registration screen
appears, follow the on-screen instructions.
Click Next.
hIf you do not want to set your machine as the
default printer, clear the Set as Default Printer
check box, and then click Next.
iWhen the Setup is Complete window
appears, confirm the settings, and then click
Next.
14
Finish and restart
aClick Finish to restart your computer.
After restarting the computer, you must log on
with Administrator rights.
bThe following screens will appear.
• When the Software Update Setting screen
appears, choose the software update setting
you want and click OK.
• When the Brother Product Research and
Support Program screen appears, select
your preference and follow the on-screen
instructions.
3
1
3
2
NOTE
If an error message appears during the software
installation, do one of the following:
-Windows
® XP, Windows Vista® and
Windows®7 users: Run the Installation
Diagnostics located in (Start) >
All Programs > Brother > DCP-XXXX (where
XXXX is your model name).
-Windows
®8 users: To run the Installation
Diagnostics, double-click (Brother
Utilities) on the desktop, and then click the
drop-down list and select your model name (if
not already selected). Click Tools in the left
navigation bar.
NOTE
• Internet access is required for the software
update and the Brother Product Research and
Support Program.
• When you install MFL-Pro Suite, Brother Help
will also be installed automatically. Brother
Help allows you to access the Brother
Solutions Center when you click in the task
tray.
Finish
The installation is now
complete.

10
Windows®
USB
To install optional applications:
Now go to
Page 21
NOTE
Windows®8 users: If the Brother manuals
included on the CD-ROM are in PDF format, use
Adobe® Reader® to open them. If Adobe®
Reader® is installed on your computer but you
cannot open the files in Adobe® Reader®, change
the file association for PDF (see How to open a
PDF file in Adobe® Reader® (Windows®8)
on page 23).
11
Macintosh
USB
Windows®Macintosh
USB
For Macintosh USB interface users
(Mac OS X v10.6.8, 10.7.x, 10.8.x)
11
Before you install
Make sure your machine is connected to the power
and your Macintosh is ON. You must be logged on
with Administrator rights.
12
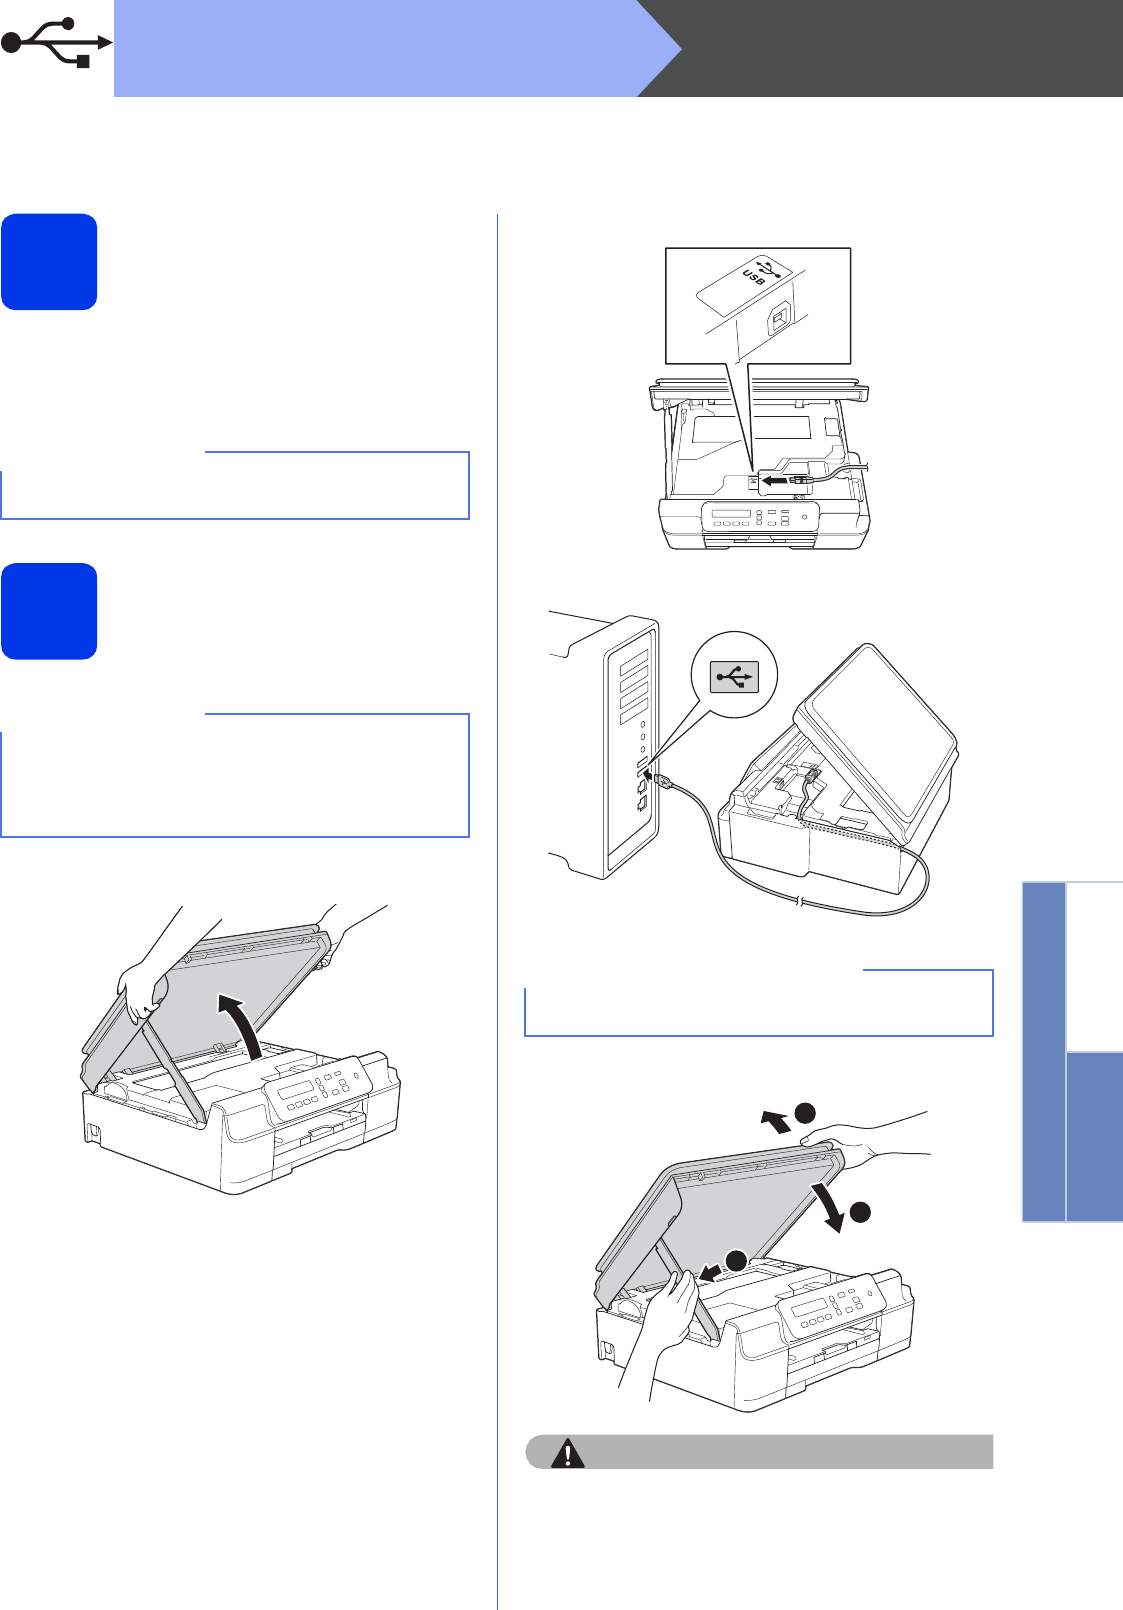
Connect the USB cable
a
b
c
d
CAUTION
Be careful not to pinch your fingers when the
scanner cover closes.
NOTE
For Mac OS X v10.6.0 to 10.6.7 users, upgrade to
Mac OS X v10.6.8 - 10.8.x.
NOTE
• DO NOT connect the machine to a USB port on
a keyboard or a non-powered USB hub.
• Connect the machine directly to your
Macintosh.
IMPORTANT
Make sure that the cable does not restrict the
cover from closing, or an error may occur.
3
1
3
2
12
Macintosh
USB
13
Install MFL-Pro Suite
aPut the CD-ROM into your CD-ROM drive.
bDouble-click the Start Here OSX icon to install.
If the model name screen appears, choose
your machine.
c(DCP-J105 only)
Choose Local Connection (USB), and then
click Next. Follow the on-screen instructions.
dAfter the installation, the Brother software will
search for the Brother device. This will take a
few moments to complete.
eChoose your machine from the list, and then
click Next.
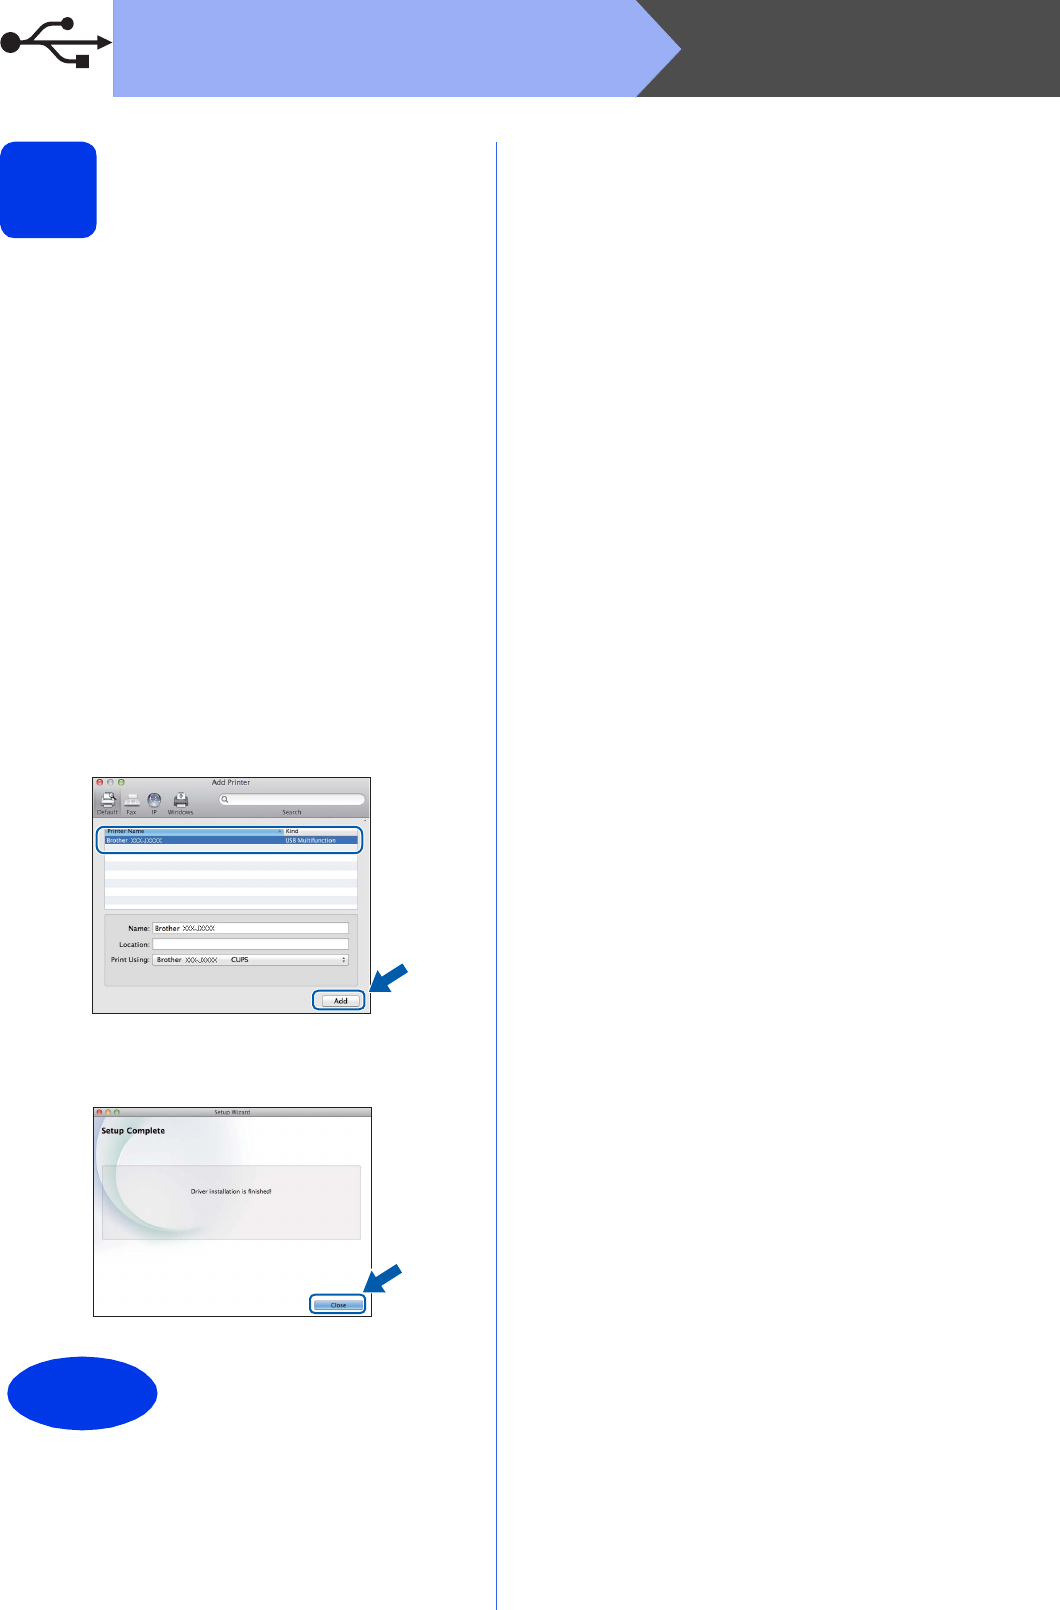
fWhen the Add Printer screen appears, click
Add Printer.
gChoose your machine from the list. Click Add
and then click Next.
When the support screen appears, click Next.
hWhen this screen appears, click Close.
Finish
The installation is now
complete.

13
For Wireless Network Users
Wireless Network
For wireless network interface users (DCP-J105 only)
11
Before you begin
12
Choose your wireless setup method
The following instructions will offer three methods for setting up your Brother machine on a wireless network. If
you began the wireless setup from step 9 on page 6, go to method b or c. For all other users, choose the method
you prefer for your environment.
Method a is the recommended way to connect (Windows® or Macintosh).
NOTE
If you have previously configured the wireless settings of the machine, you must reset the network settings
before you can configure the wireless settings again.
On your machine, press Menu.
Press aor b to choose 3.Network. Press OK.
Press aor b to choose 0.Network Reset. Press OK.
Press a twice to accept the change.
NOTE
To set up your machine in Ad-hoc mode (connected to a wireless-capable computer without an access
point/router), see instructions in the Software and Network User’s Guide on the CD-ROM.
To view the Software and Network User’s Guide:
1 Turn on your computer. Insert the CD-ROM into your CD-ROM drive.
For Windows®:
2 Choose your model and the language. The CD-ROM top menu will appear.
3Click User’s Guides, and then click PDF/HTML documents.
4Click Software and Network User’s Guide.
For Macintosh:
2 Double-click User’s Guides. Choose your model and the language.
3Click User’s Guides, and then click Software and Network User’s Guide.
aSetup using the CD-ROM (Windows® and Macintosh)
• We recommend using a computer wirelessly connected to your network for this method.
• A USB cable might be needed in some cases.
Now go to
page 15
14
For Wireless Network Users
bManual setup from the control panel using the Setup Wizard (Windows®, Macintosh and
mobile devices)
If your wireless access point/router does not support WPS (Wi-Fi Protected Setup™) or AOSS™,
write down the wireless network settings of your wireless access point/router in the area below.
If you need assistance during setup and want to contact Brother customer service, make sure
you have your SSID (Network Name) and Network Key ready. We cannot assist you in locating
this information.
Item Record the current wireless network settings
SSID (Network Name)
Network Key*
* The Network Key may also be described as the Password, Security Key or Encryption Key.
NOTE
If you do not know this information (SSID and Network Key), you cannot continue the wireless
setup.
How can I find this information?
1) Check the documentation provided with your wireless access point/router.
2) The initial SSID could be the manufacturer’s name or the model name.
3) If you do not know the security information, please consult the router manufacturer, your system
administrator, or your Internet provider.
Now go to
page 16
cOne-push setup using WPS or AOSS™ (Windows®, Macintosh and mobile devices)
Use this method if your wireless access point/router supports automatic wireless (one-push) setup
(WPS or AOSS™).
Now go to
page 17

15
For Wireless Network Users
Wireless Network
13
Setup using the CD-ROM
(Windows
®
and Macintosh)
For Windows® Users:
aPut the CD-ROM into your CD-ROM drive. If
the model name screen appears, choose your
machine. If the language screen appears,
choose your language.
bClick Install MFL-Pro Suite and click Yes if
you accept the license agreements.
cChoose Wireless Network Connection, and
then click Next.
dWhen the Firewall/AntiVirus detected screen
appears, choose Change the Firewall port
settings to enable network connection and
continue with the installation.
(Recommended), and then click Next.
If you are not using the Windows® Firewall, see
the instructions provided with your firewall
software for information on how to add the
following network ports.
For network scanning, add UDP port 54925.
If you still have trouble with your network
connection, add UDP ports 137 and 161.
eFollow the on-screen instructions to set up the
Brother machine.
fYour machine will now try to connect to your
wireless network. It may take a few minutes.
Wireless setup is now complete.
To install MFL-Pro Suite
For Windows® users:
Now go to
Step 15-e on page 18
For Macintosh Users:
Put the CD-ROM into your CD-ROM drive and
double-click Start Here OSX. Select Wireless
installation and follow the Wireless Device
Setup instructions on your computer screen.
When setup is complete, go to step 15-e on
page 20.
NOTE
If the Brother screen does not appear
automatically, go to Computer (My Computer).
(For Windows® 8: click the (File Explorer)
icon on the taskbar, and then go to Computer.)
Double-click the CD-ROM icon, and then
double-click start.exe.
16
For Wireless Network Users
13
Manual setup from the
control panel using the
Setup Wizard
(Windows
®
,
Macintosh and mobile devices)
aIf you began the wireless setup from step 9 on
page 6, press aor b to choose 1.Setup
Wizard and press OK.
Then go to c.
All other users go to b.
bOn your machine, press Menu.
Press aor b to choose 3.Network. Press OK.
Press aor b to choose 3.Setup Wizard.
Press OK.
cWhen WLAN Enable? is displayed, press a
(Yes) to accept.
This will start the wireless setup wizard.
To cancel, press Stop/Exit.
dThe machine will search for available SSIDs. It
will take several seconds to display a list of
available SSIDs.
If a list of SSIDs is displayed, press aor b to
choose the SSID you wrote down in step 12-b
on page 14. Press OK.
If the machine asks you to enter a Network
Key, go to e.
Otherwise, go to f.
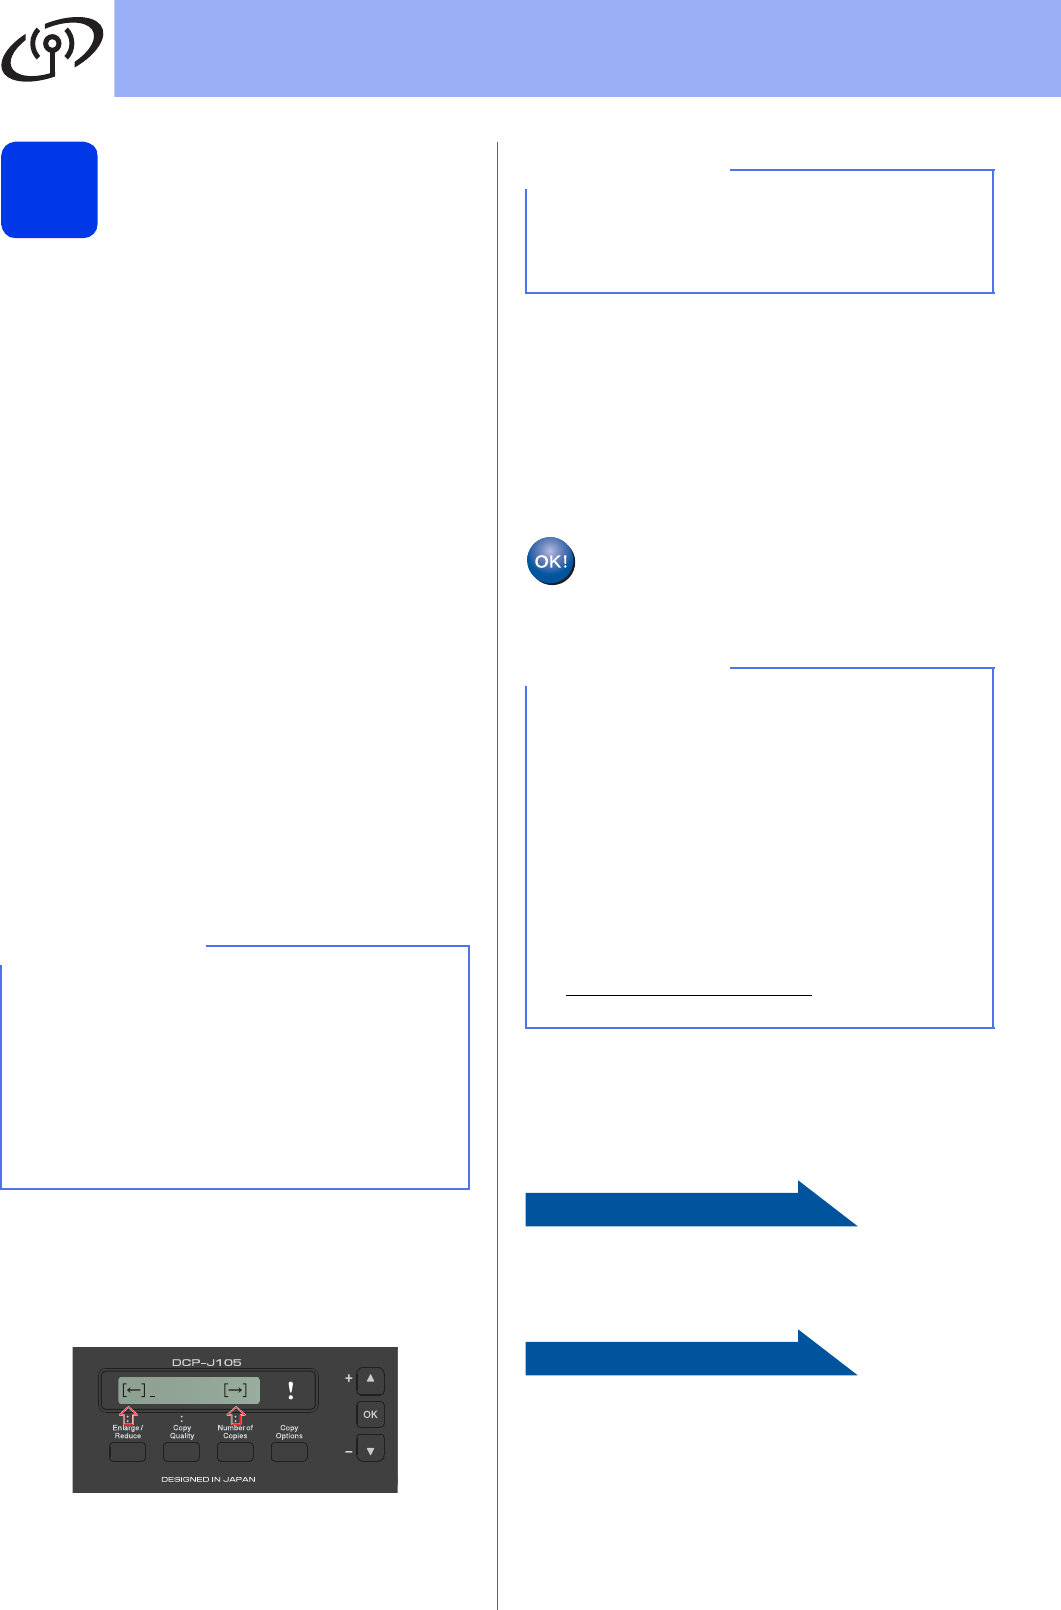
eEnter the Network Key you wrote down in
step 12-b on page 14 using the a, b keys to
choose each letter or number.
Use the Enlarge/Reduce or Number of
Copies key to move the cursor left or right.
For example, to enter the letter a, press the
akey once. To enter the number 3, hold down
the akey until it appears.
Press OK when you have entered all the
characters, then press a (Yes) to apply your
settings.
fYour machine will now try to connect to your
wireless network. It may take a few minutes.
When Press OK Key appears on the LCD,
press OK.
Wireless setup is now complete.
To install MFL-Pro Suite, continue to
step 14.
For Windows® users:
Now go to
Page 18
For Macintosh users:
Now go to
Page 20
NOTE
• If the list is blank, check that the wireless
access point/router has power and is
broadcasting the SSID. Move your machine
closer to the wireless access point/router and
try starting from b again.
• If your access point is set to not broadcast the
SSID, you will have to manually add the SSID
name. For more information, see the Software
and Network User’s Guide.
NOTE
The letters appear in this order: lower case, upper
case, numbers and then special letters.
(For more information, see Entering Text for
Wireless Settings on page 22.)
NOTE
For mobile device users:
• Connect your mobile device to a wireless
access point/router using a Wi-Fi connection.
• Download and install Brother iPrint&Scan
(Android™/iOS/Windows® Phone) from your
mobile device’s application download site. You
can also use AirPrint (iOS) with this machine.
• To download the User’s Guide for the
application you are using (Brother
iPrint&Scan/AirPrint), visit the Brother
Solutions Center at
http://solutions.brother.com/ and click Manuals
on your model’s page.
17
For Wireless Network Users
Wireless Network
13
One-push setup using
WPS or AOSS™
(Windows
®
,
Macintosh and mobile devices)
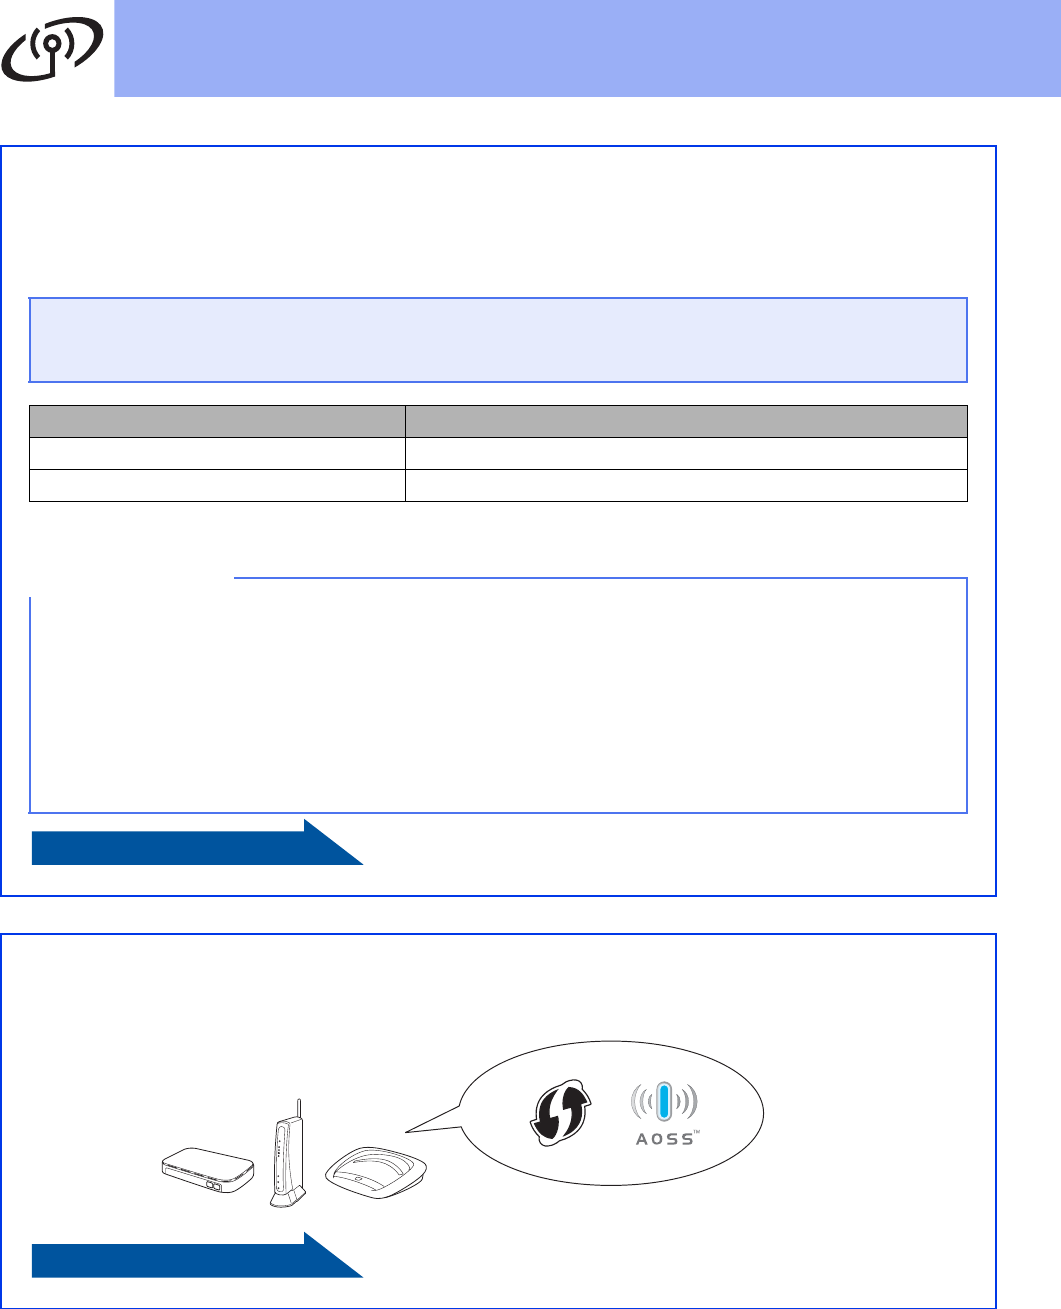
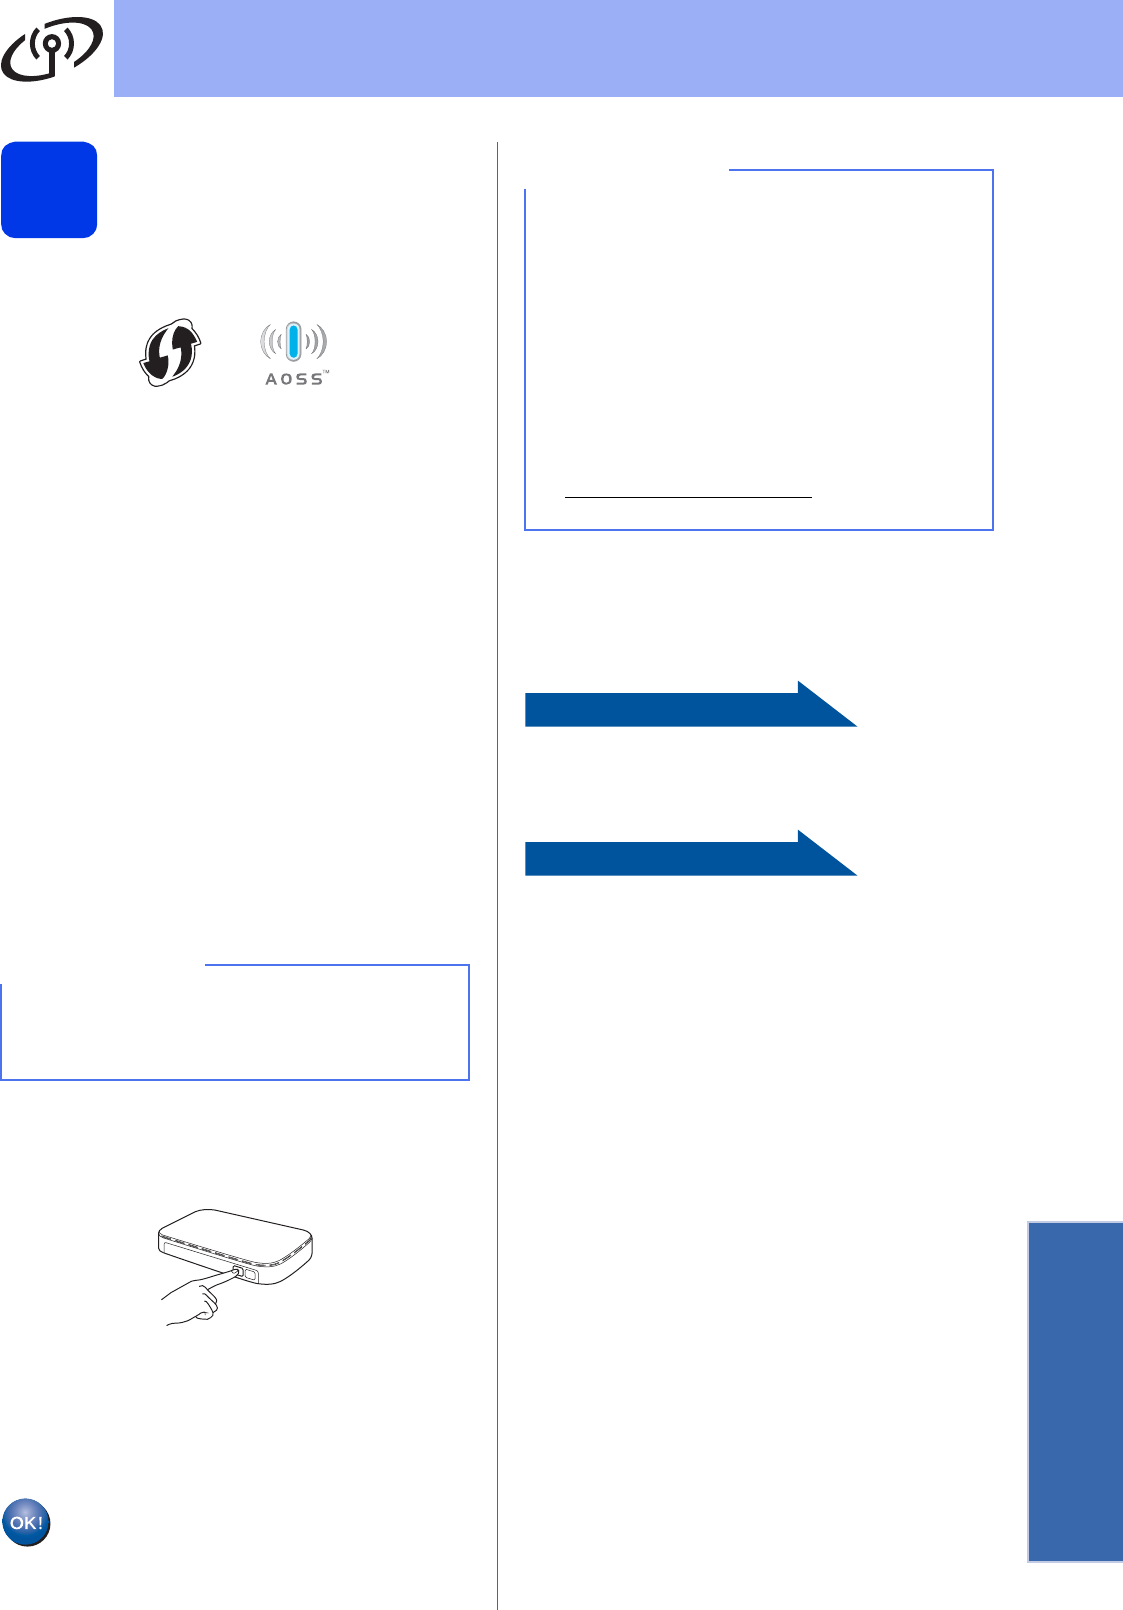
aConfirm your wireless access point/router has
the WPS or AOSS™ symbol as shown below.
bPlace the Brother machine within range of your
WPS or AOSS™ access point/router. The
range may differ depending on your
environment. Refer to the instructions provided
with your access point/router.
If you began the wireless setup from step 9 on
page 6, press aor b to choose 3.WPS/AOSS
and press OK.
Then go to d.
All other users go to c.
cOn your machine, press Menu.
Press aor b to choose 3.Network.
Press OK.
Press aor b to choose 4.WPS/AOSS.
Press OK.
d When WLAN Enable? is displayed, press a
(Yes) to accept.
This will start the wireless setup wizard.
ePress the WPS or AOSS™ button on your
wireless access point/router (for more
information, see the instructions provided with
your wireless access point/router).
This feature will automatically detect which
mode (WPS or AOSS™) your wireless access
point/router uses to configure your machine.
When Press OK Key appears on the LCD,
press OK.
Wireless setup is now complete.
To install MFL-Pro Suite, continue to
step 14.
For Windows® users:
Now go to
Page 18
For Macintosh users:
Now go to
Page 20
NOTE
If your wireless access point/router supports
WPS, you can also configure your machine using
the PIN (Personal Identification Number) Method.
uuSoftware and Network User’s Guide
NOTE
For mobile device users:
• Connect your mobile device to a wireless
access point/router using a Wi-Fi connection.
• Download and install Brother iPrint&Scan
(Android™/iOS/Windows® Phone) from your
mobile device’s application download site. You
can also use AirPrint (iOS) with this machine.
• To download the User’s Guide for the
application you are using (Brother
iPrint&Scan/AirPrint), visit the Brother
Solutions Center at
http://solutions.brother.com/ and click Manuals
on your model’s page.

18
Windows®
Wireless Network
Install the drivers and software
(Windows®XP Home/XP Professional/Windows Vista®/Windows®7/Windows®8)
14
Before you install
Make sure that your computer is ON and you are
logged on with Administrator rights.
15
Install MFL-Pro Suite
aPut the CD-ROM into your CD-ROM drive. If
the model name screen appears, choose your
machine. If the language screen appears,
choose your language.
bClick Install MFL-Pro Suite and click Yes if
you accept the license agreements.
cChoose Wireless Network Connection, and
then click Next.
dWhen the Firewall/AntiVirus detected screen
appears, choose Change the Firewall port
settings to enable network connection and
continue with the installation.
(Recommended), and then click Next.
If you are not using the Windows® Firewall, see
the instructions provided with your firewall
software for information on how to add the
following network ports.
For network scanning, add UDP port 54925.
If you still have trouble with your network
connection, add UDP ports 137 and 161.
eChoose your machine from the list, and then
click Next.
fThe installation of the Brother drivers will
automatically start. The installation screens
appear one after another.
gIf the Environmental Advice for Imaging
Equipment screen appears, click Next.
hWhen the On-Line Registration screen
appears, follow the on-screen instructions.
Click Next.
iIf you do not want to set your machine as the
default printer, clear the Set as Default Printer
check box, and then click Next.
jWhen the Setup is Complete window
appears, confirm the settings, and then click
Next.
NOTE
If the Brother screen does not appear
automatically, go to Computer (My Computer).
(For Windows® 8: click the (File Explorer)
icon on the taskbar, and then go to Computer.)
Double-click the CD-ROM icon, and then
double-click start.exe.
NOTE
• If your machine is not found over the network,
confirm your settings by following the
on-screen instructions. If you encounter this
failure, go to step 12-b on page 14 and set up
the wireless connection again.
• If you are using WEP and the LCD displays
Connected but your machine is not found on
the network, make sure you entered the WEP
key correctly. The WEP key is case-sensitive.

19
Windows®
Wireless Network
Windows®Macintosh
Wireless Network
16
Finish and restart
aClick Finish to restart your computer. After
restarting the computer, you must log on with
Administrator rights.
bThe following screens will appear.
• When the Software Update Setting screen
appears, choose the software update setting
you want and click OK.
• When the Brother Product Research and
Support Program screen appears, select
your preference and follow the on-screen
instructions.
To install optional applications:
Now go to
Page 21
NOTE
If an error message appears during the software
installation, do one of the following:
- Windows® XP, Windows Vista® and
Windows®7 users: Run the Installation
Diagnostics located in (Start) >
All Programs > Brother > DCP-XXXX LAN
(where XXXX is your model name).
- Windows®8 users: To run the Installation
Diagnostics, double-click (Brother
Utilities) on the desktop, and then click the
drop-down list and select your model name (if
not already selected). Click Tools in the left
navigation bar.
NOTE
• Internet access is required for the software
update and the Brother Product Research and
Support Program.
• When you install MFL-Pro Suite, Brother Help
will also be installed automatically. Brother
Help allows you to access the Brother
Solutions Center when you click in the task
tray.
Finish
The installation is now
complete.
NOTE
Windows®8 users: If the Brother manuals
included on the CD-ROM are in PDF format, use
Adobe® Reader® to open them. If Adobe®
Reader® is installed on your computer but cannot
open the files in Adobe® Reader®, change the file
association for PDF (see How to open a PDF file
in Adobe® Reader® (Windows®8) on page 23).
20
Macintosh
Wireless Network
Install the drivers and software
(Mac OS X v10.6.8, 10.7.x, 10.8.x)
14
Before you install
Make sure your machine is connected to the power
and your Macintosh is ON. You must be logged on
with Administrator rights.
15
Install MFL-Pro Suite
aPut the CD-ROM into your CD-ROM drive.
bDouble-click the Start Here OSX icon to install.
If the model name screen appears, choose
your machine.
cChoose Wireless Network Connection, and
then click Next.
dAfter the installation, the Brother software will
search for the Brother device. This will take a
few moments to complete.
eChoose your machine from the list, and then
click Next.
fThe installation of the Brother drivers will
automatically start. Please wait for the software
to install.
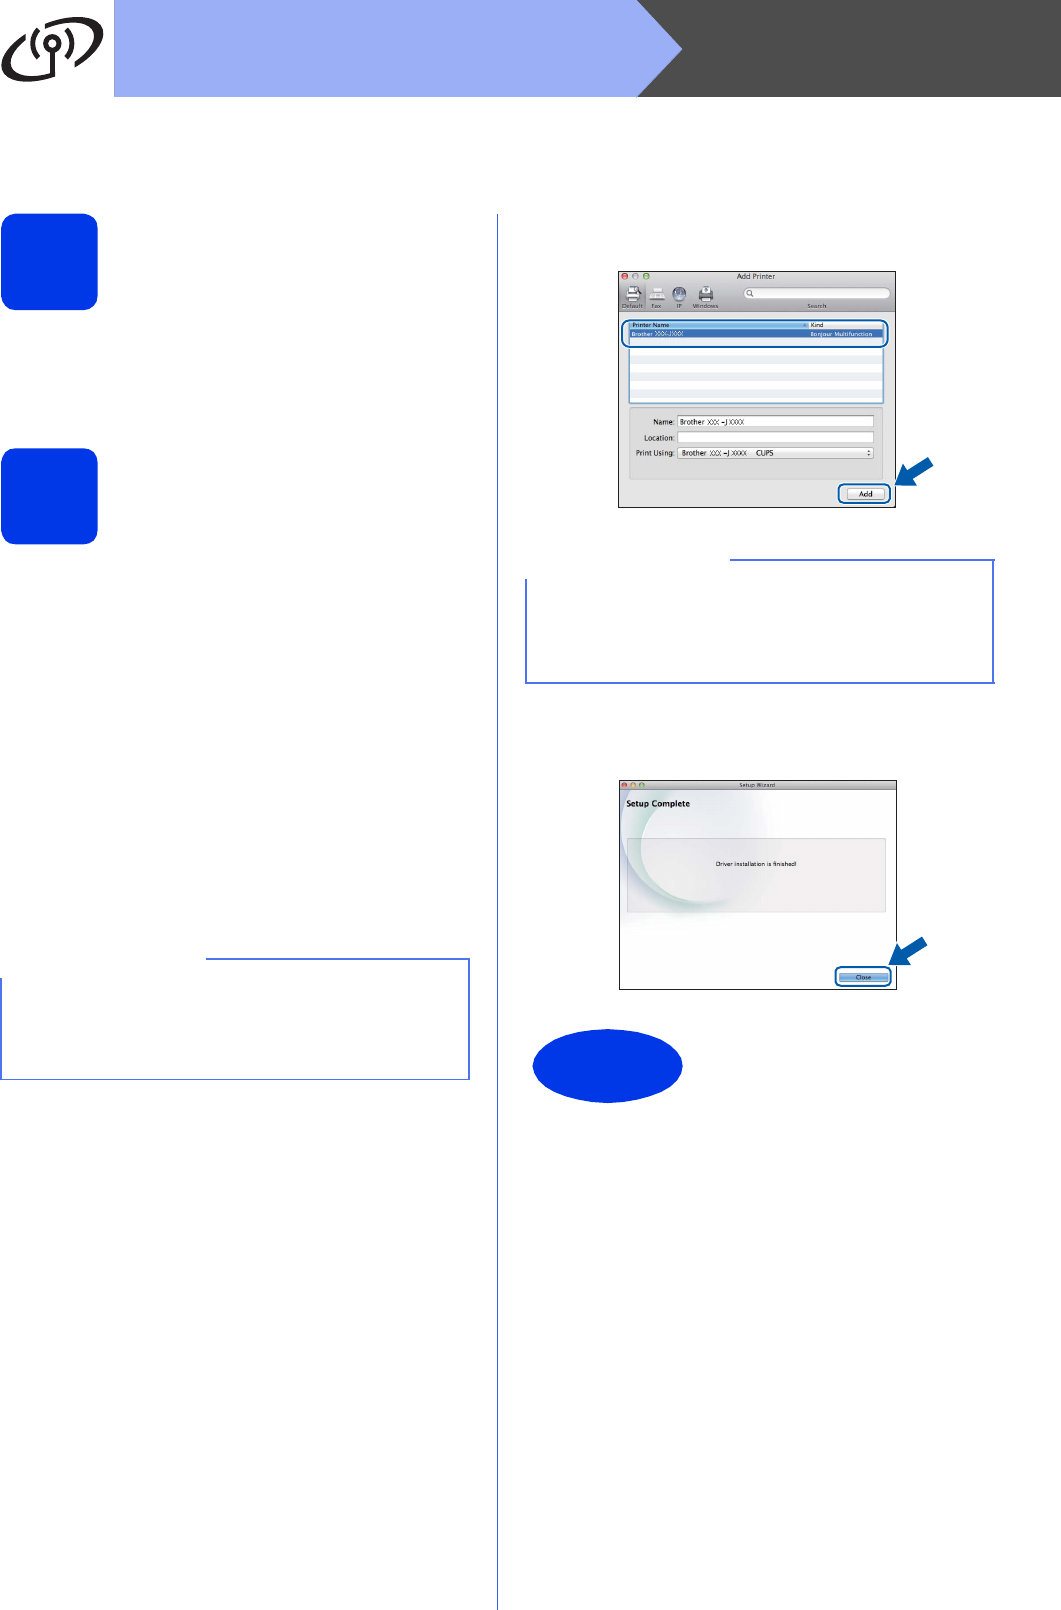
gWhen the Add Printer screen appears, click
Add Printer.
hChoose your machine from the list. Click Add
and then click Next.
When the support screen appears, click Next.
iWhen this screen appears, click Close.
NOTE
If your wireless settings fail, the Wireless Device
Setup Wizard screen appears. Follow the
on-screen instructions to complete the wireless
configuration.
NOTE
(OS X v10.8.x)
Select Brother DCP-XXXX CUPS (where XXXX
is your model name) driver from the Use pop-up
menu.
Finish
The installation is now
complete.

21
Windows®
Install Optional Applications
1
Install optional
applications
You can install the following applications.
BookScan&Whiteboard Suite supported
by Reallusion, Inc
Homepage Print 2* supported by
CORPUS
* This application supports Microsoft® Internet Explorer®
7.0/8.0 and Firefox® 3.
aOpen the top menu again by ejecting and then
reinserting the CD-ROM or by double-clicking
the start.exe program from the root folder. If
the language screen appears, choose your
language.
bThe CD-ROM Top Menu will appear. Click
Additional Applications.
cClick the button for the application you want to
install.
dWhen installation is complete, click the button
for the next application you want to install.
To exit, click Exit.
NOTE
• The machine must be ON and connected to the
computer.
• Some applications require Internet access.
• Make sure you are logged on with
Administrator rights.
• This application is not available for Windows
Server® 2003/2008/2012 series.
NOTE
To start BookScan&Whiteboard Suite,
double-click the shortcut icon on your desktop.
To start Homepage Print 2, click (Start) >
All Programs > Homepage Print 2 > Homepage
Print 2.
Windows® 8: Move your mouse to the lower right
corner of your desktop. When the menu bar
appears, click Start > Homepage Print 2.

22
For Network Users
Reset the network settings to factory default
To restore all network settings of the internal Print/Scan server to the factory default, please follow the steps below:
aMake sure the machine is idle.
bPress Menu.
cPress aor b to choose 3.Network.
Press OK.
dPress aor b to choose 0.Network Reset.
Press OK.
ePress a to choose Reset.
fPress a to choose Yes.
gThe machine will restart, and the reset is complete.
Entering Text for Wireless Settings
Press aor b repeatedly to select a character from the list below:
abcdefghijklmnopqrstuvwxyzABCDEFGHIJKLMNOPQRSTUVWXYZ0123456789
(space)!"#$%&'() +,-./:;<=>?@[\]^_`{|}~
Press Enlarge/Reduce or Number of Copies to move the cursor left or right.
NOTE
Making corrections
If you entered an incorrect letter and want to change it, press Enlarge/Reduce or Number of Copies to
position the cursor under the incorrect letter. Use a and b to change to the correct letter, then press Number
of Copies repeatedly to move the cursor back to the end of the text. If you press Stop/Exit, all letters above
and to the right of the cursor will be deleted.

23
Other Information
How to open a PDF file in Adobe
®
Reader
®
(Windows
®
8)
aMove your mouse to the lower right corner of
your desktop. When the menu bar appears,
click Settings, and then click Control Panel.
bClick Programs, click Default Programs, and
then click Associate a file type or protocol
with a program.
cSelect .pdf, and then click the Change
program... button.
dClick Adobe Reader. The icon next to .pdf
changes to the ‘Adobe Reader’ icon.
Adobe® Reader® is now the default application
for reading .pdf files until you change this file
association.
Brother CreativeCenter
Get inspired. If you’re using Windows®, double-click
the Brother CreativeCenter icon on your
desktop to access our FREE website with many ideas
and resources for personal and professional use.
Mac users can access Brother CreativeCenter at
http://www.brother.com/creativecenter/

www.brotherearth.com
Trademarks
Brother is a trademark of Brother Industries, Ltd.
Microsoft, Windows, Windows Vista, Windows Server and Internet Explorer are either registered trademarks or trademarks of Microsoft
Corporation in the United States and/or other countries.
Apple, Macintosh, Mac OS and OS X are trademarks of Apple Inc., registered in the United States and other countries.
AirPrint is a trademark of Apple Inc.
Adobe and Reader are either registered trademarks or trademarks of Adobe Systems Incorporated in the United States and/or other countries.
AOSS is a trademark of Buffalo Inc.
Wi-Fi and Wi-Fi Protected Access are registered trademarks of the Wi-Fi Alliance.
WPA, WPA2, Wi-Fi Protected Setup and Wi-Fi Protected Setup logo are trademarks of the Wi-Fi Alliance.
Android is a trademark of Google Inc. Use of this trademark is subject to Google Permissions.
Firefox is a registered trademark of the Mozilla Foundation.
Each company whose software title is mentioned in this manual has a Software License Agreement specific to its proprietary programs.
Any trade names and product names of companies appearing on Brother products, related documents and any other
materials are all trademarks or registered trademarks of those respective companies.
Compilation and Publication
Under the supervision of Brother Industries, Ltd., this manual has been compiled and published, covering the latest product descriptions and
specifications.
The contents of this manual and the specifications of this product are subject to change without notice.
Brother reserves the right to make changes without notice in the specifications and materials contained herein and shall not be responsible for
any damages (including consequential) caused by reliance on the materials presented, including but not limited to typographical and other
errors relating to the publication.
Copyright and License
©2014 Brother Industries, Ltd. All rights reserved.
This product includes software developed by the following vendors:
©1983-1998 PACIFIC SOFTWORKS, INC. ALL RIGHTS RESERVED.
©2008 Devicescape Software, Inc. All rights reserved.
This product includes the “KASAGO TCP/IP” software developed by ZUKEN ELMIC,Inc.
