Bryton orporation RIDER30 GPS enabled cycling computer User Manual Rider 30 Series QG P1 eps
Bryton Incorporation GPS enabled cycling computer Rider 30 Series QG P1 eps
Contents
- 1. User Manual 1 of 2
- 2. User Manual 2 of 2
User Manual 1 of 2
EN
FR
DE
2
1
4
6
7
5
3
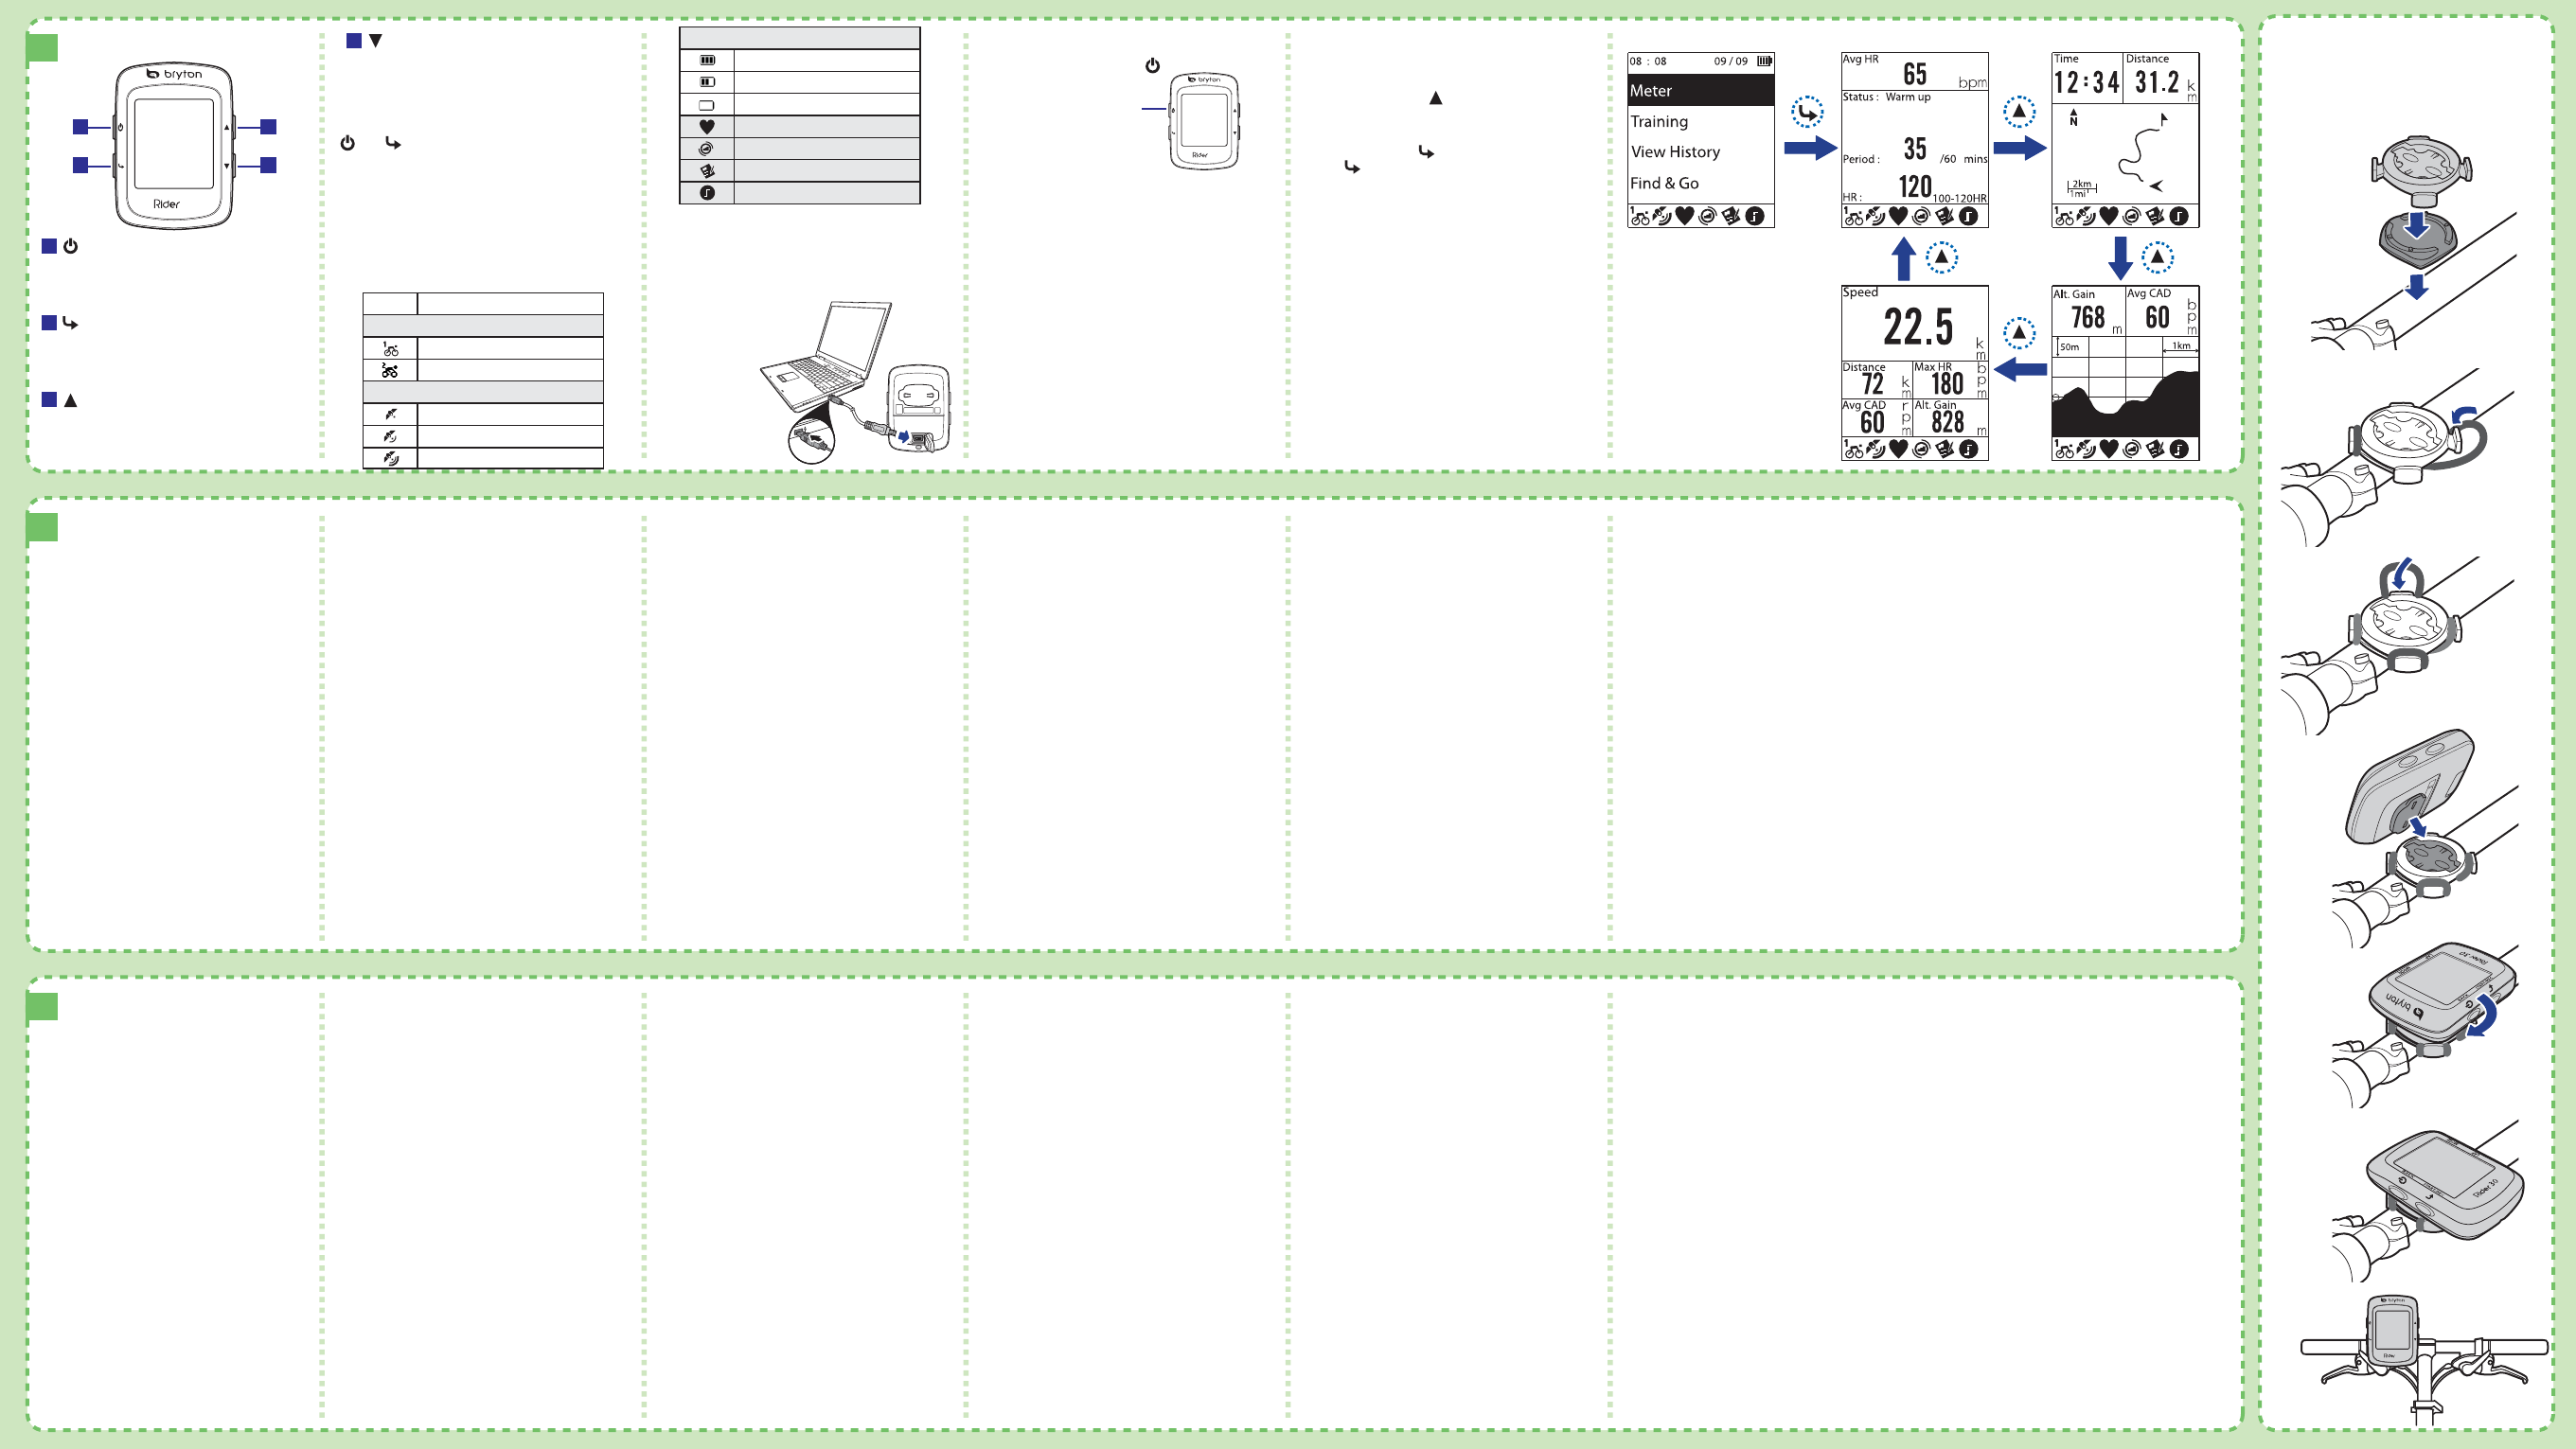
Mount the Rider 30 to the Bike
FR
DE
1
2
4
30
BACK
START/REC
MODELAP
1
2
3
4
NOTE:
Training Plan and Log Record are displayed only when
they are in progress.
Charging the Battery
Acquire Satellite Signals
Once the Rider 30 is turned on, it will automatically search
for satellite signals. It may take 30 to 60 seconds to acquire
signals.
Turn on the Rider 30
Press and hold the Power button to turn on the
Rider 30 on.
30
BACK
START/REC
MODELAP
Power button
The Rider 30
Power / Back
• Press and hold to turn the Rider 30 on or
o.
• Press to return to the previous page or
cancel an operation.
Lap / Down
• In menu mode, press to move down to scroll
through menu options.
• While recording, press to start to record a lap.
3Mode / Up
• Press to switch modes: Meter, Find & Go,
Altitude Chart and My Buddy.
• In menu mode, press to move up to scroll
through menu options.
Start / Stop
• In menu mode, press to enter or conrm a
selection.
• In free cycling mode, press to start
recording. Press again to stop recording.
Accessories
The Rider comes with the following accessories:
• USB cable • Bike mount
Optional items:
• Speed/Cadence sensor • Power adapter
• Heard rate belt • Plug(s)
Reset the Rider 30
To reset the Rider 30, press and release both
and at the same time.
Status Icons
icon Description
Bike in used
Bike 1
Bike 2
GPS Signal Status
No signal (not xed)
Weak signal
Strong signal
Power Status
Full battery
Half battery
Low battery
Heart Rate Sensor Active
Cadence Sensor Active
Training Plan in Progress
Log Record in Progress Manage Rider 30 Data via Your
Computer
1. Connect your Rider 30 to your computer by using USB
cable.
2. Install the Bryton Bridge application. You can
download the application at
http://corp.brytonsport.com/supportSDownload.html
or the bundled CD that includes in the package.
3. Follow the on-screen instructions to transfer data to
your computer.
Share Your Experience With
Other Bikers
To share your experiences and training result with
other bikers around the world, please visit
http://Brytonsport.com.
Initial Setup
When turning the Rider 30 on for the rst time, the setup
wizard appears on screen. Follow the instructions to
complete setup.
1. Select the display language.
2. Select the unit of measurement.
3. Enter your “user prole”.
(It is recommended to input the data. The data accuracy
will highly aect your training analysis.)
4. Read and accept the Safety Agreement.
NOTE:
If you want to change the language on the device, change
the setting via Bryton Bridge -> My Rider 30 -> Device
Language.
Ride your Bike with Rider 30!
1. Just ride with free cycling mode or set up a training
program through Menu options.
2. Press the Mode button to switch modes.
3. Select from the available dierent modes: Meter,
Find & Go, Altitude Chart and My Buddy.
4. In free cycling, press to start recording log, and
press again to stop recording.
Switching Modes
To charge the battery, connect
your Rider 30 to your
computer by using USB cable.
30
BACK
START/REC
MODELAP

IT
ES
NL
IT
ES
NL
2
1
4
6
7
5
3
30
BACK
START/REC
MODELAP