CARRIN ELECTRONICS KW9177T THERMO SENSOR User Manual
CARRIN ELECTRONICS COMPANY LIMITED THERMO SENSOR
User manual

KW9075RFwithoutdoorcableprobe WWVB
1.Features:
zRadiocontrolledclockwithWWVBsignal.
z433MHzRFreceivingfrequency.
zPerpetualCalendarUptoYear2099.
z12/24Hourtimedisplayselectable.
zDailysnoozealarmfunction
zIndoorTemperaturemeasurement:range32F~122F
OutdoorTemperaturemeasurement:range58F~+158F
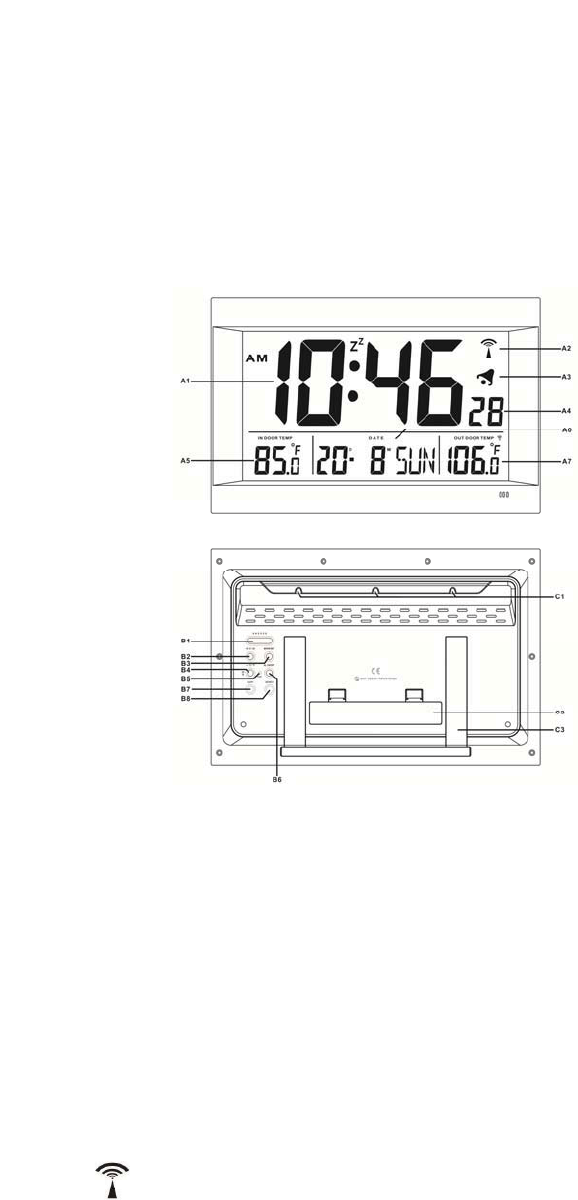
2.MainUnitAppearance:
PARTA:
A1:RadioControlledTime.
A2:RadioControlledIcon
A3:AlarmIcon
A4:Second
A5:IndoorTemperature
A6:Date&DayofWeek
A7:OutdoorTemperature
PARTB:
B1:“SNOOZE”Button
B2:“+/12/24”Button
B3:“MODE/SET”Button
B4:“/C/F/ “Button
B5:“RESET”Button
B6:“ALON/OFF”Button
B7:“ALERT”Button
B8:“SEARCH”Button
PARTC
433.92MHz RF receivin
g
fre
q
uenc
y
.

C1:WallMountHole
C2:BatteryCompartmentCover
C3:Stand
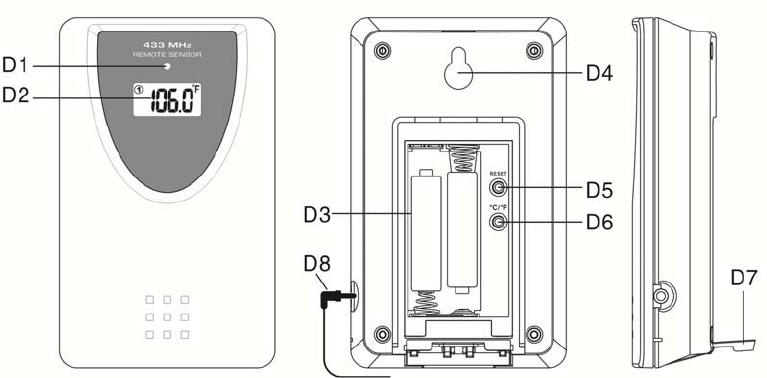
3.OutdoorSensorAppearance.
D1:TransmissionIndicationLED
D2:OutdoorTemperature
D3:BatteryCompartment
D4:WallMountHole
D5:“RESET”button
D6:°C/°F”button
D7:Stand
D8:Cableprobe
4.GettingStarted:
4.1MainUnit:
zOpenmainunitbatterycompartmentcover[C2]
zInsert3xCsizebatteriesobservingpolarity[“+”and“–“marks]
zReplacemainunitbatterycompartmentcover[C2]
zUseapintopresstheRESET[B5]buttonontherearofthemainunit,themain
unitisnowreadyforuse
4.2OutdoorThermoSensor
zBattery compartment (D3) of thermo sensor is locating behind the back cover,
unscrewsthebatteriescovertoopen.
zInsert2xAAAbatteriesobservingpolarity[“+”and“–“marks]
5.Installation
5.1MainUnit
Themainunitcanbeplacedontoanyflatsurface(C3),orwallmountedbythe
hanginghole(C1)atthebackoftheunit.

5.2OutdoorThermosensor
Theremotesensorshouldbesecurelymountedontoahorizontalsurface.
Note:Transmissionsbetweenreceiverandtransmittercanreachupto100min
openarea. OpenArea:therearenointerferingobstaclessuchasbuildings,
trees,vehicles,highvoltagelines,etc.
6.RFTransmission
zThemainunitautomaticallystartsreceivingtransmissionfromoutdoorthermo
sensorforoutdoortemperatureafterbatteriesinserted.RFicon“ ”flasheson
theLCD.
zThe thermo sensor unit will automatically transmit temperature signal to the
mainunitafterbatteriesinserted.
zIfmainunitfailedtoreceivetransmissionfromoutdoorthermosensorinfirst3
minutesafterthebatteriesinserted,“.–”displayontheLCD.
zHold“SEARCH”button(B8)for3secondstoreceivetransmissionmanually.
zPress “C/F” button (D5) on thermo sensor unit to select temperature to be
displayedinCelsiusmodeorFahrenheitmode.
7.TimeandAlarmSetting
7.1RadioControlledClock:
zAfter batteries inserted and main unit finishes receiving the transmission from
outdoor thermo sensor, the clock automatically starts to scan the WWVB time
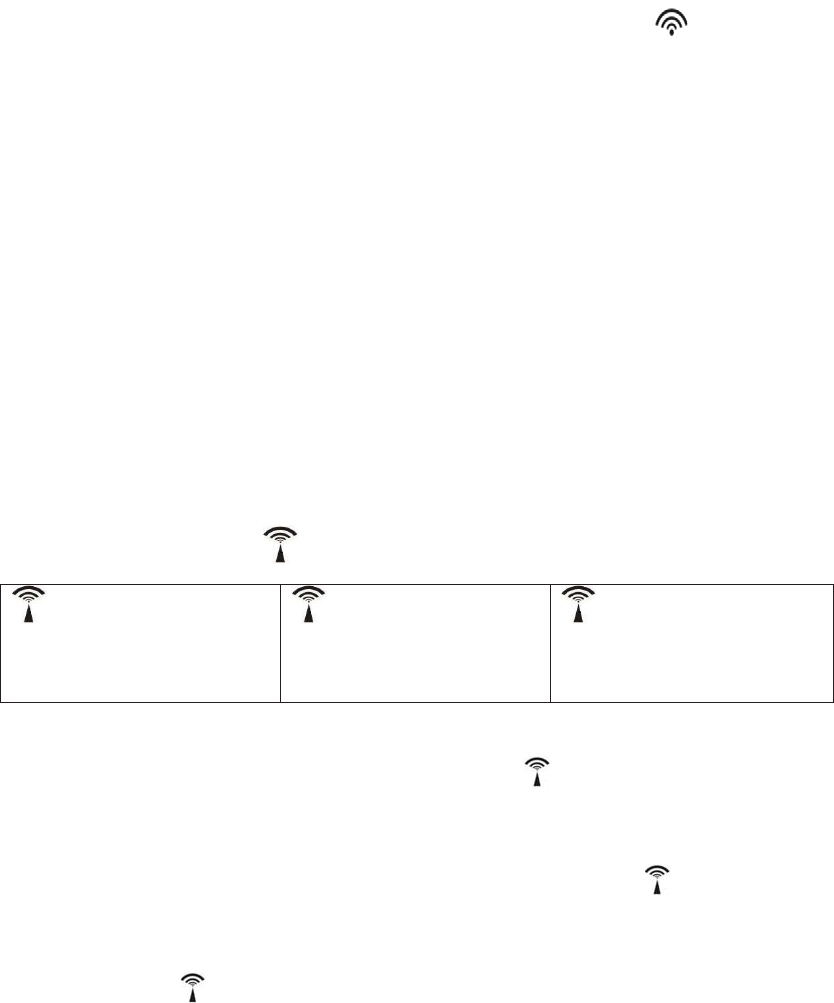
signal.RadioControlIcon“ ”flashesontheLCD.
flashes,
Indicatingnowisreceiving
WWVBsignal
turnson,
Indicatingsignalreceived
successfully
disappear,
Indicatingsignalreception
failed
zTheclockautomaticallyscansthetimesignalat2.00a.m.everydaytomaintain
accurate timing. If reception fail, scanning stops (“ ” on LCD disappear) and
repeatsagainat3.00a.m.,4.00a.m.and5.00am.
zTheclockcanbesettoscanthetimesignalmanuallybyholding“ ”button(B4)
for 3 seconds. Each reception takes around several minutes. If receptions fail,
scanningstops.(“ ”onLCDdisappear)andrepeatsagainonnextfullhour.E.g.
scanningfailedat8:20a.m.Itwillscanagainat9:00a.m.

zStopscanningbyholding“ ”button(B4)for3seconds.
7.2ManualTimeSetting:
zIn time display mode, hold “MODE” button (B3) for 3 seconds to enter
Clock/CalendarsettingMode.
zPress“+”(B2)or“”(B4)buttontoadjustthesettingandpress“MODE”button
(B3)toconfirmeachsetting.
(Bykeepingthe“+”(B2)or“”(B4)buttonpressed,couldacceleratetheprocess
andreachthedesiredvaluemorequickly)
zThesettingsequenceisshownasfollow:Hour,Minute,Second,Year,Month/Day
sequence,Month,Date,DST
Note:
(1) All Setting mode will automatically exit in around 15 seconds without any
adjustment
(2) For Time Zone: the default setting is zone “E”. By holding “+” (B2) button for 3
secondstoadjusttootherzones“P”“M”or“C”.
(3) DST:WhenDSTfunctionisactivated,andit’sinDaylightSavingMode(RCCsignal
withDST)“DST”wouldbeshownontheLCD.
7.3DailyAlarmFunction:
zPress “MODE” button (B3) to select to view alarm Time, “AL” shown on the
display
zWhenviewingtheAlarmTime,hold“MODE”button(B3)for3secondstoenter
Alarm Time setting. Press “+” (B2)or “” (B4) button to adjust thealarm time.
Press“MODE”button(B3)toconfirmthesetting.
7.4SnoozeAlarmFunction:
zPress“ALON/OFF”Button(B6)toactivateordeactivatethealarm.Ifthealarmis
on,alarmicon" "appearsonthedisplay.
zWhenalarmalerts,except“SNOOZE”button,pressanybuttontostopthealarm.
Otherwise, the alarm signal sounds for about2 minutes, then stops
automatically.
zPress“SNOOZE”(B1)buttonwhenalarmalerts.Thealarmsnoozesforaround5
minutes, then it alerts again. “ ” flashes on the LCD during the snooze time.
Thisprocesscanberepeated7times.
7.5 12/24HourDisplaymode:

zPress“12/24”(B2)buttontoselect12or24hoursmode.
8.Thermometer
8.1Temperaturedisplay
zPress “°C/°F” (B4) button to select Temperature in Celsius mode/ Fahrenheit
mode.
zIf the temperature is out of the measurable range, LL.L (beyond the minimum
temperature)orHH.H(beyondthemaximumtemperature)willbeshownonthe
LCD.
8.2TemperatureAlertfunction
zPress“ALERT”button(B7)tosettheOutdoorTemperatureAlertfunction onor
off,“ ”appearsontheLCDiftemperaturealertfunctionisactivated.
zHold “ALERT” button (B7) for 3 seconds to enter outdoor temperature alert
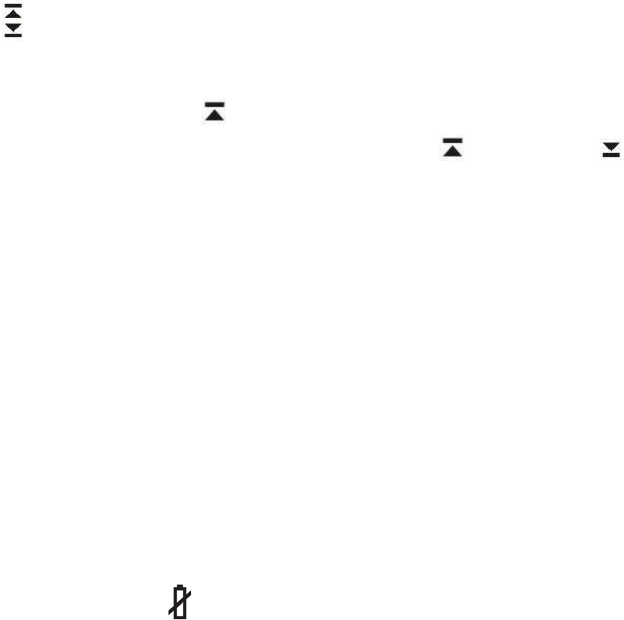
setting,upperlimiticon“ ”flashonthedisplay.
zPress“+”(B2)or“”(B4)buttontosettheupper” ”andlower“ ”limitofthe
outdoortemperature.Press“ALERT”button(B7)toconfirmthesetting.
9. The use of temperature probe
zInsert the probe plug (D8) to the jack on the right hand side of the Thermo
SensorUnit.
zPuttheprobeoutsideandleavethethermosensorunitinindoorareatoavoid
freezingupthebatterywhentheoutdoortemperatureisbelow4F.
Alwaysusethetemperatureprobetosensethetemperaturewhenthe
temperatureisbetweenthefollowingrange:58F~4Fand+122F~+158F
10.Low battery indication:
Thelowbatteryicon“ ”turns onthe display(besidetheoutdoortemperature
digit), indicatingthatthermosensorinlowbatterystatus.Thebatteriesshouldbe
replaced.
11.Precautions
zUseapintopresstheresetbutton(B5)iftheUnitdoesnotworkproperly.
zAllSettingModeswillautomaticallyexitin15secondswithoutanyadjustment.
zTheclocklosesitstimeinformationwhenthebatteryisremoved.

zAvoidplacingtheclocknearinterferencesources/metalframessuchascomputer
orTVsets.
zDonotexposeittodirectsunlight,heavyheat,cold,highhumidityorwetareas
zThe outdoor sensor must not be set up and installed under water. Set it up in
awaydirectsunlightandRain
zNevercleanthedeviceusingabrasiveorcorrosivematerialsorproducts.Abrasive
cleaningagentsmayscratchplasticpartsandcorrodeelectroniccircuits
Changes or modifications not expressly approved by the party responsible for compliance could void
your authority to operate the equipment.