CCT Tech Advanced SD4581 2.4GHz FHSS Cordless Phone w/ CID User Manual 1
CCT Tech Advanced Products Limited 2.4GHz FHSS Cordless Phone w/ CID 1
UserManual.wiki
>
CCT Tech Advanced
>
SD4581 User Manual
>
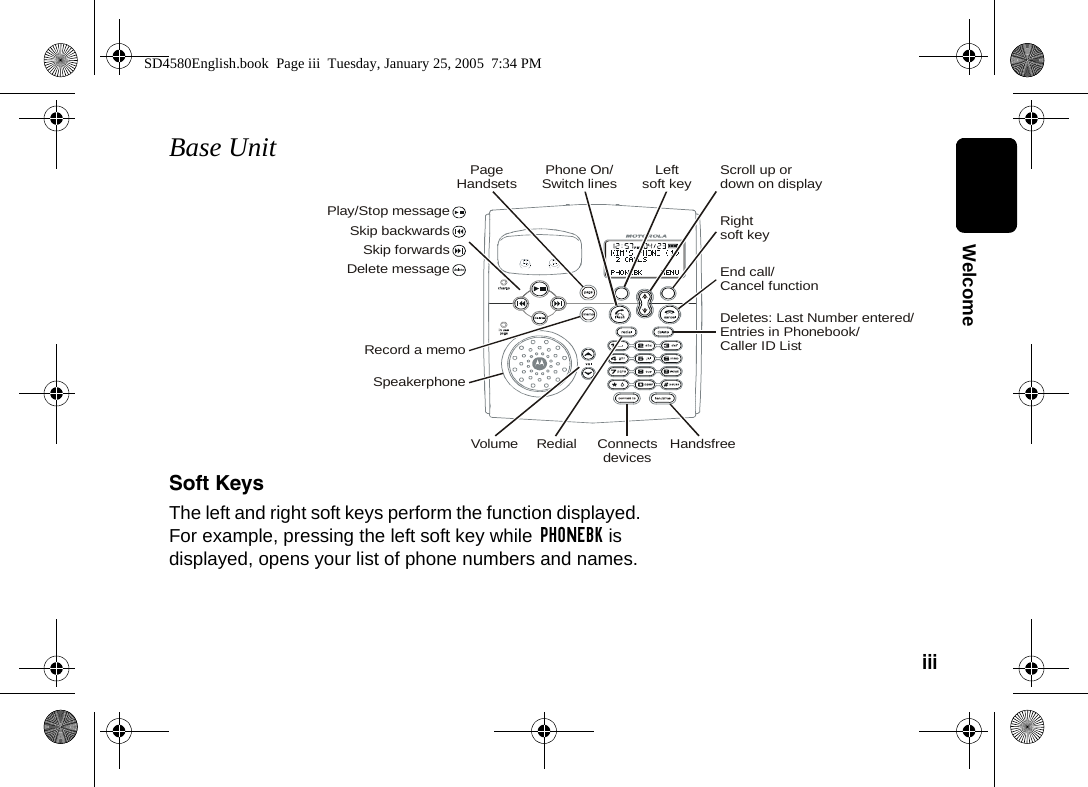
User Manual 1
Contents
1.
FCC Information
2.
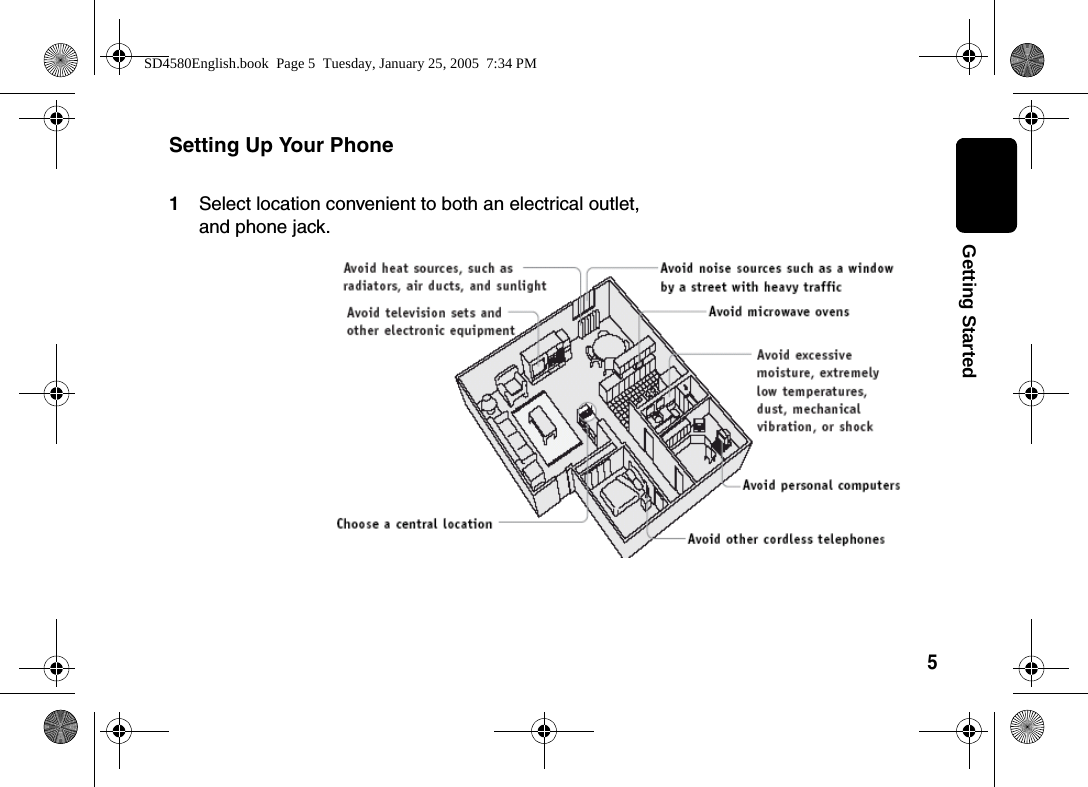
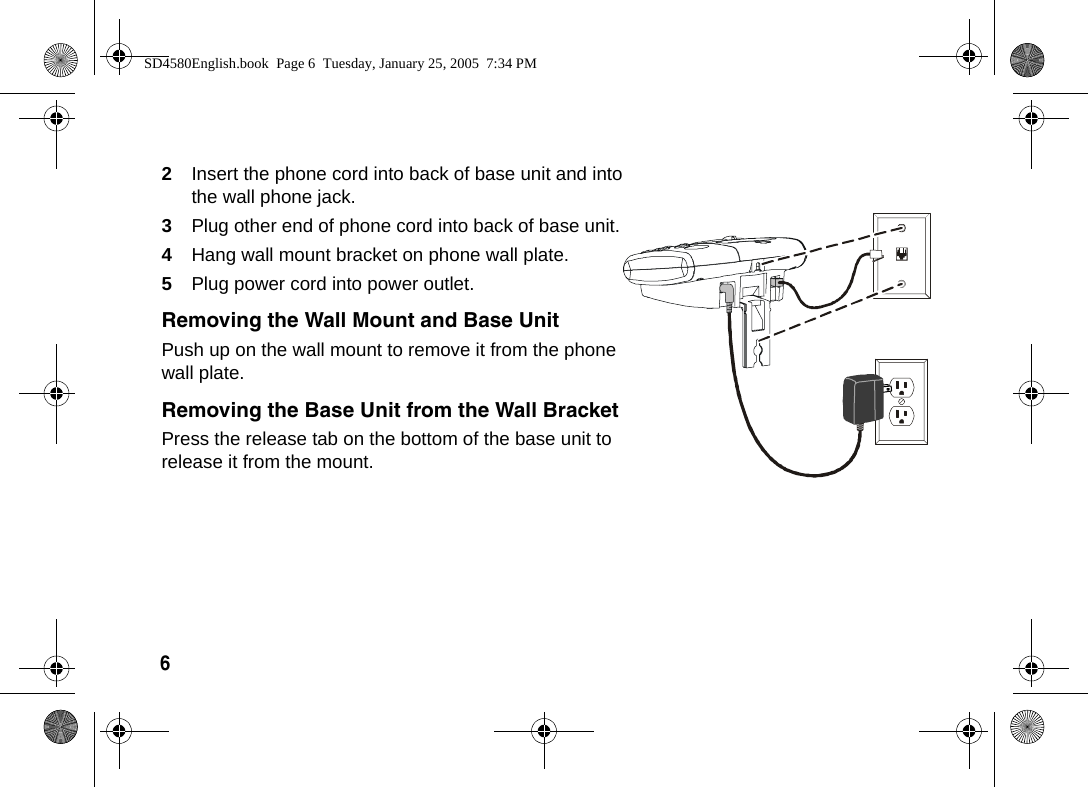
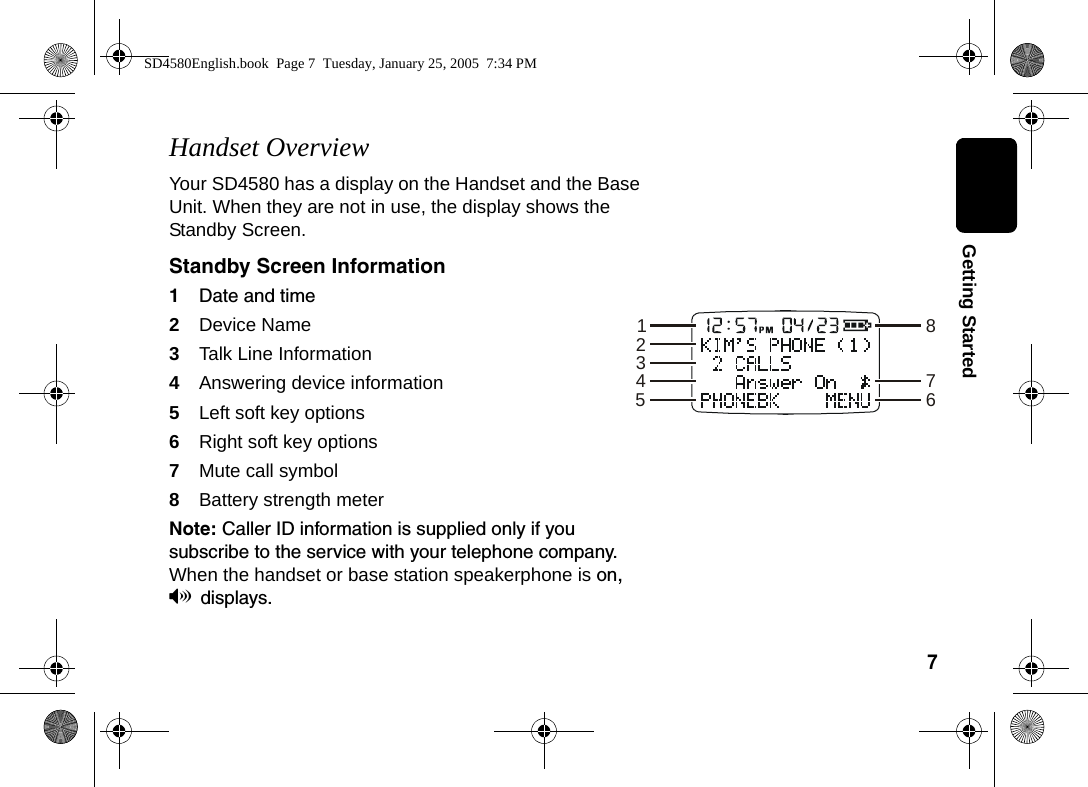
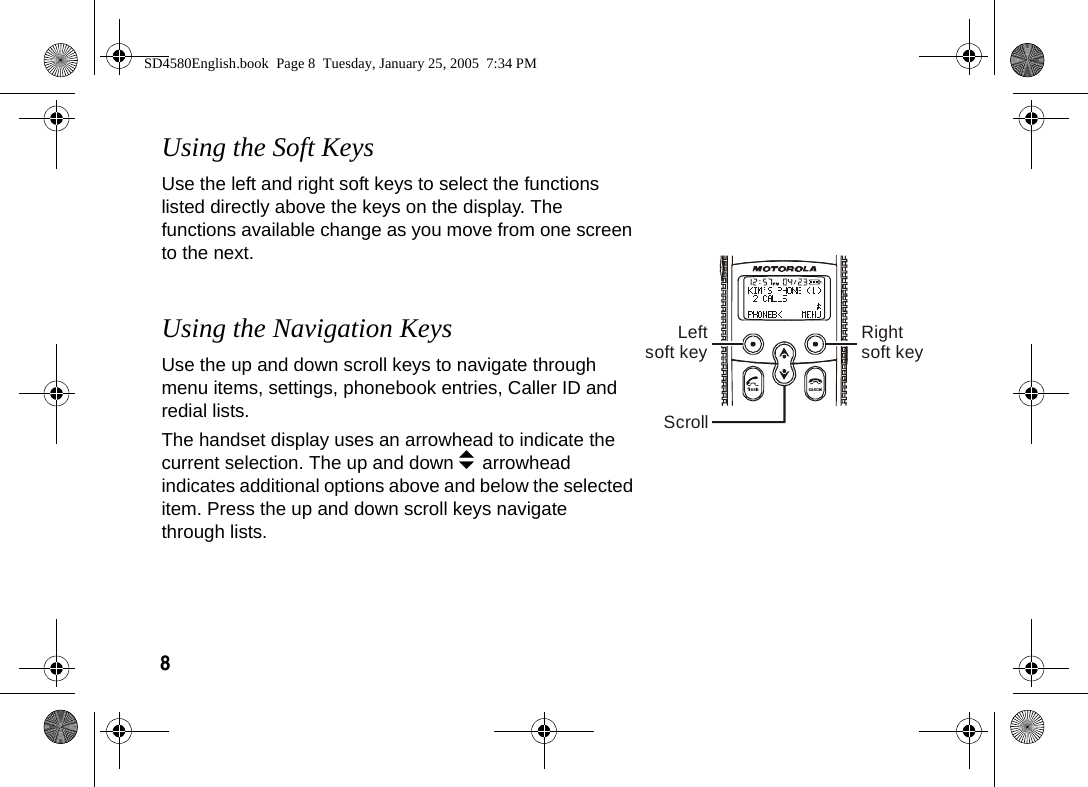
User Manual 1
3.
User Manual 2
4.
User Manual
User Manual 1
Navigation menu
Upload a User Manual
Namespaces
Wiki Guide
HTML
PDF
Info
Views
User Manual
Discussion / Help
Navigation