CCT 30549 DECT PHONE(HANDSET PP) User Manual 30542 English UG 021511
CCT Marketing, Ltd DECT PHONE(HANDSET PP) 30542 English UG 021511
UserManual.wiki
>
CCT
>
30549 User Manual
>
Users Manual 1
Contents
1.
Users Manual 1
2.
Users Manual 2
Users Manual 1
Navigation menu
Upload a User Manual
Namespaces
Wiki Guide
HTML
PDF
Info
Views
User Manual
Discussion / Help
Navigation

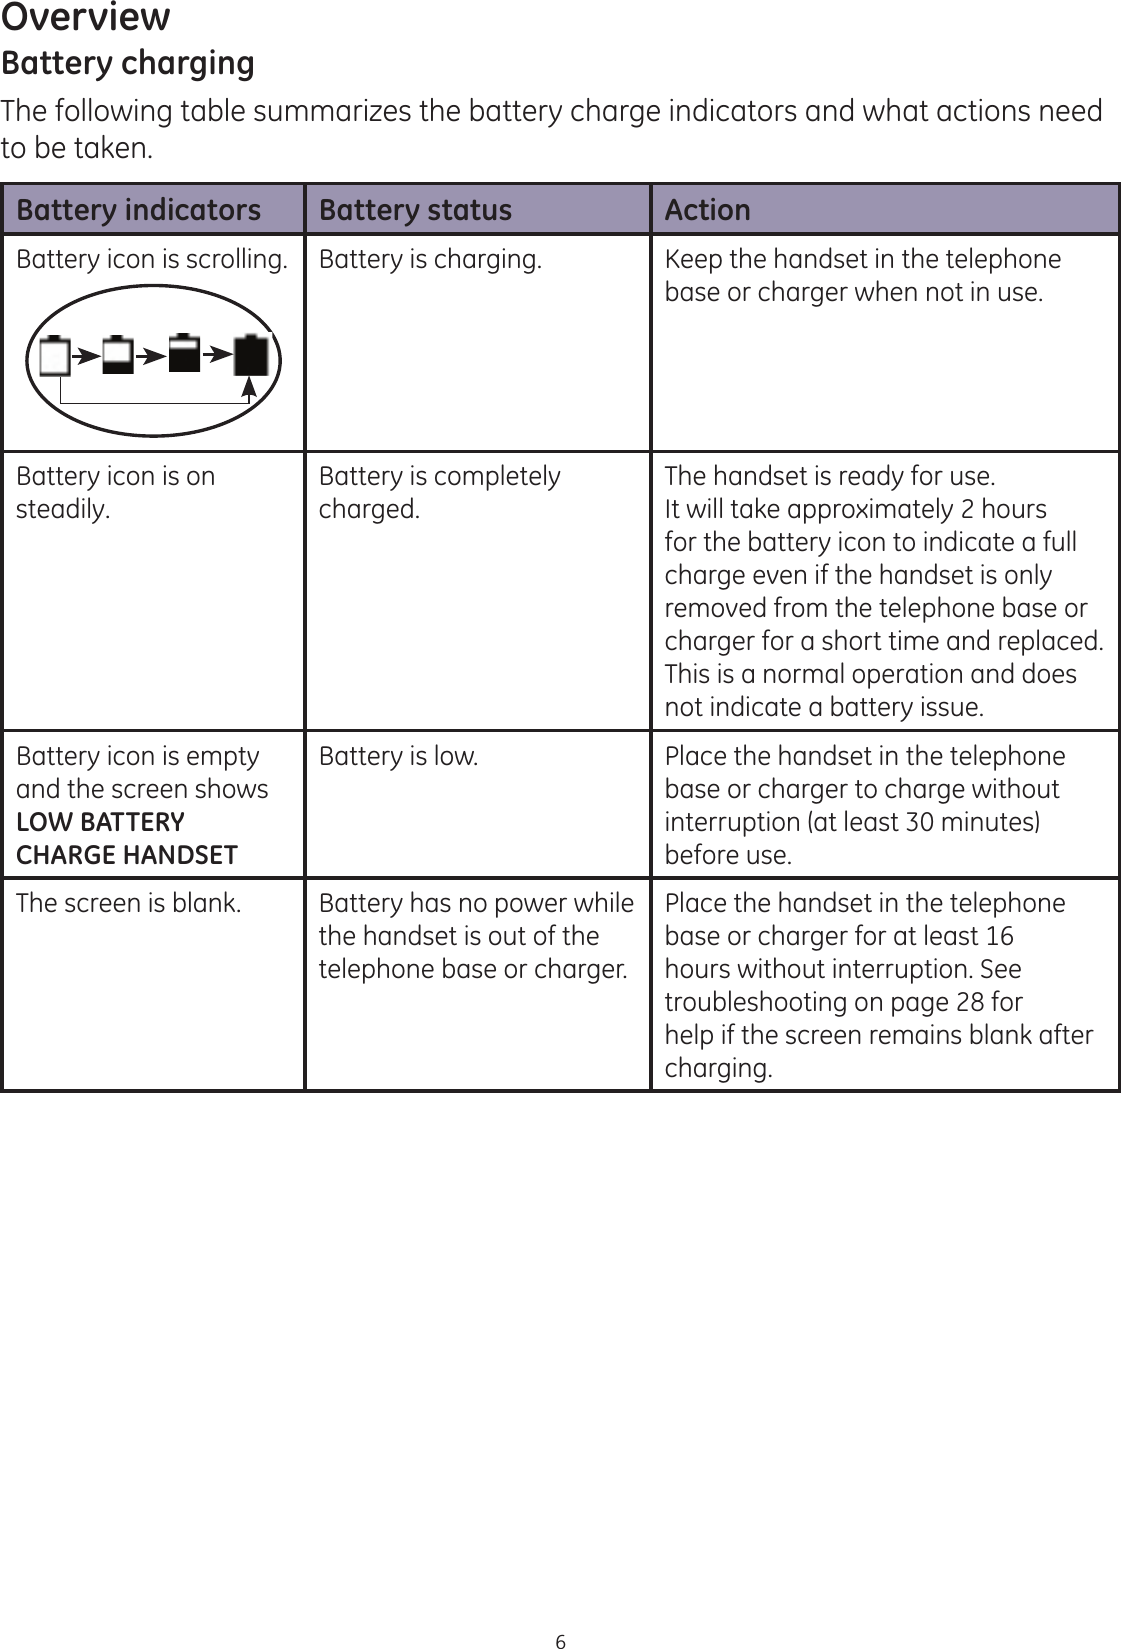
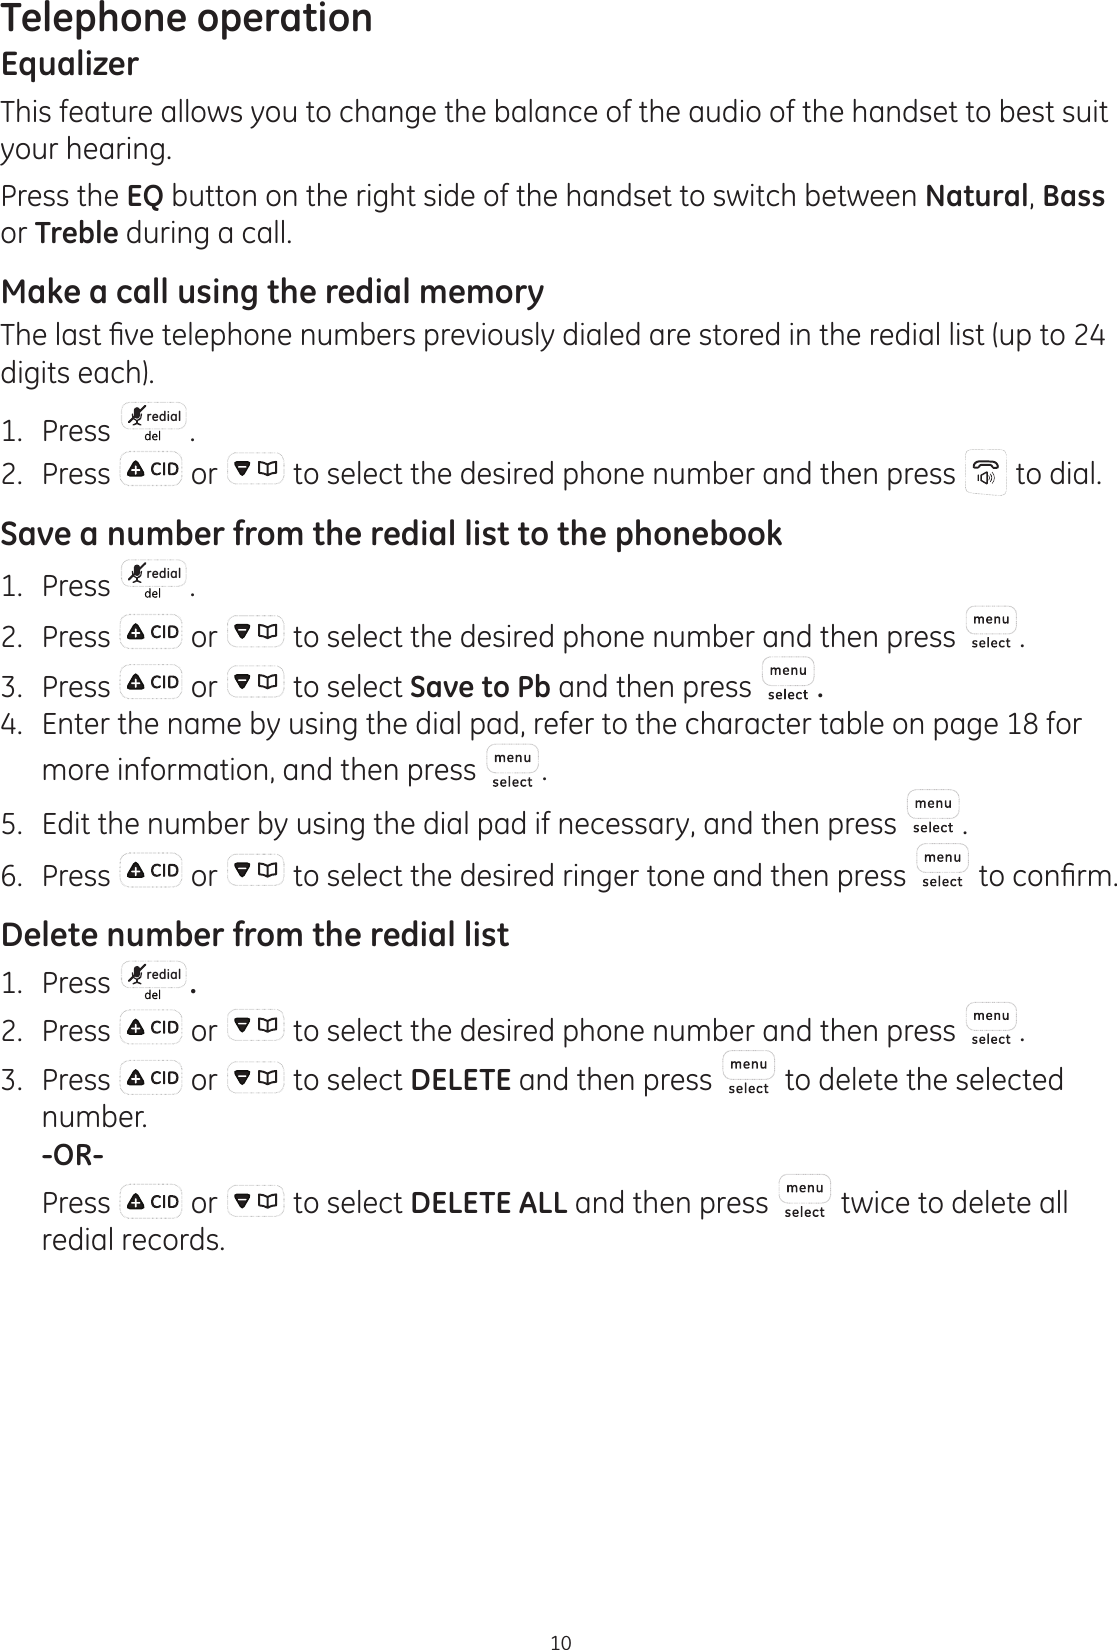
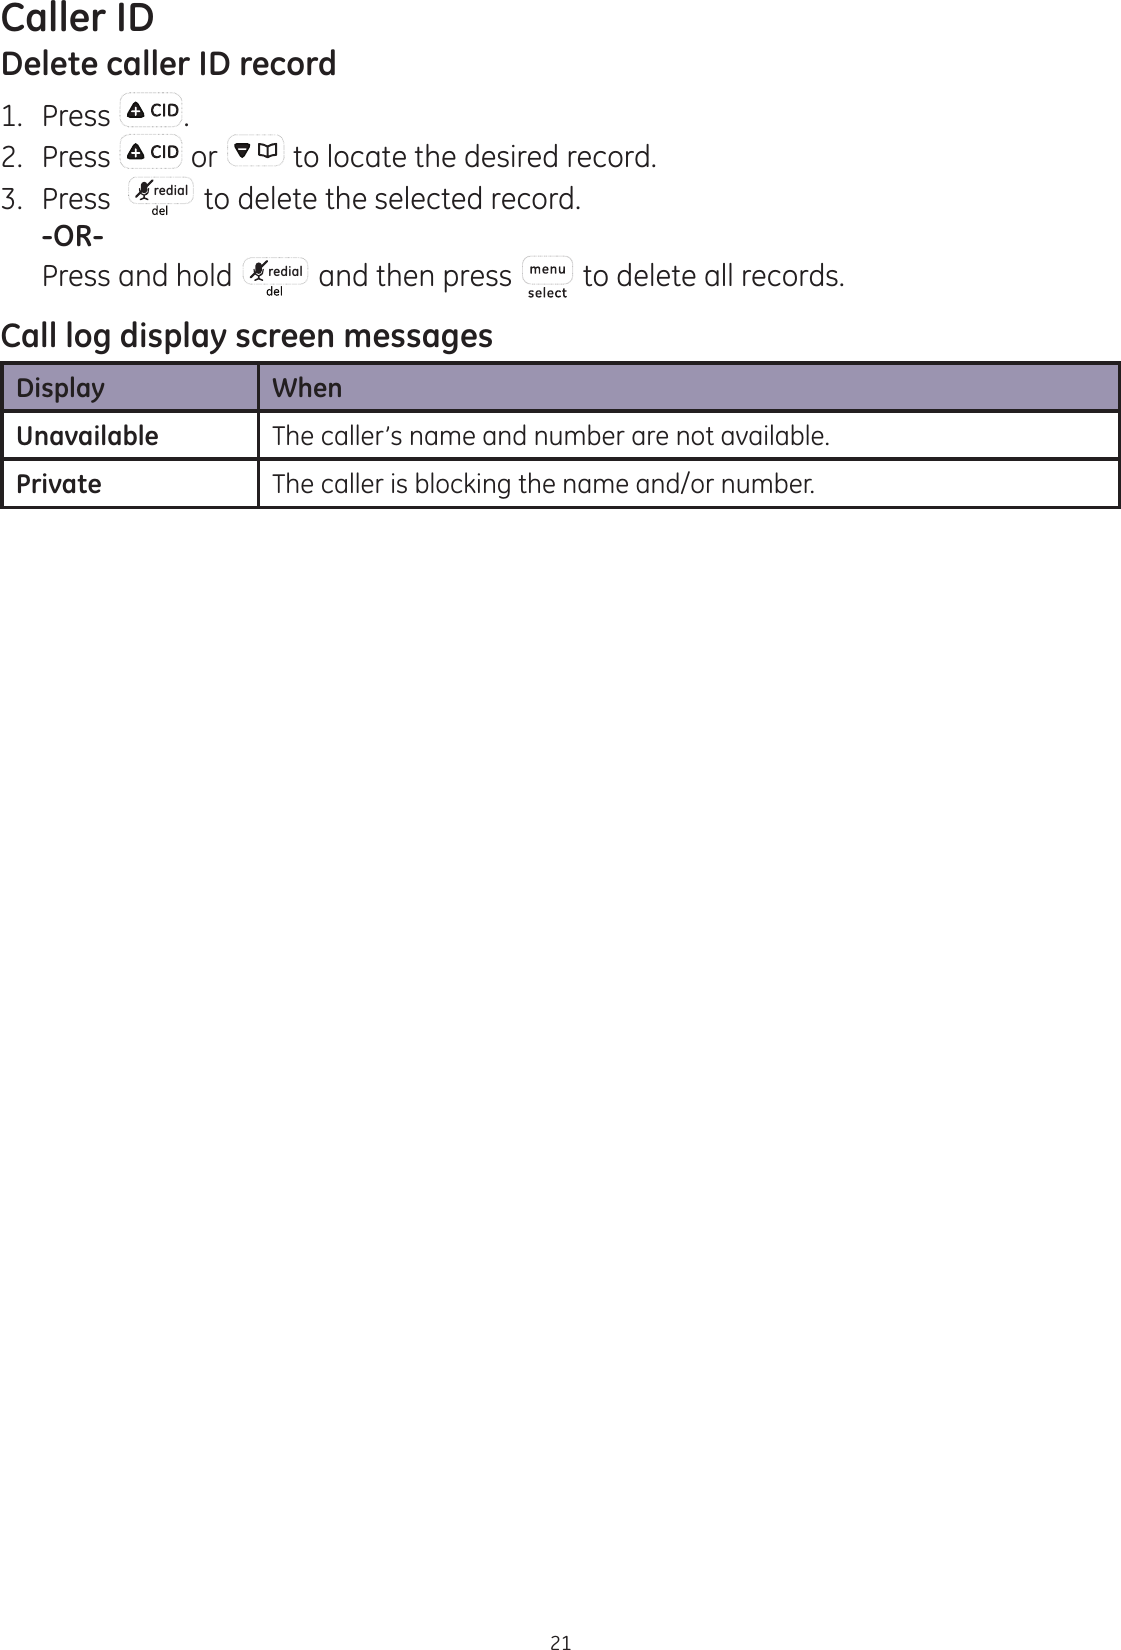
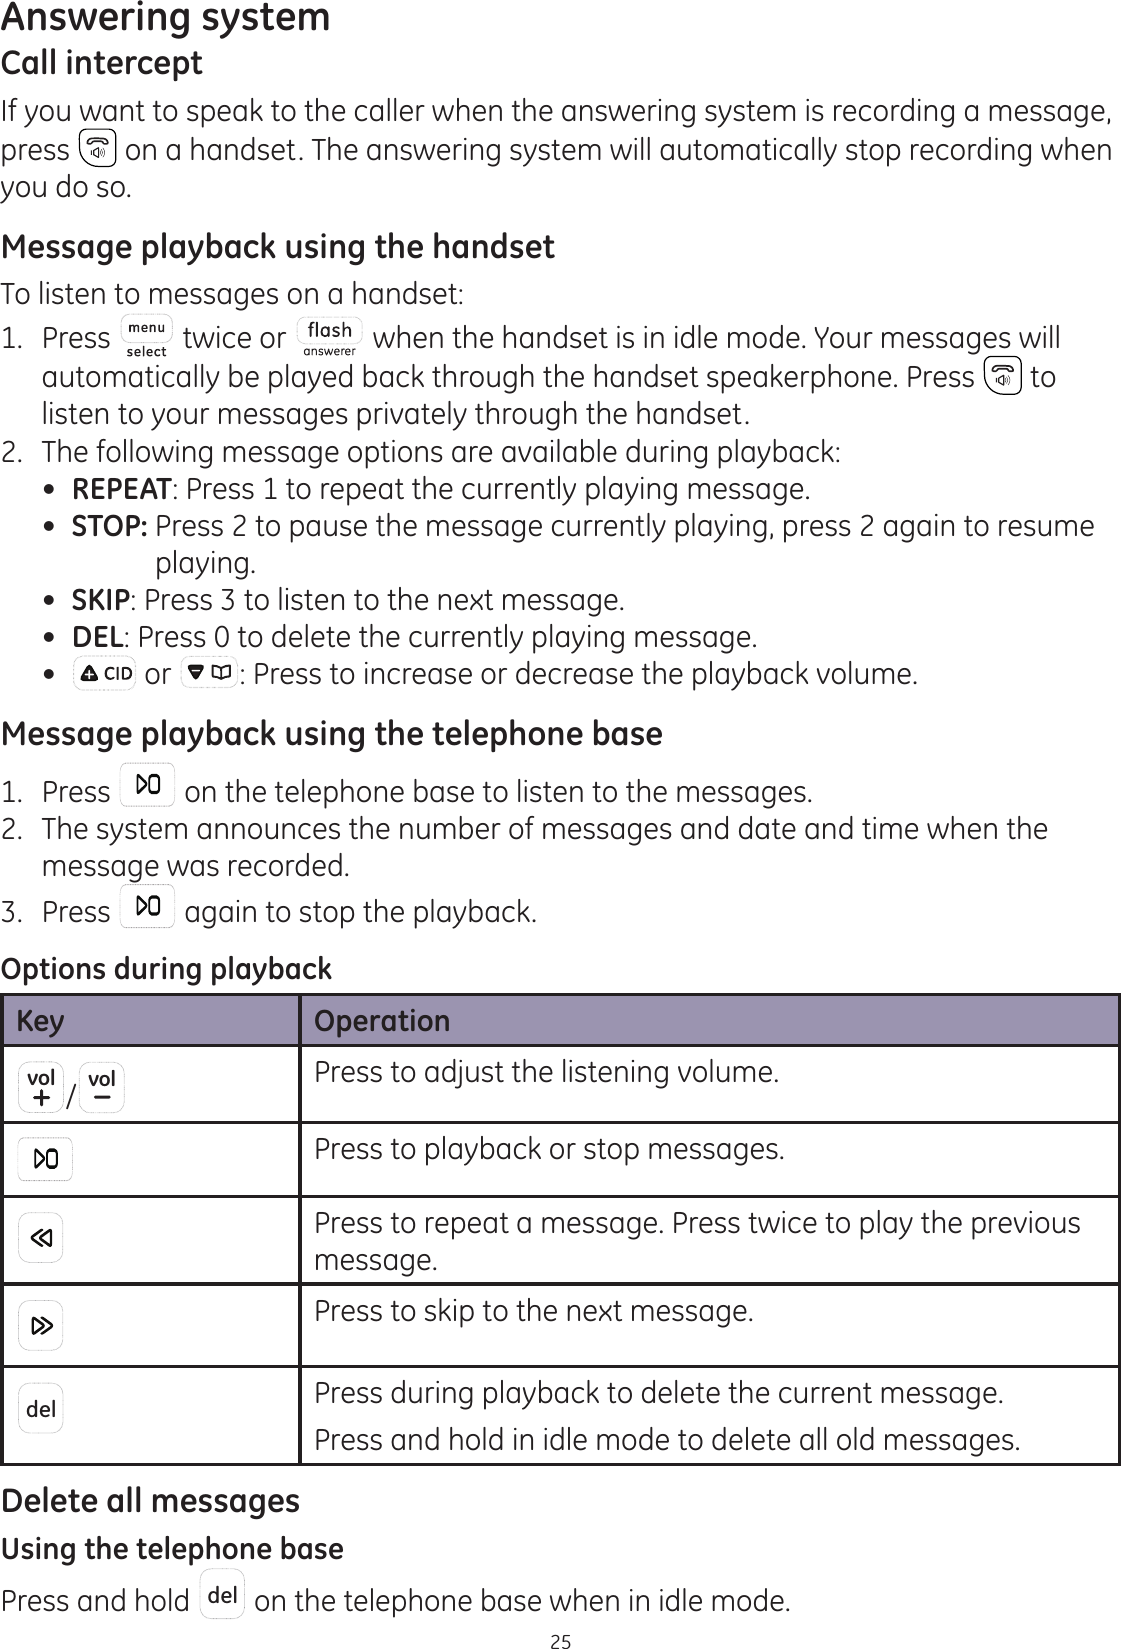
![Getting started2CAUTION: 1. Use only the power adapter that came with this unit. Using other power adapters may damage the unit. 7RSUHYHQW¿UHRUHOHFWULFDOVKRFNKD]DUGGRQRWH[SRVHWKLVSURGXFWWRUDLQRUPRLVWXUHTelephone base and charger installation1. Plug the smaller end of the power adapter into the power jack at the bottom of the telephone base, route the cord through the tabbed slot on the right.2. Plug one end of the telephone line into the jack at the bottom of the telephone base, route the cord through the tabbed slot on the left.3. Plug the other end of the telephone line into a telephone wall jack.4. Plug the larger end of the power adapter into an electrical outlet not controlled by a wall switch.,I\RXKDYH'6/KLJKVSHHG,QWHUQHWVHUYLFHD'6/¿OWHULVUHTXLUHGQRWLQFOXGHG&RQWDFW\RXU'6/VHUYLFHSURYLGHUIRUPRUHLQIRUPDWLRQDERXW'6/¿OWHU'6/¿OWHUQRWincluded) is required if you have DSL high speed Internet service.Telephone base installation Charger installationPlug the power adapter into an electrical outlet not controlled by a wall switch. Telephone jack requirementsTo use this phone, you need a RJ11C type modular telephone jack, which might look like the one pictured here, installed in your home. If you do not have a modular jack, call your telephone service SURYLGHUWR¿QGRXWKRZWRKDYHRQHLQVWDOOHGWall plateModular telephone line jack](https://usermanual.wiki/CCT/30549.Users-Manual-1/User-Guide-1421180-Page-6.png)
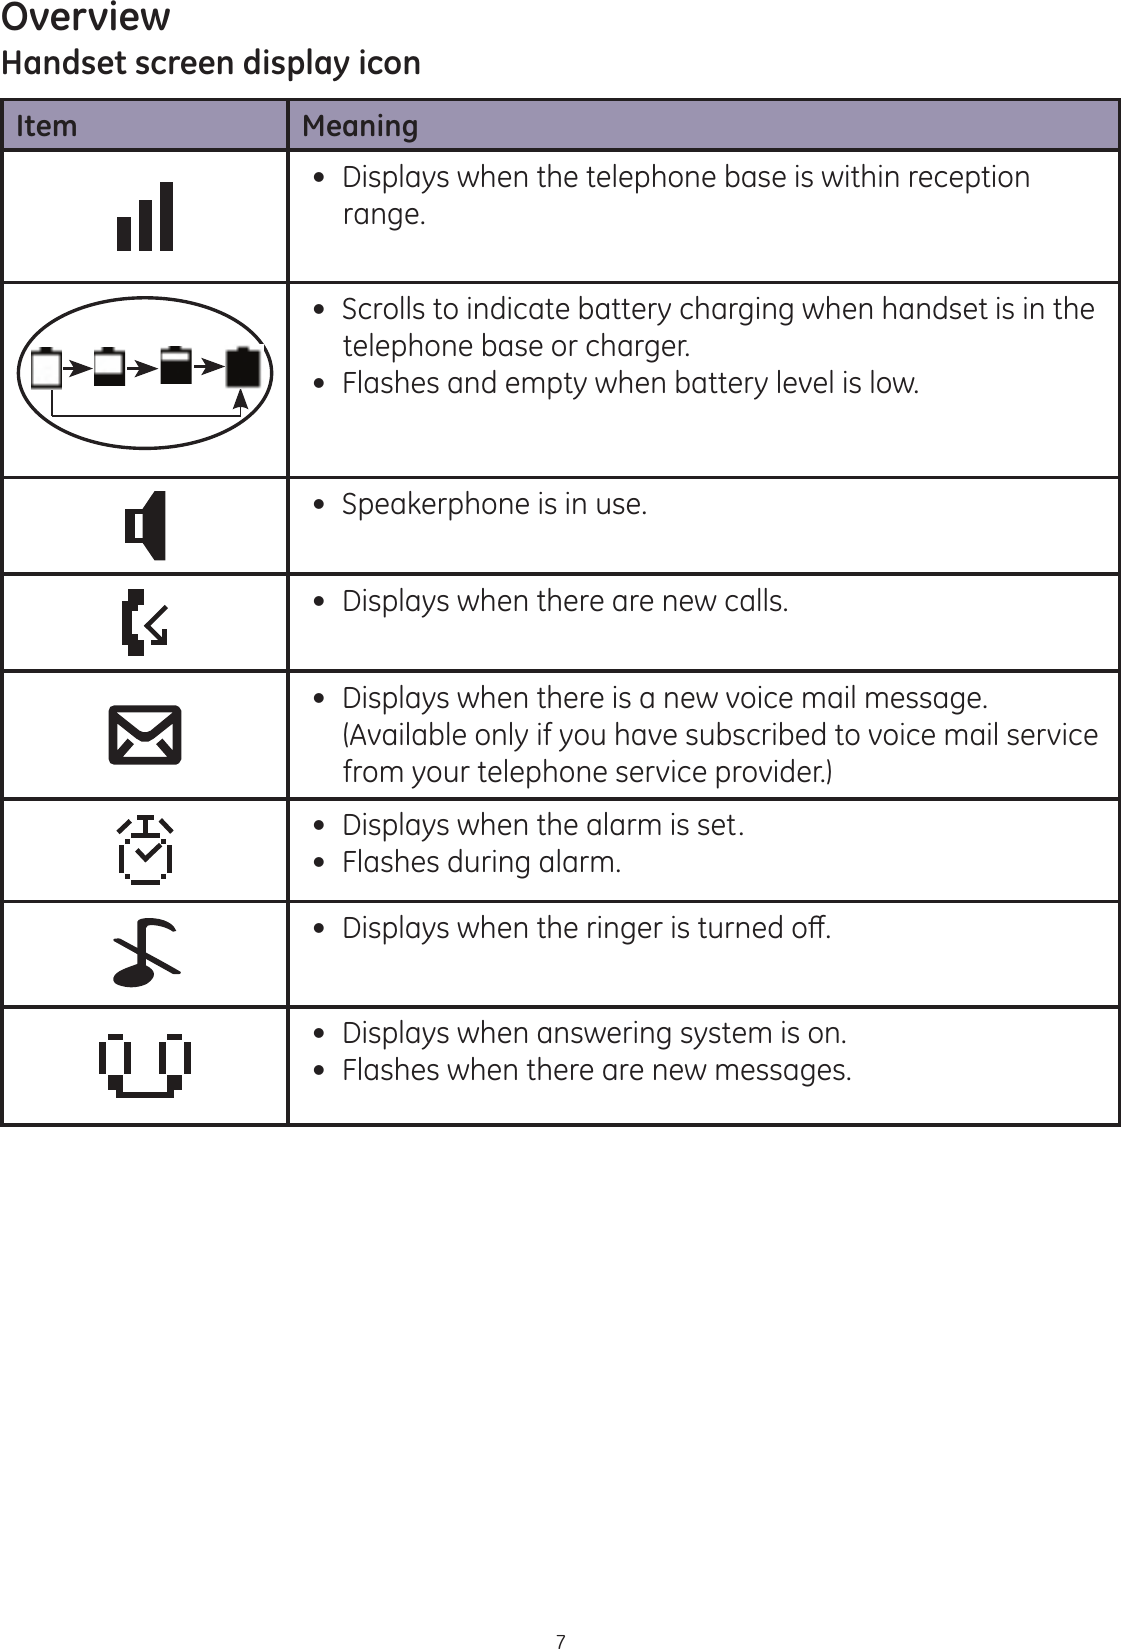
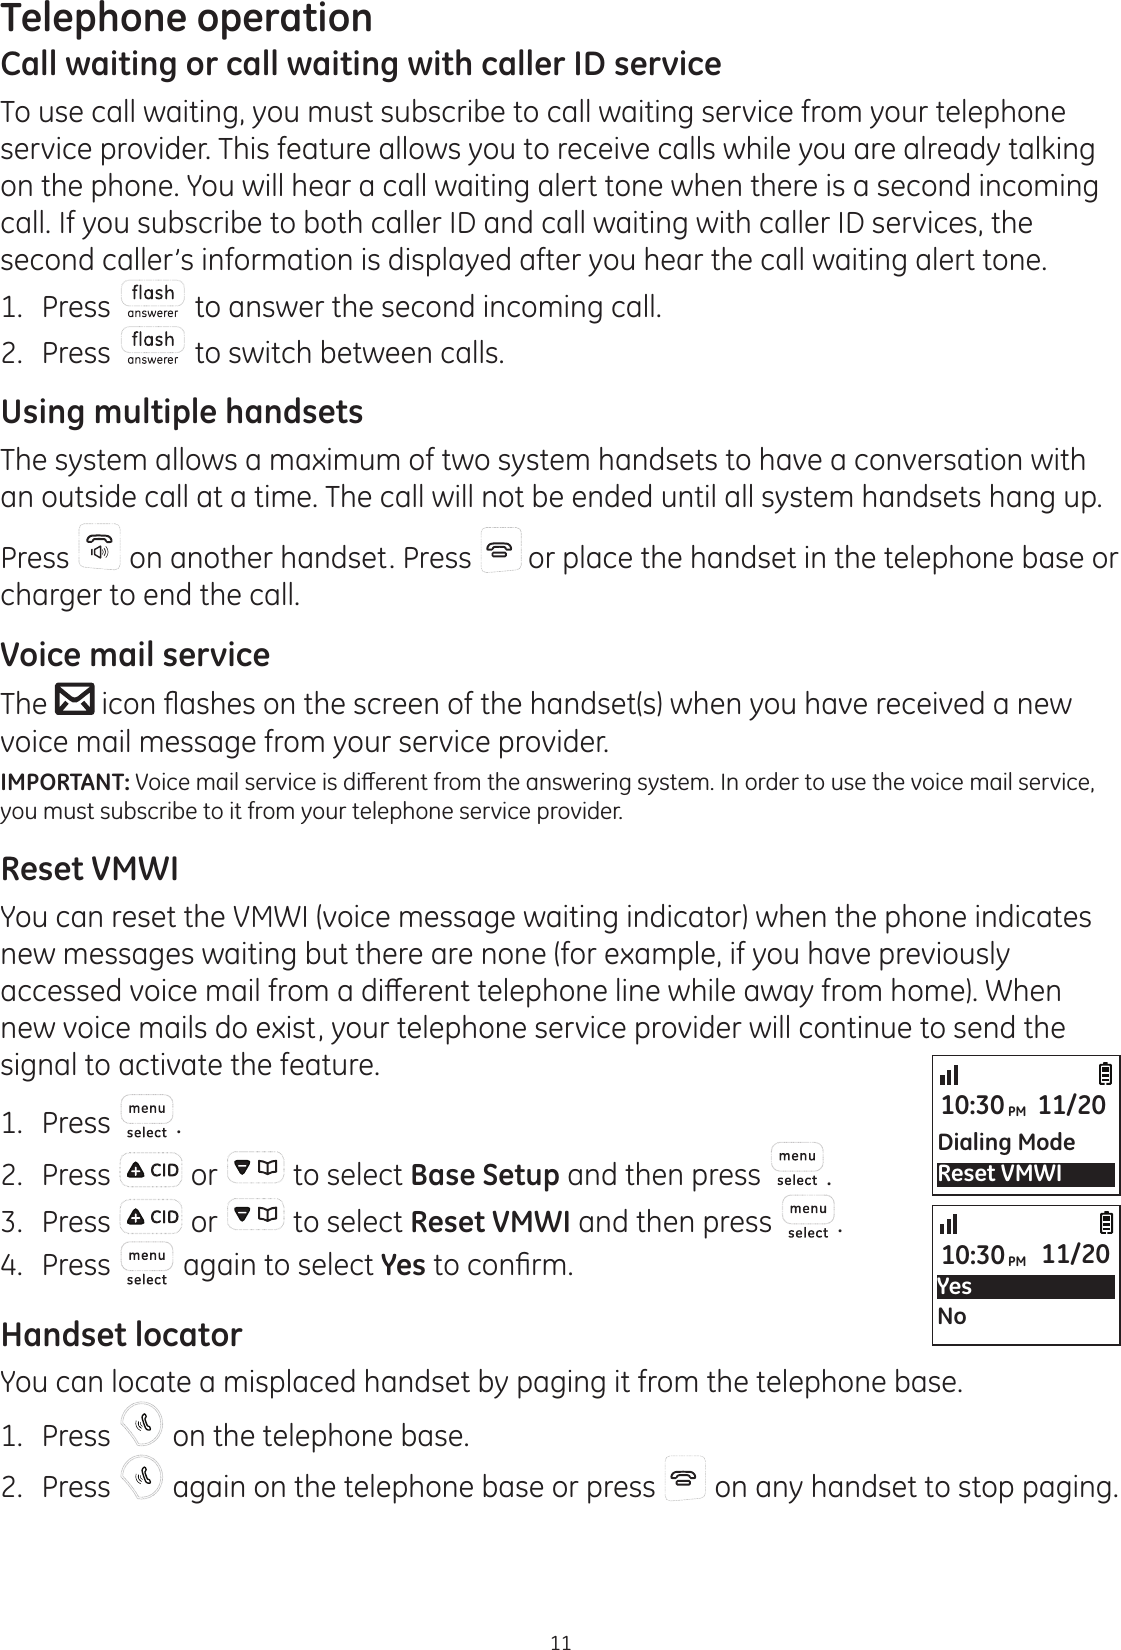
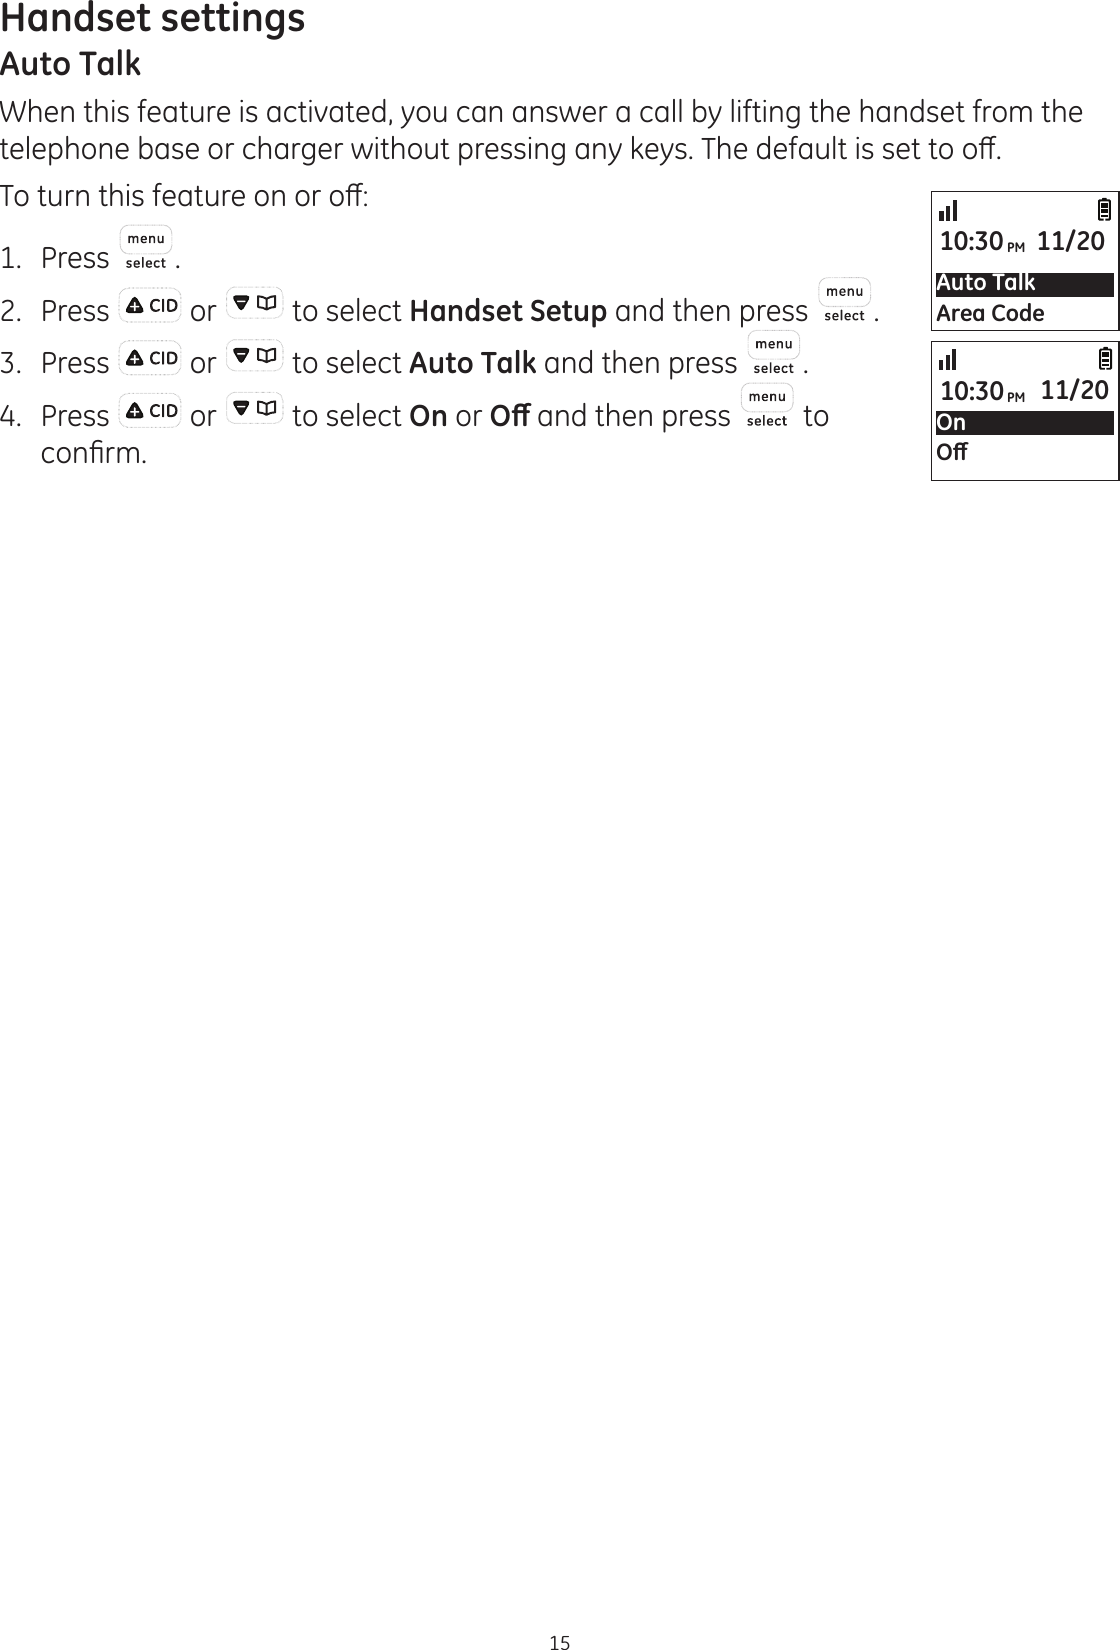
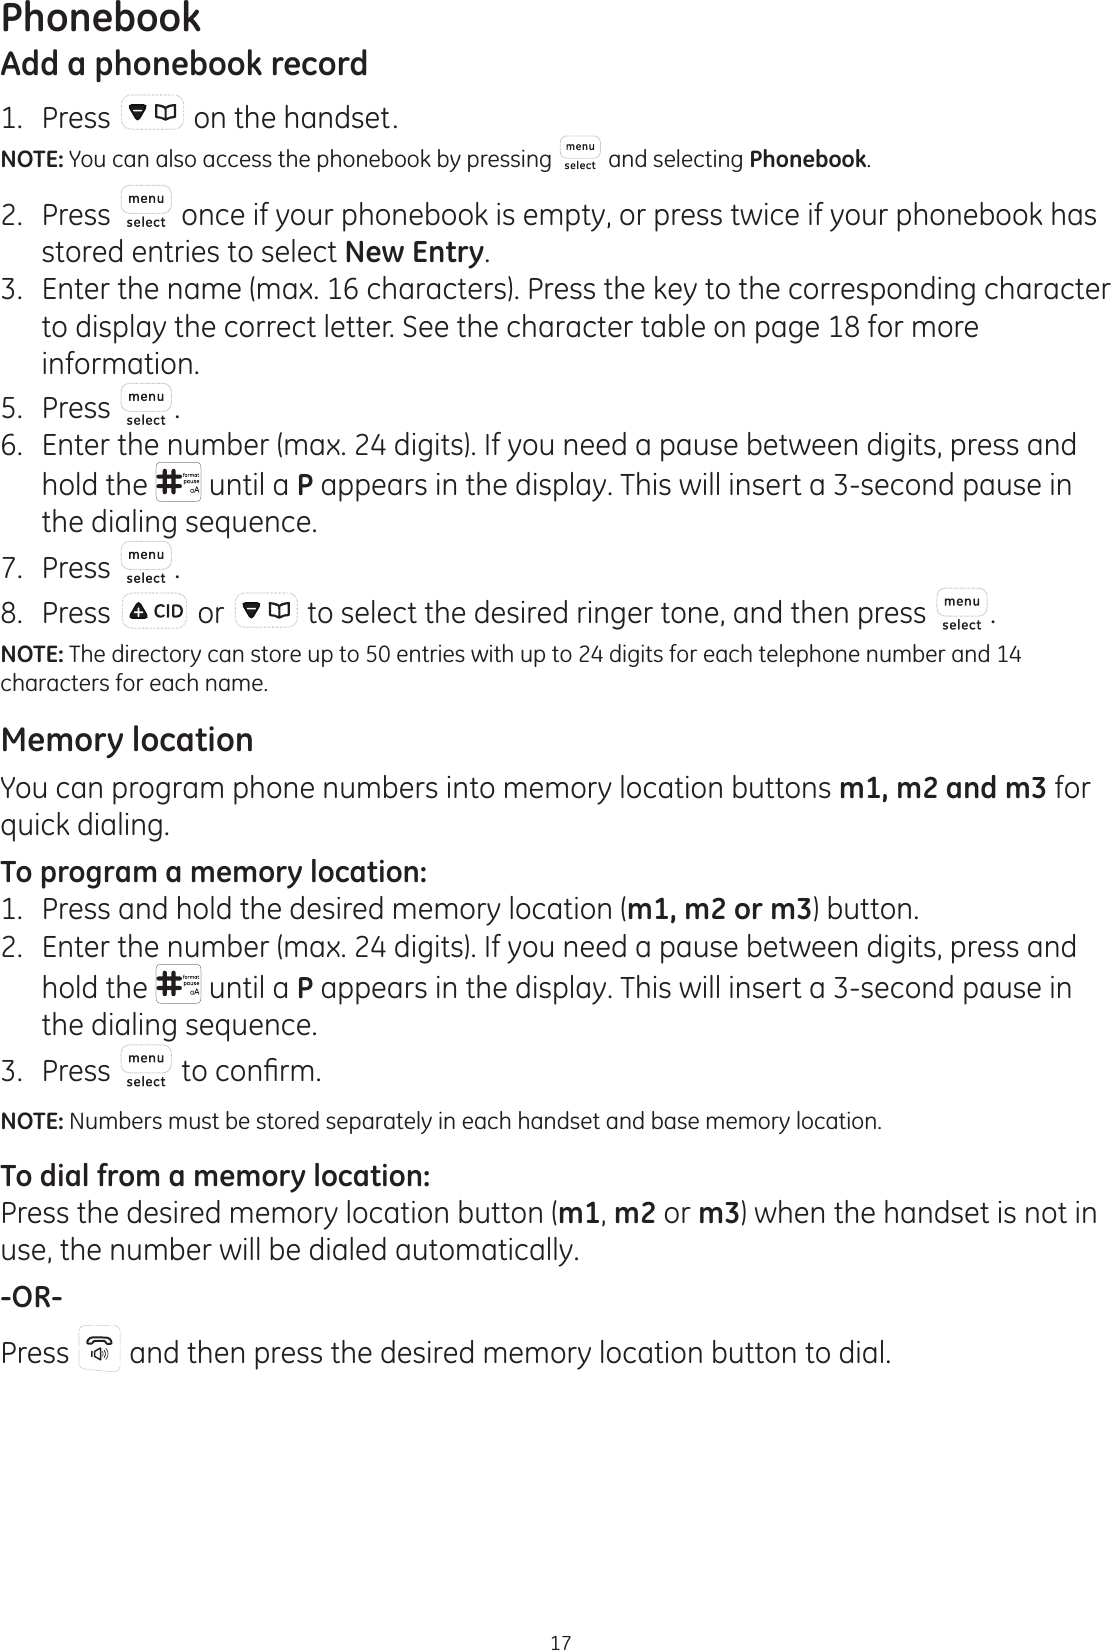
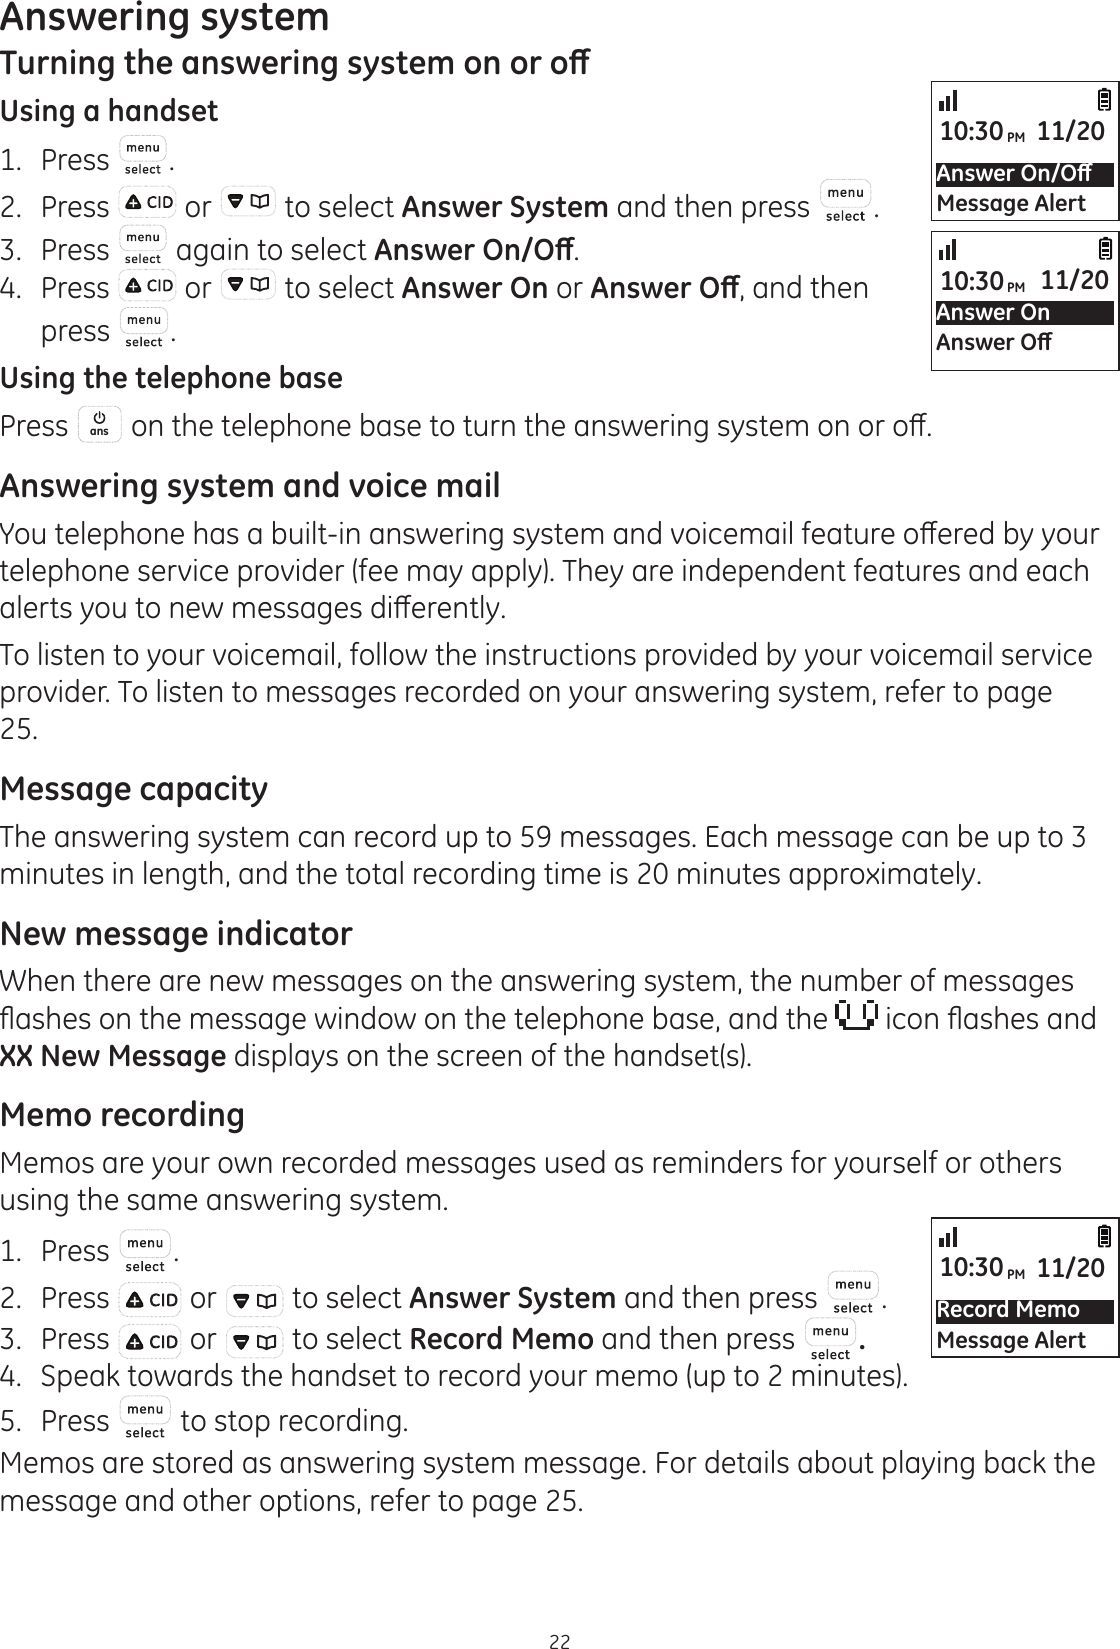
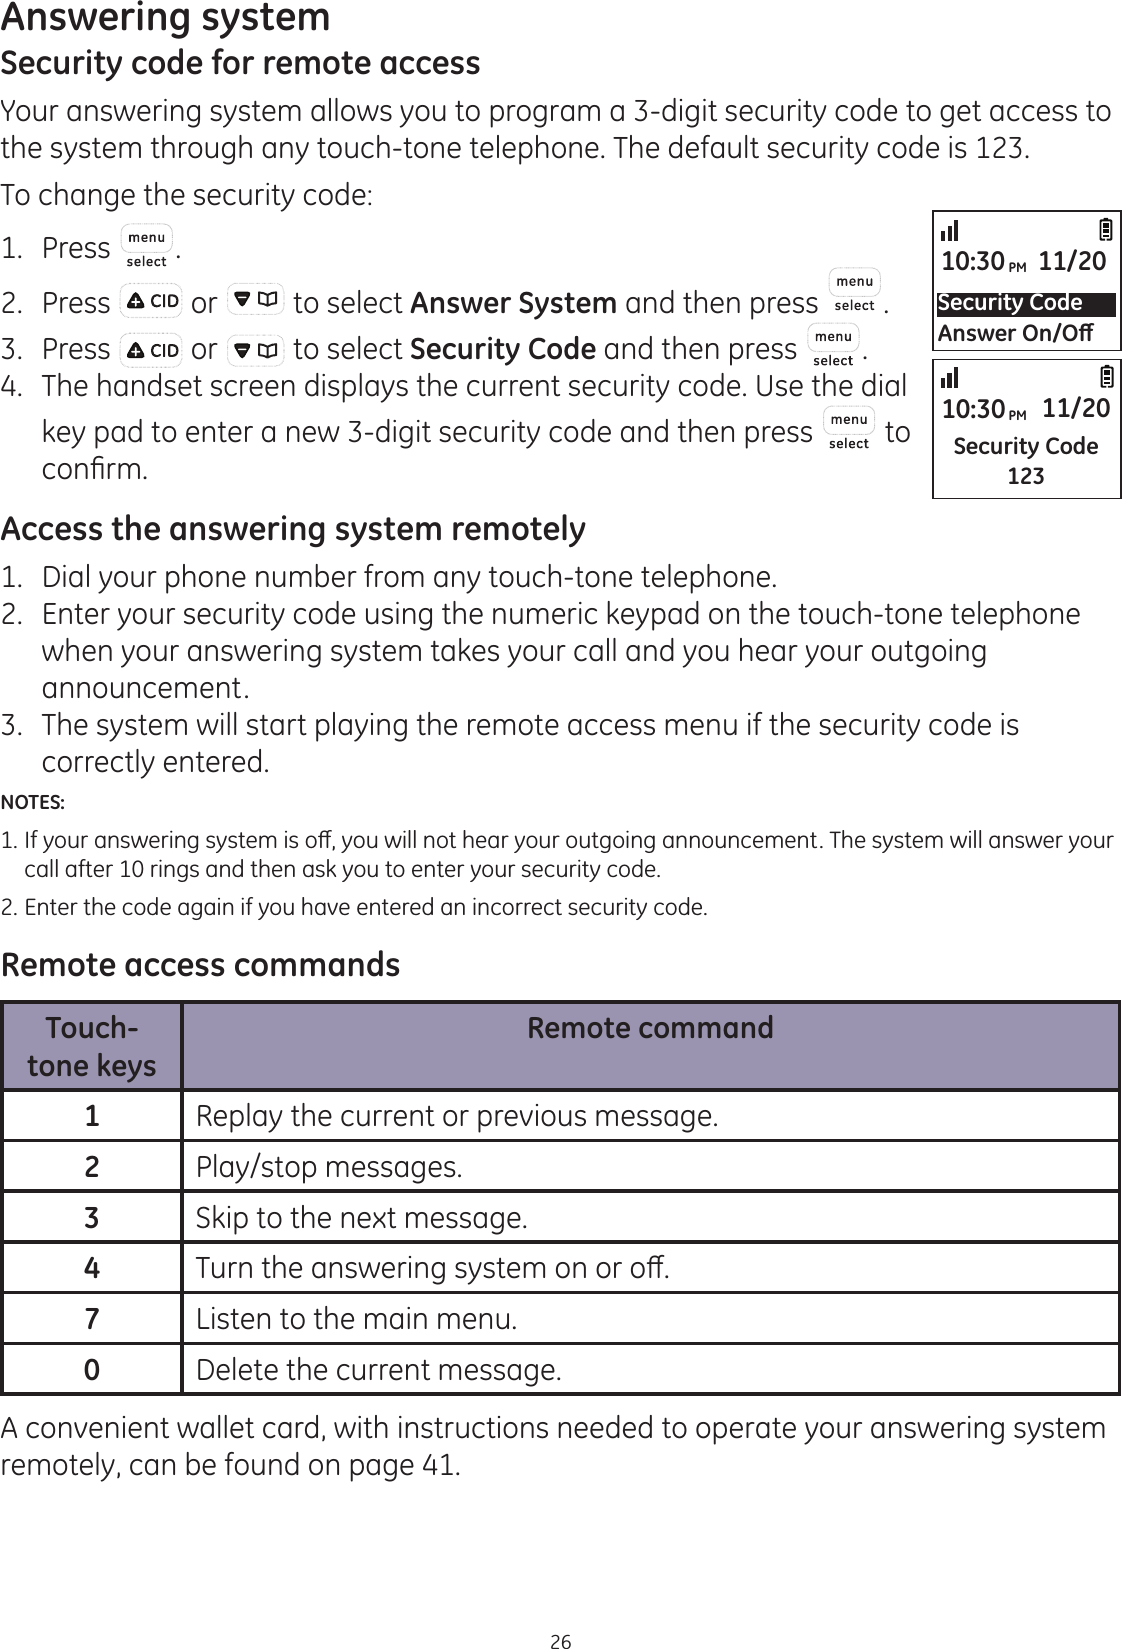
![Handset settings14EqualizerThis feature allows you to change the balance of the audio of the handset to best sit your hearing. 1. Press .2. Press or to select Handset Setup and then press .3. Press or to select Equalizer and then press .4. Press or to select the Natural, Bass or Treble, and then press WRFRQ¿UPHandset nameYour handsets will be automatically numbered starting from 1 up to the total number of handsets registered to your base unit. You can rename your handsets for easier LGHQWL¿FDWLRQHJ´.LWFKHQµ´%HGURRPµ´3DPVURRPµHWF7RSHUVRQDOL]HHDFKhandset with a name:1. Press .2. Press or to select Handset Setup and then press .3. Press or to select Handset Name and then press .4. Press redial to erase each letter of the current name.5. Enter your desired handset name (up to 14 characters). Press the key to the corresponding character to display the correct letter. See the character table on page 18 for more information. 6. Press WRFRQ¿UPDisplay languageYou can select ENGLISH, FRANCIS or ESPAÑOL as the display language. The default setting is ENGLISH. To change the display language:1. Press .2. Press or to select Handset Setup and then press .3. Press or to select Language and then press .4. Press or to select the desired setting and then press WRFRQ¿UPLanguageAuto Talk10:30PM 11/20Handset NameLanguage10:30PM 11/20EnglishFrancis10:30PM 11/20Handset NameHANDSET_10:30PM 11/20EqualizerHandset Name10:30PM 11/20Natural Bass10:30PM 11/20](https://usermanual.wiki/CCT/30549.Users-Manual-1/User-Guide-1421180-Page-18.png)
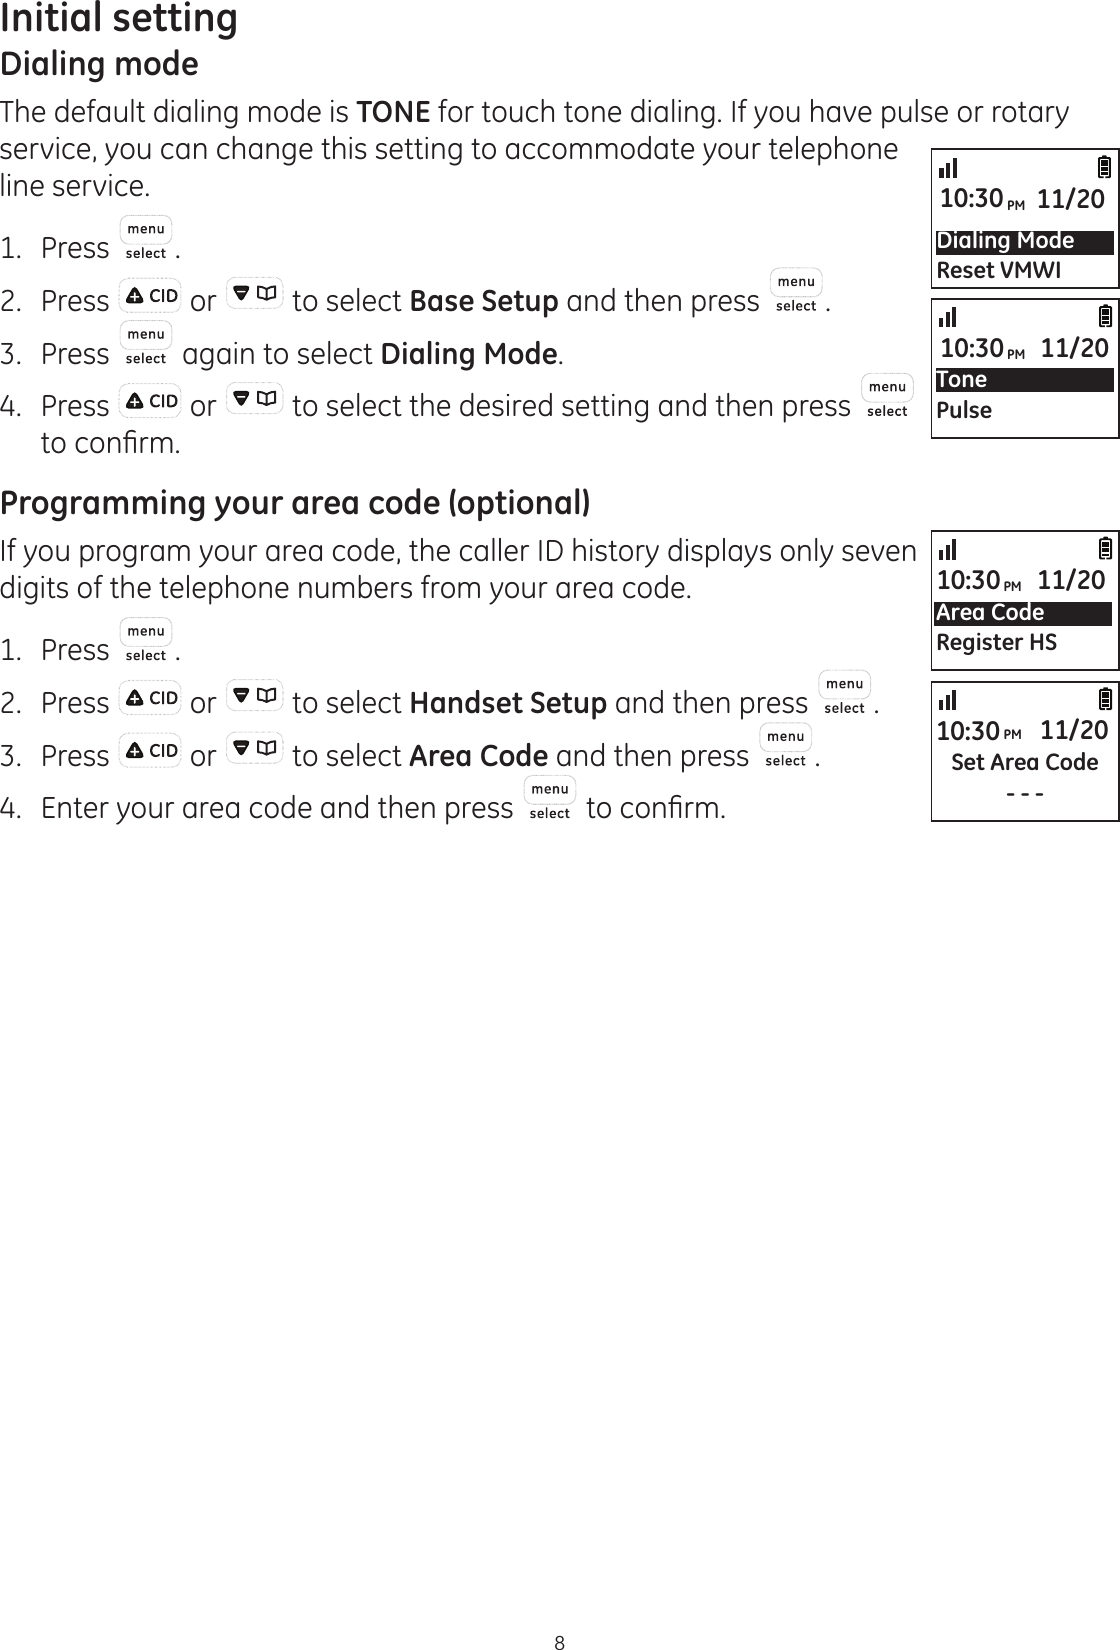
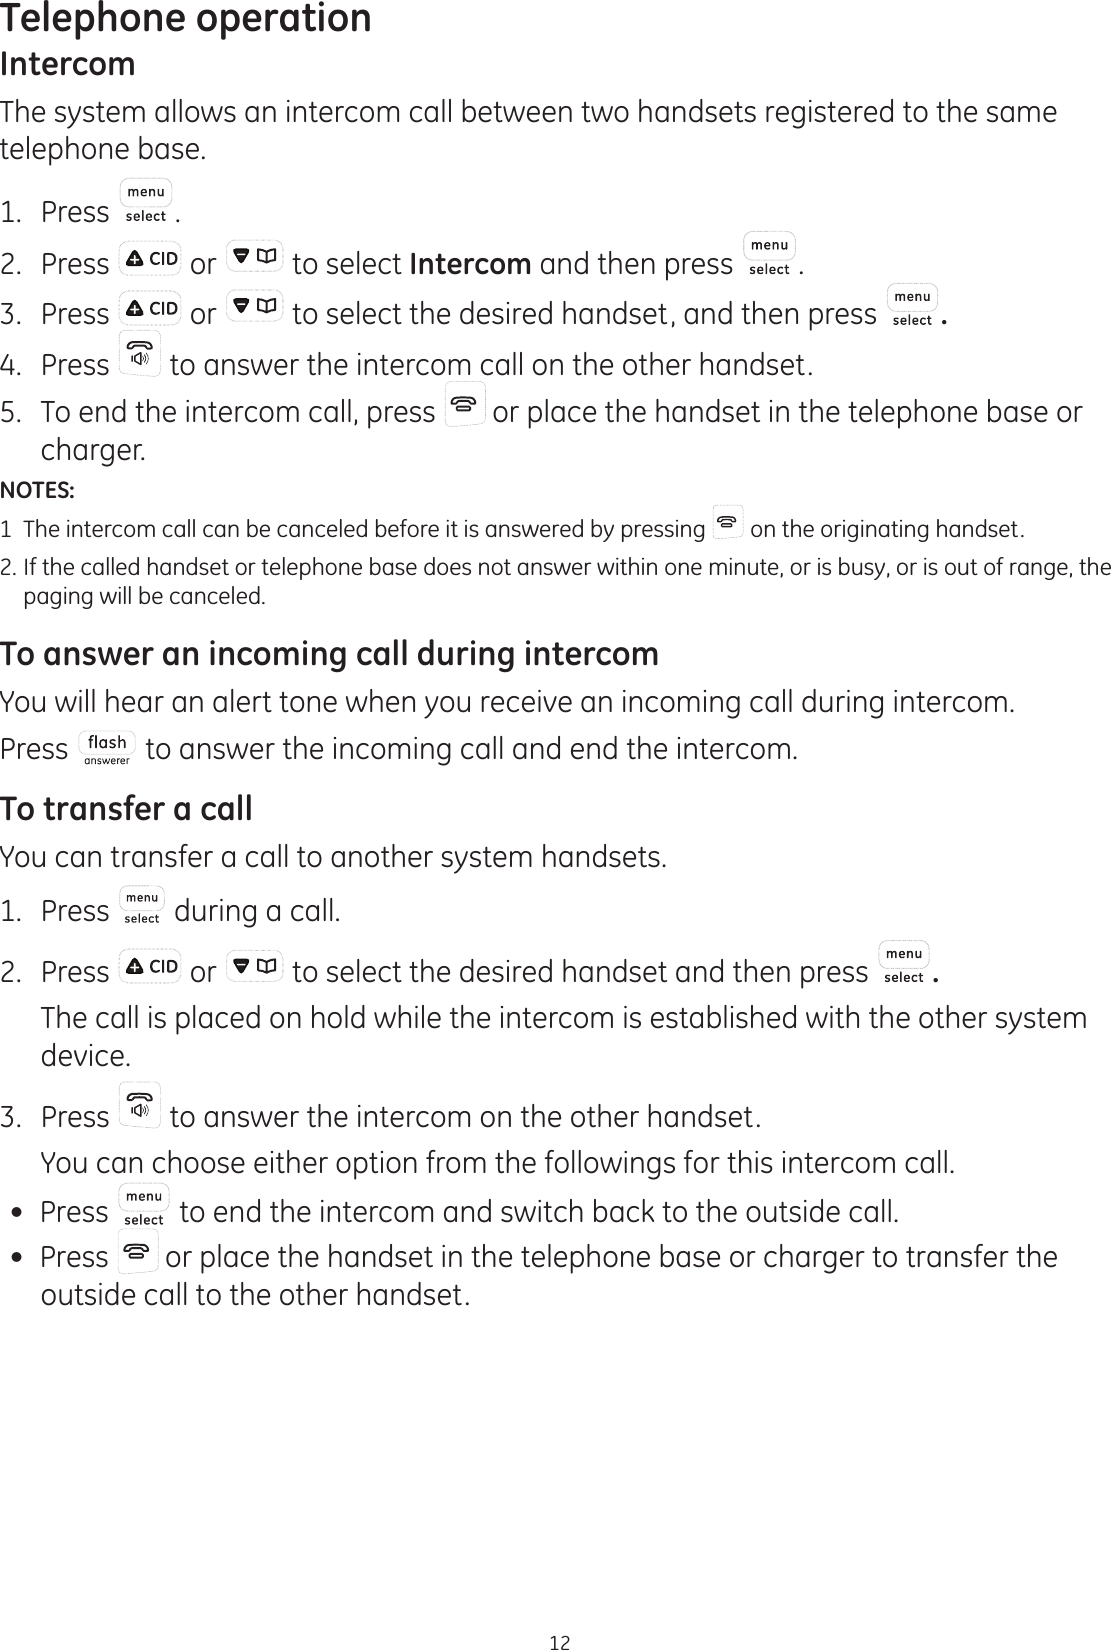
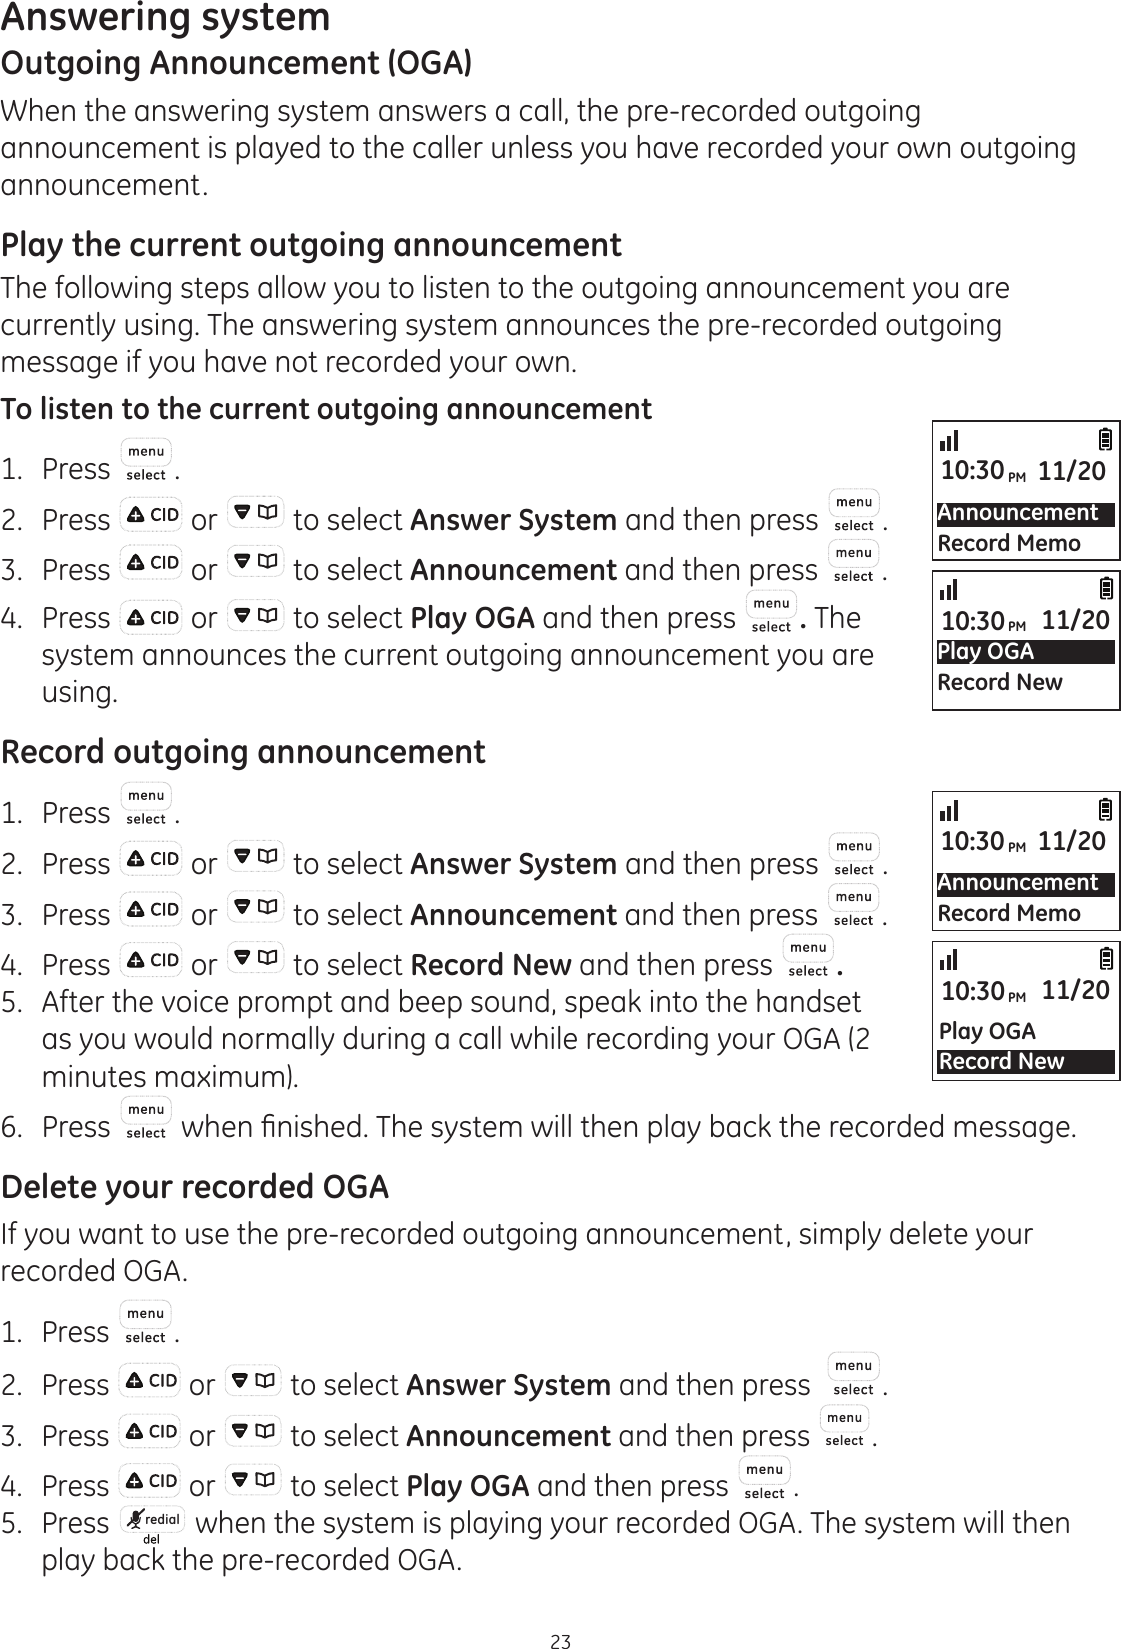
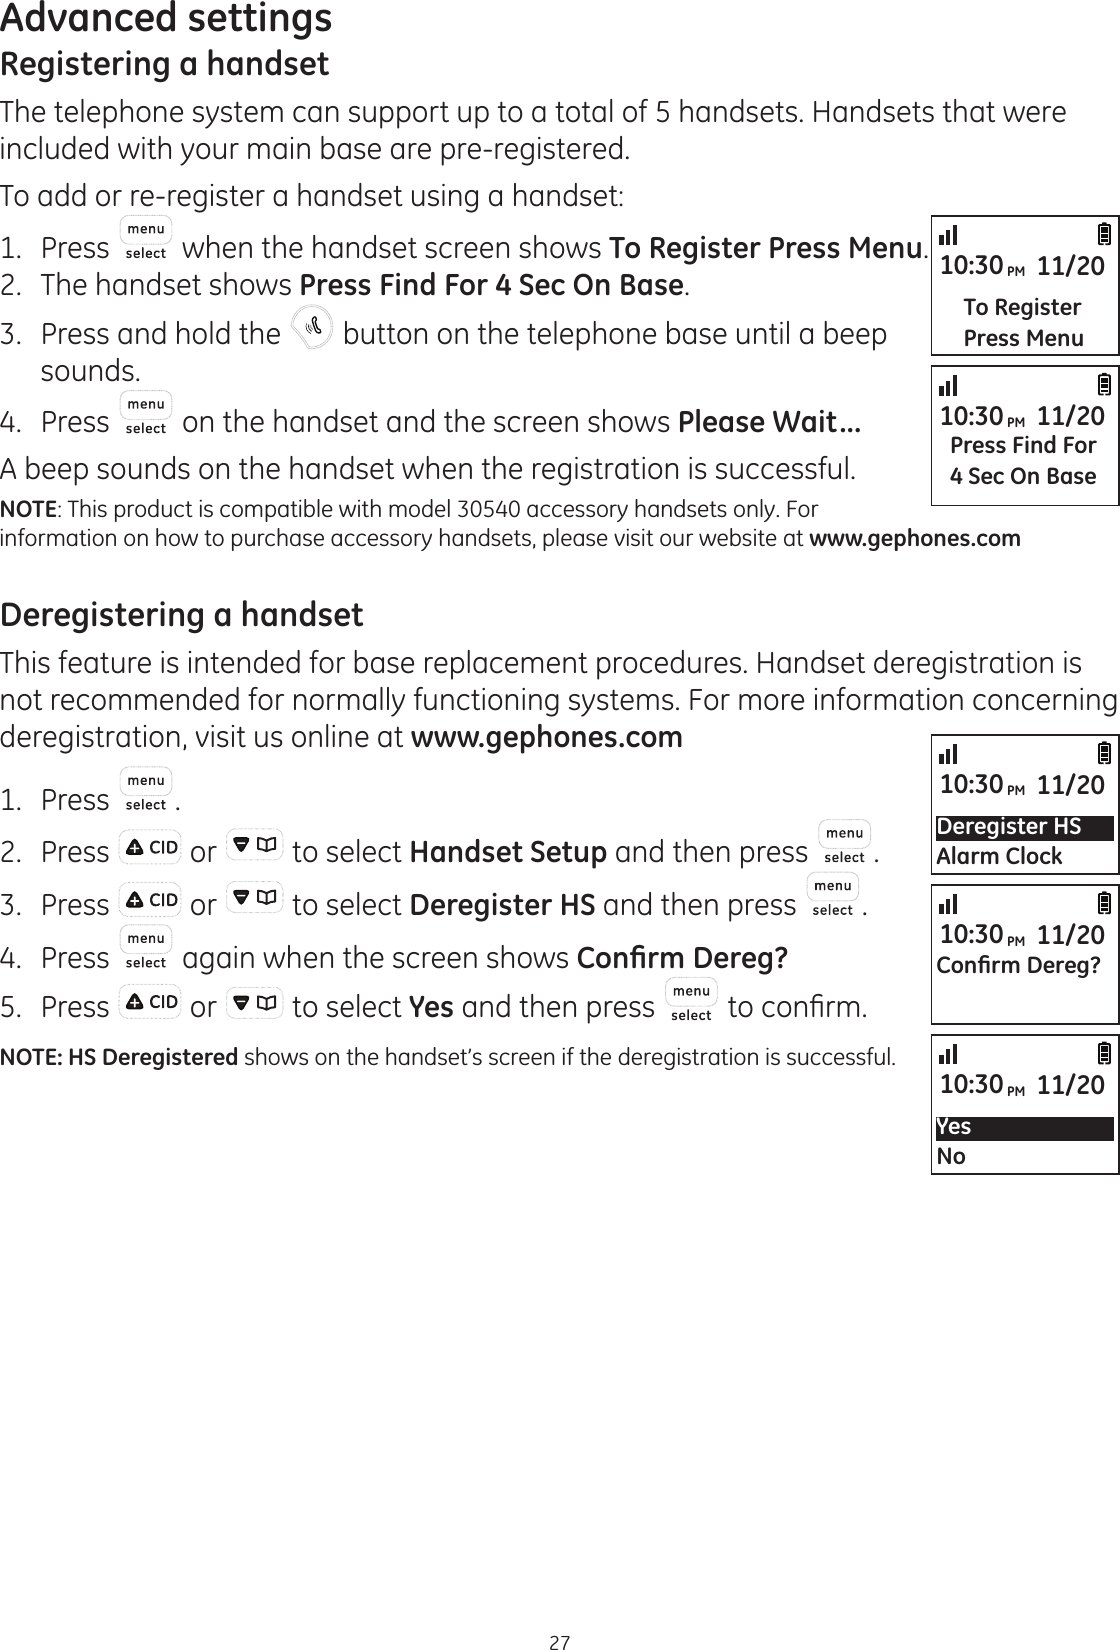
![16Clock and alarmDate and timeYou can set the date and time of the telephone system as follows.1. Press .2. Press or to select Handset Setup and then press .3. Press or to select Set Date & Time and then press .4. Enter the current hour and minute. For example, 9:30 should be entered as [0], [9], [3], [0]. Press or to select AM or PM.5. Press WRFRQ¿UP6. Enter the current month, day and year. For example, May 16, 2010 should be entered as [0], [5], [1], [6], [1], [0], and then press to FRQ¿UPAlarmThe alarm can be programmed to sound once or daily for one minute. The alarm setting is independent to each handset.1. Press .2. Press or to select Handset Setup and then press .3. Press again to select Alarm Clock.4. Press or to select On and then press .5. Enter the desired hour and minute and then press or to select AM or PM.6. Press WRFRQ¿UP7. Press or to select the desired alarm melody and then press .8. Press or to select Once or Daily and then press to FRQ¿UP (Once: The alarm sounds once at the set time. Daily: The alarm sounds daily at the set time.)Set Date & TimeEqualizer10:30PM 11/20Time09:30PM10:30PM 11/20MM/DD/YYYY05/16/201010:30PM 11/20On2ȹ10:30PM 11/20Ringer 1Ringer 210:30PM 11/20Set Alarm Time05:30AM10:30PM 11/20OnceDaily10:30PM 11/20](https://usermanual.wiki/CCT/30549.Users-Manual-1/User-Guide-1421180-Page-20.png)
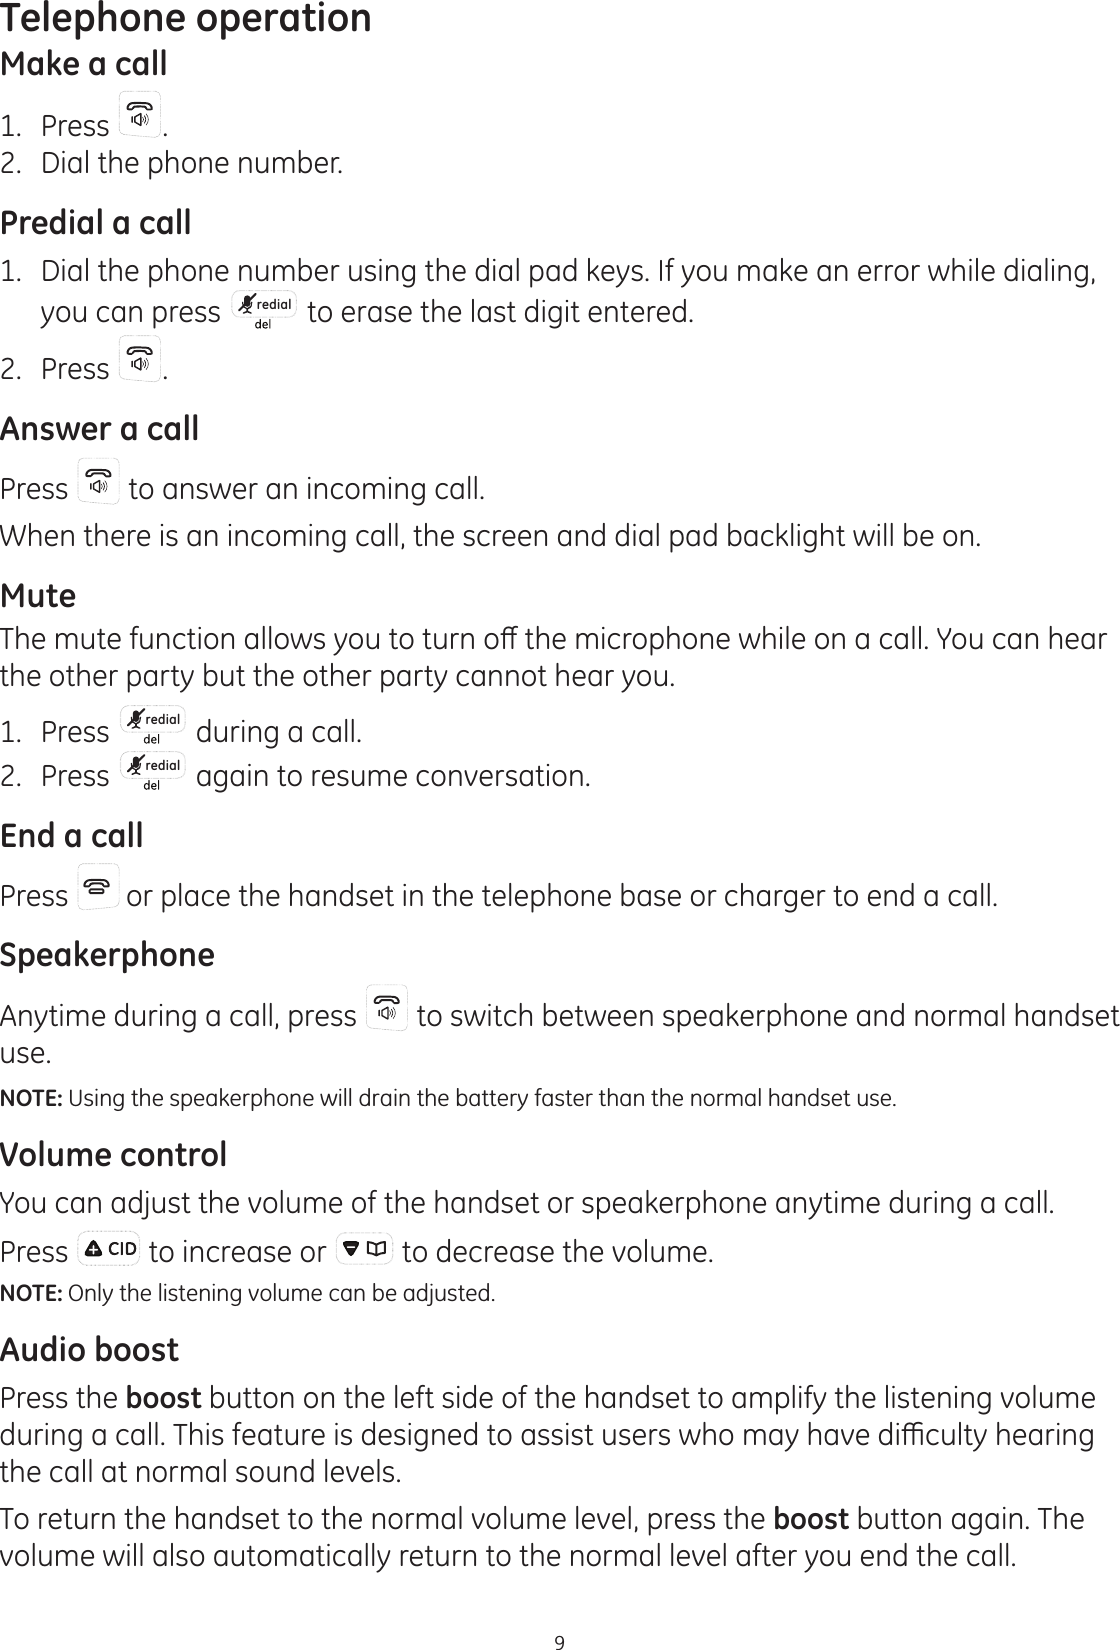
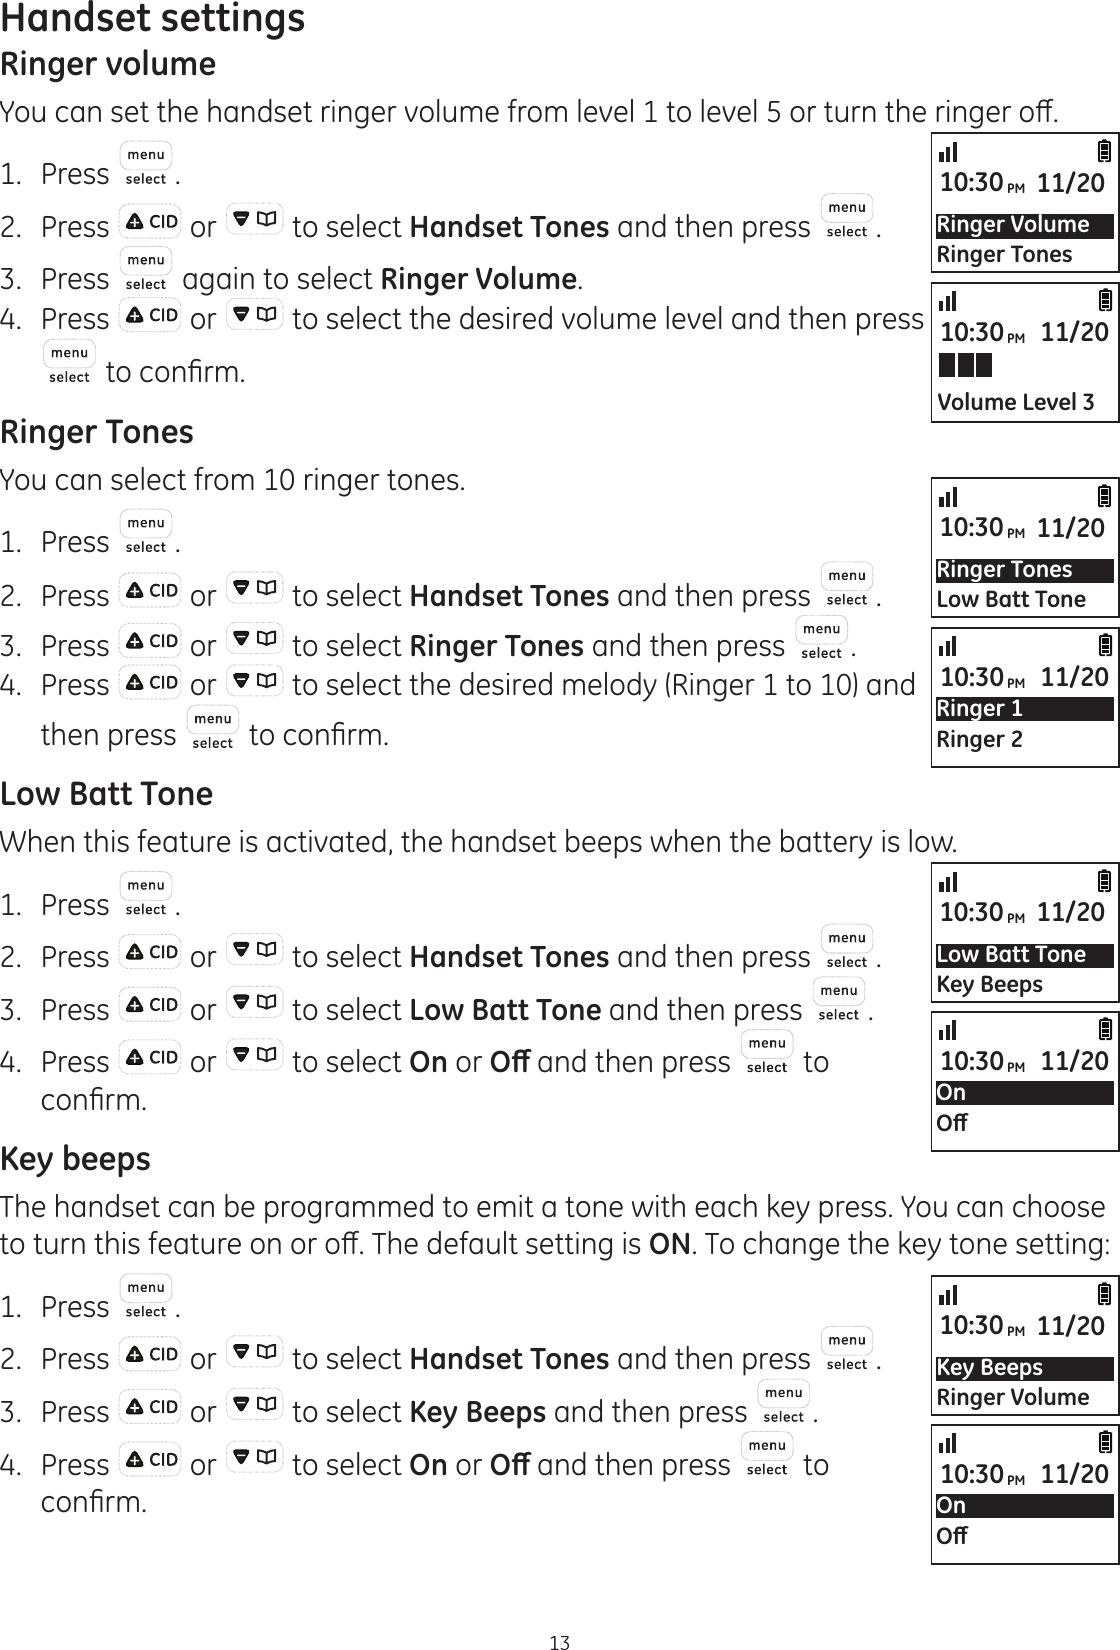
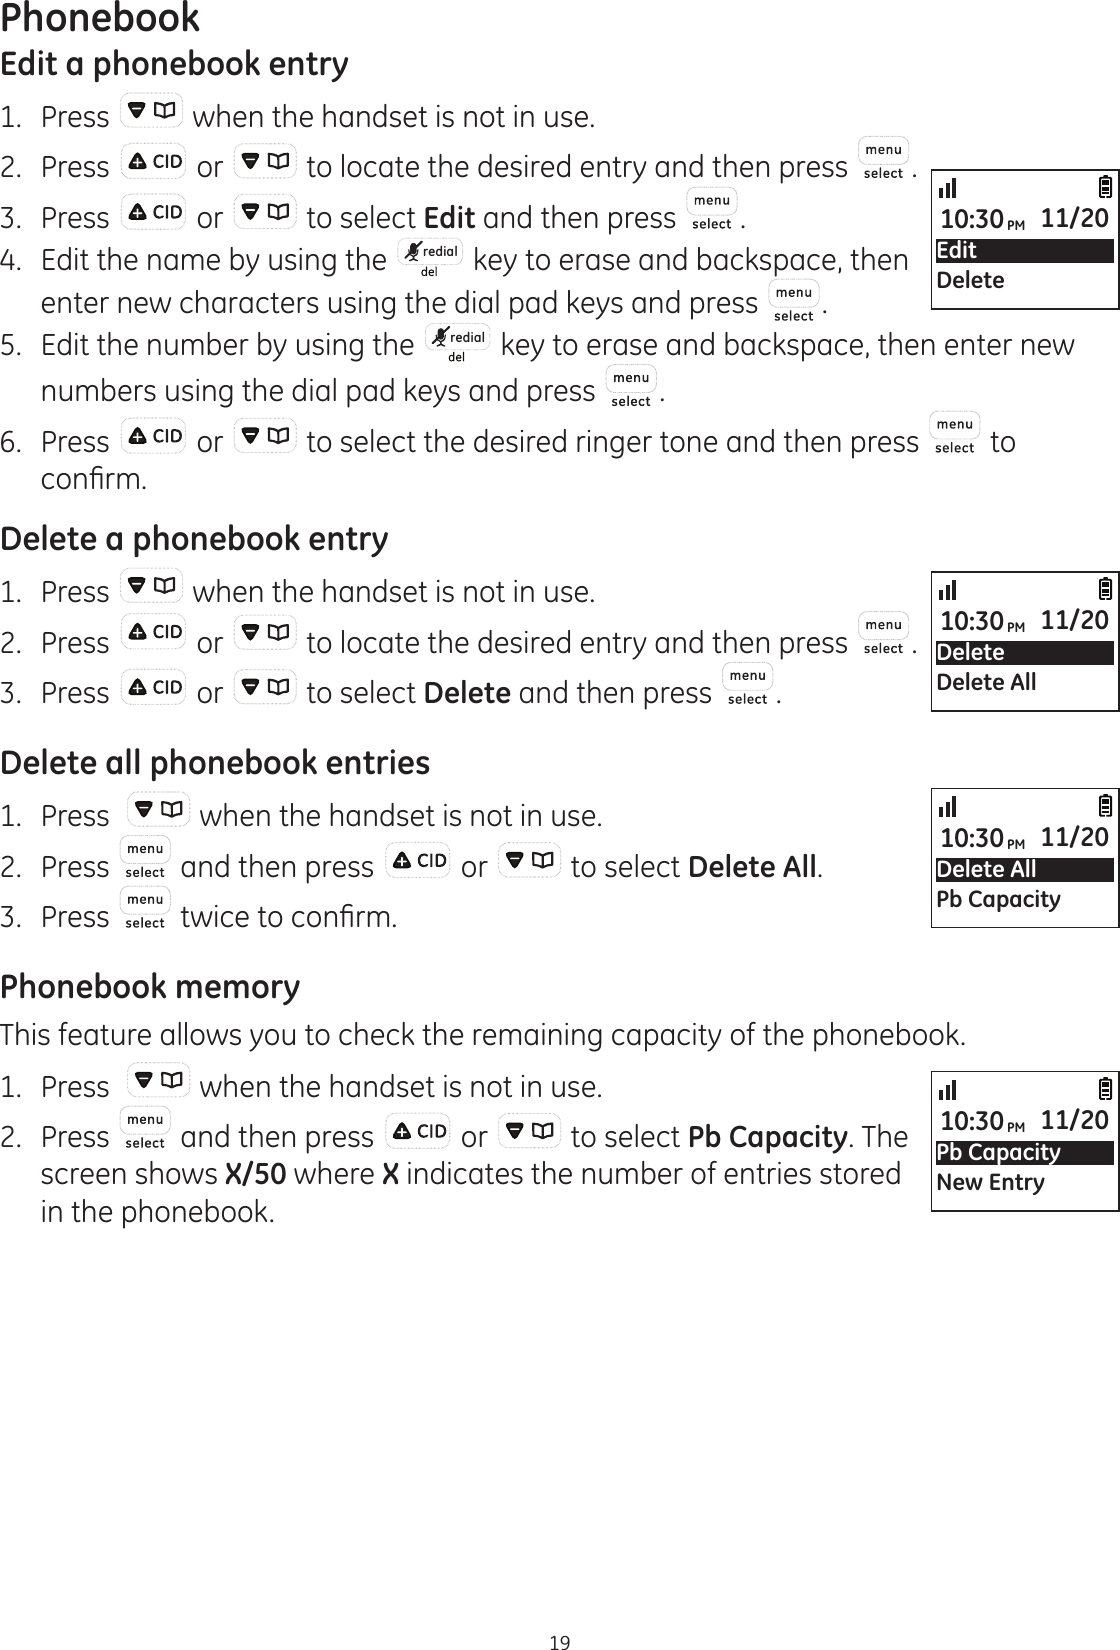
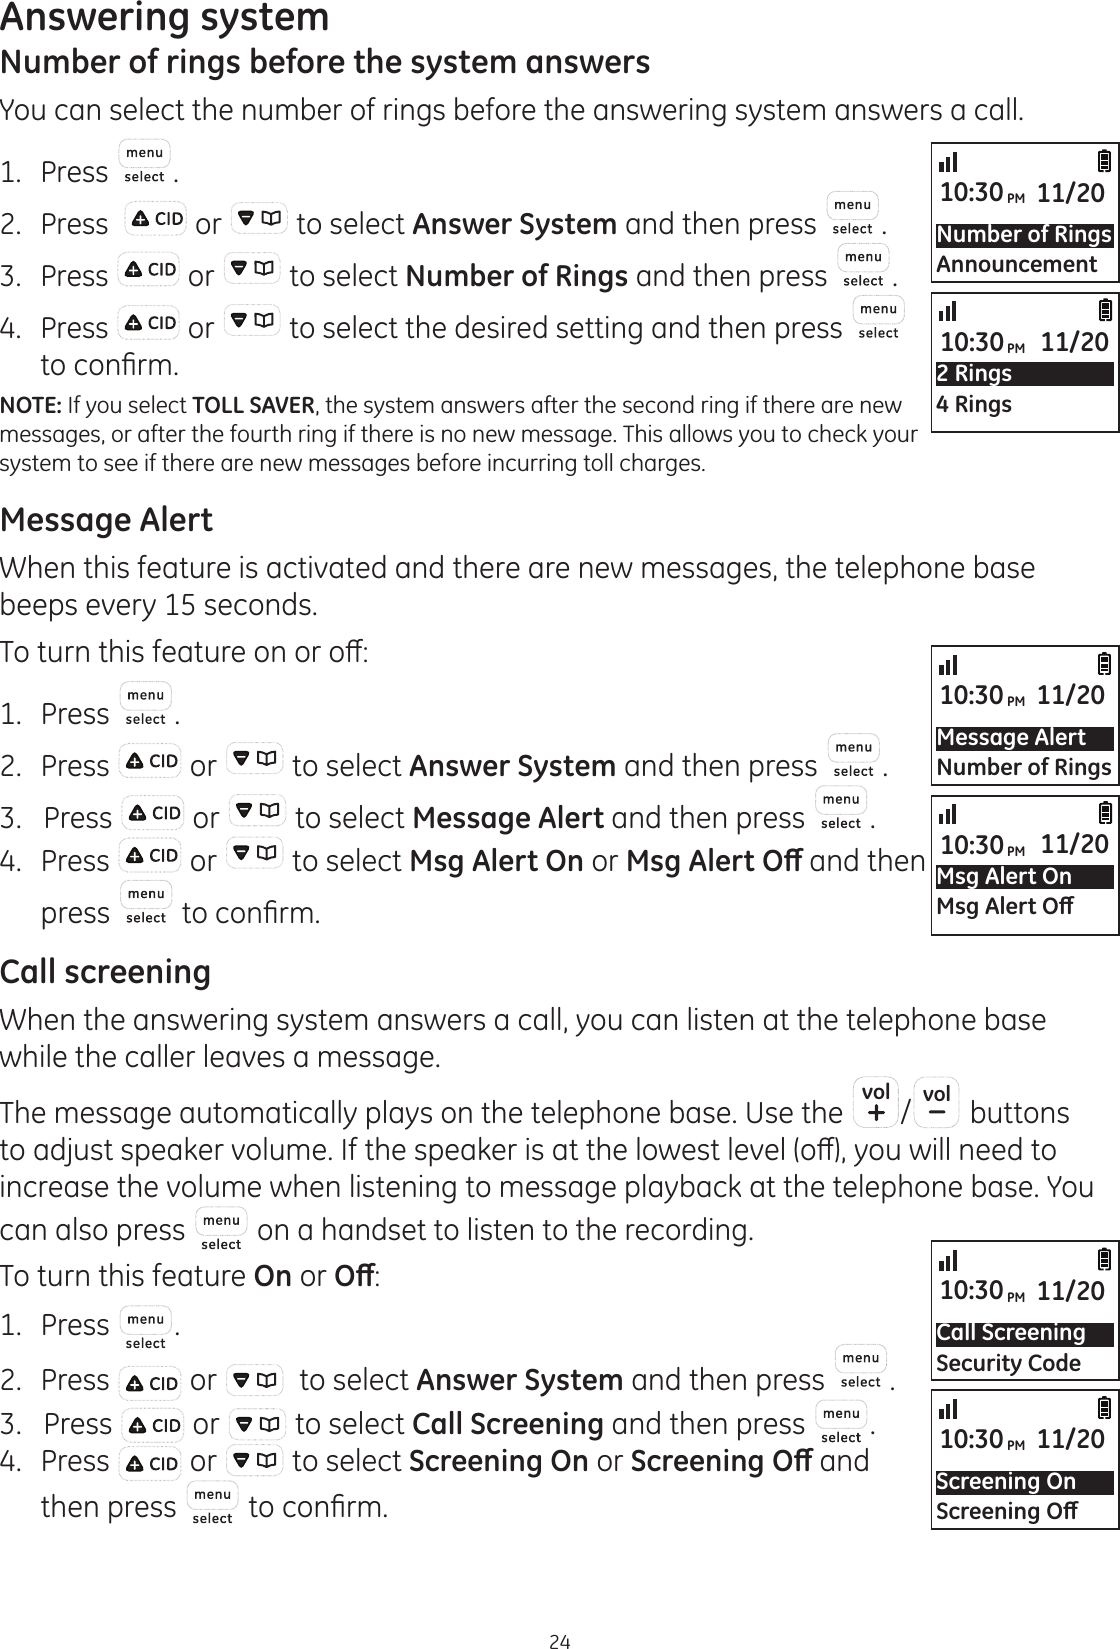
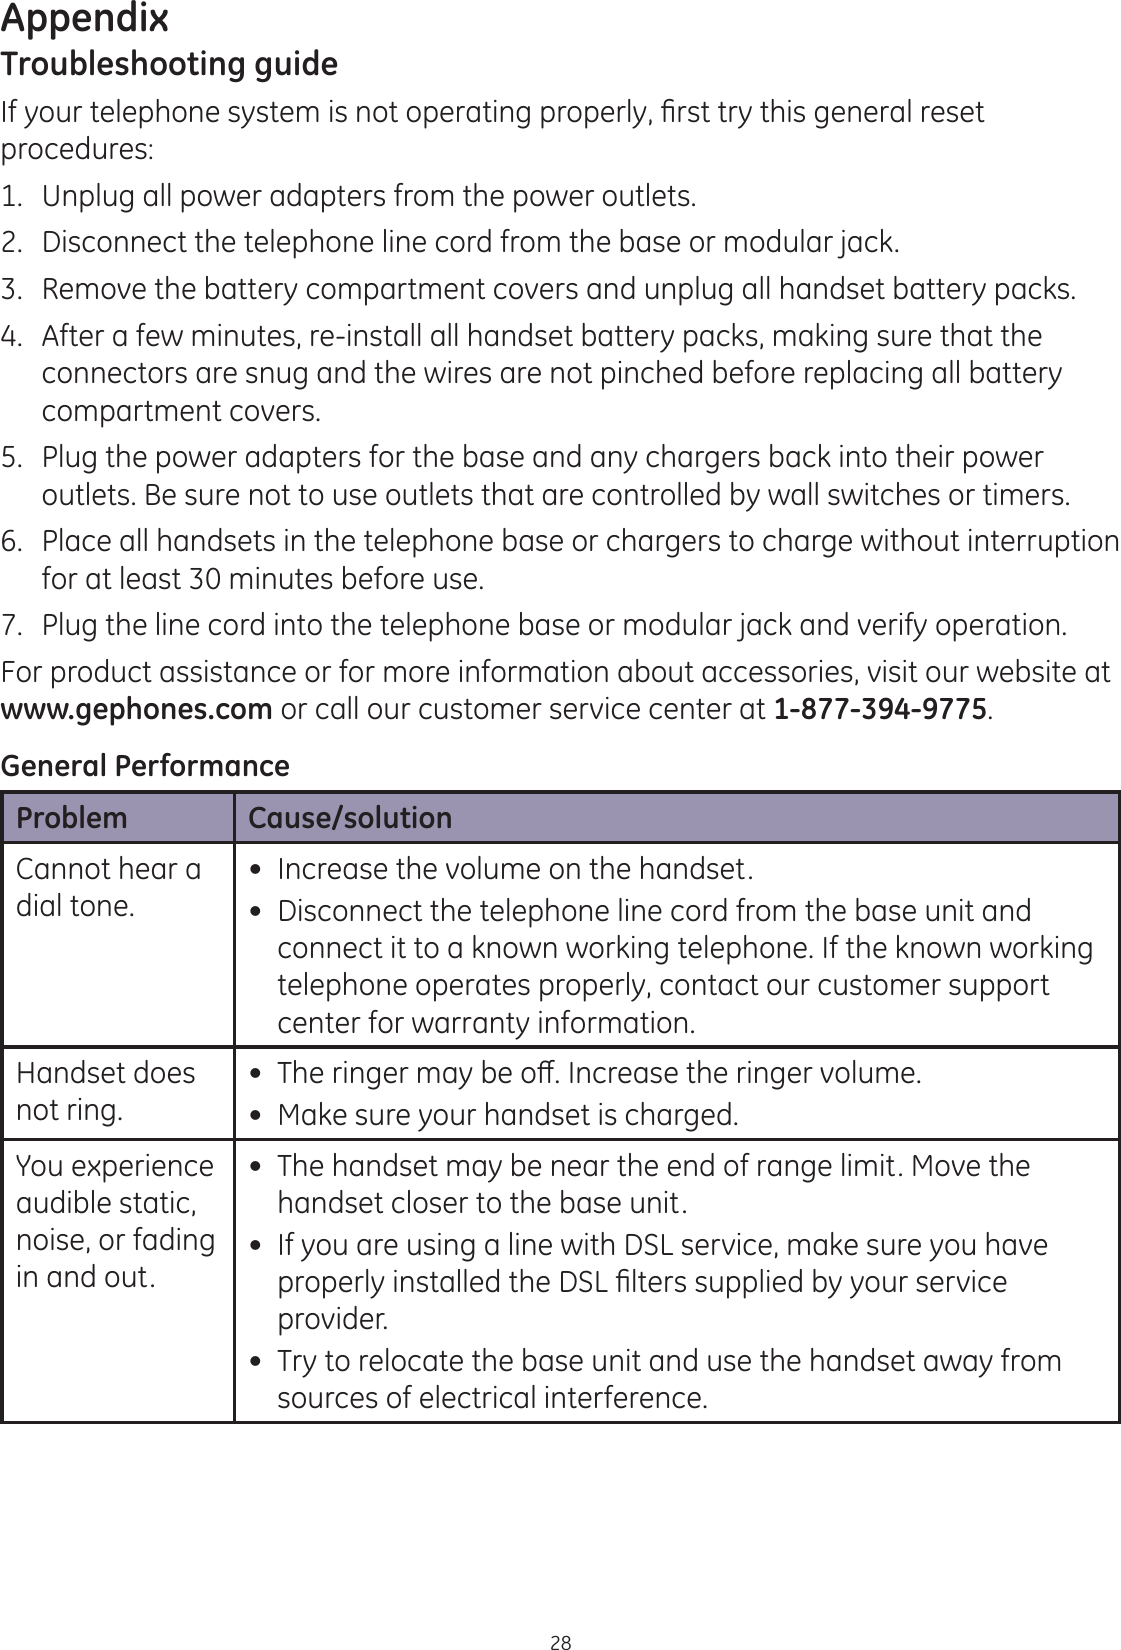
![Phonebook18Character tableUse the dial pad and the chart below to enter a name (up to 16 characters). Each press of a particular key displays the character in the following order:Dial pad keyCharacter by number of key presses123456[1] space 1 # ‘ , - . &[2] A B C 2[3] D E F 3[4] G H I 4[5] J K L 5[6] M N O 6[7] P Q R S 7[8] T U V 8[9] W X Y Z 9[0] 0To view/call a phonebook recordRecords are stored alphabetically in the phonebook. To search the phonebook:1. Press when handset is not in use.NOTE: You can also access the phonebook by pressing and selecting Phonebook.2. Press or WR¿QGDQHQWU\3. Press to call the displayed entry. To search a phonebook entry alphabetically1. Press when the handset is not use. 3UHVVWKHGLDOSDGNH\WKDWFRUUHVSRQGVWRWKH¿UVWOHWWHURIWKHHQWU\\RXDUHlooking for. The closest match in alphabetical order will appear. You can then press or to view the next entry.3. Press to call the displayed entry.](https://usermanual.wiki/CCT/30549.Users-Manual-1/User-Guide-1421180-Page-22.png)
![Appendix31 B. The product has been exposed to rain or water. C. The product does not operate normally by following the operating instructions. D. The product’s cabinet has been damaged. E. The product exhibits a distinct change in performance. 20. Avoid using a telephone during an electrical-storm. There may be a remote risk of electric shock from lightning. 21. Do not use the telephone to report a gas leak in the vicinity of the leak. 22. Do not place this product on an unstable cart, stand, or table. The product may fall, causing serious damage to the product. 2QO\XVHDWWDFKPHQWVDFFHVVRULHVVSHFL¿HGE\WKHPDQXIDFWXUHU24. Unplug this apparatus during lightning storms or when unused for long periods of time.IF YOUR PRODUCT UTILIZES BATTERIES, THE FOLLOWING ADDITIONAL PRECAUTIONS SHOULD BE OBSERVED:8VHRQO\WKHW\SHDQGVL]HEDWWHU\LHVVSHFL¿HGLQWKHXVHU·VPDQXDO2. Do not use this product if the battery door is removed or missing.3. Replace batteries that appear to be swollen or have damaged wiring. 'RQRWGLVSRVHRIWKHEDWWHU\LHVLQ¿UH7KH\PD\H[SORGH&KHFNZLWKORFDOFRGHVIRUpossible special disposal instructions. 5. Do not open or mutilate the battery(ies). Released electrolyte is corrosive and may cause damage to the eyes or skin. It may be toxic if swallowed. 6. Exercise care in handling battery(ies) in order not to short out the battery(ies) with conducting materials such as rings, bracelets, and keys. The battery(ies) or conductor may overheat and cause burns. 'RQRWDWWHPSWWRUHFKDUJHWKHEDWWHU\LHVSURYLGHGZLWKRULGHQWL¿HGIRUXVHZLWKWKLVproduct that are not rechargeable. The battery(ies) may leak corrosive electrolyte or explode. 'RQRWDWWHPSWWRUHMXYHQDWHWKHEDWWHU\LHVSURYLGHGZLWKRULGHQWL¿HGIRUXVHZLWKWKLVproduct by heating them. Sudden release of the battery(ies) electrolyte may occur causing burns or irritation to eyes or skin.9. When replacing battery(ies), all batteries should be replaced at the same time. Mixing fresh and discharged batteries could increase internal cell pressure and rupture the discharged battery(ies). (Applies to products employing more than one separately replaceable primary battery.) 10. When inserting battery(ies) into this product, the proper polarity or direction must be observed. Reverse insertion of battery(ies) may result in leakage or explosion. 11. When inserting battery(ies) into this product, do not twist or pinch the wires or allow wires to become pinched in battery door. 12. If storing over 30 days, remove battery(ies) from this product because the battery(ies) could leak and damage the product. 13. Discard “dead” battery(ies) as soon as possible since “dead” batteries are more likely to leak in a product.](https://usermanual.wiki/CCT/30549.Users-Manual-1/User-Guide-1421180-Page-35.png)